

White nails can go chalky fast. That’s the whole challenge with milky white coffin nails: the line between soft and harsh is narrow, and you can cross it with one heavy coat, one bad file angle, or a white shade that leans too blue. When the color is right, though, the effect is hard to beat. The nail looks creamy, clouded, and clean instead of stark.
A good milky set has a little blur to it. You still catch a whisper of the natural nail bed underneath, the sidewalls look neat, and the coffin shape gives the softness some structure. Full-coverage white can feel flat on a long taper. Milky white doesn’t. It has air in it.
I keep coming back to this look because it flatters the whole hand. Rings stand out more. Cuticle care shows. Even a longer ballerina shape feels calmer when the white has that yogurt-like translucency instead of the hard edge of correction-fluid white. Gloss makes it look fresh from the salon. Matte turns it powdery and hushed.
And yes, the little details matter more than people think. The exact opacity. The width of the taper. Whether the white sits over a pink-beige base or over a bare clear one. Those choices decide whether the manicure looks soft and expensive or thick and awkward.
Why Milky White Coffin Nails Look Softer Than Opaque White
Opaque white is unforgiving. It draws a hard line around every edge of the nail, which means the shape, the thickness, and even tiny filing mistakes show up right away. Milky white diffuses those edges. You still get brightness, though the finish has a veil over it, almost like a sheer curtain pulled across the color.
Coffin nails help here. A square tip on a tapered sidewall already has a bit of attitude, and that can turn severe if the shade is too solid. Add a milkier white and the shape relaxes. The nail still looks long and deliberate, but not sharp in the cold, rigid way full white can look.
There’s also a skin-tone reason this works. A blue-white manicure can drain warmth from the hand, especially under indoor lighting. A milky white with a touch of pink, ivory, or beige sits closer to the natural nail bed, so the hand looks smoother and more even. That tiny shift changes everything.
You see the same principle in bridal sets, soap-nail manicures, and translucent gel overlays. The eye reads soft contrast as polished. Hard contrast reads graphic. Both have a place. If you want gentleness, milk wins.
How to Choose the Right Opacity, Length, and Undertone
What throws most people off is that “milky white” is not one color. It’s a family of whites, and some are far softer than others.
Pick the opacity first
If your goal is a soft look, aim for about 60 to 75 percent opacity. Two thin coats of a sheer gel usually land there. Once the nail turns fully blank and paper-white, you’ve moved out of the milky lane and into opaque white.
Three signs you picked the right opacity:
- You can still see a faint nail-bed shadow under bright light.
- The free edge does not look like a pasted-on white block.
- The color looks creamy from the side, not dense.
Match the length to the softness you want
Long coffin nails can carry a milkier shade well, though the softer look shows best on a short-to-medium coffin, usually with 4 to 10 mm of free edge beyond the fingertip. Go much longer and you need stronger structure at the apex, or the set starts to feel heavy.
Short coffin nails deserve more love than they get. A shorter ballerina shape with sheer white has that clean, groomed feel people often want from nude nails, though it still reads brighter.
Choose an undertone that flatters your hand
Not all milky whites sit the same on skin.
- Pink-leaning milk white tends to suit cooler skin tones.
- Ivory milk white softens warmer or golden skin.
- Neutral marshmallow white works well when you want a balanced look that does not pull too rosy or too creamy.
Bring two reference photos if you can. One should show the shape. The other should show the opacity. Nail techs can recreate almost any soft white if you tell them those two things clearly.
Prep and Topcoat Details That Keep White Nails Looking Clean
Fresh milky white has a certain look: smooth surface, crisp sidewalls, no yellow cast, and a shine that makes the color look deeper instead of thicker. That finish does not happen by luck.
A white manicure shows prep errors faster than pink or beige. Dry cuticles, fuzzy shaping, and dust trapped under topcoat all stand out. I’ve seen gorgeous color choices ruined by a rushed final buff.
If you want the set to keep that clean look past day three, these salon details matter:
- Ask for thin layers. Two thin coats of milky white cure better and look smoother than one thick one.
- Check the apex placement. On a medium coffin nail, the highest point should usually sit about one-third of the way down from the cuticle.
- Use a high-gloss topcoat or a true velvet matte. Anything in between can make white look dull.
- Cap the free edge. That small swipe helps prevent lifting and early staining.
- Oil the cuticle twice a day. White polish looks fresher when the skin around it stays soft.
- Wear gloves around hair dye, self-tanner, and turmeric-heavy cooking. Milky white will pick up color faster than nude beige.
Short sentence, big truth: white nails ask for upkeep.
Most coffin fills look their cleanest around the 2- to 3-week mark, depending on how fast your nails grow and how rough you are with your hands. Wait too long and the softness disappears because the grow-out line gets all the attention.
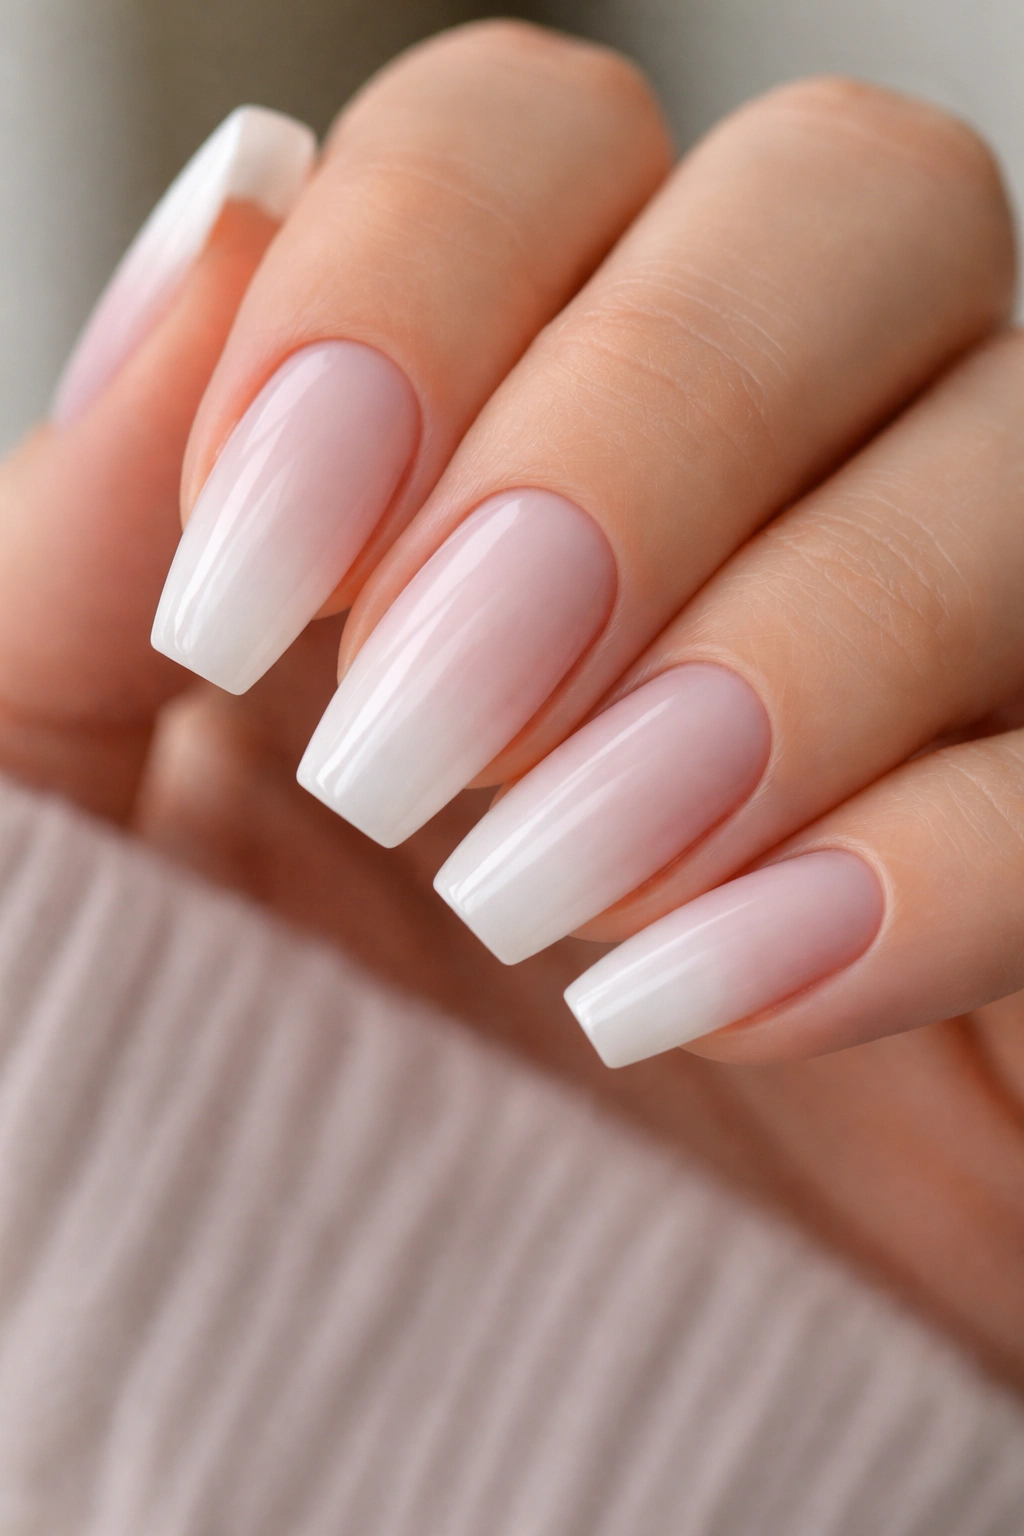
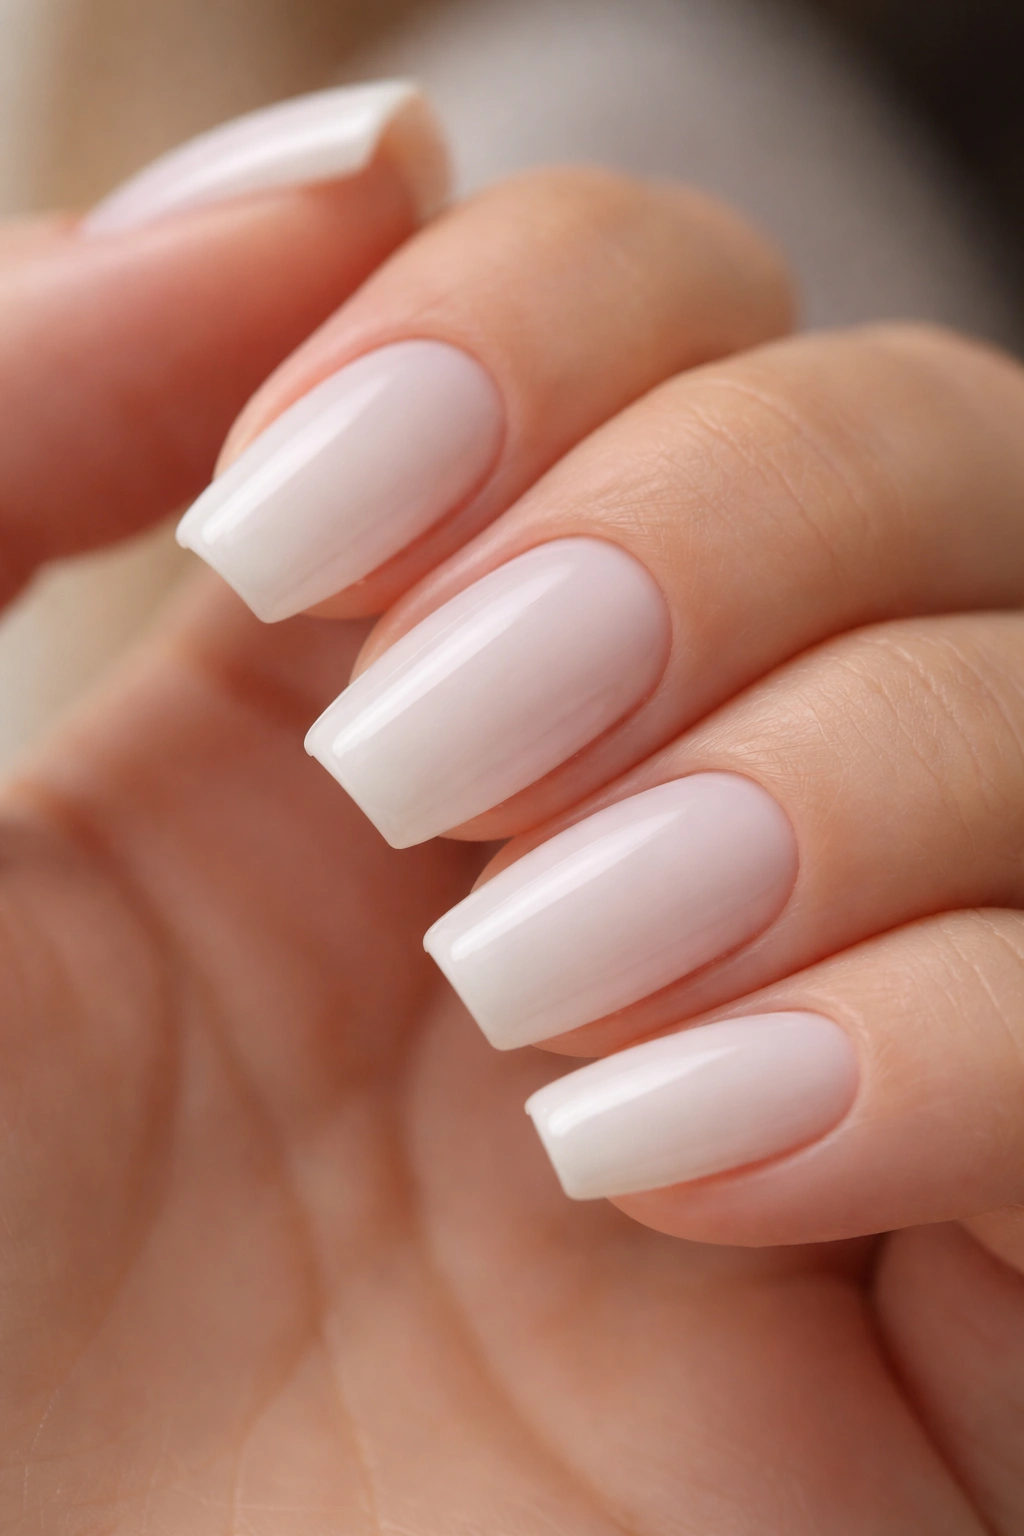
1. Classic Sheer Milky White Coffin
If you want the version that never misses, start here. The classic sheer milky white coffin set is exactly what it sounds like: a soft white gel laid in thin layers over a clean coffin shape, finished with enough gloss to make the nail look almost wet.
Why this one keeps working
The charm is in the restraint. You are not adding glitter, crystals, chrome, or art that competes with the color. The eye goes straight to the creamy finish and the taper of the nail. That’s why it looks expensive even when the design itself is stripped down.
A nail tech usually gets this look with a sheer pink-beige base and one to two coats of milky white gel layered over it. That base matters. Put sheer white over a stark clear extension and the tip can look cold. Put it over a soft natural-toned base and the white gets depth.
What to ask for at the salon
- A medium coffin shape with slim sidewalls and a softened square tip
- A white that looks cloudy, not chalky
- Two thin coats max, unless the polish is extra sheer
- A glassy topcoat with no shimmer
Best pick if you want one set that works for workdays, weddings, dinner, and every in-between errand.
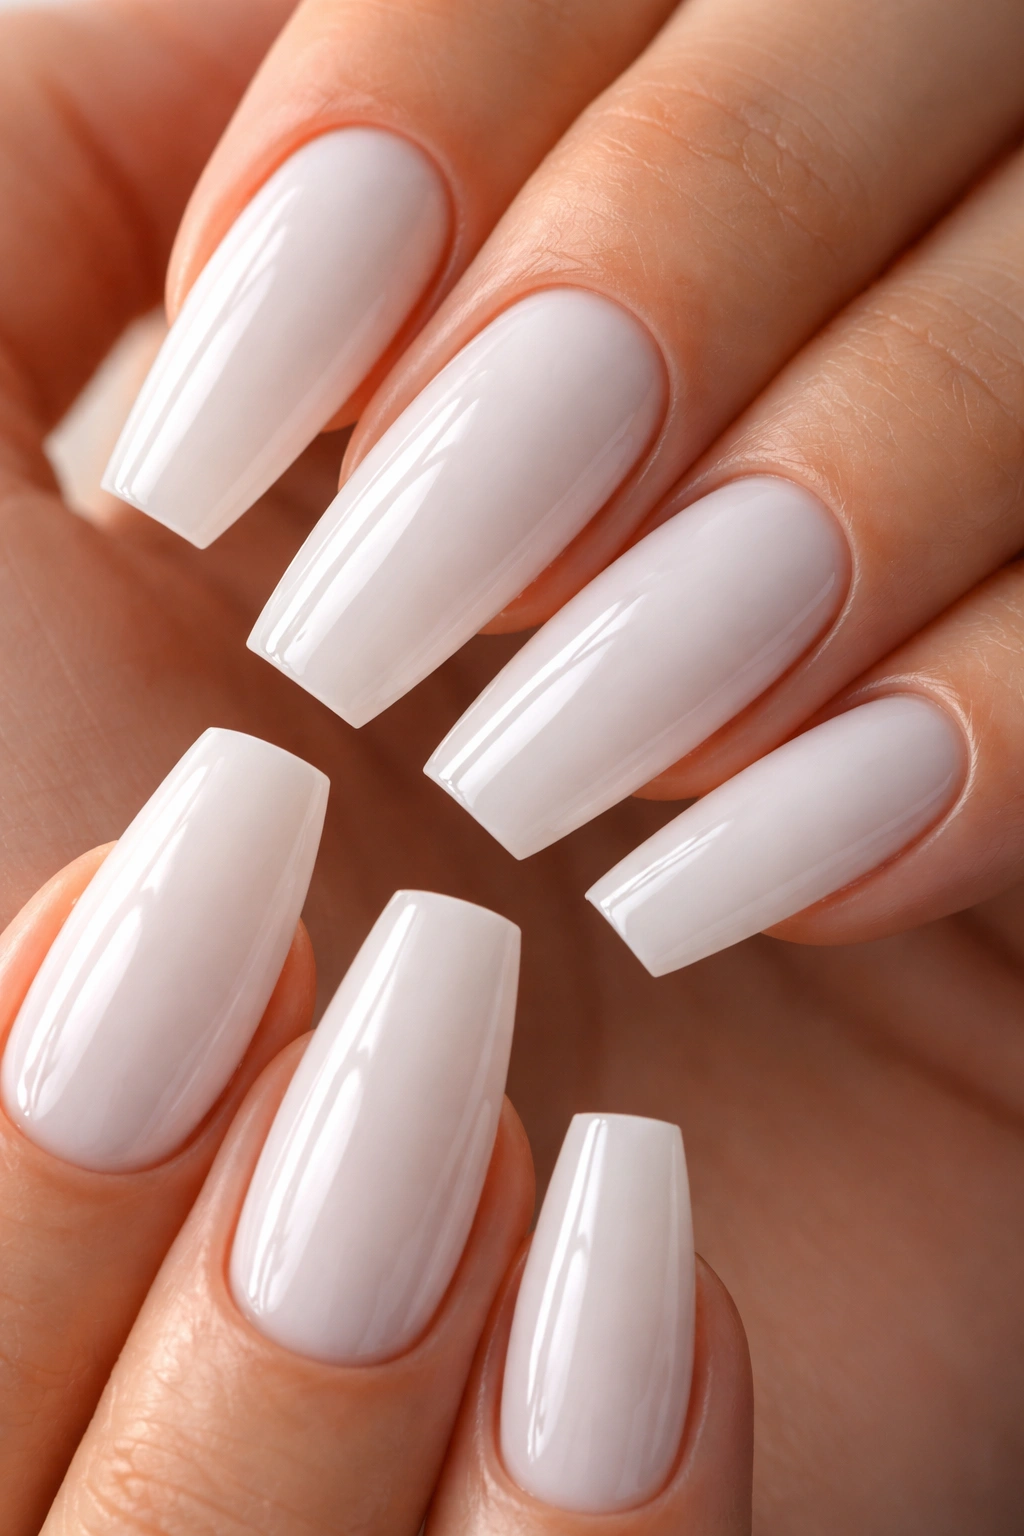
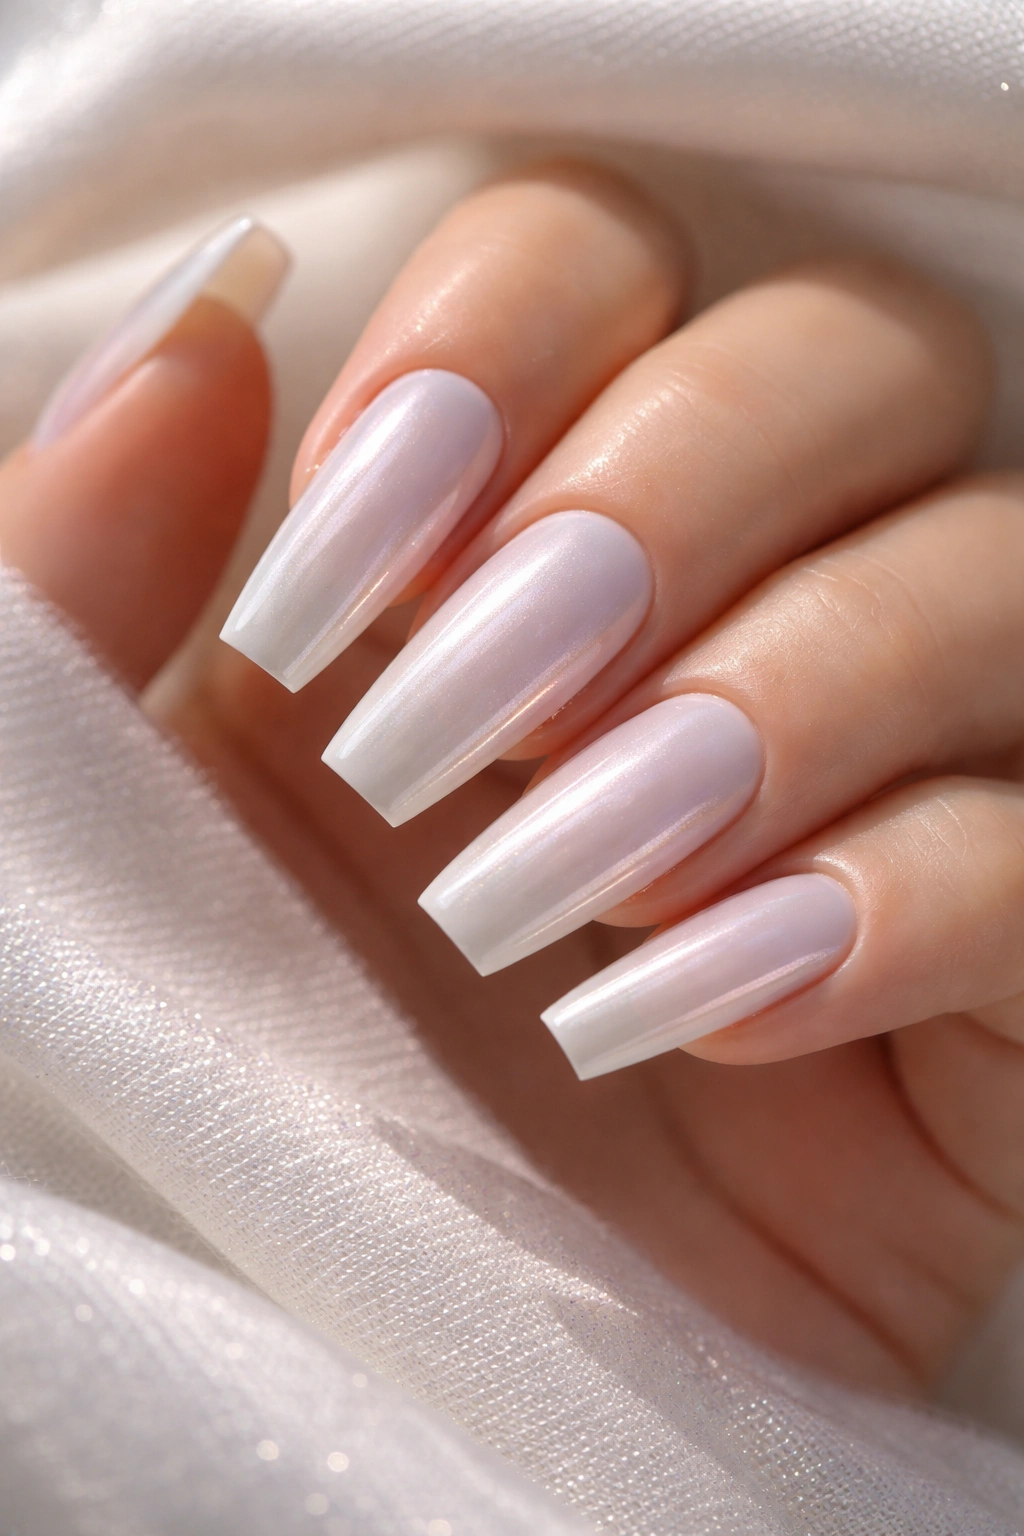
2. High-Gloss Milky White Glass Nails

Gloss changes the mood of milky white more than any accent ever will. A high-gloss finish turns a soft white into something almost liquid. Under window light, the nail looks deeper, like there’s cream suspended under glass.
That shine matters on coffin nails because it sharpens the edges without making the color feel harder. Matte softens shape. Gloss defines it. Put those two things together—soft color, crisp shine—and the set lands in a sweet spot that feels polished and deliberate.
I like this style most on medium-long coffin nails, around 8 to 12 mm past the fingertip, because the reflection has room to stretch across the nail plate. On a shorter set it still looks good, though you lose a bit of that long clean line that makes the finish stand out.
Salon trick: ask for a non-wipe topcoat floated in a slightly thicker layer, then cured flat so the reflection line stays smooth from cuticle to tip. If the surface has dips, the whole manicure reads cheaper. White is ruthless like that.
Skip extra art here. A shiny milky white coffin set does not need help. A thin ring stack and moisturized hands will do more for this look than a handful of decals ever could.
3. Short Milky White Coffin With a Soft Taper
Can short coffin nails still look soft and elegant? Yes—and I’d argue this is one of the smartest ways to wear milky white if you type all day, cook a lot, or do not want the drama of a longer set.
The mistake people make with short coffin nails is keeping the tip too wide. Then the shape turns boxy. A soft taper on each sidewall fixes that. You only need a slight pull inward, usually 1 to 2 mm on each side, to get that ballerina shape without sacrificing strength.
What makes this version different
On a short length, milky white acts almost like a bright nude. It cleans up the look of the hand, though it does not feel loud. That’s why this style suits people who want a neat manicure that still has shape and intent.
A shorter set also makes the milkiness easier to control. The product does not need as much structure, so you can keep the nail thinner from side view. And thin white always looks better than bulky white.
How to keep it flattering
Ask your nail tech to leave the tip slightly softened rather than ruler-straight. That tiny detail keeps the short coffin from looking blocky. If your nail beds are short, a pinker milk white will also lengthen the look of the hand more than a cooler white.
This one is underrated.
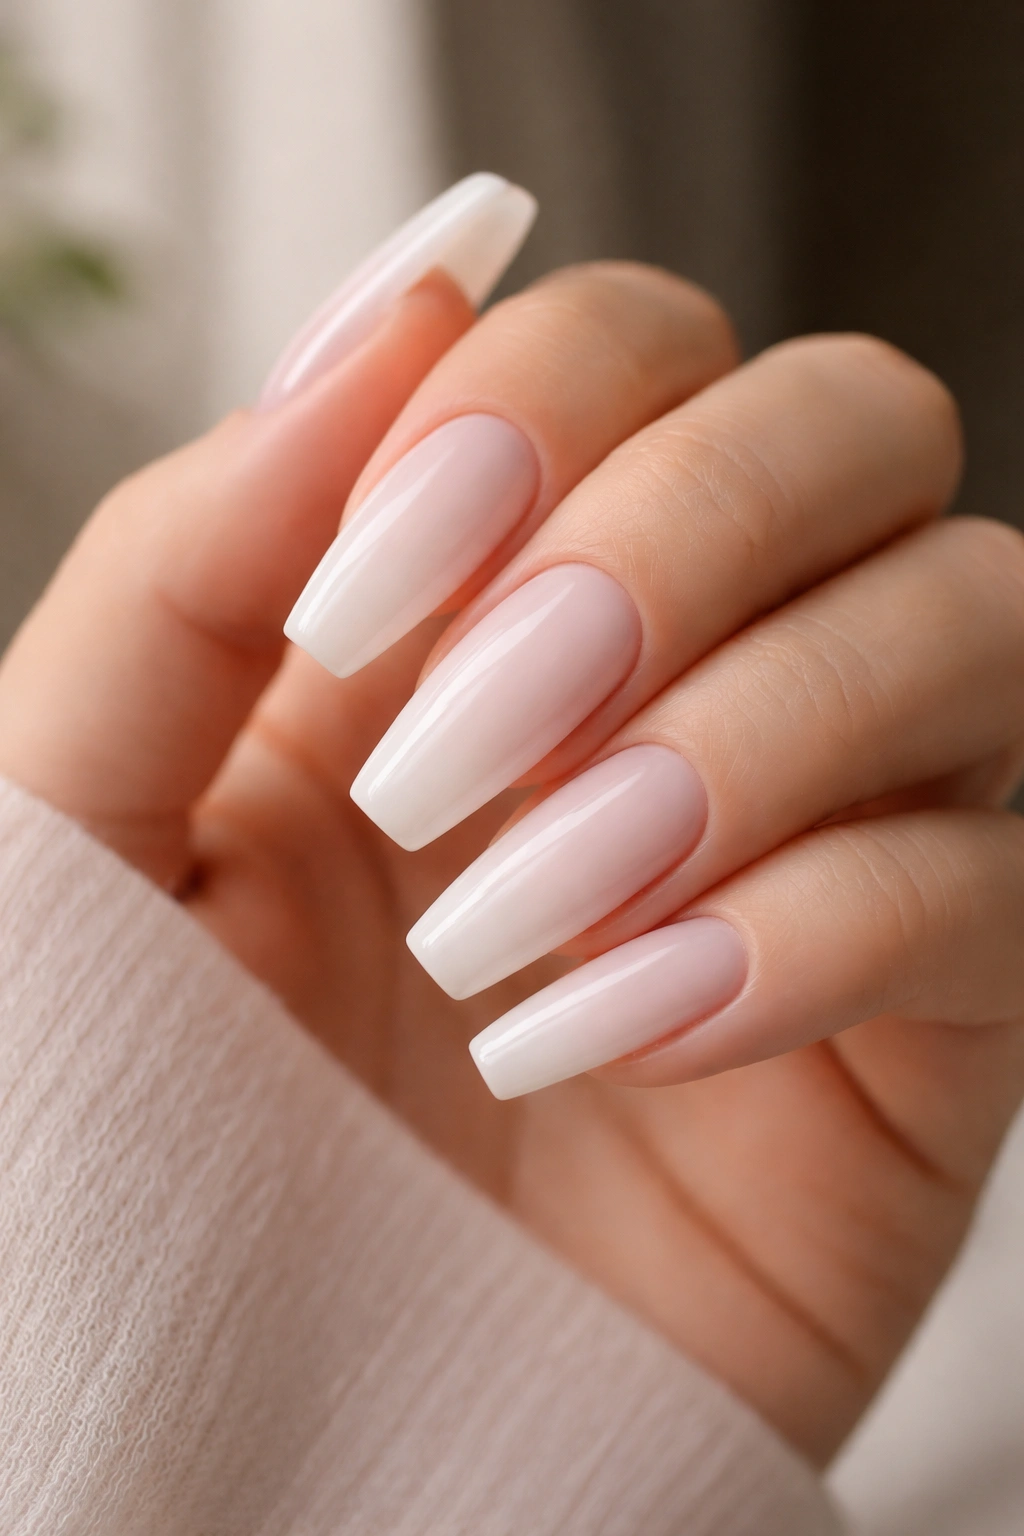
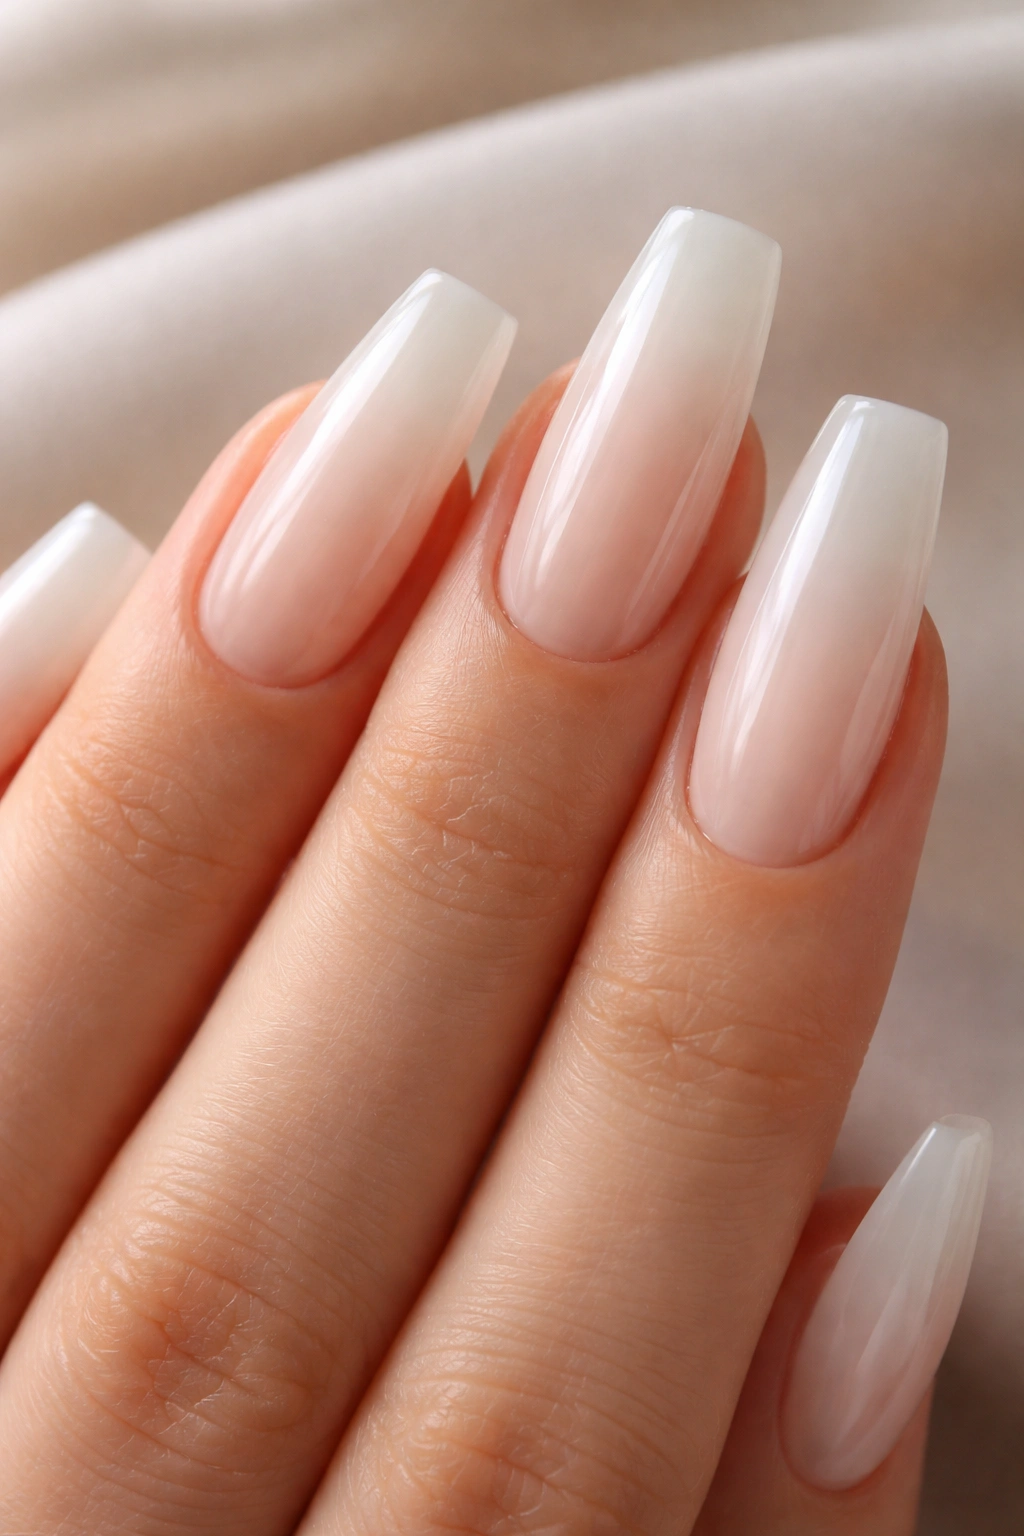
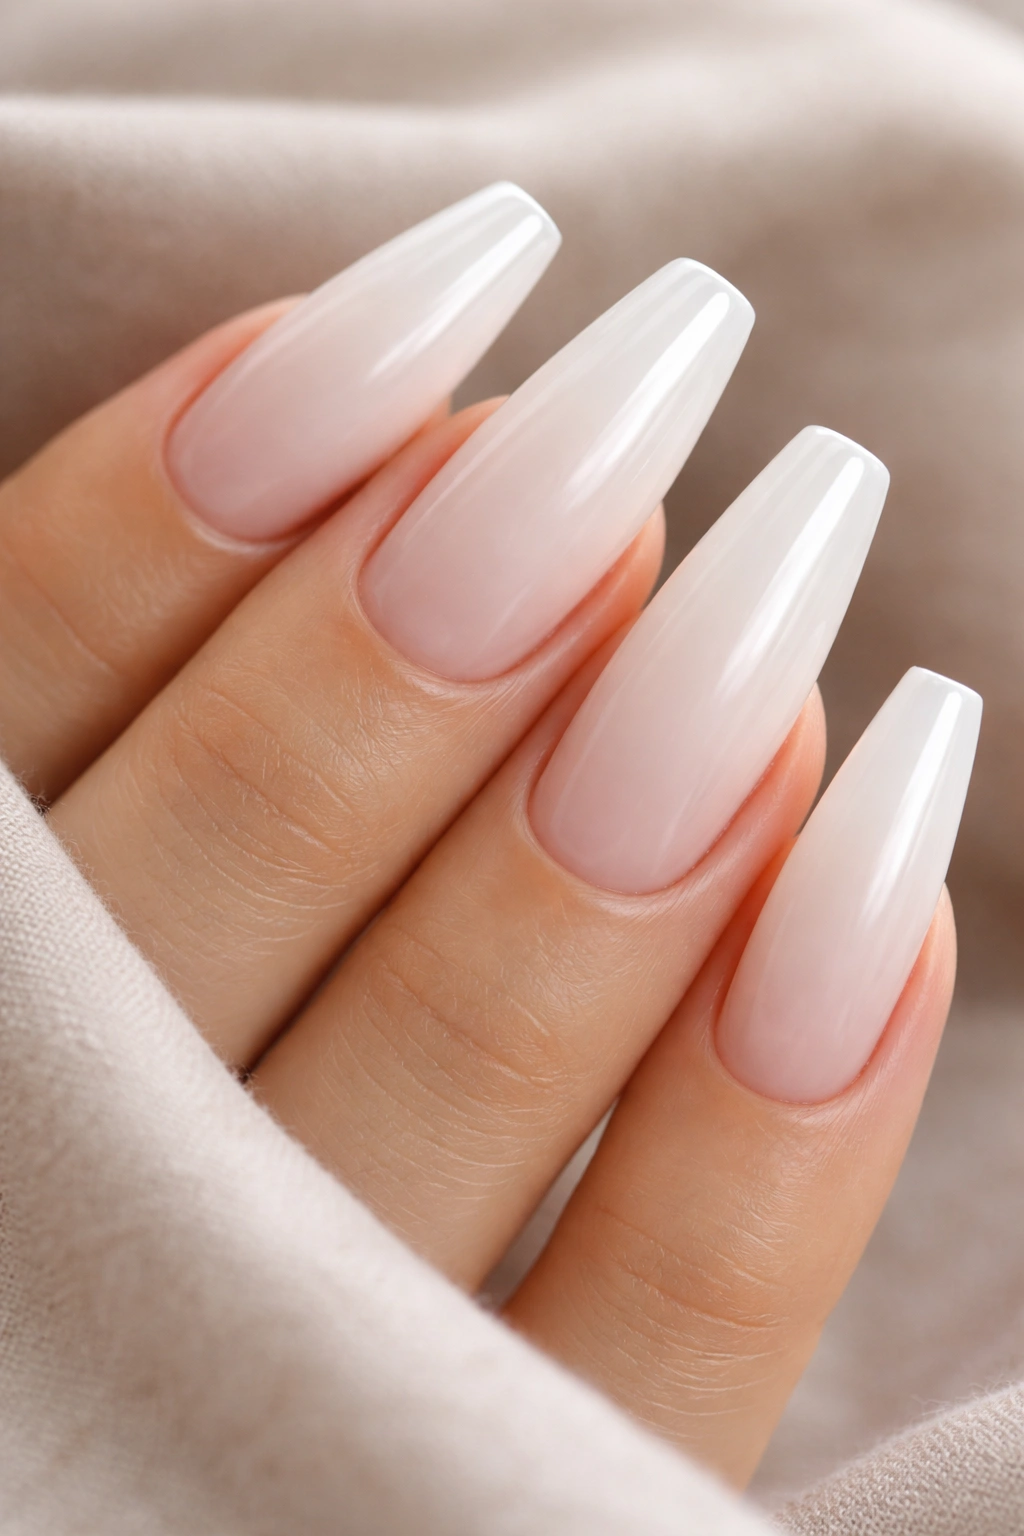
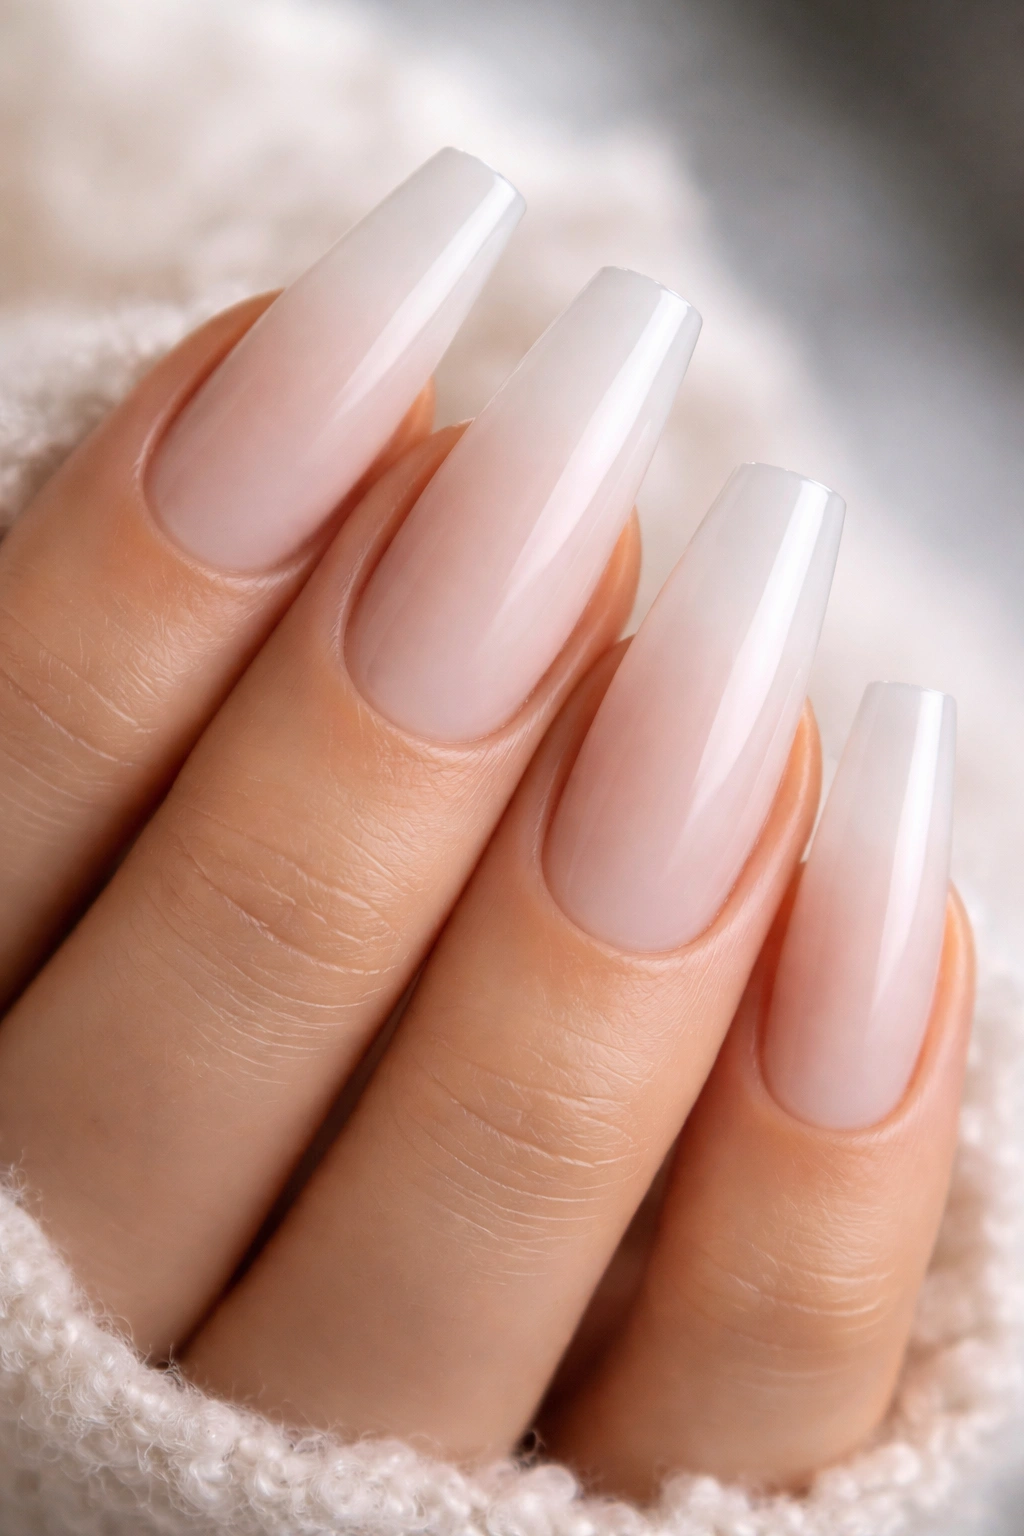
4. Baby Boomer Milky Fade Coffin
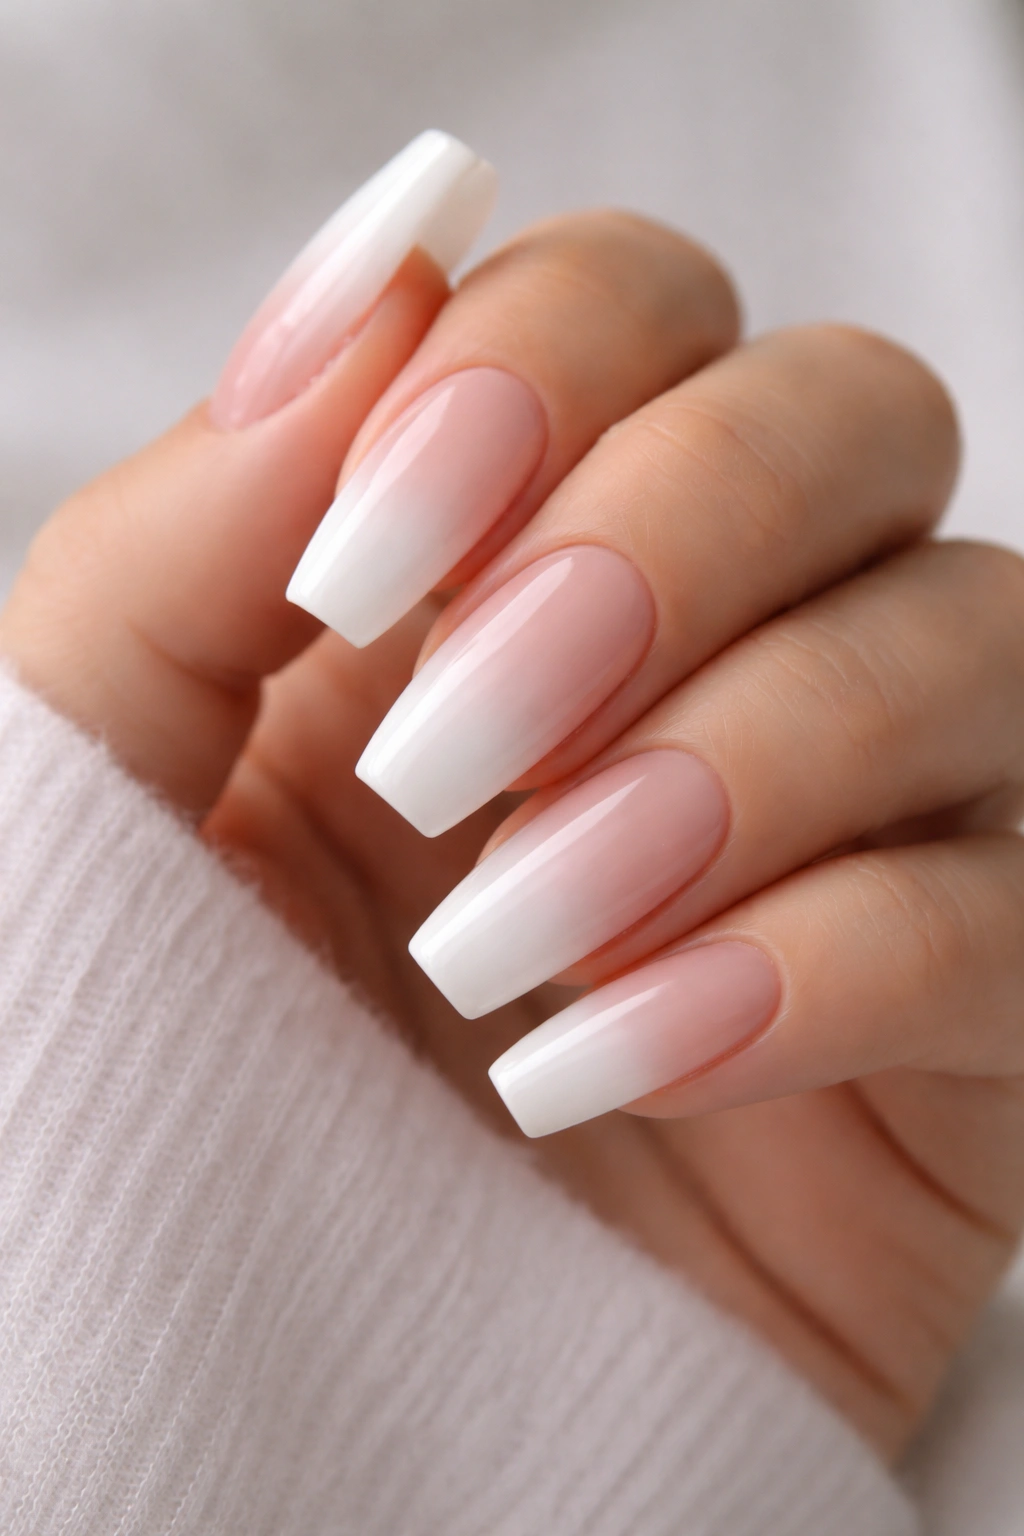
Picture a set where the white seems to appear from nowhere. Near the cuticle, you see a pale nude or pink base. Halfway down, the color clouds over. By the tip, the white is fuller, though still soft. That’s the baby boomer fade done right.
The reason this style suits coffin nails so well is shape geometry. The taper draws your eye forward, and the fade follows that path. You get length from the ombré and softness from the milkiness in the white. A hard French line can chop the nail visually. A fade stretches it.
Good baby boomer sets depend on blending, not extra pigment. The smoothest versions use a sponge blend, ombré brush, or airbrush effect with two close base shades rather than a deep pink fighting a bright white.
A few details make or break it:
- Keep the nude base within one shade of your natural nail bed.
- Let the white start diffusing around the midpoint of the nail, not right at the cuticle.
- Finish with gloss if you want a cleaner bridal feel; use matte if you want a powdery, editorial look.
- Avoid bulky builder near the tip, or the fade loses that airy feel.
If you like French manicures but want less contrast, this is the move I’d pick first.
5. Milky White Coffin With Micro French Edges
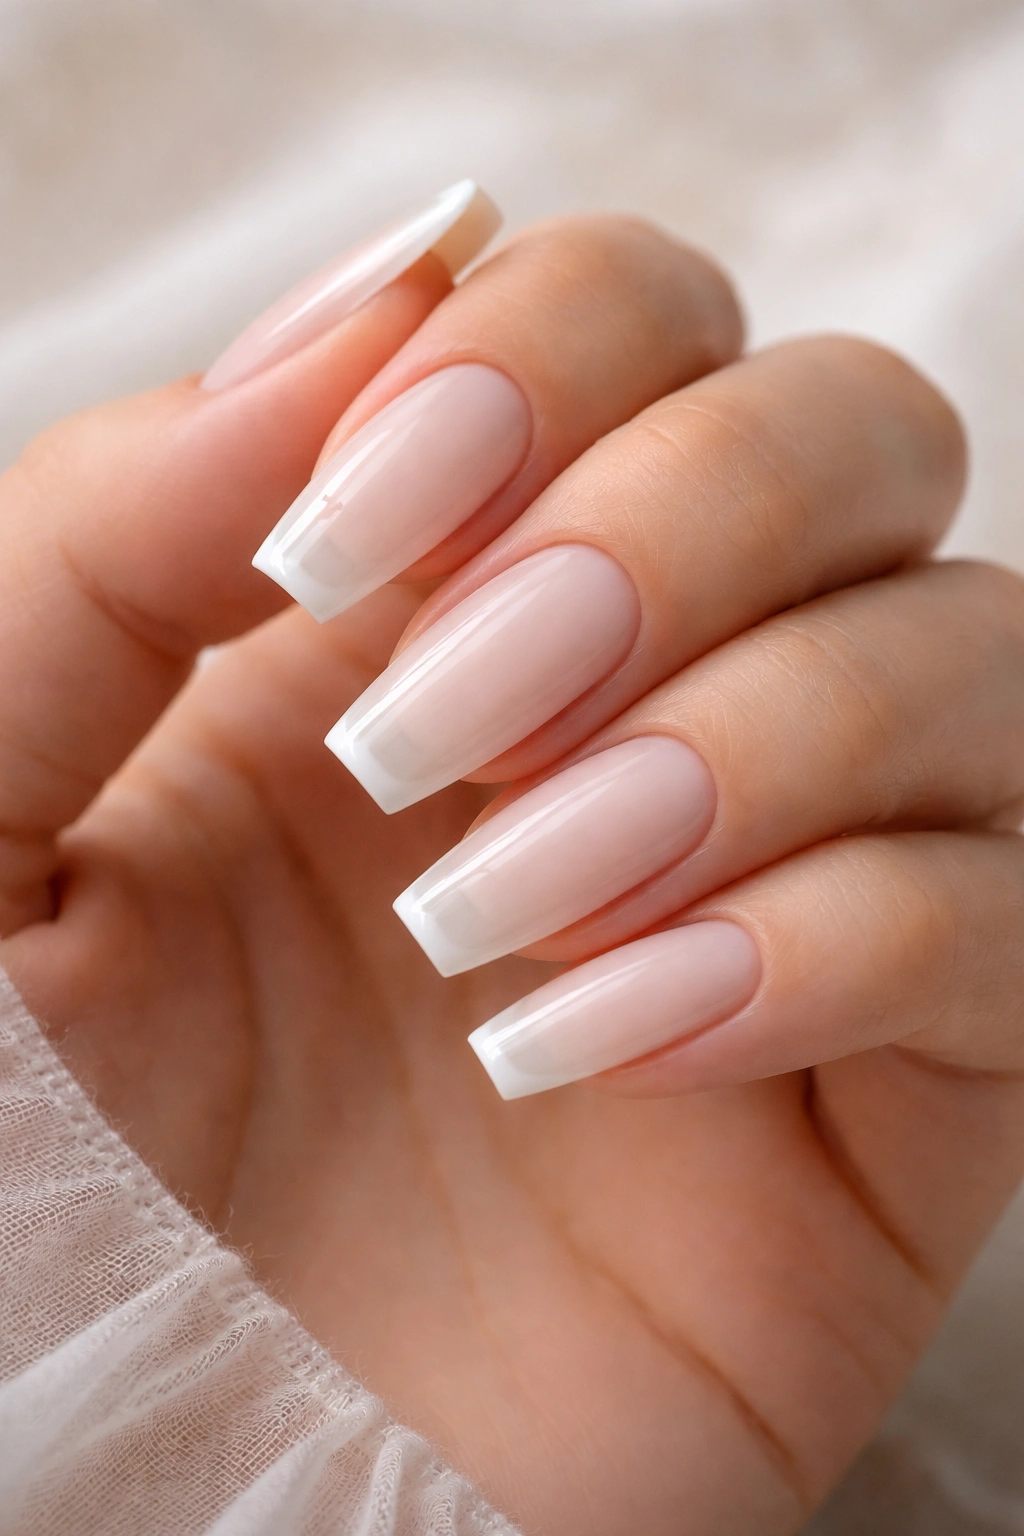
There’s something sly about this design. At first glance, it reads like a plain milky white set. Look closer and you notice a hair-thin white French edge tracing the tip, maybe 1 mm wide, maybe less. That little line sharpens the coffin shape without dragging the manicure into high-contrast territory.
I love this approach because it gives you two whites working together. The base is cloudy and soft. The tip line is brighter and more exact. You get definition, though the set still feels gentle. It’s the manicure version of pressing a shirt and leaving the jewelry at home.
The execution has to stay neat. A thick French edge ruins the point. The line should sit only on the outer edge of the tip, not eat into the nail plate. If the milky base is sheer, the brighter white tip pops more. If the base is dense, the line disappears. That balance is the whole game.
This style also ages well between fills. A soft base near the cuticle hides regrowth better than a hard white design, while the micro tip keeps the shape from looking sleepy after week two. Small thing. Big payoff.
If your taste leans clean and tailored, this is one of the strongest milky white coffin nail ideas on the list.
6. Slim Coffin Nails With a Pink-Milk Base
Unlike a standard sheer white set, this version starts with a noticeable pink-milk wash under the white. The result looks warmer, softer, and a touch more skin-like. If blue-white shades make your hands look dull, try this before writing off milky white altogether.
A pink-milk base is especially good on slimmer coffin nails because the warmth keeps the taper from reading severe. Long narrow nails can turn sharp fast. Add pink into the milk and the shape relaxes.
Who does this suit best? People with cooler or rosy skin often look good in it, though warmer skin can wear it too if the pink has a beige cast. The key is balance. You want the base to peek through, not dominate.
Ask for:
- A sheer rose-beige rubber base or builder layer
- One veil of milky white over the top
- A file shape that narrows the sidewalls, though keeps enough width at the tip to stay coffin, not almond
I’d also use this style for bridal nails before plain opaque white. Photos tend to pick up the warmth in a flattering way, and the hand looks smoother from a distance.
7. Velvety Matte Milky White Coffin
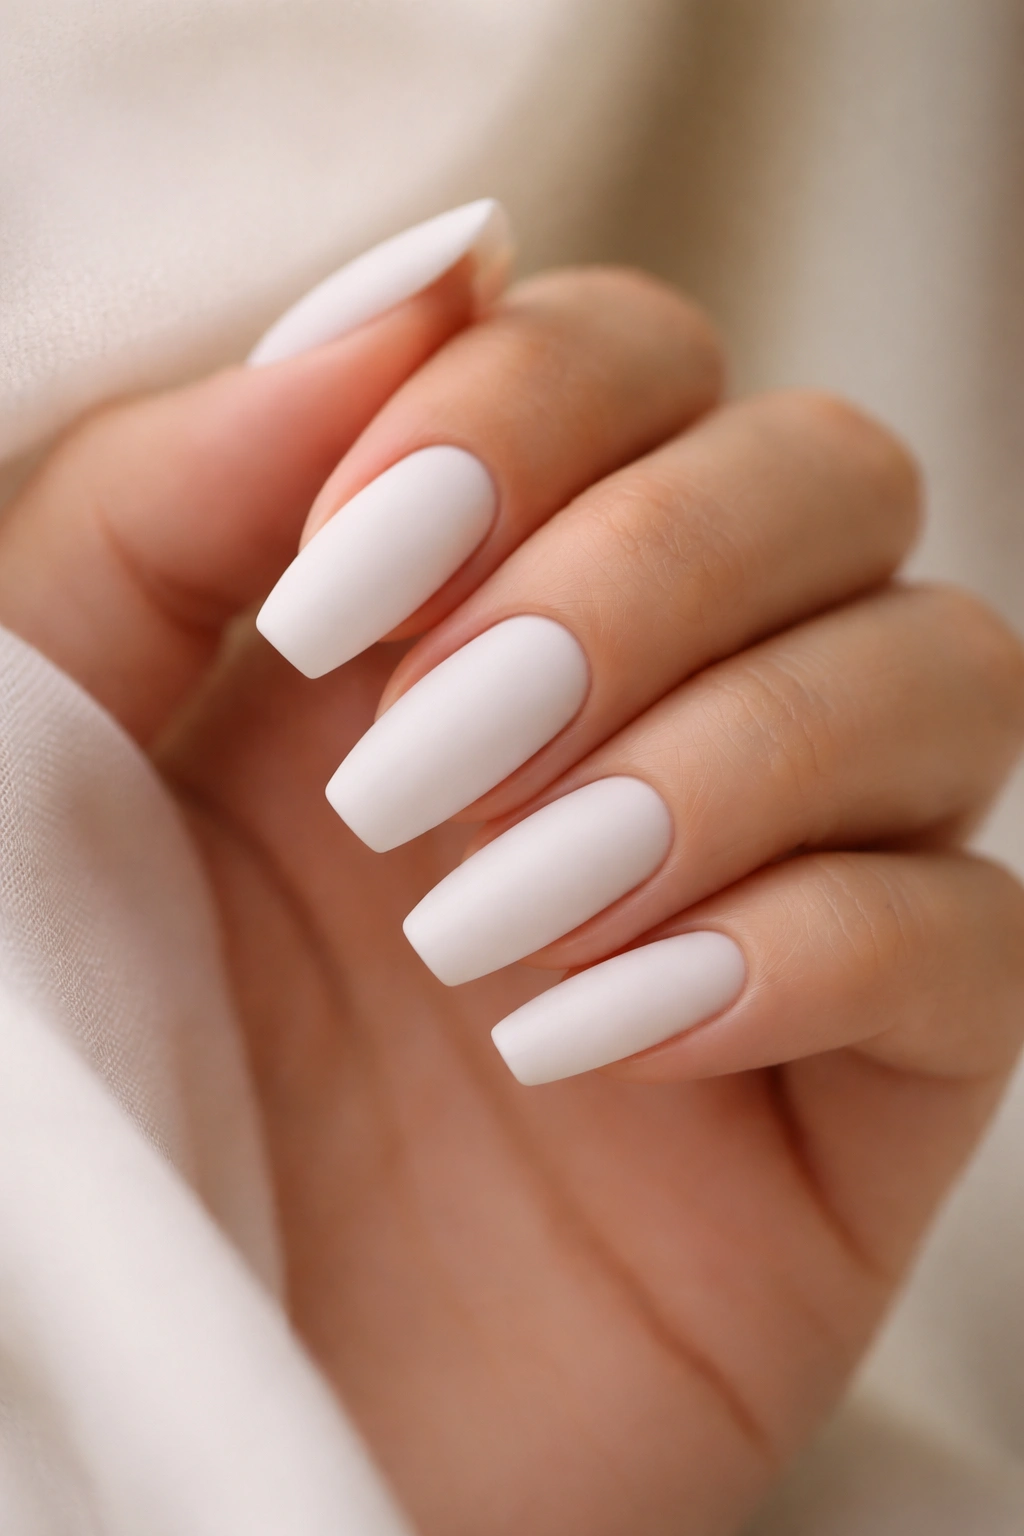
Gloss gets most of the attention, though matte can be the better choice if you want your milky white nails to feel quiet and tactile. A true velvet matte topcoat turns the color from creamy to powdery. It almost looks like porcelain that has been worn smooth at the edges.
What the matte finish changes
First, it lowers contrast. Shine always makes edges look crisper. Matte blurs them a bit, which pushes the whole manicure further into soft territory. Second, it changes how the white photographs in daylight. Instead of bright highlights, you get a flatter, more even surface.
Not every matte topcoat works on white. Some leave a gray cast. Others catch oil from your skin and turn patchy after two days. Ask for a soft-touch matte topcoat that cures evenly and can handle pale shades.
Good ways to wear it
- Keep the shape short to medium coffin so the look stays refined.
- Pair it with no art at all, or one tiny accent on a single finger.
- Reapply cuticle oil around the nail, though wipe the nail plate clean so the matte finish stays crisp.
If glossy white feels too bridal or too polished for your taste, matte milky white gives you the same softness with a drier, more fashion-forward finish.
8. Milky White Coffin With a Nude Cuticle Shadow
A shaded cuticle area can make a white manicure look far more natural. Instead of laying milky white evenly from cuticle to tip, the tech leaves a faint nude or sheer beige halo near the cuticle, then feathers the white over it. The effect is subtle, though it changes the whole set.
Why does it work so well? Because hard white at the cuticle can make regrowth look obvious after a week and a half. A nude shadow buys you more graceful grow-out. It also gives the nail bed more depth, which keeps the manicure from looking pasted on.
I’ve seen this done with a sheer camouflage base, then a soft white wash applied from the mid-nail upward with the remaining product brushed back toward the cuticle. You do not want a visible line. You want haze.
This is a smart choice if you love white nails but hate the rigid look of a fully coated cuticle area. It suits medium and longer coffin shapes, and it looks especially good when your hands are going to be in close-up photos. The nail still reads white, though the transition into the skin looks calmer.
Not flashy. Smart.
9. Milky White Coffin With One Tiny Crystal
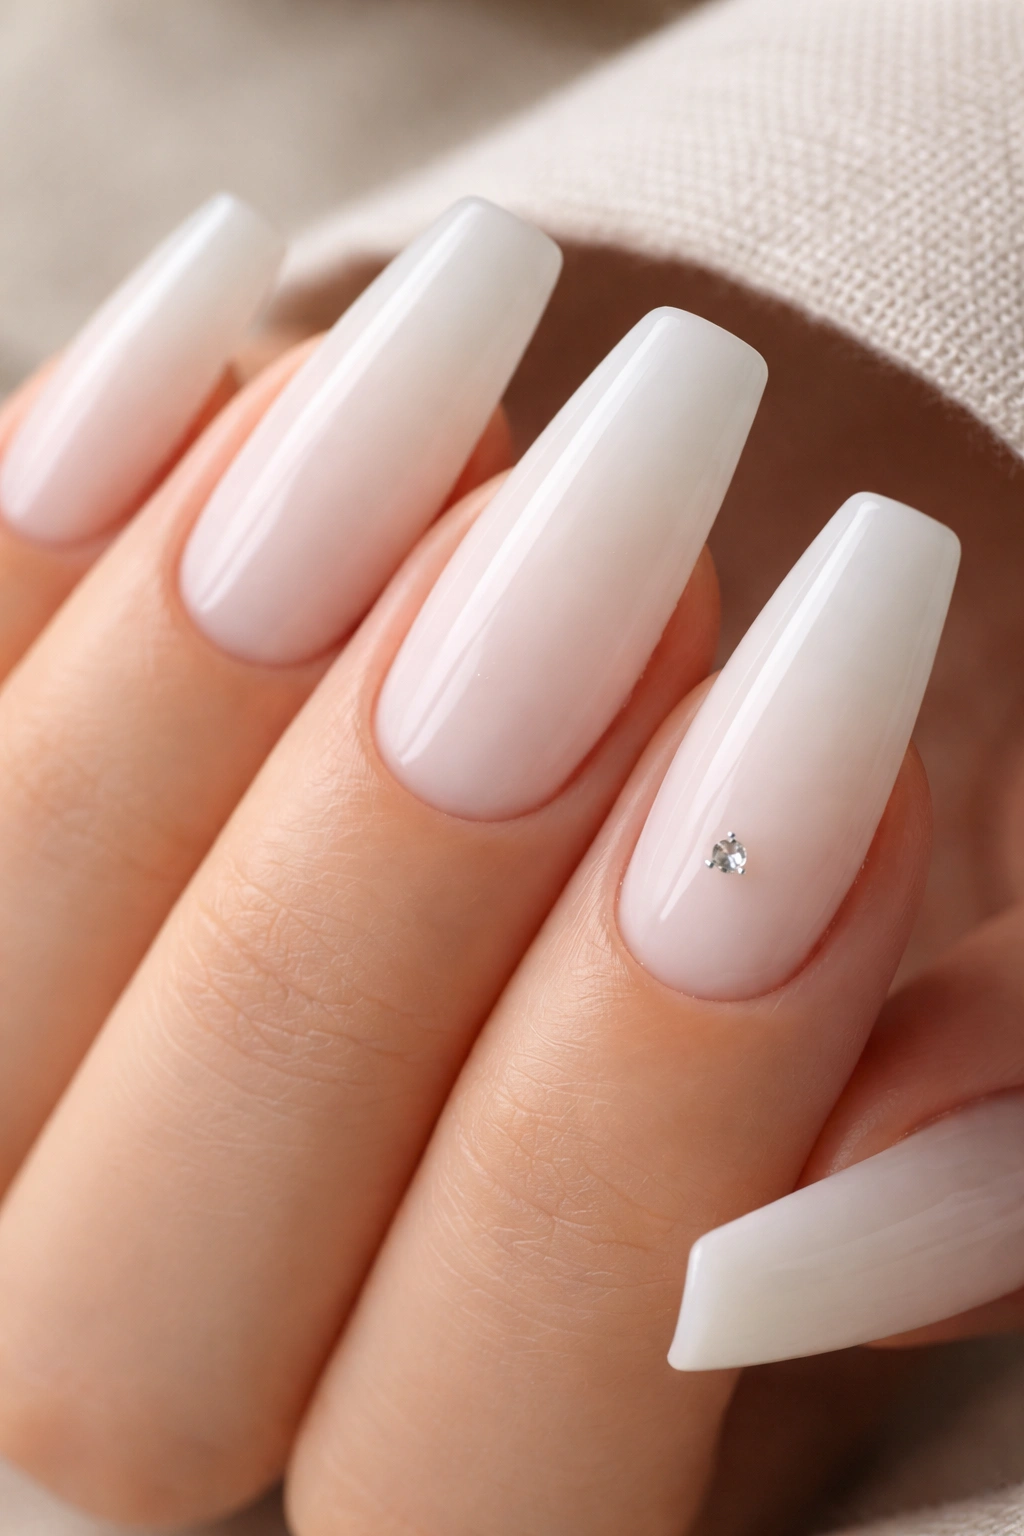
Does a soft white set need sparkle? Usually no. But one small crystal—placed with restraint—can give the manicure a focal point without wrecking the softness.
The key word is one. Maybe two, if the placement is mirrored and the stones are small. Think ss3 or ss5 size rhinestones, tucked near the cuticle on the ring finger or placed off-center on the middle finger. Anything larger starts pulling the set into pageant territory, and that is not the point here.
Why the single accent works
Milky white acts like a quiet background. A crystal catches light in a sharper way, so the eye notices it quickly. Because the base is calm, that one point of shine feels intentional instead of busy.
Placement matters more than stone count. A crystal jammed in the center of the nail can look clumsy on a coffin shape. A small offset placement follows the taper better.
How to keep it clean
Use a flat-back crystal, set it into a dot of gel, and seal around the base rather than flooding over the top. If the stone sinks into topcoat, it loses that crisp light play and can snag hair.
This is the set I’d choose for an event where you want one detail people notice only when they’re close.
10. White Swirl Overlay on a Milky Base
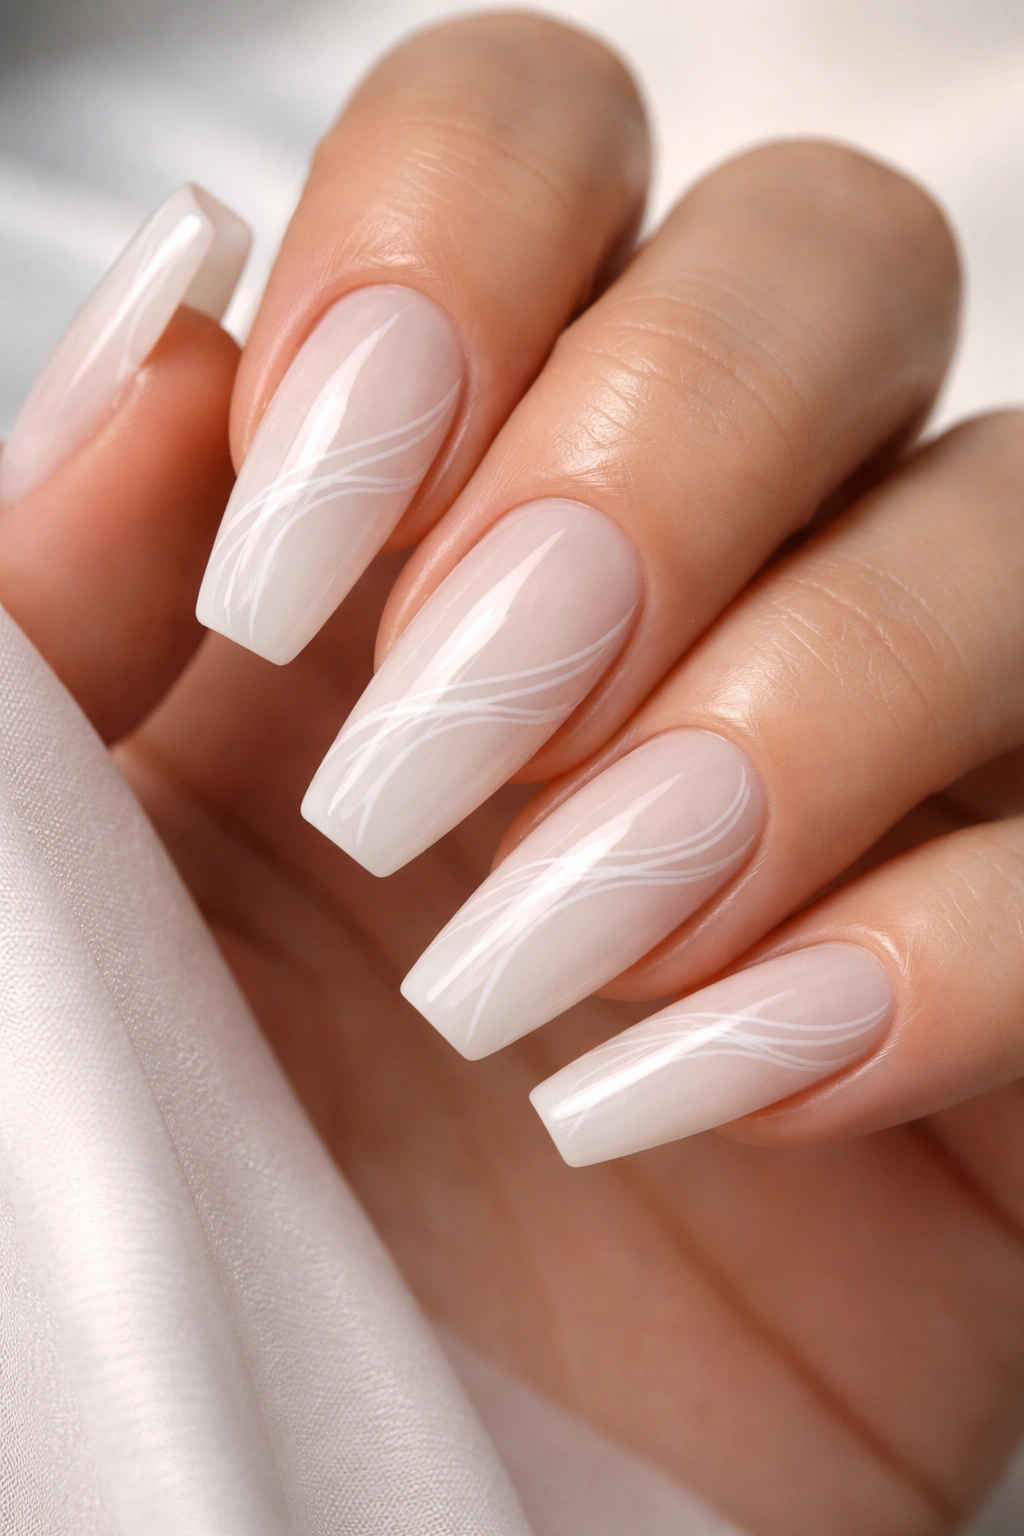
A friend of mine once brought a reference photo for “plain white nails” and then pointed to a faint raised pattern she had not even clocked at first. That tiny pattern turned out to be the whole reason the set looked special. That’s the power of a soft swirl overlay.
On this design, the base stays milky and sheer. Then a slightly brighter white is painted in thin flowing lines—curves, loops, maybe a soft S-shape—across one or two nails or the whole set. The art should sit close to the base color, not contrast hard against it.
A few rules keep this from going tacky:
- Keep the line work thin and airy, not thick and cartoony.
- Use 2 to 3 feature nails if you want the lightest look.
- Choose gloss for a smooth overlay or a raised gel line if you want texture.
- Leave plenty of empty space on the nail so the swirls can breathe.
This kind of design works because the movement breaks up the flatness of white, though it does not interrupt the softness. You notice shape and surface, not color contrast. For people who like nail art but still want the hand to look calm, this hits a sweet spot.
11. Pearl Chrome Washed Over Milky White
Pearl chrome can go icy in a hurry. Put it over a harsh white base and the finish turns mirror-cold. Layer a fine pearl powder over milky white, though, and you get something much softer—more shell than metal, more glow than glare.
This is one of the few chrome looks I actually like on coffin nails when the goal is softness. The coffin shape provides enough edge already. A mirror chrome pushes too far. Pearl powder dusted thinly over a milk base gives you a sheen that shifts as your hands move, though the base still reads creamy.
Application is everything. The nail should be mostly finished first: smooth base, cured no-wipe topcoat, then a light rub of pearl pigment with a sponge applicator. Too much powder and the nail loses its milkiness. Too little and the effect disappears in indoor light.
Wear this one when you want your manicure to catch the eye from movement rather than color. It looks strong next to satin, silk, or soft knit textures, and it has that clean event-ready mood without shouting for attention.
12. Iridescent Flake Milky Coffin Nails
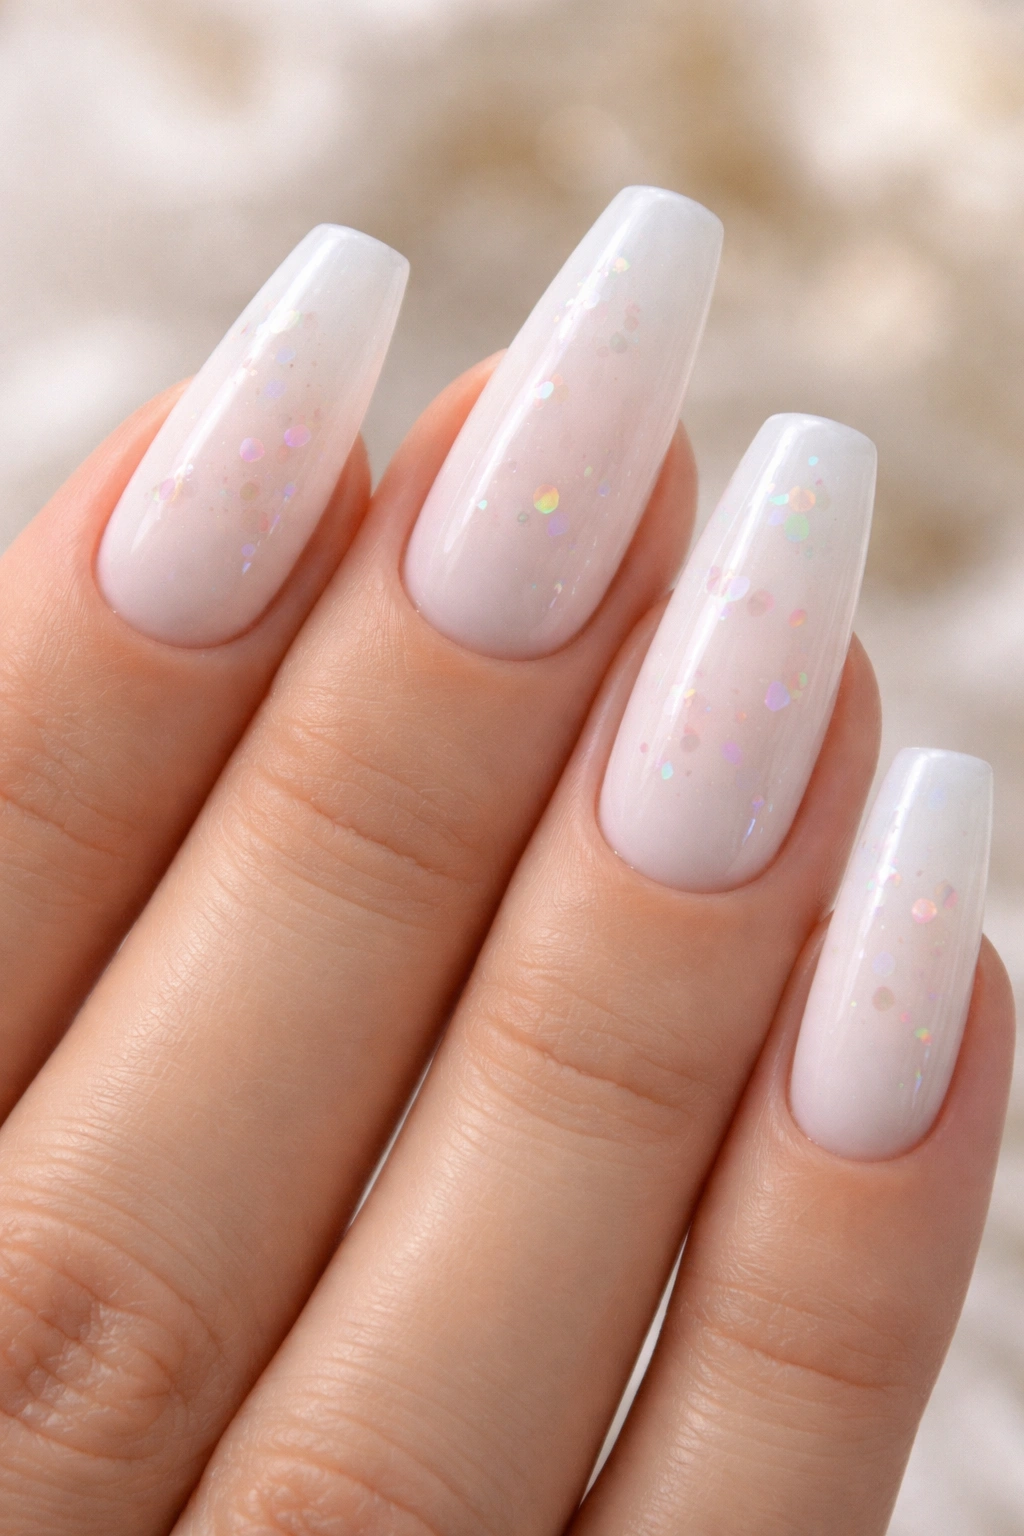
Unlike pearl chrome, iridescent flakes give you soft flashes instead of an all-over sheen. Tiny pieces of opal-toned foil—think pink, blue, lilac, maybe a touch of green—sit inside or on top of the milky white so the color shifts only when light hits at an angle.
That restraint is why I like flakes on a soft white base more than glitter. Glitter announces itself from across the room. Flakes flicker. On milky white coffin nails, that flicker feels airy, almost suspended inside the gel.
This works best when the flakes are sparse. You want 5 to 10 small pieces per nail, not a packed foil effect. Place them closer to the center and tip, leave the cuticle cleaner, and seal under a smooth topcoat so the surface stays glassy.
Who should try it? Anyone who finds plain white a bit too plain but hates chunky sparkle. The manicure still reads soft and bridal-adjacent, though there’s more movement in it. One caution: pair it with clean jewelry. A busy ring stack plus iridescent flakes plus a long coffin shape can tip into too much all at once.
13. 3D Gel Dew Drops on Milky White
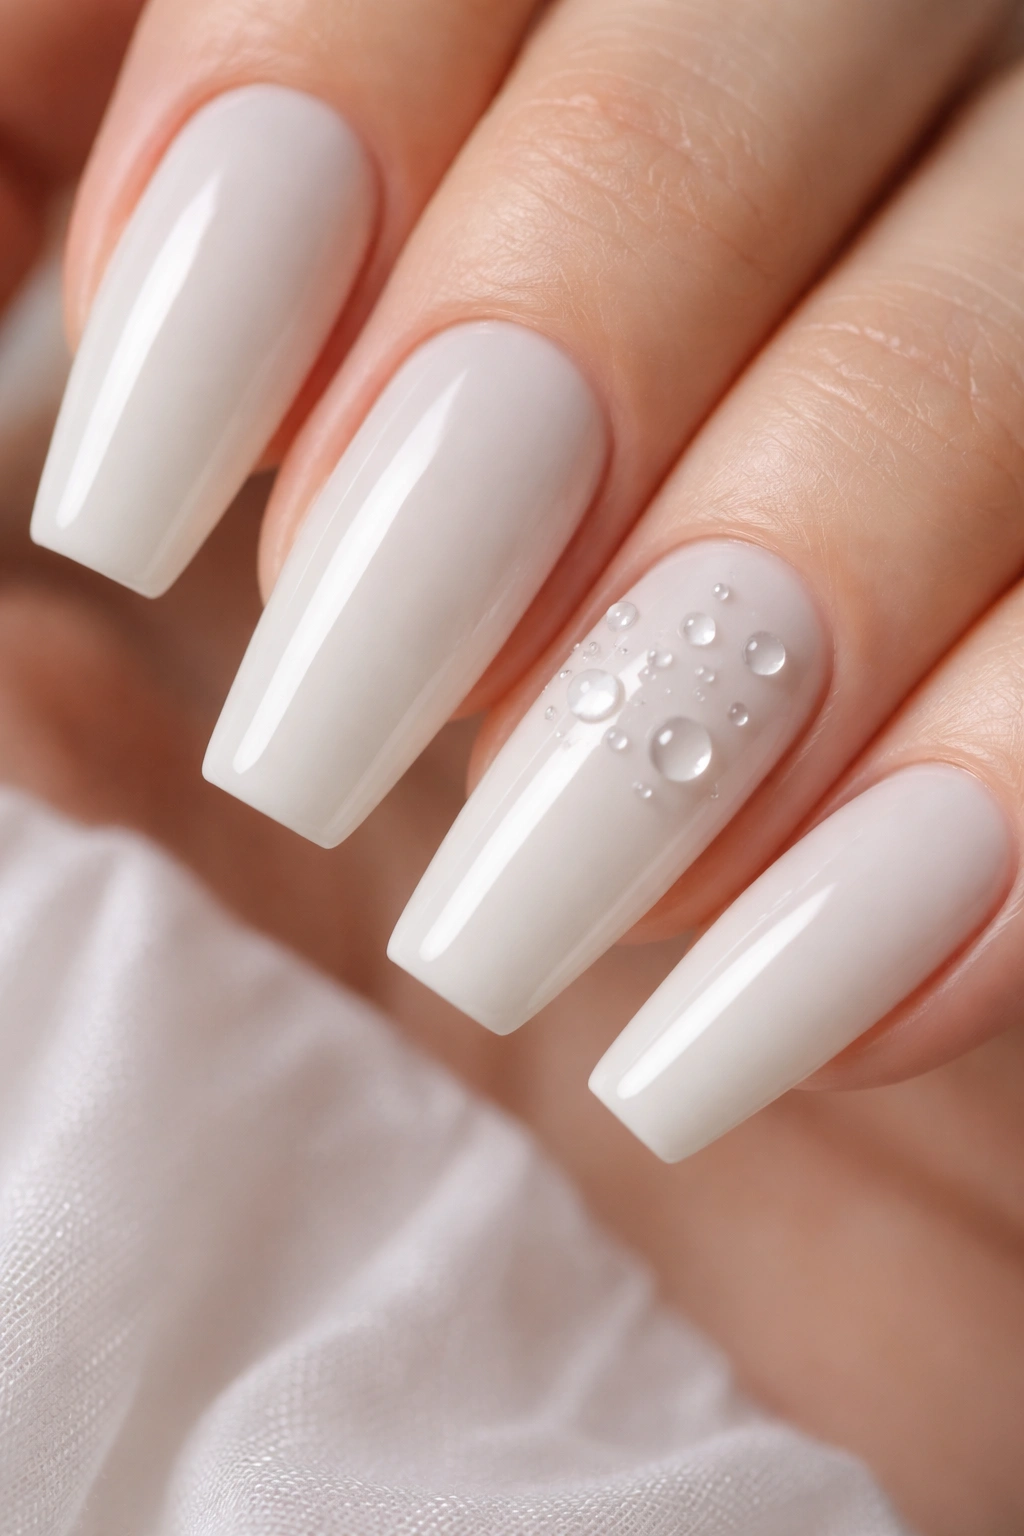
This one is more playful, though it can still stay soft if the scale is controlled. Small clear gel droplets placed over a milky white base create a fresh, dewy surface—like condensation beads on cool glass.
Why the texture works here
Clear 3D art keeps the color story quiet. You are adding texture, not another shade. On a milk-white base, the droplets cast tiny shadows that make the nail look touchable and light.
You do need discipline with size. The nicest versions use mini droplets no wider than 2 to 3 mm scattered on one or two accent nails. If every nail is covered in big blobs, the set starts to feel costume-like.
What to ask for
- A smooth milky white base, fully finished first
- Clear builder gel placed in small domes with a dotting tool
- Accent placement on the ring finger, middle finger, or thumb
- Gloss topcoat on the base, though not over the droplets if you want them to stay raised
Best for someone who wants a soft manicure with one tactile surprise. It is cute, a little odd, and far more wearable than it sounds if the droplets stay tiny.
14. Lace-Fine White Line Art on Milky Coffin
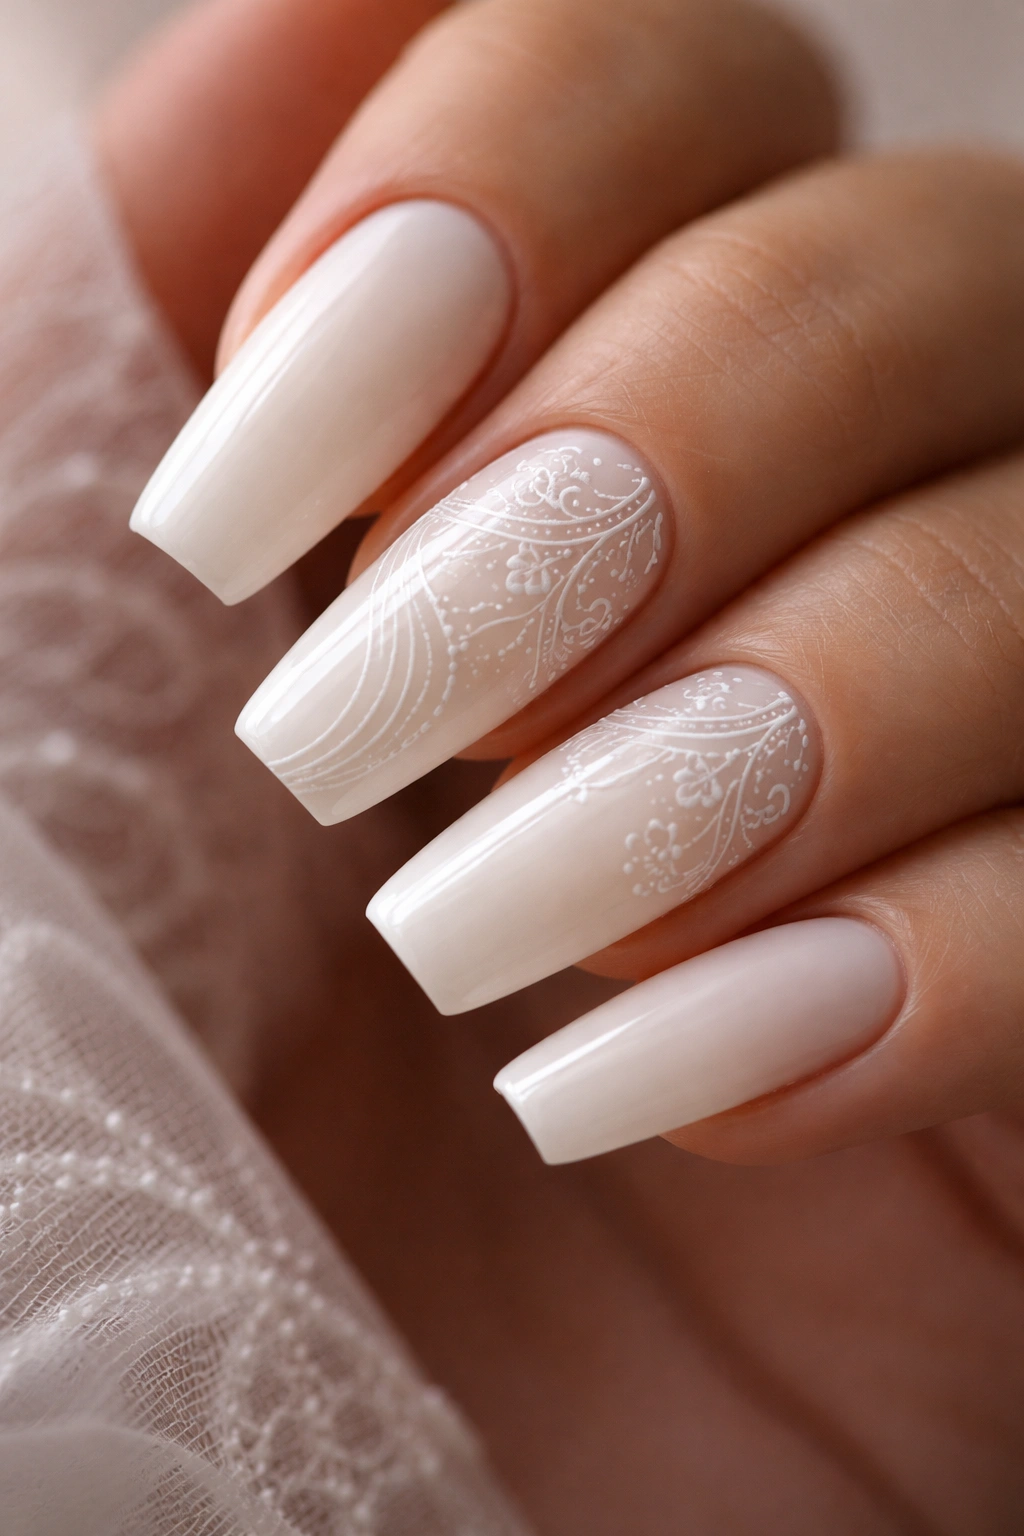
Thin line art can make a milky manicure feel dressed up without making it louder. Think tiny lace curves, a whisper of floral veining, or a single ribbon-like line trailing diagonally across the nail. Not a big bouquet. Not a chunky abstract print. Fine work only.
This design depends on contrast control. The art should be only a shade or two brighter than the base, or done in a slightly raised gel so texture does the work. On a milk-white background, a stark bright line can look too crisp. Softer white-on-white line work keeps the manicure in the same mood.
A nail artist with a steady hand will use a liner brush around 7 to 11 mm long for those narrow curves. You do not need every nail painted. Two feature nails and eight plain milky ones often look better than a full set of art.
The reason I like this style is that it feels intentional from up close, though calm from far away. At arm’s length, the set reads soft white. Lean in and you catch the fine detail. That is a smart kind of manicure. It does not oversell itself.
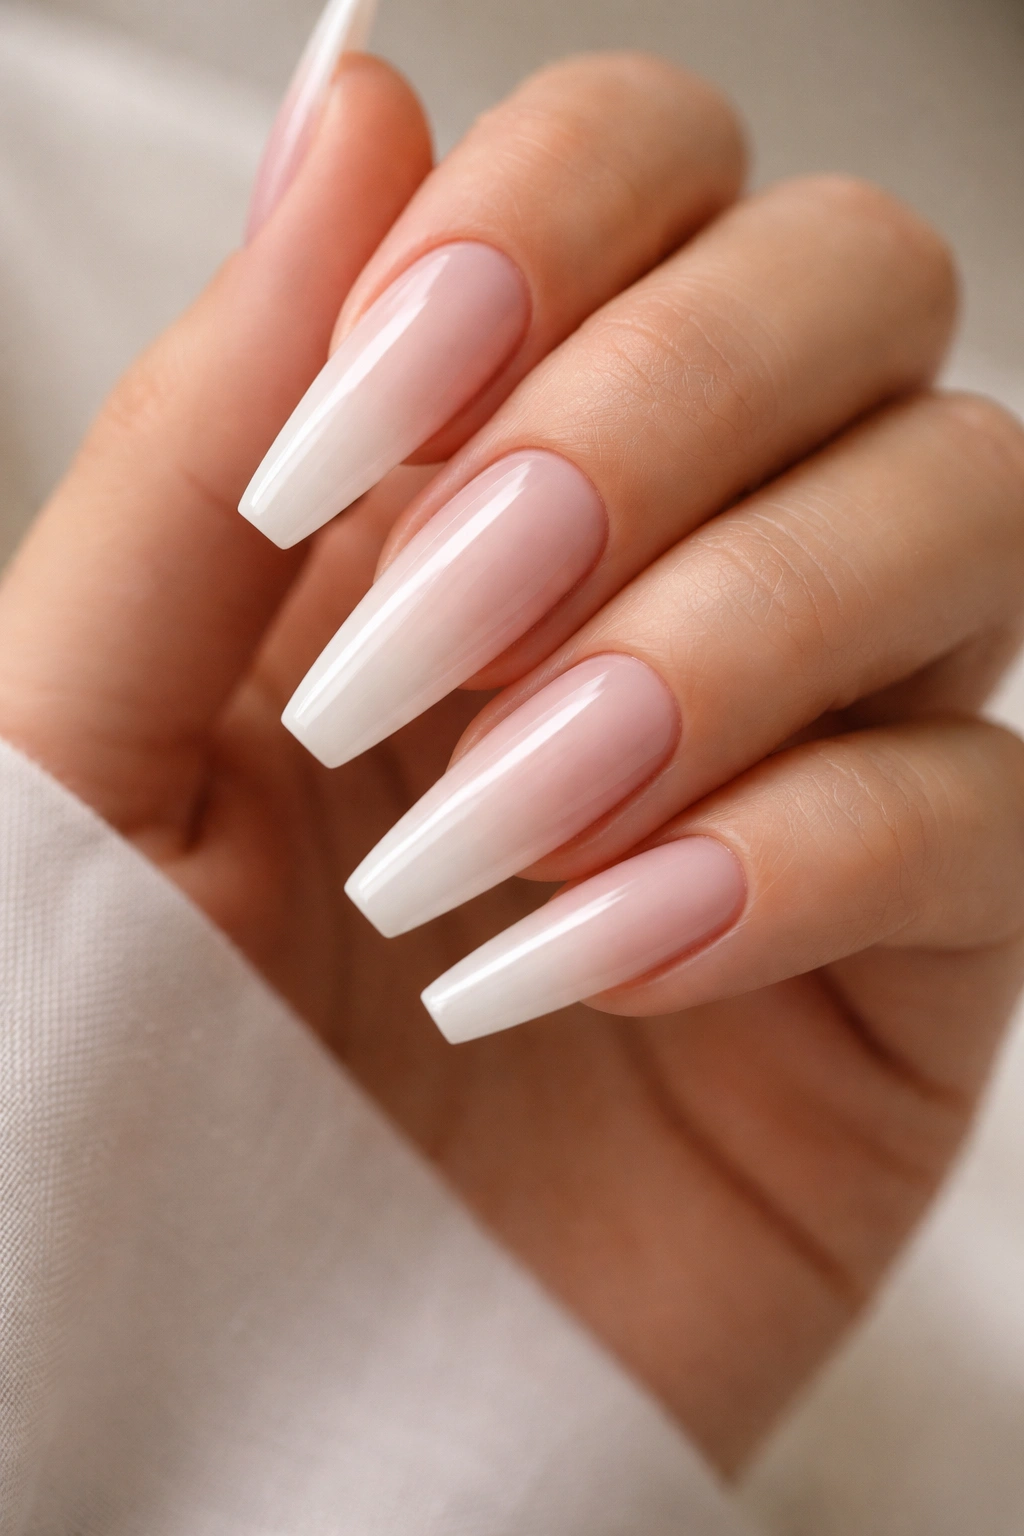
15. Semi-Transparent Milky Ombre Coffin Tips
If you want your coffin nails to look light—almost airy at the ends—go for a semi-transparent milky ombré that gets sheerer toward the tip instead of denser. Most white ombrés build up to a stronger white edge. This version does the reverse or keeps the tip more translucent, and the effect is softer by a mile.
It helps to think of it as fog rather than paint. The center of the nail carries the milkiness. The tip thins out, allowing a little more light through. On clear or jelly extensions, that can look almost frosted. On natural overlays, it gives the free edge a less blocky finish.
This style shines on medium and long coffin nails, where the transparency has space to show. A tech may use sheer builder, diluted white gel, or a soft airbrush blend to keep the tip from turning solid. The file shape matters too. Crisp sidewalls with a thin free edge make the transparency look intentional, not unfinished.
I like this one for people who want white nails but keep complaining that regular white feels “too much.” They’re usually right. A semi-transparent tip keeps the brightness, though the whole set feels lighter in mood and lighter in appearance too.
Final Thoughts
The milky white set people save to their camera roll over and over is rarely the loudest one. It’s the one with the right opacity, a clean coffin taper, and a finish that suits the mood—glassy if you want crisp, matte if you want powdery, pearl if you want a low-key glow.
If you’re booking a salon appointment, bring photos that show the milkiness and the shape. Those are the two details that matter most. Saying “white coffin nails” is not enough. Saying “soft milky white, medium coffin, two thin coats, no chalky finish” gives your nail tech something useful to build.
And if I had to narrow the list to three that almost always land well, I’d pick the classic sheer set, the baby boomer fade, and the nude cuticle shadow. Clean, flattering, and easy to wear for more than a day or two. That’s the kind of soft look worth asking for.
