

Milky white coffin nails have become the quiet luxury of nail art. There’s something undeniably chic about them—they’re elegant without trying too hard, understated yet impossible to ignore, and they work with literally any outfit or aesthetic. Unlike stark white or cream, milky white sits in this perfect middle ground: soft, slightly opaque, with just enough depth to catch light beautifully without being flat or boring.
The coffin shape amplifies this sophisticated vibe. Those elongated, tapered edges with the squared-off tip create a naturally dramatic silhouette that makes even a simple solid color feel intentional and polished. When you extend that shape into the longer nail territory, you’re not just wearing nail art—you’re making a statement about precision, confidence, and an appreciation for the details that elevate an entire look.
What makes milky white so magnetizing is its versatility paired with that understated elegance. It photographs beautifully, suits every skin tone, works for professional settings and night-out glamour alike, and gives you a perfect canvas for adding subtle details that feel elevated rather than overdone. Whether you’re drawn to minimalist geometry, delicate embellishments, or intricate nail art layered over the creamy base, milky white coffin nails give you a foundation that only gets better with the additions you make.
The designs here span the full spectrum—from pure simplicity that relies entirely on the color and shape’s inherent elegance, to detailed art that transforms your nails into wearable jewelry. Each one has been chosen because it genuinely works, feels current without being trendy, and translates beautifully onto long coffin nails specifically. Let’s explore what’s possible when you commit to this sublime color and shape combination.
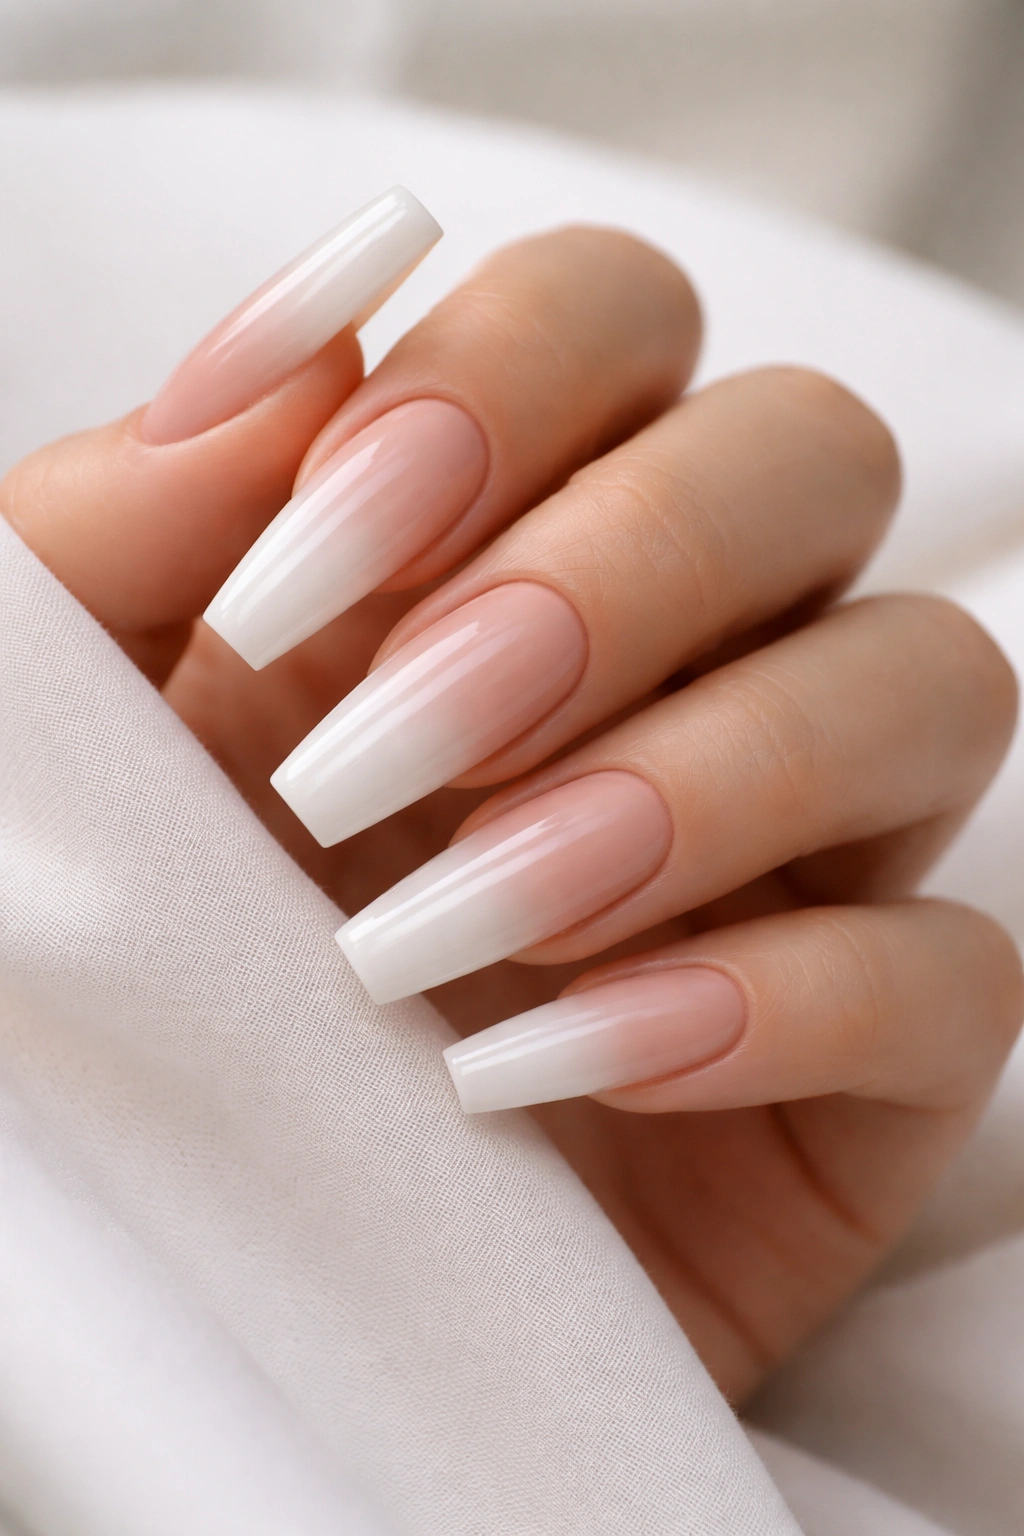
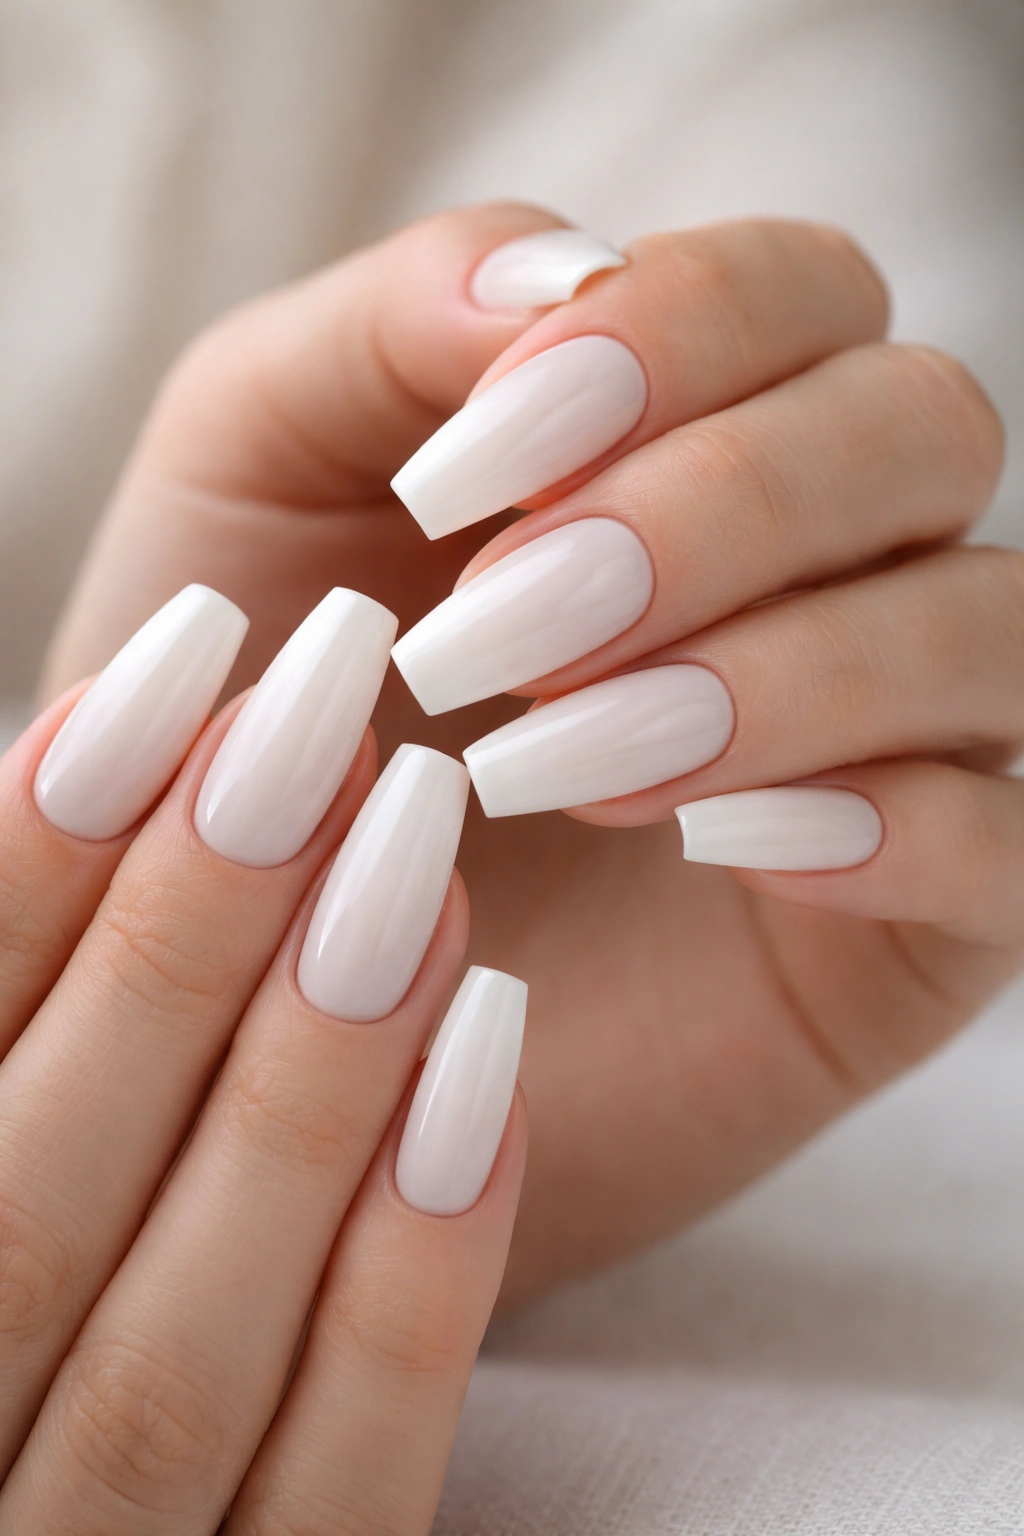
1. Pure Milky White Perfection
Sometimes the most beautiful nail design is no design at all—just flawless application of a creamy milky white shade that catches light with subtle depth. This is the version that makes people ask “what polish are you wearing?” because it looks so deliberately luxe, even though it’s genuinely minimal.
Why It’s a Timeless Choice
The elegance of milky white coffin nails lies in their understated sophistication. A perfectly executed solid milky white manicure reads as polished, intentional, and effortlessly expensive-looking. There’s a reason this appears in high-end editorials and on the hands of people who know that sometimes less is everything.
How to Nail the Application
- Use a milky white base coat in a shade with just enough pigment to require two coats but not so much that it covers unevenly
- Apply thin, even layers rather than one thick coat—this prevents streaking and creates that coveted semi-opaque finish
- Invest in a quality top coat with UV protection to prevent yellowing over time
- Keep the edges perfectly clean and shaped for maximum visual impact with no distracting flaws
- Consider a matte top coat for an ultra-modern, almost creamy finish, or high-gloss for traditional elegance
Pro tip: Milky white is the first shade to yellow under sunlight and UV exposure. Use a sunscreen-rated top coat and reapply every few weeks to keep that pristine white-cream color from shifting toward champagne or beige.
2. Milky White with Delicate Gold Leaf Accents
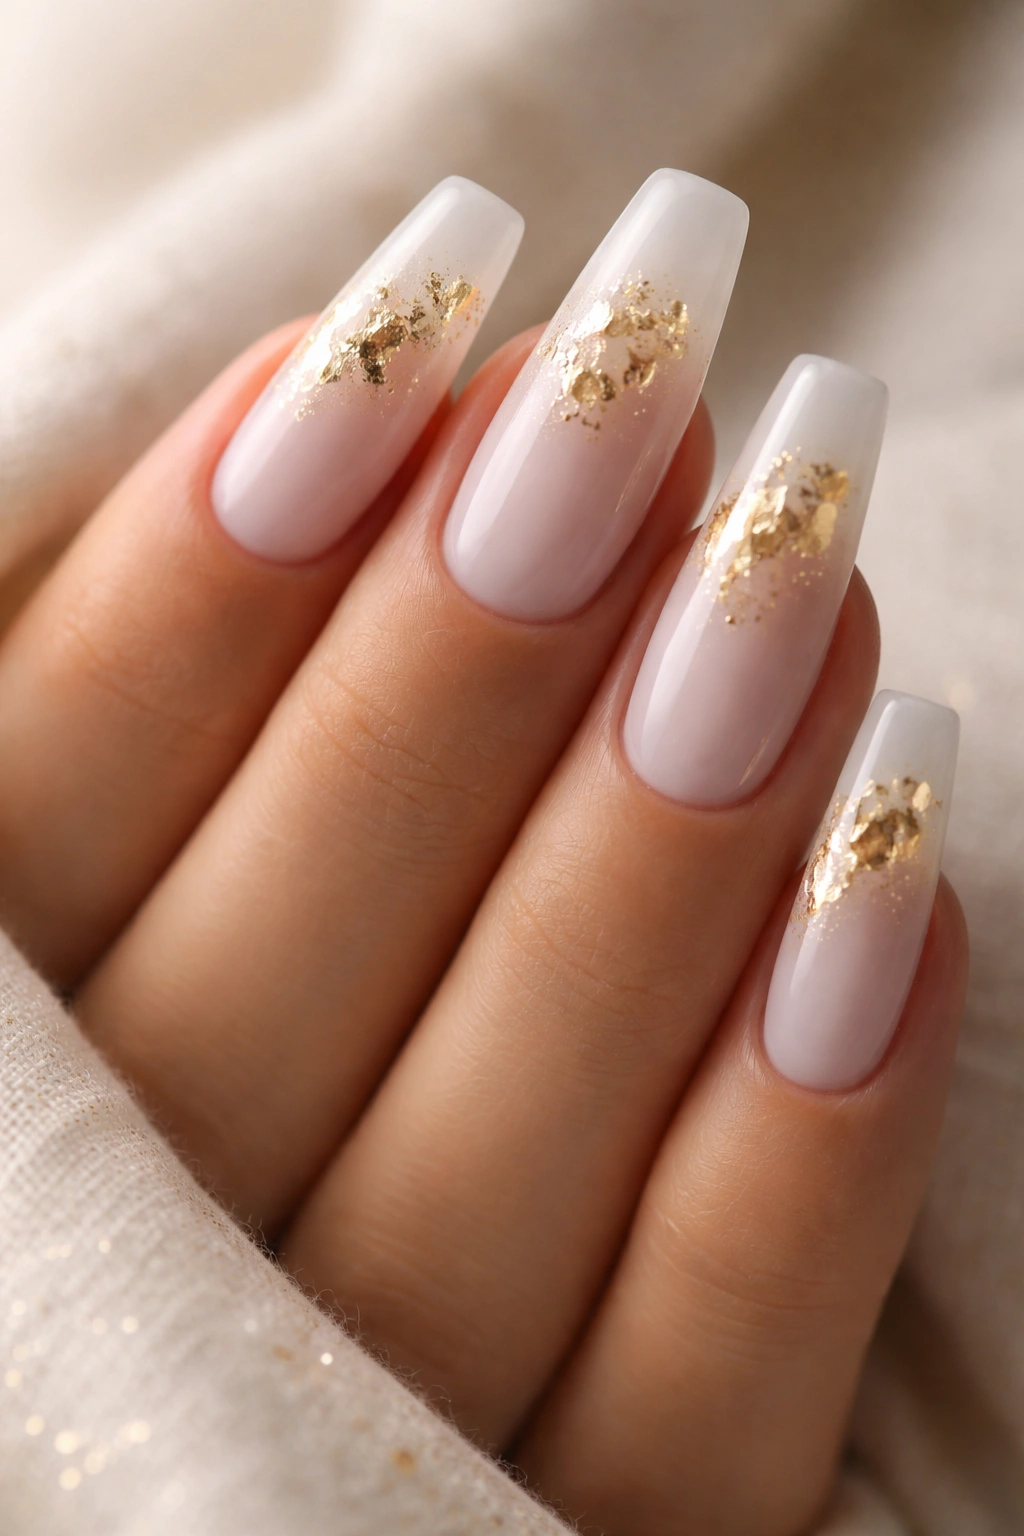
Gold leaf catches light in ways that solid metallics simply can’t—it fragments and dances, creating movement even when your hands are still. Layering thin sheets of gold leaf onto milky white coffin nails creates a design that reads as high-end and artistic without requiring any freehand painting skill.
Why Gold Leaf Elevates the Base
Gold leaf adds luxury through texture and subtle dimension. The way it catches different angles of light makes these nails feel more dimensional and refined than a solid color, but the milky white background keeps it sophisticated rather than flashy. This combination says “I appreciate quality materials” rather than “I want attention.”
Placement Techniques That Work Best
- Place gold leaf across the entire nail face for dramatic impact, or just along one edge for understated elegance
- Apply to the accent nail (ring finger) for a balanced design that draws the eye without overwhelming
- Layer gold leaf only on the lower third or nail tip for a gradient-like effect
- Create a geometric pattern by placing leaf in triangular sections or horizontal strips
- Seal everything under a glossy top coat so the gold doesn’t tarnish or lift
Worth knowing: Real gold leaf is durable and won’t tarnish, but ensure your top coat fully seals it to prevent any peeling. Budget-friendly versions work fine for this application if sealed properly.
3. Ombré Milky White to Soft Blush
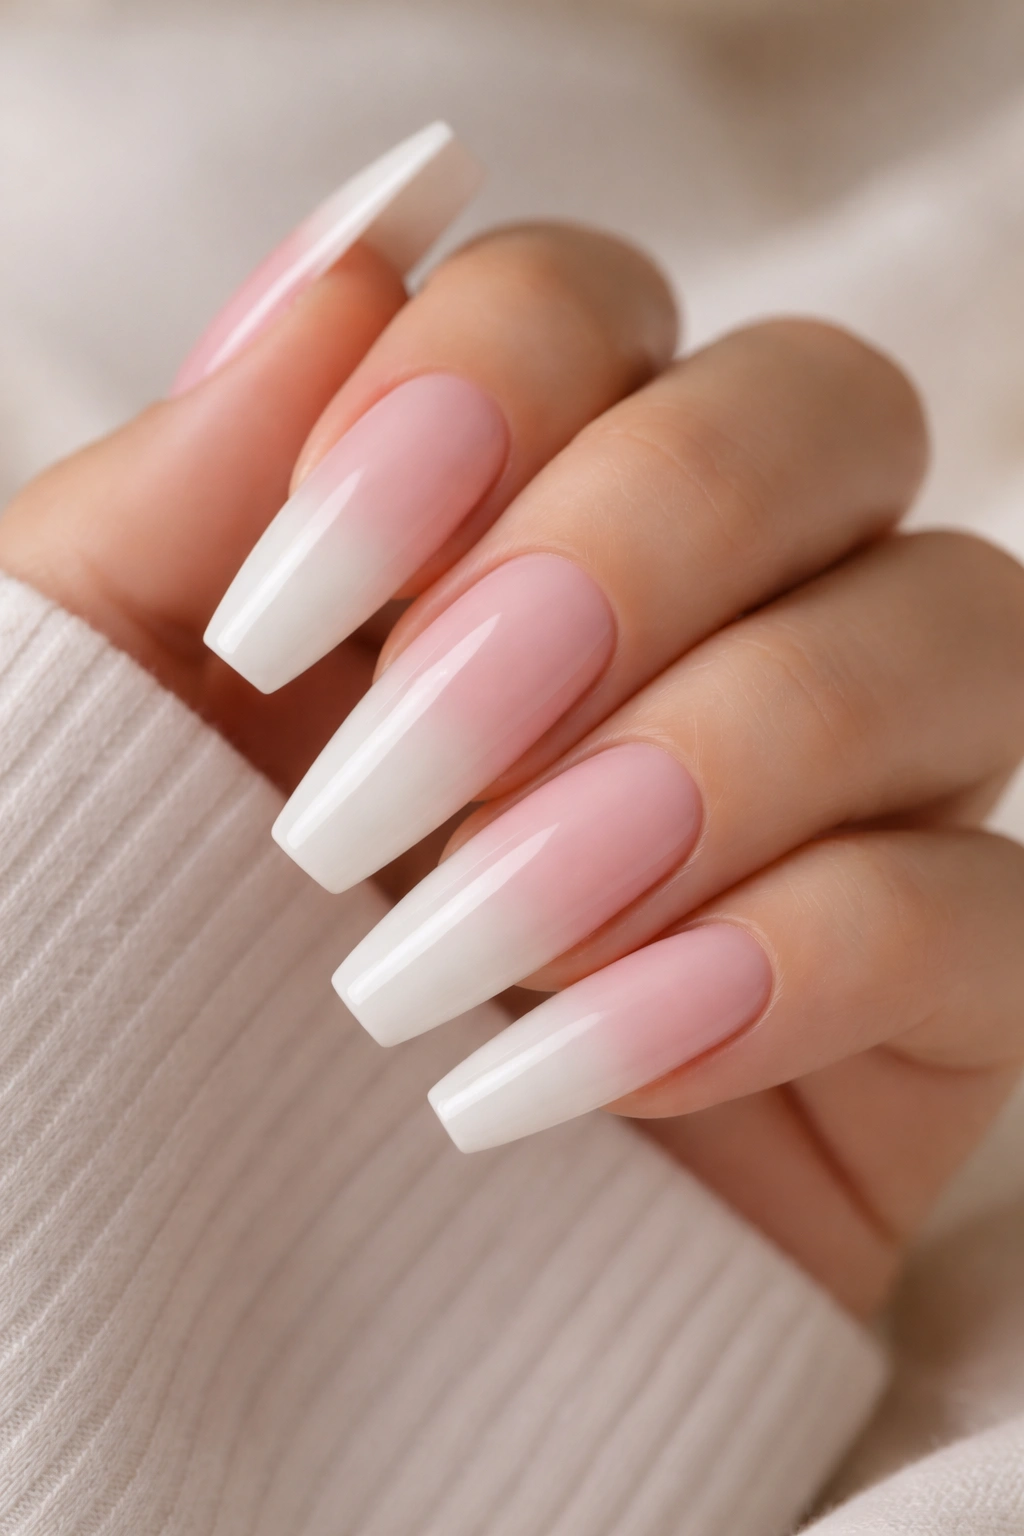
An ombré transition from milky white into soft blush pink creates a gradient that feels organic and romantic without veering into cutesy territory. The color shift is gentle enough to read as sophisticated while adding warmth and dimension to the design.
How the Color Transition Creates Impact
This design works because the colors are adjacent on the color wheel, making the transition feel natural rather than jarring. The milky white grounds the design in elegance while the blush adds softness and femininity. Together they create something that feels both modern and timeless.
Blending Techniques for Seamless Results
- Use a makeup sponge to stipple the gradient rather than dragging, which creates a softer blend
- Apply the darker shade (blush) to the tip and work upward, then apply milky white at the base and blend the middle
- Use three shades if you’re struggling with a two-shade transition: milky white, light blush, deeper blush
- Keep the sponge slightly damp for better product pickup and smoother blending
- Seal with a glossy top coat that will enhance the gradient effect by catching light
Insider note: This design actually looks better the second or third time you do it—your technique improves and the color placement becomes more intuitive once you’ve practiced the blending motion.
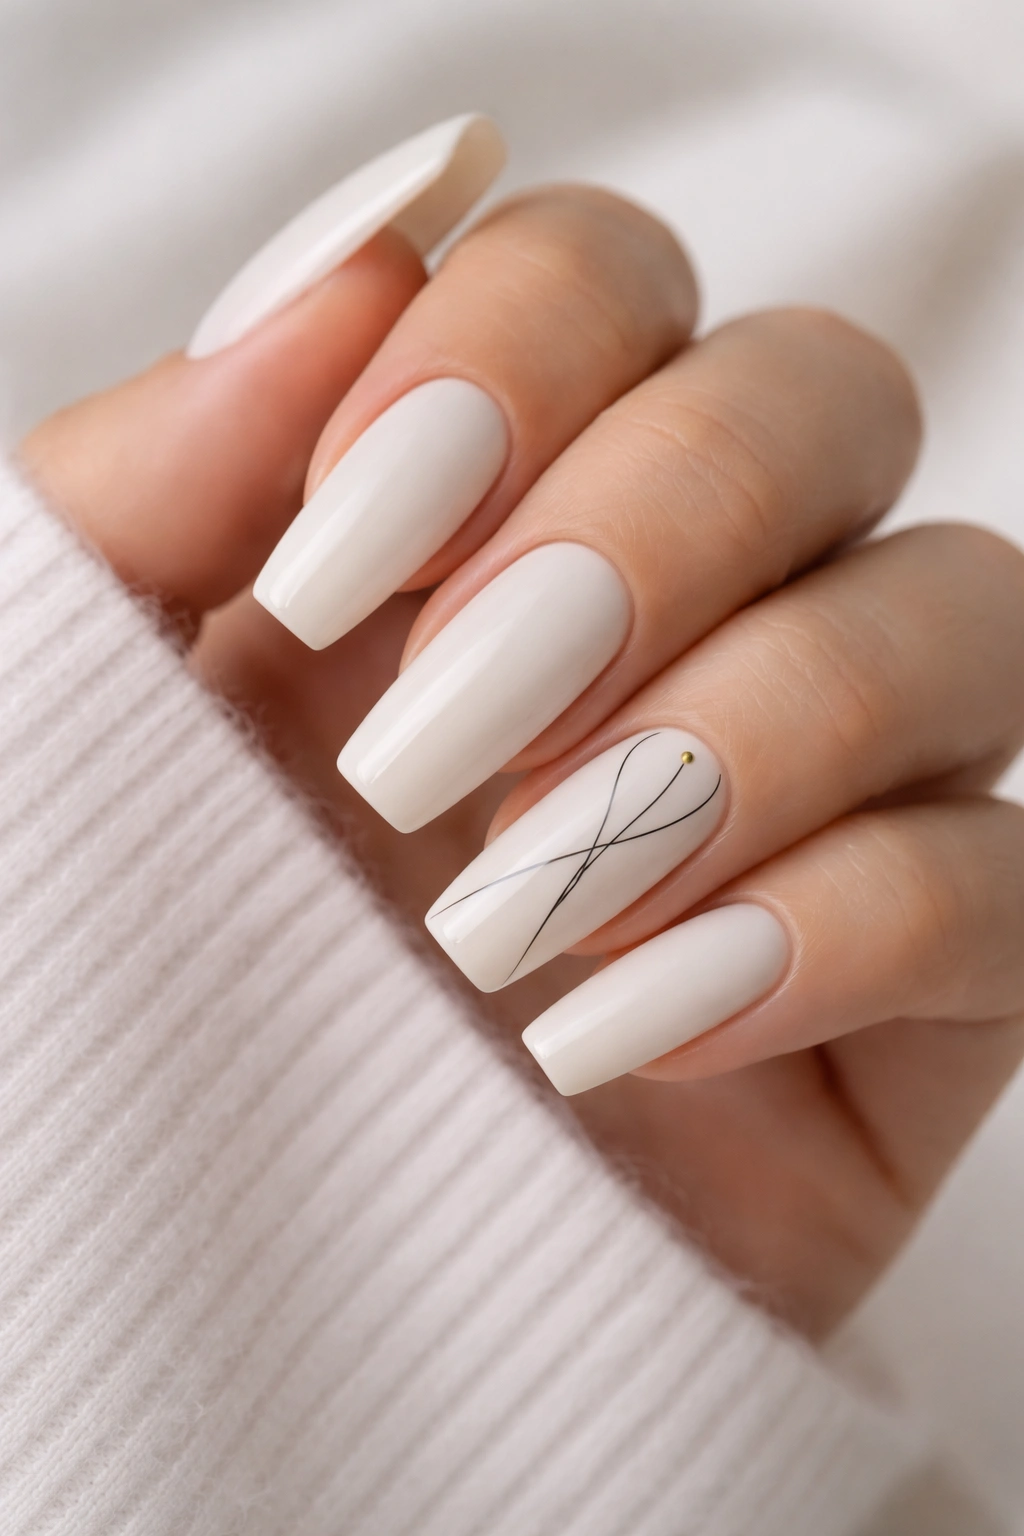
4. Milky White with Thin Black Linear Details
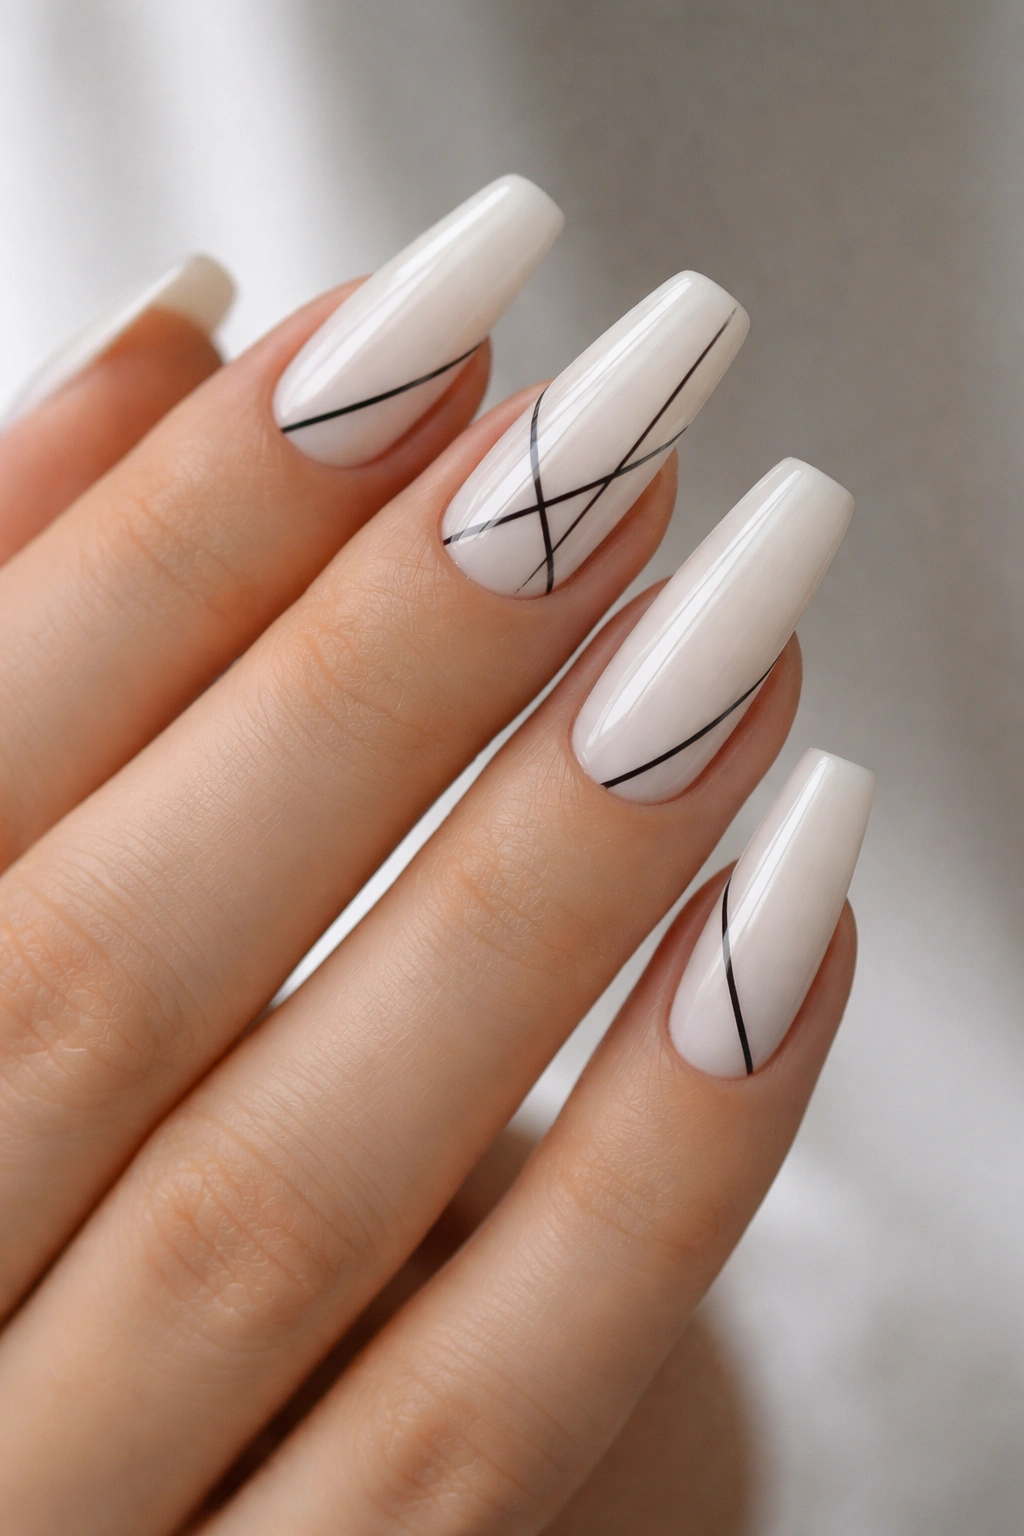
Geometric elegance meets minimalism with thin black lines drawn across milky white coffin nails. These designs don’t require freehand artistic ability—they’re built on straight lines and simple shapes that even a beginner can execute with the right tools.
Why Negative Space Makes This Work
The milky white background is essential here. Without it, thin black lines would feel busy or chaotic. But against the calm, creamy base, these lines create sophisticated geometric interest that reads as intentional design rather than decoration. The restraint of black on white is inherently elegant.
Black Line Design Ideas That Deliver
- Single vertical stripe down the center of each nail for a minimalist look
- Horizontal lines spaced evenly across the nail face, creating a striped effect
- Diagonal lines creating a woven or lattice pattern
- Triangle outlines at the tip or distributed across the nail
- Simple abstract swooshes or waves using a fine detail brush
Pro tip: Invest in a nail art pen with a precision fine tip rather than trying to execute these with a regular brush. The control is exponentially better, and the lines will be consistently thin and clean.
5. Milky White with Pearl Dust Effect
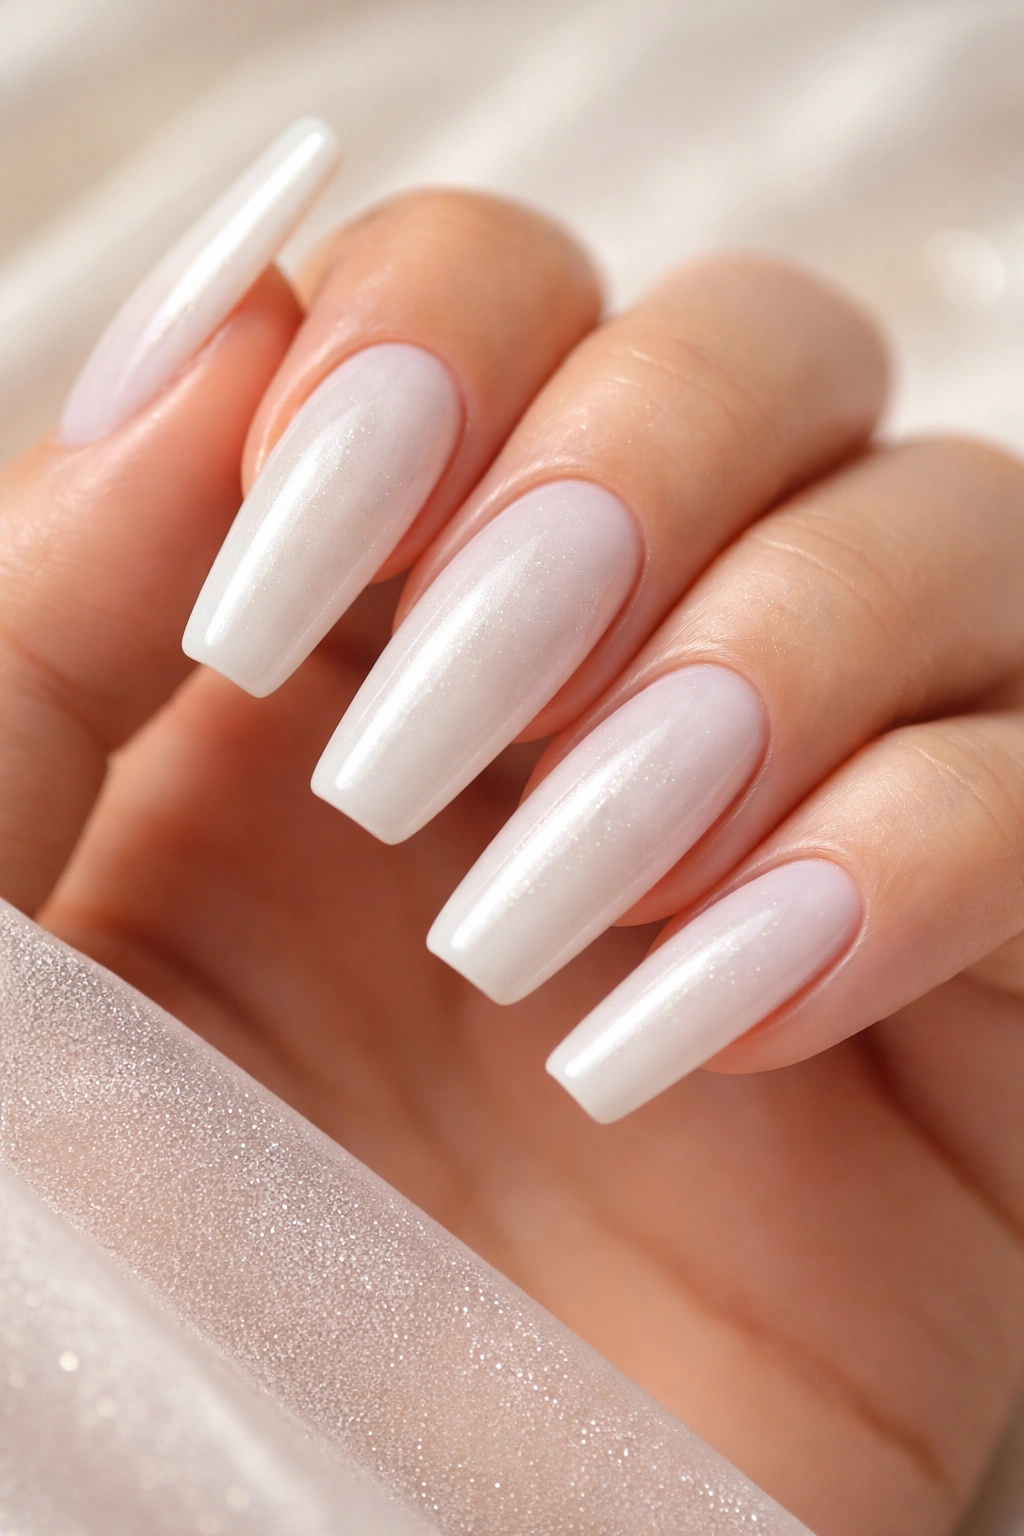
Pearl dust creates a subtle shimmer that catches light without being glittery—it’s the kind of dimensional finish that makes people lean in to look closer. Mixed into milky white, it creates a soft, luminous effect that feels modern and expensive.
What Makes Pearl Dust Different From Glitter
Pearl dust particles are incredibly fine and sit flush against the nail surface, creating a smooth, almost holographic shimmer rather than visible sparkle. This makes it perfect for professional or formal settings where glitter might feel too casual. The effect is sophisticated luminosity, not sparkle.
Application Methods for Best Results
- Mix pearl dust directly into your milky white polish before applying for an integrated, seamless finish
- Apply milky white first, then dust pearl powder over wet top coat and seal
- Use a specialized pearl dust suspension liquid if you’re worried about the dust settling or separating
- Apply pearl dust just to accent nails (ring finger and pinky) for balanced, intentional use
- Combine different undertones of pearl dust—warm gold pearls, cool silver pearls, or iridescent pearls—for more dimension
Worth knowing: Pearl dust can sometimes appear chalky or matte rather than shimmery if applied too thickly. Build the effect gradually with multiple thin applications rather than trying to achieve it in one coat.
6. Milky White with Delicate Floral Line Art
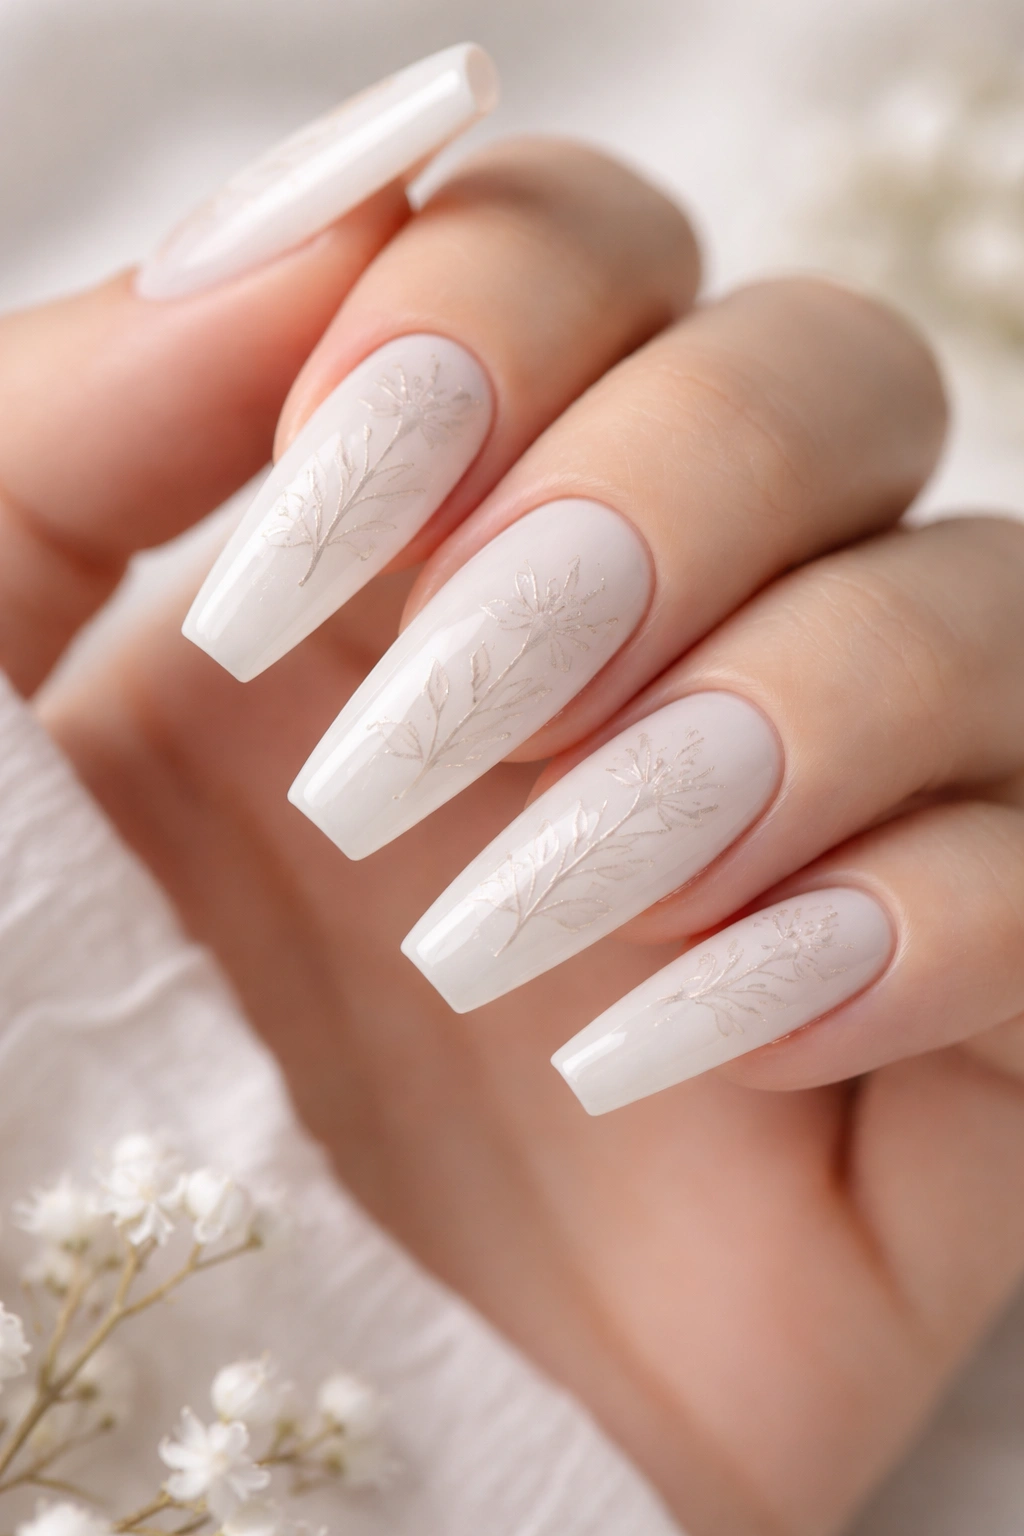
Tiny hand-drawn flowers scattered across milky white coffin nails create a romantic, artistic aesthetic that still feels refined and wearable. The key is keeping the flowers small, the lines thin, and the overall design sparse so it reads as thoughtful rather than cluttered.
Why Floral Line Art Works on Milky White
The creamy, neutral base lets delicate floral details shine without competing for attention. Line art—rather than filled-in flowers—maintains the design’s elegance and prevents it from feeling too decorative or craft-project-ish. The simplicity of the drawing style keeps it modern.
Flower Designs That Translate Well to Nails
- Single-line minimalist flowers (a circle with simple petals around it)
- Tiny rose sketches with just enough detail to be recognizable
- Wildflower sprigs scattered naturally across the nail
- Botanical-style line drawings of recognizable flowers like tulips or daisies
- Abstract floral shapes that suggest flowers rather than replicate them exactly
Pro tip: Practice your floral designs on nail wheels or paper first. Even small mistakes are visible on nails, so build your confidence before committing to polish.
7. Milky White with Champagne Metallic Tips
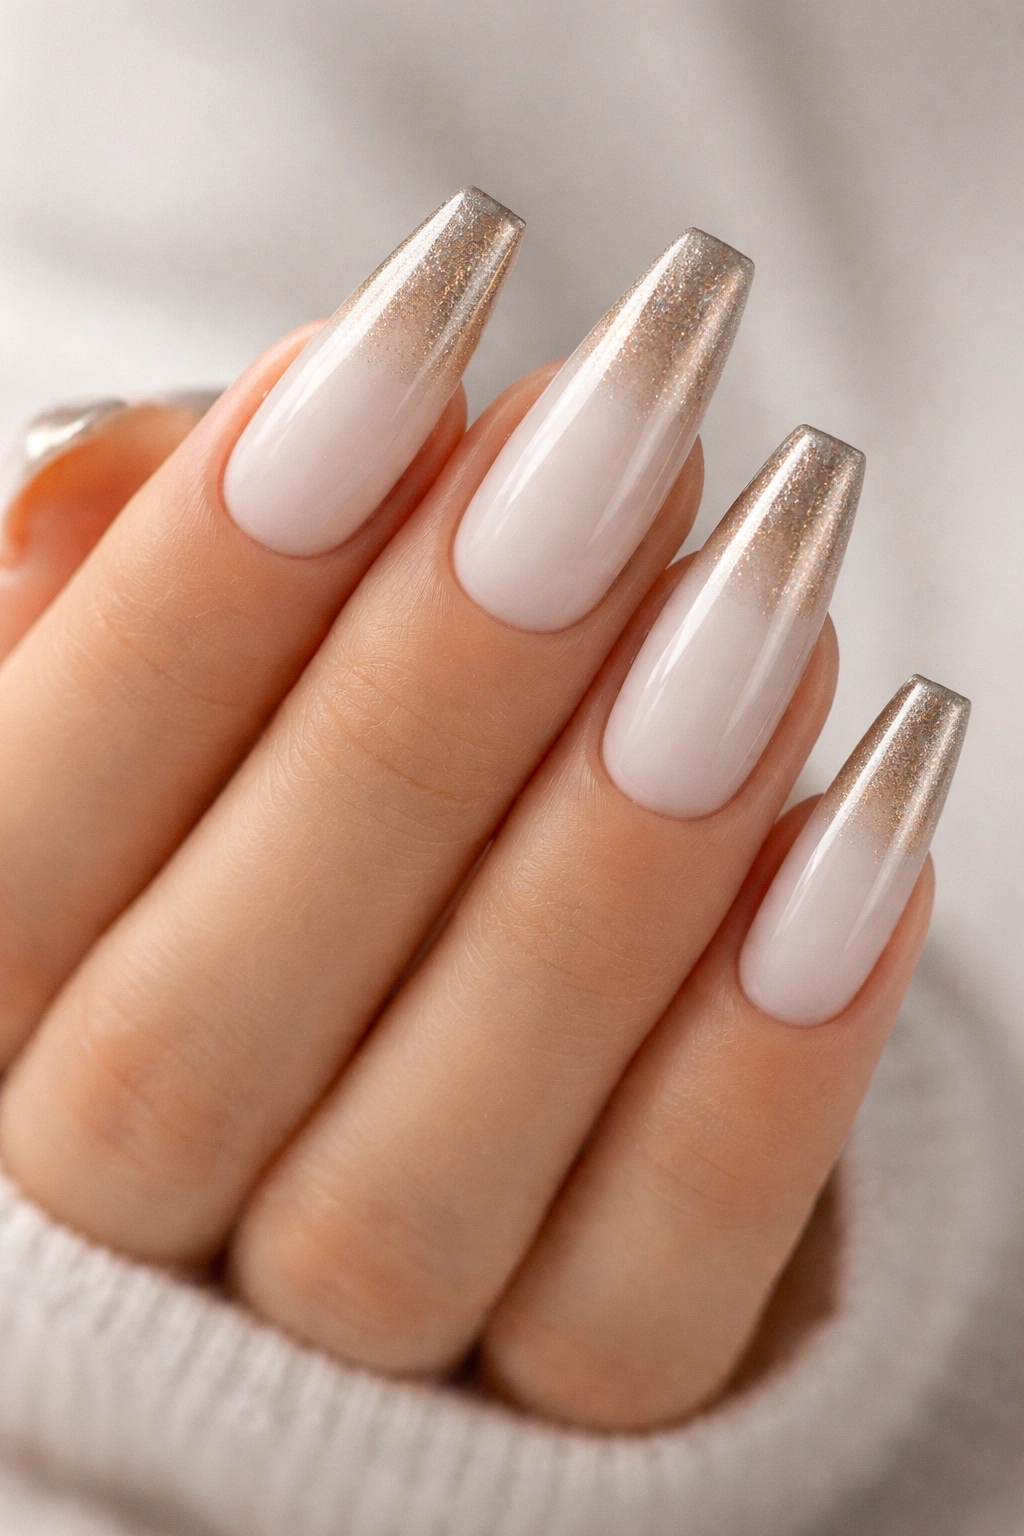
A champagne metallic gradient that intensifies toward the tip creates a sophisticated, understated ombre that feels more elevated than a standard French manicure. The transition from creamy white to warm metallic feels organic and intentional.
Why Champagne Works Better Than Plain Gold
Champagne has warm undertones without being as bold or yellow as traditional gold. It complements the coolness of pure white while adding just enough warmth to prevent the design from feeling washed out. The combination reads as refined and modern rather than dated or overly romantic.
Creating the Gradient Transition
- Apply milky white as your full base color across all nails
- Using a makeup sponge, apply champagne metallic starting at the tip and blending upward into the milky white
- Create a subtle transition zone by blending the two colors together in the middle
- Seal with a high-gloss top coat to enhance the metallic shimmer
- If you prefer a sharper definition, skip the blending and create a clear color line about one-third down from the tip
Insider note: This design stays fresher longer than solid champagne because the milky white base doesn’t show growth or nail bed exposure as obviously as a darker shade would.
8. Milky White with Rose Gold Striping
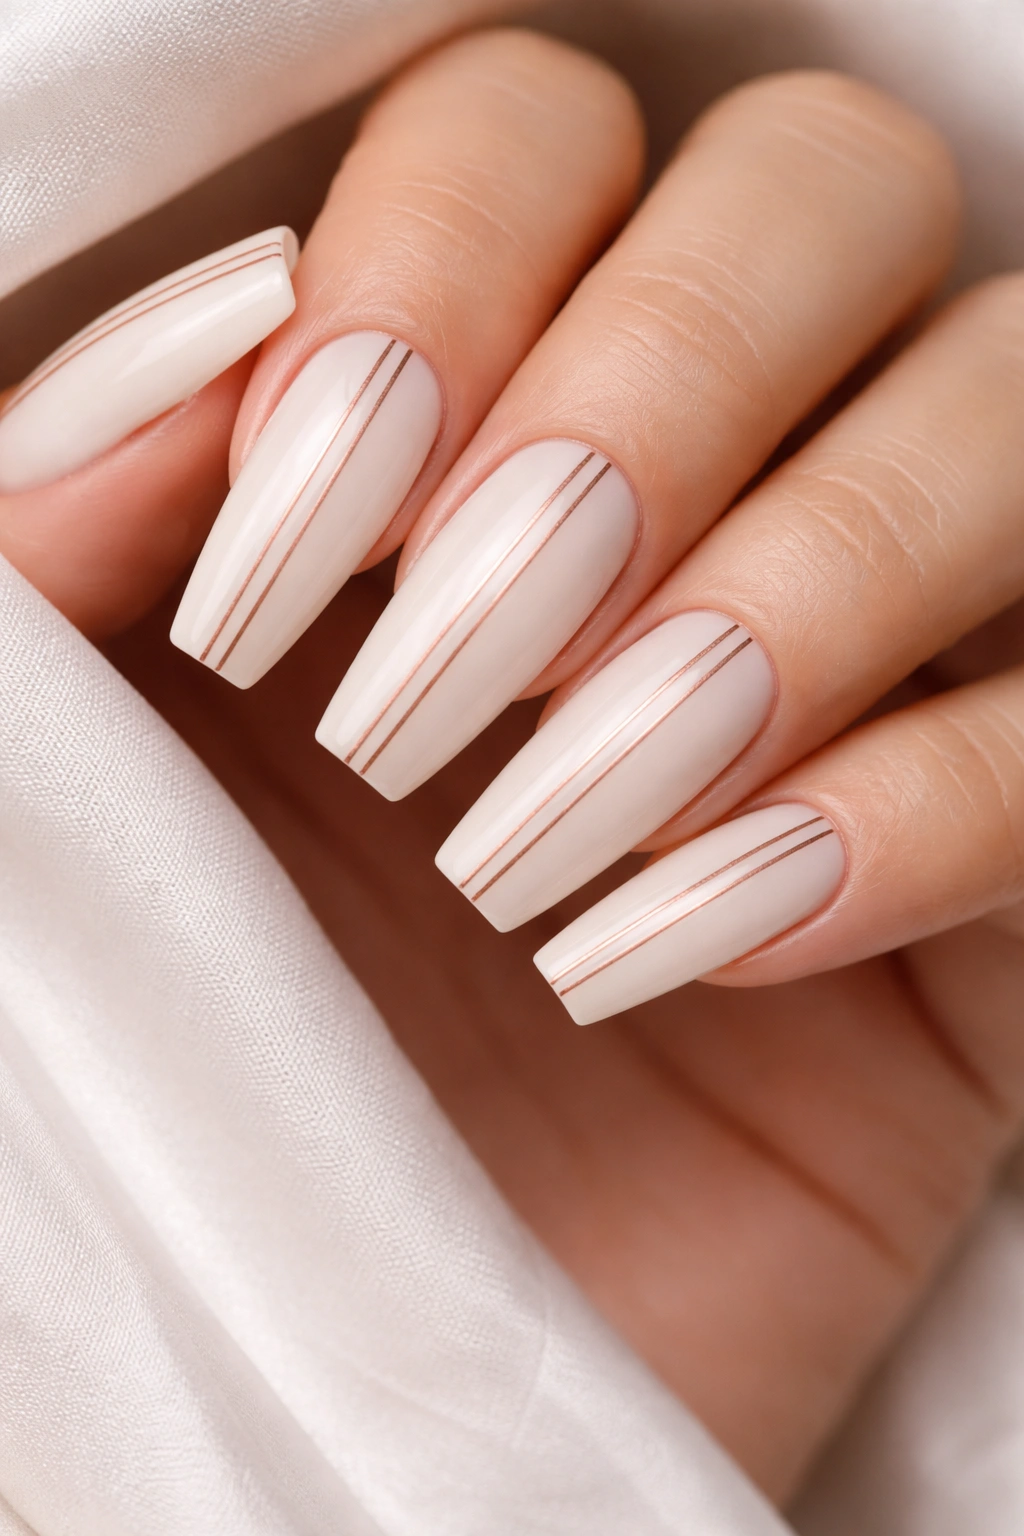
Thin rose gold stripes placed strategically across milky white nails add glamour without overwhelming the design. Rose gold has become more wearable than cool silver because it complements warm and cool undertones equally well.
How Striping Adds Movement and Interest
Stripes create directional movement that draws the eye across the nail, making them appear longer and more intentional. Rose gold against milky white is a color combination that feels inherently luxurious—warm-metal against cool-cream is a classically elegant pairing.
Striping Placement Options
- Vertical stripes evenly spaced across the nail width
- Diagonal stripes creating a dynamic, energetic feel
- Horizontal stripes stacked toward the tip or distributed across the full nail
- Corner-to-corner stripes creating a geometric pattern
- Single accent stripe down the center for minimal, statement-making impact
Worth knowing: Striping tape (thin craft tape designed for nail art) makes this design infinitely easier than freehand painting. Place tape, apply rose gold polish, remove tape—clean lines guaranteed.
9. Milky White with Subtle Holographic Shimmer
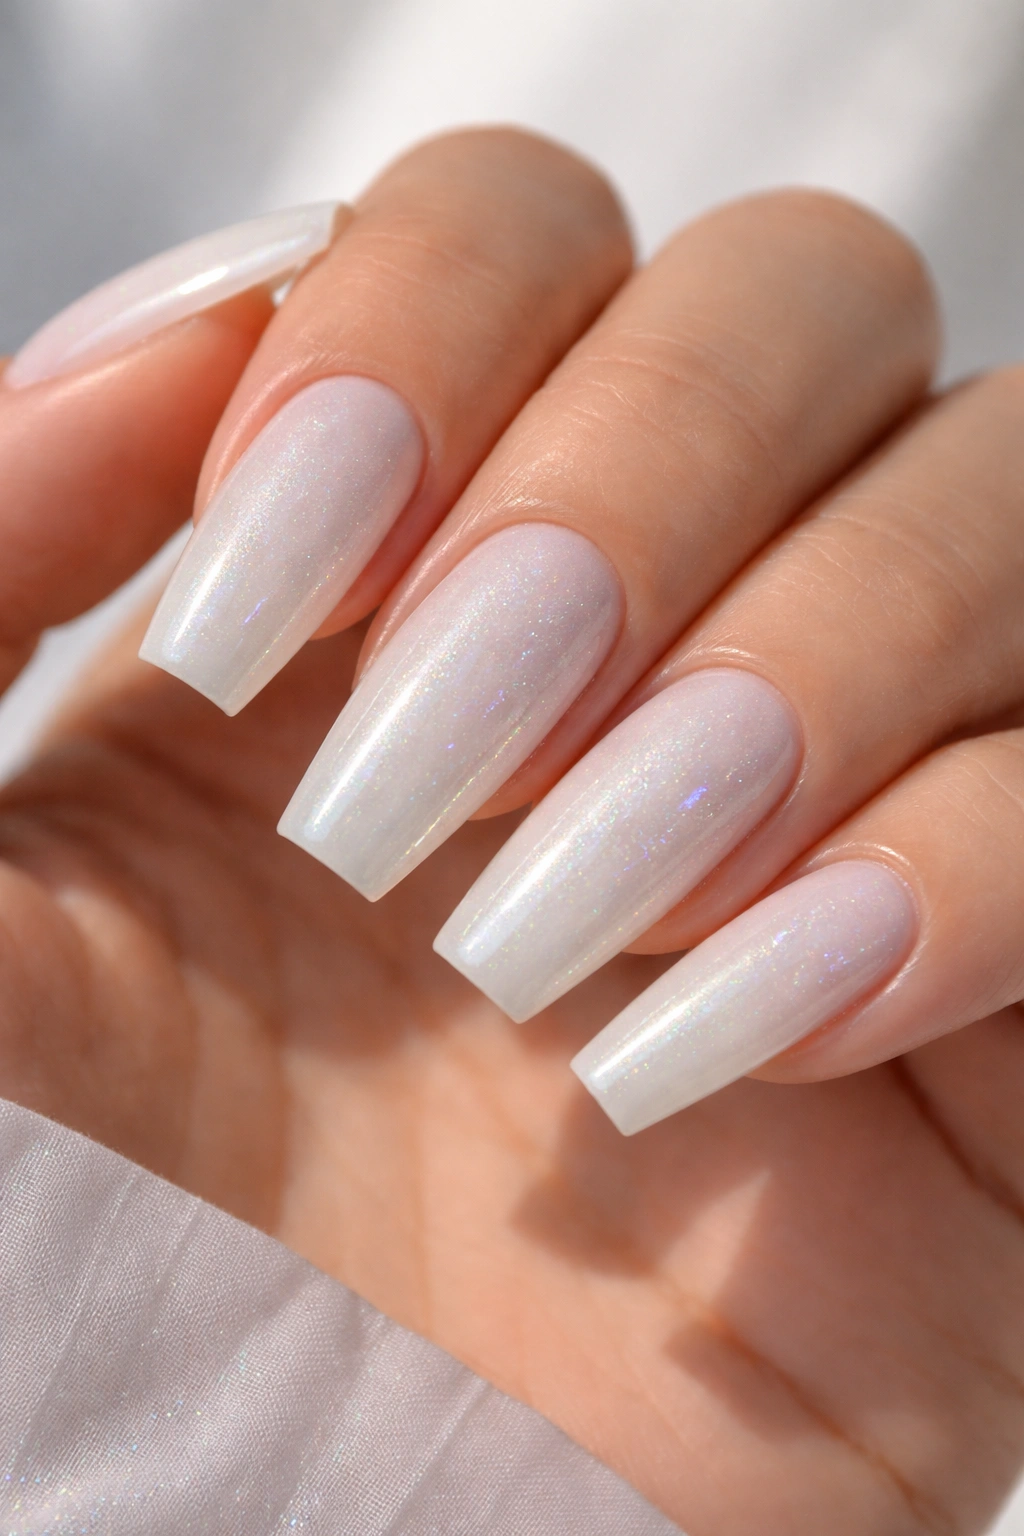
A holographic top coat layered over milky white creates a prismatic effect that shifts color slightly depending on the angle and light. It’s more restrained than full glitter but more dimensional than pearl dust.
Why Holographic Feels Modern Without Being Trendy
Holographic effects are based on the physics of light refraction, which means they’ll always look visually interesting and current. The effect is sophisticated and modern, not dated or overly playful, especially when applied subtly to a neutral base like milky white.
Application for Subtle Holographic Effect
- Apply milky white as your full base in at least two coats for solid coverage
- Apply holographic top coat over the fully cured base polish
- Use a single thin coat of holographic polish rather than multiple heavy coats for a subtle effect
- A high-gloss clear top coat over the holographic polish will enhance and protect the effect
- This works beautifully on all nails equally or as an accent nail design
Pro tip: Holographic effects show best in bright, natural light or direct sunlight. In dim indoor lighting, they may appear barely visible—which is actually perfect for professional settings where you want elegance without obvious sparkle.
10. Milky White with Negative Space Geometric Cutouts
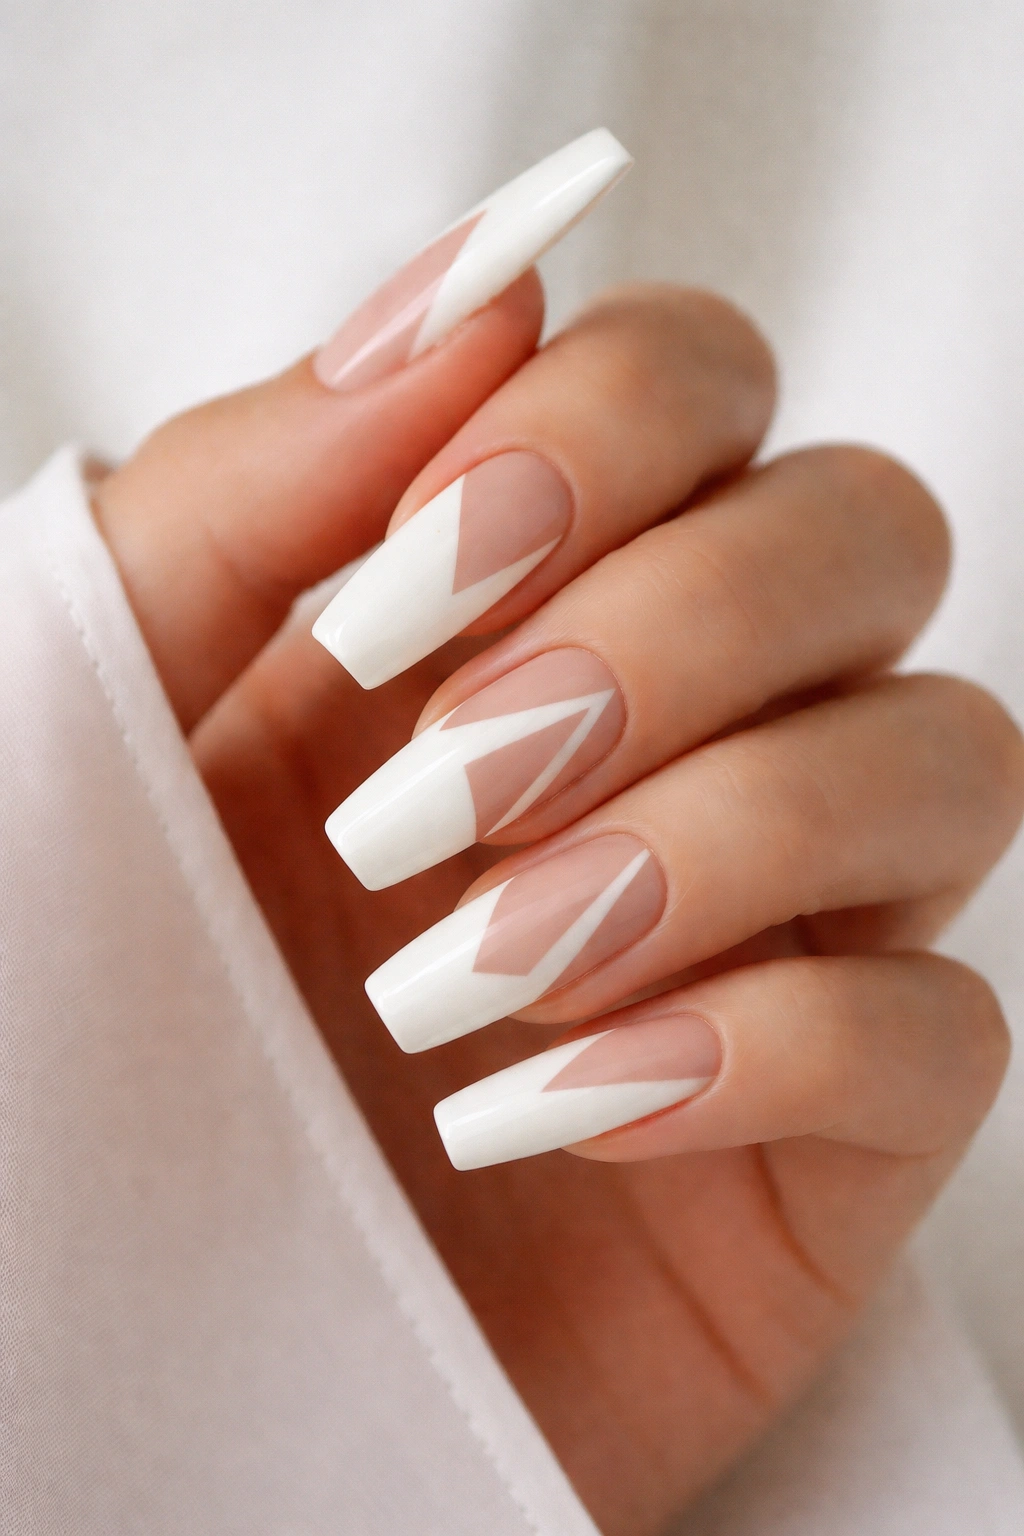
Creating intentional negative space—areas where the nail base or a contrasting color shows through—builds a modern, architectural design that feels very current. Think geometric shapes with clean lines that reveal either nude nail or a dark base beneath.
Why Negative Space Reads as Intentional Design
Negative space forces the viewer’s brain to complete the pattern, making the design feel more sophisticated and less obvious. It also creates visual interest through what’s NOT there, which is a sign of confident, editorial design thinking rather than decorative filling.
Geometric Negative Space Ideas
- Triangular cutouts stacked vertically down the center of the nail
- Square or rectangular windows revealing a coordinating color beneath
- Abstract shapes scattered across the nail face
- A half-moon shape at the base revealing contrasting color
- Striped patterns created by removing sections of the base color to show through to nail or contrasting layer
Insider note: This design is easier to execute if you paint a base layer, let it dry, place tape in your desired pattern, and paint over it. When you remove the tape, you’ll have clean negative space without needing precision painting skills.
11. Milky White with Gradient Chrome Accent Nail
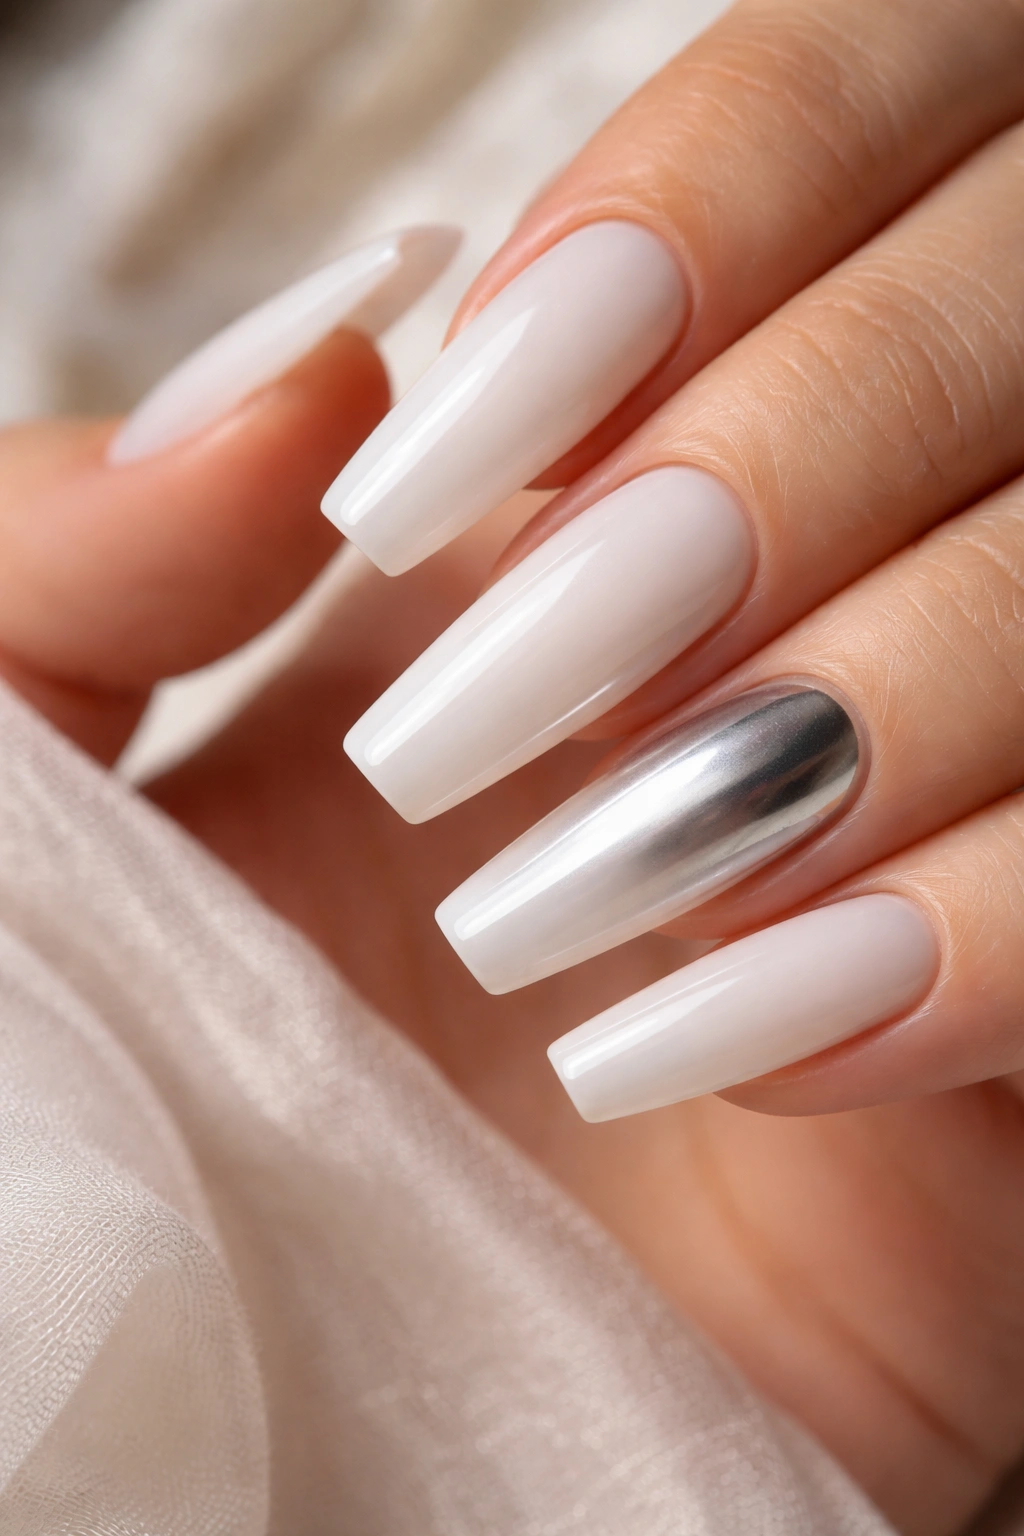
While the majority of nails stay in clean milky white, one accent nail features a gradient chrome or metallic effect that transitions from milky white into a reflective, mirror-like finish. This creates a statement accent without overwhelming the entire manicure.
Why Gradients Work Better Than Solid Chrome
A gradient from milky white into chrome creates a visual journey that keeps the eye engaged. It’s more sophisticated than a fully chromed nail, which can read as harsh or one-dimensional. The transition from creamy to reflective feels modern and intentional.
Creating the Gradient Effect
- Apply milky white across all nails including the accent nail
- On the accent nail only, apply chrome powder or metallic polish to the tip, blending upward into the milky white
- Use a sponge to blend the transition zone, or create a deliberate color line if you prefer sharper definition
- Seal everything under multiple layers of top coat to protect the metallic finish
- Alternatively, use a gradient-creating sponge with metallic polish already mixed into the gradient for easier application
Worth knowing: Chrome powder and mirror metallic polishes require a special base coat or polish formulated for metallics to adhere properly. Regular polish and metallic powder won’t create that perfect reflective finish—you need products designed to work together.
12. Milky White with Subtle Glitter Placement
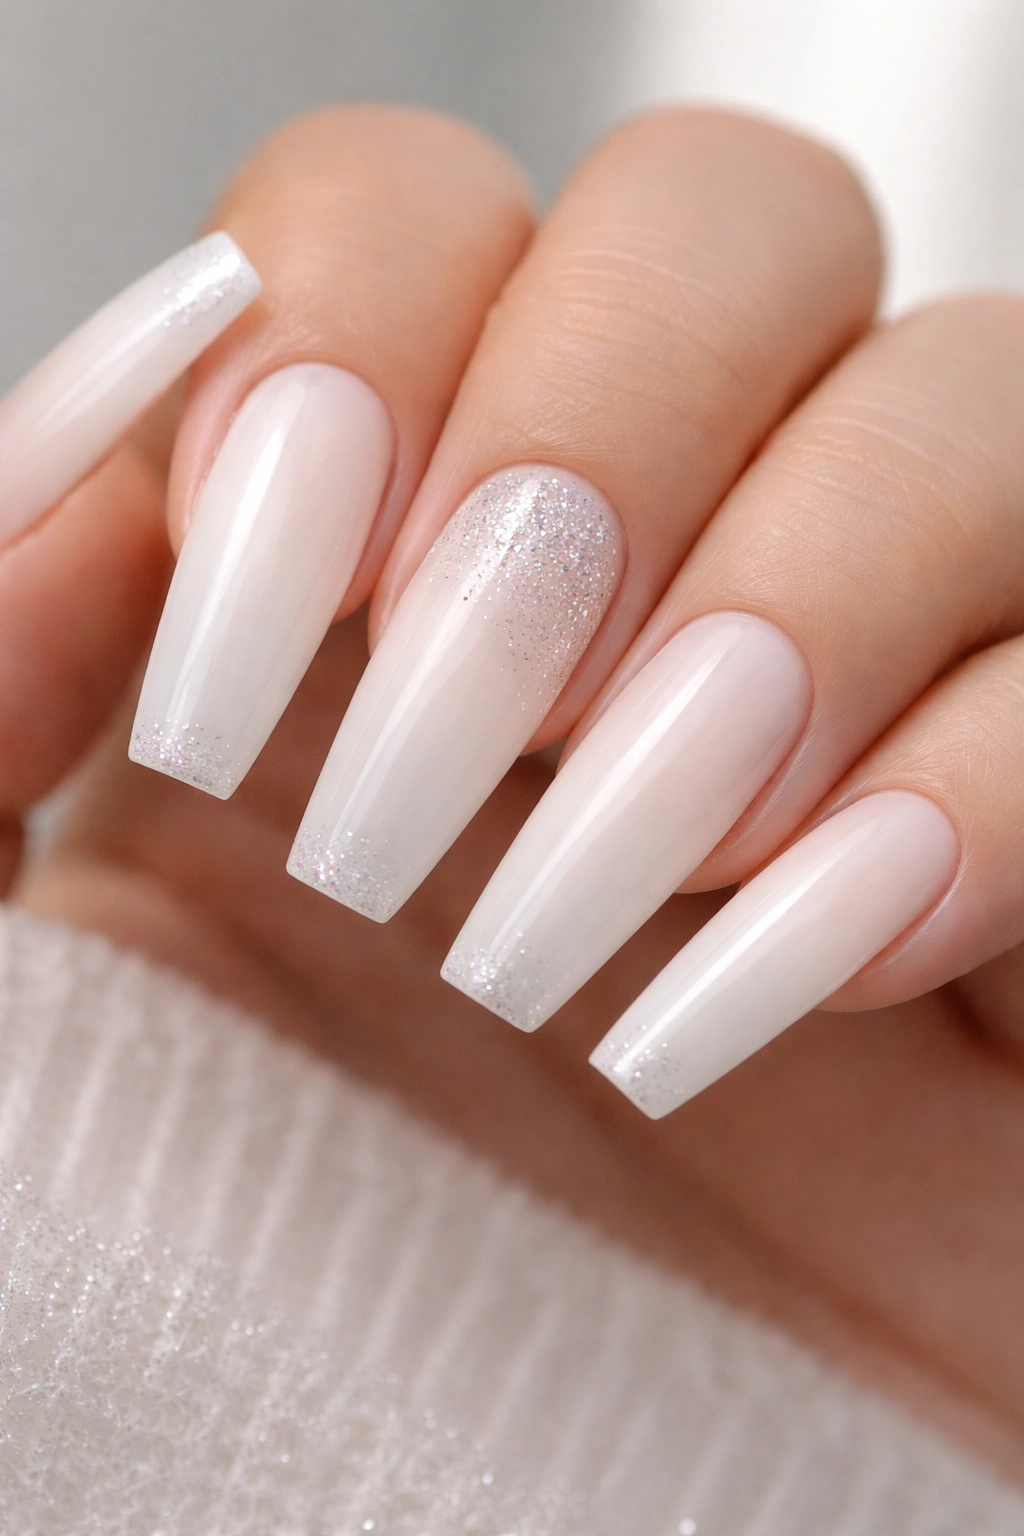
Rather than full glitter coverage, strategic placement of sparkly elements—perhaps just on the accent nail, along the tips, or in geometric patterns—adds festive elegance without making the design feel juvenile or over-decorated.
How Restraint Makes Glitter Feel Elevated
Most people apply glitter too generously. Using it sparingly against milky white actually makes glitter look more luxurious because it reads as intentional rather than “I wanted to sparkle everywhere.” This is editorial thinking about embellishment.
Glitter Application Strategies
- Apply glitter only to the accent nail (ring finger) for balanced, purposeful glamour
- Create a glitter gradient where sparkles are concentrated at the tip and fade out toward the base
- Place glitter in geometric patterns—corners, stripes, or specific shapes—rather than scattered randomly
- Use fine, refined glitter rather than chunky craft glitter, which reads as costume-like
- Layer glitter over wet top coat rather than mixing it into polish for easier application and removal
Pro tip: Apply a layer of clear or milky white gel or polish first, sprinkle glitter over it, then seal with another layer of clear polish. This encapsulation method keeps glitter from shedding and from getting under the nail where it becomes annoying.
13. Milky White with Thin Gold Geometric Outlines
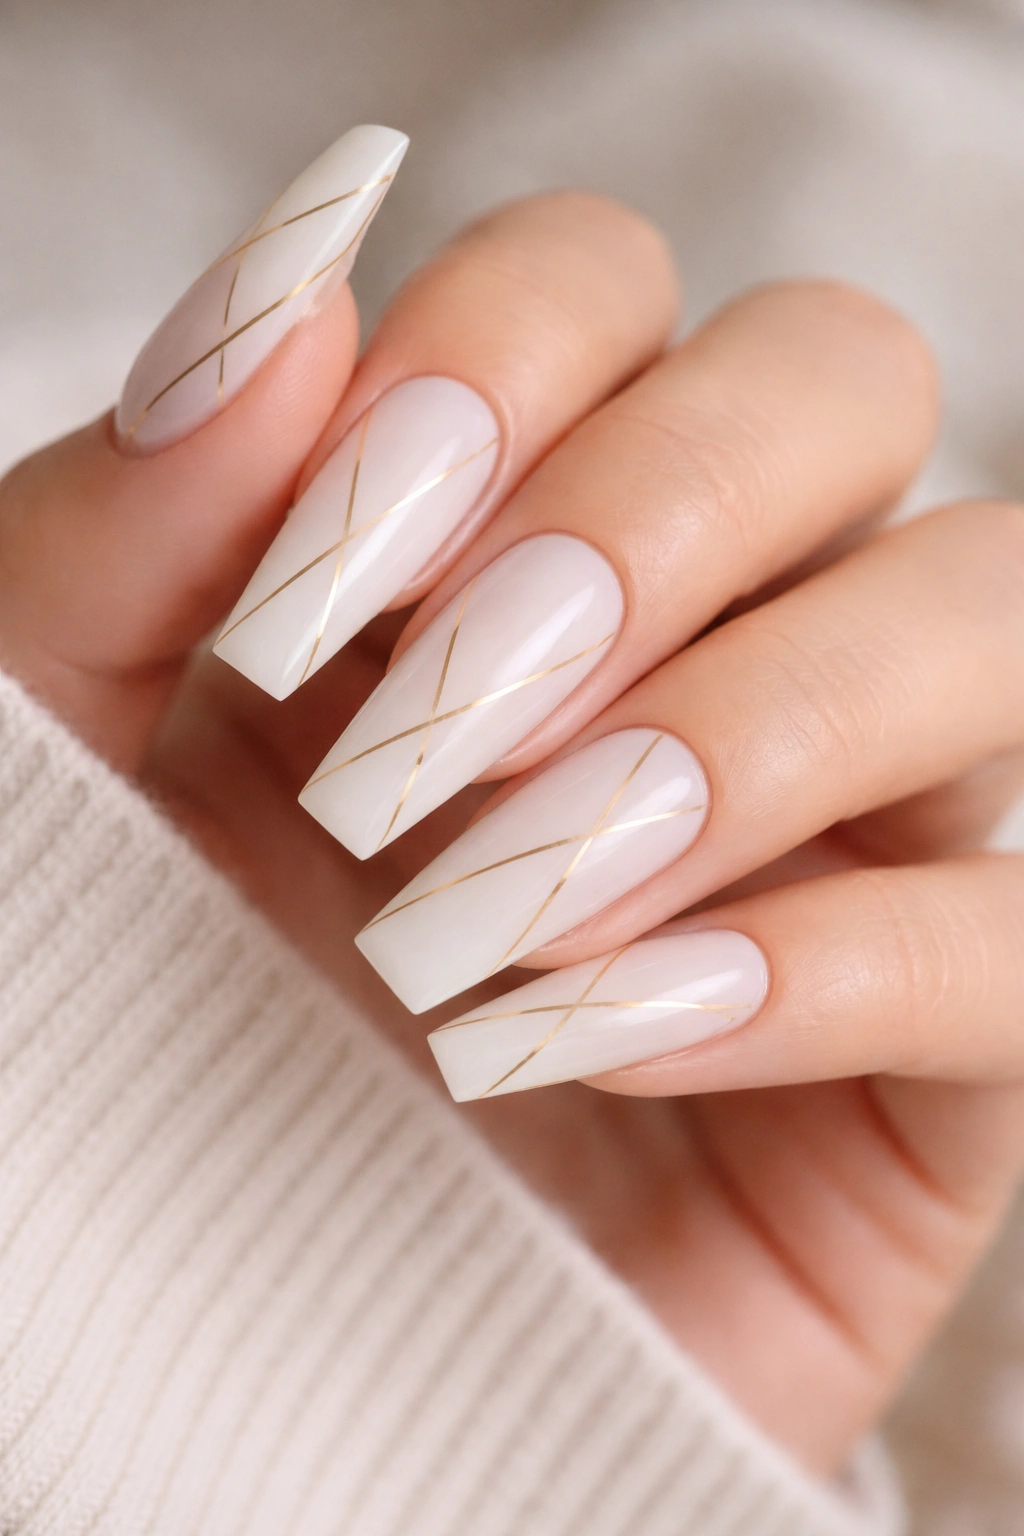
Clean geometric shapes outlined in thin gold lines create a design that feels both minimalist and intentional. The gold outlines are visible enough to create interest but subtle enough that the milky white is still the dominant visual element.
Why Outlined Shapes Read as Sophisticated
When you outline a shape without filling it, you’re using a restraint principle—showing rather than telling. The viewer’s eye completes the shape, making the design feel intelligent and modern. This is the opposite of heavy-handed decoration.
Geometric Shape Ideas with Gold Outlines
- Triangles pointing down toward the nail tip, evenly spaced
- Circles or semicircles scattered organically across the nail
- Diamond shapes stacked or scattered
- Hexagons or other geometric honeycomb patterns
- Wavy or curved lines creating abstract organic shapes
Insider note: Use a nail art pen with a fine tip or a very thin brush loaded with metallic polish. The thinner your lines, the more sophisticated the final result. Thick lines read as amateur; thin, precise lines read as intentional and professional.
14. Milky White with Soft Nude Ombre Reverse Gradient
Instead of the typical white-to-blush gradient, reverse it: start with a soft nude at the nail bed and transition smoothly into milky white at the tip. This creates a naturally elegant effect that elongates the nail and feels fresh.
Why Reverse Gradient Feels Modern
A reverse gradient is less predictable than the traditional tip-darkening approach, which makes it feel more current and editorial. It also creates the optical illusion of even greater nail length because the light color extends all the way to the tip, which is an intentional design choice.
Executing the Reverse Gradient
- Apply soft nude polish to the full nail as your base
- Using a makeup sponge, apply milky white to the tip and blend upward into the nude
- Create a smooth transition zone through sponging rather than sharp lines
- Build the effect gradually—it’s easier to add more white than to remove it
- Seal with glossy top coat to enhance the gradient’s dimension and smoothness
Worth knowing: This design actually photographs even better than it looks in person because the gradient catches light beautifully in photos, creating that editorial, high-end manicure aesthetic.
15. Milky White with Pressed Flowers Under Clear Layers
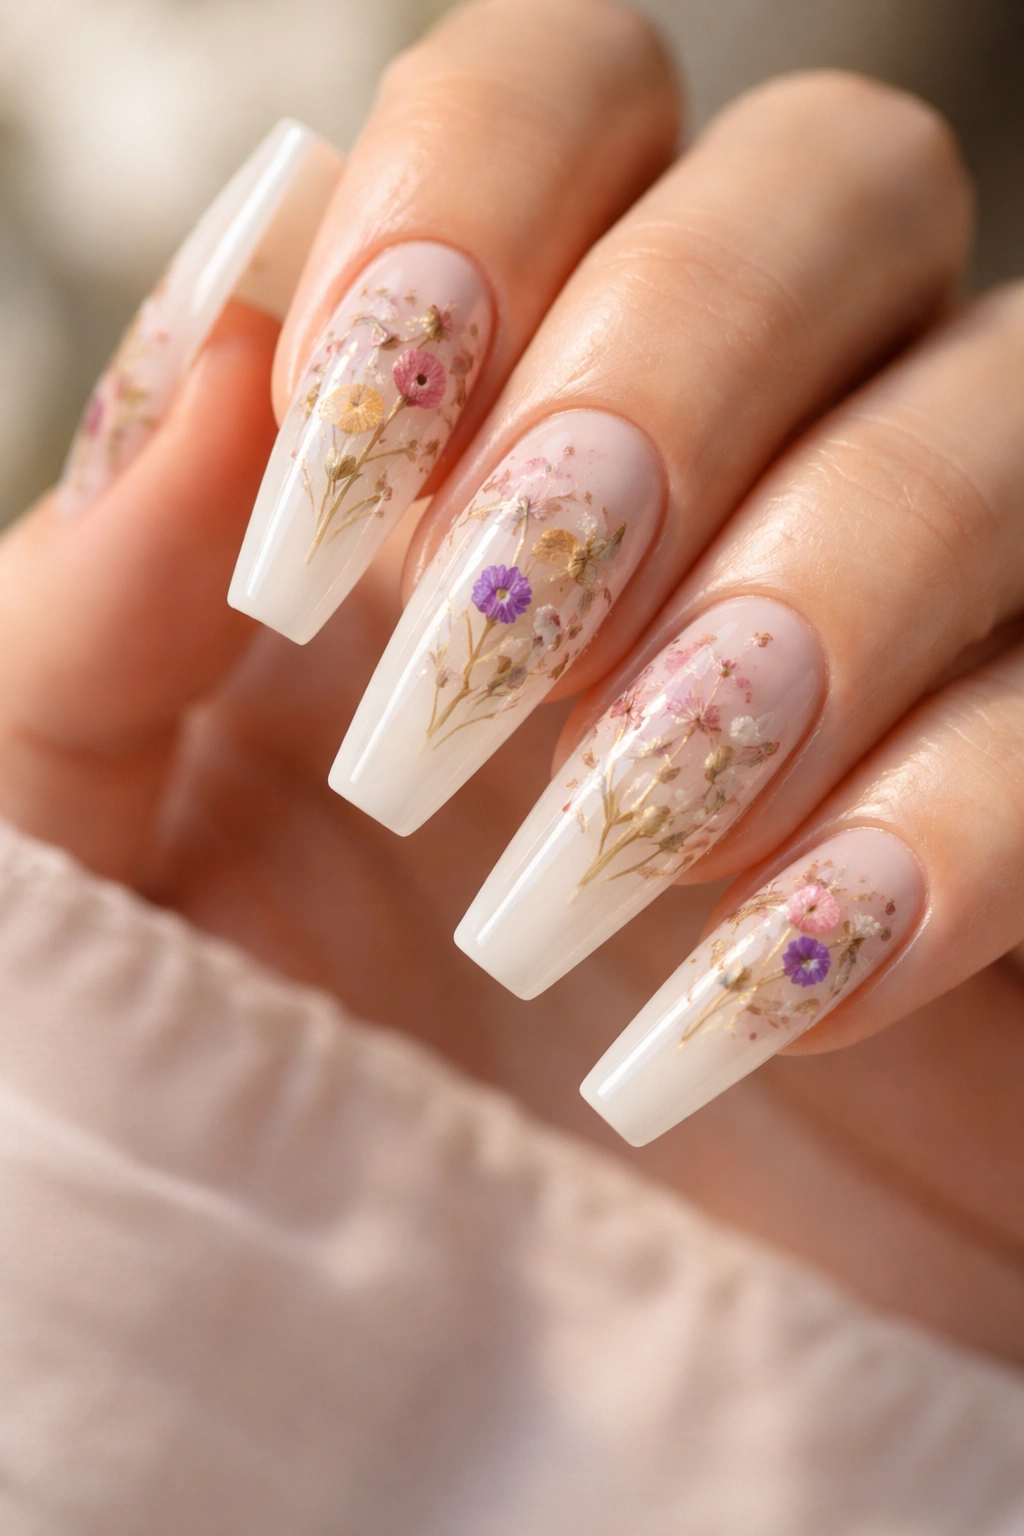
Real pressed flowers sealed under clear topcoat on milky white nails create a botanical, romantic aesthetic that feels artisanal and unique. Each nail becomes a tiny piece of preserved nature, which reads as thoughtful and special.
Why Real Flowers Add Authentic Artistry
Photographs don’t do justice to the depth and dimension of actual preserved flowers under clear polish. In person, they create an organic, one-of-a-kind quality that nail art design alone can’t replicate. The effect is genuinely beautiful and conversation-starting.
Applying Pressed Flowers Correctly
- Use truly dry pressed flowers (from a craft store pressed flower collection or dried yourself)
- Apply milky white base and let it cure completely
- Place your chosen flower on the nail, positioning it before it permanently adheres
- Apply a layer of clear gel or polish over the flower carefully, avoiding air bubbles
- Seal with multiple coats of durable top coat to protect the flower and prevent lifting
- Cure thoroughly between each layer
Pro tip: Thinner flowers work better than thick ones—delicate petals or small flowers stay flatter under polish and look better under magnification. Expect some flowers to crack or shift during curing, so have backups ready.
16. Milky White with Metallic Half-Moon Design
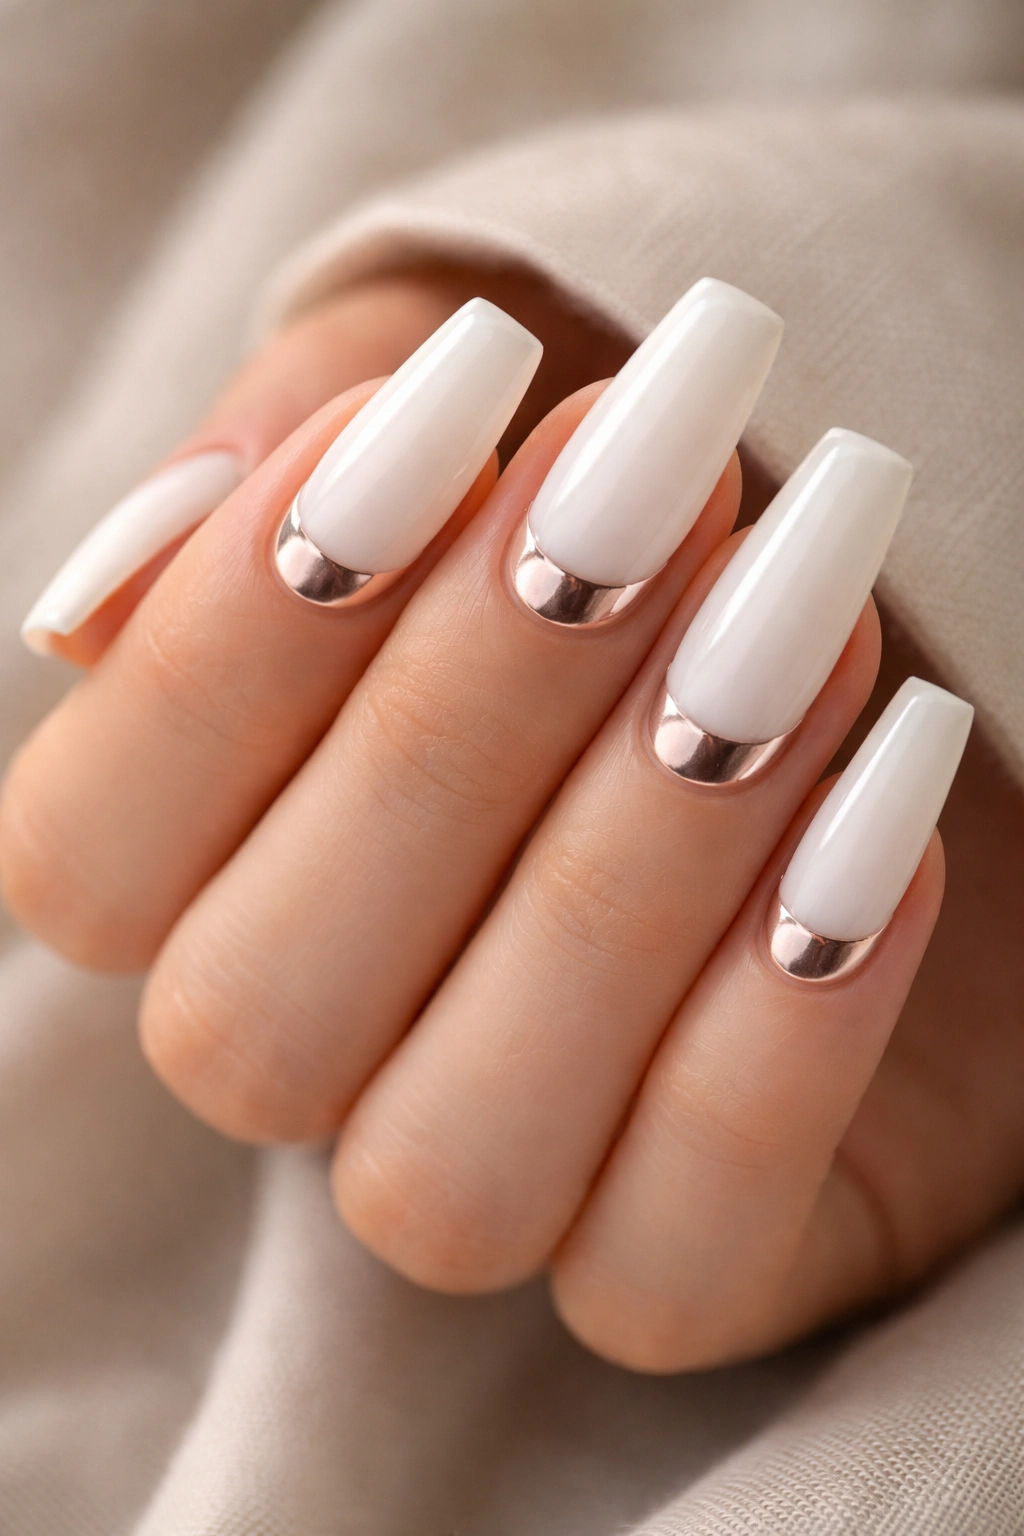
A half-moon shape at the base of the nail in rose gold, gold, or champagne metallic creates a modern, graphic design that references traditional nail art while feeling completely current. It’s striking without being complicated.
Why Half-Moons Feel Contemporary
The half-moon shape is iconic but relatively uncommon in modern nail art, which makes it read as fashion-forward and thoughtful rather than dated. Combined with milky white and refined metallics, it becomes editorial and intentional rather than retro.
Executing Clean Half-Moon Designs
- Apply milky white as your base across all nails
- Use a curved striping tape or a semi-circle stencil to create a clean half-moon shape at the nail base
- Apply metallic polish within the tape outline
- Remove tape carefully while the polish is slightly tacky but not fully wet
- Seal with glossy top coat once the metallic is completely dry
Insider note: If you don’t have striping tape, place a small circular sticker (like a tiny circle punch) at the nail base, then paint around it. When removed, you’ll have a perfectly clean edge.
17. Milky White with Textured Matte Finish
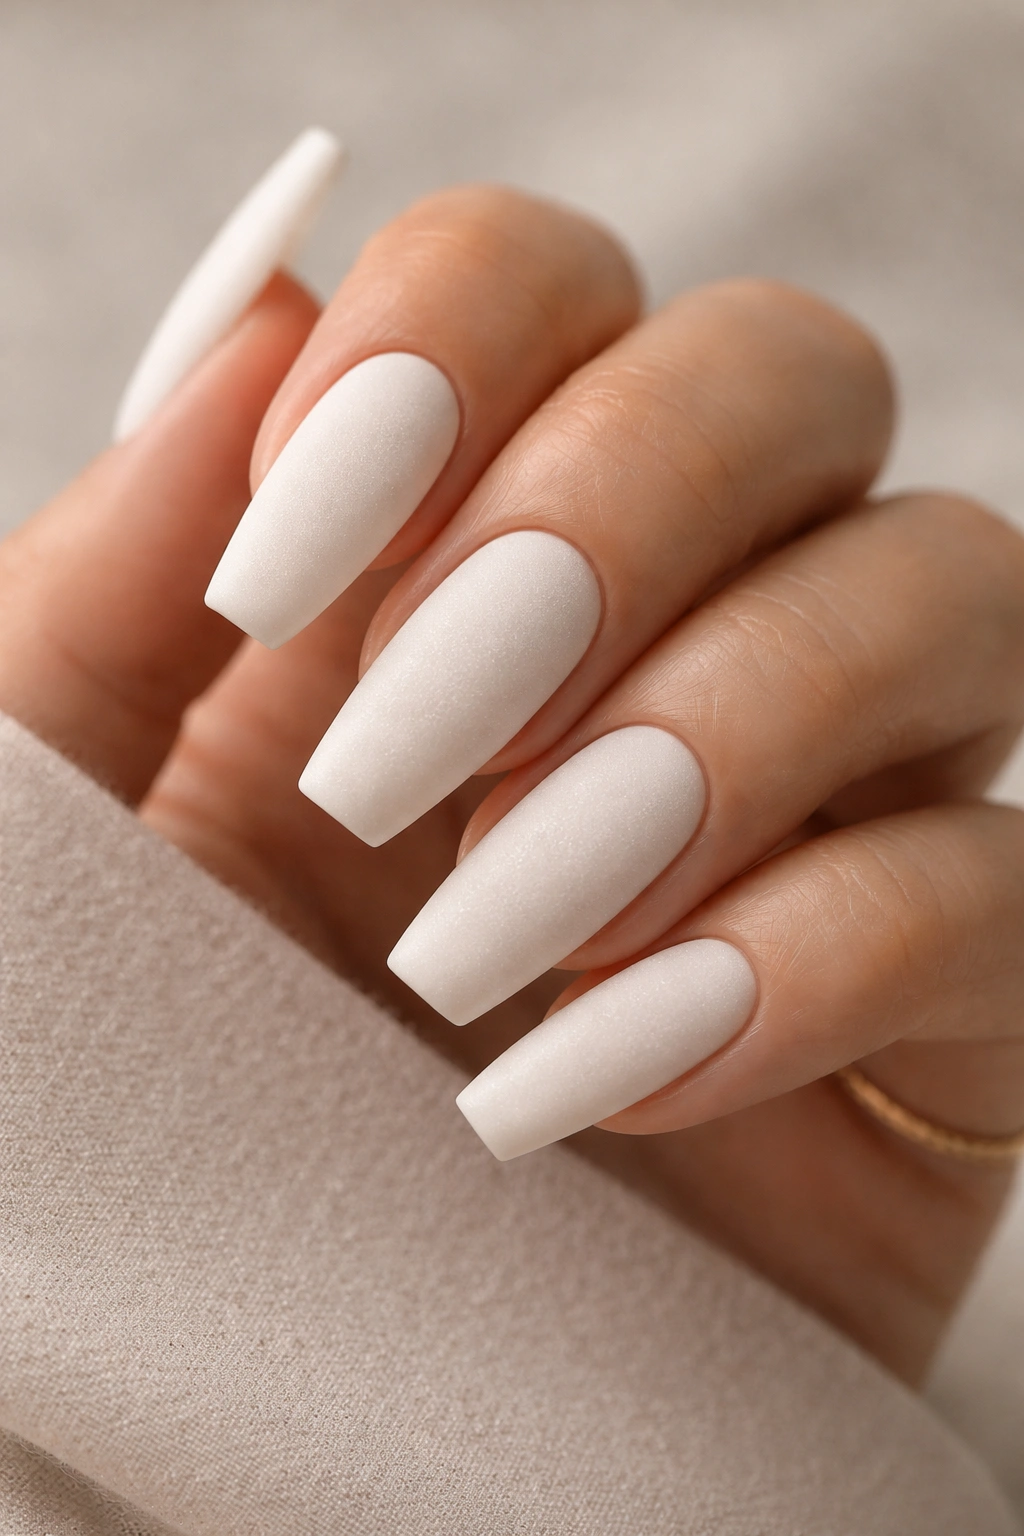
A matte topcoat over milky white creates a velvety, almost creamy finish that feels incredibly luxe and modern. The texture catches light differently than gloss, creating subtle dimension while remaining sophisticated and understated.
Why Matte Textures Feel High-End
Matte finishes are associated with luxury—high-end cosmetics, designer nail salons, and editorial photography often feature matte effects because they photograph beautifully and feel intentional. The texture creates visual interest while maintaining elegance.
Creating Perfect Matte Finish
- Apply milky white in two coats for solid, even coverage
- Apply a dedicated matte top coat (not a matte polish as top coat, but actual matte sealant)
- One coat of matte is usually sufficient—multiple coats can become chalky or dull-looking
- Matte finish is delicate, so use a protective layer of gloss over it if you want to extend wear
- Alternatively, apply the matte coat, then a thin layer of gloss for a semi-matte sheen that’s more durable
Worth knowing: Matte finishes don’t hide imperfections as well as gloss does, so your base application must be perfectly smooth and even. This design rewards careful, methodical application.
18. Milky White with Minimalist Line Art Accent Nail
One nail features fine-line artwork—perhaps a single minimalist face, abstract line drawing, or tiny detailed illustration—while the remaining nails stay in clean milky white. This creates a statement accent that’s artistic without overwhelming the manicure.
Why Single Accent Art Feels Gallery-Worthy
When you limit detailed nail art to just one or two nails, it reads as intentional, curated design rather than general decoration. The negative space (the plain milky white nails) actually makes the artwork stand out more powerfully and feel more important.
Line Art Ideas for Maximum Impact
- Minimalist face drawn with a few essential lines (closed eyes, simple mouth)
- Single wildflower or botanical line drawing with delicate stems
- Abstract geometric face or figure using continuous lines
- Tiny detailed landscape or horizon line
- Minimalist portrait or profile silhouette
- Simple celestial elements: moon, stars, or constellation patterns
Pro tip: Invest in a professional-grade fine-tipped nail art brush or pen. The precision matters tremendously when creating detailed line art on such a small surface. Shaky, thick lines will ruin the sophisticated minimalist aesthetic you’re going for.
Final Thoughts
Milky white coffin nails work because they nail the intersection between elegance and versatility. You’re not choosing between looking polished or expressing your personal style—milky white as a base gives you both. Whether you’re drawn to the purity of a completely solid design or you’re ready to layer in details, gold accents, metallics, or art, this color and shape combination is endlessly forgiving and always sophisticated.
The designs here are genuinely wearable. They work for professional environments where bold nail art would be out of place, for everyday wear where you want to feel put-together, and for special occasions where you want intentional glamour. Milky white coffin nails read as someone who knows that true elegance often comes from restraint and thoughtfulness rather than obvious decoration.
What makes these designs successful is specificity. Rather than generic “white nails with some details,” each design commits fully to its concept—whether that’s the simplicity of a pure matte finish or the editorial precision of geometric outlines. Your nails will look better when you choose one specific direction and execute it confidently rather than trying to combine every possible embellishment.
The beautiful part is that if you commit to milky white as your signature shade, you can rotate between these designs, trying different details and effects as your mood or occasion changes. You’ll become familiar with how this color works with your skin tone, how different finishes photograph, and which embellishments make you feel most confident. That’s when nail art becomes not just something you do, but part of how you present yourself to the world.
