

When you want to celebrate with nails that absolutely steal the show, coffin nails are your golden ticket. Their elongated, tapered shape creates the perfect canvas for bold birthday statements, intricate designs, and eye-catching colors that demand attention. Long coffin nails specifically give you maximum surface area to play with sparkle, dimension, and personality — whether you’re going for subtle elegance or all-out glam that screams “it’s my day.”
The beauty of coffin nails for birthdays isn’t just the shape itself; it’s that they bridge the gap between sophisticated and fun. They’re edgy enough to feel special and different from everyday nails, yet refined enough for any celebration venue. You can dress them up with crystals and metallics, tone them down with pastels and minimalist designs, or go completely wild with multi-colored artwork that tells a story. The length gives you room to experiment without looking chaotic — everything just feels intentional and luxe.
Whether you’re planning your own birthday manicure or getting inspired for a celebration coming up, these twenty designs showcase the endless possibilities when you combine the coffin shape with festive flair. From classic elegance to trendy modern looks, there’s something here for every birthday vibe.
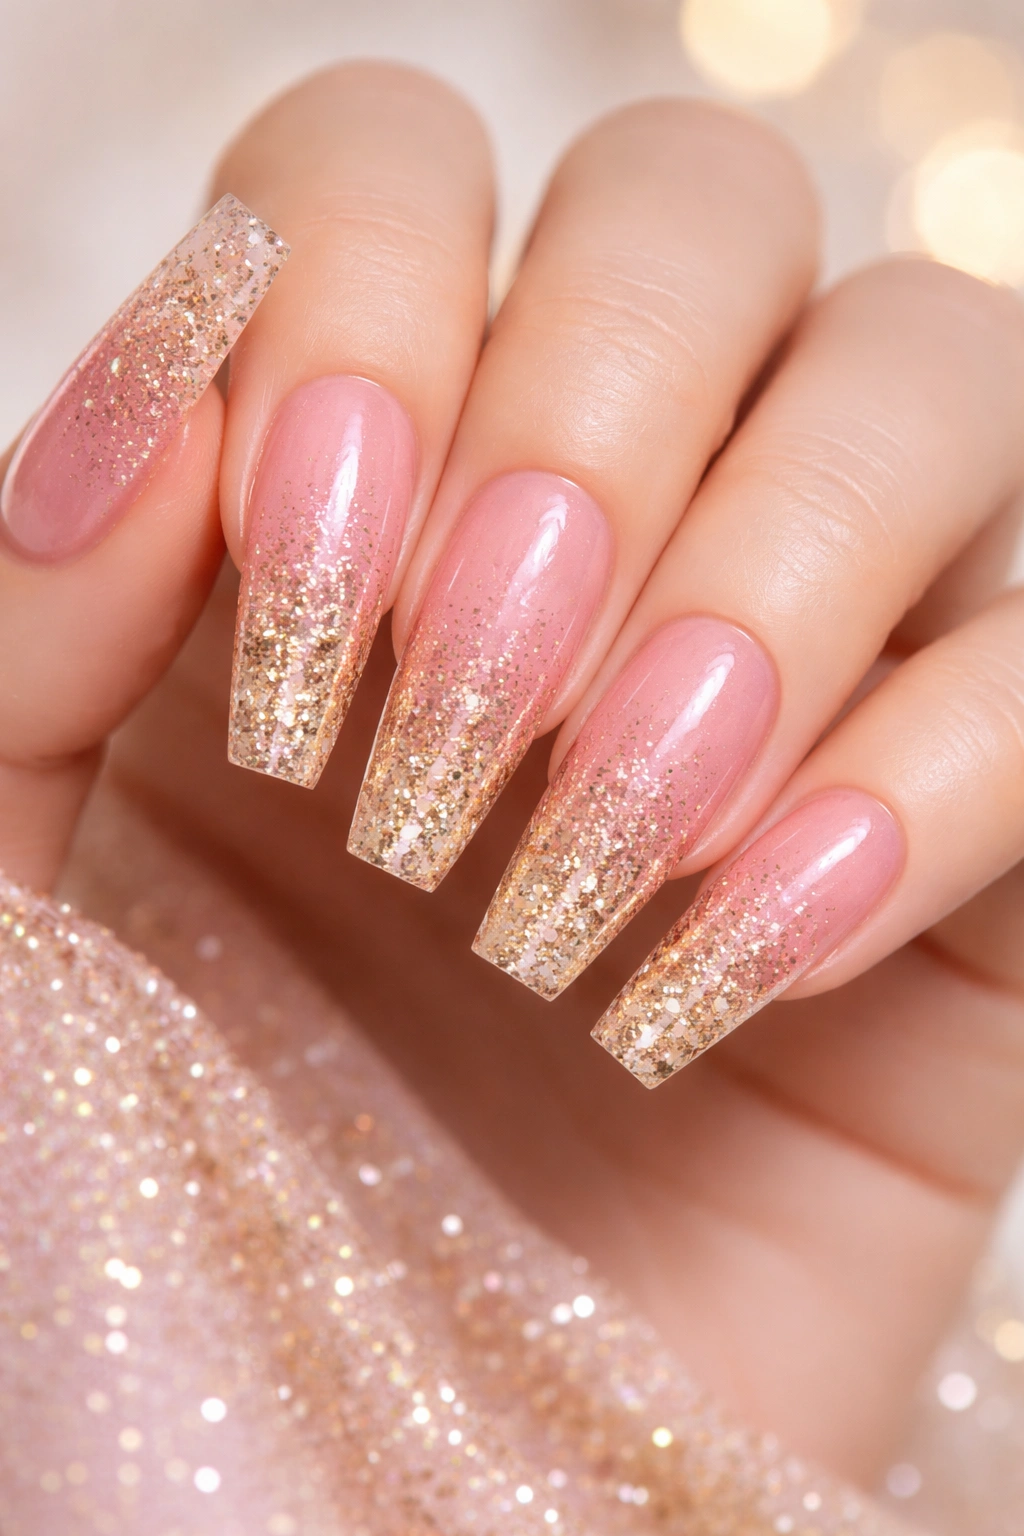
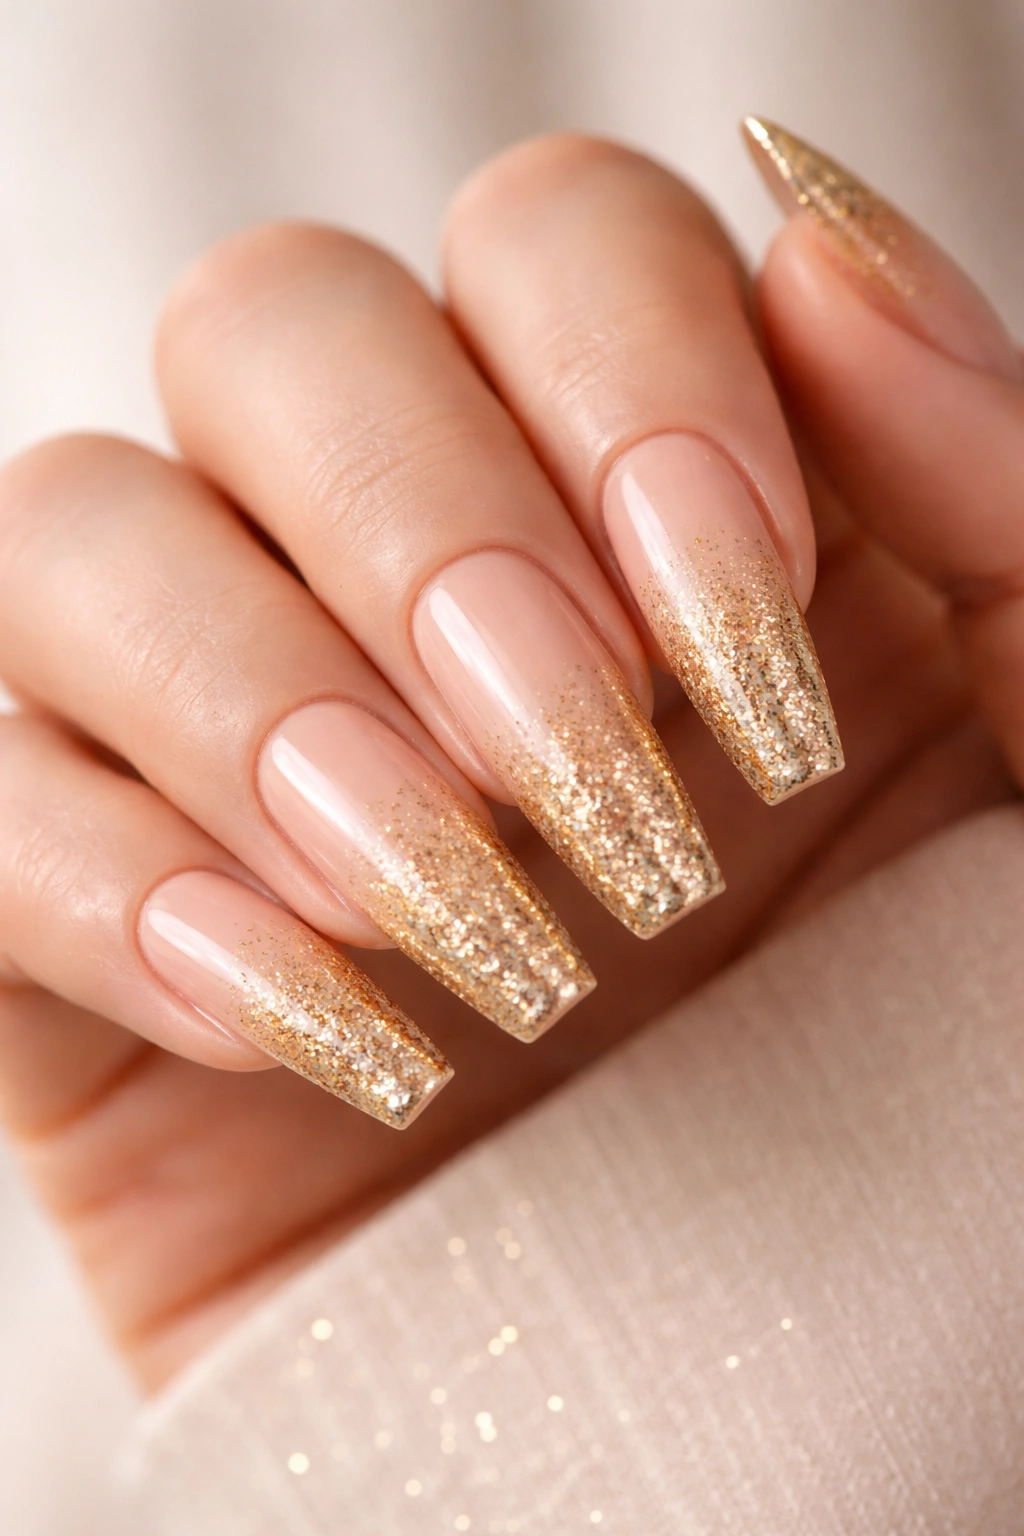
1. Gold Glitter Ombre Coffin Nails
This design starts with a nude or champagne base that gradually transitions into rich gold glitter toward the tip. It’s sophisticated enough for a formal birthday dinner yet sparkly enough to feel celebratory and special. The ombre effect creates depth and dimension without being overwhelming, making it a universally flattering choice that photographs beautifully.
Why This Design Works for Birthdays
The soft gradient from light to dark creates an inherently elegant look that says “occasion” without screaming. Gold is universally flattering against all skin tones and works with any outfit color you might wear to your celebration. The glitter payoff is concentrated at the tips, where the light hits most dramatically, so you get maximum sparkle with subtle sophistication.
How to Achieve This Look
- Use a nude or champagne gel base as your foundation, applied smoothly across all five nails
- Apply fine gold glitter mixed with a clear gel to just the bottom third of the nail at first
- Gradually transition the glitter placement upward with each subsequent layer, creating a smooth blend
- Seal everything with a high-shine top coat that amplifies the glitter’s reflective quality
- Consider adding one accent nail with solid gold glitter for extra drama
Pro tip: Let each layer of glitter cure completely before adding the next to avoid muddy blending and maintain clear color transitions.
2. Birthday Cake Coffin Nails
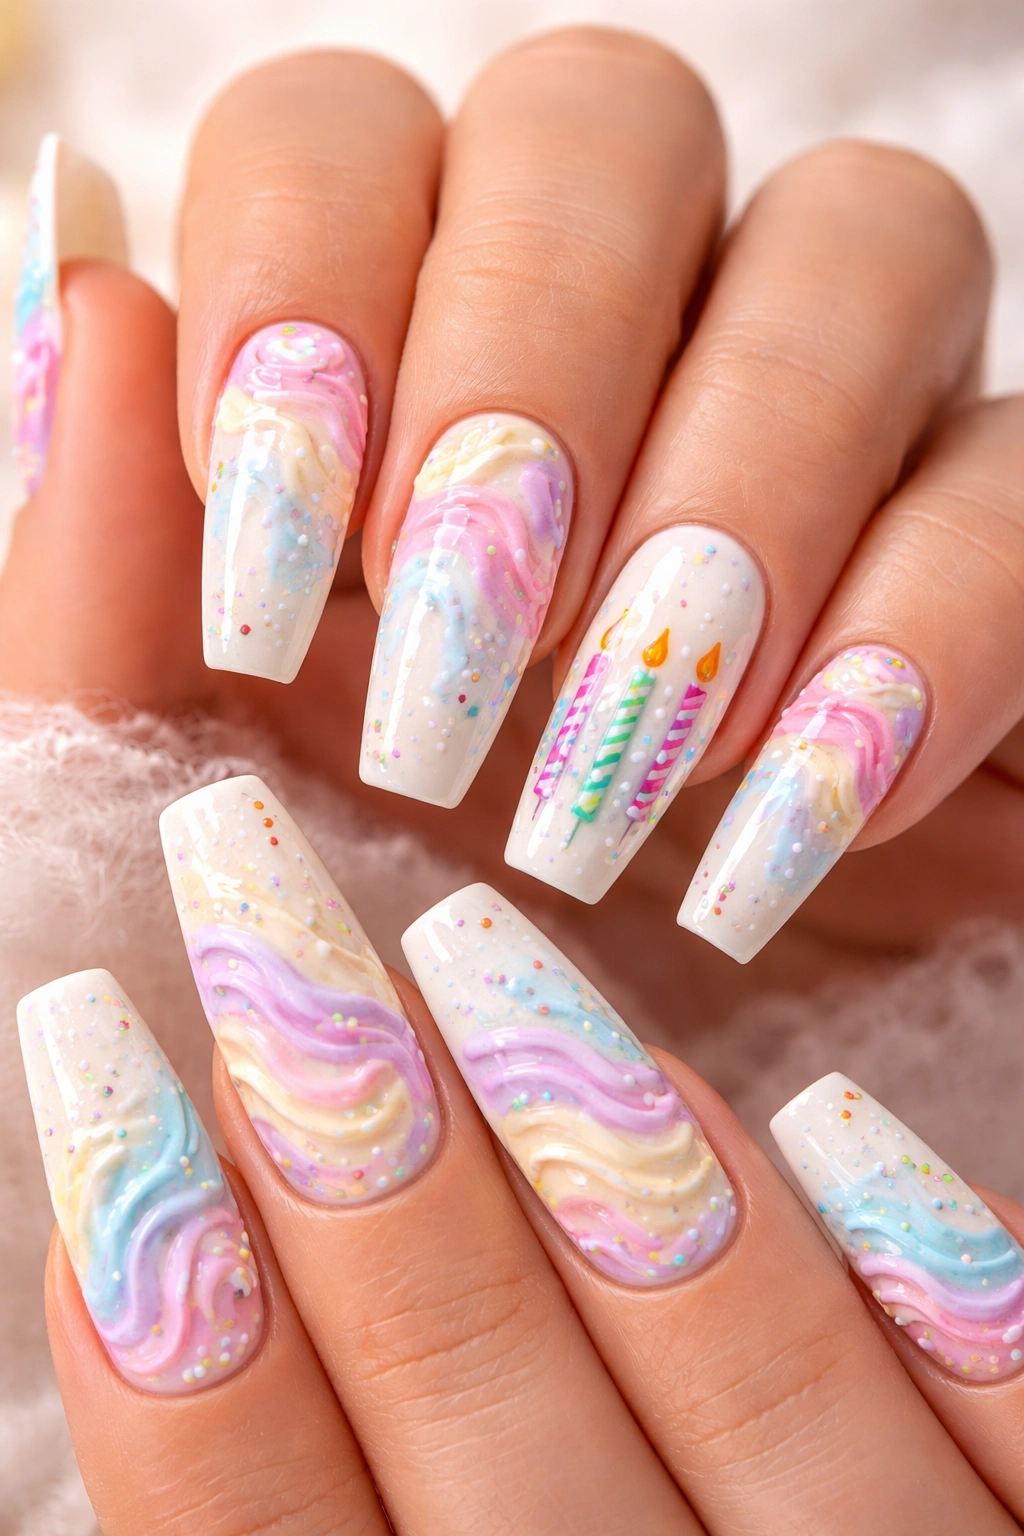
Design your nails like an actual birthday cake, complete with frosting swirls, layers, and tiny candles painted on the nail surface. This playful approach combines cream or white base colors with pink, yellow, or pastel accents that mimic cake frosting. It’s whimsical, conversation-starting, and instantly recognizable as birthday-themed.
The Art of Cake Nail Design
Each nail can represent a different layer or flavor of cake, or all five can coordinate into one cohesive cake theme. The key is using fine detail brushes to paint frosting swirls that look intentionally hand-decorated rather than perfect. Imperfection actually adds charm here — it makes the design feel more like an actual cake covered in frosting.
Design Elements to Include
- Base layers of cream, white, or pale pink gel polish for the “cake” foundation
- Pastel accent colors (mint, lavender, peach, pale yellow) for frosting details
- Tiny white dots or lines to suggest sprinkles
- Miniature painted candles on at least one nail using thin brush strokes
- A glossy top coat that makes everything look freshly frosted
Worth knowing: Use nail art pens rather than a brush for more control when painting small details like candle flames or sprinkle patterns.
3. Rose Gold Geometric Birthday Nails
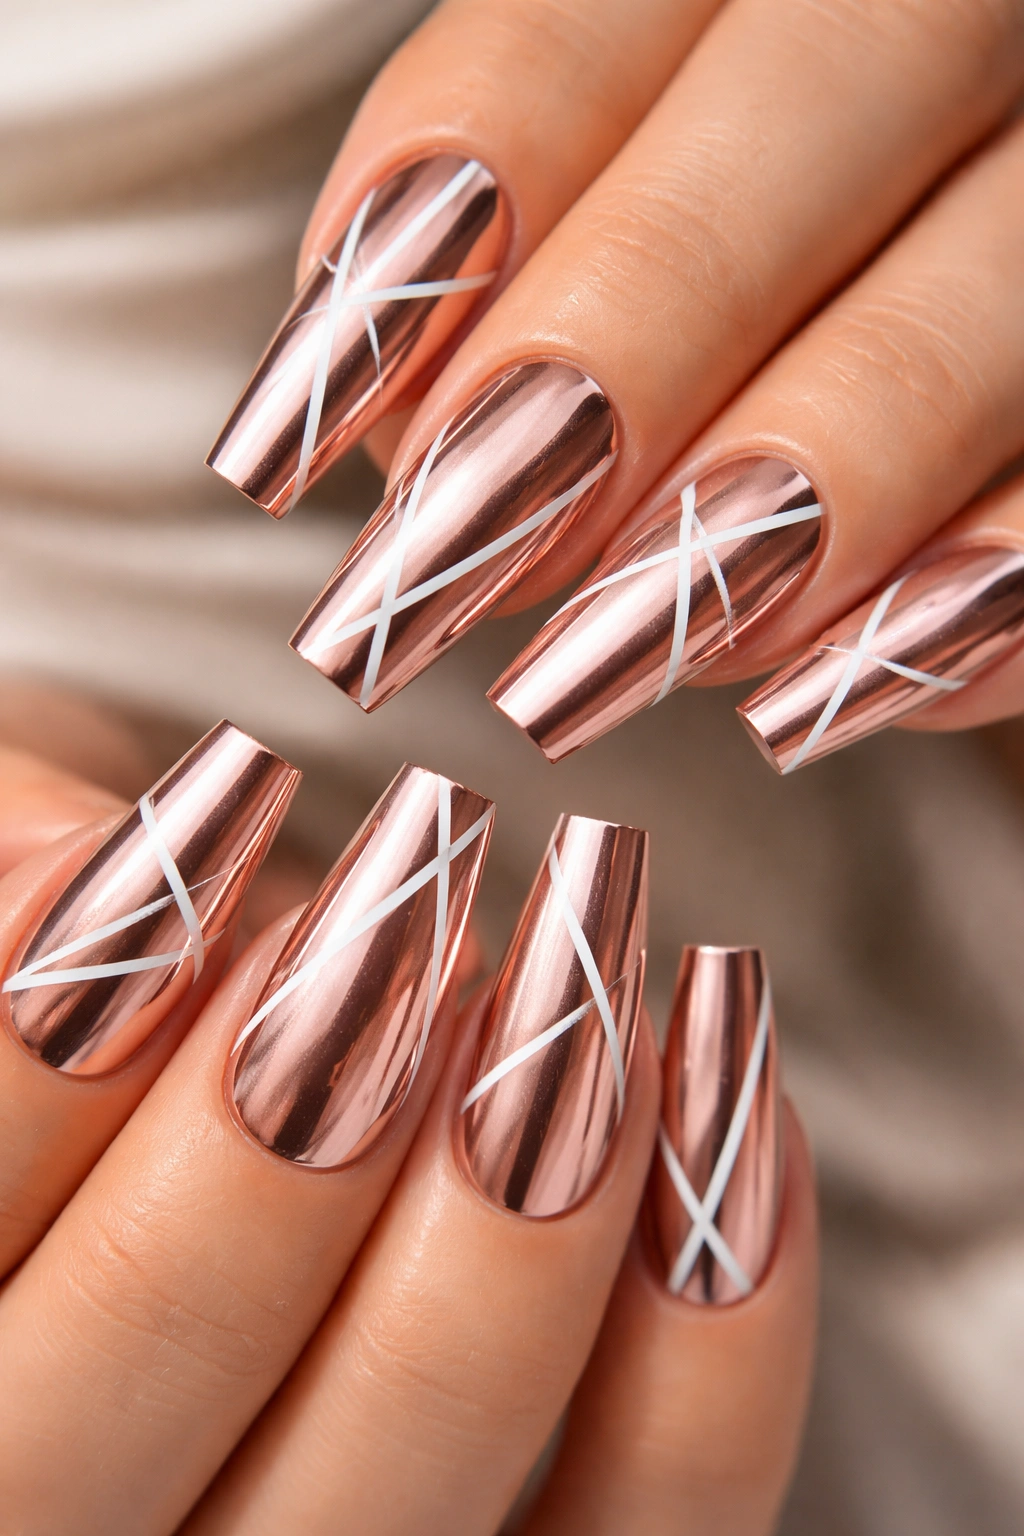
Combine rose gold metallic polish with clean geometric lines — triangles, chevrons, or angular shapes that create visual interest and modern sophistication. Rose gold feels warm and celebratory while geometric patterns keep the look contemporary and fashion-forward. This design walks the perfect line between elegant and trendy.
Building the Geometric Pattern
Start with a rose gold chrome base or metallic polish that catches light beautifully. Layer white or cream gel polish on top in carefully planned geometric shapes using striping tape as a guide. The contrast between the metallic background and opaque accent color makes every angle pop and creates dimension.
What Makes This Design Special
- Rose gold’s warm undertone flatters all skin tones and photographs gorgeously
- Clean lines feel intentional and fashionable rather than childish or casual
- Geometric patterns never go out of style and work with any birthday outfit
- The design is bold enough to feel special but wearable for everyday life after the party
Pro tip: Use thin striping tape to create perfectly straight lines; remove it immediately after application before the gel cures for clean edges.
4. Champagne and Pearl Coffin Nails
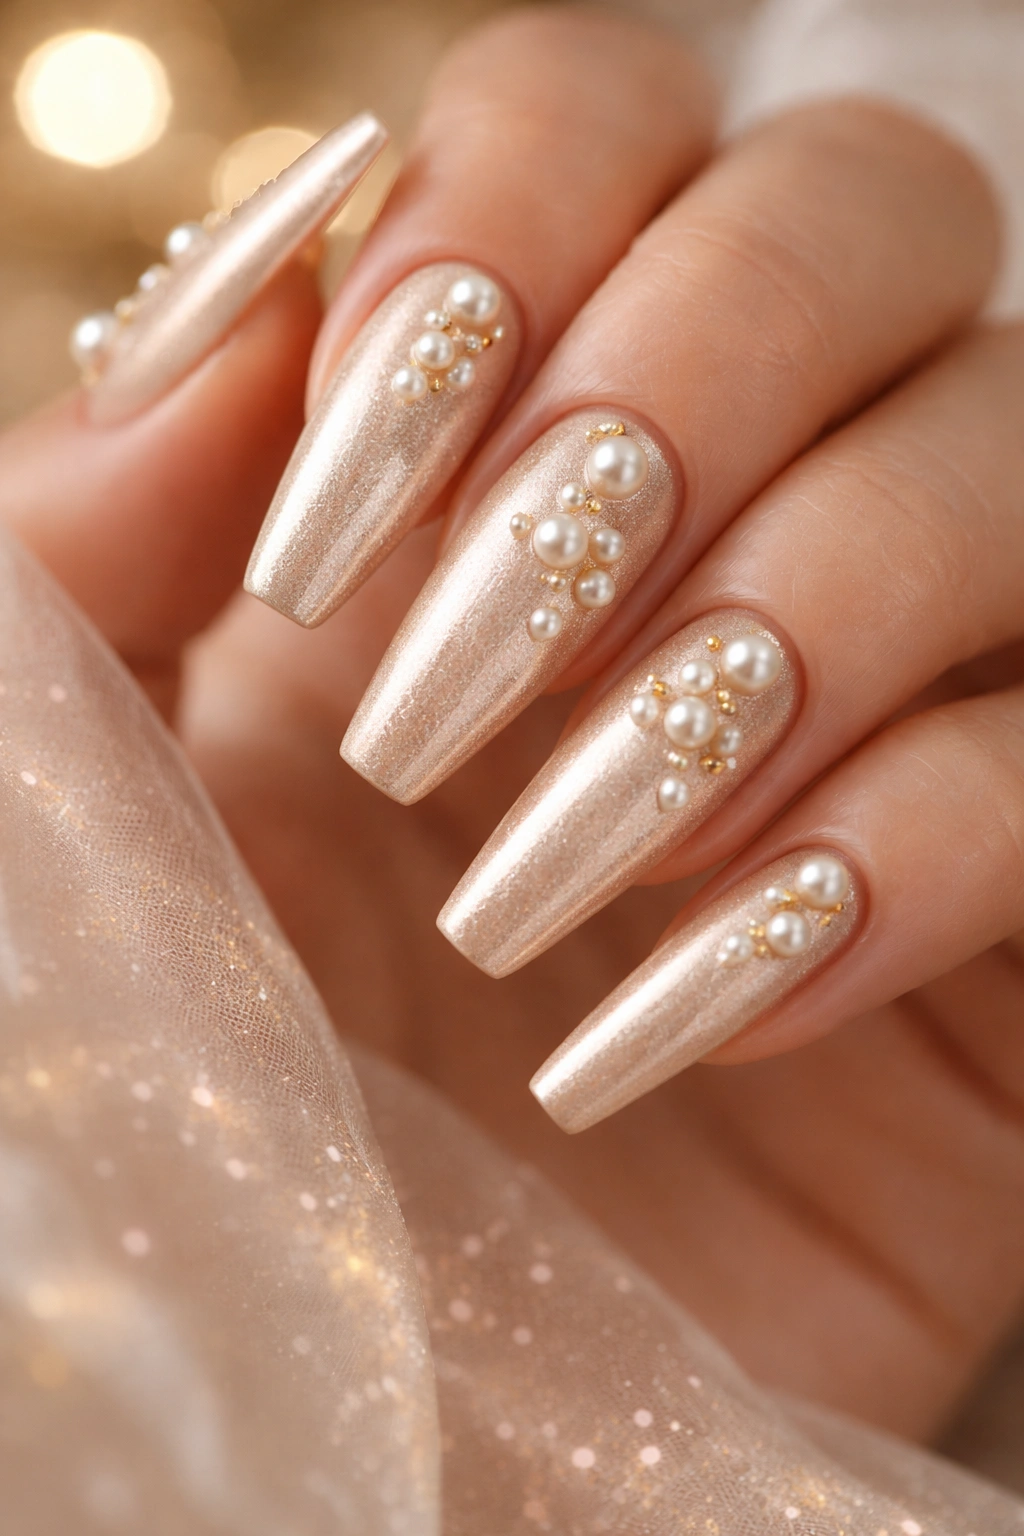
Create a luxe, understated birthday look with champagne metallic polish as your base and pearl accents scattered across the surface. Pearls can be actual nail gems, painted details, or a pearlescent finish that catches the light from multiple angles. This design screams elegance and refined celebration without demanding attention.
The Luxury Appeal
Champagne and pearl combinations evoke high-end jewelry and formal celebrations. The subtle shimmer feels festive without being loud, making it perfect for birthday brunches, dinners, or professional environments where you still want to acknowledge the occasion. The soft sheen is calming to look at while remaining distinctly special.
Application Technique
- Apply champagne metallic or chrome polish as a smooth, even base
- Add actual pearl-shaped gems strategically across each nail, clustering them near the cuticle or scattered randomly
- Alternatively, use a pearlescent gel polish that naturally shifts and shimmers in different light
- Finish with a glossy top coat that amplifies the champagne’s warmth
Worth knowing: Real nail gems stay put longer when applied to a slightly tacky gel layer before final curing, rather than being added to the top coat.
5. Rainbow Confetti Coffin Nails
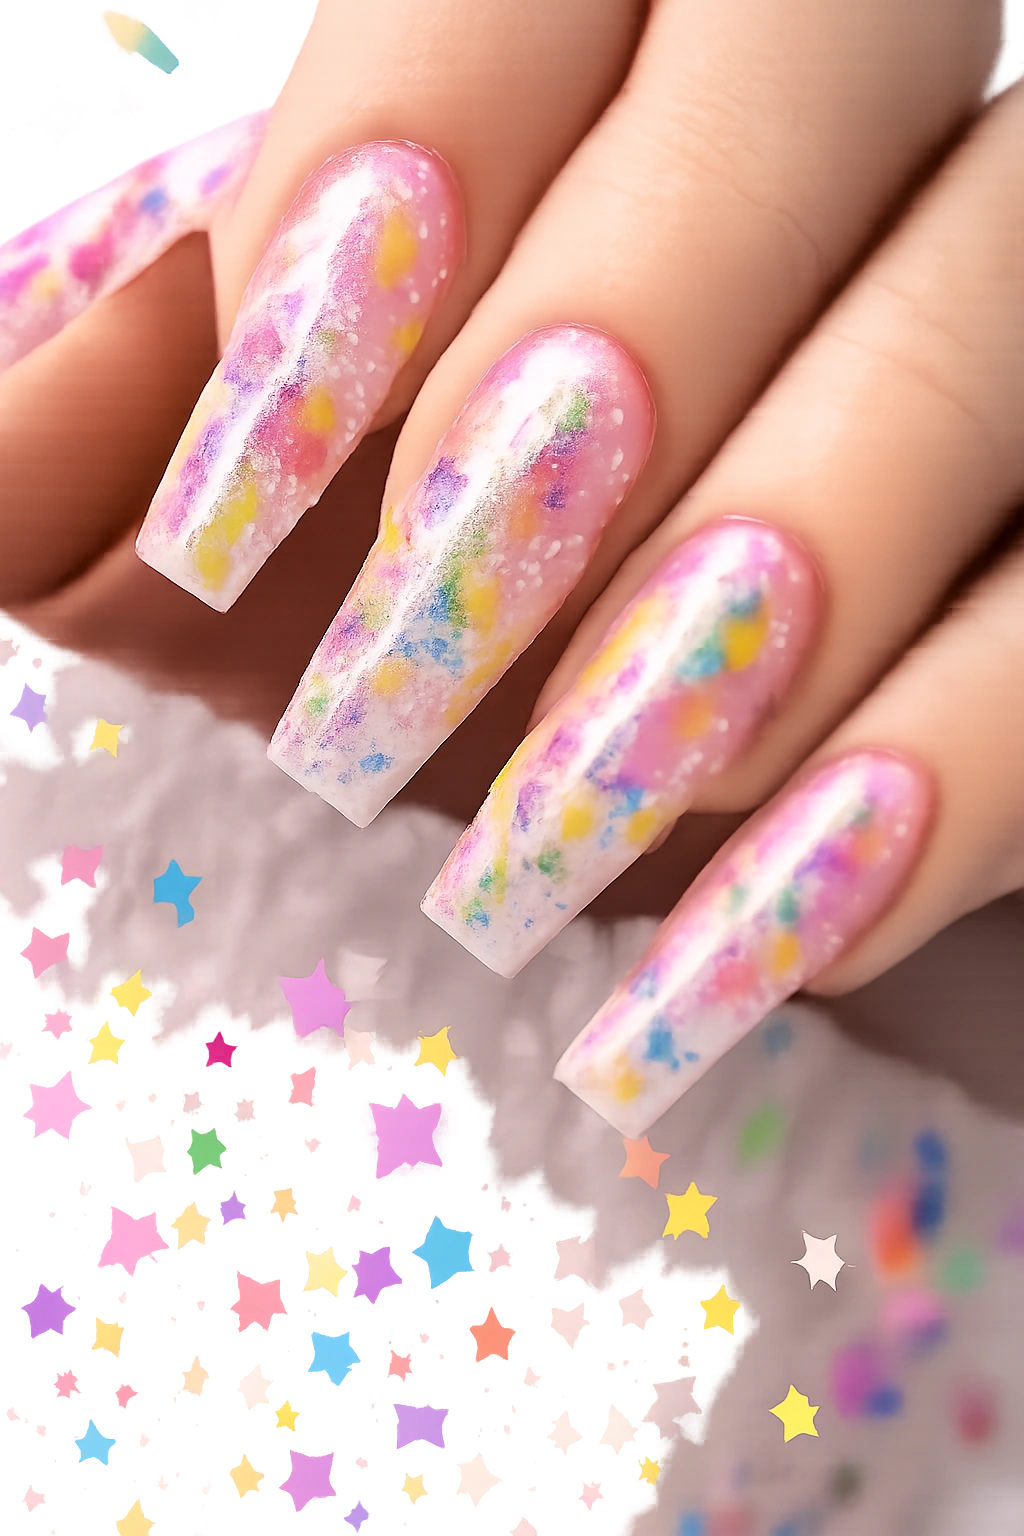
Go full celebration mode with a clear or white base topped with multicolored confetti scattered across the entire nail surface. Rainbow confetti feels inherently festive, fun, and unapologetically birthday-appropriate. It’s joyful, youthful, and impossible to wear without smiling when you look at your hands.
Creating Authentic Confetti
Use actual nail confetti pieces (tiny holographic shapes in various colors) rather than trying to paint individual pieces — it’s faster, looks more professional, and catches light beautifully. Scatter the pieces randomly across the nail in varying sizes and colors for authentic party aesthetic. The randomness is what makes it feel genuinely celebratory rather than contrived.
Why Confetti Works for Birthdays
Confetti is literally the symbol of celebration and joy. There’s no way to misinterpret this design — everyone immediately knows it’s party-related. The burst of color against any base color creates instant visual impact and photogenic nails.
Application Steps
- Apply a clear or soft white gel base as your foundation
- While the base is still slightly tacky (or immediately after curing, depending on your technique), press confetti pieces onto the surface
- Use various sizes and colors for authentic scattered appearance
- Seal everything with a thick top coat that encases the confetti securely
Pro tip: Don’t overcrowd the nail with confetti or it becomes visually chaotic; leave some white or clear space visible so the eye can rest.
6. Nude with Gold Foil Accent Coffin Nails
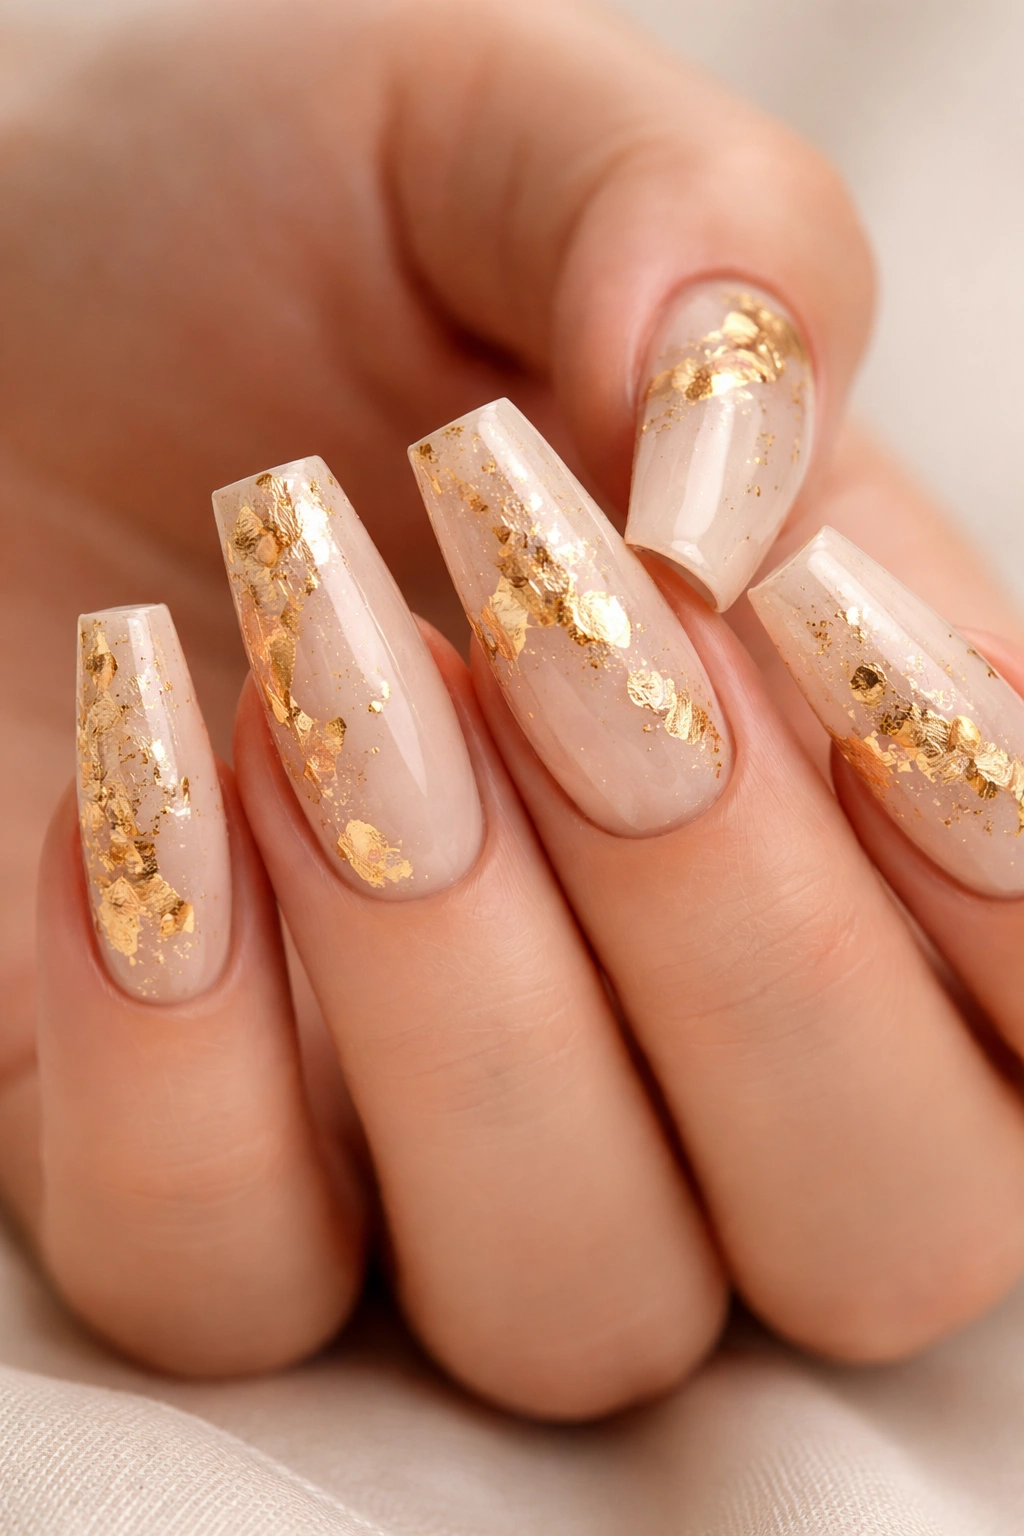
A timeless look that pairs a creamy nude base with strategically placed gold foil accents that catch light and create sparkle. The foil creates texture and dimension while the nude base keeps the overall look refined and wearable. It’s celebratory without being over-the-top, elegant without being boring.
The Power of Gold Foil
Gold foil creates an entirely different effect than glitter or metallic polish — it’s dimensional, catches light at sharp angles, and feels more luxe because it looks hand-applied. The slight irregularity of foil placement makes it feel custom and intentional rather than mass-produced. It’s a professional nail artist move that feels elevated and expensive.
Foil Application Method
- Apply a smooth nude gel base to all nails and cure
- Apply a thin layer of foil adhesive (or sticky top coat) to the areas where you want foil to adhere
- Tear small pieces of gold foil and press gently onto the adhesive
- Seal with a glossy top coat once the foil pieces are positioned
Worth knowing: Different foils (holographic, chrome, mirror finishes) create entirely different effects; choose based on whether you want warm gold, cool silver, or rainbow-shifting sparkle.
7. Marble and Glitter Coffin Nails
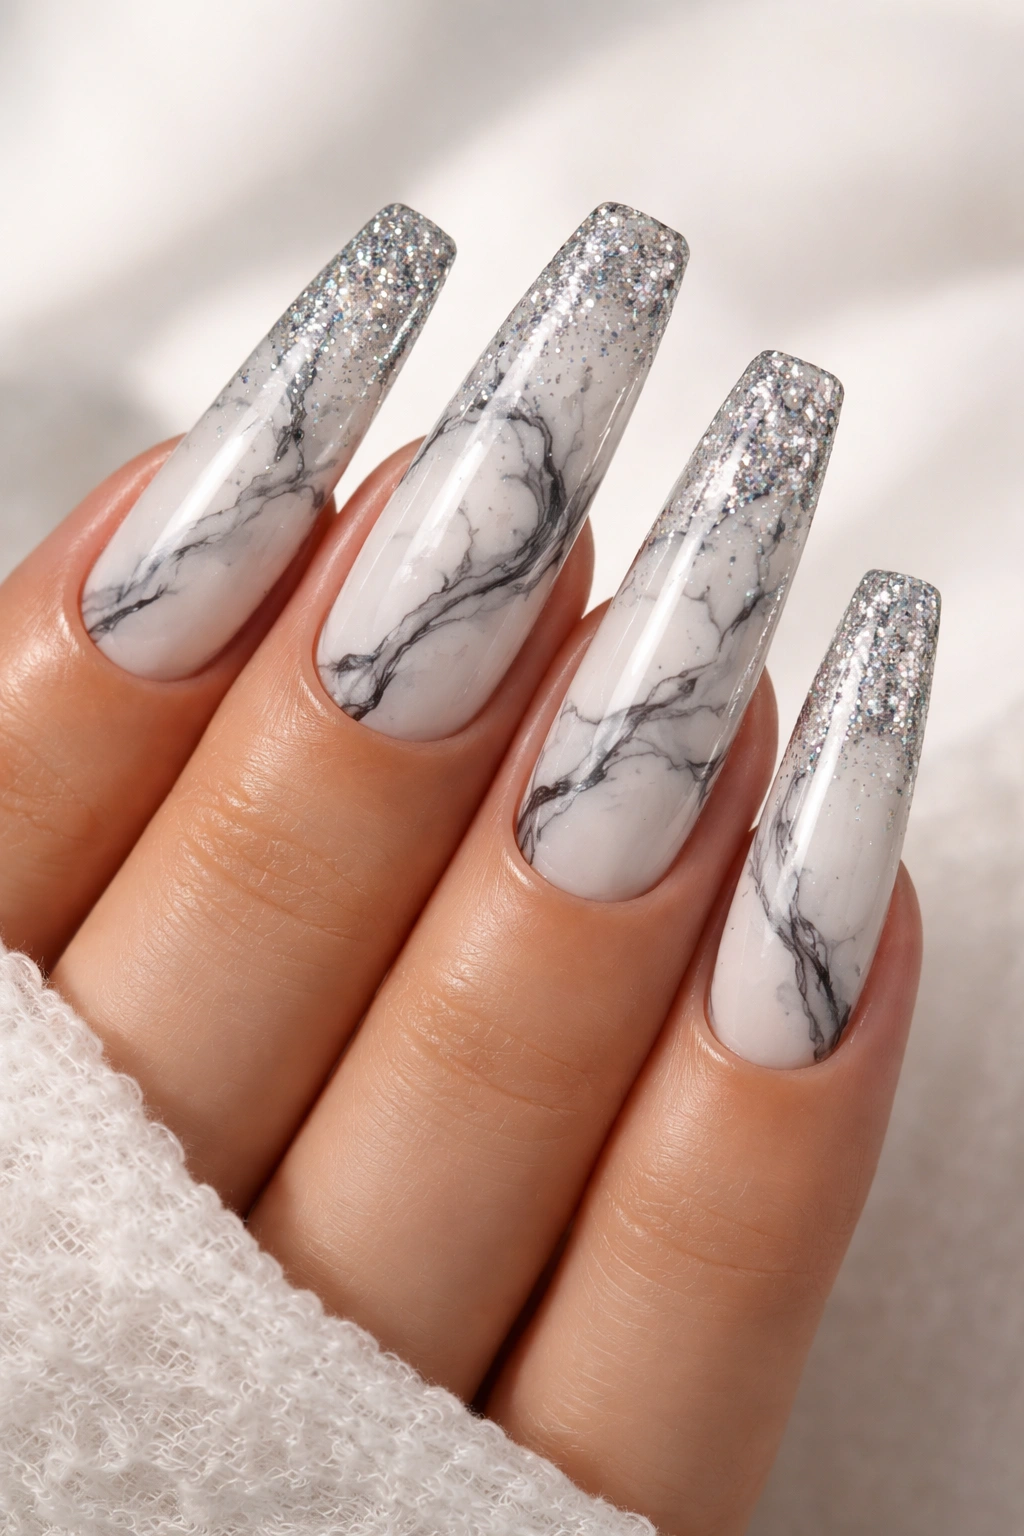
Combine the elegance of marble veining with strategic glitter placement for a design that’s both artistic and celebratory. Soft marble patterns in gray, black, and white create the artistic base, while glitter concentrated at the tips adds the birthday sparkle. It’s sophisticated art meets party vibes.
Creating Marble Effect
Use white or cream as your base, then add thin black or gray lines with a thin brush to mimic natural marble veining. The lines should be irregular and organic, not perfectly symmetrical. Some should flow across the entire nail while others are shorter and clustered. This organic quality makes it look like actual stone rather than a simple pattern.
Adding the Glitter Element
Once the marble is set, apply glitter gradient that starts clear at the base and becomes increasingly sparkly toward the tip. This two-part design gives you the sophisticated marble aesthetic plus the celebratory glitter impact.
Why This Combination Works
- Marble feels upscale and refined, perfect for elevated celebrations
- Glitter adds the obvious birthday component
- Together they balance art and festivity perfectly
Pro tip: Use a dotting tool to create small marble accent details on your skin around the base of the nail for an intentional, curated look.
8. Holographic Chrome Coffin Nails
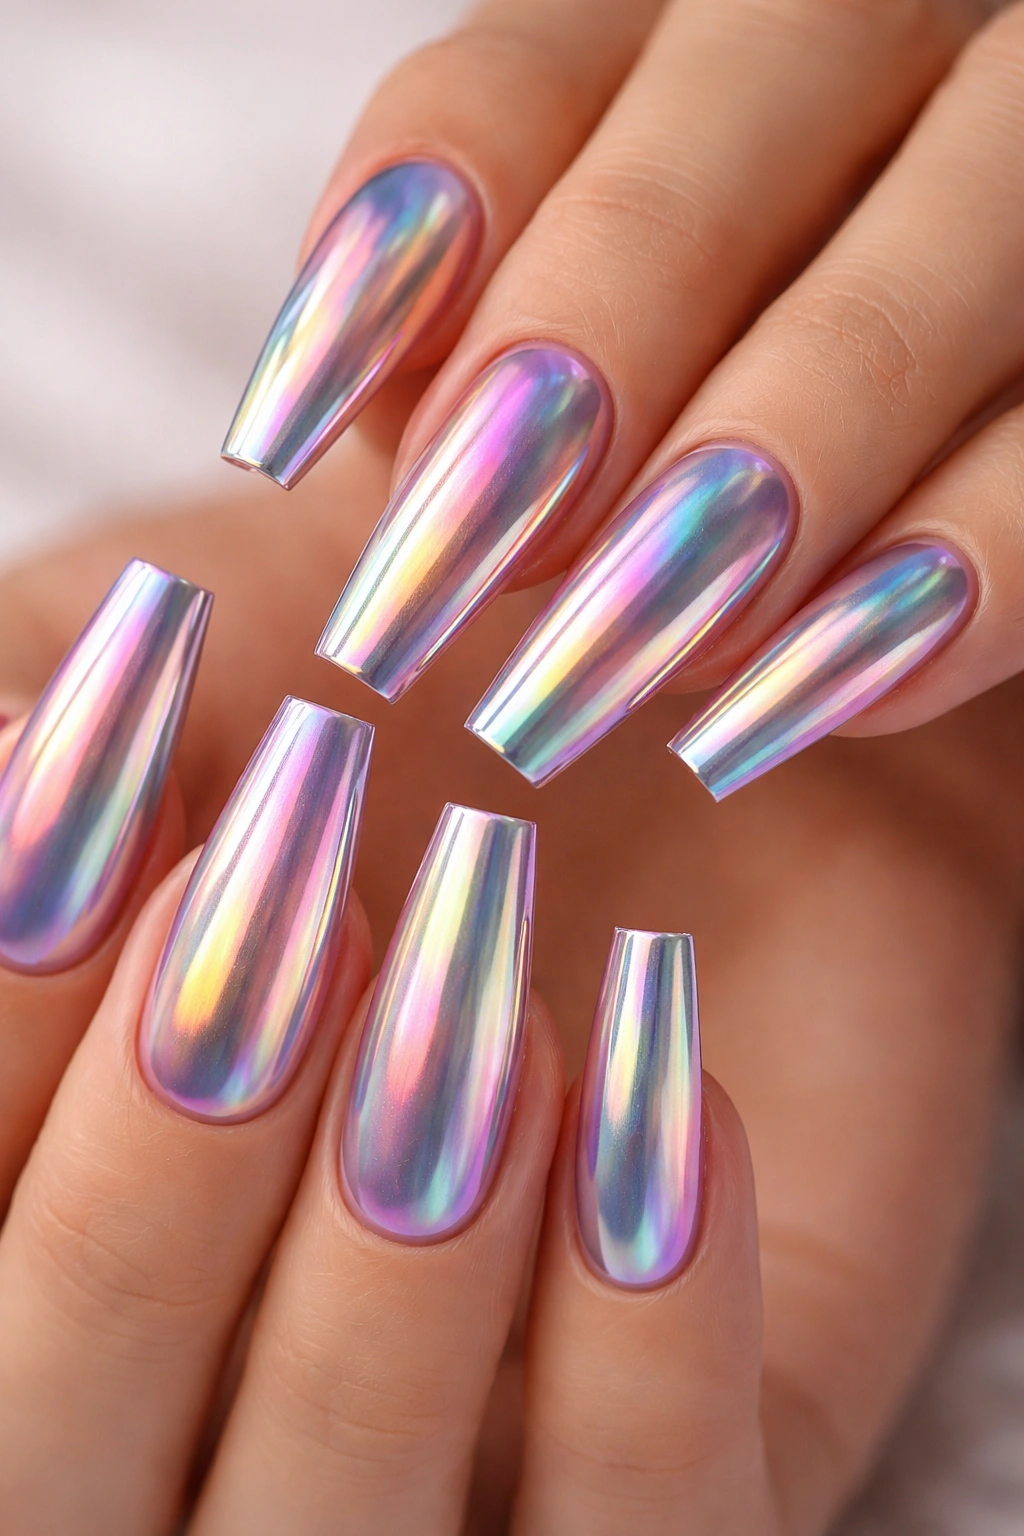
Apply holographic chrome polish that shifts through rainbow colors as you move your hand and light hits it differently. Holographic finishes are inherently party-appropriate because they’re eye-catching, multi-dimensional, and impossible to miss. The shifting colors feel magical and celebratory without requiring actual nail art.
The Magic of Holographic Polish
Holographic polishes contain micro-reflective particles that break light into spectrum colors. As you move your nails, the colors shift and change, creating endless visual interest. A single color holographic might show blue, green, and purple as you rotate your hand. This dynamic quality makes your nails feel alive and celebratory.
Application for Best Results
- Apply holographic polish in thin, even layers for the clearest color shift
- Build coverage gradually with multiple thin coats rather than one thick coat
- Use a quality top coat that won’t dull the holographic effect
- Avoid matte finishes which completely kill the shifting-color magic
Worth knowing: Different holographic polishes shift through different color ranges — some are warm (red-gold-orange), others are cool (blue-purple-green). Choose the shift range that complements your skin tone.
9. Neon and Black Ombre Coffin Nails
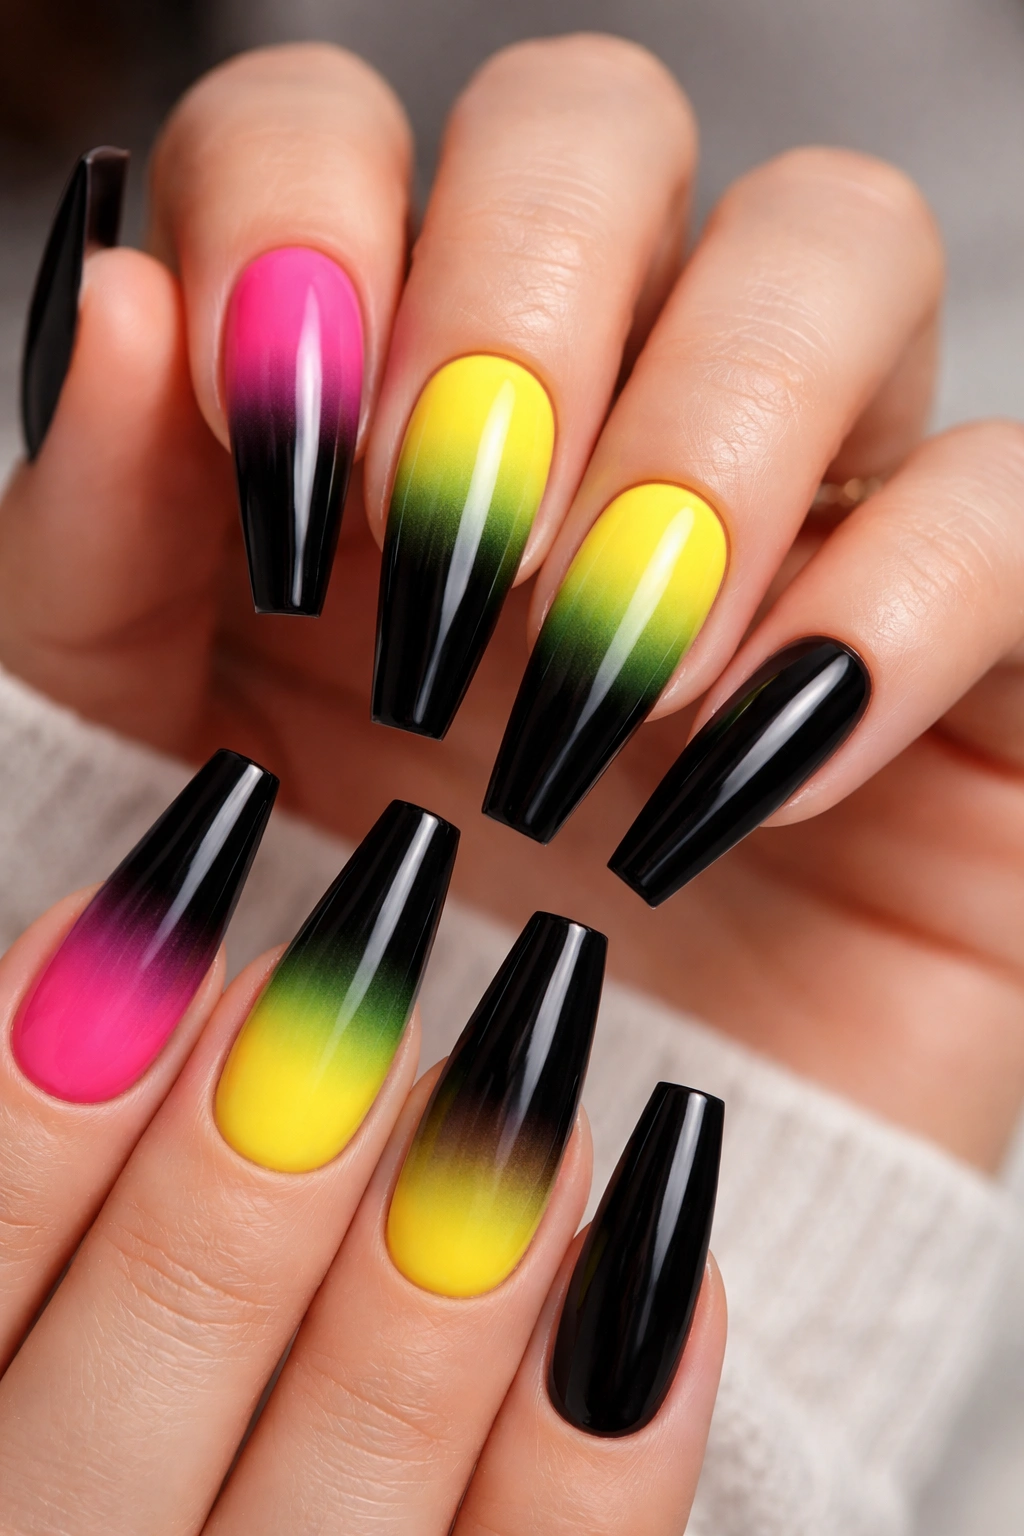
Start with bright neon pink, yellow, or green at the base and gradient it down to solid black at the tips. The extreme contrast creates bold visual drama while the ombre technique keeps it visually cohesive. It’s edgy, modern, and absolutely perfect for birthday celebrations that lean toward bold fashion.
Why Neon Works for Birthday Nails
Neon is inherently celebratory and youthful. It demands attention and reads instantly as special and intentional. When paired with the sleekness of black, the neon becomes even more striking because of the contrast. It’s a design that doesn’t apologize — it owns the boldness completely.
Creating the Ombre Gradient
- Apply bright neon polish to the entire nail and cure
- Apply black gel to the tips only, about one-third of the nail
- Use a dry sponge to blend where the two colors meet, creating a gradient transition
- The blend should be smooth but still show clear color separation from bright to dark
Pro tip: Neon polishes can be sheer, so you might need three coats to achieve full opacity and the brightness that makes neon truly pop.
10. Birthday Number Coffin Nails
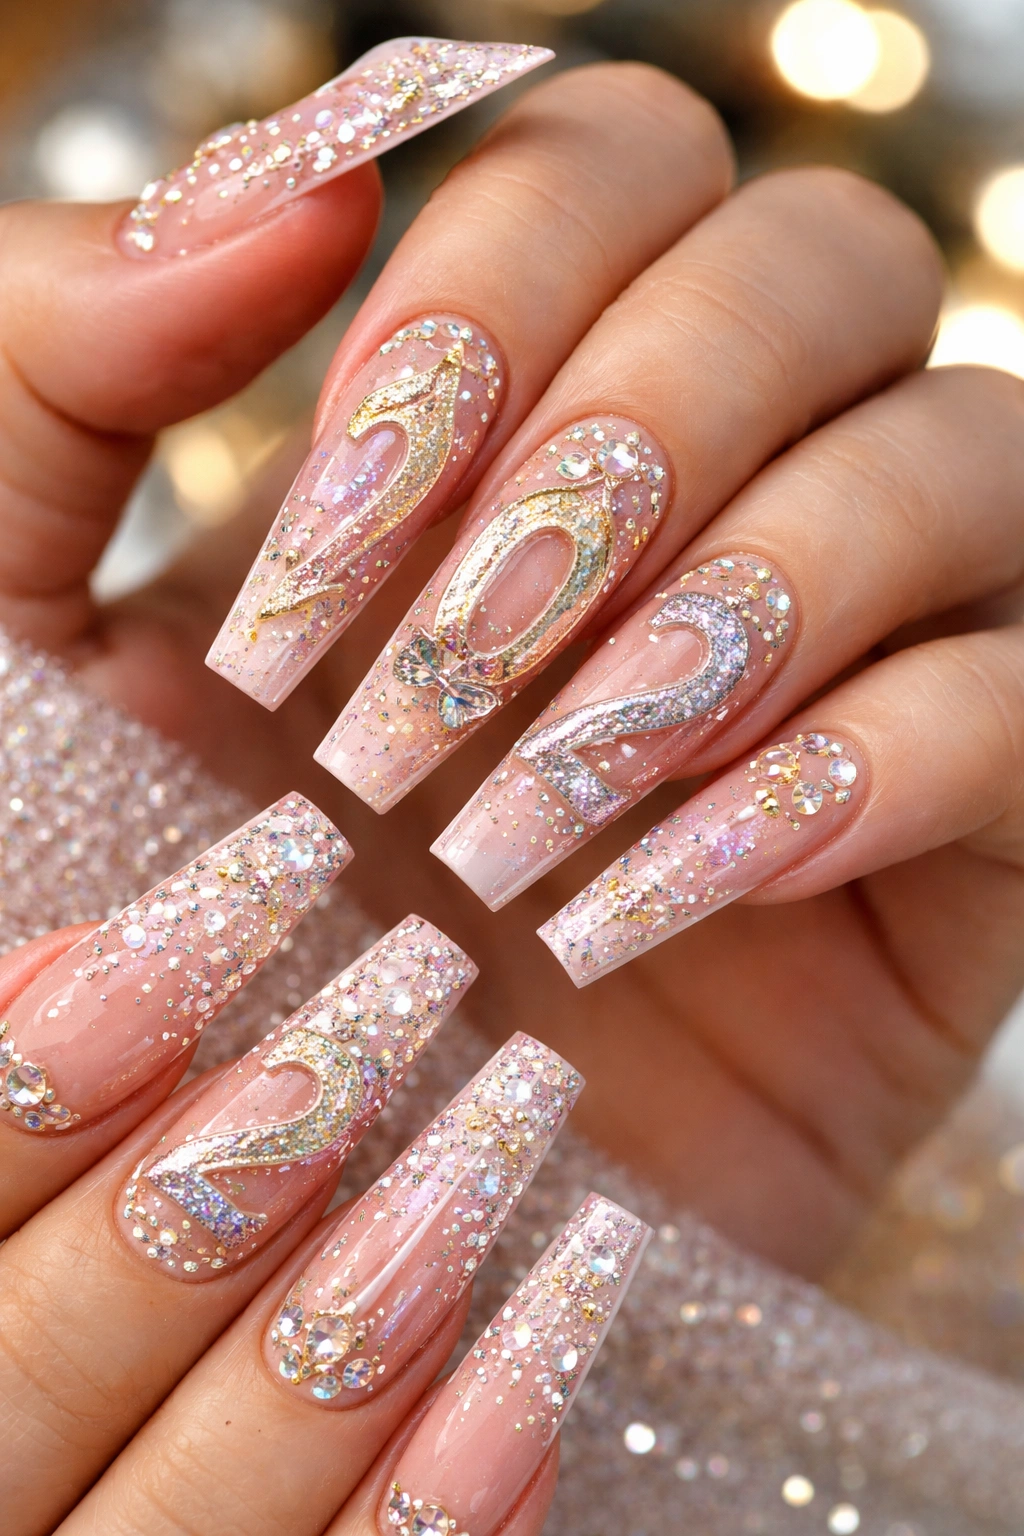
Paint your age or a significant number directly on your coffin nails using fine detail brushes or nail art pens. You could put one large number across all nails, individual numbers on each nail, or incorporate the number as part of a larger design. It’s personal, meaningful, and instantly communicates what you’re celebrating.
Design Approaches for Number Nails
- Large single number across multiple nails in a bold color against contrasting base
- Each of five nails features one digit that collectively shows your full age
- Number incorporated into a larger scene (like birthdays number floating in confetti)
- Fancy calligraphy-style numbers for sophisticated celebrations
- Block style numbers for bold, modern aesthetic
Making Numbers Readable
The key is ensuring the numbers are sized large enough and colored boldly enough to be actually readable from normal viewing distance. Small delicate numbers disappear and don’t read clearly. Go bigger than you think necessary for maximum impact.
Worth knowing: Practice on a practice nail or paper first if you’re painting the numbers yourself; nail artist precision takes practice even for experienced artists.
11. Ombre Birthday Cake Nails
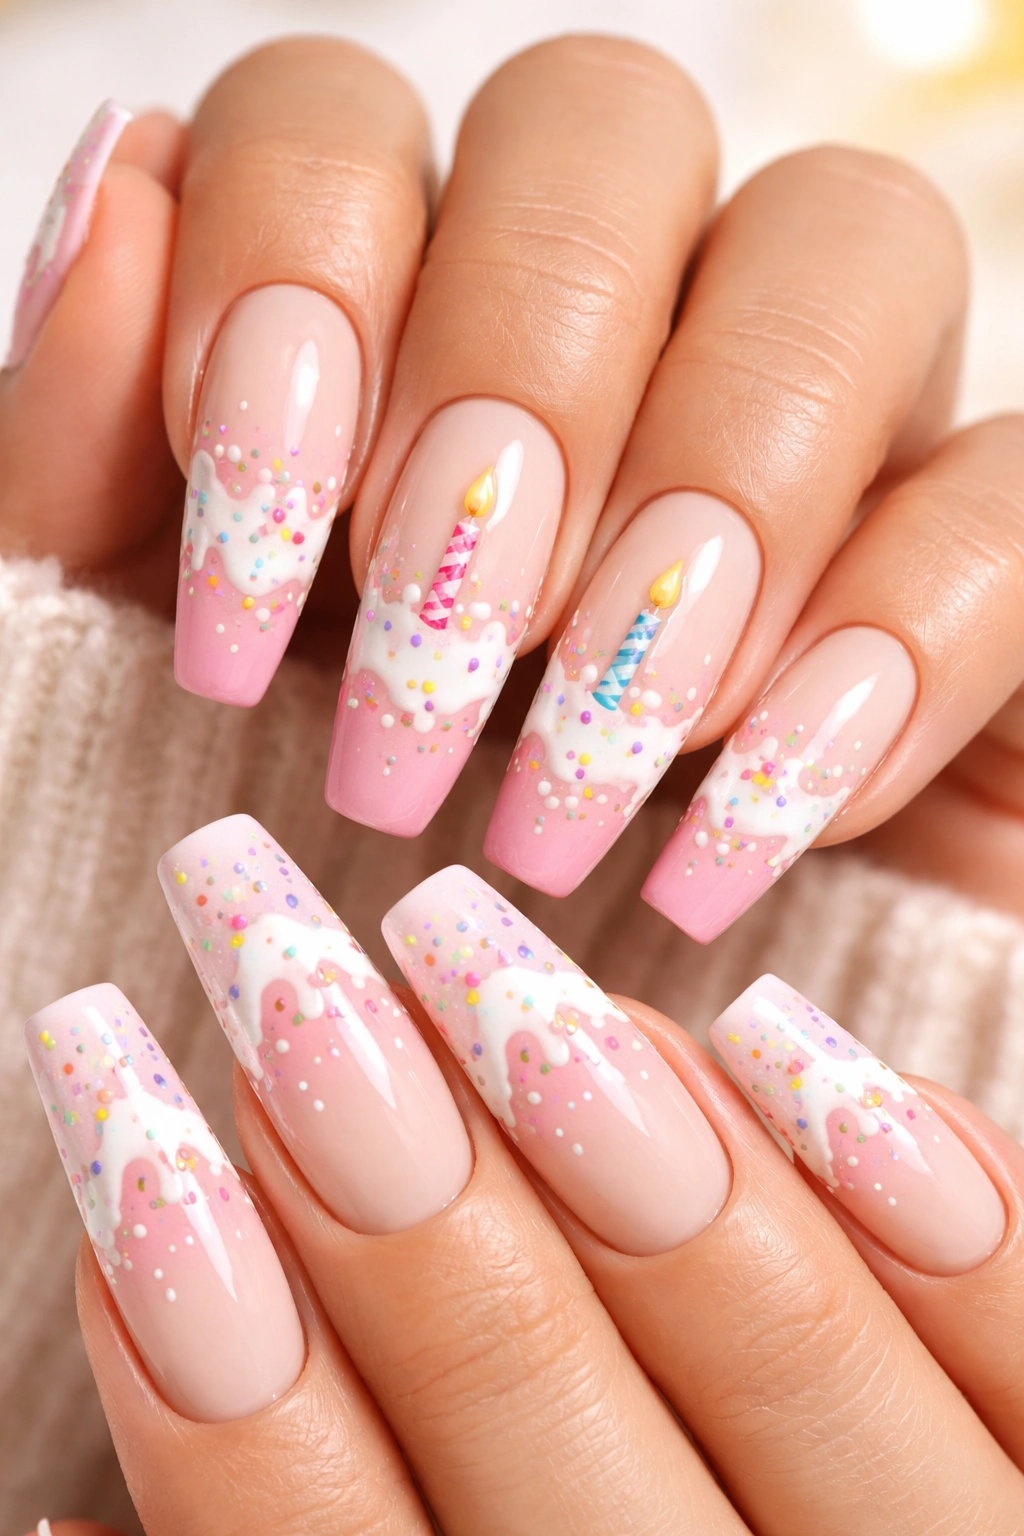
Gradient from cream or white at the base to pink at the tips, mimicking a classic cake frosting color. Add hand-painted details like frosting swirls, tiny candles, or sprinkle details on top. This design combines the elegant ombre technique with playful cake-themed details.
Building the Ombre Base
- Apply cream or off-white as your full base color
- Apply pink gel only to the tip section, about one-third of the nail
- Blend the transition using a dry sponge dabbed between the two colors
- Cure and add cake details on top
Cake Details That Add Impact
- Hand-painted frosting swirls in darker pink or berry tones
- Tiny white dots suggesting sprinkles
- Small painted candles with flame details
- Piping details that suggest the decorative quality of frosted cake
Pro tip: Use a thin striping brush for swirls and a dotting tool for sprinkle details; these precise tools make tiny details look intentional rather than accidental.
12. Crystal and Gem Encrusted Coffin Nails
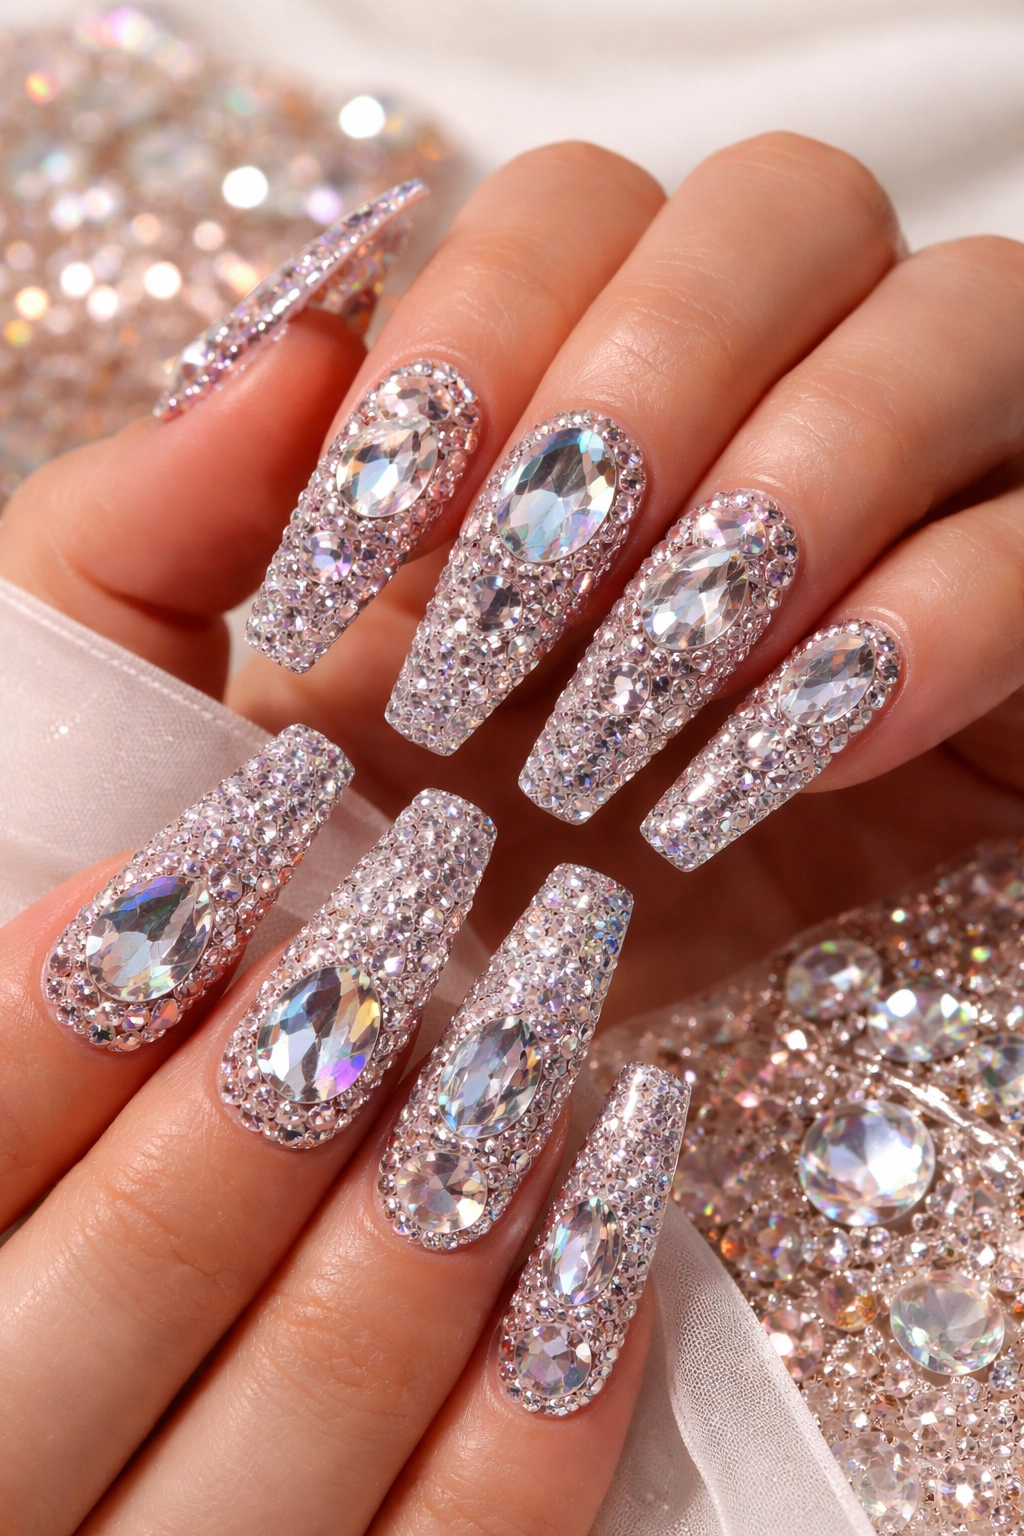
Cover your coffin nails with actual crystals and gems in coordinating colors for maximum glamour and sparkle. Whether you choose AB crystals that shift through rainbow colors or coordinating colored stones, gem encrusting is the ultimate birthday luxury. It’s high-impact, photogenic, and impossible to miss.
Choosing Your Gems
- AB (Aurora Borealis) crystals that shift multiple colors are universally flattering
- Single-color crystal coordination (all rose gold, all blue, all pink) for cohesive looks
- Mixed sizes from large statement pieces to smaller accent stones create visual interest
- Crystal brands like Swarovski offer superior sparkle and longevity
Application for Lasting Results
- Use a sticky base coat or tacky gel as your adhesive layer
- Apply gems in intentional patterns or random scattered placement
- Start with largest stones first, then fill in with smaller pieces
- Seal with a thick gel top coat that encases all gems securely
Worth knowing: Gems applied to the tips of coffin nails catch light constantly and create maximum sparkle with every hand movement and gesture.
13. Black Coffin Nails with Gold Birthday Lettering
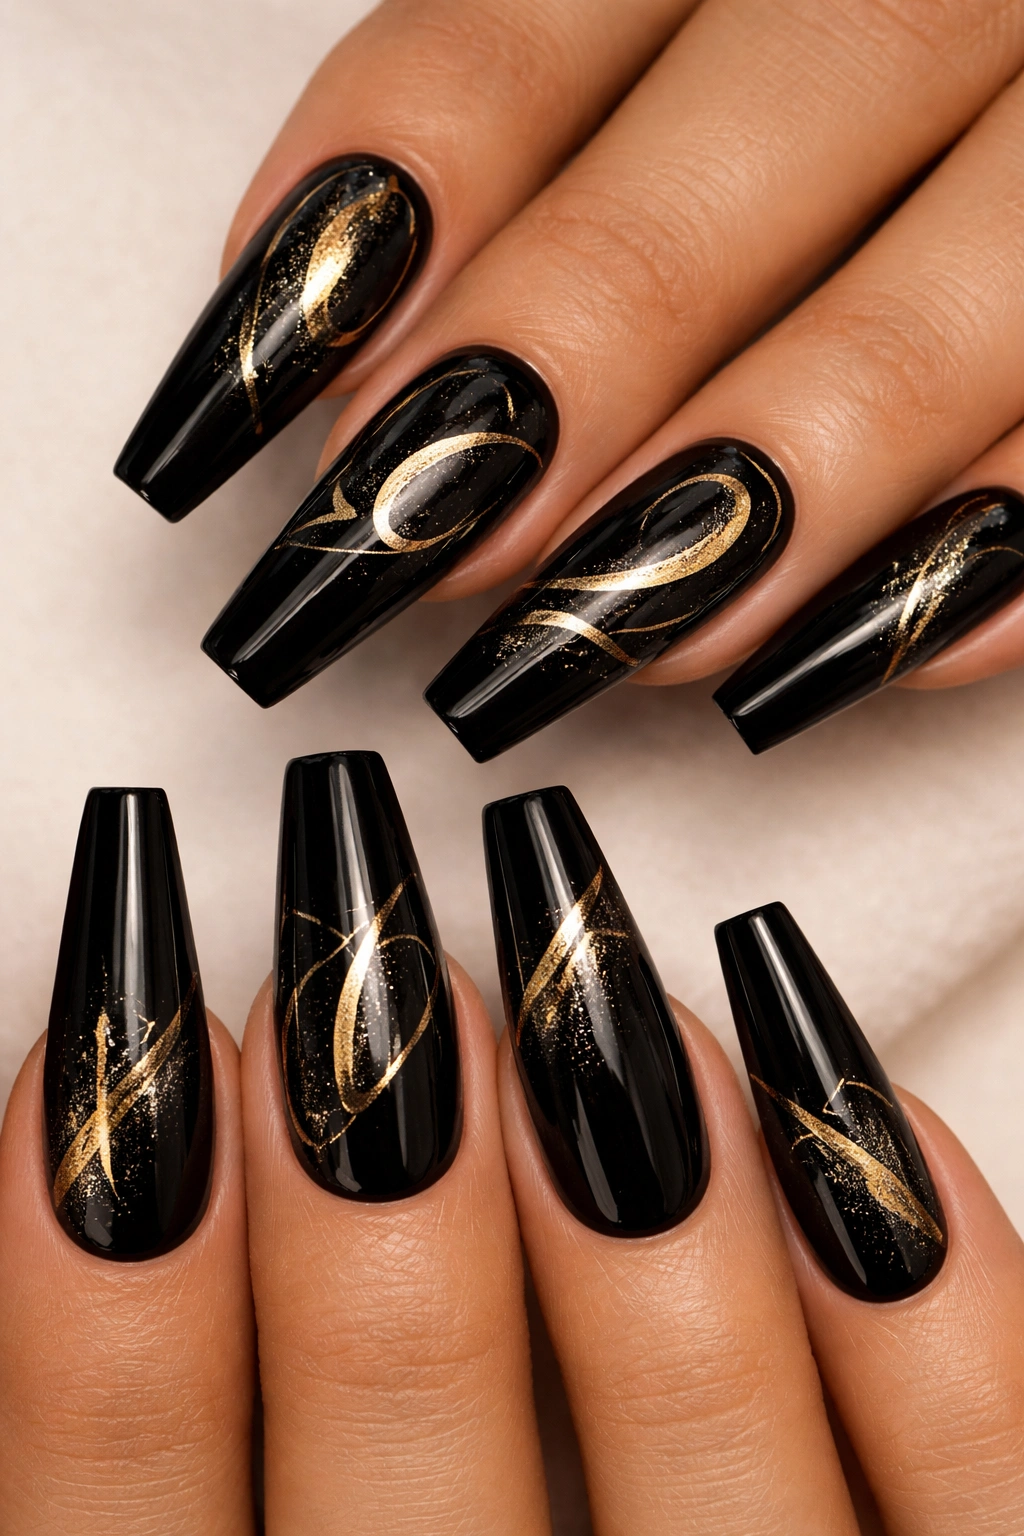
Go dark and sophisticated with a rich black base, then add “BIRTHDAY” or your age spelled out in gold lettering. Black is elegant and modern, while gold lettering adds luxury and celebration. It’s a design that feels exclusive and intentional.
Creating Bold Lettering
- Use a thin brush and steady hand to paint gold lettering, or
- Use gold leaf with a precise adhesive to create dimensional lettering, or
- Apply gold nail art pens that offer more control for small lettering
Why This Design Reads as Celebratory
Black alone can feel somber or plain, but add gold text that explicitly references the birthday and suddenly it’s clearly an occasion look. The contrast between dark base and bright lettering ensures every word is readable and impactful.
Pro tip: Paint lettering on the nude or clearest nails first and practice the placement before committing to your colored nails.
14. Pastel Rainbow Gradient Coffin Nails
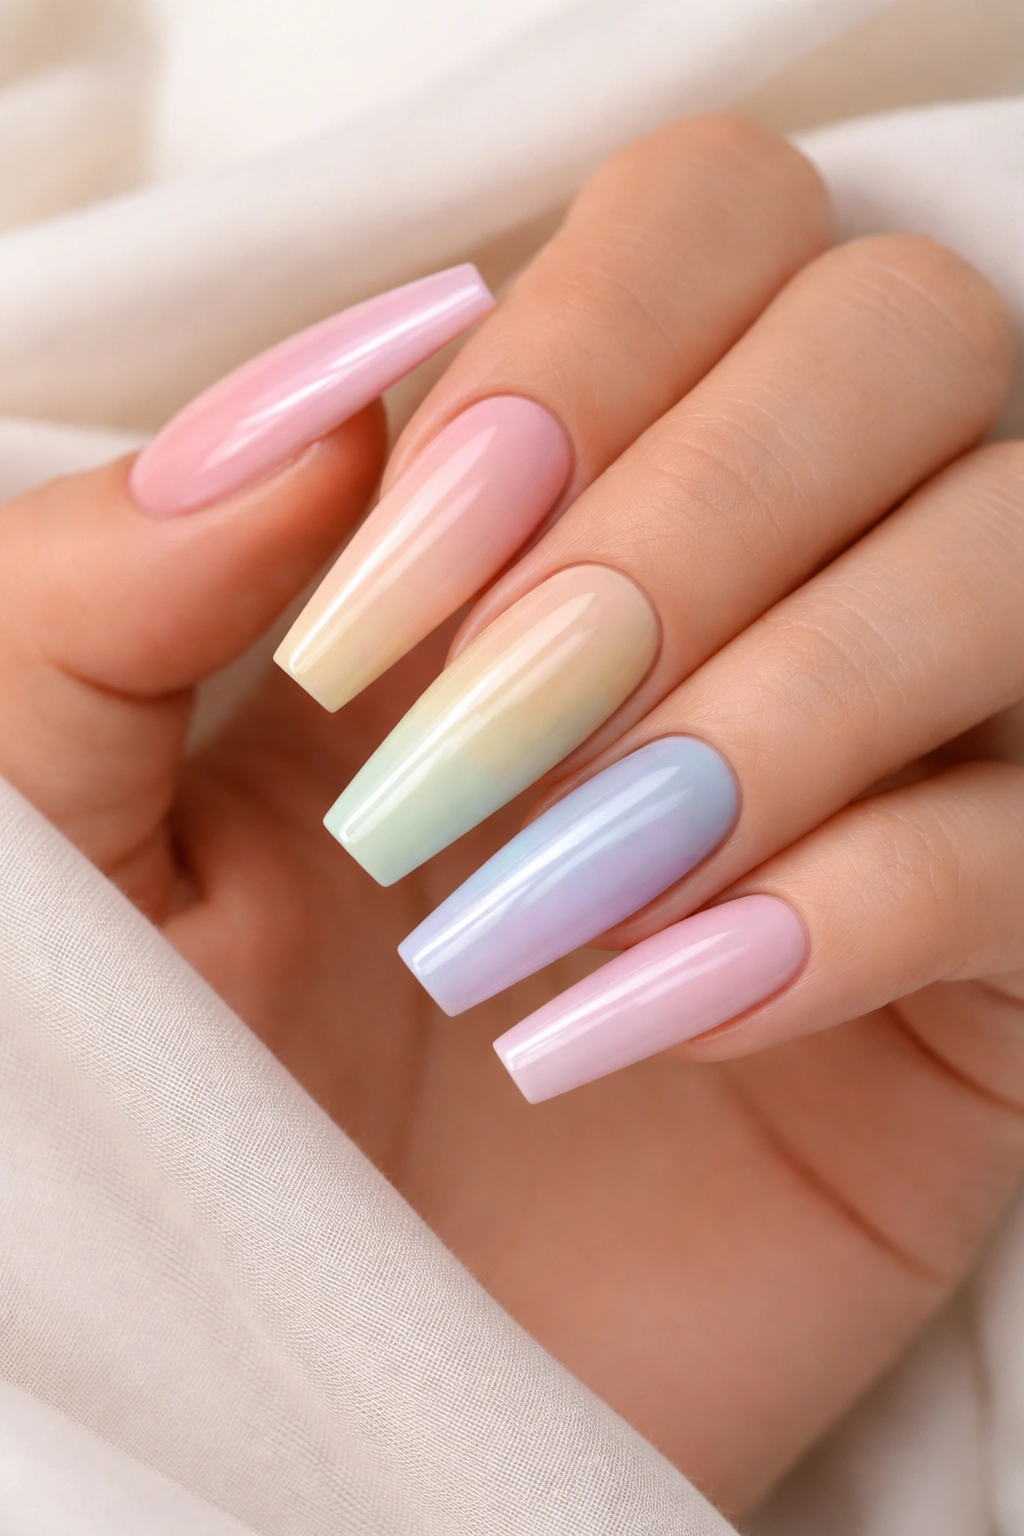
Create a soft rainbow gradient using pastel versions of rainbow colors — pale pink, peachy, pale yellow, pale green, pale blue, and pale purple. Each nail can be a different pastel color, or all five nails can coordinate into one flowing gradient from thumb to pinkie. It’s soft, sophisticated, colorful, and birthday-perfect without being loud.
Building the Pastel Rainbow
- Choose pastel versions of all six rainbow colors (avoid bright saturated tones)
- Apply each color to one nail in rainbow order, or
- Create a gradient using sponge blending across all five nails for a continuous color flow
- Use white or cream as a neutral base first if the pastels aren’t opaque enough
Why Pastels Work Better Than Bright
Pastel colors feel refined and intentional while bright rainbow can read as childish. Pastels are gentle on the eyes while still providing plenty of color variety. They photograph beautifully and coordinate with most outfit colors better than bright rainbow would.
Worth knowing: Pastel polishes are often more transparent than opaque, so plan for multiple thin coats rather than one heavy coat to avoid muddy colors.
15. Nude with Silver Starburst Coffin Nails
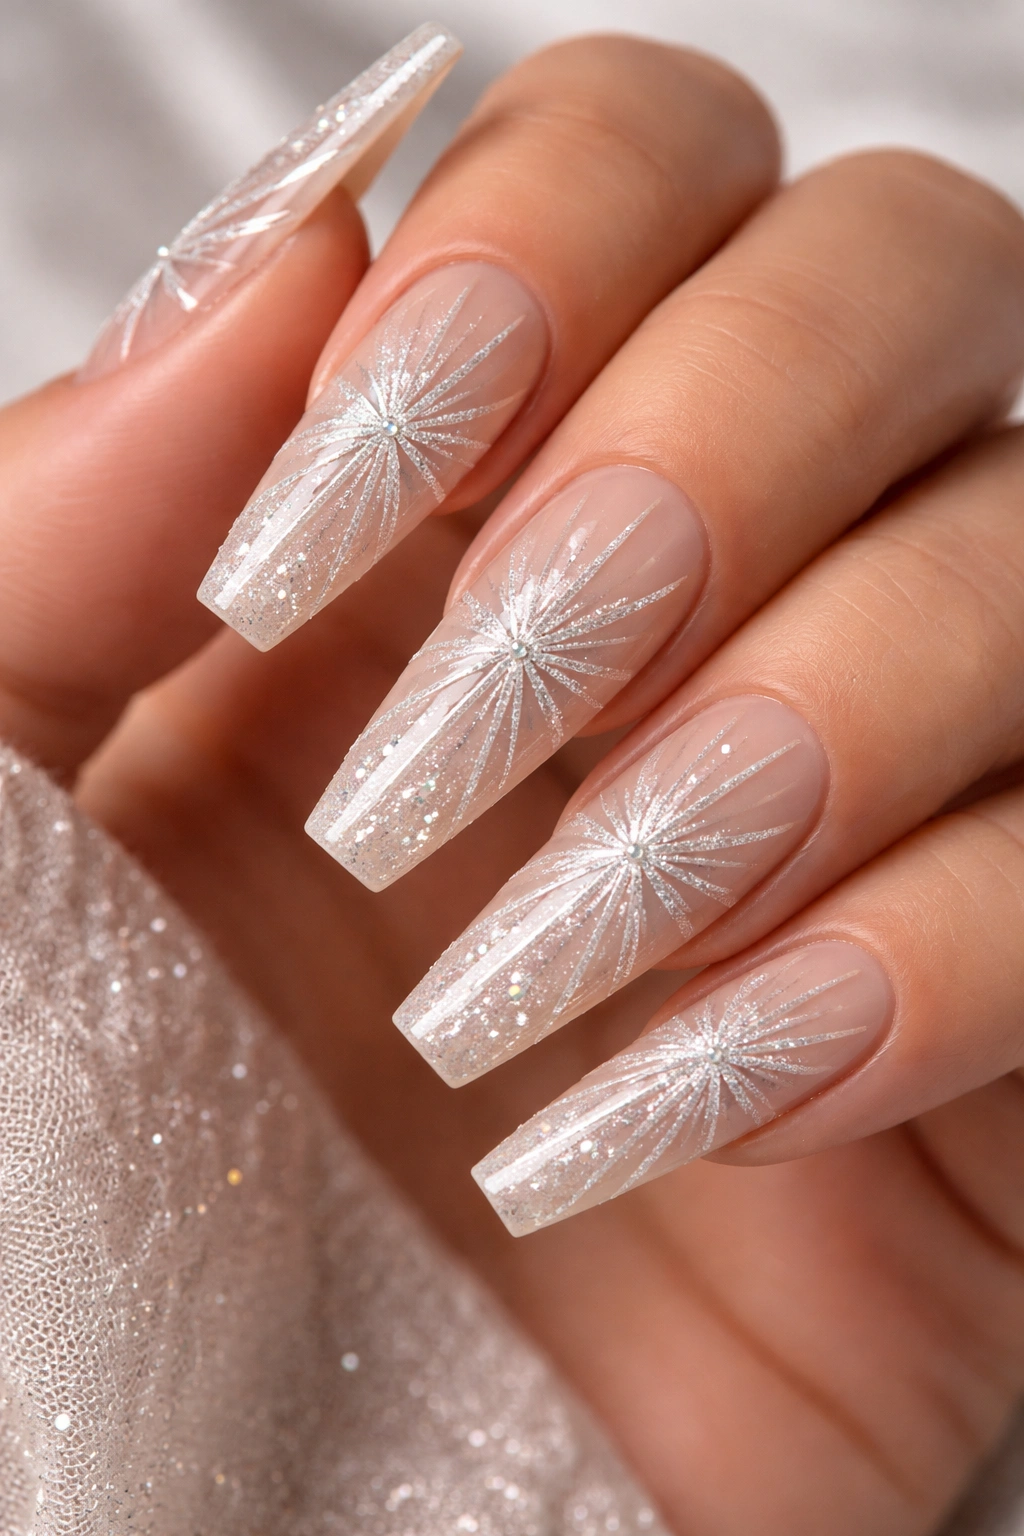
Pair a warm nude or beige base with silver rays or starburst patterns radiating from the center or tips of each nail. The starburst creates visual movement and sparkle while the nude base keeps it wearable and sophisticated. It’s abstract art meets celebration in the most elegant way.
Creating Starburst Patterns
- Apply nude or beige base and cure
- Using a thin brush and silver gel, paint radiating lines from the center of the nail outward, or
- Create rays emanating from just below the cuticle downward
- Vary the width of lines and density of rays for organic, handmade quality
- Add silver glitter to the lines for enhanced sparkle
Why This Design Is So Effective
The starburst creates visual motion and draw the eye directly to your nails. Silver against warm nude is a universally flattering color combination. The geometric starburst pattern feels intentional and artistic rather than random.
Pro tip: Use a striping brush and steady hand or use thin striping tape as a guide for straight, clean rays.
16. Rose Gold Floral Birthday Nails

Apply rose gold metallic base and layer with delicate hand-painted florals — tiny roses, peonies, or wildflowers in coordinating pink, cream, and green tones. Florals are inherently celebratory and feminine while rose gold adds warmth and luxury. It’s romantic, sophisticated, and beautifully artistic.
Painting Delicate Florals
- Use a very thin brush or toothpick dipped in gel to create tiny petals
- Start with the center of each flower (a tiny dot) then add petals radiating outward
- Add green stems and leaves in between floral clusters
- Keep flowers small and delicate rather than large and dominating
Making Florals Look Professional
The key is keeping details small and intentionally placed rather than covering the entire nail. Leave plenty of rose gold visible so the florals accent rather than overwhelm. Cluster flowers together rather than spreading them out randomly.
Worth knowing: If hand-painting florals feels intimidating, many nail artists can accomplish intricate floral designs; it’s worth paying for this level of artistry.
17. Matte Black with Glossy Gold Tip Coffin Nails
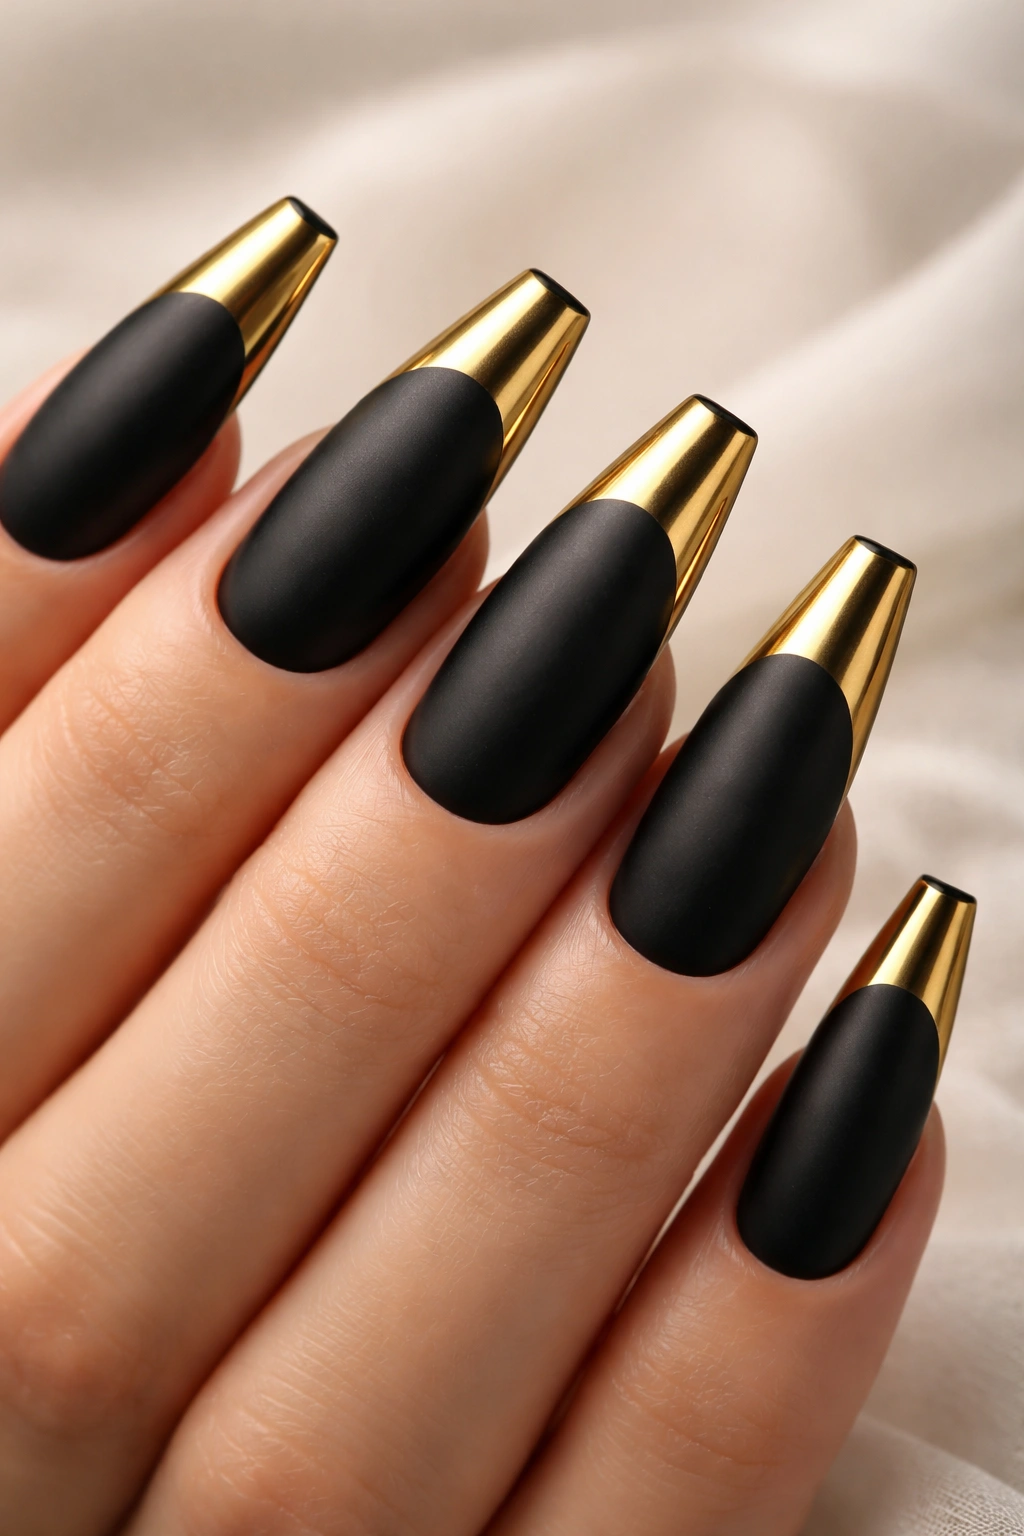
Create contrast by using matte black on the base and transitioning to glossy gold on the tips. The matte-to-glossy finish transition creates texture and visual interest beyond just color change. It’s ultra-modern, edgy, and absolutely photogenic.
Achieving the Matte to Glossy Transition
- Apply matte black gel to the entire nail and cure with matte top coat
- Apply glossy gold gel only to the tip section (about one-third)
- Cure with glossy top coat on the gold section only, or
- Apply a glossy top coat to the entire nail for the overall finish and let the two finishes create natural visual separation
Why Matte and Glossy Together Feel Special
Finish variation creates immediate visual interest. Our eyes naturally perceive matte and glossy as different even if they’re the same color, so different colors with different finishes triple the visual impact. It feels intentional and high-fashion.
Pro tip: Matte and glossy finishes sometimes don’t blend seamlessly where they meet, so embrace that line as a design element rather than trying to hide it.
18. Glitter Gradient Coffin Nails in Birthday Colors
Choose two complementary birthday colors — perhaps pink and gold, or silver and blue — and create a gradient where one color transitions to the other, both with glitter elements. The glitter intensifies toward the tips, creating maximum sparkle where light hits. It’s dimensional, colorful, and obviously festive.
Building a Two-Color Glitter Gradient
- Apply your first color (say, light pink) to the entire nail and cure
- Apply your second color (say, gold) only to the tip section
- Before curing, use a sponge to blend where the two colors meet
- Add fine glitter mixed with gel, intensifying the sparkle toward the tips
- Seal with glossy top coat that amplifies the glitter effect
Color Combinations That Work
- Pink to gold (warm and celebratory)
- Silver to purple (cool and glamorous)
- Peach to coral (warm and energetic)
- Nude to rose gold (subtle and sophisticated)
Worth knowing: Light colors show glitter better than dark colors, so if you’re doing a dark-to-light gradient, add glitter primarily to the lighter section.
19. White with Rainbow Confetti Tips Coffin Nails
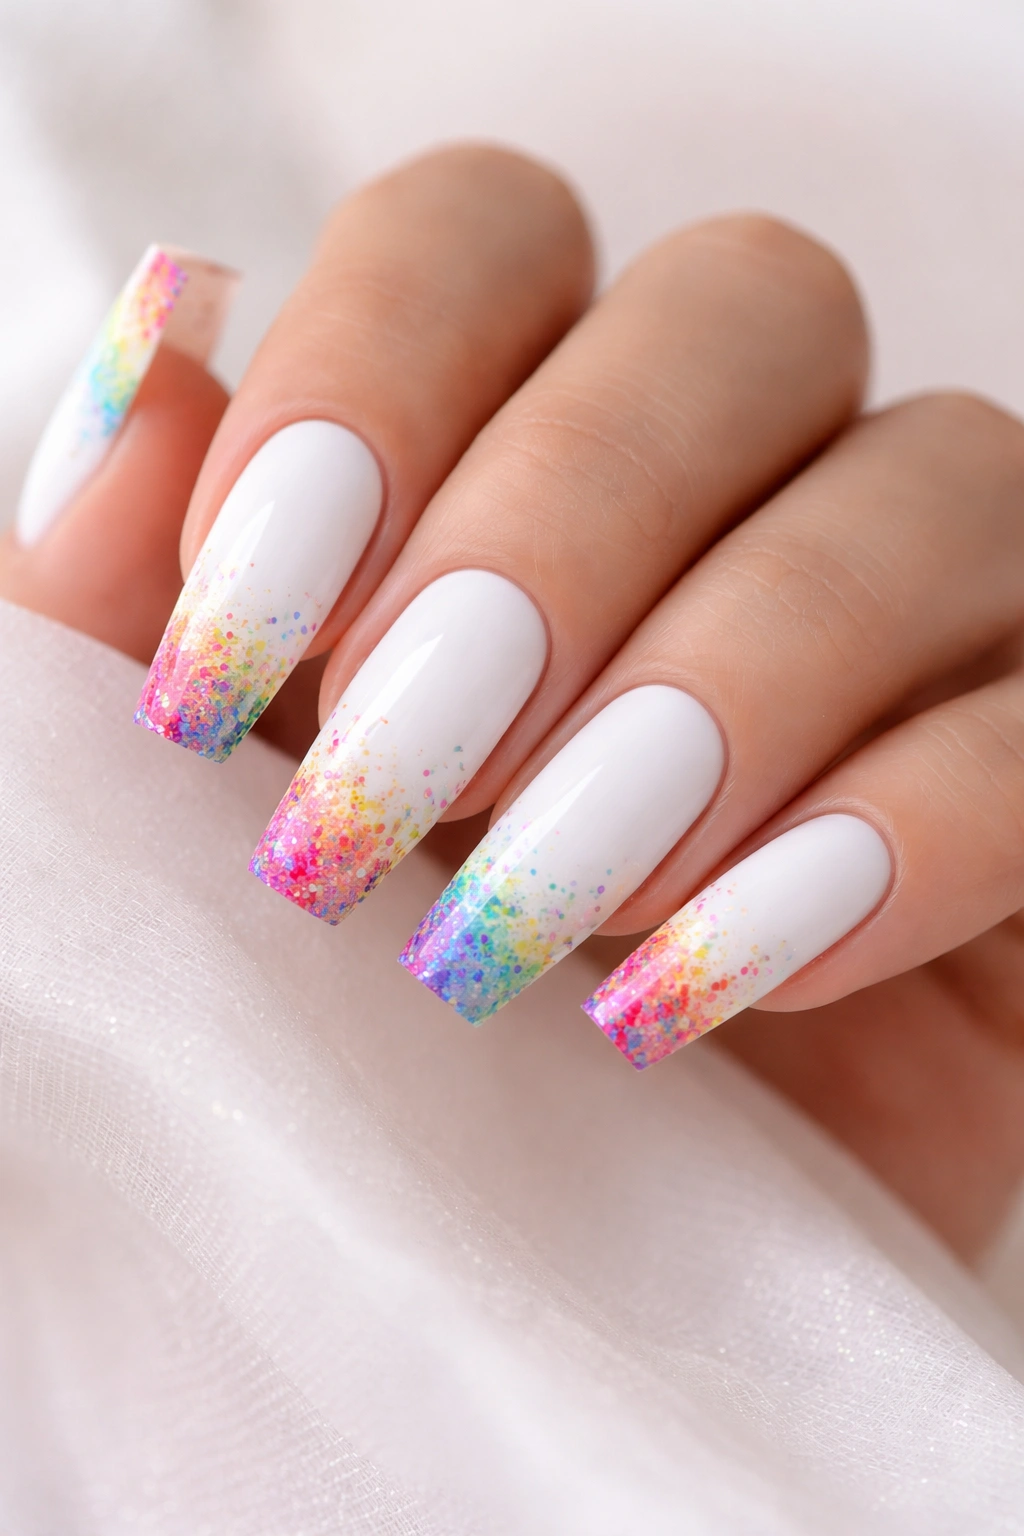
Use a crisp white base with rainbow confetti concentrated at the tips only, creating a dip-dye effect where white transitions to colorful. The white keeps it clean and modern while the confetti tips add obvious birthday celebration. It’s balanced, not overwhelming, yet still clearly festive.
Creating the Confetti Concentration
- Apply smooth white base to all nails and cure
- Scatter confetti pieces primarily across the tips (bottom third of the nail)
- Leave the cuticle and base areas mostly white with just a few scattered pieces
- This gradient of confetti density creates a natural dip-dye look
Why This Design Is So Wearable
Pure white is sophisticated and modern. Adding confetti at the tips only keeps it work-appropriate and balanced. The white space allows your eyes to rest while the confetti tips provide the celebration element. It’s perfect for people who want to acknowledge their birthday without full-on party nails.
Pro tip: Use multiple confetti colors for visual interest, but keep them coordinated (pastels together, or metallics together, rather than mixing very different color families).
20. Champagne Chrome with Birthday Gem Centerpiece Coffin Nails
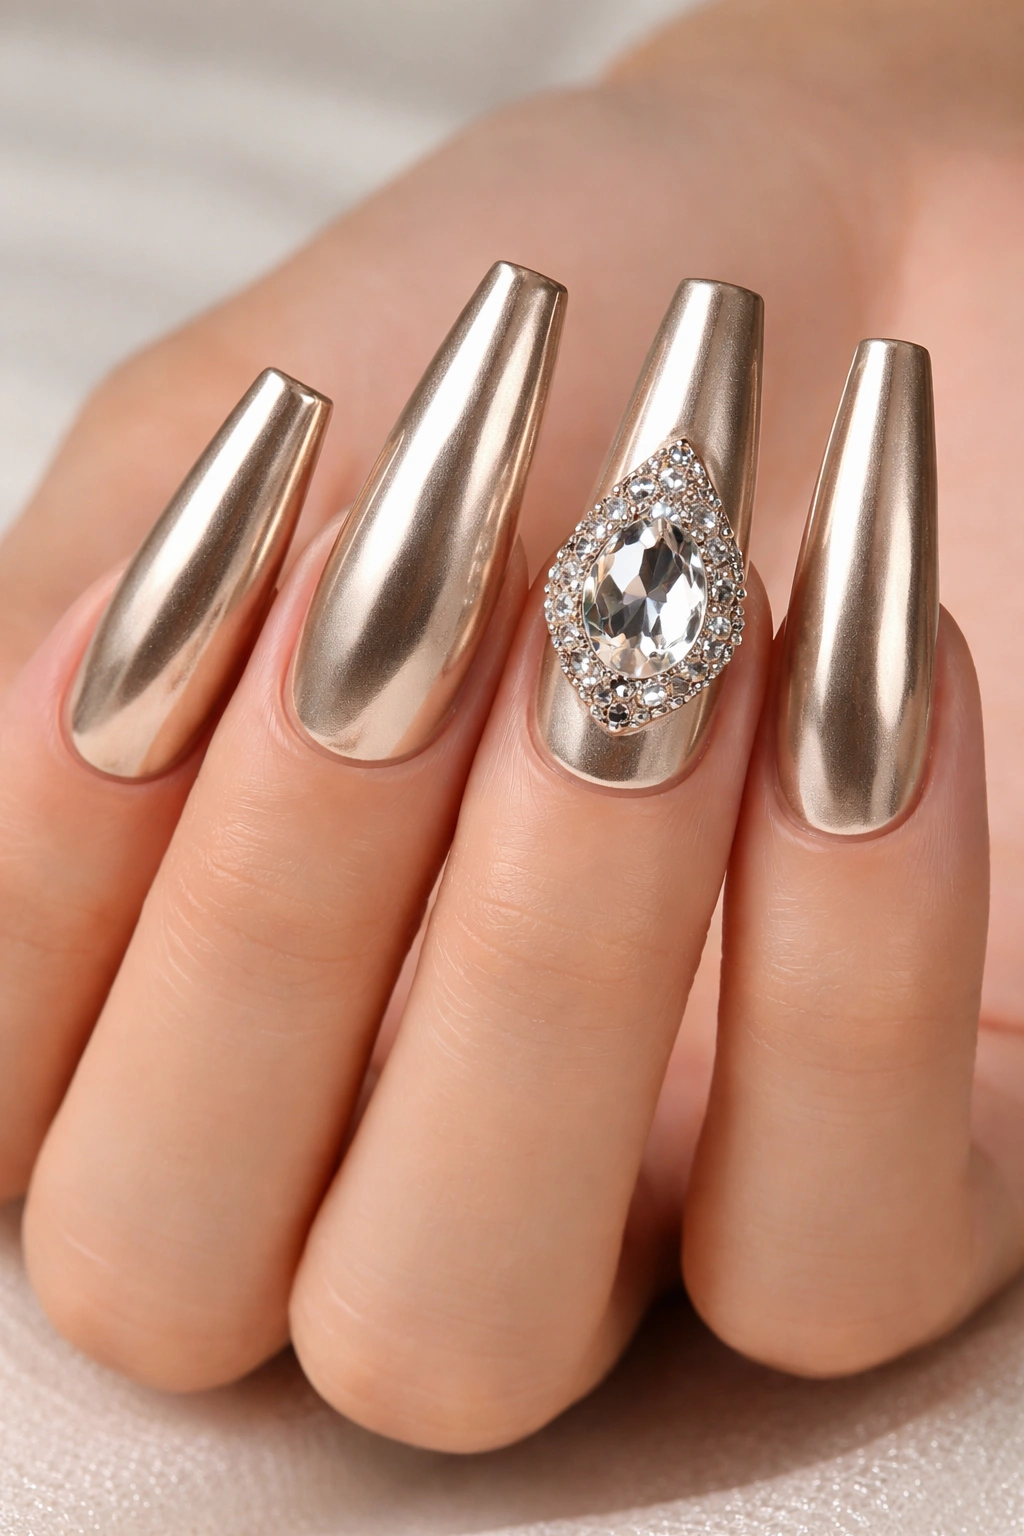
Apply a luxurious champagne chrome base on all nails, then add one large statement gem or crystal centered on one accent nail. The chrome catches light beautifully while the single gem focal point adds glamour without overwhelming. It’s understated luxury meets celebration.
Choosing Your Centerpiece Gem
- Select one oversized crystal in a color that complements the champagne chrome
- Popular choices include crystal (clear AB that shows all rainbow colors), rose gold, or blush tones
- Position it centered on your ring finger or middle finger accent nail for maximum visibility
Why This Design Feels Elegant
Champagne chrome is inherently luxurious and sophisticated. Adding one focal-point gem instead of covering the nail with gems keeps it refined. It reads as intentional and curated rather than overdone. The single gem draws the eye without creating visual chaos.
Worth knowing: One large statement gem actually looks more expensive and intentional than covering the nail with many smaller gems.
Final Thoughts
Birthday coffin nails are your chance to make a statement and celebrate yourself with confidence. Whether you choose a design that’s subtle and sophisticated like gold foil accents, or bold and unapologetic like neon ombre, your nails should make you smile every time you look at your hands. The coffin shape itself commands attention, and these twenty designs showcase just how versatile and stunning that shape can be across the full spectrum of birthday styles.
The most important thing is choosing a design that feels authentically you — whether that’s glittery and playful, elegant and refined, artistic and colorful, or some beautiful combination. Long coffin nails give you the luxury of surface area to play with, so take advantage of that canvas. Paint something that makes you feel celebrated, confident, and ready to enjoy every moment of your special day.
