

Red and gold coffin nails have a way of making every hand movement look more deliberate. Reach for a coffee, tuck your hair behind your ear, sign the receipt at dinner—suddenly your manicure feels like part of the outfit instead of an afterthought.
That color pairing does a lot of heavy lifting. Red brings depth, heat, and drama, while gold adds edge, contrast, and a little flash right where the eye lands first. On a coffin shape, with its long tapered sides and flat tip, the mix looks sharper than it does on short square nails and cleaner than it often does on almond.
Small design choices matter more than most people expect. A blue-toned crimson can make gold foil look bright and crisp, while a tomato red next to yellow gold feels warmer and louder. Put thick glitter across the free edge and the nail can look shorter; run a slim metallic line down the side and the same nail suddenly looks longer.
That’s why a good red-and-gold set isn’t only about picking two colors you like. Placement, finish, and scale decide whether the manicure feels sleek, rich, playful, or a little too busy.
Choosing Red and Gold Coffin Nails That Fit Your Hands
Red and gold is less forgiving than people think. When it’s done well, it looks polished and expensive. When the balance is off, the set can tip into clutter fast—especially on coffin nails, where the shape already has a strong silhouette.
Start with the red. Blue-reds, cherries, and deep rubies tend to look cleaner with crisp gold chrome or thin metallic striping. Brick red, rust, chili, and warm crimson sit better beside yellow-gold foil, glitter, or antique gold accents. If your skin has more golden or olive tones, warmer reds often melt into the hand in a flattering way. If your skin pulls cool or pink, wine and ruby usually look more intentional.
Length matters too. A medium coffin—roughly 1/4 to 1/2 inch past the fingertip—gives you enough room for art without turning every design into a billboard. Short coffin nails can still carry red and gold, but they need tighter placement: micro-French edges, a cuticle crescent, a slim vertical stripe, one accent nail. Long coffin sets can handle marble, chains, layered foil, and mixed finishes because the eye has room to sort the details.
Gold also comes in more than one mood.
- Gold foil looks irregular, textured, and a little raw.
- Gold chrome gives a mirror flash that reads sharp and dressy.
- Gold glitter softens the look and feels more playful.
- Metallic gold gel paint is the cleanest option for lines, stars, and frames.
- Studs or charms add texture, though they snag more than flat art.
I’d also decide early whether you want all ten nails fully designed or a cleaner set with two or three focal points. Most people wear the second option better in daily life.
Prep Work That Keeps a Coffin Set Crisp
Your manicure can leave the salon looking razor-sharp and still start lifting at the corners a few days later. That usually isn’t about the color. It’s prep, structure, and what your hands deal with once you walk out the door.
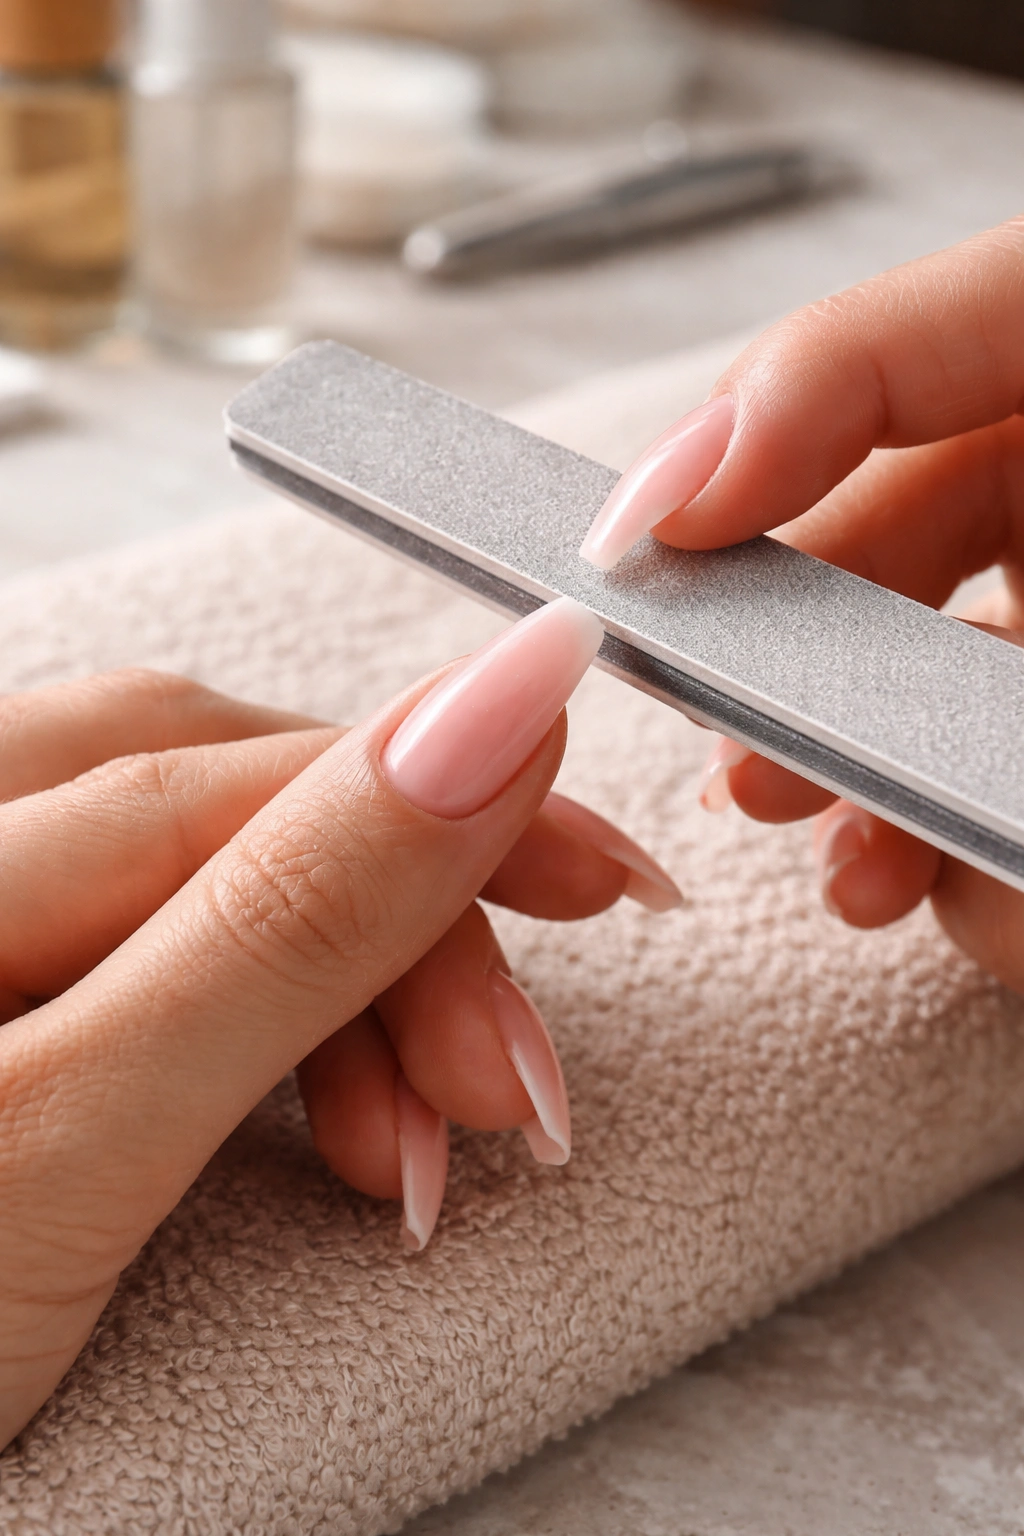
Ask for the sidewalls to stay straight through the middle of the nail, then taper near the tip. A lot of rushed coffin shapes drift too close to stiletto, which makes red polish look harsher and throws off French or outline designs. The free edge should stay flat, not rounded, or the whole style loses that coffin finish.
Before polish, the surface needs to be clean and properly etched—but not over-filed. If you use press-ons, size them so each tip reaches sidewall to sidewall without pressing into the skin. A too-small press-on leaves little gaps near the edges, and red makes those gaps obvious.
After the appointment, do the boring stuff. It helps.
- Use cuticle oil once or twice a day. Dry skin makes every manicure look older.
- Wear gloves for dishes and cleaning. Hot water plus detergent is rough on glue, polish, and your skin.
- Don’t use nails as tools. Soda cans and shipping boxes take chunks out of corners fast.
- If you wear press-ons, adhesive tabs usually give you 2 to 3 days; nail glue can hold 7 to 10 days if prep is solid.
- Skip bulky charms if you type all day or reach into pockets often.
One more thing—because I see this go wrong a lot. If your gold detail sits on top of a thick lumpy base, no top coat will hide it. Red polish shows thickness, ridges, and uneven sidewalls faster than pale nude ever will.
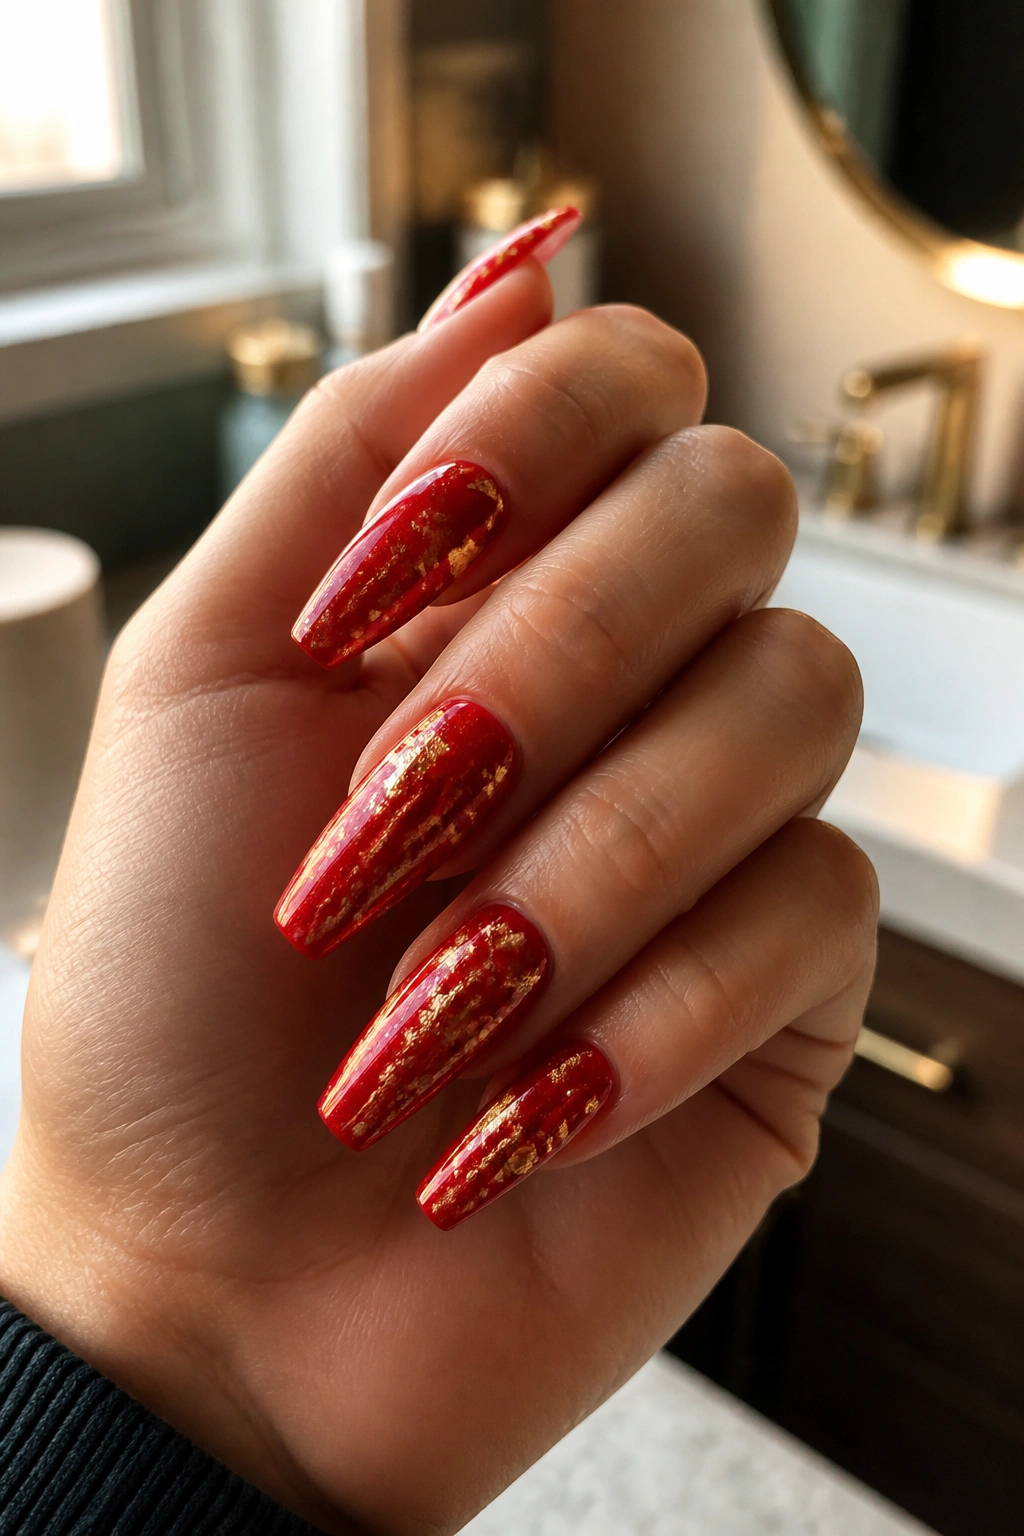
1. Classic Glossy Red and Gold Coffin Nails
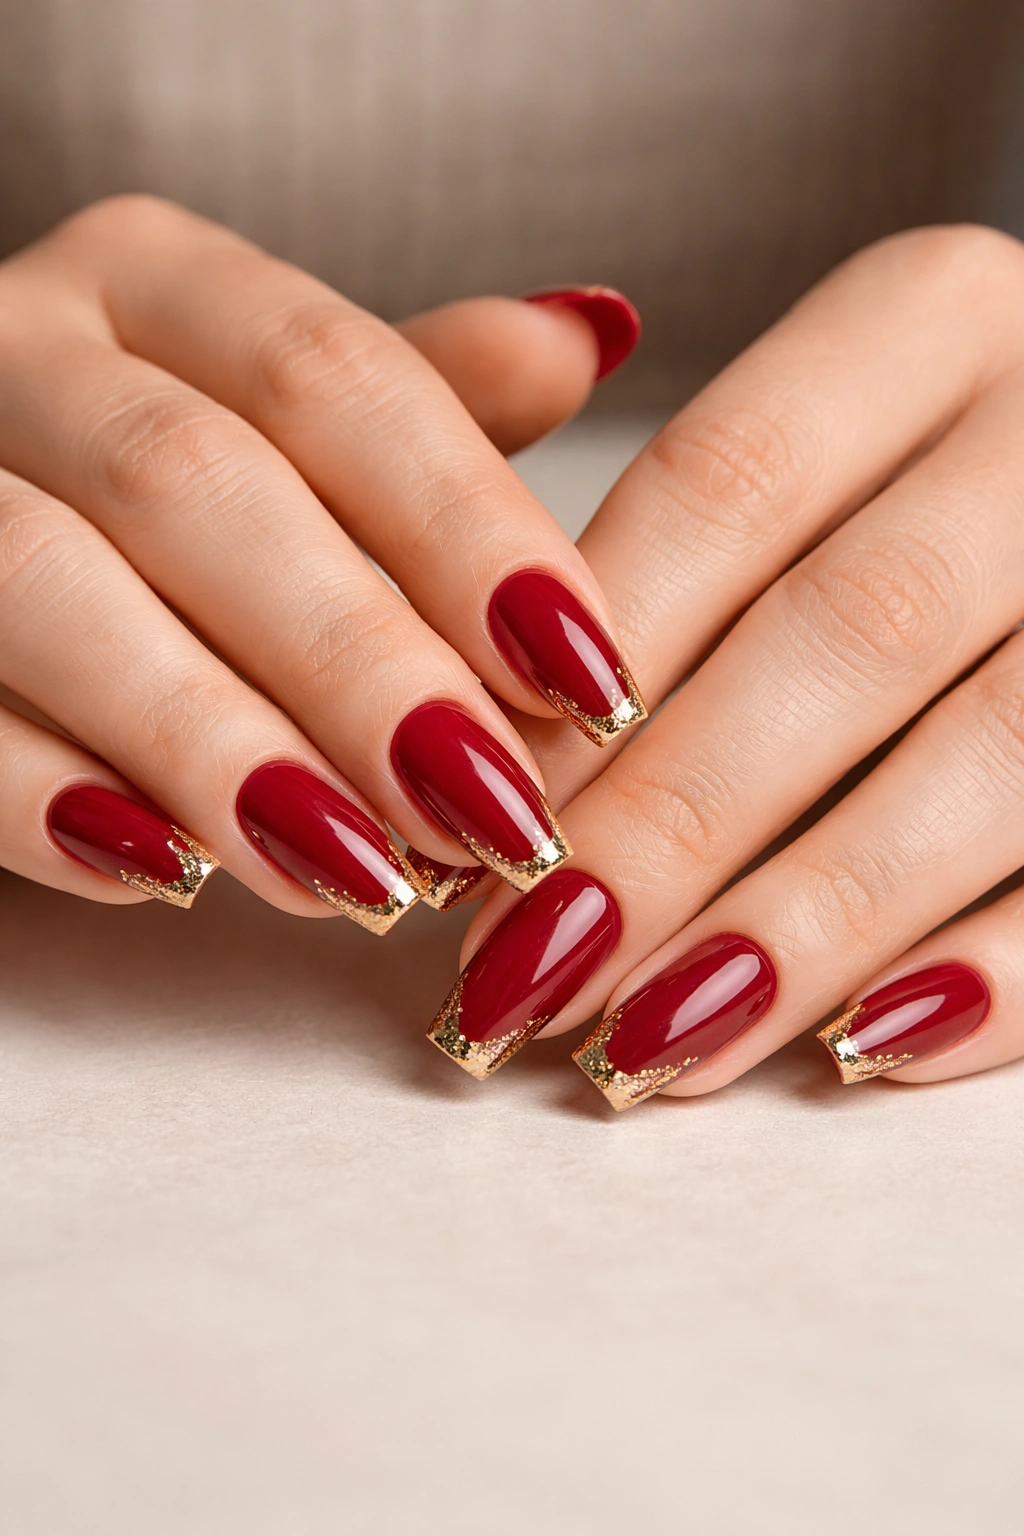
A glossy red base with gold foil at the tips is the kind of manicure that keeps earning repeat appointments. There’s nothing fussy about it. You get the bold hit of red first, then a torn, metallic edge that looks a little imperfect in the best way.
Why this design lands so well
Gold foil works because it breaks the line of the tip without adding bulk. On coffin nails, a 3 to 5 millimeter foil band across the free edge gives enough shine to catch the eye while keeping the taper visible. Go thicker than that on a medium-length nail, and the tip can start to look heavy.
I like this set most in true cherry red or blue-red gel, finished with a glassy top coat. That wet-look shine makes the foil seem embedded instead of pasted on. If your nail tech presses foil into a thin layer of uncured clear gel and caps it well, the surface stays smoother too.
Quick details to ask for
- Use transfer foil or loose leaf foil, not chunky gold glitter.
- Keep the foil denser at the center of the tip and lighter toward the corners.
- Ask for one or two full red nails with no foil to give the set a visual pause.
- Choose a short-to-medium coffin length if you want this to feel clean, not loud.
Best move: keep the gold irregular. Straight foil lines can look stiff, and stiffness is the enemy of this design.
2. Deep Ruby Base With Thin Gold French Edges
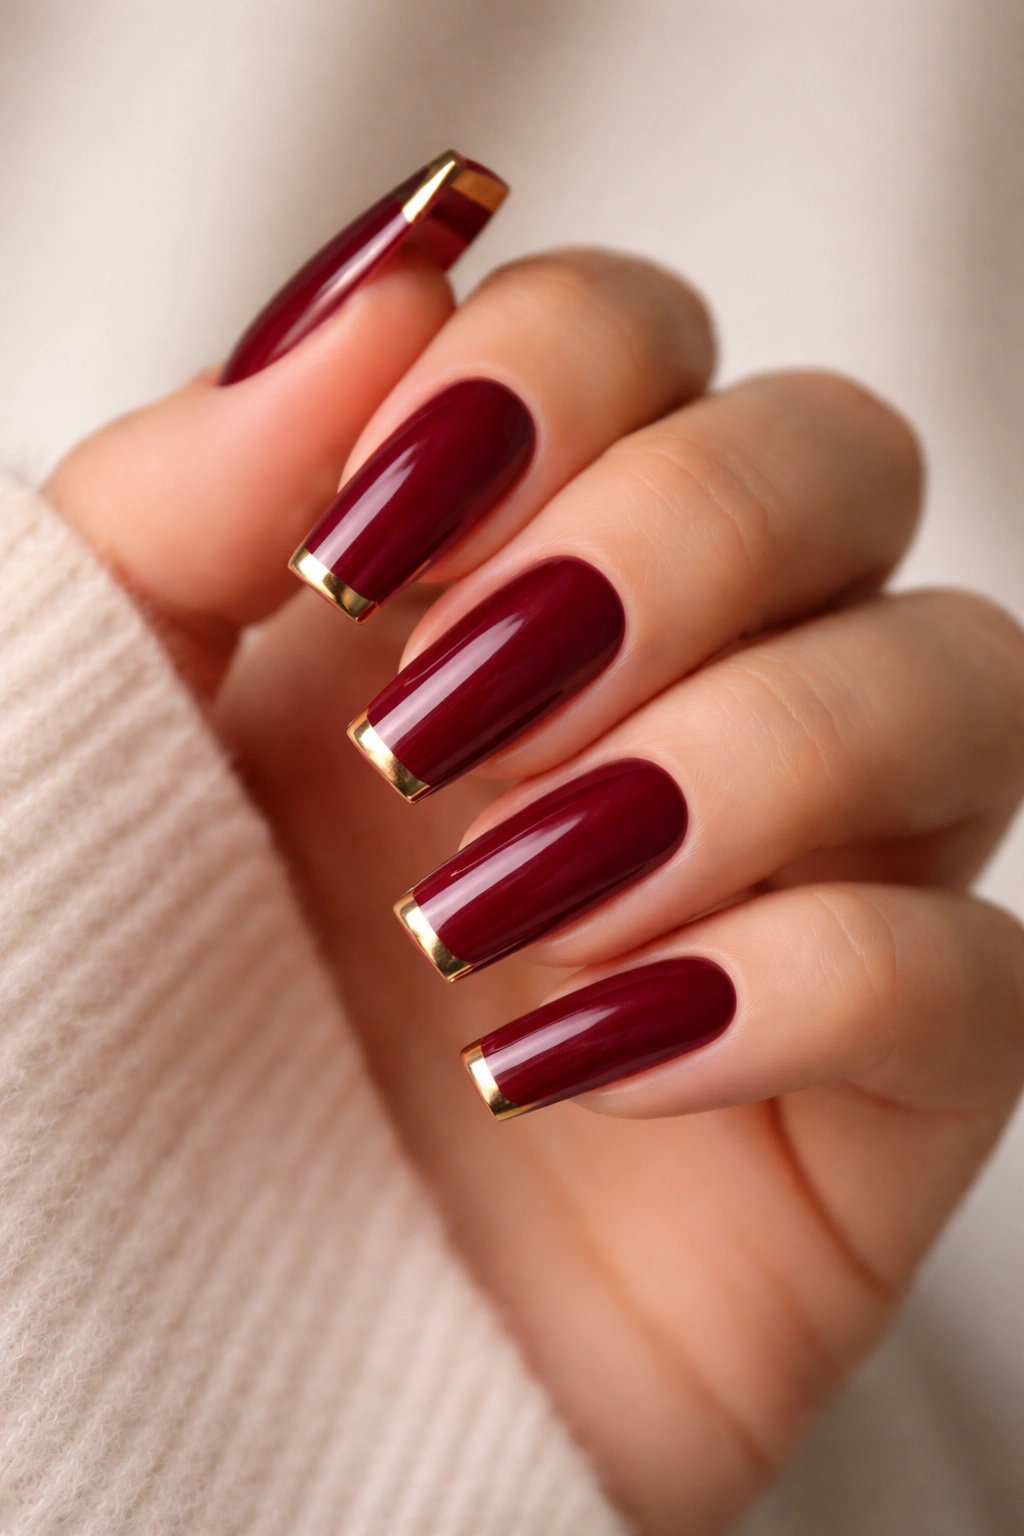
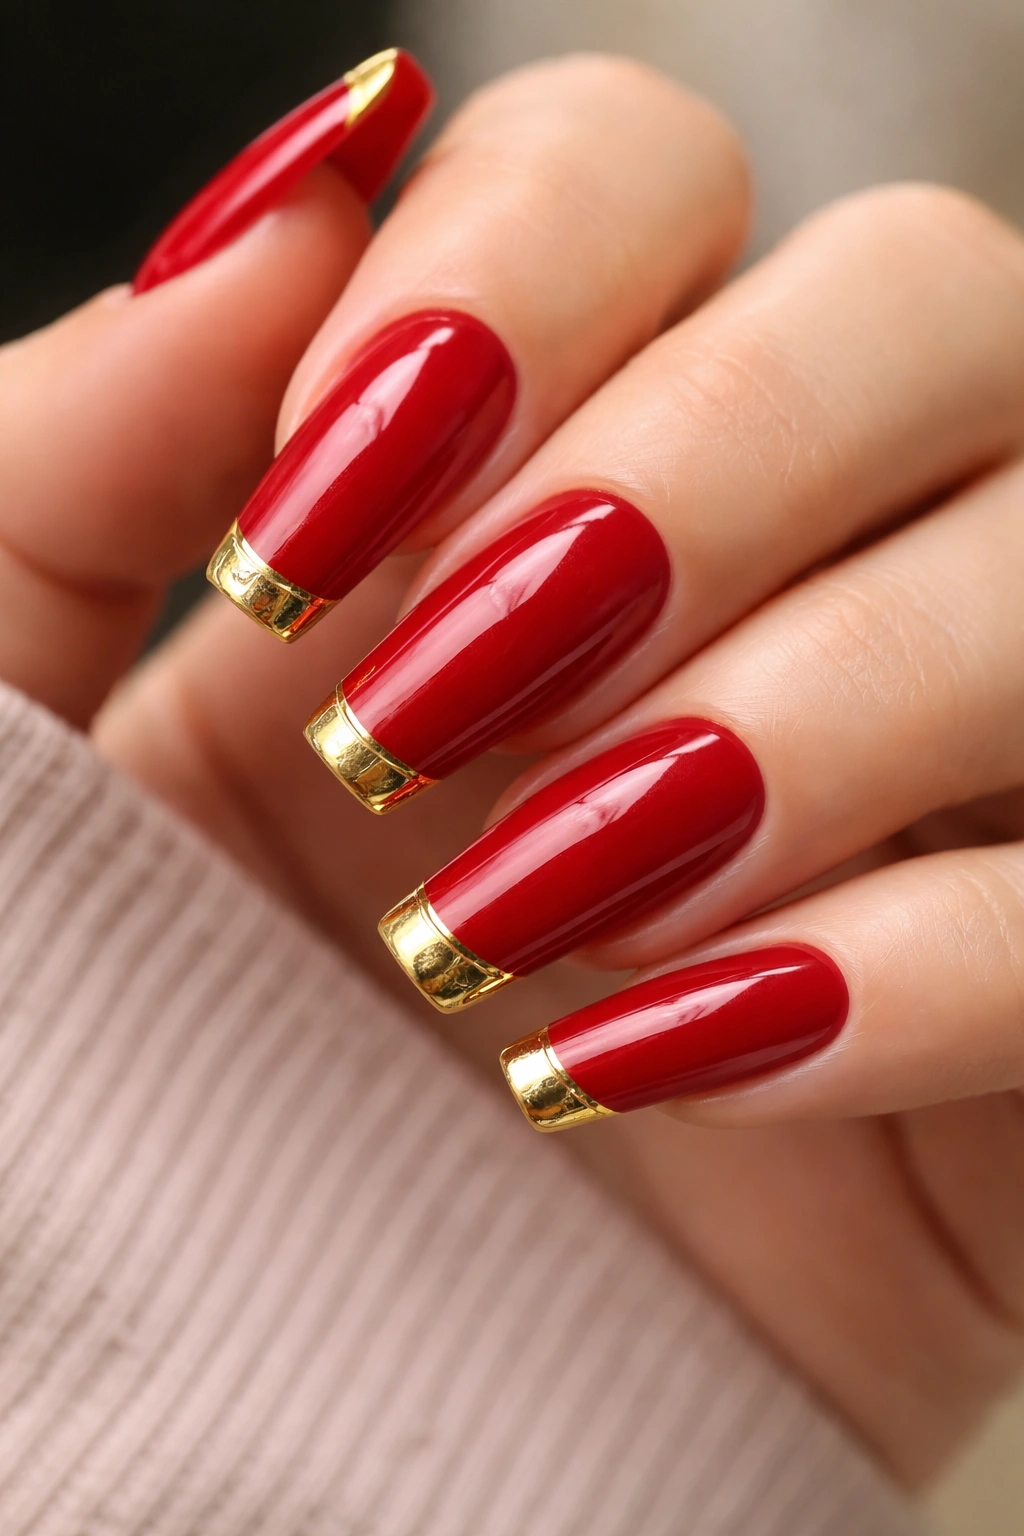
If you want red and gold without the weight of a full metallic tip, this is the set to book. A thin gold French line over a deep ruby base reads crisp, almost tailored, and it flatters shorter coffin lengths better than bulky glitter ever will.
The trick is scale. That gold line should stay fine—around 1 to 2 millimeters—and hug the squared tip cleanly. When the line gets too thick, you stop seeing the ruby base as the star. You start seeing a gold tip with red underneath, which is a different mood altogether.
Ruby is a smart choice here because the darker base lets the gold line stand out without looking cartoonish. Bright fire-engine red can work, though it pushes the look into something punchier and more playful. Deep ruby, oxblood, or garnet keeps it sleeker.
This style also wears well in real life. Chips at the edge show less than they do with a dense block of gold, and grow-out is easier to ignore because the design stays focused at the tip. Office-friendly, dinner-friendly, wedding-friendly—it covers a lot of ground without looking timid.
A small note from hard experience: make sure the smile line doesn’t dip too low at the sides. On coffin nails, a low curve can make the width look boxy.
3. Red Velvet Matte With Cuticle Gold Arcs
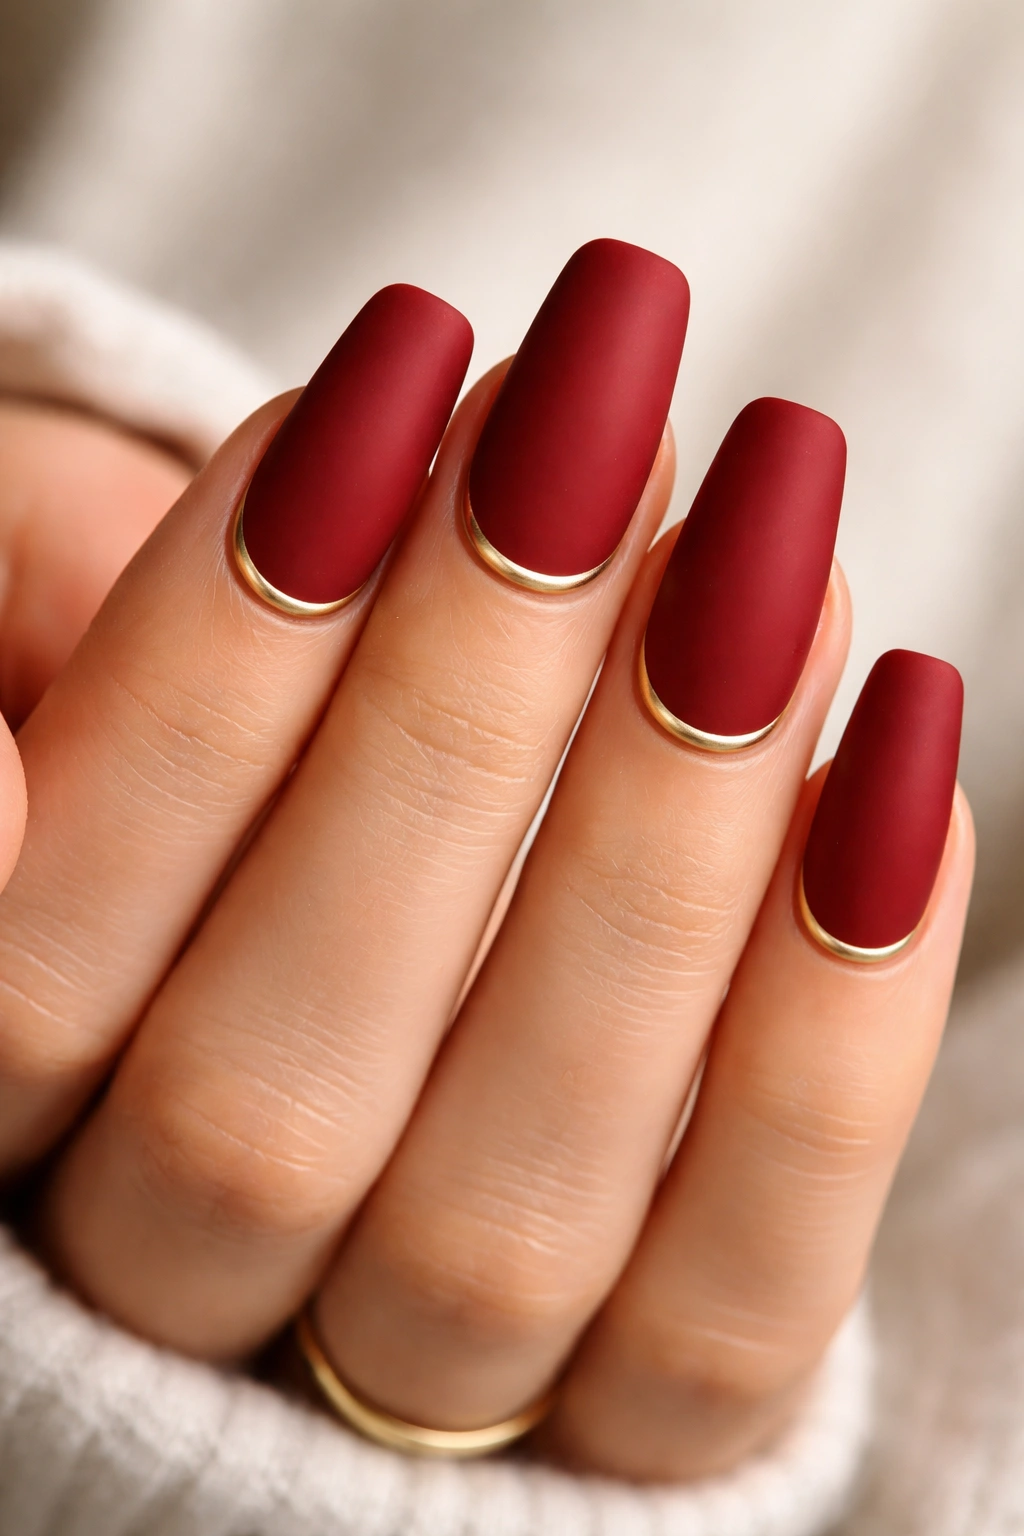
Why does a matte red set with gold near the cuticle feel so different from a gold tip? Because it shifts the light upward. Instead of drawing the eye to the end of the nail, the gold frames the base and makes the whole manicure feel more editorial.
Matte top coat changes red in a big way. Glossy scarlet looks juicy and bright. Matte scarlet can read softer, denser, almost like velvet ribbon. Add a slim gold crescent at the cuticle—usually painted in metallic gel or built with a curved striping brush—and you get a manicure that feels dressed up without needing stones or charms.
This works best on medium and long coffin shapes. The cuticle arc needs breathing room, and the flat tip balances the softness of the matte surface.
How to wear it well
Ask for the cuticle arc to stay thin and slightly lifted from the skin line, not pressed flush into it. That tiny sliver of red between the skin and the gold keeps the manicure looking clean as it grows out. I’d also avoid mixing matte, gold arcs, and glitter in the same set. Matte already changes the texture enough.
One drawback: matte top coats show wear sooner. Hand cream, oil, and daily friction can add shiny spots by the end of the first week. If you like a manicure that stays fresh-looking for longer, choose deeper burgundy instead of bright red; wear marks show less.
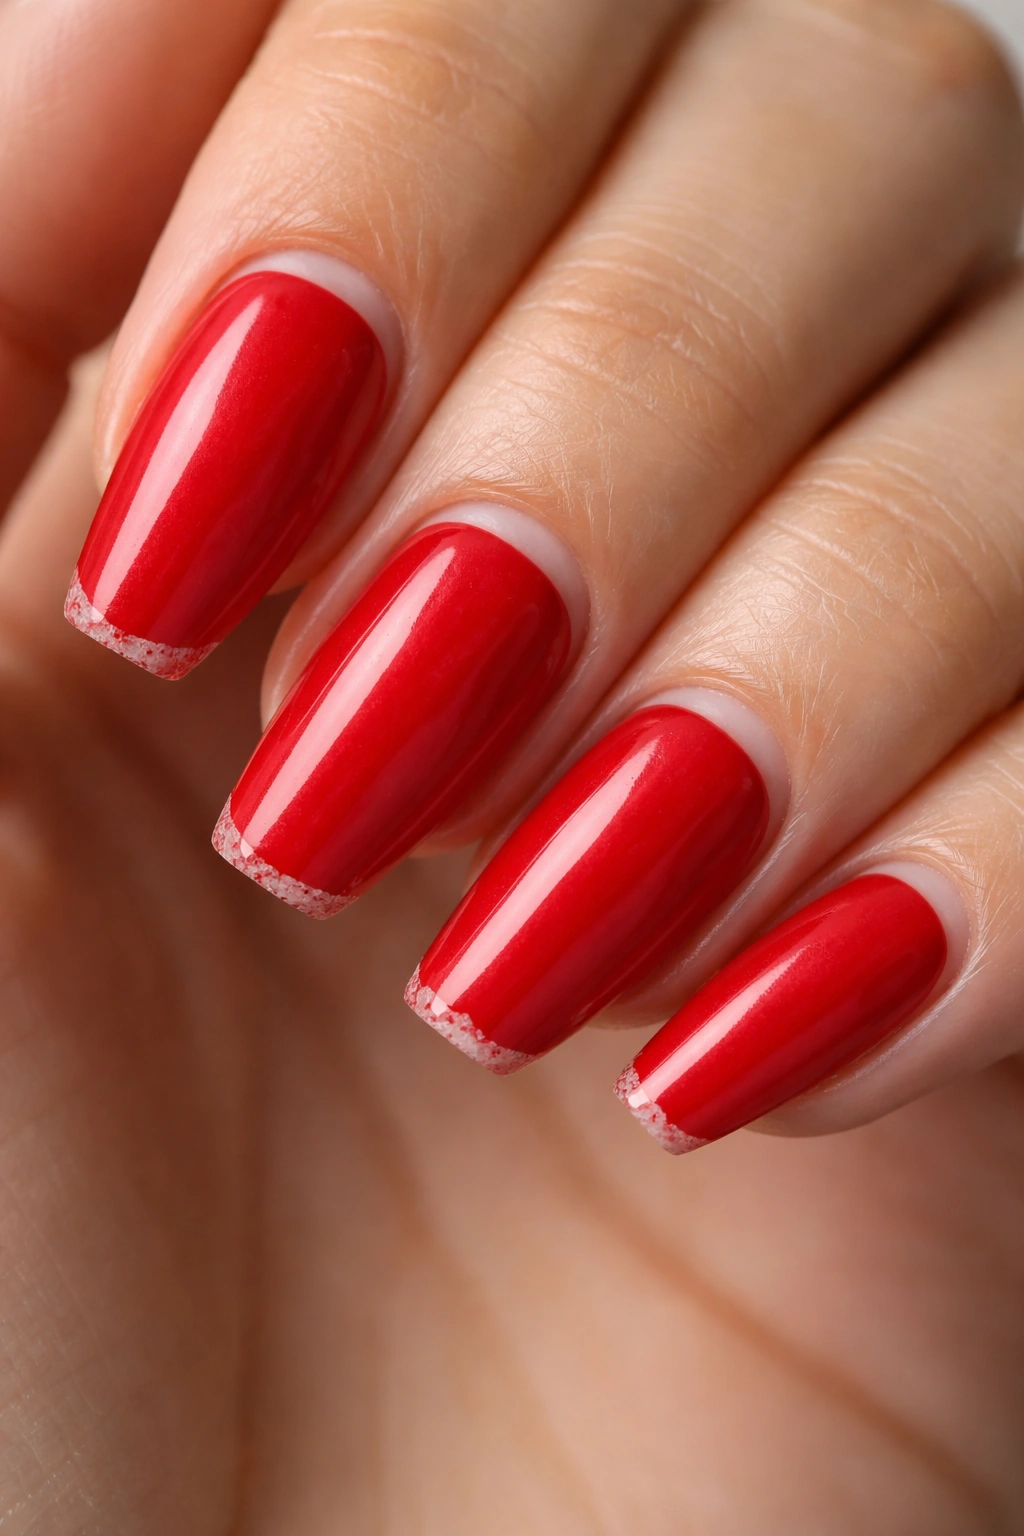
4. Candy Apple Red With Gold Chrome Accent Nails
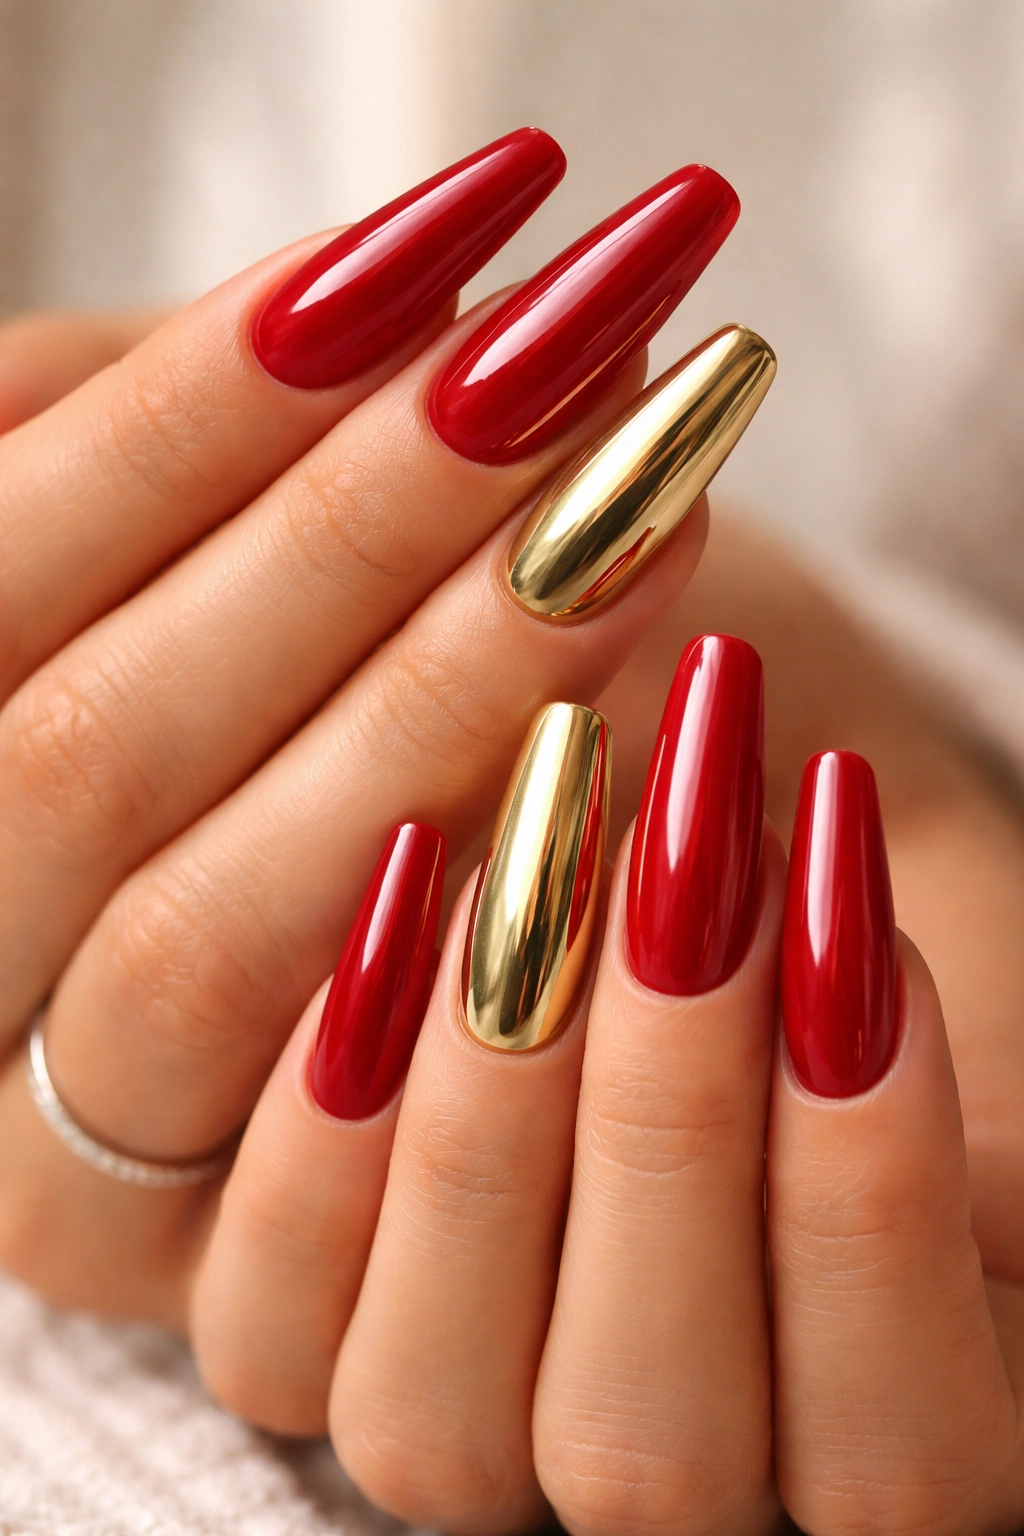
Picture a full set of candy apple red coffin nails, glossy enough to throw a hard reflection, with two gold chrome accent nails—usually the ring finger and pinky, or ring finger and thumb. That contrast hits fast. It’s louder than foil, cleaner than glitter, and miles sharper than tossing rhinestones on every finger.
Chrome needs a smooth base. Any ridge, dip, or lumpy apex shows through the mirror finish, so this design asks more of the prep than a simple crème color does. Done right, the gold nails look almost molten under indoor light, while the red nails stay glossy and saturated.
A few placement ideas work better than others:
- Ring finger only if you want the least flash
- Ring finger and thumb if you take a lot of photos holding a drink or phone
- Ring finger and pinky for a more balanced look when your hand is relaxed
- One chrome nail per hand plus a tiny gold stripe on another nail if you want the set tied together
I lean toward this design on medium or long acrylics. On short coffin nails, a full chrome accent can overpower the rest of the set. On longer nails, it feels deliberate.
Skip cheap mirror powder here. A dull chrome finish next to candy red looks flat, almost yellow-gray, and the whole point is that flash of rich metal.
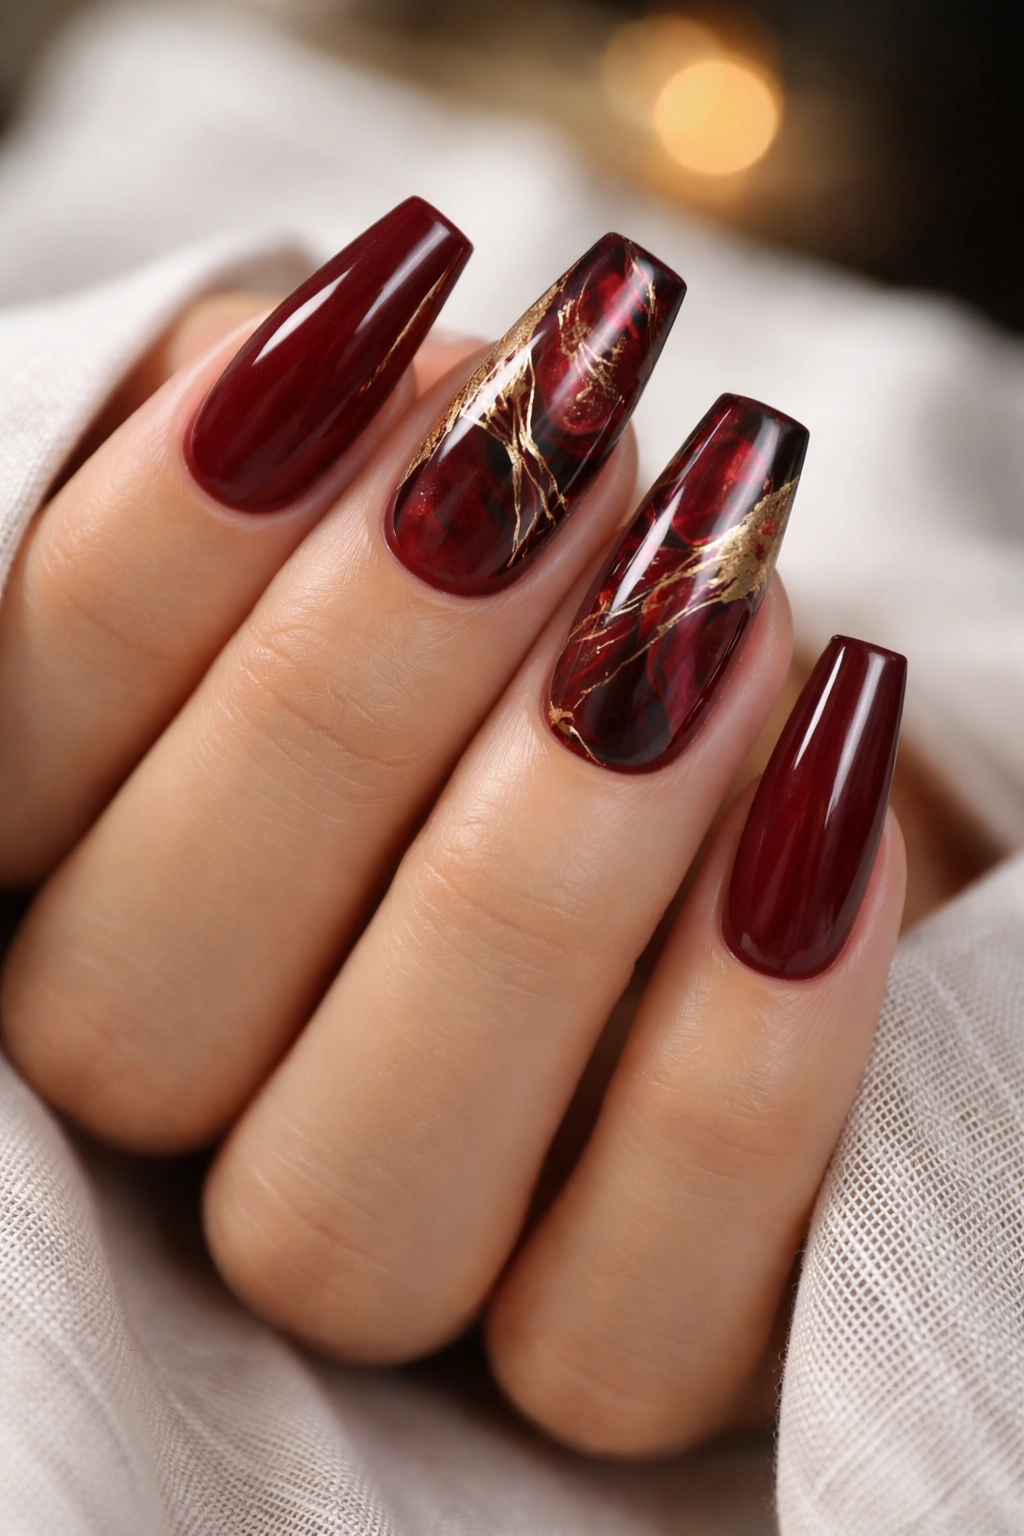
5. Burgundy Ombre With Molten Gold Veins
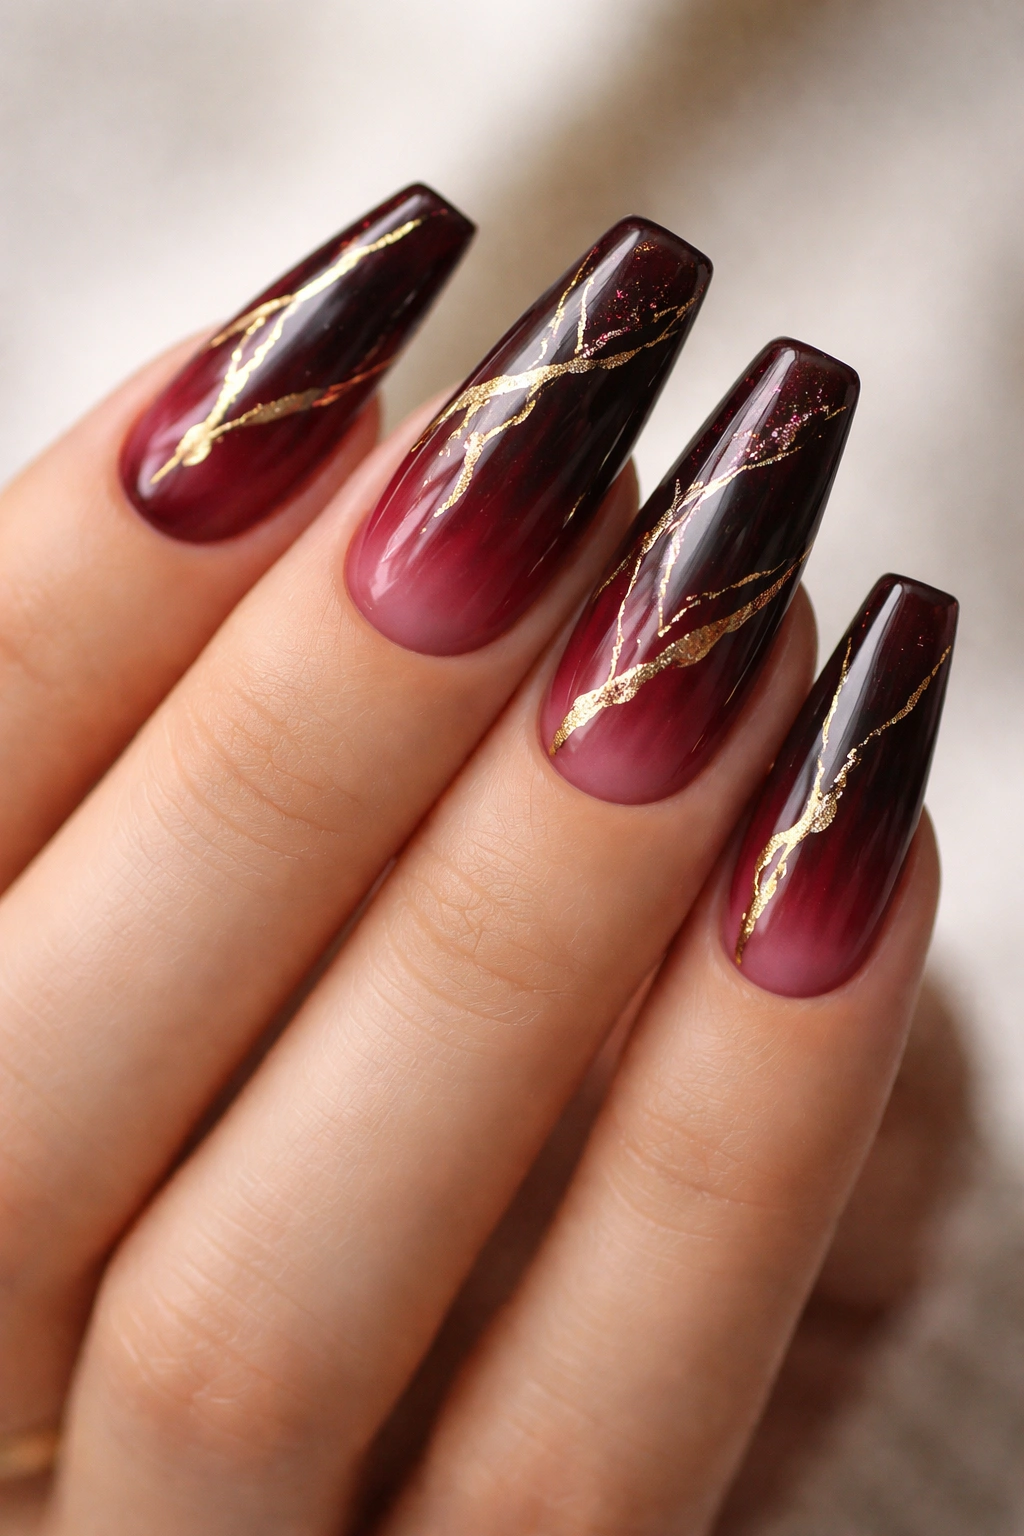
Some nail designs look best from arm’s length. This one rewards a closer look. Burgundy ombre fading into black cherry or deep plum gives the coffin shape depth, and then those fine gold veins cut through the color like liquid metal.
I love this set because it feels rich without leaning on obvious sparkle. The gold is there, but it isn’t shouting. A nail tech can create the veining with metallic gel paint, a liner brush, or foil transfer trapped inside a marble layer. Each method gives a different finish. Painted veins stay neat. Foil veins look more broken and organic. I usually prefer the second one because it keeps the set from feeling too rigid.
Placement matters. One or two strong veins per nail is enough. Three thin lines can still look intentional. More than that, and the effect starts drifting toward cracked-glass art. You lose the molten look.
This design suits longer coffin nails because ombre needs room to breathe. Aim for at least 1/2 inch past the fingertip if you want the fade and veining to read cleanly. Deep burgundy also hides regrowth better than bright scarlet, which makes this set practical in a way people don’t always expect from dramatic nails.
I would not add stones here. The texture clashes with the smooth, inky depth of the ombre. Let the gold lines do the work.
6. Scarlet Nails With Gold Starburst Details
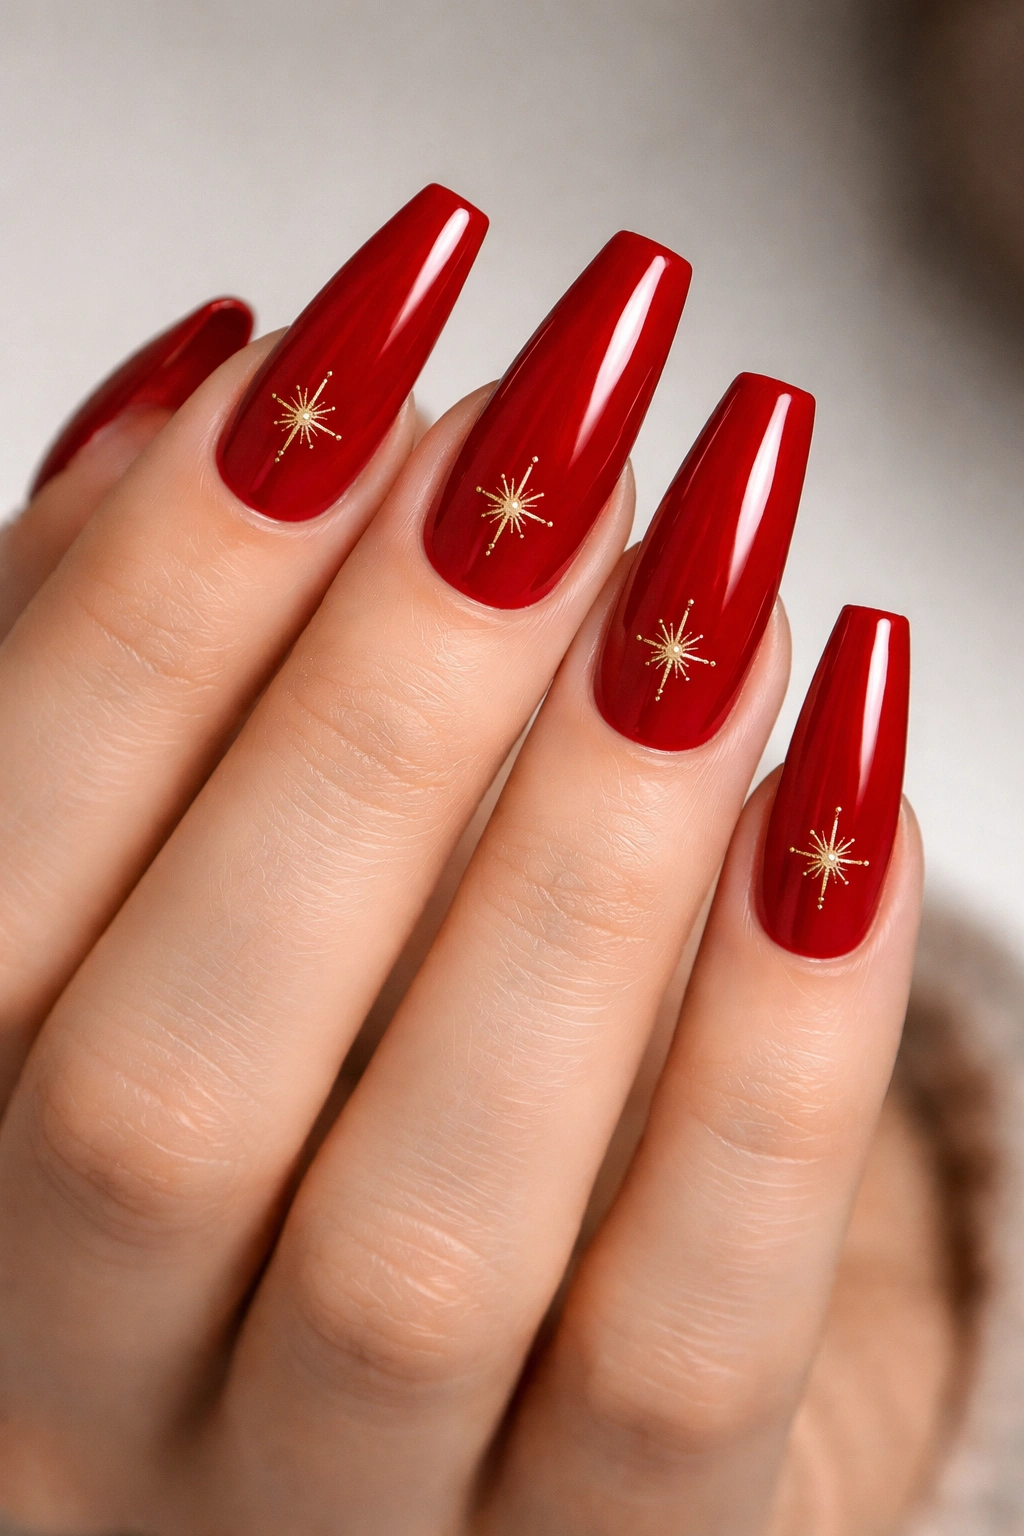
Unlike marble or foil-heavy sets, starburst nail art gives you a focal point without covering the whole nail. That’s the appeal. A scarlet base stays clean and high-impact, while a tiny gold burst near the cuticle, center, or side of the nail adds structure and a little drama.
This style leans graphic. Think of a fine metallic center point with 8 to 12 short radiating lines, sometimes finished with a tiny stud or crystal in the middle. You can wear it on all ten nails, though I think it looks better when the starbursts stay on two to four nails max. The rest can remain plain scarlet or carry a single gold dot near the cuticle.
Who does this suit? People who want detail without texture. Starbursts sit flat, which means less snagging than charms and less maintenance than beadwork.
A few design notes help:
- Put the burst off-center for a more modern look.
- Use metallic paint gel, not glitter polish, or the lines blur.
- Keep the base red bright and smooth; starbursts disappear on muddy polish.
- Pair with almond? You can. Coffin gives the art straighter edges to play against, which I like more.
You’ll need a steady hand or a nail tech with a fine liner brush. A sloppy starburst looks messy fast. Sharp lines make the whole manicure feel intentional.
7. Wine Red and Gold Marble Coffin Set
Marble can go wrong in a hurry. Too much white, too much black, too many swirls, and the nail starts looking cloudy instead of layered. A wine red and gold marble set avoids that problem by staying in a tighter palette: deep red, a little translucent depth, a touch of black or burgundy shadow, then gold threading through the movement.
Where the design gets its depth
Good marble nails don’t look flat. They have areas where the color is stronger, thinner spots where the base peeks through, and metallic lines that seem trapped below the top coat. On coffin nails, I like marble on two or three accent nails with the rest in solid wine red. Full marble across all ten fingers can get visually heavy.
The nicest versions usually use blooming gel, sheered color, or hand-pulled swirls rather than chunky mixed blobs. You want movement, not soup.
Best ways to place the gold
- Fine diagonal lines through the marble
- A broken gold edge on one sidewall
- Tiny flakes embedded inside the swirl
- A gold outline around one full marble accent nail
My take: this set looks strongest in low light and evening settings, where the wine base turns inky and the gold lines flash when you move your hands. It has mood.
8. Red Jelly Coffin Nails With Floating Gold Flakes
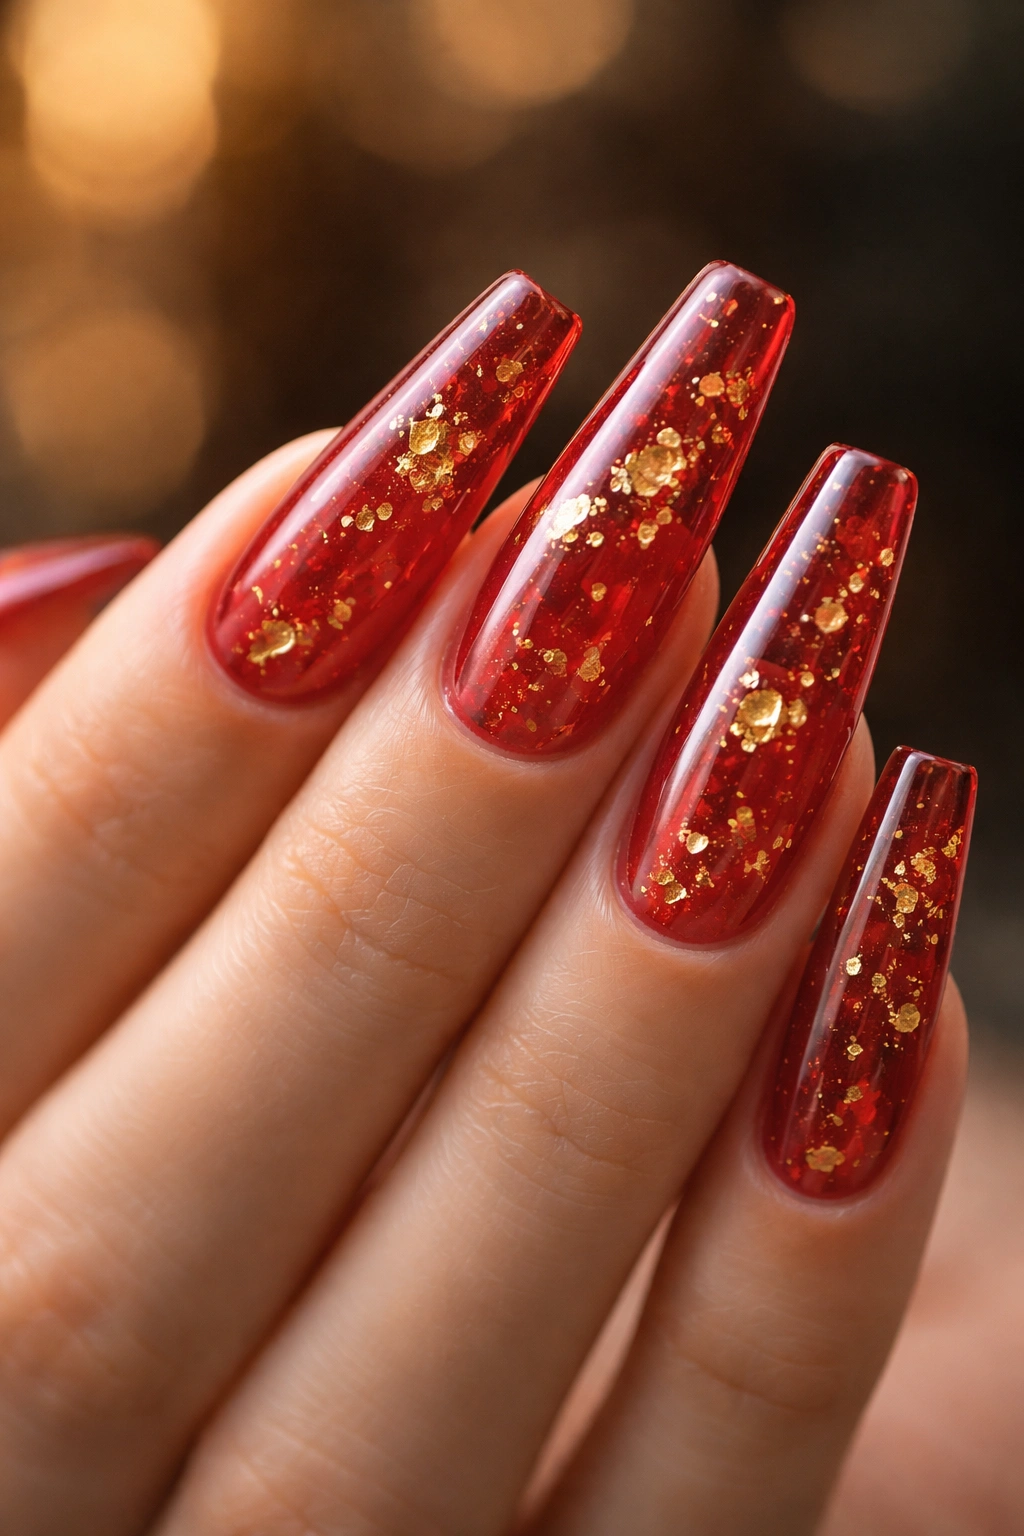
Red jelly nails can look cheap if the color is cloudy or too pink. Get the shade right, though, and they’re addictive—the translucent red lets light pass through the nail, and the gold flakes look suspended inside like bits of leaf in hard candy.
That sheer depth is what makes this design different from standard red glitter nails. You’re not looking at sparkle sitting on top. You’re seeing layers. Nail techs usually build the look with clear extension product, a tinted jelly red, and gold foil or flakes encapsulated between layers so the surface stays smooth.
Medium-long coffin nails suit this better than short ones. Short jelly nails can still be cute, though the see-through effect reads strongest when there’s enough length for light to travel through the tip. I also think this design shines most with warm cherry, candy apple, or cranberry jelly, not muddy maroon.
One caution. Encapsulated flakes add thickness fast. If the builder layer gets bulky, the nails can lose that crisp coffin side profile. Ask for flakes placed mainly through the center or lower half of the nail instead of piled at the free edge.
I keep coming back to jelly reds because they feel playful without looking childish. Gold flakes take them out of “cute” territory and give them some polish.
9. Crimson and Nude Color-Block Coffin Nails With Gold Lines
Want red and gold coffin nails that still leave a little breathing room on the nail? Go color-blocked. A nude base paired with crimson sections and slim metallic gold striping gives you contrast, clean geometry, and a manicure that looks tidy even when the design is busy on paper.
The nude matters more than people admit. Choose one that matches your skin tone closely enough to act like negative space, not a third loud color. Once that’s settled, the crimson can take over in angled blocks, half-nail diagonals, side French shapes, or a lower-corner sweep.
Gold striping is what makes the design feel finished rather than chopped up. That line can sit where nude meets red, or it can frame the edge of a single block. I’d keep the line thin and placed with intention—roughly 1 millimeter is enough. Thick striping starts to fight the red instead of separating it.
This design is a smart pick if you want nail art that still photographs cleanly. The negative space stops the set from looking too dense, which helps on medium coffin lengths. It also grows out a little more gently than a full red base.
Ask your tech to paint the red first, cure it, then add the gold striping on top with a liner brush rather than relying on metallic tape alone. Painted lines usually sit flatter and last longer.
10. Black Cherry Red With Gold Chain Art
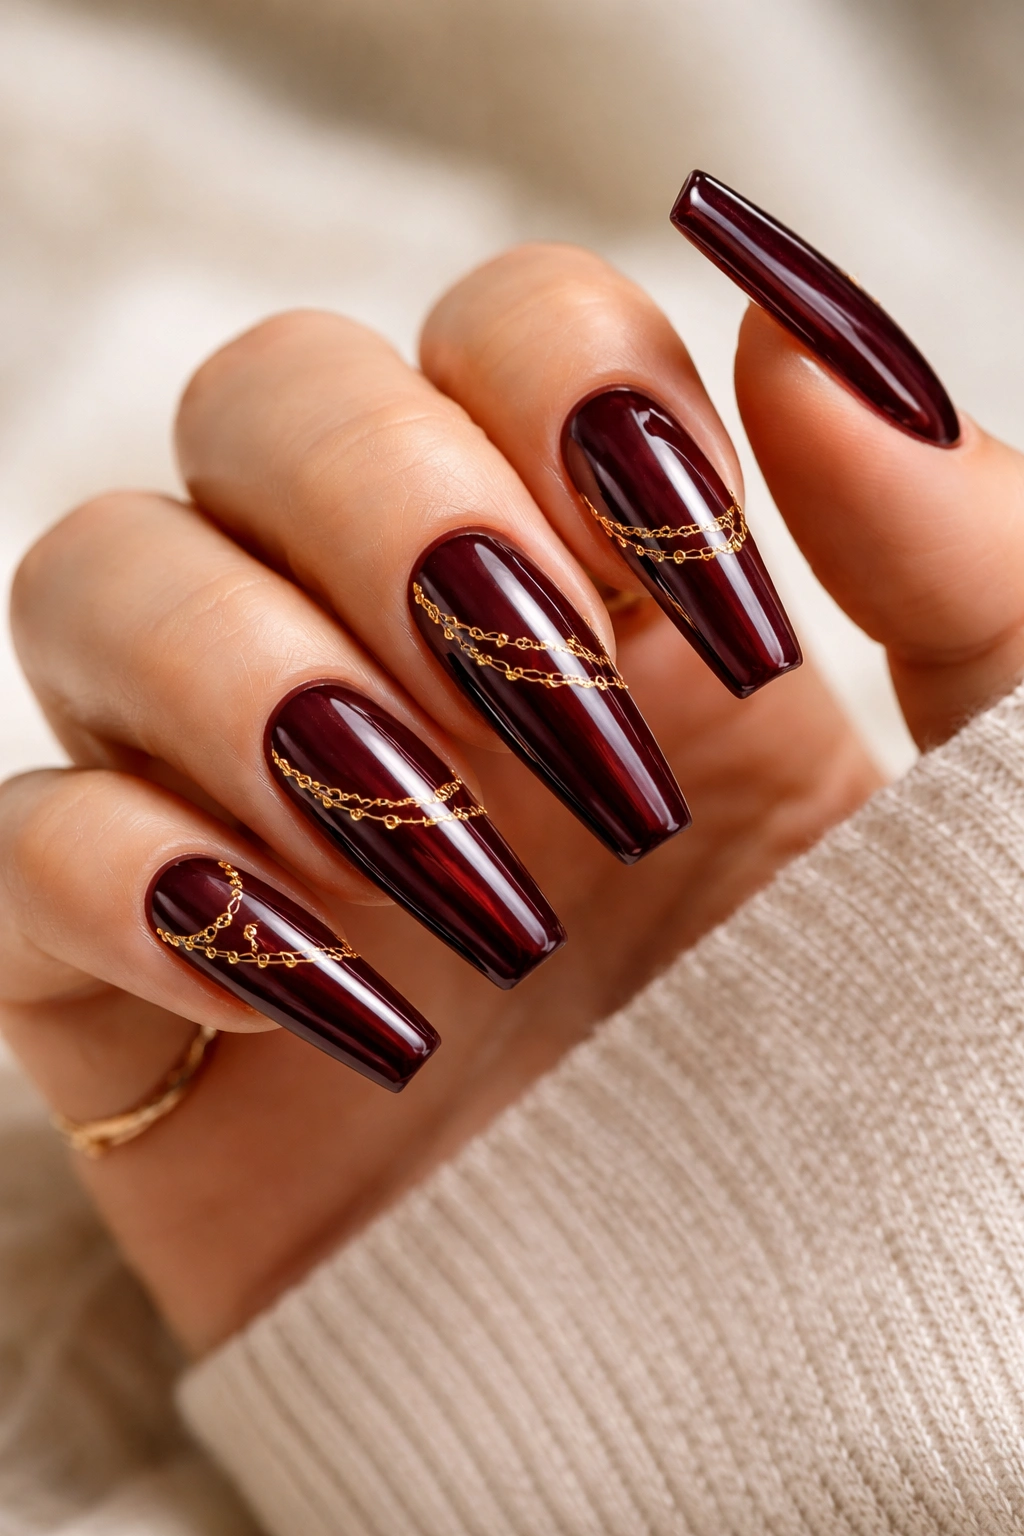
Chain art is not subtle. That’s why it works so well against a black cherry base, which already has that almost-black depth around the edges. Gold chain decals or hand-painted chain links give the manicure a jewelry feel, and coffin nails have the straight edges to make it look structured instead of random.
You do need restraint here. One chain running vertically down a nail is enough. A side-draped chain near the cuticle works too. Cover every nail with linked gold and the set crosses into costume territory fast—unless that is exactly what you want, in which case go all the way and commit.
A few placement ideas I’d actually wear:
- Single center chain on the ring fingers
- Cuticle-to-sidewall chain drape on the thumbs
- One vertical chain plus solid black cherry nails everywhere else
- Chain art with one tiny gem at the top link, not five
The best version uses flat art, not raised metal charms. Raised chain pieces catch in knits, hair, jacket linings, seat belts—you name it. Painted or decal chain motifs keep the look sharp without the daily annoyance.
This manicure has bite. If your wardrobe leans tailored, monochrome, leather, or dark denim, it slides right in.
11. Cherry Red Micro Glitter Fade With Gold Stud Corners
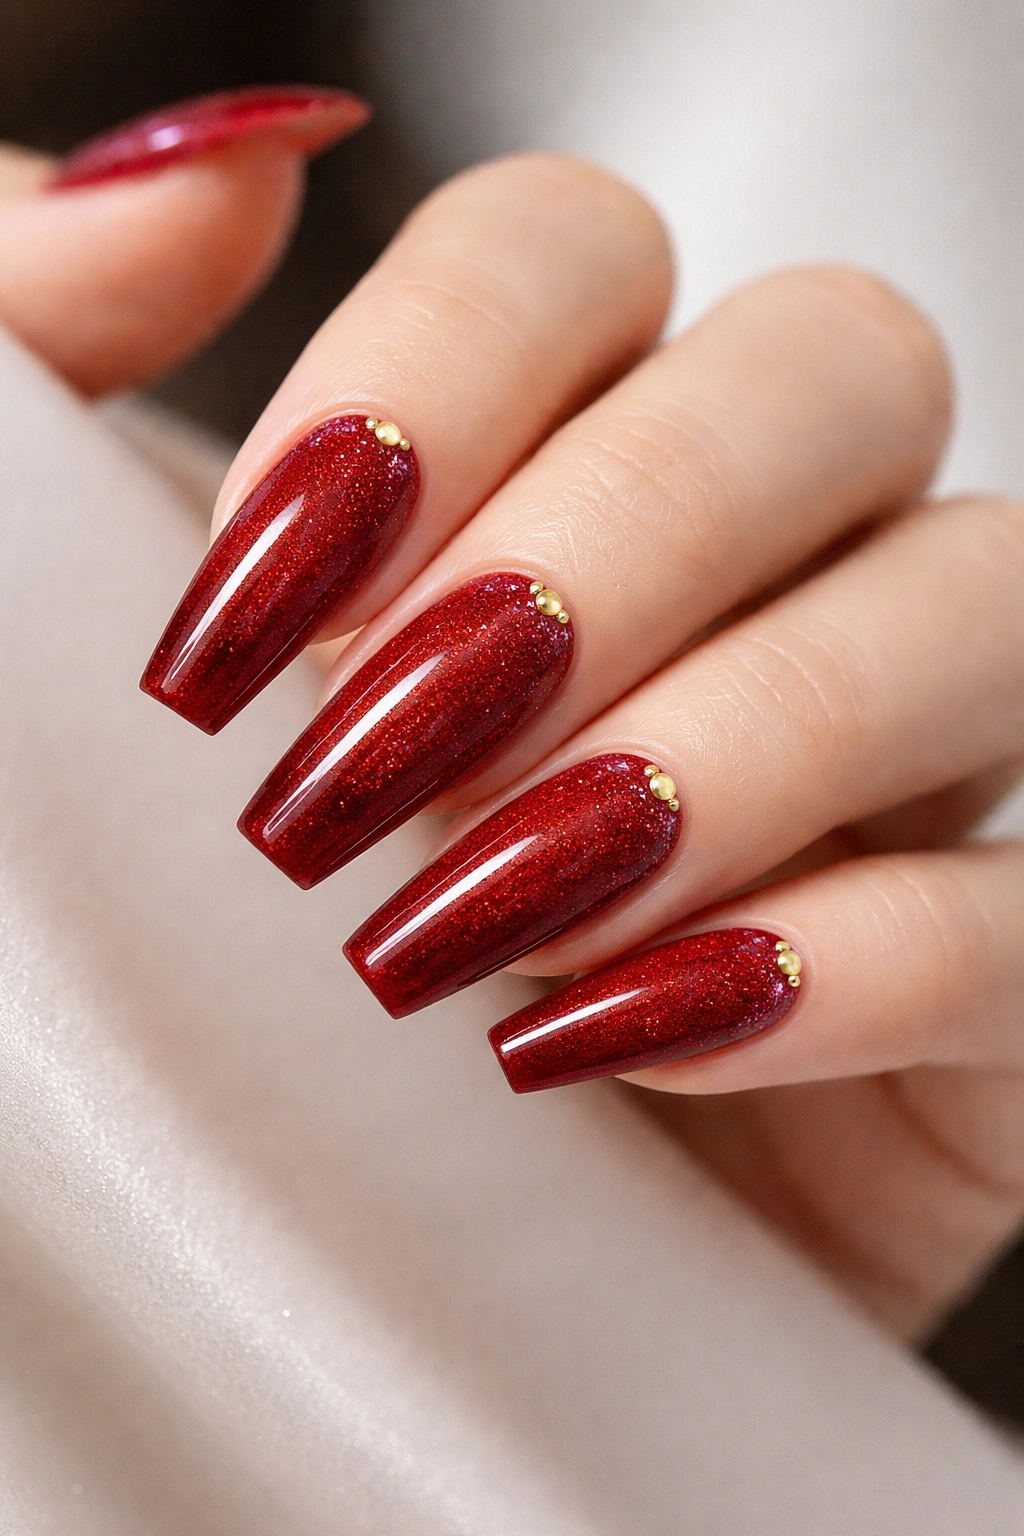
There’s a narrow line between a glitter fade that looks chic and one that looks like leftover holiday polish. The difference comes down to particle size and placement. A cherry red base with micro glitter fading upward from the tip stays refined; chunky mixed glitter rarely does.
Micro glitter gives a soft sparkle rather than obvious confetti. Add one small gold stud at the outer corner of two or three nails, and the set gets structure. I like the stud placed where the sidewall meets the tip, almost like a tiny metal bracket holding the shape in place.
Why the corner detail matters
Centered studs can feel expected. Corner placement follows the coffin lines and draws attention to the taper. It also leaves the middle of the nail open, which helps the glitter fade stay airy.
What to ask for at the salon
- Use fine red shimmer or micro glitter, not hex glitter.
- Fade the sparkle from the free edge upward about one-third of the nail.
- Limit gold studs to 2 or 4 nails, not all ten.
- Seal the studs under a thick enough top coat that the edges do not catch.
A set like this makes sense if you want shine but don’t want full chrome or foil. It’s lighter on the eye, and it moves nicely under evening light without turning into a disco ball.
12. Dark Red Tortoiseshell Accents With Gold Frames
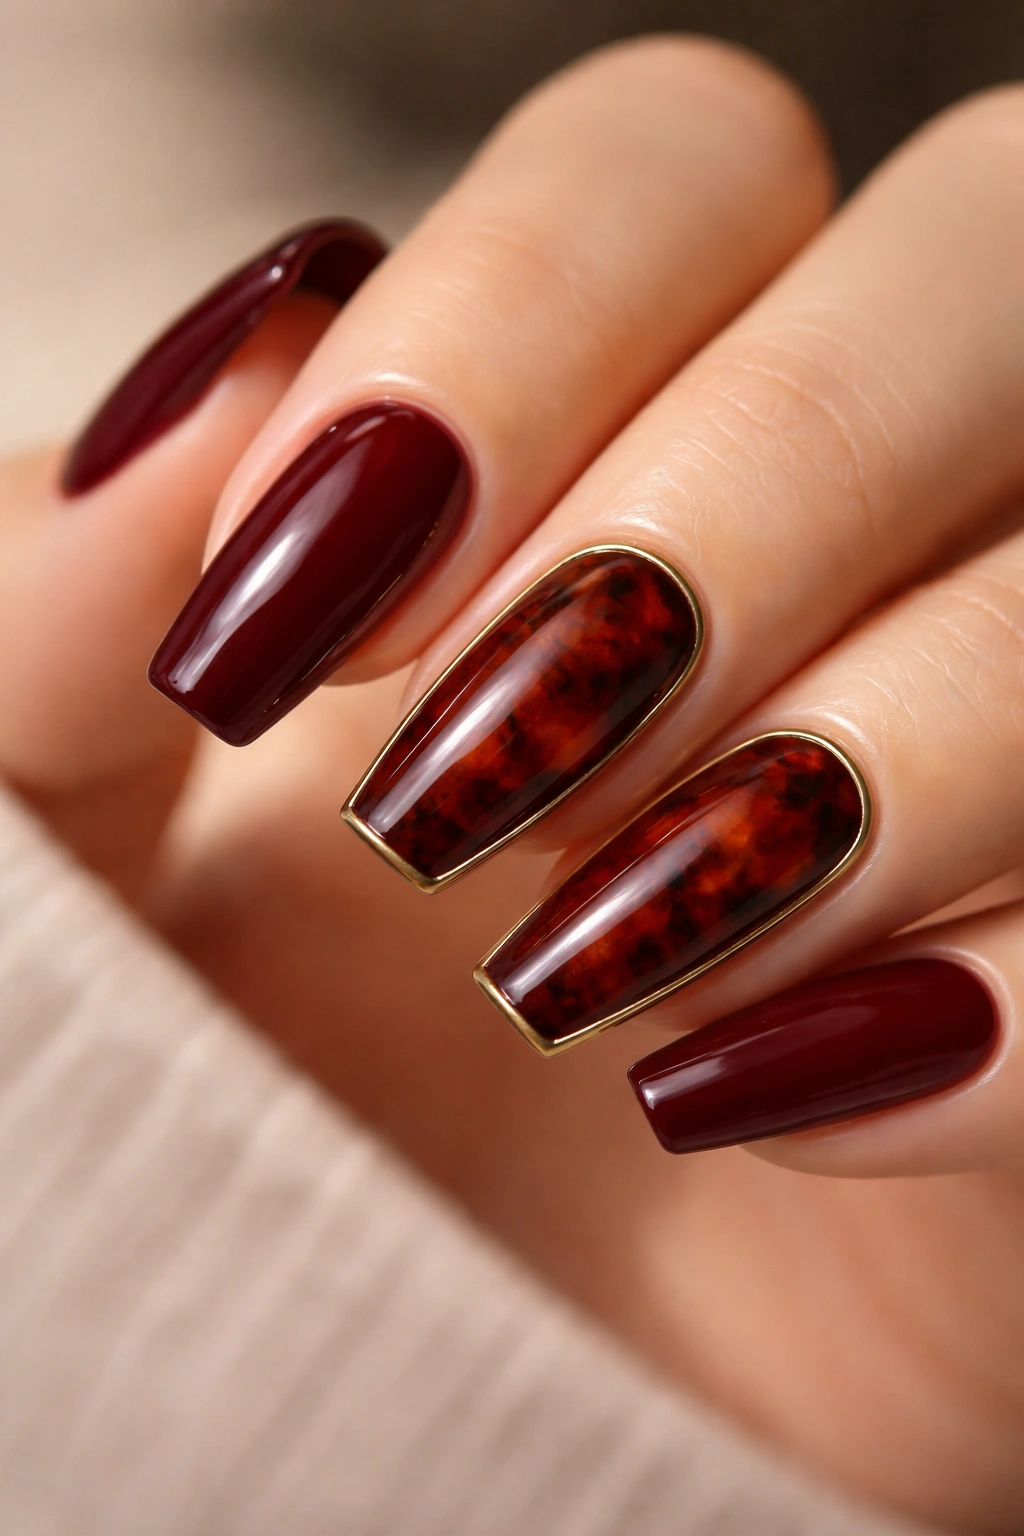
This is one of those manicures that sounds odd until you see it done well. Dark red tortoiseshell accent nails—built from translucent amber-red, brown shadowing, and a little black—bring depth and movement, while a slim gold frame around the perimeter turns each accent nail into a tiny art piece.
I would not do tortoiseshell on every nail in this color family. Two accent nails are plenty. The rest should stay in a solid oxblood or mahogany crème so the pattern has somewhere to land. Once every finger starts swirling, the eye gets tired.
The red tortoiseshell effect usually comes from layering jelly tones in patches, curing between thin coats, then adding a final tint to unify everything. That layered look is the whole point. Flat painted blobs won’t cut it. The gold frame should stay fine and close to the edge—think picture frame, not thick border.
This set has an old-money mood without looking dusty, and yes, I know that phrase gets thrown around too much. Still, it fits. The color story feels rich, grounded, and a little unexpected next to standard cherry red.
Longer coffin nails show the tortoiseshell best. On shorter lengths, I’d use the pattern on the thumbs only or skip the frame and go with gold flecks instead.
13. Metallic Red Cat-Eye Nails With Gold Half Moons
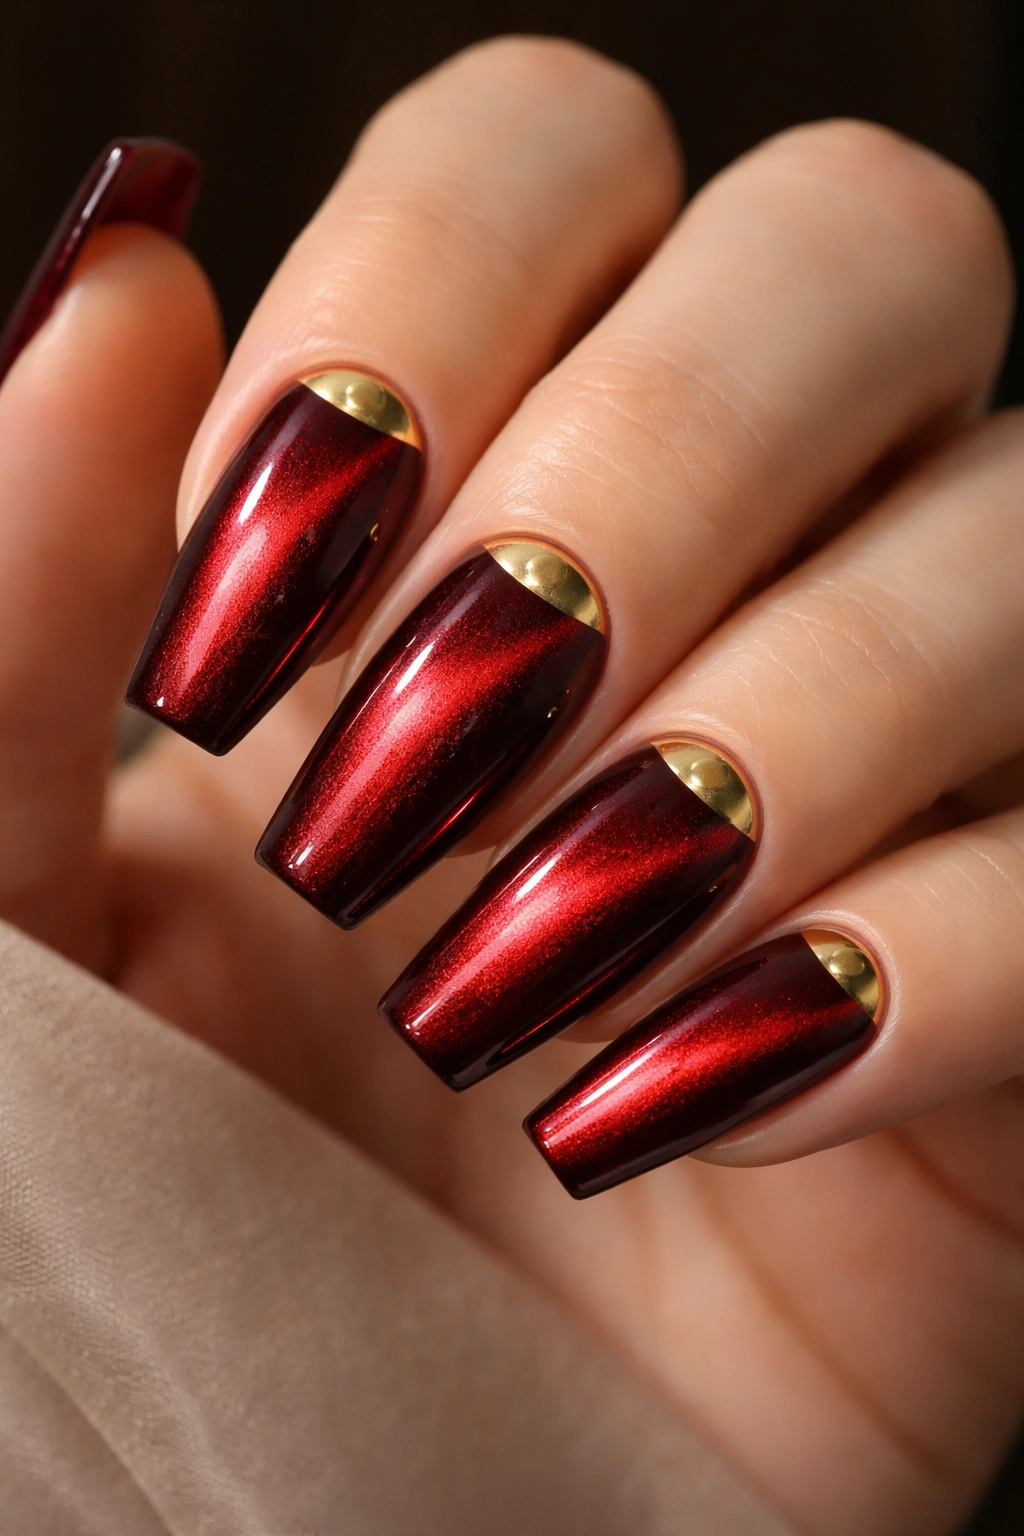
Cat-eye gel has a magnetic depth that flat red polish can’t fake. Move your hand, and the light band shifts across the nail like satin pulled tight. Add a gold half moon at the base and the whole design looks sculpted rather than painted.
Why the two finishes work together
Metallic red cat-eye already has movement. Gold half moons add a clean anchor point, which stops the look from feeling too fluid. That contrast—moving light on top, fixed metallic shape at the base—is what makes this design satisfying.
You can go lighter with ruby cat-eye or darker with a blackened garnet. I lean dark here. The gold reads richer against a deeper field, and the coffin shape keeps the effect from turning too soft.
Details worth getting right
- Ask the magnet to pull the cat-eye line slightly diagonal or centered, not scattered.
- Keep the half moon tight and symmetrical at the cuticle.
- Use flat gold gel paint rather than chunky glitter.
- Seal with a glossy top coat. Matte kills the magnetic shift.
This is one of those sets that looks different every time you move your hand under a lamp. If you get bored with static polish, cat-eye solves that problem fast.
14. Red Sweater-Texture Coffin Nails With Gold Striping
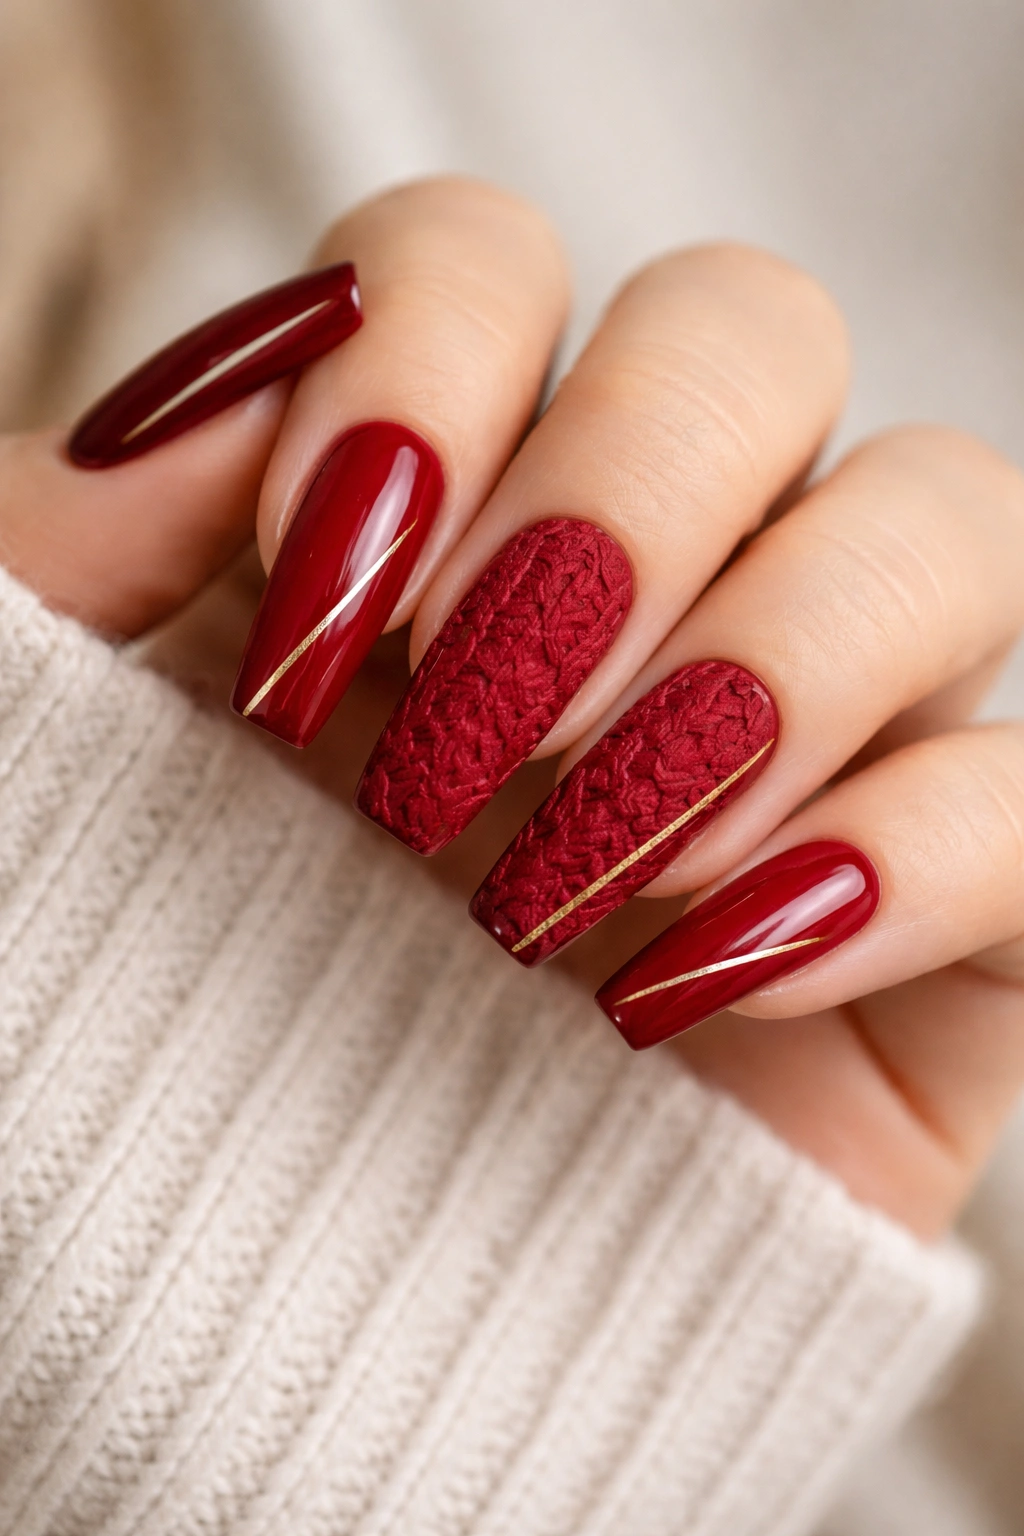
Texture on nails can be a little divisive. Fair enough. Some raised designs look clunky, and some are a nightmare once you start washing your hair. But a sweater-texture accent on a deep red base, balanced with slim gold striping on the neighboring nails, can look sharp and cozy rather than gimmicky.
The trick is not to put texture on every finger. One or two accent nails with cable-knit or ribbed gel detail is enough. The rest of the set should stay smooth, with gold striping running vertically, diagonally, or near the sidewall to echo the structure without adding more bulk.
Best layout for this set
Use the sweater texture on the ring finger only or ring finger plus thumb. Put a single gold stripe on the middle finger and pinky, then leave the index solid red. That spacing keeps the design from crowding itself.
What can go wrong
Raised gel needs clean lines and a steady hand. If the texture blobs together, it stops reading as knit and starts reading as lumpy top coat. Gold striping can also peel if it sits too close to the sidewall and isn’t sealed well.
This style makes more sense on acrylic or builder-gel coffin nails than on flimsy press-ons. Texture needs a solid base under it. And yes, it is less practical than a plain gloss set. Worth it? If you like tactile nail art and don’t mind a little extra care, absolutely.
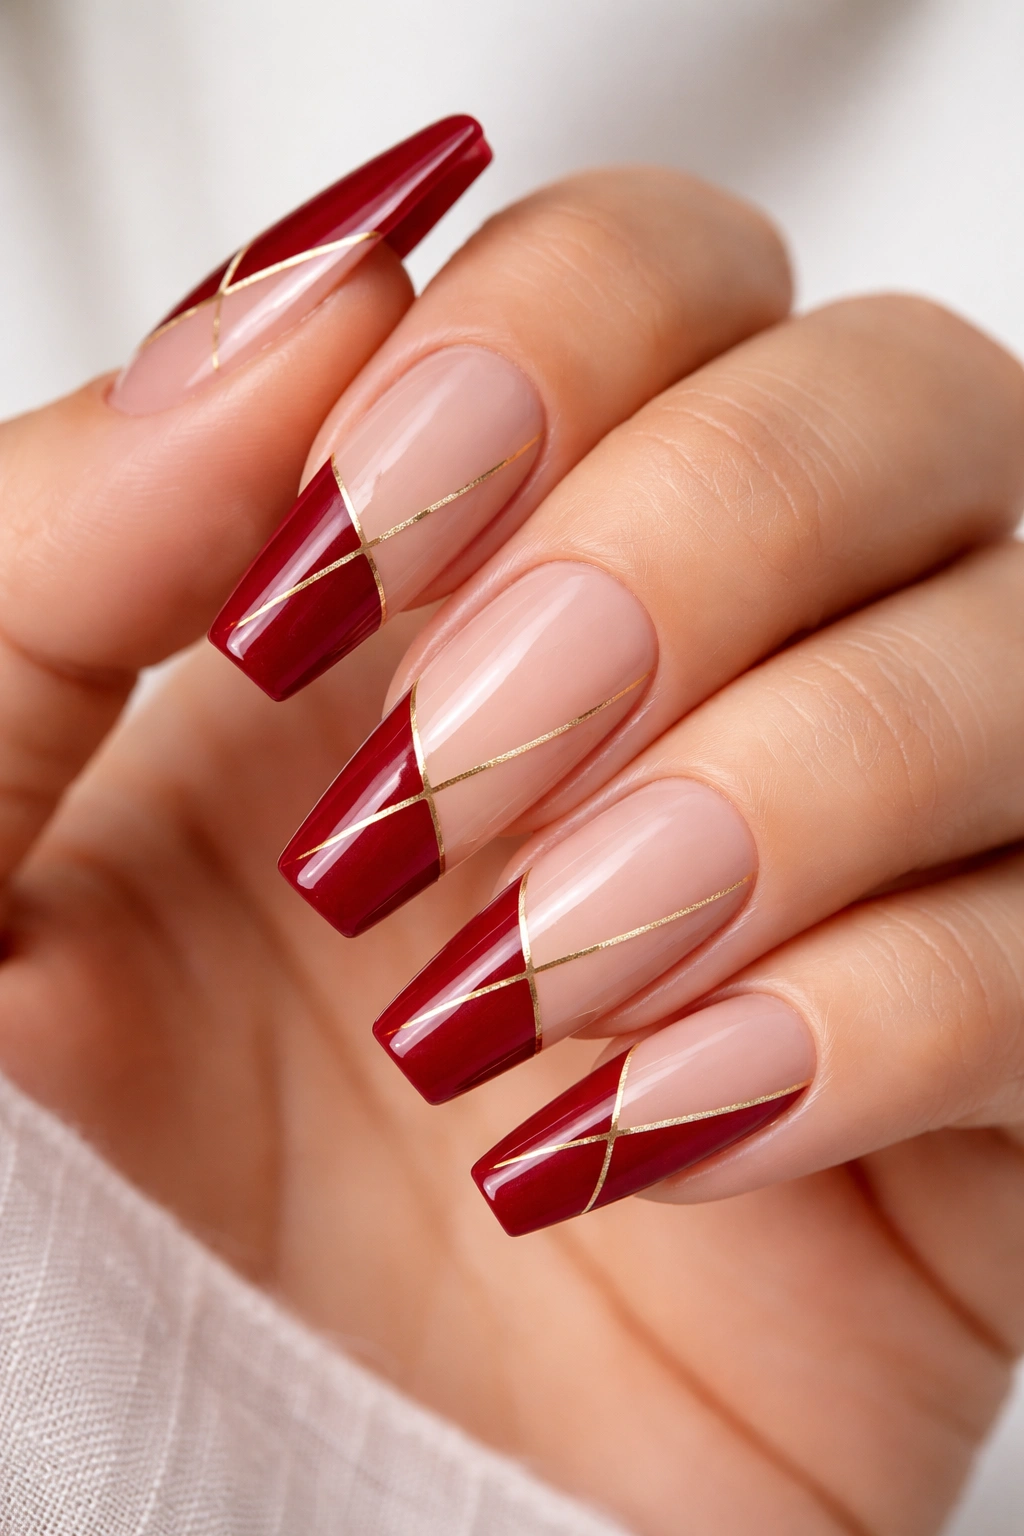
15. Minimal Bare Base With Red Tips and Gold Outline
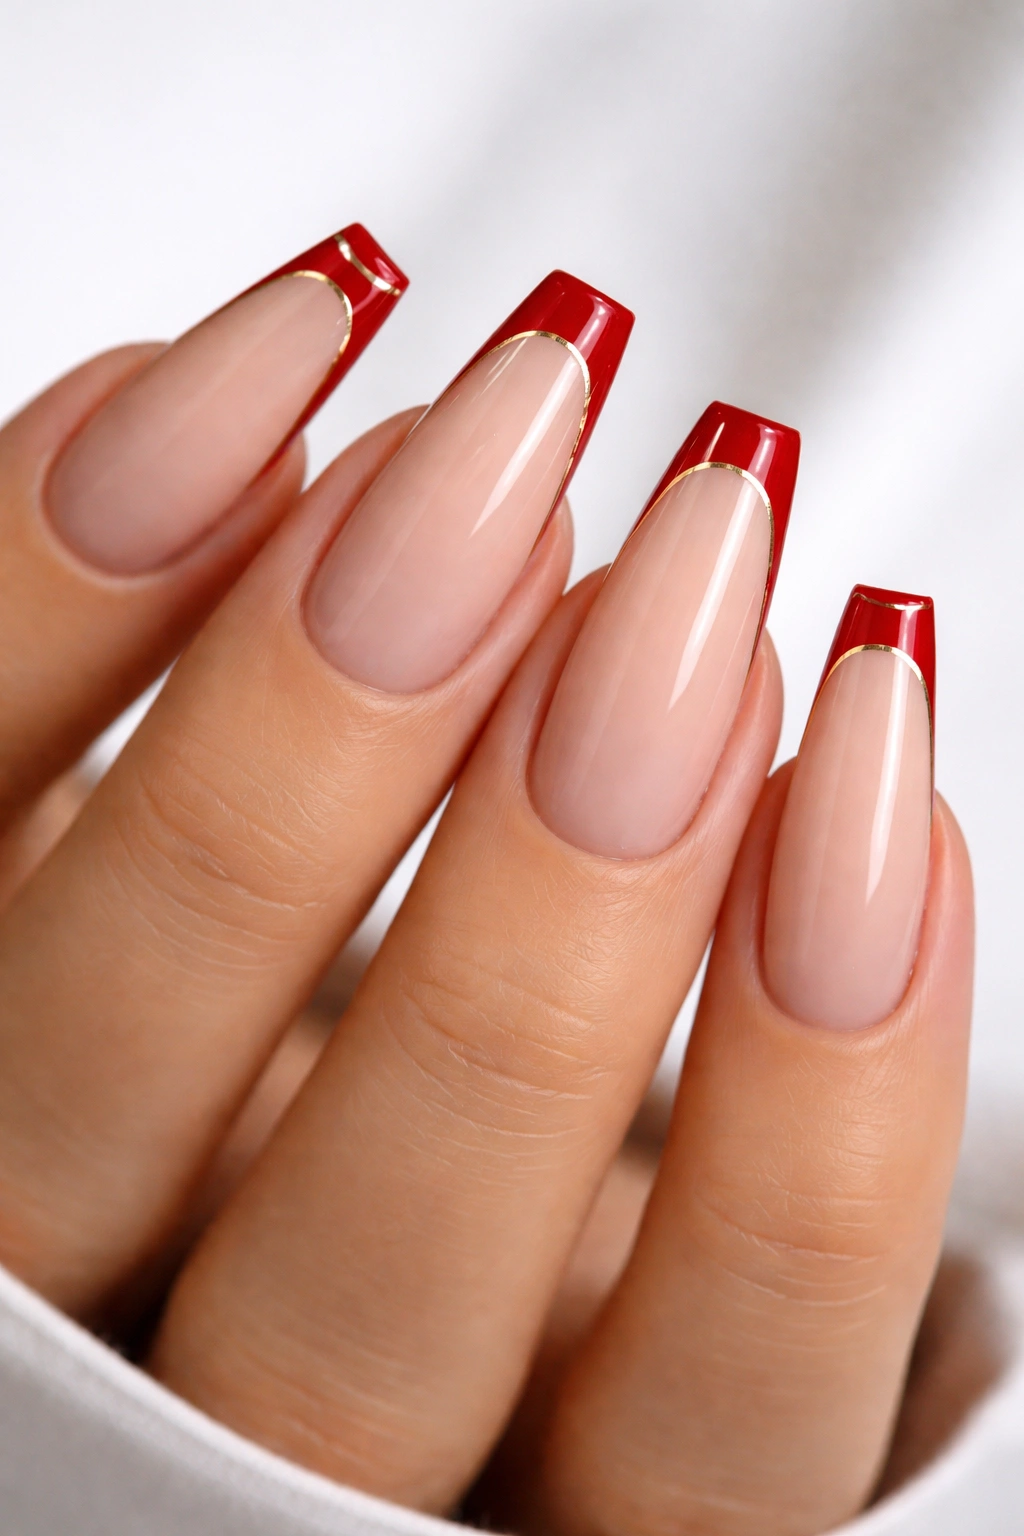
Not every red-and-gold manicure needs a full red base. One of the cleanest versions uses a sheer nude or bare-looking foundation, a red French tip shaped to the coffin edge, and a whisper-thin gold outline where the red begins. Done well, it looks crisp, expensive, and far more modern than a standard full-color set.
This design depends on precision. The red tip needs to mirror the coffin shape exactly, with straight side sections and a squared edge. Then the gold line traces the border—fine, even, and steady. A shaky gold outline ruins the whole effect because the negative space leaves nothing to hide behind.
I’d choose bright true red for a sharper contrast or deep crimson if you want a quieter look. Longer coffin nails make the geometry more obvious, though a medium length still works if the smile line sits high enough.
What I like most here is the balance. You get red. You get gold. You still get air between them. The set feels deliberate without trying too hard, and it handles everyday wear better than heavier foil or stone work.
If you want one design from this list that can move from work to dinner to a formal event without a wardrobe change, this is the one I’d point you toward first.
Making Your Manicure Last Past Day Seven
A red manicure shows wear fast. Tiny chips, dull top coat, dry cuticles, growth lines—dark or bright red reveals all of it quicker than soft pink ever will. Gold details do the same because metallic finishes draw the eye right to the area that’s lifting or wearing thin.
A few habits buy you more time. Apply cuticle oil at night. Use hand cream after washing. Avoid soaking your nails in hot water for long stretches. If you wear press-ons, carry a tiny glue tube or extra adhesive tabs in your bag; coffin corners take more hits than rounded shapes.
If you’re booking salon gel or acrylic, ask your tech to cap the free edge on the red nails and seal gold foil or striping under enough top coat that the surface feels smooth when you run a fingertip across it. That single detail changes how the set wears.
And if a design has chains, studs, or raised texture, accept the trade-off. Extra dimension looks fun for a reason. It also asks more from you.
Final Thoughts
Red and gold coffin nails work because the pairing already has built-in contrast. You do not need ten extra ideas piled on top of it. One strong red, one well-placed gold detail, and a clean coffin shape can carry a whole manicure.
If you like bold nails, lean into chrome, marble, jelly layers, or chain art. If you want something cleaner, the thin French edge, gold outline tip, or cuticle arc gives you the same color story with less maintenance. That’s the nice part of this palette—there’s room for restraint, and there’s room for drama.
My own bias? I keep coming back to glossy cherry red with irregular gold foil and to the bare-base red tip with a gold outline. One feels lush. The other feels sharp. Both let the coffin shape do what it does best: make every line look intentional.
