

Black polish can look flat in the bottle and rich on the nail, while gold often does the reverse. On a coffin shape, the two stop fighting and start framing each other. Black and gold coffin nails have that rare mix of sharp, dressy, and a little dangerous—the sort of manicure that looks thought-out before anyone notices the details.
Most sets miss in one of three places. The black is too sheer, so the sidewalls look patchy. The gold is the wrong tone—too yellow, too pale, too glittery—and it starts reading cheap. Or the design piles on chrome, foil, gems, and striping all at once, which is how a manicure loses its edge in a hurry.
Coffin nails help because the shape already has structure. The straight sidewalls and squared tip give metallic details somewhere to land, and dark polish makes that outline look even cleaner. Nail techs learn early that black shows every wobble; harsh, yes, but useful. If the shape looks crisp in black, the whole set tends to look expensive.
Some of the ideas below lean sleek, some go full evening wear, and a couple are plainly extra. Good. This color pair can handle all of that.
Why Black and Gold Coffin Nails Never Look Flat
Contrast does half the work for you. Black absorbs light. Gold throws it back. Put those finishes side by side on a coffin nail, and even a tiny metallic line looks deliberate because your eye lands on it right away.
The shape matters more than people think. Coffin nails have a flat edge that makes French tips, foil placement, side outlines, and geometric blocking look cleaner than they do on round or almond nails. You get straight visual lines, and straight visual lines make metallic accents look sharper.
Restraint matters.
If you stack glitter, foil, chrome, crystals, and hand-painted swirls on all ten nails, black and gold can drift into costume territory. The strongest sets usually pick one main gold texture and let the black carry the weight. Maybe two accent nails. Maybe a single arc at the cuticle. Maybe a thin border around a French tip. That’s enough more often than people expect.
Where the color pairing works best
A few combinations almost always land well:
- Glossy black with bright gold line work gives the cleanest, dressiest contrast.
- Matte black with antique gold foil feels moodier and a little rough around the edges.
- Smoky black jelly with encapsulated gold flakes has more depth than a flat cream polish set.
- Nude-and-black blocking with slim gold outlines looks lighter on the hand and wears well in day-to-day life.
One more thing. Gold is not one color. Pale champagne, rich yellow gold, old-brass foil, and mirror chrome all create different moods. That choice matters almost as much as the design itself.
Picking the Right Gold Finish for Black and Gold Coffin Nails
Which gold are you choosing—the mirror-bright one, the brushed one, the flaky one, or the dusty old-metal one? That decision changes the whole manicure.
Mirror chrome for a cleaner, brighter look
Gold chrome powder gives you the sharpest reflection. It looks best when the black base is glossy, the nail surface is perfectly smooth, and the chrome sits over a fully cured no-wipe gel top coat. Most LED lamps cure that layer in about 60 seconds, though thicker gel systems may need longer. If the surface has ripples, chrome will show every one of them.
Foil and leaf for texture
Gold foil is messier in the good sense. Torn pieces, uneven edges, small gaps—those all add character. Over matte black, foil looks almost antique. Encapsulated under builder gel, it looks deeper and smoother. If the foil is left sitting on top with a thin seal, it can catch at the edges. Hair will find it. Sweaters will too.
Metallic paint, glitter, and studs
Metallic gel paint is the choice for thin borders, cuticle crescents, and pinstripes. Glitter gives sparkle but can bulk up the nail fast, so it works better as a wash or accent than a full heavy coat on every finger. Studs can look great near the cuticle or in a half-moon layout, though they need to sit flush. Raised metal pieces on a long coffin set can snag on pockets and knitwear by day one.
If your jewelry leans warm yellow gold, match it. If you wear paler metals or your skin has cooler undertones, a softer champagne gold often looks calmer than bright yellow foil. Tiny detail. Big difference.
How to Make Black and Gold Coffin Nails Last More Than Two Weeks
A black manicure looks fresh for about five minutes after you leave the salon—then you grab your keys, open a can, or dig through your bag. Dark polish shows wear faster because chips are easy to spot. Gold details have their own problem: if they are raised or poorly sealed, they fray first.
Start with the structure. A good coffin shape needs a clear apex near the stress area, straight sidewalls, and a tip that is tapered but not pinched. If the nail is too flat, long black coffin nails crack more easily. If it is too bulky, the design loses that clean blade-like look that makes the shape work.
The finish matters too. Gloss top coat hides small surface scuffs better than matte. Matte is gorgeous for editorials and photos, but it shows dents, hand cream smears, and tiny abrasions sooner. If you want matte, ask your tech to matte the black and leave the gold glossy. That contrast looks richer and wears better.
A few maintenance habits help more than any charm or sticker ever will:
- Cap the free edge so black polish does not wear off the tip first.
- Use cuticle oil at night, not once a week when you remember.
- Wear gloves for dishes and cleaning, because hot water and detergent dry out enhancements fast.
- Book fills on time, usually around the 2- to 3-week mark for medium or long sets.
- Do not pry things open with your nails. Coffin tips are not tiny tools.
That last one sounds obvious. People still do it.
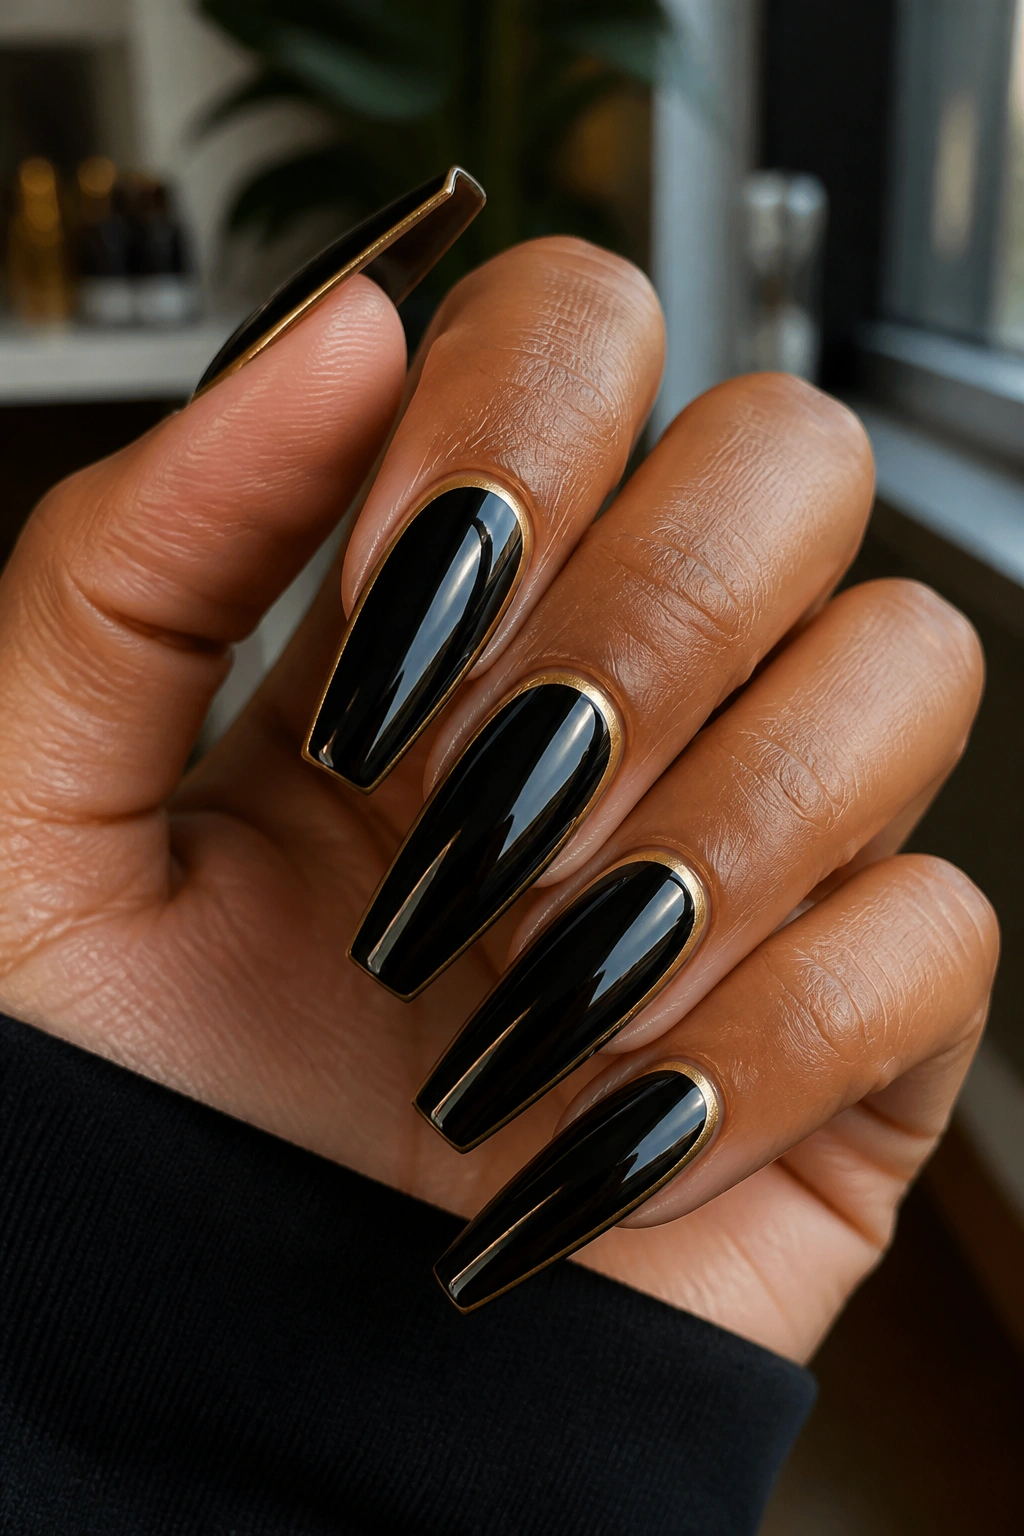
1. Jet Black Nails With Thin Gold Cuticle Arcs
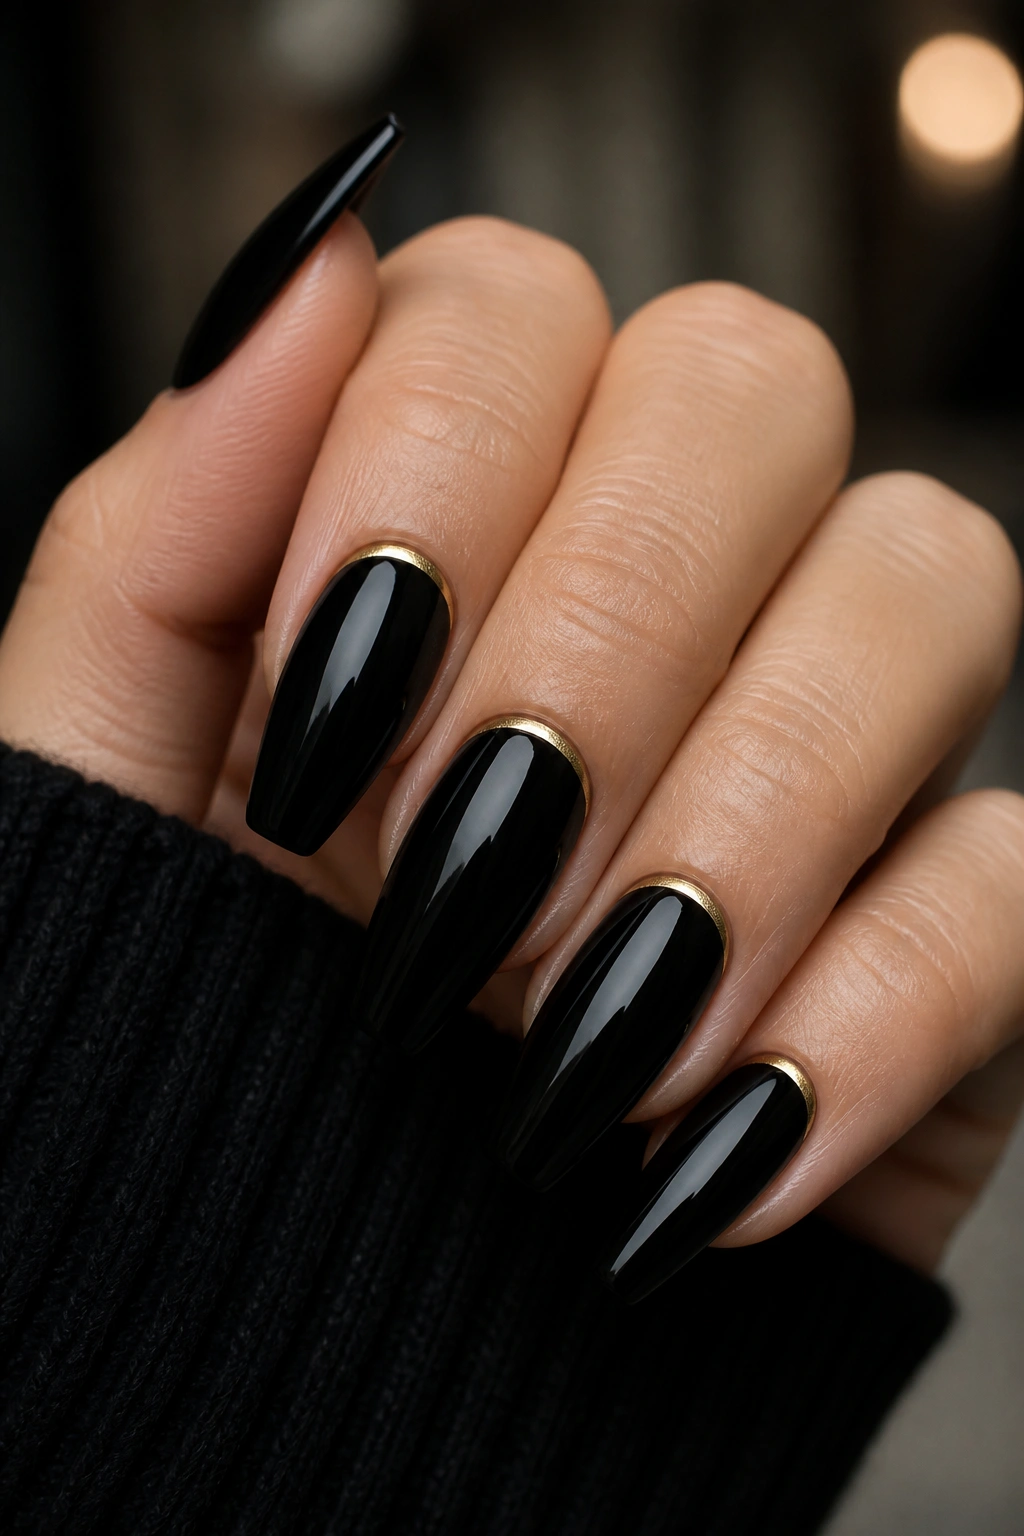
The cleanest sets usually have the least going on. A full jet black coffin manicure with a fine gold arc hugging the cuticle looks polished from every angle, and the design does not rely on extra gems or heavy art to make its point.
This is the set I would point to for anyone who wants black and gold coffin nails that feel dressy but not loud. The black carries the drama. The gold simply marks the base of the nail and gives the eye a place to rest.
Why this one looks so clean
That curved metallic line echoes the natural shape of the cuticle, so the design feels built into the nail instead of pasted on top of it. Keep the line thin—about 1 millimeter or less—and it looks precise. Push it thicker and the set starts looking heavier near the base, which can shorten the look of the nail.
Quick notes for the salon chair
- Ask for an opaque black gel, not a streaky jelly black, unless you want some transparency.
- Use metallic gel paint for the arc instead of loose glitter; glitter is too chunky for this shape.
- Keep the gold on all ten nails or only the ring and middle fingers. Both work.
- Finish with a high-gloss top coat so the black reflects like patent leather.
Salon note: if your cuticles are dry, this design will show it. A cuticle tidy-up makes a bigger difference here than on almost any other set in this list.
2. Matte Black Coffin Nails With Torn Gold Foil
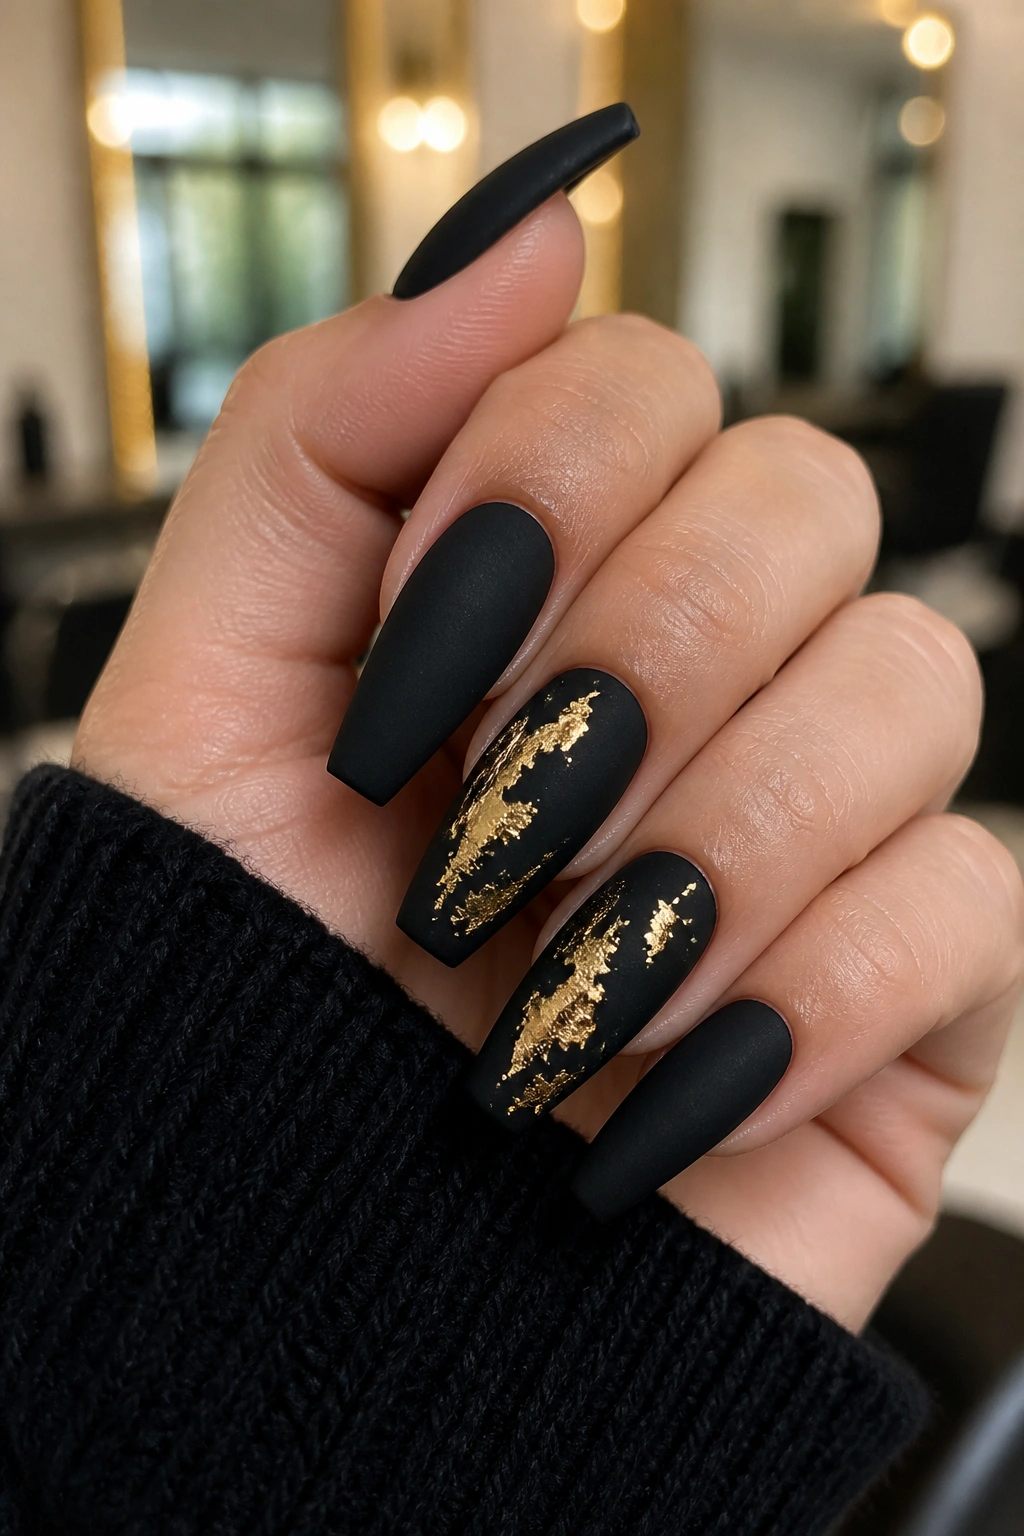
Texture changes the mood fast. Swap glossy black for matte black, tear up a few pieces of gold foil, press them into two or three nails, and the manicure shifts from sleek to gritty in a way I like a lot.
This look works because the matte base absorbs light while the foil throws off small, broken reflections. The contrast is less polished than chrome and less neat than striping tape. Good. That roughness is the point. You want uneven foil edges, small gaps, maybe one larger patch near a tip and a few smaller shards closer to the center.
Keep some discipline, though. If every nail gets a full coat of foil, the set loses air and starts to feel dense. Two foil-heavy accent nails and a couple of tiny foil touches on the rest usually look smarter. Ring finger and thumb is a strong pairing on a long coffin set because you catch both in motion.
Matte top coat can dull foil if it sits directly over it. Ask for the foil to be sealed first, then use matte over the black areas while leaving parts of the foil under gloss. That mixed finish makes the gold look deeper, almost like old metal leaf pressed into stone.
One warning: matte black shows scratches sooner than glossy black. If you are rough on your hands, this design still works—just do not expect it to look untouched forever.
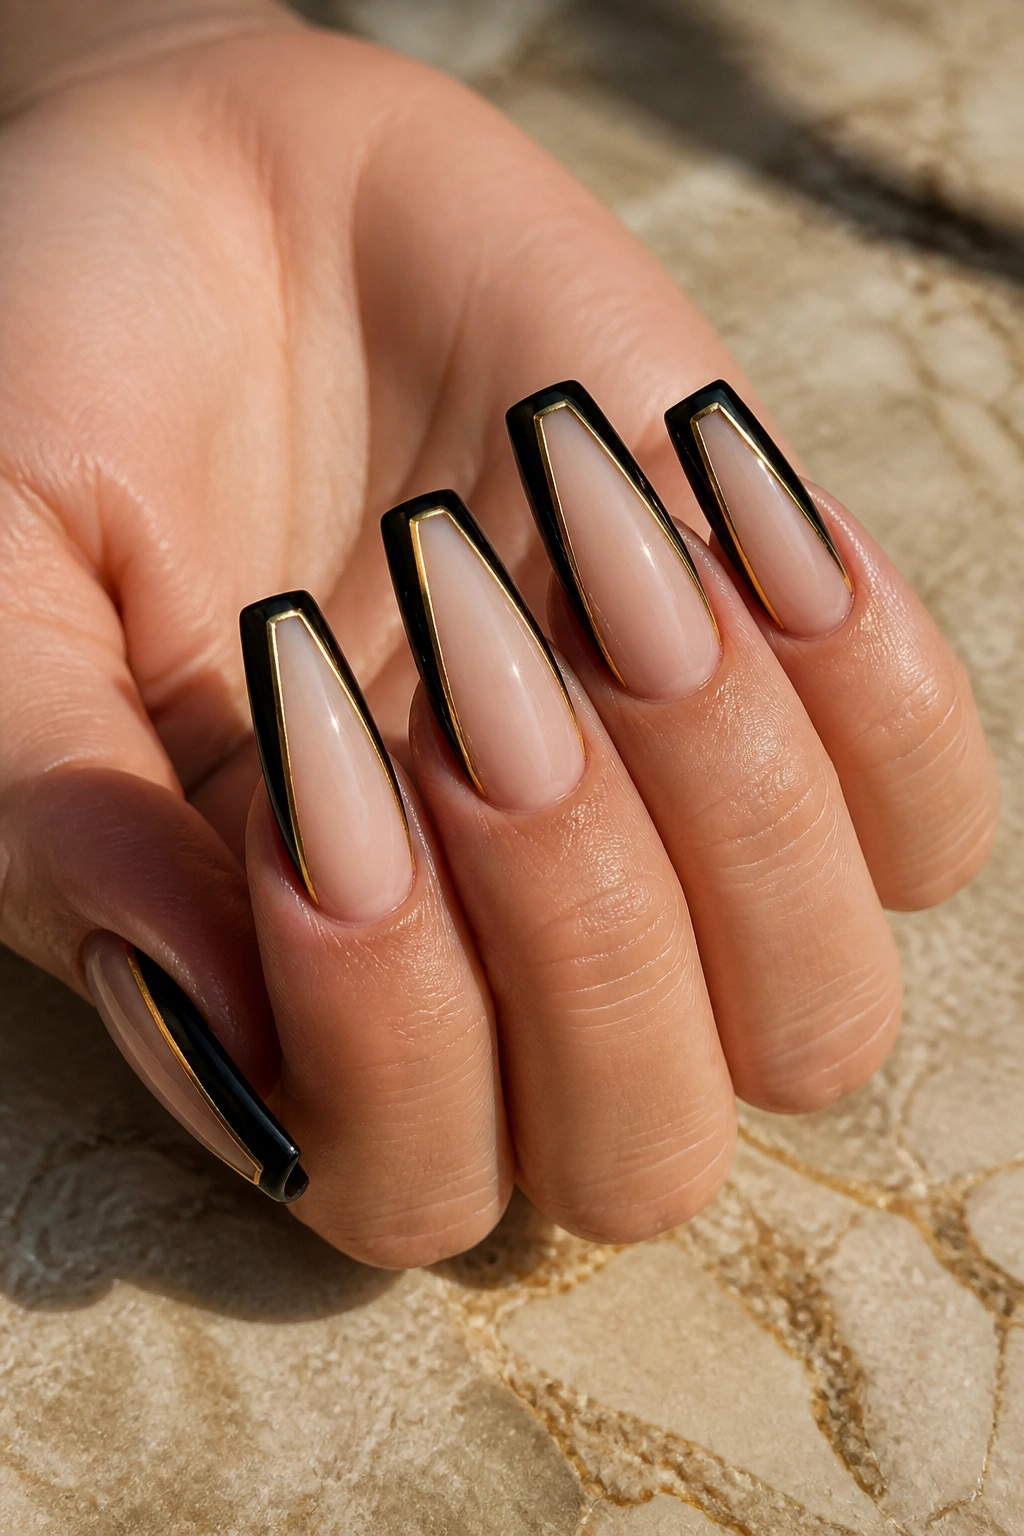
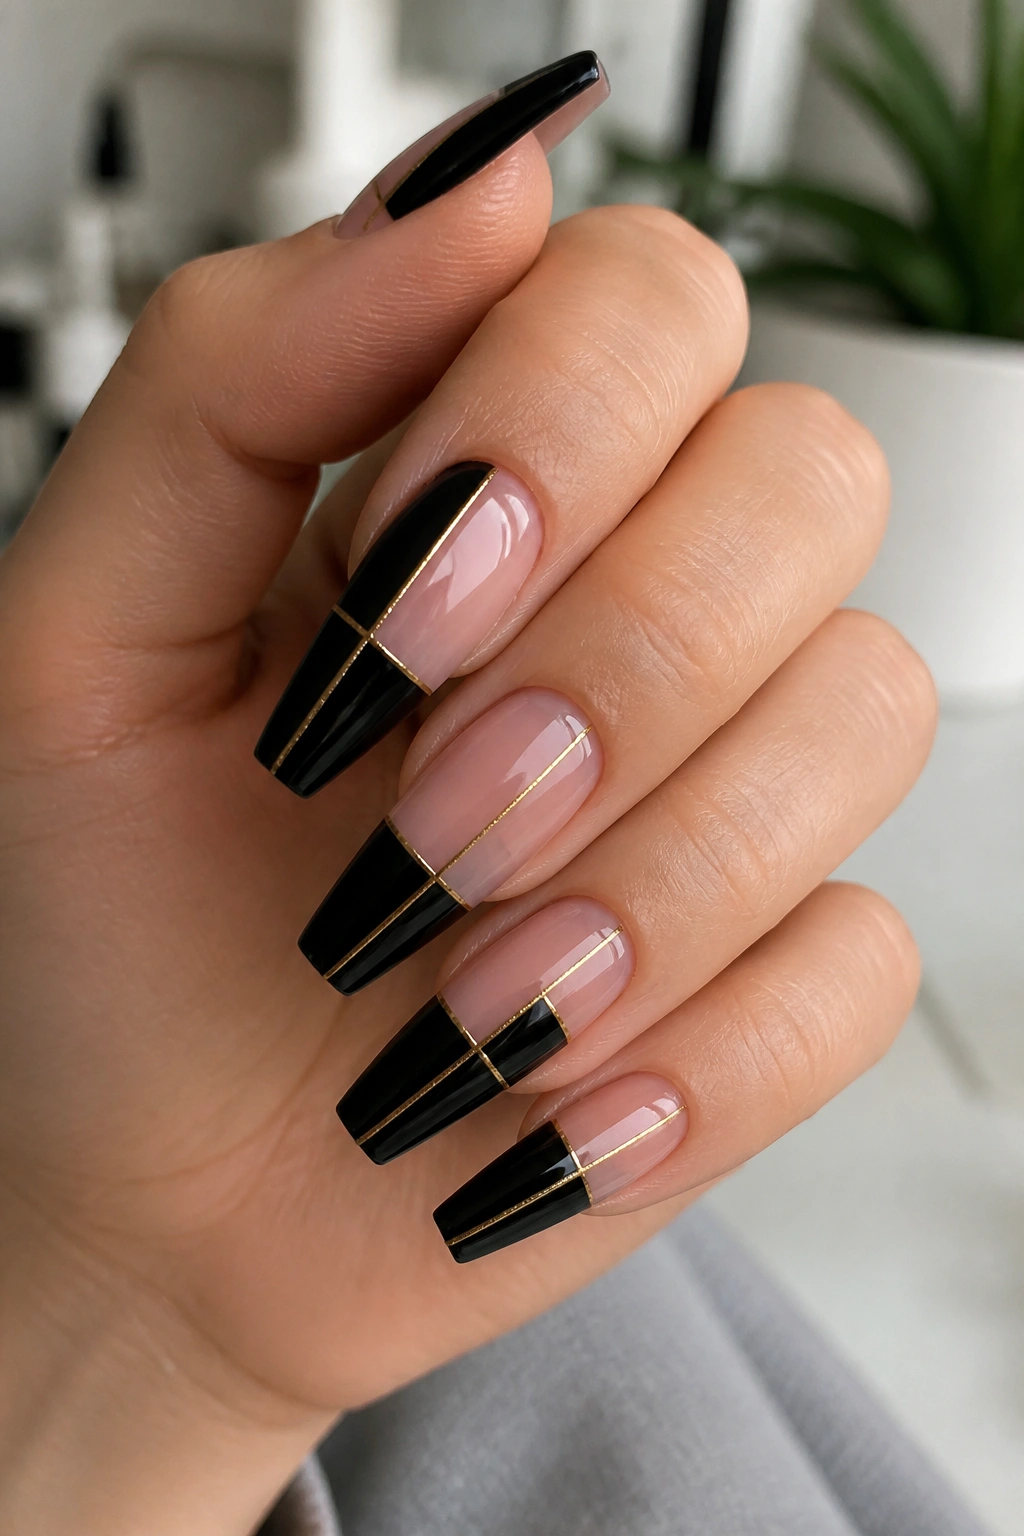
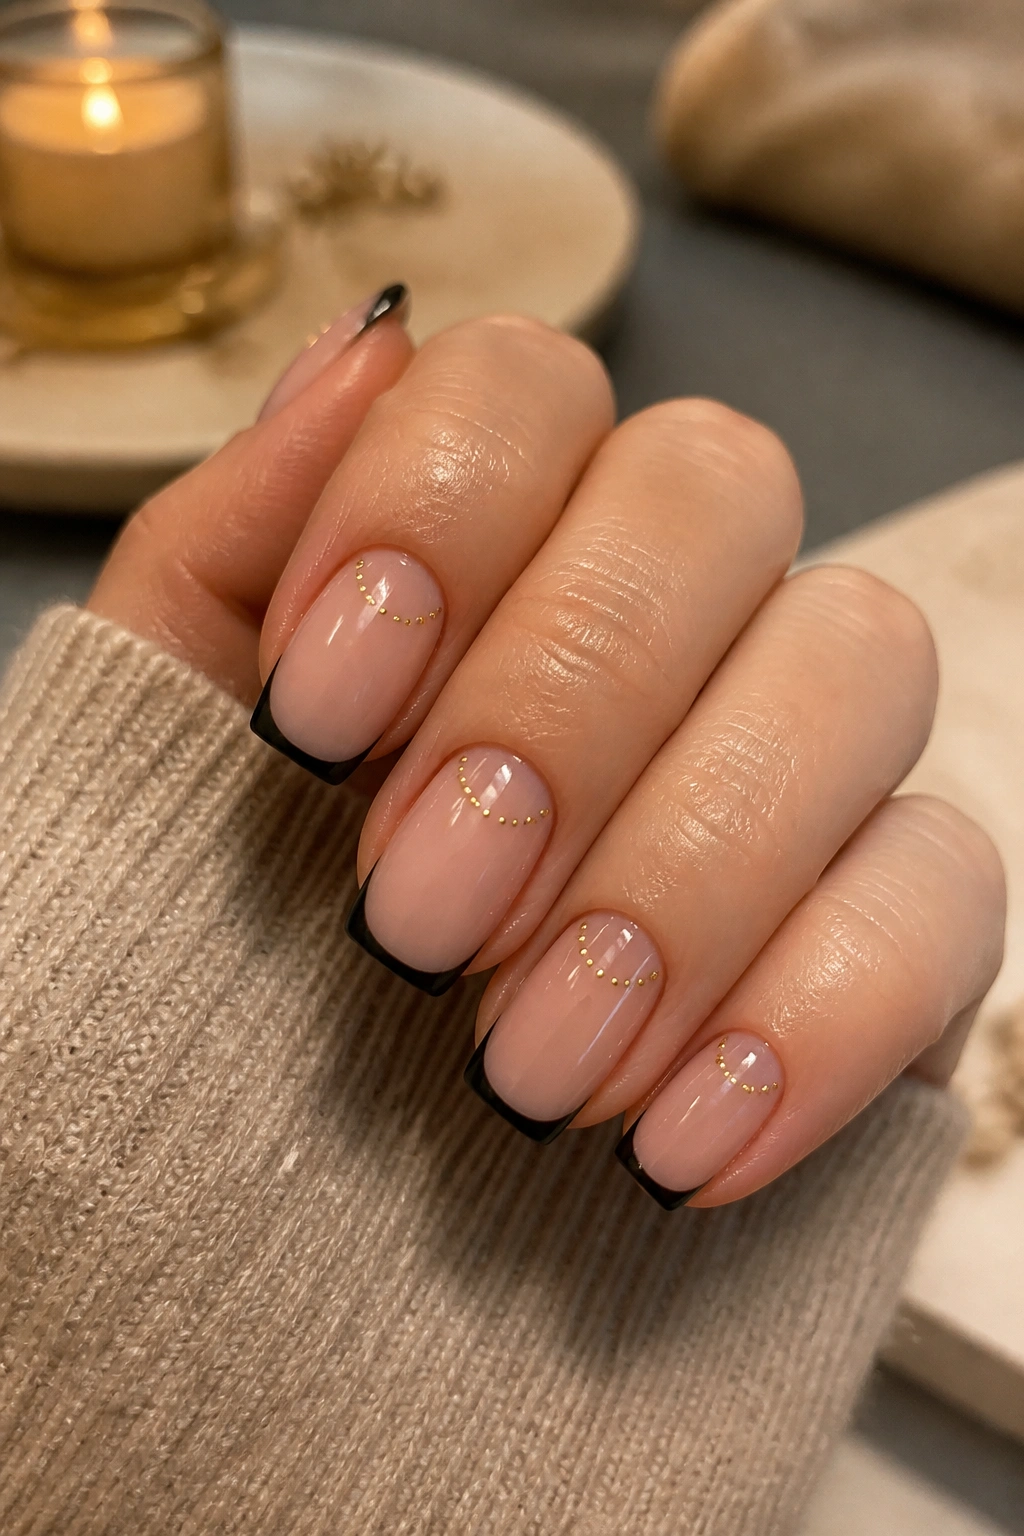
3. Glossy Black French Tips With Razor-Thin Gold Borders
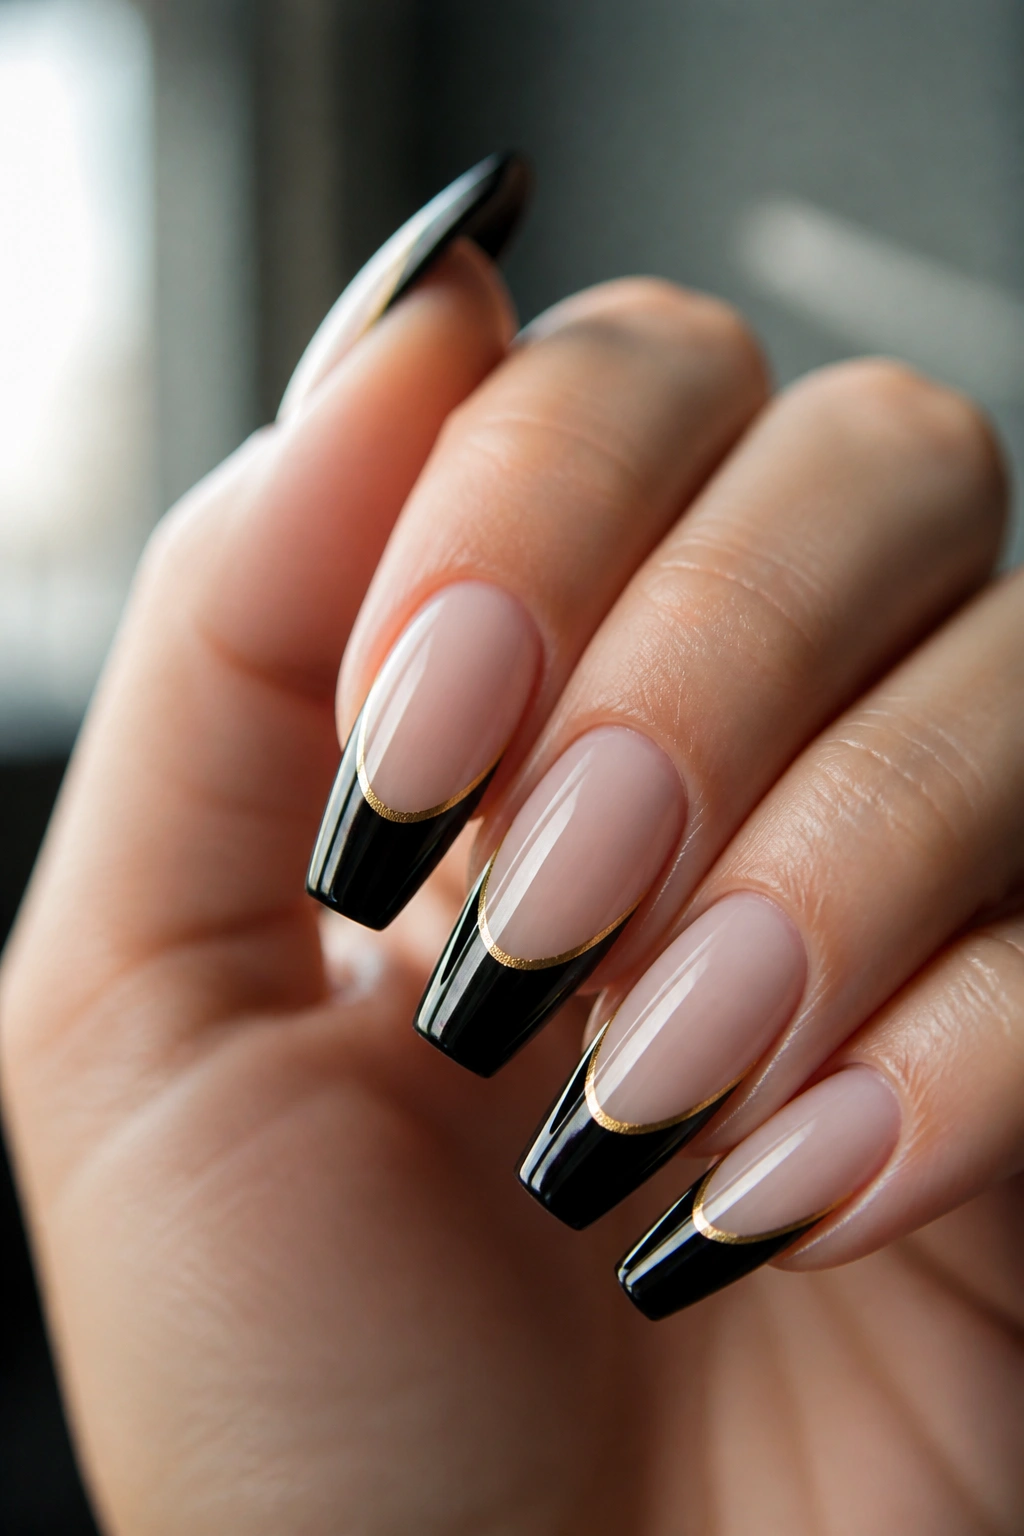
Want the shape to look longer without painting the whole nail black? Go with a nude or sheer pink base, deep black French tips, and a thin gold border where the smile line meets the base.
This design is cleaner than a full black set and lighter on the hand, which makes it a smart pick if you like black and gold but do not want your manicure to dominate every outfit. On coffin nails, the squared tip keeps the French edge looking crisp. On a longer almond nail, the same idea gets softer. Here, it stays sharp.
How to ask for it
Ask for a deep smile line rather than a flat one. That curve lengthens the nail bed and keeps the black from looking like a blunt block at the tip. Then have your tech trace the edge with a metallic gel paint line that is thinner than the French itself. You want a border, not a stripe.
A few details matter:
- A milky nude base tends to look richer than a clear base.
- Bright yellow gold gives this set more contrast; champagne gold softens it.
- Medium-long coffin nails show the line best. On short nails, keep the black tip shallow.
- Gloss is the move here. Matte takes away the clean tailored feel.
This is one of those sets that suits almost any setting because the black stays controlled at the tip. It still has edge, though. No one is mistaking it for a plain nude manicure.
4. Black and Gold Marble Accent Nails
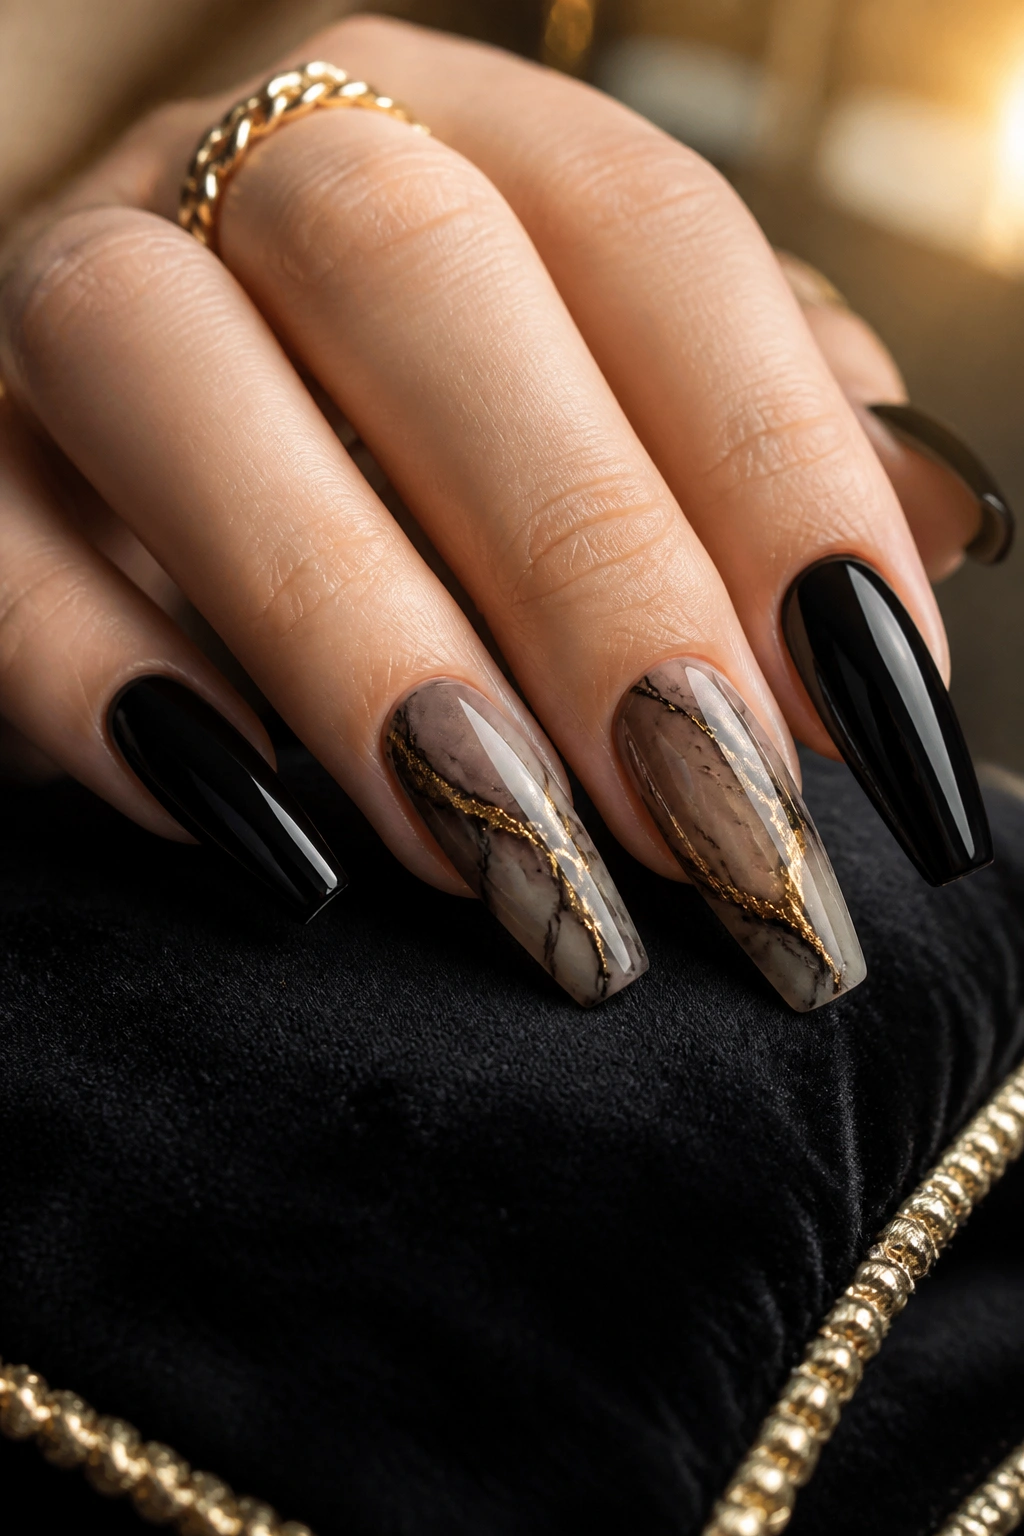
Picture one smoky accent nail with ribbons of black and slivers of gold running through a translucent base, set against solid black neighboring nails. That mix has more life than a fully uniform manicure, and it breaks up the darkness without abandoning it.
Marble nails can go wrong fast when the veining gets thick or too symmetrical. Real stone does not look planned. The best black and gold marble designs use thin inky movement, a little sheer space, and gold that cuts through the design in short irregular lines rather than heavy zigzags.
On coffin nails, marble looks strongest on one or two accent fingers. Any more than that, and the hand gets busy. Keep the rest glossy black, or do one more nail with a simple gold line to tie everything together.
Details worth asking for
- Use a translucent smoky base on the marble nails so the veining has depth.
- Keep gold veining thin and broken, not a solid road of metallic paint.
- Pair the marble with solid black index and pinky nails for contrast.
- Ask for the marble to sit under builder gel or top coat, not on top with raised edges.
This is a good choice when you want something artistic but still sharp. It has movement, but the black anchors it. That balance keeps the set from drifting into soft, cloudy nail art that loses the coffin shape.
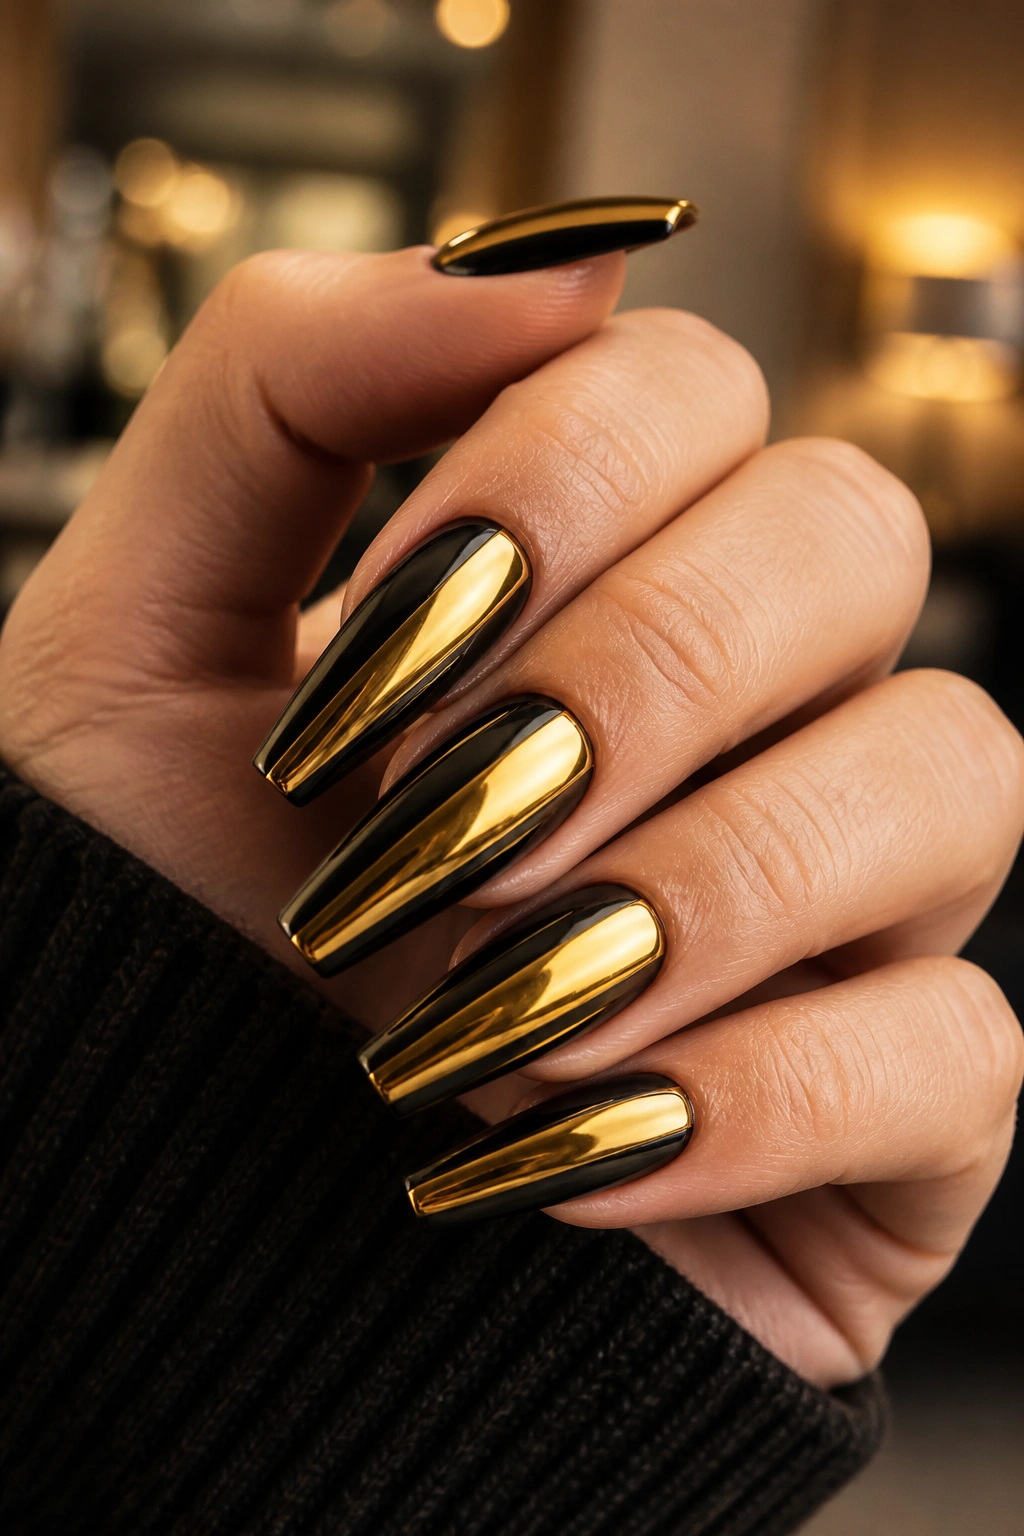
5. Soft Black Ombre With Gold Chrome Lines
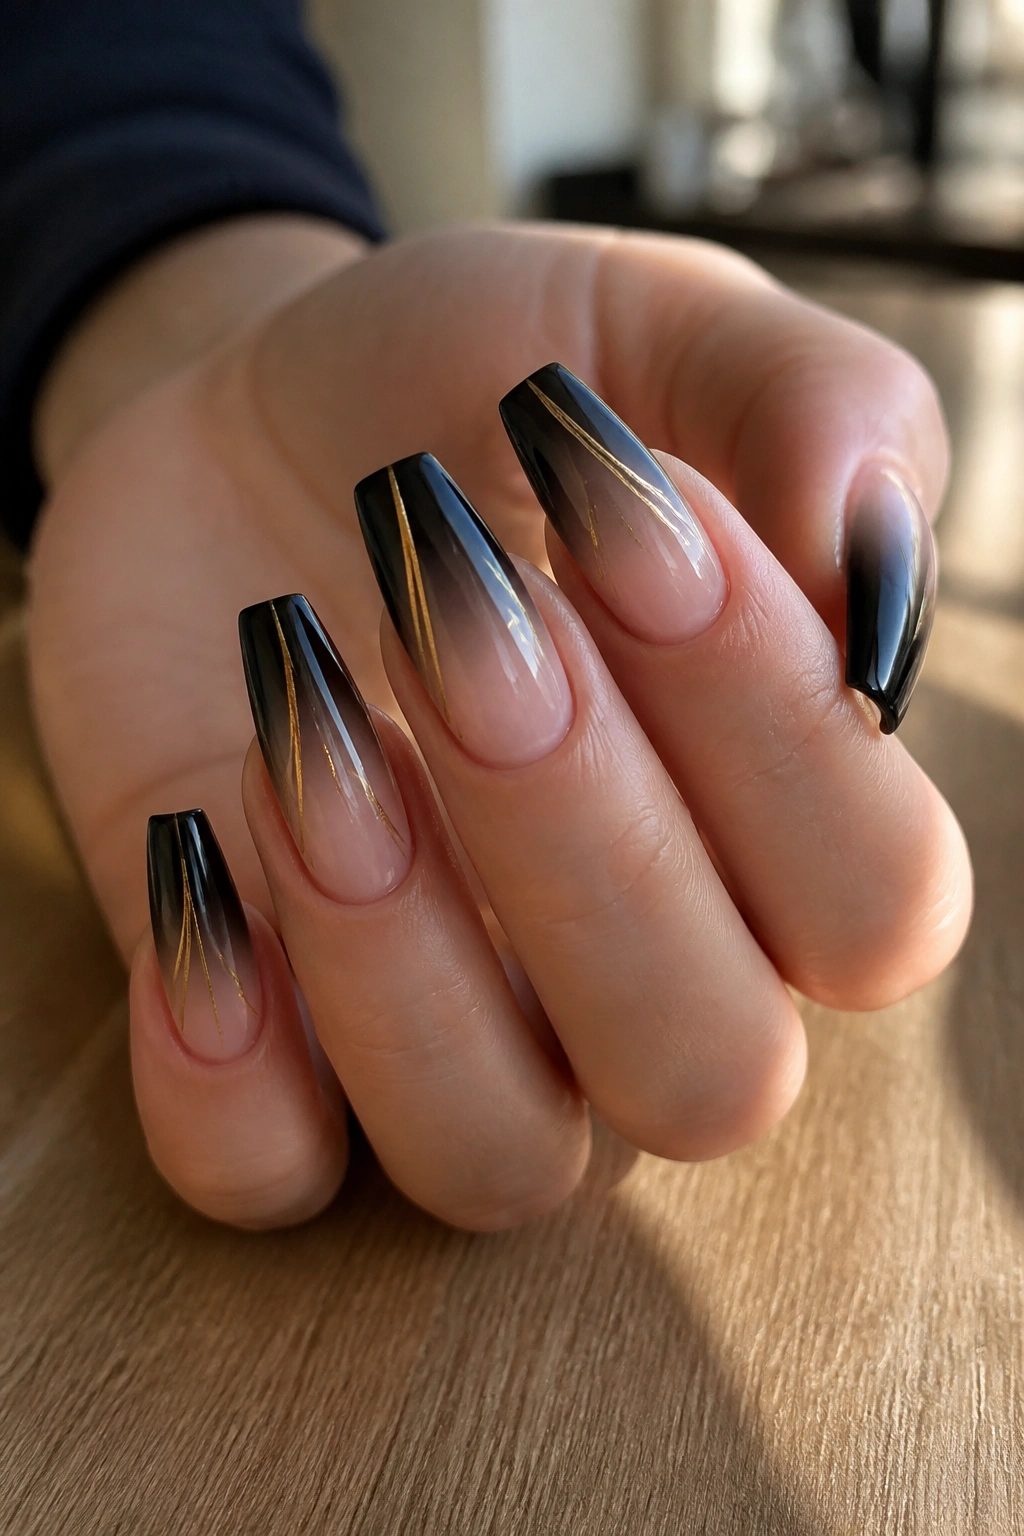
A soft fade buys you room. Instead of dropping a solid black block onto the whole nail, this design lets the color move from sheer nude at the cuticle into smoke and then full black near the tip. Over that gradient, one or two gold chrome lines—vertical, diagonal, or gently curved—turn the set into something more polished than a basic ombré.
What I like here is the pacing. Your eye travels. It starts at the natural base, follows the fade, then lands on the metallic line. The set feels lighter than a full coverage manicure, but it still carries the mood of black polish.
The line placement matters. A single off-center vertical line can make the nail look longer. A diagonal line adds movement but should not slice the nail exactly in half; that can make the design feel stiff. Two ultra-thin lines with uneven spacing often look better than one thick line.
Chrome is the better gold finish here because it echoes the smooth fade. Foil is rougher. Glitter is too busy. You want the black transition to stay soft and the gold to stay crisp.
Airbrushed ombré gives the smoothest result, though a good sponge fade can work under gel when it is blended properly. If the fade is patchy, the whole design falls apart. This is not the set to rush through in 20 minutes.
6. Black Velvet Nails With Tiny Gold Starbursts
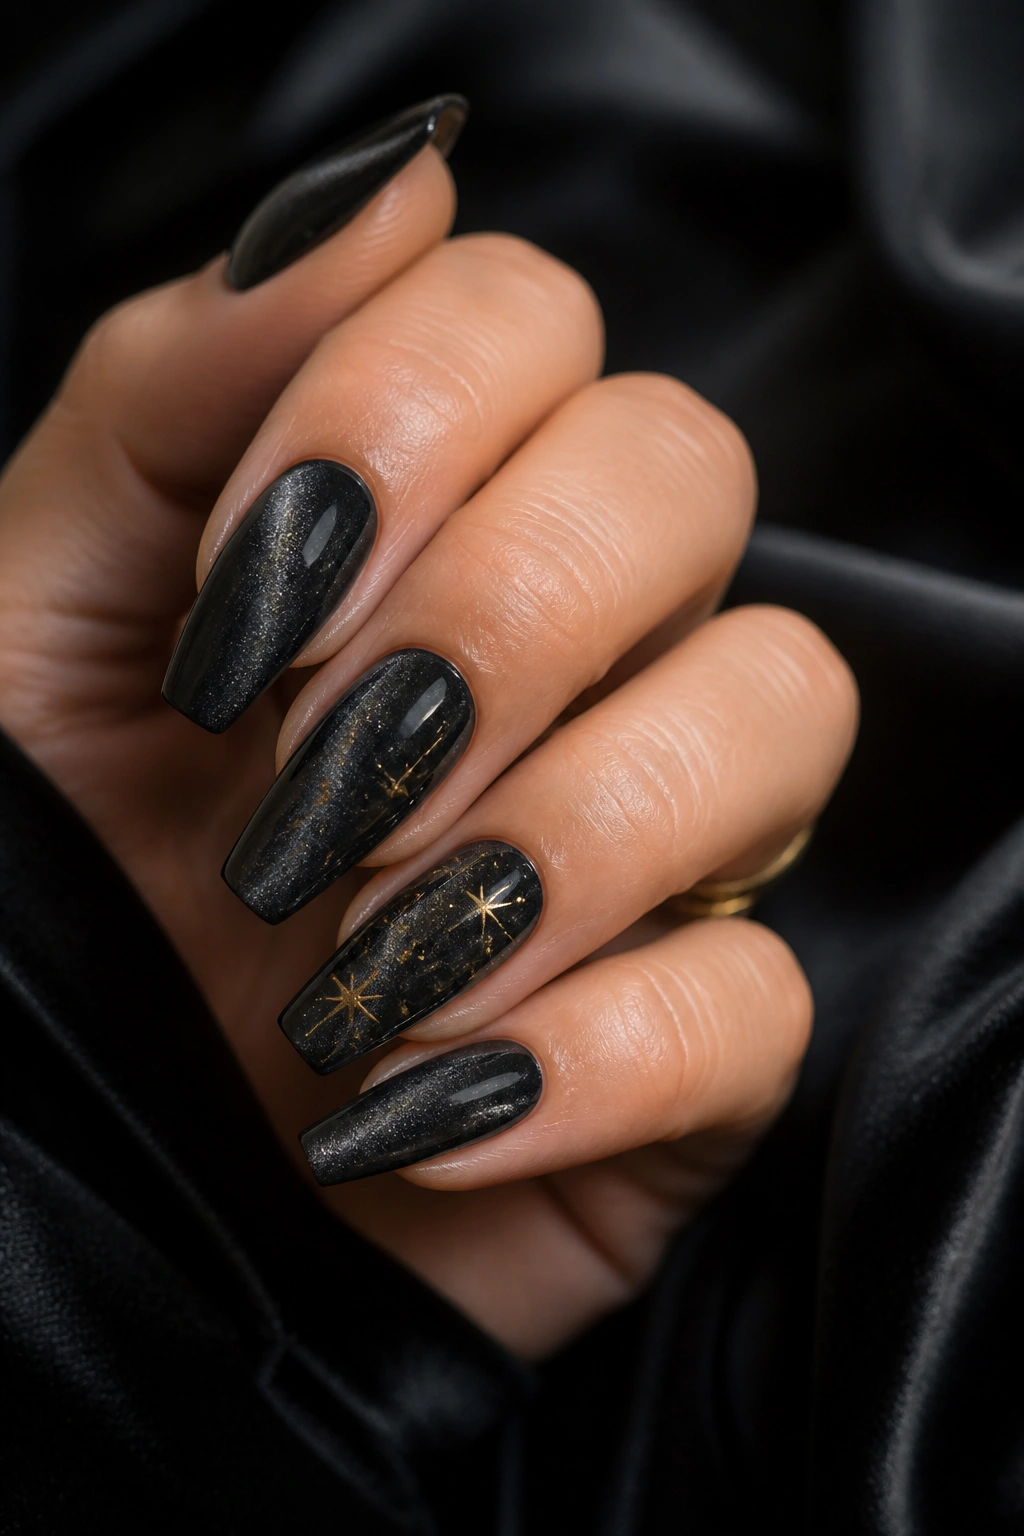
Tilt your hand and this design shifts from charcoal to near-black. That is the magic of magnetic velvet gel, and on a coffin shape it looks rich without needing much extra art.
Black velvet nails already have movement built in, so the gold should stay small. Think tiny starbursts, micro celestial crosses, or single-point spark accents placed on two or three nails. Anything bigger competes with the magnetic effect.
What makes the texture matter
Velvet gel creates a soft band of reflected light inside the polish. It is not glitter, and it should not look gritty. When the magnet is held at the right angle before curing, that inner glow gives the black depth. Gold starbursts then sit on top like sharp punctuation marks.
Best way to wear it
- Use the celestial details on accent nails only.
- Keep the starburst lines fine and short, not chunky.
- A short-to-medium coffin length is enough; the velvet finish already does a lot.
- Choose gloss top coat, because matte kills the magnetic shift.
This set leans moody, almost night-sky territory, though it does not need moons and planets on every finger to get there. Two well-placed gold stars can do more than ten cluttered decals. That restraint keeps the manicure expensive-looking instead of novelty-heavy.
7. Nude Base With Black Sidewalls and Gold Outline
Full coverage is not required. One of the smartest black and gold coffin nail ideas leaves the center of the nail lighter and pushes black along the sidewalls, then outlines that shape with gold.
Unlike a standard black set, this design keeps more negative space on the nail, which means it can feel easier to wear if you type all day, dress simply, or want your hands to look a little longer. The black panels act like visual contour. They slim the nail. The gold outline sharpens the effect.
Who is this best for? Anyone who likes a graphic manicure but hates bulk. Because the center stays nude or milky pink, grow-out is softer than with full black polish. The design still looks intentional after a bit of wear, which is more than I can say for some all-over dark sets.
Ask your tech to keep the black sections even on both sides and start the taper around the midpoint of the nail. If the side panels are too wide near the cuticle, the nail can look squat. If they are too thin, you lose the graphic impact.
A warm gold metallic paint works better than loose foil here. You want clean edges, not texture. Think architecture, not rubble.
8. Croc-Texture Coffin Nails With Molten Gold Details
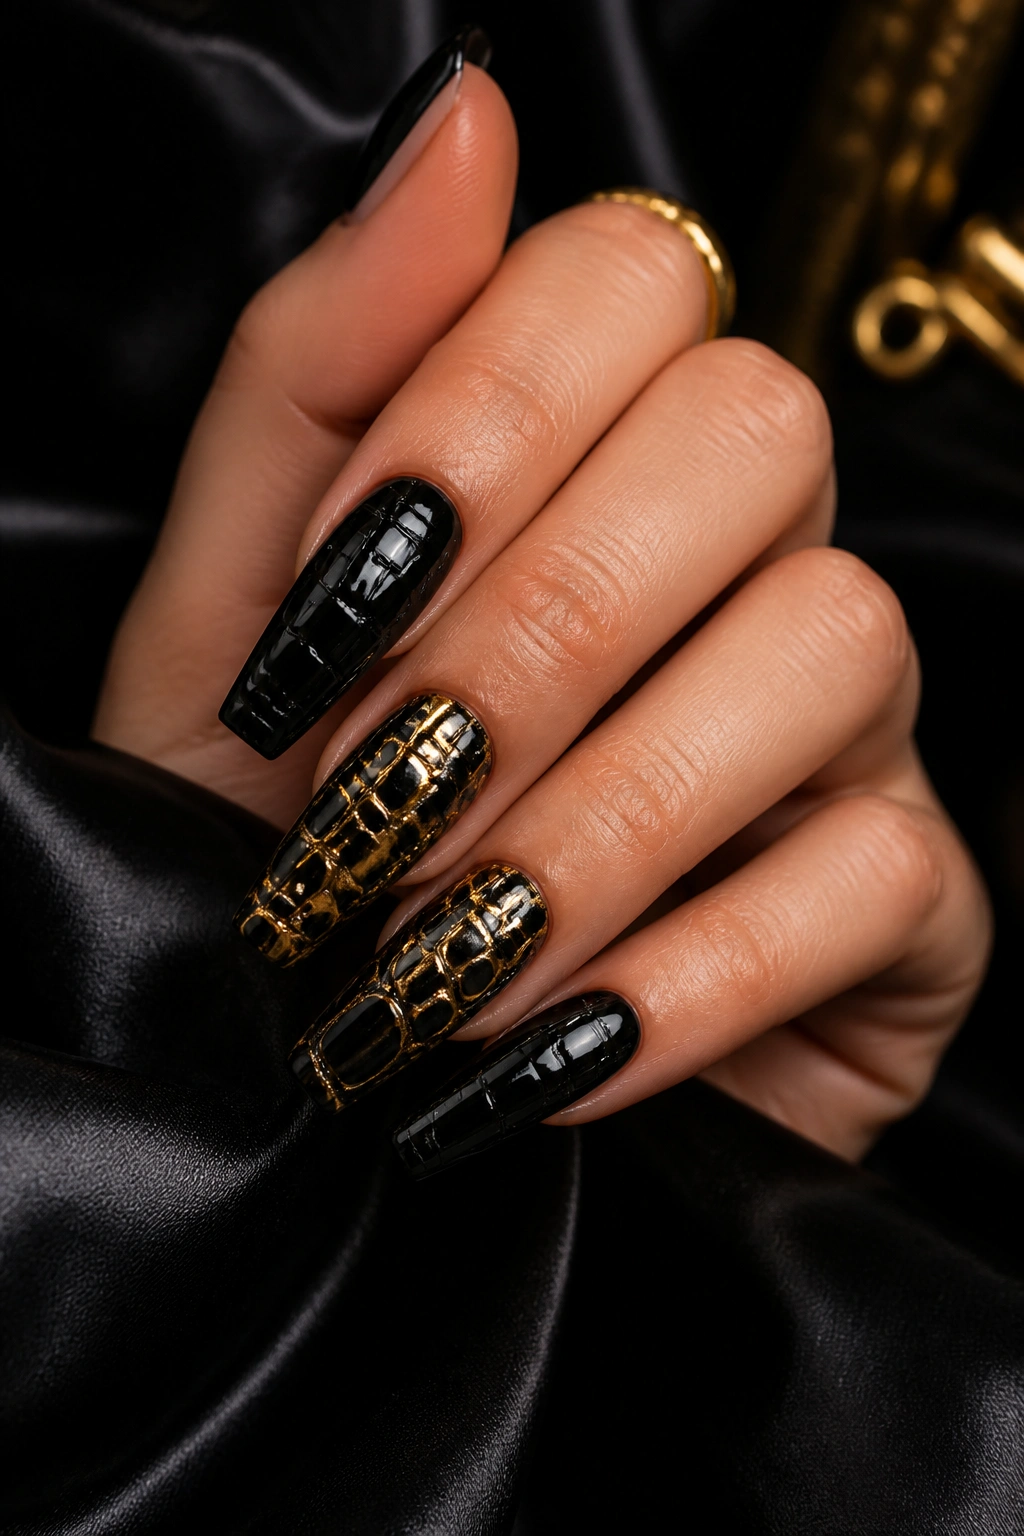
This one is loud.
Croc texture already has attitude because the raised pattern throws tiny shadows across the nail. Add black as the base and molten-looking gold pressed into parts of that texture, and you get a manicure that feels more like jewelry than polish. It suits long coffin extensions best, where the pattern has room to breathe and the tip still looks sharp.
The trick is not to make every nail equally busy. One or two textured nails on each hand is enough. Use solid glossy black on the rest, maybe with a slim gold cuticle line or one small metallic accent so the set feels connected. Full croc texture on all ten nails can look heavy and is not much fun if you wear knit sleeves or handle delicate fabrics often.
Raised art needs good sealing around the edges, though not over the top if you want to preserve the texture. Builder gel or sculpting gel creates the croc pattern first. After curing, gold chrome or metallic pigment can be rubbed onto selected raised areas to make the pattern look molten rather than flat-painted.
This is not the manicure for someone who wants low maintenance. It is the manicure for someone who wants people to notice their hands across a room.
9. Half-Moon Black Nails With Gold Stud Accents
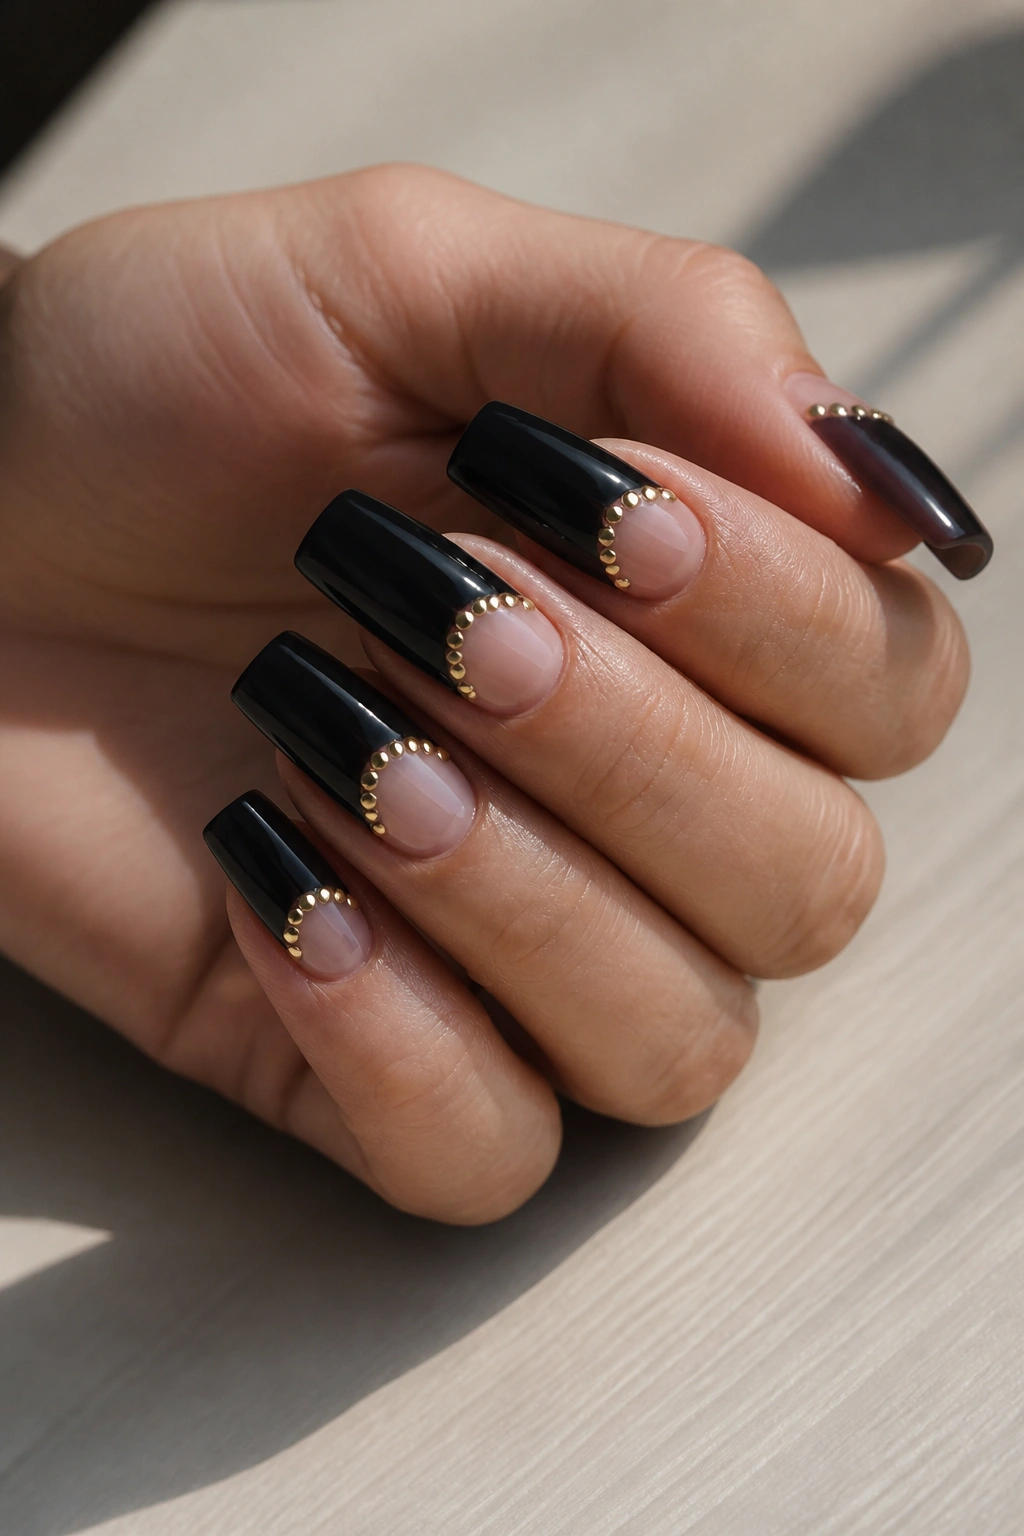
Short nail beds can wear black and gold well when the design starts at the base. A half-moon layout flips the usual focus: leave a crescent near the cuticle nude or sheer, paint the rest black, and place tiny gold studs along that curve or just above it.
The shape looks especially good on coffin nails because the open moon at the base balances the squared tip. You get structure at both ends of the nail, and the middle stays clean. That makes the set feel more tailored than a random stud placement ever could.
Why the studs matter here
Gold studs bring a little hardware to the design, but size is everything. Use micro studs or caviar beads, not oversized domes. Bigger pieces can look clunky and catch on everything. Tiny flat-backed accents sit better and keep the moon shape readable.
A few notes worth keeping in mind:
- This design works on medium or even short coffin nails.
- Keep the half-moon smooth and even; jagged edges ruin the look fast.
- Two or three studs on each accent nail usually beat a full studded crescent.
- Seal around the studs well so they do not lift at the edges.
This look has a hint of vintage manicure style, though the black makes it far sharper than a classic red moon set. If you want elegance with a bit of metal, this is a good lane.
10. Black Glitter Nails With Dry-Brushed Gold Striping
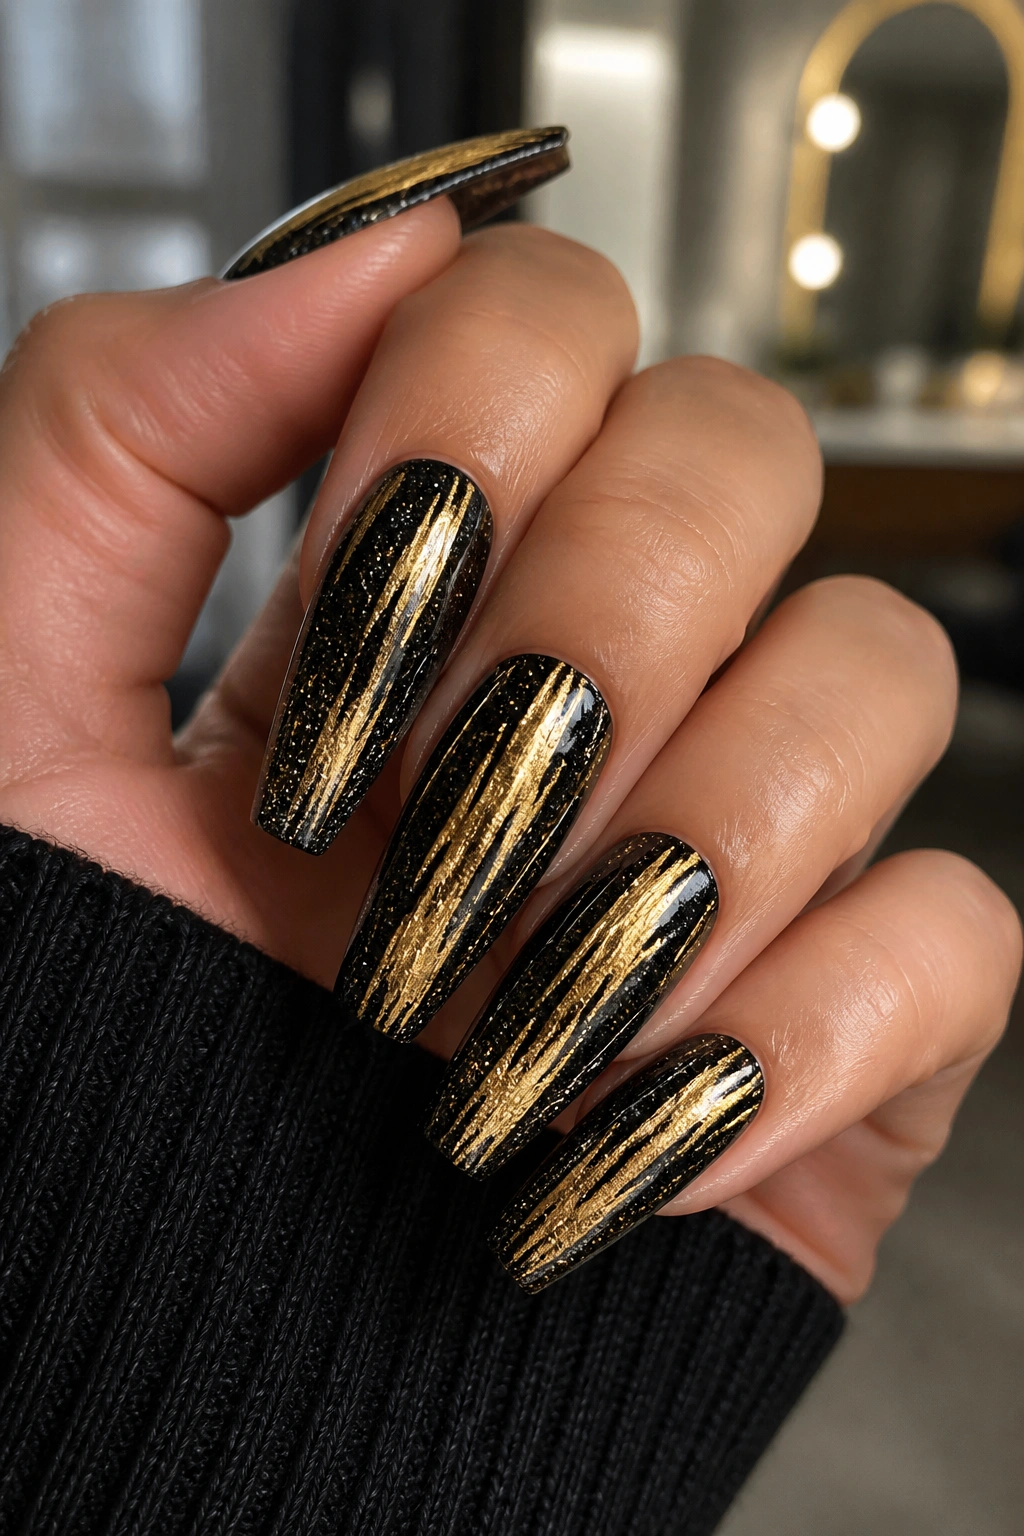
Gold glitter all over the nail can feel expected. A black glitter base with rough dry-brushed gold striping feels more like fabric or brushwork—messier, less polished, more editorial.
The base should not be a dense disco glitter. Go for a fine black sparkle that twinkles when the hand moves but still reads black from a few feet away. Then pull a mostly dry brush of gold metallic gel across part of the nail in vertical or diagonal strokes. The broken edges are what make it work. If the stripes are too perfect, the whole point disappears.
I like this best on medium-long coffin nails with two or three accent fingers carrying the brushwork. Put it on every nail and the hand starts to look too busy. Use solid black glitter on the rest, or maybe one plain glossy black nail to quiet things down.
This design holds up well in real life because the brush strokes do not depend on hairline perfection. Tiny wear marks are harder to spot than they are on a razor-thin gold border. So if you want black and gold coffin nails that still feel expressive but forgive a little day-to-day abuse, this is a good pick.
Think less polished metal trim, more black silk jacket with brushed gold threads.
11. Negative-Space Blocks With Fine Gold Wire
Sharp geometry has a place in nail art, and coffin nails are one of the few shapes that can carry it without looking fussy. A design built from clear or nude blocks, black painted sections, and hair-thin gold lines gives you a manicure that feels crisp and modern.
The gold can be hand-painted or done with ultra-fine metallic striping tape, though I usually prefer paint under top coat because tape edges can lift. You want straight lines that look embedded in the design, not stuck on as an afterthought.
What to ask for
Ask for asymmetry. One nail might have a diagonal black corner and a single gold line. Another might use a vertical black block with a narrow clear panel. Another may stay mostly nude with just one gold wire line framing a black tip. The inconsistency between nails is what keeps the set alive.
A few rules help the design stay clean:
- Keep at least 30 to 40 percent negative space on the nails using this art style.
- Limit the gold to one or two lines per nail.
- Use glossy top coat so the blocks look smooth and intentional.
- Avoid adding gems. They fight the geometry.
This style has a graphic, almost fashion-sketch quality to it. It suits people who like black and gold coffin nails but want something lighter than full coverage and sharper than swirls or foil.
12. Black Swirl Nails With Gold Leaf Tips
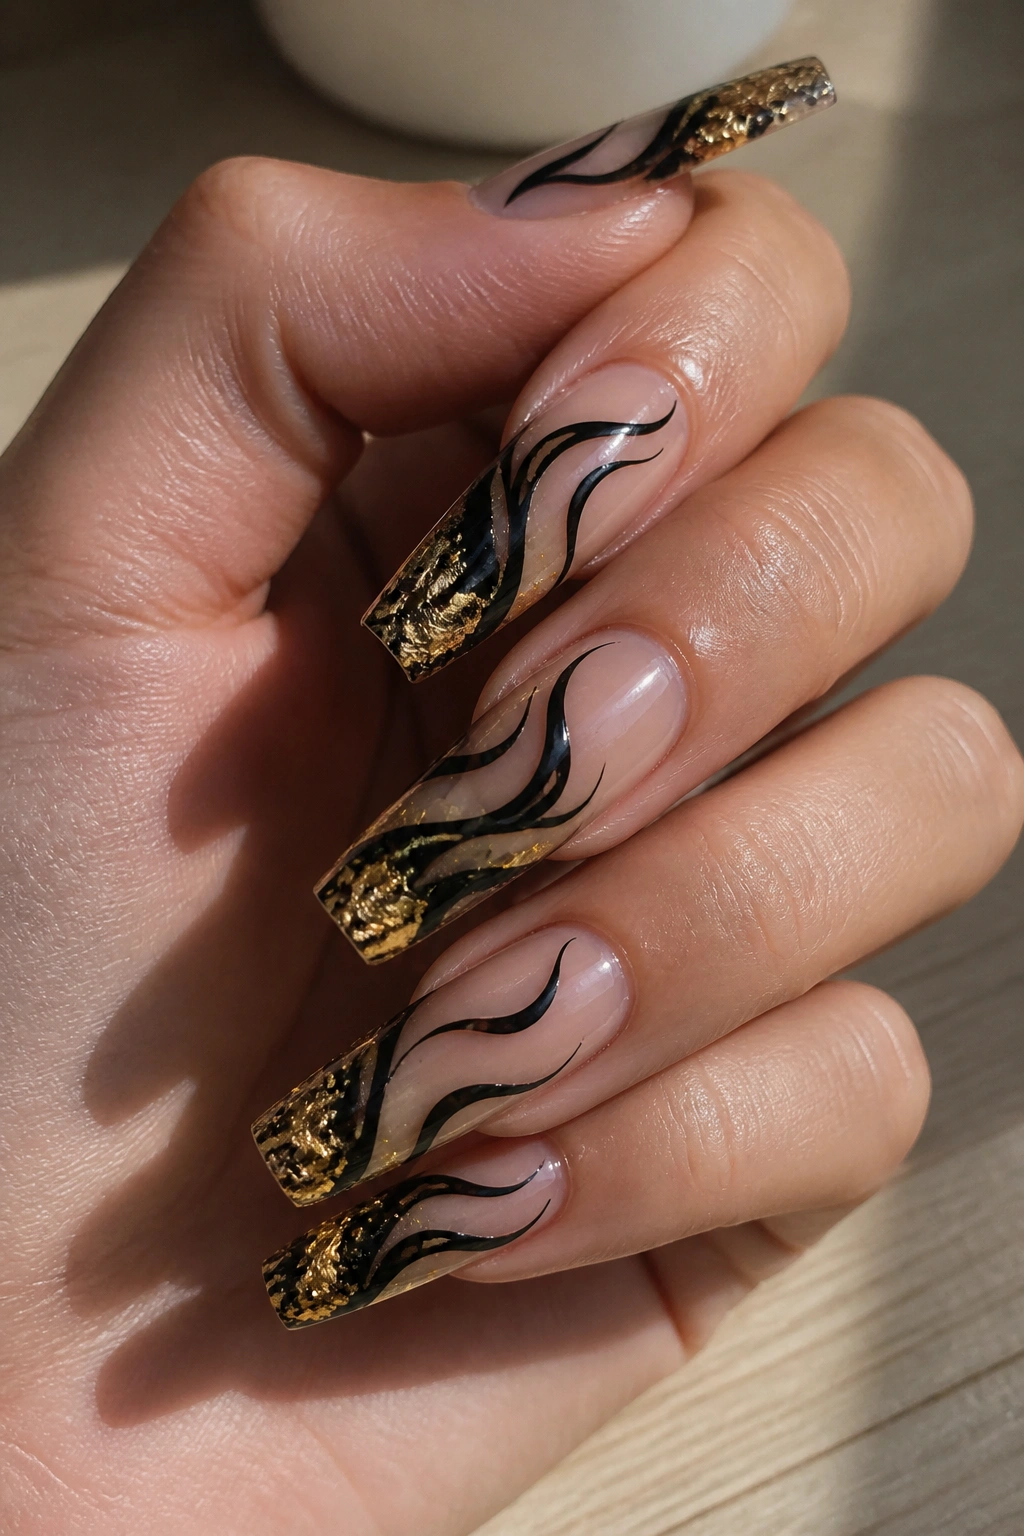
Swirls loosen everything up. If your taste runs softer than strict line work, black painted swirls over a nude or sheer base with little flashes of gold leaf at the tips give you movement without losing the black-and-gold palette.
The reason this set works on coffin nails is the tip. A coffin shape gives the swirl somewhere to finish. Instead of trailing off at a rounded edge, the design lands at that squared-off end, where the gold leaf can sit like a final accent. It looks intentional when the swirls widen slightly toward the tip and narrow near the cuticle.
Gold leaf is better than chrome here because the broken texture matches the organic flow of the swirls. Press small fragments into the tip area or along the outer curve of one swirl. Keep the pieces fine. Big torn chunks can overpower the line work.
This is also one of the friendlier black and gold designs for a shorter coffin shape. You do not need extreme length to show a few curves and a light scatter of leaf at the tip. That makes it a smart option if you like nail art but still need your hands for daily work, typing, cooking, or contact lenses.
Loose, yes. Messy, no.
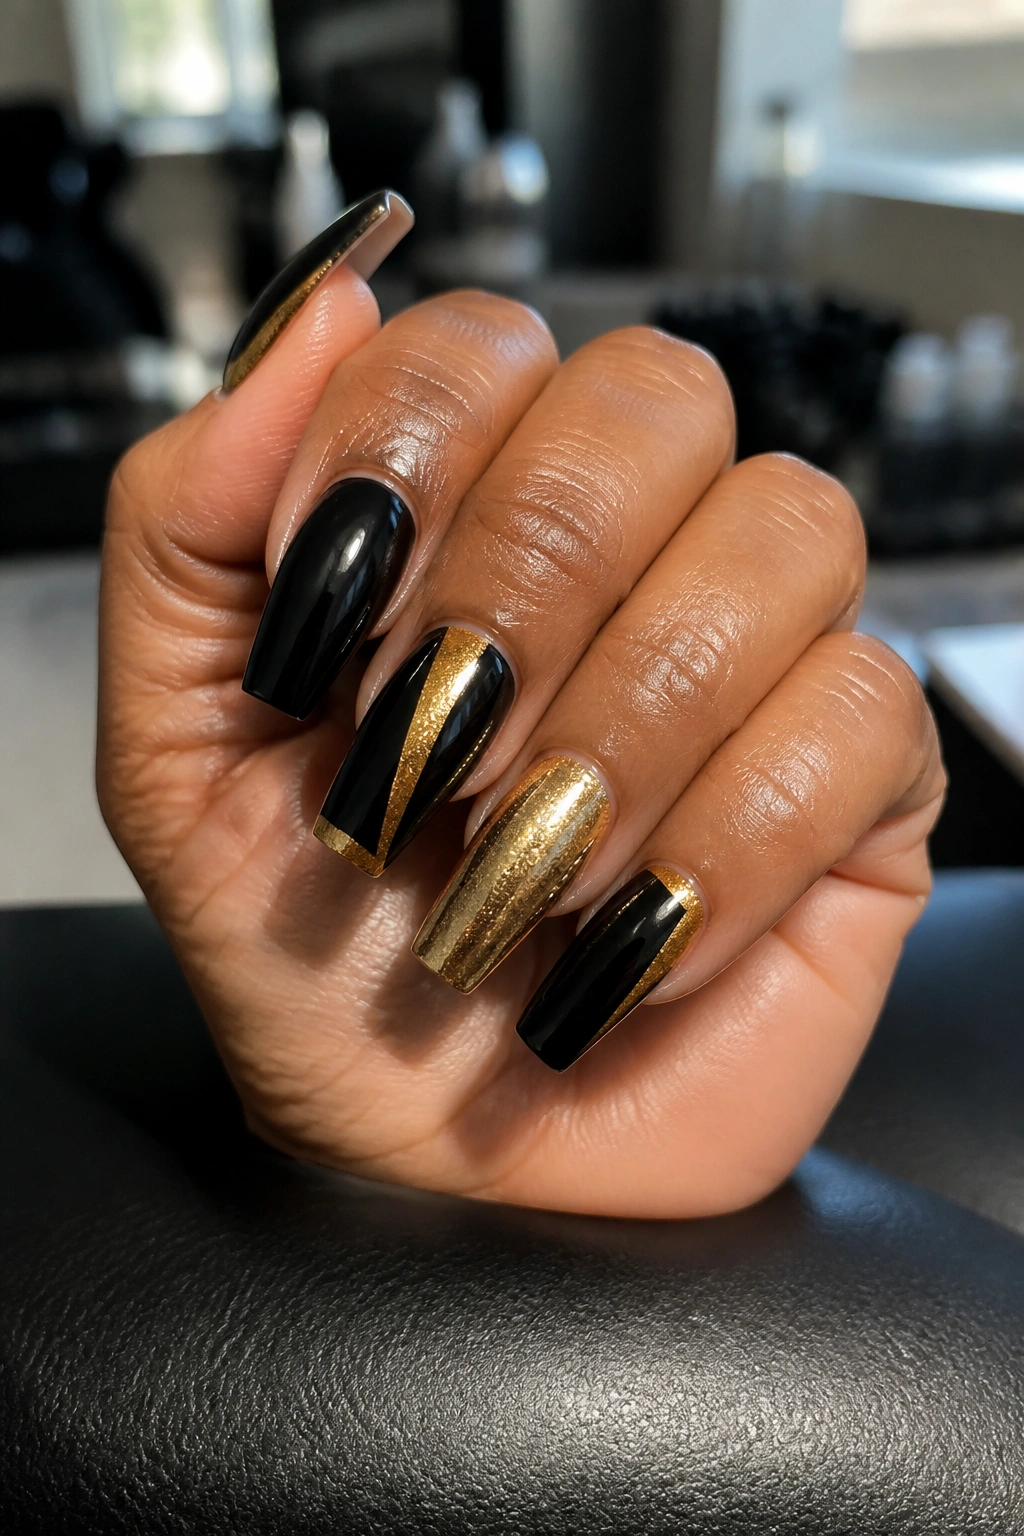
13. Tuxedo-Inspired Black and Gold Coffin Manicure
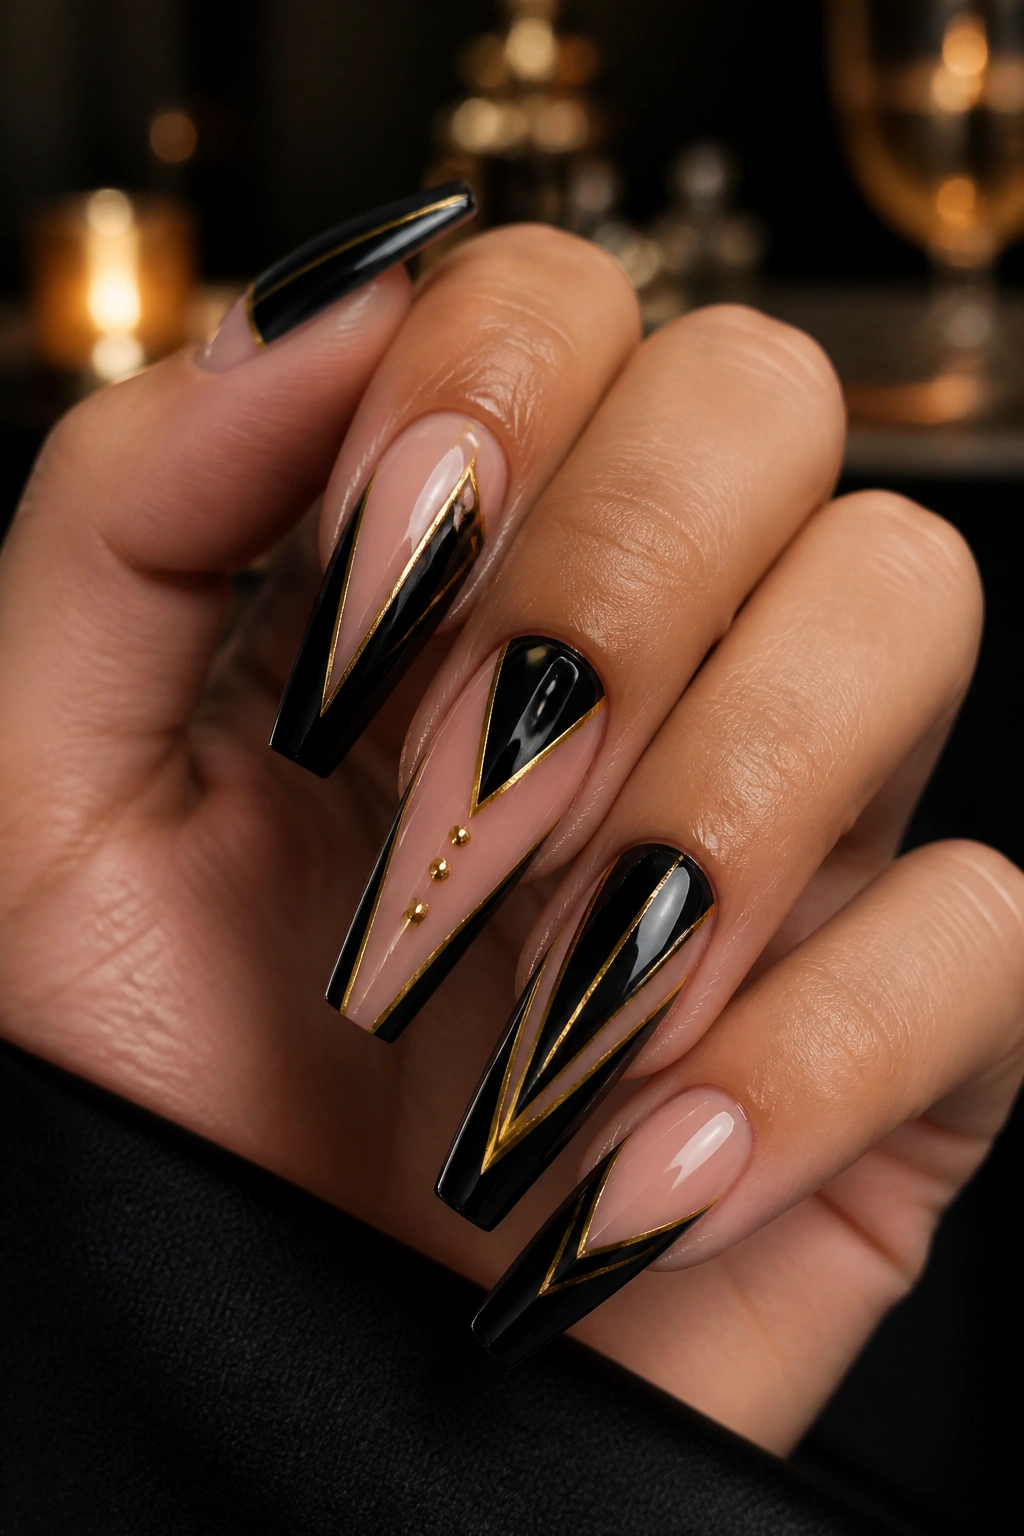
If a manicure could wear a dinner jacket, it would look like this. Think glossy black panels, bare or nude sections, maybe a sharp angled French on one nail, and slim gold pinstripes that feel more tailored than sparkly.
This design is less about texture and more about clean placement. One nail might have a black side panel with a gold vertical line. Another might use a V-shaped black tip edged in gold. Another could stay full black with a single metallic stripe near the cuticle. The shared mood is formal, neat, and a little severe in the best way.
What makes it feel tailored
The gold should stay thin, almost like piping on a jacket seam. Use metallic paint, not glitter. Keep the black glossy. And leave enough nude space that the manicure has contrast beyond color alone. The open space is what stops the set from looking like a flat black wall.
A tuxedo-style set works especially well for:
- Medium-long coffin nails with crisp sidewalls
- People who wear gold jewelry often
- Events where you want the manicure to feel polished, not playful
- Anyone who likes French tips but wants a darker version
This is one of the more disciplined looks in the group. No texture pile-on. No giant stones. No need. The precision is the whole appeal.
14. Black Jelly Coffin Nails With Encapsulated Gold Flakes
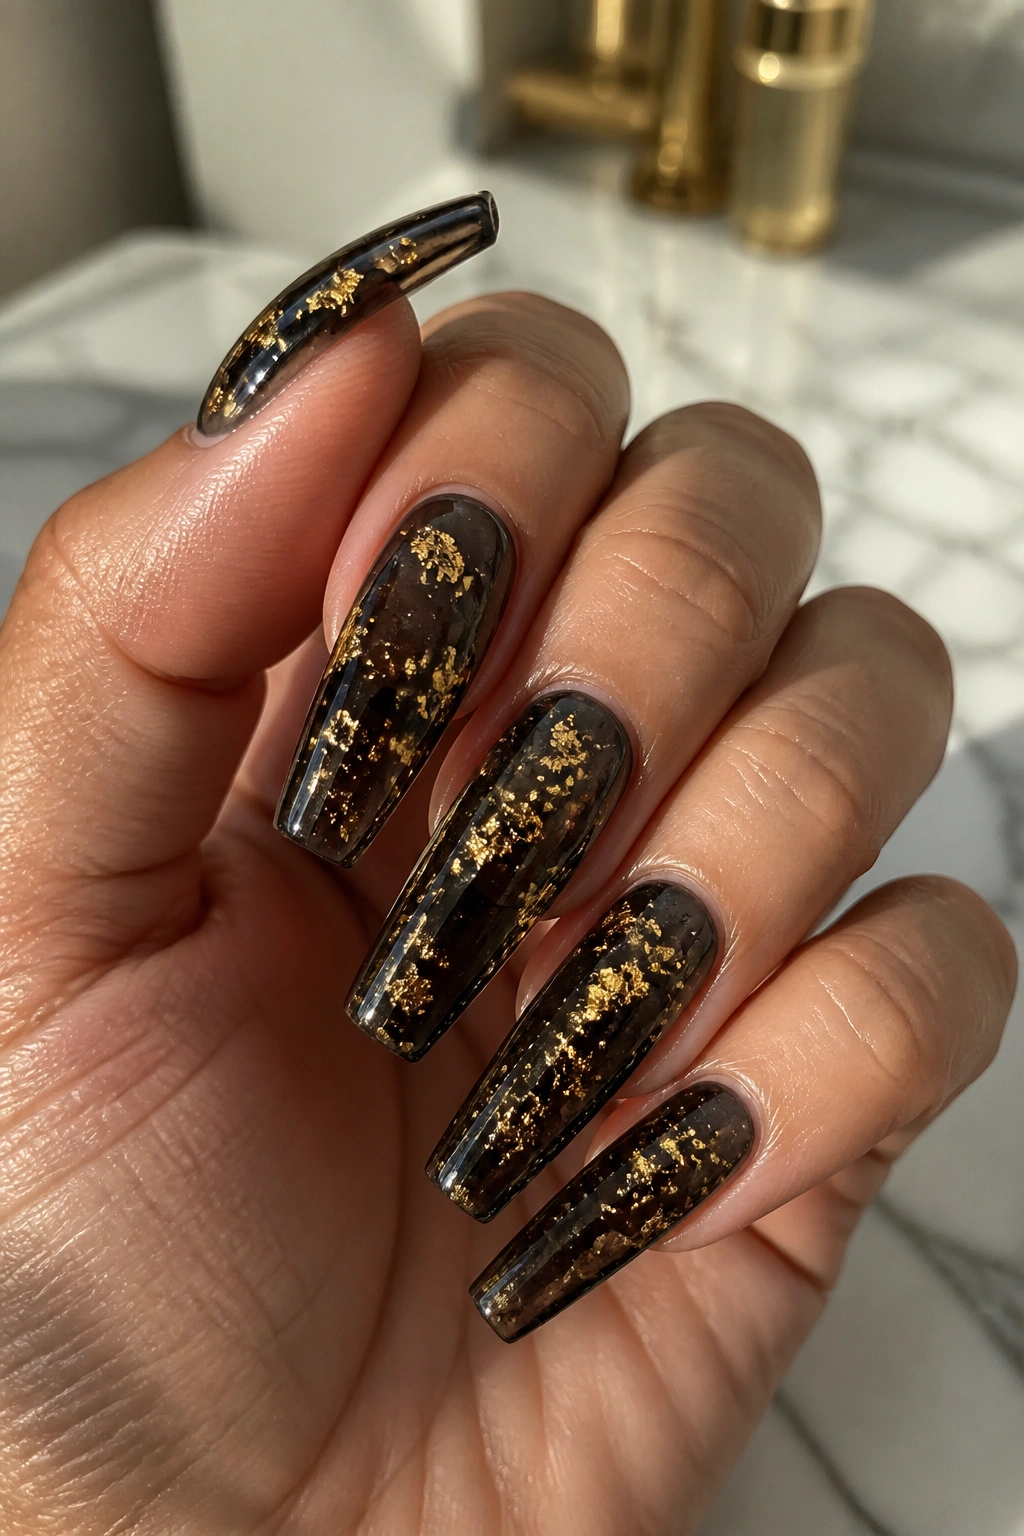
Translucent black has depth that cream polish cannot fake. A black jelly coffin set lets light pass through the color a little, and when gold flakes are suspended under the surface, the nails look layered instead of painted.
Encapsulation is what makes this design sing. The gold should sit under builder gel or hard gel so the surface stays smooth. That matters on coffin nails, where a bulky top layer can ruin the shape fast. When done well, the flakes seem to float inside the nail rather than sit on top of it.
Placement counts. Push the gold toward the tips for a gradient effect, scatter it through the center for a suspended look, or cluster it near one sidewall for something less predictable. You do not need massive flakes, either. Fine irregular pieces give more depth than big uniform chunks.
This design works well on full-coverage extensions and sculpted sets alike, though it shines on medium-long lengths where the translucent black has room to show. If you want black and gold coffin nails with a little mystery—less graphic, more depth—this one has that.
One practical note: jelly black can show thickness inconsistencies. A smooth build is non-negotiable here. Lumpy structure ruins the illusion right away.
15. Short Coffin Nails With Black Micro-French and Gold Dotwork
You do not need long extensions.
A short coffin shape with a black micro-French tip and tiny gold dotwork near the cuticle or along one side is one of the easiest ways to wear this color combo day to day. The tip keeps the black controlled. The dots give the manicure a little jewelry-like detail without adding bulk.
The success of this set lives in scale. Keep the French edge narrow—almost a whisper of black along the tip—and use a dotting tool for small, evenly spaced metallic dots. One dot at the center cuticle works. A diagonal row of three near the sidewall works too. A full ring of dots around the entire nail usually feels overworked on a short shape.
This is the design I recommend when someone likes black and gold coffin nails in photos but knows they do not want long dramatic extensions. It still gives you the coffin silhouette, still feels sharp, and still nods to the color pairing without asking you to baby your hands all week.
Short sets also grow out more gracefully when the base stays sheer. That matters. Practical nail art is not boring nail art.
Final Thoughts
If you want one rule, keep this one: pick one gold texture and let it do its job. Chrome, foil, metallic paint, studs, encapsulated flakes—each one brings a different mood. Piling two or three onto every nail usually weakens the set instead of strengthening it.
Coffin nails already provide structure, so your design does not need to shout. A razor-thin gold border, a smoky jelly base, a half-moon stud detail, a small starburst on velvet black—those moves go farther than people think when the shape is clean and the finish is sharp.
And if you are torn between two looks, go with the one your hand can actually live with. The smartest manicure is not the busiest one. It is the one you still enjoy staring at after day five, when the salon glow has worn off and your nails are back in real life.
