

Gem coffin nails fail in two predictable ways: the stones pop off, or the whole set starts looking cheap by day three. Usually it’s both. You leave the salon or finish your press-ons at home with that clean, glassy sparkle, then a gem disappears after you button jeans, pull on a sweater, or spend ten minutes doing dishes.
The annoying part is that the problem usually is not the gem itself. It’s placement, base structure, and size. Coffin nails give you a long, flat surface that can hold crystals better than round or squoval nails, but the tip still takes hits, the sidewalls still catch hair, and bulky stones still snag when they sit too high.
I’m picky about gem placement for that reason. A neat line at the cuticle, a centered stack, a diagonal sweep on one accent nail — those choices tend to hold up. Random large stones scattered across every finger rarely do, and they can make even a pricey set look cluttered.
If you want gem coffin nails that stay on and still look good after real life happens, the sweet spot is controlled sparkle, a stable nail underneath, and enough restraint to let the shape do some of the work.
Why Some Gem Coffin Nails Last Two Weeks and Others Lose Stones in Two Days
Most loose gems come from bad placement, not bad luck. When a stone sits on the last few millimeters of the free edge, it gets smacked every time you type, tap, open a can, or reach into a bag. Put that same stone closer to the cuticle or along the center spine of the nail, and it usually lasts much longer.
The base matters too. Crystals hold better on a firm acrylic set, a structured gel overlay, or a well-built Gel-X style tip than they do on a thin, bendy nail. If the nail flexes every time you grab something, the adhesive bond weakens. Small gems may survive. Bigger stones usually do not.
Size is another deal-breaker. Flat-back crystals in the 1 mm to 3 mm range are the safest daily-wear option for most coffin sets. Once you move into chunky charms, pointed-back stones, and oversized metal frames, you’re no longer wearing a low-profile design. You’re wearing hardware.
These are the failure points I see most often:
- Stones placed on the tip edge, where impact is highest
- Gems pushed into the sidewalls, where hair and fabric catch first
- Top coat used as the only adhesive under medium or large crystals
- Press-ons applied without etching the surface first, so the gel has nothing to grip
- Too many stones packed together, which leaves tiny gaps where water and oil can creep in
None of this is glamorous, but it’s what separates a set that still looks sharp on day ten from one that starts shedding by the second shower.
The Prep and Placement Rules That Make Gem Coffin Nails Wear Better
A good gem set starts before the first crystal touches the nail.
Start with a rigid, balanced base
If you’re doing salon enhancements, ask for enough structure through the apex so the coffin shape doesn’t flatten under pressure. If you’re using press-ons, file the underside where it meets your natural nail, then lightly etch the top surface where the gems will sit. A 180-grit file works well for that. Smooth plastic and thick top coat are both weak landing zones.
Choose stone sizes that match the nail length
On a short coffin nail, SS3 to SS8 crystals usually look cleaner and wear better than anything oversized. On longer nails, you can push a little bigger on one accent finger — think a 4×6 mm emerald-cut crystal, not a huge dome charm. Scale matters. A stone that looks elegant on a long ring finger can look clumsy on a shorter index nail.
Seal around the gem, not over the top
This one gets missed all the time. If you flood top coat over the face of a crystal, you dull the shine and create a cloudy surface. The smarter move is to nestle the gem into rhinestone gel or builder gel, cure it, then run a thin detail liner with top coat around the base of the stone to lock the edges without covering the facets.
Placement should leave breathing room too. Keep gems about 0.5 to 1 mm away from the cuticle and slightly in from the sidewalls. That tiny gap makes the set look tidier and cuts down on lifting.
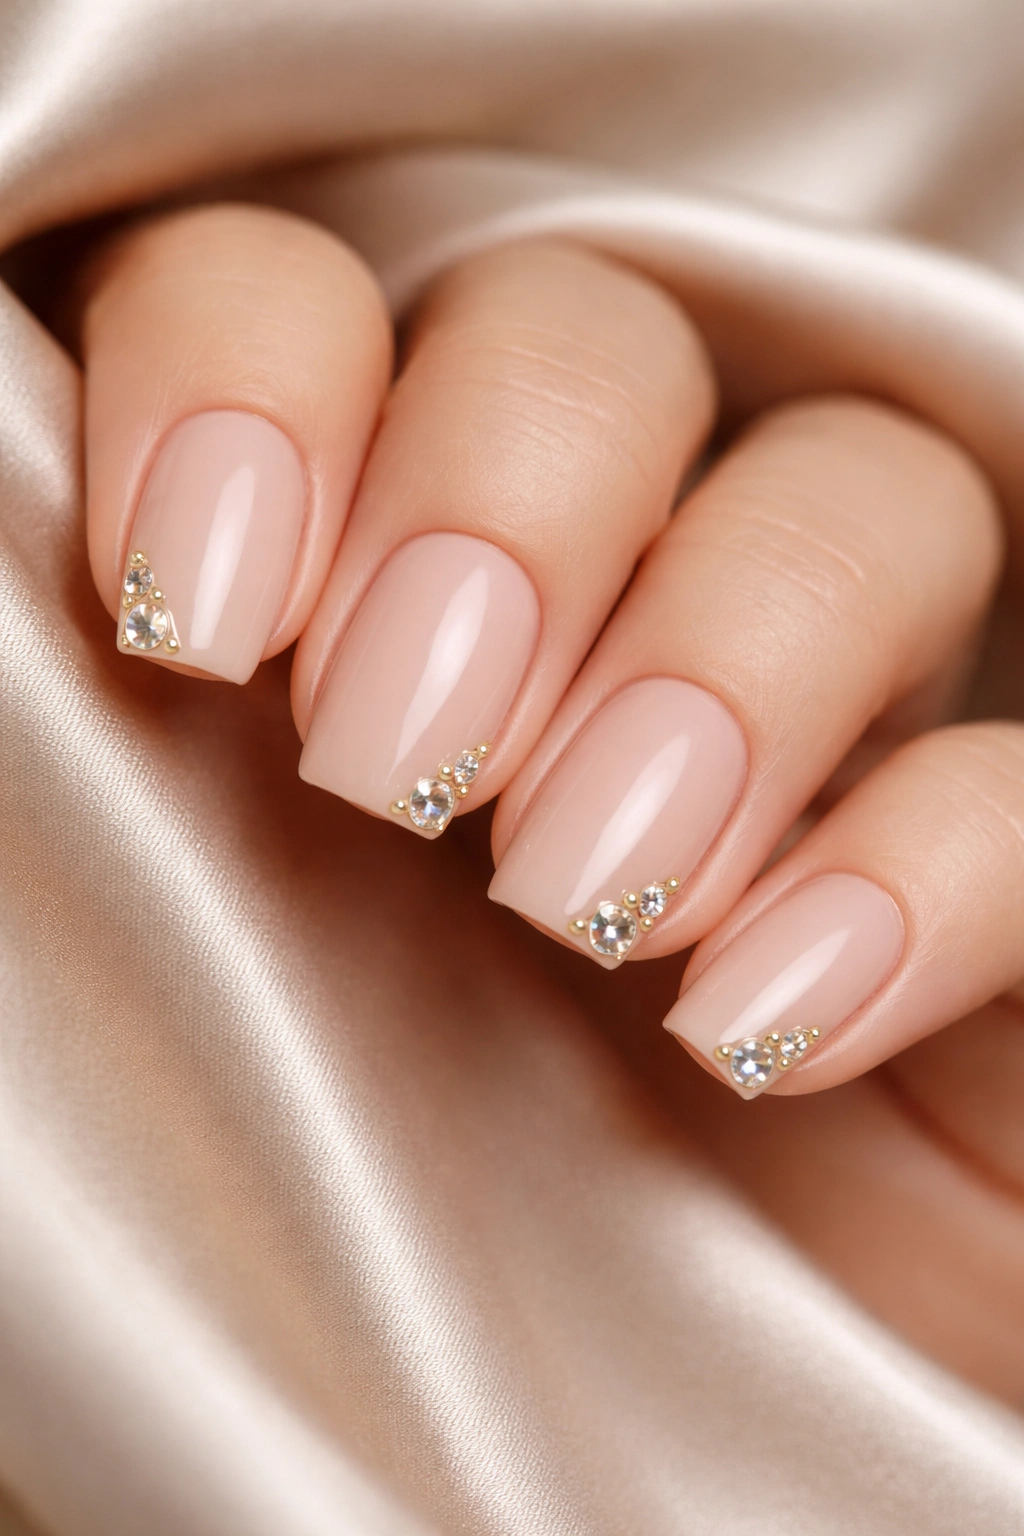
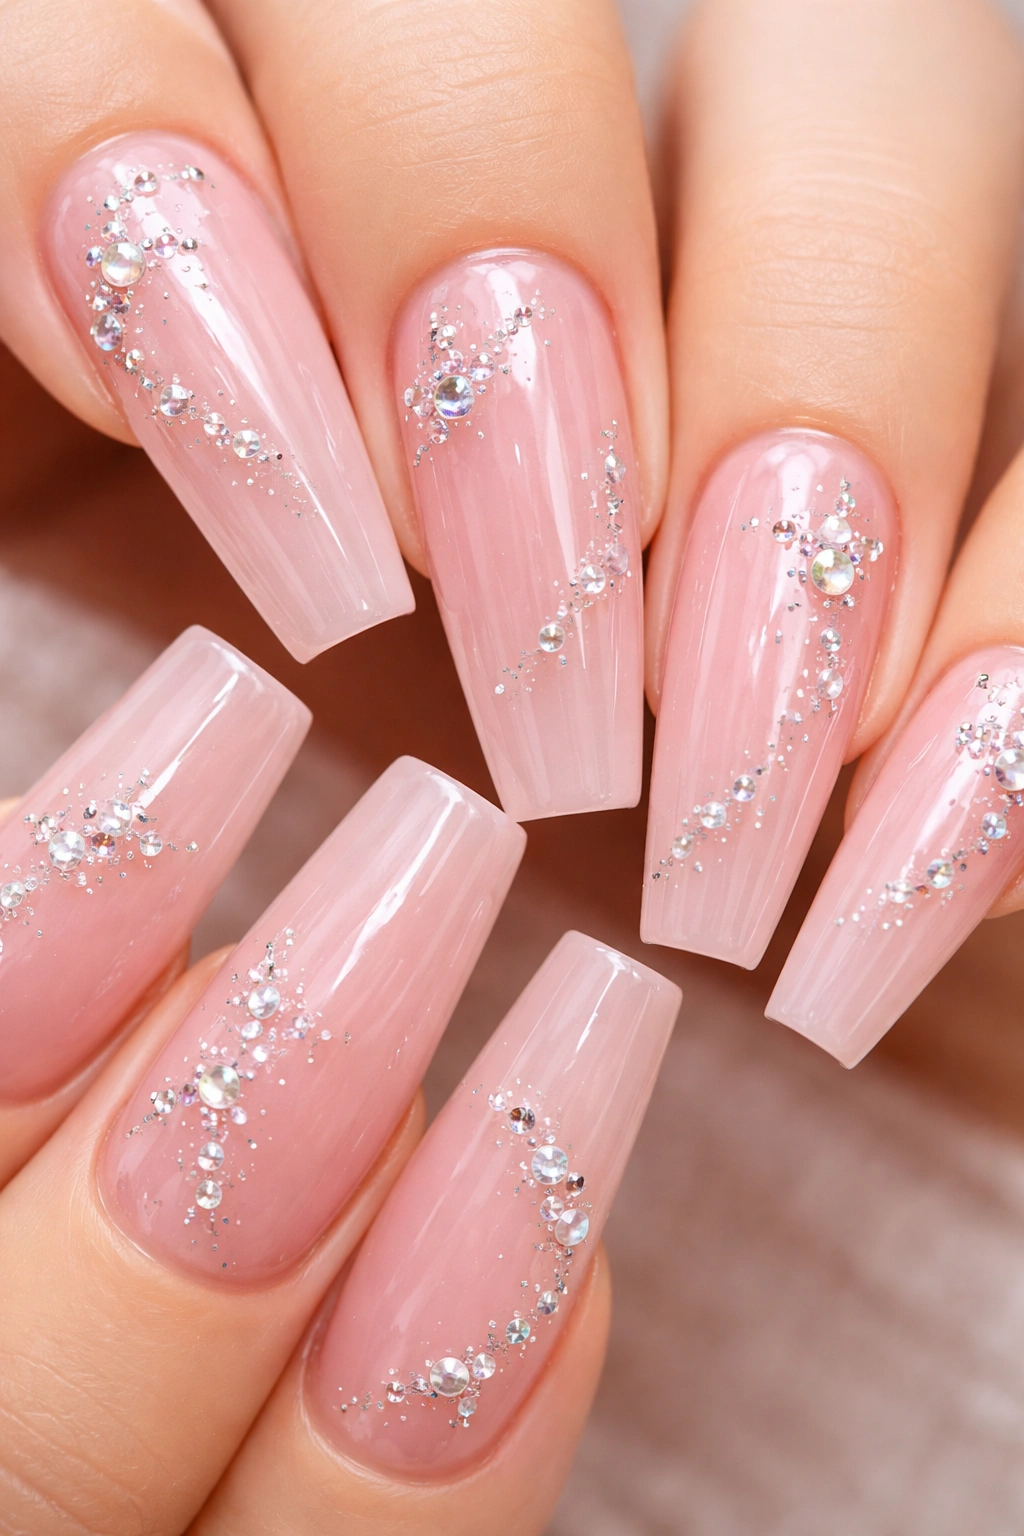
1. Nude Gem Coffin Nails with a Cuticle Crescent
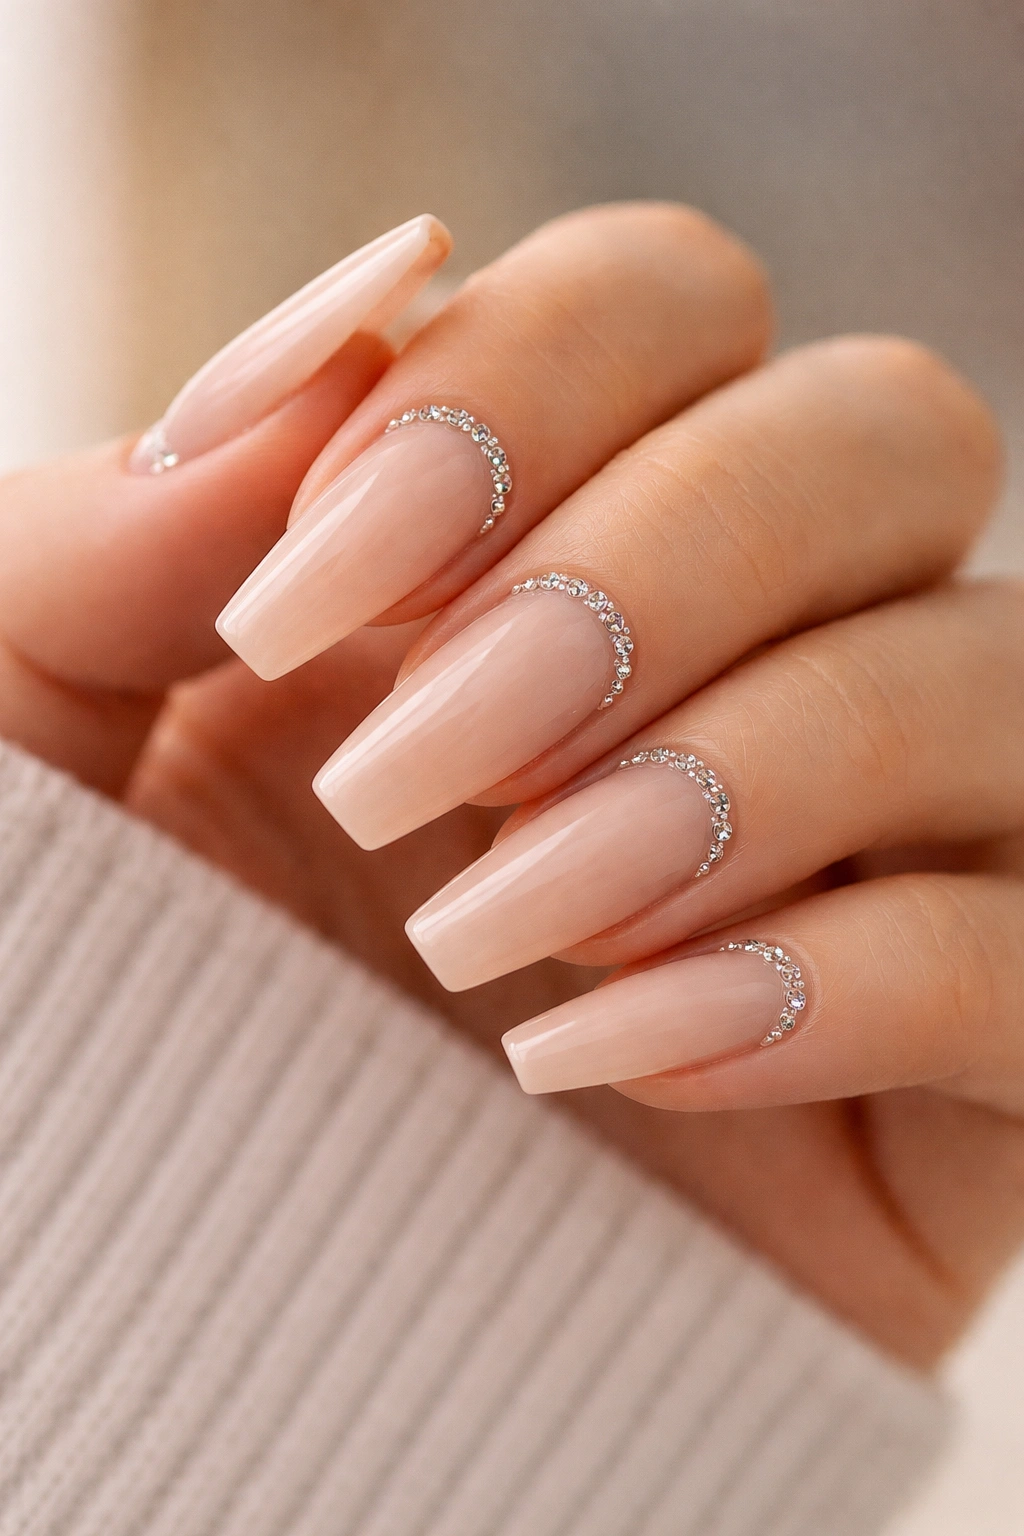
If you want one design that almost always reads clean, polished, and expensive, this is it. A soft nude base with a curved line of small crystals near the cuticle gives you sparkle where the eye naturally lands, while keeping the tip free for actual daily use.
I recommend this layout to people who want gem coffin nails without the “I can’t touch anything” feeling. The stones stay low, they don’t crowd the shape, and grow-out tends to look softer on a beige, pink-beige, or milky nude base than it does on bright white or black.
Why the cuticle line holds up
The lower third of the nail takes fewer direct hits than the tip. That makes it a safer home for crystals, especially on medium coffin lengths. A neat crescent also follows the natural curve of the nail plate, so the design looks intentional instead of stuck on.
Quick design notes
- Use 5 to 7 flat-back crystals in graduated sizes, usually SS3 through SS8
- Keep the largest stone near the center, then taper down toward both sides
- Leave a hairline gap above the cuticle so the set stays crisp as it grows
- Choose a sheer nude with enough pigment to blur the natural nail line
Wear tip: Ask for builder gel or rhinestone gel under the stones, then a thin seal around the base. On this design, that small technical choice makes a big difference.
2. Micro-French Coffin Nails with Gems Along the Smile Line

A micro-French with a few stones beats a full crystal tip almost every time for real-world wear. I know the fully iced-out tip looks fun in photos, but the free edge is the hardest-working part of the nail. Put your sparkle there and you’re asking for trouble.
The smarter version keeps the French tip narrow — around 2 to 3 mm on a medium coffin nail — and places tiny crystals just above the smile line or at the corners where the white meets the nude base. That gives you a crisp border and a flash of shine without adding weight to the edge.
White polish can make sloppy gem placement stand out, so precision matters more here. I like using one or two SS5 stones near the outer curve of the smile line, or a row of micro SS3 stones tucked just above it on a single accent nail. The look stays neat because the sparkle follows an existing visual line.
This is also one of the better choices for office wear, weddings, or any time you want rhinestone nails that still feel restrained. The coffin shape gives you enough width to show the French line clearly, yet the design does not shout at people from across the room. It reads tidy up close, sharp from a distance, and it ages well over the life of the set.
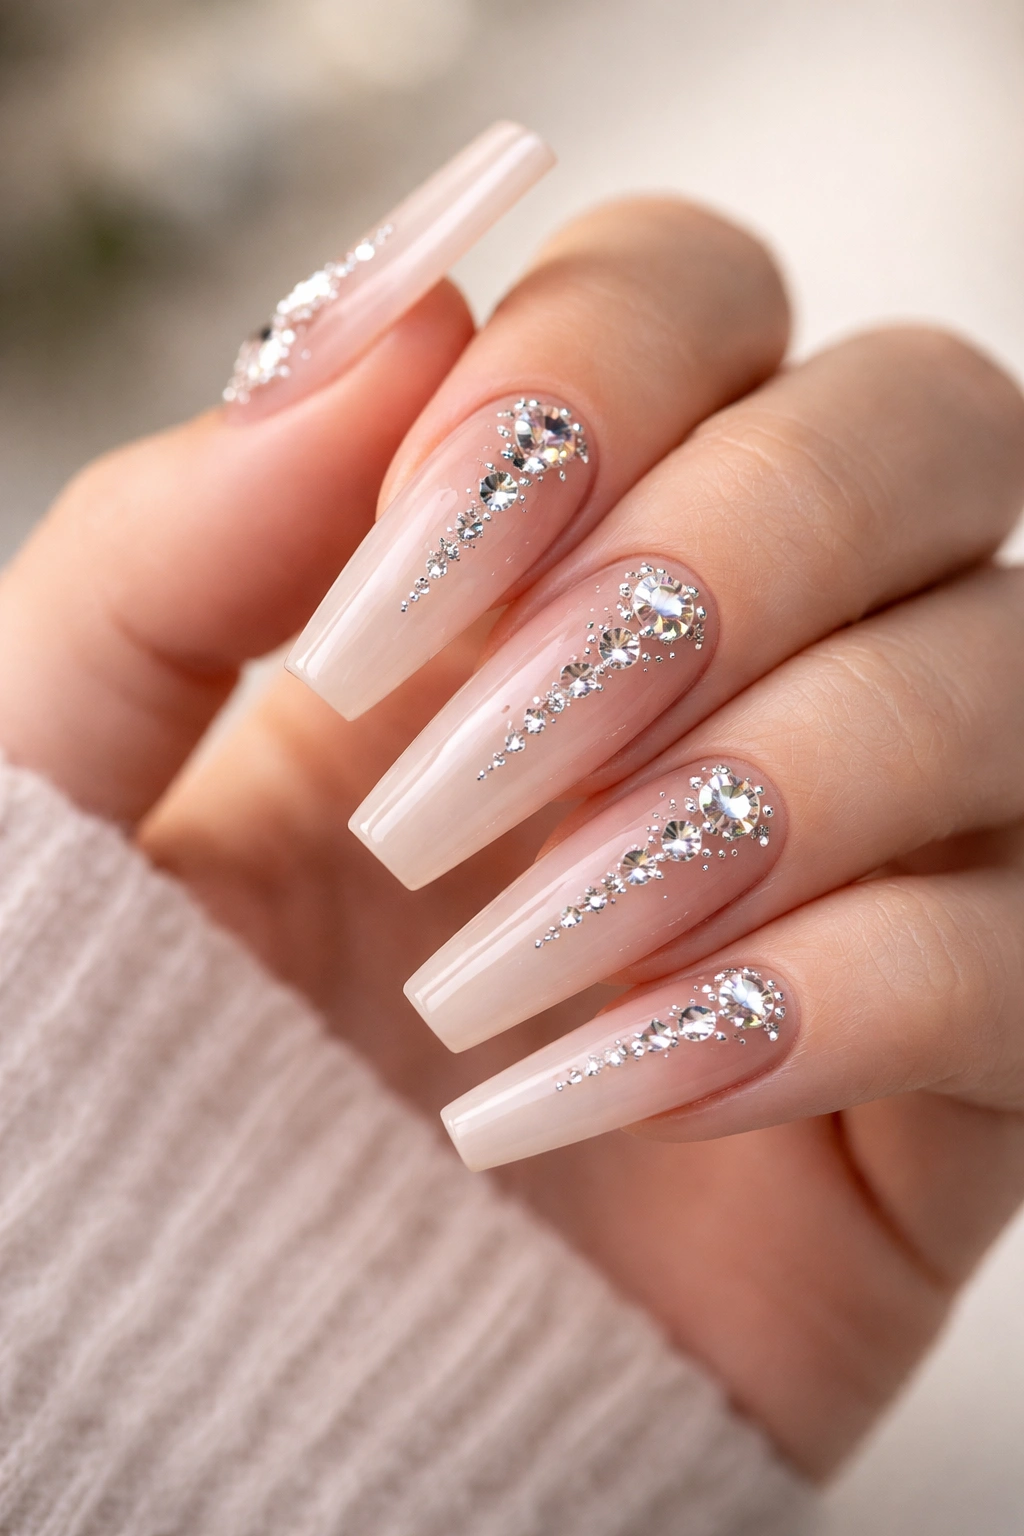
3. Baby Pink Ombre Coffin Nails with a Centered Crystal Stack
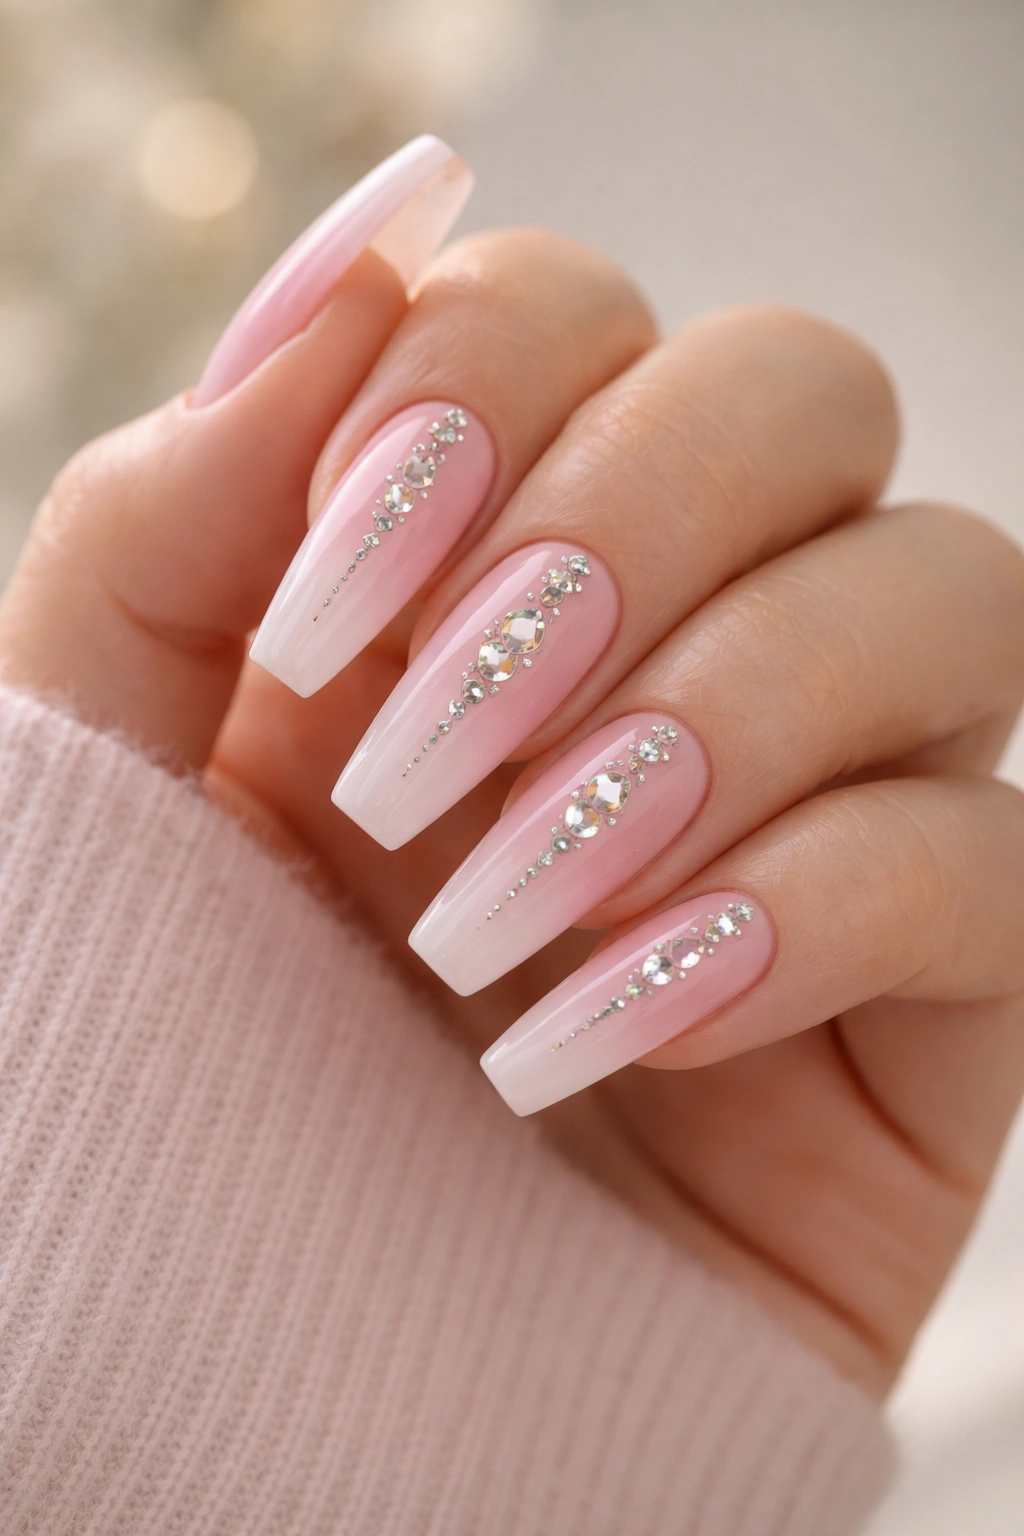
Why does a straight stack of crystals down the middle look so good on coffin nails? Because the shape is already symmetrical and tapered. A vertical line echoes that structure instead of fighting it, which makes the whole set look longer and calmer.
A baby pink ombre base helps too. When the color fades from a denser pink at the nail bed into a softer tip, the grow-out line is less harsh, and the center stones stand out without needing a loud background. I like this design on medium or long coffin nails where you have enough room to space the gems properly.
The placement is the whole trick. Start the first crystal a little above the cuticle, then run three to five stones up the center spine of the nail, shrinking the size as you move toward the tip. Stop short of the free edge by at least 4 mm. That empty space keeps the design from feeling cramped and cuts down on impact wear.
How I’d place the stones
Use one larger center crystal near the base — SS8 or SS10 — then move into SS6 and SS4 sizes as the line climbs. Keep the stack narrow. If the stones drift left or right, the symmetry falls apart fast, and coffin nails are unforgiving when alignment is off by even a little.
One more thing: this design works best when you do not repeat it on all ten fingers. One or two statement nails are enough. Past that, the center stacks start competing with each other, and the set loses the quiet structure that makes it appealing in the first place.
4. Glossy Black Coffin Nails with One Emerald-Cut Accent Stone
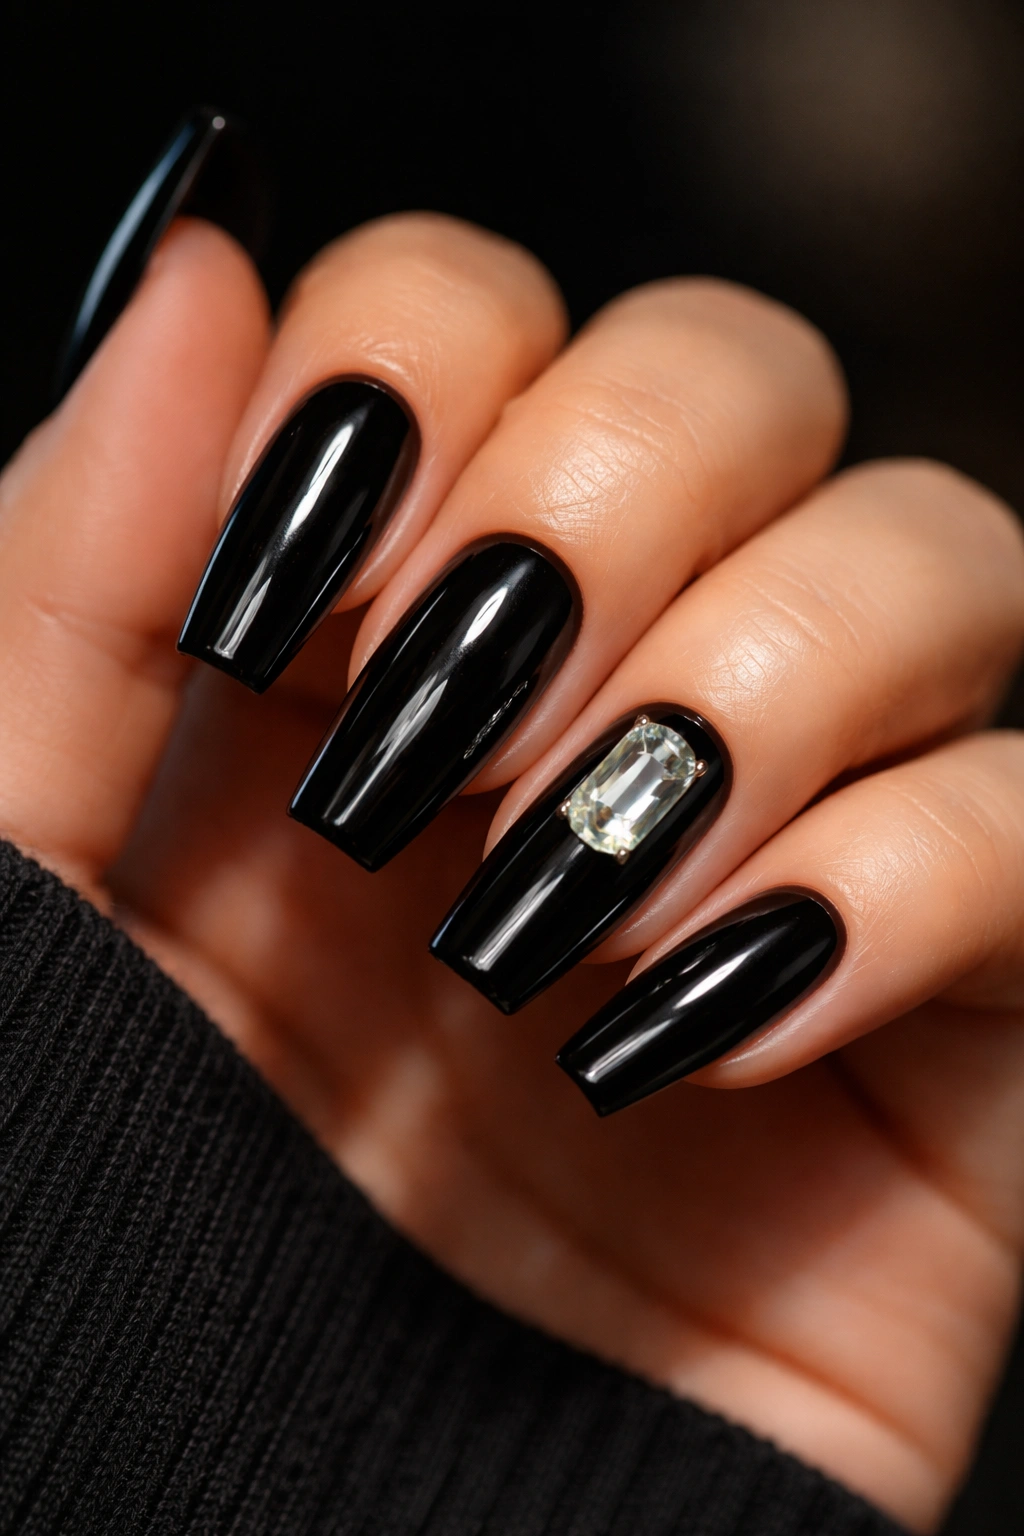
Picture a glossy black set, medium-long coffin shape, no clutter anywhere — and then one ring finger carrying a single emerald-cut crystal that throws hard flashes under indoor light. That contrast is what makes this design work.
Black polish gives gems a harder edge than nude or pink. The stone looks brighter because the background is darker, and the coffin shape keeps the whole set sharp rather than soft. Still, restraint matters more here than almost anywhere else. One large accent stone does more than five medium ones scattered around the hand.
The best placement is usually the lower center of the ring finger or middle finger, sitting above the cuticle line rather than in the middle of the nail. A 4×6 mm stone can work on a long coffin nail, but it needs a secure cradle of builder gel or rhinestone gel underneath. Large framed stones look nice, though they sit higher and can catch more easily than flat-back cuts.
A few practical details make this design easier to wear:
- Keep the big stone on one finger per hand
- Skip the index finger, which takes too many direct hits
- Pair it with a solid jet-black gel finish, not a smoky black
- Use a low-profile frame or no frame at all if you want better longevity
If you want drama without committing to a full bling set, this is one of the smartest ways to do it.
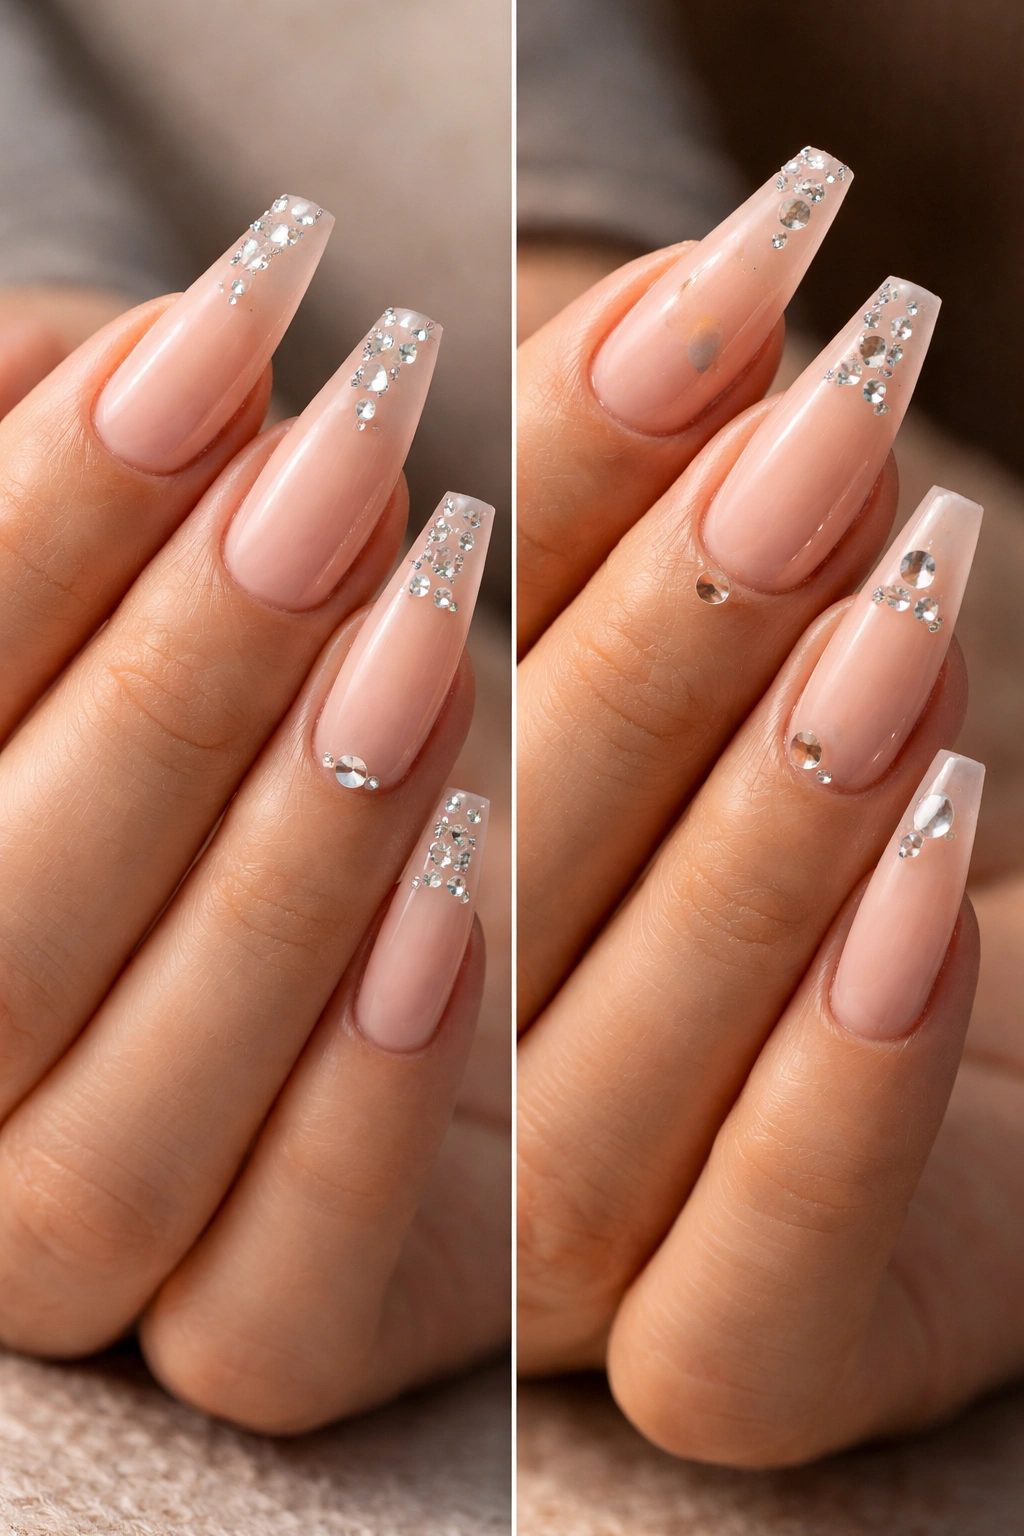
5. Clear Gem Coffin Nails with Encapsulated Crystal Flakes
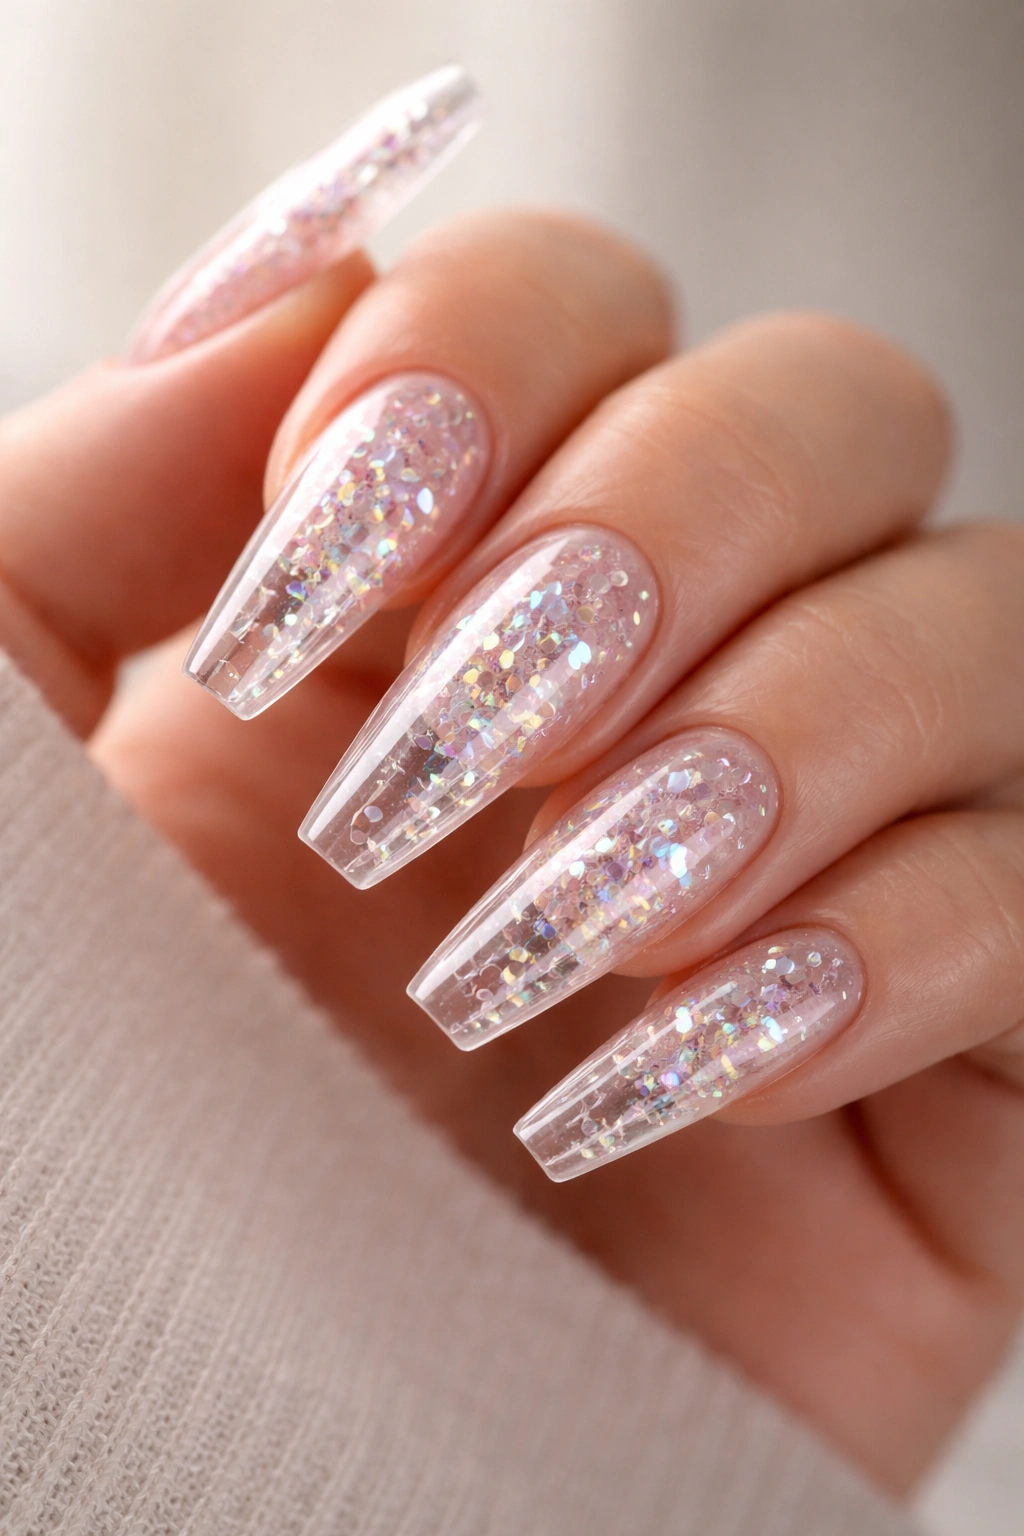
Here’s the quiet winner for durability: encapsulated sparkle almost always outlasts exposed sparkle. If the crystal pieces sit under a layer of builder gel or hard gel, nothing is sticking up to snag, dull, or peel away.
Clear coffin nails are ideal for this because the base becomes part of the effect. You can suspend crushed iridescent crystal, tiny flat glitter shards, or micro glass chips between clear layers and still keep the nail looking smooth on top. The result has depth, but the surface stays slick.
I like this approach for people who use their hands a lot and still want a gem look. Teachers, hair stylists, office workers, parents — anyone who does not want to baby a set. You still get the shine of crystal nail art, only it’s sealed inside the structure instead of perched on the outside like a risk.
There is one catch worth saying plainly: thickness has to stay controlled. If the nail tech packs in too much glitter or too many crushed pieces, the clear nail can get bulky, and coffin nails already carry visual weight at the sides. The prettier version uses a light hand — scattered crystal in the center, a fade toward the tip, or a clean diagonal pocket with negative space around it.
Clear sets also show bubbles, dust, and sloppy filing more than opaque colors do. So if you pick this design, craftsmanship matters. On a clean build, though, this is one of the longest-wearing gem coffin nail ideas on the list.
6. Mocha Coffin Nails with Champagne Gem Clusters
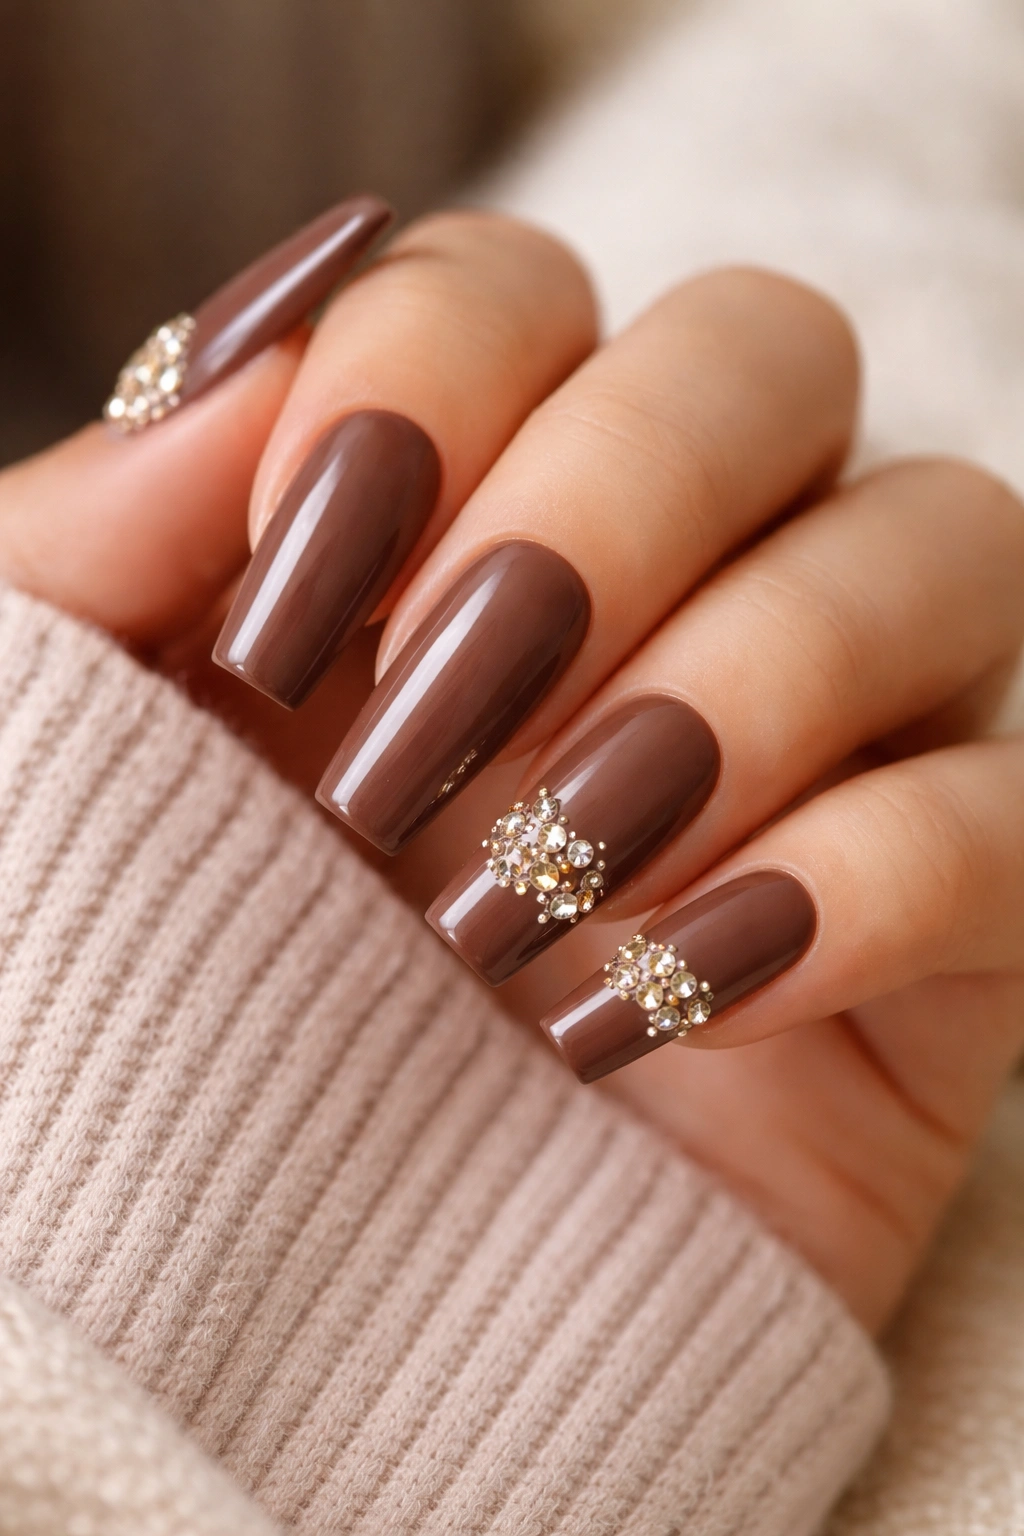
Unlike pale nude sets that show every chip and every smudge of makeup, mocha and chocolate tones are forgiving. They hide wear better, frame the coffin shape well, and make champagne crystals look warmer and less stark than clear silver-toned stones.
That warmth is the whole appeal here. A rich brown base with soft gold-champagne gems feels dressy without tipping into costume territory. The design also looks better in lower light than icy clear crystals sometimes do, because the stones reflect a softer glow instead of a sharp white flash.
I prefer clusters over full lines on this color family. Three-stone groupings placed on the lower third of the nail, or a small off-center burst on the ring finger, keeps the set grounded. If you line the entire cuticle with gold-toned stones on a dark brown nail, it can get heavy fast.
This set suits medium and long coffin lengths, and it wears well across skin tones because the brown base does a lot of the work. If you want a specific layout, try mocha on all ten nails, then add one cluster of three stones on each ring finger and a smaller two-stone detail on each thumb. That gives the set rhythm without turning it into a jewelry display.
7. Soft White Coffin Nails with Tiny Opal Gem Dots
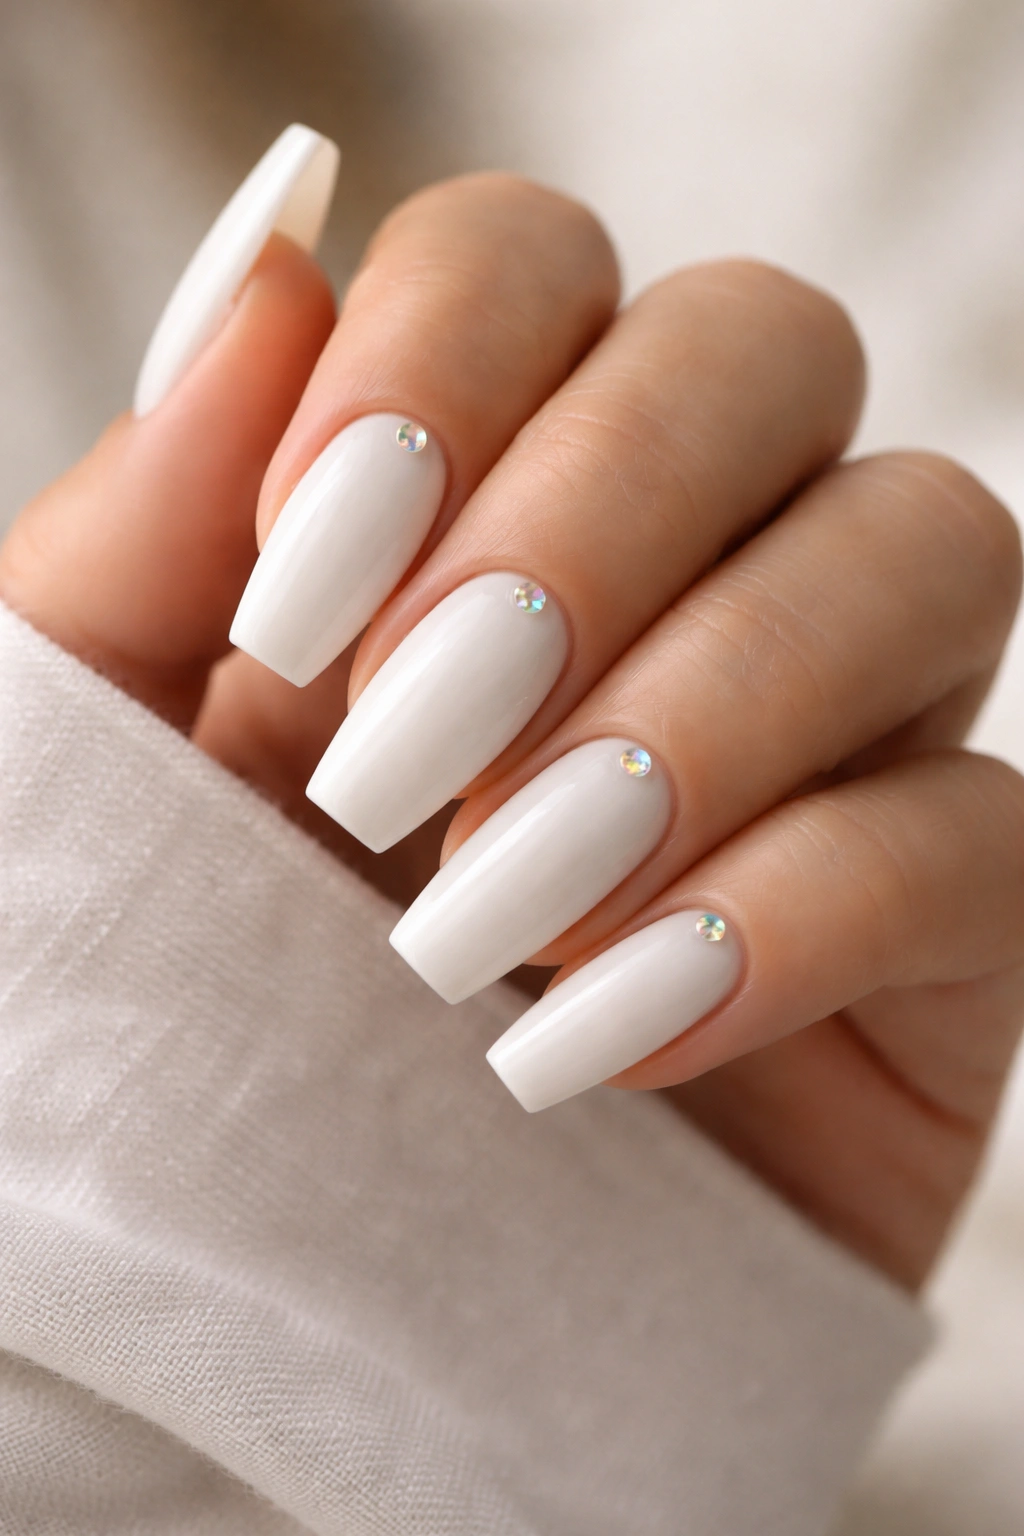
Soft white is less harsh than bright paper white, and that matters with gems. The base looks creamy instead of chalky, so small opal stones can sit on top without the set feeling cold or clinical.
I reach for this combination when someone wants a clean look with a little color shift. Opal cabochons — or flat opal-style stones — throw pale blue, pink, and green depending on the light, but they do it in a quieter way than clear crystals. On a coffin shape, those tiny color changes keep the nail from looking flat.
Why the placement stays cleaner
Use the opals as punctuation, not as a border. One dot near the cuticle on each nail, or a tiny three-stone cluster on two accent nails, looks controlled. Once you start outlining the whole nail in opals, the design loses that crisp white-space effect that makes it feel fresh.
Quick placement ideas
- A single 2 mm opal at the base of each nail
- Three tiny opals in a triangle on the ring finger only
- A thin silver bead paired with one opal for a sharper look
- A milky white gel base rather than a stark, opaque white
Wear tip: White shows glue overflow and dusty filing marks fast. On this design, a clean final wipe and a precise top-coat line around the gems matter almost as much as the stones themselves.
8. Deep Burgundy Coffin Nails with a Diagonal Gem Sweep
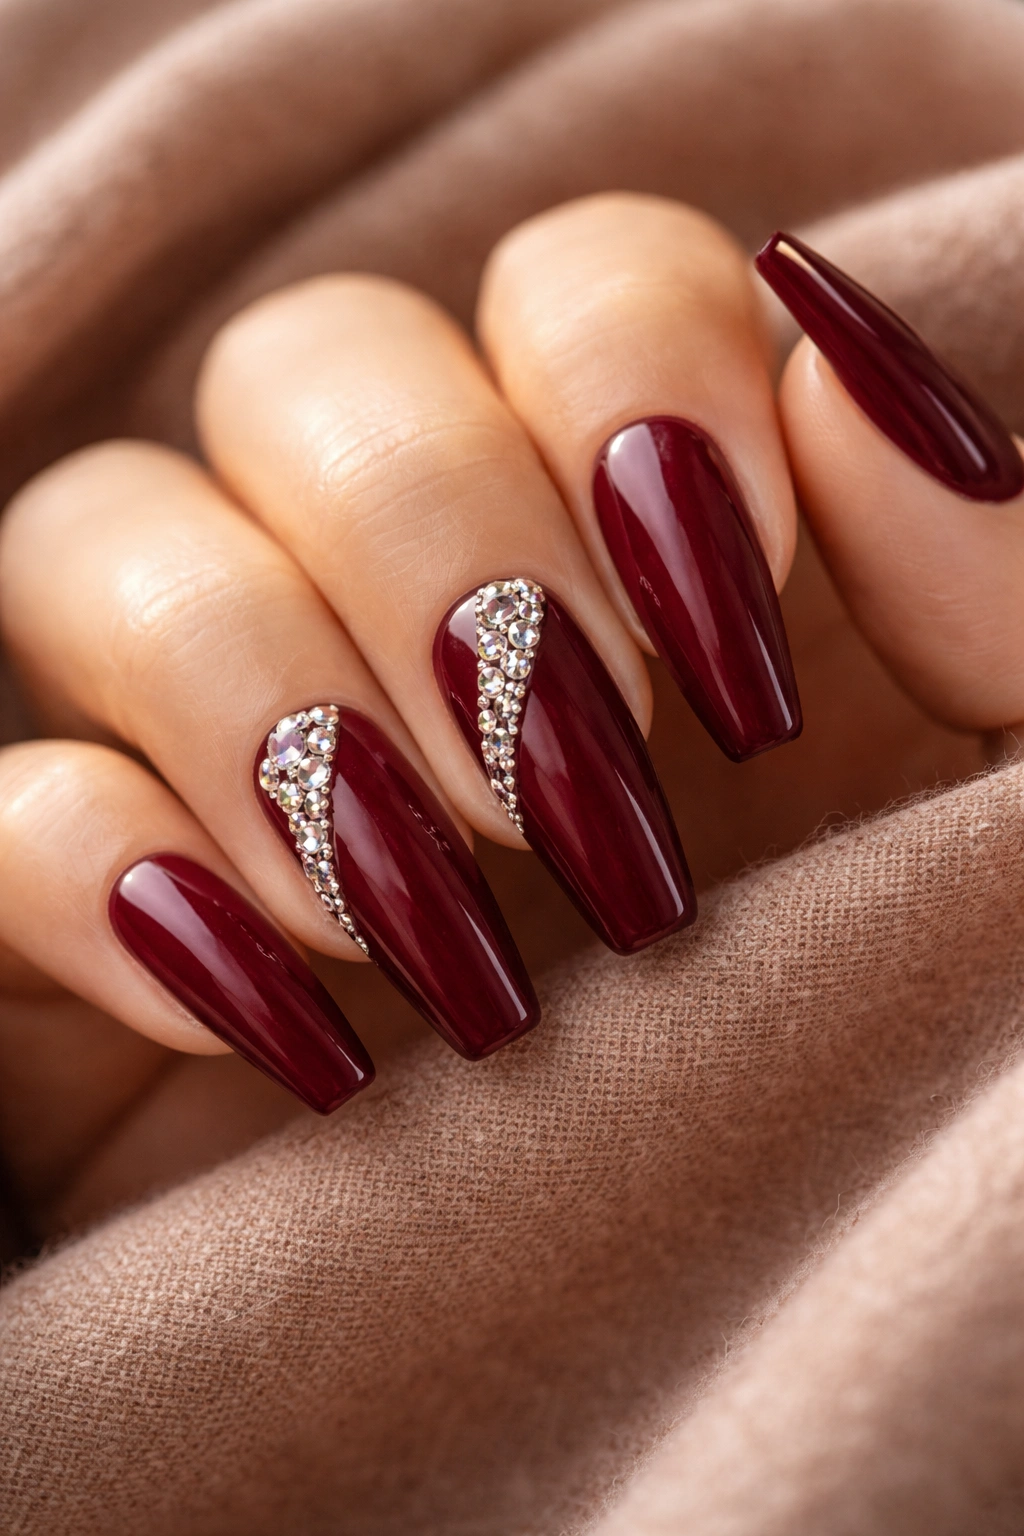
Deep burgundy can carry more sparkle than nude without looking overloaded. That’s because the color already has richness built into it, so the gems don’t have to do all the visual heavy lifting.
The diagonal sweep is the part that keeps the set flattering. Rather than running gems straight across the nail — which can chop up the coffin shape — place them from one lower corner toward the upper center in a soft slant. The line should feel like motion, not a stripe. That diagonal draws the eye upward and slims the nail at the same time.
I would not put that sweep on every finger. Two accent nails per hand is enough, usually ring and middle or ring and thumb. On burgundy, a mix of clear and garnet-toned stones works well, though I prefer sticking to one dominant gem tone so the set stays polished. Tiny gold beads can sit between stones if you want a jewelry feel without adding much height.
This design wears better in fall and winter wardrobes — not because of any date on the calendar, but because burgundy plays nicely with darker knits, black coats, brown leather, and gold jewelry. It has weight. It also chips less visibly than lighter shades, which is no small thing on longer coffin nails. If you like color and still want something grown-up, this is a strong pick.
9. Silver Chrome Coffin Nails with a Crystal Frame
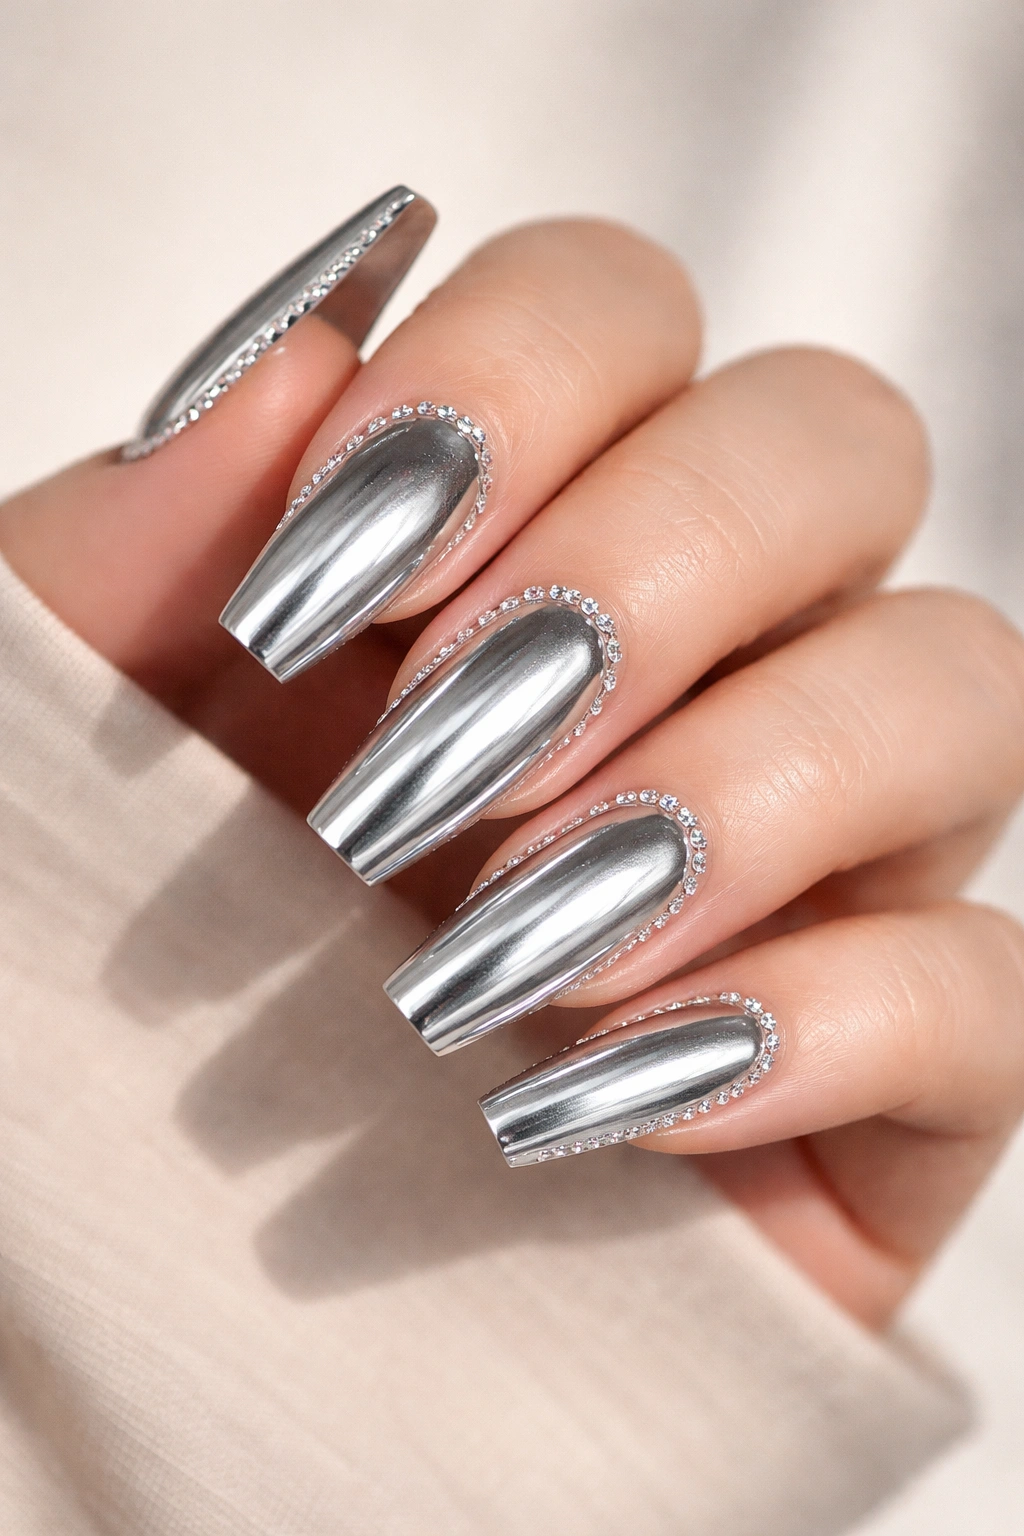
Can a framed gem nail work on coffin shapes without turning into a snag magnet? Yes — if you fake the frame instead of tracing every edge.
The mistake is outlining the entire nail, tip included, with raised stones. That last row at the free edge catches everything. A better frame runs along the cuticle and side lines, then stops before the final few millimeters of the tip. Your eye reads it as a full border anyway, but the nail behaves much better.
Silver chrome is the base that makes this design sing. The reflective finish echoes the crystal surface, so the stones look integrated rather than pasted on. On a medium coffin nail, I like SS3 crystals spaced tightly around the lower perimeter, leaving the tip clean and maybe adding one slightly larger stone at the center base.
How to keep the frame from lifting
Use micro stones only. Bigger crystals along the side edges sit too high and catch sooner. The chrome layer also needs to be sealed properly before the gems go down, or the finish can wear unevenly around the stones and make the set look tired even when the crystals are still attached.
This design is more maintenance-heavy than a cuticle crescent or encapsulated look. No point pretending otherwise. But if you want full sparkle energy without resorting to huge charms, the partial crystal frame is a sharp compromise.
10. Short Gem Coffin Nails with Geometric Corner Stones
Not everyone wants long coffin nails, and that’s fine. A shorter coffin shape can still hold gems well if the design respects the limited space instead of trying to cram a long-nail concept onto a smaller surface.
One of my favorite solutions is the corner placement design: small stones tucked into one upper corner or one lower corner of the nail, creating a geometric accent rather than a central statement. It feels cleaner on short lengths because the embellishment stays out of the way and lets the shape breathe.
This is also one of the easiest gem layouts to live with if you type all day. There’s no big stone in the middle catching pressure, no heavy cuticle arc, no full border around the edges.
Use these rules and the set tends to wear well:
- Stick to two or three stones per nail, not more
- Keep the gems under 2 mm on shorter nails
- Choose one corner direction and repeat it so the hand looks intentional
- Pair the design with sheer pink, taupe, smoky nude, or soft black bases
The geometry does the work here. You get shine, structure, and a modern look without filling every inch of the nail. On short coffin press-ons, this is also a safer design because lighter gem loads put less stress on the tip adhesive.
11. Matte Taupe Coffin Nails with Glossy Gem Half-Moons
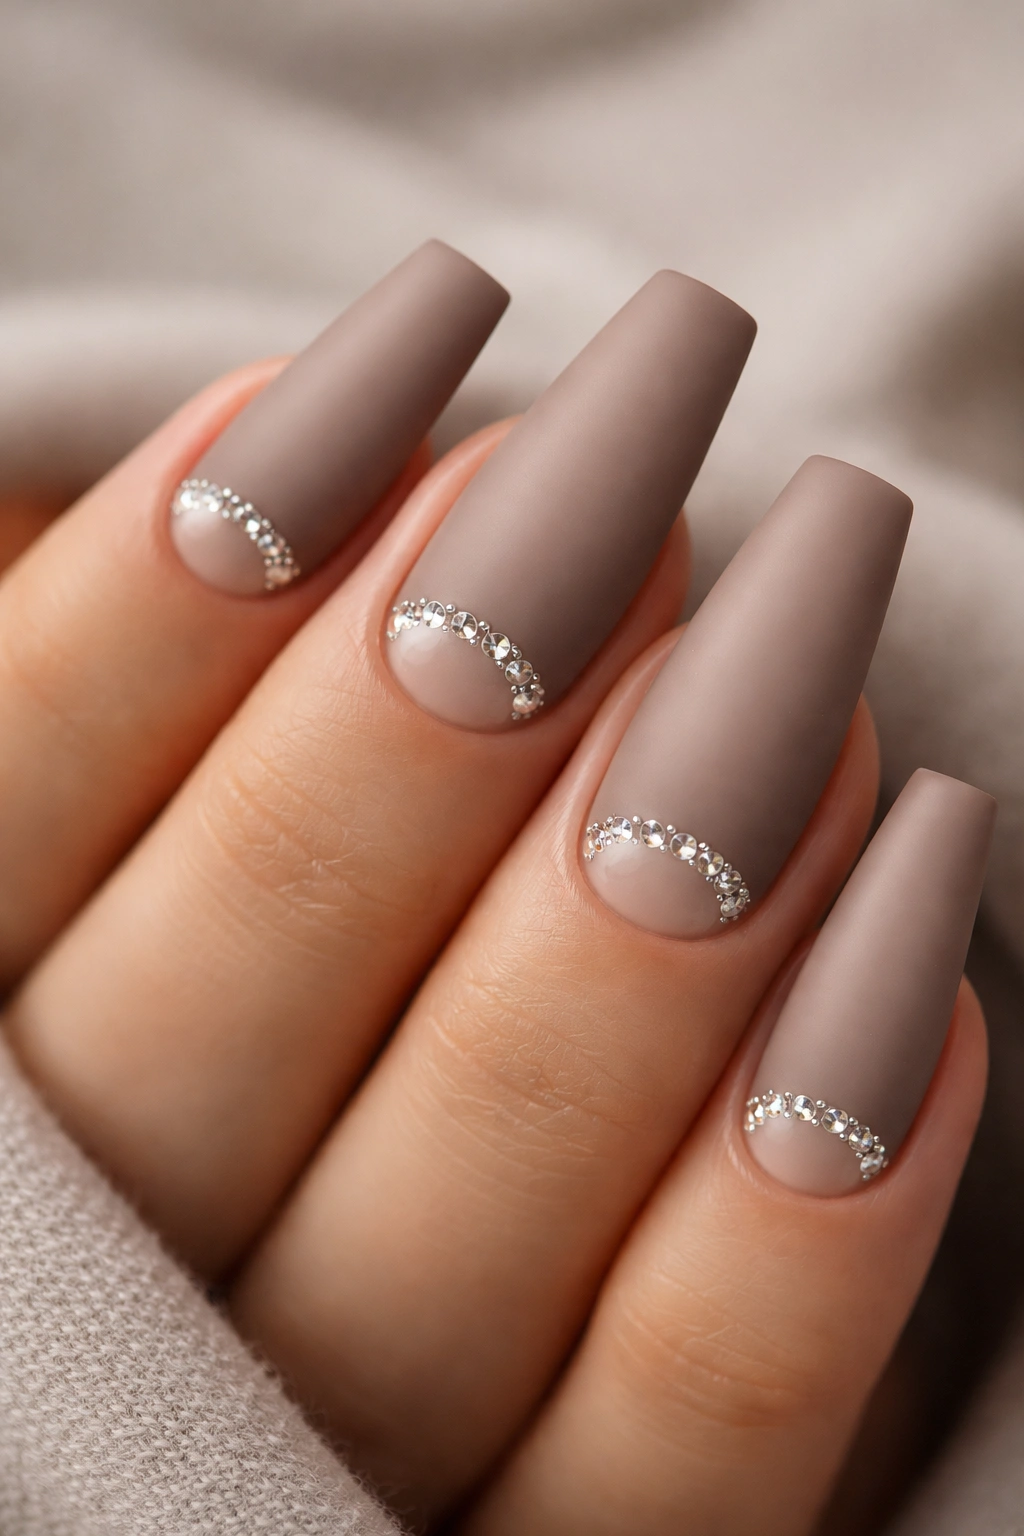
Matte taupe is one of those shades that makes gem work look smarter right away. The color is muted, the finish absorbs light, and that means even a small crystal detail stands out with purpose.
The glossy half-moon at the cuticle is what keeps this design from feeling flat. Instead of placing gems on a fully matte surface, leave or create a curved glossy pocket at the base of the nail, then set the stones along that arc. The finish contrast gives the eye two textures to read: velvety taupe across most of the nail, glassy shine where the gems sit.
There’s a practical reason to do it this way too. Crystals bond more reliably to a properly prepared glossy gel surface than they do to a matte top coat that’s been left powdery or overly slick after wiping. I’d still rough up the gem zone lightly with a fine file, but the half-moon gives you a built-in placement map and a cleaner bond zone.
Taupe also hides regrowth better than stark shades. That matters on gem coffin nails because the stones naturally draw attention to the base area. If the whole lower third looks neat, the set can stretch longer without appearing messy. This design is understated, yes, but not dull. It’s the kind of set that still looks composed with jeans, knitwear, tailoring, or a slip dress, which is why I keep coming back to it.
12. Jelly Pink Coffin Nails with Scattered Crystal Constellations
Compared with a fully paved bling set, jelly pink nails with scattered crystals feel lighter on the hand and tend to wear longer. There’s less hardware, more negative space, and the see-through base keeps the sparkle from looking boxed in.
Jelly pink has a soft, glass-candy look that suits coffin nails well because it shows the shape without making the set feel blocky. On top of that translucent base, mixed-size crystals placed in small asymmetrical clusters create a constellation effect. Think SS3, SS5, and SS6 stones grouped in twos and threes, with a few millimeters between clusters so the eye can rest.
I like this design best when the placement varies slightly from nail to nail. One finger might have a cluster near the cuticle, another near the center, another drifting toward one side. The hand still looks coordinated if you keep the same stone color family and similar spacing. Too much symmetry makes constellation nails feel stiff, which defeats the airy look.
This is a smart choice for anyone who wants gem coffin nails that still feel playful. My recommendation: use a sheer pink builder base, keep the nail medium length, and limit larger stones to the ring fingers. The jelly finish already gives you shine. The gems should act like punctuation, not wallpaper.
Final Thoughts
The gem coffin nails that hold up best are usually the ones that show a little restraint. Cuticle placement, center alignment, encapsulated sparkle, and low-profile stones beat random bulk almost every time. You do not need ten overloaded nails to make the set feel dressed up.
If I had to narrow it down, the safest long-wear picks are the nude cuticle crescent, the encapsulated clear crystal set, and the short geometric corner design. Those three keep the gems out of the danger zones and let the coffin shape stay crisp.
One last opinion — and I feel strongly about this one: if a design needs constant caution to survive a normal week, it is not a good everyday nail design. Pick the set that still looks polished after opening boxes, washing your hair, and living your life. That’s the one you’ll want to wear again.
