

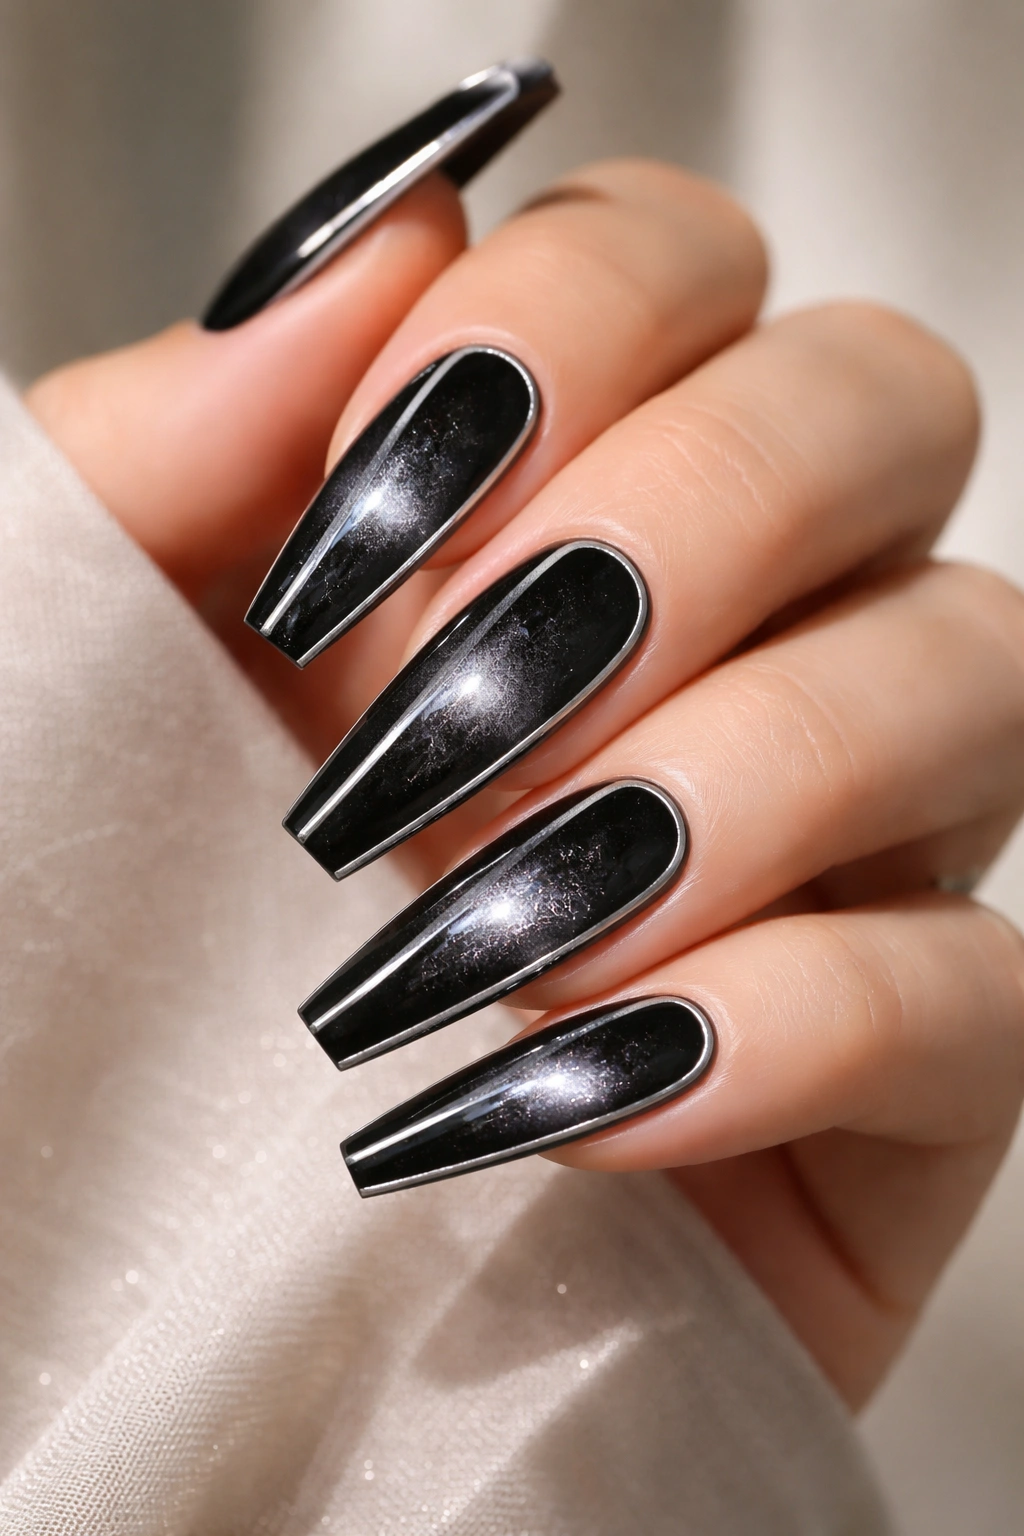
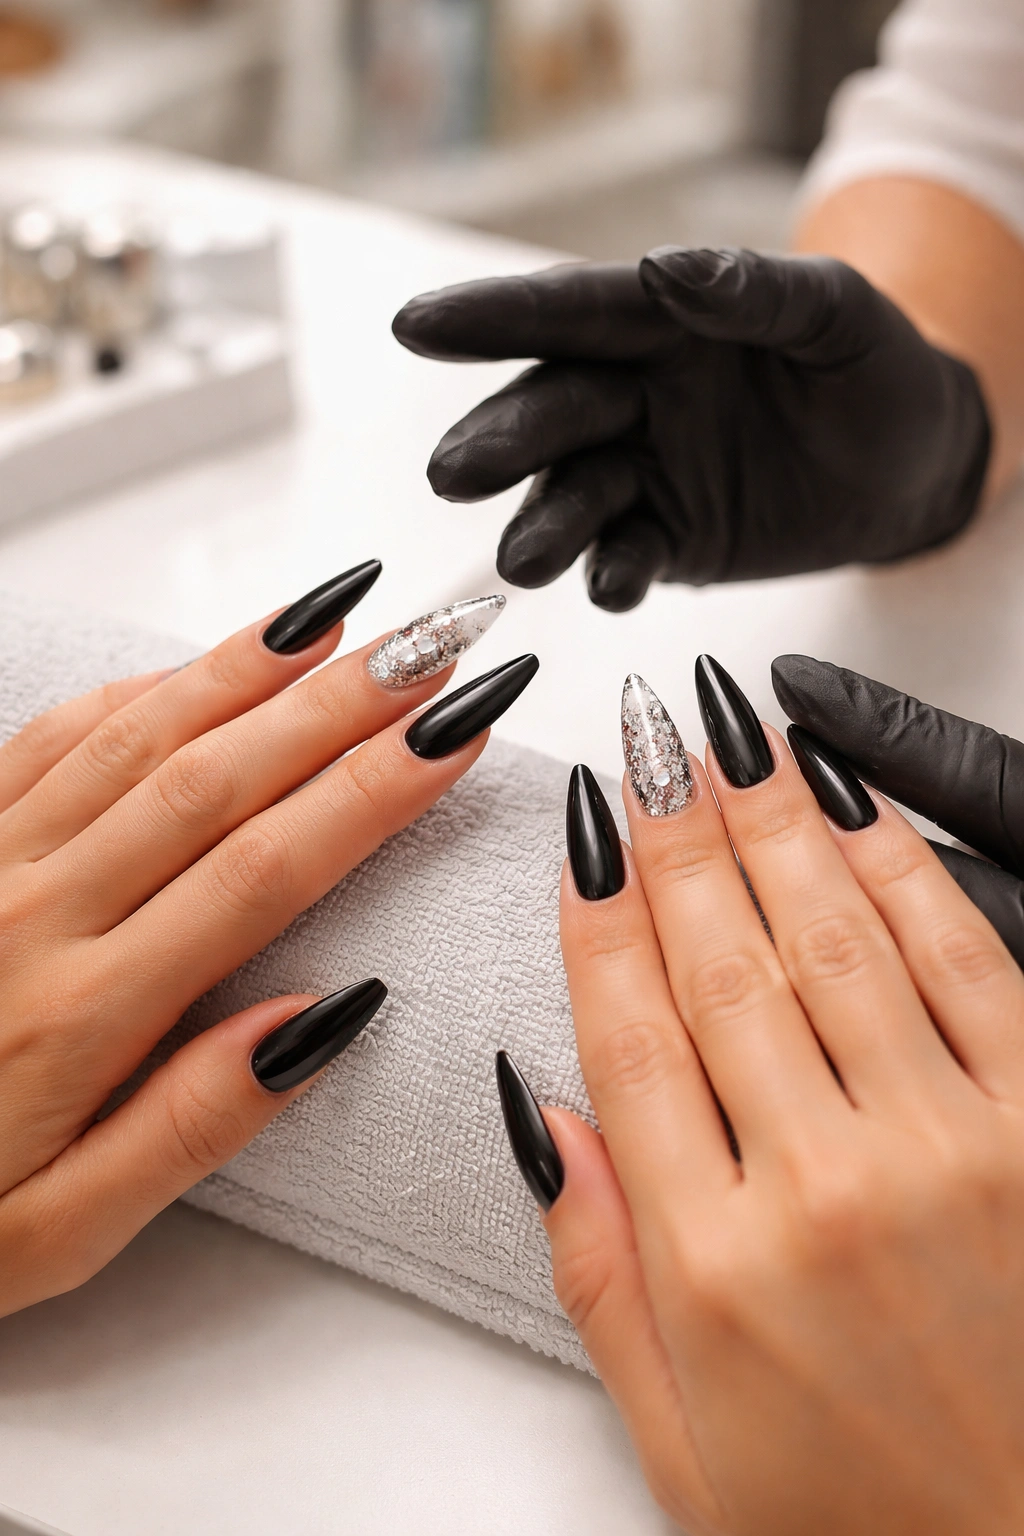
Black and silver coffin nails do something few manicures manage: they make your hands look sharper before anyone even notices the art. Black gives the set weight. Silver cuts through that darkness like metal hardware. And the coffin shape keeps the whole thing lean instead of soft or rounded.
That combo sounds easy on paper. It isn’t.
Dark polish shows every wobble at the sidewall, every uneven patch near the cuticle, every little bump under chrome powder. Coffin nails also need the right taper. Too wide and they look heavy. Too short and the shape loses its edge. A black-and-silver set can read sleek and expensive, or clunky and rushed, with only a tiny difference in line work.
I keep seeing the same mistakes: silver glitter piled on thick enough to make the tip bulky, chrome rubbed over a lumpy base so the nail reflects every ridge, and heavy designs placed on all ten fingers when the shape already makes a strong statement on its own. The good news is that the best black and silver coffin nails are not the busiest ones. They’re the ones with control.
A clean matte finish, a thin strip of silver gel, a magnetic flash placed down the center, a cuticle arc that sits 1 millimeter lower so grow-out looks cleaner—those small choices are what separate a set you admire for two days from one you keep staring at for two weeks.
Why Black and Silver Coffin Nails Look Stronger Than Most Color Combos
Contrast does the heavy lifting here. You are not working with two colors so much as two behaviors: black absorbs light, while silver throws it back. On a coffin shape, that contrast exaggerates length and gives the nail a straighter, more architectural outline.
Black alone can look flat, especially on long acrylics or Gel-X tips. Silver alone can drift into party-polish territory if it covers too much surface area. Together, they fix each other’s weaknesses. Black gives the design structure. Silver creates pressure points—tiny places where the eye stops, follows a line, and notices the shape.
Finish matters as much as color. A matte black base with mirror silver detail feels crisp and graphic. A glossy black base with fine silver foil feels deeper and richer. A smoky translucent black with suspended silver pieces gives you depth, which is harder to get with opaque polish.
If you are choosing between design directions, these pairings tend to work best on coffin nails:
- Matte black + thin chrome lines when you want clean edges and a sharp silhouette.
- Glossy black + silver glitter fade when you want movement without losing the dark base.
- Black jelly + encapsulated foil when you want depth under the surface.
- Silver satin base + black art on top when you want the silver to read more like brushed metal than jewelry.
Small detail, big payoff.
The Coffin Shape Details That Decide Whether the Set Looks Sharp or Clunky
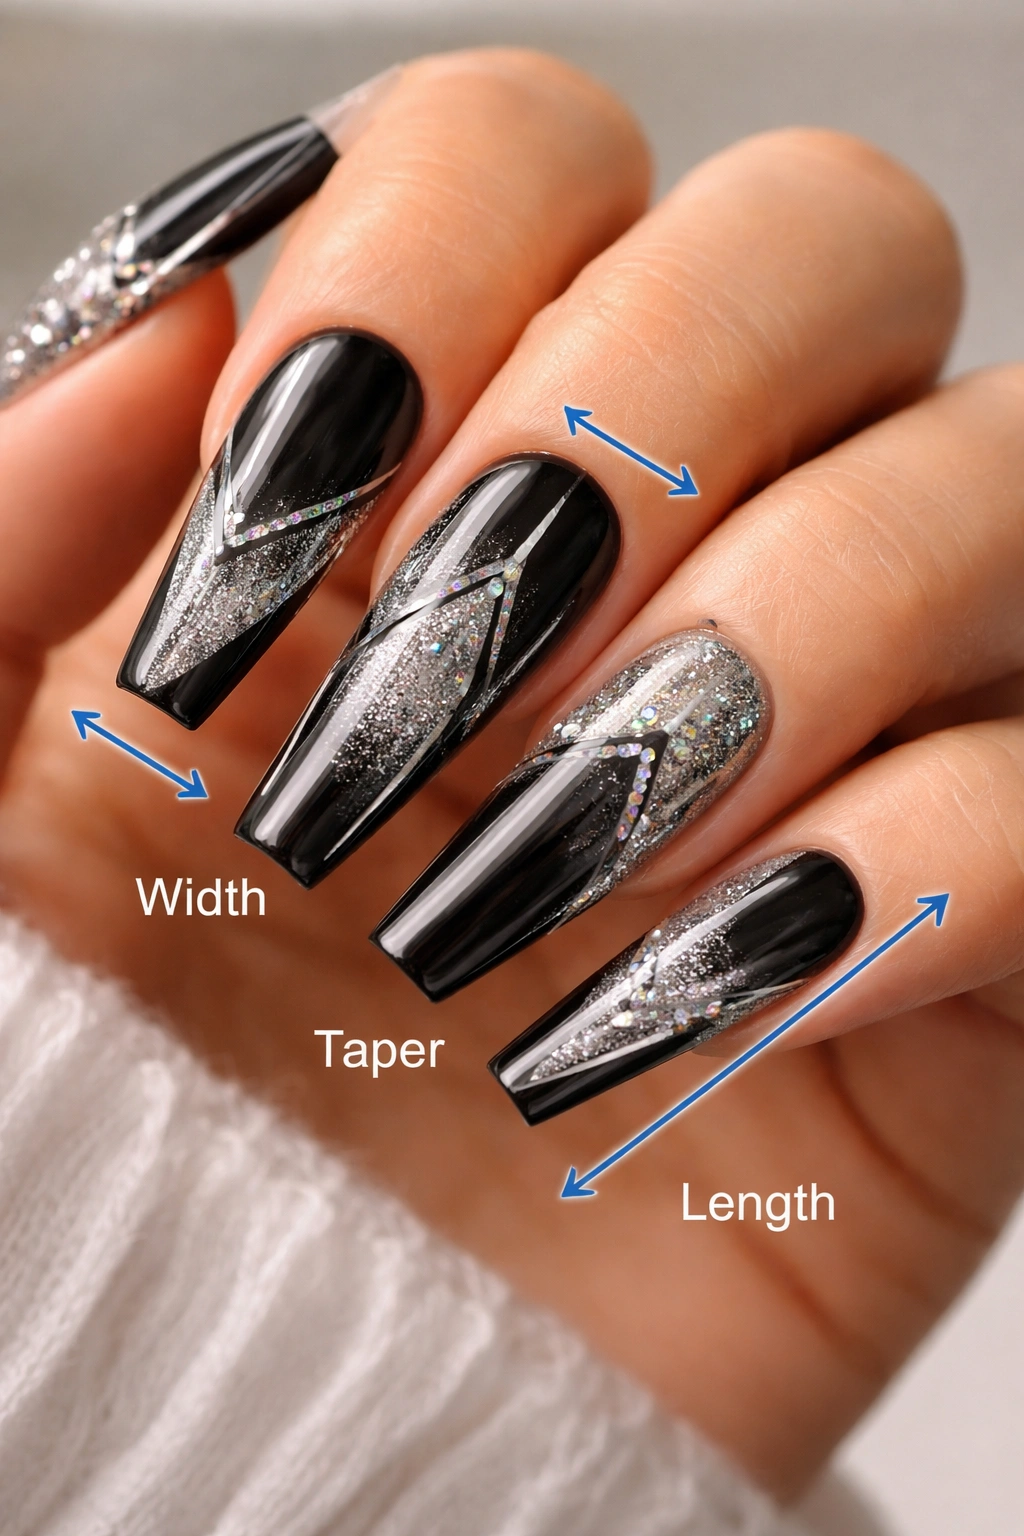
Why do some coffin sets look sleek while others look like little paddles? Most of it comes down to width, taper, and length—not the art.
Length changes the mood
A medium coffin usually starts to look balanced when the free edge extends about 6 to 10 millimeters past the fingertip. That gives the nail enough room to taper without pinching the sidewalls too hard. Longer sets, in the 12 to 16 millimeter range, give you more space for silver detailing like flames, checkerboard blocks, or cuticle cuffs.
Go shorter than that and a true coffin can get awkward fast. On shorter natural nails, ask for a soft coffin or tapered square instead. You’ll get the same general attitude without forcing a shape the nail bed cannot support.
Tip width matters more than people think
The end of a coffin nail should look narrow, not tiny. If the tip gets filed down too aggressively, the nail starts to look fragile. If it stays too wide, black polish makes the whole set feel heavy. A good nail tech will taper from the sidewalls in a straight line and then flatten the tip, keeping the free edge proportional to the nail bed.
Silver detail can either help or hurt that balance. Thin vertical or diagonal silver lines make the nail look longer. Thick horizontal bands do the opposite.
Surface smoothness shows up under metallic detail
Chrome powder, foil, and reflective glitter all highlight texture. If the base has dents or ripples, silver will show them. That is why proper prep matters so much with black and silver coffin nails. You want a smooth apex, clean cuticle work, and enough structure that the light reflects evenly across the nail instead of bouncing off bumps.
That part is boring. It is also the difference between “Where did you get those done?” and “Something feels off.”
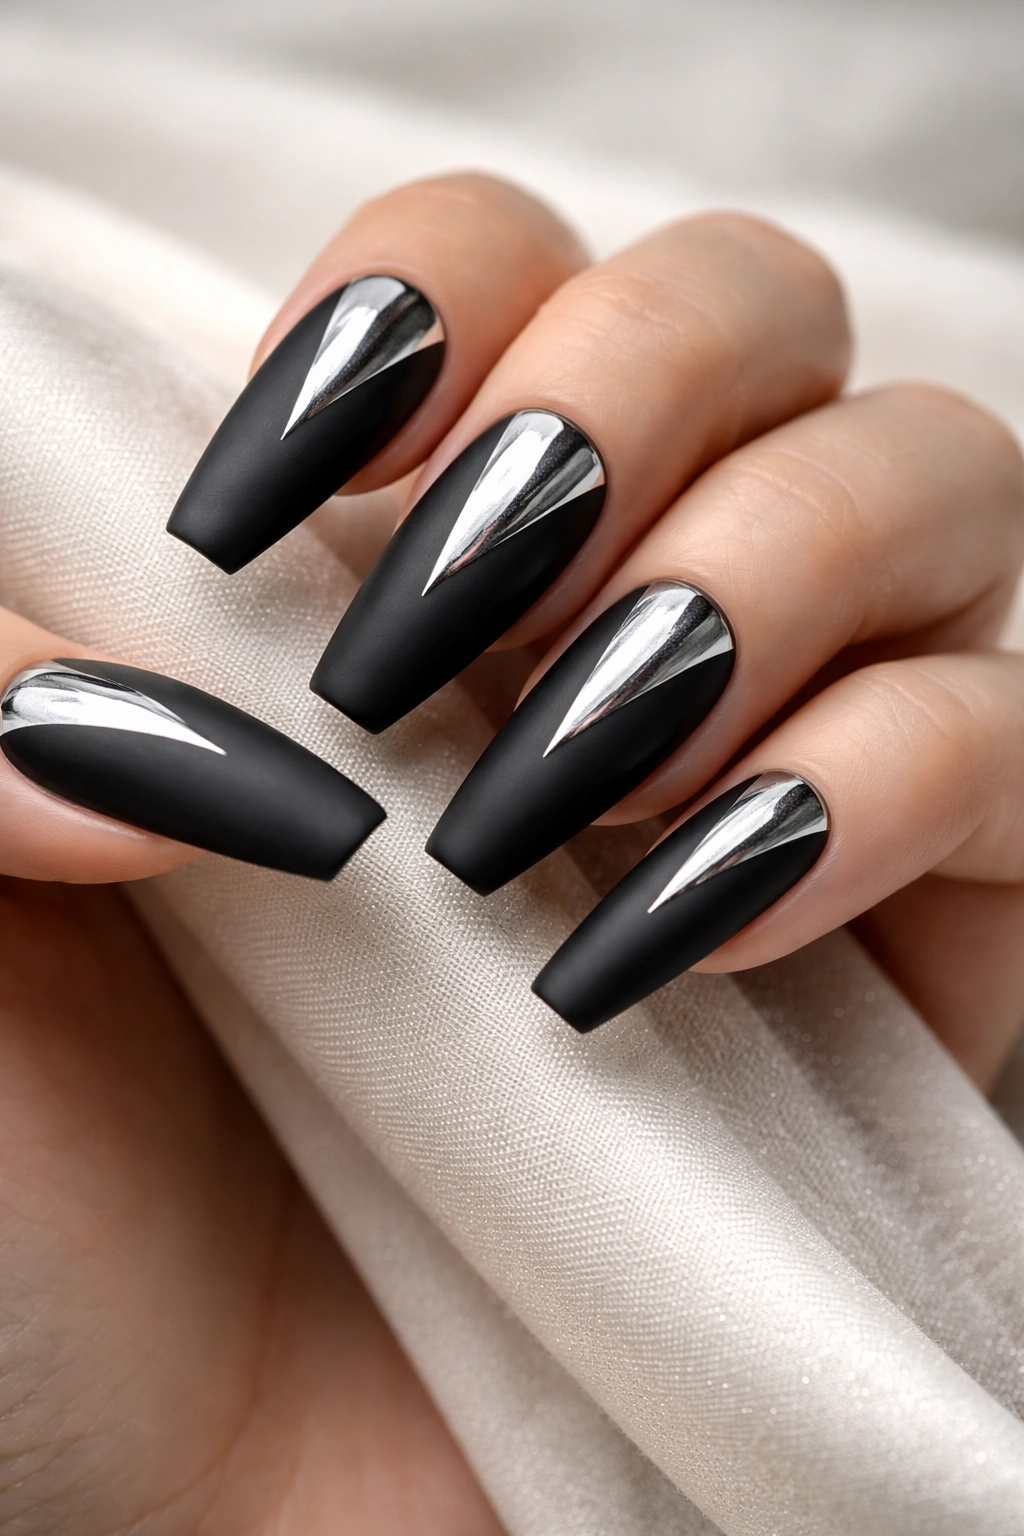
1. Matte Black Coffin Nails With Silver Micro-French Tips
Some sets do not need drama to feel bold. This is one of them.
A matte black coffin nail with a silver micro-French tip works because the silver stays narrow—usually 1 to 2 millimeters wide—while the black absorbs everything behind it. The result is crisp, controlled, and much sharper than a thick glitter French line.
Why the Thin Tip Matters
A thick silver tip can chop a coffin nail in half. A micro tip does the opposite. It traces the edge, reinforces the flat end of the shape, and makes the fingers look longer from a distance. Matte top coat helps because it kills glare on the black base and lets that silver line stand on its own.
This set is also easier to wear than it looks. It pairs well with rings, leather, denim, suiting, and plain black basics. Nothing about it feels fussy.
Quick Design Notes
- Best length: medium to long coffin, with at least 7 millimeters of free edge for a clean taper.
- Best silver finish: mirror chrome gel paint or fine metallic gel, not chunky glitter.
- Best placement: all ten nails, since the design stays restrained.
- Salon note: ask for the line to be painted after shaping and before the final top coat so the tip stays precise.
My take: if you want your first black and silver coffin nail set to feel polished rather than loud, start here.
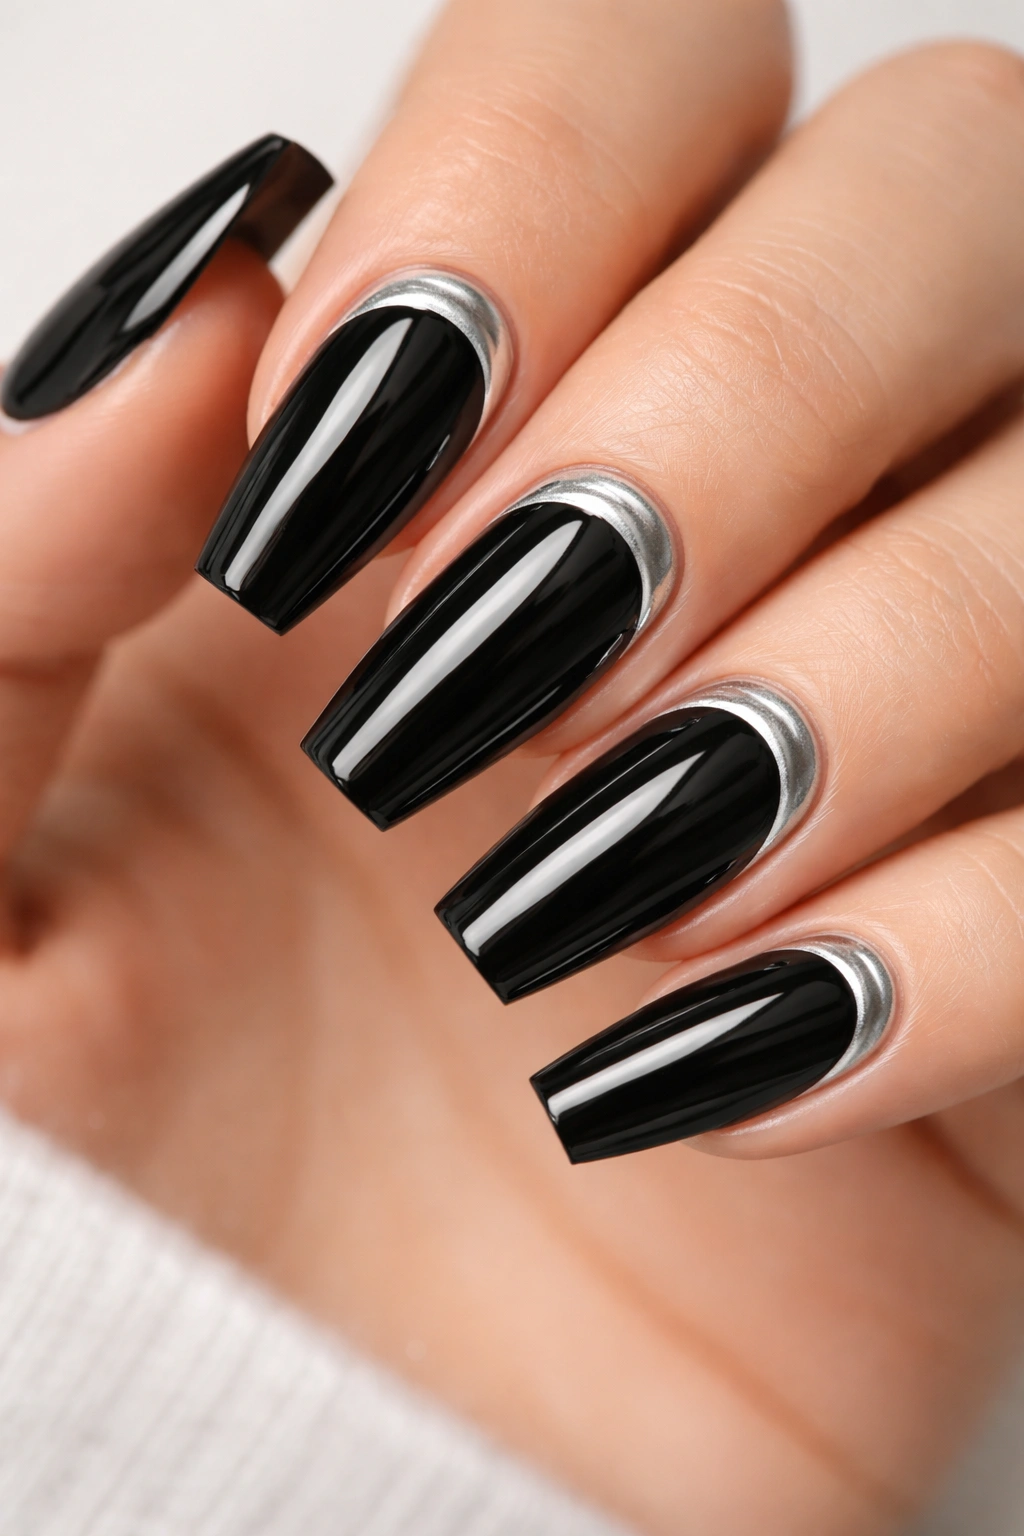
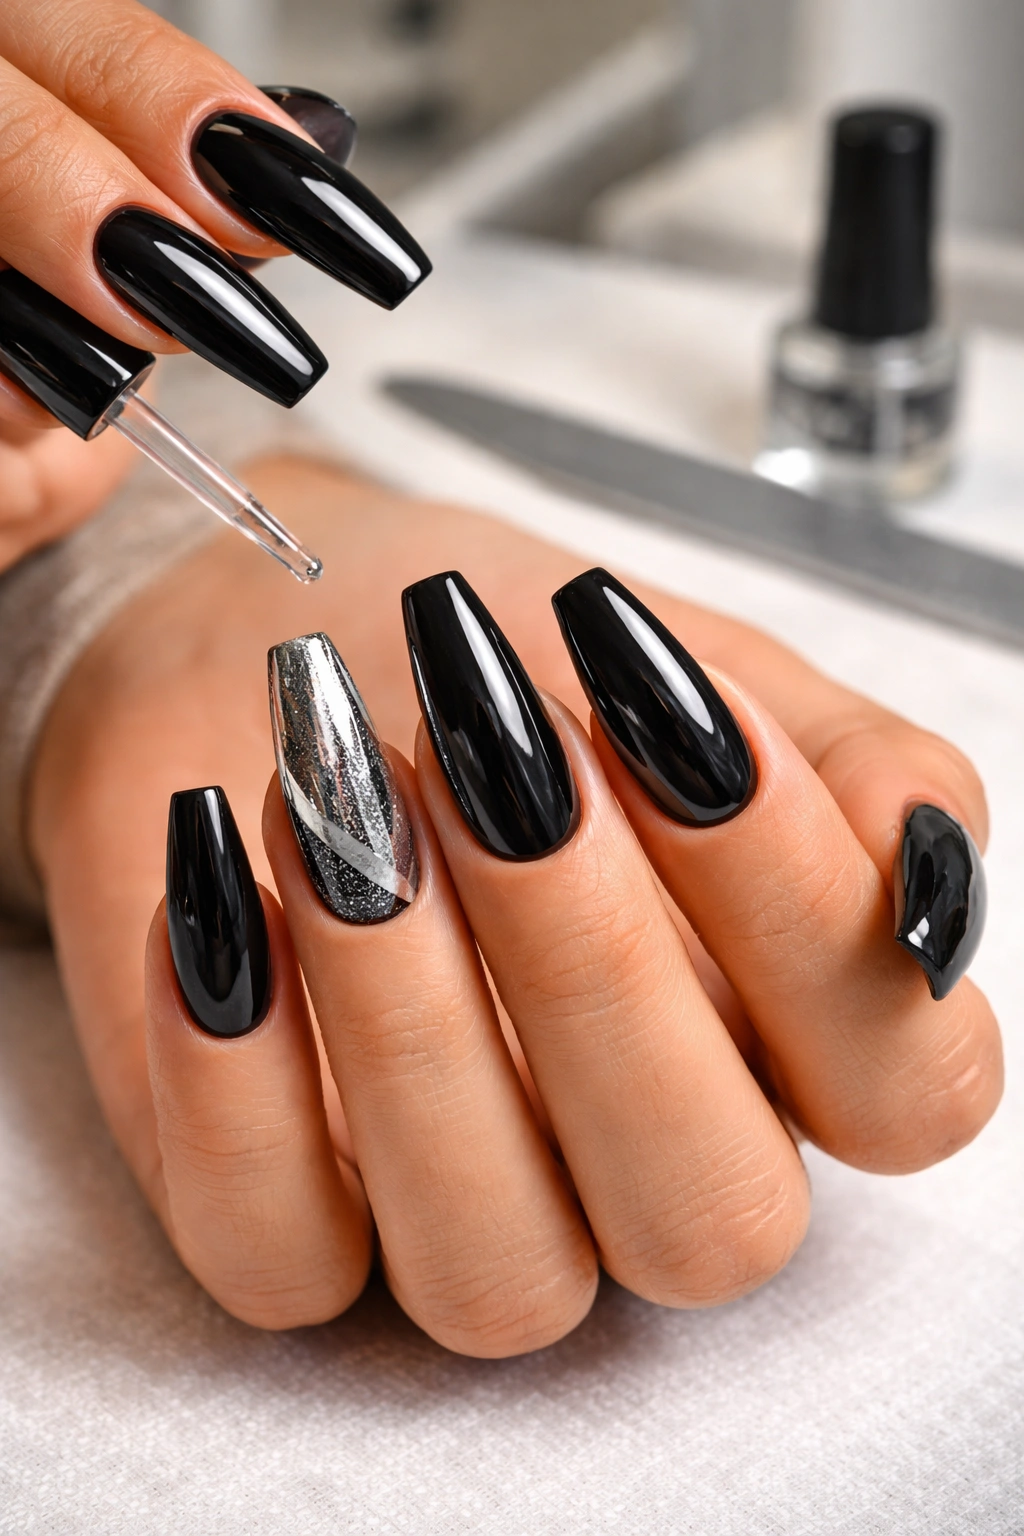
2. Glossy Black Nails With Two Mirror Silver Accent Fingers
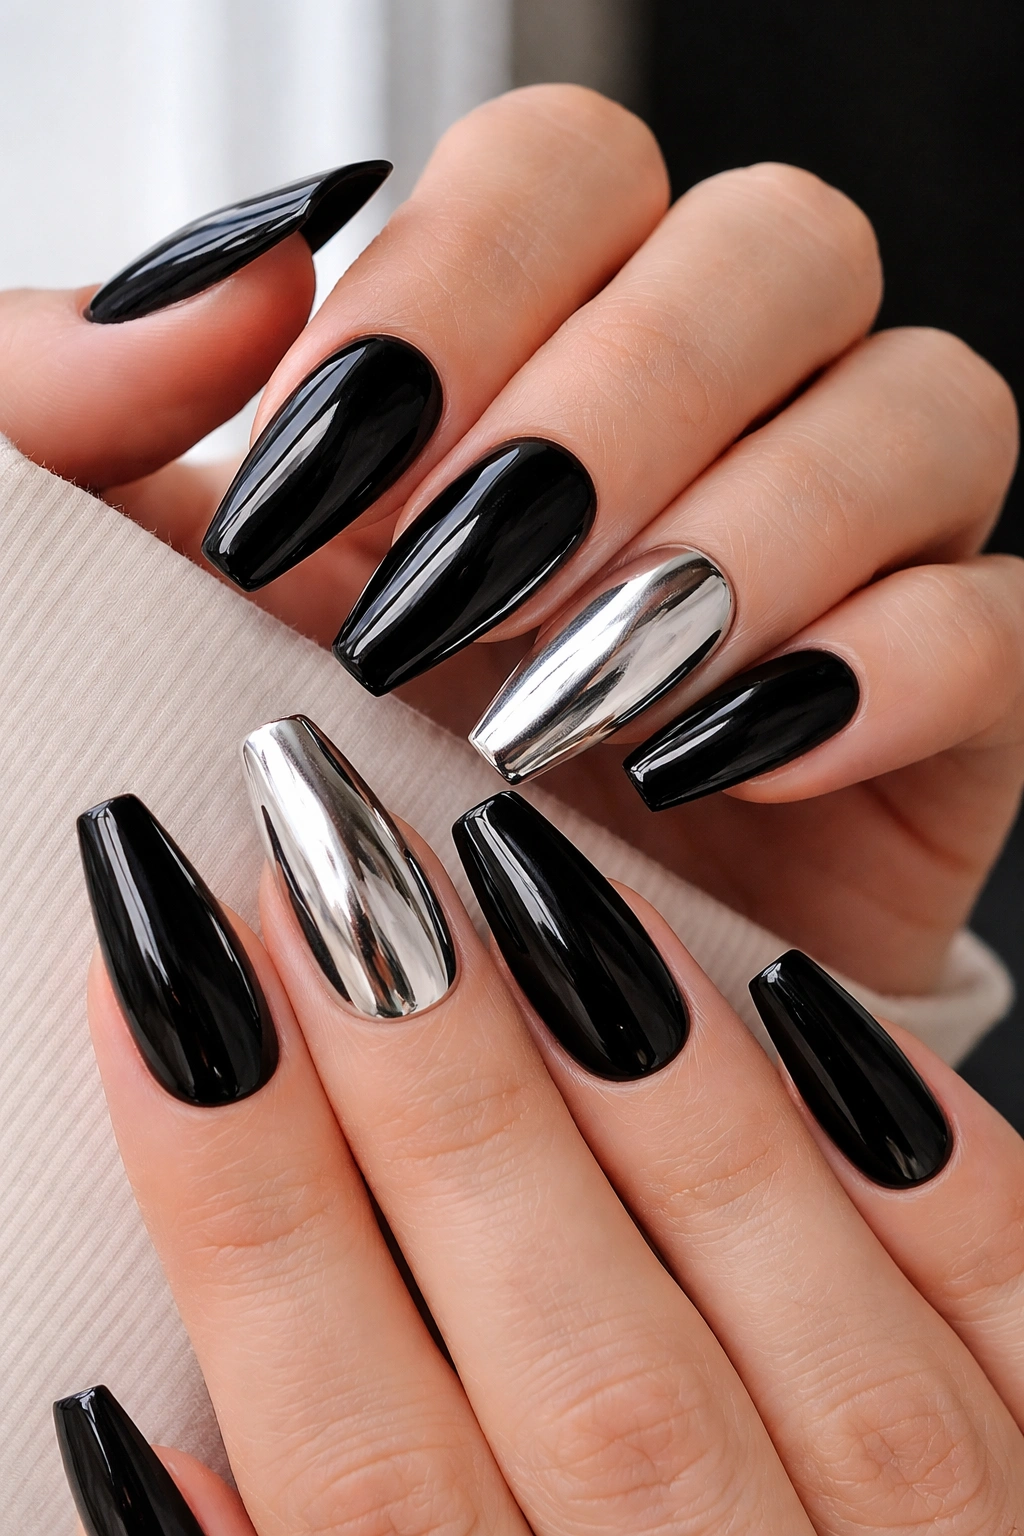
Two chrome accent nails are enough. More than enough, actually, if the silver is true mirror chrome.
I like this layout when someone wants black and silver coffin nails but does not want art on every finger. Keep eight nails in glossy jet black, then switch two accent nails—ring finger and pinky, or ring finger and index—to full silver chrome. The black gives the set weight. The chrome nails act like punctuation marks.
Placement changes the feel. Ring-finger accents look more classic. Index-finger accents push the whole set into sharper territory because the silver shows first when you point, text, or wrap your hand around a coffee cup. Pinky accents can be fun, though they read more playful than severe.
Here is the catch: mirror chrome needs a smooth base. Any dip in the builder gel, any scratch left from shaping, will show. That is why I prefer this design on hard gel overlays, Gel-X, or acrylics that have been finished with a fine buffer, then sealed with a no-wipe top coat before chrome powder is rubbed in.
This design also ages well between fills. Black regrowth is obvious, yes, but there is no fine line art to distort as the nail grows out. If you want impact with low visual clutter, this one earns its keep.
3. Black Marble Coffin Nails With Fine Silver Veins
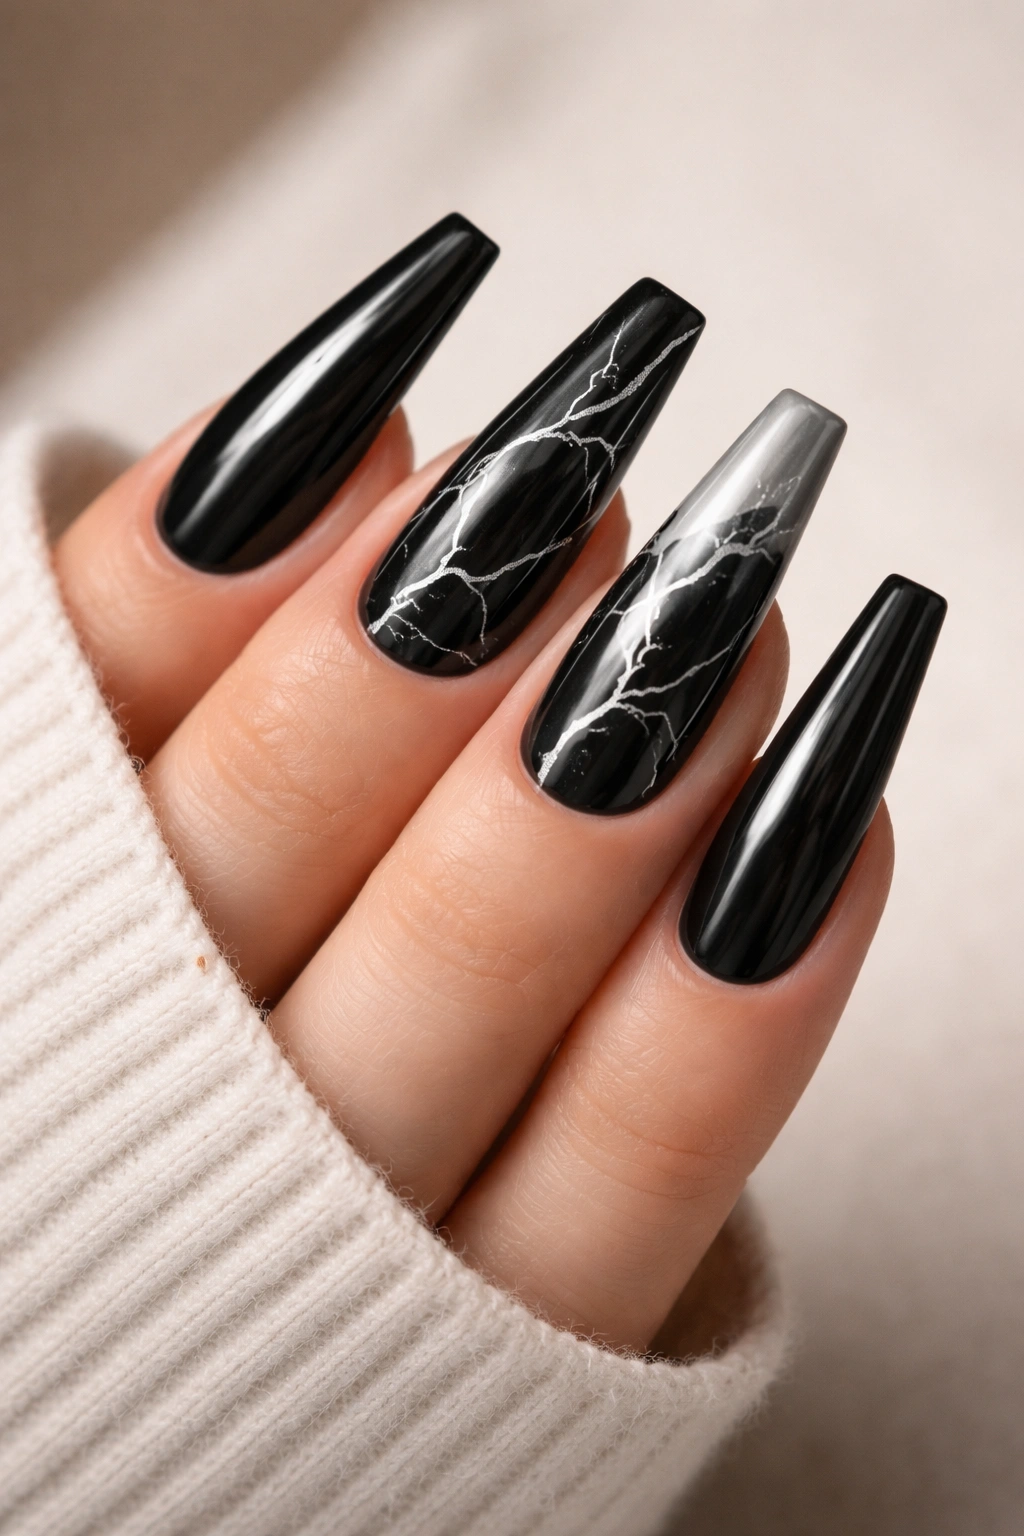
Why do some marble nails look expensive while others look muddy? The answer is restraint.
Black marble on coffin nails works when the pattern has room to breathe. You want soft smoke-like patches of black, a little translucency, and hairline silver veining that looks cracked through the surface instead of dropped on top like striping tape. The minute the veins get thick, the illusion disappears.
A full set of black marble can be too much on long coffin nails. I get better results when the marble appears on two or three nails per hand, with the rest done in solid black or satin silver. That mix gives the eye a place to rest, which marble needs.
How to Ask for Marble That Stays Sharp
Tell your nail tech you want diffused black movement with minimal silver lines, not a dense stone pattern. If they use blooming gel, the black should spread softly from a few placed points. If they use gel polish and alcohol ink, the design should still keep open space between the veining.
Silver foil can work here, though fine metallic gel lines usually look cleaner on coffin nails because the shape already has straight geometry. Foil adds a more broken, cracked finish. Painted silver gives you a colder, sharper result.
This is one of those designs that looks better up close than in a rushed salon photo. On the hand, the silver veins pull your eye down the length of the nail and make the coffin taper look even more deliberate.
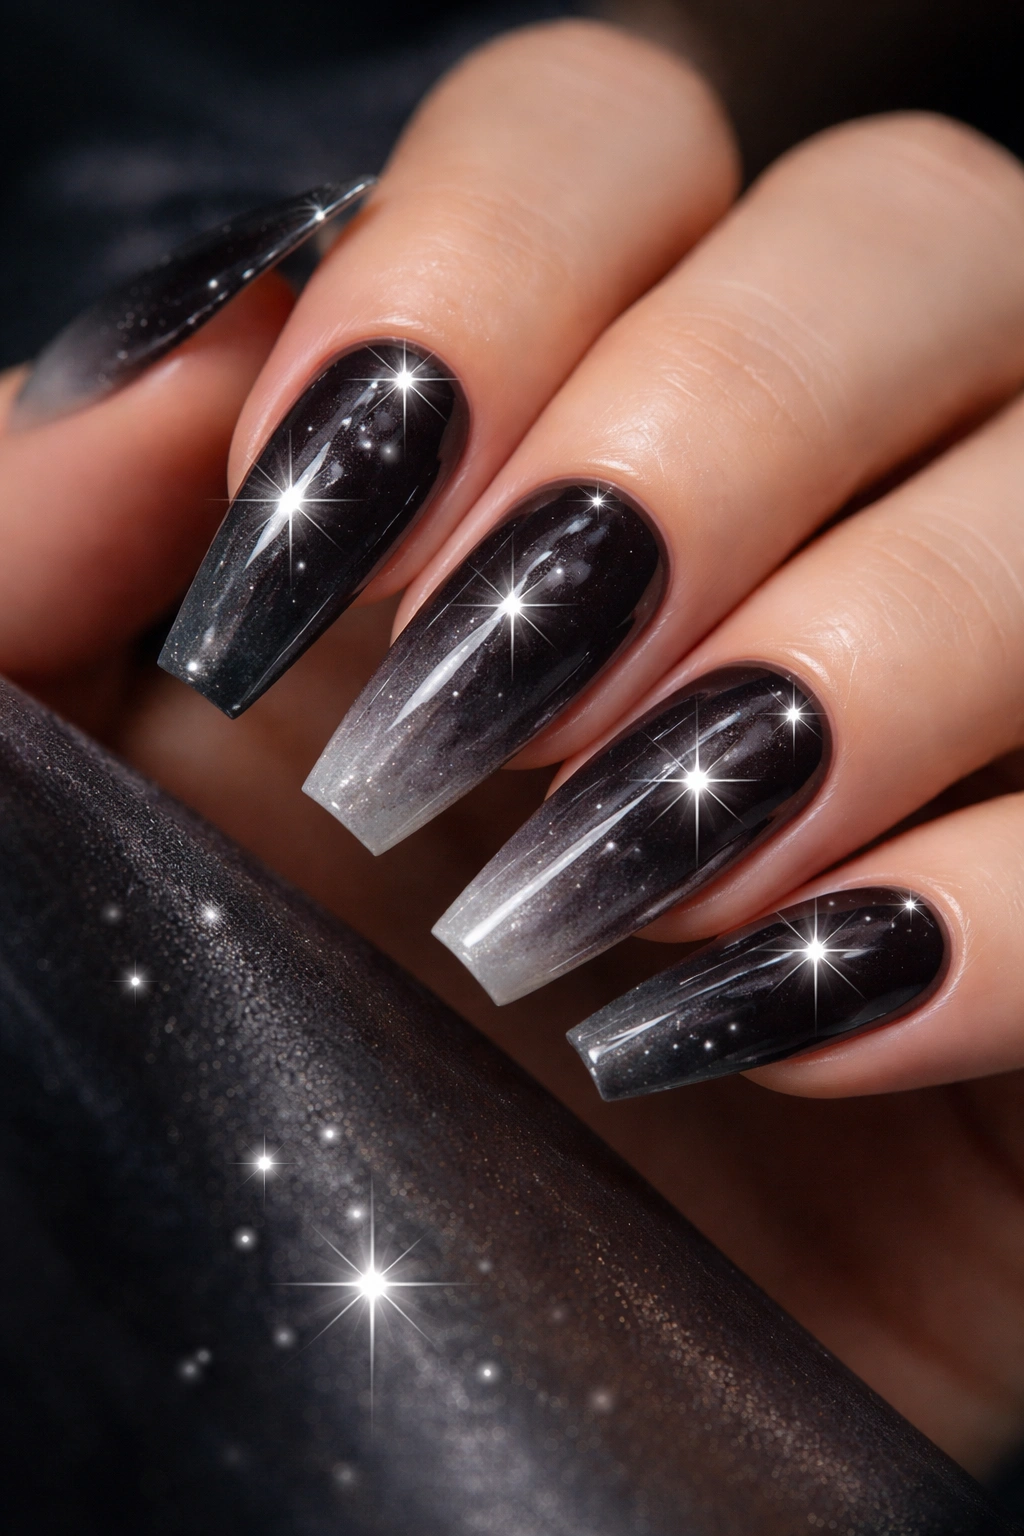
4. Silver Glitter Ombre Rising From a Black Base
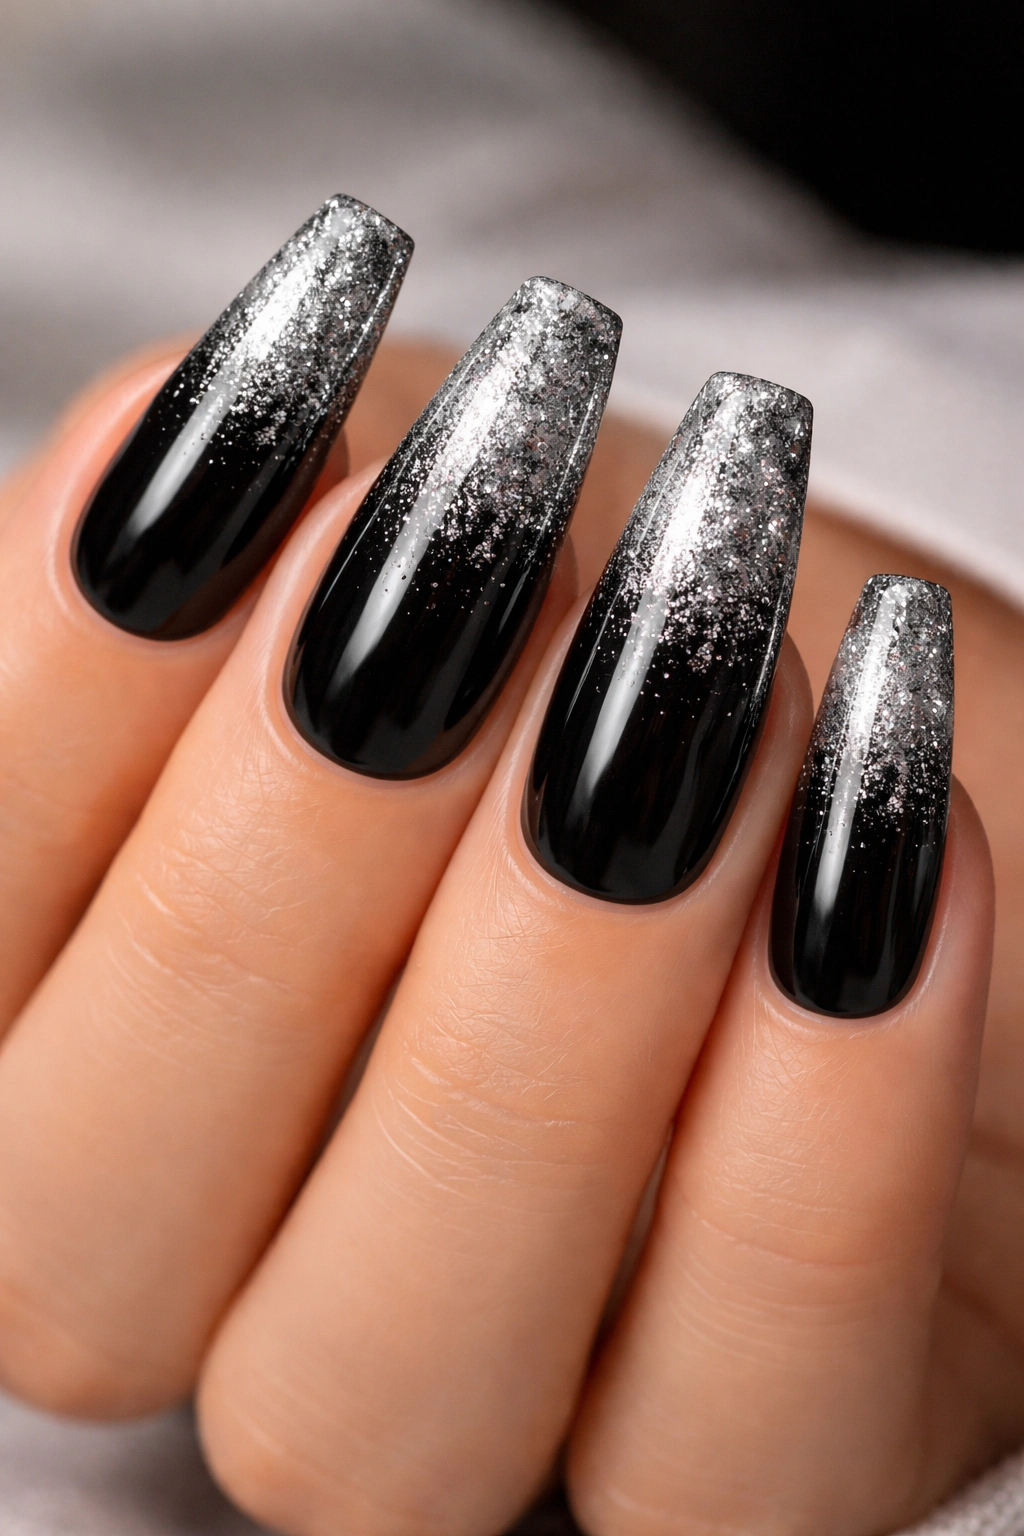
Picture a nail that reads black first, then reveals a soft silver fade as your hand moves. That is why this design keeps getting chosen. It has motion without looking busy.
A silver glitter ombre over black works best when the glitter starts either at the cuticle or the tip and then thins out gradually over one-third to one-half of the nail. The fade should look airy, not packed. If glitter covers too much space, the black base loses its purpose.
Fine glitter usually looks better than chunky hex pieces on coffin nails. Chunky glitter can leave the surface uneven, and dark colors make that texture stand out more. I like a mix of micro-glitter plus a small amount of medium reflective pieces so the finish has depth but still files and top-coats smoothly.
A few details matter:
- Cuticle fades hide regrowth a bit better than tip fades.
- Tip fades make the free edge look sharper and flatter.
- Gloss top coat gives glitter more dimension than matte in this design.
- Accent placement works well here: two glitter fades on each hand, solid black on the rest.
If you want black and silver coffin nails that feel dressy without turning into heavy art, this one sits in a sweet spot. It still has edge. It also survives formal events, office wear, and nights out without feeling like three different sets fighting each other.
5. Diagonal Silver Striping Across Jet-Black Coffin Nails
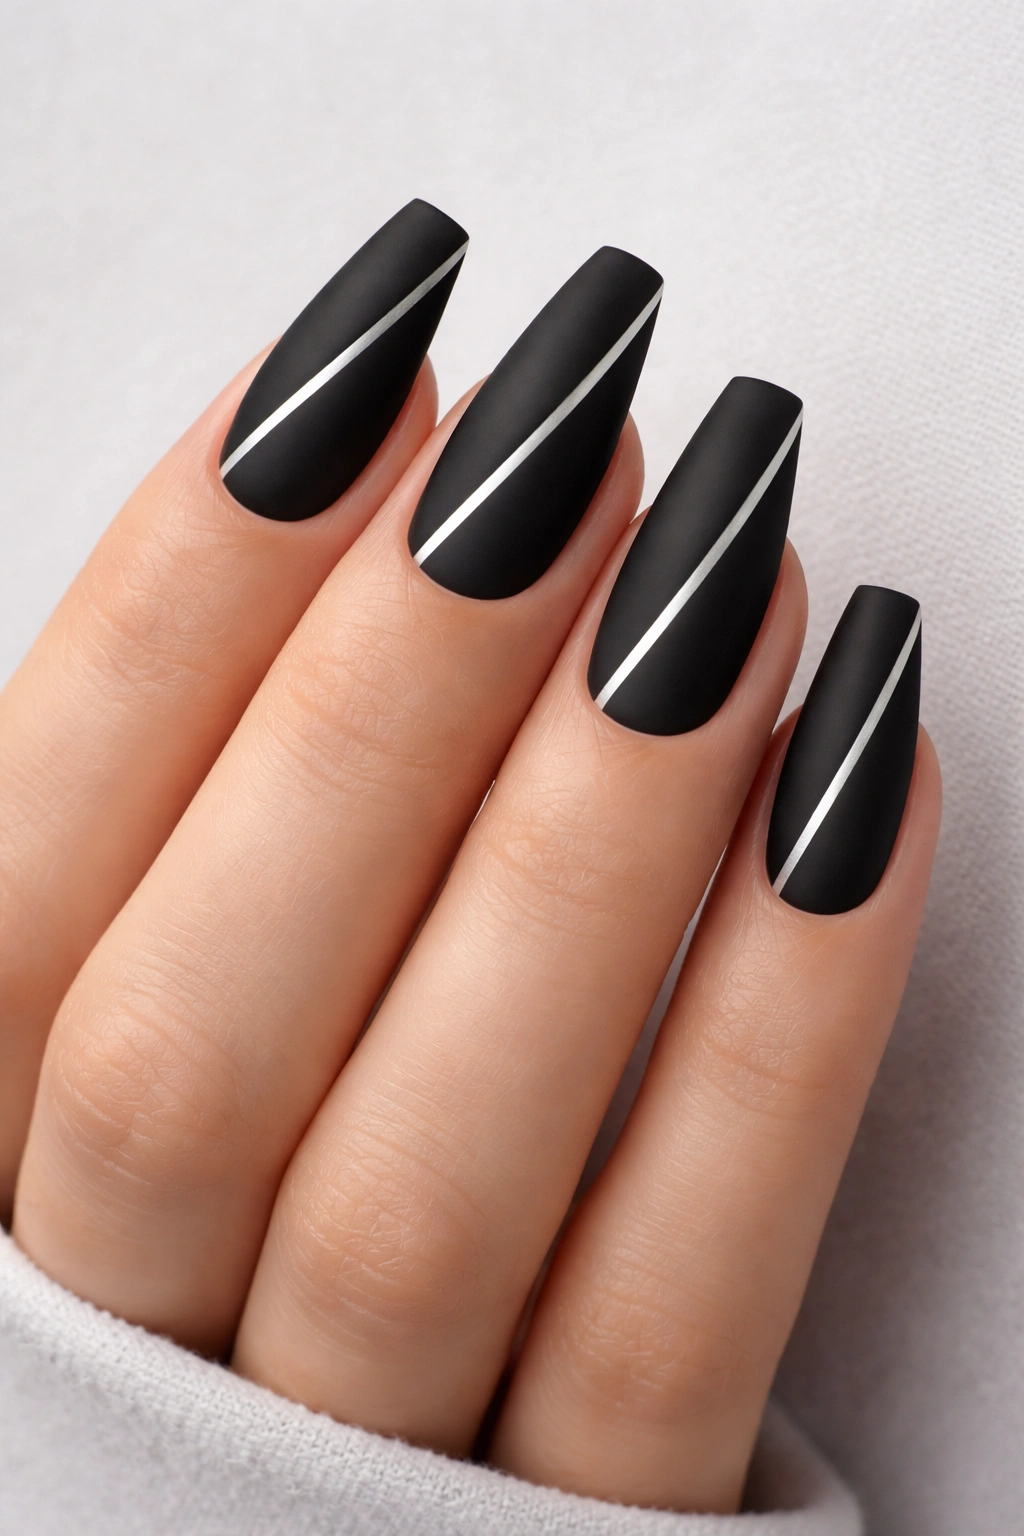
Unlike glitter or chrome, diagonal striping lives or dies on placement. There is nowhere for a crooked line to hide.
That is part of why I like it. A single silver diagonal running from the lower sidewall toward the opposite upper corner makes a coffin nail look longer in one stroke. Two diagonals can work too, though I would stop there. Once you reach three or four lines per nail, the set starts to look crowded.
Hand-painted gel lines last better than physical striping tape. Tape can lift at the edges, especially if the free edge gets knocked against keyboards, drawers, or the side of your phone. A painted silver gel line sealed under top coat stays flatter and cleaner.
This design suits medium-length coffin nails well because it does not need much surface area. If your nails are wider, diagonal lines help break up that width. If your nails are already narrow, use one line instead of two so the art does not make the nail look pinched.
Matte black works better than glossy here. The matte finish keeps the black surface calm while the silver line does all the talking. The set ends up looking precise, almost tailored, and that mood fits coffin nails better than loose, scattered detail.
6. Black Jelly Coffin Nails With Encapsulated Silver Foil
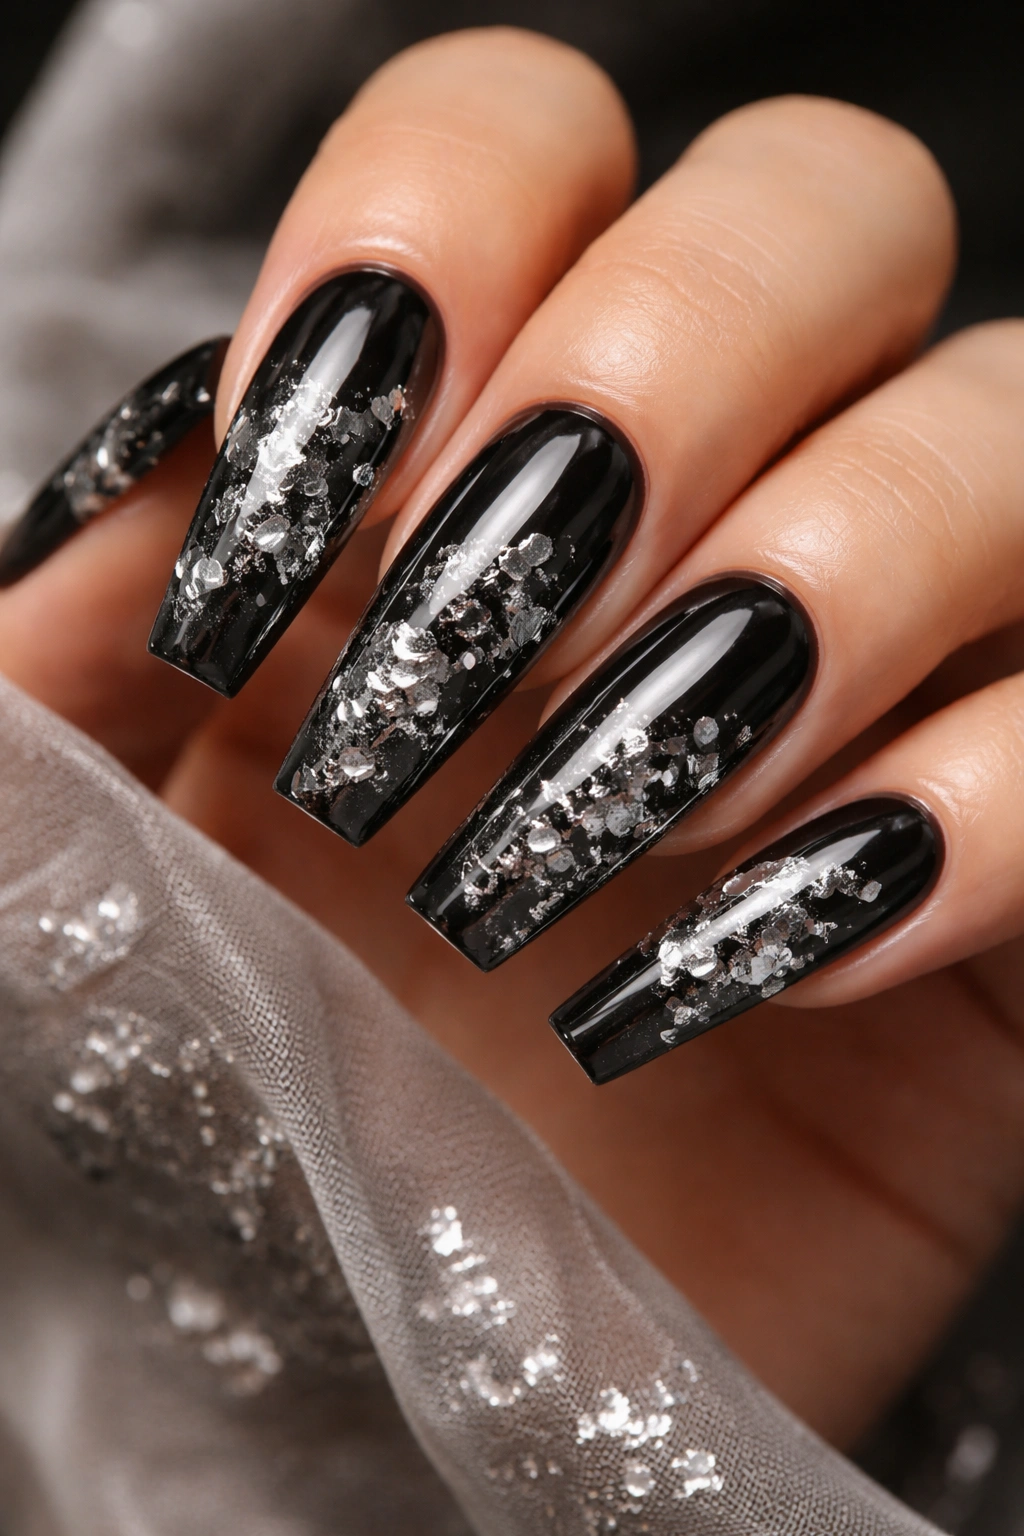
Opaque black gives you surface. Black jelly gives you depth.
That is the whole appeal of this set. Instead of painting a flat black layer and laying silver on top, your nail tech builds a translucent smoky black effect and places silver foil pieces inside the structure so they look suspended under the nail. On a longer coffin shape, that little bit of depth is enough to make the set feel custom.
Unlike chunky glitter, foil can be torn into irregular fragments. That matters because uniform pieces tend to read craft-store fast. Small, uneven flecks placed with space between them look more like shattered metal under glass. Two thin tinted layers over the foil usually give the cleanest result.
This design needs length. I would not bother on a short coffin. You want at least 10 to 12 millimeters past the fingertip so the encapsulation has room to show. It also needs a slightly thicker build than flat polish art, which is fine on extensions but can feel bulky on a weak natural nail overlay.
Who is it best for? Anyone who wants black and silver coffin nails with texture and depth, but not in a raised 3D way. You can still run your fingers over the surface and feel a smooth top coat. The drama stays inside the nail.
7. Velvet Black Cat-Eye Nails Framed With Silver Lines
Tilt your hand and the center band shifts across the nail like smoked metal. Few finishes look as rich as a good black cat-eye gel.
A velvet black cat-eye set framed with thin silver side lines gives you movement down the center and structure at the edges. That pairing works well on coffin nails because the magnetic effect follows the taper, while the silver frame keeps the shape from looking soft.
The Magnet Step That Changes the Whole Set
Cat-eye polish can look muddy if the magnetic stripe is weak or off-center. A strong result usually comes from working one nail at a time, holding the magnet in place for 5 to 10 seconds, and curing immediately. If the line drifts, the nail loses that clean stretched effect.
The silver framing should stay narrow. Think hairline borders, not thick outlines.
Quick Fit Check
- Best base: black magnetic gel over a dark undercoat.
- Best silver detail: ultra-thin gel paint along one or both sidewalls.
- Best length: medium-long to long coffin, where the magnetic pull has room to show.
- Best finish: glossy, because matte kills the movement in cat-eye gel.
One warning: do not put silver on every possible edge. One sidewall line or a delicate double frame is plenty. Cat-eye already has motion built in.
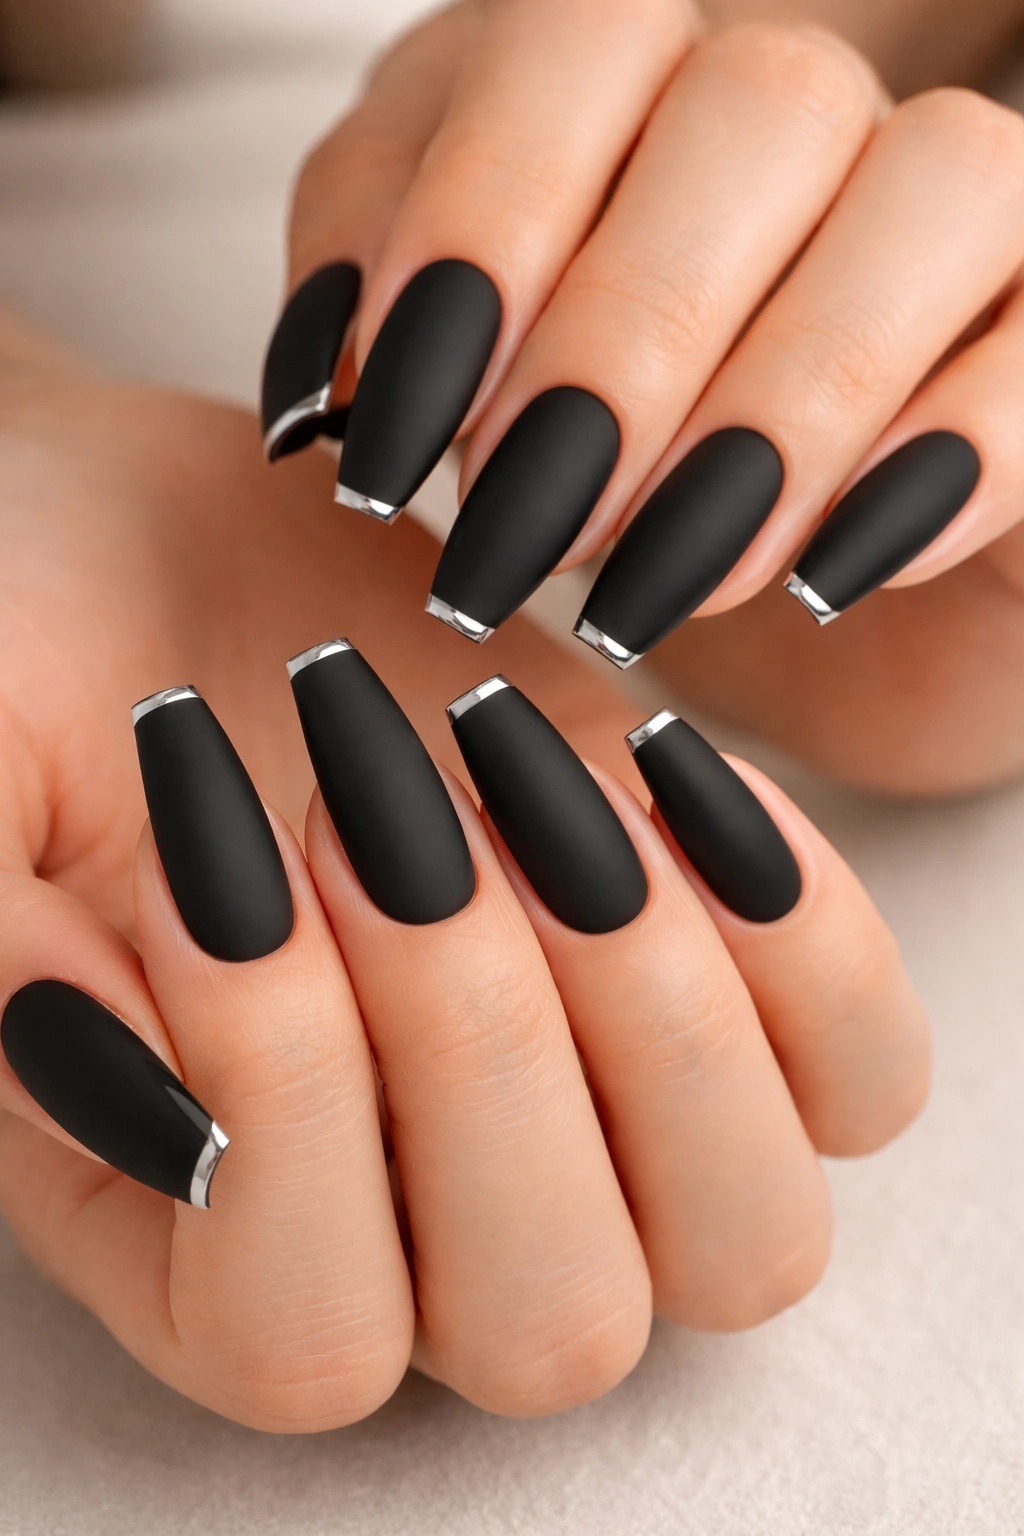
8. Reverse French Black Nails With Molten Silver Cuticle Arcs
Tip art gets most of the attention, yet a silver cuticle cuff can make coffin nails look longer than a French tip ever will. The eye starts at the base, follows the curve, and then travels all the way to the squared tip.
The trick is keeping the silver arc slightly away from the skin. If the line sits right against the cuticle, grow-out shows fast. Leave about 1 millimeter of breathing room and the manicure stays cleaner longer. That tiny gap also makes the silver look intentional instead of crowded.
I like this design most when the rest of the nail stays either glossy black or matte black with no extra art. You can place the cuff on all ten fingers if the line stays thin. If you want a heavier silver moment, use reverse French arcs on two or four nails and keep the rest solid black.
There is a small downside. Cuticle art demands clean prep. Dry skin, ragged cuticles, or flood marks around the base will drag the whole set down. If your cuticle area tends to get rough, this is the kind of design that benefits from a day or two of cuticle oil before your appointment—yes, before, not only after.
9. Split Black and Silver Checkerboard Coffin Nails
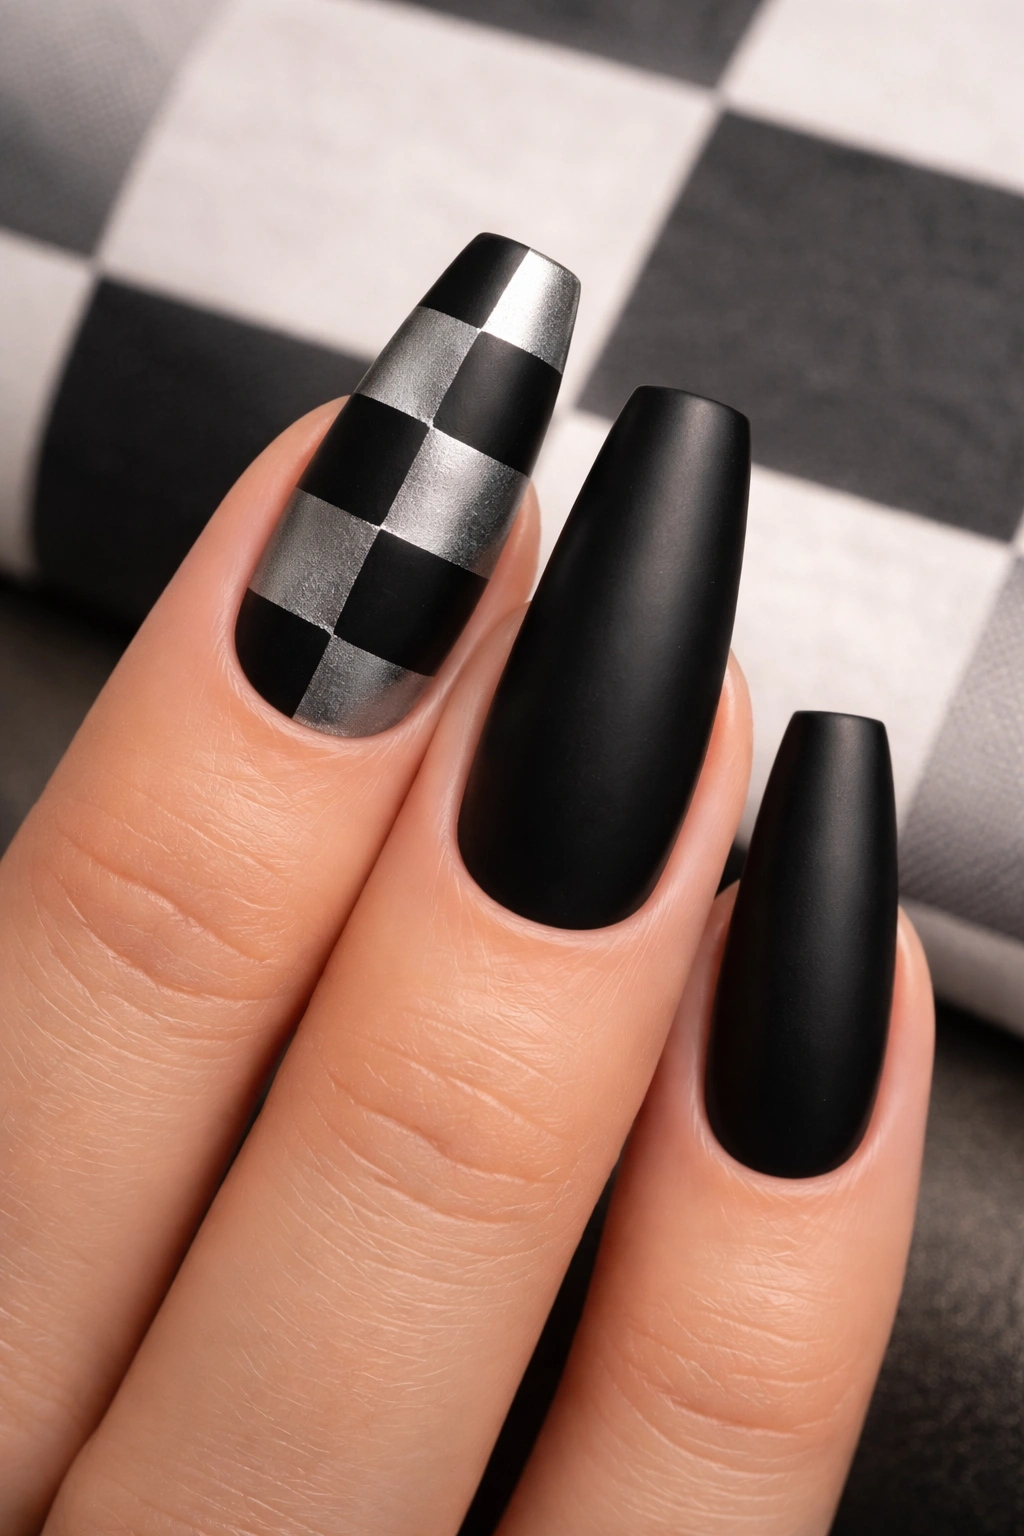
Can checkerboard look grown-up on coffin nails? Yes, though scale decides everything.
Tiny squares tend to look busy on a tapered shape. Bigger blocks—two to four squares across the nail, not six or eight—hold up much better. I also prefer checkerboard used as an accent, not as a full ten-finger commitment. Two checkerboard nails with solid black and silver around them look sharp. Ten checkerboard nails can feel costume-like in a hurry.
Where the Pattern Should Sit
A full checkerboard nail works on ring fingers. A half-and-half layout, where one side of the nail stays black and the checker pattern fills the other side, often looks even better because it respects the long coffin silhouette. Another good option is a checkerboard tip with a solid black lower half.
Texture helps here. Matte black squares next to silver chrome squares create more separation than two glossy shades fighting for the same space. If mirror chrome feels too loud, switch the silver to a brushed pewter gel so the pattern still reads metallic without turning every finger into a mirror.
This design has attitude. It also needs editing. Bigger blocks, fewer accent nails, cleaner payoff.
10. Silver Chrome Base With Sharp Black Flame Art
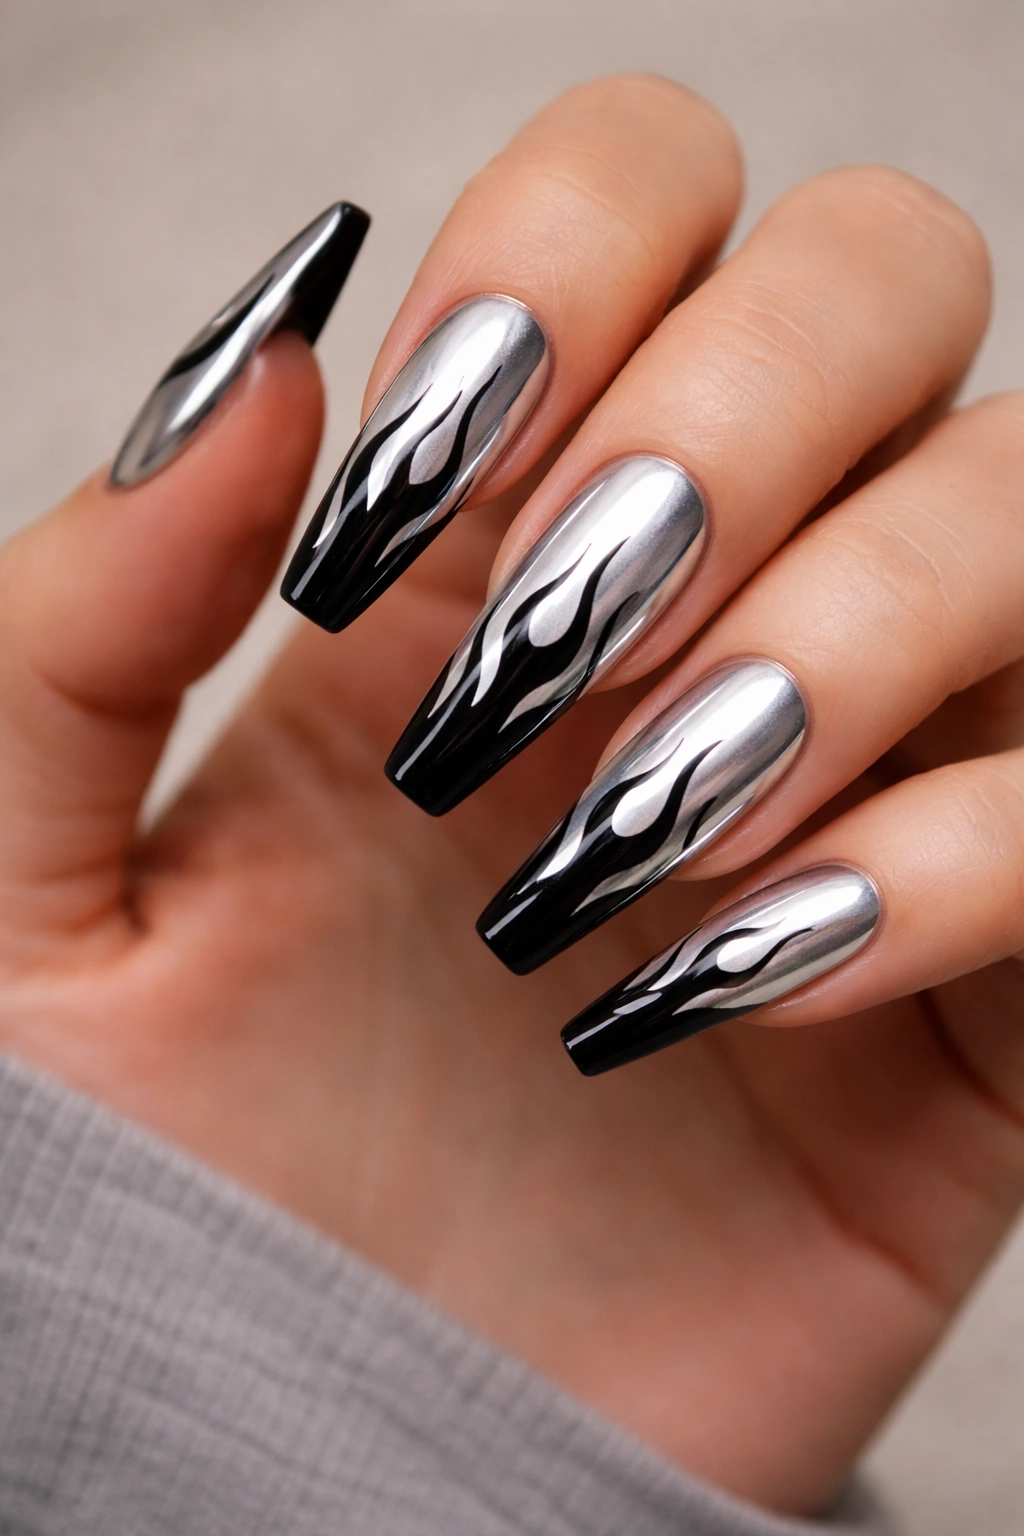
This one is loud, and it should be.
A silver chrome base with black flames flips the usual black-and-silver order. Instead of silver acting like a detail, it becomes the stage. That gives the set more heat and more motion, which is why I save this design for longer coffin nails where the flames have room to stretch.
Flames look best when they stay thin at the start, widen through the middle, and end in pointed tongues rather than round blobs. On coffin nails, the points should travel upward along the center or side of the nail instead of spreading flat across the tip. Spread them too wide and the shape looks shorter.
Here is the version I would ask for:
- Length: at least 12 millimeters past the fingertip.
- Placement: black flames on two to four nails, solid black or solid silver on the rest.
- Silver finish: chrome or high-shine metallic, not chunky glitter.
- Flame style: long, narrow points with clean negative space between them.
The finish matters more than people expect. A chrome base under black flames gives you a slick, almost machine-like feel. A softer silver metallic under the same art leans more rock-and-roll. Same concept, different personality.
11. Smoky Black Ombre With Silver Starburst Details
I like this design when plain black feels too flat but full glitter still feels like too much. It sits somewhere in the middle, and that is exactly why it works.
Start with a smoky black ombre, usually deeper at the tip and softer toward the center or cuticle. Airbrush gives the smoothest fade, though a good sponge blend can still get there if the layers stay thin. You want haze, not hard bands. On coffin nails, the gradient should follow the length of the nail so the tip still looks straight and sharp.
Then add tiny silver starburst details—little crossed lines, spark shapes, or short radiating marks. Keep the count low. Three to five starbursts across both hands is often enough, with maybe one larger burst on an accent nail and a couple of smaller ones scattered nearby. Pile them on and the set loses the dark, moody base that made it good in the first place.
Gloss top coat makes the ombre look deeper. Matte top coat makes the starbursts feel flatter and more graphic. I prefer gloss here because it gives the black some atmospheric depth, though that is one of those design choices that depends on mood more than rules.
This set works well for events, photos, and nights when jewelry and nails need to talk to each other a little. Silver rings echo the starbursts nicely. So does a black sleeve pulled down over part of the hand. Small styling detail, big effect.
12. Black Lace Nail Art Over a Brushed Silver Background
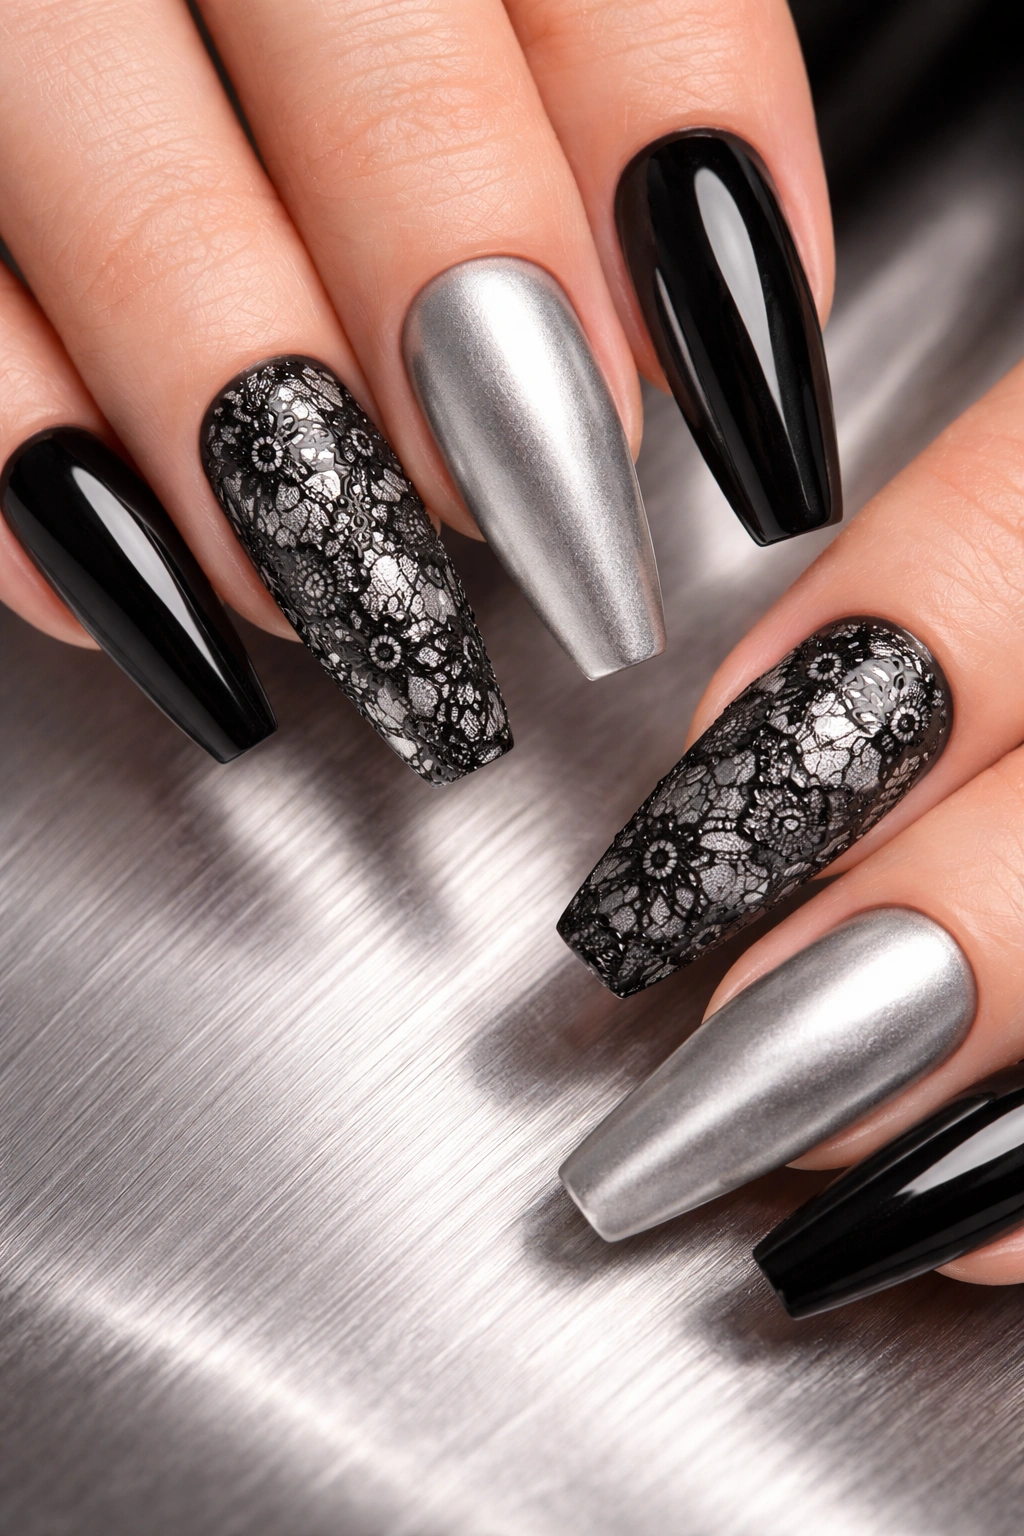
Compared with mirror chrome, a brushed silver base has a softer, almost industrial texture. That makes it a strong partner for black lace.
Lace art can get messy on nails fast. The way around that is to use it sparingly and keep the base a little muted. A satin or brushed silver background gives the black pattern enough contrast to show, but it does not glare the way chrome does. The lace itself can be stamped, hand-painted, or created with a fine gel brush and a steady hand.
I would use black lace on two accent nails per hand and keep the rest solid black or silver. Full lace on every finger can start to feel dense, especially on a long coffin shape. The best versions leave some open silver space so the eye can still read the pattern.
This design suits people who like edge with a slightly dressier finish. It pairs well with pointed rings, tailored jackets, mesh, satin, and darker evening makeup. It can lean gothic, but it does not have to. Change the lace pattern from floral to netted, and the mood shifts from romantic to strict in one step.
If you want black and silver coffin nails that feel detailed rather than flashy, this is the one I would keep in the screenshot folder.
What to Tell Your Nail Tech Before the First Coat
A good reference photo helps. Two good reference photos help more. Ten photos from ten different angles usually create confusion.
When you book black and silver coffin nails, describe the set in pieces: shape, length, finish, placement, then art. That gives your nail tech something useful to build from.
A clean request sounds like this:
- Shape: medium coffin, soft coffin, or long coffin with a narrow tip.
- Length: say the free-edge length if you know it—8 millimeters, 12 millimeters, whatever you want.
- Base finish: glossy black, matte black, black jelly, satin silver, mirror silver.
- Accent count: two accent nails, four accent nails, or full set art.
- Silver style: chrome, foil, fine glitter, gel line art, cat-eye, brushed metallic.
- Art scale: micro details, medium details, or bold statement art.
Mention your daily life too. If you type all day, open boxes, lift weights, or work with gloves on, say it. Long coffin nails with heavy chrome can still work, though the design may need a bit more structure or a slightly shorter length to survive your week.
Keeping Black and Silver Nails Crisp Between Fills
Black polish shows wear fast. Silver details show fingerprints, top-coat scratches, and dullness. Maintenance matters with this color pairing more than it does with a milky nude set.
Cuticle oil does more than make the set look nicer
Dry skin around a dark manicure stands out. A small amount of cuticle oil once or twice a day keeps the base of the nail cleaner-looking, which matters a lot with reverse French cuffs, silver arcs, and any design that draws attention to the cuticle line.
Do not peel gel or chrome off
The American Academy of Dermatology has long warned against peeling off gel polish because it can take layers of the natural nail with it. On black and silver coffin nails, peeling also wrecks the clean surface that chrome, glitter, and metallic gel need. If one nail lifts, book a fix or soak it off the right way.
A few habits keep the finish sharper
- Wear gloves for dishwashing and heavy cleaning.
- Seal hand cream into the skin, then wipe excess off the nail surface if you have chrome.
- Use the pad of your finger, not the nail tip, to pop open cans or pry stickers.
- Ask for a fresh top-coat refresh around the two-week mark if your salon offers it.
One more thing. Silver chrome loses its crisp mirror effect faster than plain black gloss if the top coat gets scratched. If you know you are hard on your hands, matte black with painted silver detail usually ages better than full chrome accents.
Final Thoughts
The best black and silver coffin nails are not the ones with the most detail. They are the ones that know where to stop. A thin silver tip, a clean diagonal line, a controlled cat-eye stripe, a smoky fade with only a few starbursts—those are the sets that keep their shape and their mood.
If I had to narrow the list, I would put matte black with silver micro-French tips, black jelly with encapsulated foil, and velvet cat-eye framed in silver at the top. Each one gives you a different version of bold: clean, deep, or dramatic.
Pick the design that matches how you use your hands, not only how it looks in a photo. That choice is what turns a good nail idea into a set you will still like when the first salon-fresh shine wears down.
