

Ombre coffin nails look easy in photos and oddly unforgiving on a real hand. One hard stripe between colors and the whole manicure can shift from soft fade to craft-project sponge marks in about two seconds.
That’s why this style gets judged so harshly. Coffin nails give you a long, flat runway for color, which is great when the blend is clean and brutal when it is not. You can see every patchy layer, every bulky tip, every place where the darker shade climbed too far up the sidewall.
The good news is that a smooth gradient is not magic. It usually comes down to thin product, smart color pairing, and knowing where the fade should sit on a coffin shape. Nail techs who do this well are not piling on polish and hoping for the best; they build a blur with sheer layers, keep the apex balanced, and use the squared-off tip to make the color shift look longer and cleaner.
And some color combos do more work for you than others.
Why the Coffin Shape Gives Ombre More Room to Fade
Coffin nails make gradients look better than rounded shapes when the design is planned for the shape itself. The long sidewalls and flat tip give the eye a straight path from cuticle to edge, so the fade reads as one smooth movement instead of a quick color jump.
A round or almond nail can soften color by shape alone. Coffin nails do not hide much. They show placement. If the lighter shade sits too high, the nail can look shorter. If the darker shade crowds the free edge with too much opacity, the tip turns blocky and heavy.
Length changes the effect too. Medium and long coffin nails give you enough space to fit three visual zones: the base color, the transition area, and the tip color. On a shorter coffin set, you usually need lower contrast or a more sheer top shade, or the blend gets cramped.
Shape matters.
One trick I keep coming back to is this: the sharper and more structured the coffin, the softer the color transition should be. A crisp tip already gives the manicure edge. The ombre should supply the blur, not compete with the shape by adding another harsh line.
The Thin-Layer Blending Method Nail Techs Use for Smooth Ombre

A clean ombre is built in whispers, not thick coats. That is the part people skip.
When a nail tech lays down one dense nude and one dense white and tries to blend them together on the nail, the result often looks chalky. The product piles up in the middle, the apex gets fat, and after top coat you can still spot the seam. Two sheer coats beat one heavy coat every time.
Sponge, brush, and airbrush each leave a different finish
A makeup sponge gives that soft, clouded look many people want for pink-to-white sets. It lightly stipples color, which helps break up the line between shades. The trade-off is texture, so the surface usually needs an extra smoothing layer of gel or top coat.
A small ombre brush works better with gel polish when you want more control along the sidewalls. The tech feathers the darker shade downward or the lighter shade upward in tiny taps. Short strokes. Barely any pressure.
Airbrush-style fades look the smoothest of all, which is why they photograph so cleanly. They also need the right setup and a steady hand, so you will not see that method at every salon.
The quiet hero is the middle shade
If you want a dark mocha tip fading into a pale beige base, add a translucent caramel between them. If you want lavender fading into white, use a milky lilac veil in the center. That middle tone does half the work.
No middle shade, more problems.
Color Pairings That Look Soft Instead of Muddy
Some colors melt into each other. Others fight.
The easiest ombre combinations share one of two traits: they are close in depth or they are linked by a translucent bridge shade. Nude into white works because the contrast is gentle. Burgundy into black works because both shades sit in a similar rich, dark family. Neon yellow into deep plum can be done, sure, but it needs more planning than most people want for a manicure appointment.
Opacity matters as much as color. A jelly pink over a milky base gives a hazy fade. A full-coverage cream over another full-coverage cream creates a visible band unless you blur it carefully. That is why a lot of strong ombre sets use one solid color and one sheer color rather than two dense shades.
A few rules save time:
- Keep the biggest contrast at the tip, not the middle of the nail.
- Use one milky or jelly shade when the colors are far apart.
- Matte top coat can hide minor blend flaws; gloss shows everything.
- Chrome powder softens transitions because the reflective finish distracts the eye from tiny irregularities.
- Short coffin nails do better with low-contrast fades, while longer sets can carry bolder color jumps.
Once you know that, choosing the right design gets easier.
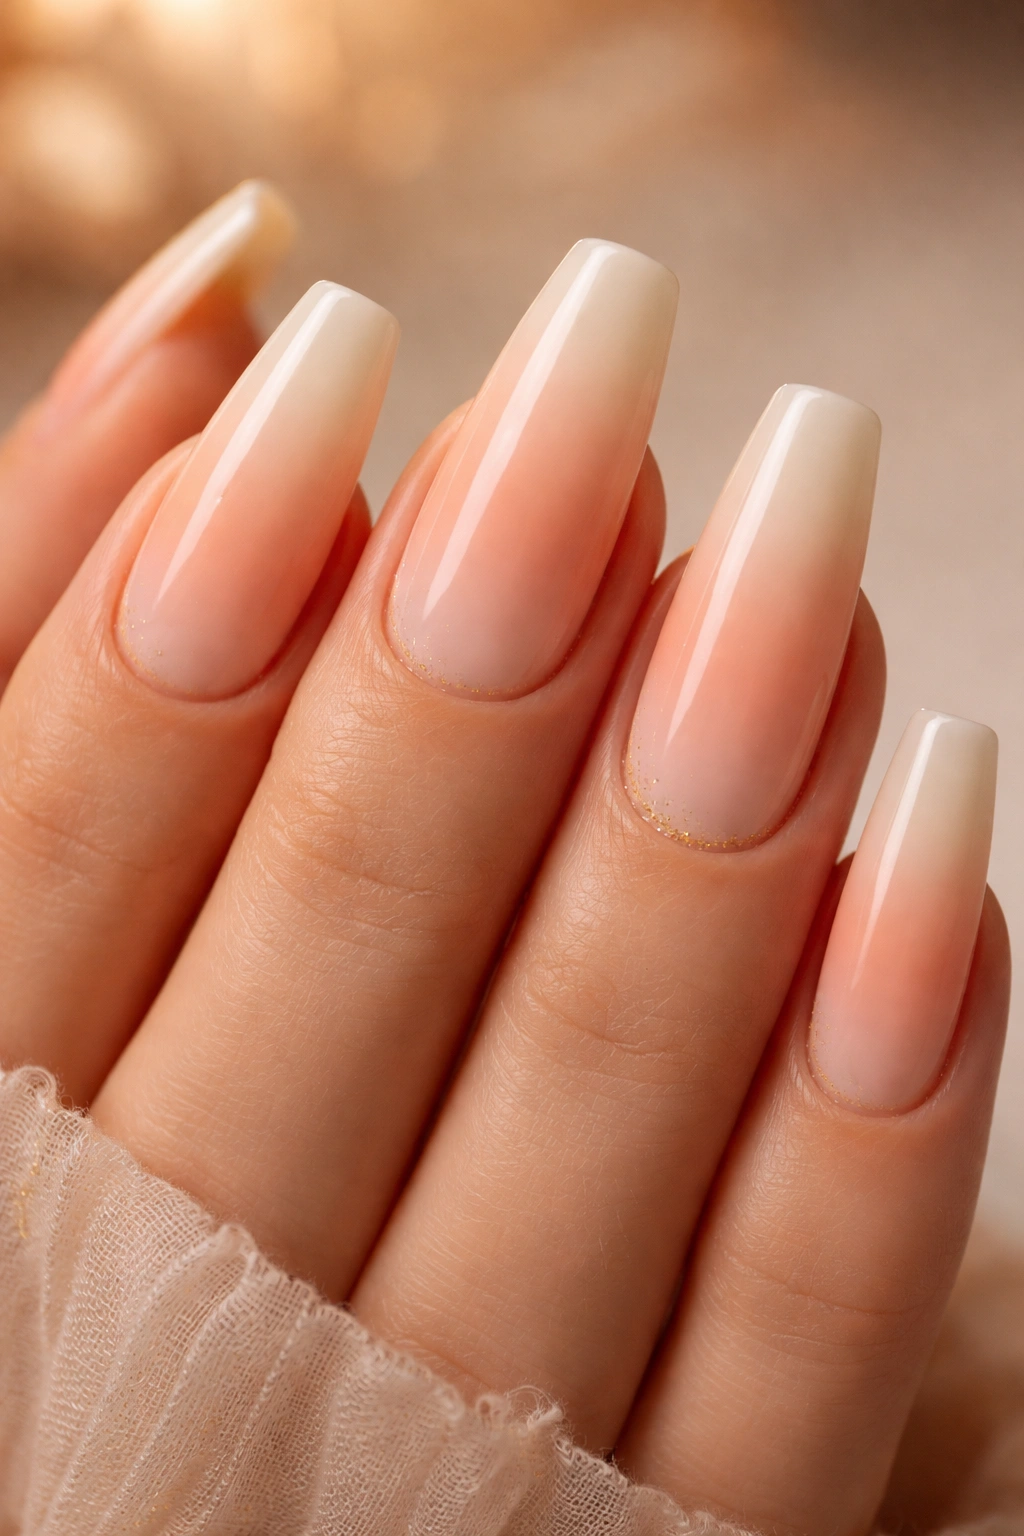
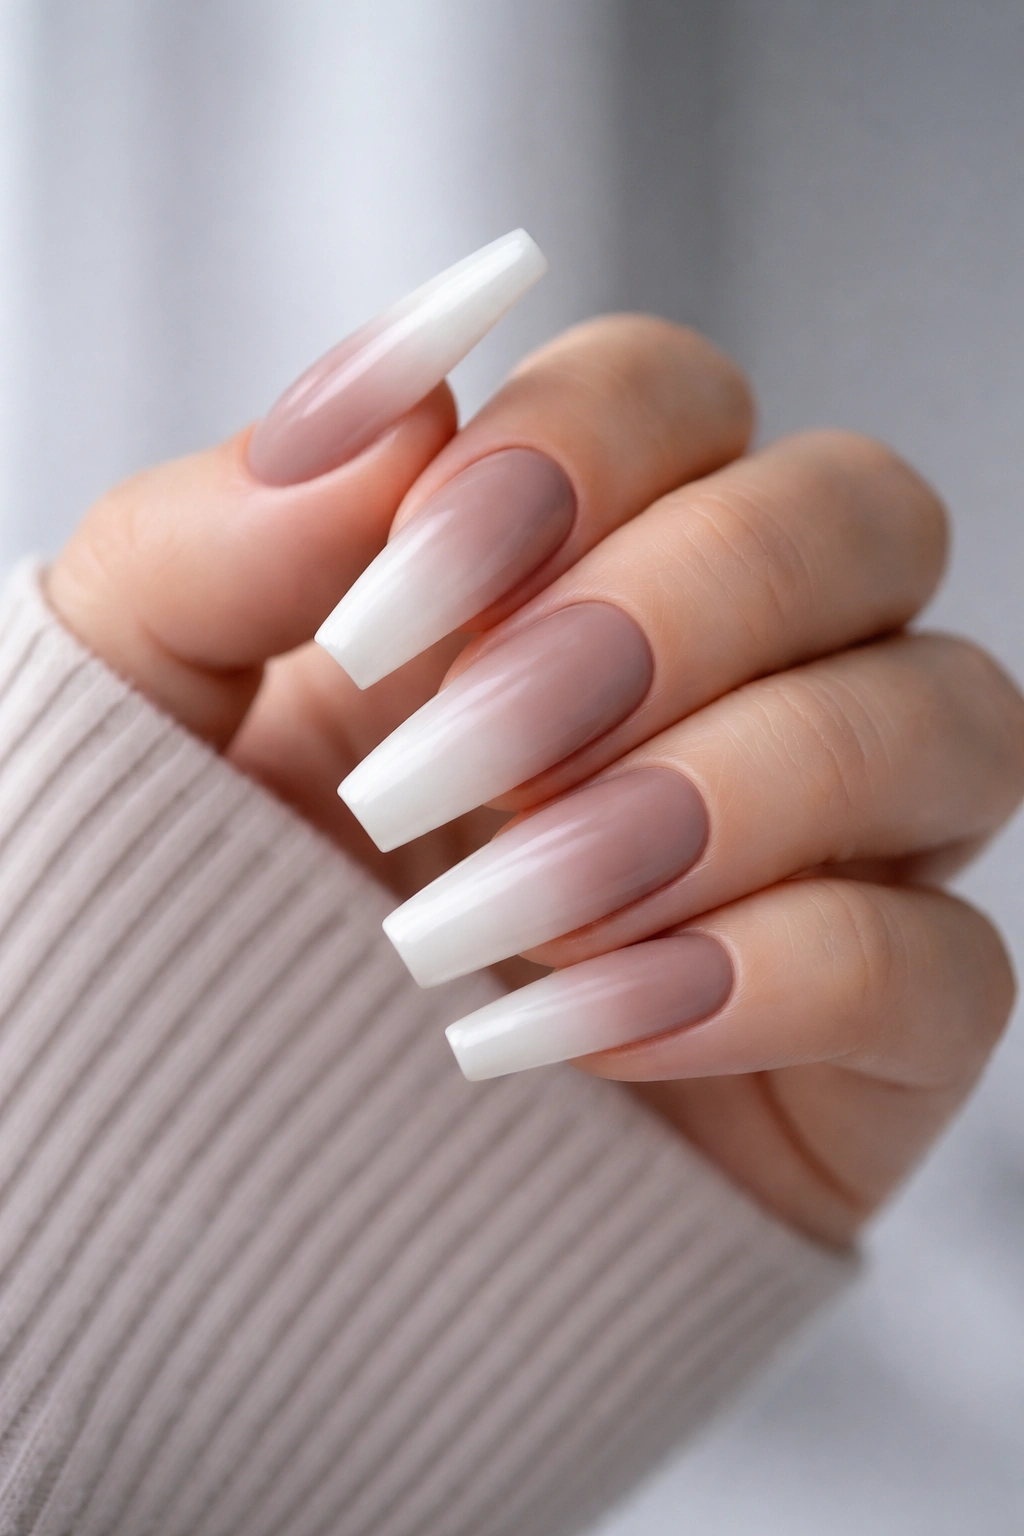
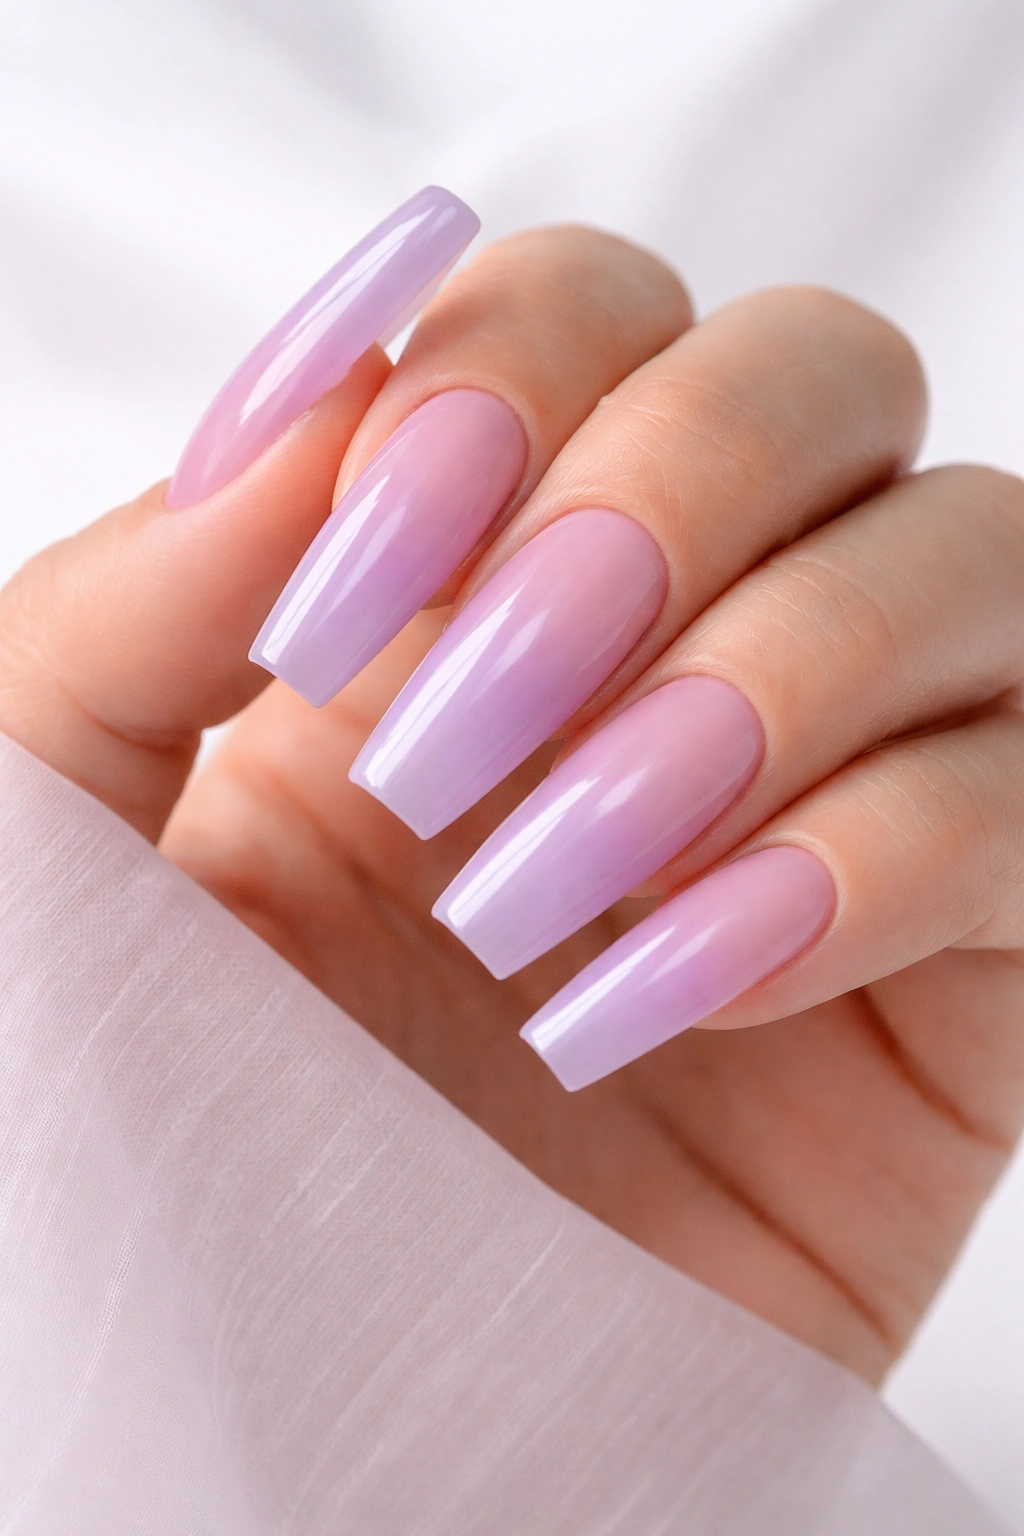
1. Milky Pink to Soft White Ombre Coffin Nails
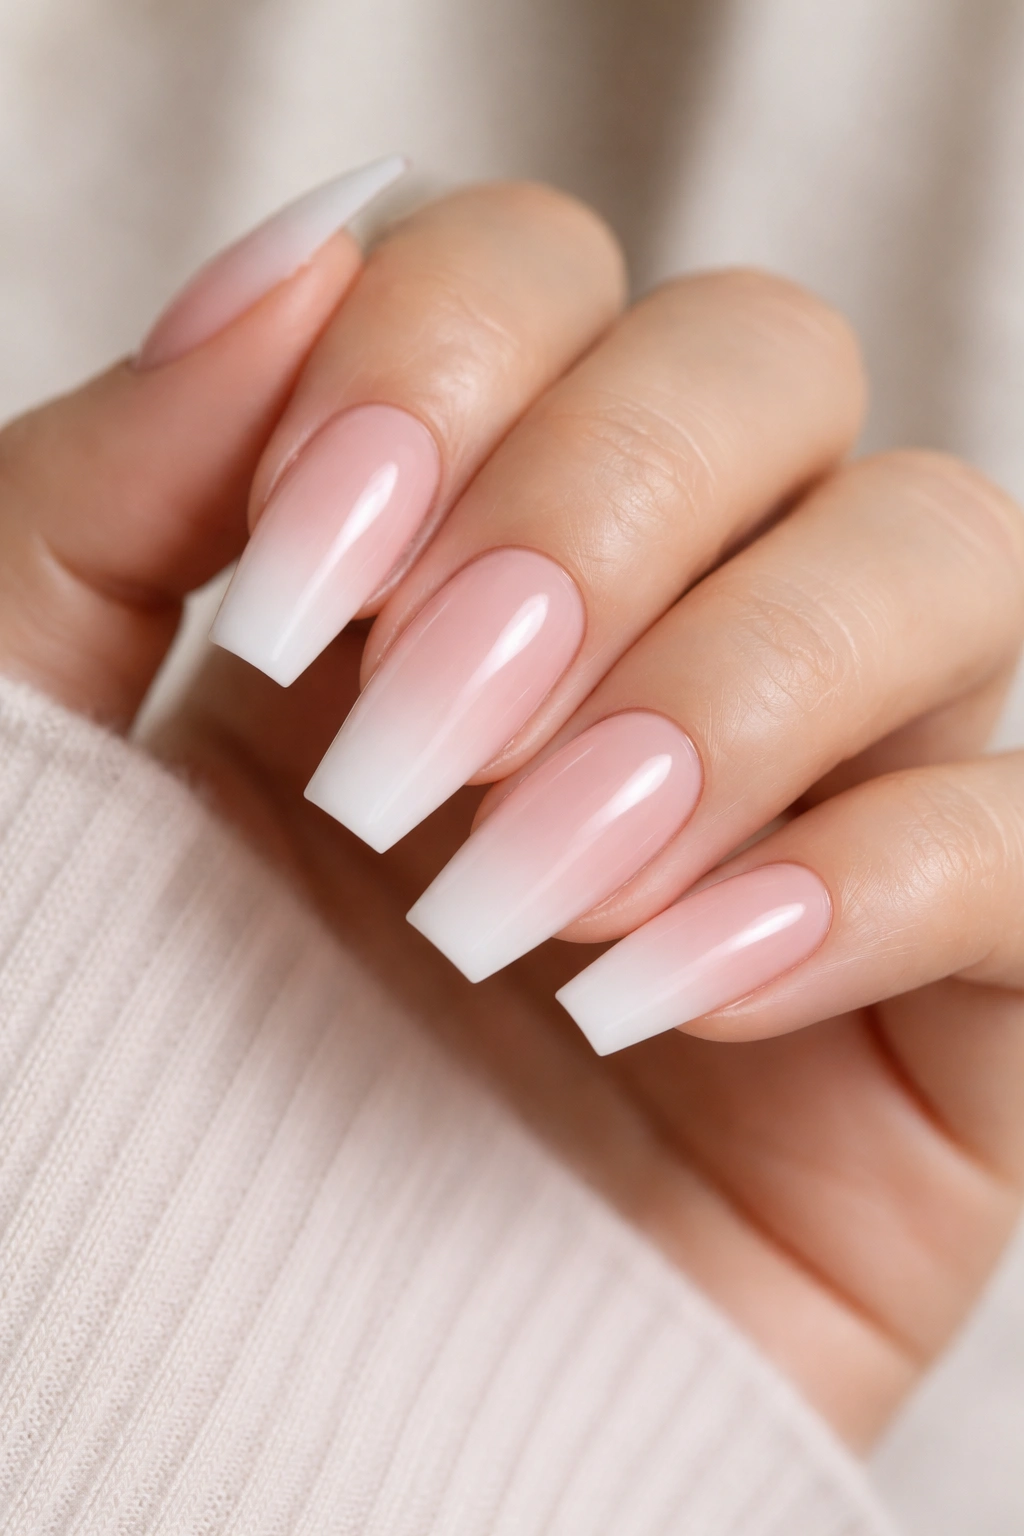
This is the classic for a reason. A milky pink base fading into soft white gives coffin nails that clean, lifted look without the hard smile line of a traditional French tip. On medium or long lengths, the fade can start around the lower third of the nail and still leave room for a gentle transition.
Where this style shines
Bridal sets, work-friendly manicures, everyday acrylics—this pairing fits all three without looking dull. The pink keeps the nail bed from looking flat, and the white at the tip makes the shape look crisp and freshly filed.
A lot of salons call this a baby boomer set. The best versions do not use bright white from the start. They begin with a sheer milky white, then build brightness in two passes so the tip stays soft instead of chalky.
Quick details worth asking for
- Ask for cool white only at the outer tip, not halfway up the nail.
- A rubber base or builder gel overlay helps the surface stay smooth after sponge blending.
- Medium coffin lengths—about 14 to 18 mm past the fingertip—show this fade best.
- Fine pearl powder can be added over the top if you want a glazed finish without changing the color story.
Tip: If your nail beds run pink or rosy on their own, choose a neutral milk-pink base instead of a peach one, or the whole set can lean too warm.
2. Nude Beige to Caramel Fade
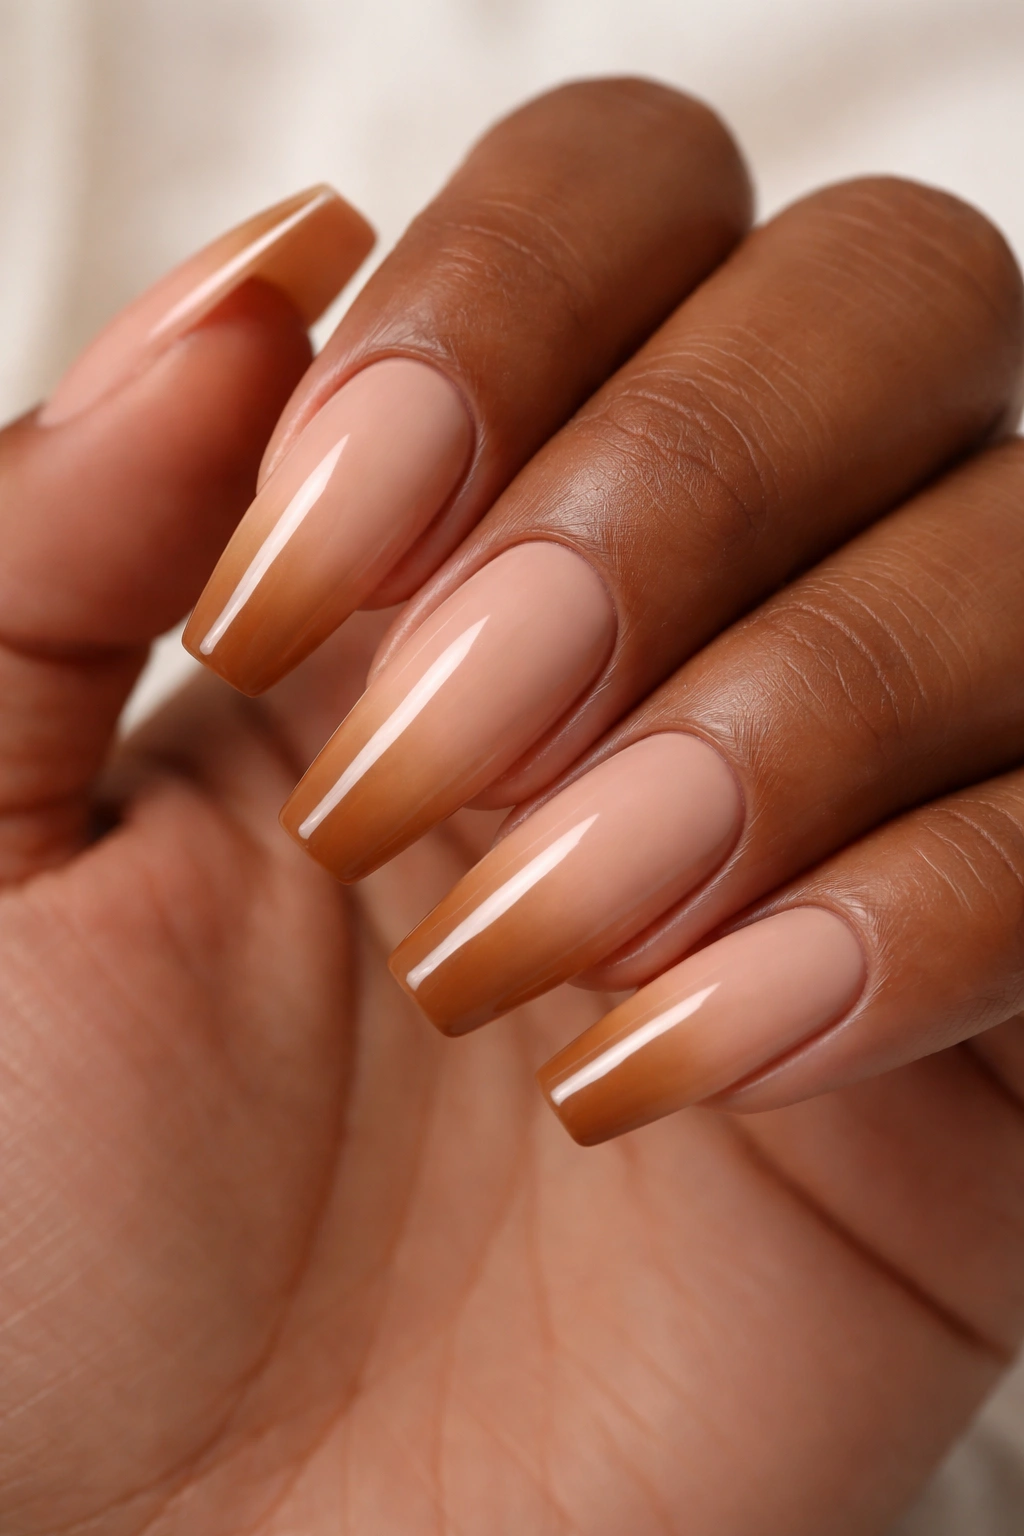
This is one of the most flattering ombre combinations on deeper and olive skin tones, and it does not get enough credit. Beige into caramel has warmth, but not the orange cast that can make nude manicures look off under indoor lighting.
The trick is restraint. You want the base to sit close to your natural nail-bed depth, then let the caramel build toward the tip in a veil, not a stripe. When the caramel is opaque from sidewall to sidewall right away, the nail loses its softness and starts looking dipped instead of blended.
Gloss suits this design well because it makes the shades look richer and more fluid. Matte can work too, though it shifts the finish toward suede, which changes the mood of the whole manicure. Neither is wrong. They just read differently.
Jewelry changes how this set feels. With yellow gold, it looks warm and polished. With silver, the beige stands out more and the caramel feels deeper by contrast. Small detail, big difference.
If you are booking this as an acrylic set, ask for a translucent camel transition shade between the nude and the darker tip. That one adjustment is often the difference between expensive-looking and muddy.
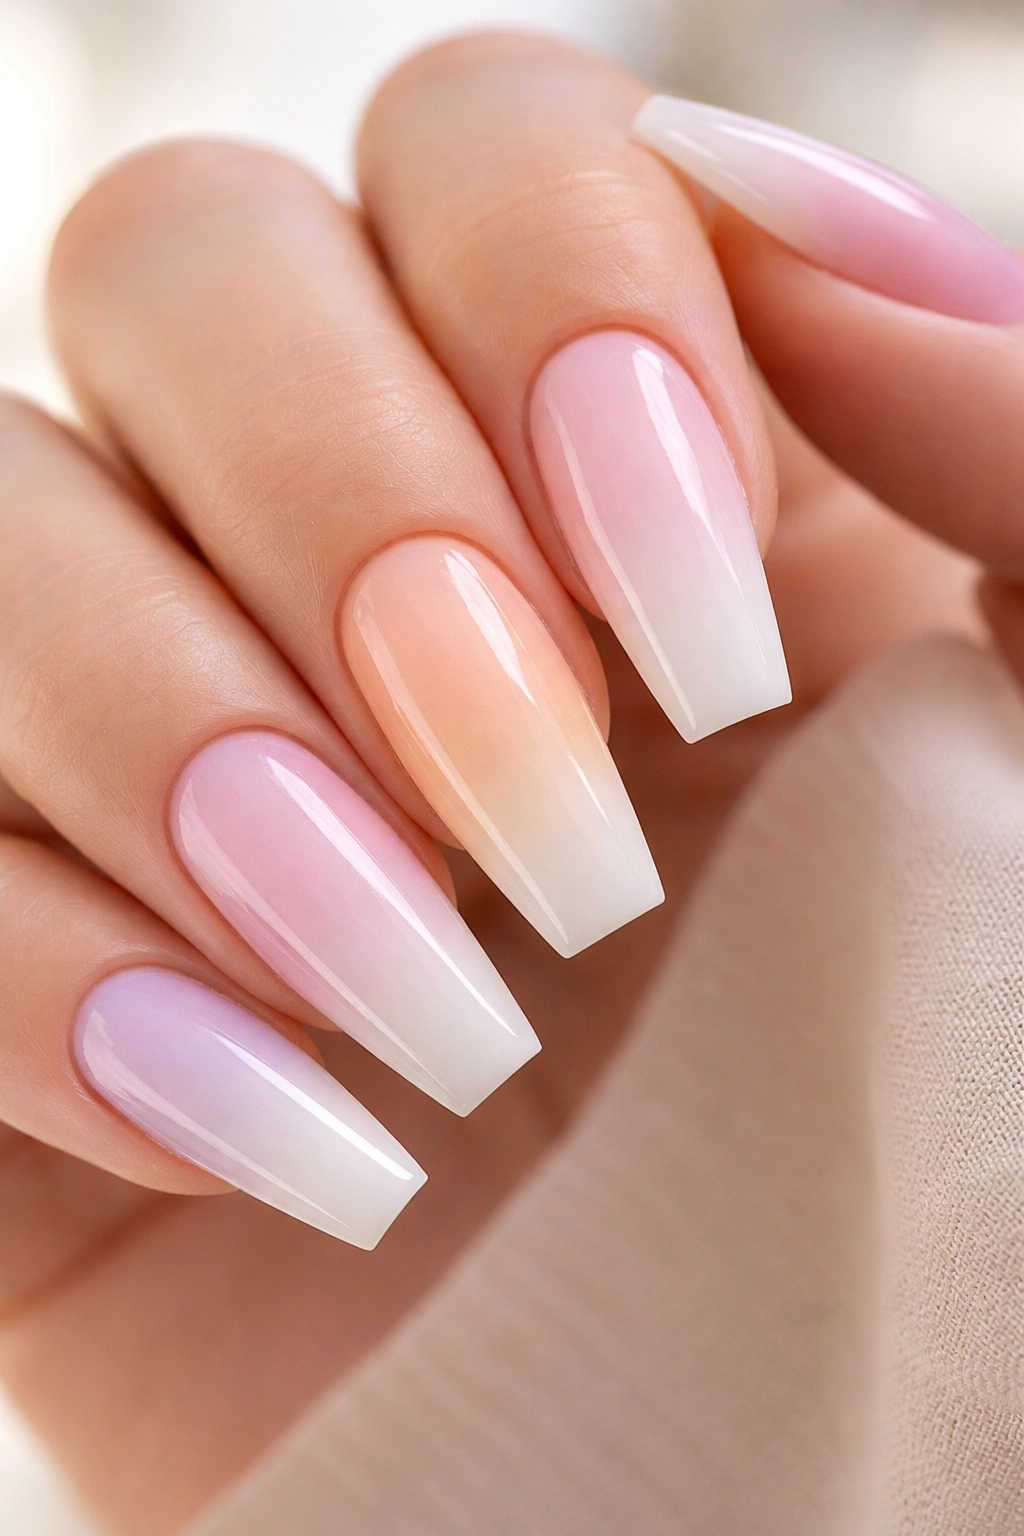
3. Peach to Cream Sunset Coffin Nails
Why does peach work so well in an ombre when brighter orange often does not? Because peach already carries white within it. It is softer by nature, so the fade has less distance to travel before it reaches cream.
On coffin nails, peach near the base gives the hand more warmth, while the cream at the tip keeps the shape neat. It feels brighter than a nude fade but still wearable. You notice it. It does not shout.
This pairing also forgives tiny blend flaws better than pink-to-white. If the transition is slightly hazy, that softness suits the color story.
How to wear it without making it look sugary
Keep the cream off-white rather than pure white. A soft ivory or whipped-cream tone looks smoother against peach. Pure white can make the blend feel cut in half, especially under cool LED salon lamps.
A thin gold outline along one or two nails can sharpen the set without ruining the fade. So can a glossy top coat with a high-reflection finish. If you want art, go minimal—a tiny starburst, a fine foil line, maybe one crystal near the cuticle. More than that and the ombre stops being the point.
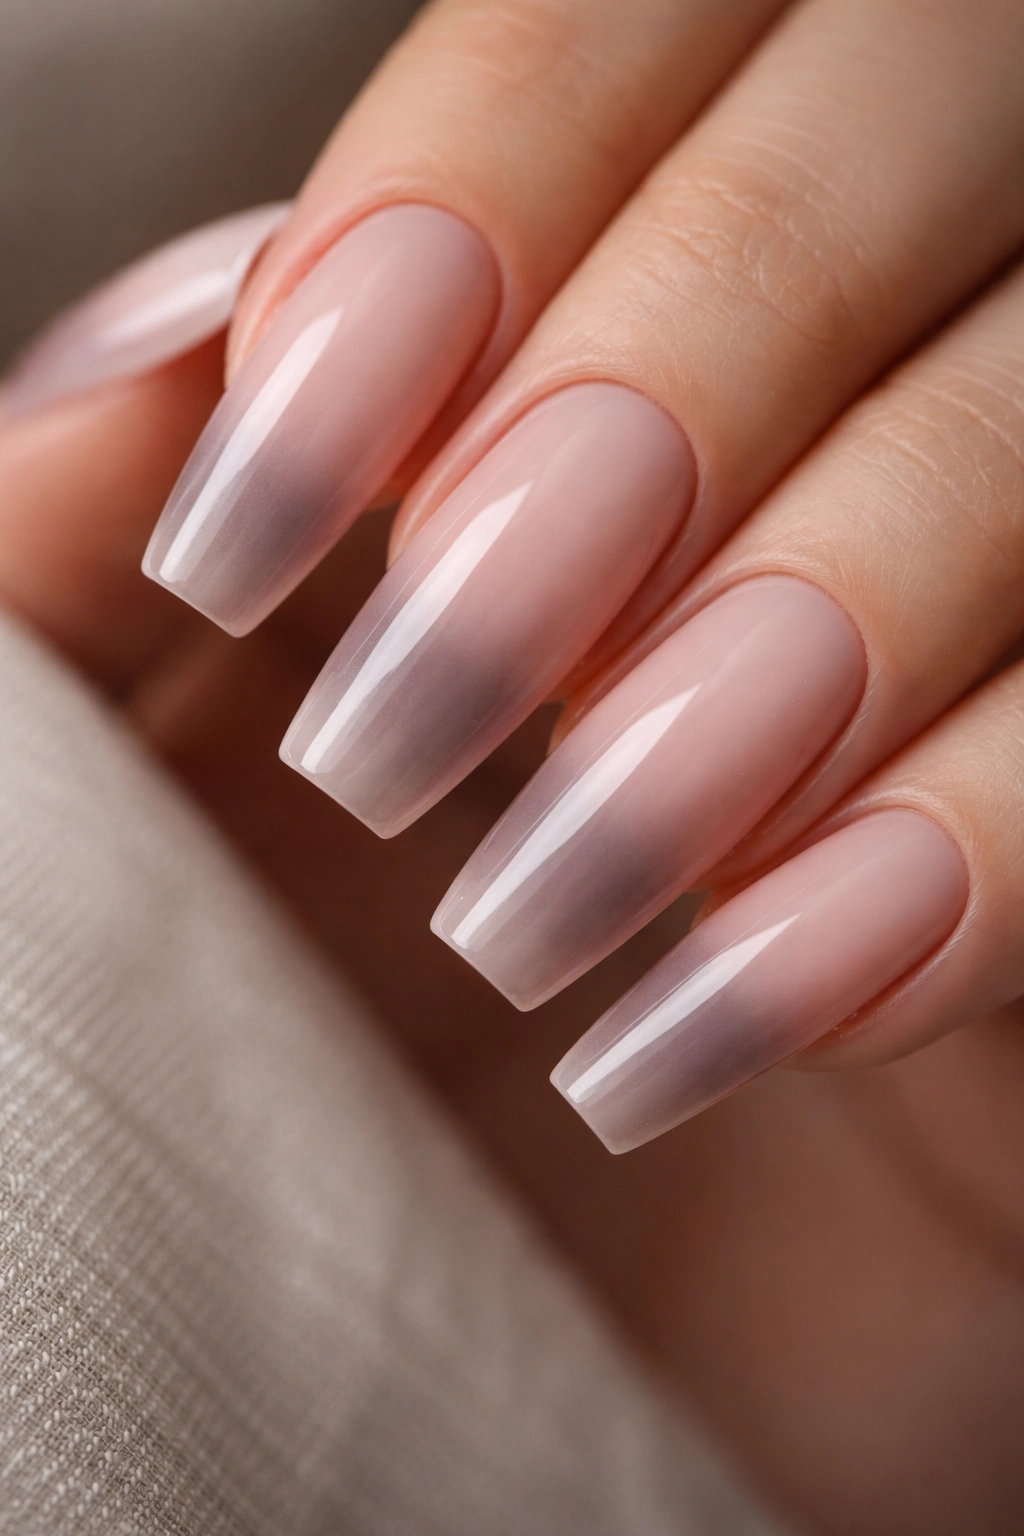
4. Rose Quartz Pink to Mauve Fade
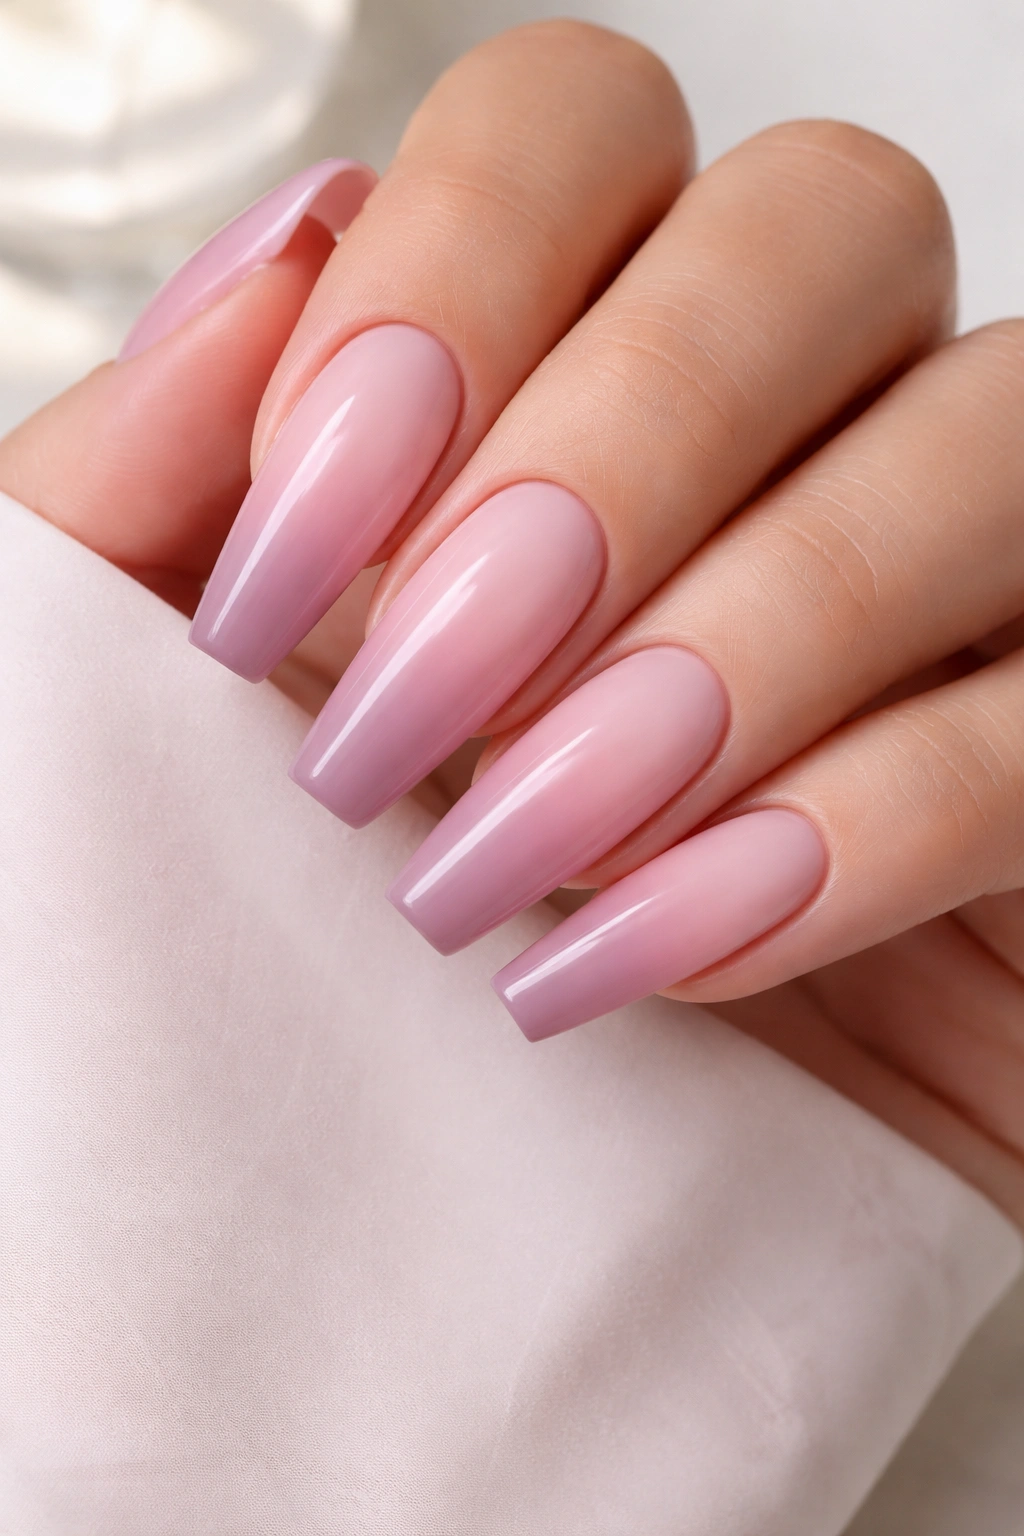
I like this pairing when someone wants pink coffin nails but not the sugary version. Rose quartz into mauve has depth, and on a long taper it looks softer in daylight than it does in the salon chair, which is usually where people panic and think the tip is too dark.
The fade works because both shades sit in the same family, yet the mauve adds shadow. That shadow makes the coffin tip look sharper without using black, navy, or another high-contrast color.
A matte top coat changes this set in a big way. Gloss makes it look more polished and juicy. Matte turns it powdery, almost velvety, and the transition can seem even softer because the surface is not bouncing back as much light.
A few notes that help:
- Use a jelly rose base instead of a full-coverage pink.
- Keep the mauve deepest at the center tip and lighter at the side edges.
- Almond lovers often wear this in a romantic way; on coffin nails it reads cleaner and more architectural.
- Tiny silver foil near the fade line can work, though I would keep it to one accent nail.
That last point matters. Too much foil breaks the blur.
5. Mocha to Latte Brown Ombre Coffin Nails
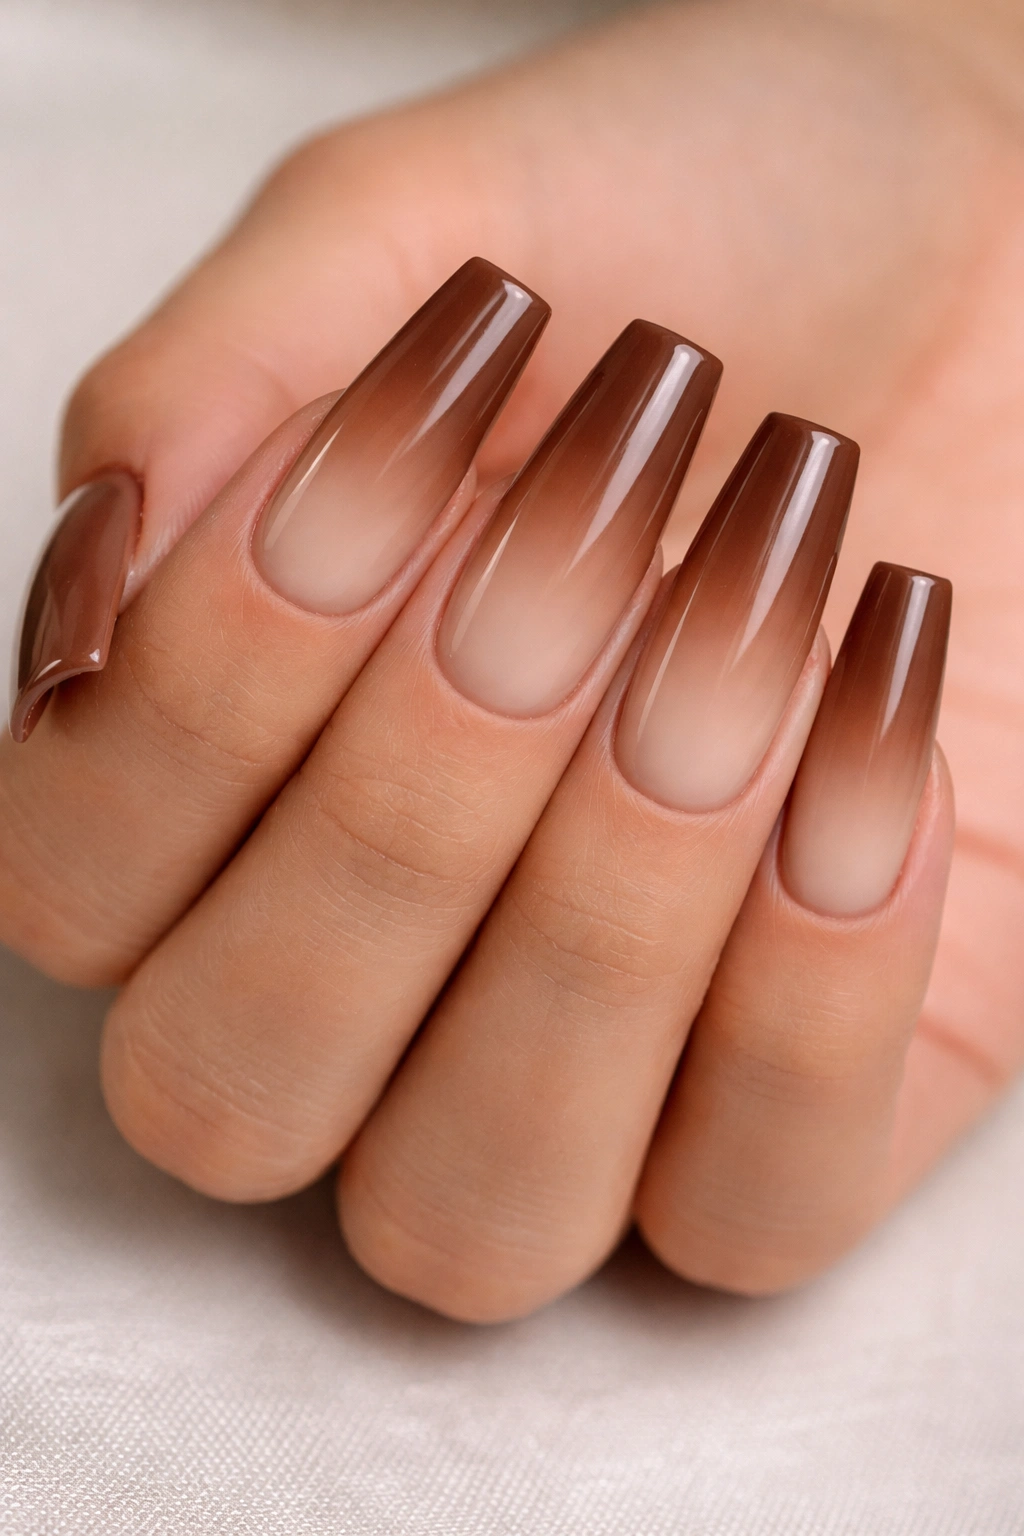
Brown ombre has more personality than people expect. A good mocha-to-latte set looks creamy, rich, and far more expensive than the usual beige nude, especially on coffin nails where the squared tip gives the darker end a solid finish.
The color order matters here. A deep mocha at the tip fading into a latte or milk-coffee base makes the fingers look longer because the eye starts with softness near the cuticle and lands on structure at the edge. Flip it the other way and the nails can feel front-heavy.
This is one of the best ombre looks for matte top coat. Matte brown does not have to read flat if the gradient underneath has enough depth. You still need contrast—about two to three shades between base and tip—but the finish turns it into something closer to suede than gloss lacquer.
Shorter isn’t wrong.
A short coffin version can work if the base stays sheer and the dark brown is concentrated on the outer 20 to 25 percent of the nail. Any higher and the fade gets crowded. On long acrylics, you can push the transition lower and even add a whisper of cinnamon or caramel in the center for more dimension.
Chrome rarely helps brown ombre. This is one of those times I would skip the extra effect and let the gradient carry the set on its own.
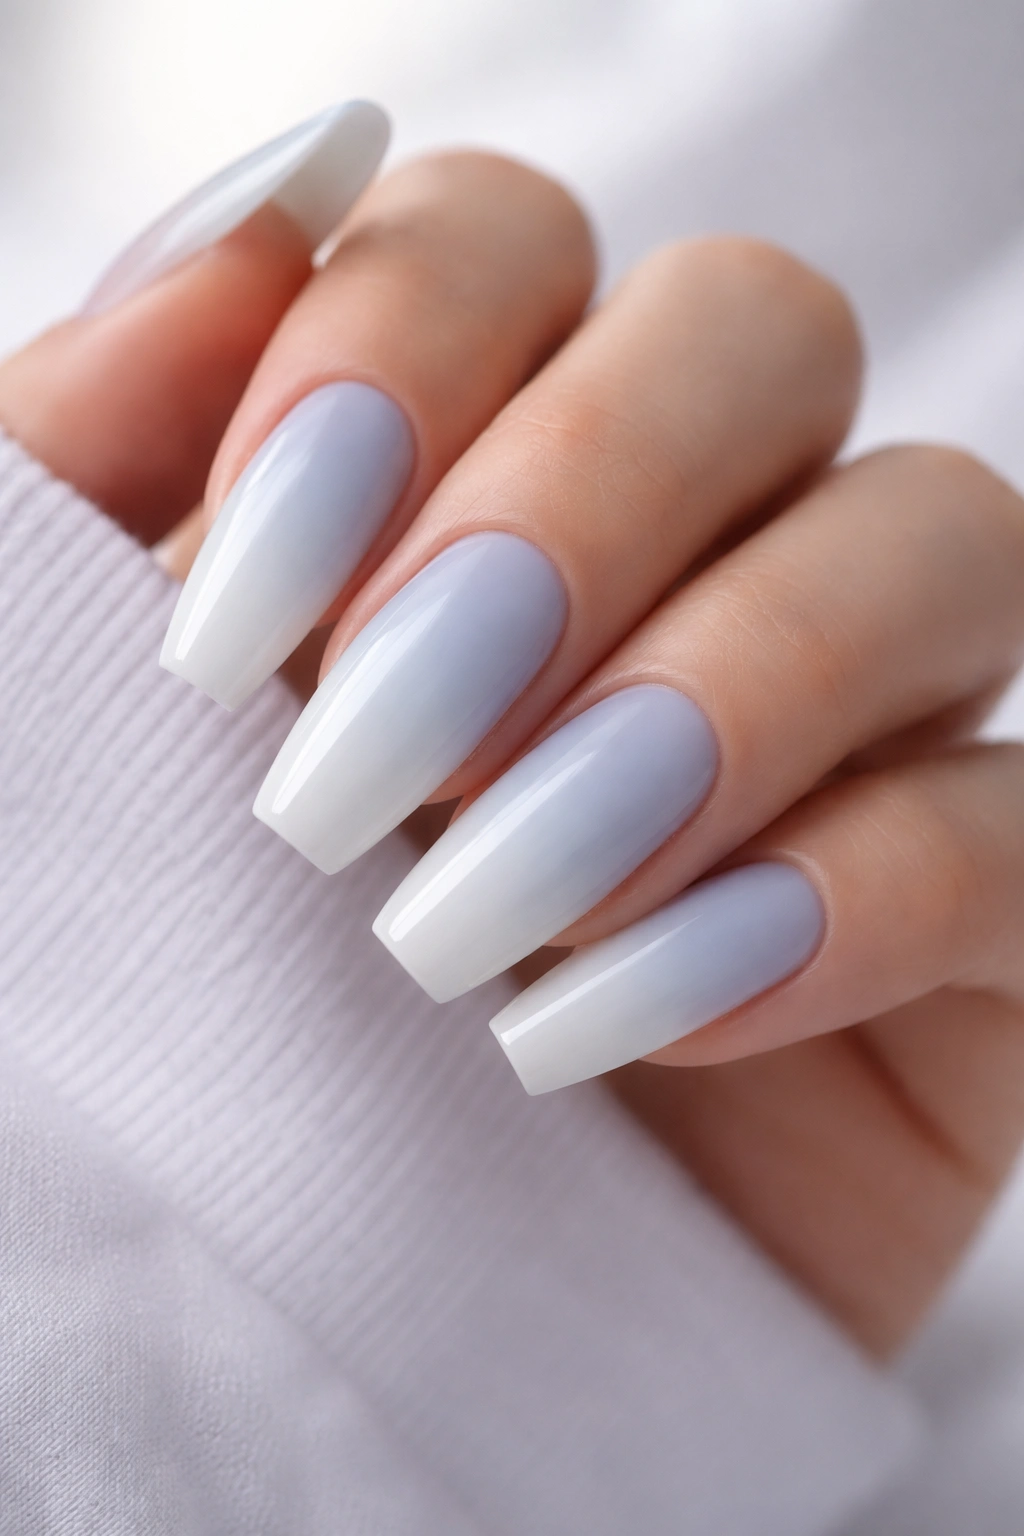
6. Taupe to White Smoke Coffin Nails
Unlike a plain nude-to-white fade, taupe into white smoke gives you a cooler, cleaner finish. It is quieter than gray and less sweet than pink, which makes it a smart choice if you want ombre coffin nails that feel polished without leaning bridal.
Taupe also solves a problem that beige sometimes creates: yellow cast. Under warm indoor bulbs, some beige nudes can turn buttery. Taupe stays controlled. The white smoke tip—think diluted white with a trace of gray—blends into it with less visual shock than bright salon white.
This set does well on medium lengths where you still want the coffin shape to read sharply. Too short and the smoky tip can look like a fading French. Too long and the coolness may feel severe unless the blend is extra soft.
Who is it best for? People who wear silver jewelry, cool neutrals, charcoal knits, blue denim, slate tailoring. The manicure tends to sit nicely against those colors because the undertone is aligned from the start.
Ask for a semi-sheer taupe base and a softened sidewall blend. The crisp coffin tip already gives you enough structure. The fade should stay hazy.
7. Lilac to Icy Lavender Coffin Nails
Pastel purple can go chalky fast, which is why this design works best when both shades stay a little translucent. Lilac at the base fading into icy lavender gives you color without the thick, painted-on look that some pastel sets get.
Why this pairing is kinder than full pastel purple
A lot of lavender gels are loaded with white pigment. That makes them cute in the bottle and streaky on the nail. Using a jelly lilac first keeps the nail bed alive, then a cooler lavender at the tip creates the fade without adding too much bulk.
This set looks sharper under gloss than matte. Light needs to move across the blend so the two purple tones feel connected.
Small details that make it land
- Start the icy shade lower on the nail than you think—around the upper third.
- A milky base coat underneath both colors helps the transition read cleaner.
- Micro-shimmer works here if it is fine enough to look frosted, not chunky.
- Coffin lengths with a narrow side taper make this pairing feel more grown-up than square tips.
Tip: If you want one accent nail, use a clear base with suspended iridescent flakes in lavender and silver. It echoes the fade without copying it.
8. Baby Blue to Cloud White Coffin Nails
Blue is unforgiving. It shows streaks, brush marks, and patchy sponging faster than pink, nude, or brown.
That sounds like a reason to skip it. It is not. It just means the blend has to be cleaner. Baby blue fading into cloud white looks fresh and crisp on coffin nails, especially with a glossy top coat that makes the tip look almost glassy.
The smartest version of this manicure keeps the blue milky rather than primary. Think soft sky color, not marker blue. Cloud white should stay a touch muted too. A stark white tip next to a pastel blue base can look separate, like two designs sharing a nail.
Placement is where many sets go wrong. The white should sit at the far tip and gently ghost downward. If the white reaches the center too quickly, the blue disappears and the whole manicure loses its point. Airbrush or sponge methods usually handle this color combo better than a flat brush because the pigment disperses more softly.
If your salon offers encapsulated glitter, a faint silver shimmer under the top coat can help the blend look smoother by diffusing the eye. Used lightly, it works. Dumped on, it turns into holiday nails.
9. Sage Green to Bare Nude Fade
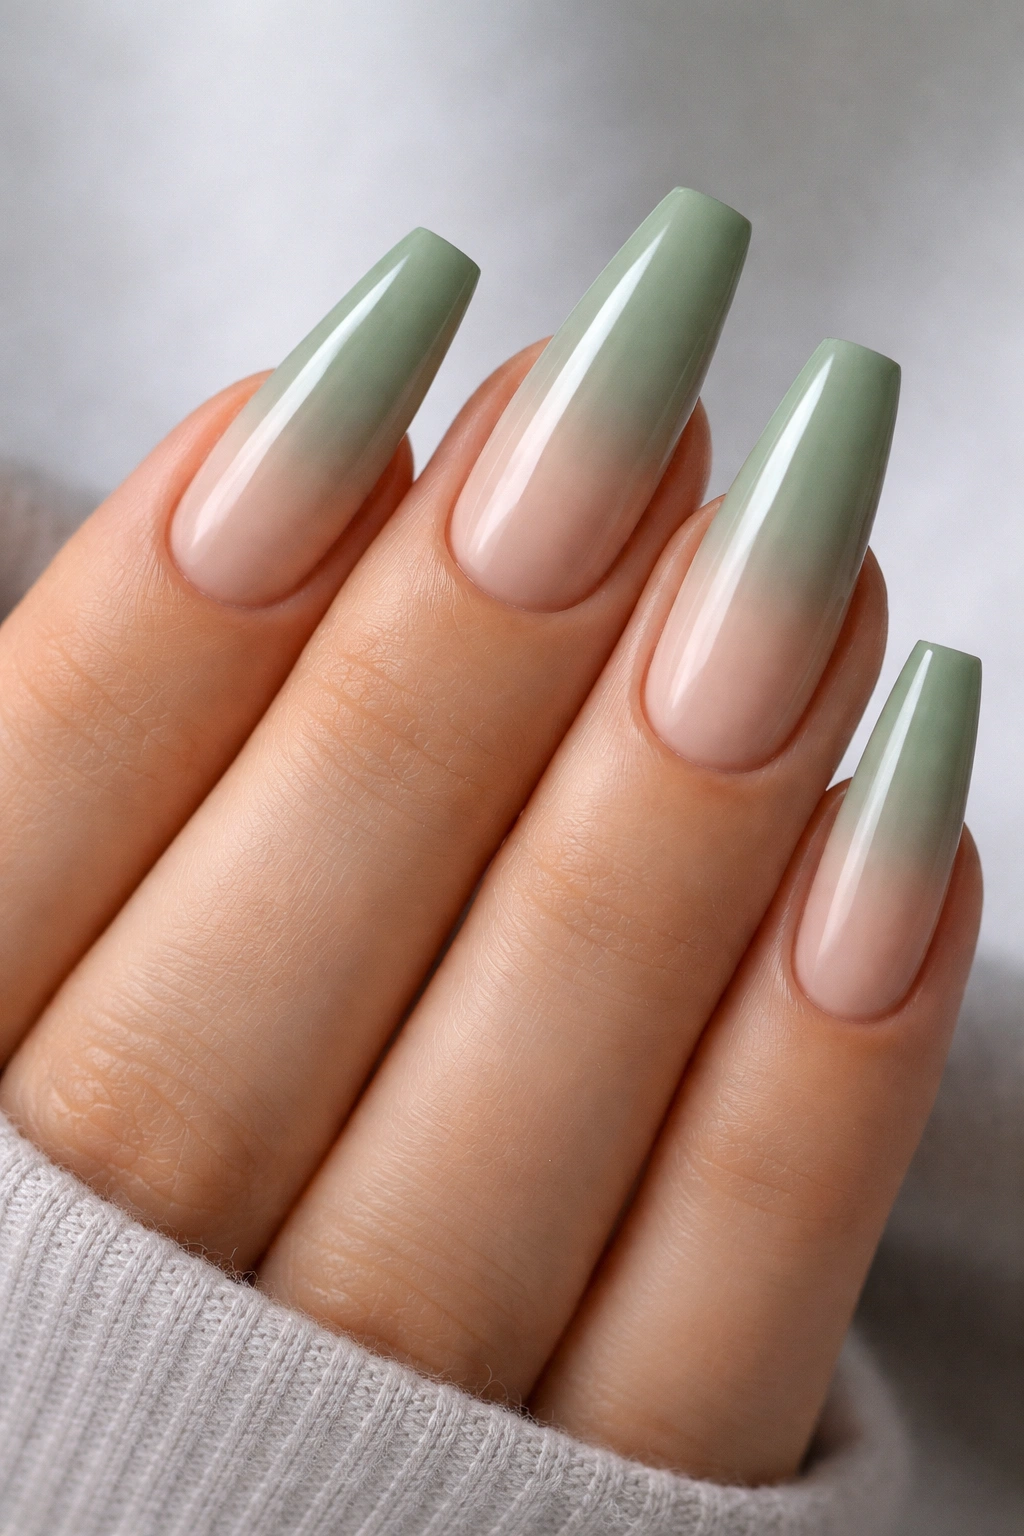
Why does muted green work on a neutral manicure at all? Because sage behaves like a dusty gray with a green cast. It is softer than emerald, less icy than mint, and easier to fade into skin-toned shades than people expect.
On coffin nails, a bare nude base with sage at the tip feels crisp and slightly earthy without reading theme-based. That matters. You do not want the manicure tied to one outfit color or one mood.
A jelly nude base helps the green melt in. Full-coverage beige can fight with sage and turn the center of the nail muddy. Use a nude with a touch of pink or neutral beige, then feather the sage from the tip in short taps.
Placement changes everything here
Keep the green denser at the center edge and lighter at the corners of the tip. That creates a softer taper and stops the free edge from looking like a painted block. If you want art, think thin white linework, a tiny leaf outline, or one glazed accent nail. Big floral decals tend to cheapen this pairing.
This design also survives grow-out well. Because the base is close to the natural nail, the regrowth line does not announce itself after a few days the way a full green base would.
10. Dusty Teal to Slate Fade
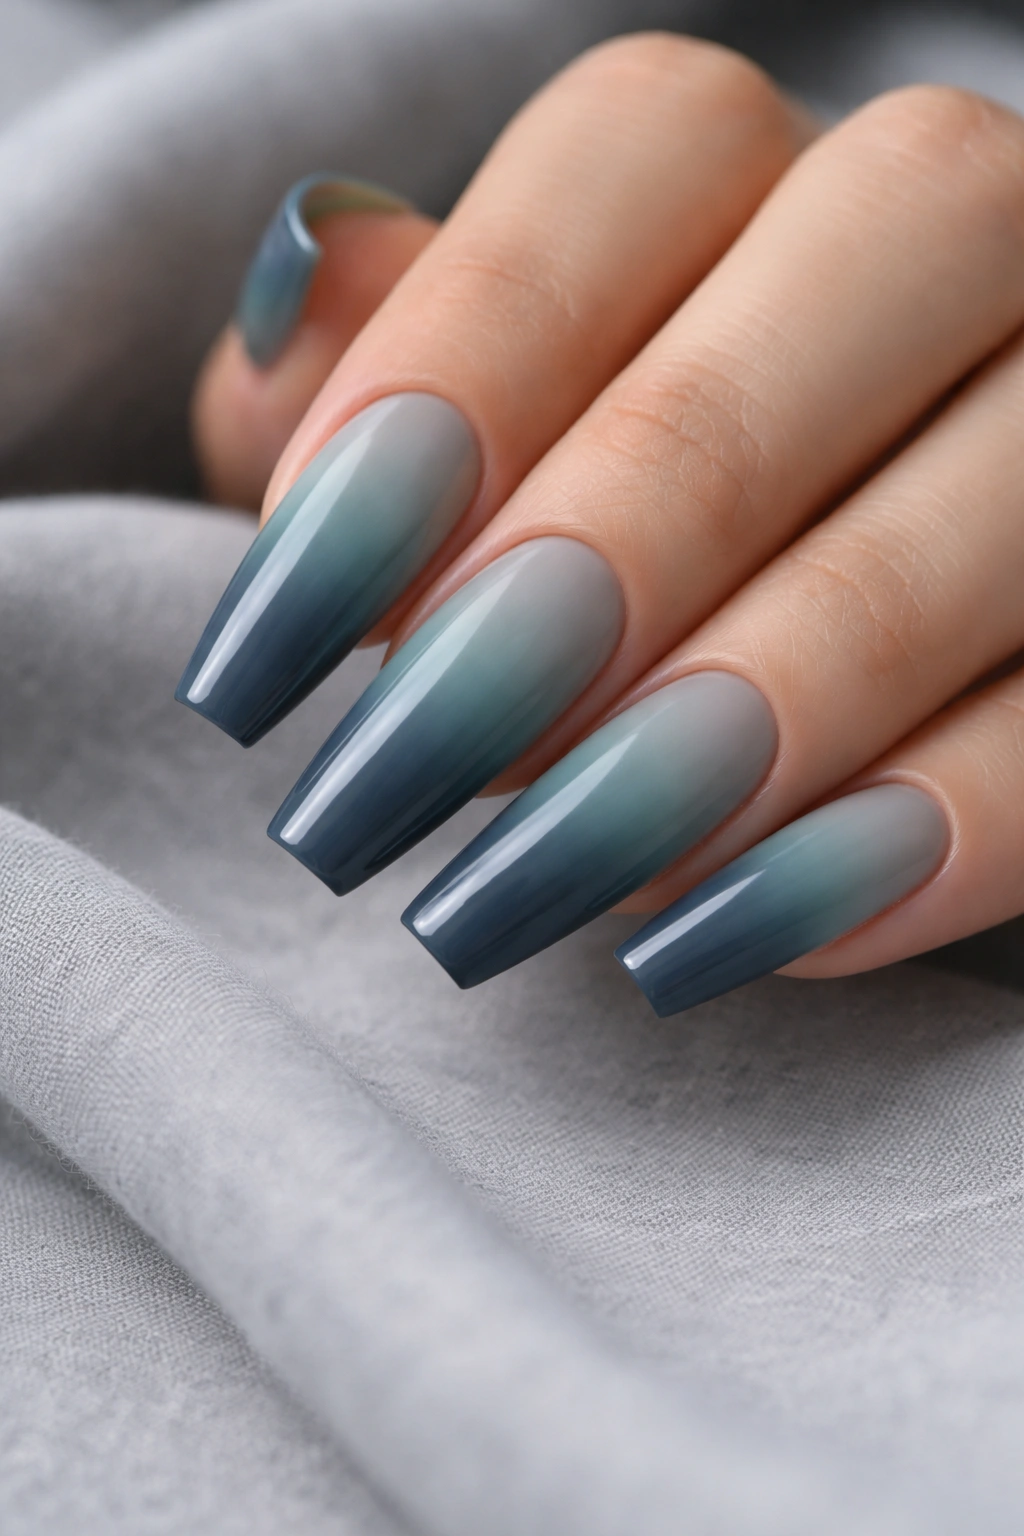
Picture a rainy-day color palette, but cleaner. Dusty teal into slate has mood without the heaviness of black, and on a long coffin nail the fade can look almost smoky from arm’s length.
This design leans cooler and deeper, so the surface matters. Gloss gives the teal more depth and makes the slate look inkier. Matte drains some of that depth and can flatten the transition unless the blend is perfect. I would choose gloss first and only go matte if the rest of your style already runs soft and muted.
A good tech will not use straight teal from the bottle. They usually mute it with gray or choose a pre-mixed dusty shade, then carry that haze into the slate tip. The result should feel layered, not loud.
Useful details to mention at your appointment:
- Ask for muted teal, not turquoise.
- Keep the slate concentrated on the last quarter of the nail.
- A charcoal glitter topcoat on one accent nail can tie the colors together.
- This pairing looks strongest on medium-long or long coffin sets.
Navy could do a similar job, sure. Teal is more interesting. It gives you color without losing the soft gradient effect that makes ombre worth doing in the first place.
11. Coral to Sheer Pink Coffin Nails
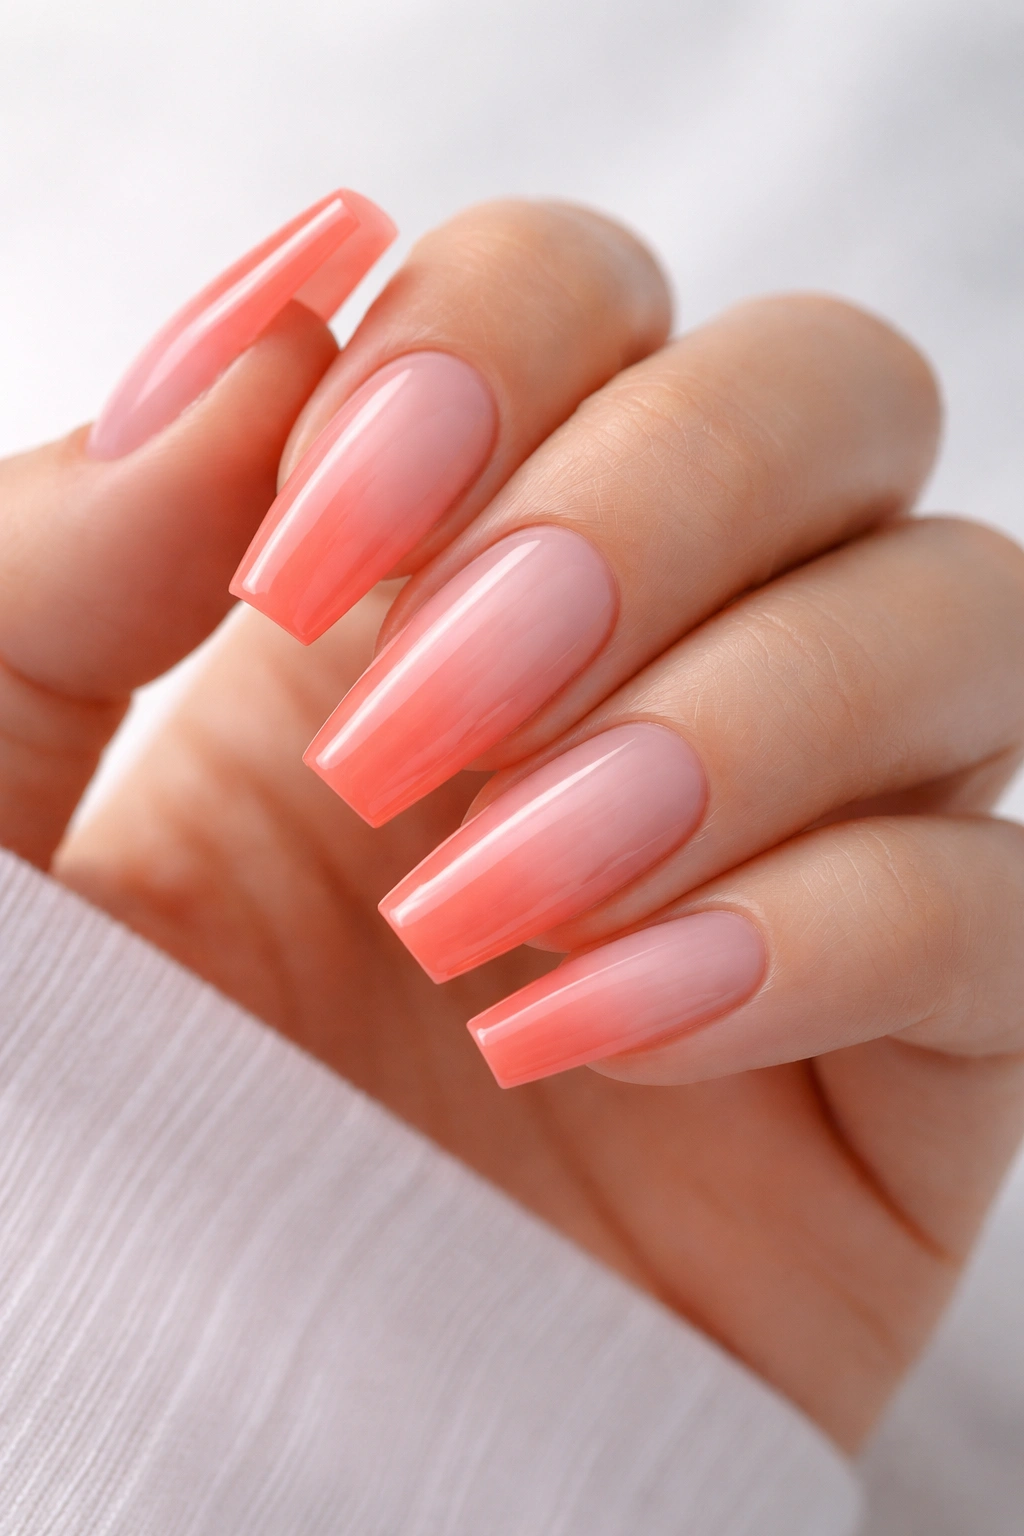
Coral can turn cartoonish fast. The fix is simple: keep the base sheer pink and let the coral live mostly at the tip, where the coffin shape can hold brightness without making the whole nail look dense.
The best version of this set looks juicy, not opaque. A sheer blush or jelly pink base lets light pass through the nail, which helps the coral melt in rather than sit on top like a sticker. This is one of those designs where gloss is doing real work, because the reflective finish smooths the color shift.
A tiny amount of orange in the coral makes the manicure feel warmer. More red pushes it toward watermelon. Neither is wrong, though they give different energy. If your skin has golden or olive tones, the warmer coral usually sits more naturally. On cooler skin, a pink-coral can look cleaner.
I would skip chunky gems here. Coral already has enough life on its own. If you want extra detail, try a thin gold chrome line near the free edge on one finger or a translucent shimmer top coat that only flashes when the hand moves.
And yes, this one photographs well—but more importantly, it looks lively in person, which is where some brighter ombre sets fall flat.
12. Burgundy to Black Velvet Coffin Nails
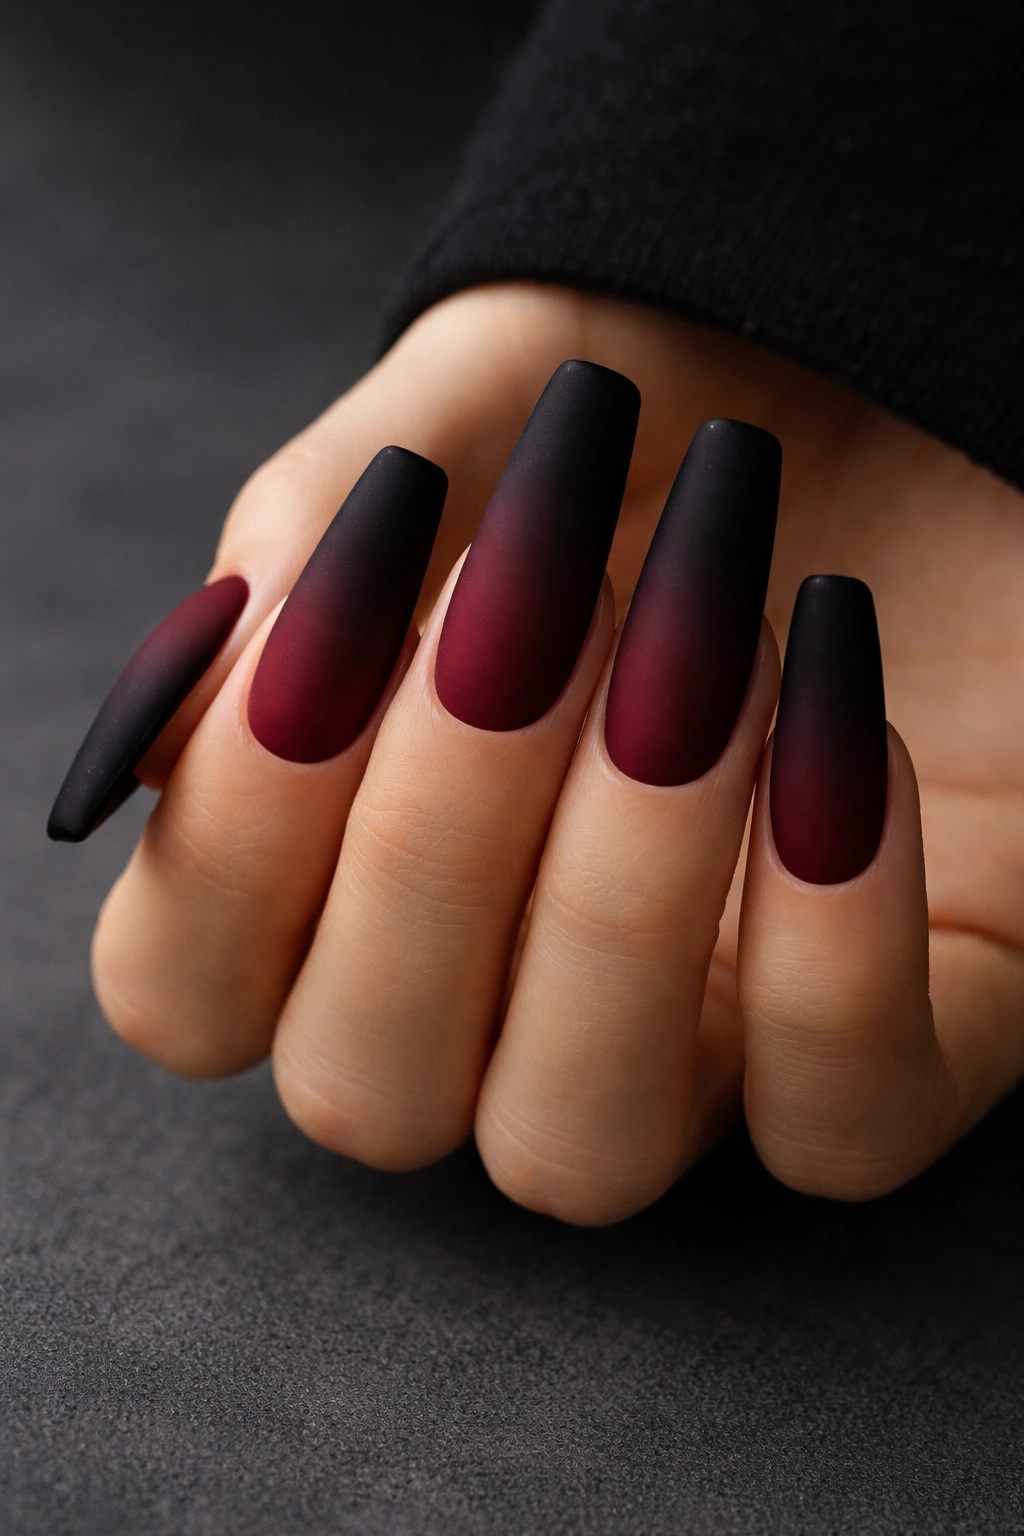
Unlike straight black coffin nails, burgundy fading into black gives you dimension before you add a single crystal or line of art. The black sharpens the tip. The burgundy keeps the set from looking dead flat.
Long coffin nails carry this pairing best because dark colors eat visual space. On a short set, the fade can collapse into one deep tone unless the burgundy is lighter and more wine-toned than you first imagined. That part matters more than people think.
Matte top coat changes everything.
With matte, the set reads like velvet or brushed suede, especially if the burgundy has a cool wine undertone. With gloss, you get a richer, lacquered look that makes the transition more obvious. If you want the ombre to be the focus, gloss shows it more clearly. If you want mood, matte wins.
Who should pick this? Anyone who likes dark nails but is tired of plain black. It also wears better with tiny chips than a pure black manicure because the slight color variation hides wear at the tip.
Ask your tech to build the black slowly. One thick coat of black gel can swallow the burgundy whole.
13. Cocoa to Gold Chrome Ombre Coffin Nails
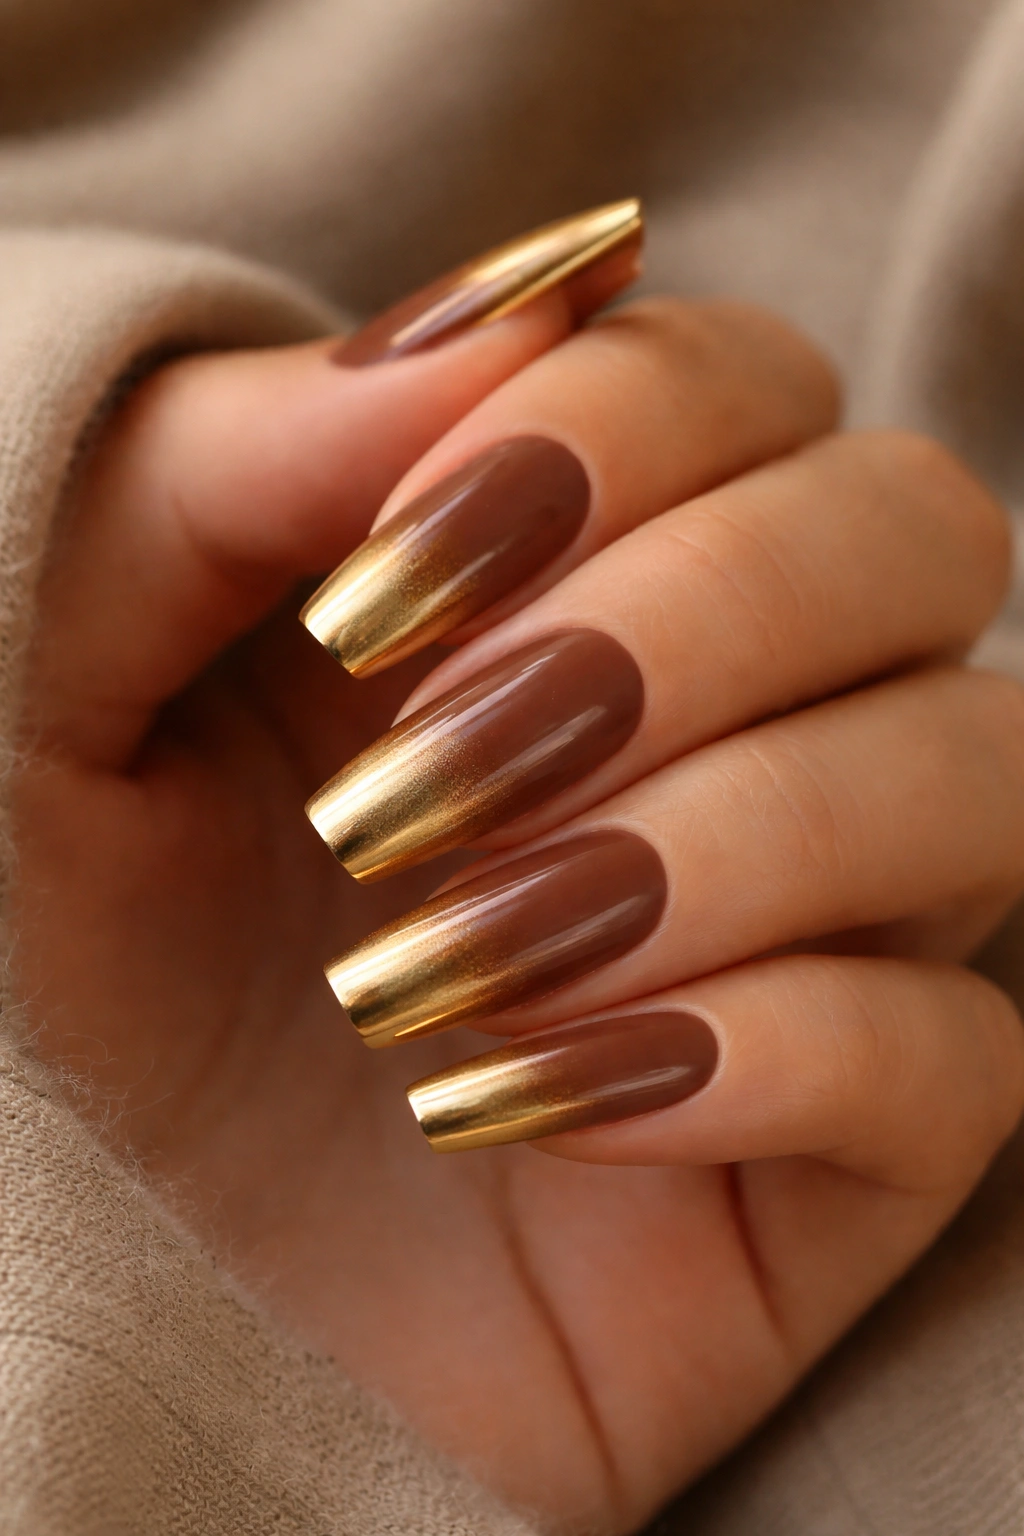
A reflective ombre can go wrong in a hurry, yet cocoa fading into soft gold chrome looks rich when the metallic is treated like a veil instead of a solid color. The brown grounds the design. The chrome catches the light at the tip and gives the coffin shape a sharper finish.
Why the metallic should stay concentrated
Gold chrome works best as a rubbed-on effect over the outer third of the nail, not a dense gel color covering half the set. The transition should move from creamy cocoa into a bronzed edge, almost like the tip was dusted rather than painted.
That is what keeps it from reading costume.
What to ask for in the salon
- Use a warm medium-brown base, not dark espresso.
- Apply the chrome over a no-wipe gel layer only on the tip area, then soften the edge before top coat.
- Choose soft gold, champagne, or antique gold over bright yellow gold.
- Keep the rest of the set simple—no rhinestone clusters, no heavy foil marbling.
Tip: A coffin shape with a slightly narrower taper makes metallic tips look more refined because the reflective area has less width to fight against.
14. Pink Glazed Pearl Fade

If you like a glazed manicure but want more depth than one flat pearly shade, this is the move. A pink glazed pearl fade starts with a soft blush or milky pink base, builds into a milk-white tip, then gets topped with pearl chrome that shifts the whole nail into a frosted finish.
The order matters. Do not put chrome on top of a bad blend and hope it saves the manicure. It hides small flaws, yes, though the underlying fade still needs to be there. You want the color transition first, then the pearl layer to unify it.
This set is softer than straight white chrome nails. The pink keeps the manicure from looking cold, while the pearl reflects enough light to make the coffin tip look crisp. It works on medium lengths, long acrylics, and even structured gel overlays if the free edge is kept clean.
A small caution: too much pearl powder can flatten the color difference and make the whole nail look silver. Ask for one thin rub of chrome, then check it before the final top coat cures. That little pause can save the design from going metallic when what you wanted was glazed.
15. Black to Clear Smoke Coffin Nails
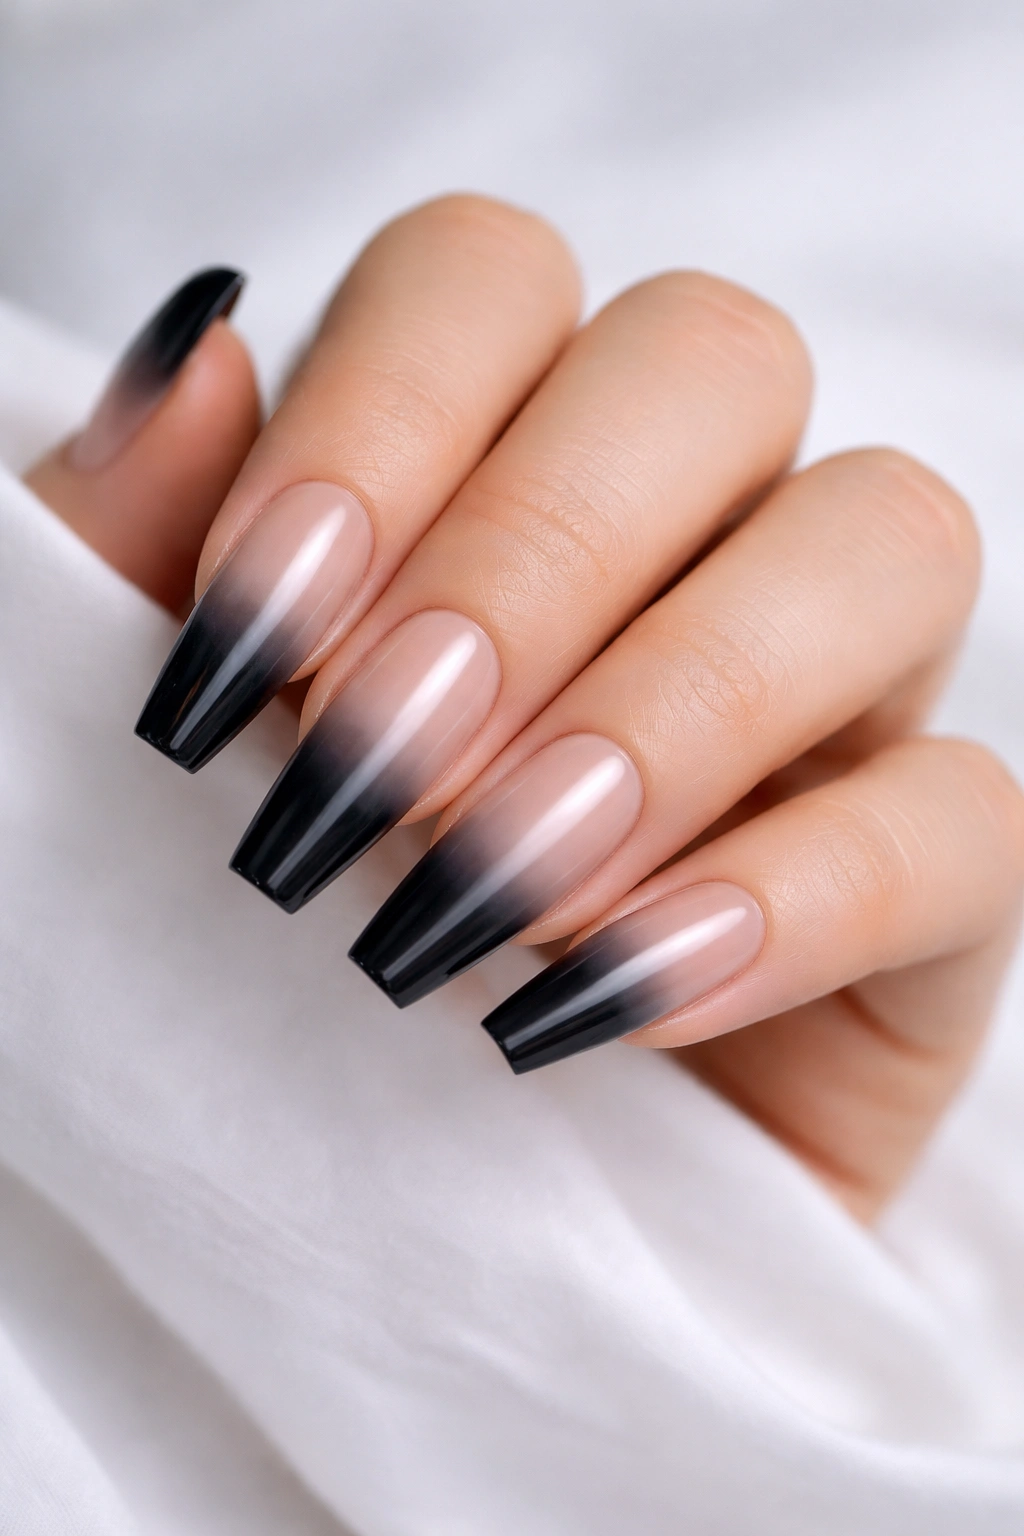
This one is moodier, sharper, and a little harder to pull off well—which is exactly why I like it. A black-to-clear smoke fade keeps the base translucent, then deepens the tip with diluted black jelly gel so the coffin shape looks almost dipped in shadow.
The key word there is diluted. If the black is not thinned with clear gel or a true jelly black formula, the tip turns solid and the fade disappears. You need translucency for this design to read as smoke instead of French tip in black.
On a long coffin set, the effect can look almost like tinted glass. On medium length, it feels cleaner and more graphic. Either way, the sidewalls have to stay neat. Any uneven pooling is visible because the base is clear.
You can wear this plain, though it also works with encapsulated silver flakes or a fine line of chrome near the tip. I would keep embellishment light. The negative space is the whole point.
Not every ombre needs to be soft and bridal. Some should look a little dangerous.
Final Thoughts
The ombre coffin nails that hold up best are usually the ones with controlled contrast and a clean surface. Color matters, sure, though the finish, the placement of the fade, and the sheer-versus-opaque balance matter just as much.
If you are choosing between two designs, pick the one whose shades are easier to blend before you pick the bolder concept. A smooth beige-to-caramel fade will outshine a patchy neon experiment every time, even if the quieter set sounds less exciting on paper.
One last practical tip: ask to see the shades side by side before they touch your nails. On a swatch stick, you can tell right away whether the jump is too big, the white is too stark, or the base is too opaque. That 30-second check prevents most ombre regrets.
