

Green is having a serious moment in nail design, and there’s a reason why. Whether you’re drawn to emerald richness, sage sophistication, or seafoam freshness, green coffin nails offer a versatile canvas that works for everything from casual weekends to formal events. The coffin nail shape—that chic tapered silhouette with a flat, squared-off tip—creates the perfect stage for green polish to make a bold statement while maintaining an elegant, elongated look.
Medium-length coffin nails hit a sweet spot that many people appreciate. They’re long enough to showcase intricate nail art and vibrant colors without becoming impractical, and they work well for most hand shapes and lifestyles. Green, in particular, flatters a wider range of skin tones than you might expect, from cool undertones to warm and golden complexions. The shade and finish you choose determine whether your nails feel fresh and modern or rich and sophisticated.
If you’re considering a green coffin nail design but aren’t sure which direction to go, you’re in exactly the right place. This article breaks down 18 distinct green coffin nail ideas that range from minimalist elegance to bold, eye-catching designs. Each one can be customized based on your skill level, available tools, and personal style preferences. Whether you’re visiting a salon or doing your nails at home, you’ll find inspiration that feels authentically you.
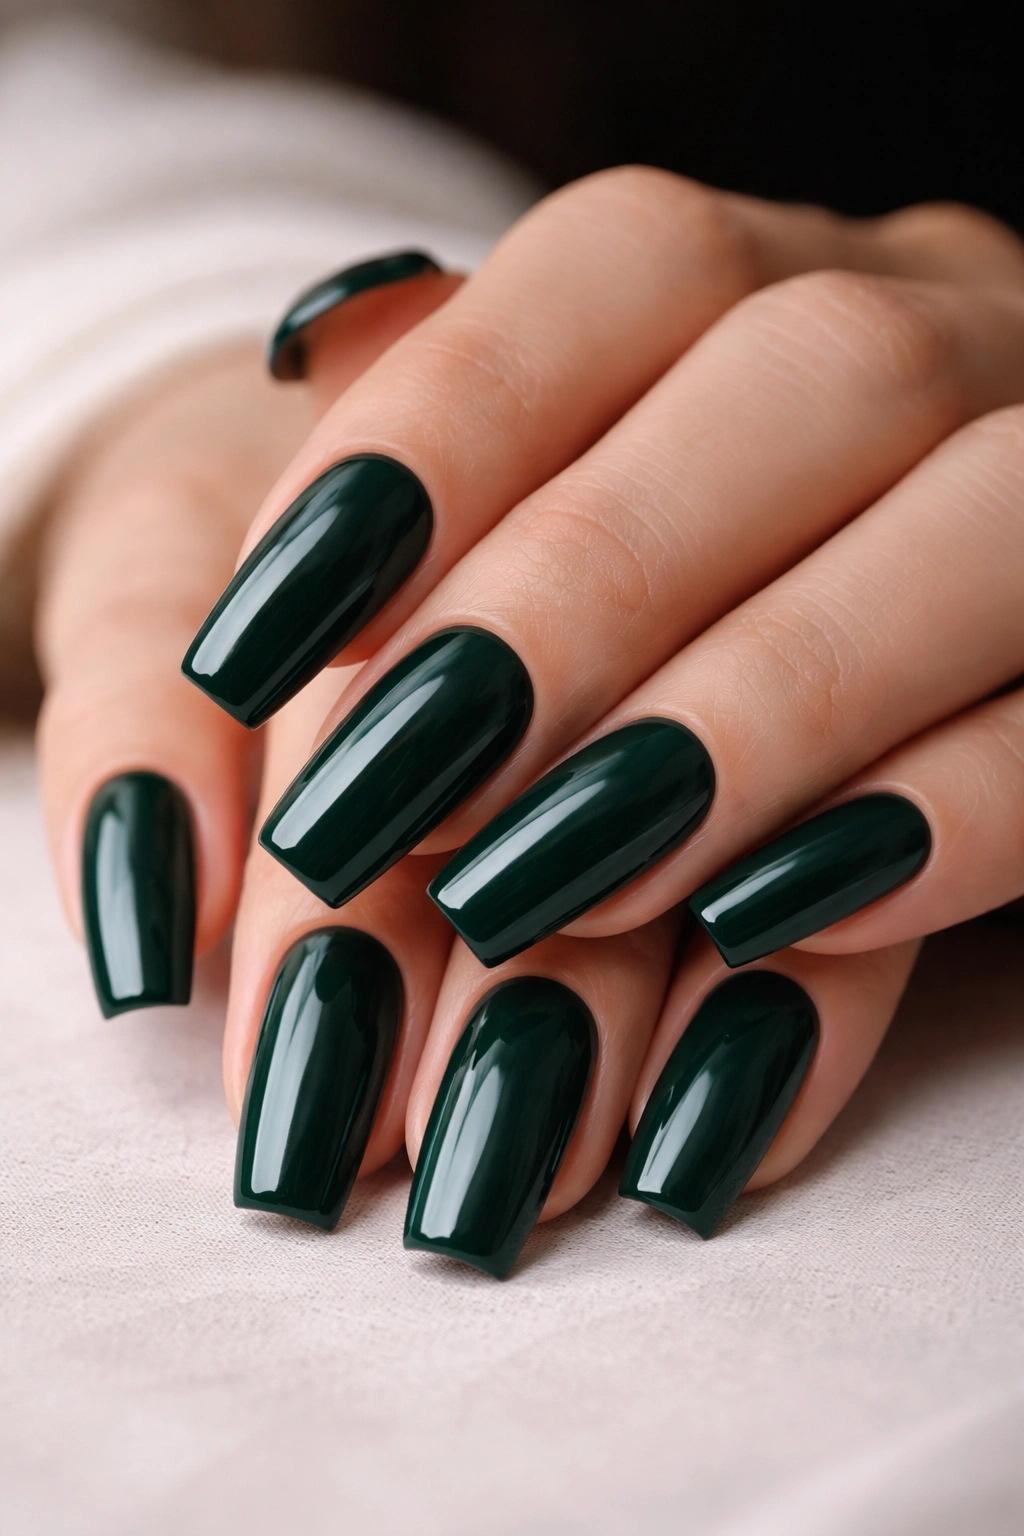
1. Classic Deep Emerald Green
Deep emerald green is the green nail color that feels timeless and universally flattering. This shade sits somewhere between forest green and a true jewel tone, giving it enough depth to look expensive and sophisticated without veering into overly trendy territory. On medium coffin nails, a single-color emerald base creates an understated luxury that works for professional settings, date nights, or just whenever you want your hands to look polished and intentional.
Why This Design Works So Well
Emerald green has historical associations with luxury and wealth, which comes through in how the color photographs and catches light. A cream finish (rather than glittery or metallic) ensures the focus stays on the pure, rich color itself. The simplicity of this design means it showcases the coffin nail shape beautifully—no distracting elements, just clean lines and nail beds that appear longer and more elegant.
Application and Longevity Tips
- Two coats is typically the minimum for full opacity and color richness; some emeralds need three coats for maximum saturation
- Invest in a good base coat to prevent staining on lighter skin tones, as deep greens can occasionally leave a tint
- Top coat matters significantly—a glossy finish amplifies the jewel-tone quality, while a matte top coat creates a more modern, velvety appearance
- This shade hides growth well compared to lighter colors, making it practical for longer wear between fills or touch-ups
Pro tip: Apply the emerald polish slightly thinner on the second coat rather than thick and goopy—multiple thin layers look smoother and more professional than one heavy coat.
2. Sage Green with Gold Leaf Accents
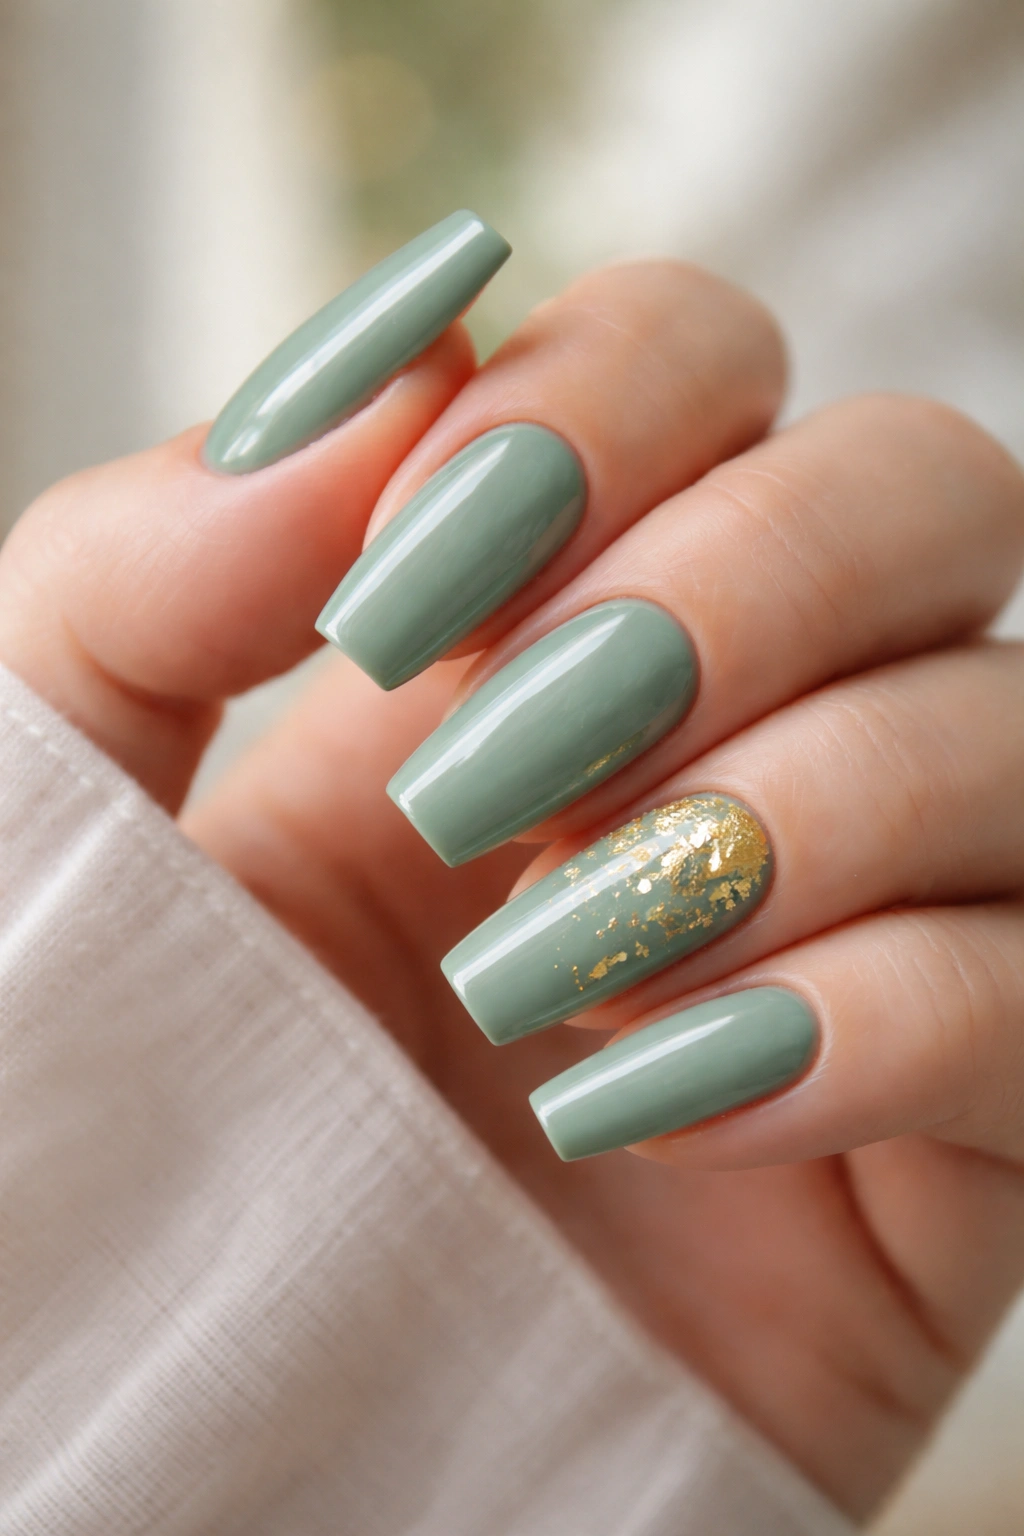
Sage green is the muted, dusty green that feels calm and sophisticated—almost like the color of dried herbs. When you pair it with delicate gold leaf accents on one or two nails, you create a design that looks intentionally curated without demanding all the attention. Gold leaf catches light beautifully against muted green and reads as elegant rather than flashy.
What Makes This Combination Special
The softness of sage combined with the subtle glamour of gold creates a balanced aesthetic. This design works particularly well if you want something that photographs beautifully but doesn’t feel over-the-top in person. The gold leaf brings just enough texture and dimension to keep the design interesting while the sage base keeps everything grounded and wearable.
How to Build This Look
- Start with two coats of sage green polish in a cream finish—matte finishes can make sage look dull, so stick with glossy or satin
- Apply a glossy top coat before adding gold leaf to create a sticky surface the leaf will adhere to
- Press gold leaf pieces onto one accent nail (usually the ring finger or middle finger) while the top coat is still slightly tacky
- Seal everything with a final top coat to lock the gold leaf in place and protect against peeling
- Work over a mat or paper towel when handling gold leaf—these tiny pieces go everywhere and cleanup takes patience
3. Seafoam Green with White Ombre
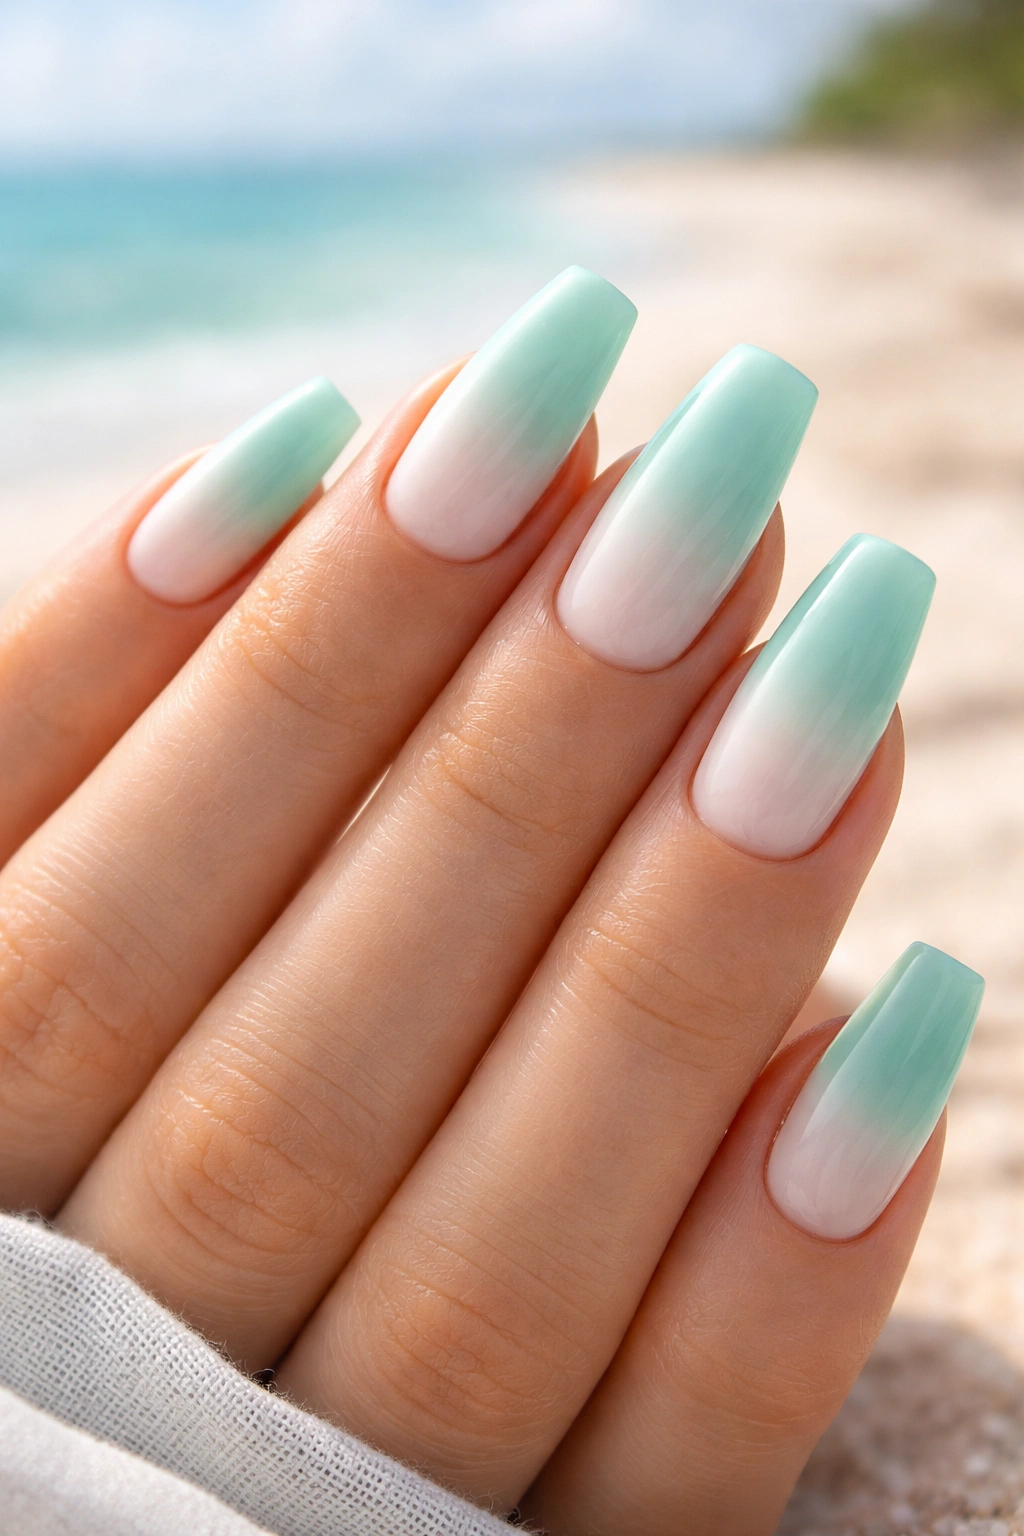
Seafoam green is that pale, blue-tinged green that reminds you of shallow beach water. When you blend it into white at the tips or sides of the nail, you create an ombre effect that feels fresh, ethereal, and distinctly summery. This design captures movement and lightness in a way that solid colors sometimes can’t.
Why Ombre Works for Coffin Nails
The elongated shape of coffin nails provides plenty of surface area for an ombre gradient to breathe. Rather than looking cramped or busy, the color transition has room to develop gradually across the nail. Seafoam-to-white specifically creates a calming visual effect—it’s the color equivalent of looking out at the ocean horizon.
Creating the Ombre Effect
- Use a makeup sponge (not a nail sponge) for better control—cut a regular cosmetic sponge into a smaller piece and dampen it very slightly
- Apply seafoam and white polish side by side on the sponge, then dab gently onto the nail multiple times to build the gradient
- Work quickly before either polish dries on the sponge
- Blend the middle section where the colors meet by dabbing with a nearly-dry sponge
- Clean up edges with a small brush and rubbing alcohol before the polish fully sets
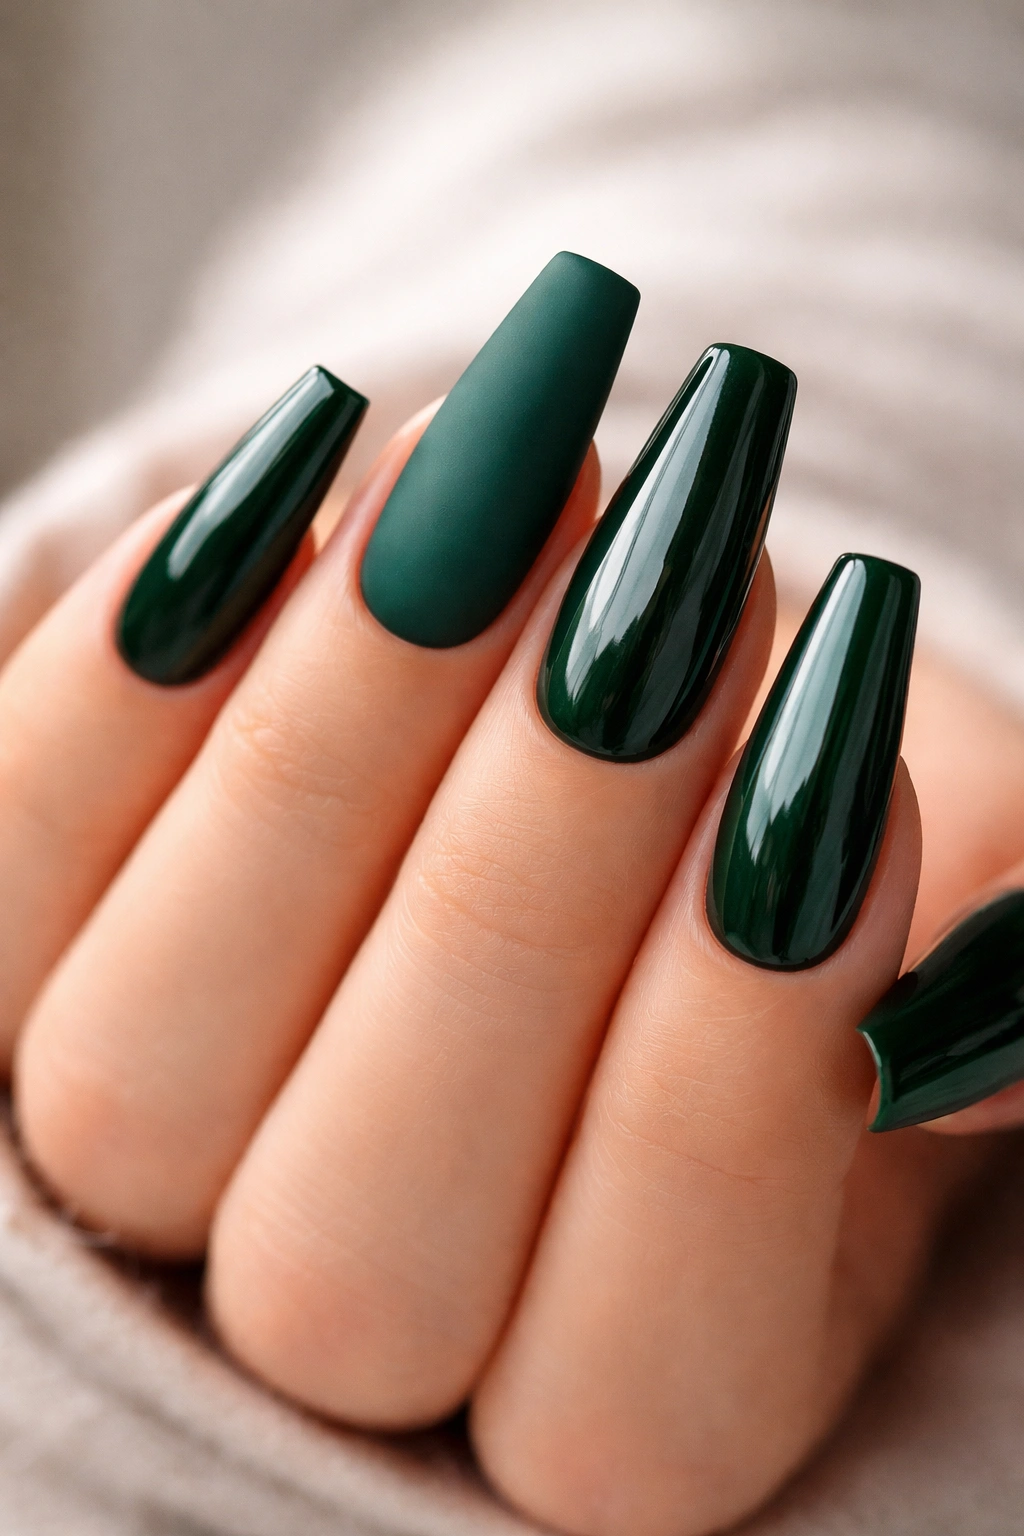
4. Forest Green with Matte Finish
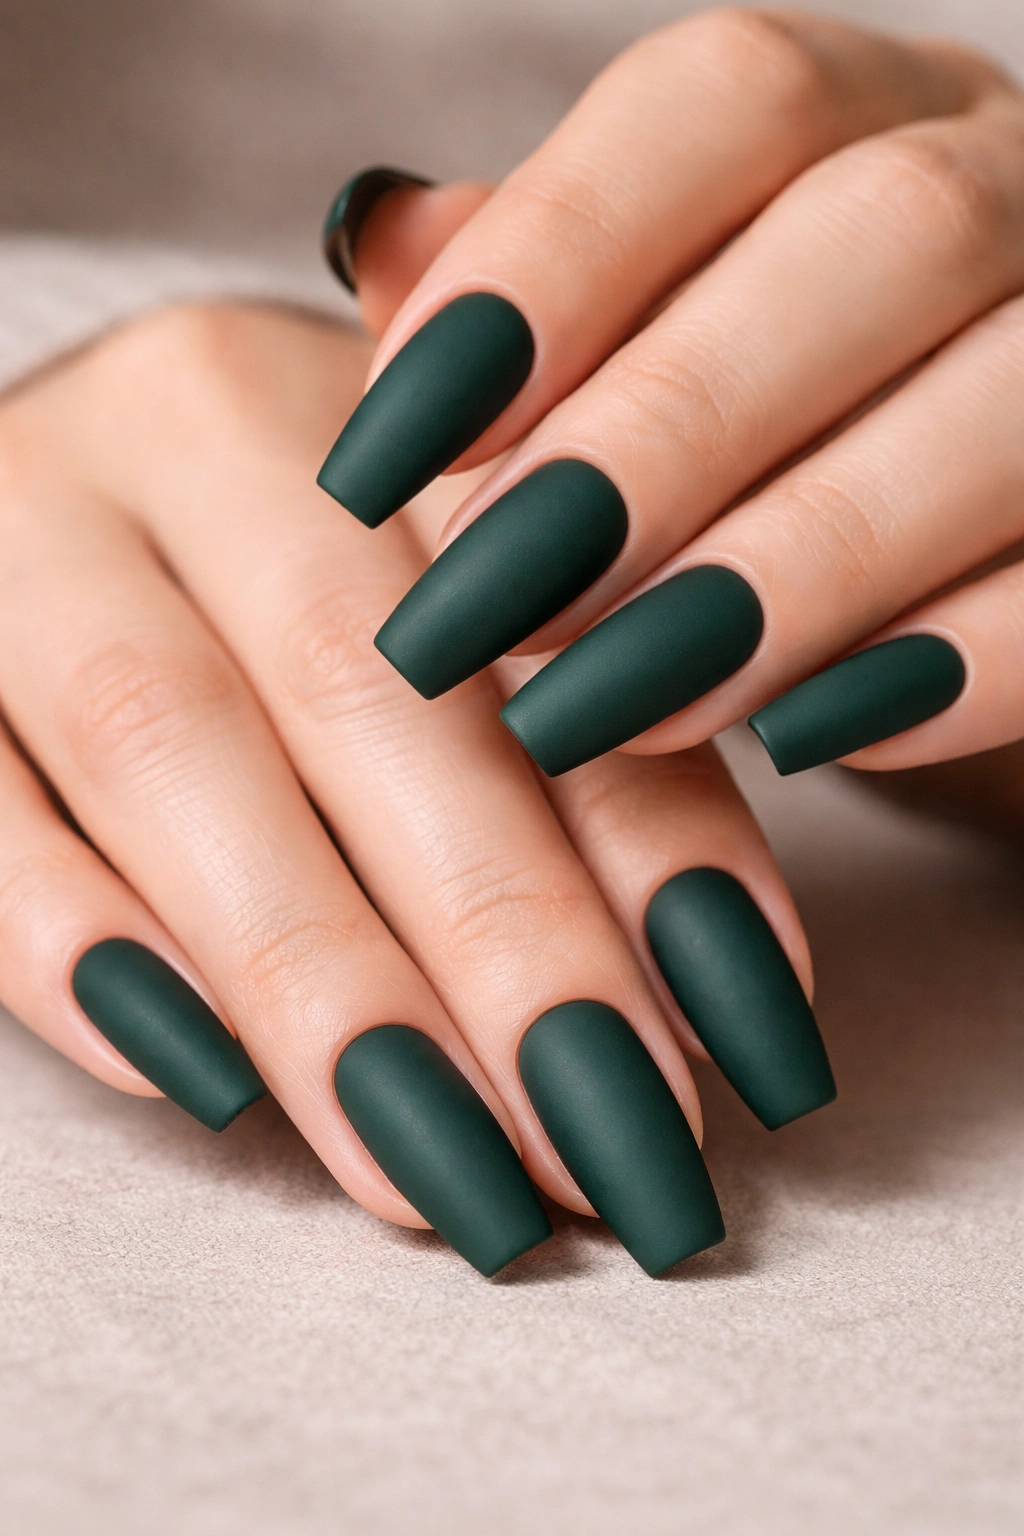
Matte green coffin nails have an unexpected elegance that glossy finishes sometimes miss. Forest green in particular looks almost velvety when matte—it absorbs light rather than reflecting it, creating a sophisticated, understated look. This finish works beautifully for winter styling, professional environments, and anyone who gravitates toward modern minimalism.
The Appeal of Matte Over Gloss
Matte finishes change how color reads on nails. The same forest green looks completely different glossy versus matte—the matte version feels more subtle, more artistic, more intentional. It also photographs differently, creating softer shadows rather than bright reflections. Matte nails tend to show fewer smudges and water spots, which is a practical bonus.
Maintaining Matte Nails
- Apply matte top coat over fully dried polish—don’t apply it while the base color is still wet, or you’ll get streaking
- Matte finishes can look dull without proper lighting, so be aware that these nails look better in natural light and certain indoor settings
- Hand cream and cuticle oil can temporarily dull the matte finish, but a quick reapplication of matte top coat restores the appearance
- Matte is less forgiving of imperfections than gloss, so application technique matters more
5. Olive Green with Minimalist Line Art
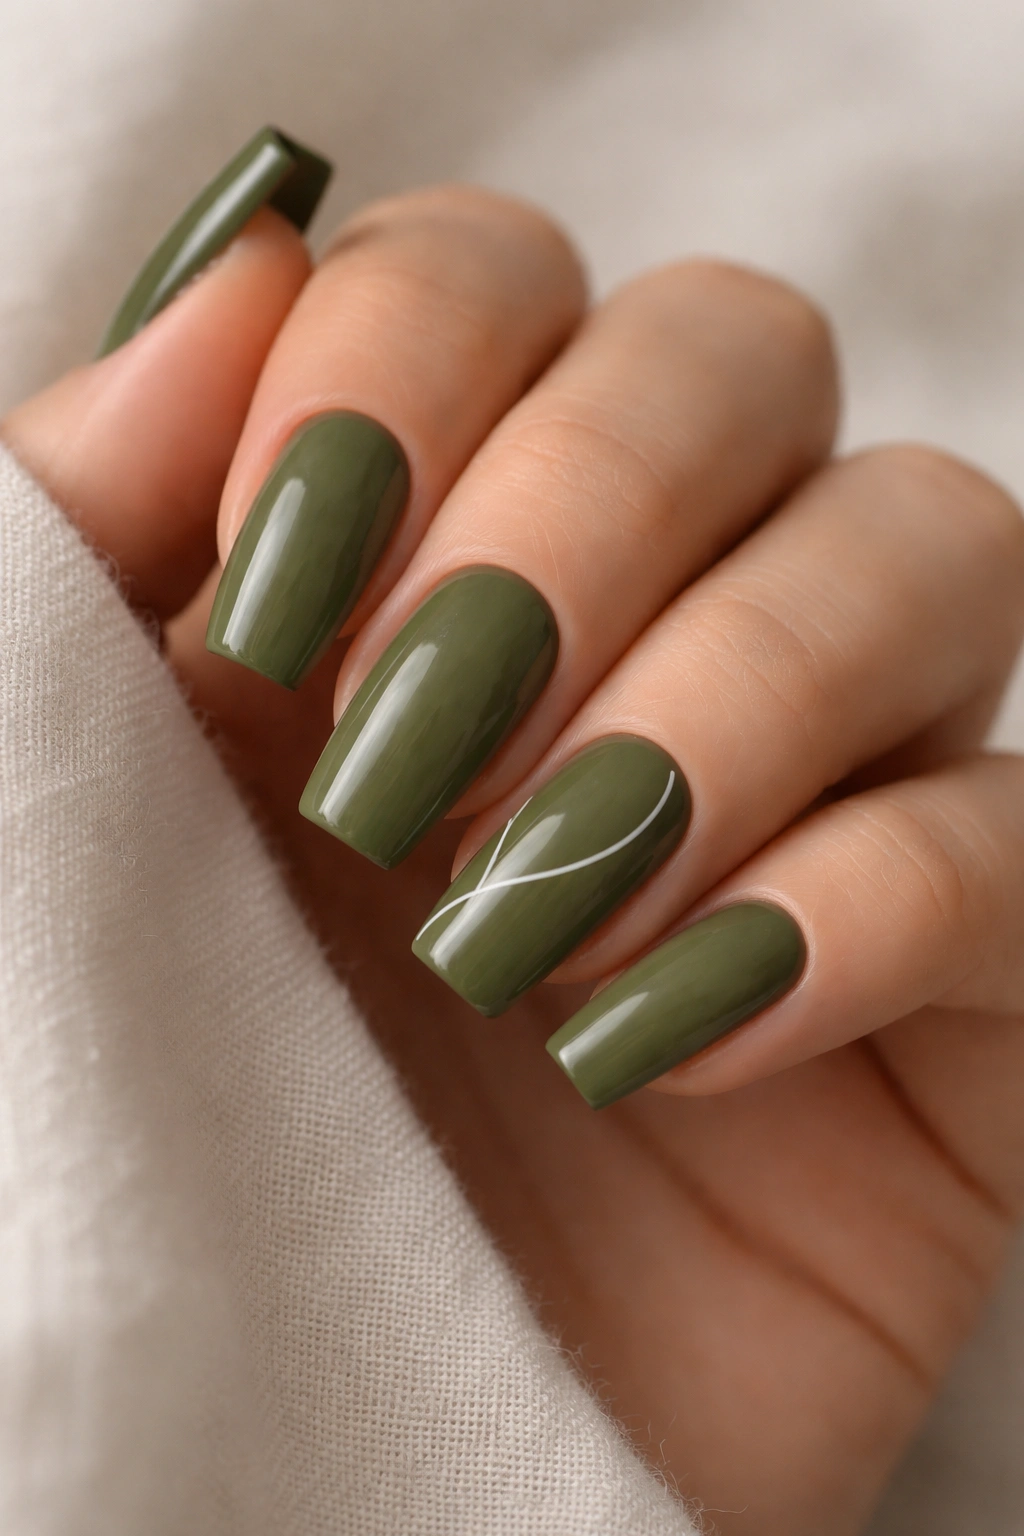
Olive green is that earthy, sophisticated green that sits between brown and true green tones. It’s subtly warm and wearable, making it perfect for someone who wants green nails but prefers more grounded, natural-looking colors. Pair it with minimalist line art—perhaps a single thin line or geometric shape in white or gold—and you get a design that’s artistic without being complicated.
Creating Minimalist Line Art on Coffin Nails
Thin, clean lines on medium coffin nails require a steady hand or a very fine nail art brush. The coffin shape’s tapered sides can actually make line work easier than on shorter, rounder nails because you have defined edges to work with. A single vertical line down the center, a diagonal slash, or a small geometric shape all read beautifully against olive green.
Line Art Technique Tips
- Use white or metallic gel pen designed for nail art, or thin nail art paint applied with a 0000 brush
- Practice the line on a nail wheel or paper before committing to your actual nails
- Steady your hand by resting your elbow on a flat surface and using your non-dominant hand to stabilize the hand getting nails done
- Very thin lines are more elegant than thick, bold ones—resist the urge to make the line thicker to “hide” waviness
- Seal everything with a glossy top coat to make the design last longer and look more polished
6. Mint Green with Pearl Finish
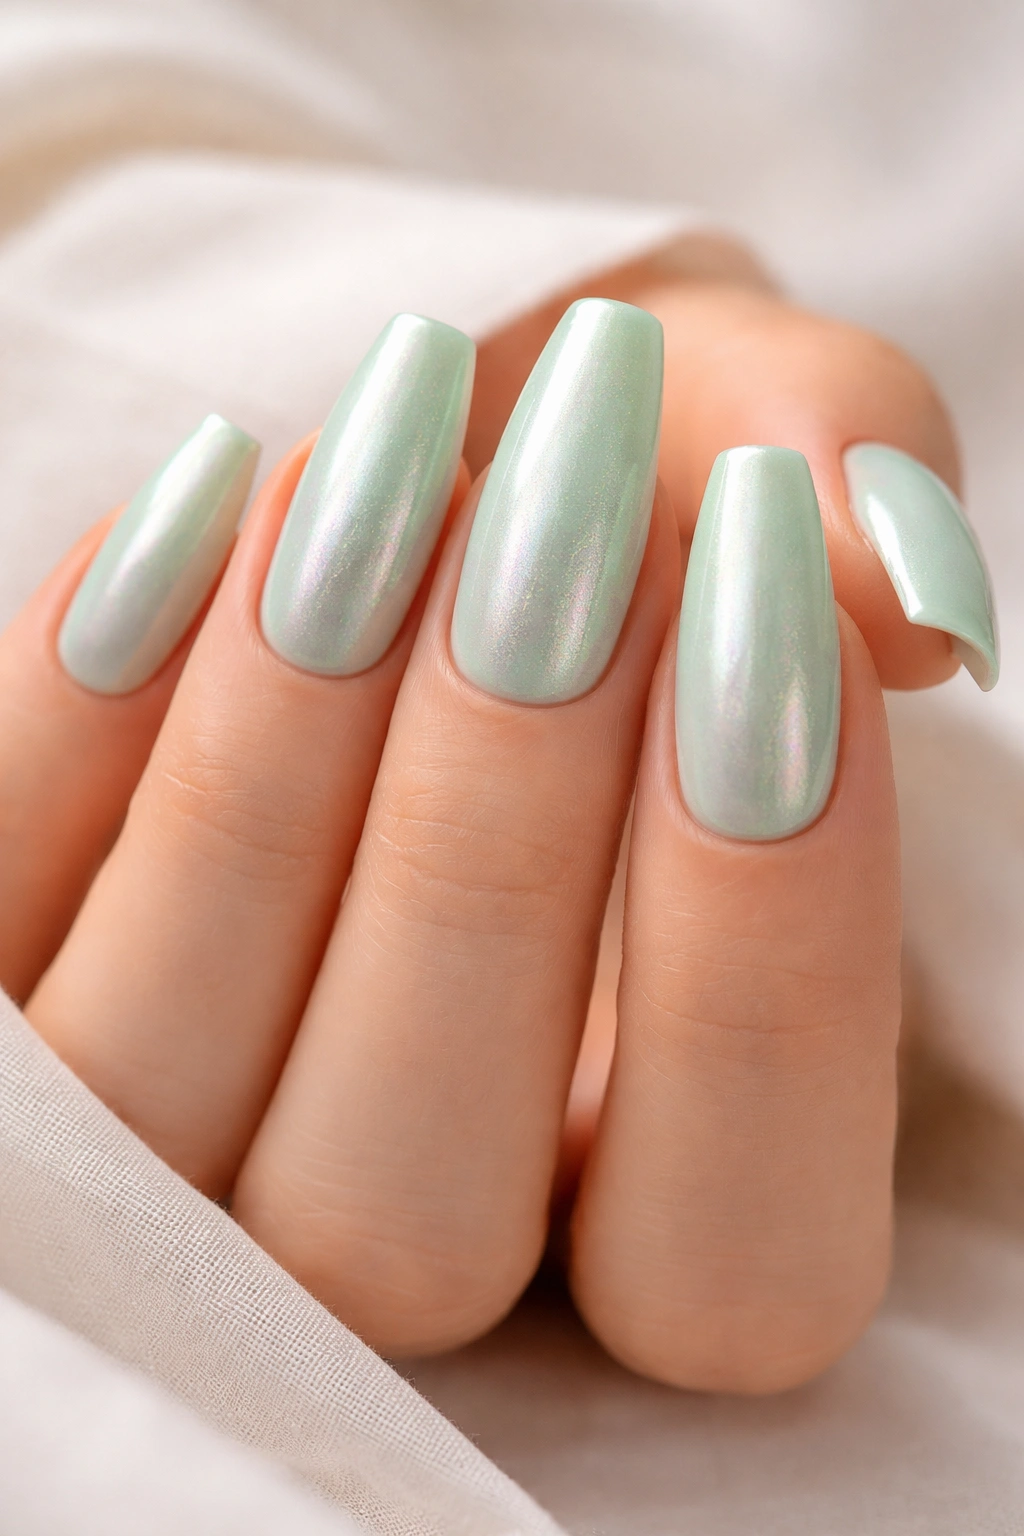
Mint green is pale, slightly cool, and inherently playful. Unlike deeper greens that feel serious and sophisticated, mint reads as fresh and contemporary. A pearl finish—which adds subtle shimmer and dimension—transforms mint from a single flat color into something with visual depth and movement. Pearl-finish nails catch light beautifully and work well for both casual and dressed-up occasions.
Understanding Pearl Finishes
Pearl finishes aren’t the same as glitter. They’re fine, uniform shimmer particles suspended in polish that create an iridescent effect without visible sparkle. The result is nails that look subtle in indoor light but glow with color-shifting shimmer in sunlight. Mint green with a pearl finish creates a soft, luminous look that photographs gorgeously.
Application for Best Pearl Effect
- Pearl polishes need good coverage—apply at least two coats, sometimes three, to see the full shimmer effect
- Use a glossy top coat rather than matte, which would flatten the pearl shimmer
- Pearl finishes show application streaks more easily than solid colors, so use careful, even strokes
- Work in good lighting so you can see where you’ve already applied polish and avoid missing spots
- The shimmer intensifies in sunlight, so if you’re indoors, the effect might be more subtle than expected
7. Hunter Green with Chrome Accent Nail
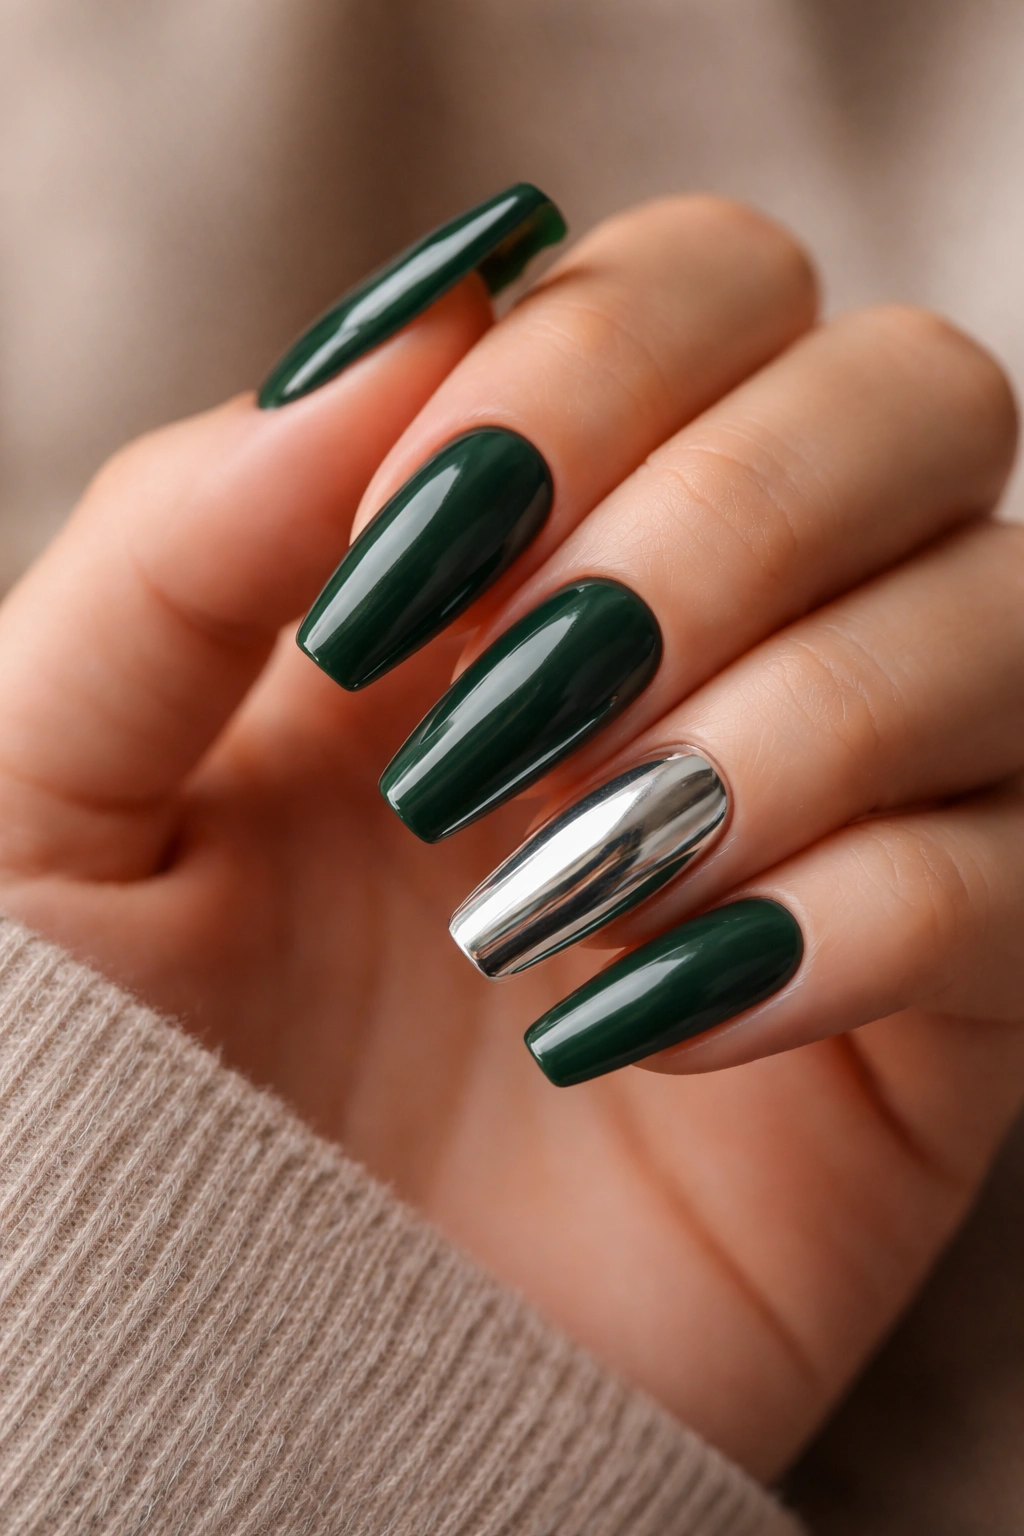
Hunter green is that deep, serious, almost military green that feels uncompromisingly sophisticated. It’s darker than emerald and has more gray undertones, giving it a modern edge. When you pair one hunter green nail with a chrome or mirror-finish accent nail (usually on the ring finger or middle finger), you create a design with real visual impact—the contrast between matte deep green and reflective chrome is striking.
The Chrome Accent Effect
Chrome finishes are having a major moment in nail design because they look futuristic and expensive. Pairing chrome with hunter green creates an interesting visual conversation—the traditional, grounded color next to the modern, reflective finish. This design feels very current without relying on trends that will feel dated quickly.
Creating Chrome Nails
- Chrome powder requires a special application technique—you typically apply a sticky gel base coat, then rub the chrome powder over the wet gel with a velvet pad or sponge
- Chrome powder is finicky and requires patience; rushing the application creates patchy, uneven results
- A protective top coat seals the chrome and prevents the powder from rubbing off
- Chrome nails work best in natural light; indoors they can appear dull or gray rather than reflective
- Alternative: purchase pre-made chrome press-on nails if powder application feels too technical
Pro tip: If chrome powder intimidates you, some nail techs offer chrome services, making it a worthwhile salon splurge for a special occasion.
8. Pistachio Green with Nude Gradient
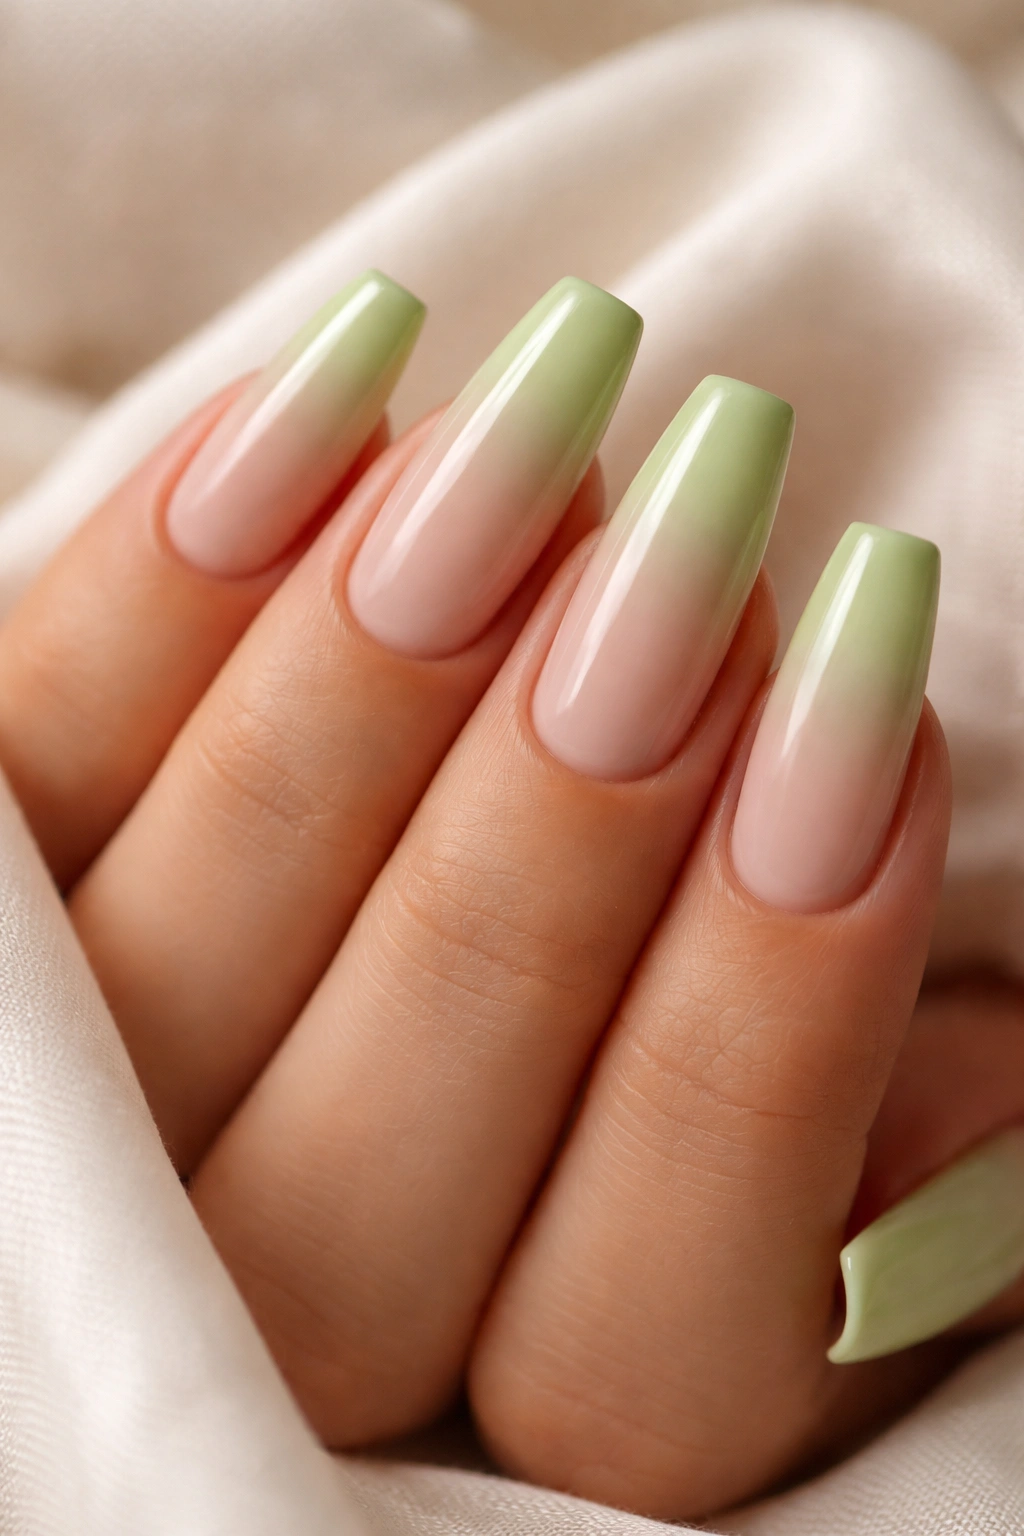
Pistachio is a soft, almost-creamy green that sits right on the line between green and beige. It’s delicate and understated, making it perfect for someone who wants green nails but prefers subtle, natural-looking color. A gradient from pistachio into nude creates a barely-there design that feels modern and refined—almost like the nails are transitioning from color to your natural nail tone.
Why Pistachio Works for Gradients
Soft, muted greens are perfect for gradient work because they blend seamlessly with neutral tones. The transition from pistachio to nude is so subtle that it reads as sophisticated rather than colorful. This design suits professional environments, minimalist aesthetics, and anyone who prefers understatement.
Creating a Soft Gradient
- Use a dry sponge technique with pistachio and a nude or skin-tone polish
- Blend the colors slowly—this isn’t a dramatic ombre, it’s a whisper of color transition
- Apply multiple light layers of each color rather than heavy single coats
- The gradient should be barely noticeable in some lighting and more apparent in others
- Finish with a glossy top coat that makes the gradient even more subtle and sophisticated
9. Neon Green with Black Nail Design
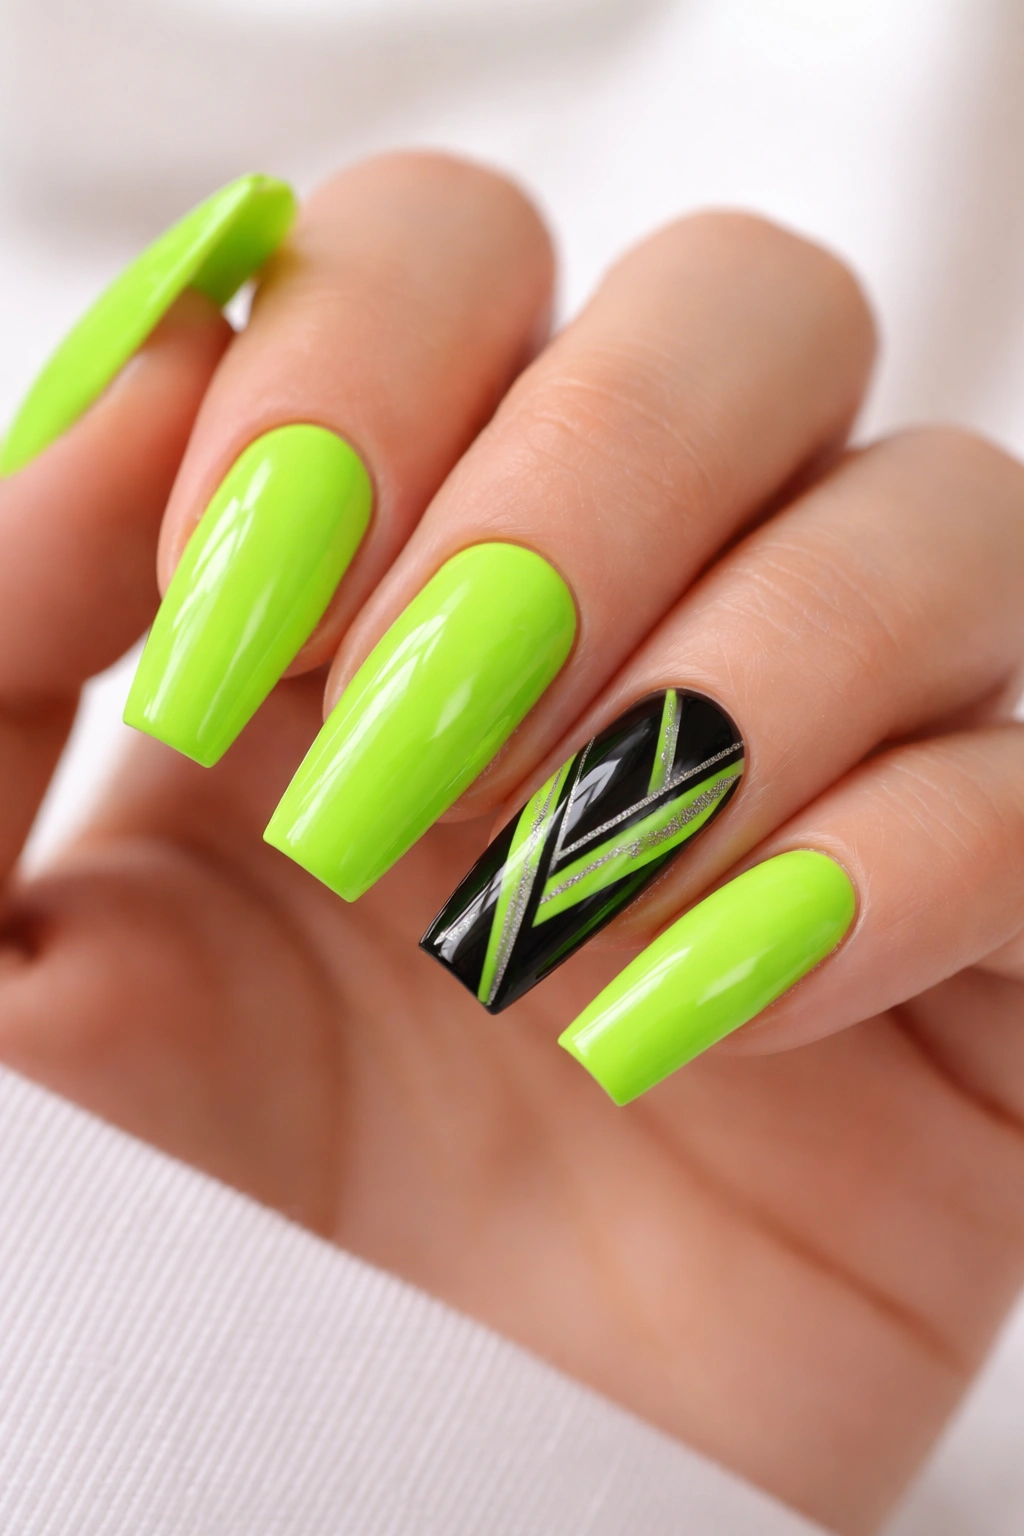
Neon green is unambiguously bold—it’s a color that demands attention and announces itself confidently. For someone ready to go truly statement-making, neon green coffin nails paired with a black nail art design create maximum visual contrast. Think black geometric shapes, black line work, or black polish on one accent nail—the neon pops impossibly against the dark background.
Who Should Wear Neon Green
Neon green reads young, playful, and confident. It works beautifully for people with warmer skin tones and darker hair, though it can work for anyone willing to commit to the boldness. This is the green you choose when you want people to notice your nails—and you want them to remember the choice long after you’re gone.
Working with Neon Polish
- Neon polishes often require more coats than regular polish to achieve true brightness
- Application matters significantly—streaky application makes neon look cheap and cheap neon looks genuinely terrible
- Use a very glossy top coat to maximize the electric effect
- Pair neon with black or very dark colors to make it pop; pastels near neon create visual chaos
- Neon green photographs incredibly well under flash, so these nails look amazing in pictures even if they feel intense in person
10. Celadon Green with Delicate Floral Stamps
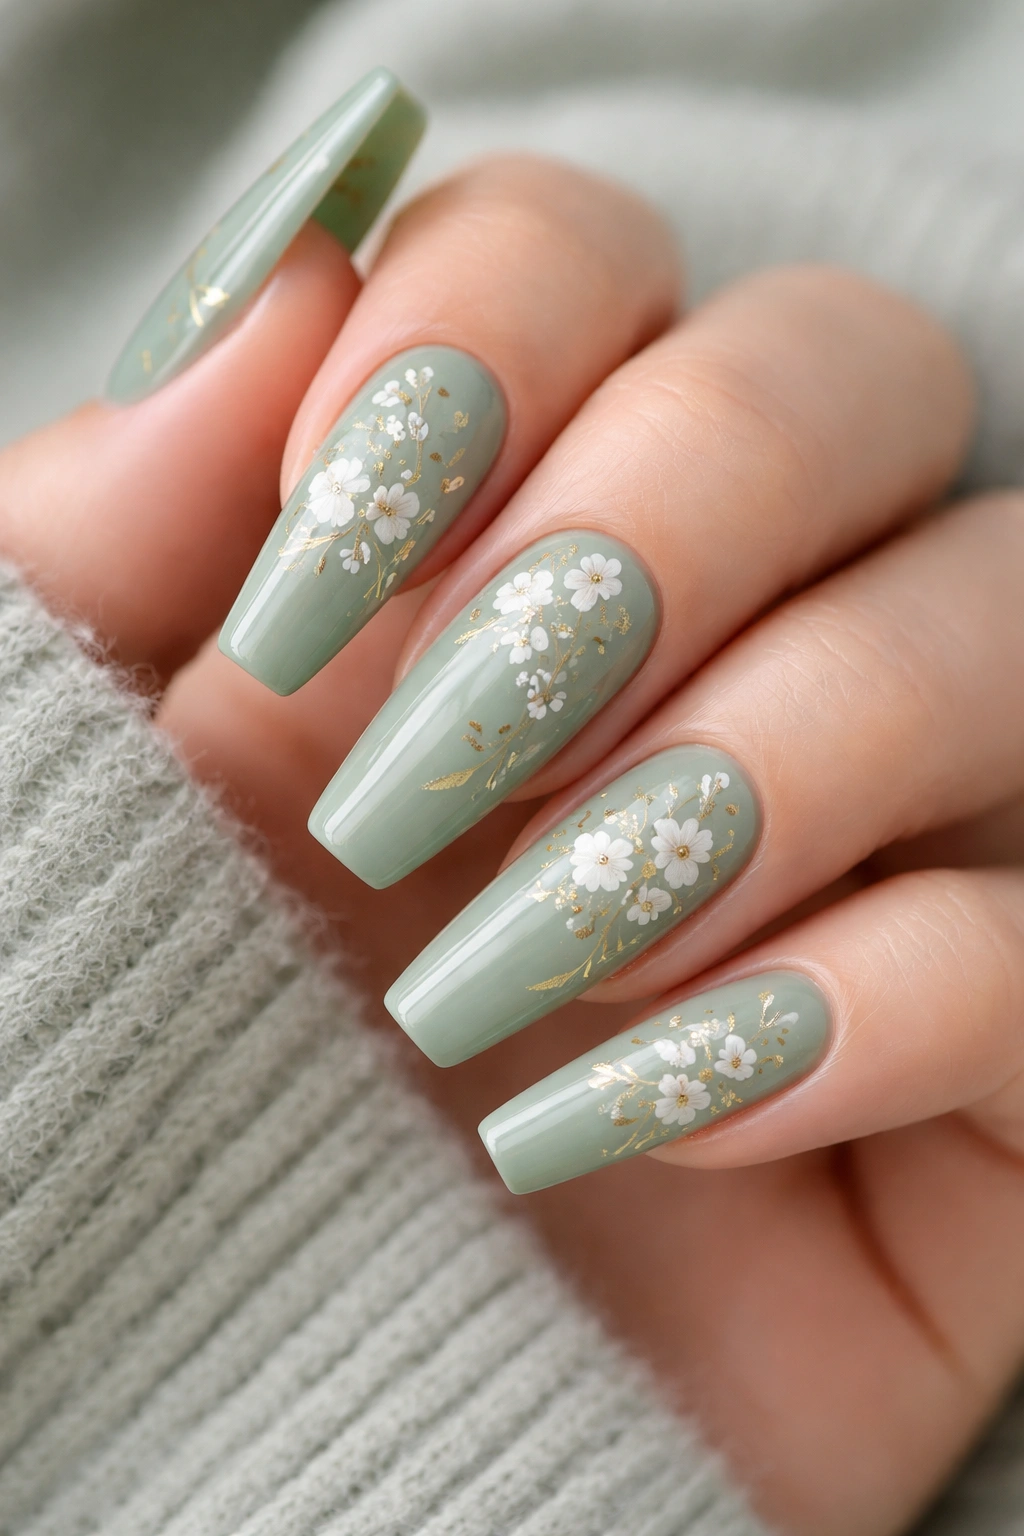
Celadon is a pale, somewhat blue-tinged green that feels soft, artistic, and very slightly vintage. It’s the green of celadon pottery and has an inherent elegance. When you add delicate floral stamps—small flowers stamped in white or gold across the nails—you create a design that feels curated and artistic without requiring advanced nail art skills.
What Makes Stamping Accessible
Nail stamping uses pre-designed images transferred from a stamp plate to your nails using a special stamper tool. It requires much less hand-steadiness than hand-painting and creates consistently clean lines. Floral stamps in particular work beautifully on green backgrounds—there’s something about flowers on green that feels naturally complementary.
Nail Stamping Basics
- You need a stamp plate, stamper, and scraper—these are inexpensive and widely available
- Quality matters—cheap stampers often don’t transfer image cleanly, so it’s worth investing in a good set
- Practice on a stamp practice pad first before stamping your actual nails
- Apply stamp polish (which is thicker than regular polish) to the plate, scrape across at a 45-degree angle, then roll the stamper over the design and press onto your nail
- Stamping works best over a sticky base coat that helps the image transfer cleanly
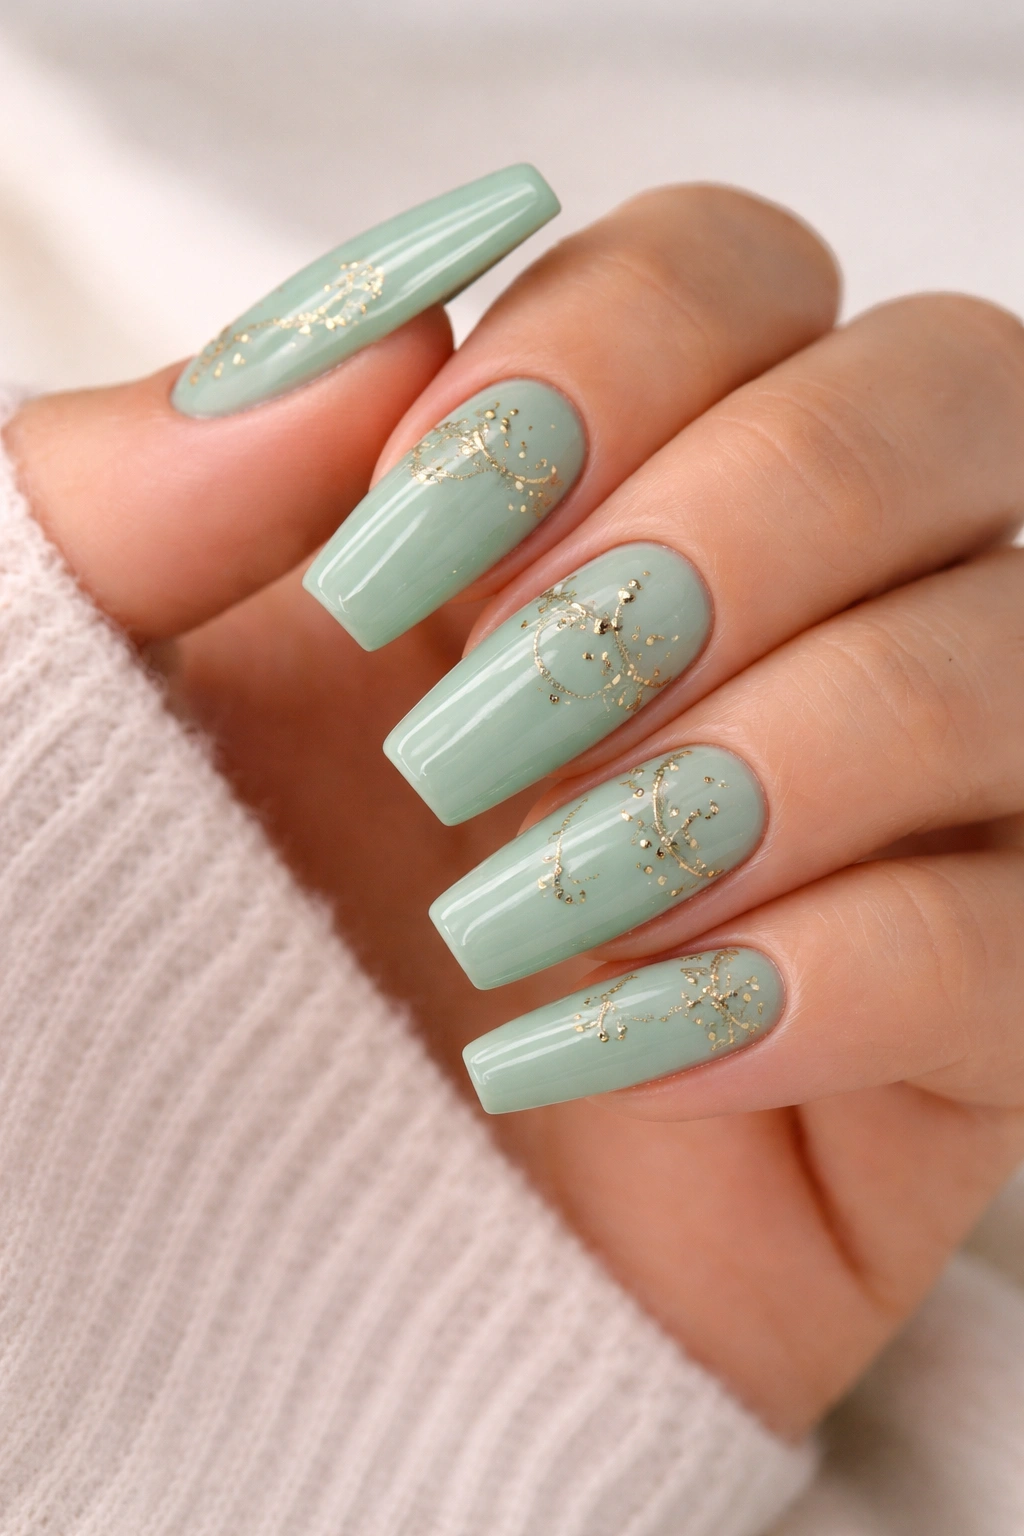
11. Bottle Green with Gold Glitter Gradient
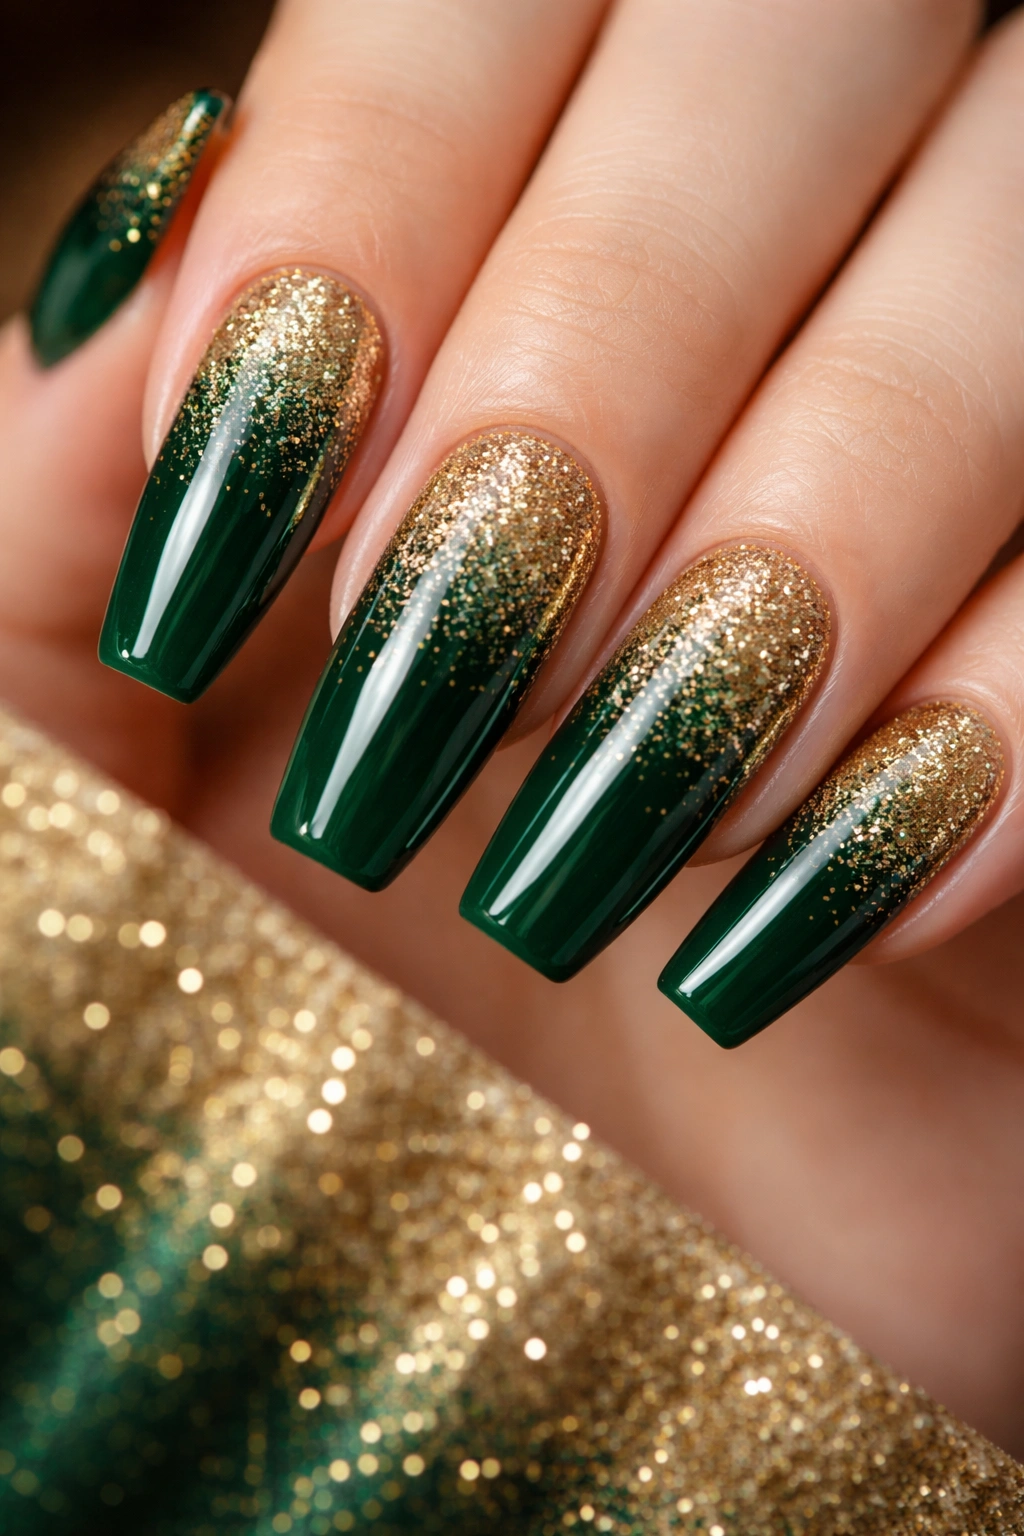
Bottle green is a deep, rich green that feels luxurious and slightly vintage. It’s darker than hunter green but warmer than forest green, landing in that perfectly sophisticated middle ground. When you layer this with a gold glitter gradient—starting with minimal glitter near the cuticle and building to dense glitter at the tips—you create a design that balances elegance with glamour.
Building a Glitter Gradient
Glitter gradients require patience and a light hand. The goal is density that increases gradually, not a jarring shift from solid color to glitter-covered. Bottle green provides the perfect dark background to make gold glitter absolutely sing without looking chaotic.
Glitter Gradient Technique
- Apply two coats of bottle green base and seal with a glossy top coat
- Use a clear or nude base coat on top of the green—this becomes your glitter adhesive
- Sprinkle glitter onto the tips where you want it densest, pressing gently to set
- Layer glitter from tip toward center of the nail, using fewer pieces as you move toward the cuticle
- Seal everything with a final top coat that locks the glitter in place and creates a smooth surface
- Clean up any loose glitter before the top coat fully hardens
Worth knowing: Glitter polish can be difficult to remove—soak nails in acetone or use glitter-removal wraps for easier cleanup.
12. Sage Green with Marble Effect

Marble effects mimic the veining and subtle color variation of natural marble stone. On sage green nails, a marble effect creates an organic, almost geological look that feels sophisticated and modern simultaneously. The veining is typically done in white, black, or metallic colors that contrast with the sage base.
Creating Marble Effect on Nails
Marble effects can be created using water marble technique, stamping, or hand-painted detail. On medium coffin nails, the technique has plenty of room to develop, creating a design that looks intentional rather than accidental.
Water Marble Technique (Simplest Method)
- Fill a small cup with room-temperature water (not hot, not cold)
- Drop two or three nail polish colors into the water in concentric circles
- Use a thin brush or toothpick to drag the colors together into a marble pattern
- Dip your nail into the water at an angle, letting the pattern wrap around your nail
- The timing is critical—if polish sits in water too long, it hardens on the surface rather than transferring to your nail
- Expect imperfection—that’s what makes it look naturally marbled rather than too polished
13. Forest Green with Minimalist Negative Space
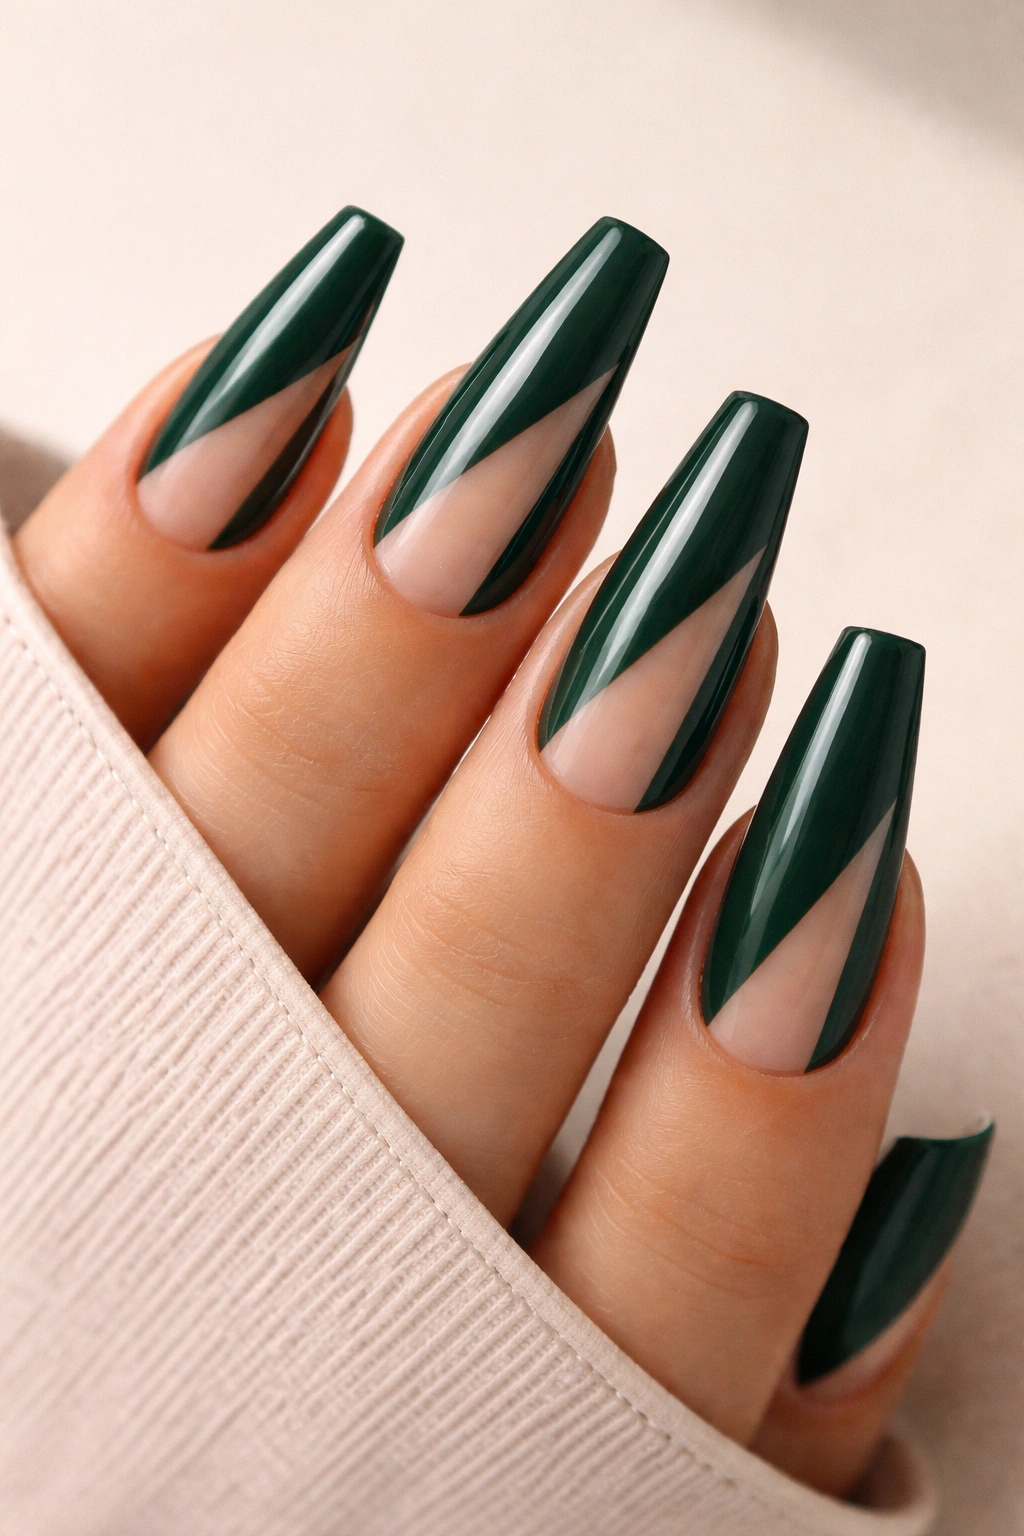
Negative space design means intentionally leaving parts of the nail bare, creating a design through absence rather than addition. On forest green coffin nails, negative space design might mean leaving small geometric shapes unpainted, or painting only the tips and leaving the lower nail bare. This creates a modern, artistic look that feels intentional and design-forward.
Why Negative Space Works So Well
Negative space design is inherently modern and minimal. It reads as intentional rather than accidental, and it works beautifully for people who want decorated nails without maximum coverage. Forest green provides a rich enough color that negative space creates genuine visual contrast.
Creating Clean Negative Space
- Use painter’s tape to create sharp edges where polish transitions to bare nail
- Apply tape carefully to the clean nail surface; if you apply it after base coat, it can pull the polish off
- Paint your forest green and remove tape while polish is still slightly tacky for cleanest edges
- Alternatively, use a detail brush to hand-paint around your negative space shapes
- Seal only the painted portions with top coat, leaving bare nails unpolished for true negative space effect
14. Pistachio with Rhinestone Accents on French Tips
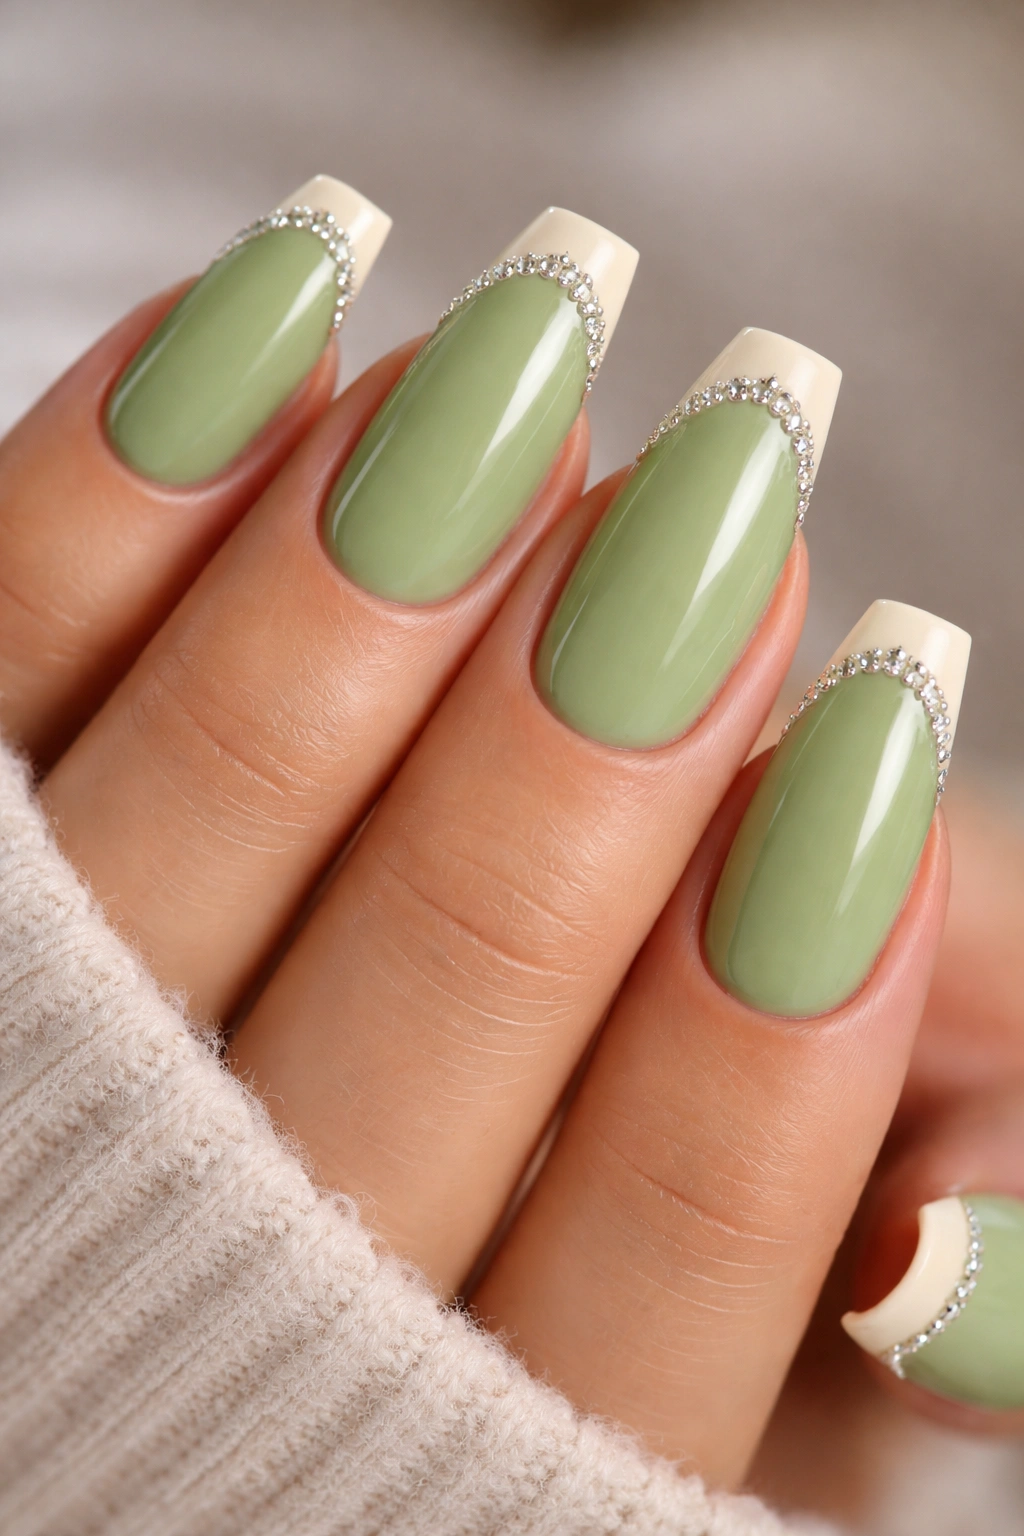
French tips (nail tips in a contrasting color) work beautifully with pistachio green as the base. Instead of the traditional white French tip, use a cream or pale gold on the tips, then add scattered rhinestones across the tips for just enough sparkle. This design balances elegant simplicity with subtle glamour—it’s refined rather than over-the-top.
Applying French Tips Over Gel or Polish
French tips can be created using French tip guides (thin tape guides you apply to the nail), hand-painting, or using pre-made French tip press-on nails. On medium coffin nails, tips typically span about one-quarter to one-third of the nail length.
Adding Rhinestones with Staying Power
- Apply rhinestones to sticky gel or to polish before it fully dries
- Use a rhinestone picker (a dotting tool with a slightly sticky ball) to place stones precisely
- Seal stones with a thick top coat that locks them in place
- Avoid water for at least 6-8 hours after application to give the top coat time to fully cure
- For longer-lasting stones, have a nail tech apply them with specialized gel techniques
15. Jade Green with Holographic Sparkle
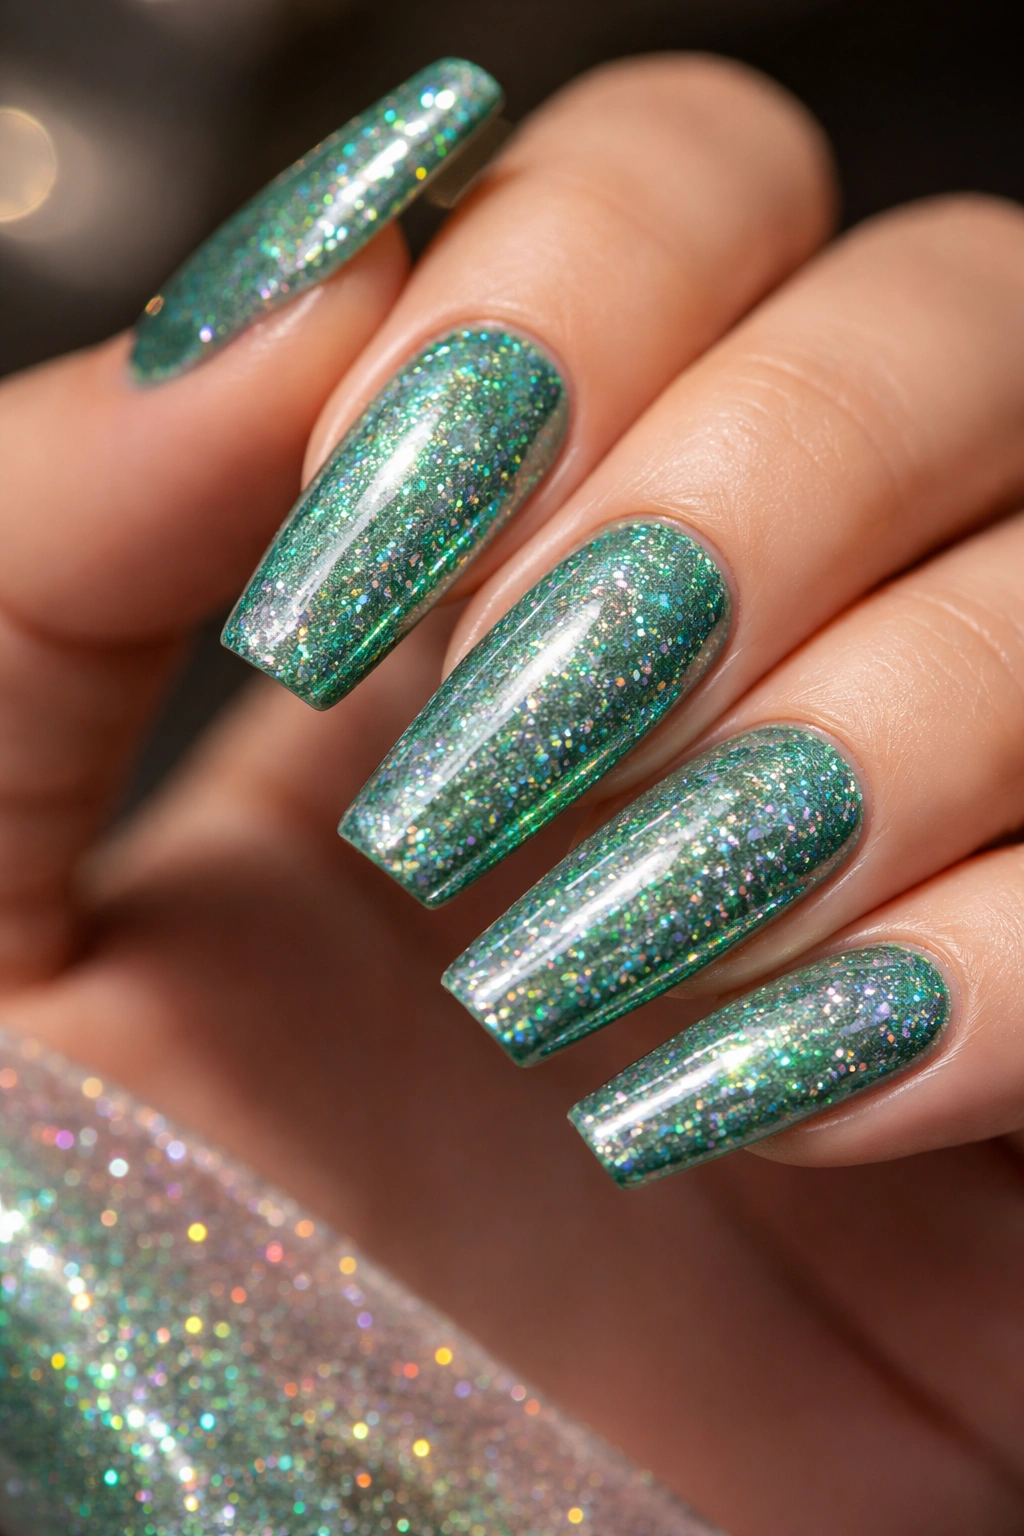
Jade green is that semi-transparent, luminous green that feels luxurious and slightly mystical. It evokes actual jade stone and has an almost precious-gem quality. When you layer this with holographic sparkle (which shifts and refracts light in multiple directions), you create an enchanting design that looks different in every lighting condition.
Understanding Holographic Effects
Holographic polish contains special pigments that reflect light across the full spectrum. Unlike regular glitter which is solid sparkle, holographic polish creates a rainbow-like shimmer that moves as you move your hands. Combined with jade green, the effect is genuinely magical.
Application for Maximum Holographic Effect
- Holographic effects require glossy finishes to maximize the light-refracting properties
- Apply at least three coats for full holographic intensity
- Use a top coat designed for holographic polish or use a glossy top coat that won’t dull the sparkle
- View your nails in different lighting conditions to appreciate the full color-shifting effect
- Holographic polish can be tricky to remove as the particles are stubborn—use acetone soaks or glitter removal wraps
16. Olive Green with Tortoiseshell Pattern
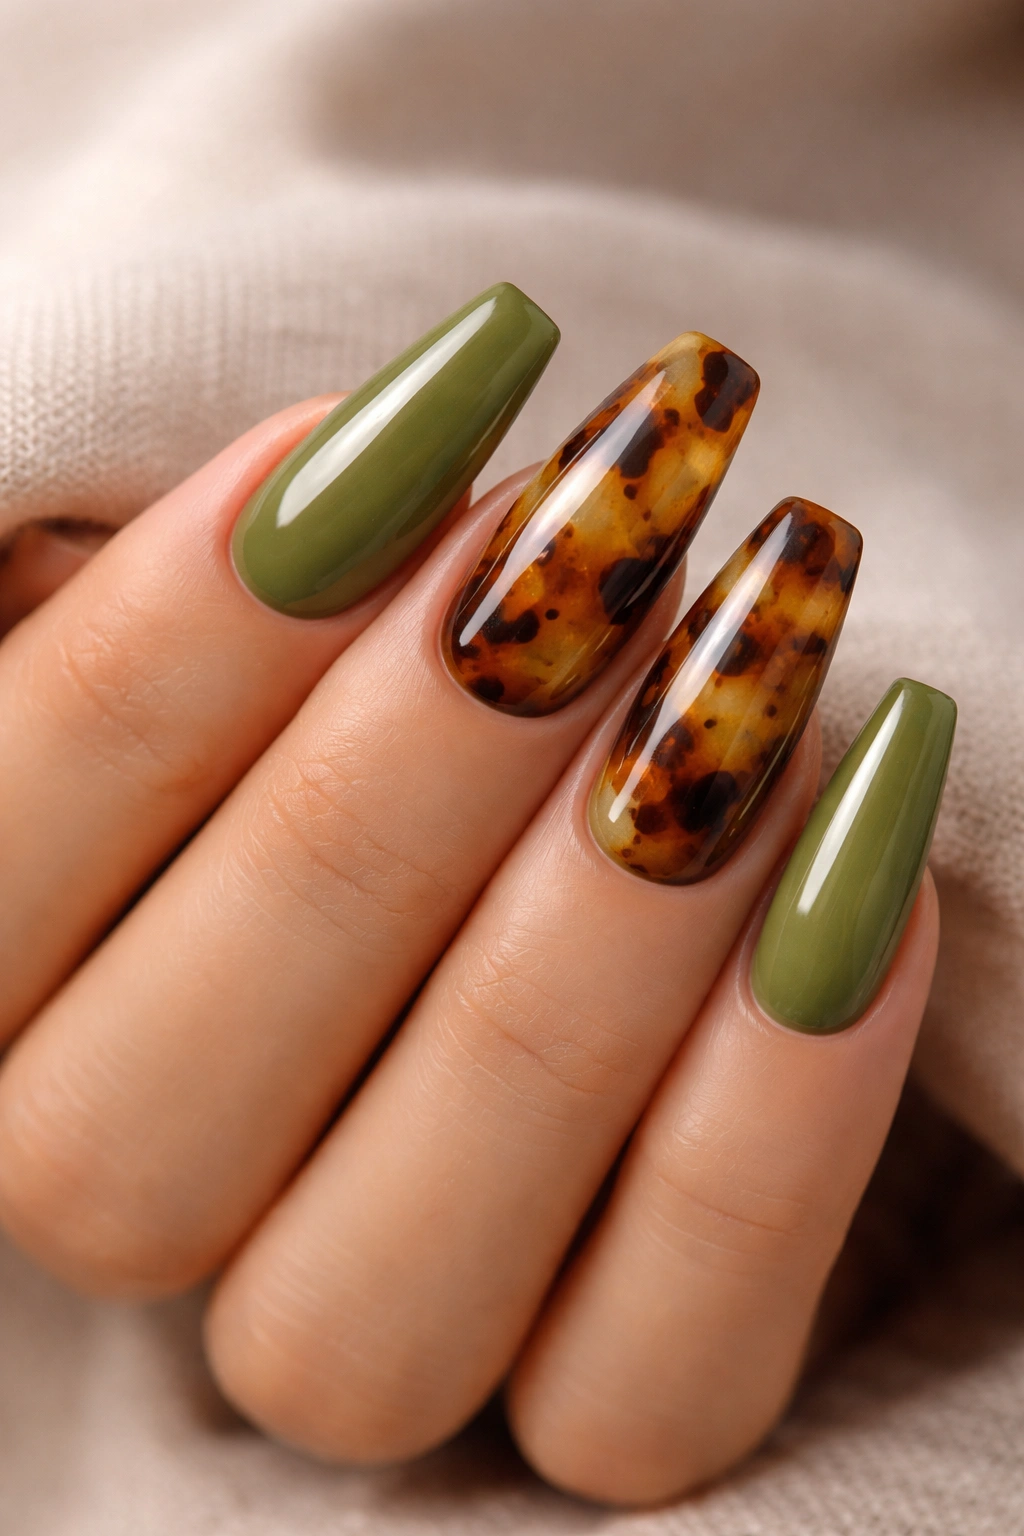
Tortoiseshell patterns mimic the natural color variation of actual tortoiseshell (though, thankfully, no actual tortoiseshell is used in modern nail design). On olive green bases, tortoiseshell patterns combine browns, golds, blacks, and warm tones to create an organic, sophisticated look. The pattern is typically hand-painted or created using stamping.
Tortoiseshell Color Combinations
Good tortoiseshell patterns on olive green might include: warm browns, burnt orange, black, pale gold, and the olive green base itself. The key is using colors that harmonize rather than clash, creating an intentional pattern rather than random color splotches.
Hand-Painting Tortoiseshell
- Start with your olive green base and seal with glossy top coat
- Use thin brushes and multiple colors to create organic patches and veining
- Don’t aim for perfection—genuine tortoiseshell is beautifully imperfect
- Blend colors slightly where they meet by dabbing with a nearly-dry brush
- Seal the final design with a top coat to protect your work
17. Seafoam Green with Metallic Nail Tattoos
Metallic nail tattoos (also called nail stickers or water decals) are pre-designed images that transfer onto nails using water. They come in countless designs—metallic patterns, delicate lines, tiny icons—and apply easily without requiring artistic skills. On seafoam green, delicate metallic tattoos create an elegant, curated look.
Choosing Nail Tattoos
Quality nail tattoos transfer cleanly and stay on as long as your polish. Poorly made tattoos crinkle, tear, or slide around. Look for tattoos specifically designed for nail use rather than general craft tattoos, which are often the wrong texture for nails.
Applying Nail Tattoos
- Apply tattoos over fully cured polish
- Cut out the tattoo shape very close to the actual design—excess backing shows
- Soak the tattoo in a small cup of water for 10-15 seconds until it slides easily off the backing
- Slide the tattoo onto your wet top coat using a nail stick or tweezers
- Position carefully and smooth out any air bubbles with a damp brush
- Seal with final top coat once the tattoo is positioned and dry
18. Emerald Green with Matte and Glossy Mix
This design plays with finish contrast—some nails matte, others glossy—all in the same emerald green shade. The visual interest comes not from different colors but from different surface finishes. One fully matte nail next to glossy nails creates an artistic, intentional look that feels very current and design-forward.
Creating Finish Contrast
Finish contrast design is surprisingly sophisticated. The same color reads completely differently when glossy versus matte, creating subtle visual variation without relying on multiple polish shades. This design works beautifully for people who love a single color but want subtle visual interest.
Application Strategy
- Paint all nails with emerald green base, two coats minimum
- Seal the majority of nails with glossy top coat
- On selected nails (typically one or two), apply matte top coat instead
- Let both finishes fully cure before using your hands
- The contrast is subtle but intentional—anyone looking closely will notice the finish variation
- This design actually photographs better than it looks in person, with the glossy and matte areas creating depth in photos
Final Thoughts
Green coffin nails offer more range than many people initially realize. From deep jewel tones that feel serious and sophisticated to pale pastels that read soft and artistic, green works beautifully in nearly every shade and finish combination. The coffin shape elongates your nails and creates plenty of space for either minimalist designs or more complex nail art, depending on your mood and skill level.
The designs here represent just a starting point. Each one can be customized—swapping colors, adjusting accent placement, mixing finishes, or adding your own artistic touches. Whether you’re doing your nails at home or consulting with a professional, you have genuine options that work for your personal style, lifestyle, and commitment level. Green coffin nails are wearable enough for everyday and special enough for intentional statements. That versatility is exactly what makes them worth exploring.
