

There’s something undeniably chic about white coffin nails. They’re clean, sophisticated, and versatile enough to work for everything from a Monday morning at the office to a Saturday night out with friends. But here’s what most people don’t realize: white coffin nails aren’t just a blank canvas. They’re an opportunity to show off your personal style through texture, embellishment, and creative nail art that actually feels elevated rather than overdone.
Coffin-shaped nails—also called ballerina nails—are wider at the top and taper toward the tip, creating that distinctive tapered point that frames your fingertips beautifully. On medium-length nails, this shape hits that sweet spot where you get the drama and elegance of a longer nail without sacrificing practicality. Medium coffin nails are long enough to showcase intricate nail designs, but short enough that you can actually function in daily life without constantly worrying about breaking them.
The truth about white coffin nail designs is that simplicity is often the most striking choice. A pure white base gives you the freedom to play with geometric patterns, delicate line work, metallic accents, or textured finishes. Whether you’re drawn to minimalist aesthetics or you want something with a bit more personality, white coffin nails can deliver. The key is choosing a design that feels genuinely you—not just something that looks good in a photo.
Let’s dive into fifteen white coffin nail ideas that work beautifully on medium-length nails, each with enough detail to inspire your next manicure appointment or DIY nail session.
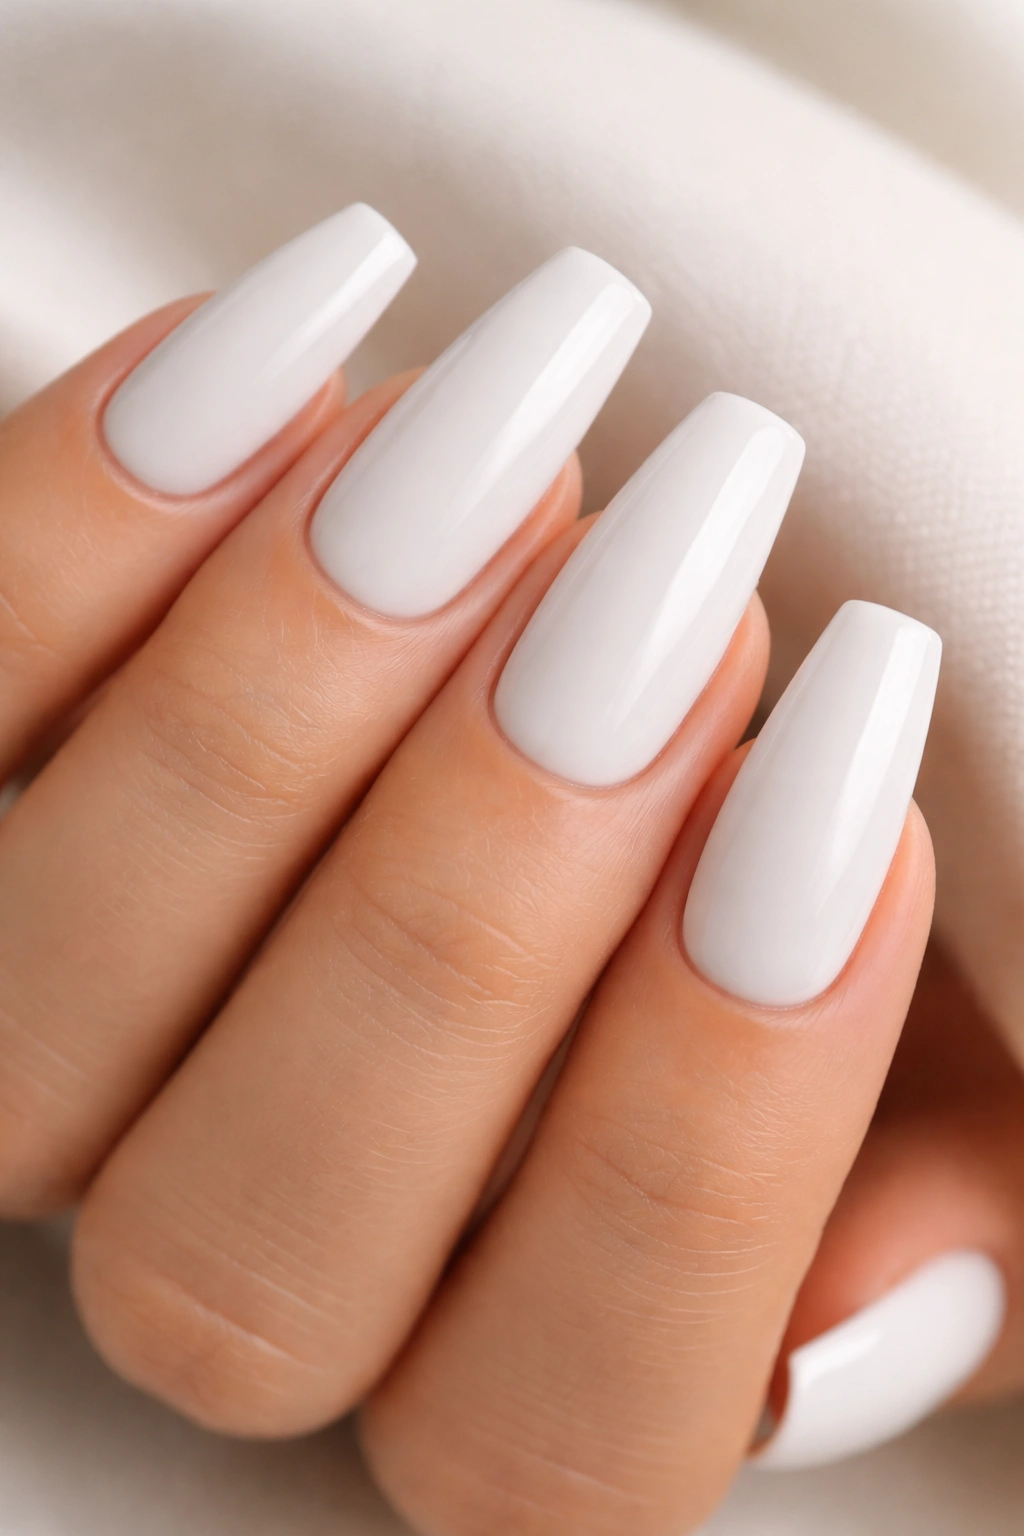
1. Classic Glazed White with Soft Shine
The fundamentals of a great manicure often get overlooked in favor of more elaborate designs. There’s genuine artistry in executing a flawless white base coat that gleams without looking artificial or plastic-y. A glazed finish sits somewhere between a standard matte and a high-gloss shine—it catches the light gently and gives your nails an almost porcelain quality.
What Makes This Timeless
This look works because it’s inherently flattering to your skin tone and can genuinely elevate your entire appearance without demanding attention. The soft luster creates dimension without adding visual clutter, making it perfect for situations where you want polished hands but don’t want your nails to be the first thing people notice about you.
How to Perfect It
- Use a high-quality white nail polish formulated with light-reflecting particles that create depth rather than a flat, chalky finish
- Apply thin, even coats rather than one thick coat—usually two coats provides optimal coverage and color
- Seal with a gloss topcoat, not a matte, to achieve that signature glazed appearance
- Keep your cuticles pushed back and moisturized; this enhances how the white reads on your nail beds
Pro tip: The best glazed white nails look intentional and well-maintained. Schedule regular touch-ups every two weeks—any chipping or yellowing at the edges immediately breaks the sophisticated vibe you’re going for.
2. White with Delicate Gold Striping
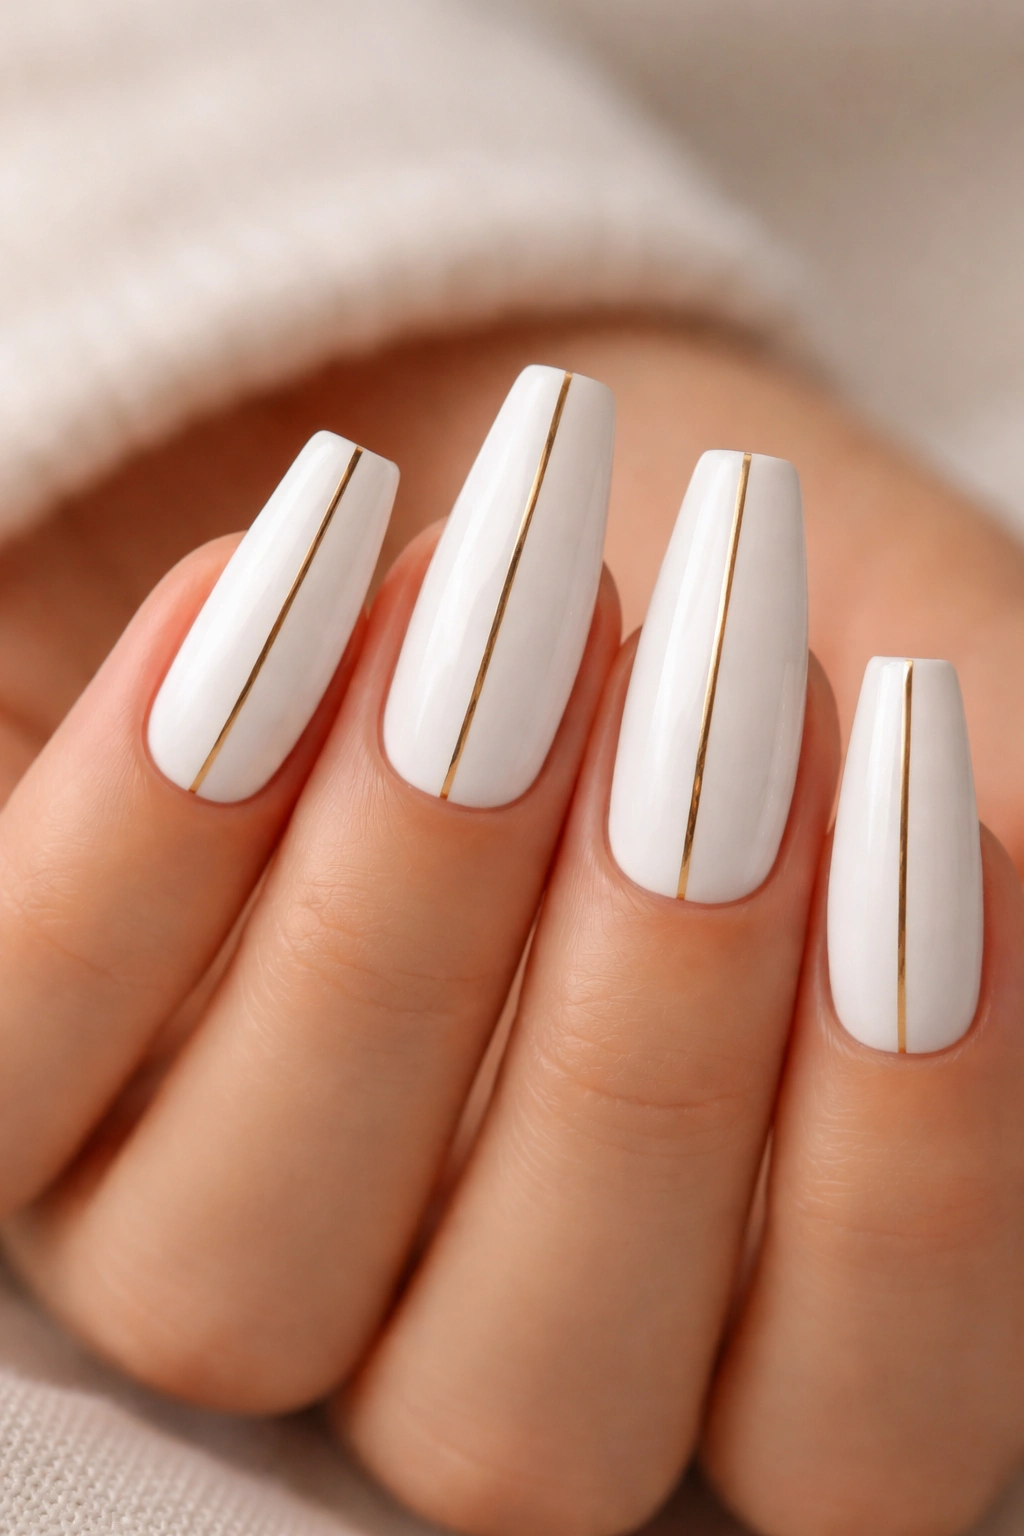
Geometric elements on white nails walk an interesting line—you can either go bold and graphic or keep things whisper-subtle. Gold striping occupies that middle ground where the design is clearly there, but it reads as refined rather than flashy. This works especially well on medium coffin nails where you have enough surface area to make the striping visible without overcrowding the space.
The Appeal of Minimalist Metal
Gold has a warmth that complements white beautifully, and the linear quality of stripes creates motion without adding visual noise. This design photographs well from every angle and works across multiple settings—it’s polished enough for professional environments yet distinctive enough to feel intentional.
Implementation Details
- Use a thin gold striping brush or a fine-tipped nail art pen for precision
- Create vertical stripes down the center of each nail, spacing them about ⅛ inch apart
- Alternatively, place one thin gold stripe along the side of each nail for a subtler take
- Seal everything with a top coat to prevent the gold from chipping or tarnishing
Worth knowing: If you’re not confident in your hand-steadiness, use a striping guide tape to mask off where you want the gold lines. Remove the tape while the polish is still slightly tacky for the cleanest edges.
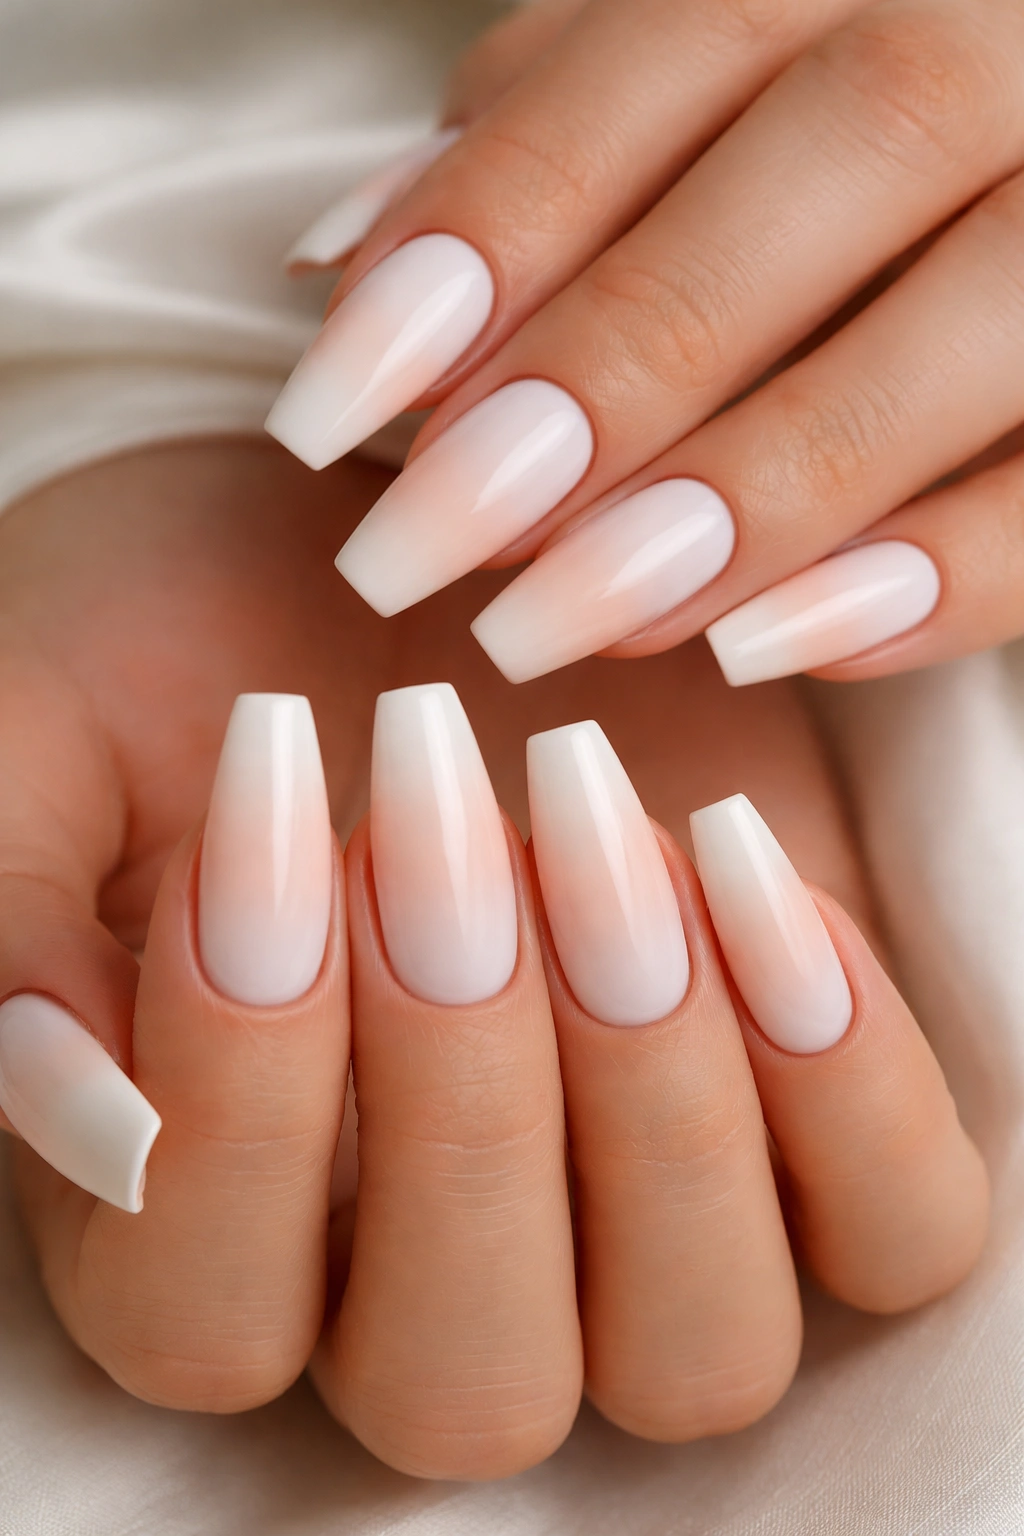
3. Soft White Ombré to Nude
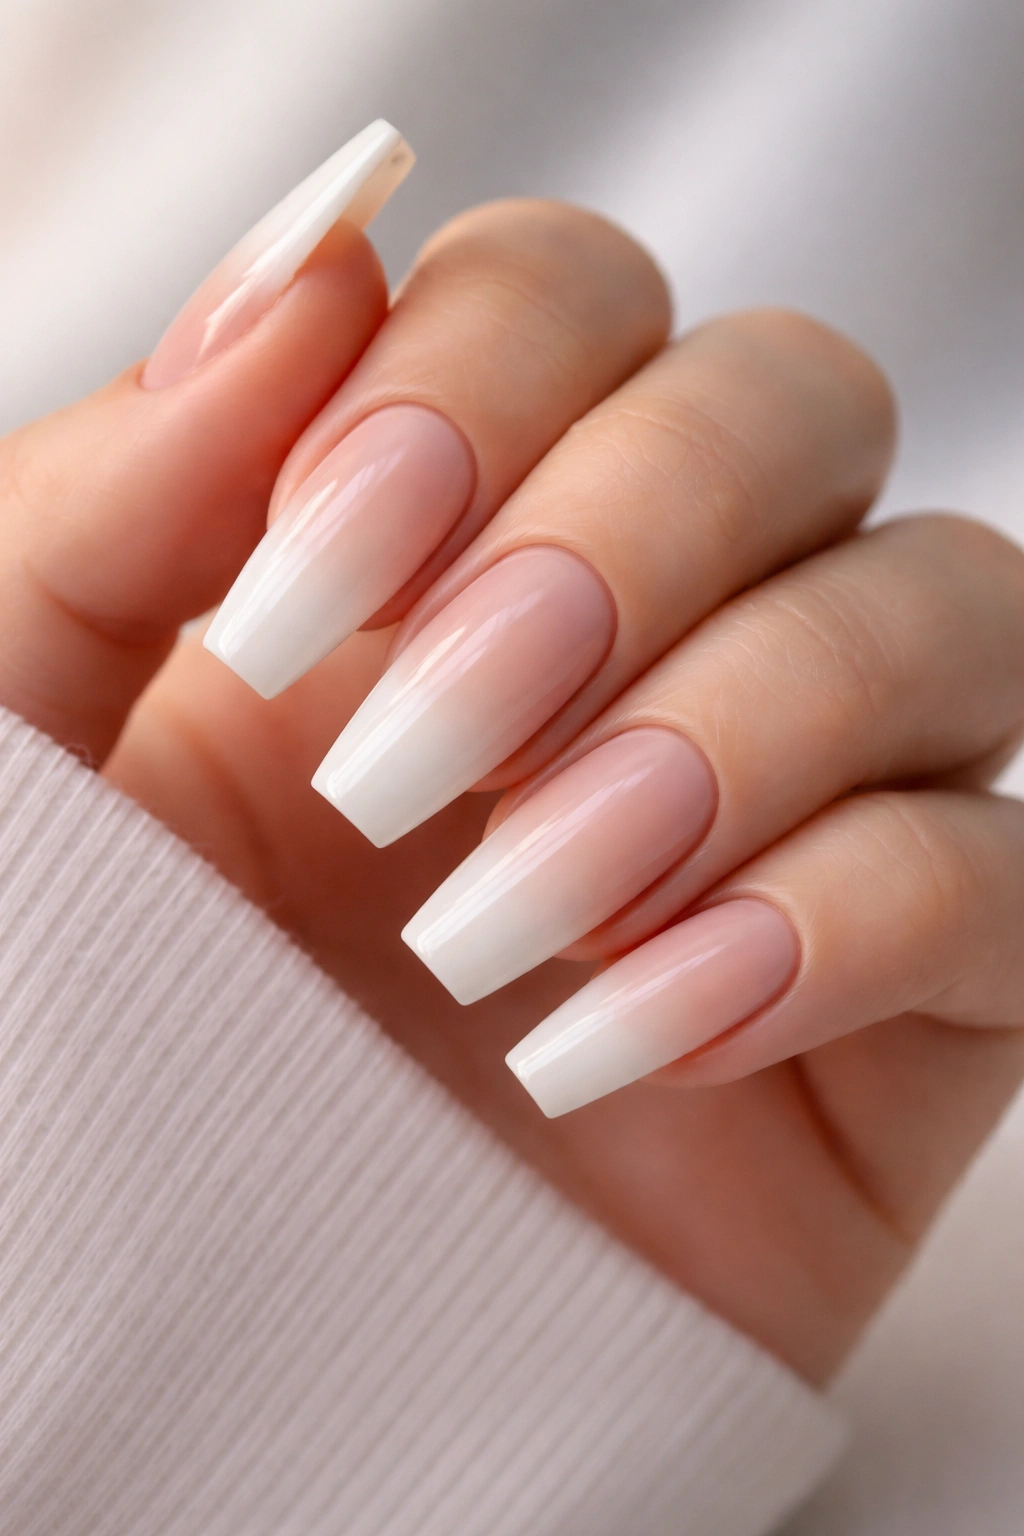
Ombré transitions create visual softness that reads as intentional and modern without being loud about it. White to nude ombré specifically plays with the idea of extension—your coffin nails appear to flow seamlessly from your skin tone, creating an elegant lengthening effect that’s universally flattering.
Why This Transition Works
The gradual fade from white at the base to nude at the tip is subtle enough for everyday wear but sophisticated enough that people notice and compliment the detail work. This design is particularly effective on medium nails because the length gives you enough space to show a clear color progression.
Creating a Flawless Ombré
- Start with a white base coat as your foundation
- Create a nude shade by mixing white polish with a tiny amount of peachy-pink or beige polish
- Use a makeup sponge with a dabbing motion to blend the colors directly on your nails
- Blend multiple times, working from the tip toward the base, until the transition feels smooth
- Finish with a glossy top coat that seals in the blended colors and adds shine
Insider note: The key to an ombré that doesn’t look muddy is building it gradually. It’s better to do three light passes with the sponge than one heavy application that creates obvious color bands.
4. White Coffin with Tiny Rhinestone Accent
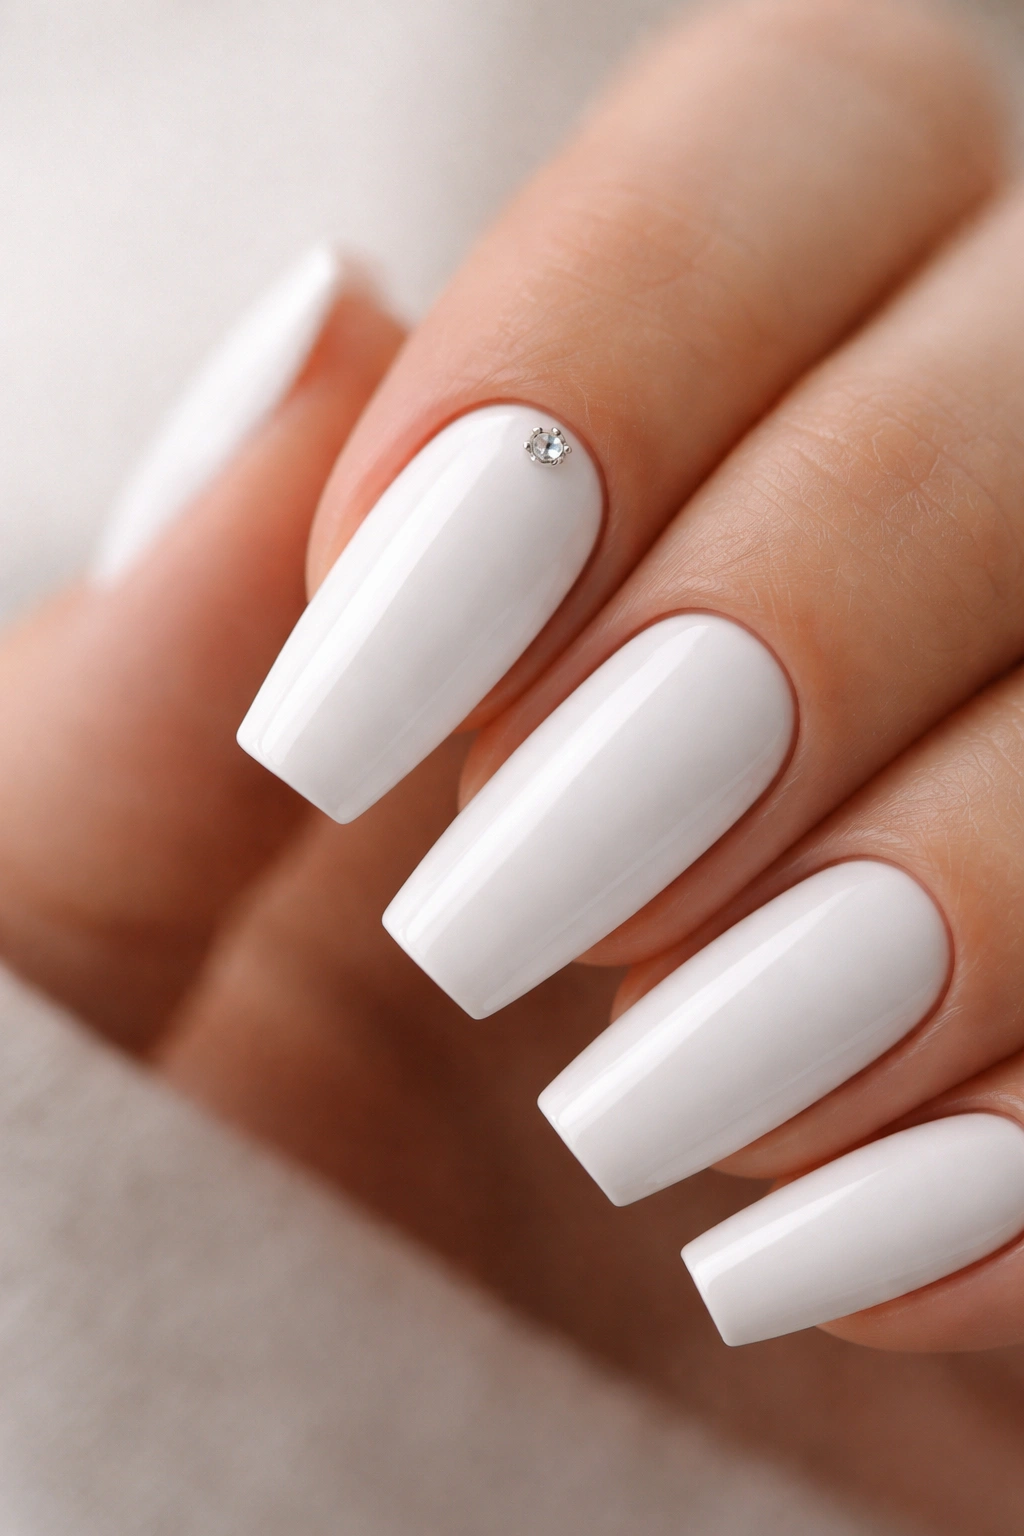
Sometimes the most elegant designs are the ones that know exactly when to stop. A single rhinestone or a small cluster of crystals placed strategically on a white base creates visual interest without tipping into costume-jewelry territory. This restraint is what separates a sophisticated manicure from one that feels overdone.
The Power of Strategic Placement
Rather than covering every nail with rhinestones, place them only on your ring finger or your middle finger—the nails that naturally draw attention when you gesture or use your hands. This creates an accent that enhances your manicure rather than dominating it.
Rhinestone Application Technique
- Use a rhinestone picker tool (a fine-tipped applicator pen with adhesive or a tweezers-style tool) for precision placement
- Apply a tiny amount of nail glue or jewelry adhesive to the back of the rhinestone
- Press firmly onto the white polish and hold for several seconds until it sets
- Once dry, seal over everything with a gel top coat or a thick regular top coat for protection
Quick fact: Not all rhinestones are created equal—Swarovski crystals catch light beautifully and won’t dull with time, but acrylic stones are more affordable if you’re experimenting with this look.
5. Matte White with Glossy French Tip
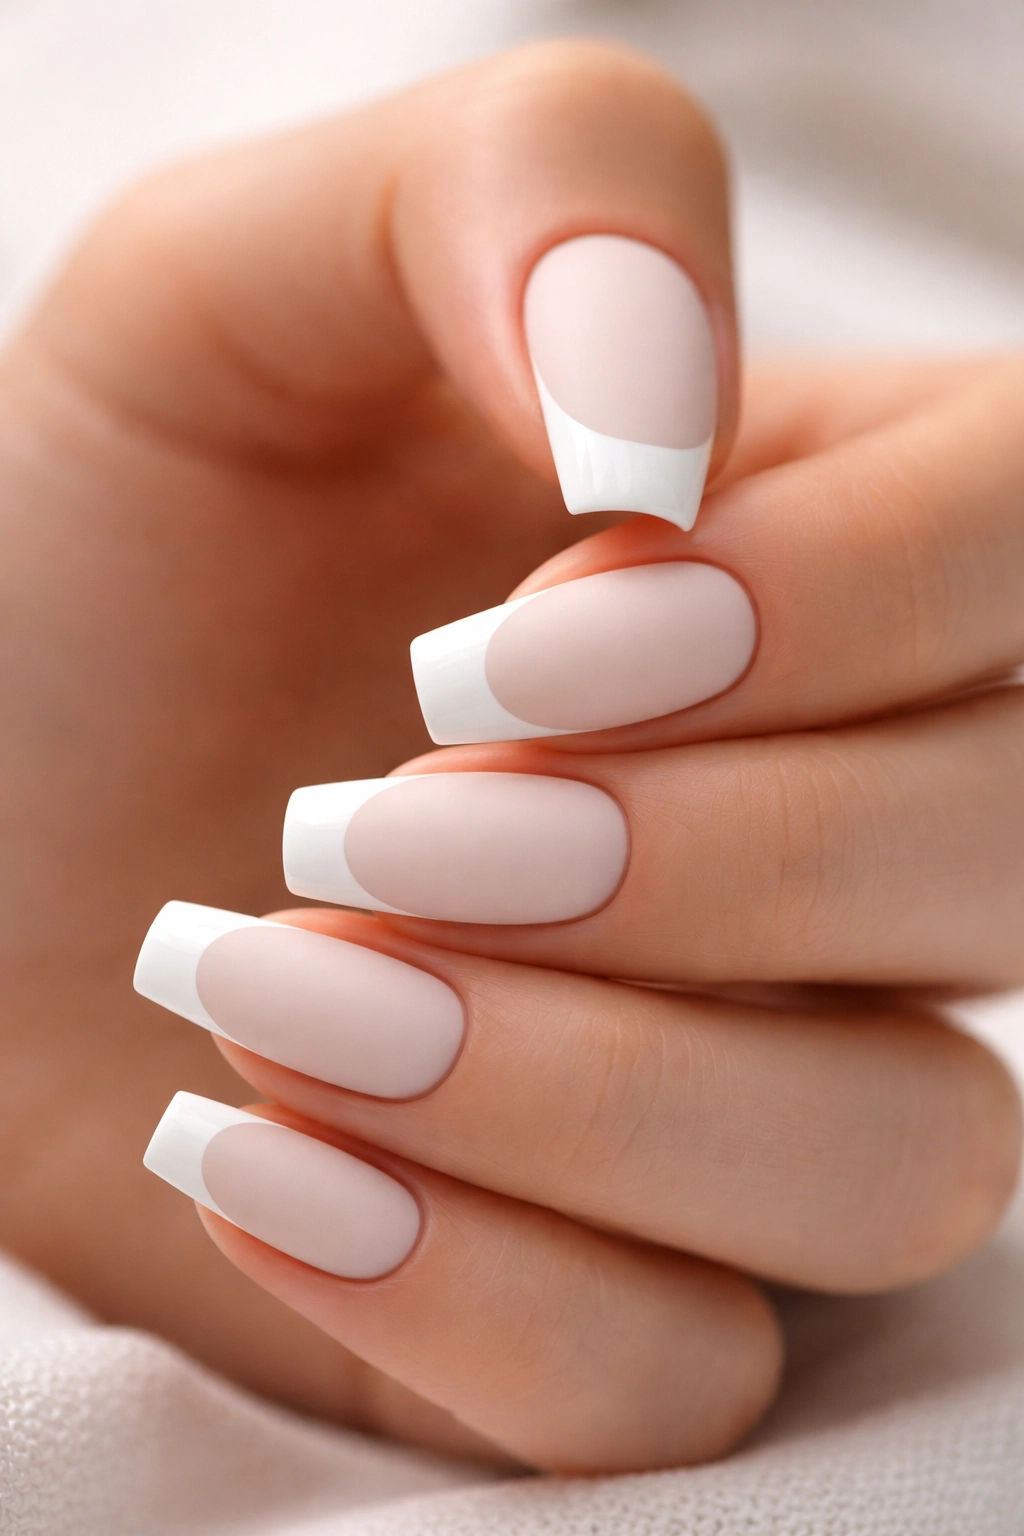
The French manicure is experiencing a genuine renaissance, but the updated versions often skip the traditional pink-and-white look in favor of all-white palettes with texture play. Using matte polish for the base and high-gloss for the tip creates dimensional contrast that feels modern and unexpected.
The Texture Contrast Approach
This design works because matte and glossy finishes interact with light completely differently. Your nails take on a sculptural quality—the matte sections appear soft and velvety while the glossy tips practically glow. On medium coffin nails, this contrast is visible and impactful without looking strange.
Execution Method
- Paint your entire nail with a matte white polish and allow it to fully dry
- Using a thin brush or a nail art pen, carefully paint a glossy white polish along the top third or tip of the nail
- The glossy white should be a slightly different white formula to show the texture contrast clearly
- Finish with a matte top coat on the matte section only, or use a glossy top coat if you want additional shine on the tip area
Pro tip: If you want a softer, curved French tip rather than a harsh line, use a sponge to create a subtle gradient where the matte gently fades into the glossy section.
6. White with Negative Space Geometric Design
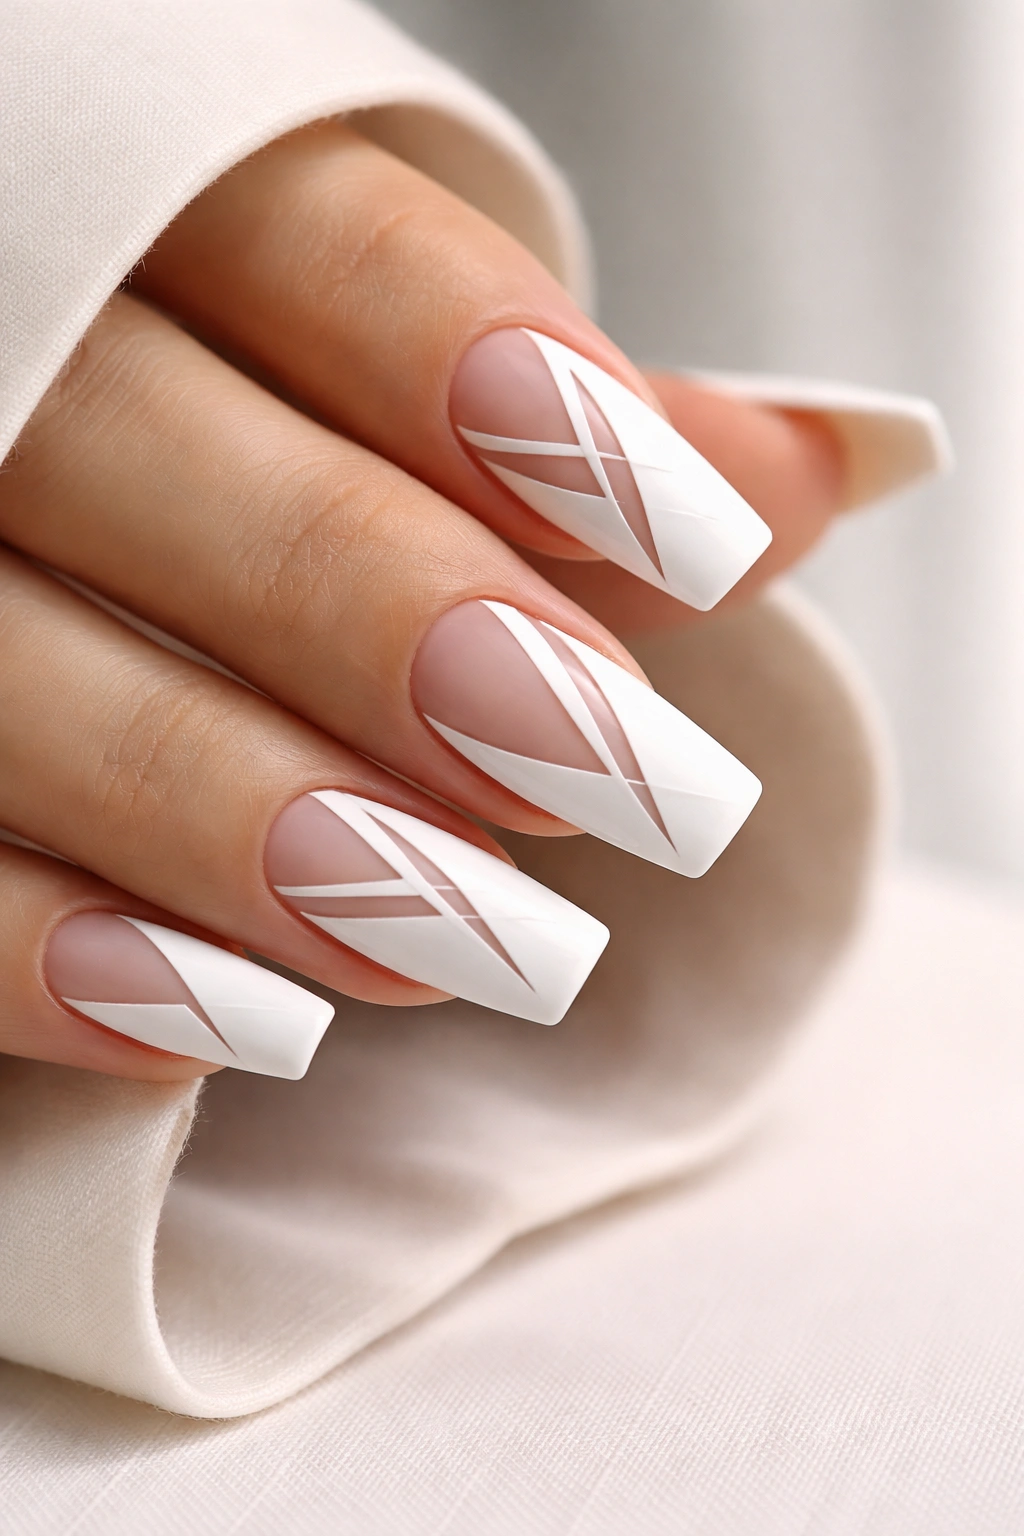
Negative space designs (where you leave areas of your natural nail or base coat visible) create the illusion of complexity while actually being quite forgiving to execute. White polish with strategic gaps and cut-out shapes feels modern and architectural, perfect for anyone who appreciates minimalist design.
Why Negative Space Feels Contemporary
There’s something intellectually satisfying about what’s not there being just as important as what is. Geometric cutouts or linear gaps in a white manicure make your nails feel curated and intentional. This style also photographs beautifully—the interplay between white and skin tone creates natural contrast that reads as sophisticated.
Negative Space Techniques
- Paint the base white and allow it to dry completely
- Use a thin brush to paint solid geometric shapes (triangles, squares, lines) with your base color or a contrasting color over the white
- Alternatively, use nail stickers or tape to mask off areas, paint white around them, and then remove the masks to reveal the negative space
- Seal with a glossy or matte top coat depending on your preference
Worth knowing: This design is easier to execute if you have steady hands and good brush control, but even beginners can achieve great results using tape or sticker guides.
7. Textured White with Velvet or Fuzzy Finish
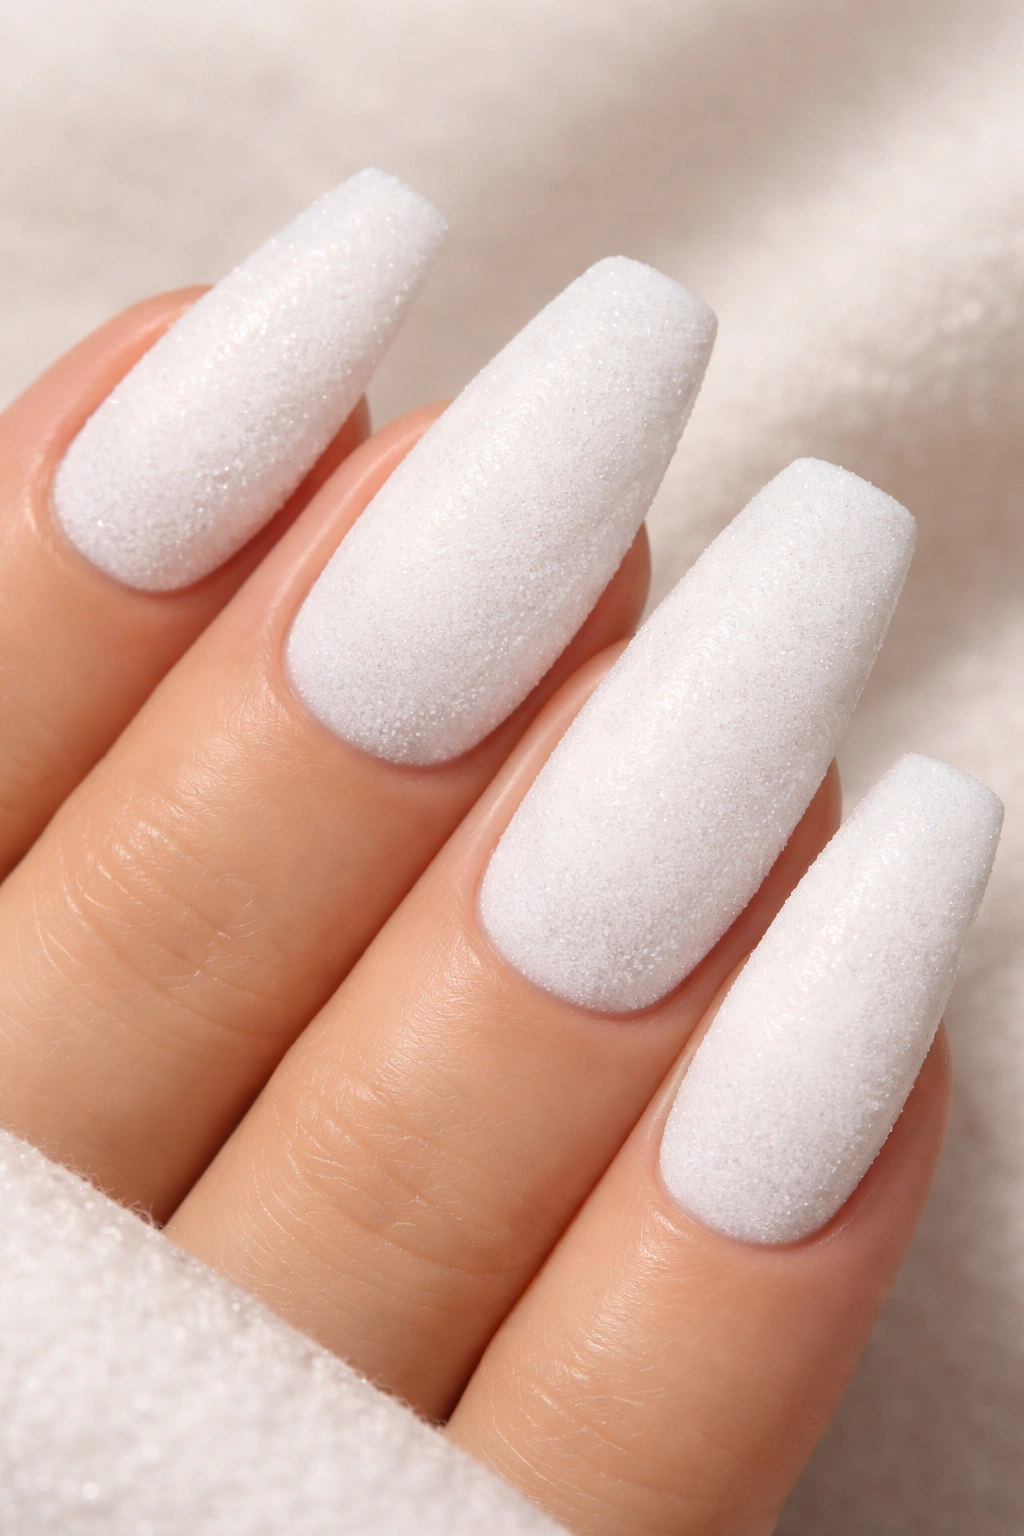
Textured nail finishes have moved from gimmick territory into genuine design territory. A velvet or fuzzy white finish creates a tactile quality that’s intriguing and luxurious-feeling, even though it’s technically a standard manicure product. The visual effect is soft and almost cloud-like.
The Appeal of Textured White
Textured finishes add depth and visual interest to the simplest designs. Velvet white nails look expensive and deliberate while remaining understated. The matte, velvety surface also tends to make nails look slightly wider and fuller, which is universally flattering on medium-length coffin shapes.
Achieving a Perfect Textured Finish
- Start with a white base coat and let it dry
- Apply a velvet powder or use a velvet nail polish specifically formulated with texture particles
- If using loose powder, use a velvet application brush or a regular brush dampened slightly
- Press the velvet into the wet polish firmly and evenly
- Avoid using a top coat, or use a clear, matte top coat that won’t flatten the texture
Quick fact: Velvet finishes are lower-maintenance than they appear—the texture actually hides minor imperfections and doesn’t show dust or debris the way a high-gloss manicure does.
8. White with Rose Gold Foil Details
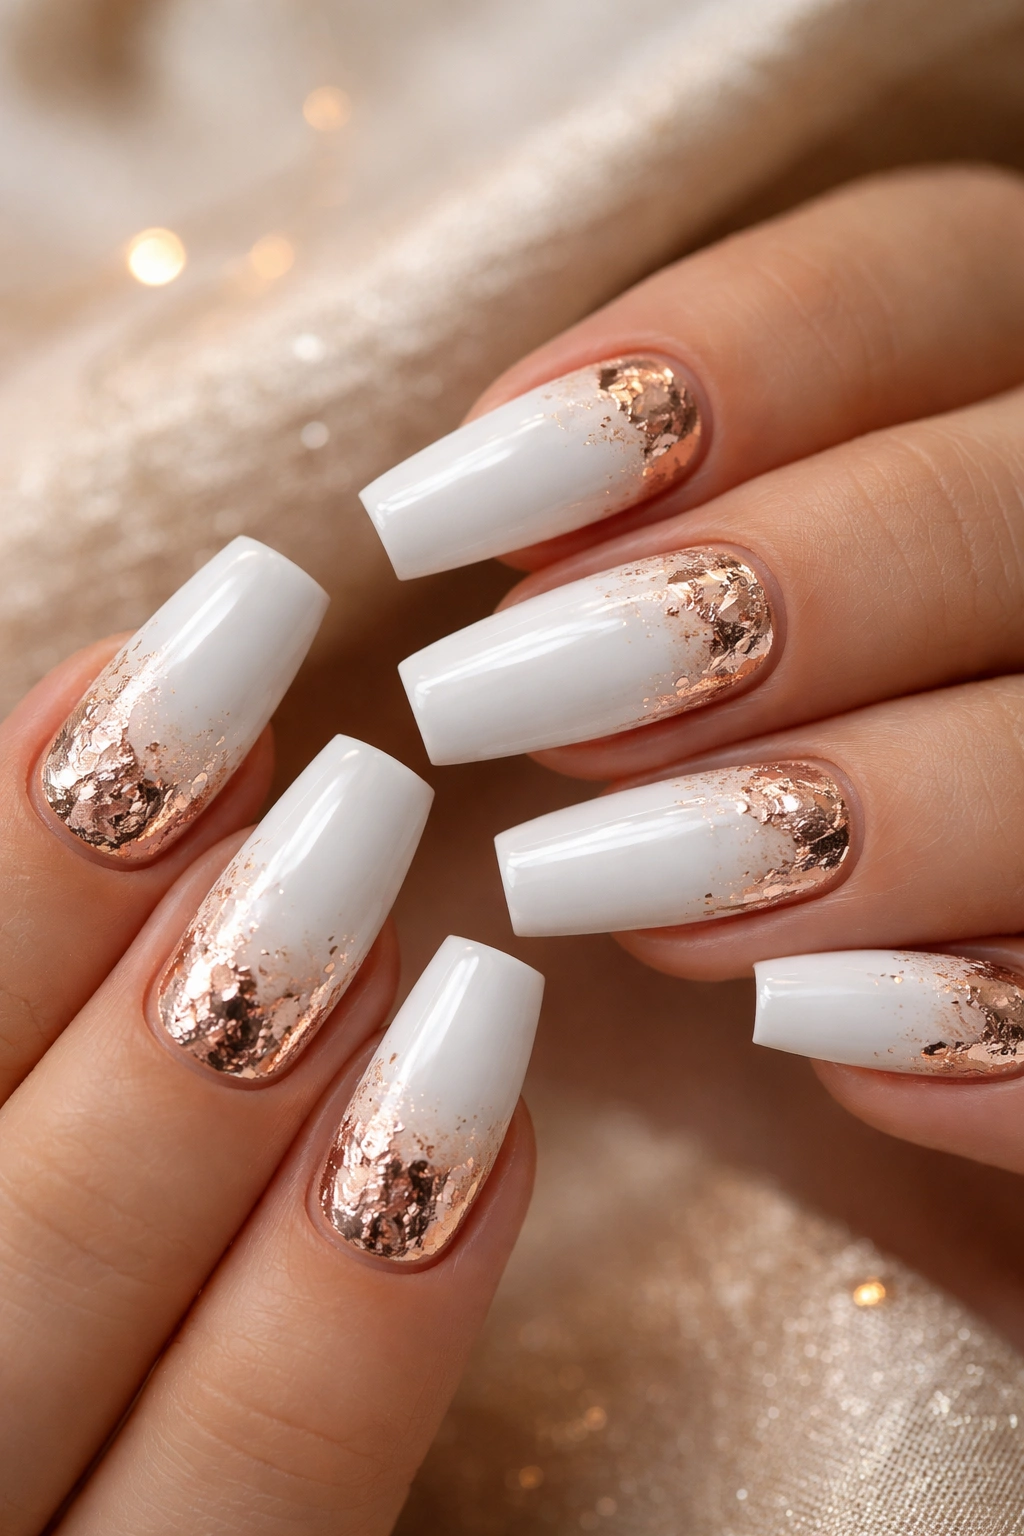
Foil adds flash and glamour while remaining sophisticated because it catches and reflects light in elegant ways. Rose gold foil on white creates warmth and visual interest without requiring the skill level of hand-painted designs. This is the perfect choice if you want something with presence but you’re not confident in nail art application.
Foil’s Transformative Quality
Foil details instantly elevate a manicure from simple to special. The metallic sheen creates dimension, and rose gold’s warm tone complements both cool and warm skin tones beautifully. Even small foil accents—a strip along the side or tiny flecks scattered across the tip—transform the overall impact.
Foil Application Process
- Paint your white base and let it dry completely
- Apply a special foil adhesive (different from regular top coat) to the area where you want the foil to go
- Cut foil pieces to size and press them firmly onto the sticky adhesive
- Use a thin brush handle or cuticle pusher to smooth out any bubbles or wrinkles
- Seal everything with a top coat that protects the foil from lifting
Pro tip: Foil works best when applied to specific areas (the tips, a side accent, a geometric section) rather than scattered randomly—it looks more intentional and polished.
9. Clean White with Thin Black Line Art
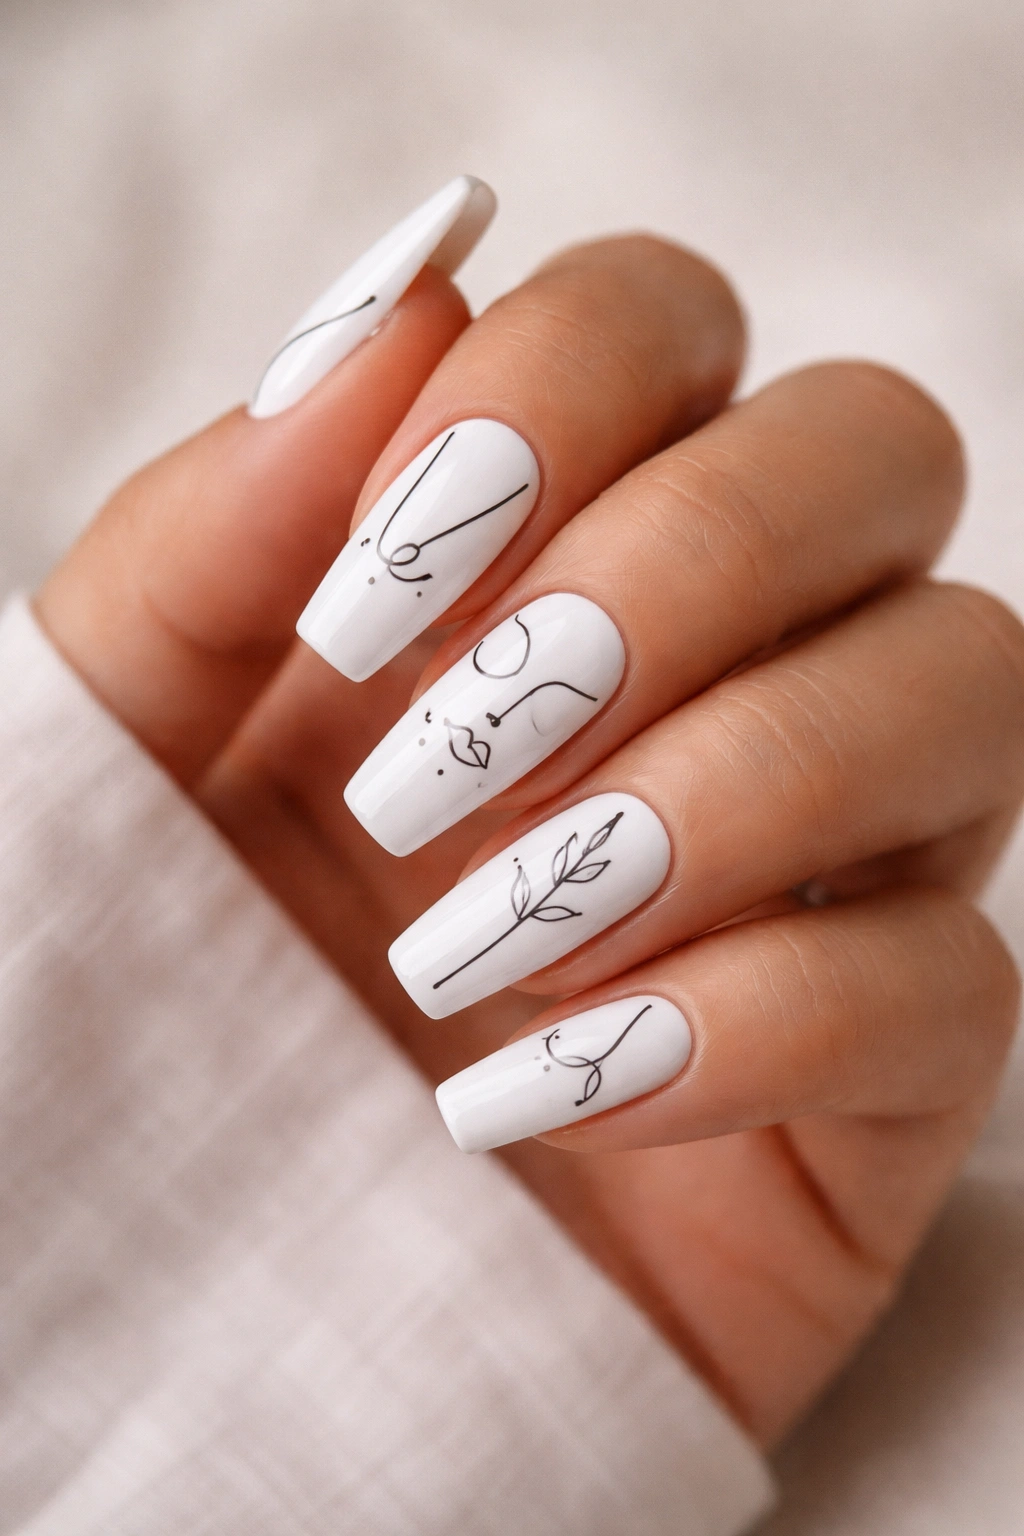
Line art on nails has become increasingly sophisticated, moving beyond simple designs into genuinely artistic territory. A thin black outline or simple illustration on white creates high contrast and makes even minimalist designs feel purposeful. This works beautifully on medium coffin nails because the shape gives you distinct space to work with.
Black and White Contrast
Black lines on white polish have an inherent visual clarity—nothing gets lost or blends together. Whether you choose abstract geometric lines, a simple illustration, or semi-abstract shapes, the contrast ensures your design reads clearly and intentionally. This is perfect if you want something with artistic credibility without resorting to full nail art complexity.
Line Art Execution
- Start with a white base coat, fully dried
- Use a thin black nail art brush or a fine-tipped pen to draw your design
- Simple options include abstract lines, botanical illustrations, or geometric patterns
- Keep lines clean and purposeful—a few precise lines reads more professional than many scattered marks
- Seal with a clear glossy top coat to protect the line work
Worth knowing: If you’re not naturally artistic, search Pinterest for simple line art inspiration and trace designs directly onto your nails using a pencil or specialized tracing tool before committing with polish.
10. White with Pearl or Iridescent Finish
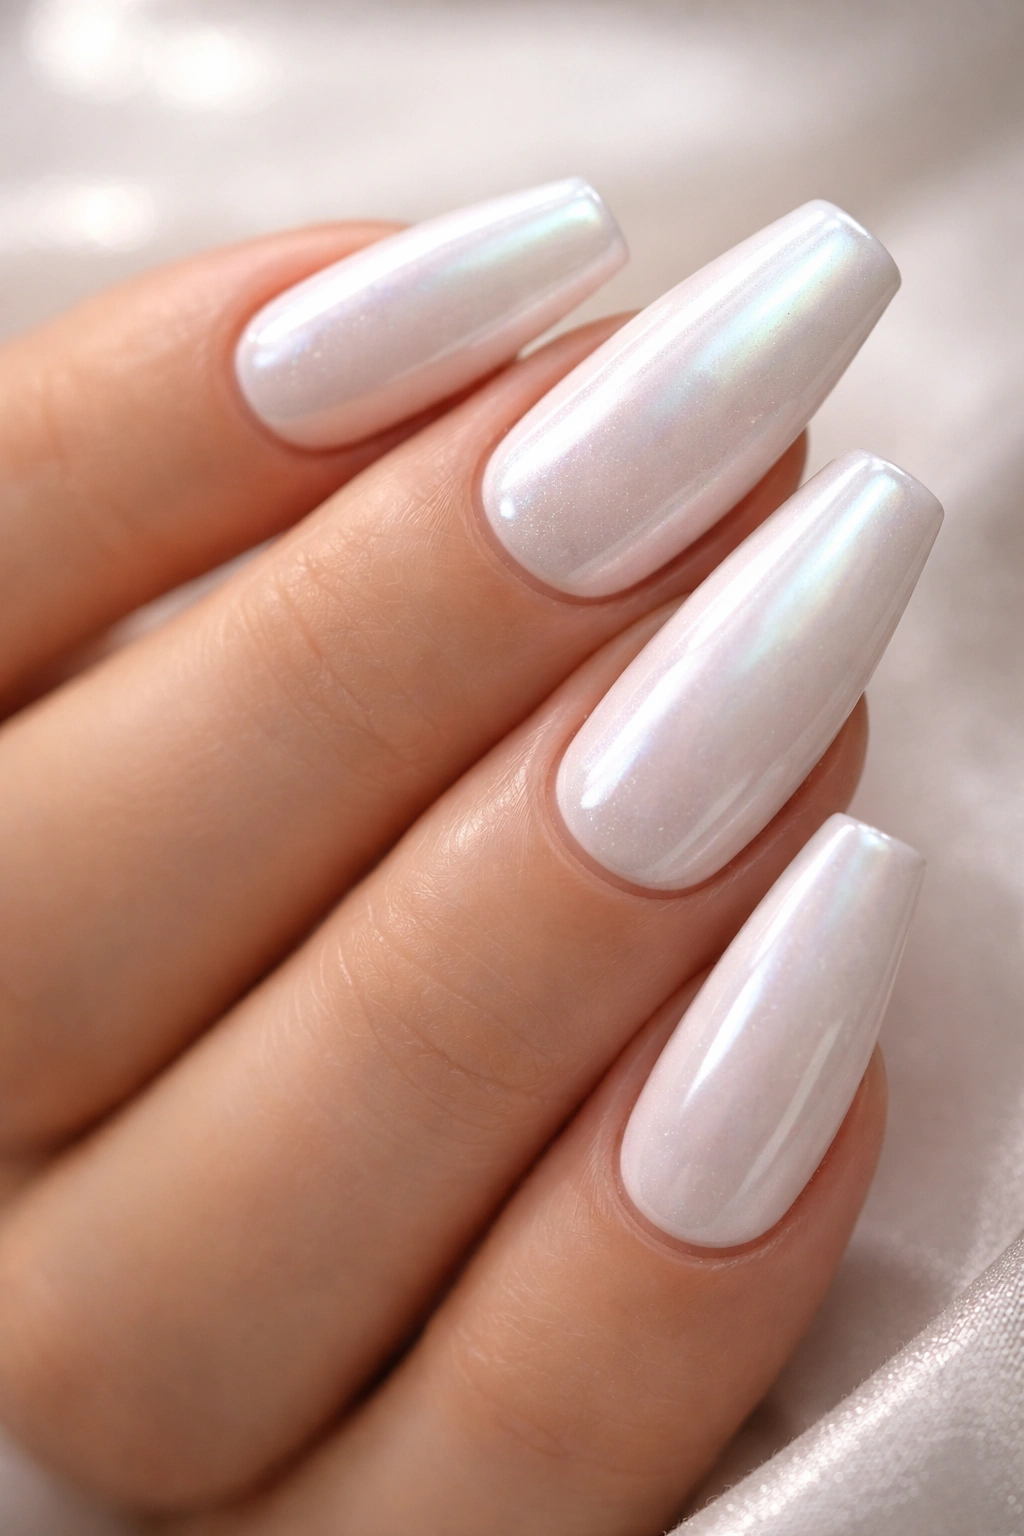
Pearl and iridescent finishes create a magical quality—your nails shift subtly between colors depending on the light and angle, creating an ethereal effect. On white, pearlescent finishes add sophistication and luxury without the boldness of solid color changes. This is uniqueness without demanding attention.
The Subtle Magic of Pearl
Pearlescent white appears to shift between white, pale blue, pale pink, and even pale green depending on how light hits it. This creates the impression of movement and sophistication. People might see your nails and think they’re different colors when they’re actually just reflecting light in multiple directions. It’s a magic trick that’s completely legitimate.
Creating a Pearl or Iridescent Look
- Use a white pearl or iridescent nail polish, which contains light-reflecting particles
- Apply two thin coats to build intensity without creating a thick, sticky texture
- Use a top coat to seal and enhance the reflective qualities
- Alternatively, layer a clear iridescent topcoat over white polish for adjustable intensity
- The effect is most visible in natural light or mixed lighting—indoor fluorescent lighting sometimes dulls the effect
Quick fact: Pearl and iridescent finishes work beautifully for every season—they’re versatile enough to move from summer into fall without looking seasonal or dated.
11. White Coffin with Subtle Nude Art Detailing
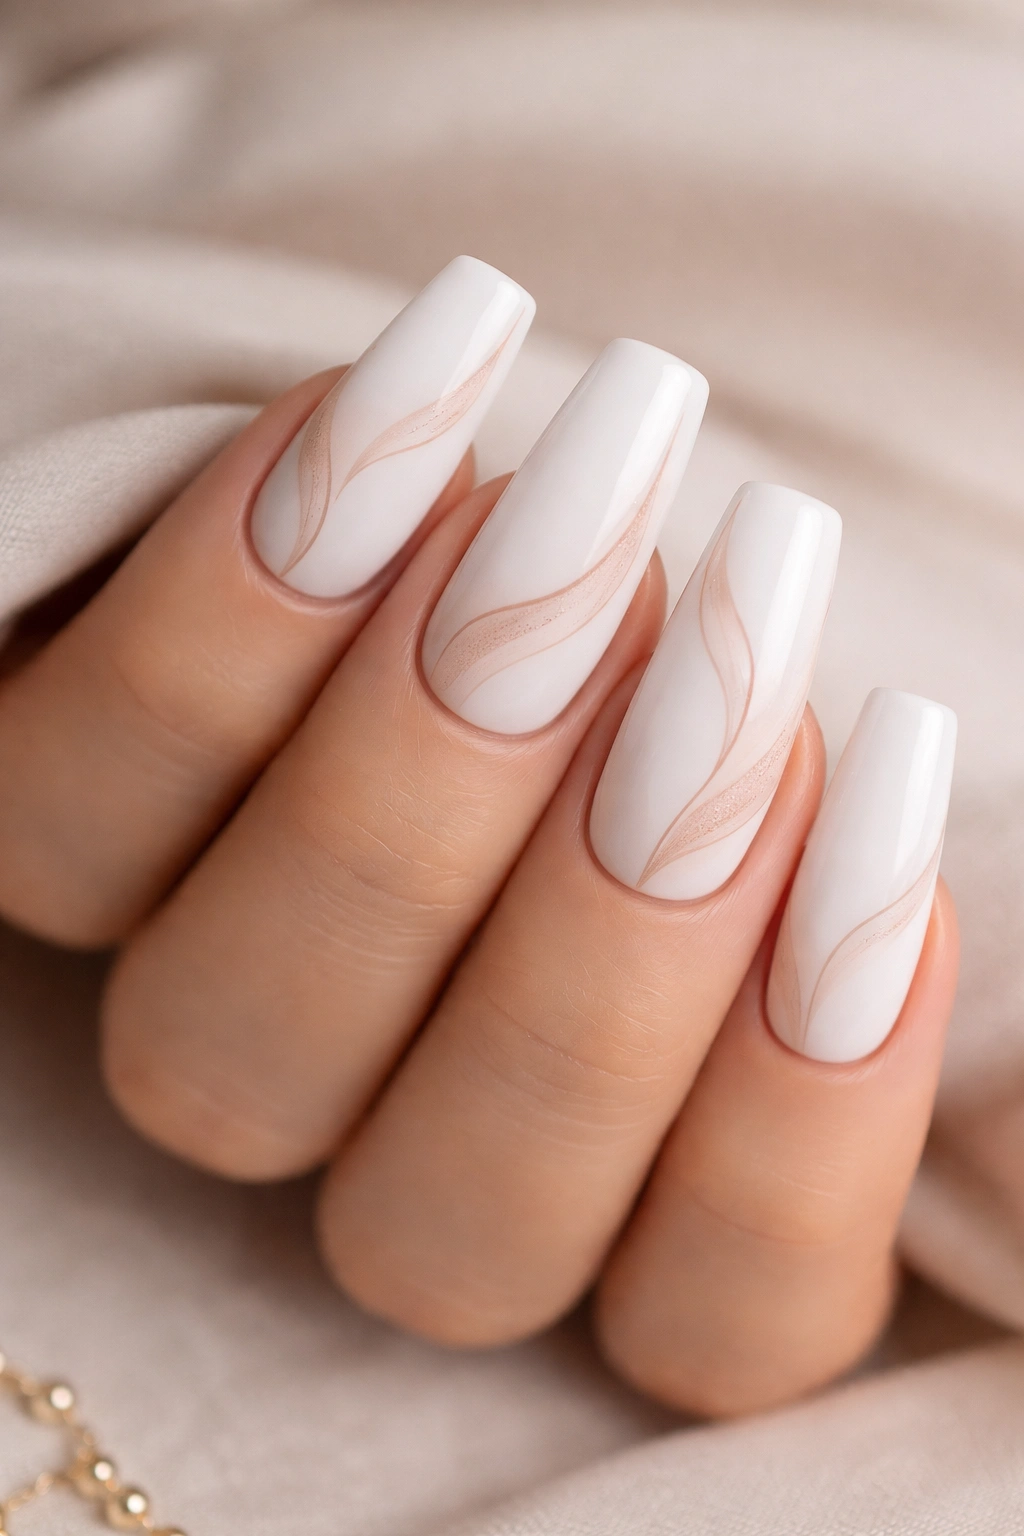
Using a complementary flesh-tone or nude shade to create art on white creates softness and sophistication. Rather than stark contrast, nude-on-white designs feel cohesive and elegant. This is a perfect option if you want nail art but prefer designs that harmonize rather than pop.
The Psychology of Harmonious Color
When your nail art uses a shade close to your skin tone, something interesting happens—the designs feel refined rather than graphic. Nude lines, shapes, or illustrations on white read as intentional and artistic without the boldness of high-contrast designs. This appeals to people who prefer understated elegance.
Nude Detailing Techniques
- Create a custom nude shade by mixing white with a tiny amount of peachy or taupe polish
- Use this shade to paint brushstrokes, lines, or simple illustrations over your white base
- Keep designs minimal and intentional—a few well-placed elements feel more sophisticated than a busy pattern
- Soft-focus designs (slightly blurred or ombréd nude elements) read as more artistic than crisp lines
- Seal everything with a glossy top coat for a polished finish
Pro tip: The best nude-on-white designs use the nude shade to create actual pictures or patterns—abstract brushstrokes, leaves, waves, or simple landscapes—rather than random marks.
12. Bright White with Minimalist Silver Accents
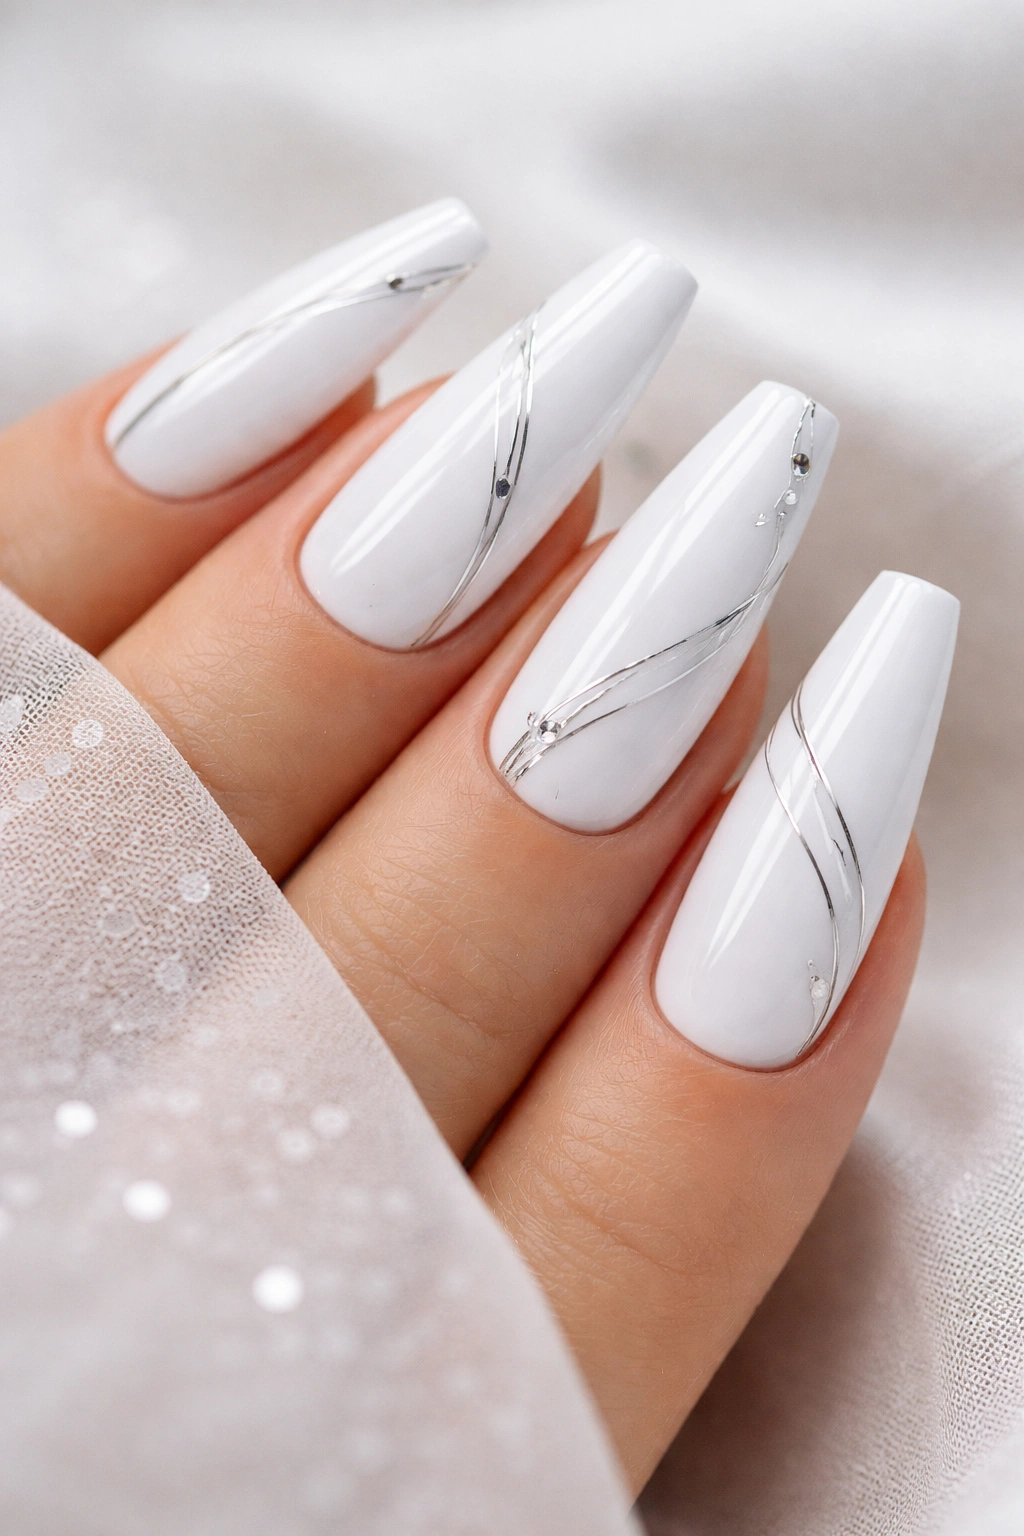
Silver is simultaneously modern and timeless, making it a perfect accent metal for white nails. Unlike gold’s warmth, silver has a cool, clean quality that makes white appear almost impossibly bright. Small silver details—thin lines, small geometric shapes, or delicate patterns—feel elegant without overwhelming the simplicity of the base.
Silver’s Cool Elegance
Silver accents on white create a sophisticated, slightly futuristic aesthetic. The cool tones together feel fresh and intentional. This is a perfect choice if your natural aesthetic leans toward minimal, geometric, or contemporary design rather than warm and romantic.
Silver Accent Application
- Paint a bright white base (look for formulas specifically labeled “bright white” rather than off-white or cream)
- Use a silver nail polish or gel to create your accent design—thin lines, small dots, geometric shapes
- Keep accents purposeful and strategic rather than scattered randomly
- Metallic silver topcoats can also be used for a cohesive, uniform shine
- Finish with a clear gloss to protect all elements and maintain shine
Worth knowing: Silver accents photograph beautifully and look crisp in both natural and artificial light, making this a great choice if you’re going to be on camera or taking photos of your nails.
13. White with Delicate Floral Line Work
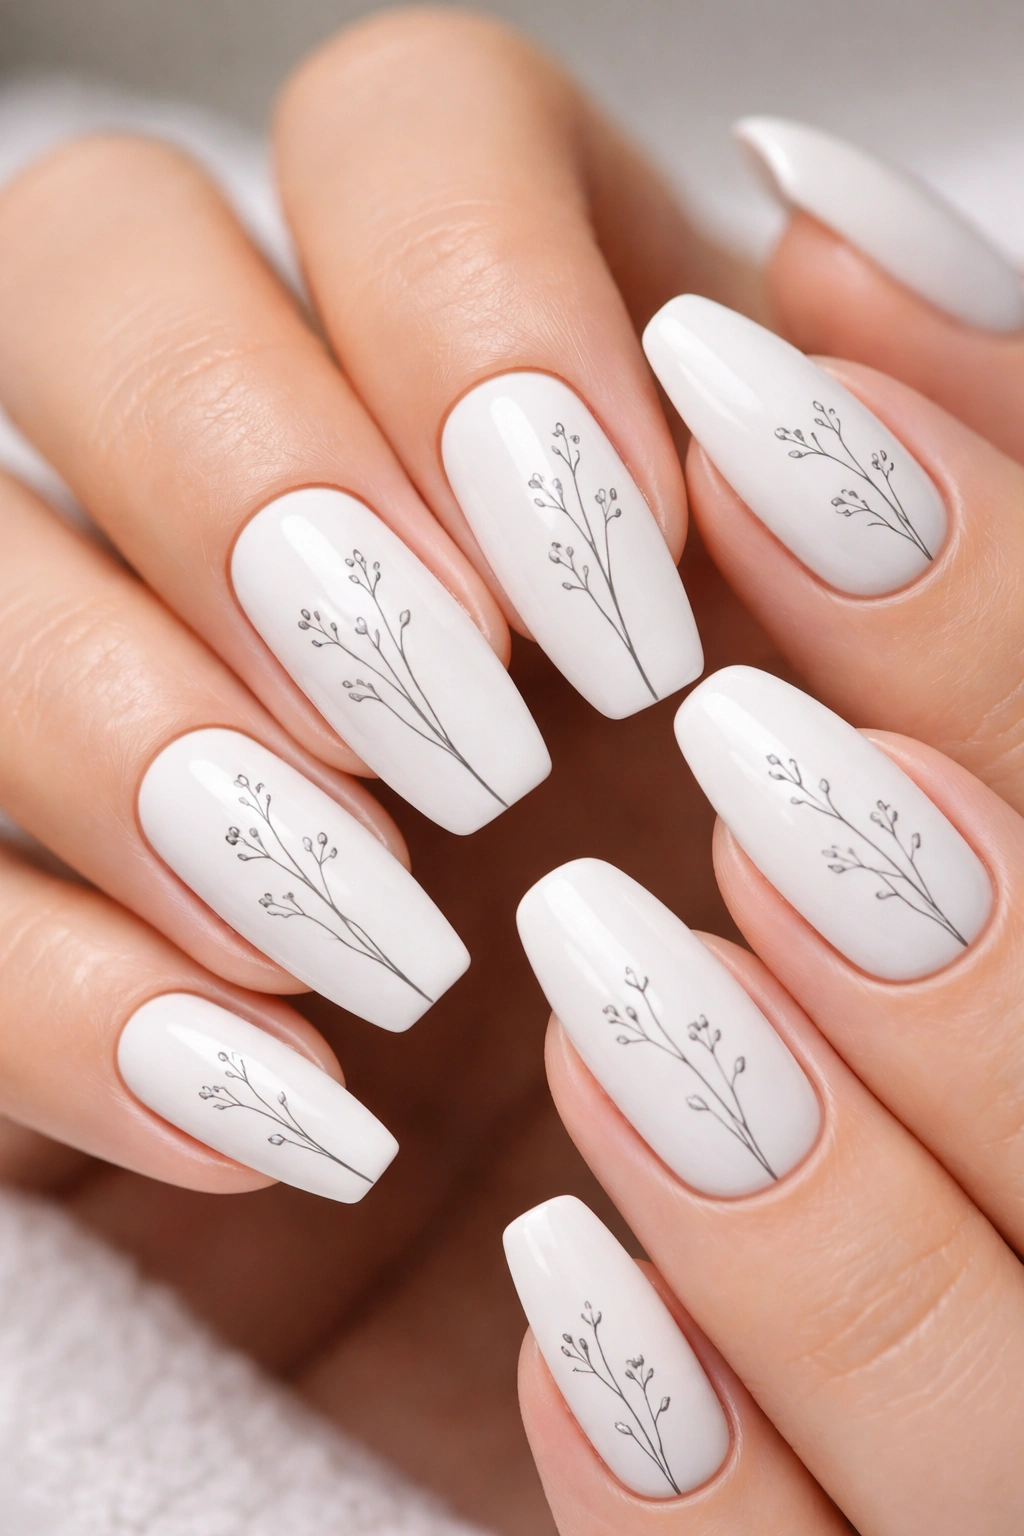
Florals are experiencing a genuine design renaissance on nails, but the most sophisticated versions use minimal, delicate line work rather than detailed paintings. A few single-line flower stems with tiny blossoms on white creates an organic, artistic feel that’s personal without being overstated.
The Beauty of Botanical Minimalism
Delicate floral line work appeals to people who love nature and organic design but want something that feels contemporary and artistic. Single-line botanicals have an elegance that detailed florals sometimes lack—they’re more about suggestion and flow than photorealistic detail. This approach works beautifully on medium coffin nails.
Floral Line Work Method
- Paint your white base and let it dry fully
- Use a thin brush or nail art pen to draw delicate plant forms in white, black, or a muted tone
- Single-line florals (where you draw flowers and stems without filling them in) feel more sophisticated than detailed versions
- Keep designs to one or two accents per nail rather than covering the entire surface
- Simple line-drawn stems with tiny dots for flowers is extremely effective and achievable
Pro tip: If you’re not confident in freehand drawing, use a nail stamper with botanical designs, or draw designs on paper first to practice before committing to your nails.
14. Matte White with Chrome or Metallic Accent Tips
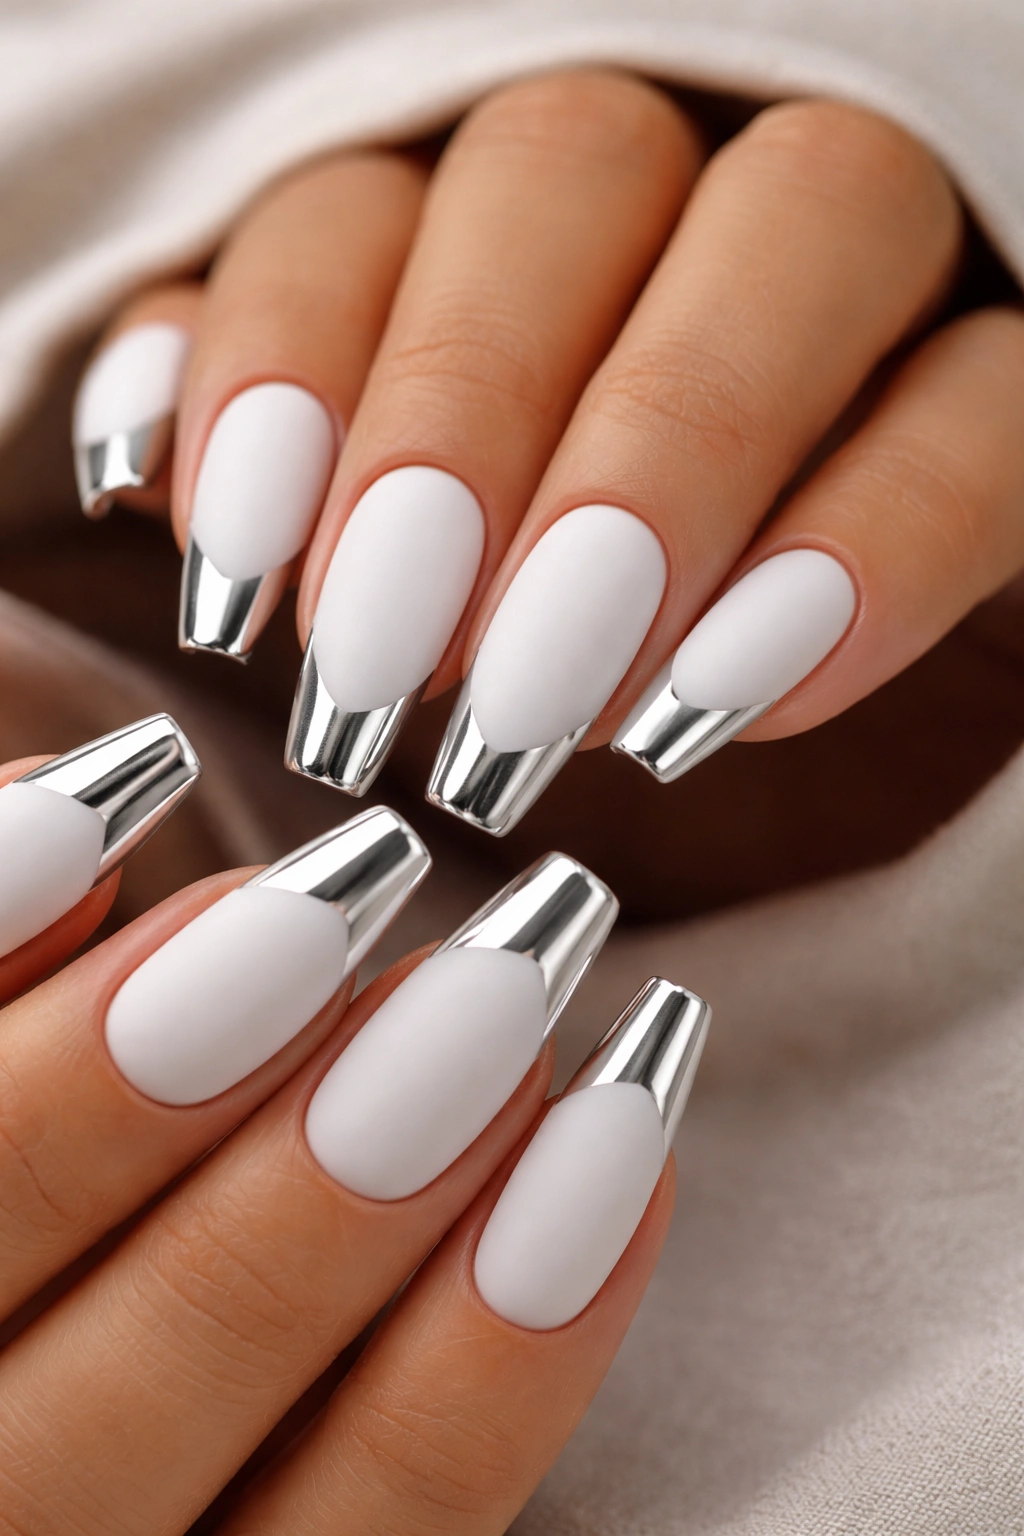
Mixing matte and metallic finishes creates dynamic contrast—the soft matte base makes any metallic element feel more striking. Chrome or metallic tips on a matte white base feel contemporary and intentional. This works as a modern interpretation of the French manicure that feels current and distinctive.
Finish Contrasts That Work
The interplay between matte (light-absorbing) and chrome (light-reflecting) finishes creates visual interest and dimensionality. Your nails appear sculptural rather than flat. This approach appeals to people who appreciate textural and material contrasts in their aesthetic choices.
Creating Matte with Metallic Tips
- Paint your entire nail with a matte white polish
- Allow it to dry completely—any tackiness will interfere with the metallic polish adhesion
- Use a chrome or metallic polish to paint only the tips of your nails in a clean line
- You can create a sharp line or a soft gradient from matte to metallic
- The matte polish acts as a base to help the metallic polish adhere better and appear more intense
- Finish with a topcoat that seals both finishes without flattening the matte
Worth knowing: Chrome polishes can be finicky and sometimes require a special top coat to prevent smudging or chipping—follow the product instructions carefully for best results.
15. White with Subtle Ombre Colored Accent
An ombre accent that transitions from white into a subtle color creates visual interest while maintaining the sophisticated white aesthetic. Rather than fully colored nails, the design stays predominantly white with a whisper of color bleeding in from one side or the tip. This is drama with restraint.
Why Subtle Ombre Works
An ombre that transitions from white into a very pale blush, peach, or nude creates a unique manicure that’s personal without being loud. Your nails read as white at first glance, but closer inspection reveals the color transition. It’s sophisticated and shows intentionality while remaining understated.
Ombre Accent Technique
- Apply a white base coat to your entire nail
- Use a makeup sponge to blend a very pale shade (barely-there peachy, blushing pink, or barely-there lavender) into one corner or along the tip
- The transition should be soft and gradual—not a harsh line
- Build the color slowly, using multiple light sponge applications rather than trying to achieve intensity in one pass
- Seal with a glossy topcoat that enhances the gradient and adds shine
Pro tip: This design is forgiving because the color is so subtle that slight imperfections in the blending actually look intentional rather than like mistakes.
Final Thoughts
White coffin nails on medium-length digits offer endless possibilities for expressing your personal style while maintaining sophistication. The key is choosing a design that genuinely resonates with you—whether that’s a pristine glazed finish, delicate artwork, textured elegance, or metallic accents.
The beauty of white as a base is that it works for every occasion and complements every skin tone. Your professional life doesn’t demand neutrality in exchange for elegance, and your weekend aesthetic doesn’t require sacrifice of functionality. Medium coffin nails specifically hit that sweet spot where you get visual impact without the maintenance burden or practicality concerns of ultra-long nails.
Start with one of these designs that speaks to your aesthetic, invest in quality products, and remember that consistency in maintenance keeps any manicure looking intentional. Schedule touch-ups regularly, moisturize your cuticles, and treat your nails gently. Your manicure is one of the first things people notice about your hands—make it count.
