

Long oval nails have become a beloved canvas for nail art because they offer the perfect balance of sophistication and playfulness. The elongated shape provides ample space for creative designs without the fragility of extra-long shapes, making them accessible for everyday wear. Swirl designs in particular work beautifully on this nail shape—the curves naturally follow the contours of the nail, creating an organic flow that feels effortless and fun.
What makes swirl nails so appealing is their versatility. You can interpret “swirl” in countless ways: soft, flowing ribbons of color that dance across the nail, tight spiral patterns, marble-like swirled combinations, or psychedelic blends that feel spontaneous and modern. They read as creative and artistic without requiring advanced technical skills, making them perfect for anyone who wants a design that stands out without looking overly complicated. Whether you’re going for pastel elegance, bold statement vibes, or dreamy aesthetic energy, swirl designs adapt beautifully to your vibe.
In this collection, you’ll discover twelve distinct swirl nail designs that all work gorgeously on long oval shapes. Each one brings its own personality to the table—some are calm and meditative, others playful and energetic, and a few push into territory that’s genuinely bold. The beauty of these designs is that most can be created at home with patience and the right tools, or brought to life by a nail technician who specializes in freehand art. Let’s dive into the designs that will have you excited to show off your nails.
1. Pastel Rainbow Swirls with Soft Ombre Blend
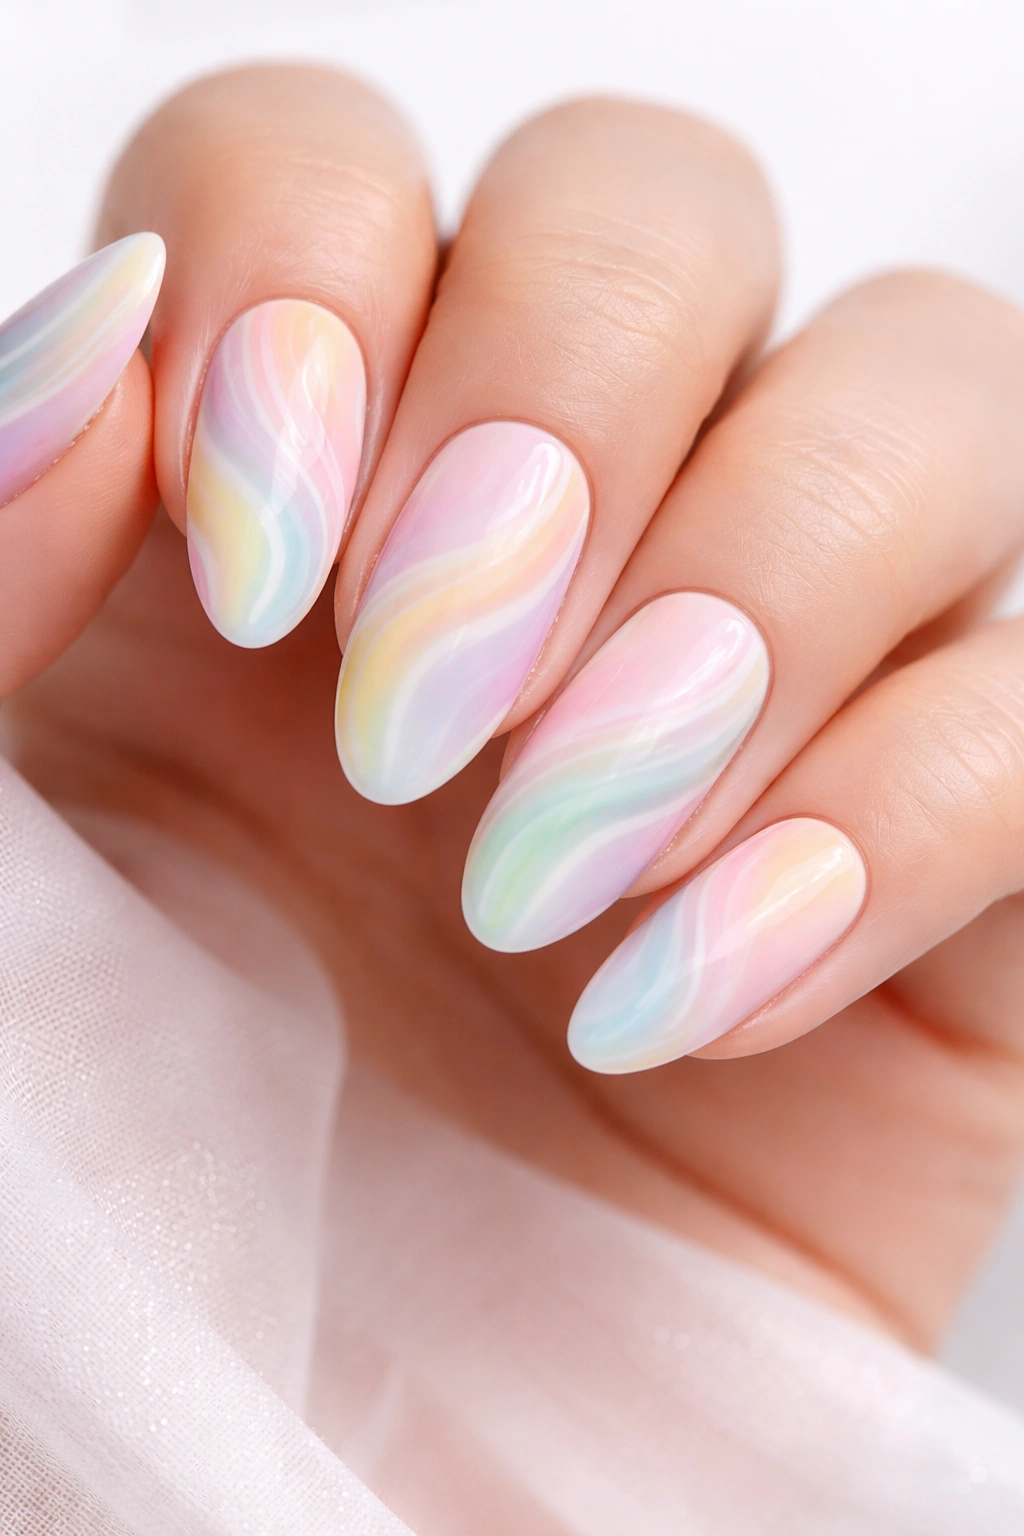
Pastel rainbow swirls feel like edible art—soft peachy tones flowing into buttery yellows, mint greens, lavender, and pale pinks all swirled together on a light cream or white base. This design works because it’s cheerful without being aggressive, and the pastel palette keeps it refined enough for professional settings while still feeling playful and creative.
Why This Design Feels So Joyful
The magic of pastel swirls lies in their ability to evoke positivity without demanding attention. Each color is muted just enough that they blend smoothly into one another, creating an ombre effect that looks intentional and polished rather than accidental or messy. The soft transitions feel calming, yet the sheer variety of color keeps the design energetic.
How to Create This Look
- Use a white or very pale cream base as your foundation
- With thin nail art brushes, add small sections of each pastel color directly onto the nail surface while the base is still wet or sticky
- Use a clean, dry brush to gently swirl and blend the colors together, working quickly before they dry
- The key is light pressure—you’re blending, not scrubbing, which keeps the pastel tones intact
- Seal with a glossy topcoat that enhances the color depth
- Total time investment: 15-20 minutes with practice
Pro tip: Paint your swirls on a slightly sticky base coat (don’t cure it fully if using gel) so the colors blend more easily before setting.
2. Monochrome Black and White Swirls on Nude
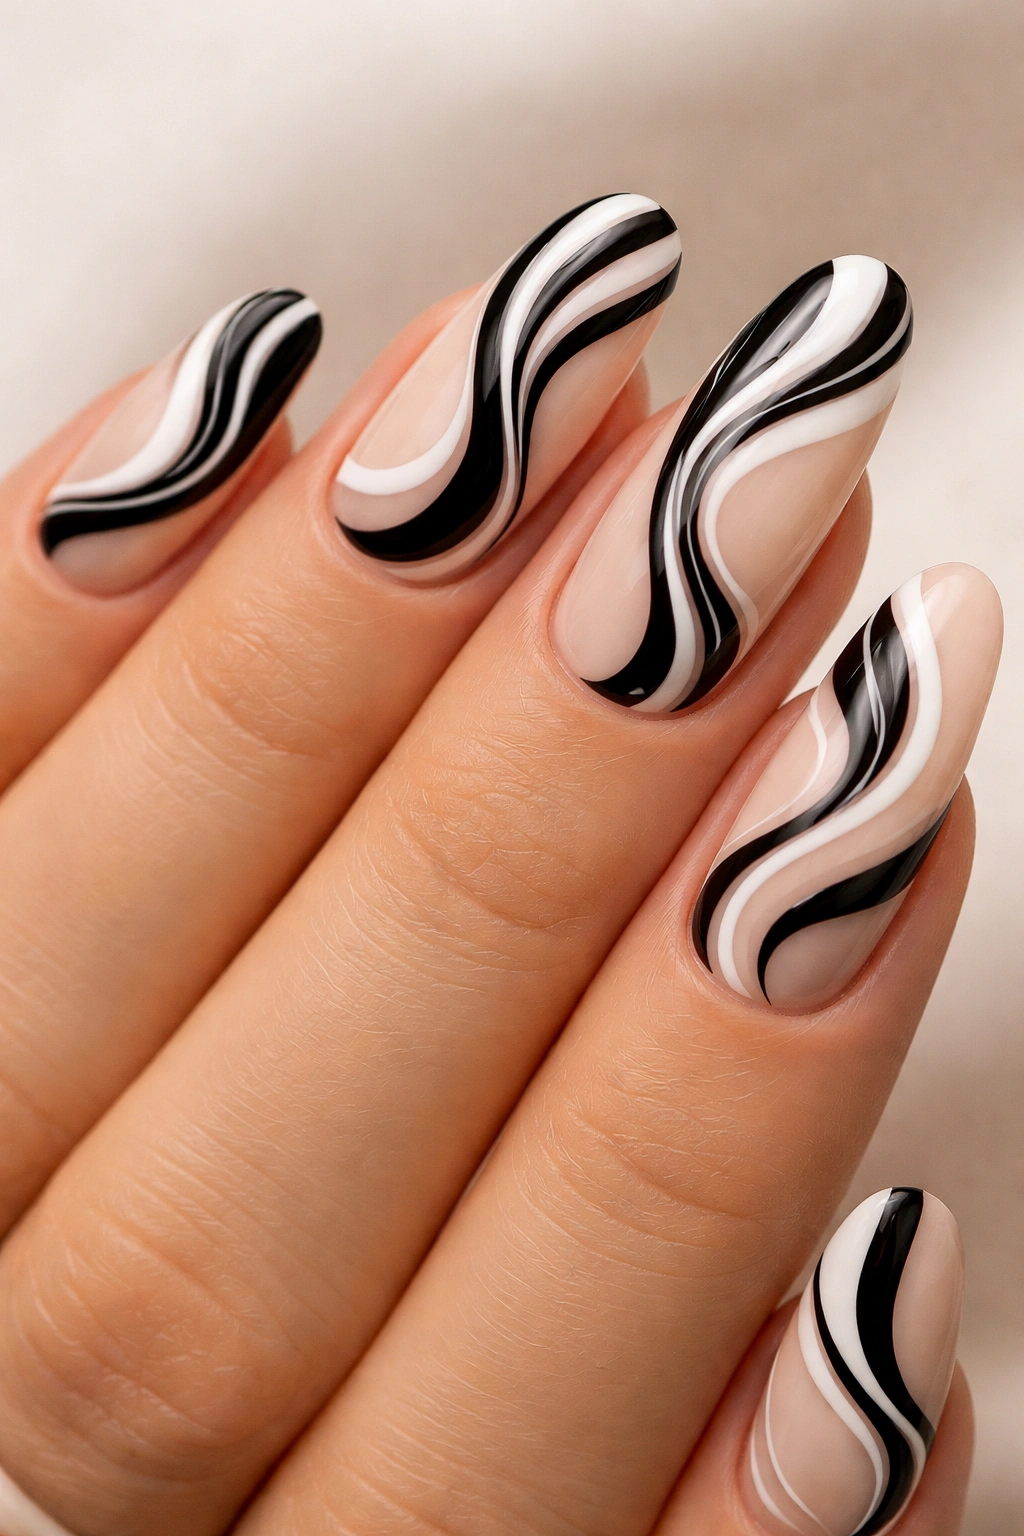
Black and white swirls over a warm nude base create striking contrast while maintaining an understated elegance. The bold lines of black paired with clean white curves feel modern and graphic, yet the nude background keeps everything grounded and wearable.
The Power of Contrast in Monochrome Design
What makes this combination work is the interplay between figure and ground. Your eye can’t decide whether to follow the black swirls or the white ones—they dance together, creating movement and visual interest. The nude base acts as a neutral referee, preventing the design from feeling harsh or overwhelming.
Execution Method
- Start with a warm beige or tan base that complements your skin tone
- Using a fine-tipped brush, freehand long, flowing lines in glossy black from cuticle to tip, allowing them to curve and dance across the nail
- Go back with white and create counter-swirls that weave between the black lines
- Don’t aim for perfect symmetry—asymmetrical placement feels more intentional and artistic
- Two generous coats of clear topcoat make the contrast pop
- Best suited for: everyday wear where you want impact without color
Worth knowing: This design works on any base color, but nude, black, white, and gray are the classic combos that never feel dated.
3. Ocean Vibes with Turquoise and Teal Swirls
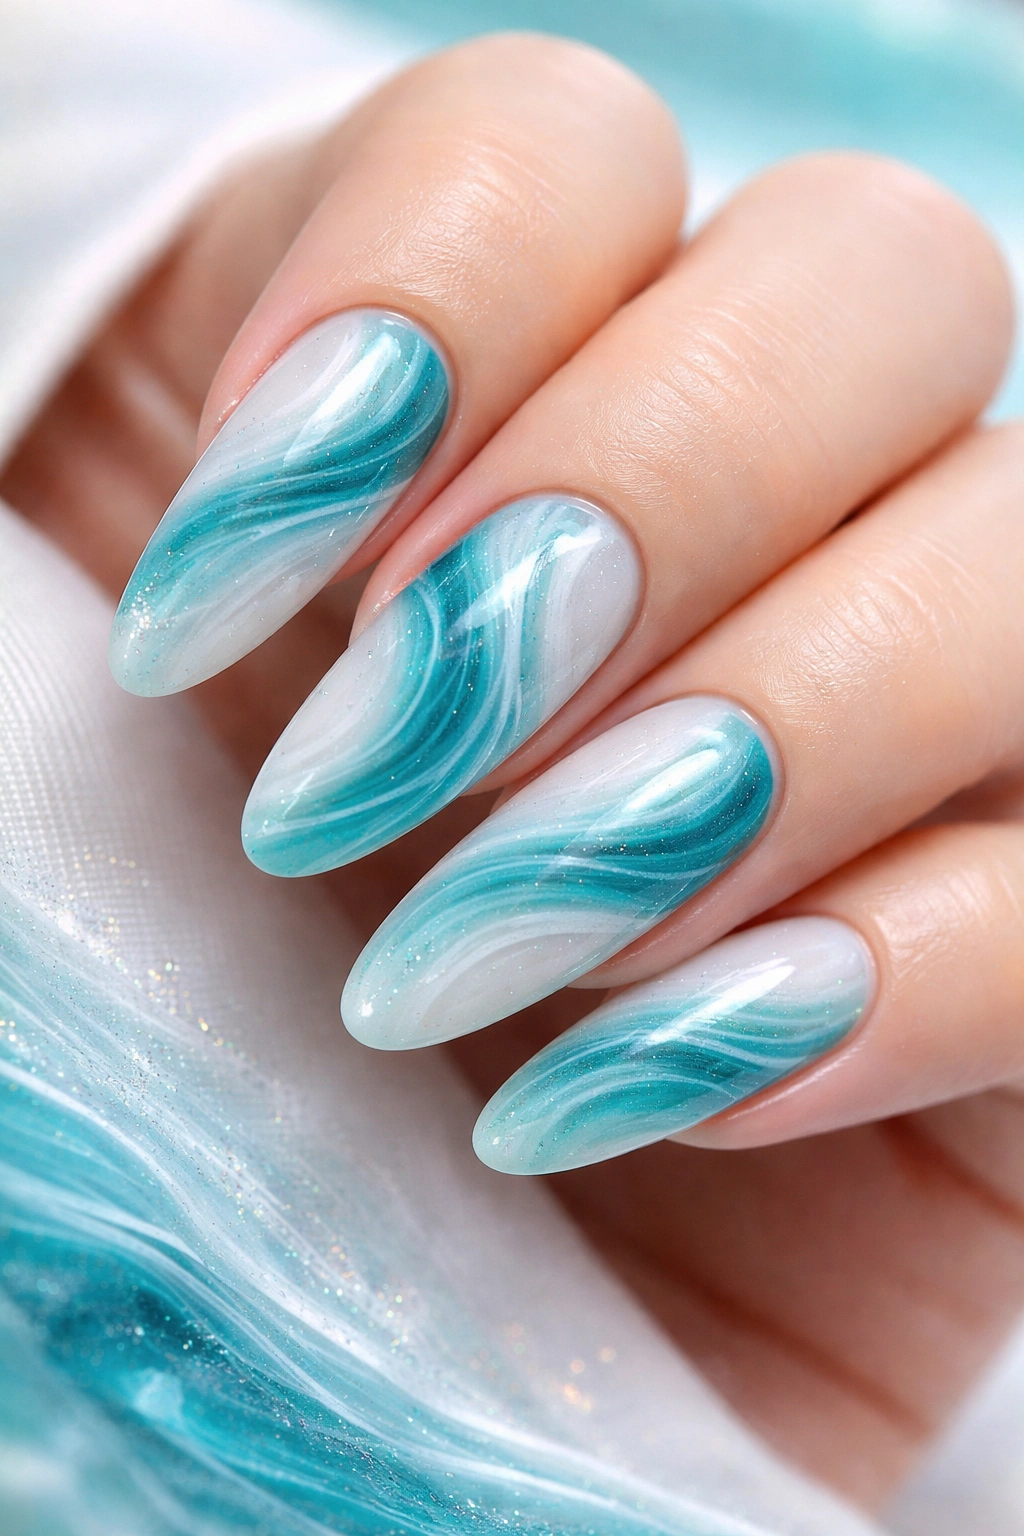
Imagine the swirling patterns of water—turquoise and teal inks diffusing into soft white, creating that mystical ocean gradient. This design brings calm, meditative beach energy to your nails while remaining sophisticated enough for any occasion.
Why Ocean Swirls Feel So Soothing
Water is one of the most visually soothing elements in design, and swirled recreations tap into that biological calming response. Turquoise shades sit at the intersection of blue and green, colors both associated with nature and relaxation. When swirled together, they create depth that makes you want to stare at your nails.
Creating the Aquatic Effect
- Use a white or very pale blue base
- Apply turquoise and darker teal in sections across the nail
- Before curing or drying, use a soft brush or sponge to blend the colors where they meet, creating that cloudy, diffused water effect
- Add delicate white lines that follow the natural movement of the swirls, enhancing the watery feel
- One or two coats of shimmer or pearl topcoat adds an aquatic shine that makes it feel like the nails are catching light off water
- Drying time: 5-10 minutes, or cure under lamp
Insider note: If you want it to feel more playful, add tiny metallic gold accents that peek through like sunlight reflecting off water.
4. Sunset Gradient Swirls in Coral, Orange, and Pink

This design captures the exact moment the sun dips below the horizon—warm coral fading into tangerine orange, then shifting into bubblegum pink. It’s inherently joyful and energetic, perfect for anyone who wants their nails to radiate summer vibes year-round.
The Warmth of Warm-Toned Swirls
Warm colors like coral and orange trigger happy, energetic responses in the brain. When swirled together, they create a sense of movement and warmth that feels genuinely uplifting. The transition from orange to pink adds sophistication, preventing it from feeling like a simple gradient.
Application for Maximum Impact
- Base: neutral nude or pale peach
- Paint coral in a section, orange in the middle, pink toward the tip
- Using a clean, slightly damp brush, sweep horizontally across the nail in gentle curves, blending each color into the next
- Repeat with vertical swirls to create a more organic, less directional effect
- The goal isn’t perfect blending—you want visible color blocks that flow together, not disappear
- Finish with a satin or matte topcoat for a modern, velvety finish
- Or use glossy for a wet, drippy candy look
Pro tip: This design pops even more if you add a single gold or metallic accent swirl running through the middle, catching the colors like a sun ray.
5. Psychedelic Purple and Pink Swirls with Holographic Flakes

Bold, unapologetic, and slightly trippy—deep purple swirled with hot pink and electric magenta, punctuated with holographic glitter flakes that catch light at every angle. This is the design for when you want to declare your confidence and creativity to the world.
Why Bold Swirls Command Attention
Bright, saturated colors demand to be noticed. When swirled together in unexpected combinations, they create visual tension that feels exciting rather than chaotic. The addition of holographic elements transforms the design into something that literally shifts and sparkles, adding an extra dimension of playfulness.
Creating Bold, Confident Swirls
- Choose a deep burgundy or dark purple base to anchor the design
- Mix in sections of hot pink, electric magenta, and even a touch of neon yellow
- Use a sponge dabbing technique to blend colors on the nail, working in sections rather than trying to smooth everything
- Once the base is set, sprinkle holographic or opalescent flakes into the sticky surface, pressing gently so they adhere
- Seal with thick, glossy topcoat that makes the flakes float on the surface
- Cure time: standard, but the effect is worth the wait
Worth knowing: This design is bold enough to need confidence to wear, but it’s also conversation-starting in the best way.
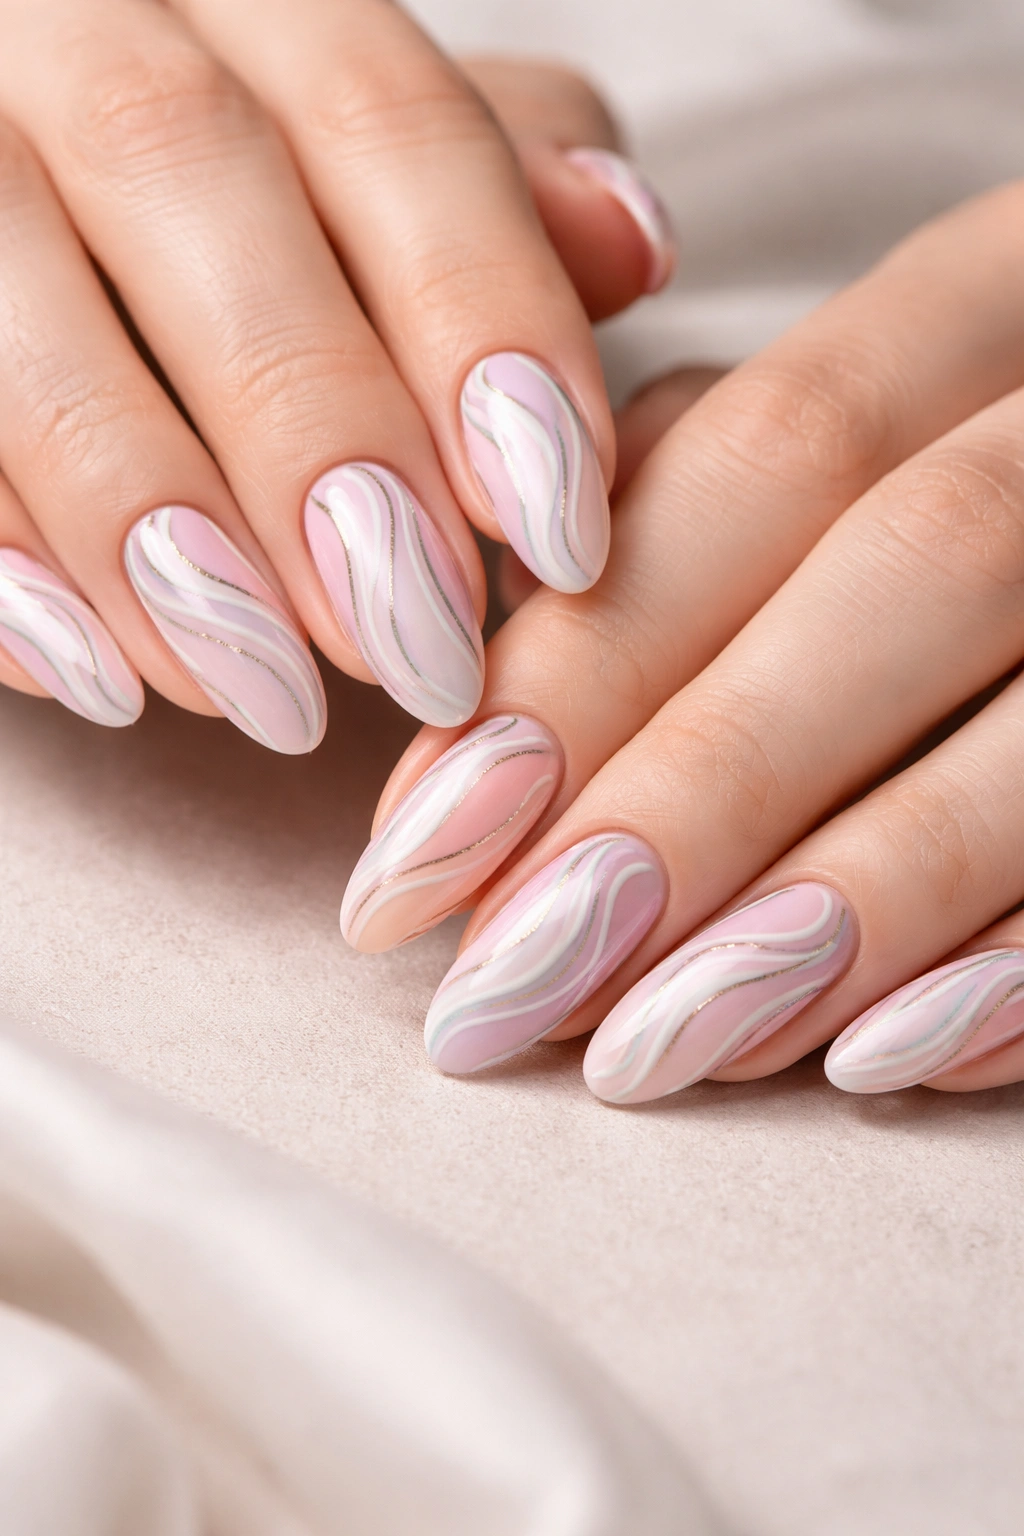
6. Soft Lavender and Cream Swirls with Tiny Dots
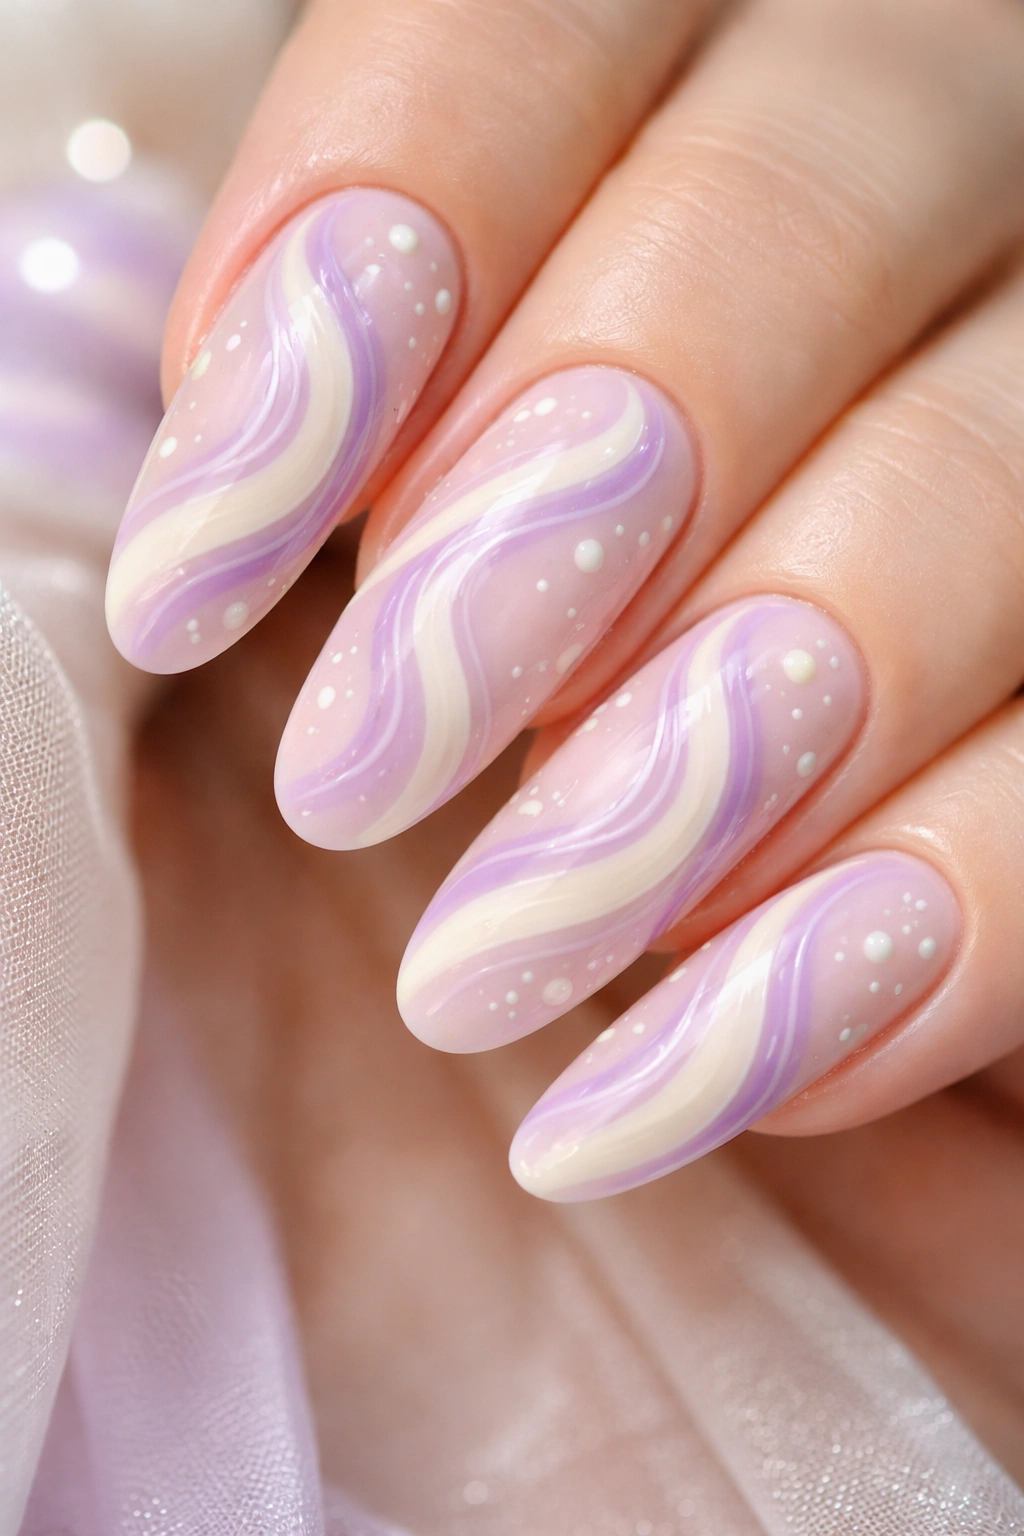
Delicate and dreamy, soft lavender swirled with white and cream, then dotted with tiny pearls or contrasting dots in lavender and white. This design feels vintage-inspired yet modern, playful yet refined—the dots add whimsy without overwhelming the flowing swirls.
The Charm of Minimalist Embellishment
Adding small dots to swirled base designs creates a visual rhythm that guides your eye around the nail. The dots feel like punctuation in a beautiful sentence—they don’t interrupt the flow; they enhance it. This particular color combination reads as both romantic and playful simultaneously.
Step-by-Step Creation
- Base: soft lavender or pale purple
- Using a thin brush, create white and cream swirls that flow diagonally across the nail, keeping them loose and organic
- Once dry, dot a thin brush or dotting tool into concentrated lavender or white polish
- Create tiny dots in a scattered pattern across each nail—think constellation rather than grid
- Some dots should sit on the swirls, others in the negative space between them
- One final coat of glossy topcoat to unify everything
- The dots won’t blur because they’re applied after the swirls set
Pro tip: If you’re nervous about freehand dots, use a dotting tool, which gives you more control than a brush.
7. Mint and Gold Swirls with Elegant Metallic Accents
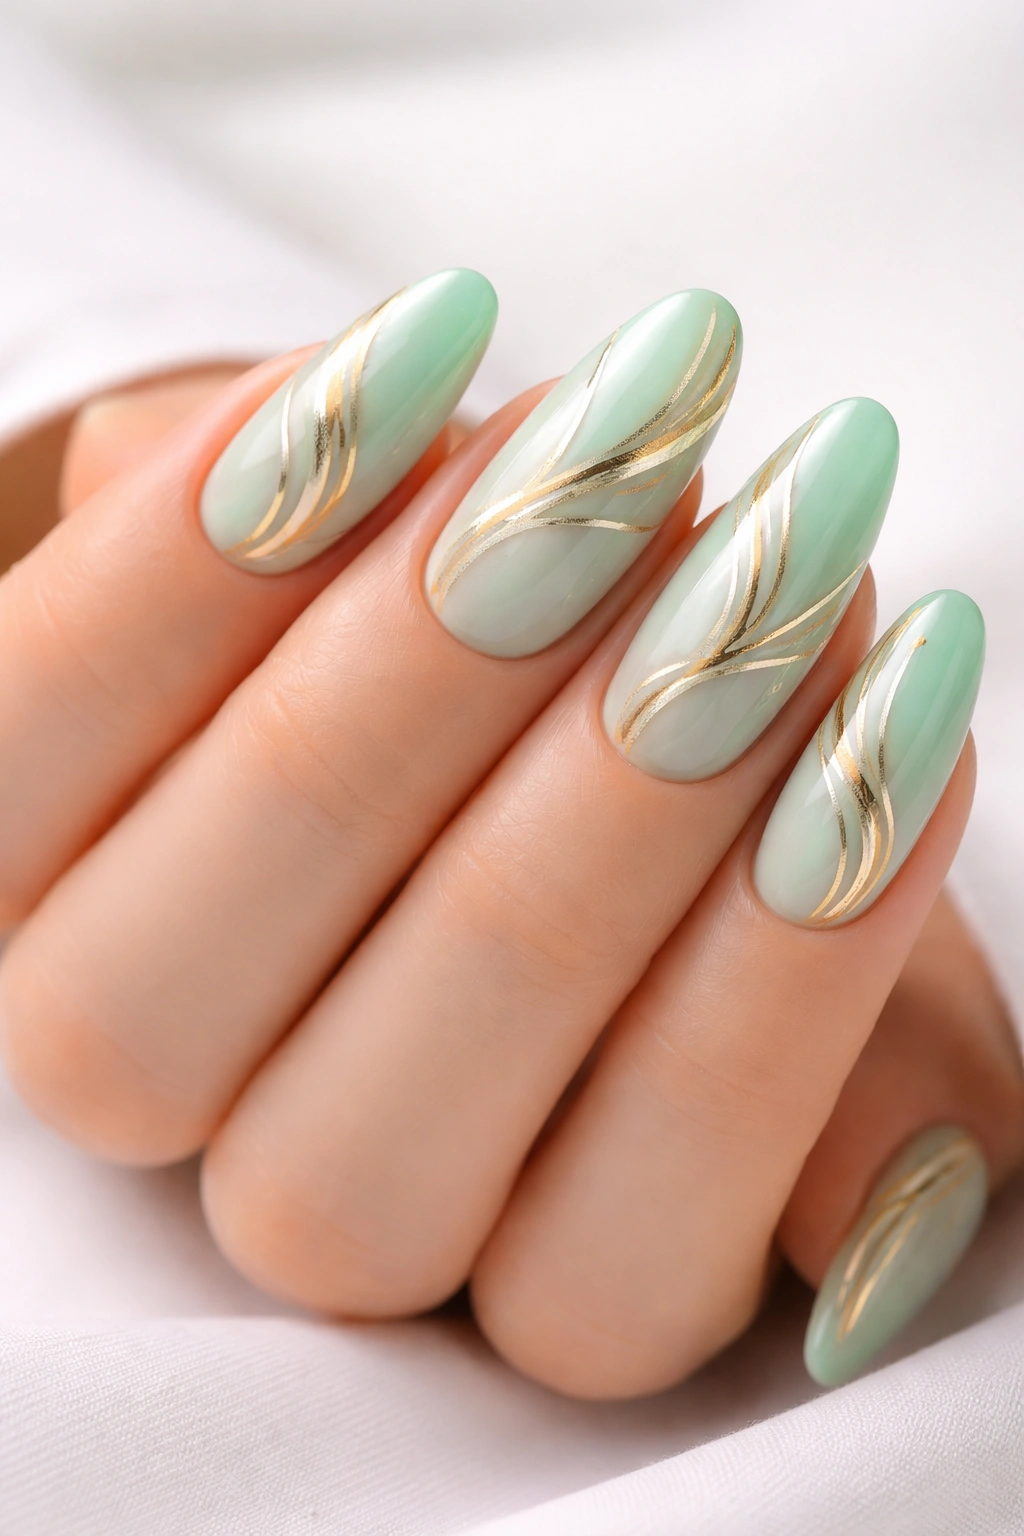
Pale mint green with delicate gold swirls running through it—sophisticated, fresh, and just playful enough. This design hits that sweet spot between “everyday professional” and “creative statement,” making it ideal for anyone who wants their nails to feel special without feeling out of place anywhere.
Why Mint and Gold Is an Eternal Combination
Mint reads as fresh and clean, while gold brings warmth and luxury. Together, they create a balance between contemporary coolness and timeless elegance. Gold has enough visual weight to anchor a lighter color, preventing the overall look from feeling washed out.
Achieving the Swirl-and-Metallic Combo
- Base: pale mint or pistachio green
- Use a thin brush with metallic gold polish to create sweeping swirls across the nail—some flowing horizontally, others spiraling diagonally
- Don’t aim for symmetry; let the gold lines follow natural curves as if water and gold are dancing together
- Optionally add tiny gold flecks using a sponge dabbing technique to create dimension
- Cure or dry, then seal with glossy topcoat that makes the gold truly luminous
- Best suited for: anyone seeking polished, not playful, energy
Insider note: This design reads differently depending on lighting—indoors it’s understated, in sunlight it’s genuinely gorgeous.
8. Tie-Dye Swirls in Multicolor Chaos for Maximum Fun
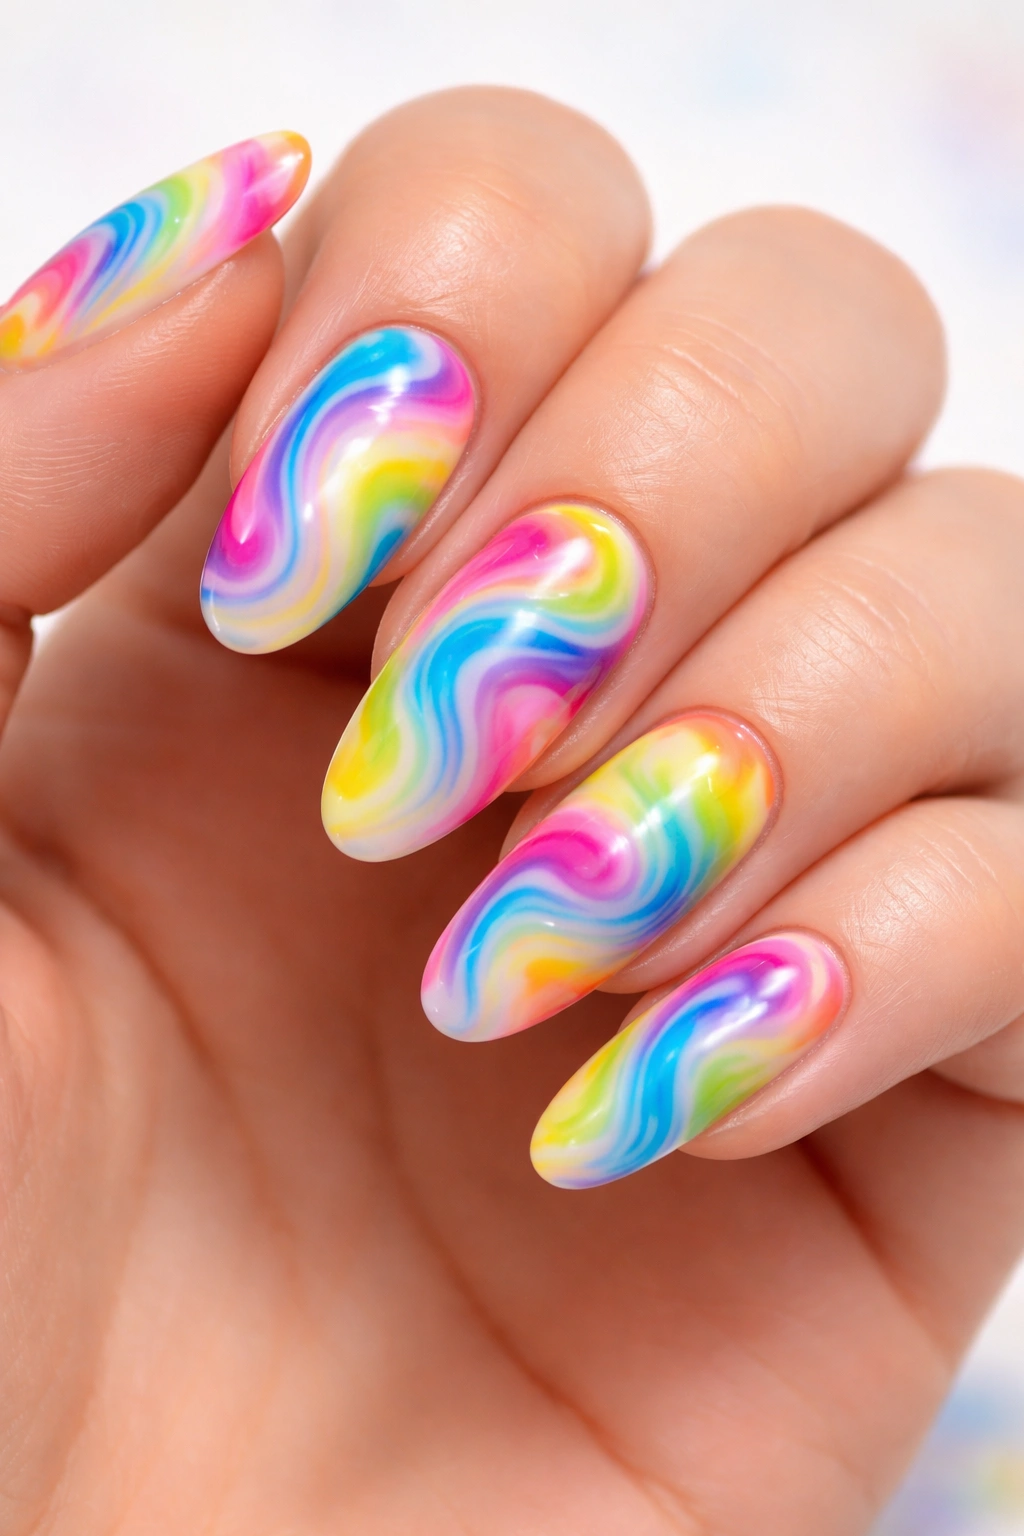
This is the design that throws subtlety out the window and just commits to joy. Multiple bright colors—electric blue, hot pink, lime green, sunshine yellow, and purple—all swirled together in a chaotic, tie-dye explosion that feels spontaneous and hilarious.
Embracing Joyful Chaos in Nail Design
Tie-dye swirls work because there’s no “wrong” way to blend them. The more chaotic and unexpected the color mixing, the more authentically playful it feels. This design is basically giving yourself permission to be bold and imperfect at the same time.
Creating Beautiful Chaos
- Start with a white or pale yellow base
- Apply different bright colors in sections across the nail—don’t overthink placement
- Use a wet brush or sponge to blend where colors meet, creating unexpected new hues at the intersections (blue + pink = purple, yellow + blue = green)
- Embrace the unpredictability—some areas will blend perfectly, others will look almost striped, and that’s the whole point
- One coat of glossy topcoat to seal and intensify the colors
- Dry time: 10-15 minutes
Pro tip: If the result looks too busy, add a single line of metallic silver or gold running down the center to anchor the chaos visually.
9. Black Base with White and Neon Swirls for Bold Contrast
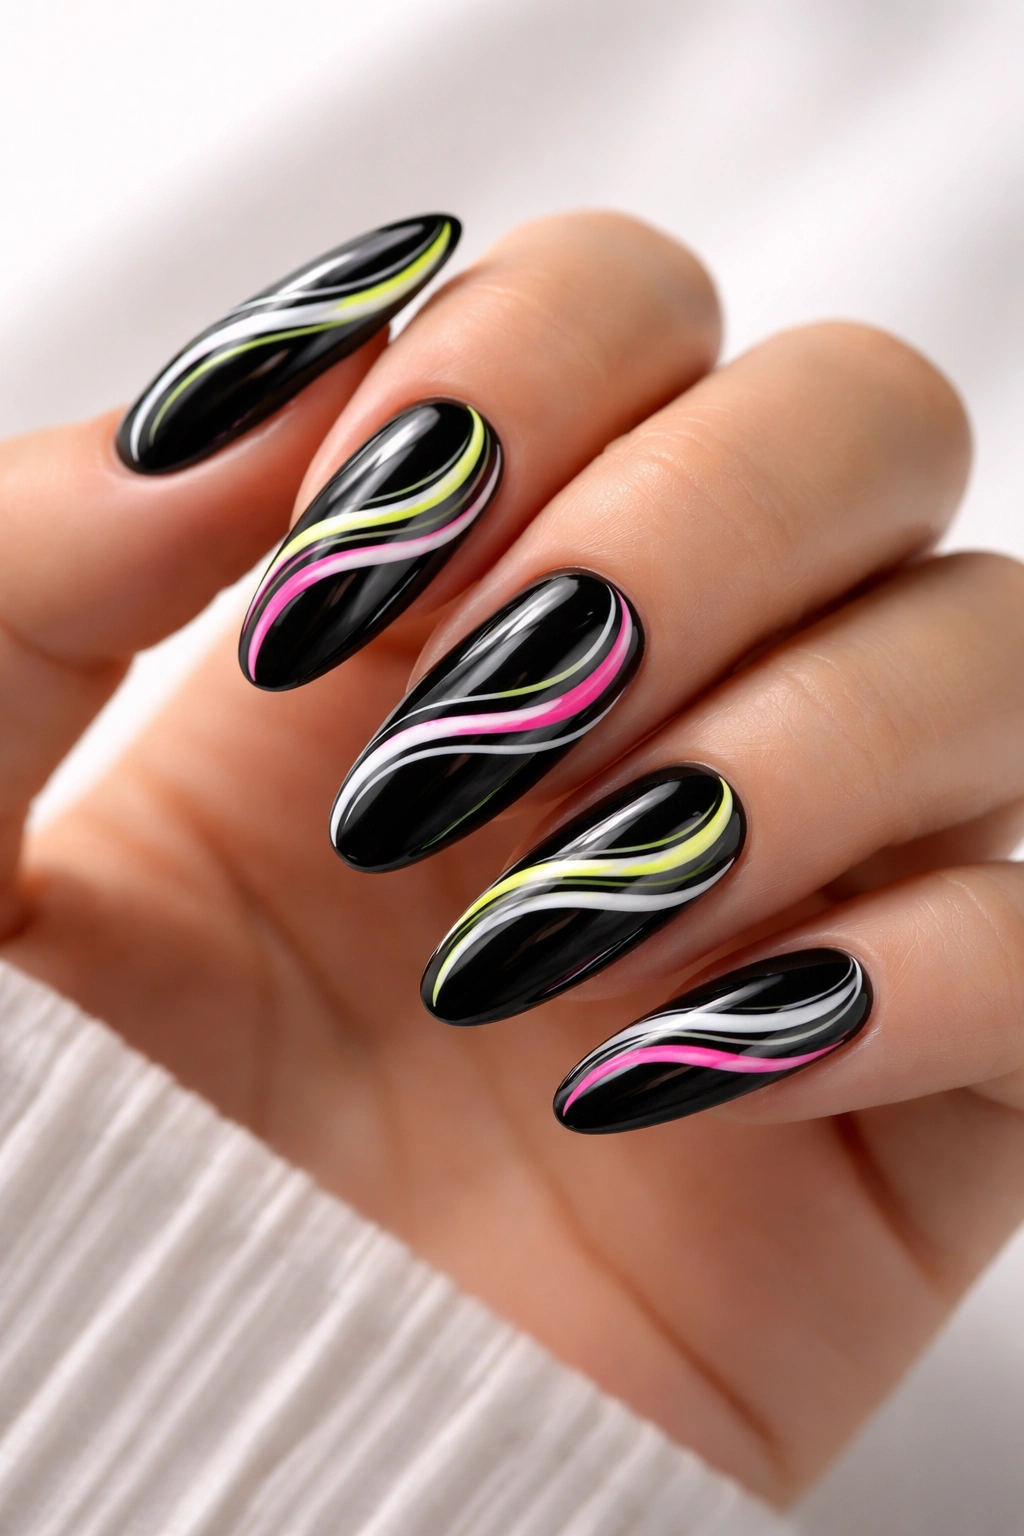
Jet black base with electric white and hot neon accents swirled in sharp, deliberate strokes. This design feels edgy and modern, like graffiti art translated to fingernails—it’s bold without being aggressive because the white and neon act as highlights rather than the main event.
The Strength of High Contrast Design
Black as a base color is underrated. It makes every other color sing brighter. White neon swirls against black create maximum contrast and visual impact without requiring multiple base colors. The design feels graphic and intentional—the opposite of accidental.
Executing Sharp, Intentional Swirls
- Base: jet black, full opacity, completely cured or dried
- Using a very fine brush with white gel or polish, create bold, confident lines that swirl across the nail in varied directions
- Don’t be tentative—swirls on black demand confidence and clean lines
- Add thin lines of neon yellow, neon pink, or neon green between or on top of the white swirls
- The neon acts as accent and heat—just a touch is enough to create impact
- Cure or dry, then seal with glossy topcoat for maximum shine and contrast
- Total effect: graphic, modern, and distinctly playful
Worth knowing: This design is striking enough that keeping other nails simple (just black) might look even cooler than matching all ten.
10. Dusty Rose and Champagne Swirls for Romance and Shimmer
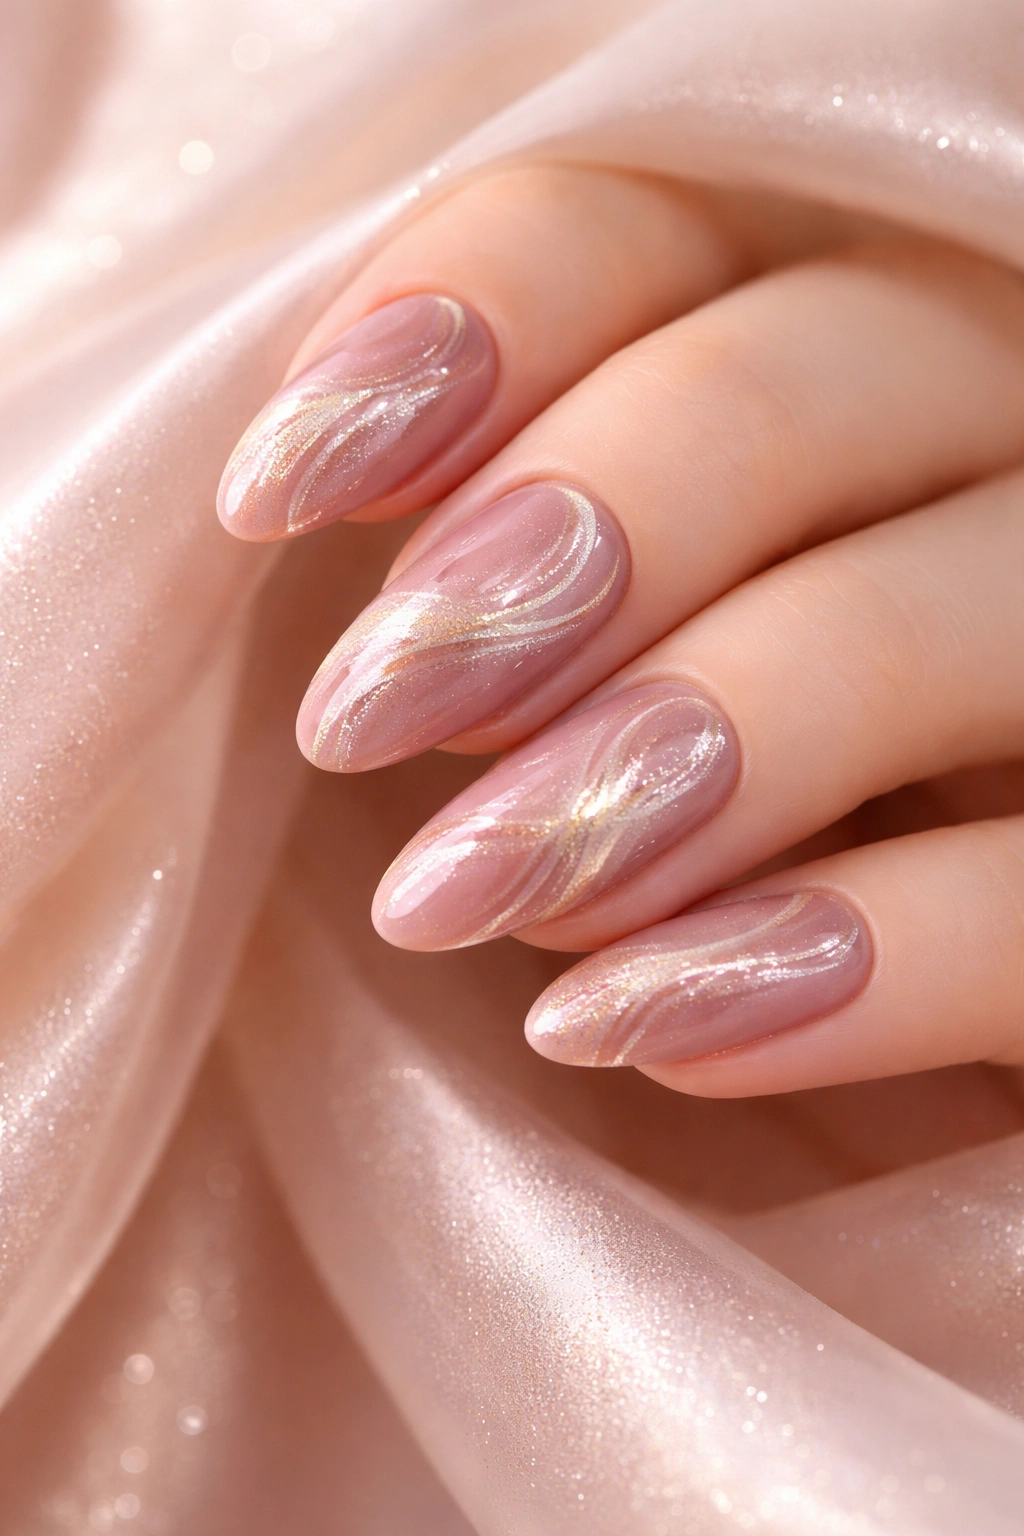
Dusty rose—that muted, slightly gray-toned pink—swirled with champagne, gold, and white. This design feels romantic, luxe, and undeniably feminine without being cutesy. The shimmer elements catch light subtly, creating dimension that feels intentional and sophisticated.
Why Dusty Rose Exudes Quiet Luxury
Dusty rose occupies a unique place in color psychology—it’s feminine without being saccharine, warm without being aggressive. When paired with champagne and gold shimmer, it becomes instantly luxe. The slightly muted quality prevents it from feeling bubblegum or overly sweet.
Layering for Shimmer and Depth
- Base: dusty rose or mauve pink
- Create sweeping swirls in champagne or pale nude, allowing them to flow across the nail in graceful curves
- Once dry, add delicate gold shimmer lines that follow some (but not all) of the champagne swirls
- The shimmer should catch light without overwhelming the base color
- Consider adding the tiniest touch of white in one or two swirls per nail for additional brightness
- Finish with glossy or satin topcoat depending on whether you want shine or a softer matte
- Best for: date nights, weddings, or when you want nails that feel elevated
Pro tip: Apply the shimmer components while the base is still slightly sticky, so they blend slightly and feel embedded rather than sitting on top.
11. Green and White Marble Swirls with Organic Lines
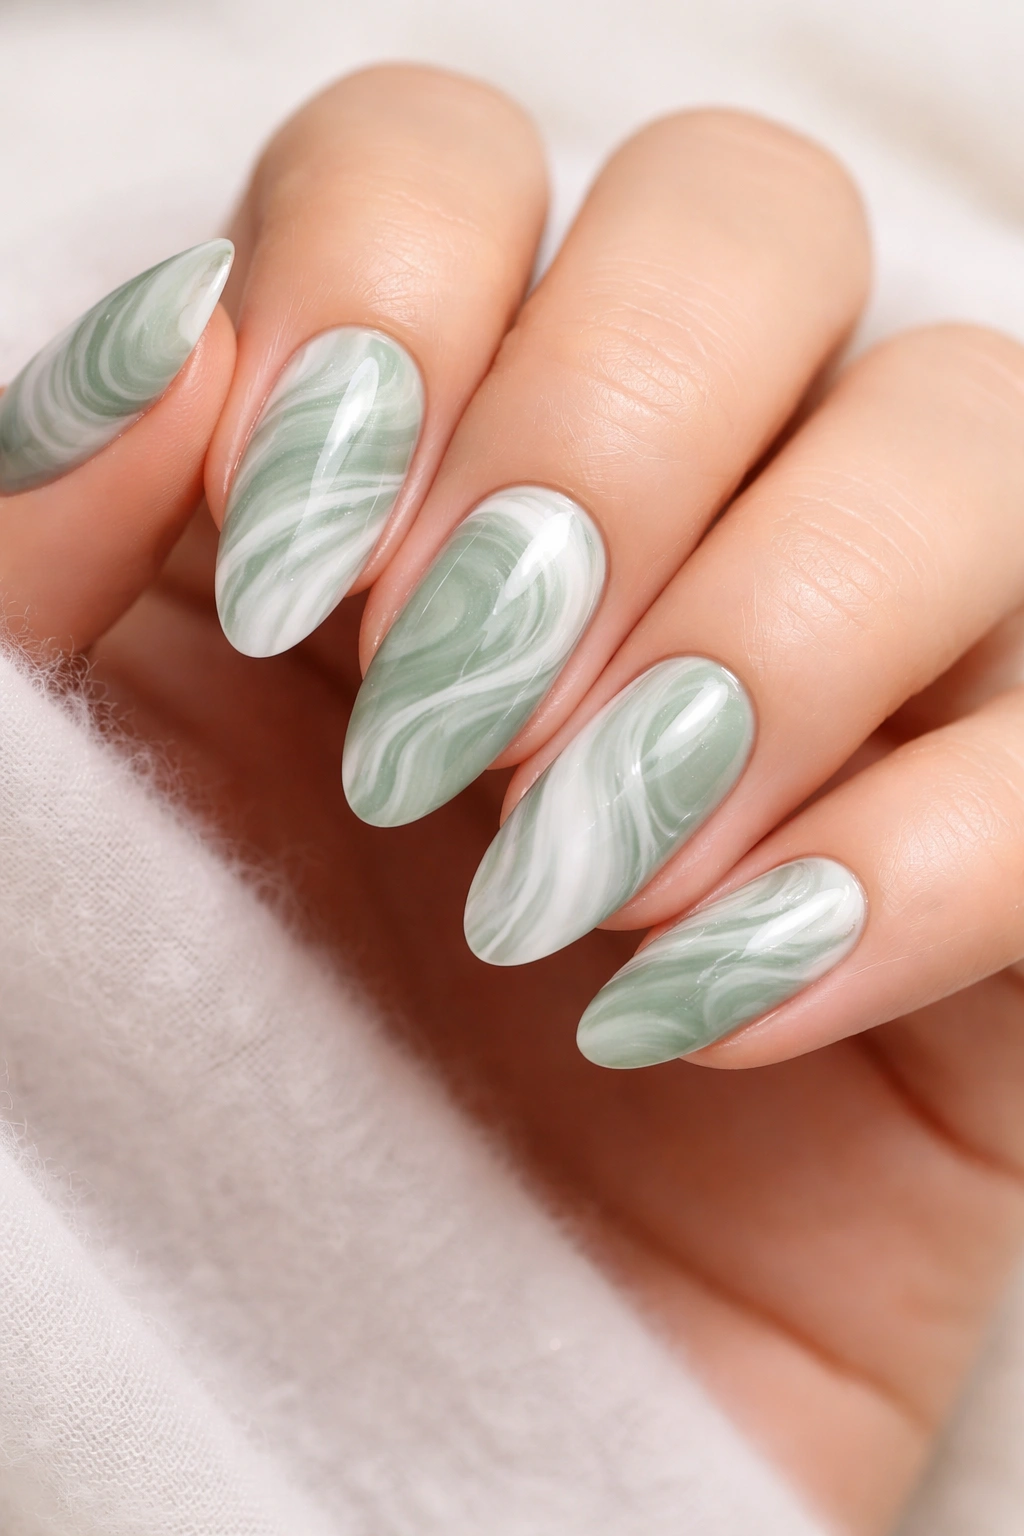
Imagine marble stone rendered in nail form—soft sage green swirled with pure white in organic, natural-looking patterns that feel less like “designed art” and more like “nature’s perfect accident.” This design reads as effortlessly artistic and incredibly sophisticated.
The Appeal of Marble and Organic Patterns
Marble is inherently luxurious because it’s natural, expensive, and timeless. Translating marble patterns to nails creates that same sense of quiet wealth and elegance. The organic, unpredictable lines of marble feel more authentic and refined than geometric patterns because they don’t look forced or overly planned.
Creating Natural-Looking Marble Swirls
- Base: soft sage green or pale green
- Using a thin brush with white polish, create organic, flowing lines that look like the veining in marble stone
- Let the lines curve and intersect naturally, sometimes running parallel, sometimes crossing
- Don’t aim for symmetry—marble veining is random, and so should your lines be
- Add occasional thicker white sections where the veining would be more prominent
- Consider adding the tiniest hint of gray or taupe in some lines to increase the authentic marble effect
- Cure or dry, then seal with glossy topcoat that makes it feel like polished stone
Insider note: This design works even better if each nail has slightly different vein patterns—it feels even more organic and authentic.
12. Rainbow Spectrum Swirls with Metallic Gold Dividers
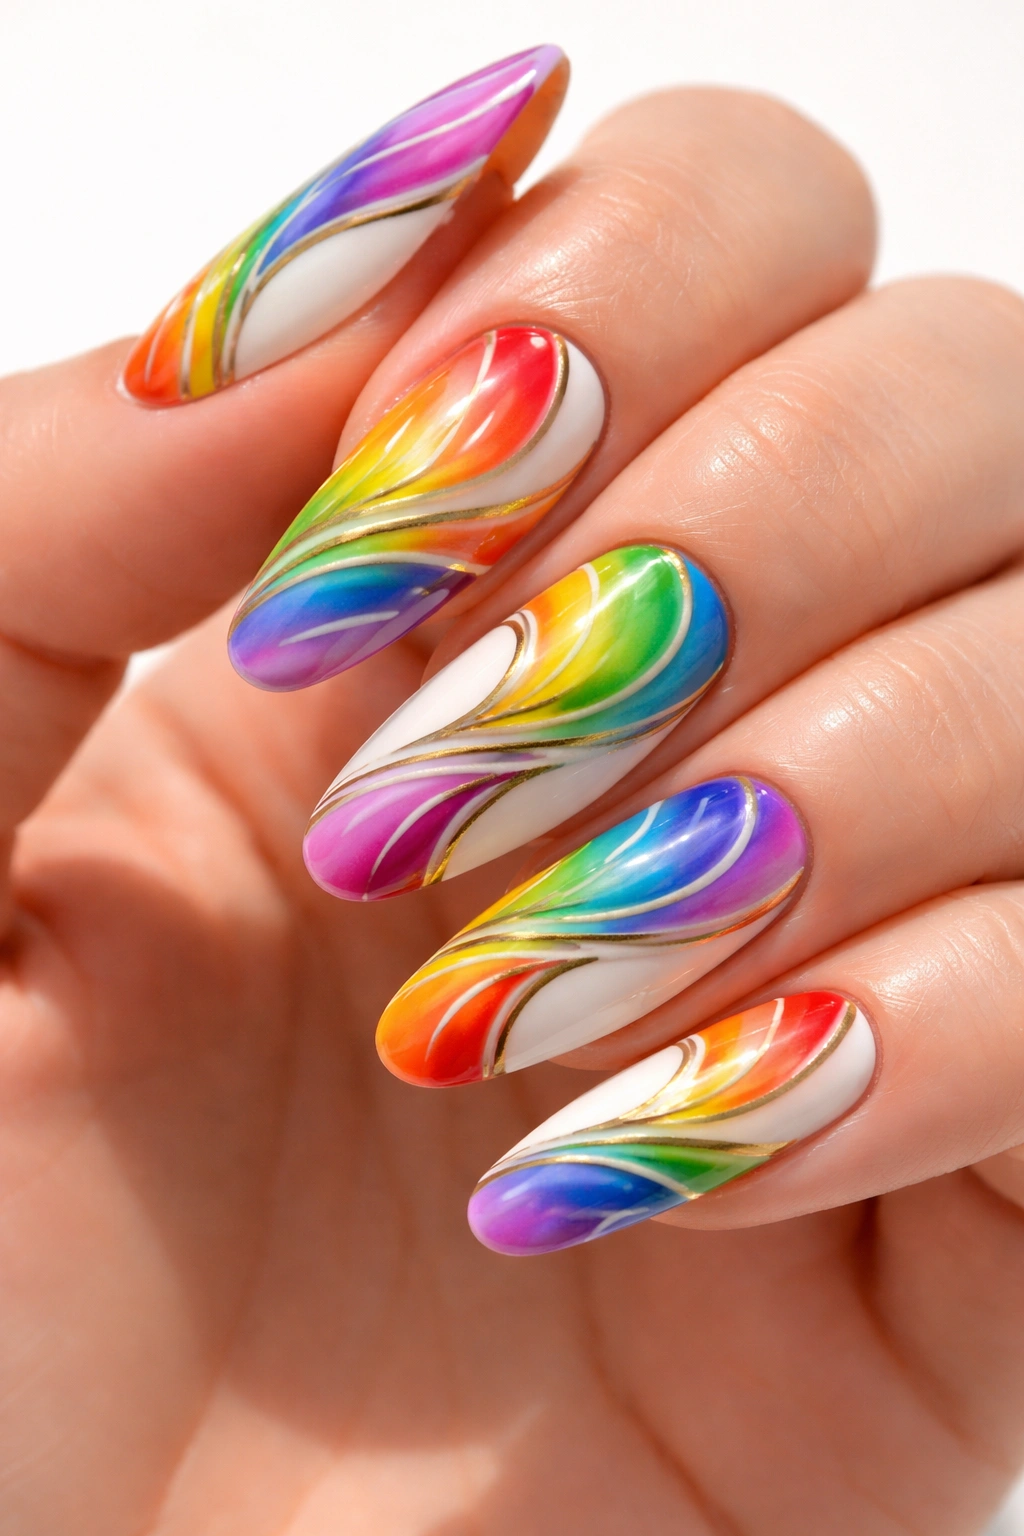
The entire spectrum—red, orange, yellow, green, blue, and purple—each swirled into the next in a full rainbow effect, with thin metallic gold lines creating gentle divisions between each color family. This design is bold, joyful, and genuinely artistic without being chaotic.
Why Full-Spectrum Designs Feel Universally Joyful
A complete rainbow carries positive psychological associations across virtually every culture—hope, diversity, celebration, and creativity. When executed on nails as swirls rather than stripes, it feels contemporary and artistic rather than childish. The gold dividers add sophistication and prevent the effect from becoming overwhelming.
Balancing Bold Colors with Intentional Design
- Base: white or very pale cream
- Divide the nail mentally into color zones (red section, orange section, yellow section, etc.)
- Using appropriately colored polish and thin brushes, create flowing swirls within each zone that connect to the next color
- The swirls should blend slightly at color boundaries without completely losing their individual identity
- Once dry, add delicate metallic gold lines that run vertically or diagonally, creating subtle divisions between color sections
- The gold acts as organization without interrupting the flow
- Finish with high-shine glossy topcoat that makes each color luminous
- Total effect: bold, artistic, intentional, and undeniably playful
Pro tip: If any color dominates too heavily and throws off the balance, add a second accent swirl in the opposite color to redistribute visual weight.
Final Thoughts
Long oval nails provide the perfect proportion for swirl designs—long enough to show off flowing, intricate work, but not so extreme that they’re fragile or impractical. What makes these twelve designs work is their variety: you’ve got soft pastels for when you want to feel gentle and calm, bold multicolors for when you want to scream joy, elegant metallics for when you want to feel refined, and everything in between.
The beautiful truth about swirl designs is that they don’t require the technical precision of other nail art styles. A swirl that isn’t perfectly symmetrical isn’t a failure—it’s more authentic, more artistic, and honestly more interesting to look at. Even tiny imperfections add character and movement that perfectly even designs sometimes lack.
Start by choosing a design that matches your current mood and the colors already in your everyday wardrobe. If you’re painting at home, invest in thin, high-quality brushes and sticky or gel bases that give you a few extra seconds to blend before colors set. If you’re getting them done professionally, bring reference images of designs you love and let your nail artist bring their own interpretation to the concept. Either way, you’re creating nail art that announces you’re someone who values creativity, playfulness, and the small joys that make life feel a little bit more beautiful.
