

Forget everything you thought you knew about nail trends. Y2K aesthetics are roaring back, and stiletto nails are the perfect canvas for the bold, playful, and unapologetically glamorous looks that defined early 2000s culture. Whether you’re channeling Paris Hilton’s hot pink obsession, embracing Britney’s sparkly maximalism, or mixing in those hyperfeminine frosted and butterfly-laden details, Y2K stiletto nails aren’t just a trend—they’re a statement.
The beauty of Y2K nail aesthetics is how they combine sweetness with edge. Think rhinestone-studded tips paired with almost-black base colors, or pastel candy hues with tiny chrome accents. These aren’t subtle manicures. They’re finger-based fashion that turns your hands into tiny pieces of wearable art. Stilettos, with their dramatic length and sharp point, provide the ultimate stage for these nostalgic designs. The elongated shape naturally draws the eye and makes intricate details feel even more impactful.
What makes these 10 designs genuinely stand out is how they nail the Y2K attitude—glamorous but playful, detailed but wearable, nostalgic but still fresh. Each one brings something different to the table, whether it’s a surprising color combination, an unexpected texture, or a clever spin on early-2000s iconography. Let’s dive into the looks that’ll have people asking where you got your nails done.
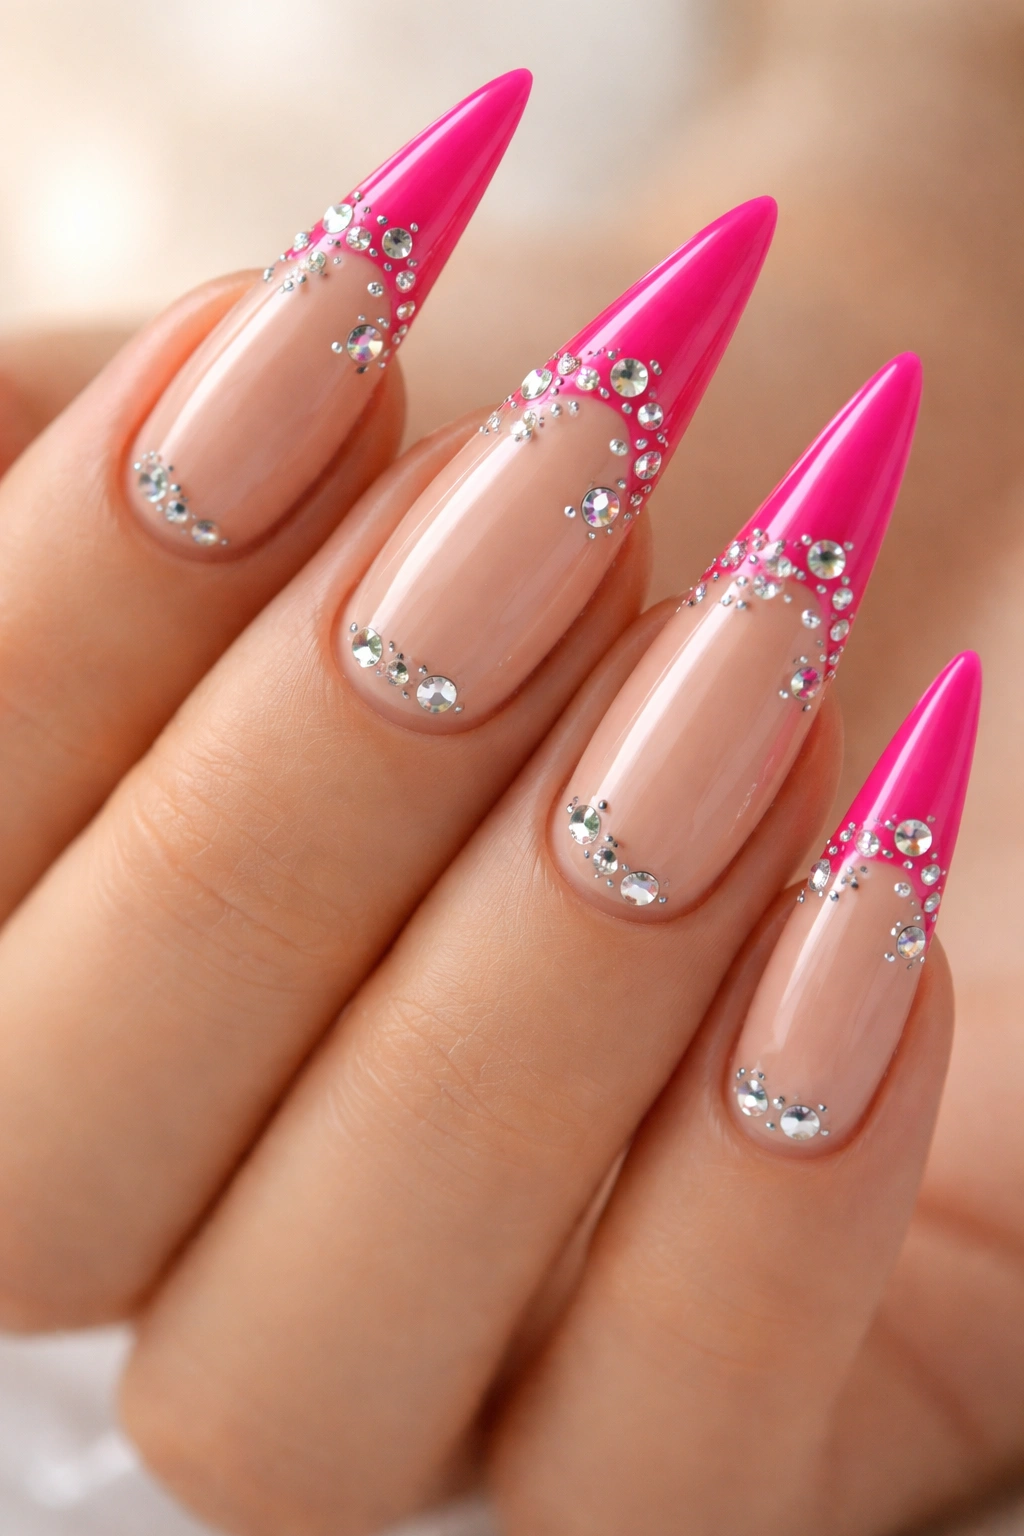
1. Hot Pink French Tips with Scattered Rhinestones
Hot pink is essentially the signature color of Y2K, and this design leans into that heritage hard. Start with a nude or barely-there pink base, then create a thick hot pink tip—we’re talking a bold, opaque line that sits somewhere between a traditional French and a full gradient. The magic comes from the rhinestones scattered randomly across both the base and the tip. They’re not perfectly aligned; they’re scattered like little sparkly accidents that somehow look intentional and perfect.
Why This Design Captures Y2K Energy
The hot pink and rhinestone combo is unapologetically feminine and playful without trying too hard. This was the exact vibe of early 2000s accessories—everything glittered, everything was hot pink or baby pink, and nobody was shy about it. Stilettos make the rhinestones pop even more, catching light with every hand movement.
How to Make It Your Own
- Use a mix of rhinestone sizes (from small microbeads to slightly larger stones) for visual interest and dimension
- Concentrate more rhinestones on the tip for extra glamour, or scatter them across the entire nail for a softer look
- Layer the rhinestones with tiny metallic studs in silver or gold for an elevated twist
- Seal everything with a thick topcoat to ensure the stones stay put and shine brilliantly
Pro tip: Let your rhinestones sit for a few seconds after placing them to ensure the adhesive grips properly. Rushing can mean stones popping off mid-day.
2. Glazed Donut with Tiny Stars
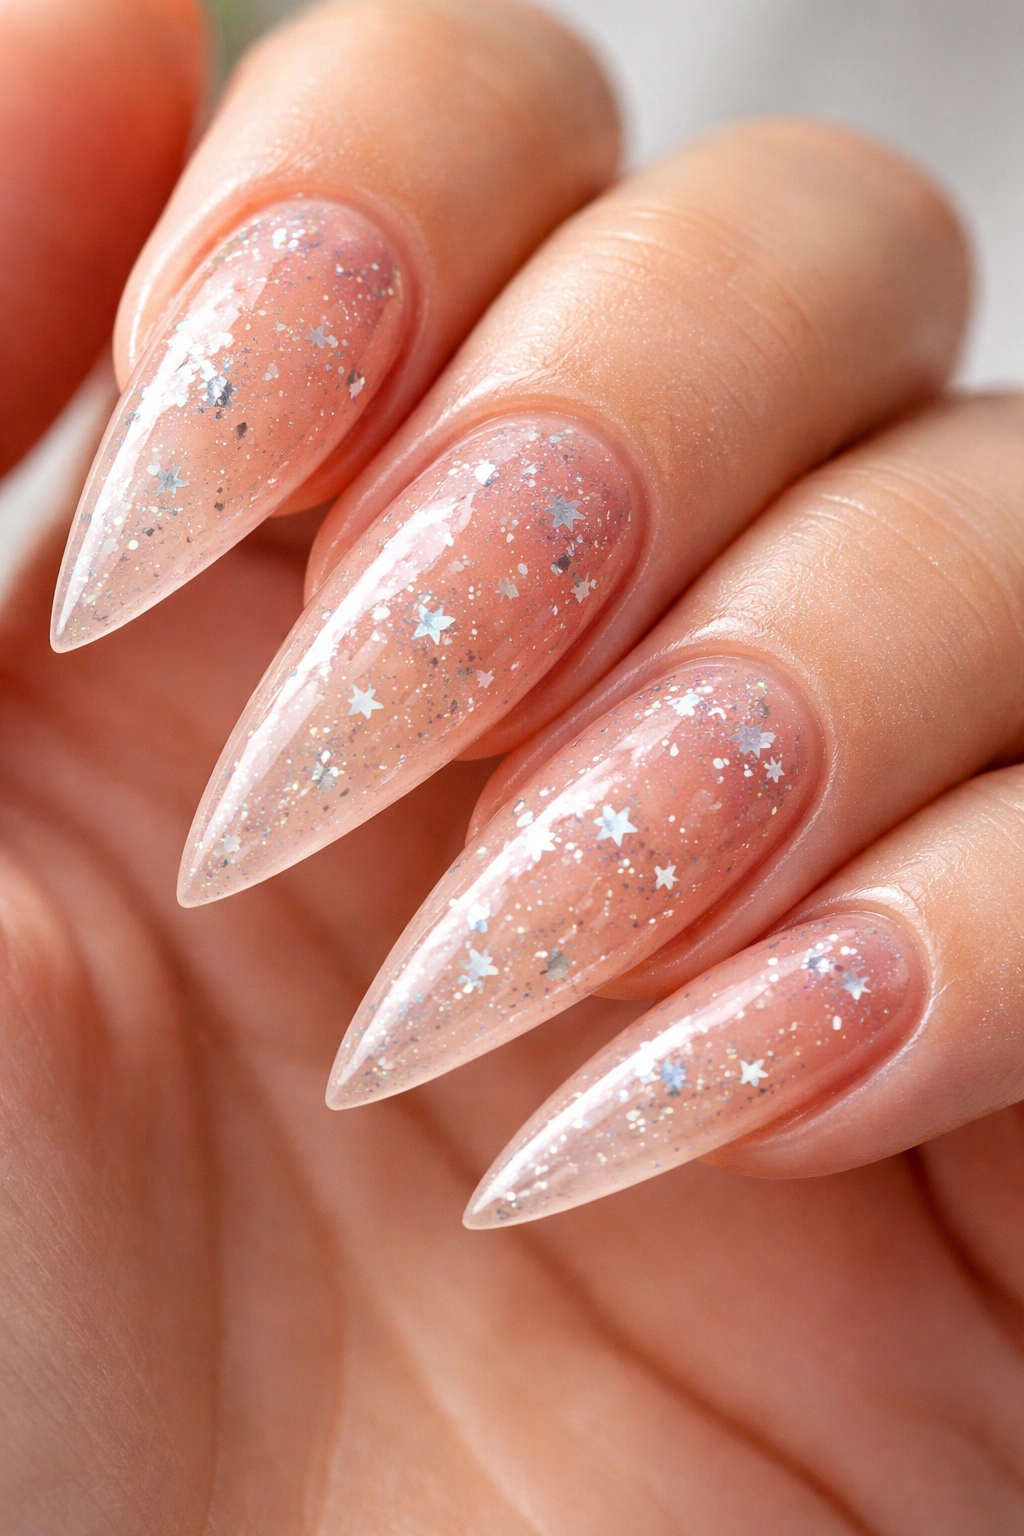
This one feels nostalgic and sweet while still hitting that Y2K aesthetic. Picture a translucent peachy-pink or nude base coat—the kind that looks like you’re wearing your nail but glossier—topped with a thick, bumpy topcoat that creates that “glazed” texture. Then add tiny silver or holographic star accents scattered across the nail surface. The stars represent that playful, whimsical Y2K vibe while the glazed effect is pure modern luxury.
The Texture That Sells It
The bumpy topcoat is essential here. It’s what transforms a simple translucent manicure into something that looks expensive and special. This texture also hides minor imperfections in application, making it actually easier to execute than a flawless smooth finish.
Application and Details
- Start with a milky nude or peachy-pink base, making sure it’s completely smooth
- Apply a thick layer of textured topcoat (many brands specifically make “bumpy” or “jelly” topcoats)
- Before it fully sets, place tiny metallic stars randomly across each nail
- Seal with a clear glossy topcoat to lock everything in place and add shine
Worth knowing: This design works beautifully on shorter stilettos too, if you’re not ready to commit to ultra-length. The stars read clearly on any length.
3. Holographic Chrome with Hot Pink Accent Nails
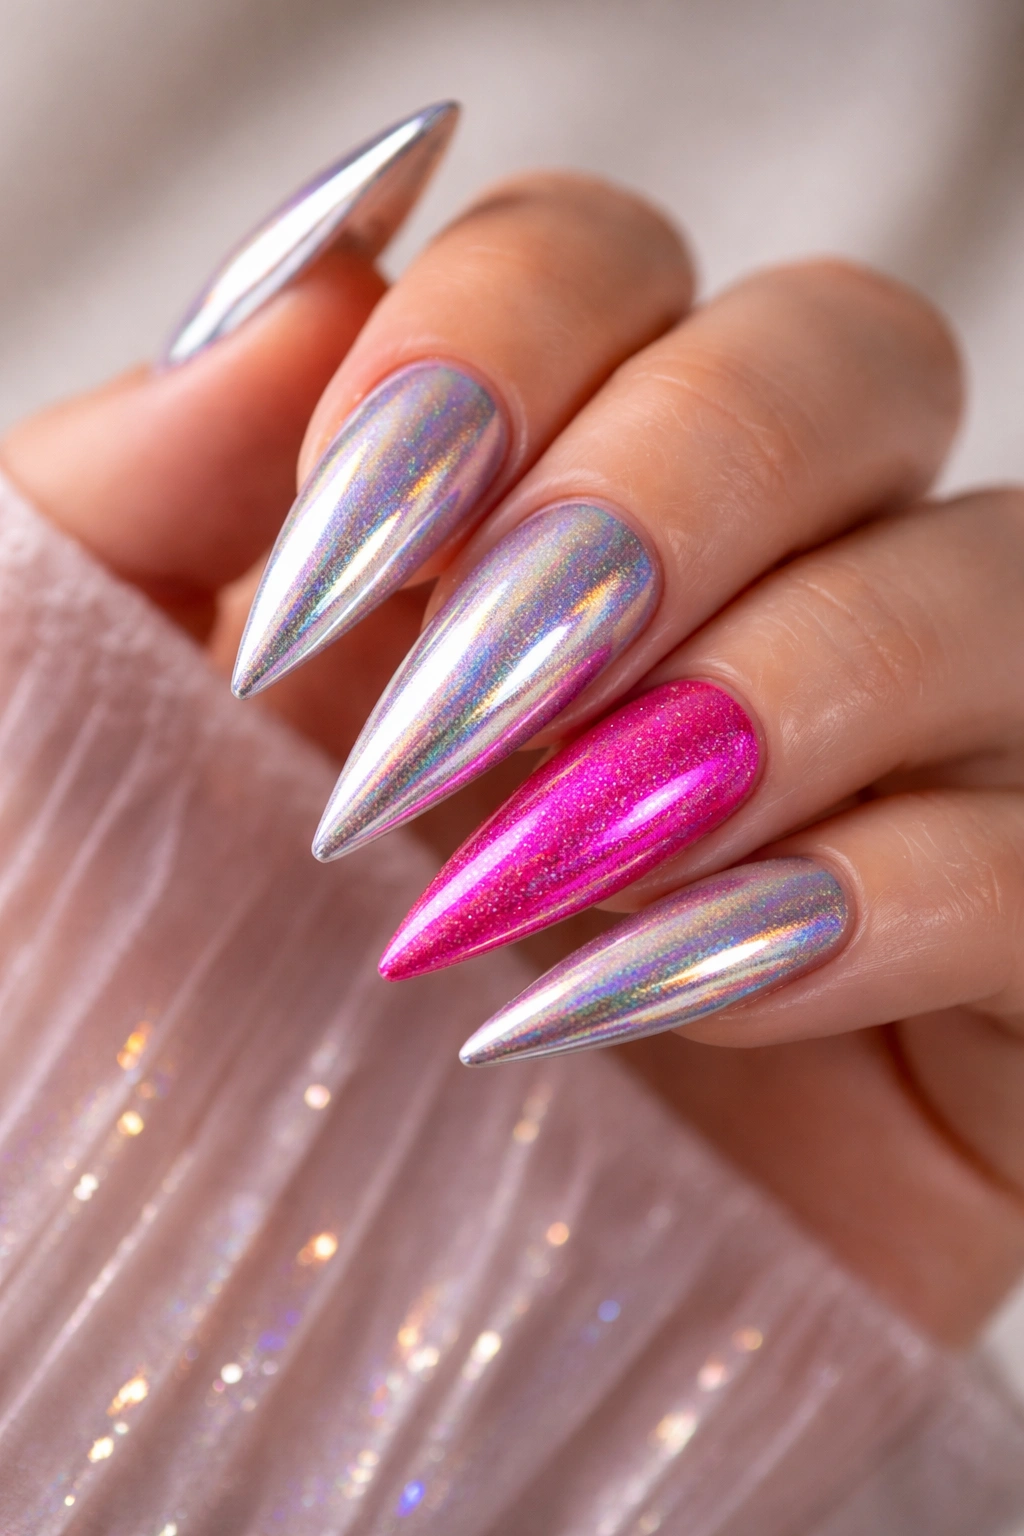
Holographic finishes feel futuristic, which paradoxically pairs perfectly with Y2K aesthetics. The entire design is chrome holographic on nine nails—that rainbow, multidirectional sparkle that catches different colors depending on the light and angle. Then pick one accent nail (usually the ring finger or thumb) and paint it a deep hot pink or even a dark purple with small holographic flecks mixed in. The contrast between the reflective chrome and the solid color is striking and incredibly modern-feeling.
Why Holographic Works for Y2K
Holographic wasn’t super mainstream in 2000-2005, but it absolutely fits the futuristic-playful Y2K energy. It’s the kind of look early 2000s fashion icons would have worn if the technology existed at that level. Now it does, and it feels like a natural extension of that era’s aesthetic.
Creating the Look
- Use a dedicated holographic chrome powder and a rubber-based base coat to apply it (a gel base helps with adhesion)
- Use a special chrome applicator tool or a soft silicone brush to rub the powder onto the wet base
- Build it up gradually—one thin layer of powder doesn’t give you that full holographic effect; two or three layers create the depth
- Paint your accent nail(s) with a rich, opaque color and add tiny holographic dust if you want subtle sparkle
Insider note: Holographic chrome shows best in bright light and outdoors. If you mostly work indoors under fluorescent lighting, the effect won’t be as dramatic, so factor that into your decision.
4. Butterfly Nail Art in Neon Colors
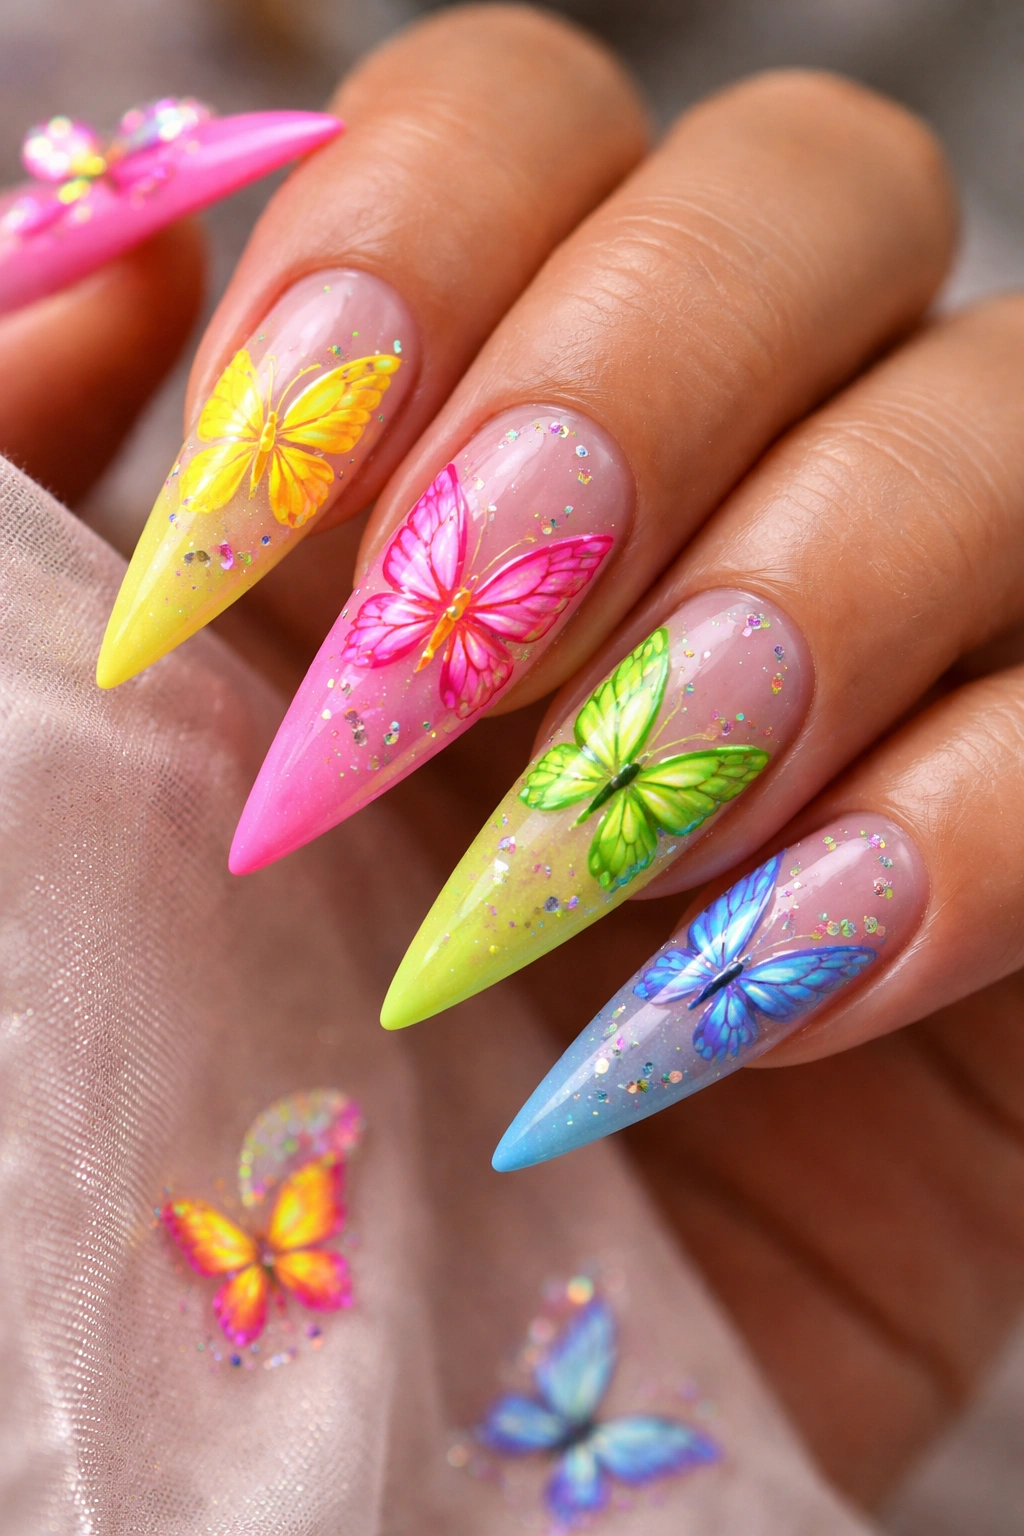
Butterflies are one of THE most iconic Y2K symbols. This design features a delicate butterfly illustration on each nail, but instead of realistic colors, use neon shades—electric yellow, hot pink, lime green, or sky blue. The butterflies can be centered on each nail or scattered across the design. The background is usually a neutral or pale complementary color so the bright butterflies really pop. Stiletto shapes make the butterfly wings look even more dramatic and elegant.
Executing Butterfly Designs
You don’t need to be a hand-painting expert to pull this off. Many nail artists use decals or stickers as a base and then hand-paint over them for a more custom look. Alternatively, you can use thin nail art brushes and a steady hand with neon gel polishes.
Design Variations
- Paint one large butterfly per nail as the focal point
- Create a scattered butterfly effect with smaller versions across multiple nails
- Alternate between solid neon nails and neon-butterfly designs
- Add tiny rhinestones or chrome accents on the butterfly wings for extra dimension
Quick note: Neon polishes can be thin and streaky, so plan for multiple thin coats rather than one thick one. The payoff—that glowing, eye-catching finish—is absolutely worth the extra time.
5. Clear Base with Chunky Glitter Stripes
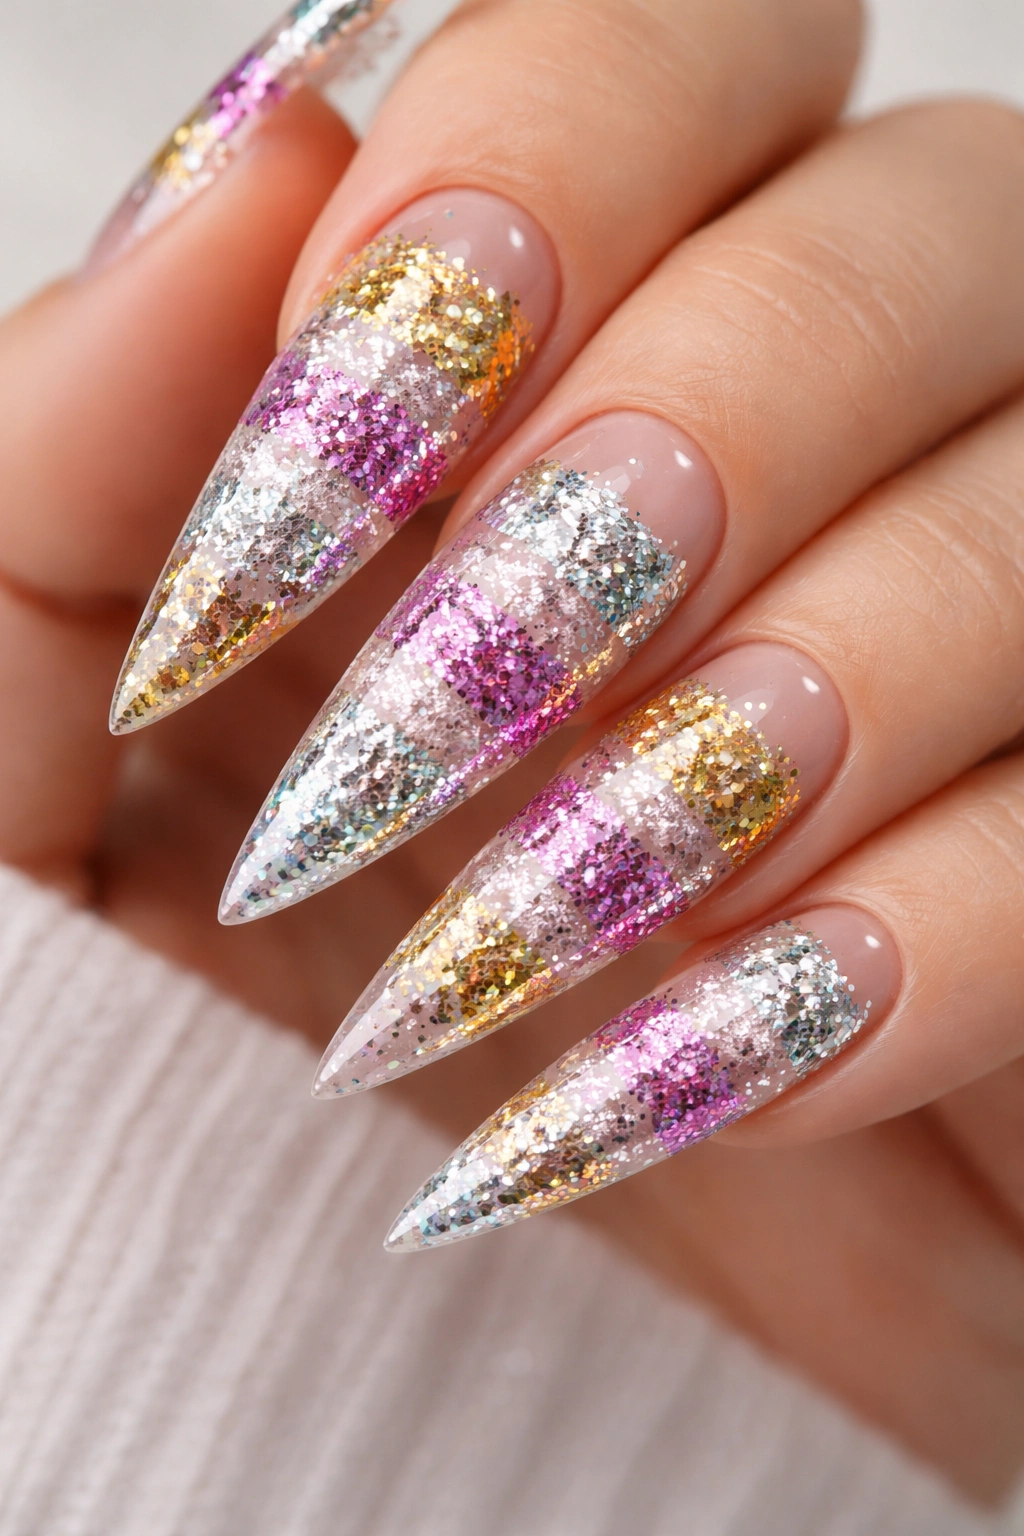
Sometimes less is more, but glitter is never less. This design starts with a completely clear base coat (you can see your nail underneath), then creates thick horizontal stripes of chunky mixed-size glitter in metallic colors—gold, silver, holographic, and pink mixed together in each stripe. The clear base lets the glitter shine without competing with color, making the sparkle the absolute star of the show.
The Appeal of Clear and Glitter
This feels modern and minimalist while still delivering maximum shimmer. It’s the perfect bridge between “I want something special” and “I want something wearable.” Clear nail looks are sophisticated, and adding glitter stripes brings back that early 2000s glamour without looking costume-y.
Building the Stripes
- Apply a clear strengthening base and allow it to dry completely
- Mix your chunky glitters together or use a pre-mixed glitter blend in a clear or nude gel
- Use a thin brush or dotting tool to create straight horizontal lines of glitter across each nail
- Space the stripes evenly, or create an ombre effect by making them denser toward the tip
- Seal with clear topcoat to ensure the glitter doesn’t migrate or shift
Pro tip: If your glitter polish is too thin, mix it with a clear gel base to make it more workable and easier to control in stripes.
6. Black and Hot Pink Ombré with Metallic Tips

This design is pure Y2K drama. The nail transitions from pure black at the base to hot pink at the tip, with a careful gradient creating the blend. Then add a thin metallic chrome or gold line right at the tip edge, separating the color from where your nail extends. It’s edgy, feminine, and has that sharp contrast that defined early 2000s style.
Creating a Clean Gradient
An ombré requires patience and blending. The best method is to apply black to the base, hot pink to the tip area, and then use a sponge or a dry blending brush to soften where the two colors meet. Gel polish makes this easier because you can work without the polish drying immediately, giving you time to achieve a smooth transition.
Adding the Metallic Edge
- Apply the black-to-pink ombré and cure it fully (if using gel)
- Add a thin chrome or metallic line right at the very tip using a fine brush
- Alternatively, paint a solid metallic tip color and blend it gently into the pink with a sponge
- Seal with a glossy topcoat for a polished finish
Worth knowing: This design looks more sophisticated on longer stilettos. The gradient has more space to show its gradient, and the proportions feel balanced.
7. Frosted White with Tiny Y2K Symbols

Frosted nails were the look in the early 2000s, and bringing them back with Y2K symbols is genius. Start with a frosted white or champagne-tinted base—that opaque, almost grainy texture that defined the era. Then add tiny symbols in hot pink, purple, or gold: tiny stars, hearts, butterflies, smiley faces, or even micro text like “LOVE” or “PINK.” Each nail can feature different symbols, creating a playful, varied look.
The Frosted Finish That Matters
Frosted polish has a particular texture and finish that’s distinct from matte. It’s creamy, opaque, and slightly sparkly in some formulations. Some modern brands have recreated that early 2000s frosted effect, or you can achieve it by using a cream-colored gel with a matte topcoat, then adding a slight shimmer.
Symbol Placement Ideas
- One symbol centered on each nail for minimalist impact
- Multiple tiny symbols scattered across the nail surface
- One symbol per nail, varied (star on index, heart on middle, butterfly on ring finger, etc.)
- A tiny crown symbol on your dominant nail for accent emphasis
- Mini text elements like “Y2K” or “ICONIC” in barely-there lettering
Quick fact: If hand-painting symbols feels intimidating, nail stickers and decals exist for just this purpose—apply them over your frosted base and seal with topcoat.
8. Candy Color Gradient Ombré (Multicolor)
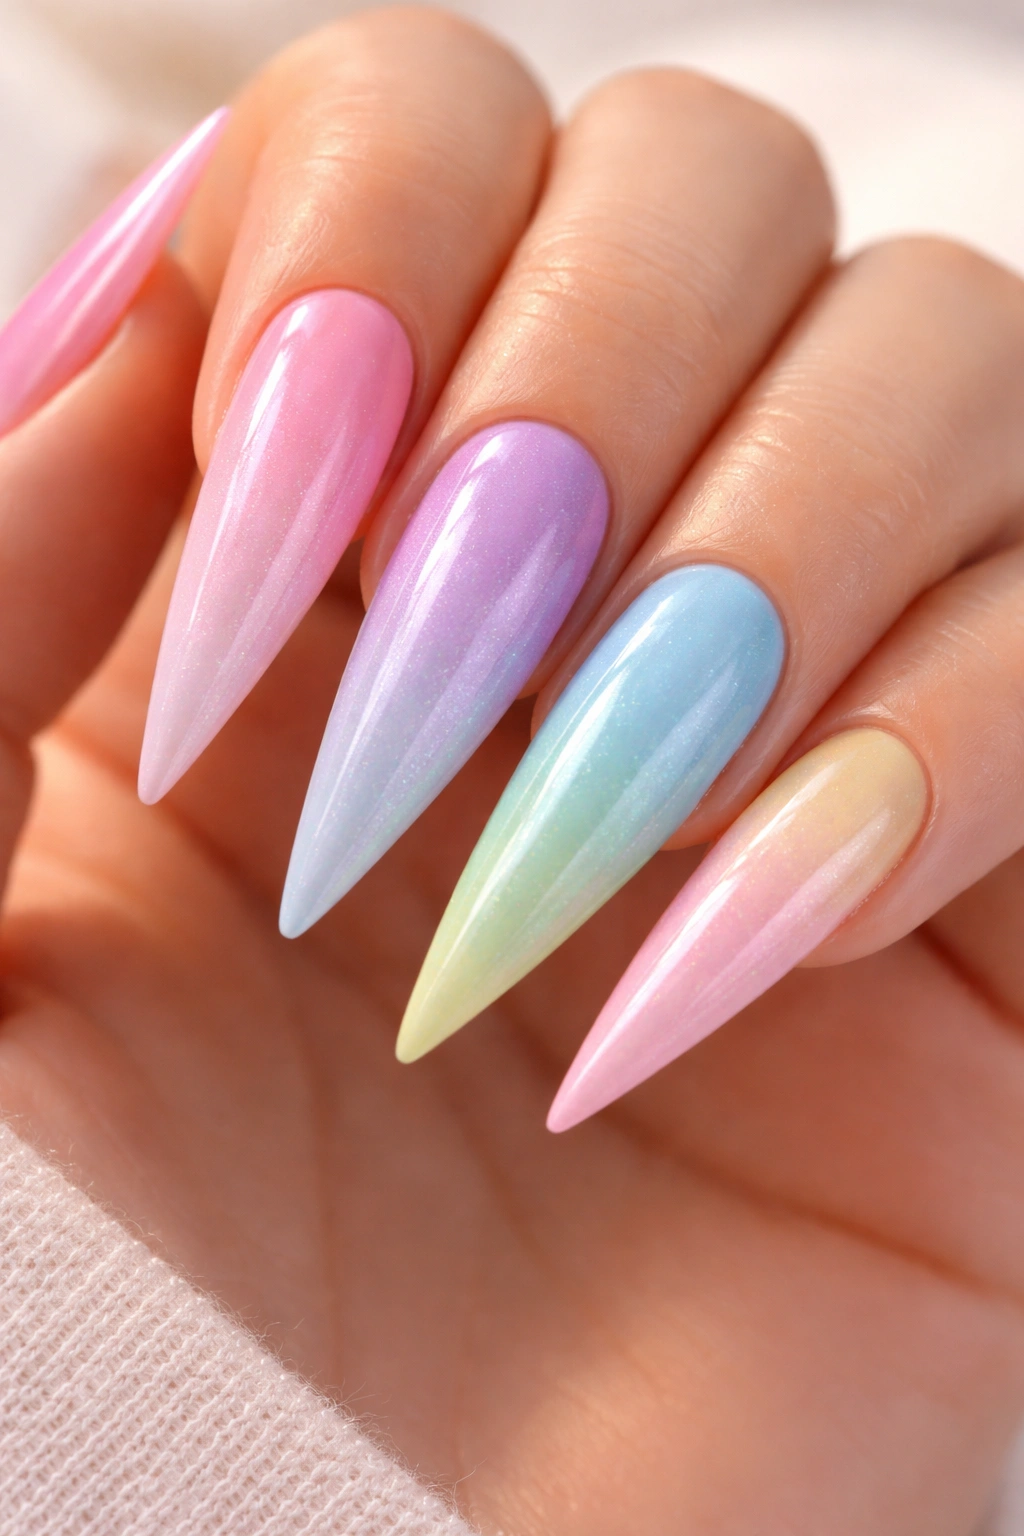
Instead of a two-color gradient, go full spectrum with pastel and candy colors blending into each other across the nail. Think baby pink transitioning to lavender, then to powder blue, then to mint green across the length of the nail. It’s playful, whimsical, and has that early 2000s “more is more” attitude. Stilettos give you enough space to make the gradient actually readable and beautiful.
Executing a Multicolor Gradient
This requires careful sponging and blending. Apply each color to a makeup sponge in strips, then press gently onto the nail and dab repeatedly to create smooth transitions. The key is using sheer or translucent colors that blend beautifully rather than creating harsh lines.
Color Combinations That Pop
- Soft pink → lavender → powder blue → mint (the classic Y2K rainbow pastels)
- Hot pink → purple → blue → teal (more saturated and bold)
- Baby blue → pink → peach → yellow (warm, sunny, and nostalgic)
- Lilac → baby pink → champagne → white (sophisticated and dreamy)
Pro tip: Practice your gradient on a nail wheel or practice nail before applying it to your actual nails. You’ll build confidence and figure out your preferred sponging technique.
9. Leopard Print with Gold Accents and Rhinestones
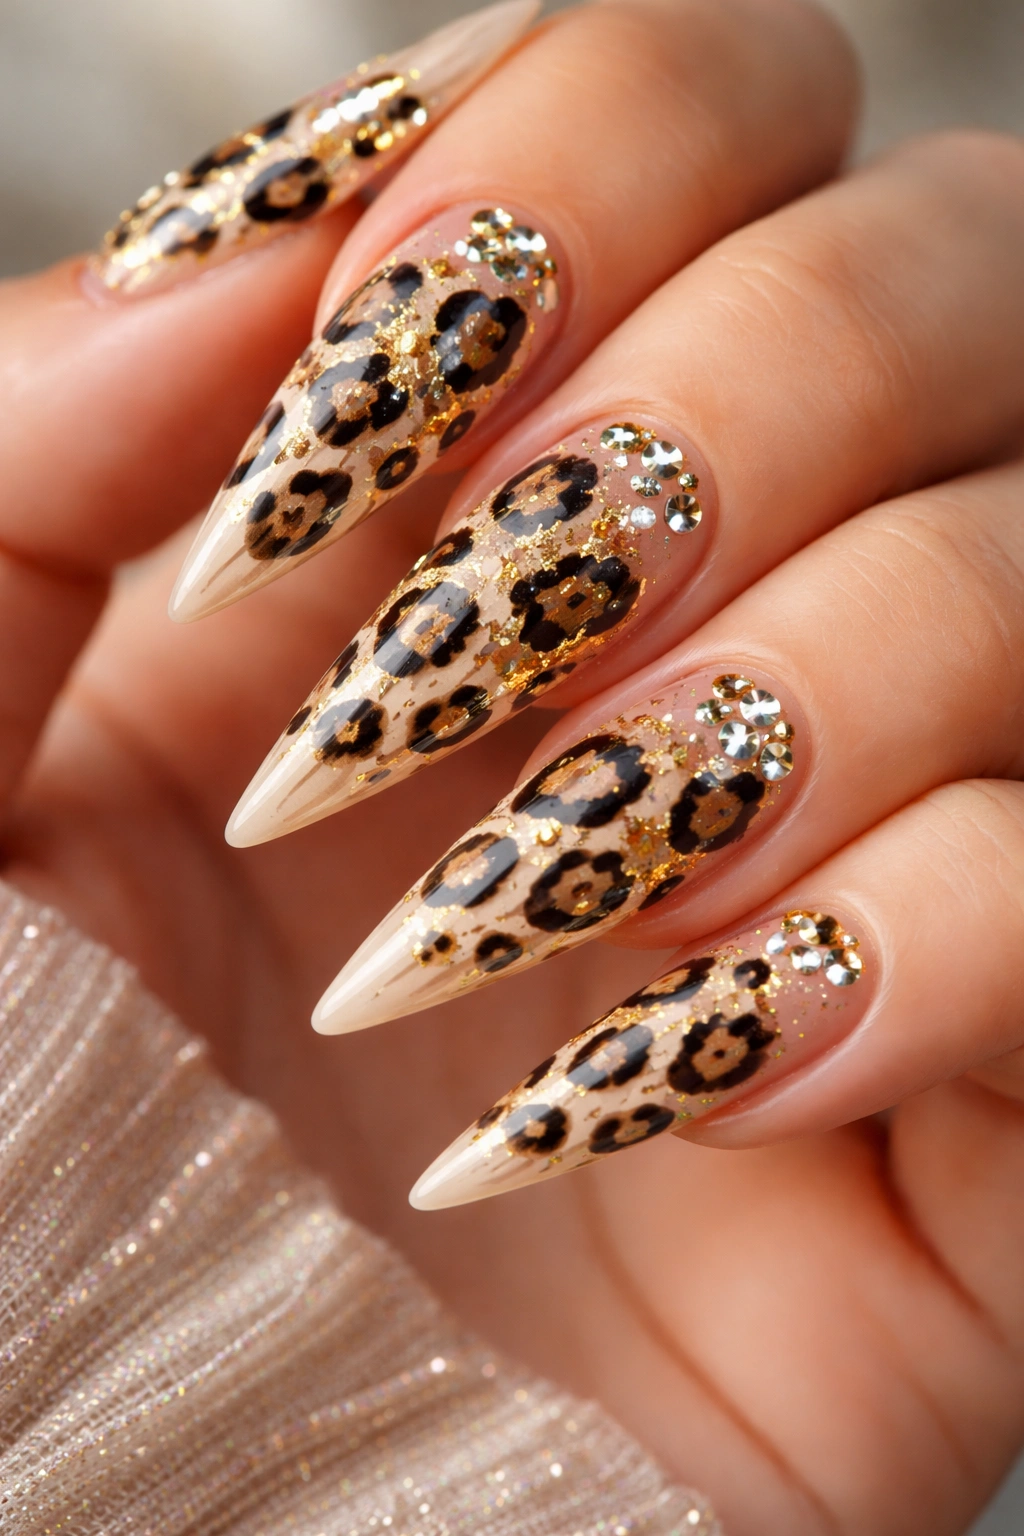
Animal prints were absolutely everywhere in Y2K fashion, and leopard was the king. This design features a base color (usually cream, nude, or light pink) with black leopard spots in a classic pattern. But here’s where it gets Y2K-special: add gold foil accents in some of the spots, creating a mixed-media effect, and scatter small rhinestones around the leopard print for glamour.
Perfecting Leopard Print
You can hand-paint leopard spots using a thin brush and black gel polish, create a stamped version using a leopard-print nail stamp, or use decals as a base. Each method offers different levels of control and customization.
Gold Foil Integration
- Paint some of the leopard spots in black
- While the black is still wet or slightly tacky, press small pieces of gold foil into select spots
- Alternatively, paint entire spots in gold from the start for a luxe two-tone leopard effect
- Add tiny rhinestones at random points across the nail for shimmer
Insider note: Leopard print looks best on longer nails where you have enough space for the pattern to show clearly. On very short nails, it can look busy rather than beautiful.
10. Pastel Baby Blue with Tiny Charms and Chrome Accents
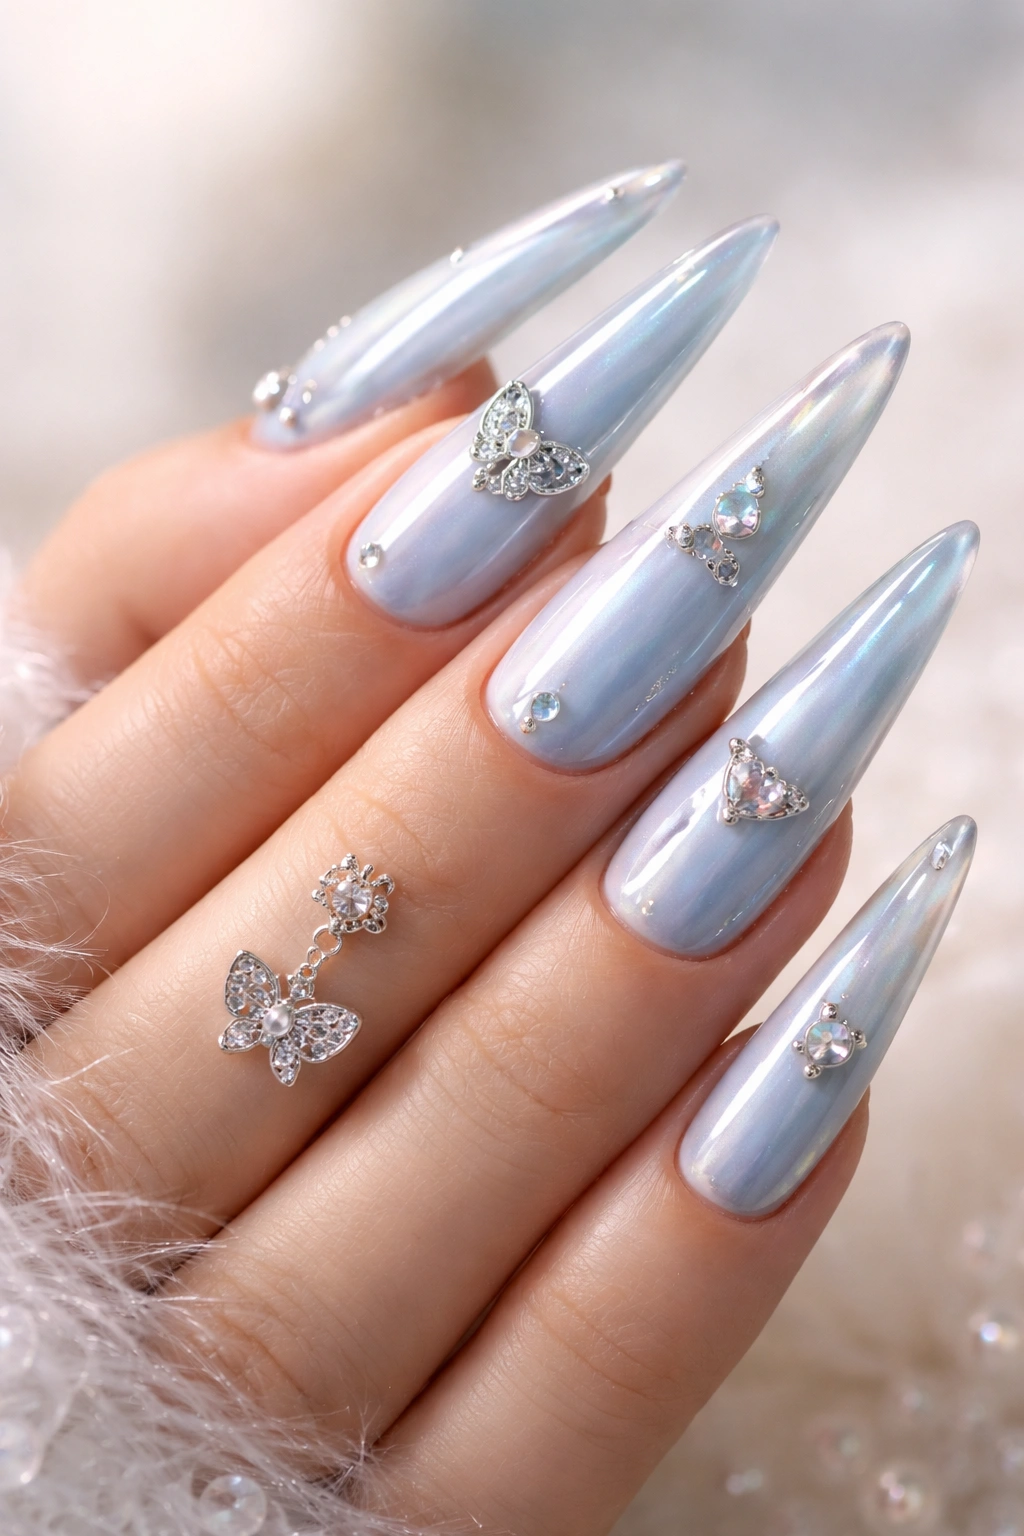
This design is soft, playful, and deeply nostalgic. The base is a milky, creamy baby blue—the exact shade of early 2000s everything from Juicy tracksuits to Paris Hilton’s accessories. Then add tiny charm attachments (small metal or resin shapes) attached to the nail: tiny hearts, stars, or even miniature designer-bag charms. Finish with tiny chrome or holographic accents scattered across the design.
Baby Blue as a Y2K Foundation
This color is essentially the signature shade of Y2K femininity. It’s gentle, sweet, and playful without being childish. Pairing it with tiny charms and chrome creates a look that feels collectible and fun, like you’re wearing wearable jewelry on your nails.
Adding Charms Safely
-
Use a nail glue specifically designed for charm attachments
-
Position charms on the side of the nail or near the tip so they don’t interfere with daily hand use
-
Seal carefully around the charm base with topcoat to ensure it stays secure
-
Plan for charm replacement over time; they’ll eventually loosen with wear
-
Add micro chrome or holographic powder to select areas for dimensional sparkle
-
Use a second shade of blue (slightly darker or more saturated) as an accent strip or gradient
-
Combine with tiny rhinestones for a more formal version of this look
Worth knowing: Nails with charms require slightly more care. They’re beautiful but not ideal if you’re doing work that involves heavy hand use or water exposure. Plan accordingly.
Final Thoughts
These 10 Y2K stiletto nail designs prove that nostalgic doesn’t mean outdated. Every single one of these looks brings back that early 2000s energy while still feeling fresh and wearable because they’re executed with modern techniques and finishes. Whether you lean into maximum glamour with rhinestones and chrome, embrace sweetness with frosted whites and pastel ombré, or go bold with neon butterflies and hot pink stripes, you’re bringing a piece of beloved fashion history directly to your fingertips.
The beauty of Y2K aesthetics is how forgiving they are. They celebrate color, pattern, texture, and shine without apologizing. Stiletto nails are the perfect vessel for this attitude because their length and dramatic shape amplify every detail. A rhinestone on a short nail is charming; a rhinestone on a long stiletto is a statement. A simple hot pink French tip is classic; a hot pink ombre with metallic accents is unforgettable.
Pick the design that speaks to your personal style, gather your supplies, and book that appointment (or DIY if you’re feeling confident). Y2K is back, and your nails deserve to celebrate that moment with genuine style and a whole lot of sparkle.
