

Coffin nails have become one of the most coveted nail shapes in modern manicure culture, and for good reason. Their sophisticated tapered silhouette—wider at the base and elegantly pointed at the tip—creates a canvas that’s somehow both edgy and refined at the same time. Unlike rounded or square nails, coffin-shaped nails have this inherent drama that makes even simple designs look intentional and put-together. The elongated surface area means there’s plenty of room for creative nail art, color blocking, intricate patterns, and eye-catching embellishments that would feel cramped on shorter nail beds.
What makes long coffin nails particularly special is their versatility across different styles and occasions. Whether you’re going for a minimalist aesthetic, a glamorous statement look, or something playful and artistic, the coffin shape adapts beautifully. They elongate the fingers, give off a confident energy, and somehow manage to feel both bold and wearable at the same time—which is a rare combination in nail fashion. The shape itself does so much of the heavy lifting visually that even understated designs feel deliberate and chic.
If you’ve been scrolling through nail inspiration and wondering what designs actually translate well onto coffin-shaped nails, you’re in the right place. The designs that follow span different aesthetics, color palettes, and complexity levels. Some are perfect for someone maintaining a professional appearance with a subtle edge, while others are pure self-expression for those who love having their nails be a focal point of their look. Each design works with the inherent strengths of the coffin shape rather than against it.
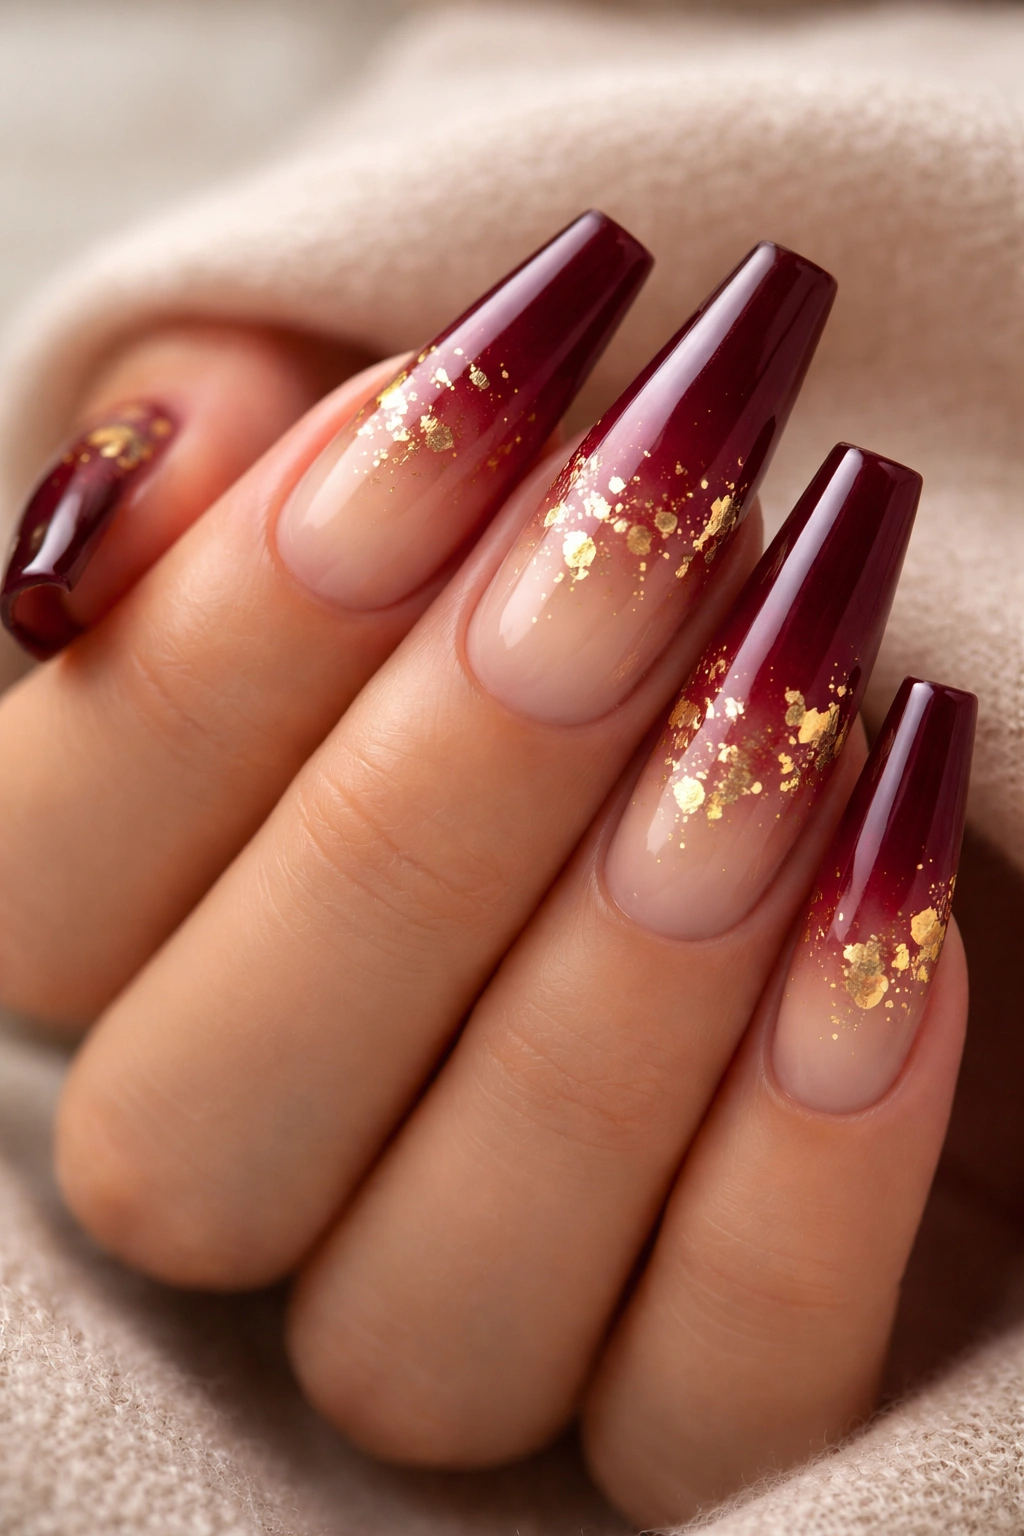
1. Burgundy Gradient With Gold Leaf Accents
A deep burgundy base melts into a warm nude gradient as it moves toward the tips, creating depth and sophistication without overwhelming the nail. The real magic happens with delicate gold leaf fragments scattered across the gradient zone, catching light from different angles and adding an unexpected luxe element that elevates the entire manicure.
Why This Design Works on Coffin Nails
The elongated shape of coffin nails gives the gradient plenty of vertical space to show its color transition beautifully. The gradient is subtle enough that it doesn’t require a perfectly executed ombré application—soft brushwork and blending look intentional rather than sloppy on a long nail. Gold leaf applied strategically breaks up the smooth gradient and prevents the overall look from feeling too simple or one-dimensional.
How to Achieve This Look
Start with a burgundy base coat applied to the entire nail. While still slightly tacky, use a sponge or soft brush to apply a lighter nude tone to the nail tip area, working the colors together where they meet. Seal with a glossy top coat, then add pieces of gold leaf using tweezers and a clear adhesive. The leaf naturally wrinkles and fragments, which is part of the aesthetic appeal. Finish with a final protective top coat to keep everything locked in place. This design works for both gel and traditional polish, though gel tends to last longer if you’re wearing gold leaf.
Pro tip: Use actual gold leaf from an art supply store rather than cheaper nail-specific versions—the quality difference is immediately noticeable and the fragmentation looks intentional rather than cheap.
2. Matte Black With Minimalist White Line Art
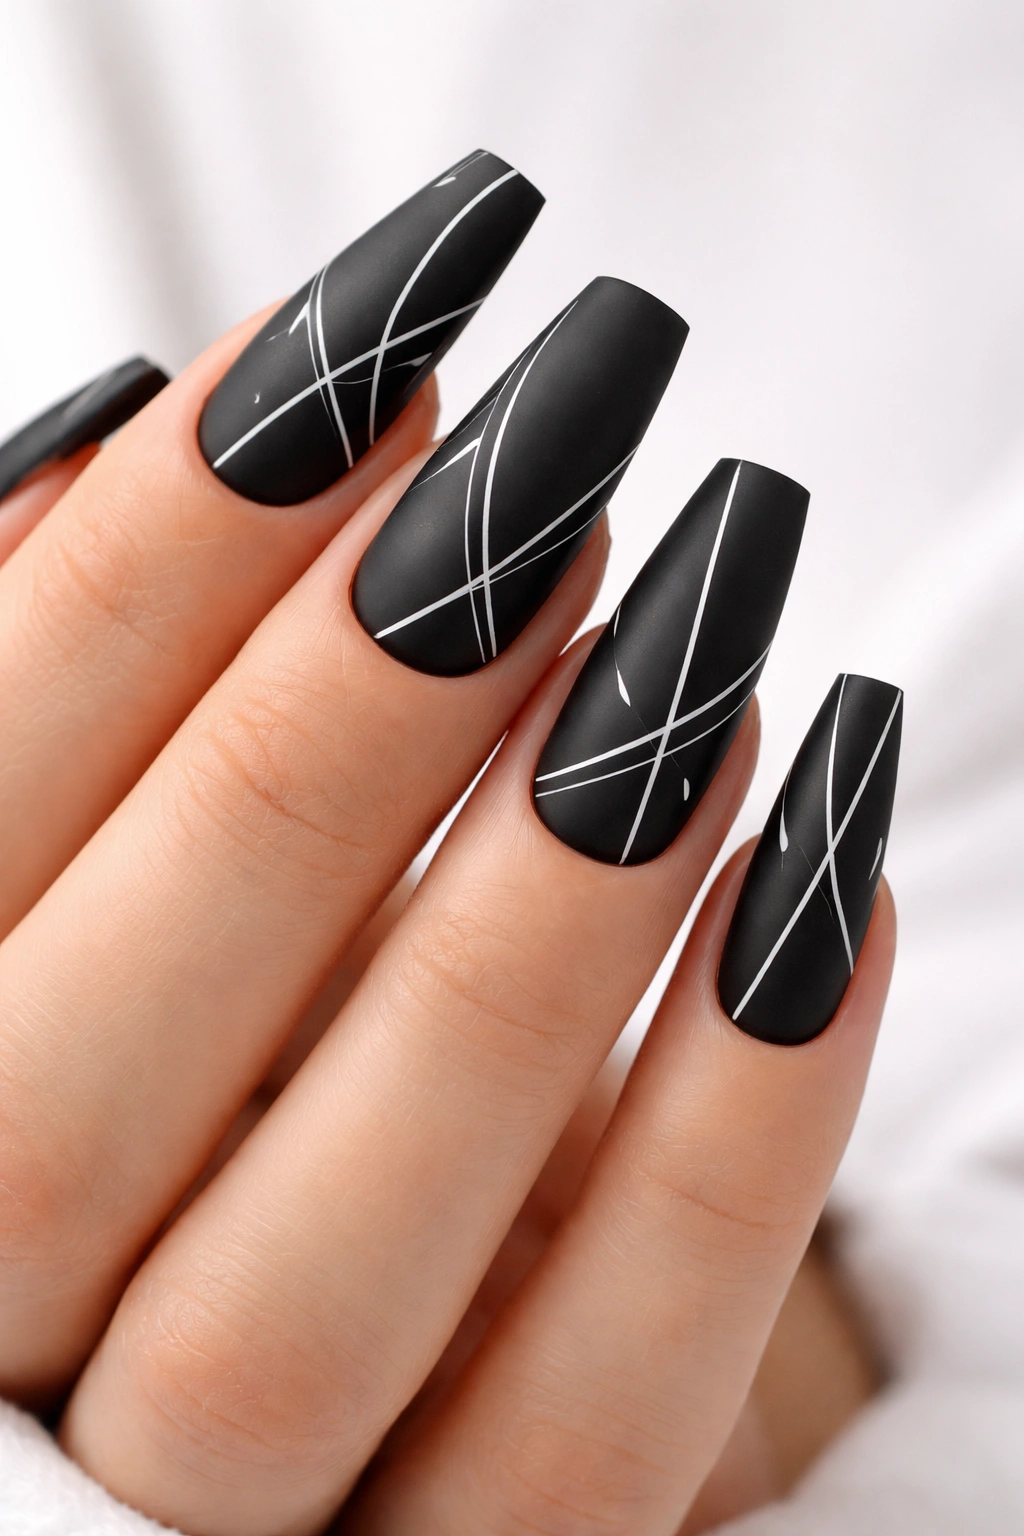
Clean, surgical-white lines create geometric patterns and abstract designs across matte black nails, creating striking contrast that reads as instantly sophisticated. The lines might be simple horizontal divisions, abstract shapes, or even tiny minimalist drawings—the beauty lies in the restraint and precision rather than elaborate detail work.
What Makes This Design Special
Matte finishes have a velvety, modern feel that glossy nails sometimes lack, and the starkness of pure white against pure black keeps the design from feeling busy even though it has clear graphic elements. The coffin shape provides enough real estate that you can create varied designs on each nail without any feeling overcrowded. Some fingers can have simple geometric divisions while others showcase more intricate line work.
Application Tips for Clean Lines
Use a thin art brush or a dedicated nail art liner for the white lines—don’t rely on the brush that comes with white polish, which tends to be too thick for precise work. The base should be completely matte; don’t mix finishes partway through. You can achieve matte with a matte top coat over regular polish, or use matte acrylic powder if you’re working with builder gel. Seal everything with a glossy top coat if you want some shine, or keep it completely matte for maximum impact. The contrast pops more with a matte finish, making the design feel more intentional.
3. Nude Base With Crystalline Stone Placement
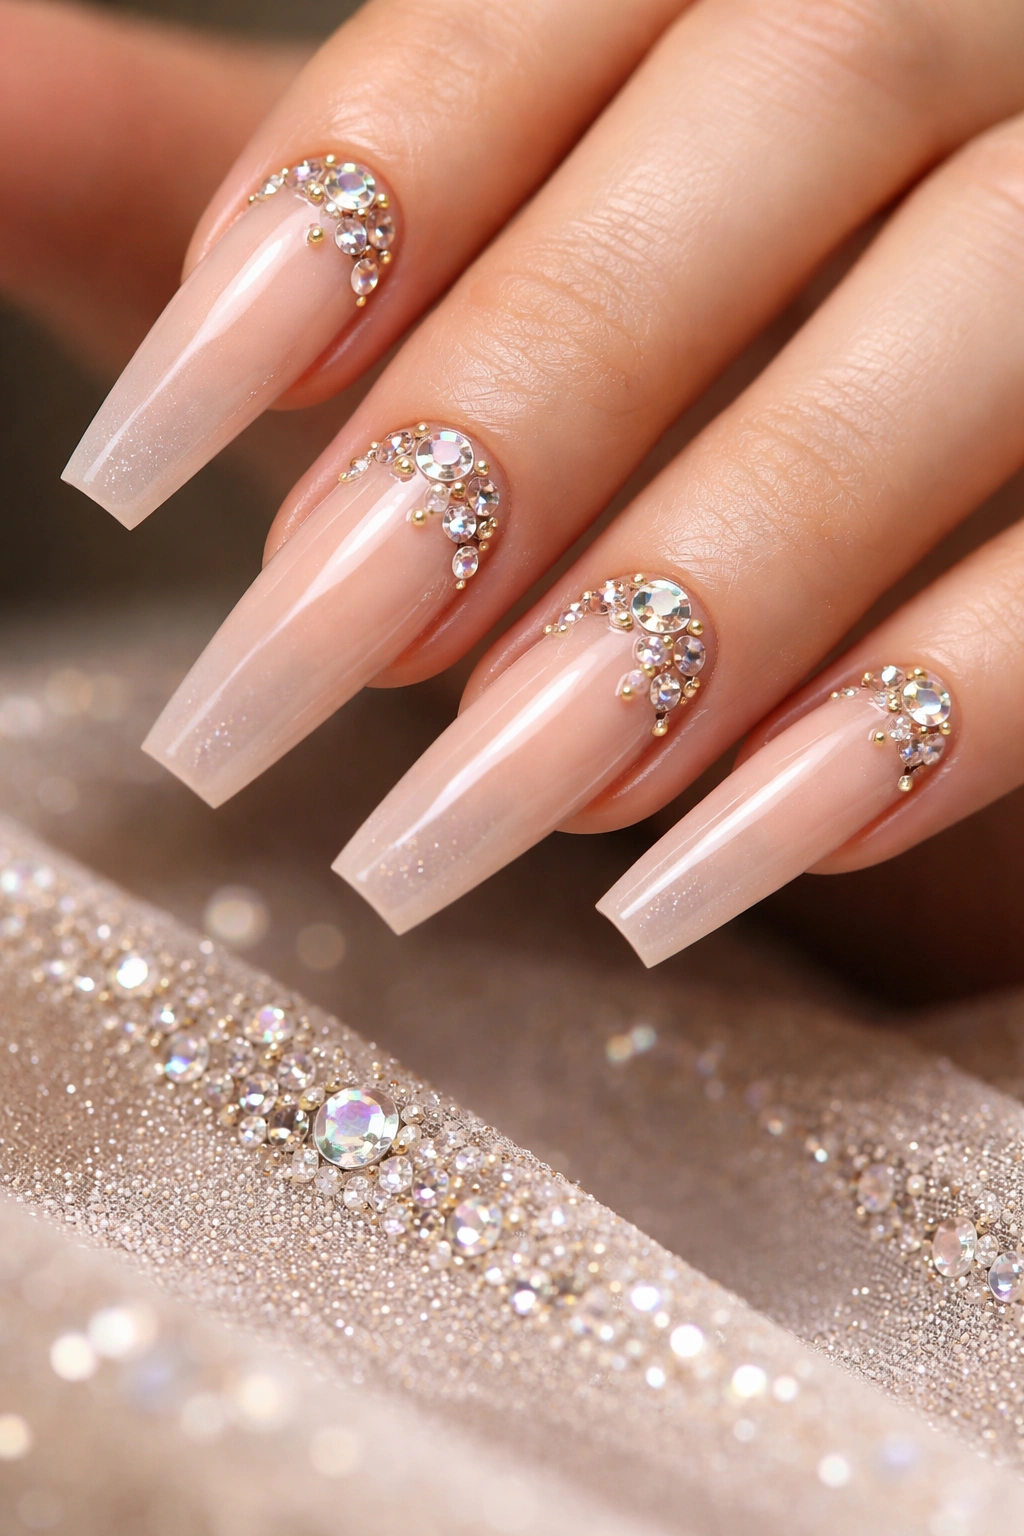
A neutral, skin-tone nude polish serves as a quiet backdrop for strategically placed crystalline stones that catch and reflect light. Rather than covering the entire nail with sparkle, stones are arranged in specific patterns—perhaps a diagonal line, a clustered accent area, or sparse scattered placement that feels deliberate rather than busy.
The Elegance of Restraint
Long coffin nails can showcase stones beautifully without the design becoming costume-like or overly blingy. The nude base keeps everything sophisticated and wearable, while the stones provide just enough flash that the manicure feels special and intentional. This design works equally well for everyday wear and for special occasions—the key is choosing stone quality and placement that reads as high-end rather than budget.
Stone Selection and Application
Swarovski crystals or high-quality glass stones create the most refined look; avoid plastic rhinestones that look dull and flat. Apply stones using a specialized rhinestone adhesive or the sticky layer under gel base coat. Let everything cure fully before sealing with top coat. The nude polish makes any stone color work beautifully—consider champagne, crystal clear, soft pink, or even colored stones depending on the occasion. Each stone should be slightly different in size to avoid a uniform, costume-like appearance.
4. Deep Teal Ombre Into Silver Glitter
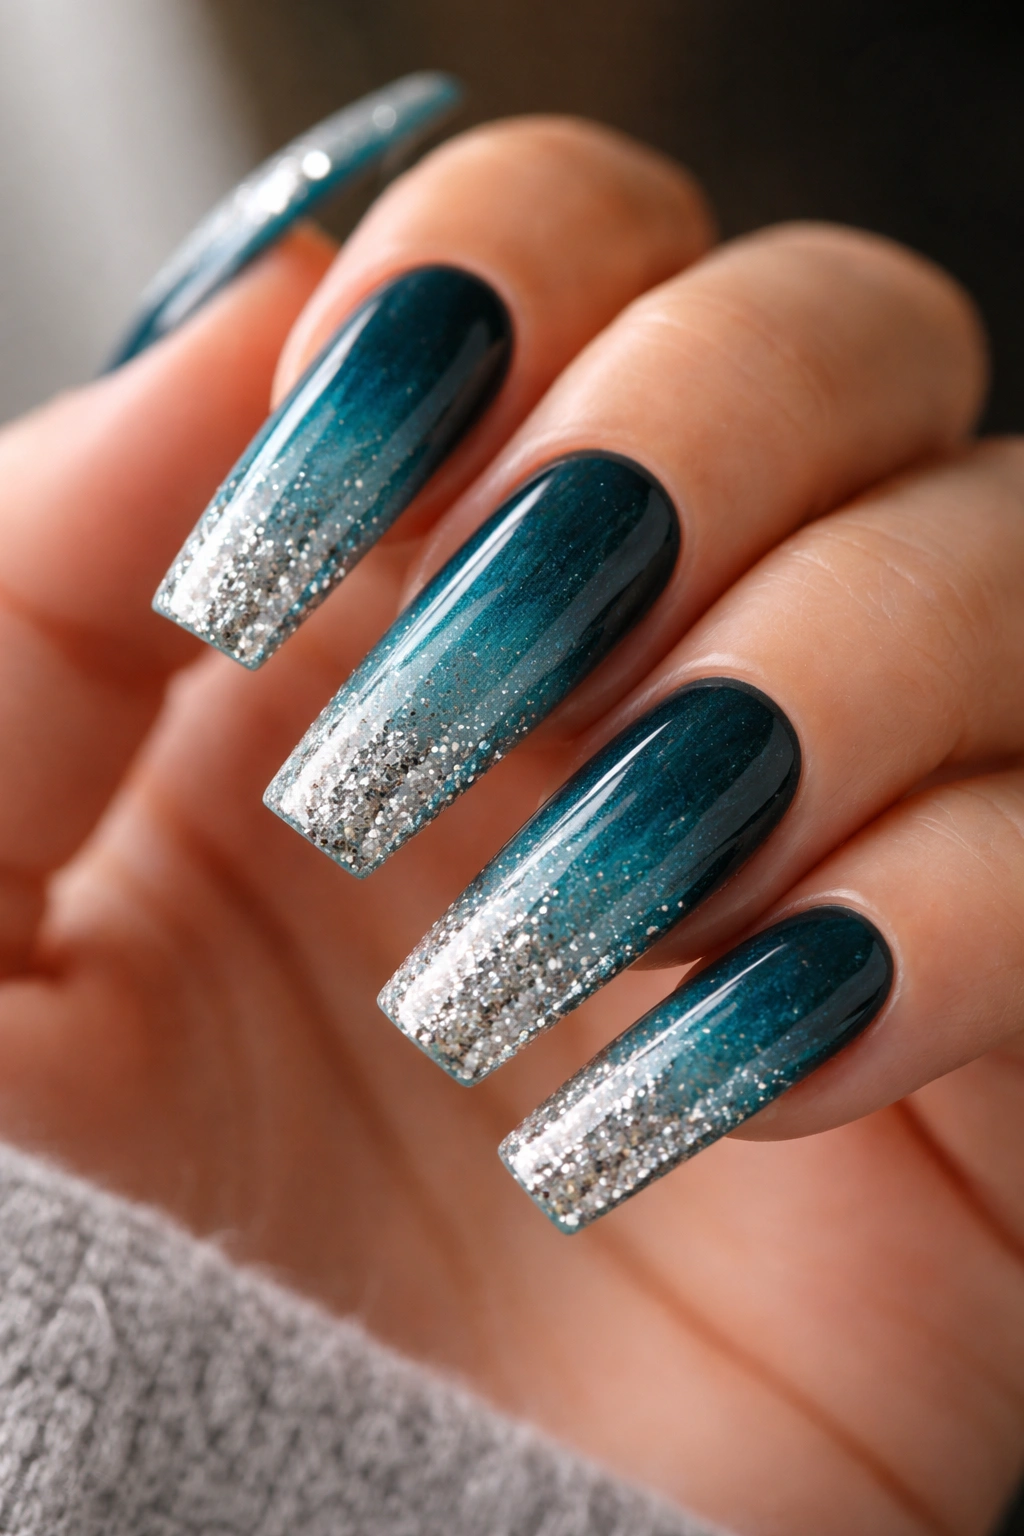
A jewel-tone teal foundation gradually transitions into a silver glitter ombré as it reaches the nail tips, creating movement and visual interest that follows the nail’s natural shape. The glitter becomes denser toward the very tip, creating a gradient of sparkle that catches light and gives the illusion of your nails catching the shimmer of movement.
Why Jewel Tones Shine on Coffin Nails
Teal sits in a wonderful middle ground between green and blue, making it feel both calming and bold depending on the surrounding context. On long coffin nails, it has room to showcase depth and variations in tone. The ombré effect is easier to execute on longer nails because there’s more surface area to blend the glitter gradient, so it doesn’t look like you haphazardly threw sparkles at your nails.
Achieving the Perfect Glitter Gradient
Apply the teal base coat as your foundation and let it dry completely. Mix silver glitter with a clear gel or polish, making the mixture more glitter-dense than your base. Apply this mixture starting at the nail tip and work it toward the middle in a concentrated area, then use a clean brush to feather and blend the edges. The feathering creates the ombré effect without hard lines. If you oversaturate the glitter early on, you can pull some back with a clean brush before it dries. Seal with a top coat, which will make the glitter sparkle even more dramatically.
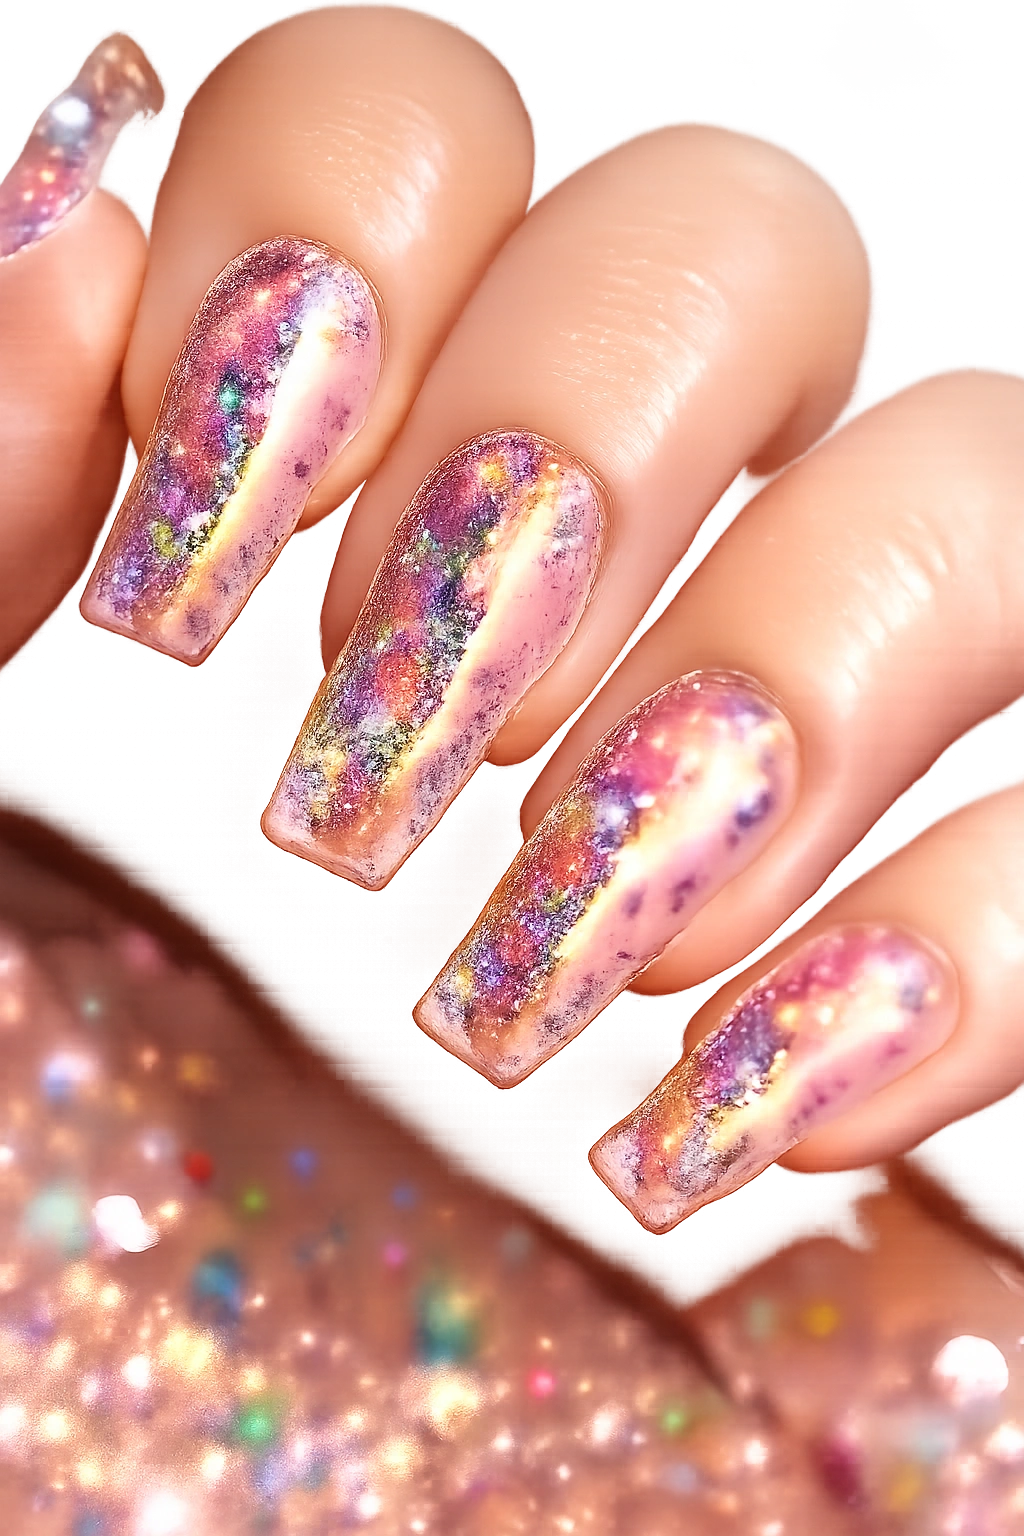
5. French Ombre With Holographic Tips
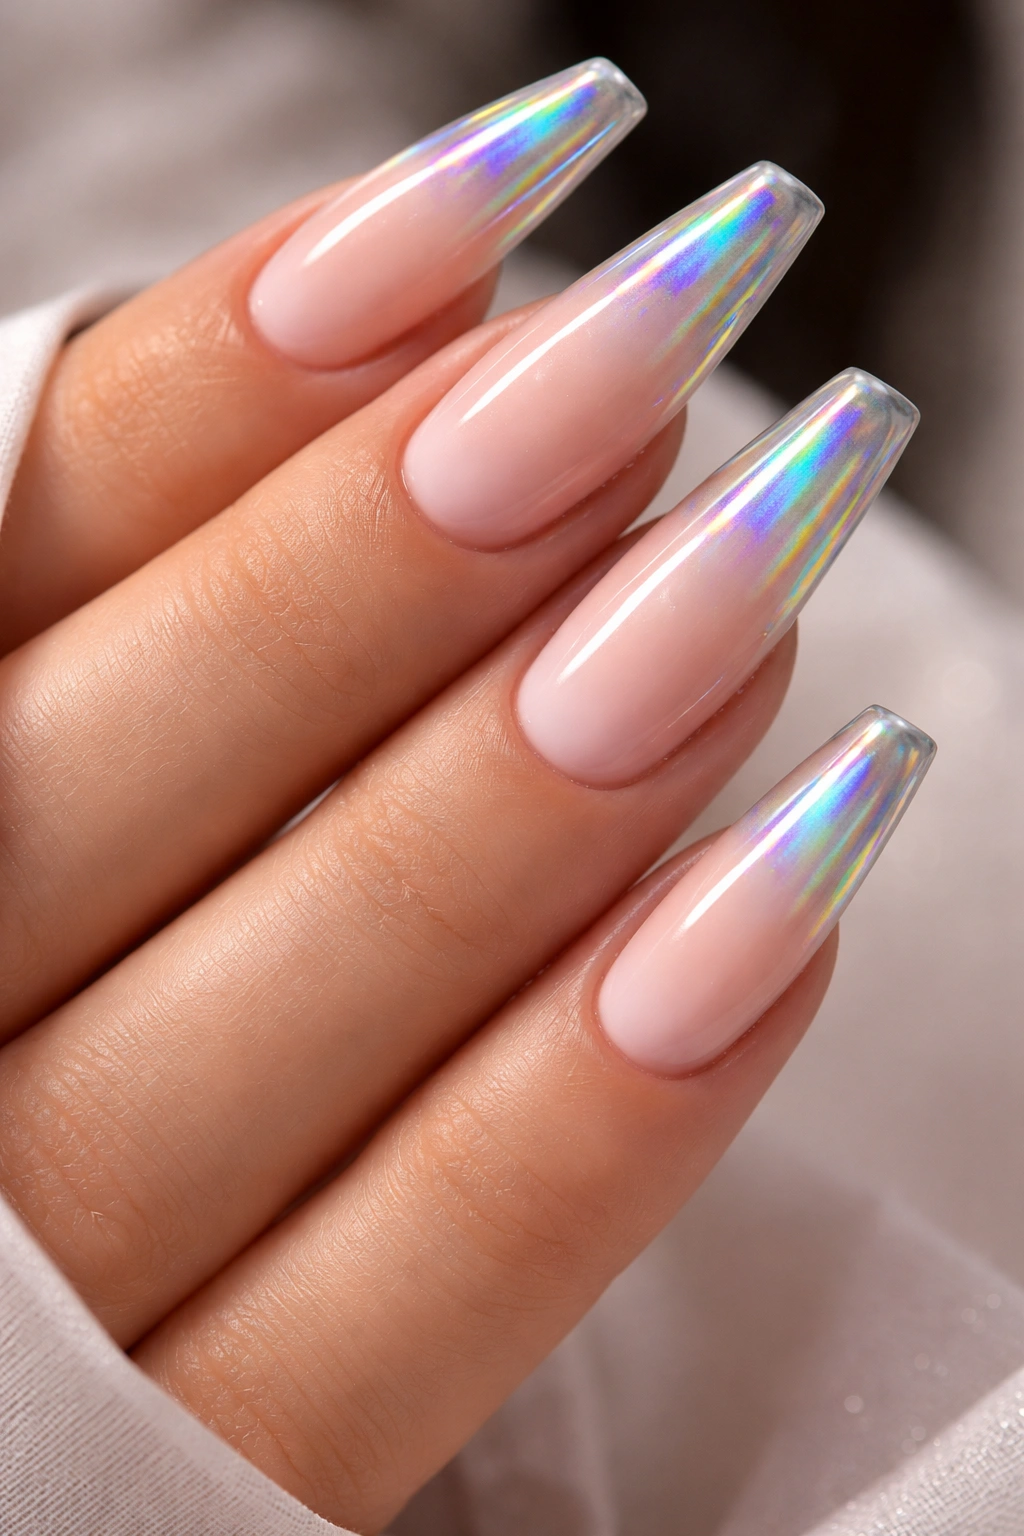
A gradient base shifts from a neutral pale pink or nude into tips that showcase full holographic chrome effects, creating rainbow reflections that seem to shift depending on light and angle. The holographic effect is concentrated at the very tip, with the gradient transitioning smoothly from the main nail color into the chrome.
The Modern Take on French Manicure
Traditional French manicures feature high contrast between base and white tips; this version is more contemporary while still honoring the classic concept. The holographic tips feel futuristic and playful while the gradient base keeps everything wearable and sophisticated. Coffin nails provide the ideal shape for this because the tapered tip area is small enough that the holographic effect feels like an intentional accent rather than overwhelming the entire nail.
Application Techniques
This design works beautifully with gel polish, though it’s possible with traditional polish if you work quickly. Apply your base gradient as you normally would—sponge method or brush-blended. Once fully cured or dried, apply holographic powder or a holographic gel polish to just the tip area. If using powder, apply it to a slightly sticky top coat layer. The key is sharp definition between the gradient and the holographic portion, so take your time with the line where they meet. A final glossy top coat seals everything and intensifies the holographic effect by creating multiple reflective layers.
6. Classic Red With Symmetrical Gold Striping
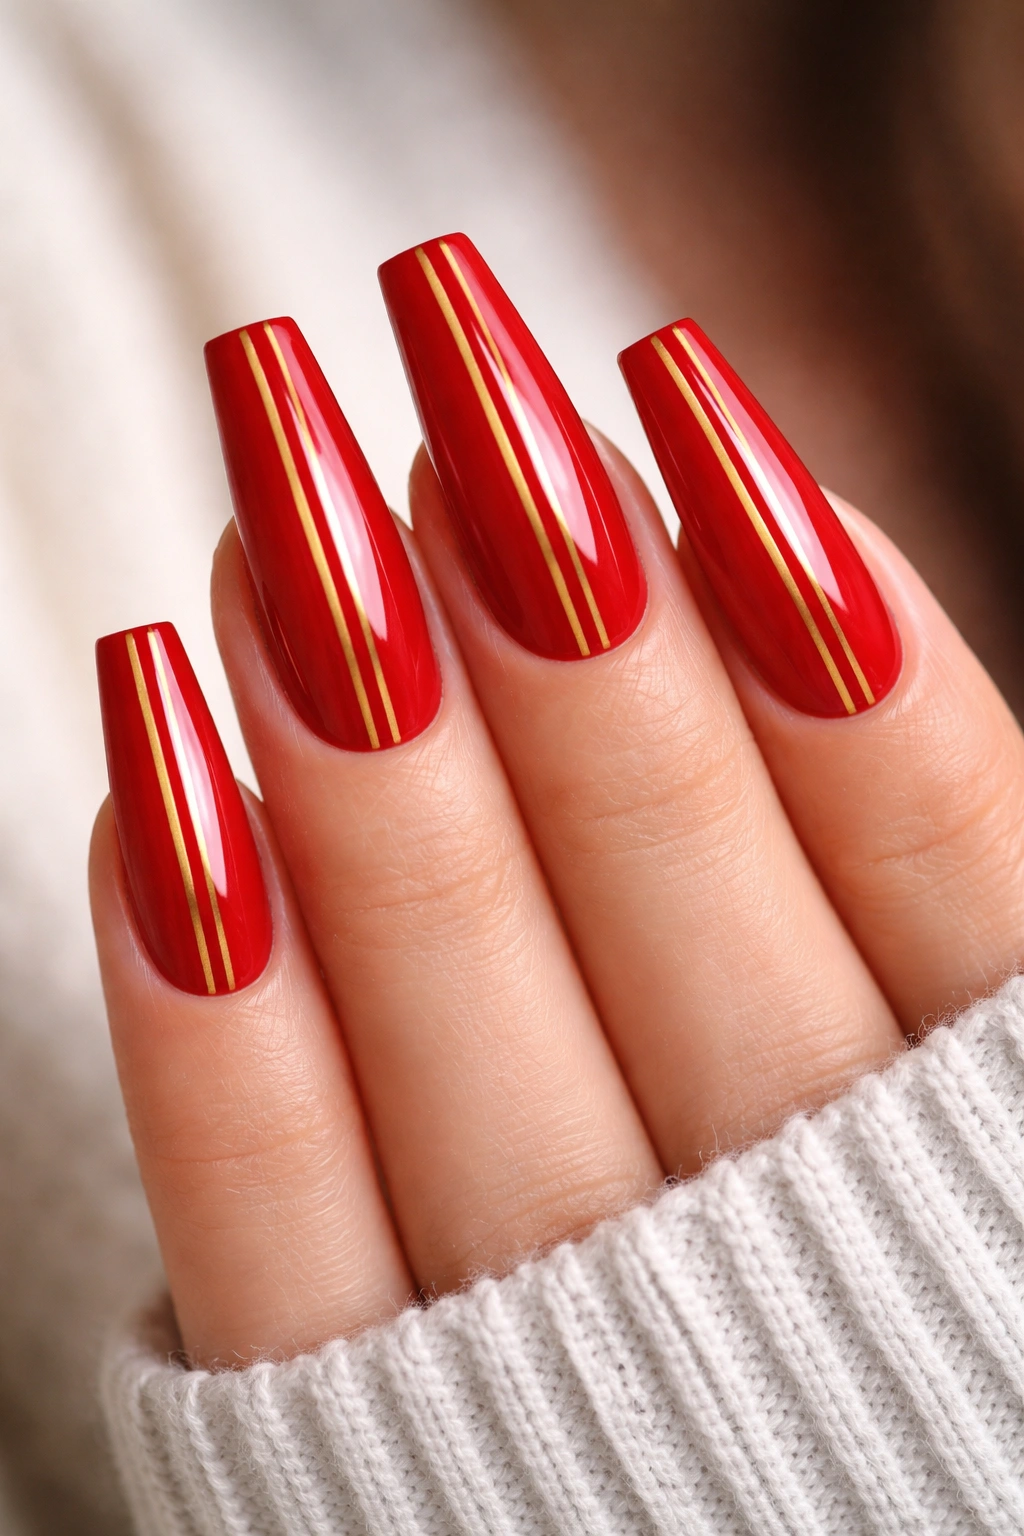
A bold red base provides a confident foundation, while thin gold stripes create perfectly symmetrical vertical lines running from base to tip. The stripes might be placed at the outer edges of the nail, down the center, or creating a subtle grid pattern that feels organized and intentional without being overly geometric.
Timeless Appeal With Modern Execution
Red and gold is arguably the most universally flattering color combination for nails, and the symmetrical striping elevates it beyond simple solid color. The design reads as polished and intentional rather than basic, with a level of detail that makes the manicure feel expensive and carefully considered. On long coffin nails, perfectly straight lines are easier to execute because there’s more length to work with—the stripes have room to shine without feeling cramped.
Creating Perfect Symmetry
Use painter’s tape or specialized nail striping tape as guides for your gold lines. Measure your nail width and mark the center point, then place tape accordingly. Use a thin striping brush and gold polish or a gold gel to create lines. Multiple thin coats look more refined than one thick coat, so resist the urge to fully cover with your first application. Once the striping is complete and fully dried, seal everything with a glossy top coat that makes the red deeper and the gold more brilliant.
Worth knowing: The contrast between matte red and shiny gold creates additional visual interest, so ensure your top coat is glossy rather than matte for maximum impact.
7. Pastel Rainbow Gradient
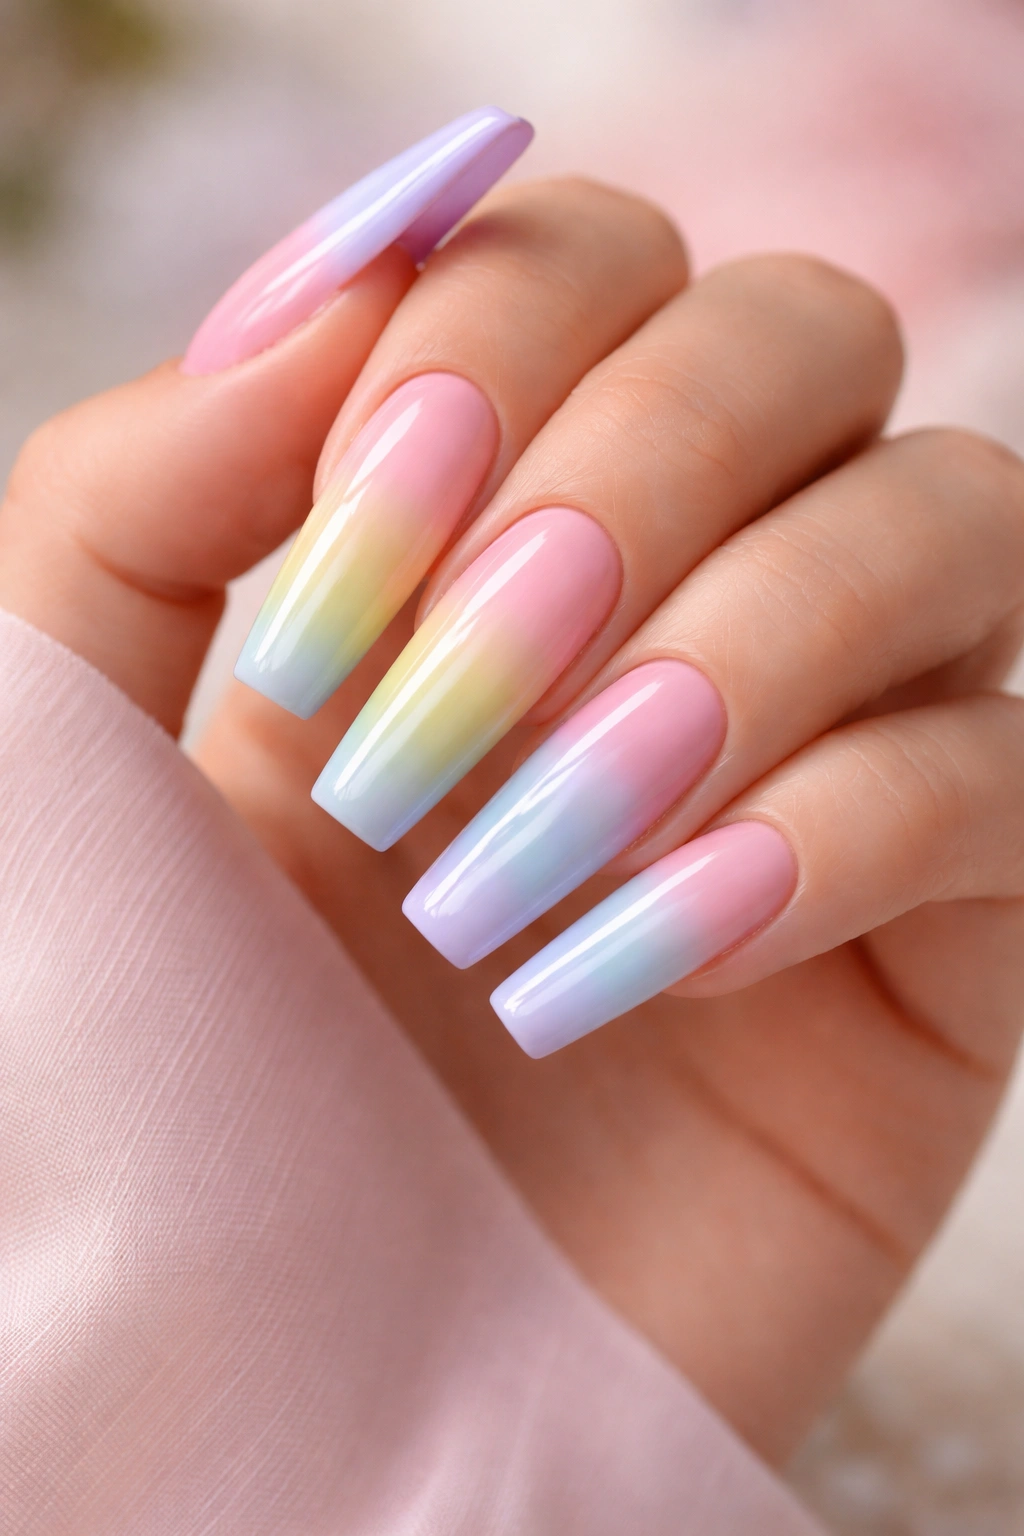
Soft, candy-colored gradients flow across the nail in rainbow order—pale pink, soft yellow, mint green, lavender, and baby blue—creating a dreamy, feminine aesthetic that somehow avoids looking childish. Each finger can feature a different color transition or all fingers can share the same gradient sequence.
Why Pastels Work on Long Nails
Pastel shades have natural softness that doesn’t feel overwhelming even when you’re working with bright, saturated colors. The coffin shape elongates these colors, making them feel more sophisticated than they might on shorter nails. A pastel rainbow on coffin nails reads as artistic and intentional rather than costume-like or overly cute—it’s the shape and length that elevates the concept.
Executing a Smooth Rainbow Transition
The sponge method works best for multi-color gradients. Paint thin stripes of each pastel color directly onto a makeup sponge, arranged in rainbow order with slight overlaps between colors. Dab the sponge repeatedly onto the nail—don’t drag it, which creates harsh lines. Build up layers gradually, re-damping your sponge between applications to avoid over-saturating. The coffin shape’s extended length means the gradient has plenty of space to display smoothly, so take your time and layer for a seamless transition. Top coat seals everything and creates smoothness.
8. Glossy Black With Embedded Star Constellations
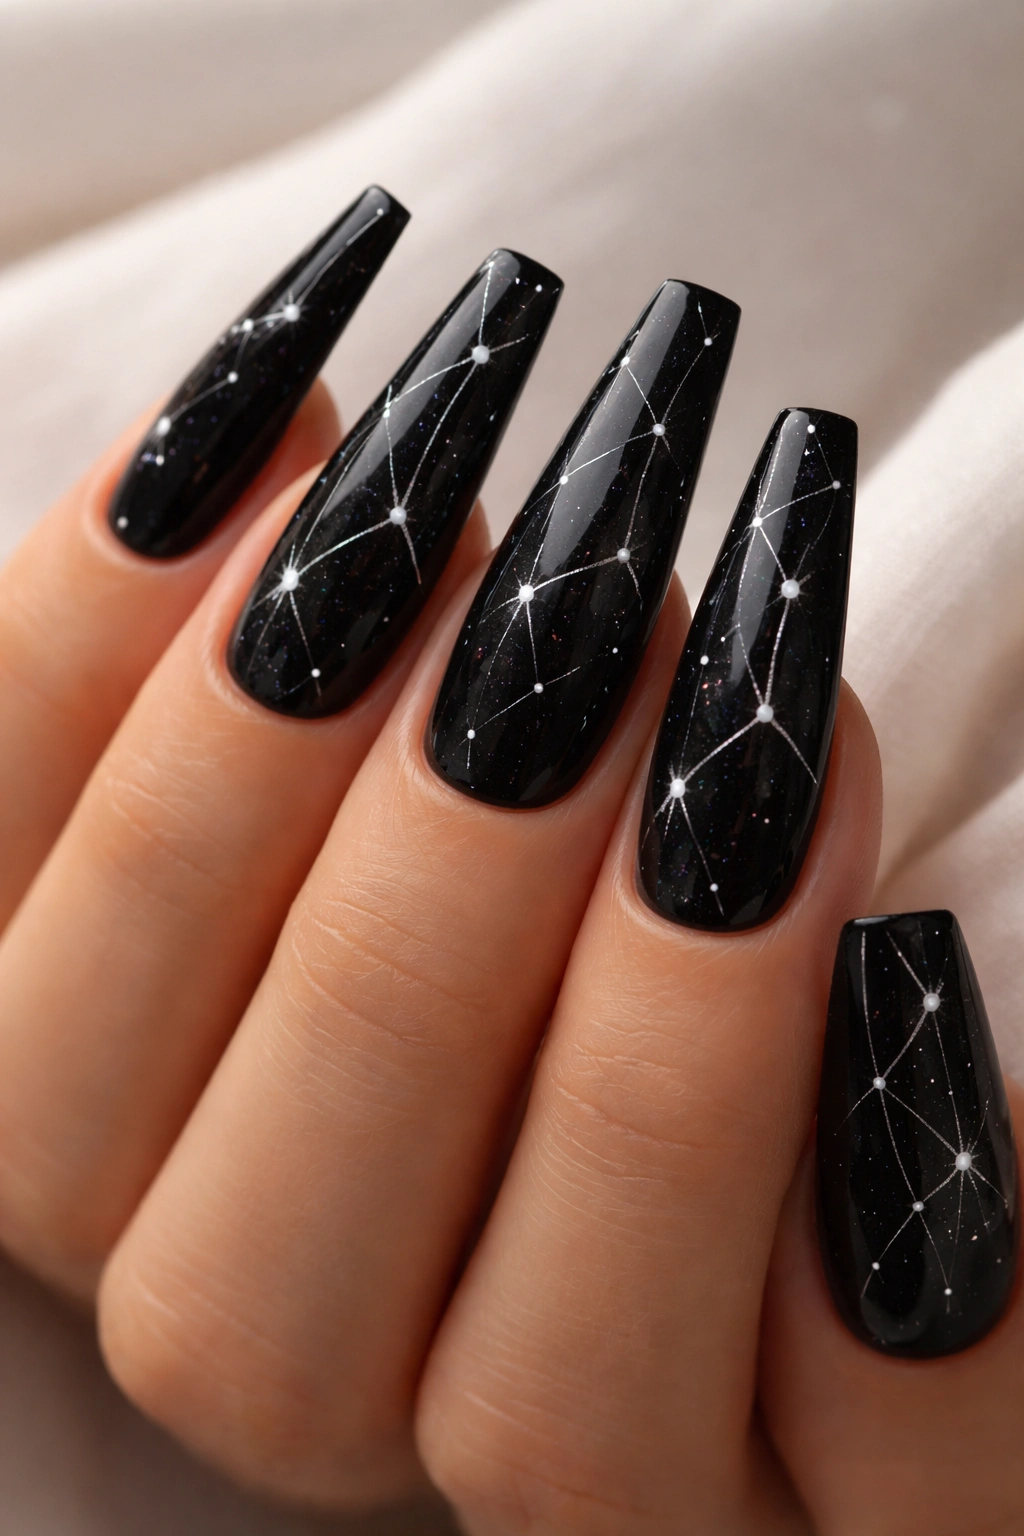
A sleek black foundation features tiny star constellations created with white dots and delicate connecting lines, like a wearable night sky. The constellations are scientifically accurate or creatively arranged, with different constellations on different fingers or a unified pattern across the full set.
Artistic Meets Wearable
This design bridges the gap between artistry and everyday wearability. The black keeps everything sophisticated and elegant, while the constellation detail gives the manicure personality and conversation-starting appeal. The design works because it combines restraint (black base, white details) with meaningful detail (actual constellation patterns), creating visual interest without chaos.
Creating Accurate Constellations
Research actual star constellation patterns before you begin—this authenticity is what makes the design feel special rather than random dots. Use a very thin brush or dotting tool to place white dots where stars are located. Once you’ve placed all the stars, use a super-thin brush to connect them with delicate white lines. This works as a two-step process; don’t try to rush it by attempting lines without established star points first. The coffin shape gives you plenty of room to include multiple constellations across different nails. Let everything dry fully before sealing with a glossy top coat.
9. Dusty Rose With Pearl Accents
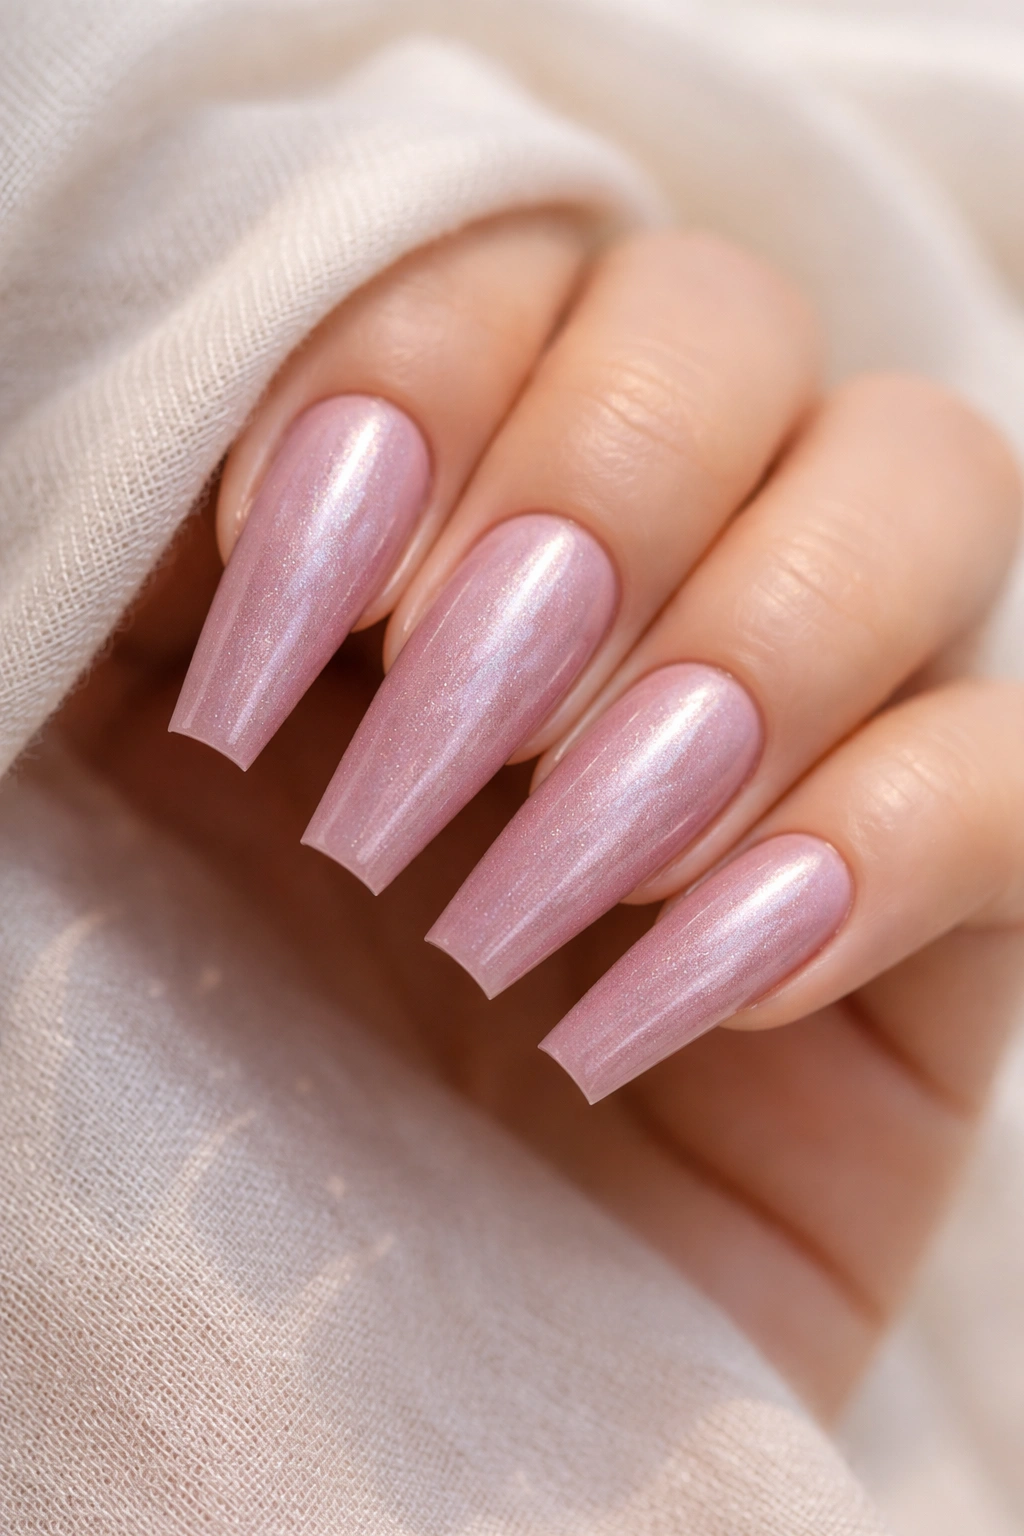
A muted, dusty rose base provides a sophisticated neutral that works with virtually any skin tone, accented with iridescent pearl powder or pearl-finish gel applied strategically across the nail surface. The pearl effect creates subtle dimension and catch-the-light appeal without being overtly sparkly.
The Sophistication of Understatement
Dusty rose occupies a special place in the color spectrum—cool enough to feel modern but warm enough to feel approachable. It’s one of the most versatile colors for everyday wear that still looks intentional and intentionally chosen. Adding pearl accents creates enough visual interest that the design doesn’t feel plain, while maintaining the overall sophisticated aesthetic.
Applying Pearl Effects
Pearl powder applied to slightly tacky gel base coat creates a gorgeous shimmering effect that catches light subtly. Apply the dusty rose base and let it cure. While the top coat is still slightly tacky (just before curing), dust pearl powder across the nail—you can apply it to the entire surface for a subtle pearl effect, or concentrate it on specific areas like the tips or the center. For more control, mix pearl powder with clear gel and apply with a brush. Cure under UV/LED light, then seal with a final glossy top coat that intensifies the pearl effect.
10. Chrome Holographic Ombre
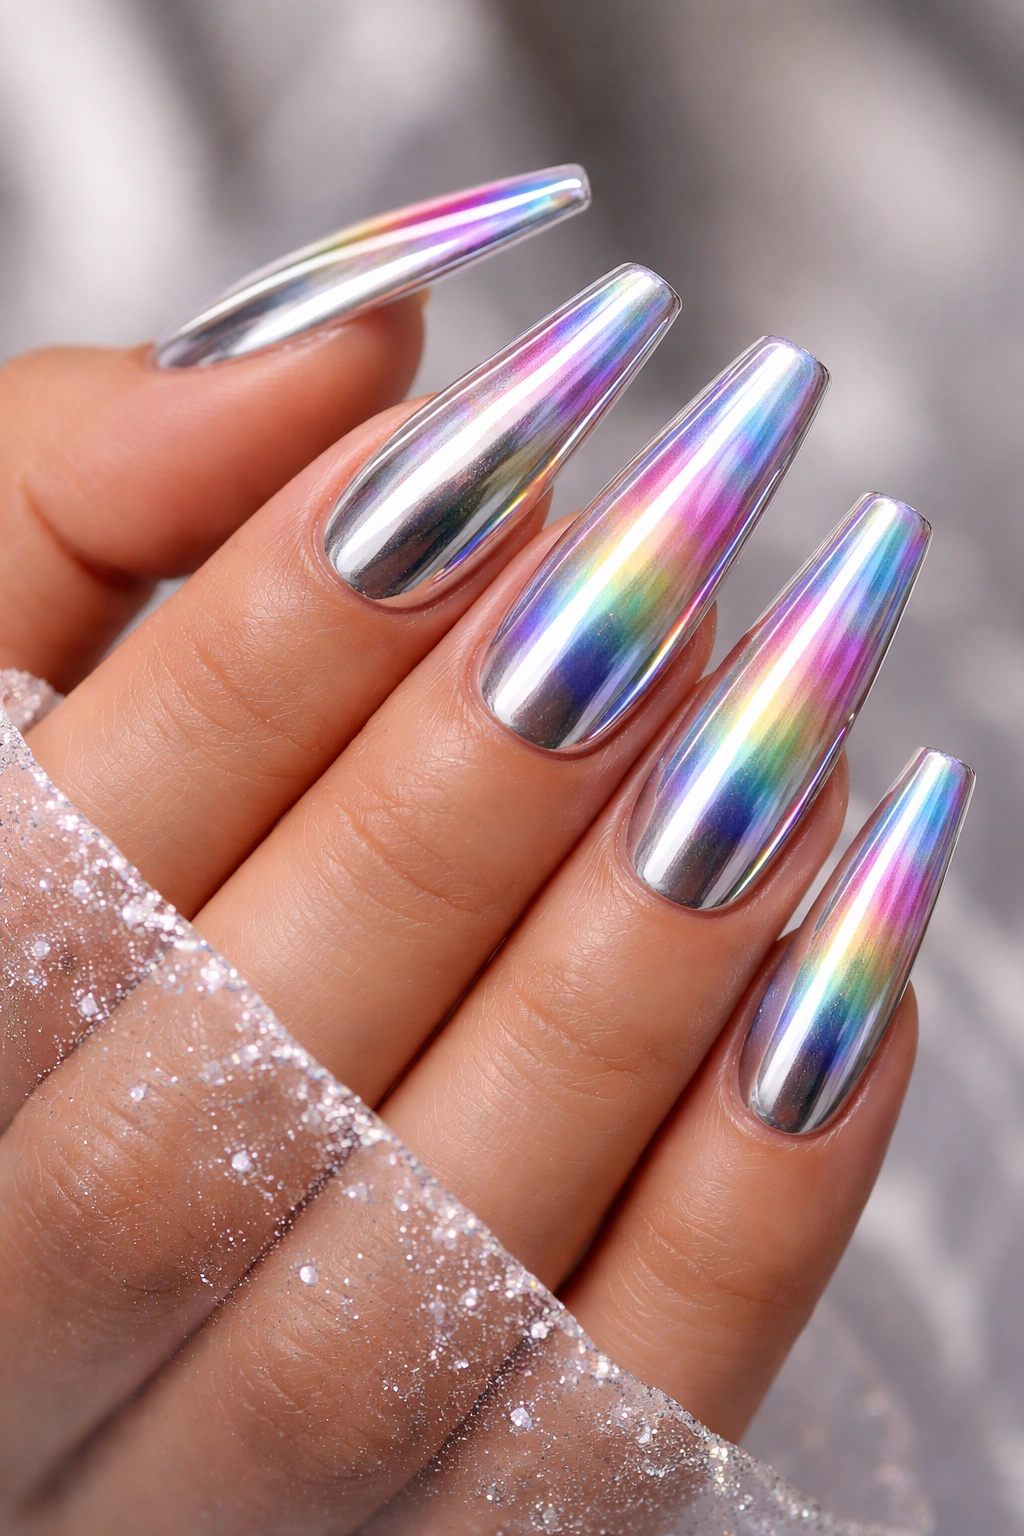
The entire nail transitions smoothly from chrome silver to holographic rainbow effects, creating an otherworldly appearance where colors shift and change depending on angle and light. There’s no separation between the chrome and holographic portions—they flow together seamlessly from silver into prismatic color.
Cutting-Edge Nail Art
This design reads as genuinely futuristic and high-fashion. It’s technically simple to execute but looks extraordinarily complex, making it perfect for impressing people who assume elaborate-looking designs must take hours to create. The long coffin shape actually makes this easier to achieve because the gradient has more space to transition smoothly.
Achieving Seamless Chrome-to-Holographic Transition
Chrome powder requires a specialized chrome base or tacky gel layer. Apply your base coat and make sure it’s sticky. Work the chrome powder on first, focusing on the base area of the nail. The chrome will be reflective silver at this stage. Next, apply holographic powder over the chrome in the tip area, gradually overlapping and blending where the two effects meet. The overlap creates the ombré transition. Don’t over-blend; slight texture and variation actually enhances the otherworldly effect. Cure under UV/LED light, then seal with glossy top coat. The top coat dramatically intensifies both the chrome and holographic effects.
11. Nude With Geometric Negative Space
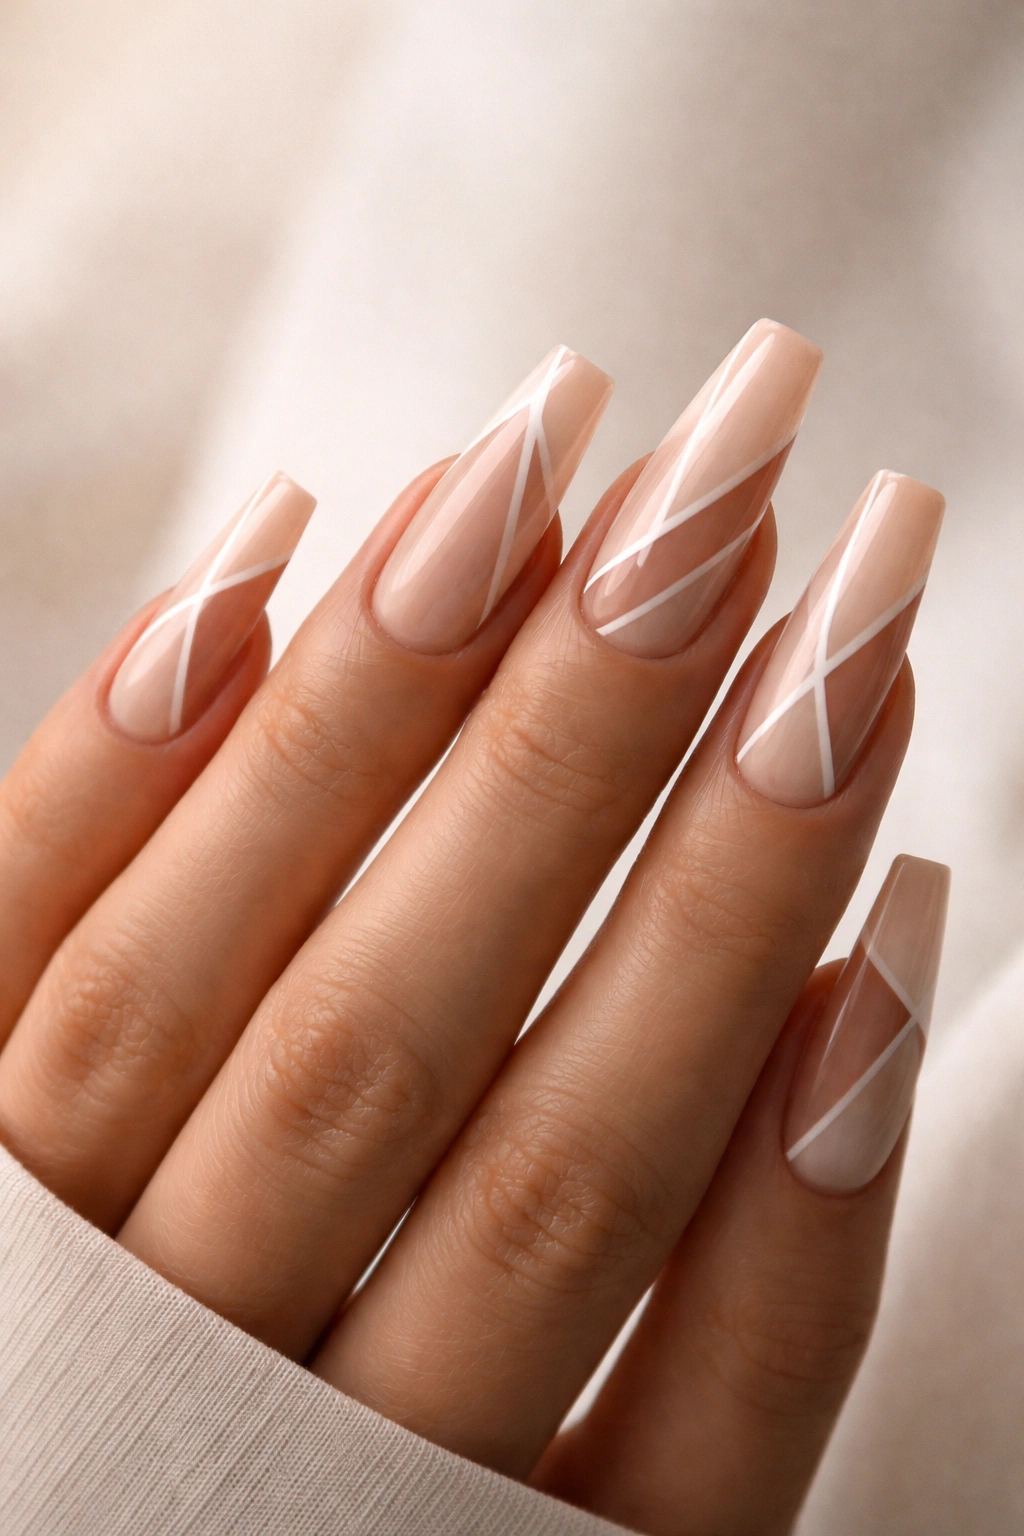
A neutral nude base features carefully cut-out negative space creating geometric patterns—perhaps triangles, stripes, or abstract shapes where the nail itself shows through or a contrasting color peeks from underneath. The negative space is clean and precise, creating bold graphic impact through what’s NOT covered rather than what is.
Negative Space Design Appeal
Negative space designs always look more interesting than you’d expect because they force the eye to work slightly harder, creating engagement. On coffin nails, the extended length means you have room to create larger geometric patterns that read clearly without feeling cramped. The design feels modern and intentional rather than accidental.
Executing Perfect Negative Space
If using traditional polish: apply your nude base and let it dry completely. Use painter’s tape to create geometric patterns for the negative space areas, carefully pressing tape edges down so polish doesn’t seep underneath. Paint your contrasting color or leave the space bare, then remove the tape carefully. If using gel: apply your nude base and cure. Use a thin brush or specialized negative space stencil to create clean geometric patterns. The precise edges are easier to achieve with gel than with traditional polish, and the design looks sharper as a result. Seal with top coat.
12. Deep Plum With Silver Scattered Glitter
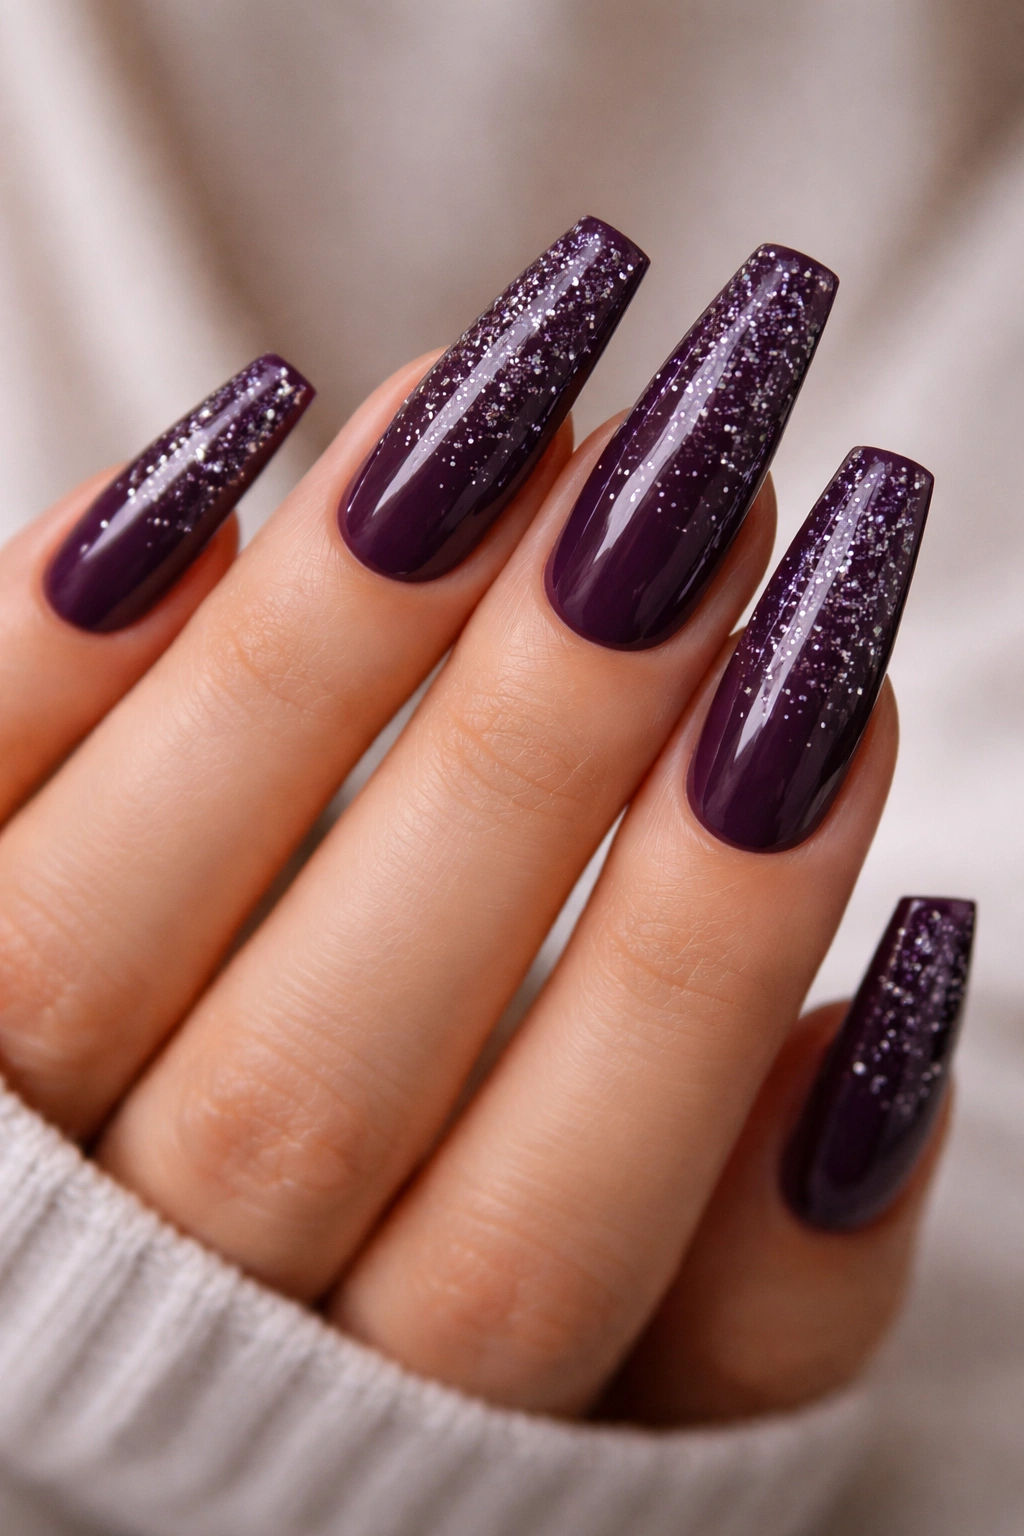
A rich, deep plum base—not quite purple, not quite burgundy—serves as the perfect backdrop for scattered silver glitter particles distributed randomly across the entire nail surface. The glitter catches light and creates sparkle without the design feeling costume-like or overly festive.
Rich Colors Simplified by Glitter
Deep plum is an underrated color choice that works across seasons and settings. Adding glitter makes it feel celebratory without requiring elaborate nail art or complex techniques. The color depth of plum makes glitter read as sophisticated rather than playful; the same glitter pattern would feel entirely different on a pale pink base versus this dramatic plum.
Applying Scattered Glitter Perfectly
Apply your plum base coat in two coats, ensuring full coverage and a smooth finish. While the second coat is slightly tacky (if using regular polish) or before curing (if using gel), sprinkle silver glitter across the entire nail surface. You want visible sparkle but not complete coverage—some negative space where the plum base shows through is part of the appeal. For traditional polish, allow to dry naturally, then seal with top coat. For gel, sprinkle glitter before curing, cure under light, then seal with top coat. The sealed glitter stays firmly in place for weeks without lifting.
13. Translucent Jelly Pink With Pressed Flowers

A semi-transparent jelly pink base allows either the nail or a contrasting color underneath to show through slightly, creating a see-through effect. Delicate pressed flowers—real or replicated with careful nail art—are embedded or drawn onto the transparent surface, creating a botanical aesthetic with nostalgic appeal.
Botanical Elegance
The translucent quality makes this design feel light and romantic while the flowers add artistic detail. Jelly tints are experiencing a resurgence in nail fashion because they feel youthful without being juvenile, and the translucency creates visual interest. Coffin nails elongate the transparent effect, creating an almost glass-like appearance that’s distinctly modern.
Creating the Jelly Effect With Flowers
For a true jelly effect, use sheer pink gel or a translucent pink builder gel over a light base—bare nail or pale pink polish. For pressed flowers, you can either embed actual dried flowers in clear gel or recreate them with nail art. To embed real flowers: place tiny dried flowers (micros daisies, baby’s breath, or small pressed petals) into the sticky layer of clear gel before the pink is applied on top. Build the jelly pink over them carefully. To recreate flowers with art: once your jelly pink base is cured, use a thin brush and green, white, pink, or yellow gel to paint tiny flowers directly onto the surface. This requires a steady hand but the result is equally beautiful. Seal with glossy top coat.
14. Cream Base With Art Deco Gold Lines
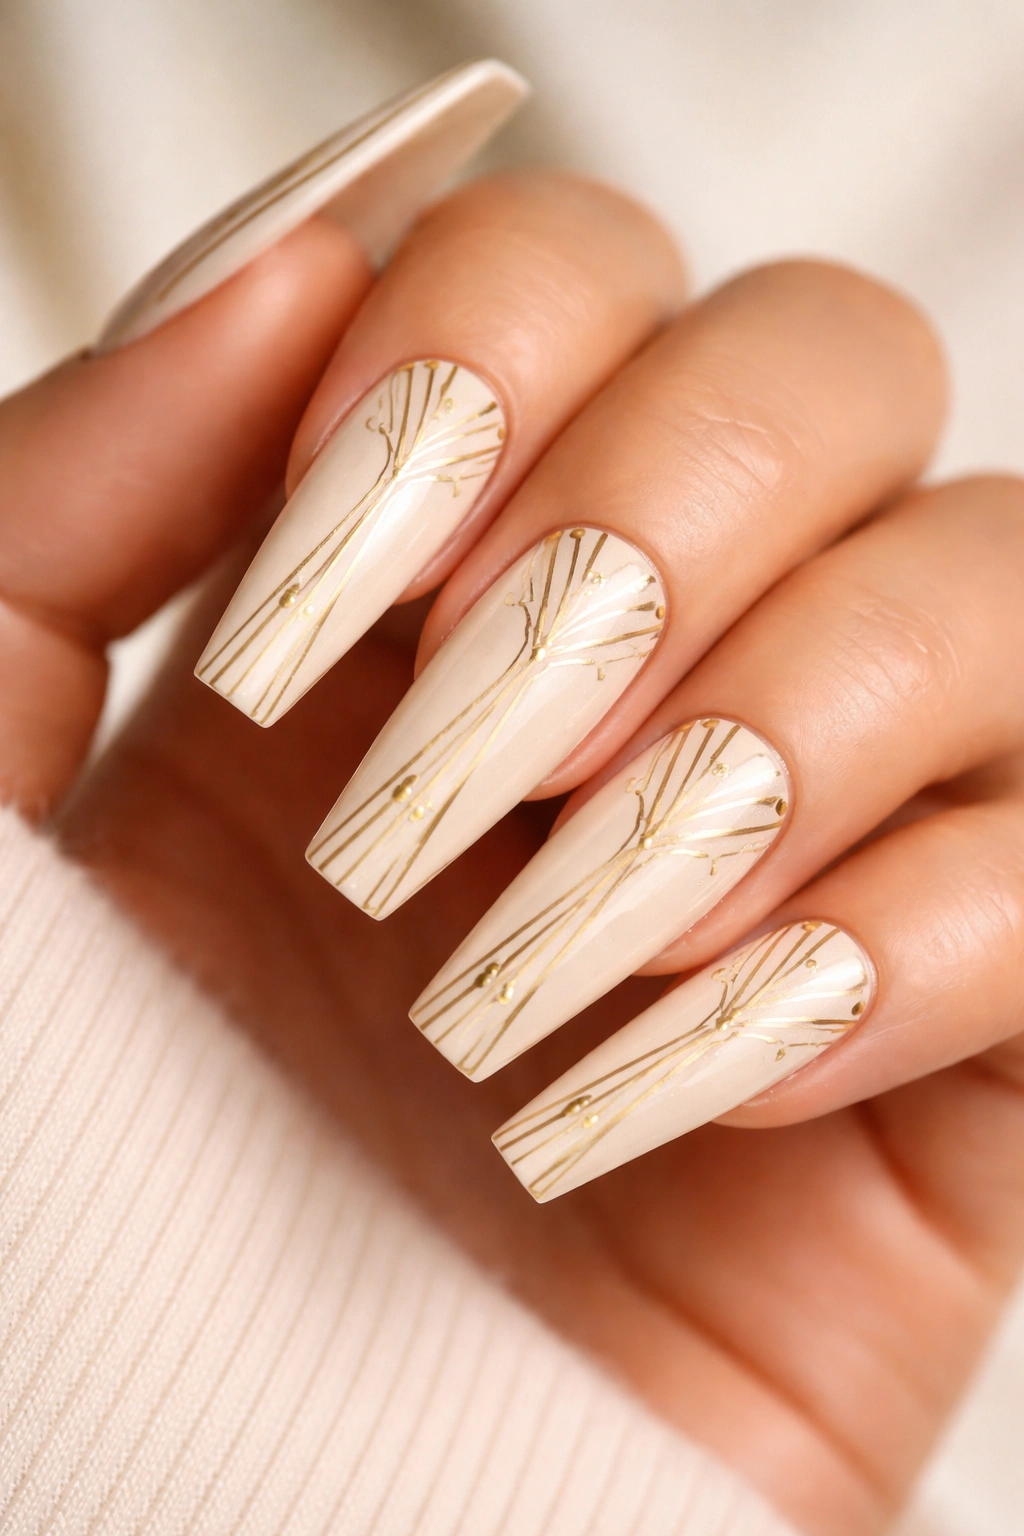
A creamy off-white base provides a canvas for intricate Art Deco-inspired gold linework—geometric patterns, sunburst designs, and architectural shapes that evoke glamour from the 1920s era. The linework is symmetrical and precisely executed, creating a sense of intentional, luxury design.
Vintage-Inspired Sophistication
Art Deco is inherently elegant and timeless, and when translated to nails, it creates an impression of polish and intentionality. The geometric precision of Art Deco design means the patterns are recognizable even at small scale on a nail. The cream-and-gold color combination is universally flattering and works across seasons, ages, and styles.
Achieving Art Deco Precision
Reference actual Art Deco designs for authenticity. Use a very thin striping brush and gold gel or polish to create your patterns. Start with the largest, most prominent lines—often a sunburst or geometric shape down the center or across the nail. Build outward with additional lines, maintaining symmetry as you go. If one side has three parallel lines, the other side should have the same arrangement. The coffin shape naturally accommodates symmetrical designs because the shape itself is balanced. This works beautifully with negative space—you don’t need to cover every millimeter; leaving gaps and breathing room is part of the aesthetic. Cure and seal with a glossy top coat that intensifies the gold and makes the cream background feel luxurious.
15. Warm Caramel With Chocolate Drip Effect
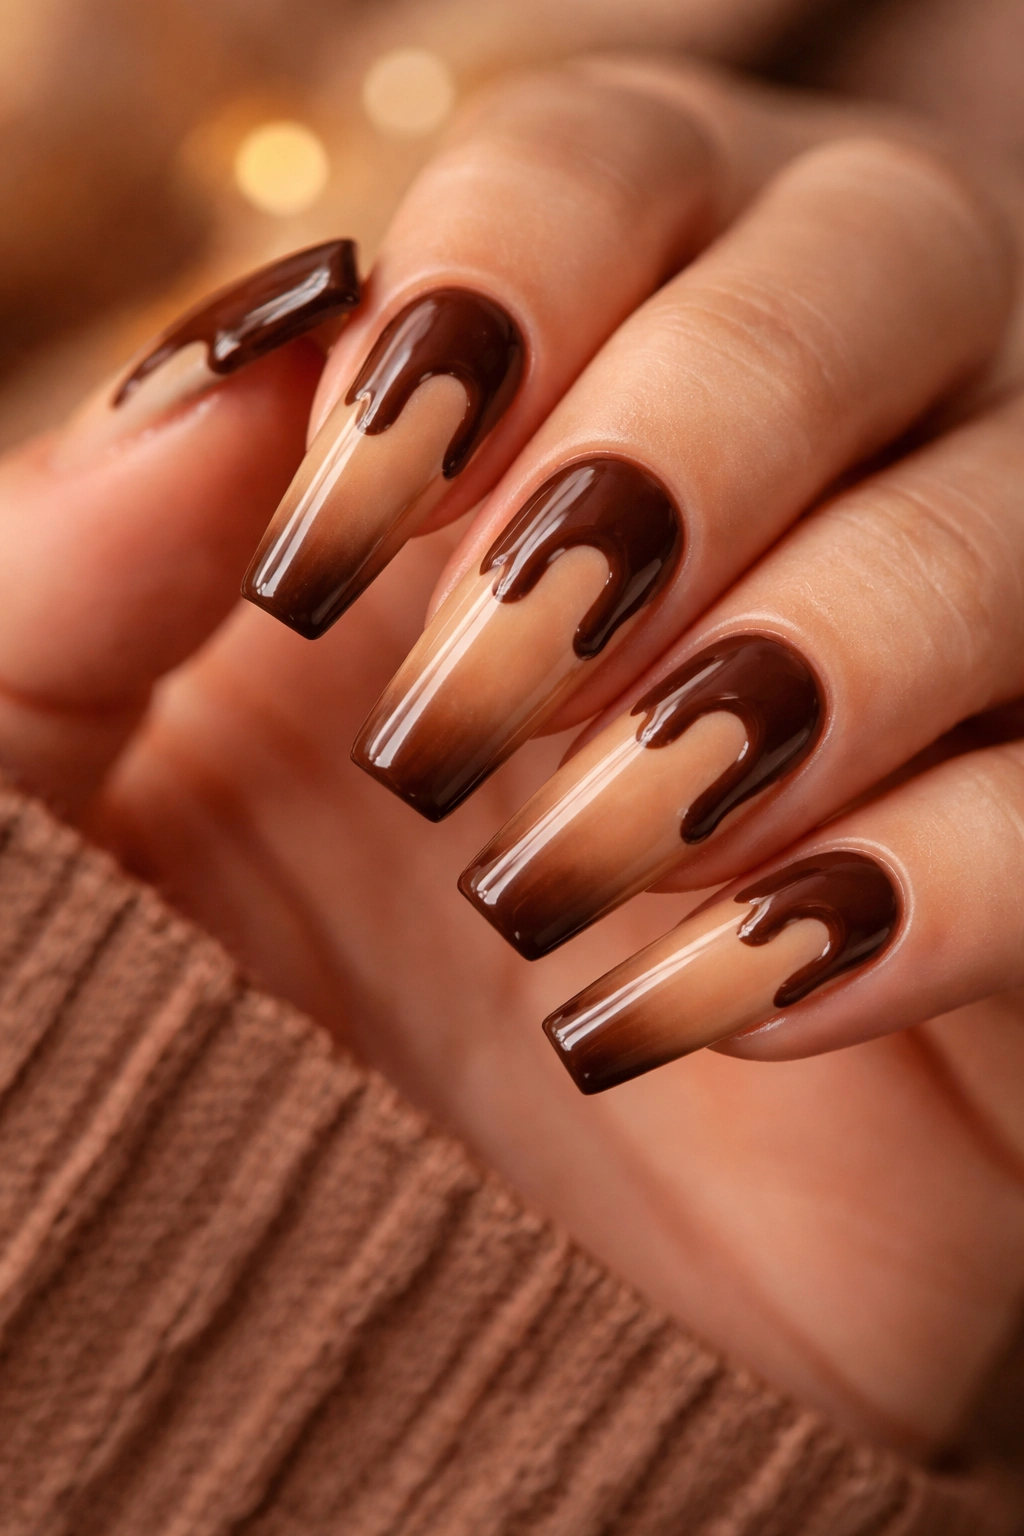
A warm caramel-beige base is topped with a darker chocolate brown that drips downward from the tips in thin, paint-like streaks, creating the effect of chocolate melting slowly down the nail. The drip is organic and asymmetrical rather than perfectly controlled, which paradoxically makes it feel intentional.
Playful Yet Sophisticated
The caramel-and-chocolate color combination feels indulgent and cozy while still reading as fashion-forward. The drip effect breaks up the potential monotony of a two-tone design while keeping execution relatively simple. The organic, slightly irregular nature of the drip means perfection isn’t required—your hand doesn’t need to be museum-quality steady.
Creating Believable Drip Effects
Apply your caramel base first and let it cure or dry completely. Using chocolate brown gel or polish, load a thin brush with product and start at the nail tip. Using a light hand, draw thin lines downward, varying the width and speed as you go. Some lines should be continuous from tip to about the middle of the nail, while others might be shorter or split into multiple rivulets. The variation creates the appearance of natural dripping rather than something mechanically applied. If a drip doesn’t look right, you can wipe it off quickly with a damp brush and try again. Once you’re happy with the drips, cure (if gel) and seal everything with a glossy top coat that makes the caramel glow.
16. Ballet Pink With Minimalist Nude French Tip
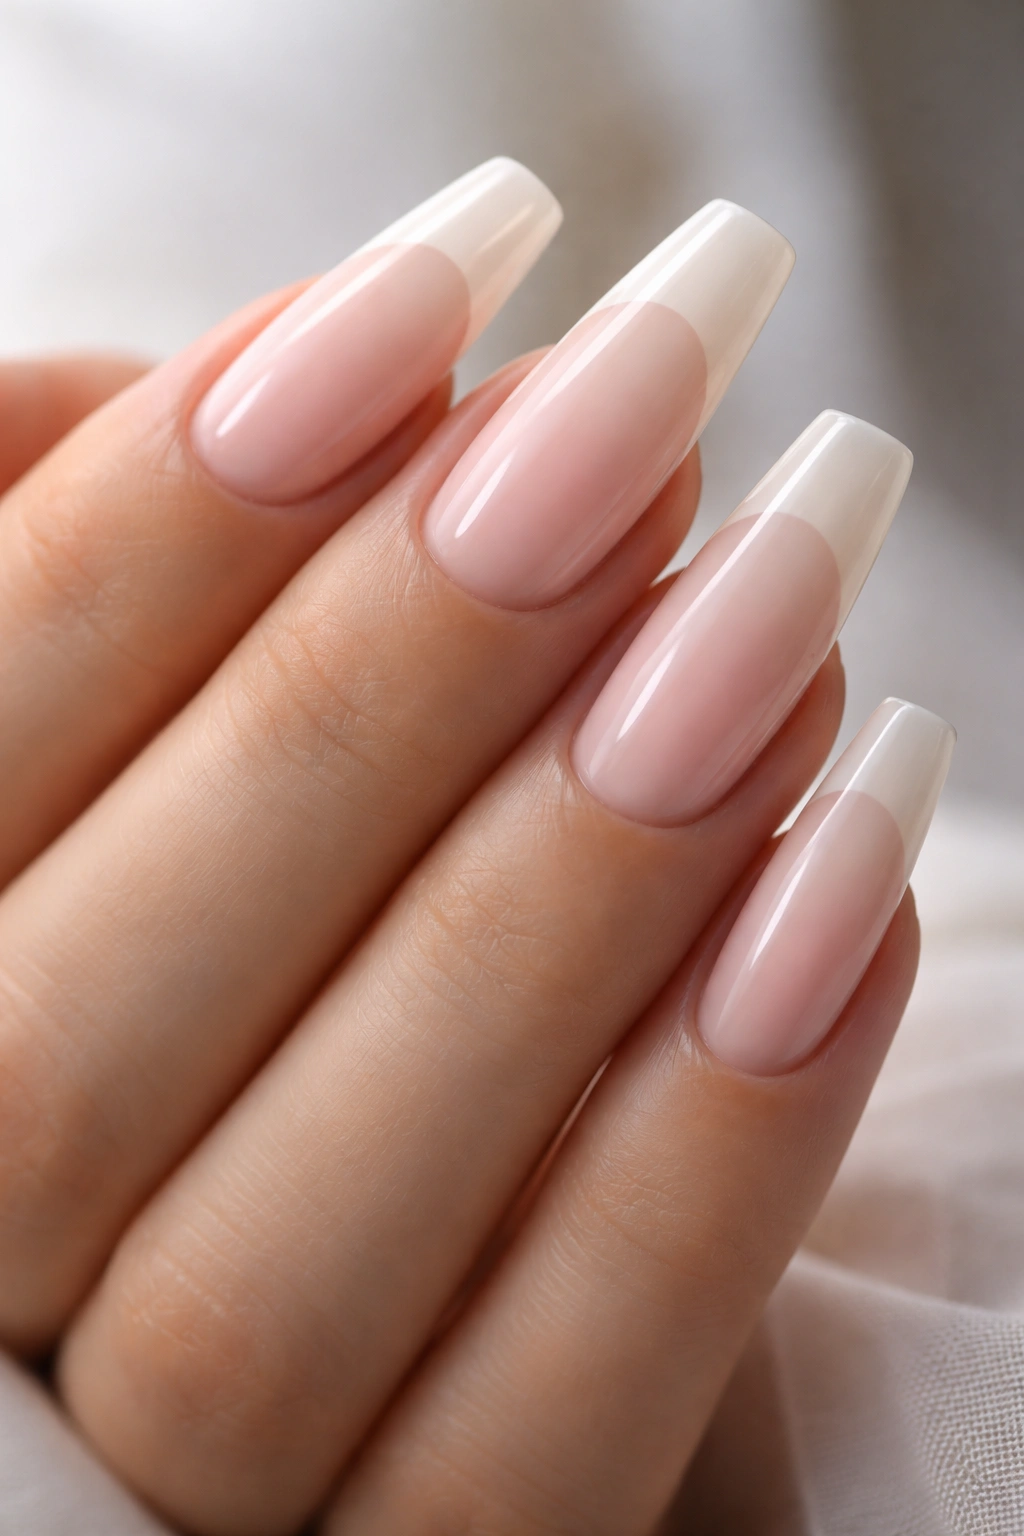
A soft ballet pink base transitions into an even softer nude-beige at the tips, creating a barely-there French manicure that’s more contemporary than classic. The transition is incredibly subtle and soft-edged rather than sharp, emphasizing the extension of the nail tip rather than creating distinct color blocking.
Understated Elegance
This design works because it respects the natural beauty of long nails while adding just enough nuance that the manicure feels intentional rather than plain. The color gradient is so subtle that it creates dimension without shouting for attention. It’s perfect for situations where you want polished, well-maintained nails that complement rather than dominate.
Achieving the Soft Transition
This works best with gel polish or acrylics, which allow precise color placement. Apply your ballet pink as the full base and cure. Use a sponge or soft brush to apply nude-beige to the tip area while the top coat is still slightly tacky (traditional polish) or to a fresh layer of clear gel before curing (gel). Blend the line where the two colors meet by feathering them back and forth slightly. The goal is a gradient so soft it’s almost imperceptible at first glance—people should notice the nails are lovely before they can identify exactly what you did. Multiple light layers of blending create a softer transition than one heavy application. Seal with a glossy top coat for a polished finish.
17. Matte Black With Holographic Geometric Shapes
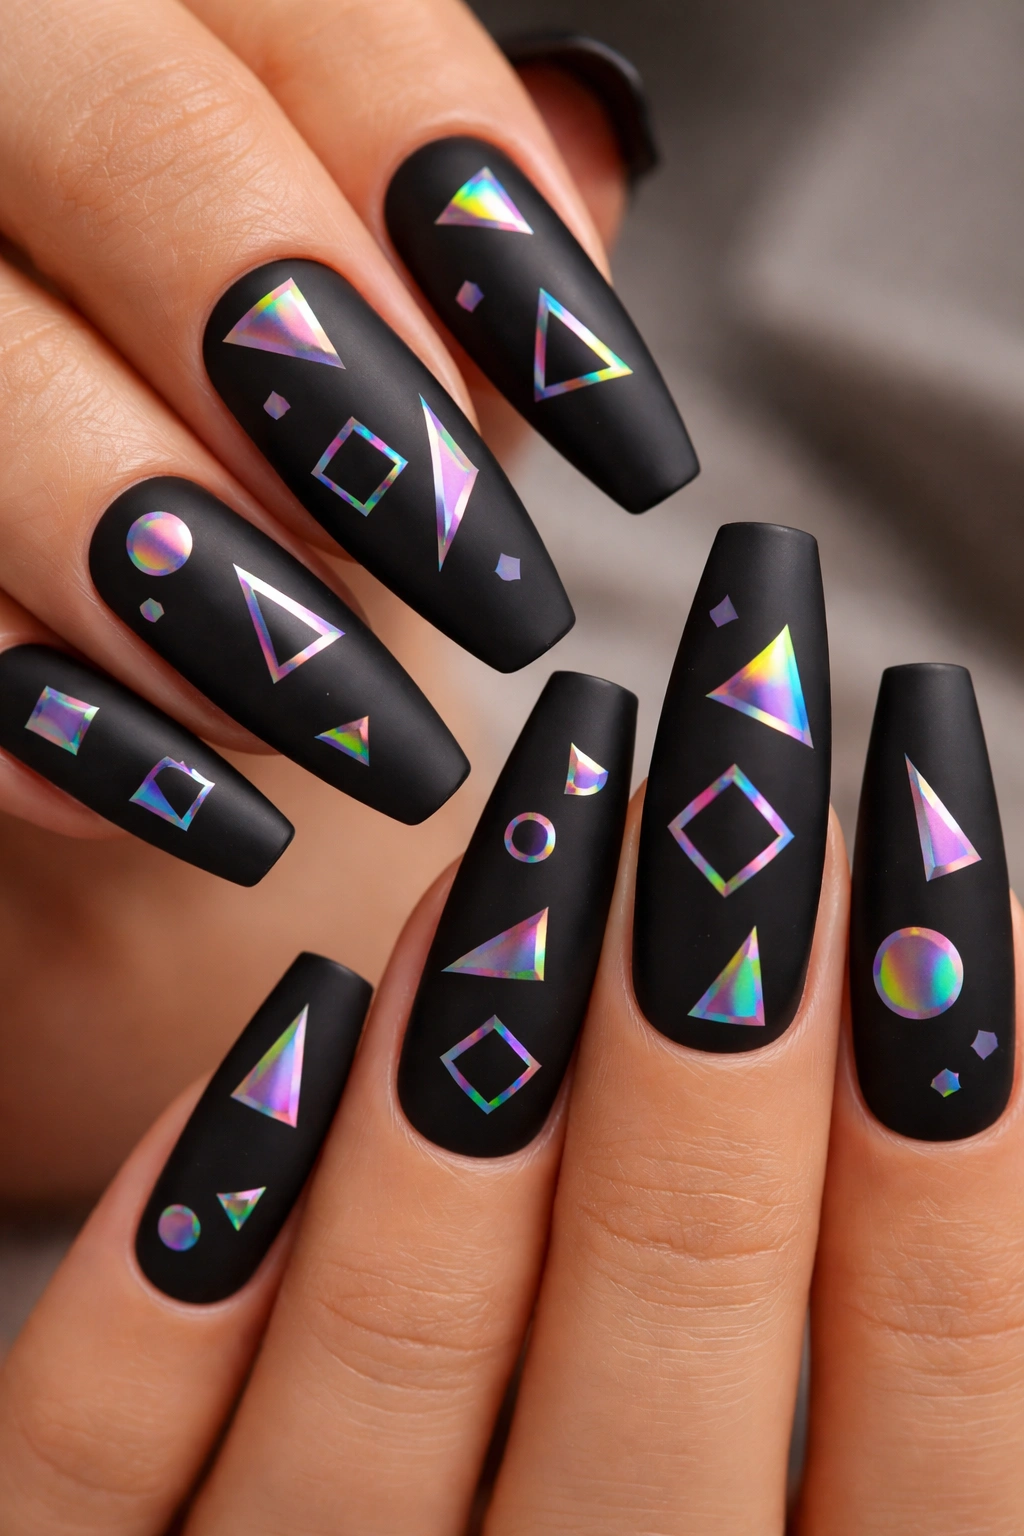
A velvety matte black foundation features holographic geometric shapes—triangles, squares, circles—that appear in specific patterns across the nail surface. The geometric shapes are created using holographic powder or foil, creating dramatic contrast and color-shifting effects against the flat black background.
Contrast as the Main Appeal
Matte versus holographic is one of the most visually striking contrasts you can create on nails. The flatness of matte makes the shifting colors of holographic pop even more dramatically. This design reads as edgy and contemporary while maintaining sophistication through the restrained color palette and geometric precision.
Applying Holographic Shapes to Matte Base
Start with a smooth matte black base—either matte top coat over black polish or matte gel. Plan your geometric shapes by lightly marking where each will go with a pencil on paper first so you execute consistently across all ten nails. Using holographic powder or foil, apply each shape individually. If using powder: apply a small amount of clear, slightly-tacky top coat in the shape area, then dust holographic powder onto it. If using foil: cut pieces of holographic nail foil into your desired shape and apply using specialized foil adhesive or clear gel. Seal everything with glossy top coat, which creates a protective layer and allows the holographic effect to refract light beautifully.
18. Soft White With Delicate Lace Pattern
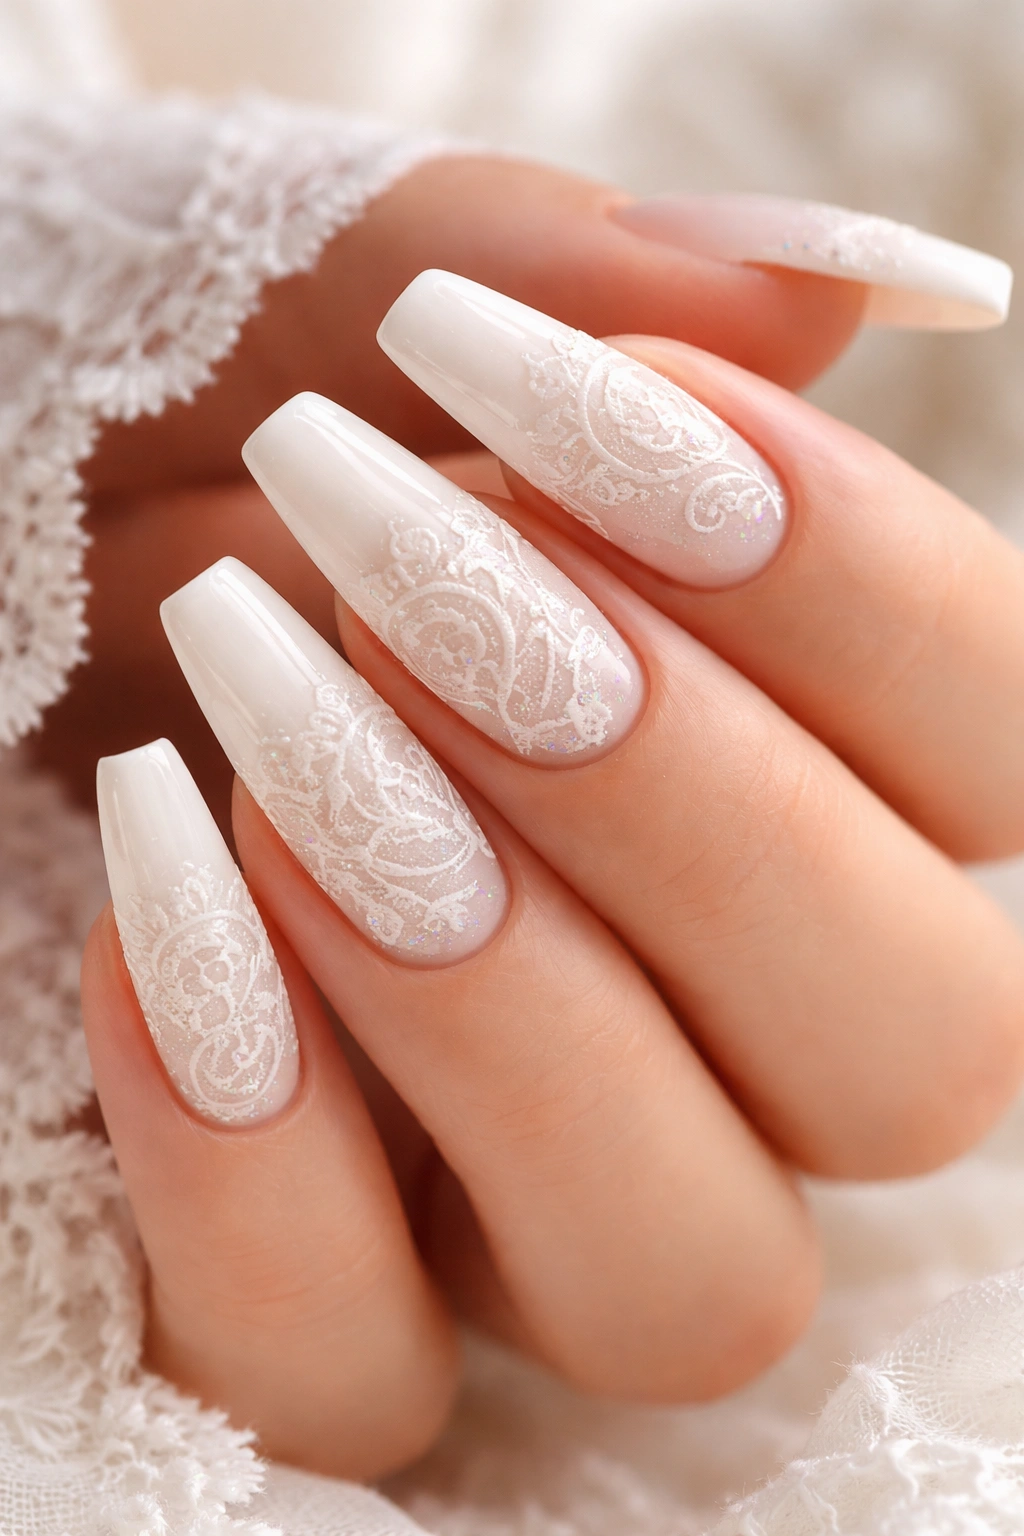
A clean, soft white base is decorated with an intricate lace pattern in ivory, silver, or nude, creating a romantic, bridal-adjacent aesthetic. The lace pattern is precise and detailed, featuring the kind of flowing curves and interconnected detail that reads as high-effort and intentional.
Romantic Without Being Overstated
White is inherently clean and fresh, and adding lace detail makes it feel intentional rather than plain. The lace pattern creates visual interest and elegance through its intricate nature. This design works across casual and formal occasions; you can dress it up for weddings or dress it down with everyday outfits.
Creating Lace Patterns
You have two approaches: freehand or template-based. Freehand requires a steady hand and lots of practice; start with simple lace-inspired curves using a very thin brush before attempting full patterns. Template-based uses specialized lace nail stencils or freehand guides. Apply your white base in two coats for opacity. Using a ultra-thin brush and ivory, silver, or nude gel/polish, recreate lace patterns. Traditional lace features flowing lines with occasional dots, so focus on curved lines with strategic dot placement rather than trying to replicate every element of actual lace. The coffin shape’s elongation means you have room to include several repetitions of a pattern, which creates visual richness. Seal with glossy top coat once everything is dry or cured.
19. Deep Burgundy Chrome
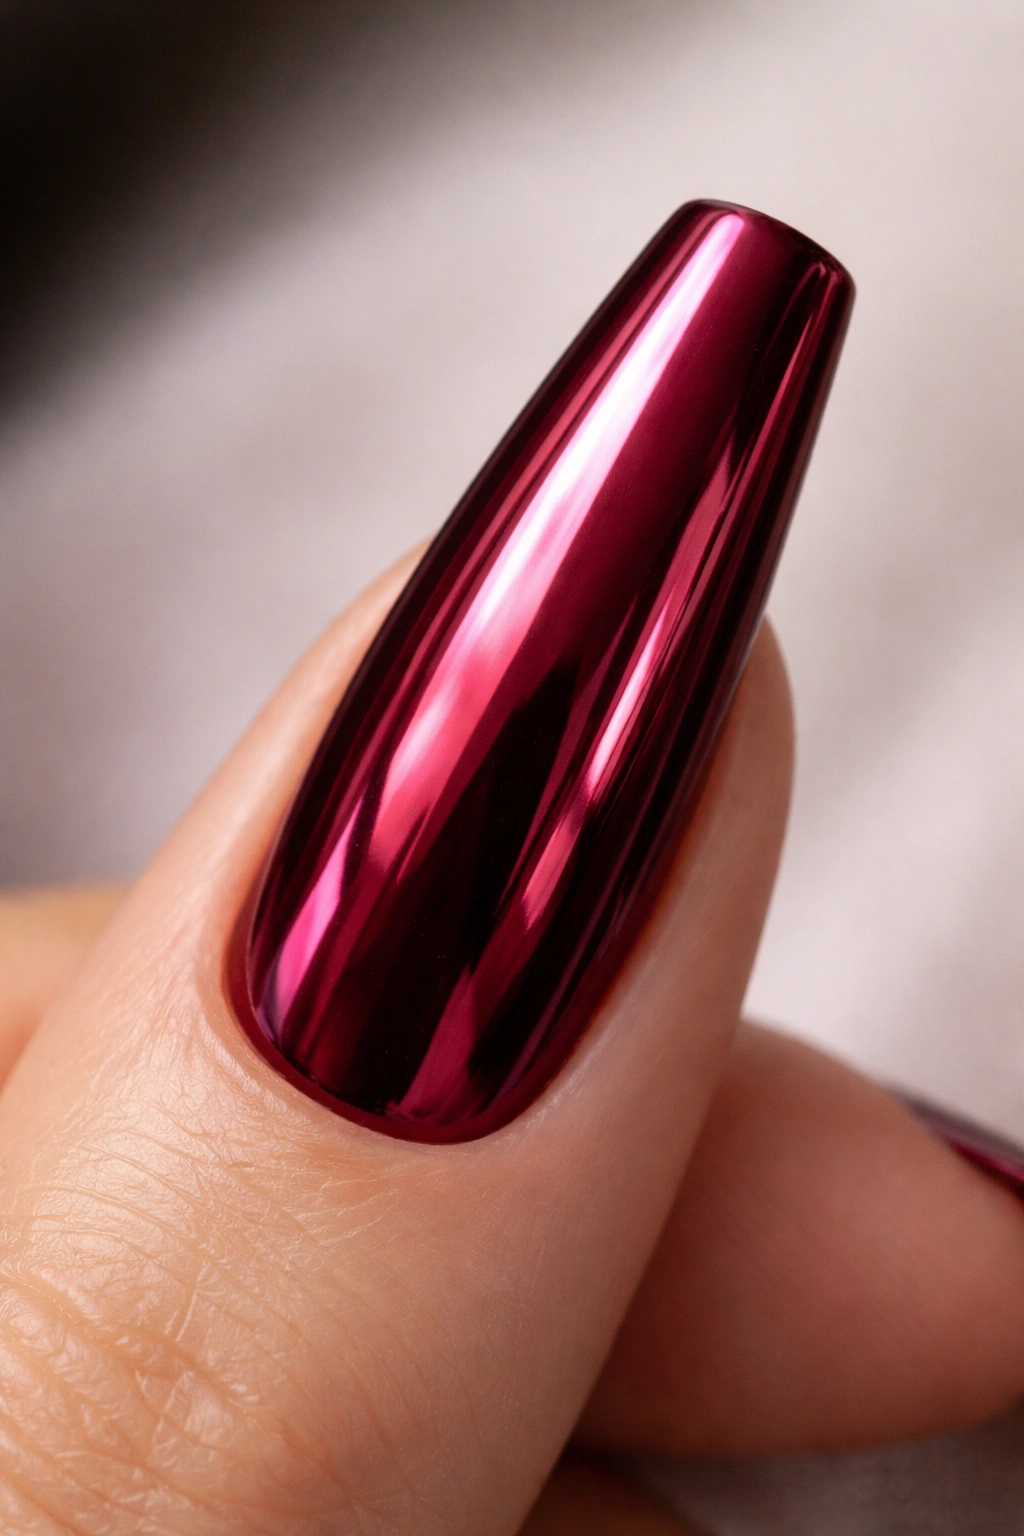
An entire nail is coated in burgundy chrome powder, creating a mirror-like finish in a deep wine color. The reflection effect creates dimension and visual interest while the burgundy keeps everything sophisticated and wearable rather than costume-like.
Impact Through Finish, Not Pattern
Chrome finishes have experienced a major resurgence, and rightfully so—they create an otherworldly appearance that draws eyes. Using chrome in a rich jewel tone like burgundy elevates the impact because it’s not silver or holographic but something unexpected. On long coffin nails, the chrome reflection follows the nail’s contours, creating movement as the nail catches light.
Achieving Flawless Chrome
Chrome requires specific application technique. Apply a chrome base coat (usually provided with chrome powder, or use tacky clear gel) to the entire nail and make sure it’s slightly sticky. Using a lint-free applicator or specialized chrome sponge applicator (usually included in chrome kits), press burgundy chrome powder onto the nail surface in a circular motion. The pressing motion—not rubbing or dragging—is essential for achieving a mirror-like finish. Build up the intensity by pressing multiple times. Once you’ve achieved full reflection, cure under UV/LED light. Apply a final glossy top coat to seal and intensify the chrome effect. The top coat should be thick enough to smooth any texture but not so thick it diminishes the reflection.
20. Nude Ombre Into Sparkly Tips
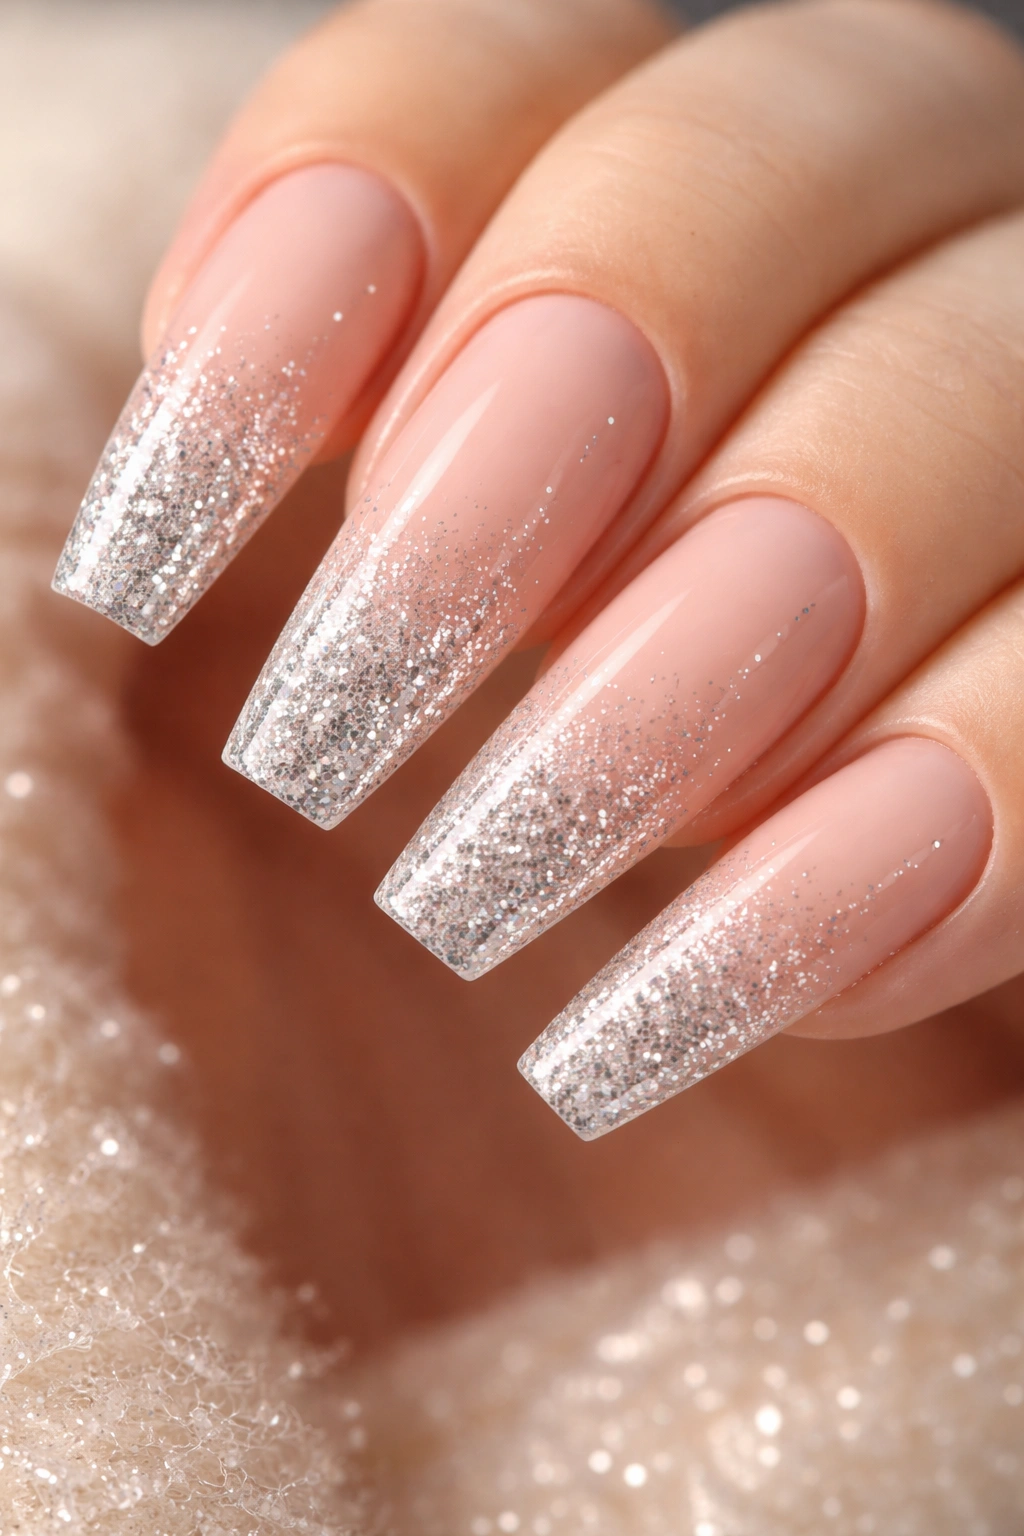
A neutral, nude color gradually transitions to increasingly sparkly tips, creating the effect of your nails becoming more and more covered in glitter as you move toward the tip. The gradient is smooth and intentional, with glitter density increasing gradually rather than suddenly appearing.
Gradual Glamour
This design bridges practical and playful—the neutral base keeps everything wearable for work or casual settings, while the increasing sparkle adds personality and shine. The gradient is the design’s entire appeal; it’s simple but visually interesting because of the thoughtful, gradual transition.
Building Sparkle Gradient
Start with a nude base applied to the entire nail. Let this dry completely. Mix clear gel or polish with fine glitter, starting with a ratio that’s mostly clear with just a hint of sparkle. Apply this mixture to the tip area of the nail, fading it outward. For the next layer, increase the glitter ratio and apply from the tip, extending slightly less far than the previous layer. Continue building layers, gradually increasing sparkle concentration and shortening how far from the tip each layer extends. By the final layer, you should have very dense glitter concentrated at the very tip. The layering creates the gradient effect without hard lines. Cure or dry completely, then seal with top coat.
21. Rich Emerald With Gold Leaf Veining
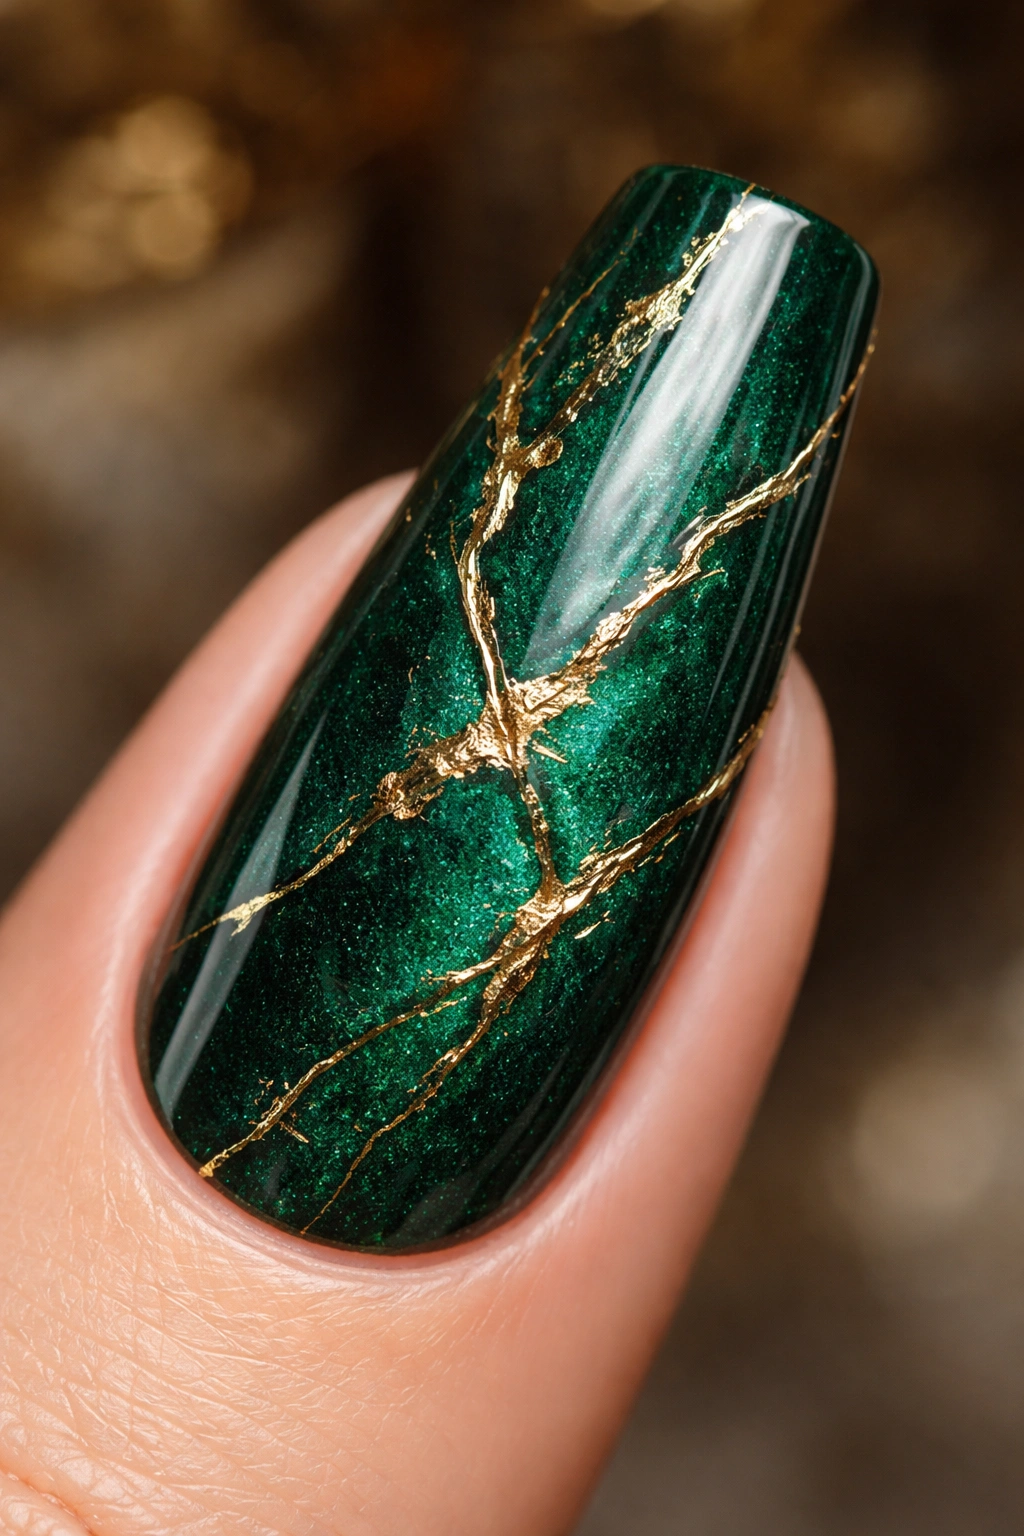
A deep, saturated emerald green base features gold leaf applied in thin, vine-like patterns that resemble natural leaf veining. The gold runs in flowing, organic lines rather than geometric patterns, creating a nature-inspired design that feels artistic and high-end.
Jewel Tone Luxury
Emerald is the ultimate luxury color—it suggests wealth, nature, and sophistication. Adding gold leaf veining elevates it further, creating a design that reads as expensive and intentional. The organic veining pattern means it doesn’t need to be mechanically perfect; slight irregularities enhance the natural aesthetic.
Creating Leaf Veining Effect
Apply your emerald base and let it cure or dry completely. Using gold leaf and a clear adhesive (specialized nail adhesive or clear top coat), tear or cut gold leaf into very thin strips. Using tweezers or a fine brush, place gold strips on the nail in patterns that resemble leaf veining—flowing lines that occasionally branch into thinner lines. The gold leaf naturally fragments and wrinkles, which is part of the appeal; don’t fight it. Allow some gaps and variation so the design doesn’t feel overly controlled. Once you’re happy with the veining, seal everything with a glossy top coat that protects the leaf and intensifies the depth of the emerald color.
22. Pale Peach With Sunset Gradient
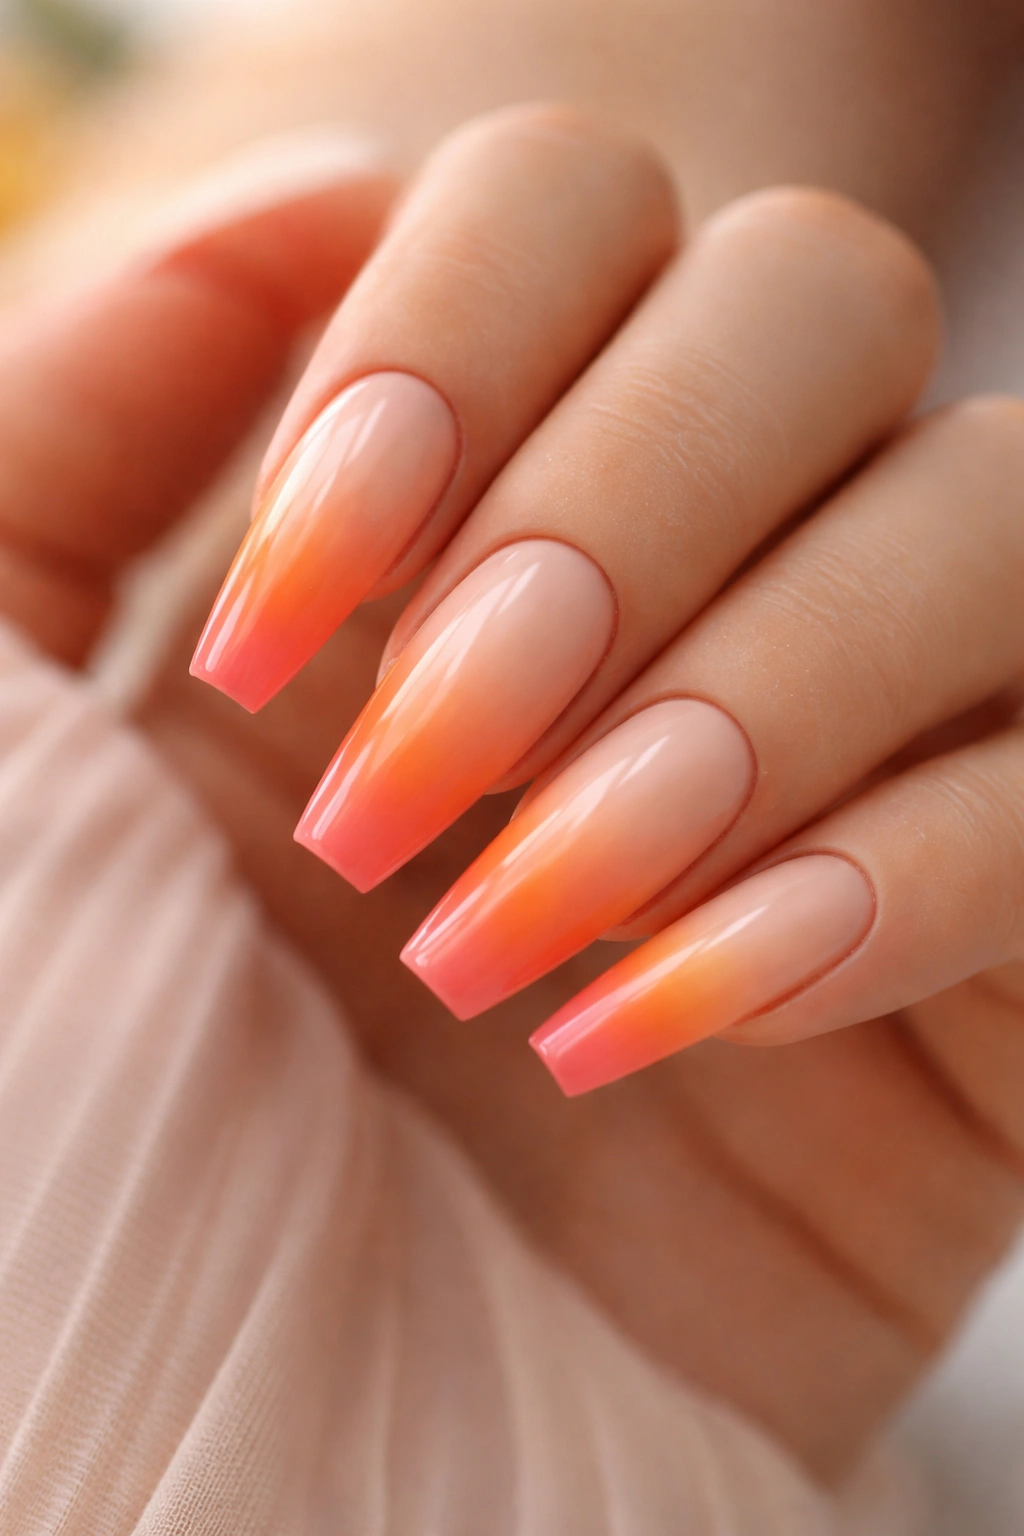
A soft, pale peach base gradually transitions into deeper coral and warm orange as it moves toward the tips, creating the effect of a sunset captured on your nails. The colors flow naturally into one another without harsh lines, creating a romantic, warm aesthetic.
Seasonal Yet Timeless
Sunset colors work across seasons and can be worn any time of year. The warmth of the gradient creates an inviting, positive energy while the pale starting point keeps the overall effect wearable and sophisticated rather than overly bold. The coffin shape elongates the gradient, giving the sunset effect plenty of space to display beautifully.
Executing Sunset Gradients
Use the sponge method for the smoothest transition. Apply thin lines of each color onto a makeup sponge in order (pale peach, peachy-coral, warm coral, light orange) with slight overlaps. Dab the sponge onto the nail repeatedly—don’t drag or swipe. Build up layers gradually, working from the tip toward the base. Continue until the gradient is opaque and smooth. The coffin shape’s length means the gradient has room to display without compressing, so take your time and layer for smoothness. Allow to dry completely or cure if using gel. Seal with glossy top coat that intensifies the warmth of the gradient.
23. Clear With Confetti Embedding
A clear or sheer nude base allows you to see through it, embedding colorful confetti particles—small metallic shapes, stars, circles, or irregular pieces—throughout the entire nail. The clear medium showcases the confetti from every angle, creating a playful, celebratory aesthetic.
Playful Sophistication
Embedding confetti in clear nails is inherently fun, yet the clear base keeps everything modern and wearable. You can customize the confetti colors to match occasions or moods. The see-through nature means the confetti displays beautifully from the nail’s underside as well as top, which is unique to clear embedding.
Embedding Confetti Properly
Clear or sheer builder gel works best for this. Apply a thin base layer of clear gel and cure. Place small pieces of confetti (metallic confetti squares, colorful foil pieces, or specialized nail confetti) onto the cured base. Try to space them somewhat evenly so they don’t all clump in one area. Apply another layer of clear gel over the confetti pieces, making sure to seal all edges and surfaces completely. Cure under light. Apply a final layer of clear gel and cure to ensure everything is sealed. The result should feel like confetti is floating within the clear gel rather than sitting on top. Seal with glossy top coat.
24. Dusty Lavender With Geometric Cutout Accents
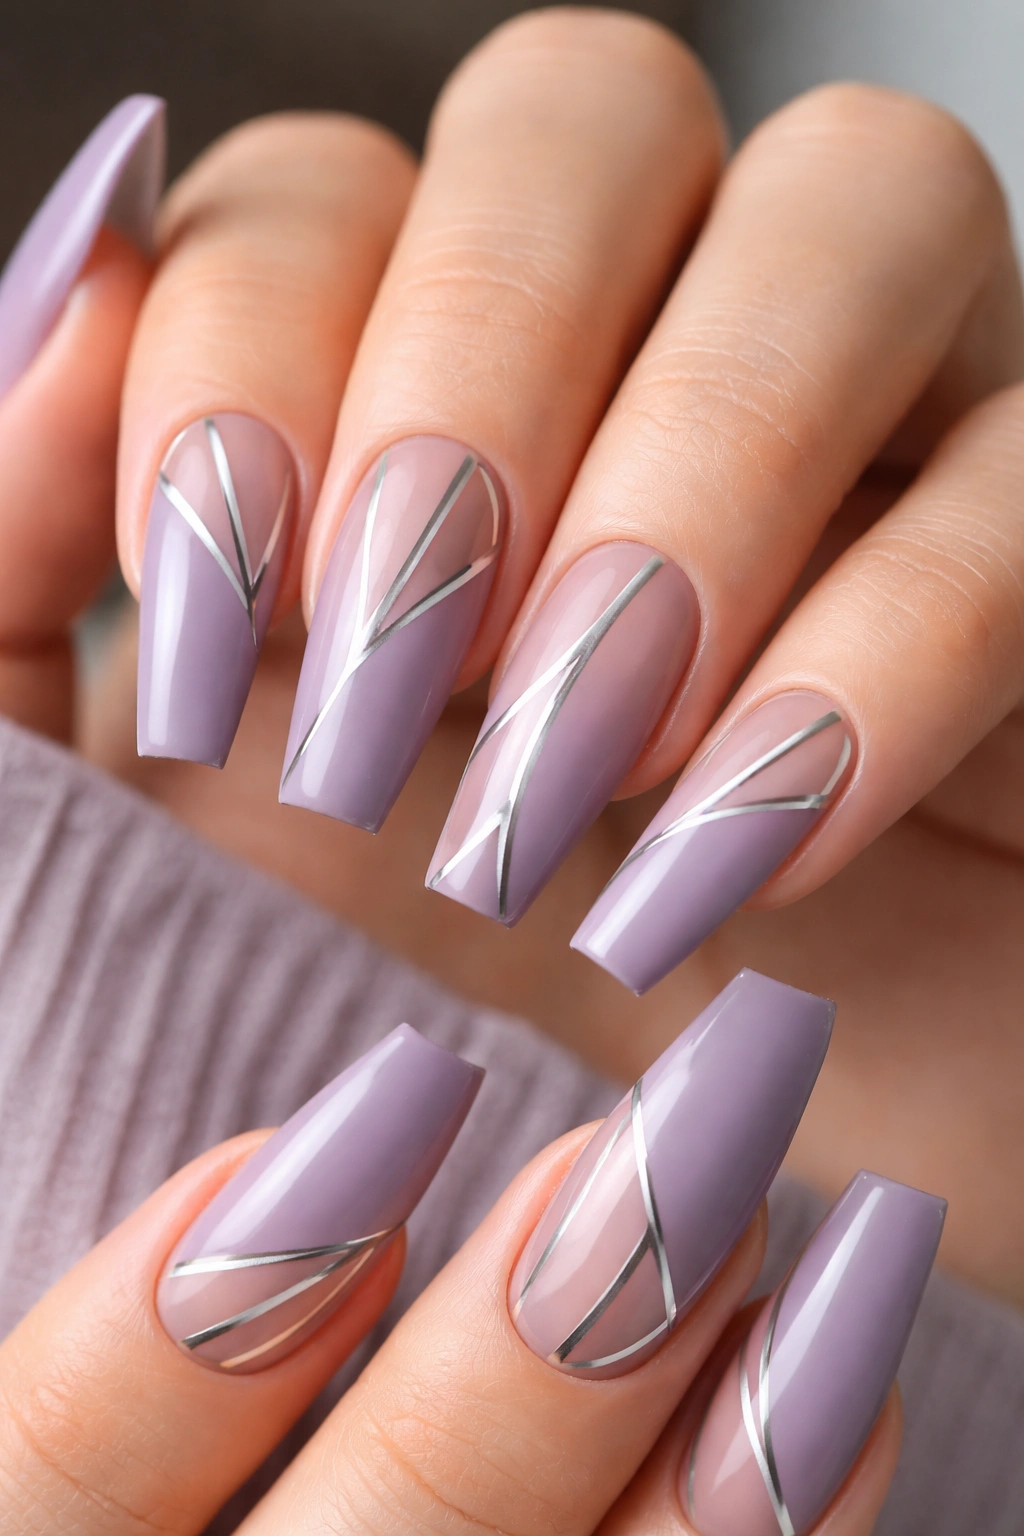
A soft, muted lavender base features negative space cutout areas where contrasting colors peek through underneath or the base color shows through openings. The cutouts form geometric patterns—perhaps a stripe down one side, small shapes at the tip, or abstract angular designs.
Dimensional Negative Space
Negative space adds dimension and visual interest without requiring elaborate nail art skills. The dusty lavender base is already sophisticated; the geometric cutouts add edge and modernity without overwhelming the foundational color. The coffin shape accommodates geometric patterns beautifully because the shape itself is geometric-friendly.
Creating Geometric Cutouts
Plan your cutout pattern on paper first. Using specialized nail files or gel drills (if working with acrylic or gel), carefully create the cutout areas. File cleanly and remove any sharp edges. You can either leave the cutout areas empty to show the nail bed or natural nail, or apply a contrasting color underneath before adding the lavender layer with cutouts. For contrasting color underneath: apply that color first to the full nail and cure. Apply lavender over top and cure. Carefully remove the planned areas with files or drills. For empty cutouts: simply file away the lavender to create negative space. The coffin shape’s size means you have room to create several distinct cutout areas without the design feeling cramped. Seal the entire nail with glossy top coat.
25. Classic Nude With 3D Pearl Embellishment
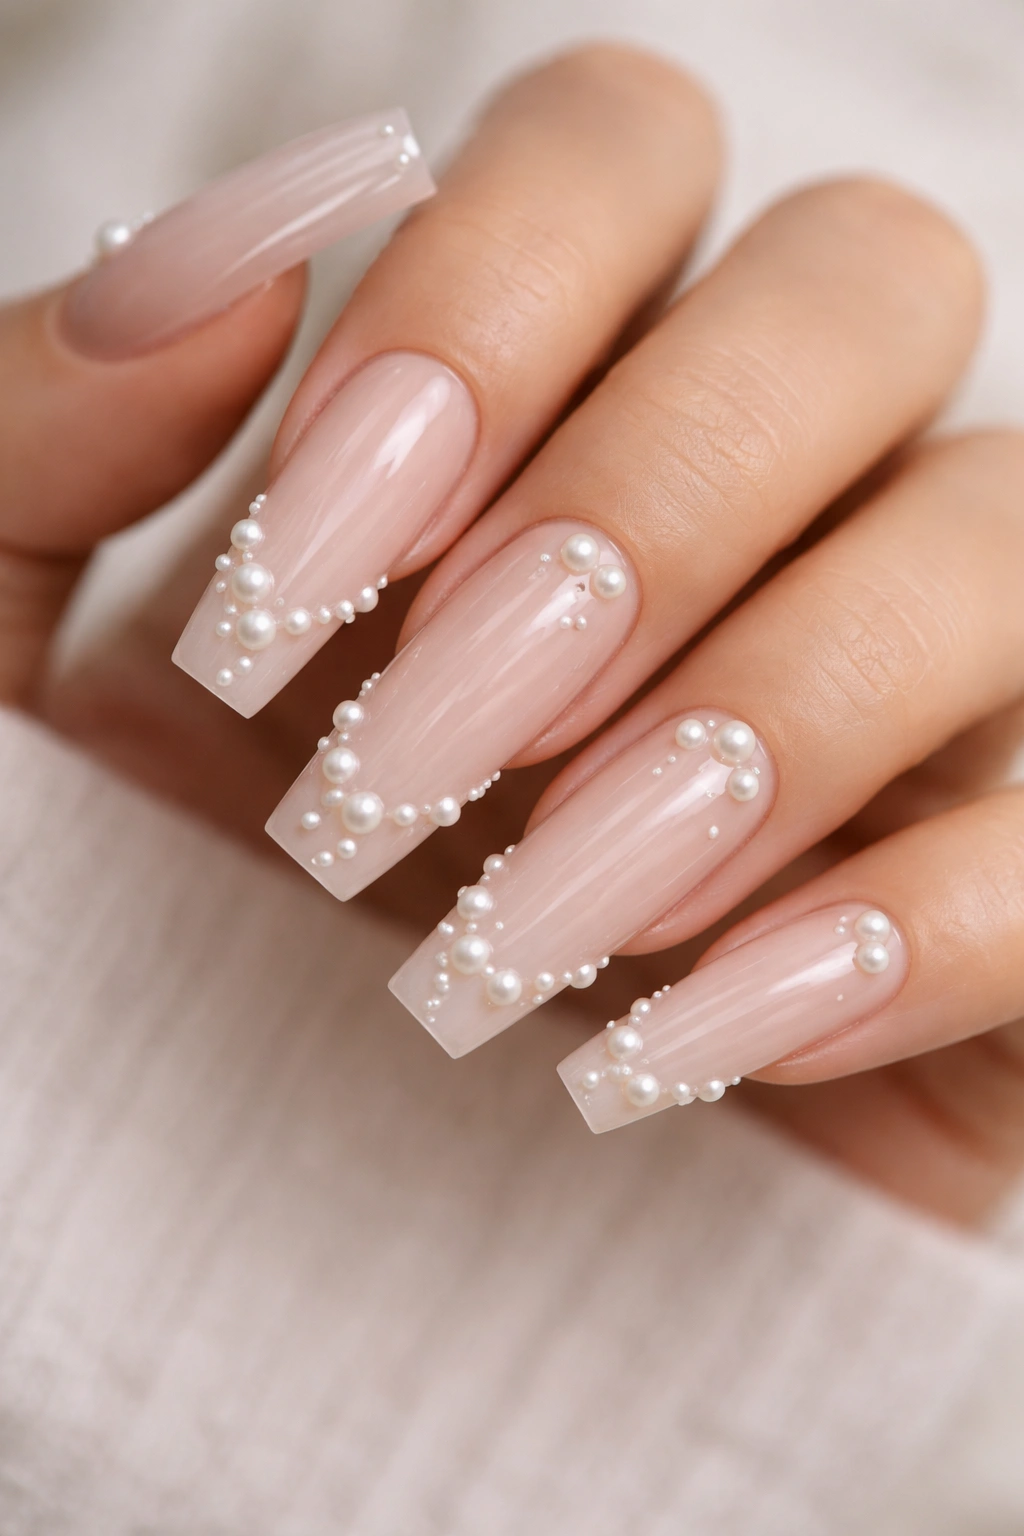
A universally flattering nude base serves as the foundation for carefully placed 3D pearl embellishments that add dimension and luxury without being overly costume-like. The pearls are positioned strategically—perhaps along the tip line, in a scattered pattern, or creating a specific design—so they catch light and add tactile interest.
Timeless Elegance With Modern Dimension
Nude is always in style, and adding dimensional elements elevates it beyond simple solid color. Three-dimensional embellishments have a luxury quality that photographs beautifully and feels genuinely special in person. The coffin shape’s tapering point means pearls can be arranged to complement the nail’s natural silhouette.
Applying 3D Pearl Embellishments
Use high-quality pearls (not cheap plastic beads) for a sophisticated final result. Apply your nude base and cure or dry completely. Using specialized 3D embellishment adhesive or clear gel base coat, place each pearl individually, working methodically so placement is intentional and even. If using adhesive, allow it to cure per product instructions before applying top coat. If using clear gel, cure between applications if placing multiple pearls. Seal everything with glossy top coat once all pearls are secure. The gloss intensifies pearl luster and creates a smooth transition between pearl and nail surface. The 3D element means people will feel compelled to touch your nails—they’re tactilely interesting in addition to being visually stunning.
Final Thoughts
Long coffin nails are a canvas that rewards creativity while maintaining an inherently sophisticated silhouette. The designs that work best are those that embrace the shape’s strengths—its length creates space for gradients and patterns, its tapered point accommodates precise detailing, and its modern angular geometry pairs beautifully with both minimalist and elaborate approaches.
The most important element across all twenty-five designs is intentionality. Whether you’re going for a subtle nude with pearl accents or a show-stopping holographic ombré, the design should feel chosen and deliberate rather than accidental or mismatched. This is what separates manicures that look expensive and thoughtfully executed from those that feel cluttered or thrown together.
Each of these designs has been selected because it translates beautifully onto the coffin shape specifically. Some showcase color brilliance, others emphasize texture and dimension, and still others rely on geometric precision or organic artistry. The variety means you can find something that resonates with your aesthetic, your skill level, and the message you want your nails to communicate. Whether you’re maintaining these designs yourself or visiting a skilled nail professional, any of these options will give you beautiful, fashionable coffin nails that draw admiration and feel genuinely special to wear.
