

Achieving the perfect manicure on short nails is often harder than it looks, especially when you are aiming for that timeless, elongating French tip almond shape. Many people assume they need long, acrylic-extended nails to pull off a French manicure, but that is simply not the case. In fact, shorter almond shapes provide a clean, sophisticated base that actually makes the finger look longer. It is all about the proportions. When your nail bed is short, the key is to keep the white tip thin and the smile line shallow. If the white tip is too thick, it overwhelms the nail plate, making the whole look feel heavy.
Getting the curve right is the most common hurdle for home manicurists. The almond shape is naturally oval with a tapered point, so your tip needs to follow that natural curve of the free edge. You cannot just draw a straight line across like you would on a square nail. This collection of styles and techniques is designed to show you that you can achieve a professional-looking French manicure at home with just a few basic tools and a bit of patience. Whether you have natural short nails or just prefer to keep your manicure low-maintenance, there is a variation here that will work for your lifestyle.
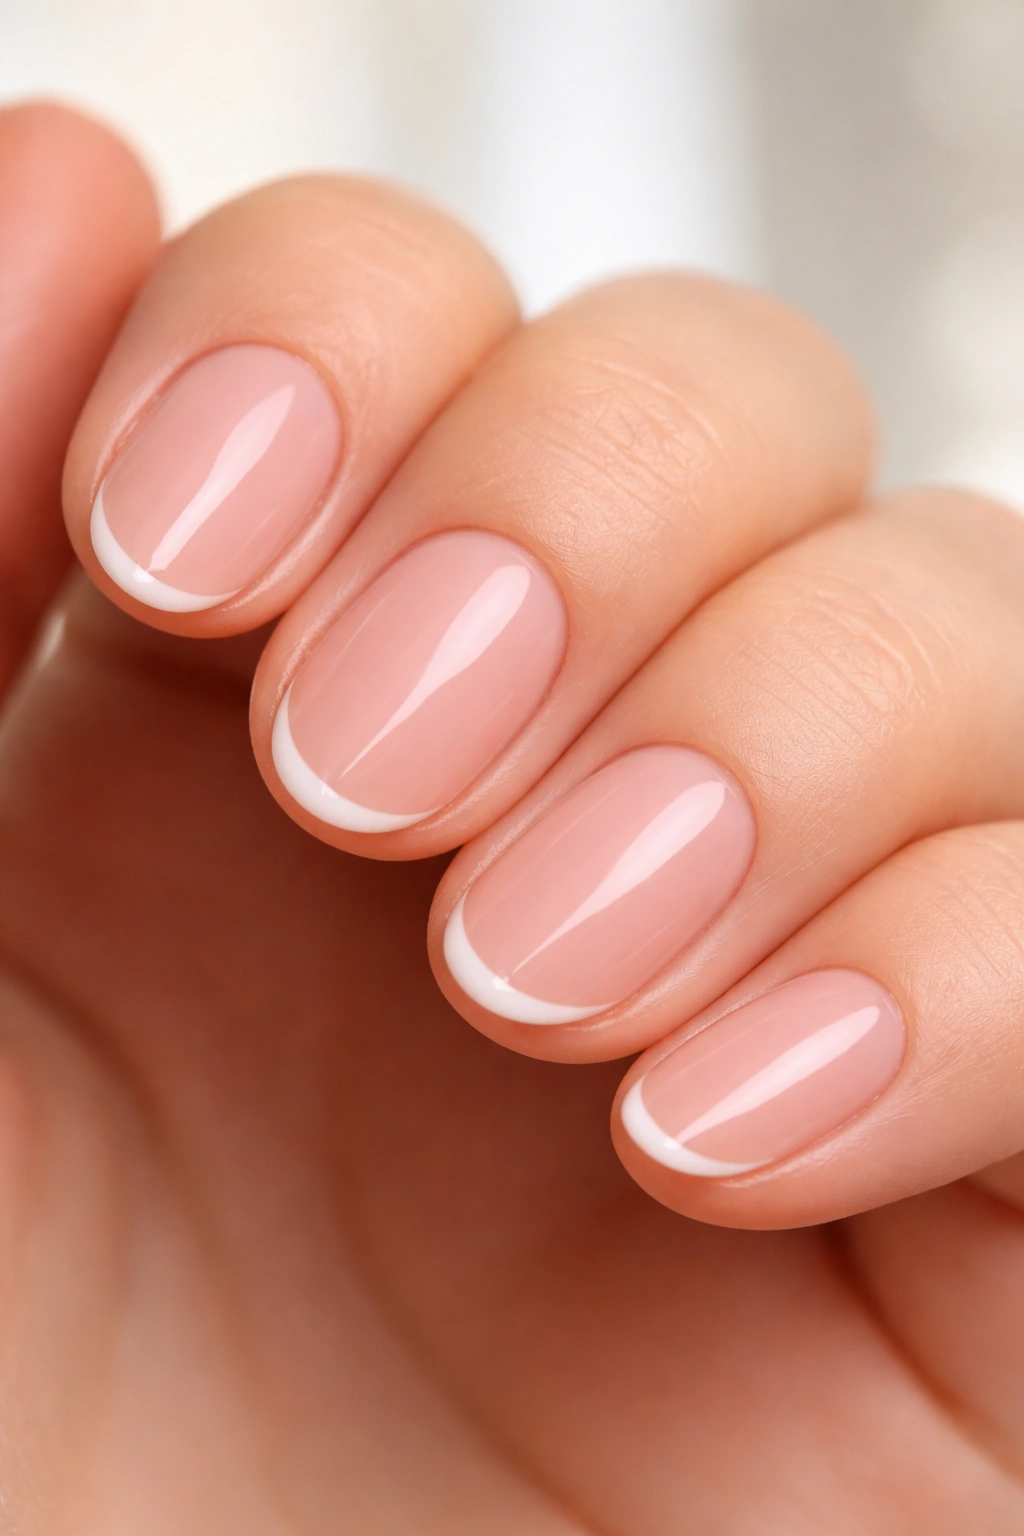
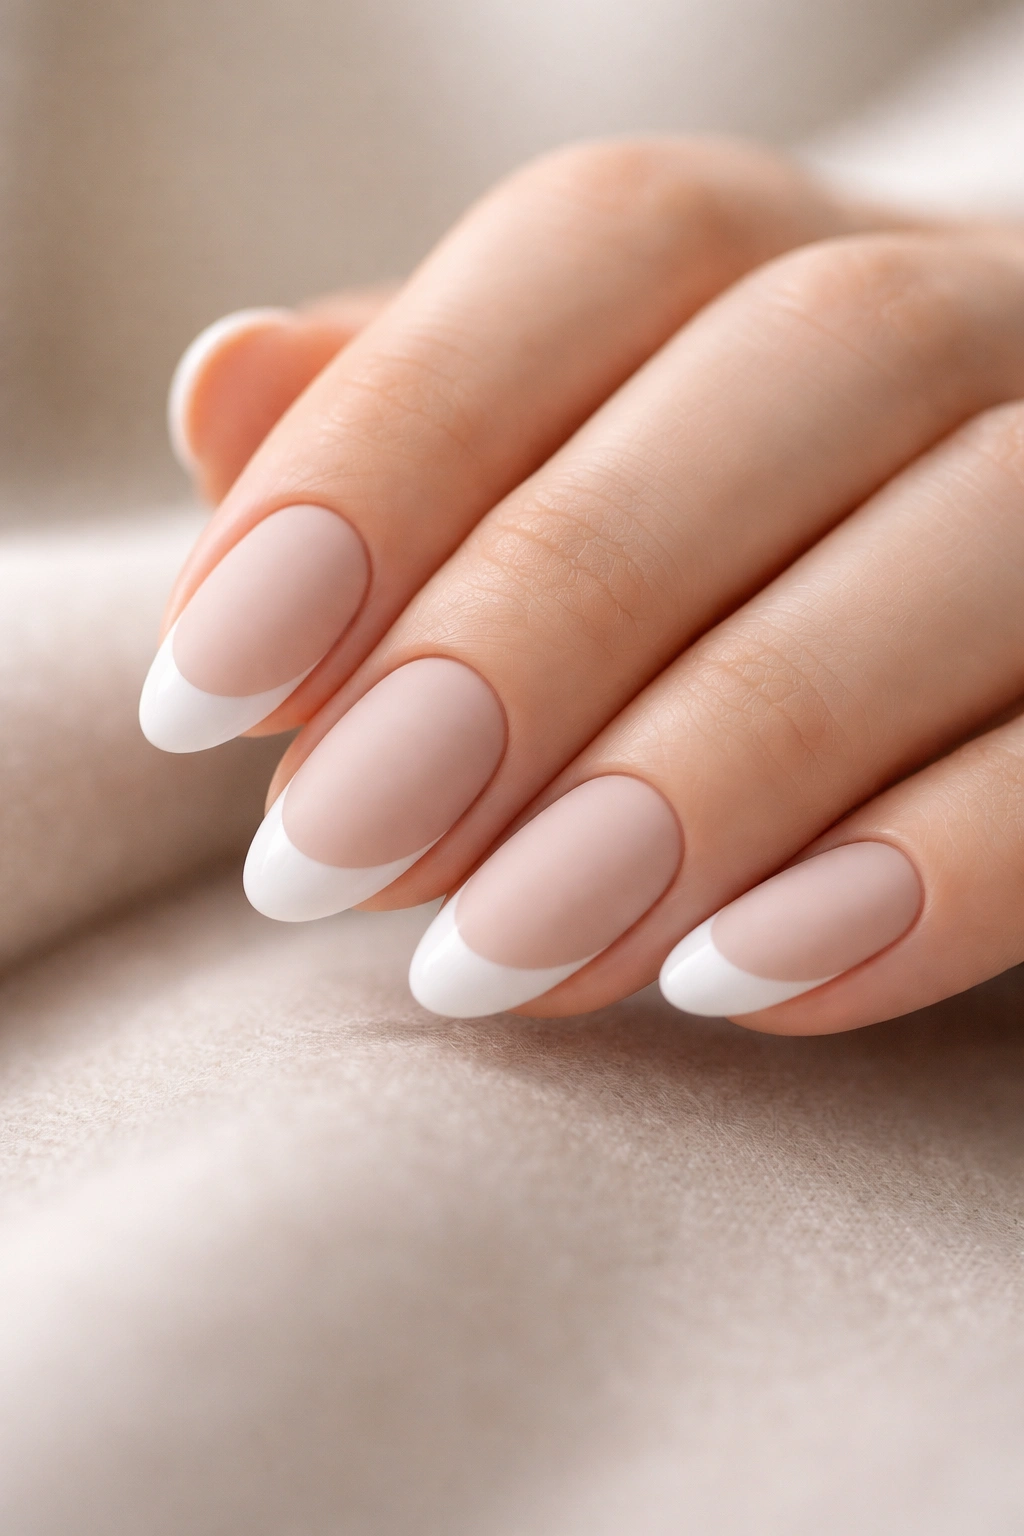
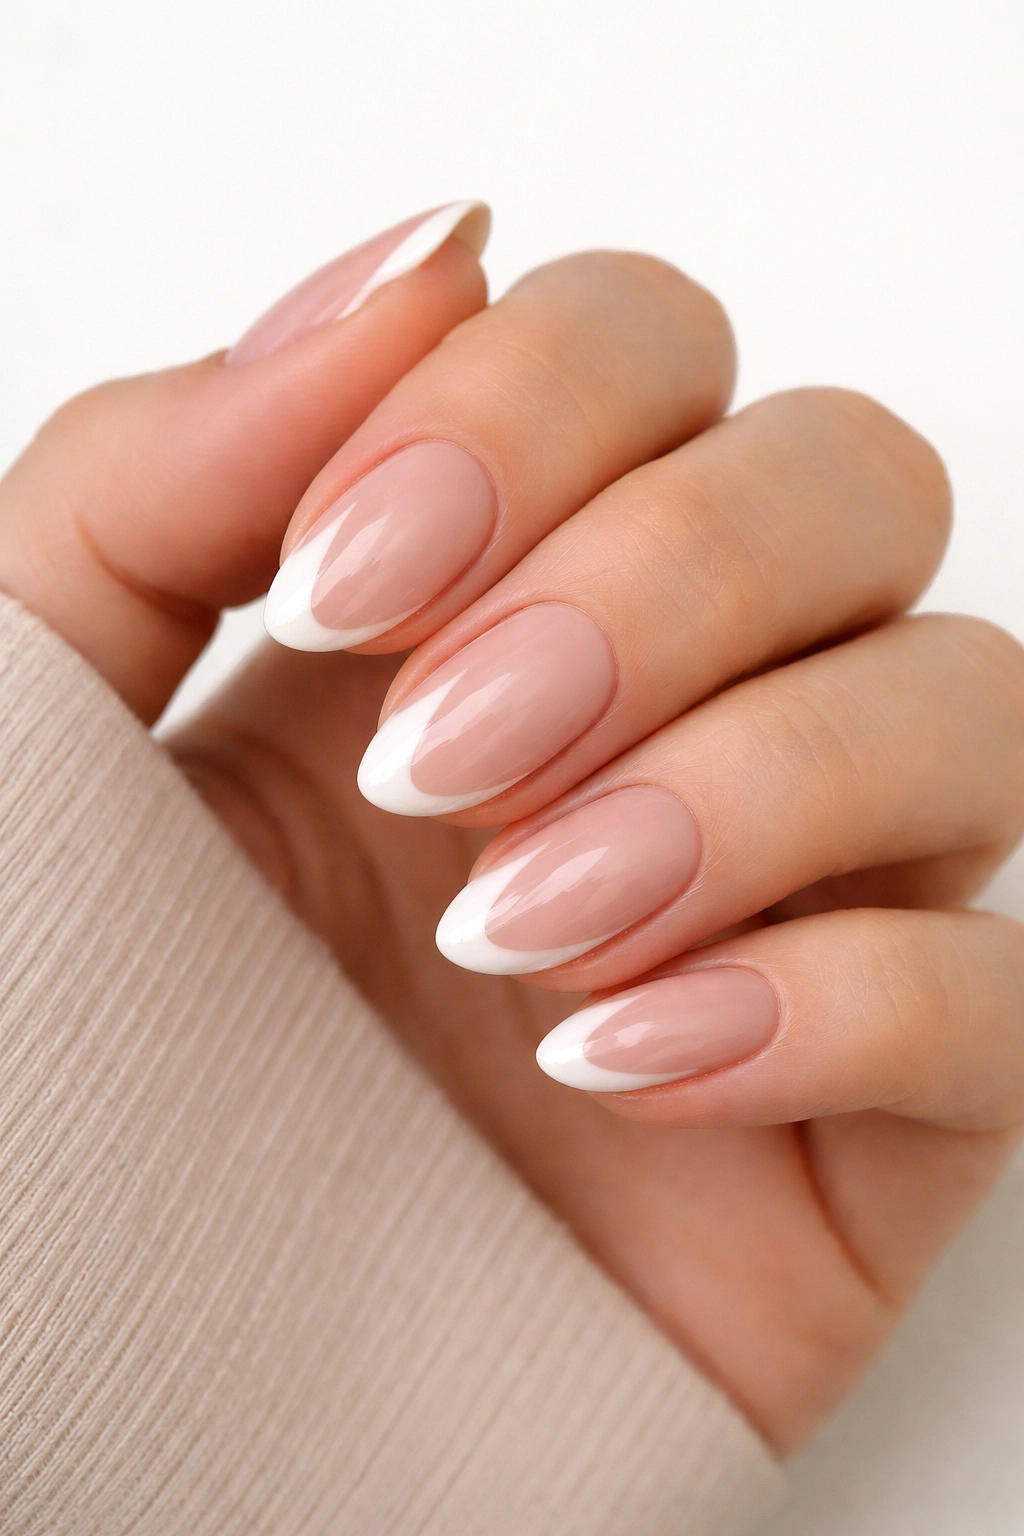
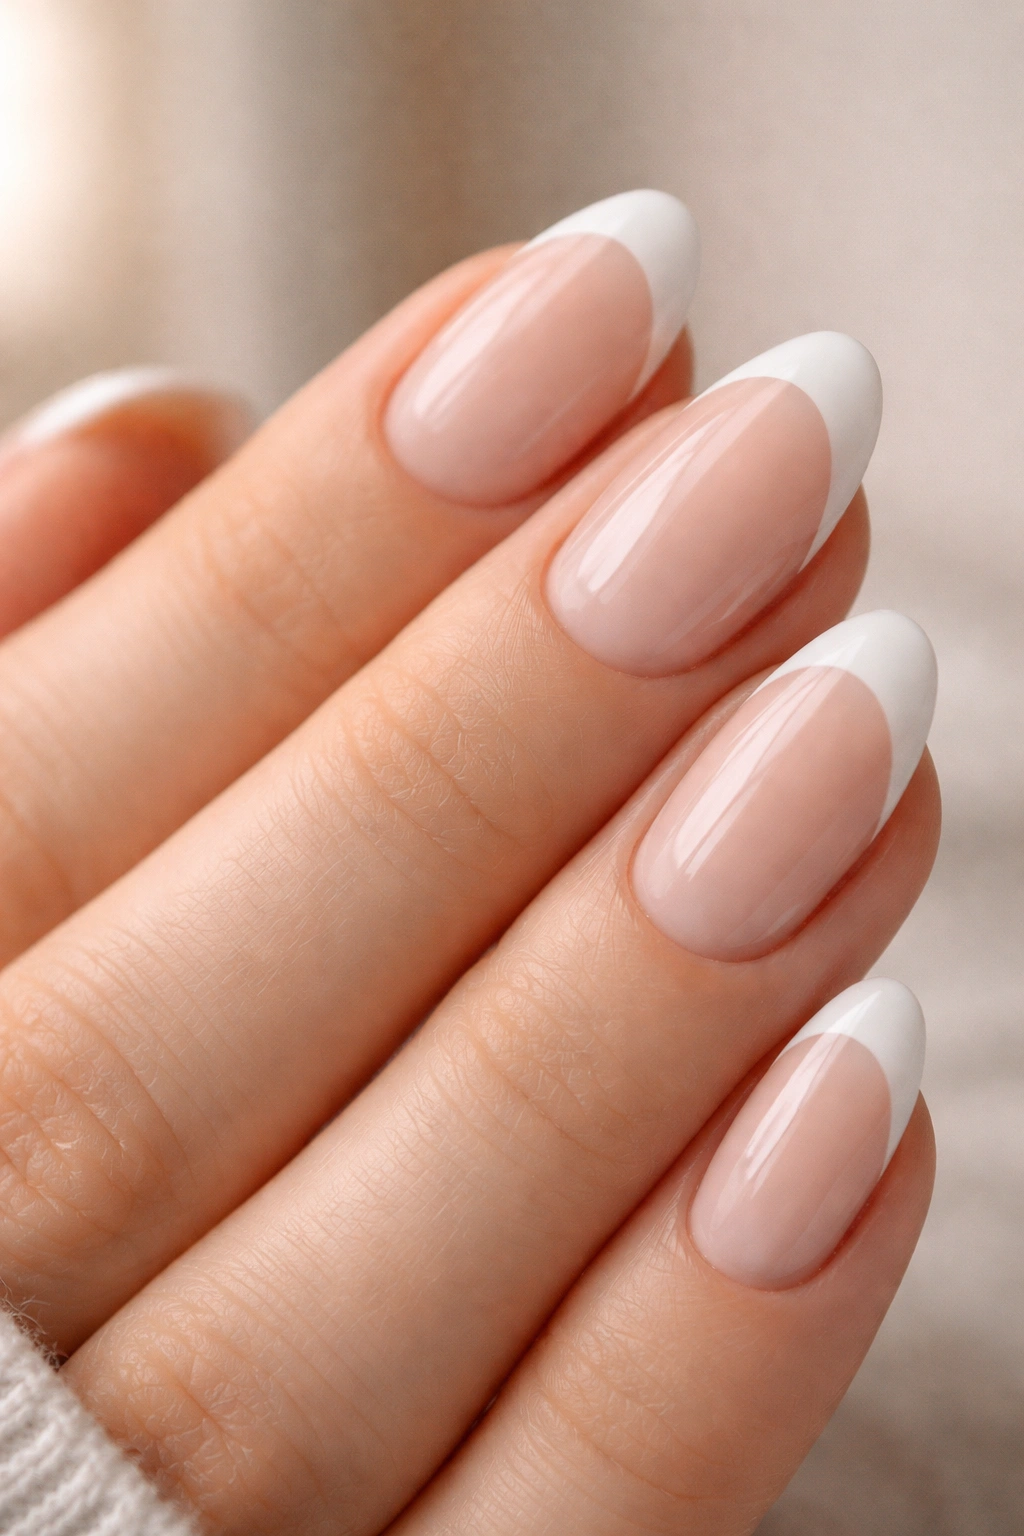
1. The Classic White Tip
The quintessential French manicure relies on a crisp, clean white tip against a sheer, milky pink or nude base. On a short almond nail, you need to be strategic about where you place that white line. Start your line about two-thirds of the way up the side wall, curving it gently toward the center of the free edge. Do not try to start from the absolute bottom of the nail bed, or the tip will look too chunky.
Technique for Precision
Use a thin striping brush rather than the brush included in the polish bottle. The standard polish brush is usually too wide to control, which leads to jagged edges and uneven thickness. Dip the striper into your white polish, outline the smile line first, and then fill in the tip. If you make a mistake, do not panic. A small cleanup brush dipped in pure acetone can sharpen that smile line into a perfect curve in seconds.
The Base Coat Secret
The secret to the “classic” look is the base color. Use a sheer, buildable nude or light pink polish. Avoid opaque whites or creams for the base, as they will clash with the white tip. You want the base to look like a healthier, slightly perfected version of your natural nail bed.
2. The Micro-French Tip
If you are struggling to get a traditional French tip to look right on a very short nail, go smaller. A micro-French tip is a paper-thin line of color at the very edge of the nail. It is subtle, modern, and practically impossible to mess up because there is no complicated smile line to perfect.
Why This Works for Short Nails
This style creates a clean, intentional finish without shrinking the visible surface area of your nail. Since the line is so thin, it does not matter if your nail bed is short; it just highlights the natural edge of the nail. It is the perfect entry-level style for anyone who finds the standard French manicure too demanding.
Getting the Line Straight
Since the line is so thin, you can use a fine-tip nail art pen instead of liquid polish. Just glide the pen along the very edge of your nail. It dries almost instantly, which prevents the smudging that usually happens when you try to maneuver a wet brush around the delicate tip.
3. The Double-Line French
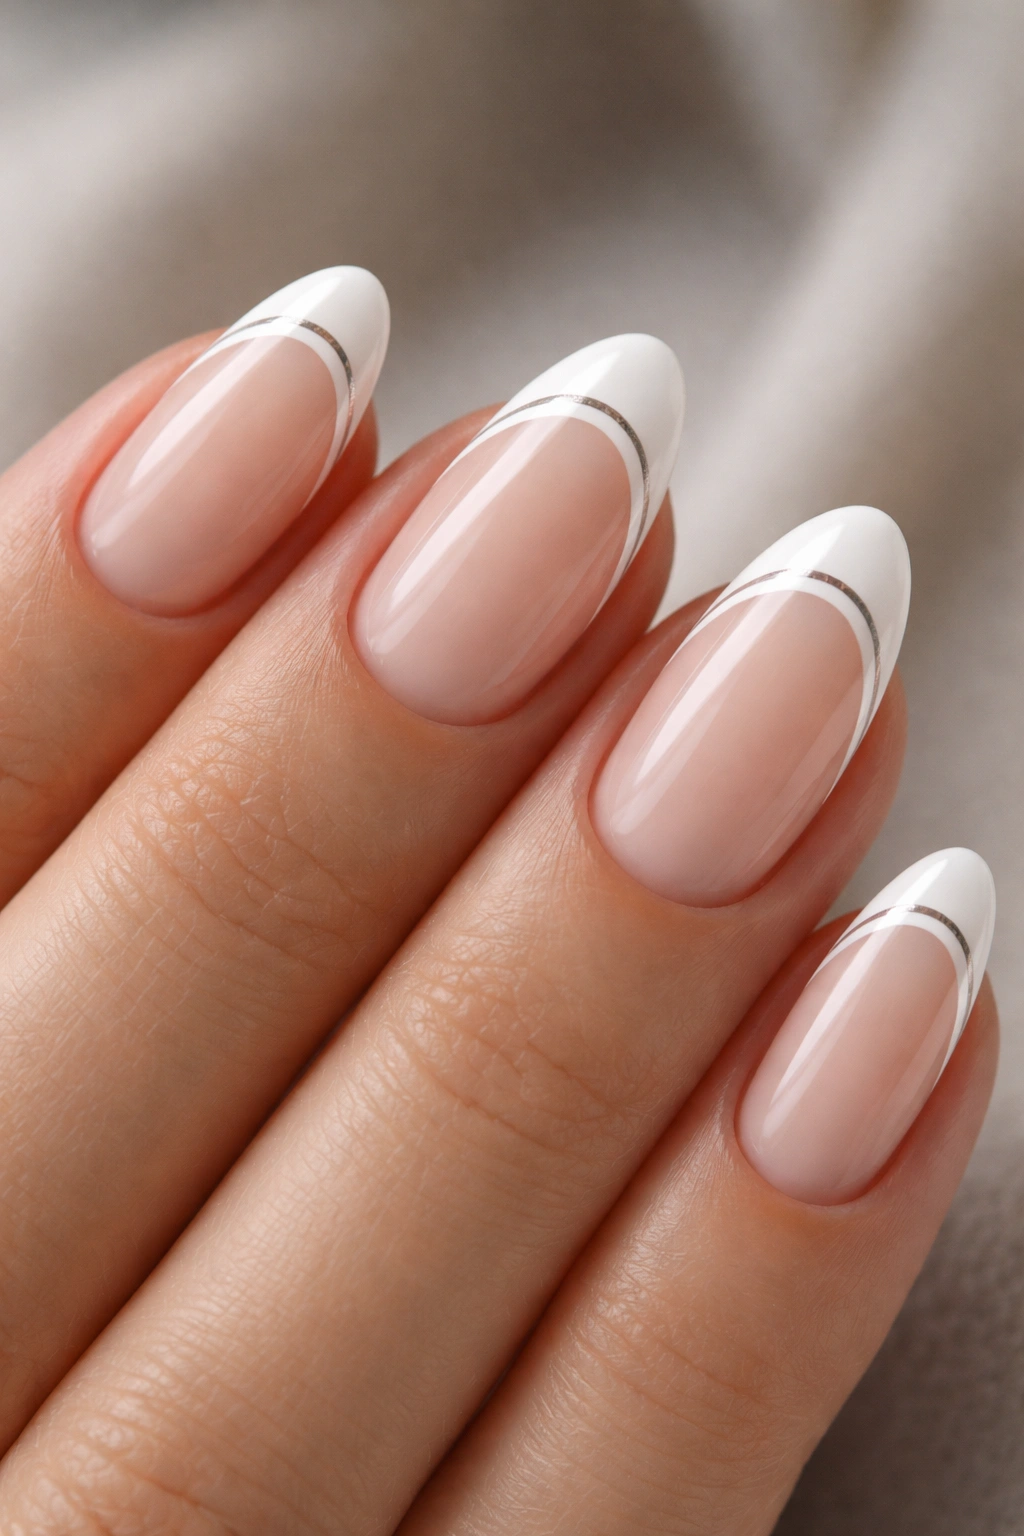
This variation adds a second, thinner line just below the main tip. It creates a graphic, intentional look that makes short nails appear much more styled and complex than they actually are. It works particularly well on almond shapes because the lines can echo the taper of the nail.
How to Execute the Layers
First, paint your primary tip in your chosen color. Let it dry completely for at least ten minutes. If the polish is tacky, the second line will drag and ruin the first one. Use a contrasting color for the second, thinner line. Place it about one millimeter below your main tip.
Staying Steady
Rest your hand on a flat surface. Your dominant hand should be braced against the table, and your non-dominant hand should be the one moving the tool. This gives you stability. If your hands shake, you will never get a straight line. Anchor your pinky finger of the painting hand against the other hand to create a tripod of stability.
4. The Glazed Donut French
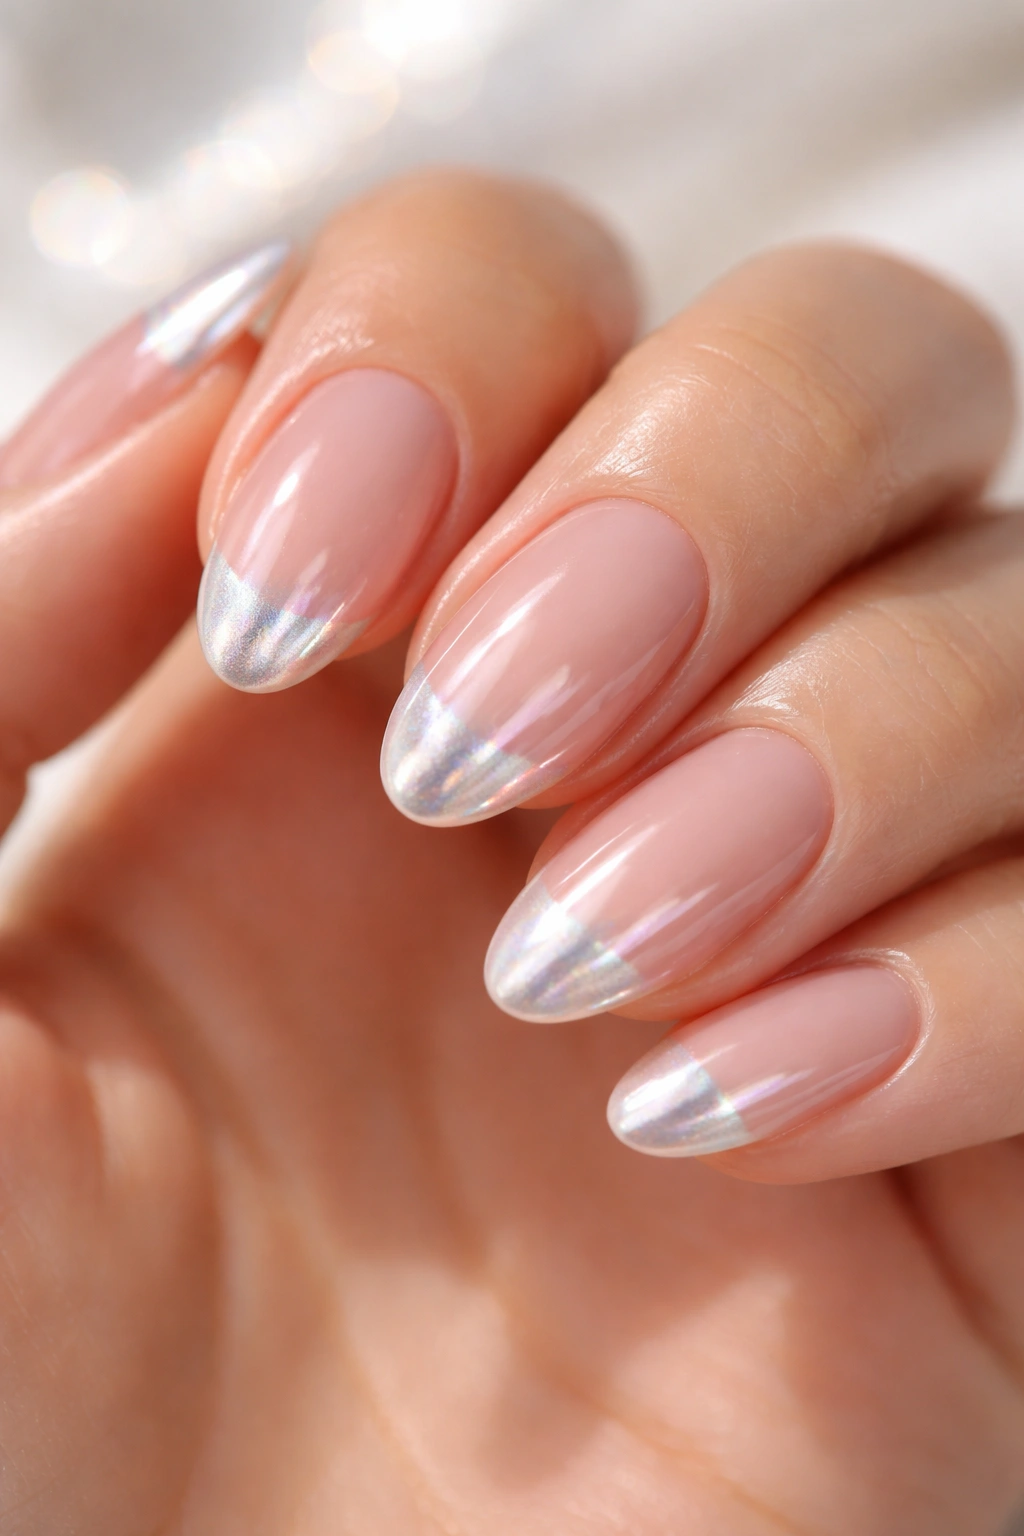
This style takes the popular iridescent, high-shine trend and applies it to the French tip. Instead of a flat crème white, you are aiming for a pearlescent, shimmery finish. This look reflects light, which naturally draws the eye to the tip of your nail, making the fingers look longer.
Applying the Chrome Effect
You need a chrome powder to get this right. Paint your white tips, let them dry, and then apply a thin layer of top coat. While the top coat is still slightly tacky, use a small eyeshadow applicator to rub the chrome powder over the white tips only. Do not put it on the base of the nail.
Sealing the Finish
The powder can be messy. Use a lint-free wipe to clean any excess dust off the base of the nail before you apply your final coat of high-gloss sealer. If you skip the cleaning step, you will end up with a glittery base coat, which ruins the clean contrast you are aiming for.
5. The Negative Space French

Negative space manicures are a lifesaver for people who hate the look of growing-out nails. Because the base of the nail is bare or painted with a sheer, clear coat, you do not have to worry about the “regrowth line” becoming visible as your nails lengthen.
Defining the Shape
The trick to a sharp negative space tip is using a small piece of painter’s tape or a vinyl nail guide. Place the guide over your nail, paint the tip, and remove the tape while the polish is still wet. If you wait until it dries, you risk peeling the paint off along with the tape.
Dealing with Staining
Since you are leaving the base of your nail bare, make sure it is buffed to a smooth, natural shine. A rough, stained nail plate looks unpolished through a clear coat. Spend an extra minute buffing the nail surface before you start to ensure the final result looks intentional, not unfinished.
6. The V-Cut French
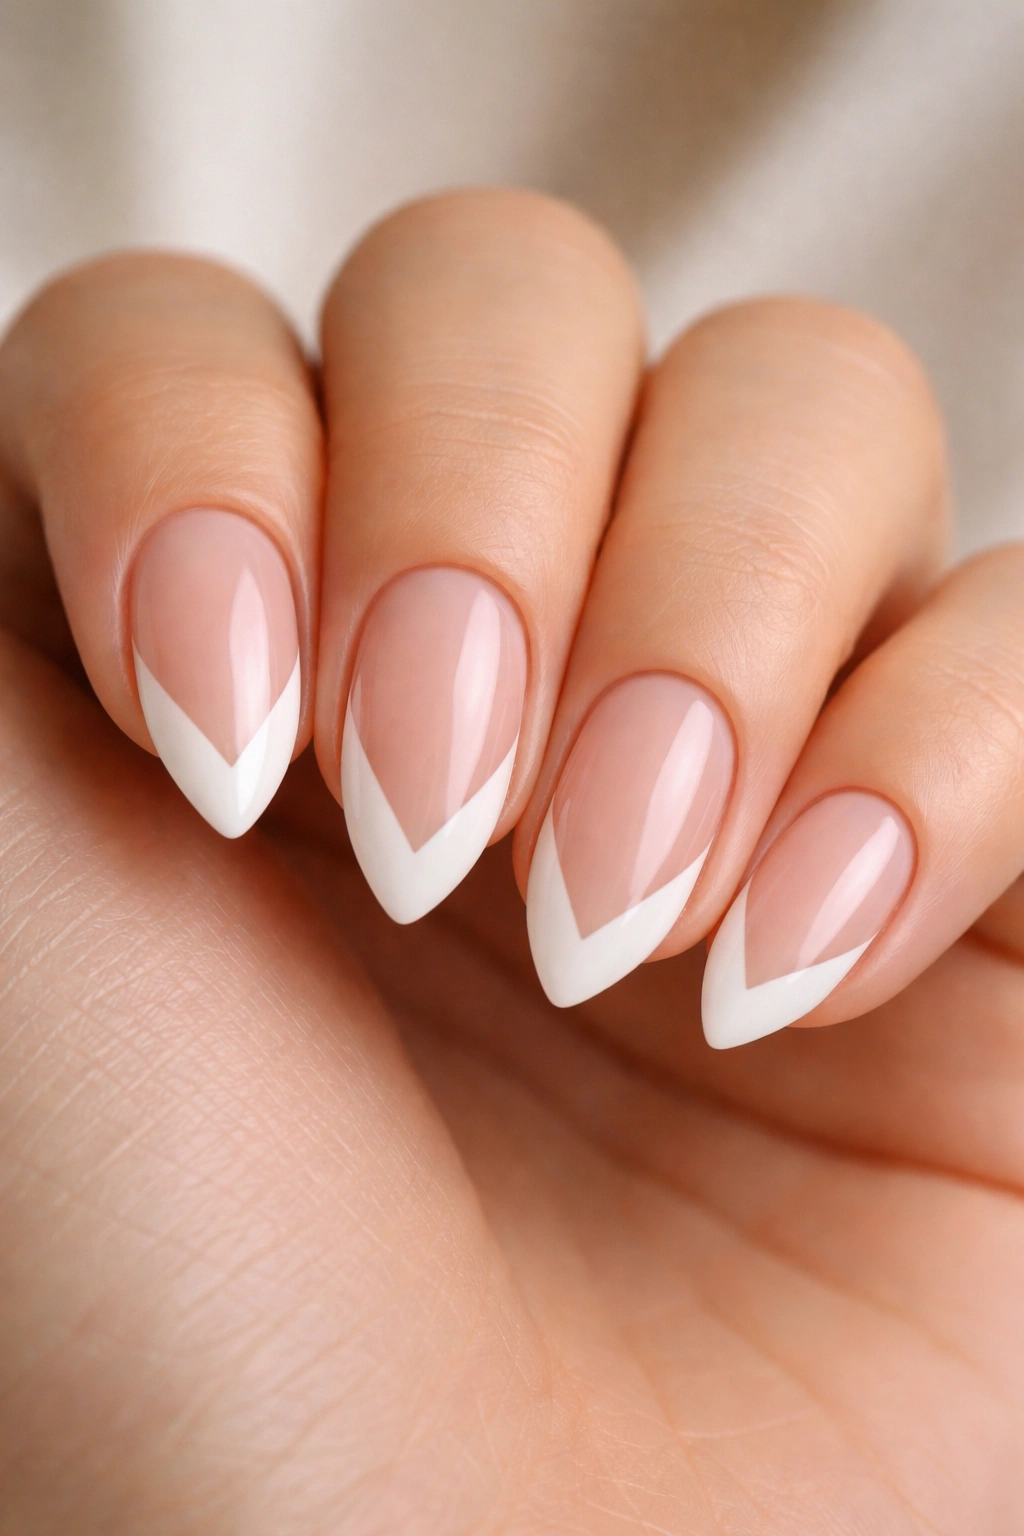
Instead of a rounded smile line, a V-cut French creates an angular, geometric look. This is surprisingly flattering on almond-shaped nails because the angle of the V mimics the taper of the nail shape. It makes a short nail look much pointier and more dramatic.
Drawing the V
Start by making a small dot at the center of the free edge of your nail. Then, draw two lines connecting from the sides of the nail to that center dot. It is essentially like drawing a triangle. Fill in the space above those lines.
Correcting the Angle
If your V looks uneven, you can use a tiny bit of non-acetone remover on a brush to carve out the sharp edges. Do not try to fix a thick, messy V by painting over it with more polish. You will just end up with a glob. Strip it back and start with a thinner layer.
7. The Matte and Gloss Combo
This style plays with texture rather than color. Paint the entire nail in a glossy polish, then apply a matte top coat to the entire nail. Once that is fully dry, take a glossy top coat and paint it only over the tip. It creates a subtle, sophisticated look that is visible only when the light hits it.
Texture Contrast
The contrast is everything. If the matte finish isn’t truly matte, or the glossy finish isn’t truly shiny, the effect will be lost. Ensure your base color is fully dry before applying the matte top coat, or you will get streaks.
Maintenance Tips
Matte polish chips differently than glossy polish. Keep a small bottle of matte top coat in your bathroom drawer for touch-ups. If the tip of your nail starts to lose its shine or gets a scratch, you can quickly dab a little more gloss on there to refresh the look.
8. The Pastel-Tip French
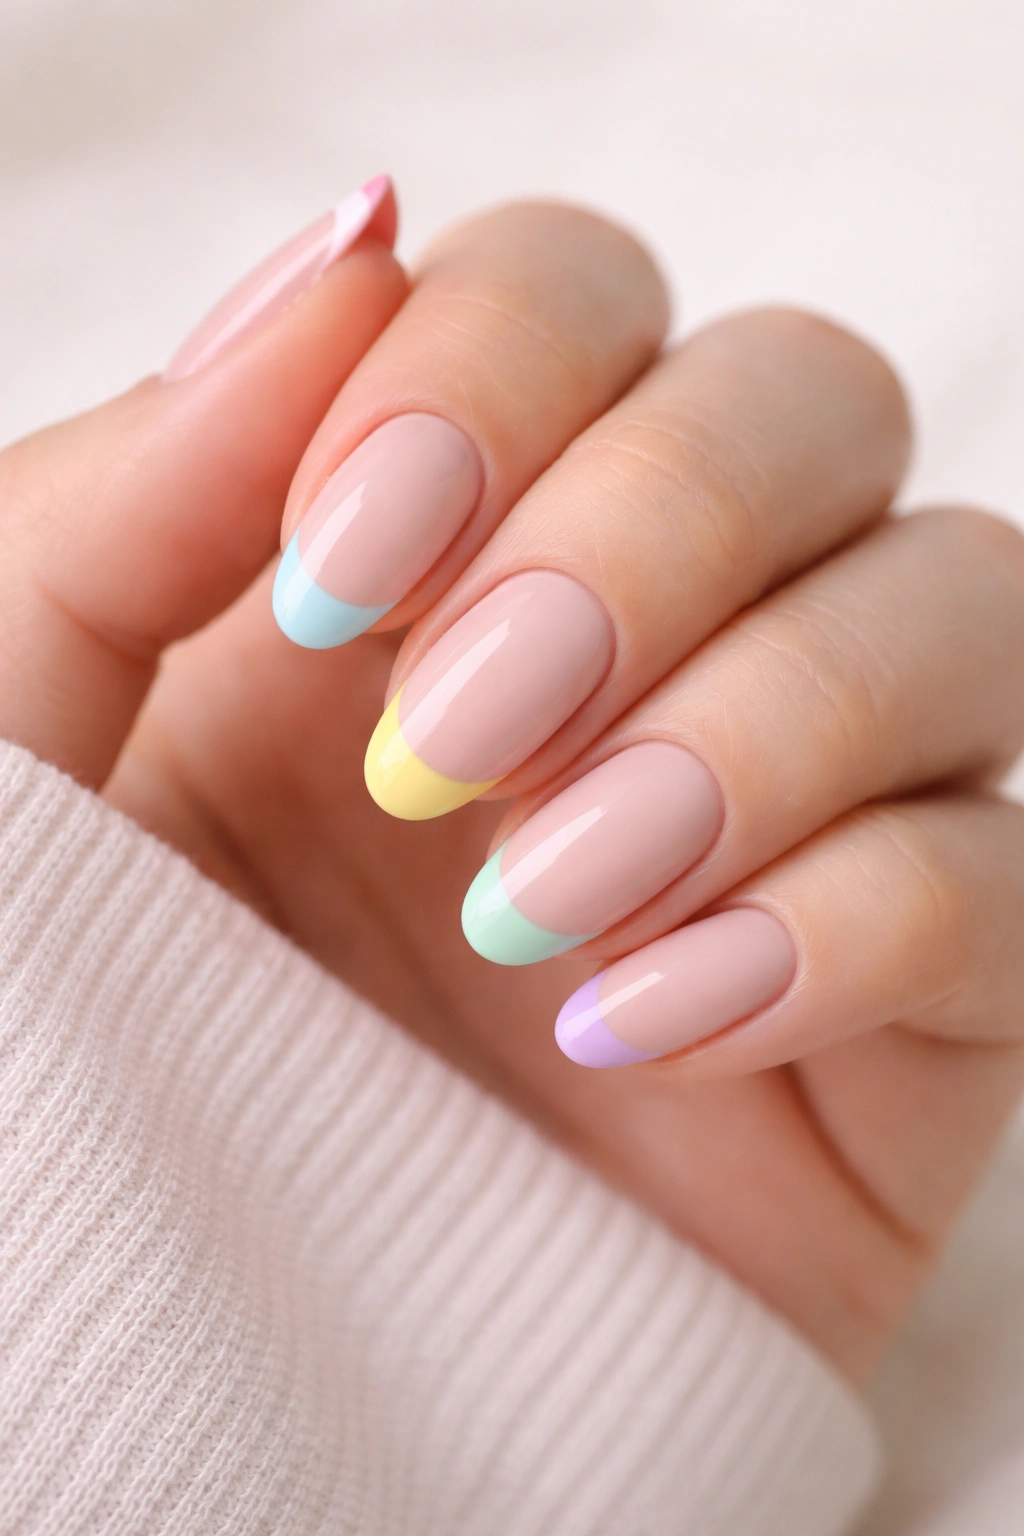
Pastels are a great way to add color without being overwhelming. On short almond nails, these soft colors look sweet and intentional. Choose shades like lavender, mint green, or butter yellow. They look particularly good against a clear or very pale nude base.
Color Theory for Nails
If you have a cooler skin tone, lean toward blue-based pastels like icy pink or periwinkle. If you have a warmer skin tone, go for peach, yellow, or sage green. Matching the pastel to your skin tone makes the manicure look like a cohesive accessory rather than a random color choice.
Avoiding Streakiness
Pastel polishes are notorious for being streaky. Apply two thin coats rather than one thick one. The first coat will look patchy; that is normal. The second coat is where the opacity builds up. If you try to force opacity with a thick first coat, you will end up with bubbles and ridges.
9. The Chrome or Metallic Tip
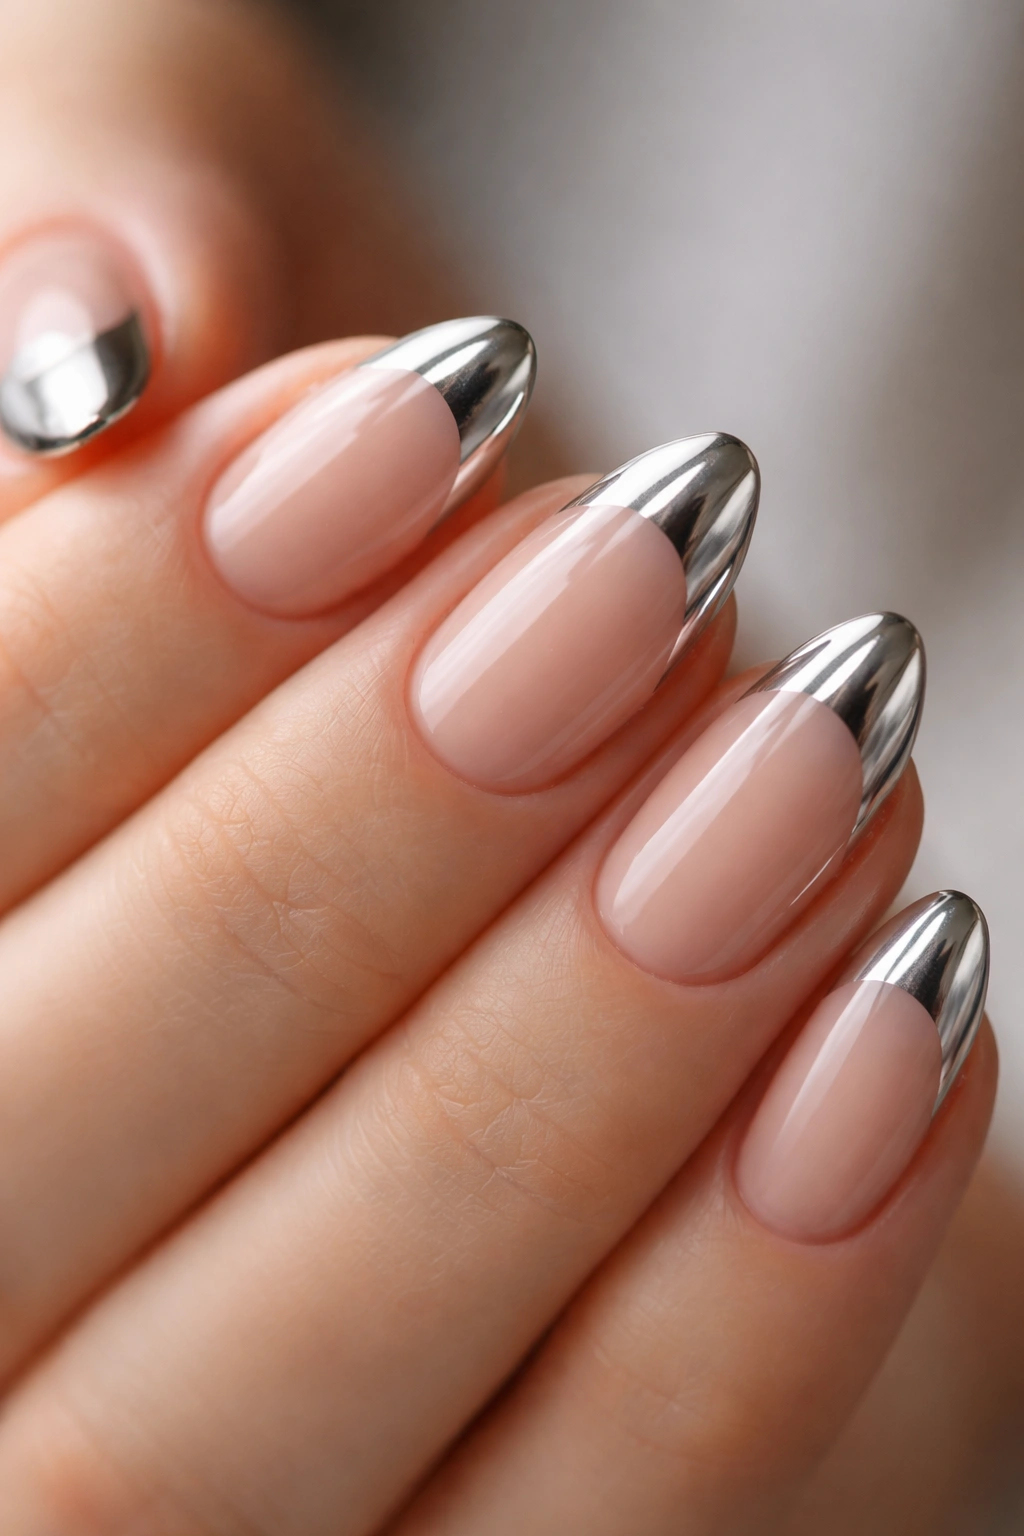
Metallic tips add a touch of edge to the classic almond shape. Gold, silver, or rose gold tips catch the light and provide a high-contrast look that is perfect for evenings or special events. It is a very forgiving style because the metallic finish hides minor imperfections in the line work.
Using Metallic Polish
Metallic polishes are usually thin and can be watery. Shake the bottle well before you start, and wipe the brush against the neck of the bottle thoroughly. You want the brush to be nearly dry with product so you can build the color gradually on the tip.
Edge Wear
Metallic polish tends to chip faster at the free edge than standard crème polish. To combat this, cap the free edge. Run the brush horizontally across the very tip of your nail so the polish coats the front edge. This prevents water from getting under the polish and lifting it, which is the primary cause of early chips.
10. The Diagonal French
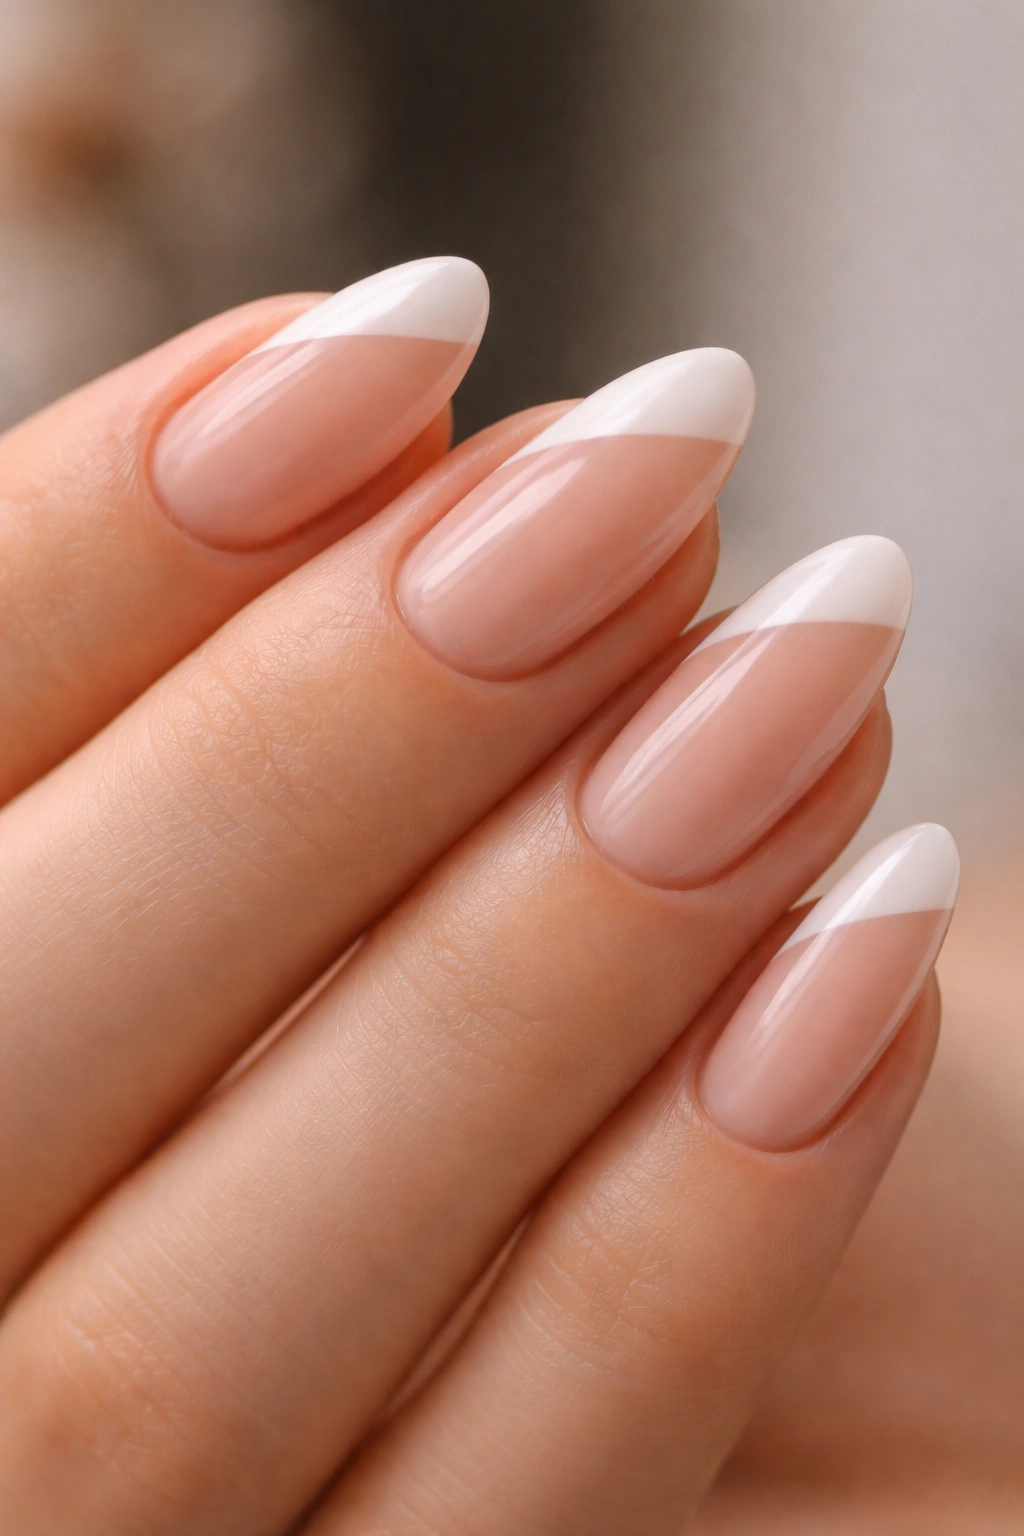
A diagonal tip creates an asymmetrical, artistic effect. It elongates the nail bed significantly because the line travels further down one side of the nail than the other. This is an excellent trick for making short nails appear longer and more elegant.
Achieving the Slope
Paint a line from one side of the nail, sloping upward toward the opposite corner. Do not worry about making it perfectly symmetrical from nail to nail. The beauty of this look is its deliberate asymmetry. Some nails can have a sharper slope, while others are more gradual.
Cleanup
Because this line spans a large portion of the nail, it is easier to see wobbles. Use your cleanup brush to go over the edge of the diagonal line once, even if it looks okay. That single pass with the brush makes the line crisp, which is what separates a DIY job from a salon manicure.
11. The Glitter-Tip French
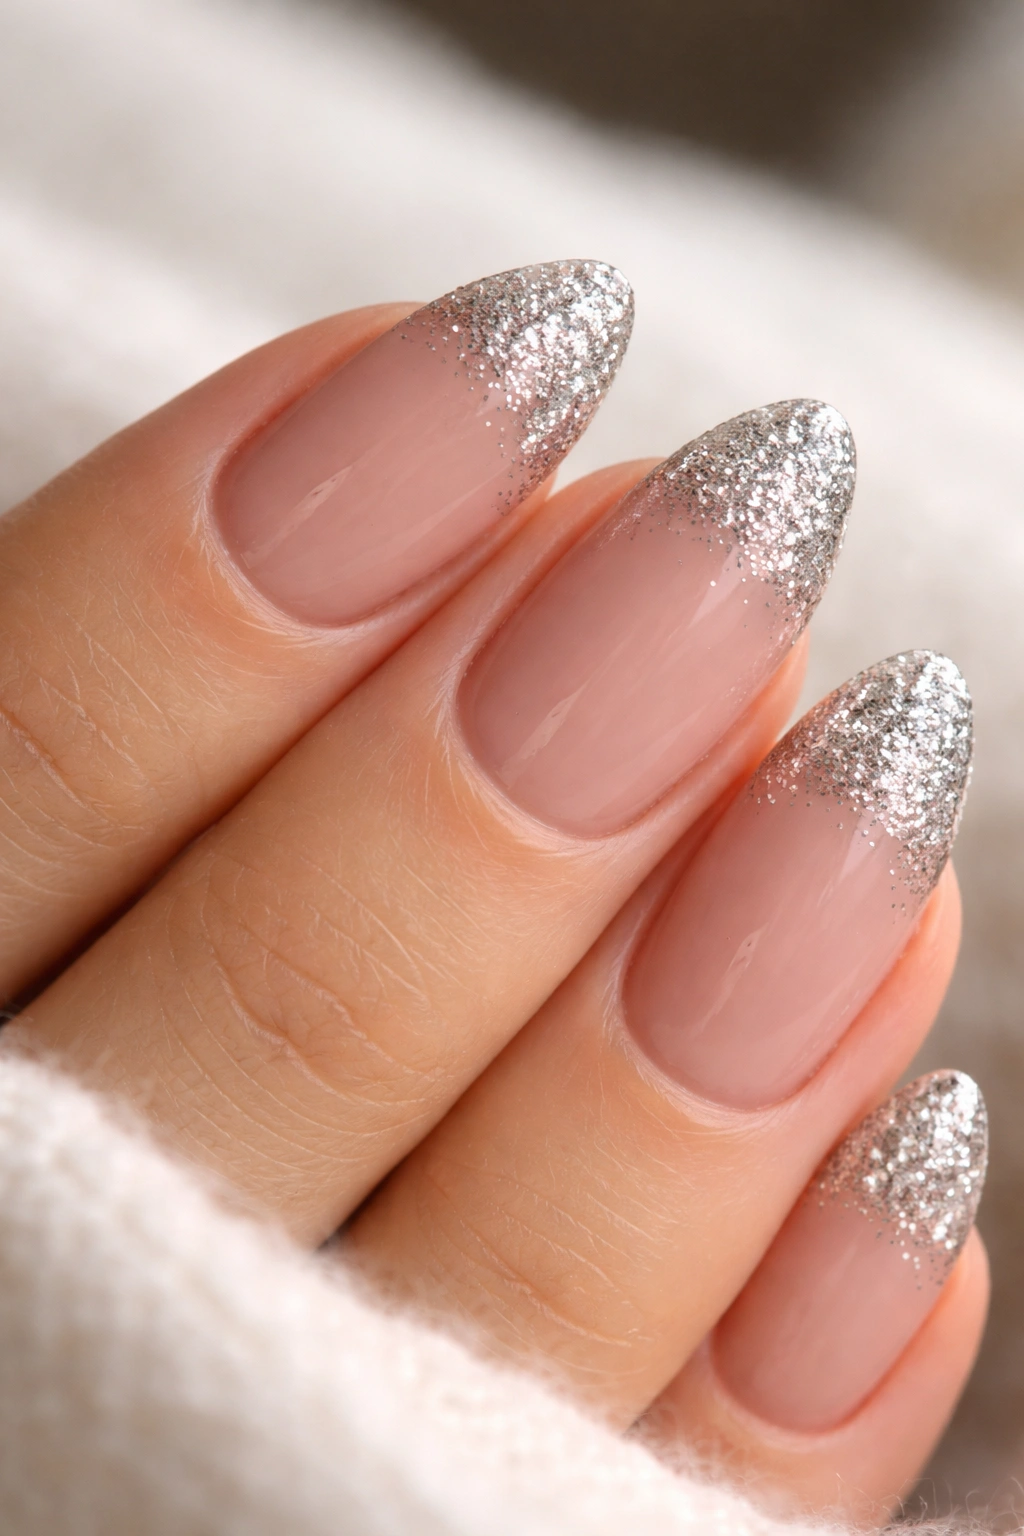
Glitter is surprisingly easy to work with because it is essentially a texture. It hides mistakes. If your smile line is slightly wobbly, a dense glitter polish will mask the imperfection while still giving you that classic French look.
Selecting the Right Glitter
Do not use a sheer topper with sparse glitter. You want a polish with high-density pigment or a glitter gel. If you are using a loose glitter polish, you can “sponge” it onto the tip using a cosmetic sponge. This creates a dense, opaque finish without needing ten layers of polish.
Removal Strategy
The only downside to this look is removal. Glitter is stubborn. Instead of scrubbing your nails with a cotton ball, soak small squares of paper towel in acetone, place them on your nails, and wrap the tips of your fingers in aluminum foil. Let them sit for five minutes. The glitter will slide right off without you needing to scrape your nail plate.
12. The Neon-Tip French
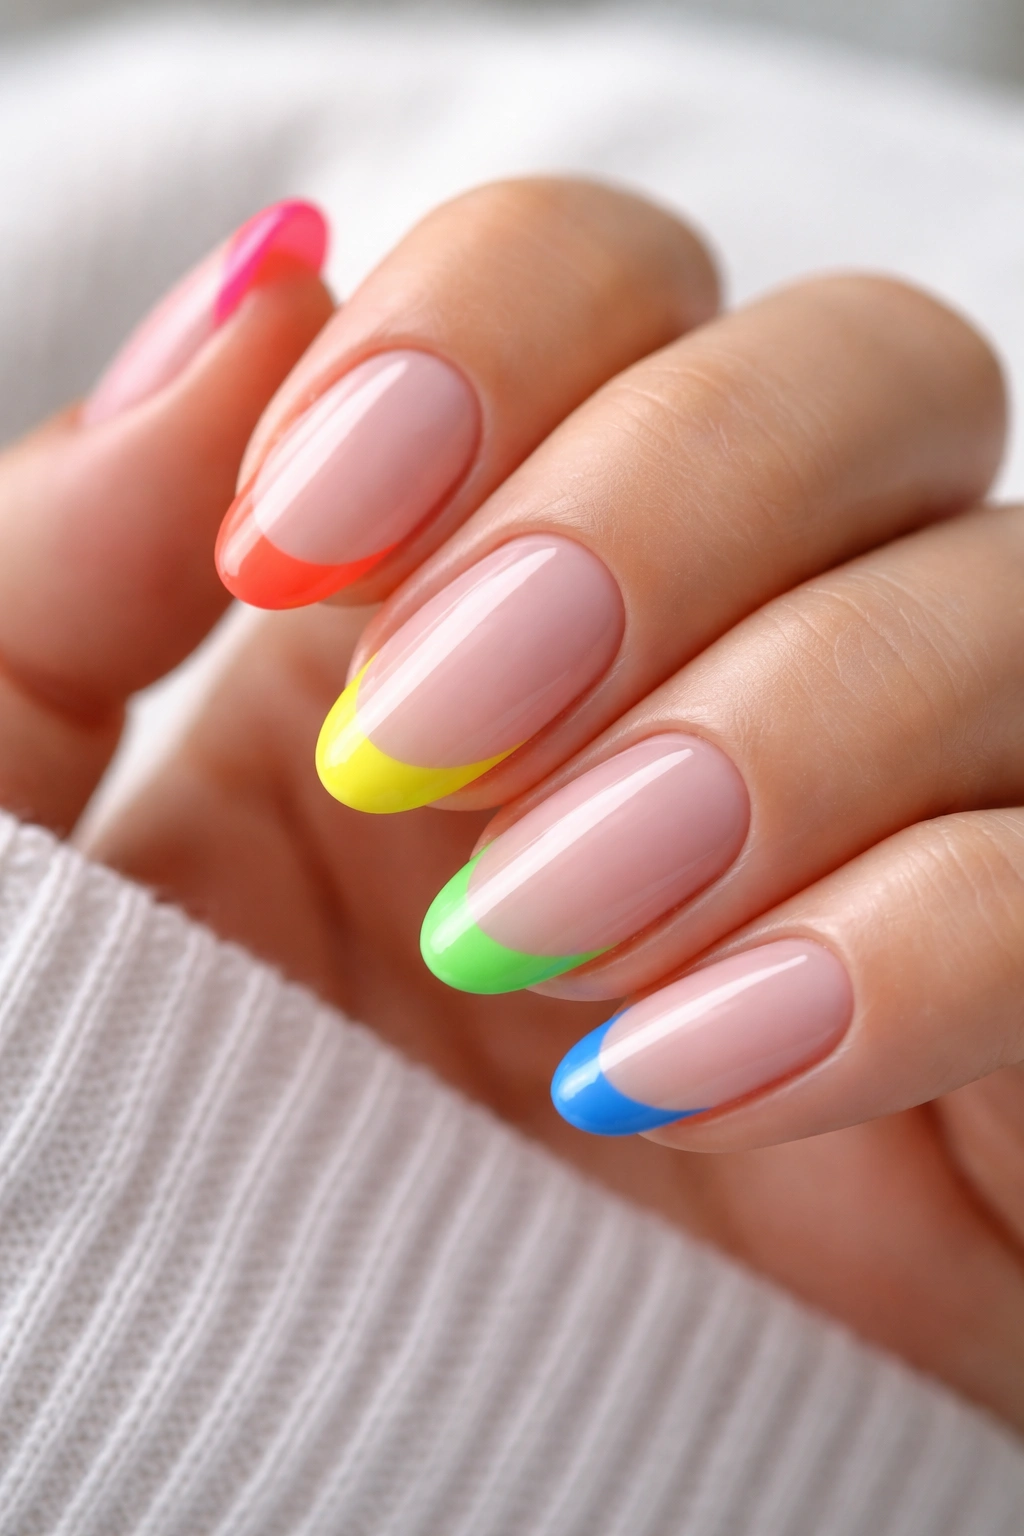
Neon colors on short almond nails are bold, fun, and energetic. The high-contrast color makes the nail stand out. Since the surface area of a short almond nail is limited, you can afford to be loud with your color choices without the manicure feeling “too much.”
Ensuring Opacity
Neon polishes often have a sheer, jelly-like formula. To get the bright, opaque pop you want, paint a layer of white polish on the tip first. Once the white is dry, paint your neon color over it. The white base makes the neon pigments glow.
Sun Protection
Neon pigments are sensitive to UV light and can fade over time. Use a top coat that includes a UV filter. This is a small detail, but it prevents your vibrant electric blue or hot pink tips from looking dull and washed out by the end of the week.
13. The Minimalist Outline French
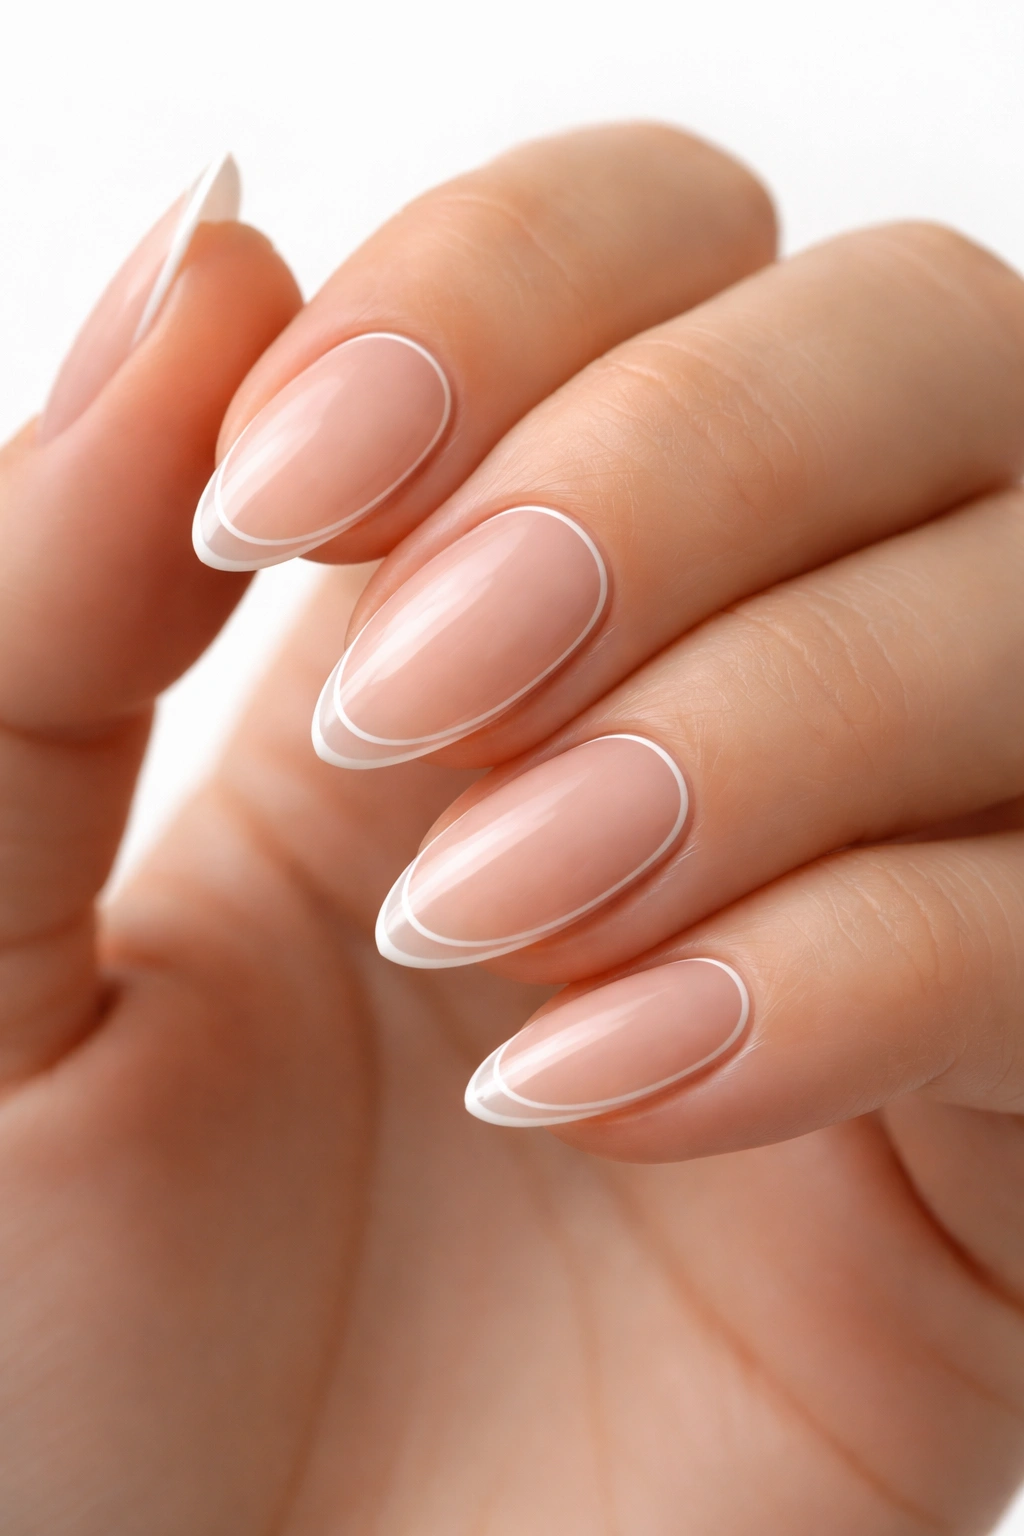
This style creates an outline of the nail tip rather than filling it in completely. It is essentially a “frame” for your nail. It is incredibly delicate and looks very high-fashion. It works best on shorter nails because it does not cover up the natural, healthy look of the nail bed.
The Tool
You need a high-quality detail brush with very long, thin bristles. A short brush will not give you enough fluid movement to drag the line across the curve of the nail. You want a brush that holds enough polish to complete the line in one smooth stroke.
Hand Placement
Do not hold your breath. It sounds silly, but people often hold their breath while doing intricate nail art, which causes you to shake when you finally exhale. Exhale slowly as you draw the line. This keeps your hands steady and allows for a fluid, uninterrupted motion.
14. The Gradient French (Ombré)
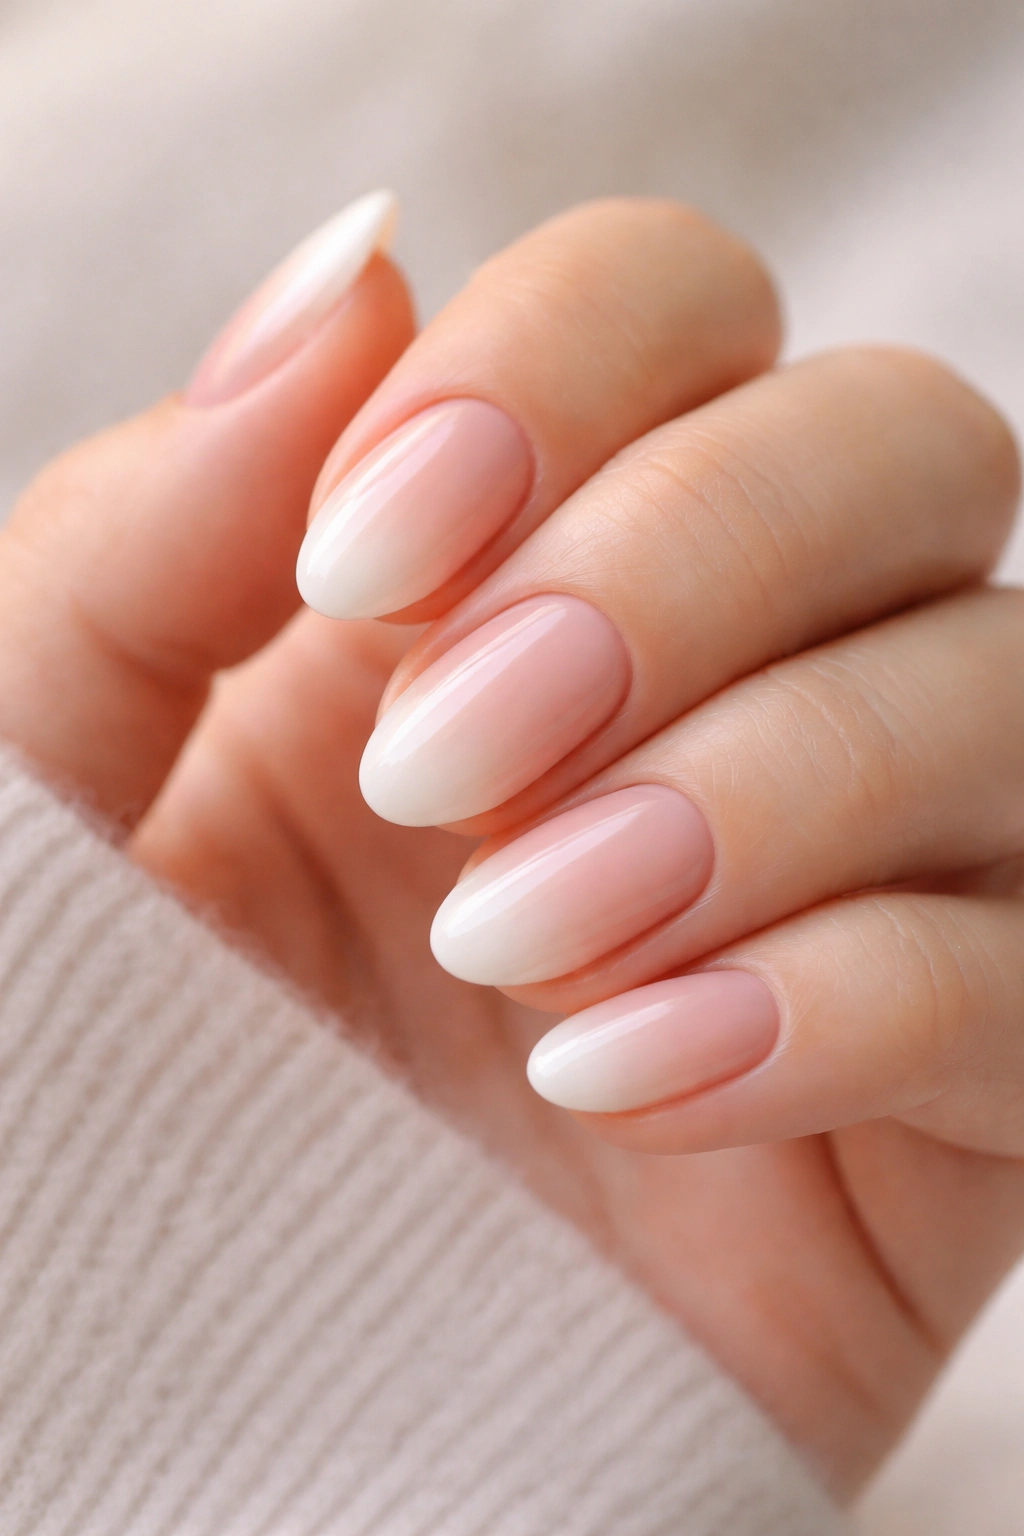
An ombré French tip blends the tip color into the base color. This softens the transition and creates a very natural, airbrushed effect. On short nails, this is great because it removes the harsh, distinct smile line that sometimes emphasizes the shortness of the nail.
Sponge Technique
Apply two different colors to a small wedge of a makeup sponge. Press the sponge onto your nail tip, rocking it back and forth to blend the colors. The porous texture of the sponge automatically creates a gradient. You will have polish on your skin, so use a piece of liquid latex tape around your nail before you start to make cleanup easy.
Sealing the Gradient
The gradient texture can be slightly bumpy because of the sponge application. Use a slightly thicker top coat (a “plumping” top coat) to smooth everything out. It will fill in the tiny voids left by the sponge and make the surface look like glass.
15. The Side-Tip French
This is an avant-garde take on the French manicure. Instead of the tip being at the top, the color is painted on the side of the nail, covering about one-third of the nail bed. It is asymmetrical, unexpected, and very easy to apply because you do not have to worry about a smile line.
Balancing the Nails
For a cohesive look, keep the side-tip on the same side for every finger (for example, the right side of every nail). If you alternate sides, it can look messy. Keeping the color consistent on one side creates a uniform, intentional aesthetic.
Painting the Edge
Since this style covers a larger surface area on the side of the nail, make sure you don’t paint too close to the cuticle. Leave a small gap of bare nail near the cuticle to avoid smearing the polish and to keep the look clean as it grows out.
16. The Jewel-Embellished French
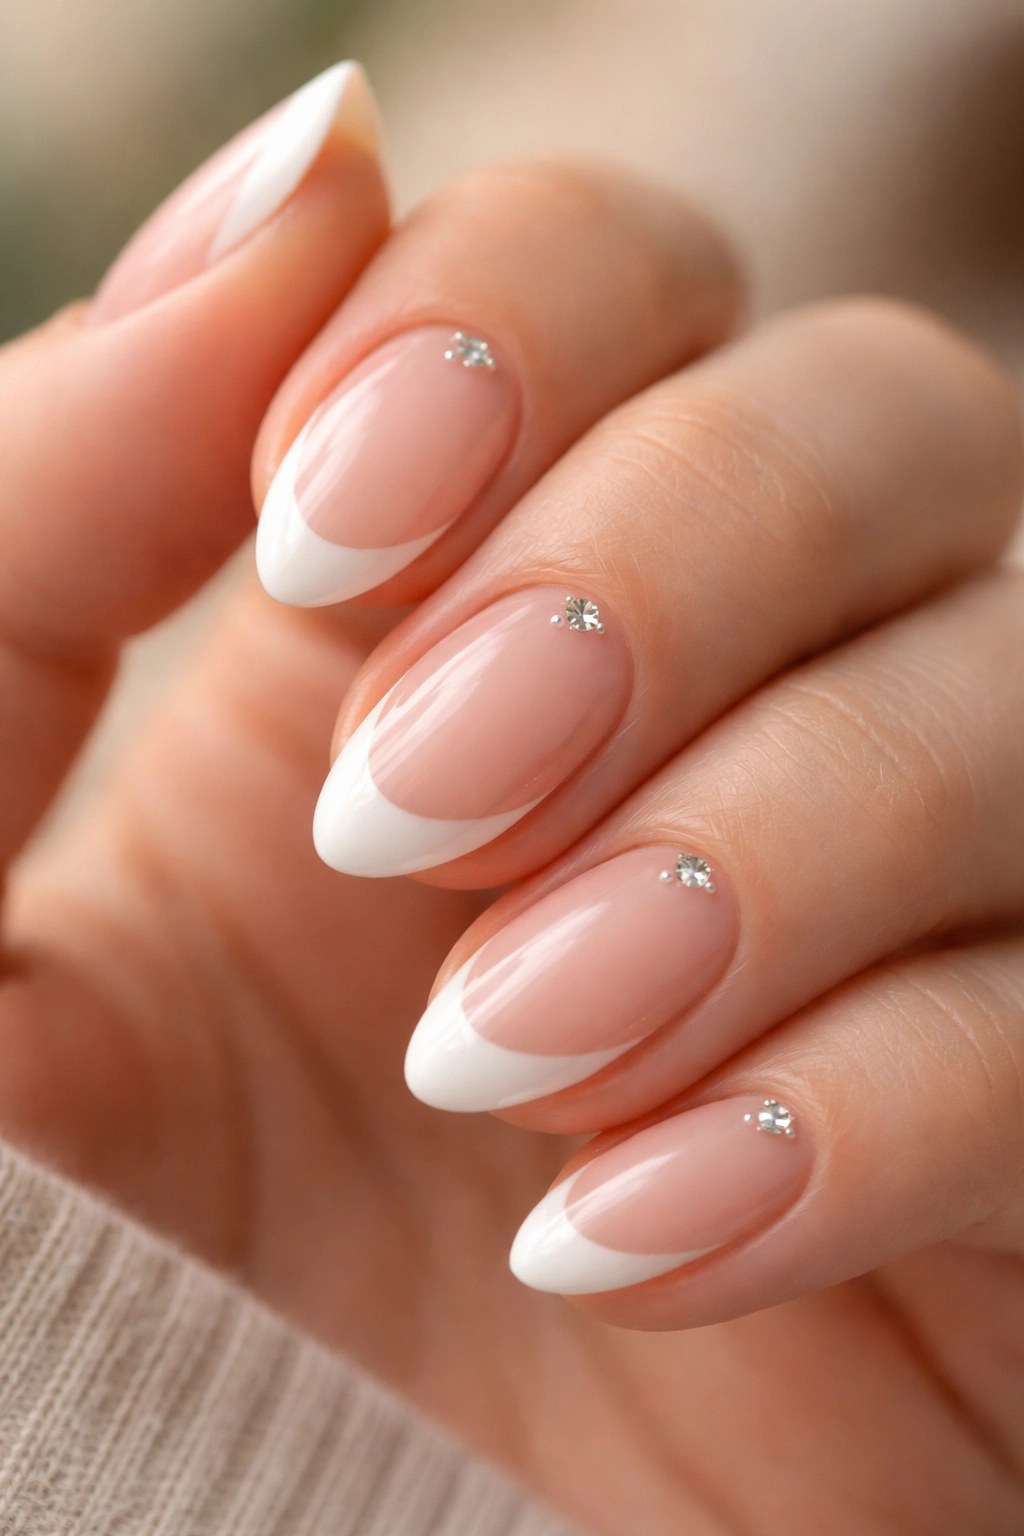
Sometimes, you want a bit of extra sparkle. Adding a single small rhinestone or a tiny pearl at the smile line of your French tip changes the entire vibe from classic to glamorous. On short nails, stick to small, flat-back crystals; large stones will just get caught on your hair and clothes.
Adhesive
Do not use regular top coat to stick down your gems. It will not hold. Use a dedicated nail glue or a thick clear builder gel. Apply a tiny dot where you want the gem to sit, place the gem with a wax-tipped picker tool, and then cure or let it dry completely.
Sealing
Do not put your regular top coat over the top of the crystal. It will coat the facets of the gem and dull its sparkle, making it look cloudy. Carefully paint the top coat around the gem, sealing the base of it, but leave the top of the crystal clear and exposed.
17. The Tortoiseshell Tip
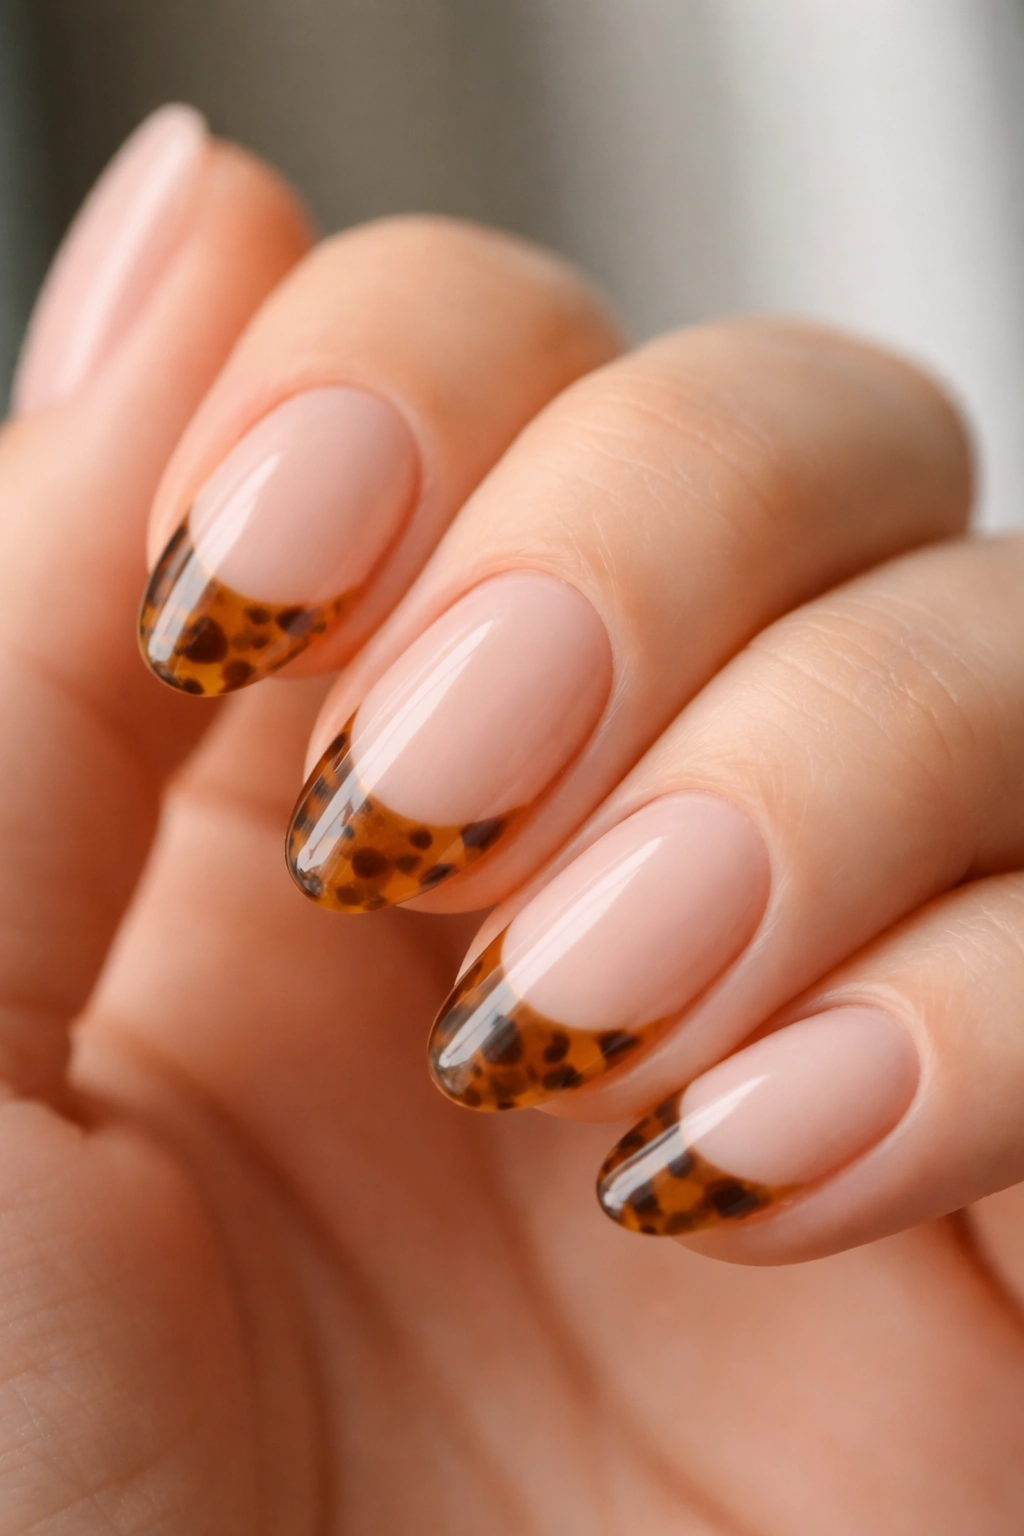
Tortoiseshell is a pattern that looks surprisingly high-end on a French tip. It sounds difficult, but it is just a matter of layering sheer colors. You will need a sheer brown polish, a sheer orange or mustard polish, and a black polish.
Layering the Effect
Paint your white French tip as usual. While it is wet (or after it dries, depending on the look you want), drop small, irregular dots of the brown polish onto the tip. Before that dries, add smaller dots of the orange polish, and then tiny, barely-there dots of black. The colors will naturally blend and marble together to create that tortoiseshell look.
Working Quickly
You need to work relatively fast so the polish stays wet enough to marble. If you are not confident in your marbling skills, practice on a piece of plastic first. Once you get the hang of the movement, it becomes very intuitive and actually quite relaxing to do.
18. The Floral-Accent French
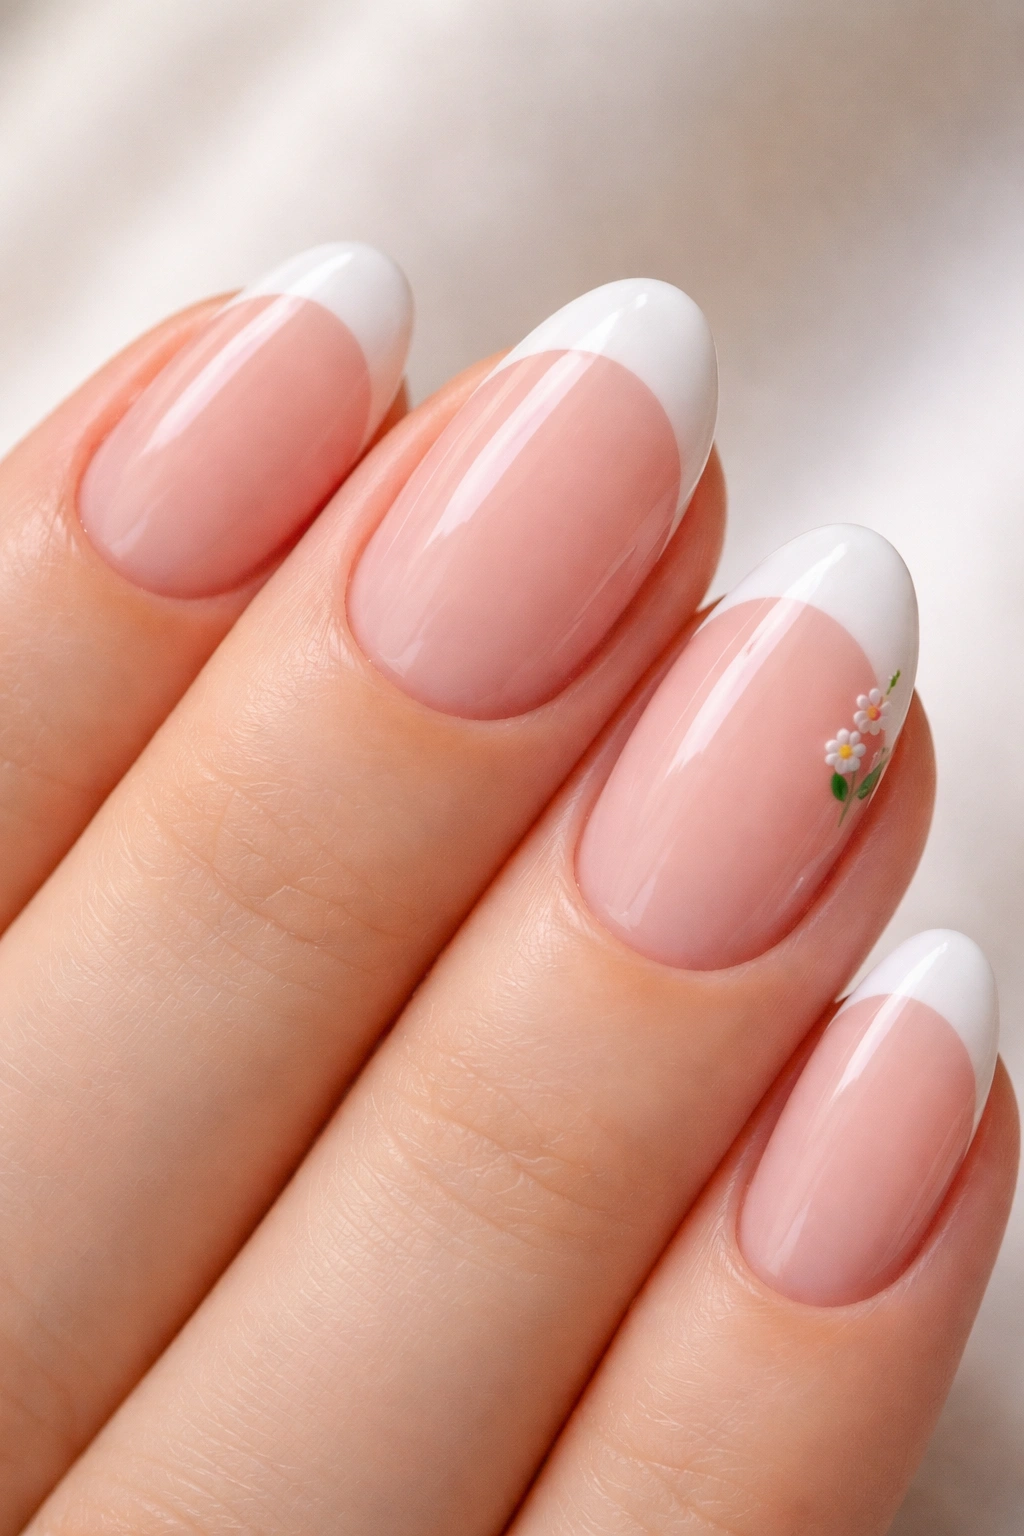
If you enjoy nail art but want to keep it subtle, add a small floral accent to the corner of your French tip. You do not need to paint flowers on every nail; just one accent nail on each hand is enough to elevate the entire manicure.
Using Decals
Unless you are a trained artist, hand-painting tiny flowers on a short nail is nearly impossible. Buy high-quality water-slide decals or thin nail stickers. They lay flat against the nail and, once topped with a high-gloss coat, look like they were painted on.
Positioning
Place the floral accent where the smile line meets the side wall. This highlights the shape of the nail and draws attention to the contrast between the white tip and the nude base. It feels like a piece of jewelry for your nail.
19. The Split-Color French
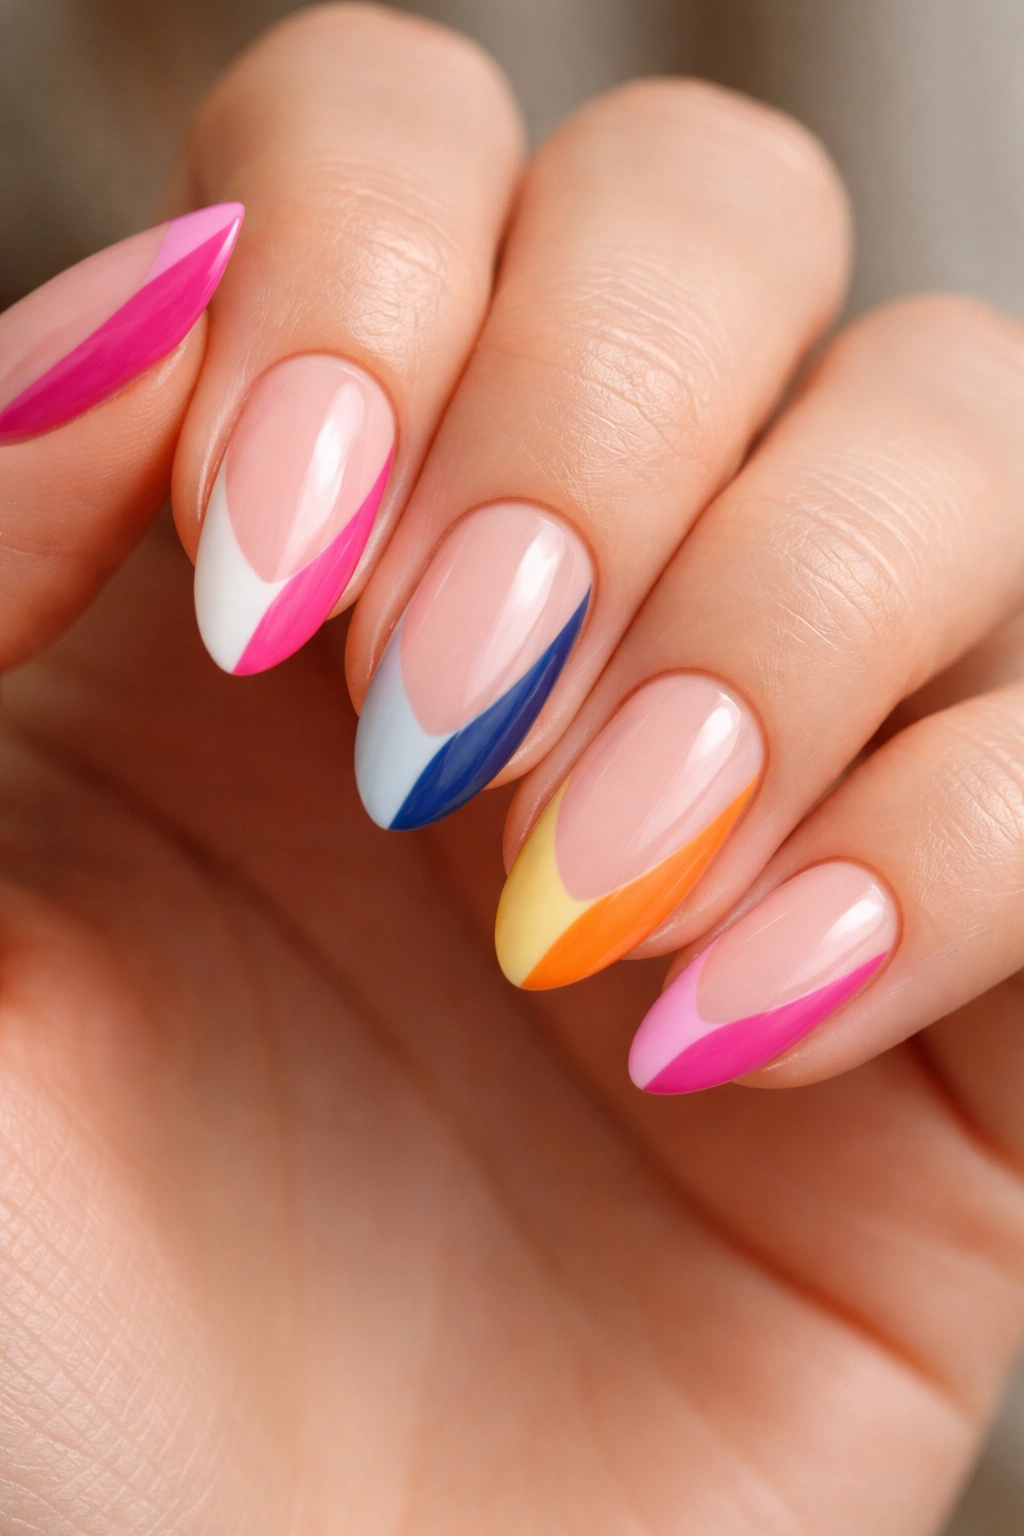
Split your tip in half with two different colors. This is a bold, color-block style that is perfect if you cannot decide between two shades. It is clean, sharp, and very modern. It works best with high-contrast colors, like black and white, or pink and red.
Creating the Divider
You need a perfectly straight line down the center of the tip. Use a striping brush to draw the line first, then fill in the two halves. If you are struggling with the center line, use a piece of thin tape to create a guide.
Dealing with Staining
Since you are using two colors, make sure you wipe your brush thoroughly between colors. If you are using a light color and a dark color, paint the light color first. If you paint the dark color and accidentally transfer it to the light side, you will have to restart the whole nail.
20. The Deep V / Deep Smile Line

For a dramatic look, bring the smile line very far down the nail bed. Instead of a shallow curve, make it a deep, elongated U or V shape that reaches almost to the cuticle. This creates an intense visual lengthening effect, which is perfect for very short, wide nail beds.
Proportionality
This style is all about balance. Because you are covering so much of the nail with the tip color, you need to be very precise. A wobbly line in a deep French manicure is glaringly obvious. Use a striper brush to map out the shape before you commit to filling it in with the polish bottle brush.
Avoiding “The Grow-Out”
The downside of a deep French is that the “naked” part of the nail is smaller, so the regrowth might show faster. However, because the design is so intentional, it usually grows out more gracefully than a standard shallow tip, which can start to look like an accidental gap as your nails lengthen.
Final Thoughts
Mastering the French tip on short almond nails is as much about control as it is about style. Do not get discouraged if your first attempt is not perfectly symmetrical. The beauty of these techniques is that they are all adjustable. If a line is too thick, thin it out. If a curve is uneven, use a cleanup brush to reshape it.
Focus on your tools. A dedicated cleanup brush, a high-quality striper brush, and a sheer base coat are the three most important things you can own. Once you have those basics, the specific design is just a matter of practice. Take your time, maintain a steady anchor for your hands, and remember that even if you mess up, it is just polish. You can always start over.
