

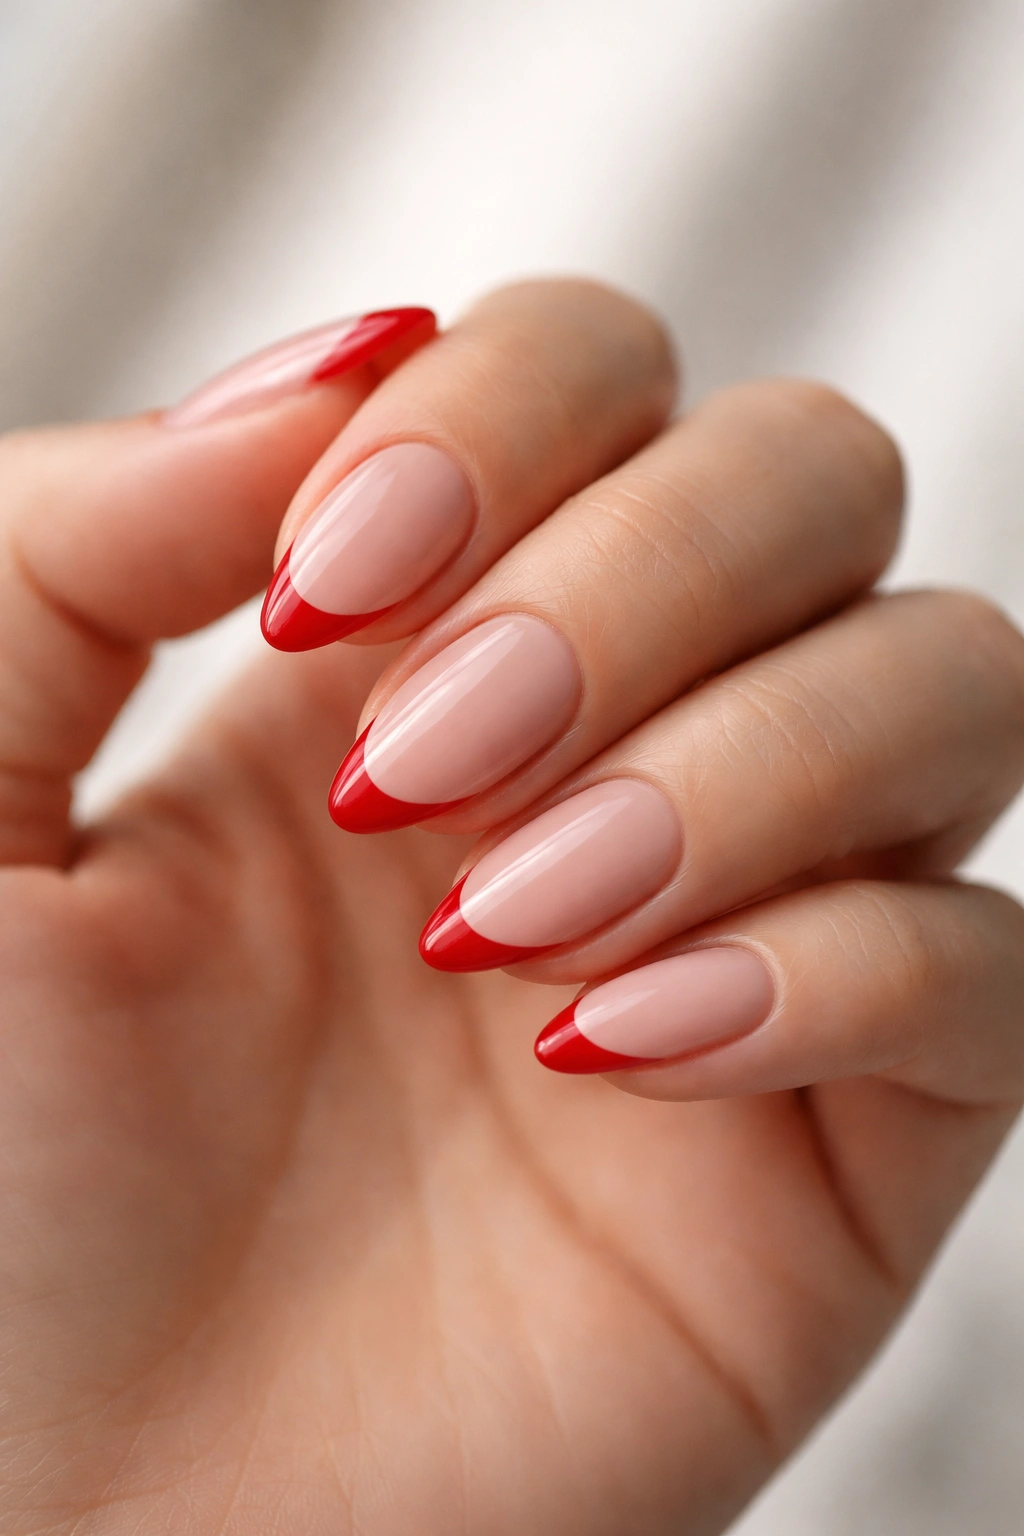
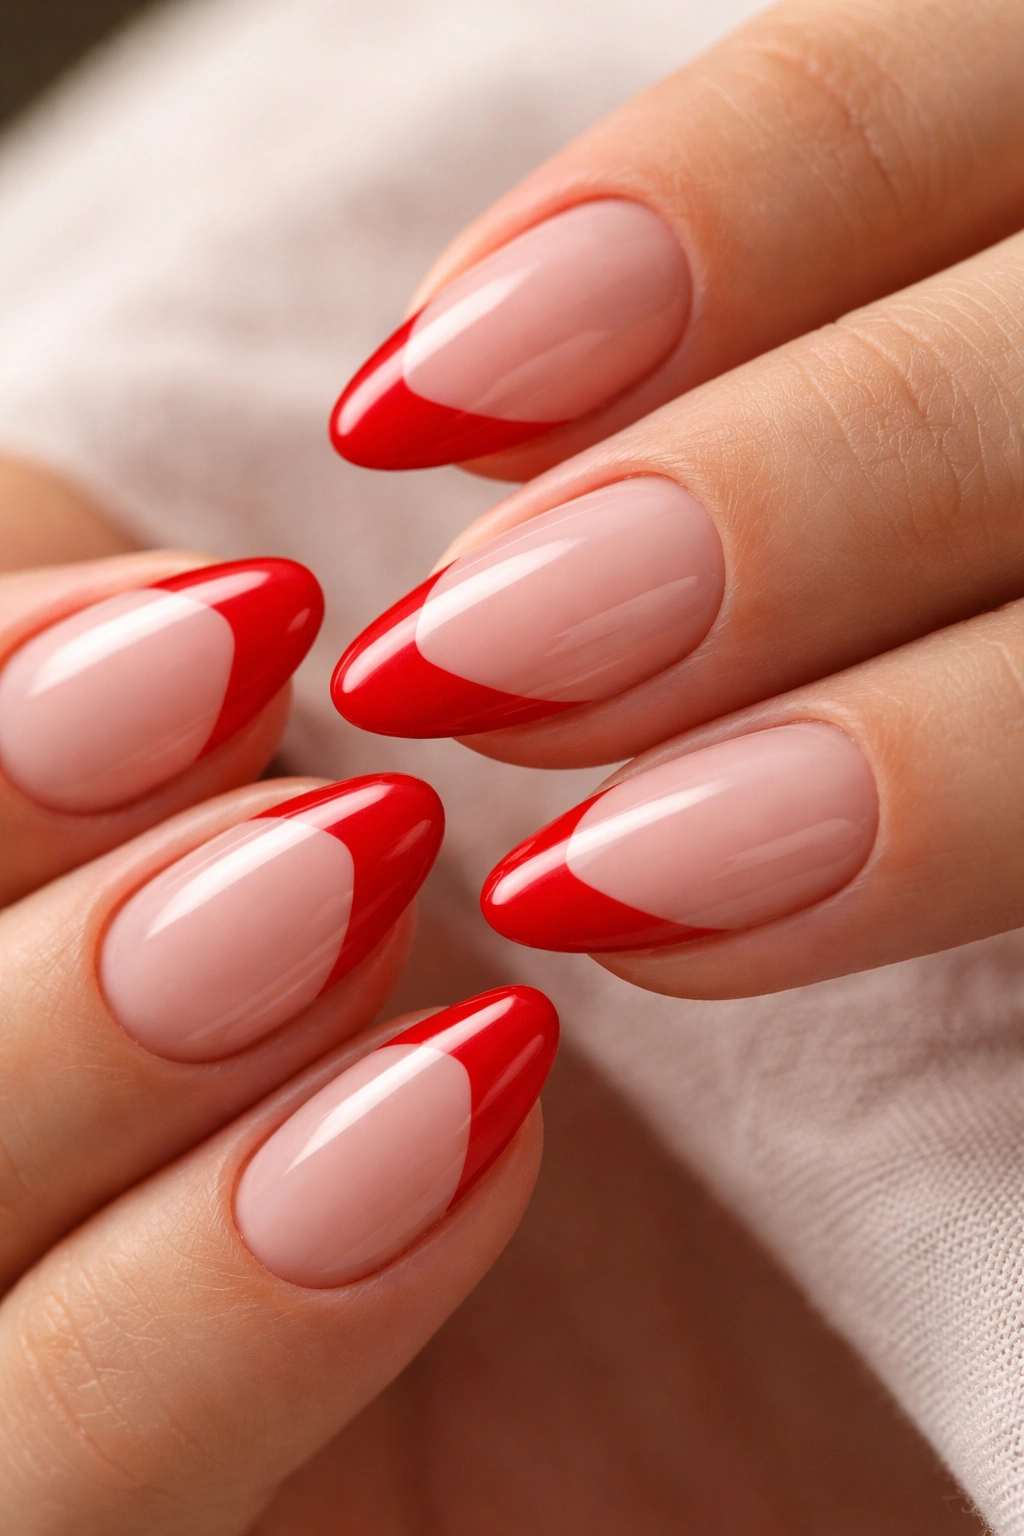
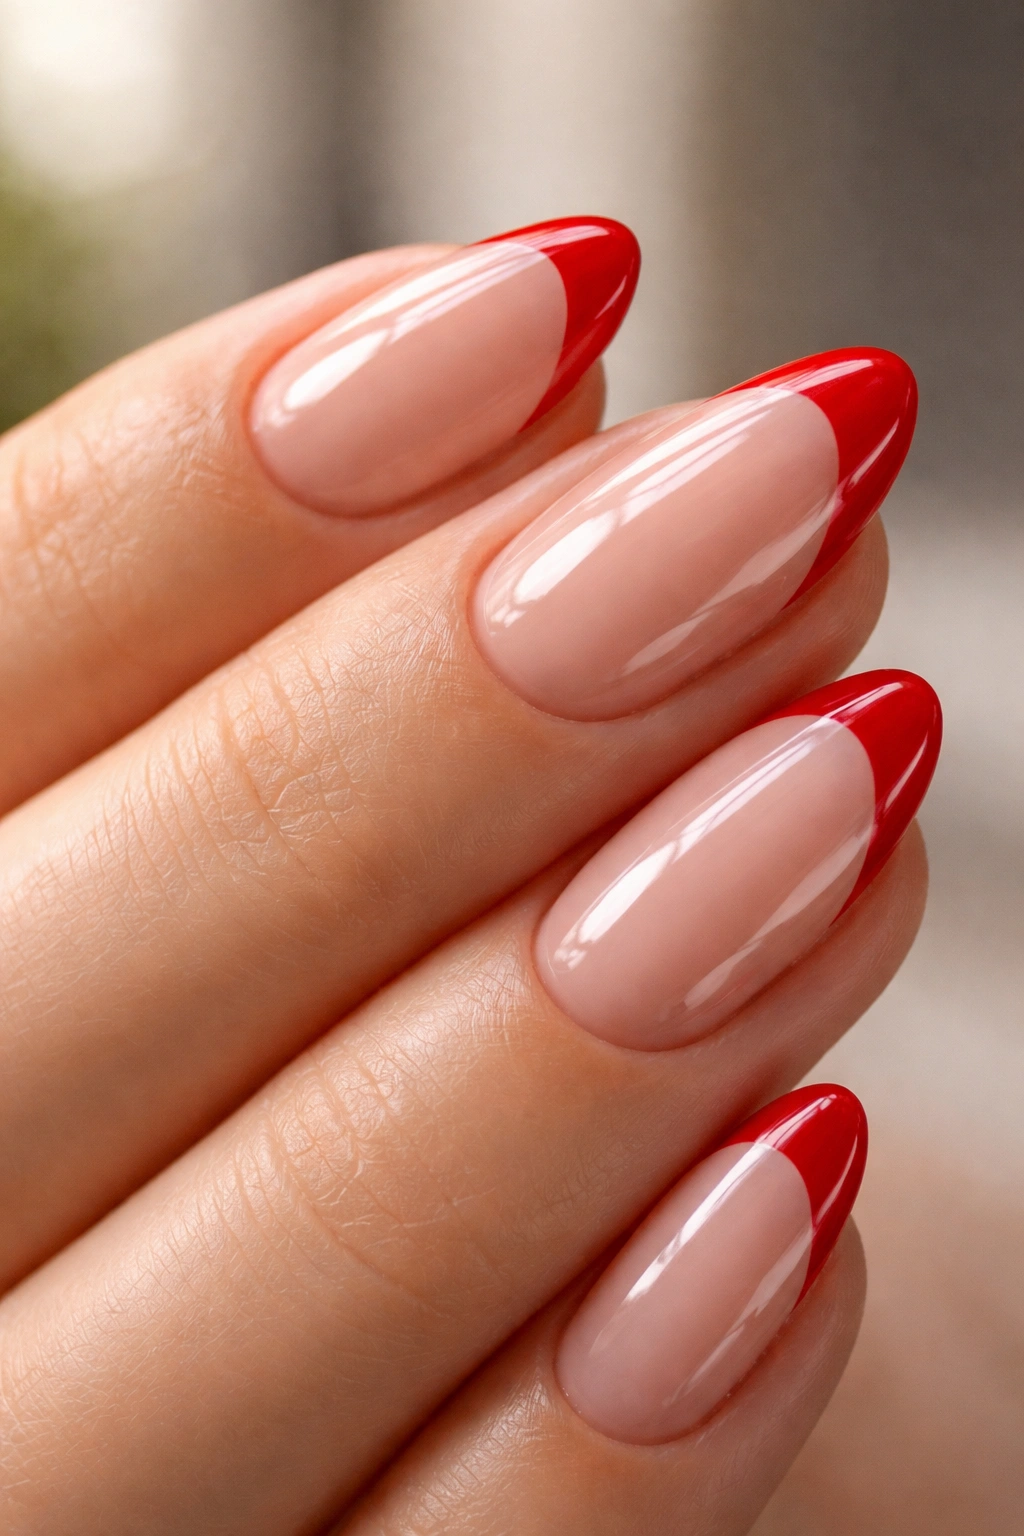
Red nail polish is a deliberate choice. Painting your entire nail bed a solid crimson screams classic glamour, but restricting that same high-impact color strictly to the tips of a short almond nail does something entirely different. It sharpens the look. It turns a traditional manicure into an architectural statement.
The French manicure spent decades defined by stark white tips on square acrylics. That strict template has finally fractured. Now, nail artists and home DIYers treat the tip of the nail as a blank canvas, and red has emerged as the ultimate replacement for white. A red tip on a short almond shape gives you the aggressive punch of a dark polish combined with the visual breathing room of a sheer, natural base.
Short almond nails are practically designed for this exact aesthetic. The tapered sides elongate the fingers naturally, while the soft, rounded point provides a perfect physical boundary for a painted “smile line.” You do not need an inch of free edge to pull this off. In fact, a shorter nail keeps the red tip looking intentional and sharp rather than costume-like.
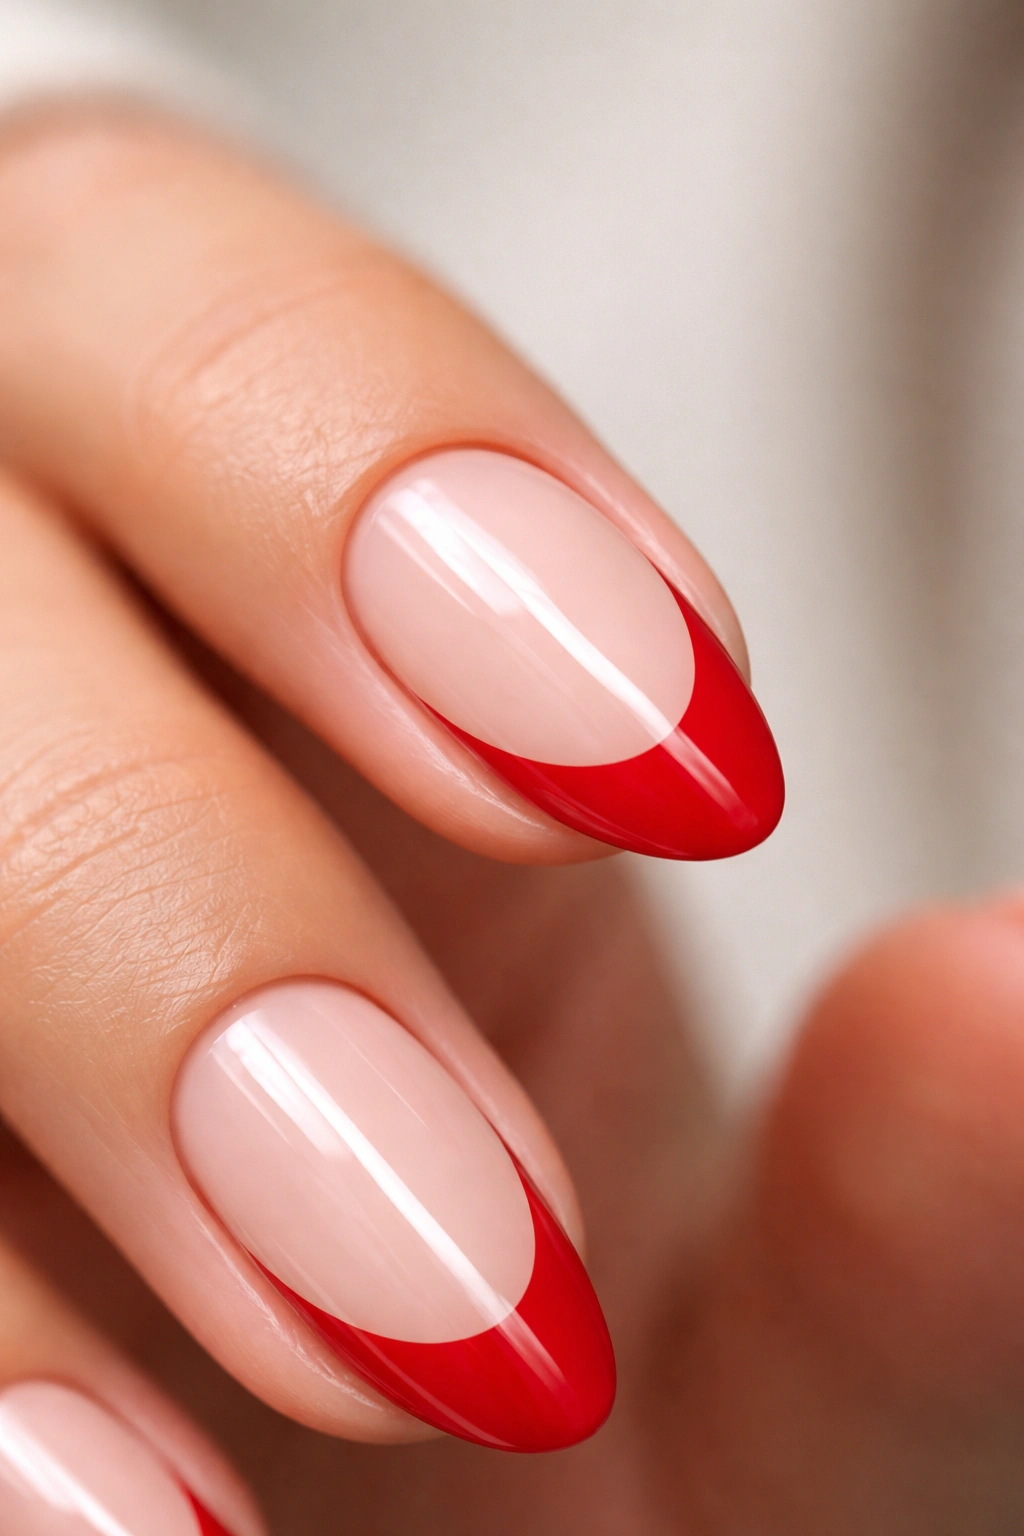
The contrast between a milky, neutral nail bed and a vibrant red tip forces the eye to focus on the precision of the line work. That means the details matter. The opacity of the red, the curve of the arches, and the exact shade of the base color will dictate whether the manicure looks like a high-end salon set or a rushed craft project.
Why Short Almond Is the Ultimate Canvas for French Tips
Nail shapes dictate the entire mood of a manicure. Square nails feel rigid and retro. Stiletto nails demand attention and massive length. Almond strikes the ideal balance, particularly when kept short.
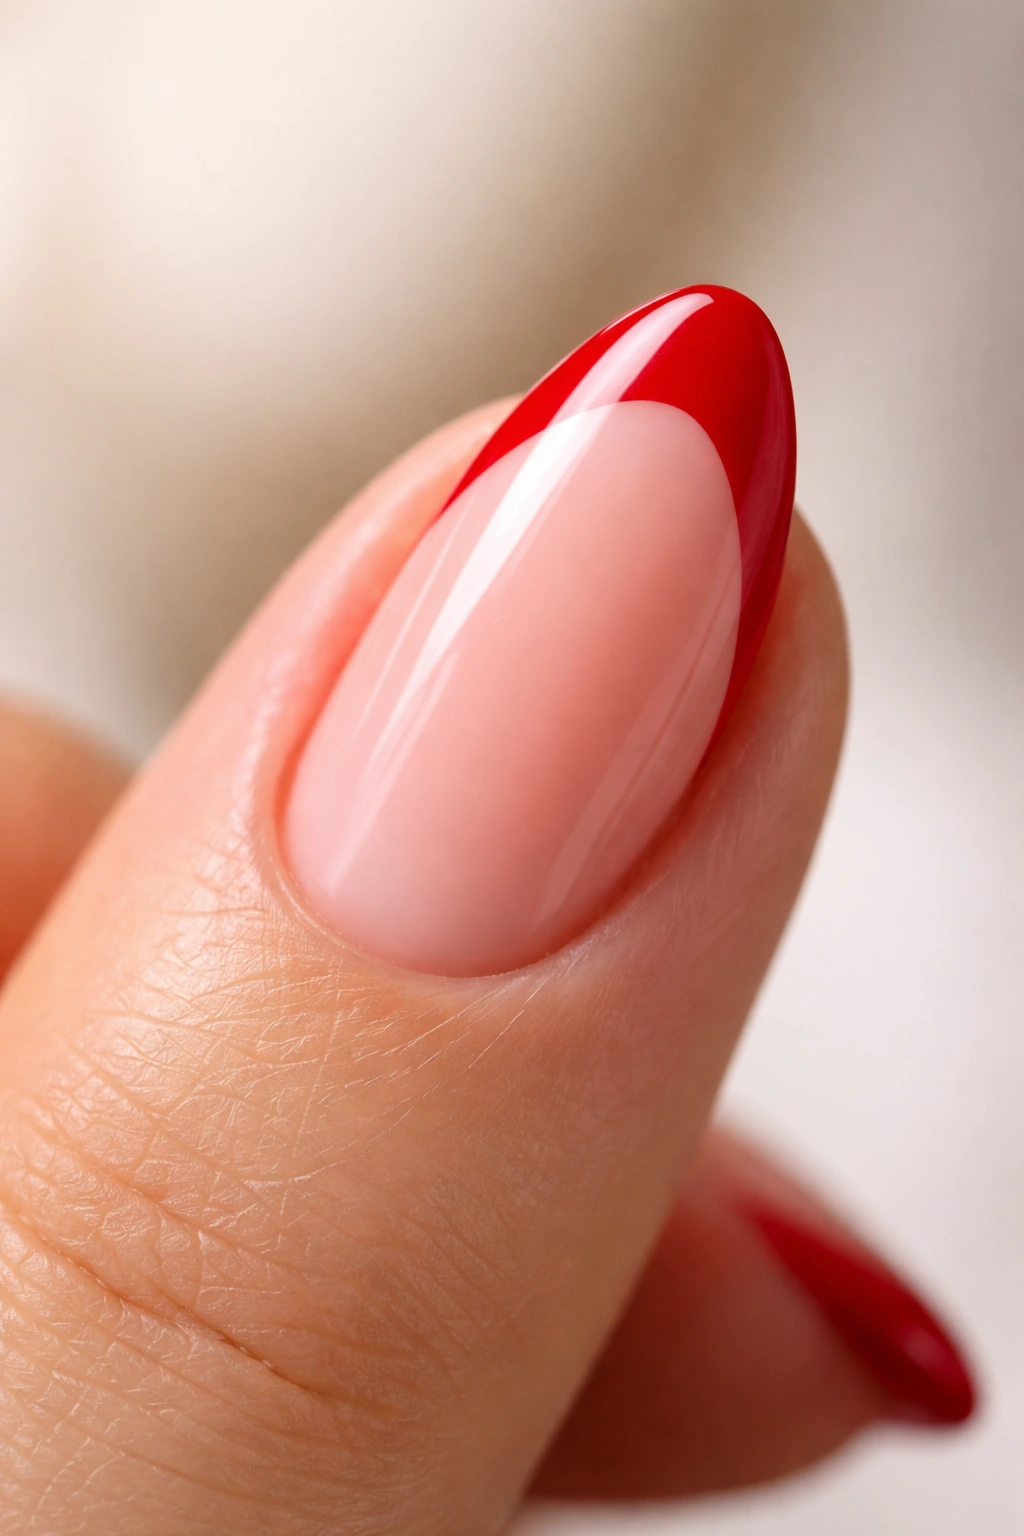
The human nail bed naturally curves. When you file the free edge into an almond shape, you are essentially mirroring the natural cuticle line at the opposite end of the nail. This creates visual symmetry. A French tip relies entirely on geometric balance. The arch of the painted tip needs to sweep down the sides of the nail seamlessly. On a square nail, that line stops abruptly at a 90-degree corner. On an almond nail, the smile line can taper gracefully down the sidewalls, blending into the natural growth channels of the nail.
Short lengths add a layer of practical durability. You retain the elegant taper of the almond shape without the leverage that causes long extensions to snap when you open a car door or type aggressively on a keyboard. A short almond nail absorbs shock better because the stress apex sits closer to the natural center of your finger.
When you apply a red French tip to this specific shape, the color acts as a frame. It highlights the tailored precision of the filing. A blunt square nail with a red tip looks blocky. A short almond nail with the exact same tip looks weaponized.
Choosing the Right Red Polish for Your Base
Not all red polishes behave the same way, especially when used for line work. Painting a solid nail allows you to build opacity over two or three coats. A French tip requires dense, immediate color payoff in a single pass.
If your polish is too thin, the red tip will look watery and pink against the sheer base. If it is too thick, you will end up with a bulky ridge sitting on the end of your nail, guaranteed to chip within three days.
The Viscosity Factor
You need a highly pigmented formula. Gel polishes labeled as “art gels” or “liner gels” are formulated strictly for this purpose. They contain a higher ratio of pigment to base medium, meaning they do not self-level as aggressively or run into the sidewalls before you can get your hand into the curing lamp. Traditional nail polish requires a formula that advertises one-coat opacity.
Finding the Right Undertone
Red is never just red. It leans blue, orange, or brown.
Cool-toned reds contain blue undertones. Think of cherry juice or a classic blue-red lipstick. These shades create a massive contrast against warm, olive skin tones and make the nail beds look almost impossibly crisp.
Warm-toned reds heavily favor orange. Tomato red, poppy, and fiery scarlet fall into this category. These shades sing on deeper skin tones and add a vibrant, punchy energy to the manicure that feels less serious than a dark crimson.
True neutral reds sit right in the middle. They do not lean warm or cool. If you are ever in doubt, a neutral primary red is the safest bet for a classic French tip.
The Anatomy of a Perfect Smile Line
Painting a French tip is an exercise in basic geometry. You cannot just swipe the brush horizontally across the top of the nail and call it a day.
The “smile line” is the curve where the pink base meets the colored tip. On a short almond nail, a deep smile line is usually the most flattering. A deep smile means the red color extends further down the left and right sides of the nail, creating a sharp U-shape rather than a shallow crescent. This vertical extension visually narrows and lengthens the nail bed.
To achieve this, ditch the standard brush that comes inside the polish bottle. It is entirely too thick. You need a dedicated striping brush—specifically an 8mm to 12mm synthetic detailer brush.
Start by mapping the tip. Place a tiny dot of red polish at the very center of your free edge to mark how thick you want the tip to be. Next, place a dot on the left sidewall and the right sidewall where you want the arches to end. Use the striping brush to connect the sidewall dots to the center dot, sweeping the brush in a smooth, continuous curve. Fill in the empty space at the very end. Clean up any wobbles with a clean brush lightly dampened with acetone or alcohol before the polish dries or cures.
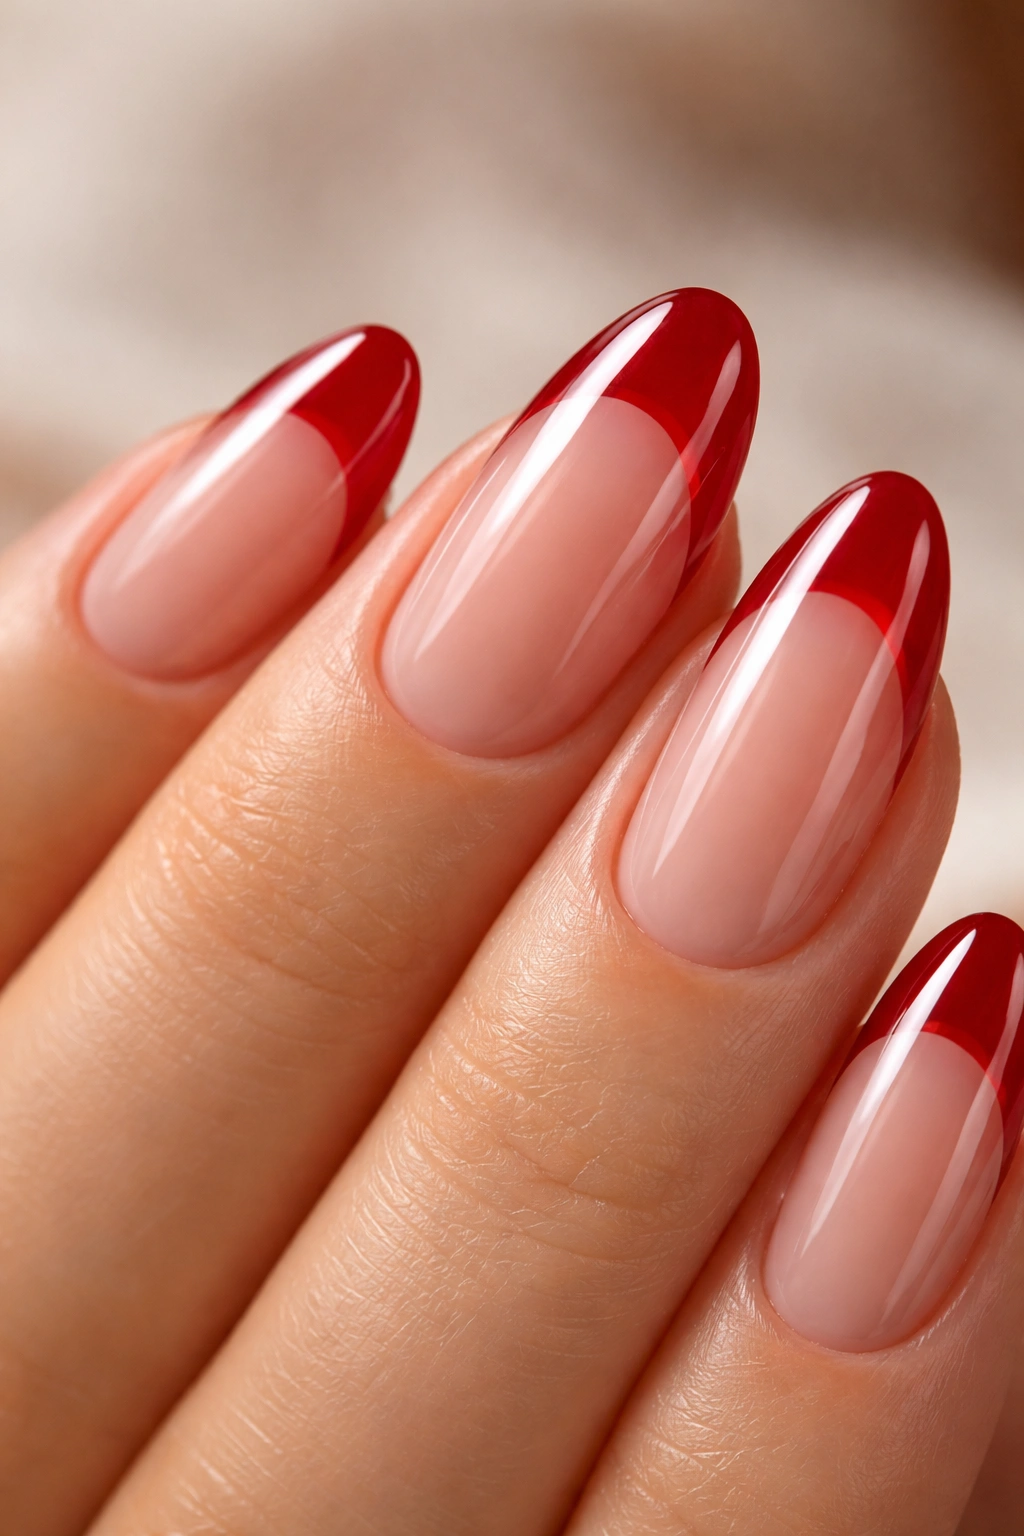
1. Classic Crimson Micro French
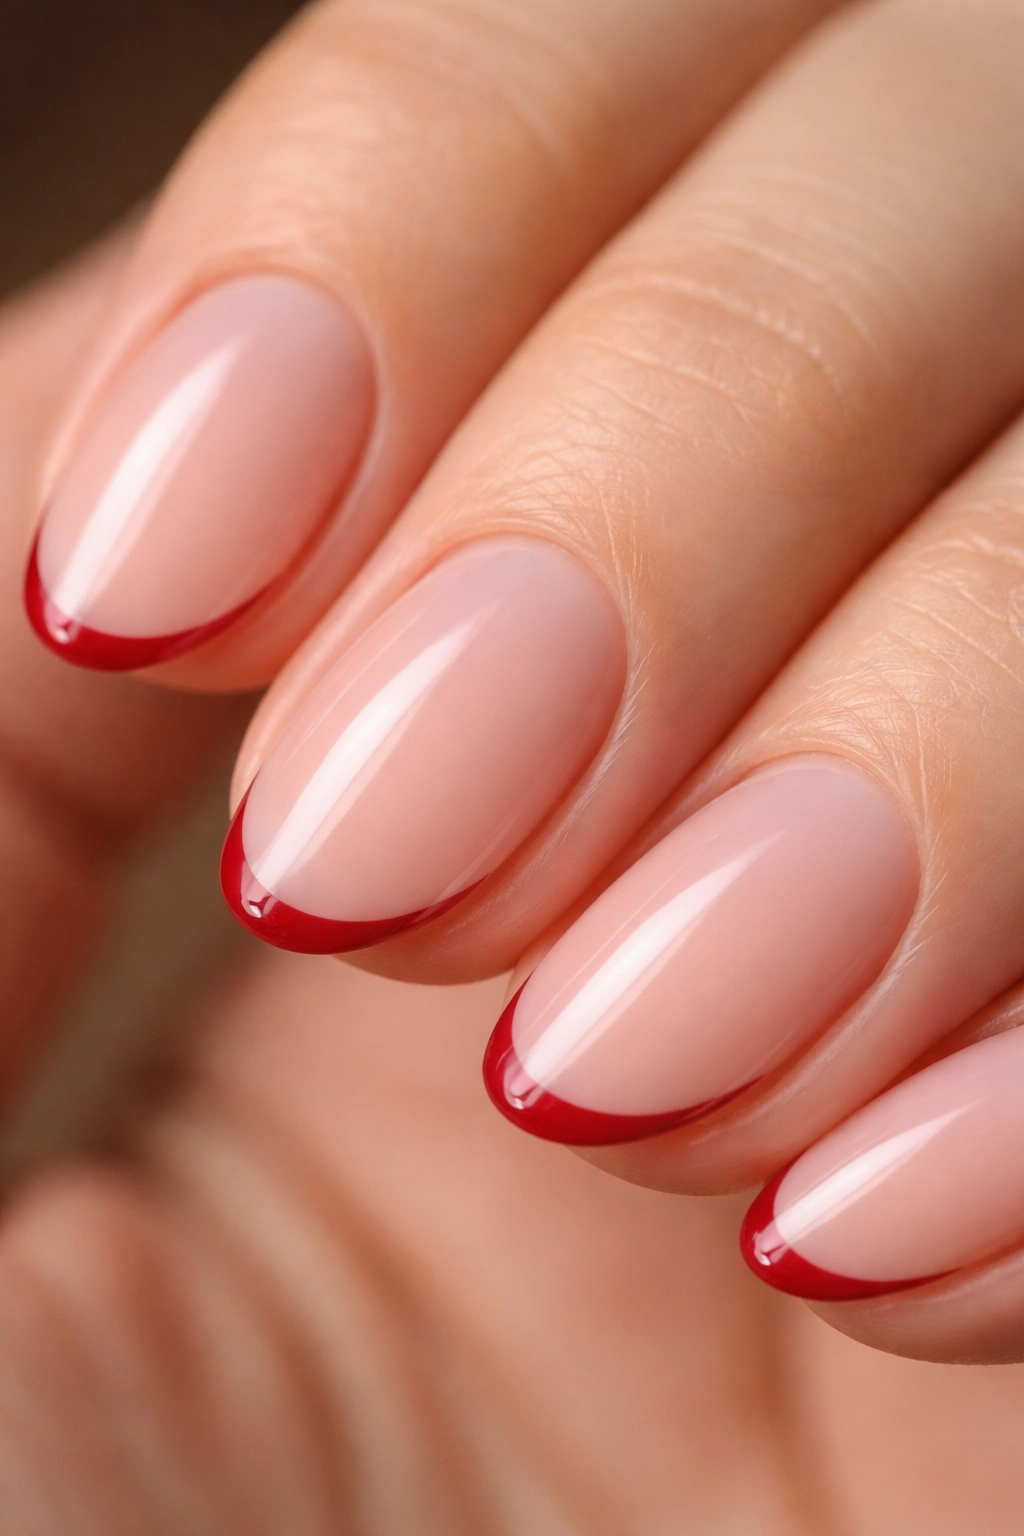
Sometimes the most aggressive statement is a whisper. The micro French tip takes the traditional broad arch and shrinks it down to a hairline fraction of a millimeter.
Why This Specific Style Works
On a short almond nail, real estate is limited. A thick French tip can easily consume half the nail bed, making the fingers look stubby. A micro tip solves this structural problem instantly. By restricting the crimson polish to the absolute very edge of the nail, you preserve the elongated look of the sheer nude base.
The Execution Strategy
- Prep the nail with a self-leveling rubber base gel in a translucent pink.
- You need an exceptionally thin liner brush. A 5mm detailer works best here.
- Load only the very tip of the brush bristles with a highly pigmented crimson gel.
- Instead of drawing a deep U-shape, drag the brush almost straight across the very tip, following the slight natural curve of the almond point.
- Keep the line completely uniform in thickness from corner to corner.
Pro tip: Anchor your pinky finger against your other hand while painting. This physical anchor stops your hand from shaking during the micro-fine line work.
2. Deep Burgundy V-Cut Tips
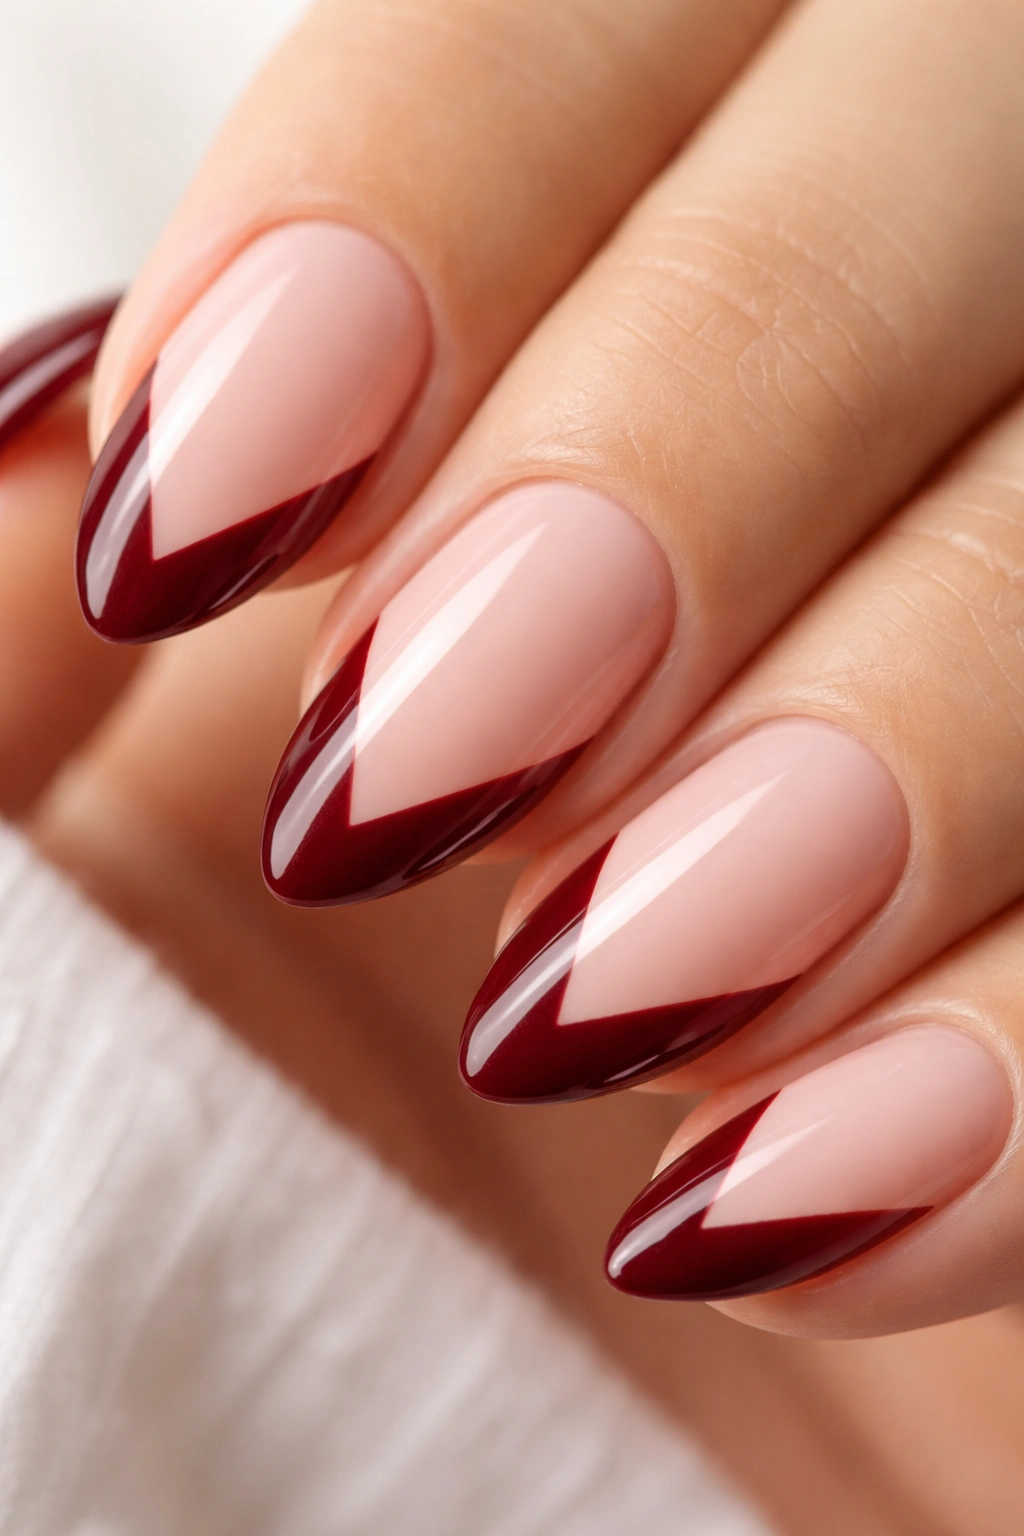
Standard rounded arches are beautiful, but introducing hard geometric angles changes the entire attitude of the manicure.
The V-cut tip replaces the soft curve of a traditional smile line with a sharp, plunging triangle that points directly down toward the cuticle. Using a deep, almost-black burgundy for this design pushes the aesthetic away from classic beauty and directly into an edgy, modern space.
The sharp downward point of the V creates an optical illusion. It forces the eye to track vertically down the center of the finger. If you have naturally short or wide nail beds, this specific geometric trick will make your nails look twice as long as they actually are.
To paint this cleanly, do not try to draw the V freehand in one go. Mark the exact center point on your nail bed where you want the bottom of the V to sit. Draw a straight diagonal line from the left corner of your free edge down to that center dot. Repeat on the right side. Fill in the top section. The crispness of the inner point is non-negotiable—if the V is slightly off-center or rounded at the bottom, the entire illusion fails.
3. Cherry Red Jelly French
Opaque polish is the standard, but sheer, translucent color offers an entirely different texture.
Jelly polishes look exactly like they sound—squishy, transparent, and intensely glossy, mimicking the texture of stained glass or a cherry hard candy.
Building the Jelly Tip
You cannot just paint a sheer polish over a milky pink base. The base color will show through and muddy the bright cherry tint.
To make a jelly tip work, you must build the nail differently. Start with a clear base coat. Paint your nude or pink camouflage color only on the bottom two-thirds of the nail, carefully fading it out before it reaches the free edge. Leave the actual tip of your nail completely clear.
Paint the cherry jelly polish over that clear section, overlapping slightly with the faded nude base to create your smile line. Because the base underneath the red is completely transparent, light will pass directly through the jelly polish. The tip of your nail will look like cast acrylic glass.
4. Matte Brick Red with Glossy Tips
Playing with contrasting finishes often produces a more striking result than contrasting colors.
Picture this. The entire nail bed is painted in a rich, muted brick red. The tone is earthy, warm, and sophisticated. You cure it, then seal the entire nail with a high-quality velvety matte top coat. The nail immediately looks like poured terracotta.
But you do not stop there.
You take the exact same brick red polish, or simply a thick, clear, high-gloss top coat, and paint a classic French tip directly over the matte surface. The color remains entirely monochromatic. The French tip reveals itself strictly through the way it interacts with light. The tip gleams and reflects sharply, while the base absorbs light completely.
This technique is remarkably forgiving for beginners. Because the base and the tip are the identical shade of red, a slightly uneven smile line is virtually invisible unless someone is inspecting your hands under a microscope. You get the intricate, detailed look of a French manicure without the high-stress precision required by contrasting colors.
5. Neon Red Negative Space Tips
Negative space designs strip away the solid blocks of color and leave exposed areas of the natural nail bed. It feels incredibly architectural.
Instead of painting the tip solid red, you only paint the outline of the French tip.
Using a shockingly bright neon red, draw the standard deep smile line arching down the sides of the almond shape. Then, draw a second line tracing the very outer free edge of the nail. Leave the space between those two lines completely empty, showing only the sheer nude base underneath.
Neon red is notoriously difficult to formulate. It often requires a white base underneath to make the pigments pop. To bypass this annoying step, purchase a highly pigmented neon red art gel. These are thicker and designed to lay down blindingly bright color in a single, un-layered stroke. The thin, floating arches of neon red create a skeletal, ultra-modern take on the French tip that thrives on short nails.
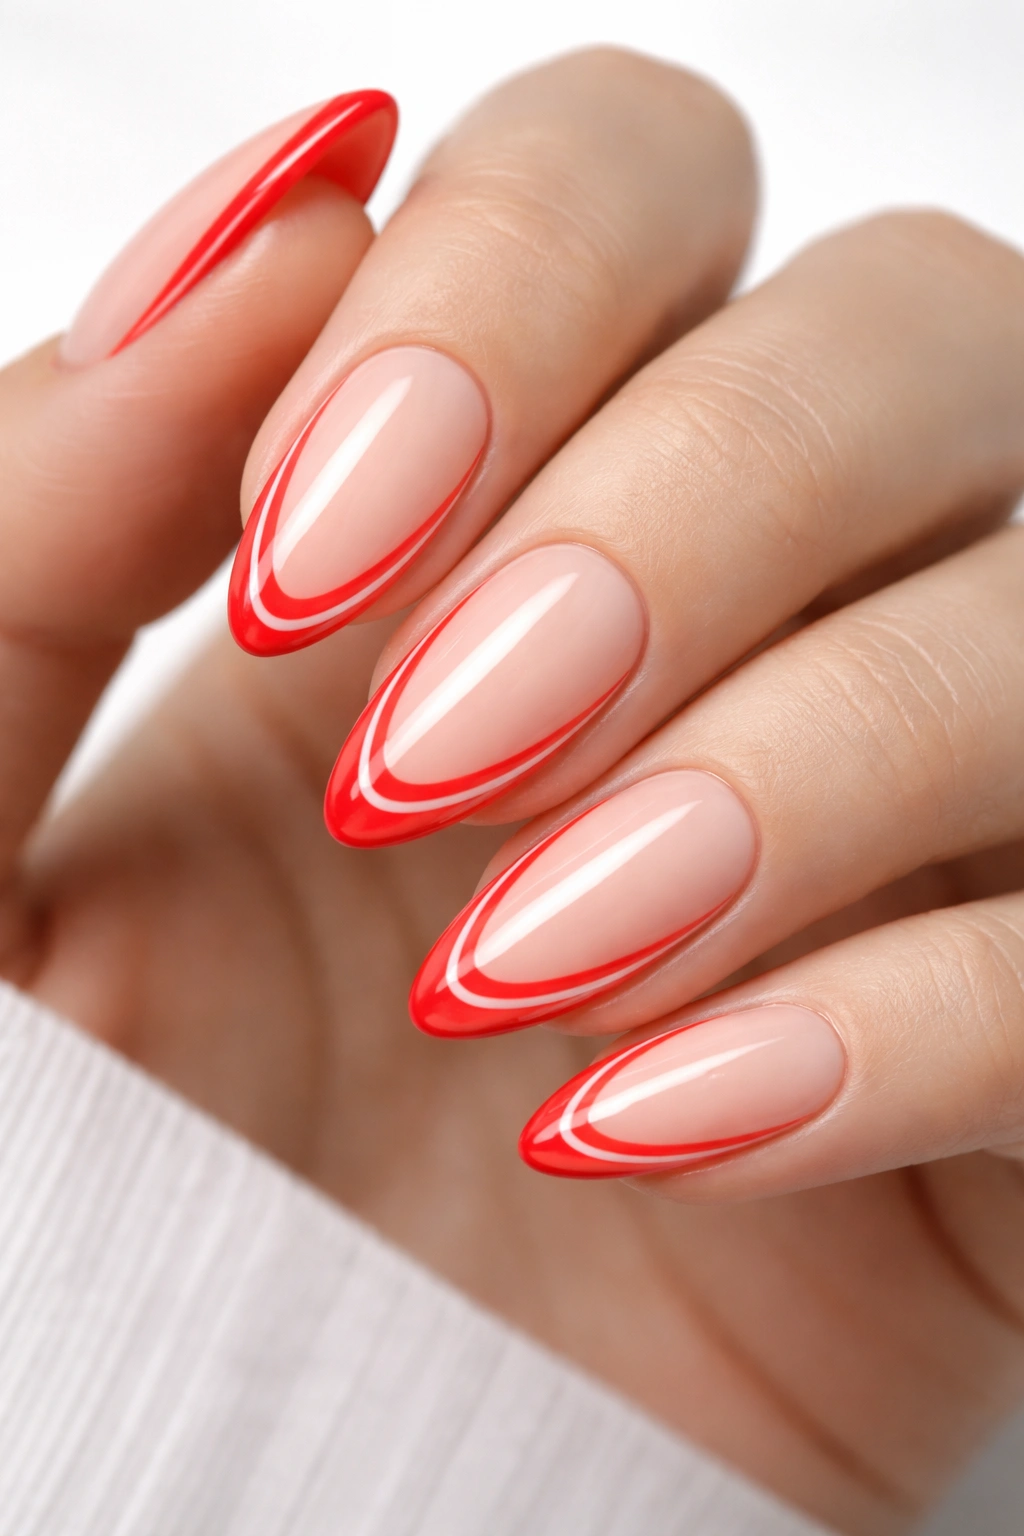
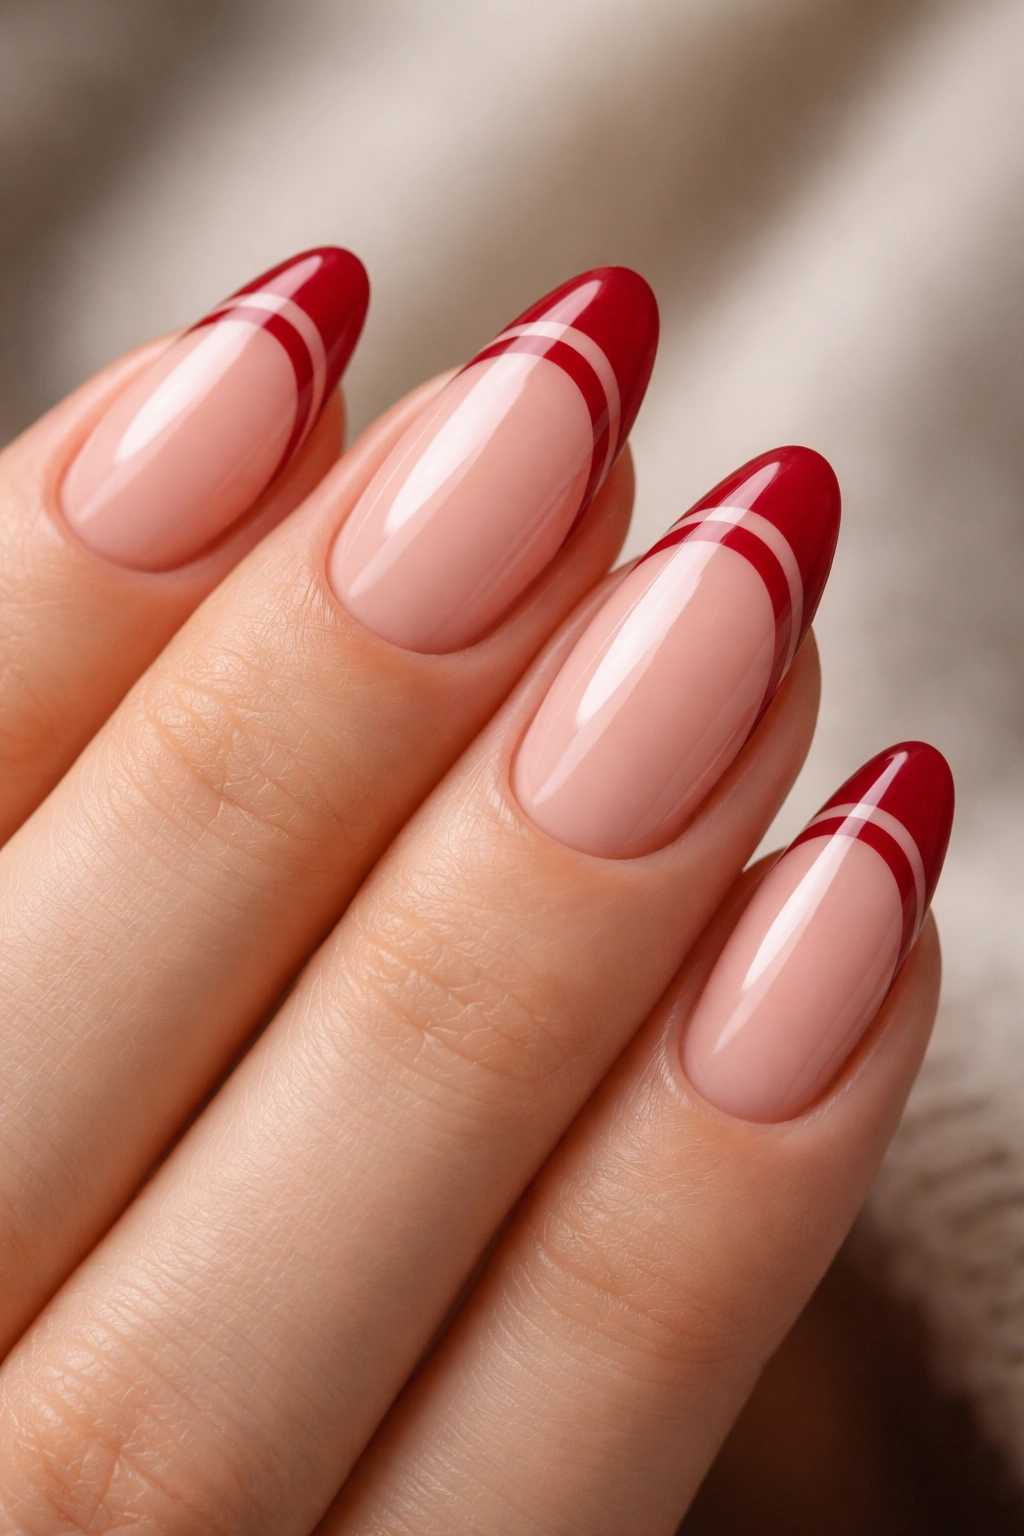
6. Ruby Red Double French Lines
If a single French tip is elegant, a double line is deliberate, structured overkill.
The Layout
The double French involves your standard red painted tip, followed by a secondary, parallel line floating just a few millimeters below the main smile line.
Getting the Spacing Right
- Paint your primary ruby red tip exactly as you normally would.
- Ensure the smile line is completely crisp and symmetrical.
- Take a 12mm striping brush with a tiny amount of the same ruby polish.
- Trace a secondary line directly below the original arch.
- The gap between the main tip and the secondary line must remain perfectly consistent across the entire curve. If the lines pinch together at the sides and widen in the middle, the design looks messy.
This style demands an incredibly steady hand and a polish that refuses to bleed. Wipe your striping brush frequently during application. A brush overloaded with gel will inevitably drop a blob of polish onto the negative space, ruining the parallel tracking.
7. Oxblood Ombre French
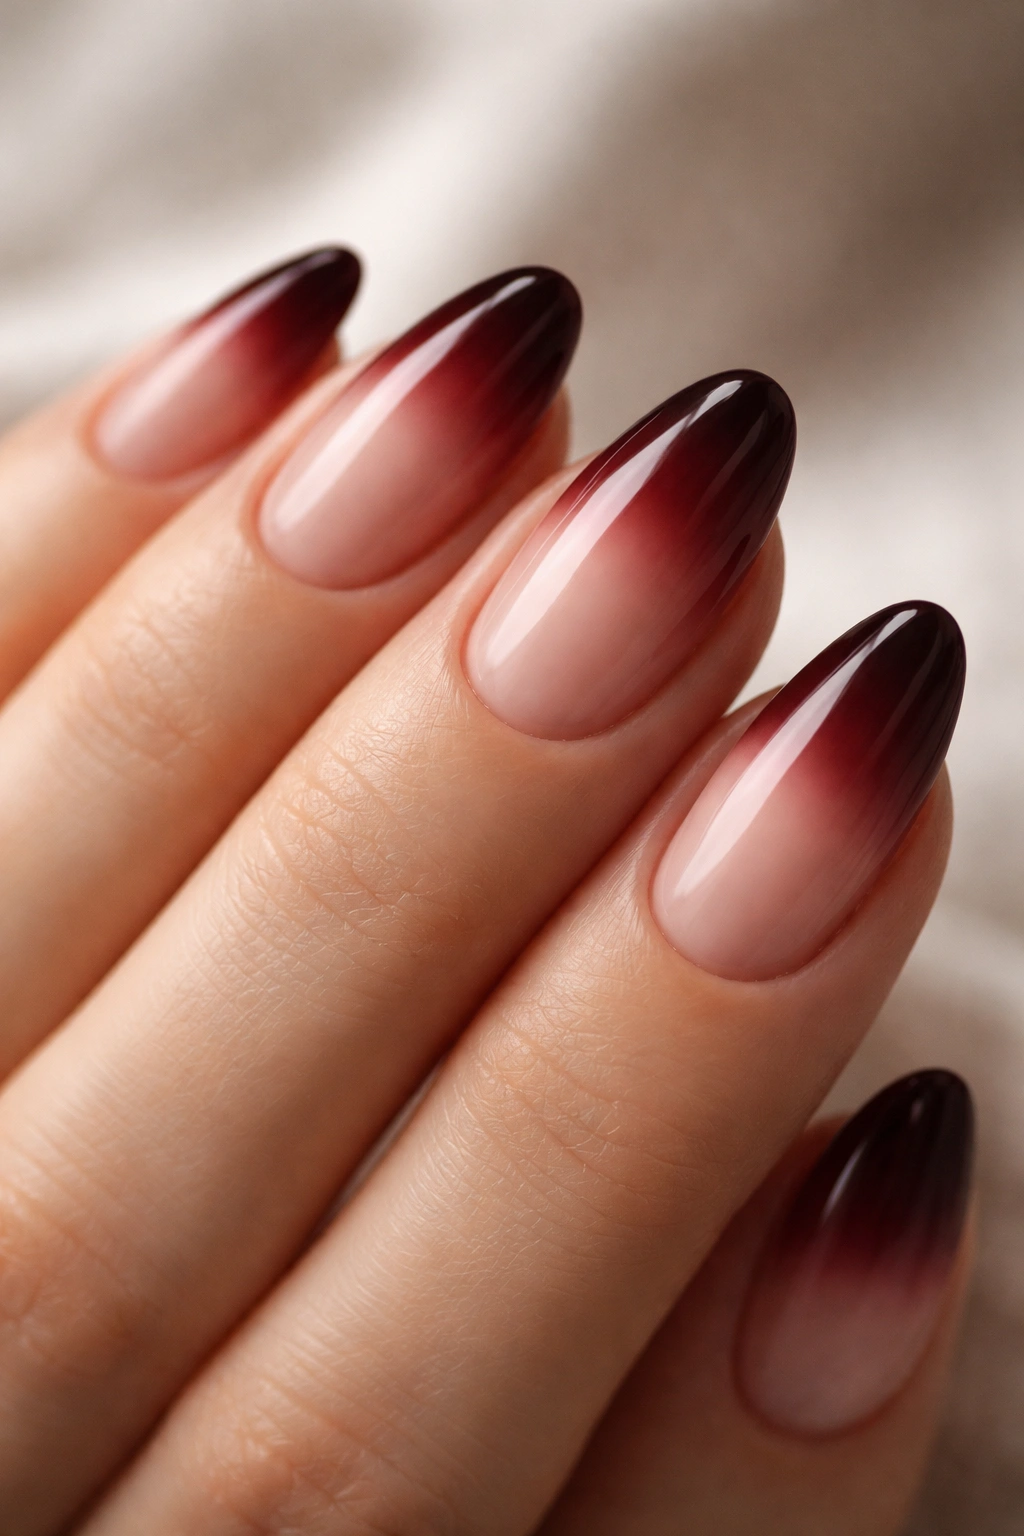
The harsh line of a traditional French tip is not for everyone. An ombre French softens the boundary, creating a smoky, blurred gradient that fades from deep color at the tip into the neutral base.
Using a dark, blackened red like oxblood makes this technique look phenomenally moody.
Start by prepping the nail with a solid, opaque nude base. Apply a thick stripe of oxblood polish horizontally across the very tip of the nail. Take a small piece of a dense makeup sponge (latex-free cosmetic wedges work perfectly for this). Lightly tap the sponge along the inner edge of the red polish, dragging the pigment slightly downward toward the cuticle.
Keep tapping. The sponge will naturally blur the harsh line, diffusing the dark red pigment into the nude base. You will likely need to repeat this process two or three times to build up true opacity at the very edge of the nail while keeping the fade smooth. Finish with a generous layer of thick, self-leveling glossy top coat. The top coat will melt the microscopic sponge marks together, leaving a flawless, airbrushed gradient.
8. Fire Engine Red Asymmetrical Tips
Perfect symmetry is beautiful, but deliberate imbalance grabs attention immediately.
An asymmetrical French tip abandons the traditional center-aligned arch entirely. Instead of swooping down both sides of the almond nail equally, the red color dominates one side and drastically tapers off on the other.
Imagine a diagonal swoop. The bright, classic fire engine red starts high up on the left sidewall, cutting sharply across the nail bed and ending in a whisper-thin point near the right corner of the free edge.
This design requires absolute confidence in your line work. The swooping curve must be perfectly fluid. If the line stutters or looks jagged, it will appear as though you made a mistake painting a regular tip rather than executing a deliberate asymmetrical design. Use a long striping brush, anchor your wrist, and pull the line across the nail in one smooth, uninterrupted motion. Do not sketch it out in tiny strokes.
9. Metallic Ruby Chrome French
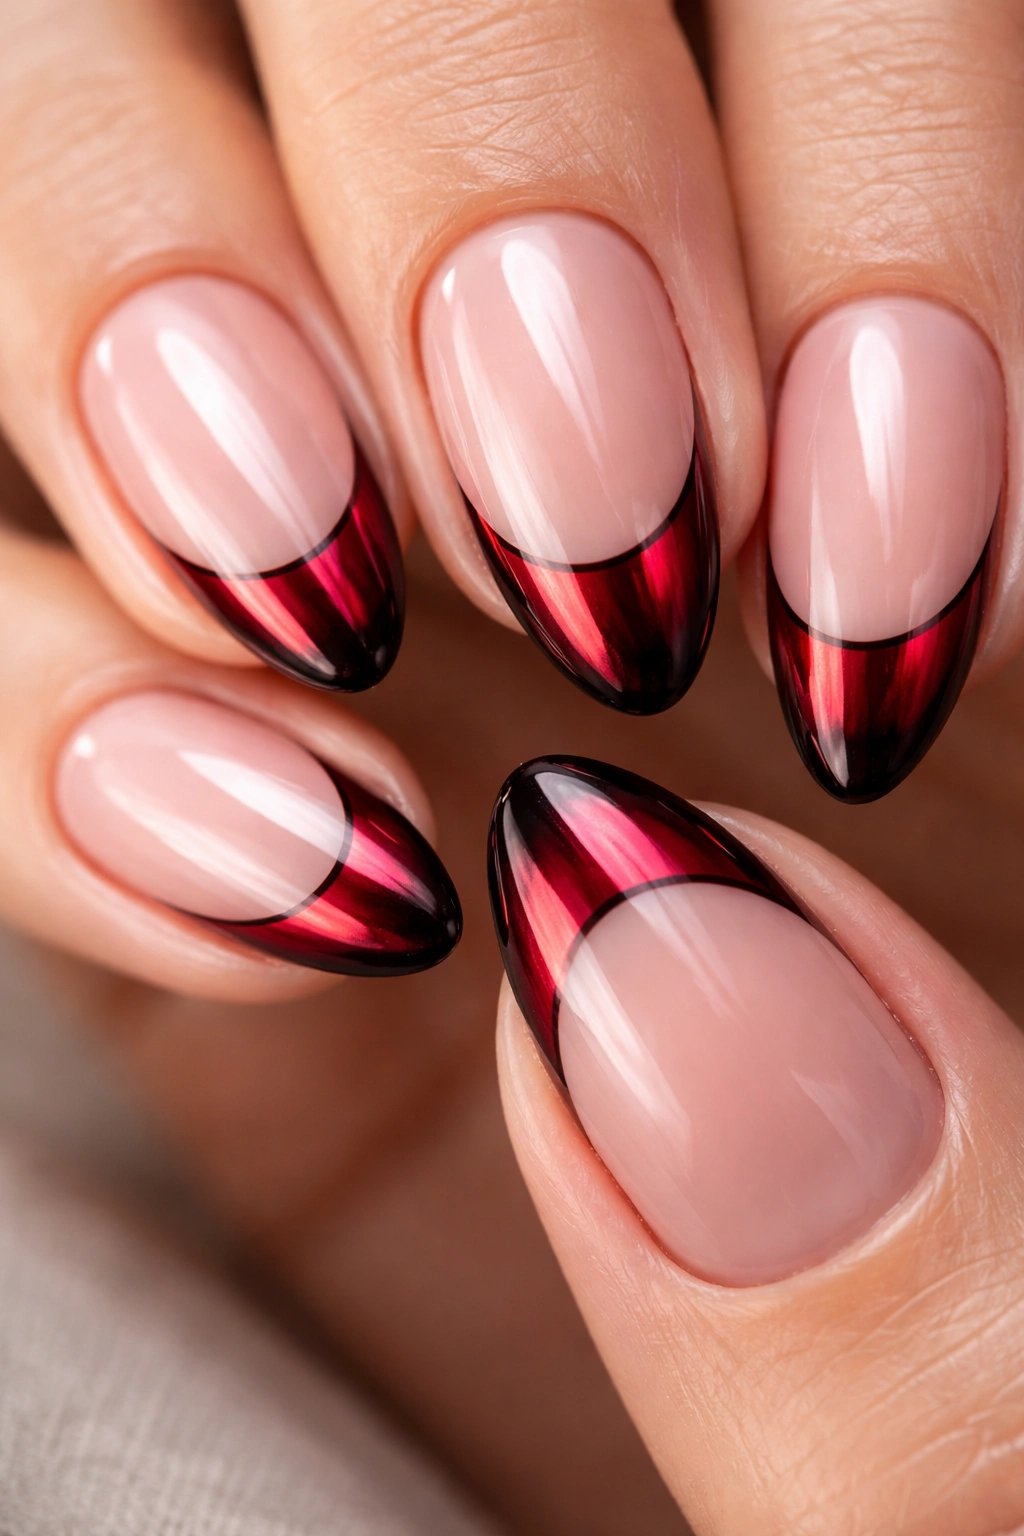
Chrome powder completely changed the texture possibilities of nail art. It turns standard gel polish into molten metal.
You want the tip of your short almond nail to look like a polished ruby gemstone.
First, paint your sheer pink base and cure it completely. Next, paint your French tip using a solid black gel polish. Yes, black. Cure the black tip, then apply a layer of no-wipe top coat strictly over the black polish and cure that for exactly 30 seconds (or half the manufacturer’s recommended time).
Take a silicone tool or a sponge eyeshadow applicator and aggressively rub a red chrome powder directly into the warm, half-cured top coat on the tip. The powder will bind to the surface, transforming the black base into a brilliant, highly reflective metallic ruby.
The most critical step happens right here. Take a lint-free wipe lightly dampened with alcohol and carefully wipe away any stray red chrome powder from the nude base of the nail. If you seal the nail without cleaning the base, your sheer pink will look like it has a dusting of rusty glitter over it. Seal the entire nail with a fresh layer of top coat.
10. Tomato Red Heart Tips
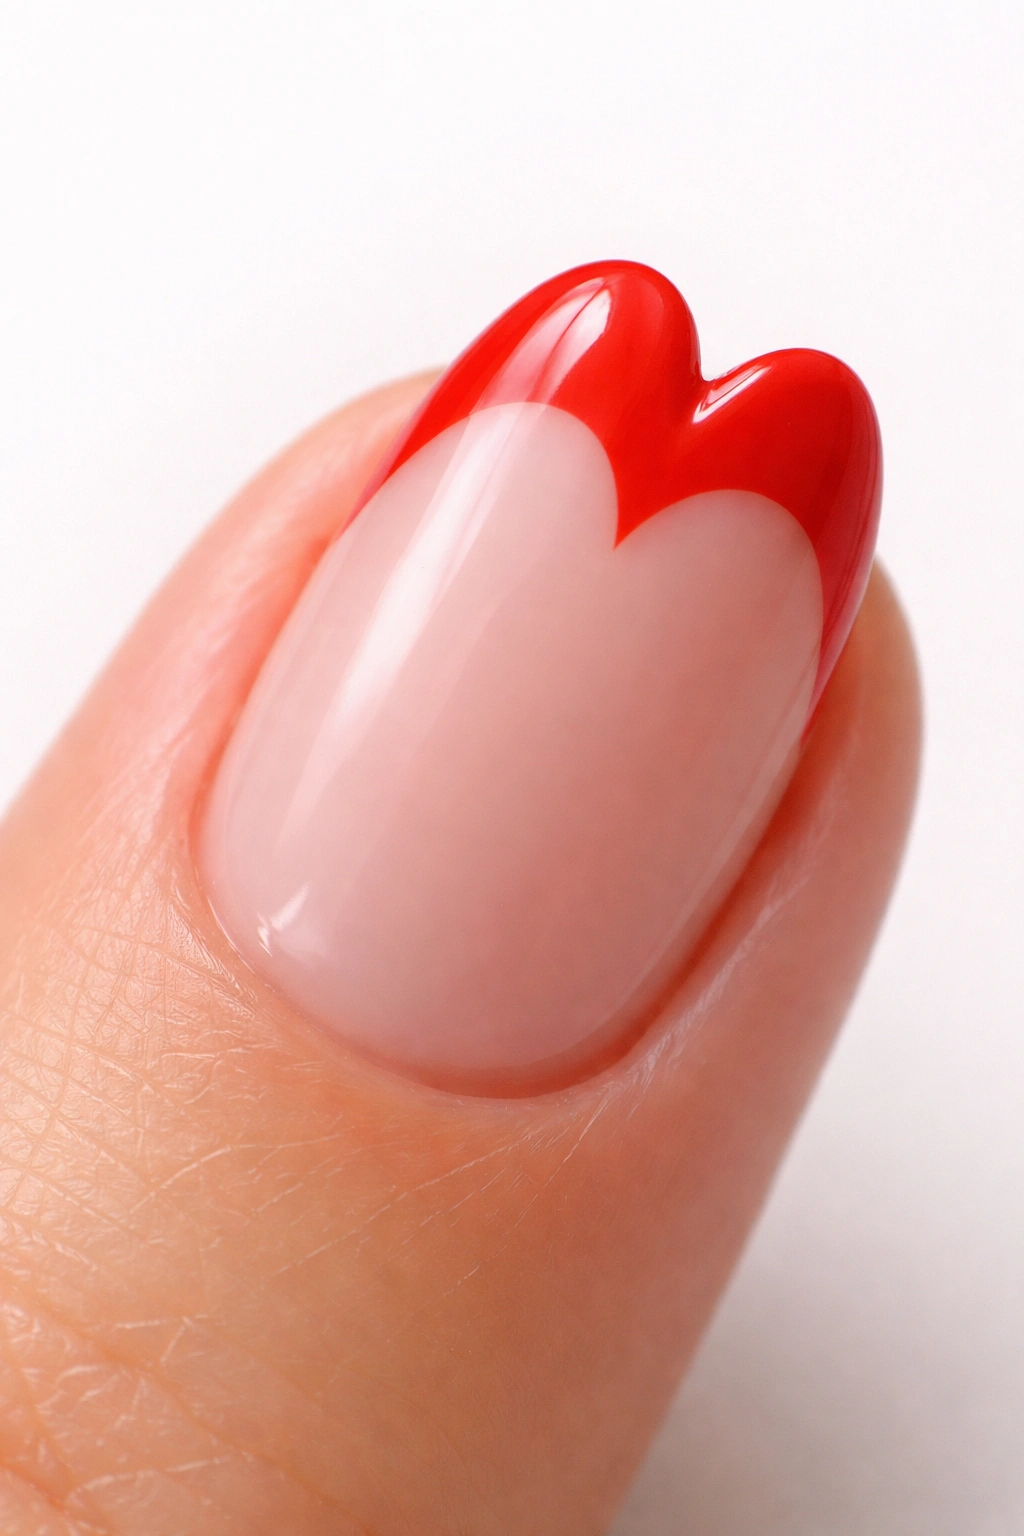
A short almond nail already tapers to a soft, rounded point. If you paint two curved humps at the top of that point, you instantly create a heart.
This is a playful, literal interpretation of the French tip. Instead of a single sweeping arch, the smile line features a pronounced dip directly in the center of the nail, curving up into two distinct peaks on either side before tapering down the sidewalls.
Tomato red is the perfect shade for this. It is bright, warm, and highly energetic, which matches the slightly kitschy, fun nature of the heart shape.
Use a dotting tool to map this out quickly. Place two large dots of tomato red polish side-by-side near the free edge of the nail. Use a fine liner brush to drag the paint from those dots down to the tip of the nail, filling in the bottom V-shape of the heart. Then, connect the outer edges of the dots down the sidewalls to complete the French tip illusion. It reads as a classic French manicure from a distance, but the heart shape becomes obvious up close.
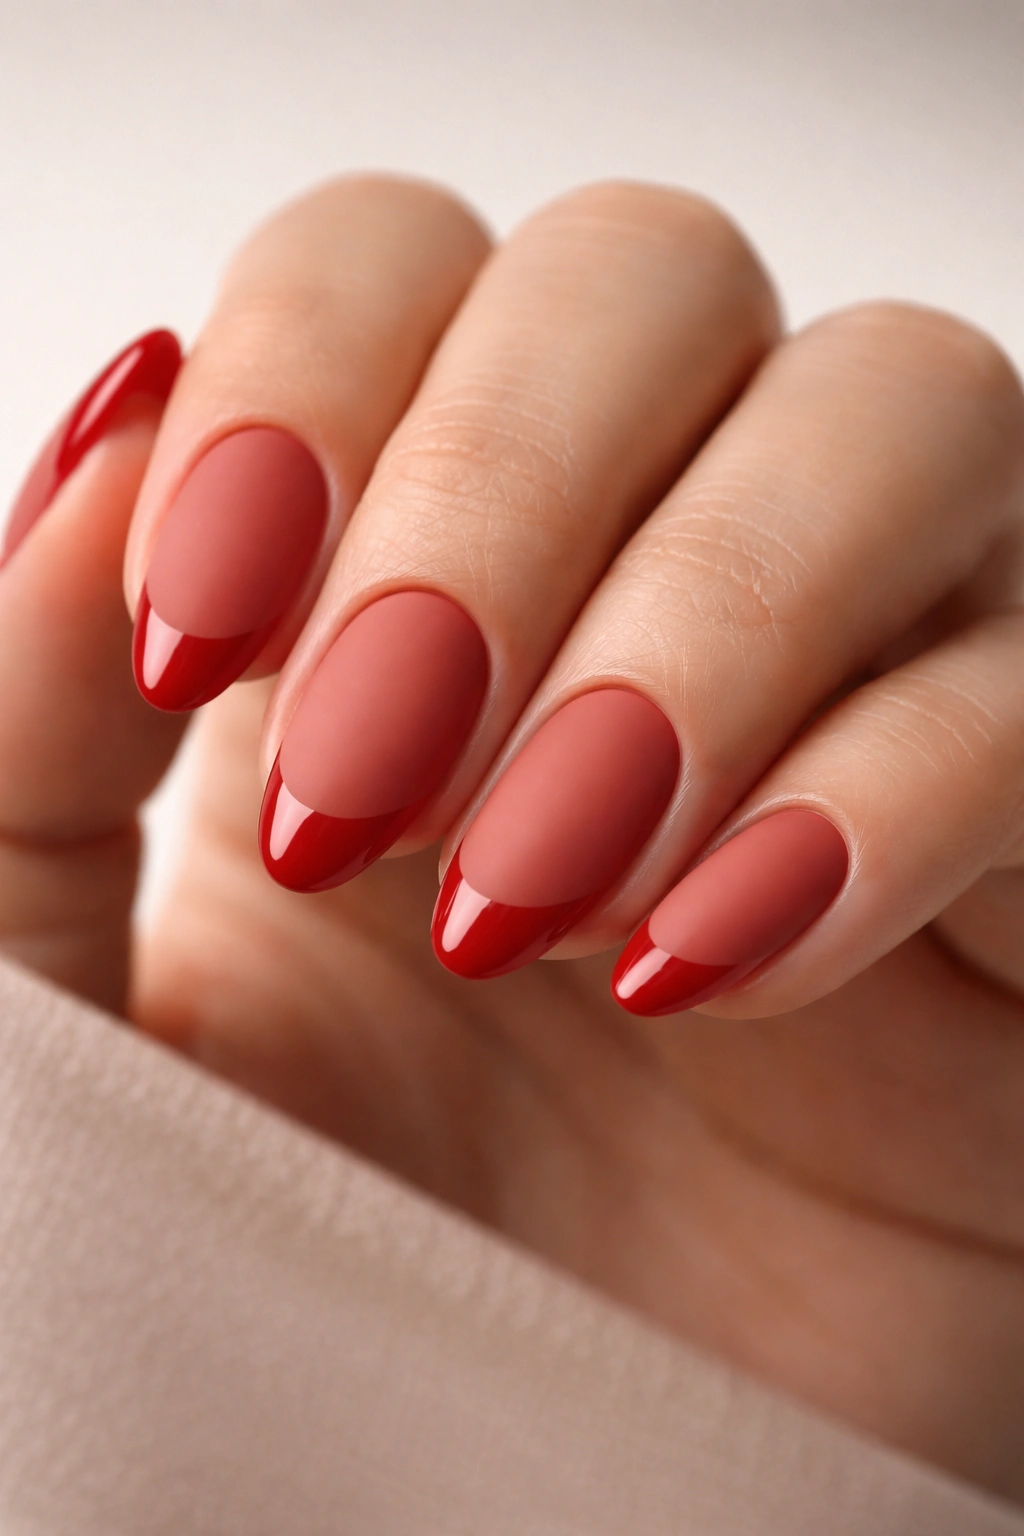
11. Muted Terracotta French
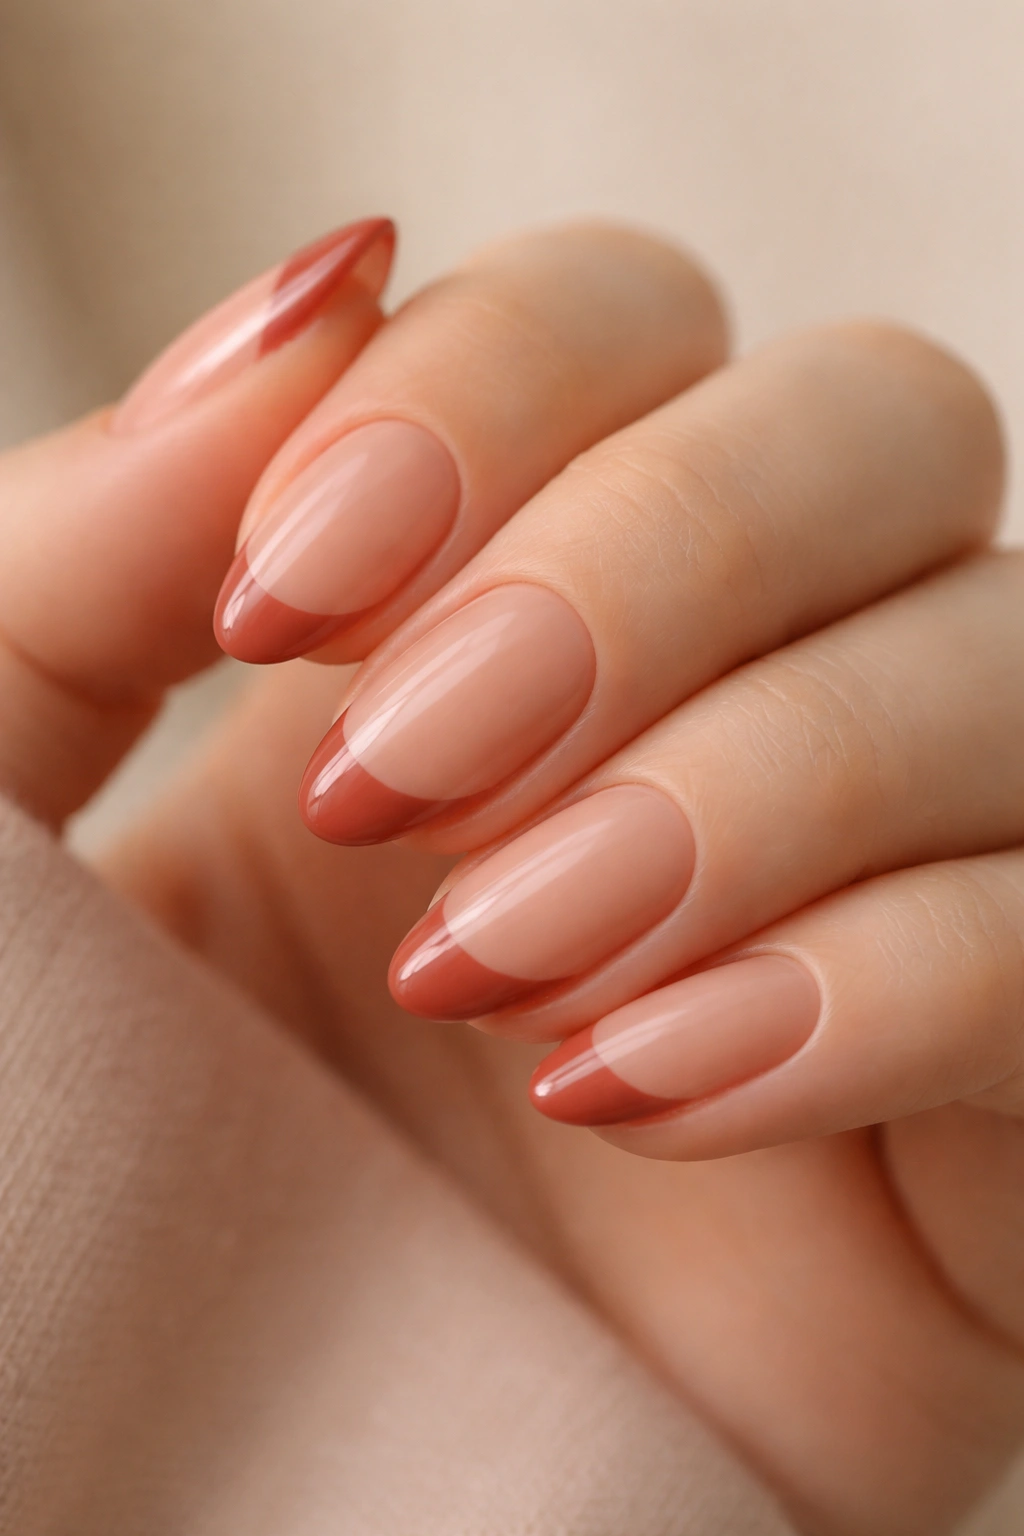
Not every red needs to scream for attention. Terracotta brings a dusty, muted earthiness to the French manicure that feels remarkably understated and grounded.
This shade incorporates heavy doses of brown and orange into the red base, creating a color that looks like baked clay.
Why Terracotta Thrives on Almond Shapes
Bright reds can sometimes visually shorten the nail bed because the contrast against the skin is so violent. Terracotta acts almost like a deep neutral on medium and dark skin tones, and provides a softer, warmer contrast on fair skin. The short almond shape paired with this dusty color creates a manicure that looks incredibly organic.
Perfecting the Base Pairing
Do not pair a terracotta tip with a cool-toned, milky pink base. The undertones will clash violently. Instead, use a sheer, warm peach or a sheer beige builder gel for the nail bed. The warm base will harmonize perfectly with the baked red tip, creating a cohesive, warm-toned color palette across the entire hand.
12. Candy Apple Red with Pearl Accents

Texture completely elevates a simple design. Adding physical, 3D elements to a red French tip breaks up the flat surface of the polish.
Candy apple red is notoriously bright and heavily pigmented. Paint a standard, deep smile line on your short almond nails. Cure it. Seal it with a top coat.
Now, introduce the hardware.
Using a tiny dot of thick builder gel or dedicated rhinestone glue, place microscopic flat-backed pearls directly along the smile line where the red meets the nude base. You can space them out evenly, placing three tiny pearls across the arch, or you can pack them tightly together to create a solid pearl border.
The stark white luster of the pearls against the blindingly bright candy apple red creates a vintage, almost hyper-feminine aesthetic. Do not paint your top coat over the pearls. Gel top coat will completely destroy the pearlescent finish, turning them into dull plastic bumps. Always apply your gems after the final top coat has been cured.
13. Garnet Red Tortoiseshell Tips
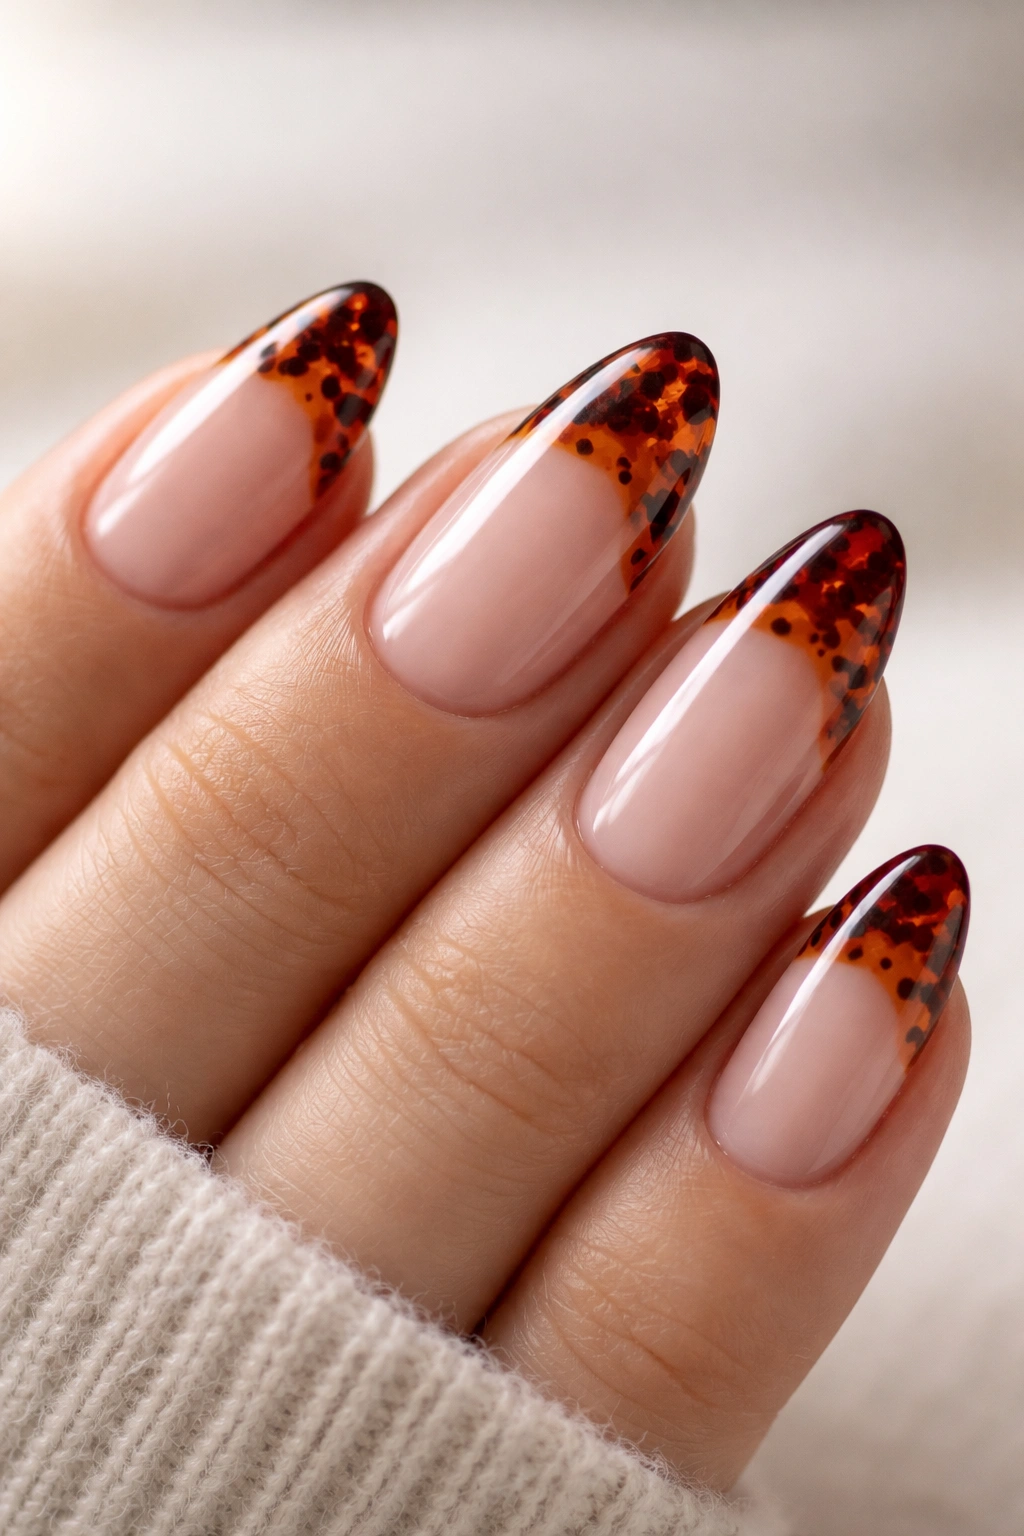
Tortoiseshell is usually reserved for browns, ambers, and blacks. Injecting a deep garnet red into that classic mottled pattern creates something entirely unique.
This design requires layering. You cannot achieve a tortoiseshell effect with a single bottle of polish. You need a sheer amber or yellow jelly polish, a dark brown, a black, and a deep garnet red.
Paint the French tip outline first using your sheer amber jelly. Do not cure it yet. While the amber is still wet, drop tiny, irregular dots of the brown, black, and garnet red directly into the jelly. Because the base layer is wet, the dark dots will naturally “bloom” and spread outward, losing their harsh edges.
The garnet red adds a flash of unexpected heat to the standard animal print. Once the spots have blurred to your liking, cure the nail. To add incredible depth, apply a second sheer layer of amber jelly over the entire tip, cure, and then add a few more tiny dots of black and red. Layering the spots between translucent jelly coats makes the tortoiseshell look like actual polished resin.
14. Blood Red Vampire Tips
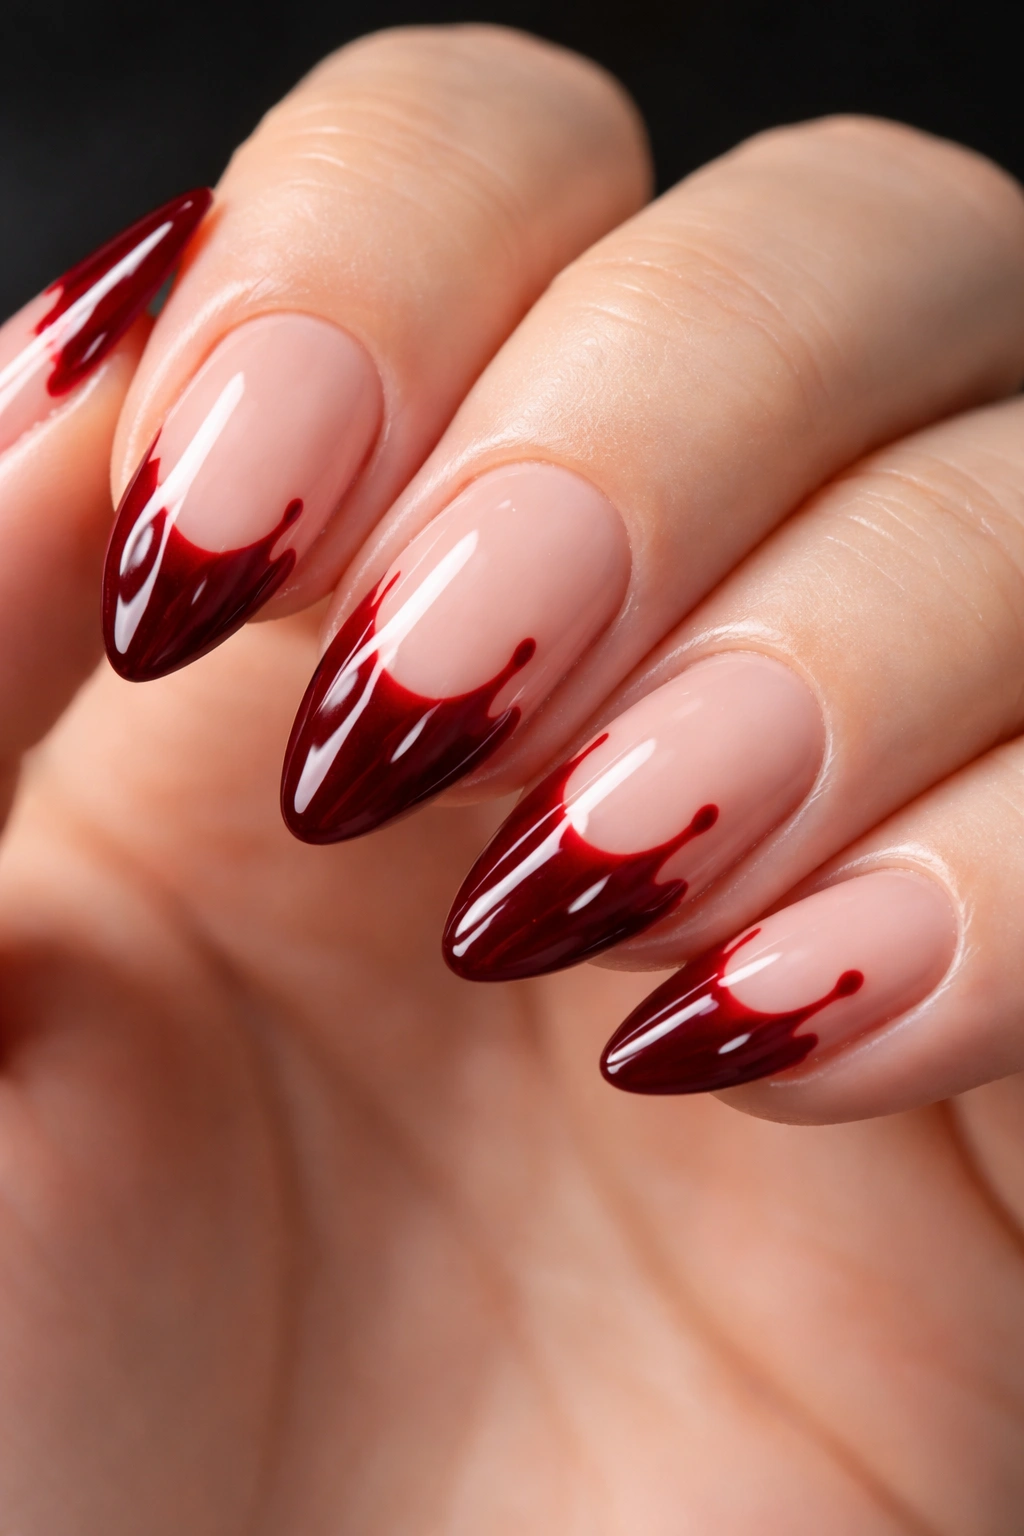
This is not a clean, crisp smile line. This is deliberate chaos.
Vampire tips mimic the look of blood dripping down the nail. It is visceral, slightly gothic, and relies heavily on a deep, coagulated shade of blood red.
Start with your sheer, neutral base. Paint a standard, somewhat thick French tip at the free edge. Then, using a dotting tool, place a few dots of the blood red polish slightly lower down on the nude nail bed. Using a fine liner brush, drag a line of polish straight up from the dot to connect it to the painted tip.
Round out the connections so it looks like fluid gravity. The drips should vary in length. Make one drip reach halfway down the nail bed, while another barely extends past the smile line. If you make the drips completely uniform, it will look like a picket fence instead of liquid. Finish with an ultra-glossy top coat to give the red polish a wet, freshly-spilled finish.
15. Scarlet Red Swirl French
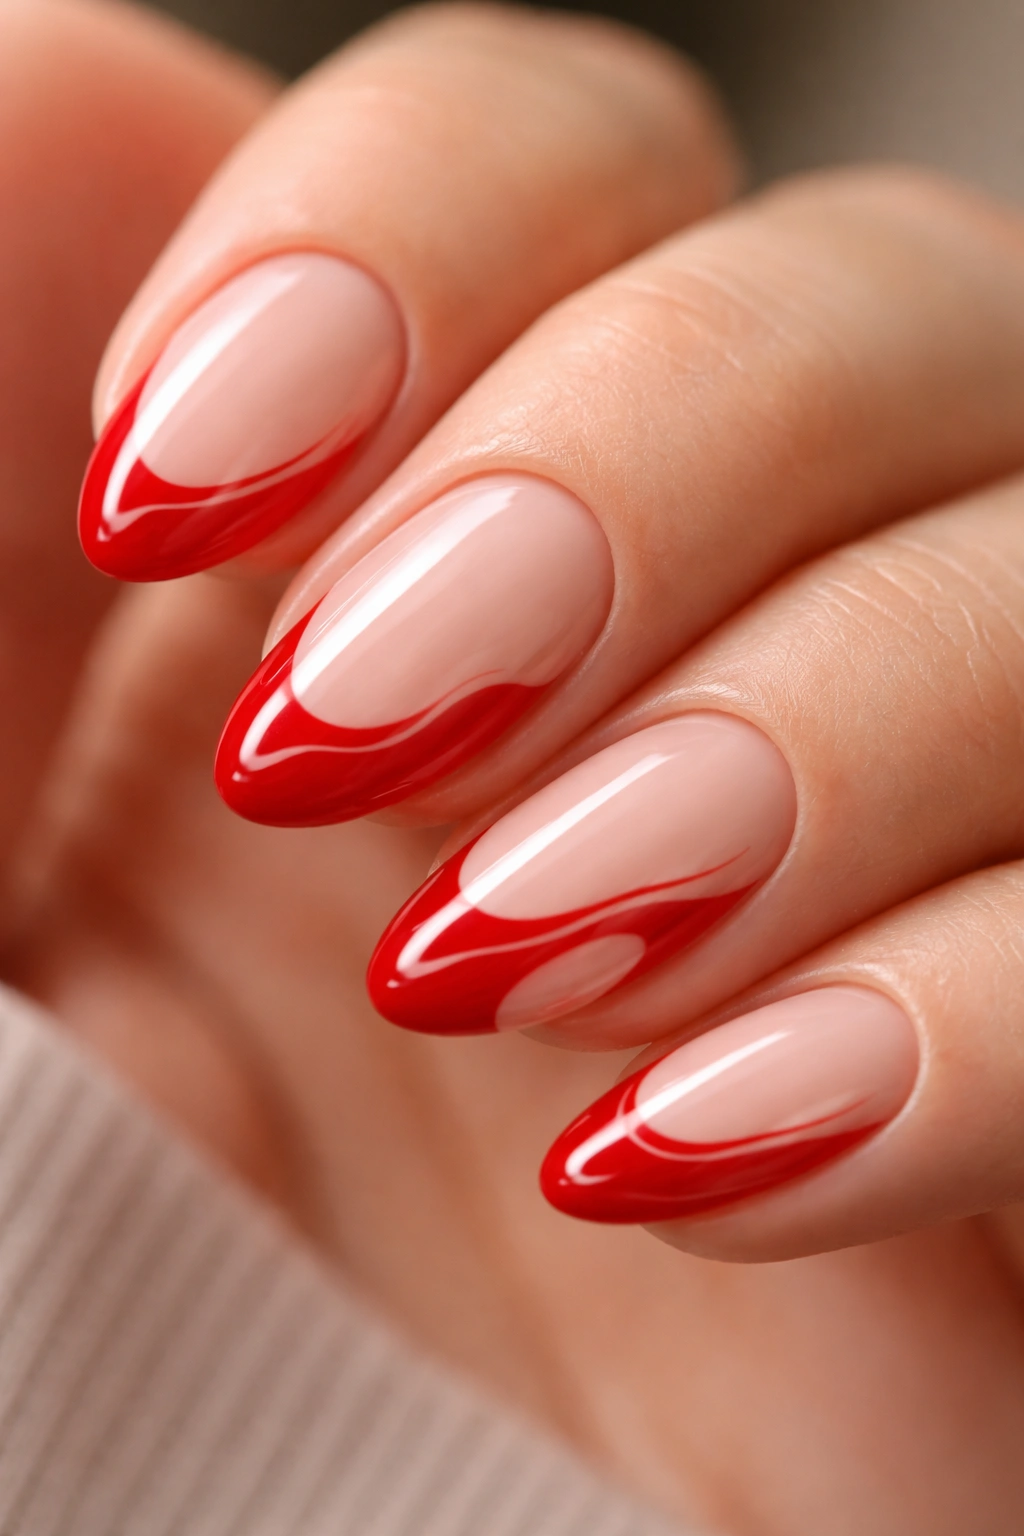
Abstract line work breaks the rigid rules of the traditional French arch.
Instead of a single, solid block of color at the tip, the scarlet red polish swirls and loops around the free edge, occasionally dipping down into the nail bed or wrapping around the sidewalls.
The Technique
- Forget the smile line entirely.
- Load a long liner brush with vivid scarlet gel.
- Start at the left corner of the free edge and pull the brush in a loose, wavy S-shape across the tip.
- Thicken the line at the very top of the nail, and let it taper off into a razor-thin point as it swoops down.
- Add a secondary, smaller swirl floating just next to the main design.
The short almond shape provides a beautiful, rounded canvas for these organic curves. The design incorporates massive amounts of negative space at the tip, making the manicure feel light, airy, and distinctly modern.
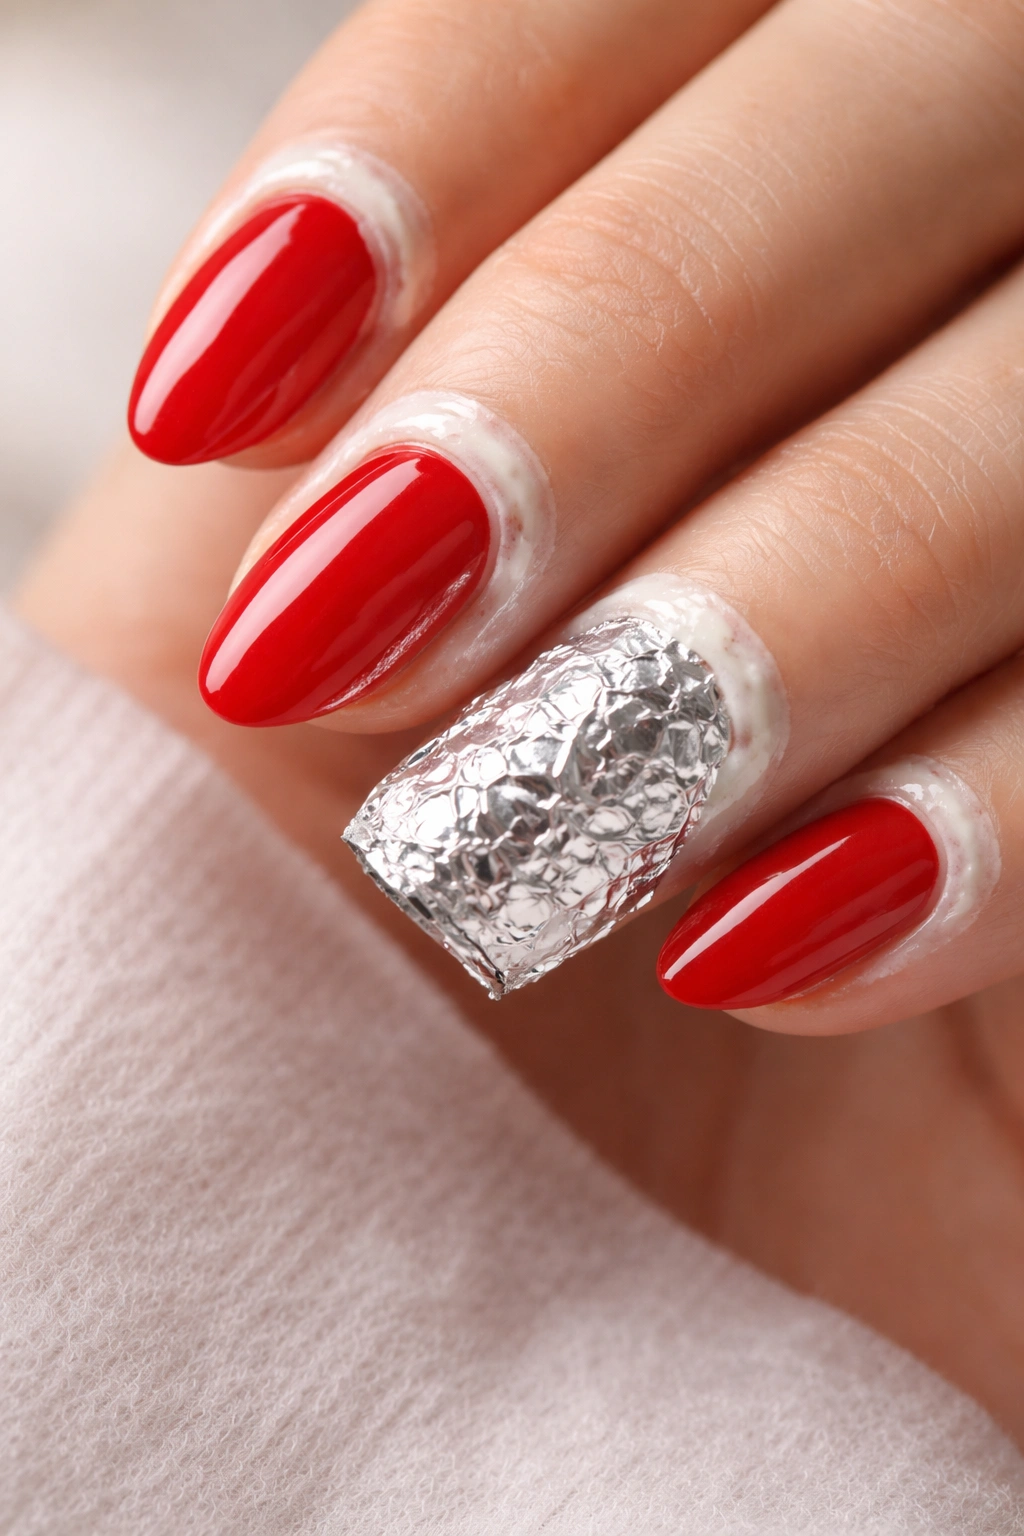
16. Merlots and Gold Foil Tips
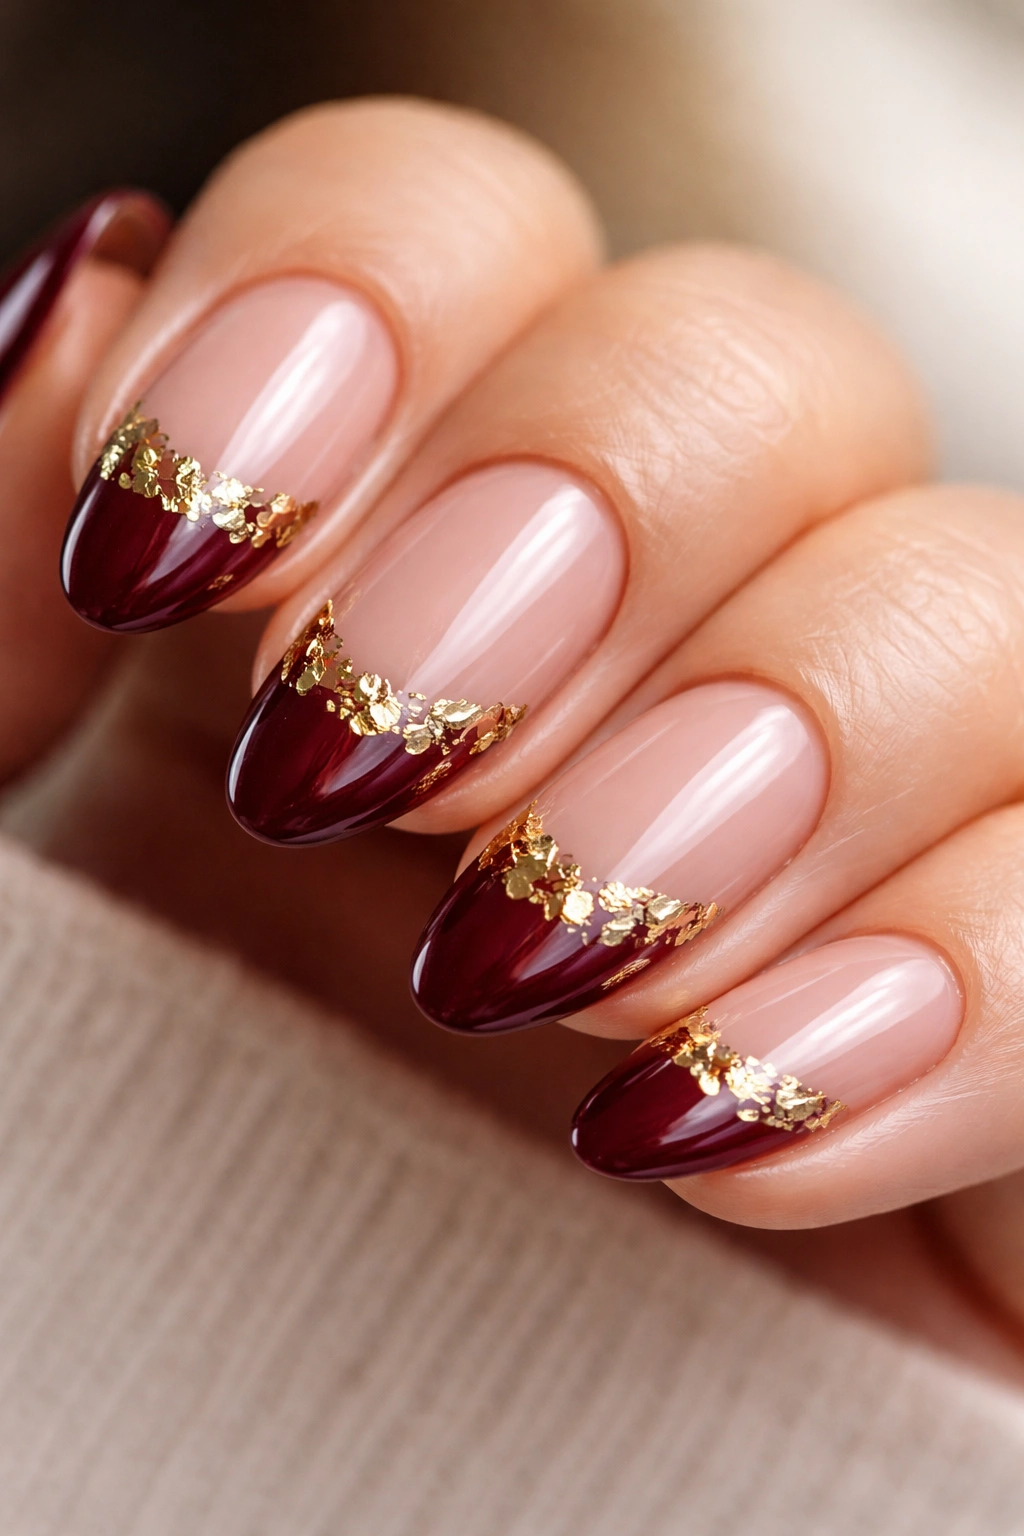
Gold leaf adds instant, chaotic luxury to any manicure. Paired with a deep, bruised merlot red, it looks opulent.
Paint a standard French tip using the darkest, purple-leaning red you own. A shade that almost looks black until the light hits it.
Before applying your top coat, grab a sheet of cosmetic gold foil. Using a pair of tweezers, tear off microscopic, jagged flakes of the foil. Press these flakes directly into the sticky inhibition layer of your cured merlot gel. Concentrate the gold foil sporadically along the smile line, letting some flakes overlap the red polish and others bleed slightly onto the nude base.
The gold foil applies completely flat, so it will not add bulky texture to the nail. The torn, irregular edges of the foil contrast beautifully against the sharp, perfect curve of the painted French tip. Seal it under a generous layer of glossy top coat to trap the foil and prevent it from tarnishing or peeling.
17. Crimson Tips with Milky White Base
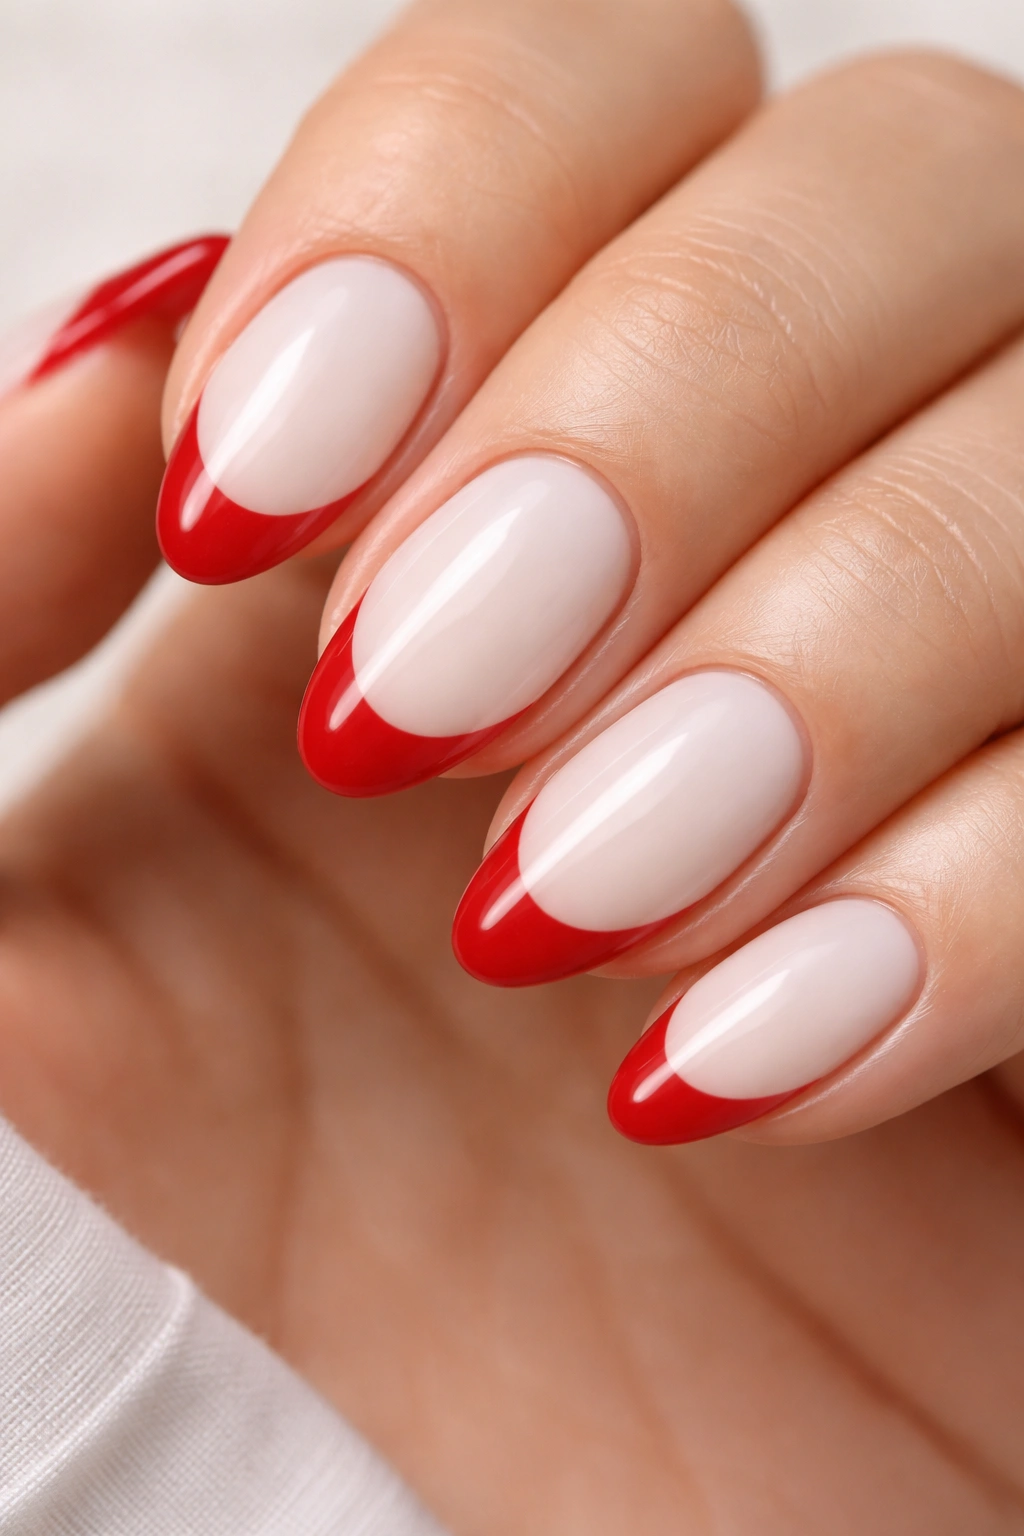
The standard French manicure relies on a sheer pink or beige base to mimic the natural nail bed. Swapping that sheer pink out for an opaque, milky white changes the contrast completely.
A milky white base creates a stark, retro-futuristic backdrop. It is not sheer. You cannot see the natural white of your real nail underneath.
When you paint a bright crimson tip over a milky white base, the red aggressively pops forward. The colors do not blend. They fight for dominance, and the result is incredibly sharp.
This style requires flawless application of the base color. Milky white polish is notoriously difficult to paint. It tends to streak and pool in the cuticles. Use a self-leveling milky builder gel rather than standard polish. Hold your finger upside down for 10 seconds before curing—gravity will pull the gel into a perfectly smooth apex, eliminating any brush strokes before you begin painting your red tips.
18. Chili Pepper Red Abstract Tips
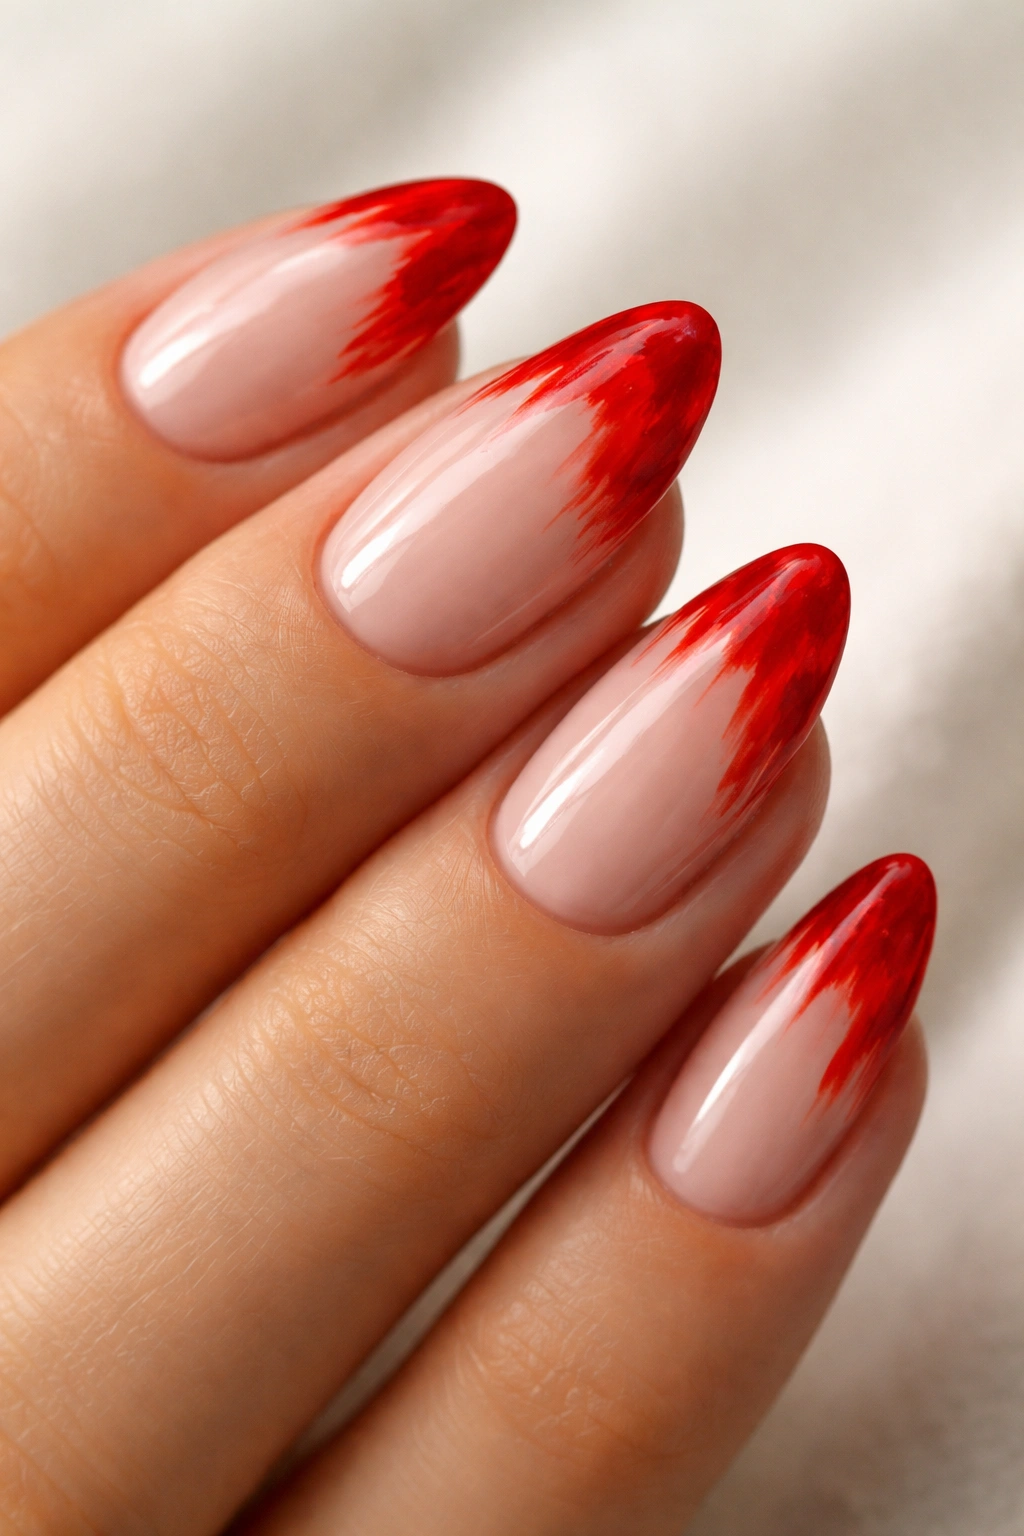
Sometimes the best French tip is one that barely qualifies as a French tip.
Abstract tips throw the geometric rulebook in the trash. Using a bright, fiery chili pepper red, paint the very edges of your short almond nails with deliberate, chunky, irregular strokes.
Do not try to make the left side match the right side. Do not aim for a smooth smile line. Let the brush create rough, painterly marks. Treat the nail like a miniature canvas and the red polish like heavy acrylic paint.
This style works exceptionally well for people who do not have the patience for perfectly symmetrical line work. The deliberate messiness is the entire point. Because the color is restricted to the tip of the nail, it still fundamentally reads as a French manicure, but it carries a distinctly artistic, unbothered energy.
How to Stop Your Red Tips from Chipping Prematurely
Nothing looks worse than a chipped French tip. Because all the color is concentrated exactly where your nail hits keyboards, unzips jeans, and opens cans, the tips take a massive amount of physical abuse.
The secret to longevity is capping the free edge.
When you paint your red smile line, do not just stop at the top surface of the nail. You must run a nearly-dry brush along the actual blunt edge of the nail tip, dragging a microscopic amount of red polish over the rim and slightly underneath.
You must repeat this exact capping motion with your top coat. Capping seals the layers of polish inside a protective gel envelope. If you leave the blunt edge of the nail exposed, water and oils will seep underneath the polish layers within a day, causing the red tip to lift and peel off in one solid sheet.
Additionally, avoid applying your red polish too thickly. A massive ridge of red gel sitting on the tip of the nail creates a physical bumper. Every time you touch something, that ridge catches. Paint your French tips in two whisper-thin layers rather than one thick, gloopy coat.
Removing Red Polish Without Staining Your Cuticles
Red pigment is aggressive. If you simply soak a cotton pad in pure acetone and vigorously scrub it back and forth over your nails, you will smear dissolved red polish completely over your fingers. Your cuticles will look like a crime scene, and the skin will remain tinted pink for days.
You need a targeted removal strategy.
Before breaking out the acetone, coat the skin around your nails entirely in a thick cuticle oil or petroleum jelly. This creates a physical barrier that stops the dissolved red pigment from sinking into the porous skin of your fingers.
Soak a small piece of a cotton ball in acetone, place it directly over the painted tip, and wrap the finger in foil. Wait a full ten minutes. Do not peek.
When the time is up, grab the foil wrap and squeeze tightly as you pull it straight off the end of the finger. The pressure and the pulling motion will drag the dissolved red polish directly off the nail and into the cotton ball, rather than smearing it sideways into your cuticles. Wash your hands immediately with warm water and soap to remove any lingering pigment dust.
The Bottom Line
A red French tip on a short almond nail strips away the excess. It takes a bold, demanding color and forces it into a tightly controlled architectural space.
You do not need extreme length to make a statement. In fact, keeping the shape short and manageable shifts the focus entirely onto the precision of the line work and the depth of the color. Whether you choose a barely-there micro line in muted terracotta or an aggressive, asymmetrical swoop in glossy cherry jelly, the format works because it relies on high contrast and clean geometry. Find an undertone that actually flatters your hands, invest in a proper liner brush, and stop settling for the standard white arch.
