

The funny thing about short almond nails is how elegant they look the moment you add a French tip design to them. You’d think you’d need length to pull off something sophisticated, but the reality is that short almond nails are actually the perfect canvas — they photograph beautifully, they’re practical enough for everyday life, and they deliver that polished, intentional look that makes people notice.
The short almond shape itself is a game-changer. It’s wider at the tip than a coffin nail, narrower than a square, and has that subtle point that reads as both professional and feminine without being impractical. Add a French tip to that silhouette and you’ve got something that works whether you’re at your desk, at a party, or doing literally anything that requires actual hand dexterity. The designs below are all achievable with basic tools and techniques — you don’t need a nail tech’s steady hand or years of practice to make them look intentional and polished. What you do need is a clear idea of what you’re going for, and that’s what this guide delivers.
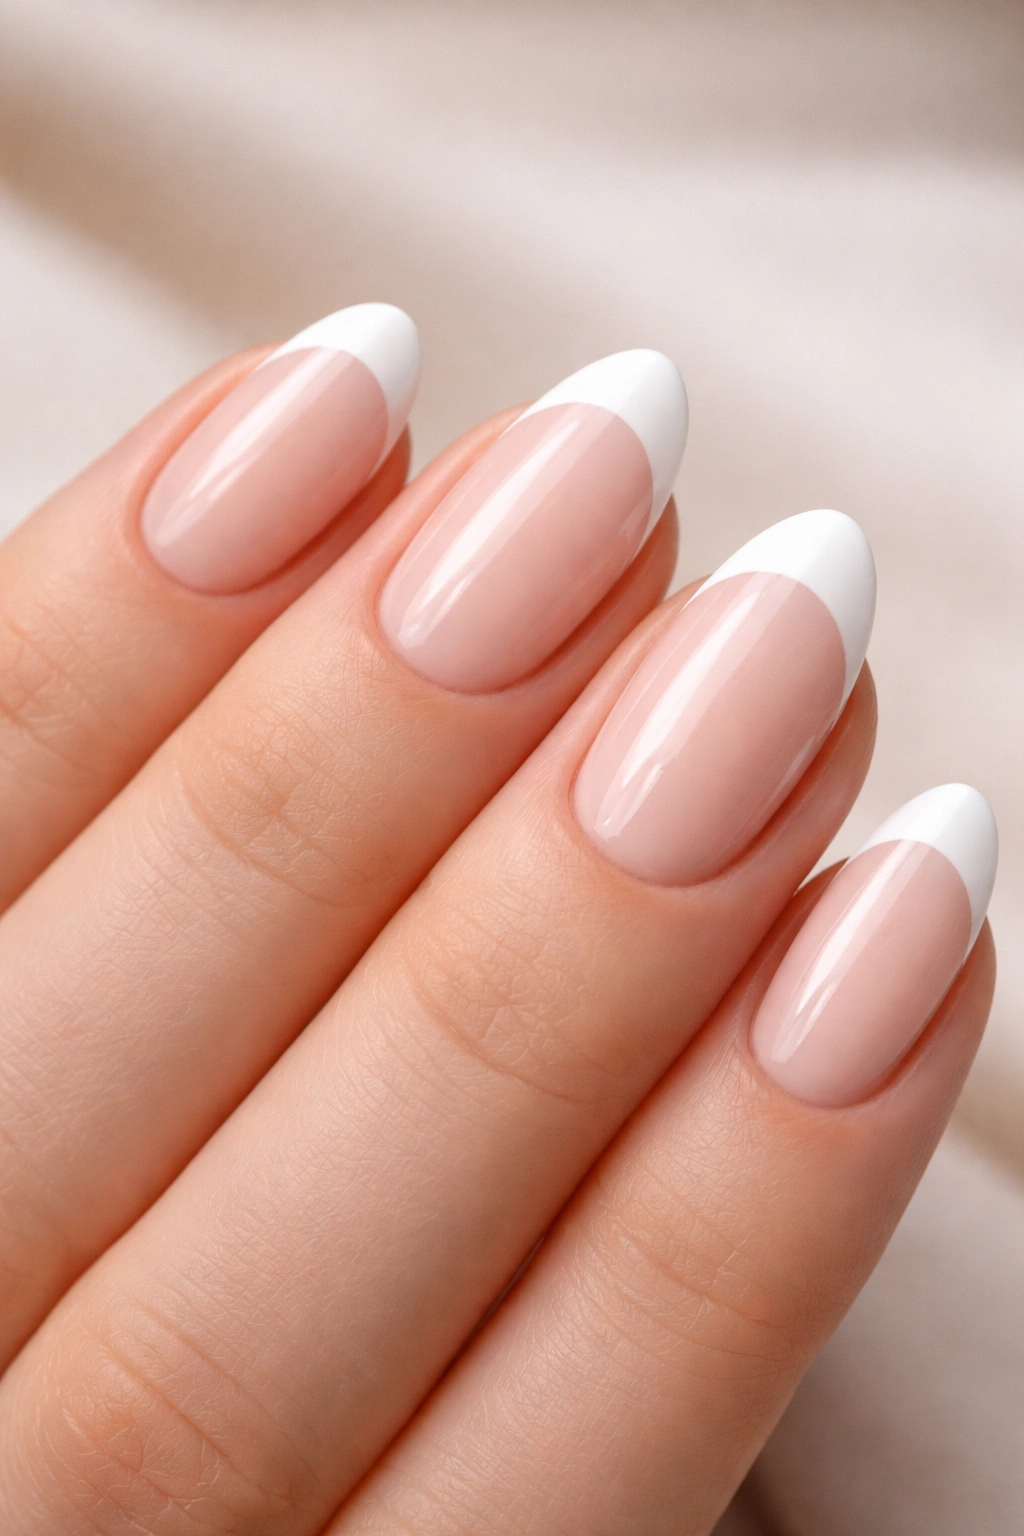
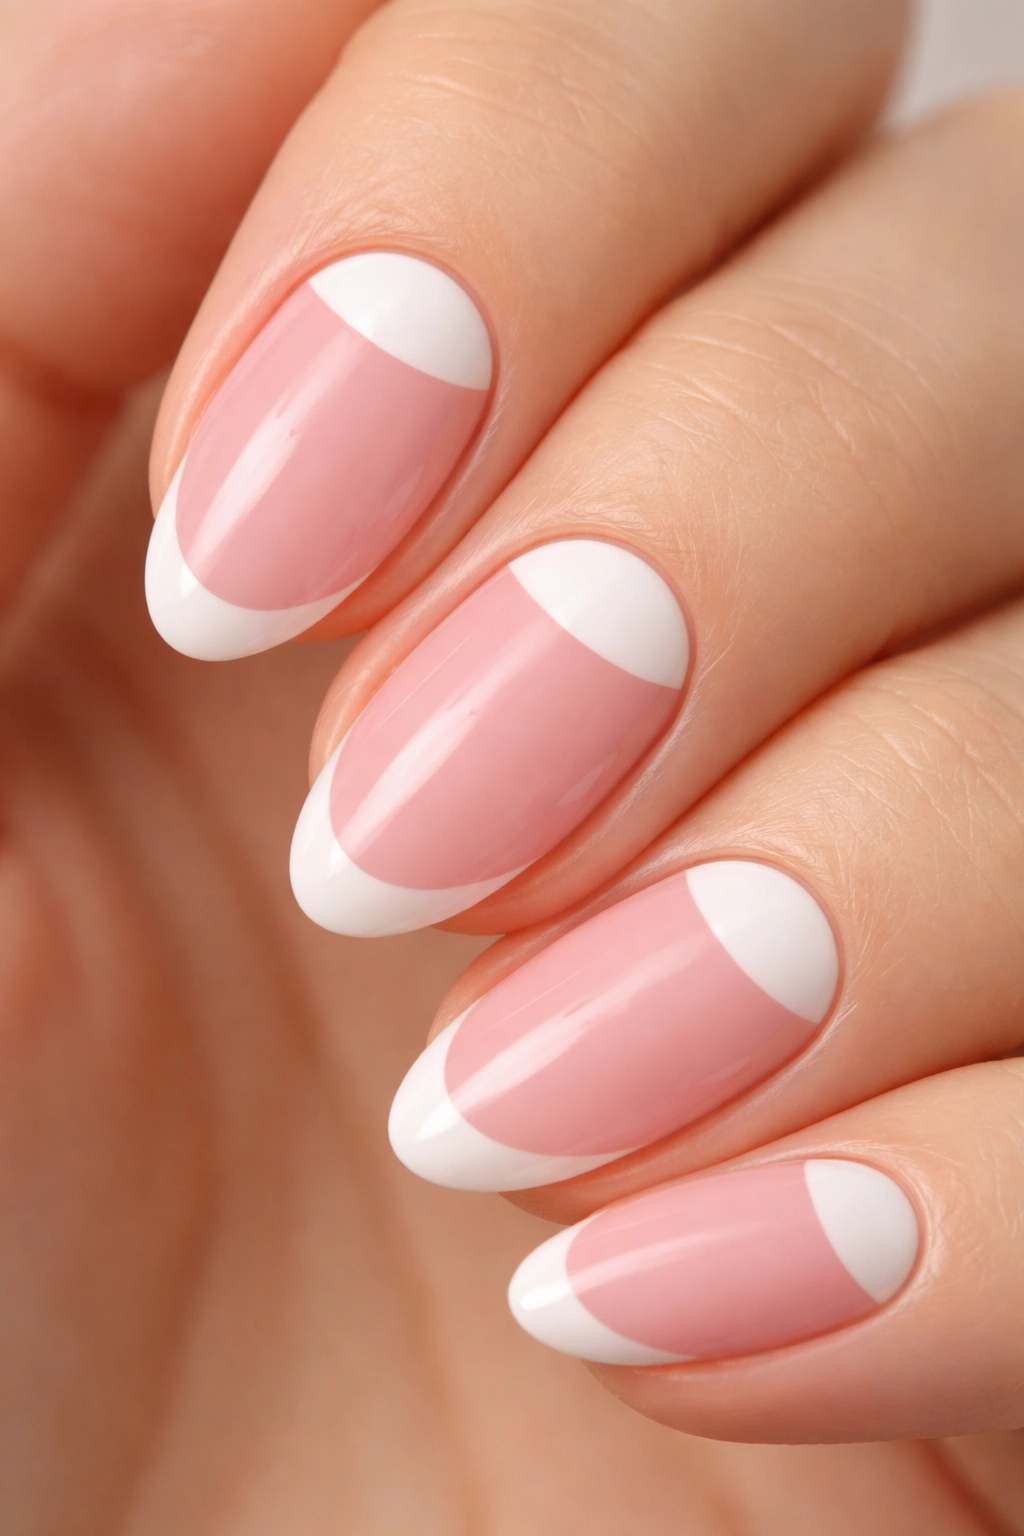
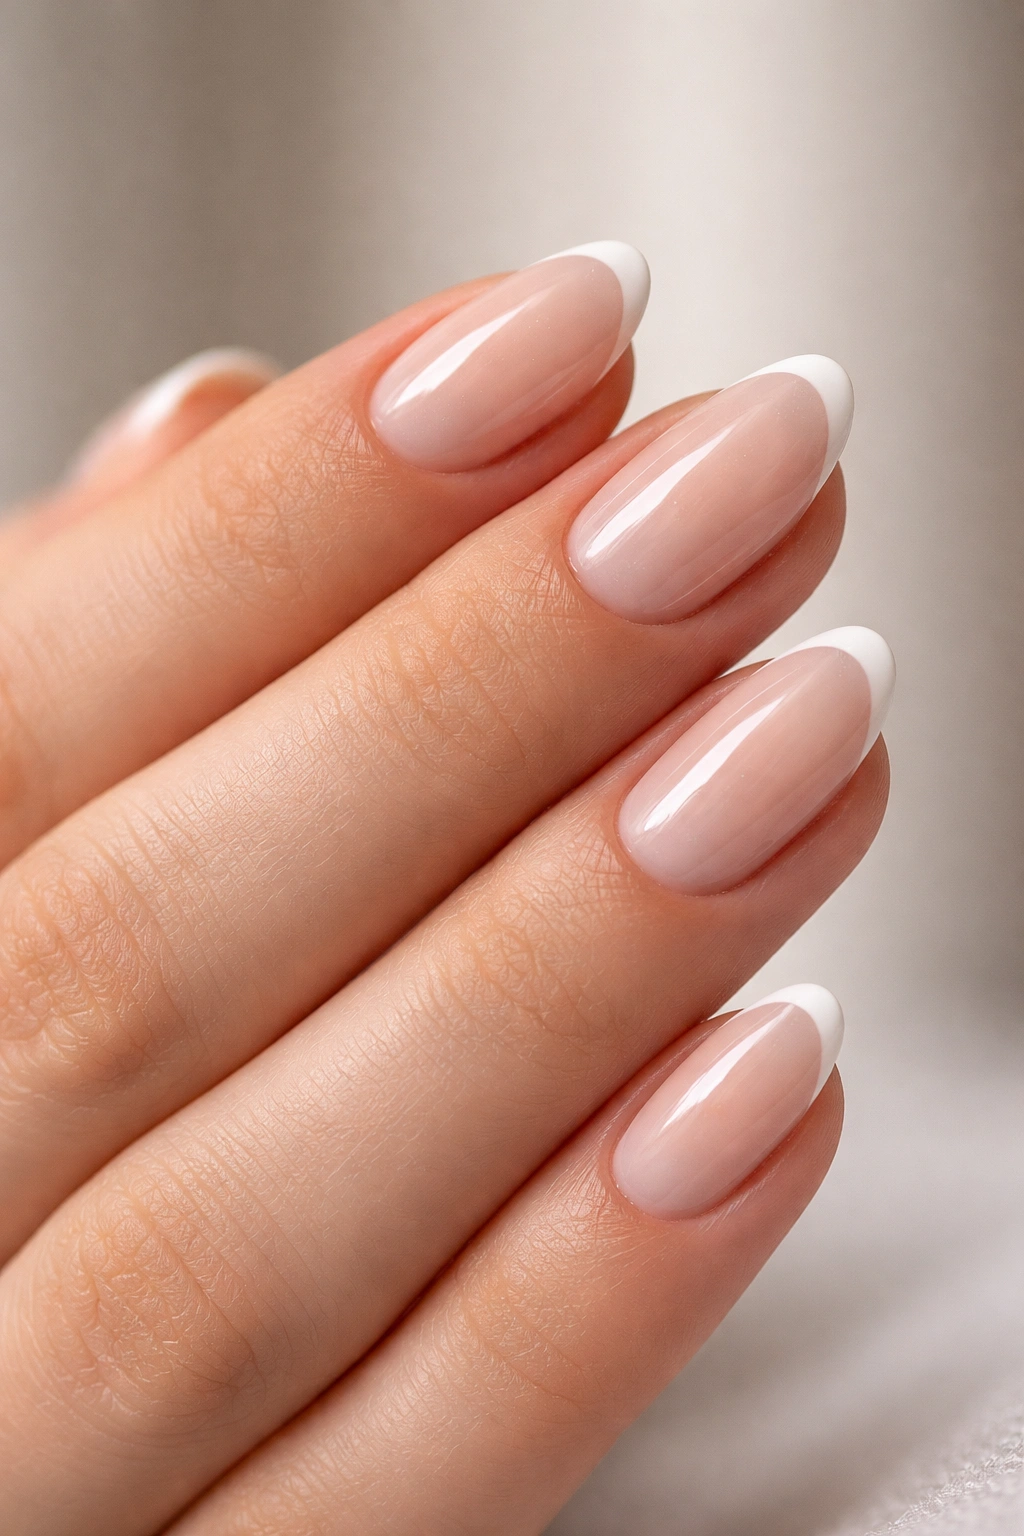
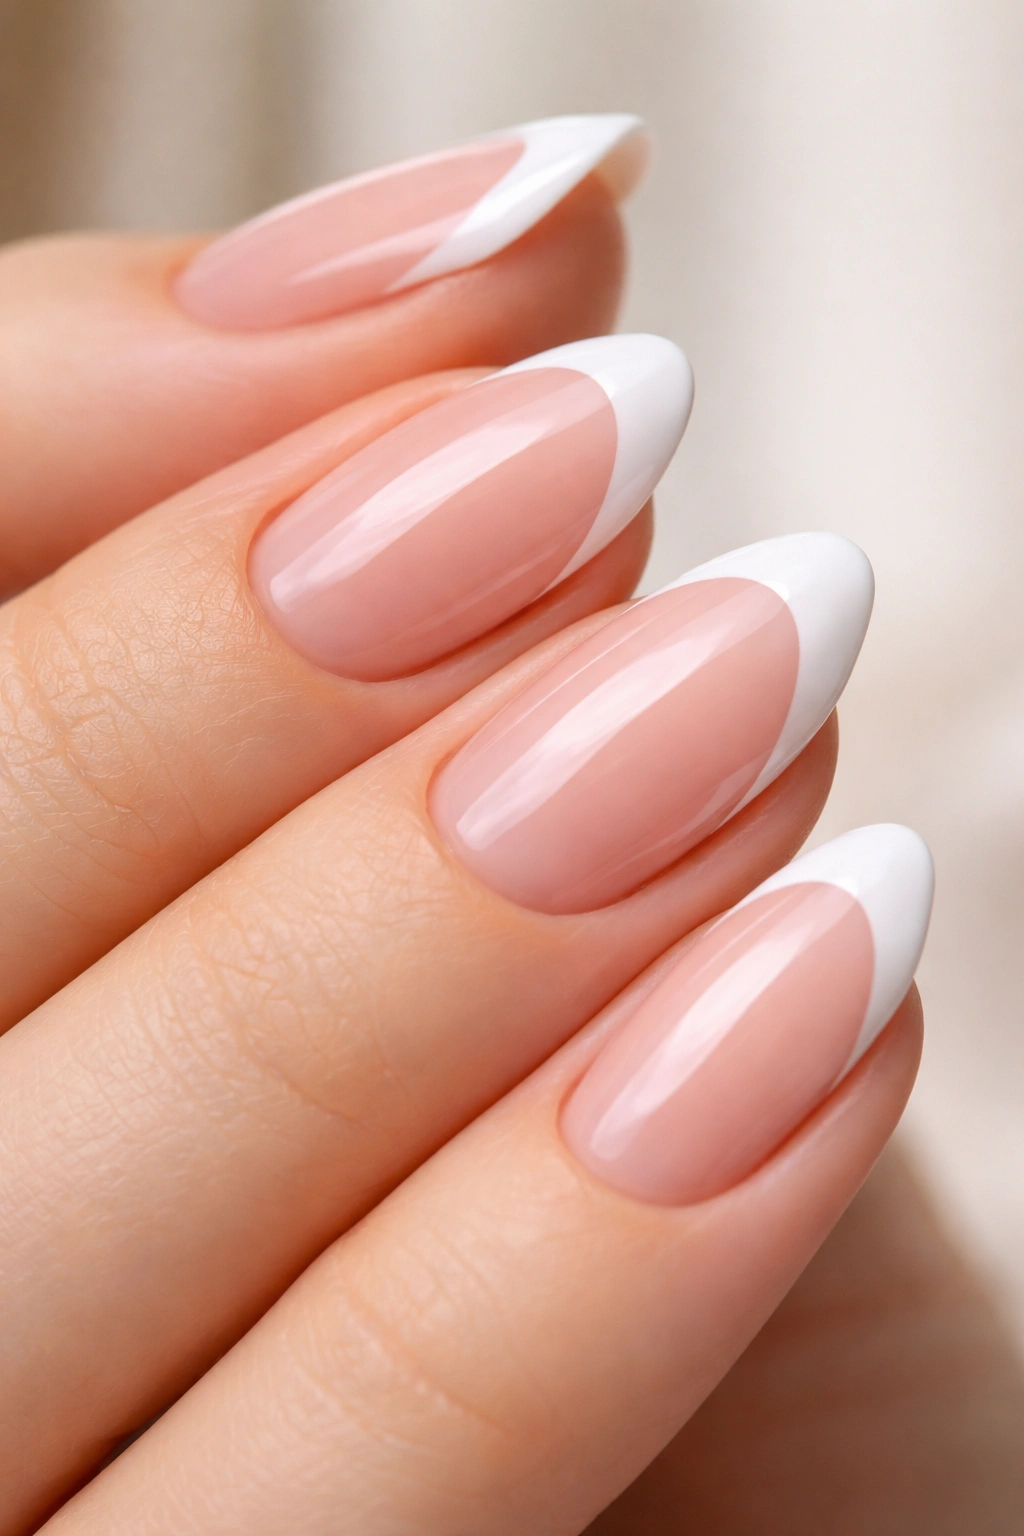
1. Classic White Tip with Rounded Smile Line
This is where every French tip journey starts, and there’s a reason it endures — it works. The white tip sits right at the edge of your natural nail, creating a clean, precise smile line that catches light and elongates the nail even when it’s genuinely short. On almond nails, the curve of the white tip mirrors the curve of your nail’s natural edge, which creates visual harmony instead of harsh lines.
The technique matters here more than you’d think. You’ll want to use a white gel polish or regular polish designed specifically for nail art — something with good opacity that doesn’t require three coats to look opaque. Apply it to just the very tip of the nail, starting with the edges and working inward toward the center, following the natural curve of your free edge. The smile line should be the thinnest part (almost translucent) at the outer edges and fuller in the center, which creates depth and makes the white look intentional rather than sloppy.
One thing most people miss: the smile line should start right where your nail naturally ends. If you place it too high up on the nail, it looks like you’re trying to create an optical illusion rather than enhance what you actually have. The best tools for this are a thin striping brush or even the edge of a cosmetic sponge pressed gently along the underside of the free edge.
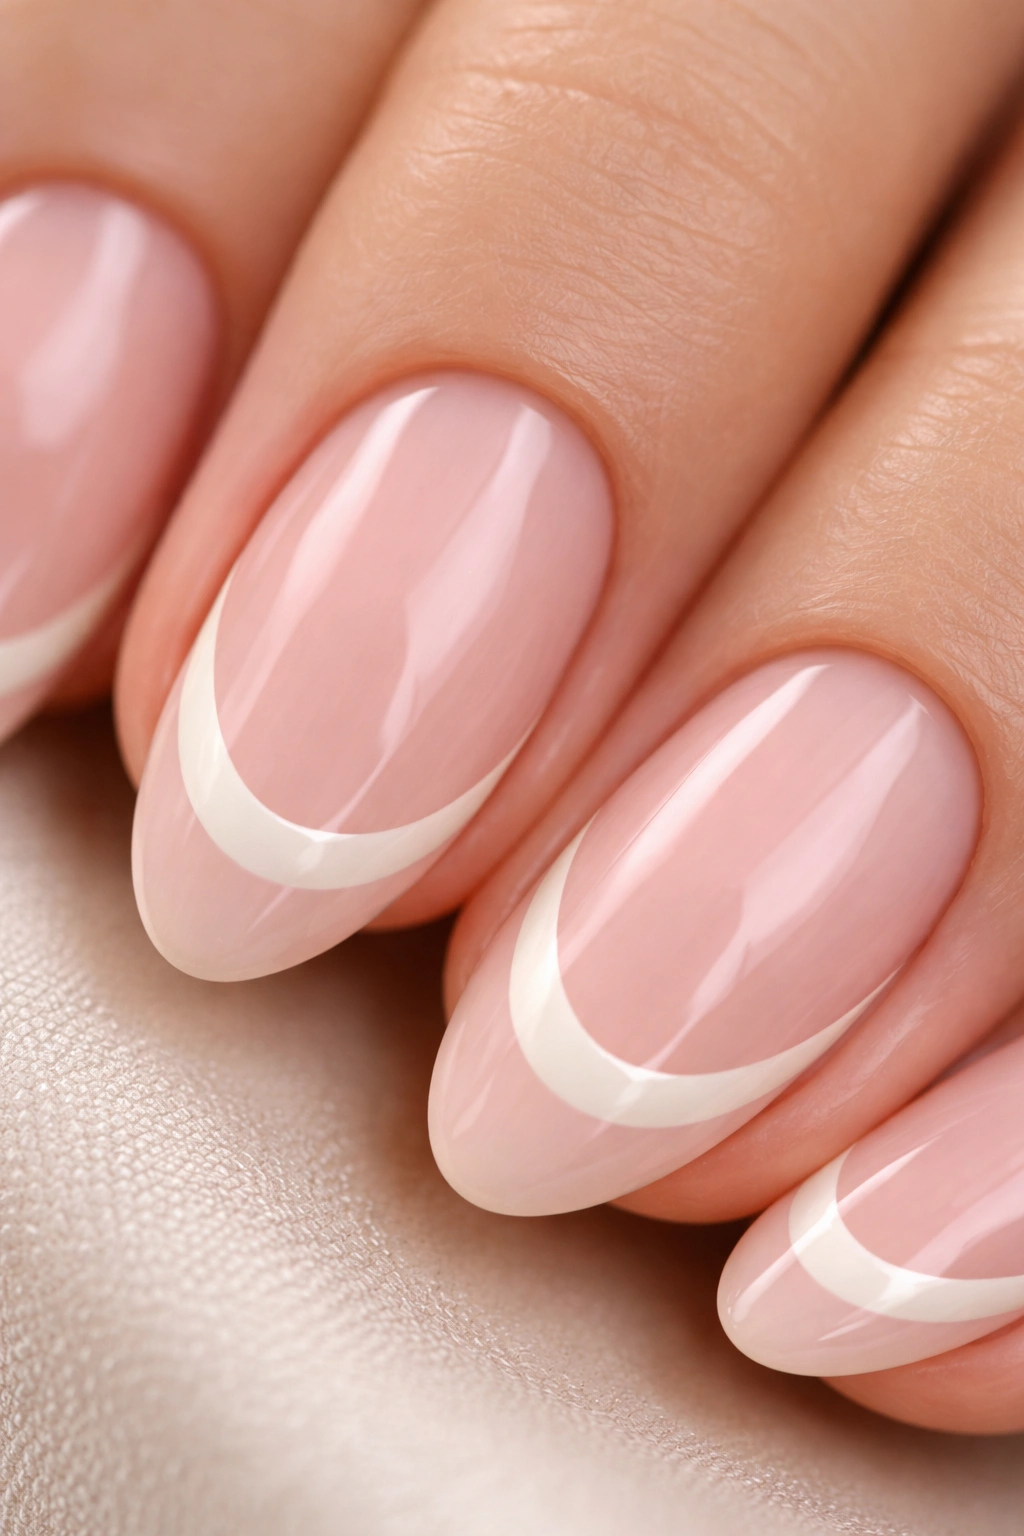
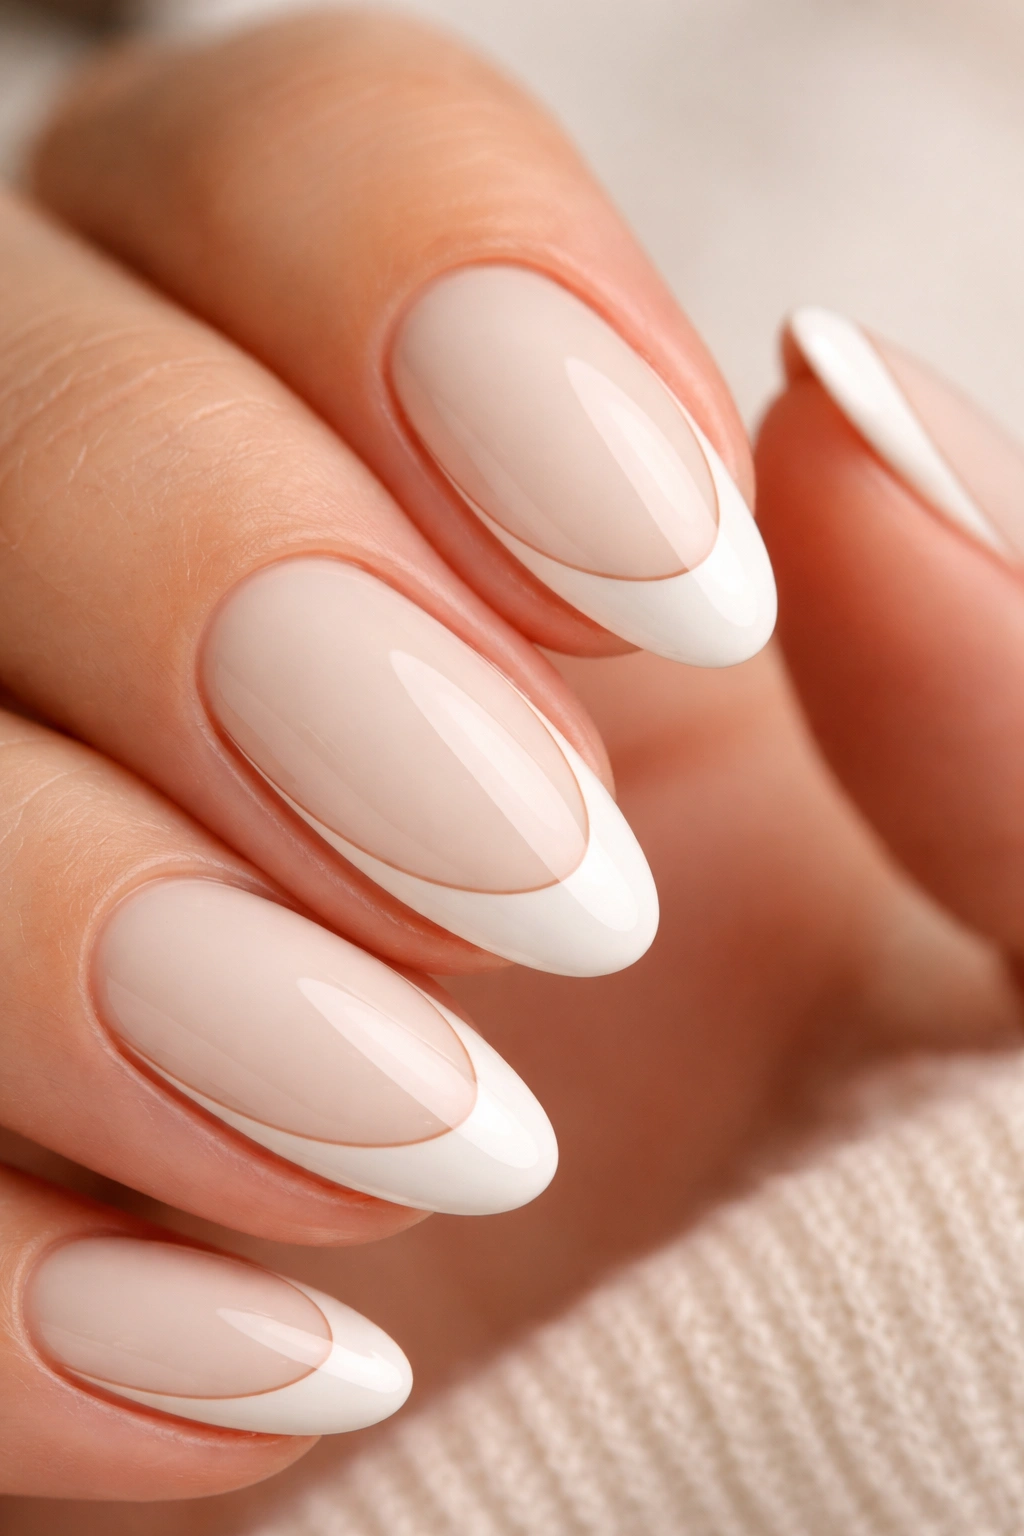
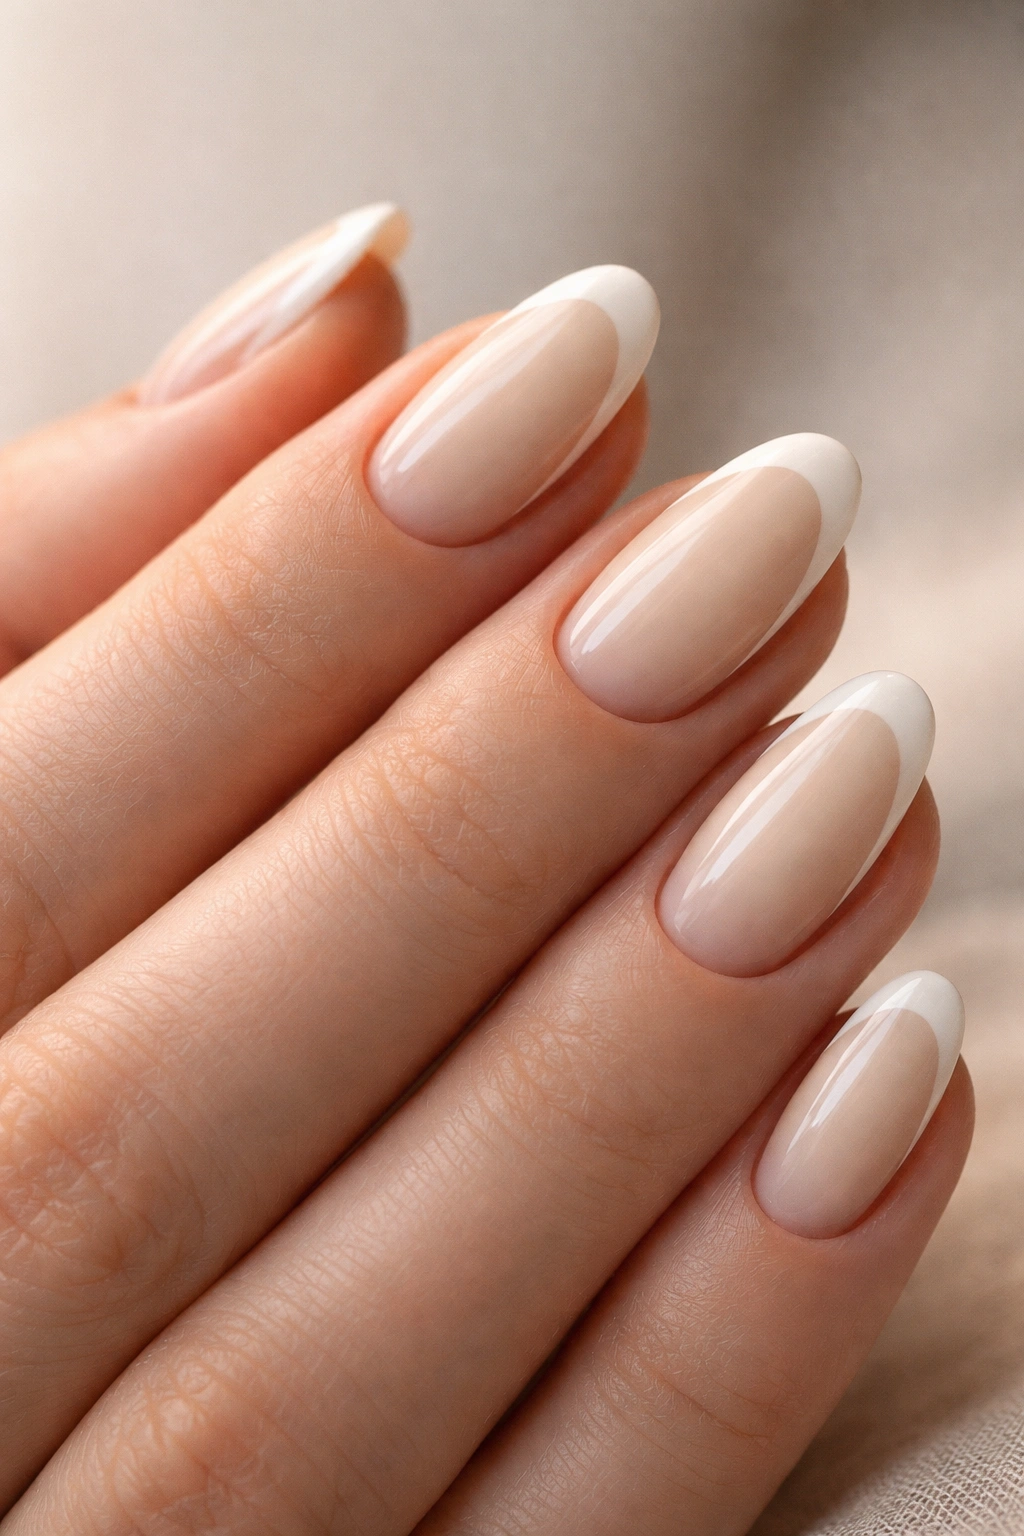
2. Milky Nude Base With Bold White Tip
What sets this apart from the classic design?
The base color completely changes the visual impact. Instead of starting with a pale pink or natural nude, a milky nude — think creamy beige with a hint of warmth — creates contrast that makes the white tip pop in a way the traditional French doesn’t. The white becomes the statement rather than the background.
Why Milky Nude Reads as More Modern
A true milky nude is opaque enough that it covers in two thin coats, but it has enough pigment that it doesn’t disappear into your skin tone. It sits between nail and skin, creating a soft blur at the base of your nail that makes short almond nails look slightly longer. The white tip against this base reads as intentional — like you chose the white for visual impact, not because it’s “supposed” to be that way.
How to Apply It Cleanly
- Choose a milky nude with warm undertones (avoid anything too pink, which competes with the white tip)
- Apply two thin coats to the full nail, making sure to seal the free edge by painting the underside
- Let each coat dry fully before the next — this prevents peeling at the free edge
- Once the base is completely dry, apply your white tip using the same curved smile line technique
The white tip should be noticeably bolder here than it would be on a traditional pink base. Make it about twice as thick as you normally would, which creates visual drama without looking overdone.
3. Sheer Pink Gradient Into White
This design works because of what happens at the transition. On short almond nails, a gradient from sheer pink at the base to opaque white at the tip creates visual length without any of the harshness of a traditional French. Your eye follows the color shift upward, which naturally elongates the nail.
The technique uses a makeup sponge. Apply a sheer pink gel or regular polish to the sponge — something so transparent that you can see your skin through it — then gently dab it onto the nail in a gradient pattern, starting at the cuticle and fading toward the tip. Once that’s set, apply the white tip as normal. The white sits on top of the pink gradient, so the gradient shows through and creates depth.
Short almond nails look their absolute best with this design because the sponge gradient follows the natural contour of your nail, while a sharp French line would cut the visual flow. It’s softer, more wearable, and significantly less formal while still being completely polished.
4. Double Smile Line — Thin White Over Thick Cream
This design breaks the single-tip rule in a way that actually works. You’re creating two distinct lines: a thick cream or pale yellow smile line first, then a thinner white line right at the very edge of the nail.
The Visual Effect on Short Nails
The double line creates dimension and makes the tip appear more sculpted. Instead of a flat white smile, you’re layering — the cream shows underneath the white, which catches light differently and creates shadow. On short nails, this depth is essential because it prevents the nail from looking flat or washed out.
Application Step by Step
- Paint a thick smile line with pale cream or butter yellow, following the natural curve of your free edge
- Let this dry completely (this prevents the white from dragging the cream color around)
- Paint a thinner white line right at the very tip, starting about 1-2mm away from the cream line’s outer edge
- The white should be noticeably thinner than the cream underneath — thin enough that the cream shows through slightly
The spacing between the cream and white creates a line of the base color showing through, which is exactly what makes this design work. If the white covers the cream completely, you’ve just created a messy thick tip instead of an intentional double line.
5. Soft White Tip With Nude Outline
This design has a very specific appeal — it looks intentional without screaming “intentional.” The white tip is soft and slightly faded, which sounds casual, but the nude outline around the edge of the white creates structure and polish.
The process starts with the white tip applied slightly softer than normal — let it fade slightly at the edges rather than keeping a perfectly sharp line. Once that’s completely dry, use a thin nude or taupe pencil or striping brush to outline just the outer edge where the white meets the nail. This outline should be subtle, maybe 0.5mm thick, and it should only be visible when light hits the nail at a certain angle.
What makes this work on short almond nails is the subtlety. The outline prevents the soft white from looking blurred or accidental — it signals that the softness was intentional, that you designed this deliberately. It’s a small detail that completely changes how polished the whole nail reads.
6. Half-Moon Reverse French
This is the design most people don’t think of when they hear “French tip,” but it’s one of the most flattering on short almond nails. Instead of white at the tip, you’re painting the base of the nail with white and leaving the tips in the base color — essentially the opposite of a traditional French.
The white half-moon sits at your cuticle and follows the curved shape of your cuticle line. It takes practice to get this right because you’re working in a curved space with precision, but the payoff is worth it. On short almond nails, a half-moon reverse French creates an elongating effect because your eye travels from the white base up through the color to the pointed tip.
The technique requires either a curved template (you can buy these inexpensively) or a very steady hand with a thin brush. Paint the white base color following your cuticle line, keeping it slightly curved and not too thick. The white should occupy maybe the bottom 20% of the nail. Once it’s dry, paint the rest of the nail with your chosen color — nude, pink, peach, or any color that creates contrast with the white.
7. Ultra-Thin White Line With Metallic Chrome Dust
This design is technically a French tip, but barely. The white line is so thin — barely thicker than a pencil line — that it sits as a delicate accent rather than a statement. The magic is in what you do next: dust the tip of the nail (just the last 1-2mm) with metallic chrome dust, which catches light and creates a micro-flash of shine.
The white line acts as a separator between the base color and the chrome, preventing the chrome from sitting directly on your nail and creating a more refined, intentional look. It’s technically three elements — base color, white line, and chrome dust — but they work together to create a single, cohesive design that reads as extremely modern and polished.
On short almond nails, this design is nearly perfect because the chrome dust won’t look heavy on short tips. The thinness of everything keeps it wearable for professional settings while still being visually interesting. The shine catches light in a way that makes even a short nail appear to have presence.
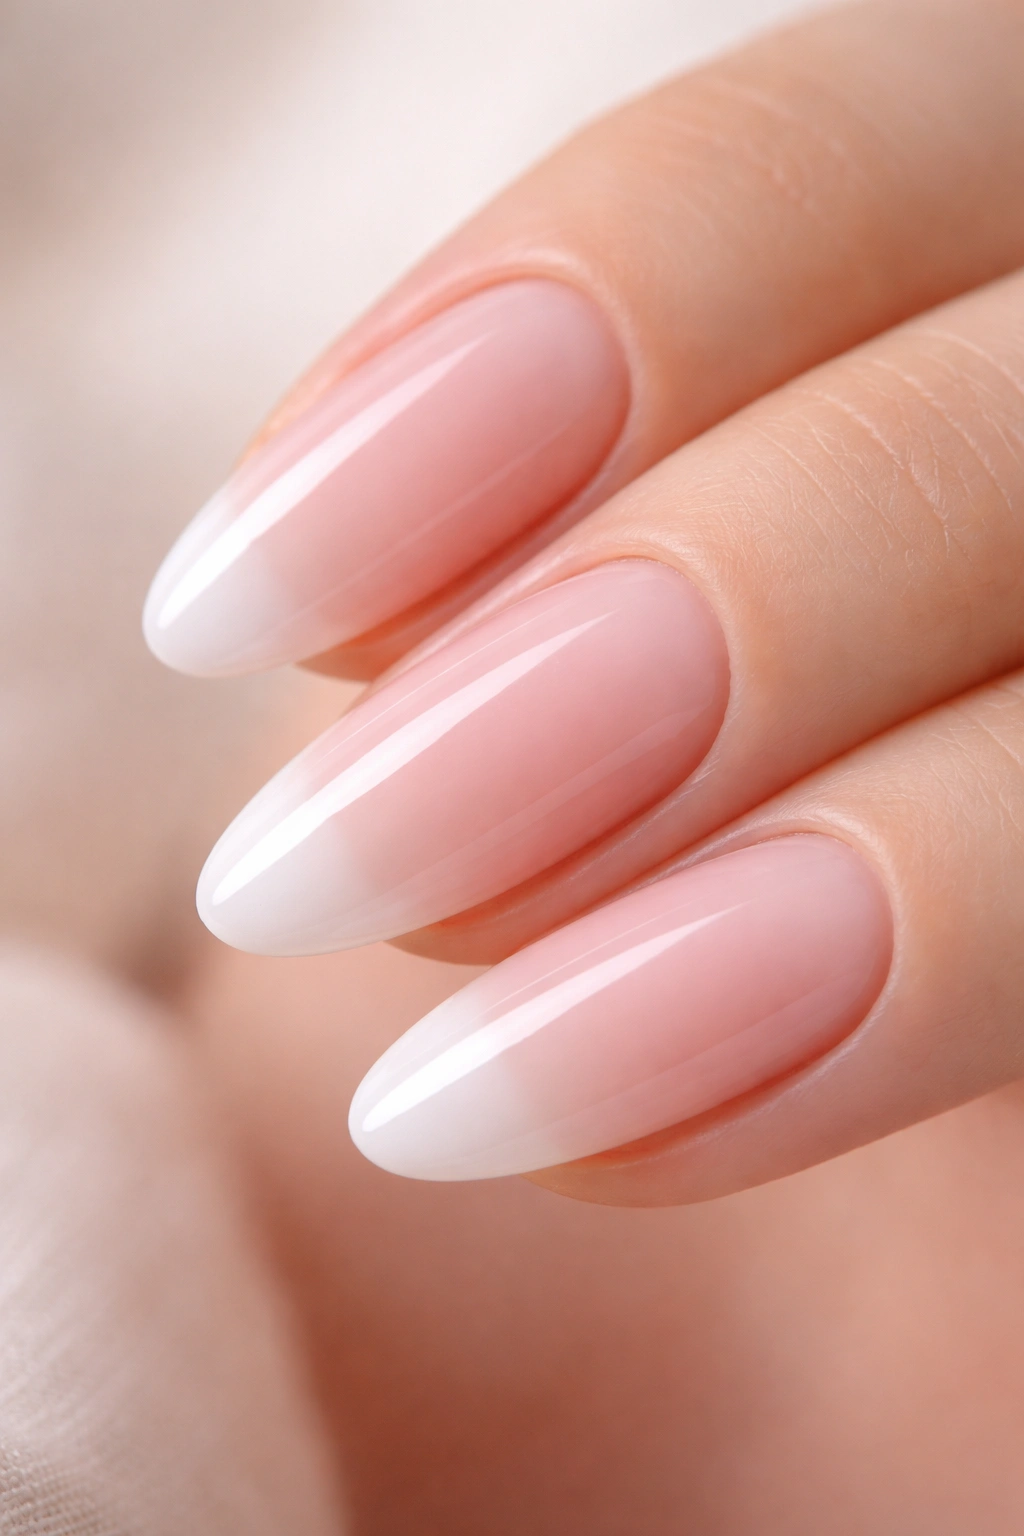
8. Baby Boomer French — Ombre Pink Into White
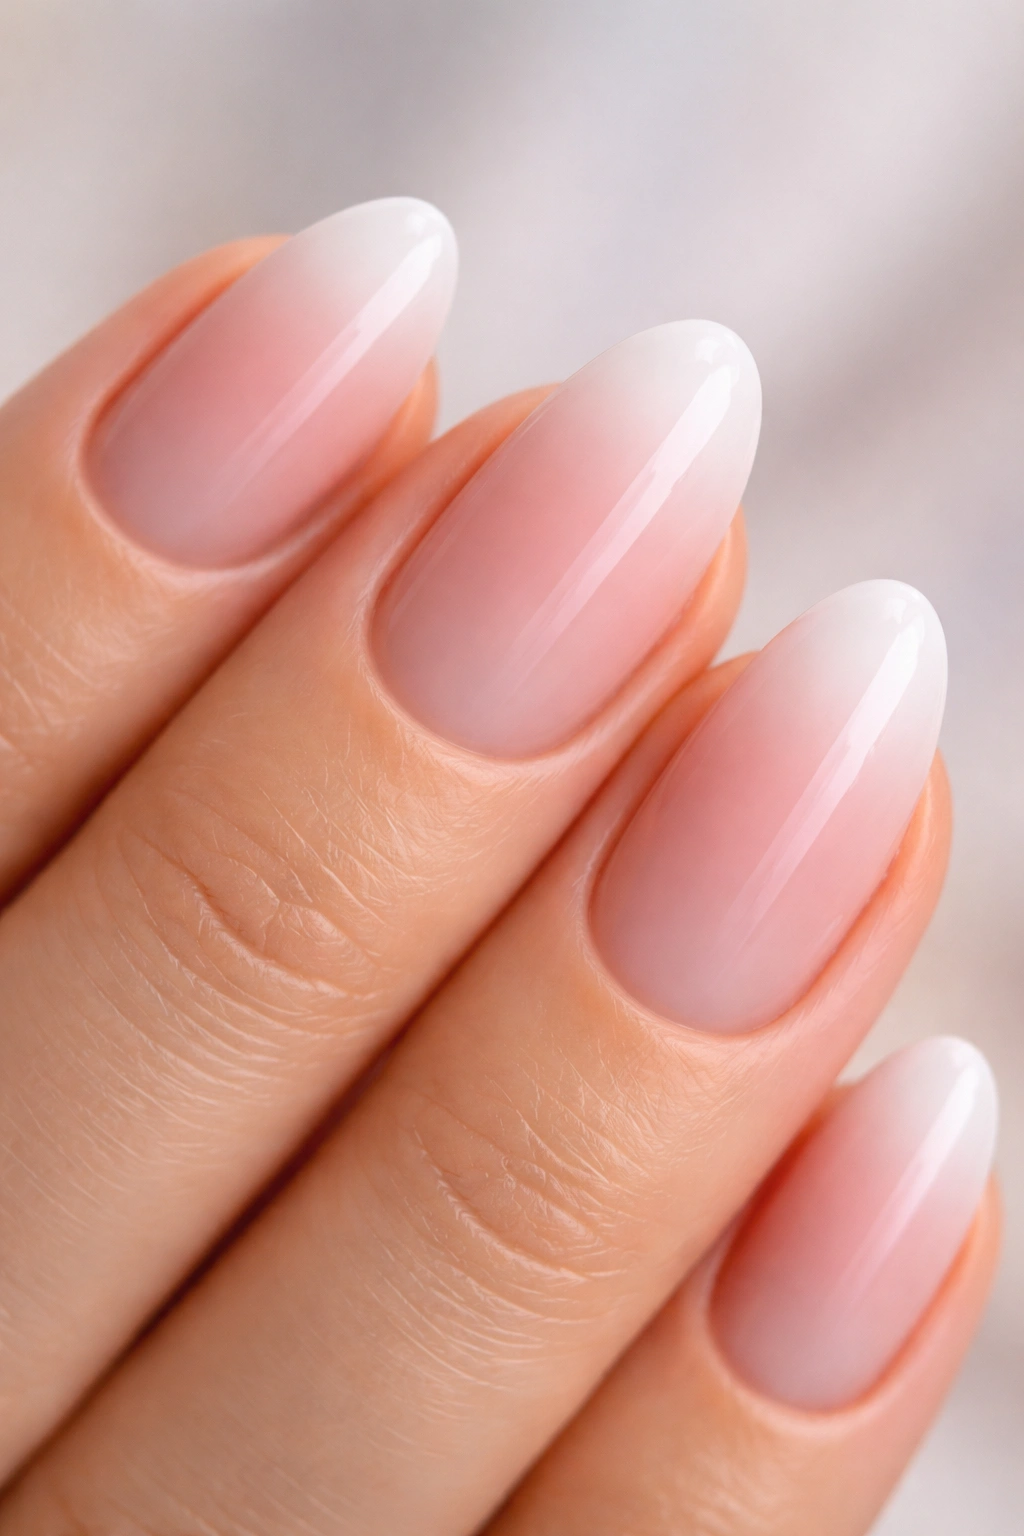
Baby Boomer is a design category you might not have heard of, but once you understand it, you’ll see it everywhere. It’s an ombre effect that starts with a sheer pink at the base, gradually deepens through the middle section of the nail, and then fades to white at the tip. It’s the opposite of a gradient nail — the color is concentrated in the center and fades at both ends.
Why This Design Flatters Short Almond Nails
The concentrated color in the center creates the illusion of width in the middle of the nail, which makes short nails appear more balanced. The fade to white at the tip is automatic with the ombre effect, so you don’t have to worry about creating a sharp line. It’s forgiving, it photographs beautifully, and it never looks flat.
How to Execute It
- Apply a sheer pink base to the entire nail in one thin coat
- Using a makeup sponge, dab a slightly darker pink in the center of the nail and work it outward slightly — but not all the way to the base or tip
- In a separate section of your sponge, dab white on the tip area and blend it slightly toward the center
- The blend happens naturally with the sponge — you’re not trying to create harsh transitions
- Once this is set, apply a glossy topcoat to blend everything together and create that signature Baby Boomer shine
Short almond nails look sophisticated with this design because the depth and dimension prevent them from appearing flat or washed out. The ombre effect is naturally forgiving, so small imperfections read as part of the design rather than mistakes.
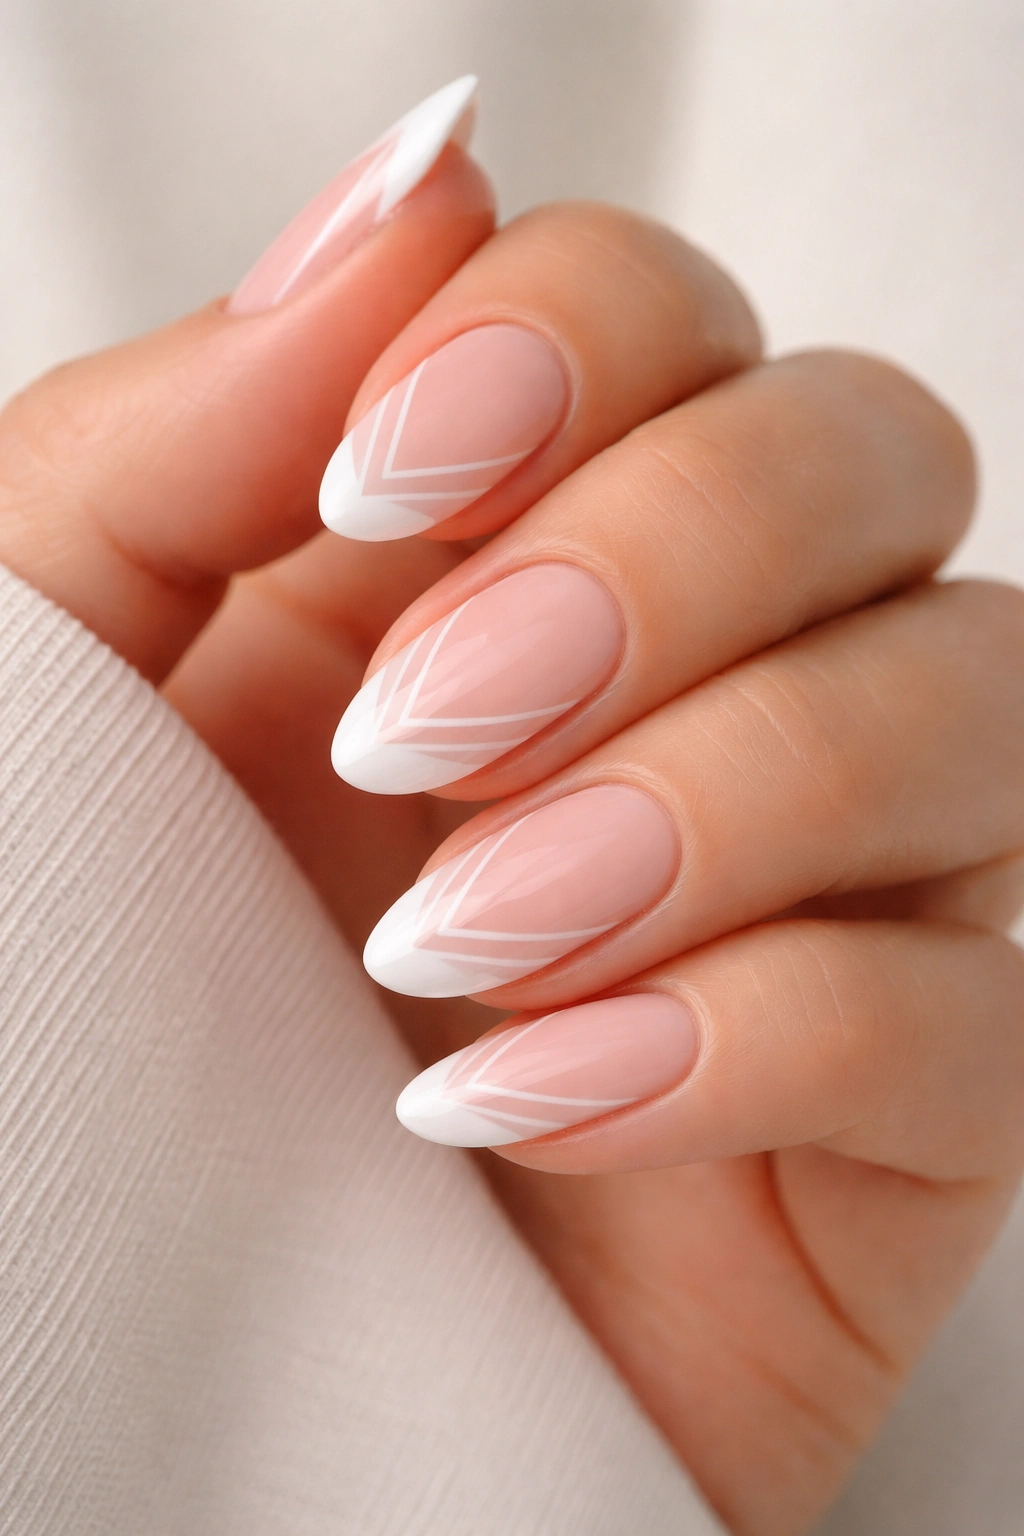
9. Geometric Negative Space French Tip
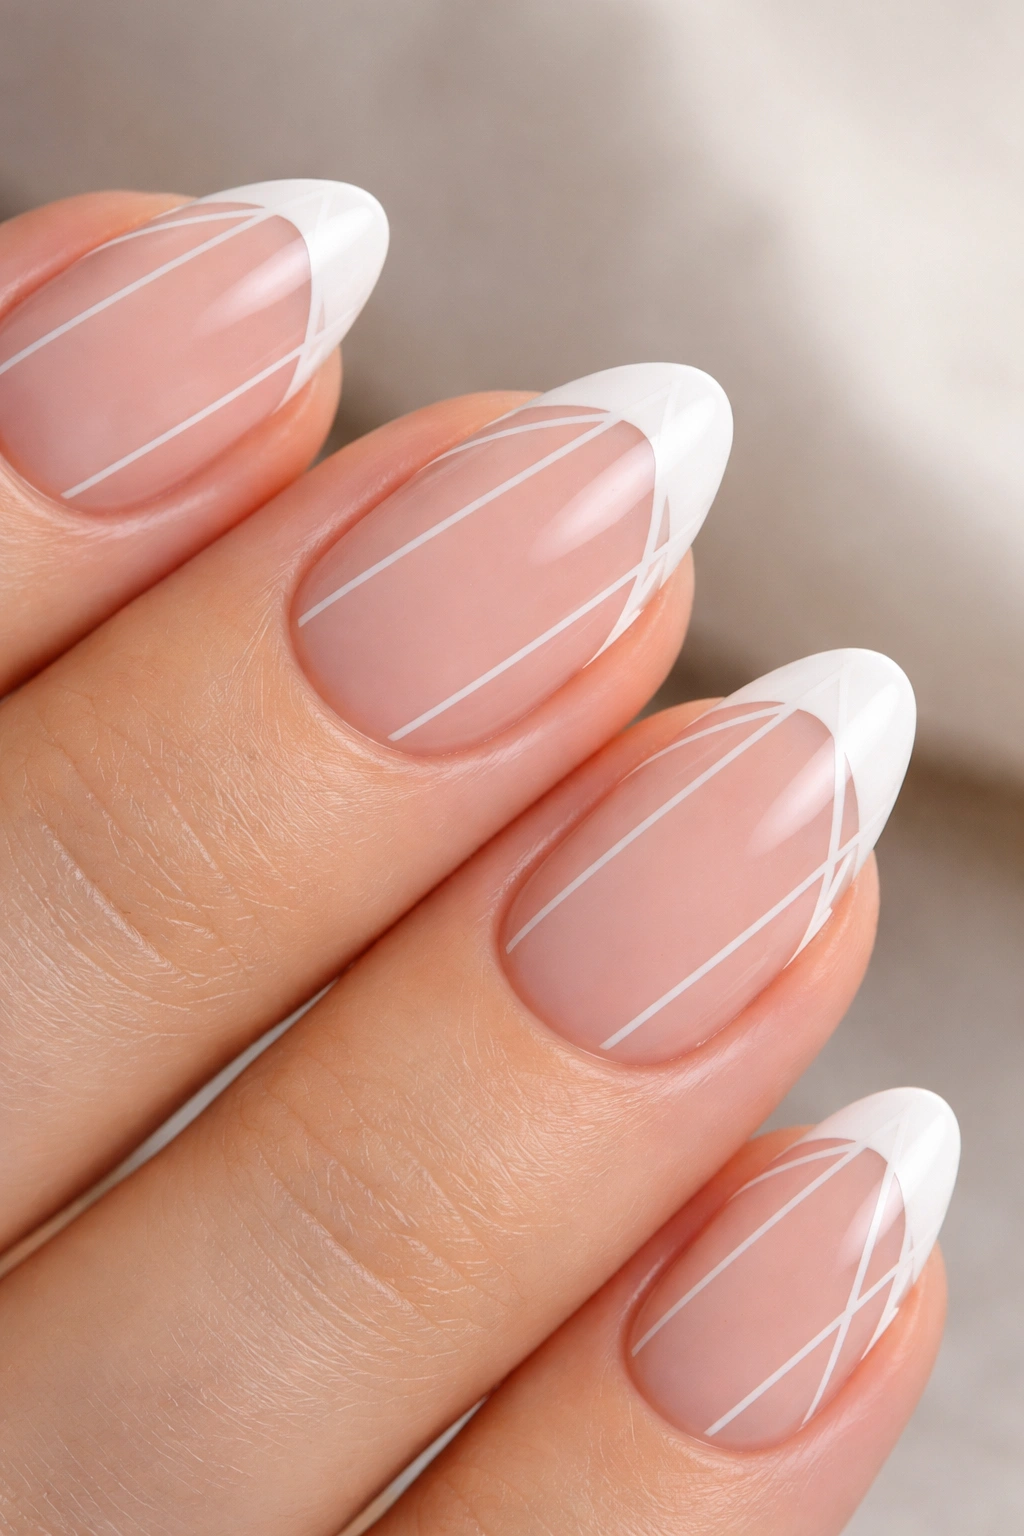
Instead of a solid white tip, you’re creating a geometric pattern within the white tip area — lines, triangles, or a honeycomb-style pattern where the base color shows through. This is where short almond nails have an advantage: the smaller surface area means the pattern is detailed and precise-looking rather than empty and sparse.
You’ll need thin striping brushes or nail art pens to execute this cleanly. Start with the solid white tip as normal, then once it’s completely dry, use a contrasting color (nude, taupe, or even gold) to paint your geometric pattern on top of the white. Thin lines work best on short nails — thick bold patterns will overwhelm the short tip.
The negative space (where the white shows through the pattern or where the base color shows through a pattern of lines) is what makes this design, so don’t skimp on details. A few thin lines are better than one thick stripe. The pattern should feel intentional and design-forward rather than accidental.
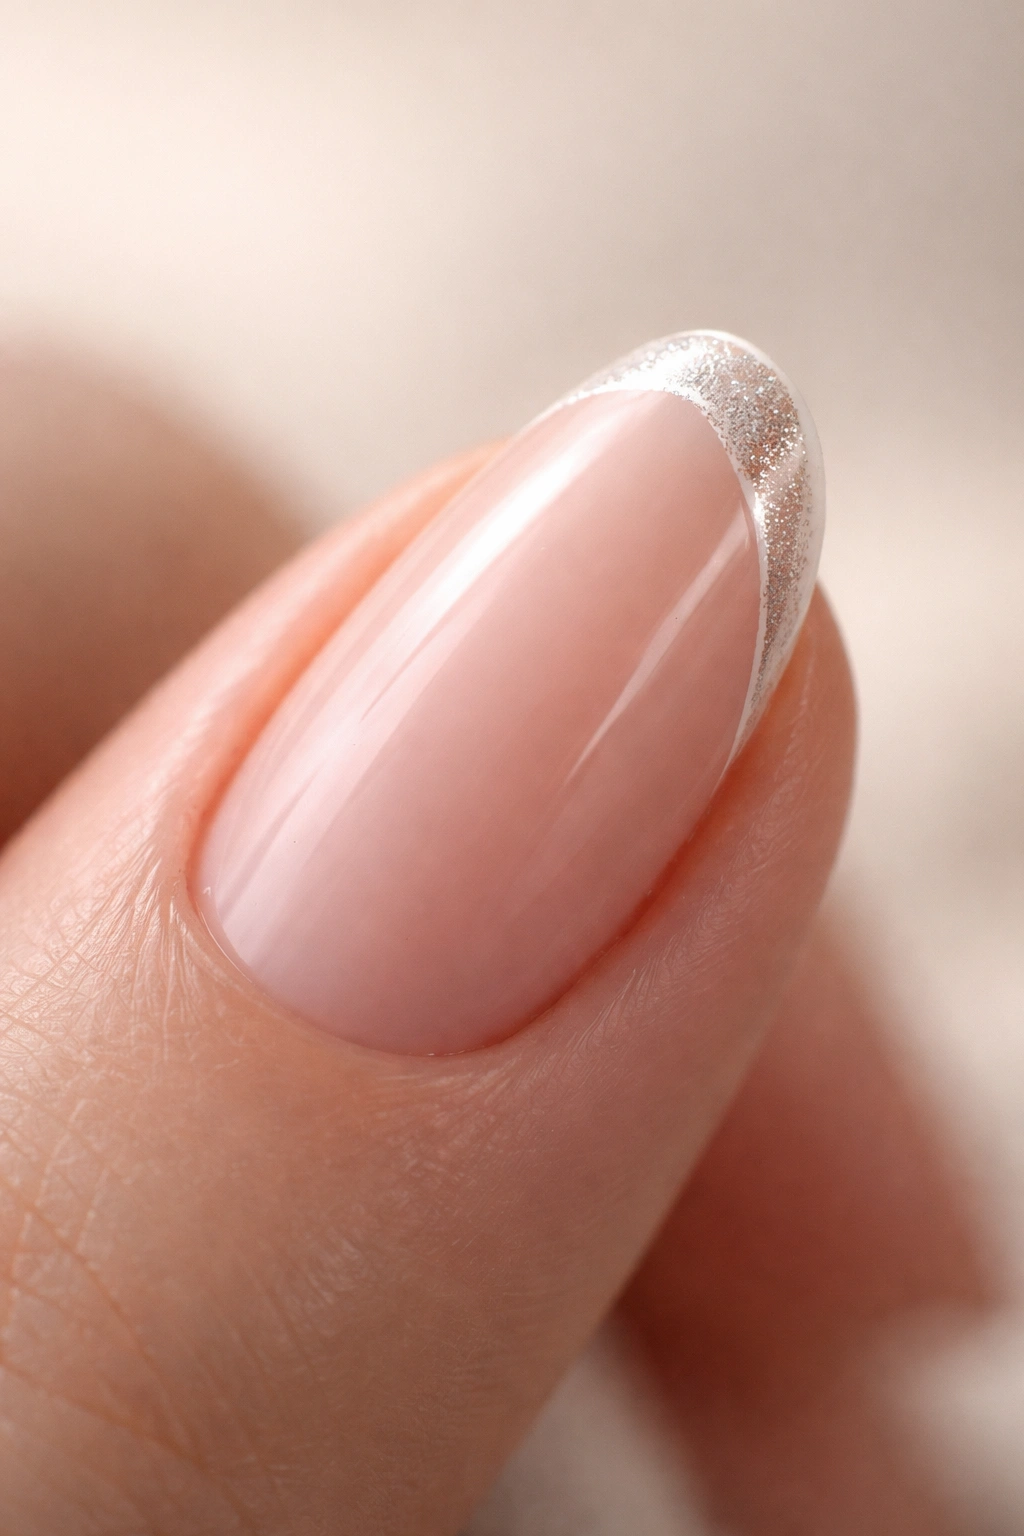
10. White Tip With Micro Glitter Gradient
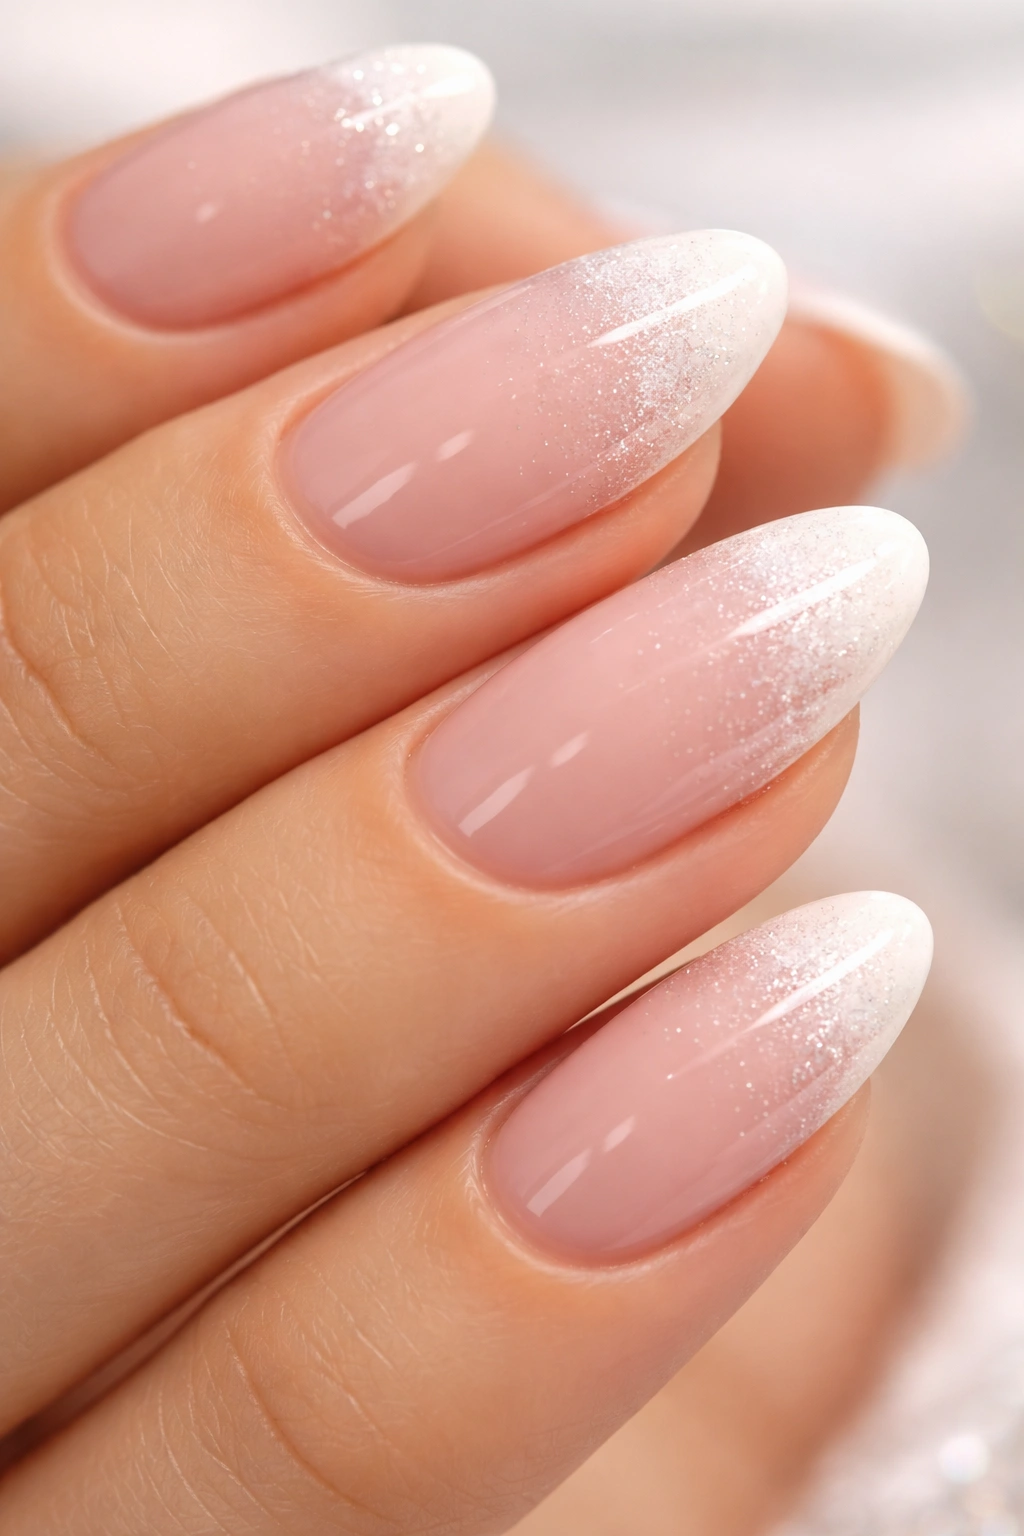
The glitter doesn’t cover the entire tip — it starts at the very edge of the white and gradually fades inward, creating a glitter gradient that sits within the white tip. This keeps it wearable for professional settings while still giving you that sparkle factor.
Applying this requires patience. Start with your white tip as the base. Once it’s completely dry, use a cosmetic sponge with fine glitter suspended in a clear gel to create the gradient. Dab the sponge at the edge of the white (at the very tip of the nail) and blend it backward toward the center. The glitter should be concentrated at the edge and almost invisible by the time you reach the smile line.
What makes this work on short almond nails is the scale. The gradient is small enough that it looks refined rather than costume-y. The glitter catches light specifically when you’re moving your hands or typing, so it creates those micro-moments of sparkle without being obvious when your hands are resting.
11. Cream Base With Precise White Smile Line And Thin Tan Outline
If the white smile line feels too stark on your skin tone, this design softens it without sacrificing definition. You’re adding a bridge color — a tan or warm taupe — between the white and the cream base that makes the transition feel more natural while keeping the white lip clearly defined.
The cream base should be warm, almost the color of vanilla ice cream. Paint this over the entire nail in two coats. Once dry, apply the white smile line as normal, but make it slightly thicker than you usually would because you’re about to add an outline that will visually reduce its thickness. Then use a very thin tan or warm taupe to outline both sides of the white smile line — one outline between the white and the cream base, and another right at the edge of the nail.
This outline sounds like it could look complicated, but in reality it looks refined. The tan acts as a transition that your eye follows, making the white feel less abrupt. On short almond nails, this softer approach is often more flattering than harsh contrast, especially if you have warm or olive undertones.
12. Soft Pink Base With White Tip And Silver Striping
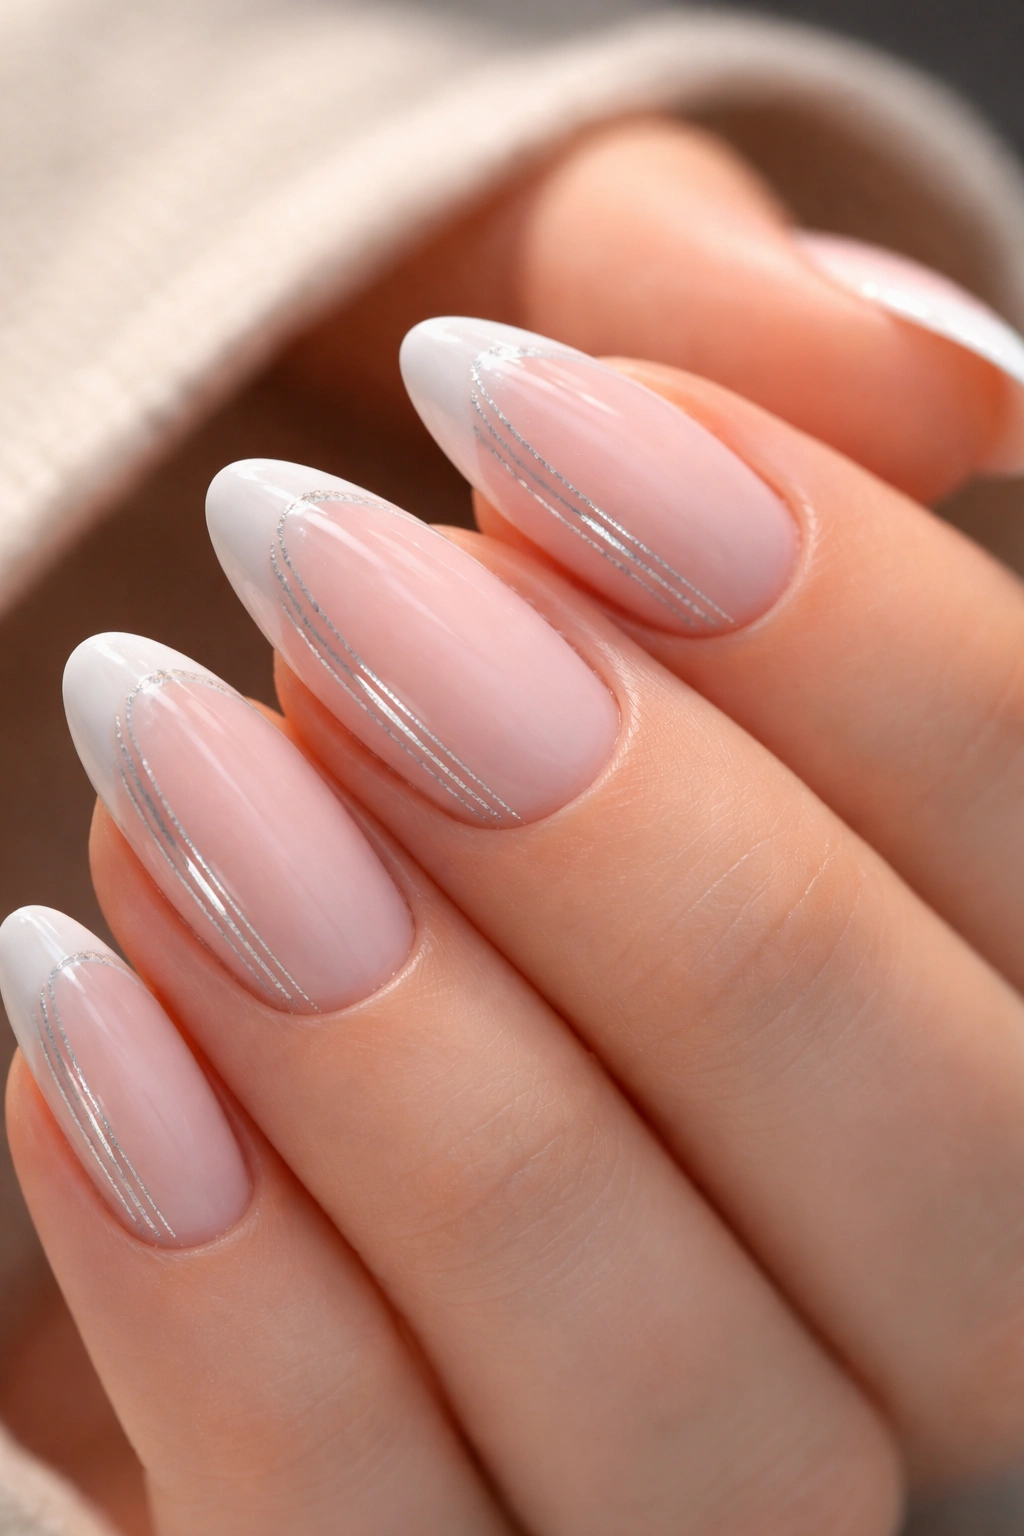
This combines the traditional French with metallic accent lines that run vertically down the tip. You’re essentially creating a subtle striped effect within the white tip area, using silver to add dimension.
Start with a soft pink base that’s slightly deeper than the traditional French nail pink — something with enough pigment that it reads as intentional. Apply your white tip as normal. Once that’s dry, use a thin silver striping brush to paint 2-3 vertical lines down the white tip, spacing them evenly. The lines should start at the smile line and extend to the very edge of the nail.
The vertical lines elongate the tip visually, which is helpful on short nails because they create the illusion of more length. The silver catches light differently than the white and the pink, so your nail becomes more dimensional and interesting to look at. From far away it reads as a simple French tip, but up close people will notice the detail work and assume you had it done professionally.
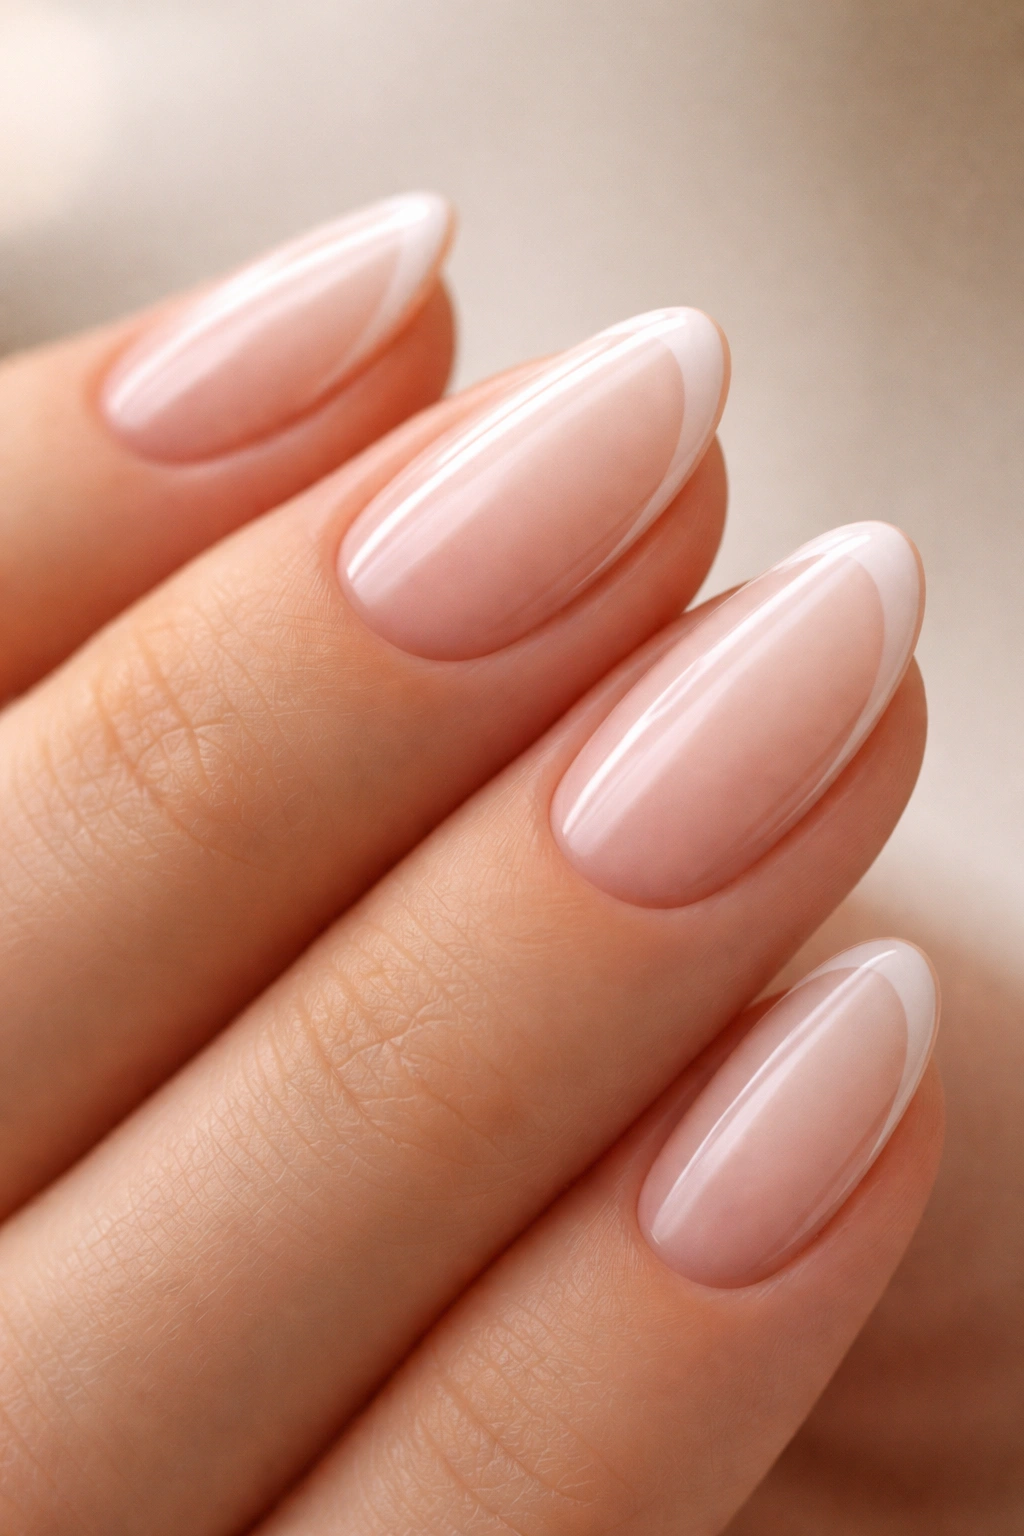
13. Barely-There White Tip With Nude Shift Polish
This design is almost minimalist, which is precisely why it works. The white tip is so pale and so thin that it’s almost whisper-thin — barely visible unless light hits it directly. The base is a nude shift polish, which means it changes color slightly depending on the angle and lighting. The white tip acts as a bright line that punctuates the subtle color shift of the base.
Nude shift polishes often have gold, pink, or even green undertones that shift depending on how light hits them. The white tip anchors this color-shifting base and prevents the nail from looking too ethereal or undefined. On short almond nails, the thin white tip provides the visual punctuation that keeps the whole design from feeling insubstantial.
This design requires restraint — the white tip really does need to be thin, barely-there thin. If you make it thick, you’ve broken the whole aesthetic and you’re back to a regular French tip. The beauty here is in the subtlety and the interplay between the shift polish and the thin white line.
14. Graphic White Tip With Matching Base Design
Instead of white tips on a solid base, you’re extending the design concept into the base color as well. Maybe the white tip has a geometric pattern and the base color has a coordinating stripe or accent in the same geometric language. Or the white tip has a negative space heart and the base color has a tiny matching heart accent near the cuticle.
This is where short almond nails shine because the small scale of the nail means the whole design becomes a cohesive visual statement rather than fragmented elements. The tip and base are working together as a unified design rather than existing separately.
The key is restraint in the base design. It should be subtle — thin lines, small accents, minimal pattern work. The white tip is still the main event; the base design should feel like an echo of that main event rather than a competing second design.
15. Creamy Ivory Base With Warm White Tip And Nude Reverse Shadow
This final design is where all the techniques combine to create something that looks deceptively simple but actually has multiple layers of intentionality. The base is creamy ivory, the tip is a warm white that matches cream undertones rather than being a pure bright white, and there’s a subtle reverse shadow created with nude or taupe that runs along the inner edge of the white tip.
The reverse shadow is the detail that transforms this from a regular French into something more sophisticated. It’s a thin line of nude or taupe that runs along the smile line, sitting on top of the ivory base and underneath the white tip. This creates the visual illusion that the white tip is slightly lifted or sculptured rather than flat.
The warmth of the colors is essential here. Creamy ivory and warm white create harmony on shorter nails, while pure white on cool-toned nails can look harsh. If your skin has warm undertones, this design will look more natural and flattering than traditional pink-and-white French tips.
Final Thoughts
The reality of short almond nails is that they don’t need length to look sophisticated. What they need is intentionality, which means choosing a design that feels purposeful and executing it cleanly. None of the designs above require a professional nail tech or equipment beyond what you probably already have at home — a few brushes, maybe a makeup sponge, some polish colors, and the willingness to redo a design if the first attempt isn’t perfect.
The white tip is forgiving because mistakes are easy to clean up. If your smile line isn’t perfectly straight, nobody notices. If your white is slightly uneven, it reads as texture. The advantage of working with short almond nails is that you’re working on a smaller canvas, which means less surface area to cover and less room for dramatic errors. Start with the designs that appeal to you visually, practice the techniques on one nail first, and once you’re confident, go full hand. Your hands will thank you for taking the time to make them look intentional.
