

French tips don’t have to follow the rules anymore. The clean, curved lines we’ve known for decades? They’re getting a creative makeover that’s all about breaking boundaries and embracing imperfection.
Abstract French tip nails throw out the rulebook entirely. Instead of perfectly uniform white crescents, you’re working with irregular shapes, unexpected angles, and artistic flourishes that look like tiny masterpieces on your fingertips. Think swirls that don’t quite match, geometric lines that zigzag across your nails, or color blocks that create visual intrigue without following any traditional pattern.
What makes this style so appealing is its forgiving nature. Miss a line? That’s part of the design. Uneven edges? Perfectly on-brand. This approach to nail art celebrates the beauty of imperfection while still delivering that polished, put-together vibe.
The abstract French is also incredibly versatile. You can keep it minimal with simple line work in neutral tones, or go bold with clashing colors and dramatic shapes. Whether you’re into moody blacks and grays or prefer vibrant neons and pastels, the abstract framework adapts to your personal aesthetic.
For anyone who’s ever felt intimidated by nail art, this is your moment. The freeform nature means there’s no “wrong” way to do it. Your dominant hand and non-dominant hand don’t need to match perfectly—in fact, slight variations just add to the artsy appeal.
Ready to ditch the traditional tip? Let’s explore ten abstract French designs that’ll give your manicure a fresh, artistic edge.
1. Wavy Modern French
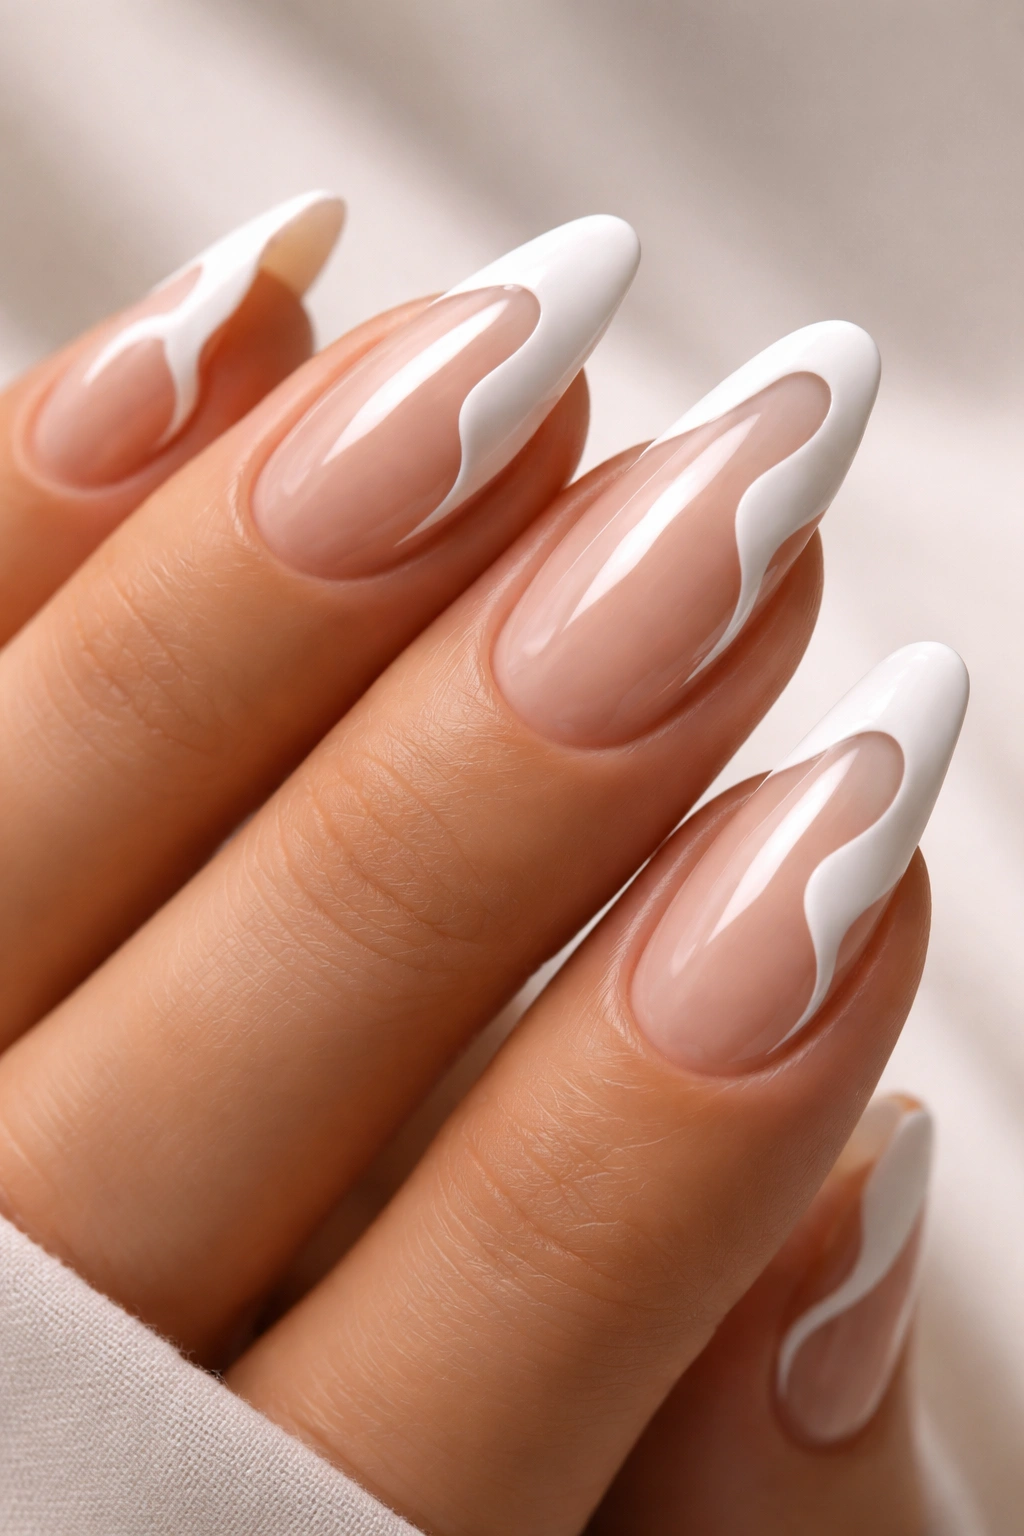
Instead of following the natural curve of your nail bed, wavy French tips introduce fluid, undulating lines that create movement and visual interest. These aren’t your grandmother’s French tips—they’re organic, flowing, and beautifully unpredictable.
What Makes It Stand Out
The wavy line brings an element of softness to your nails while maintaining that classic French sophistication. You can create gentle waves for a subtle effect or dramatic curves for something bolder. The technique works beautifully with contrasting colors—think black waves on nude bases or white waves on pastel backgrounds.
This style gained massive traction among nail artists because it’s surprisingly easy to execute. Use a thin brush and paint in one continuous motion, letting your hand naturally create the wave. The result feels both intentional and effortlessly cool.
Quick Tips for Wavy Tips
- Use striping tape as a guide if you want more control
- Vary the wave intensity across different nails
- Layer multiple colors for an ombré wave effect
- Keep the base neutral to let the waves shine
Pro tip: Metallic polishes create stunning wavy tips that catch the light with every hand movement.
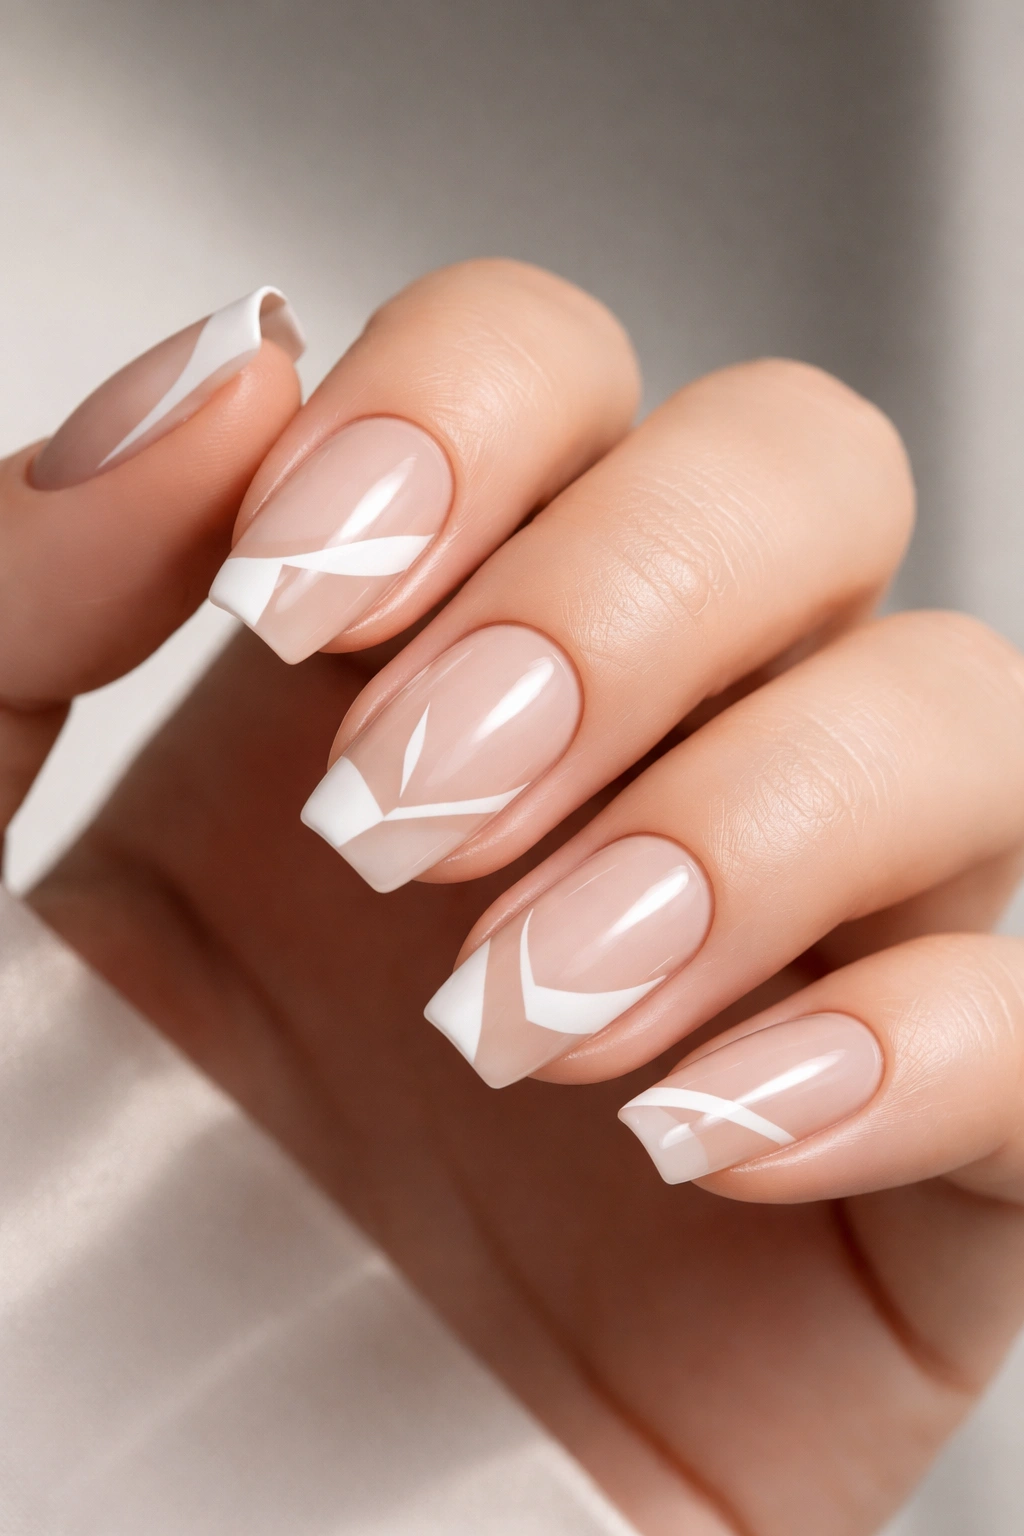
2. Asymmetric Angular Tips

Ditch symmetry and embrace diagonal lines, sharp angles, and geometric precision with asymmetric angular French tips. This edgy take on the classic combines clean lines with unexpected placement.
Why It Works
Angular tips create the illusion of elongated nails while adding a modern, architectural feel. The diagonal placement draws the eye and makes your manicure feel fashion-forward. You’ve got endless options—steep angles, shallow slopes, or even zigzag patterns that alternate across your nails.
What’s great about this design is how it plays with negative space. The angle naturally creates interesting shapes on your nail, making even simple two-color combinations look complex and thought-out.
How to Nail the Look
Start by mapping out your angle with a thin piece of tape. Paint your tip color, remove the tape while the polish is still wet, and clean up any bleeding with a small brush dipped in remover. The crisp line you get is incredibly satisfying.
- Experiment with different angle degrees
- Try double angles for added dimension
- Mix matte and glossy finishes along the lines
- Add thin metallic borders to define the edges
Fun fact: This design looks especially striking on almond and stiletto nail shapes.
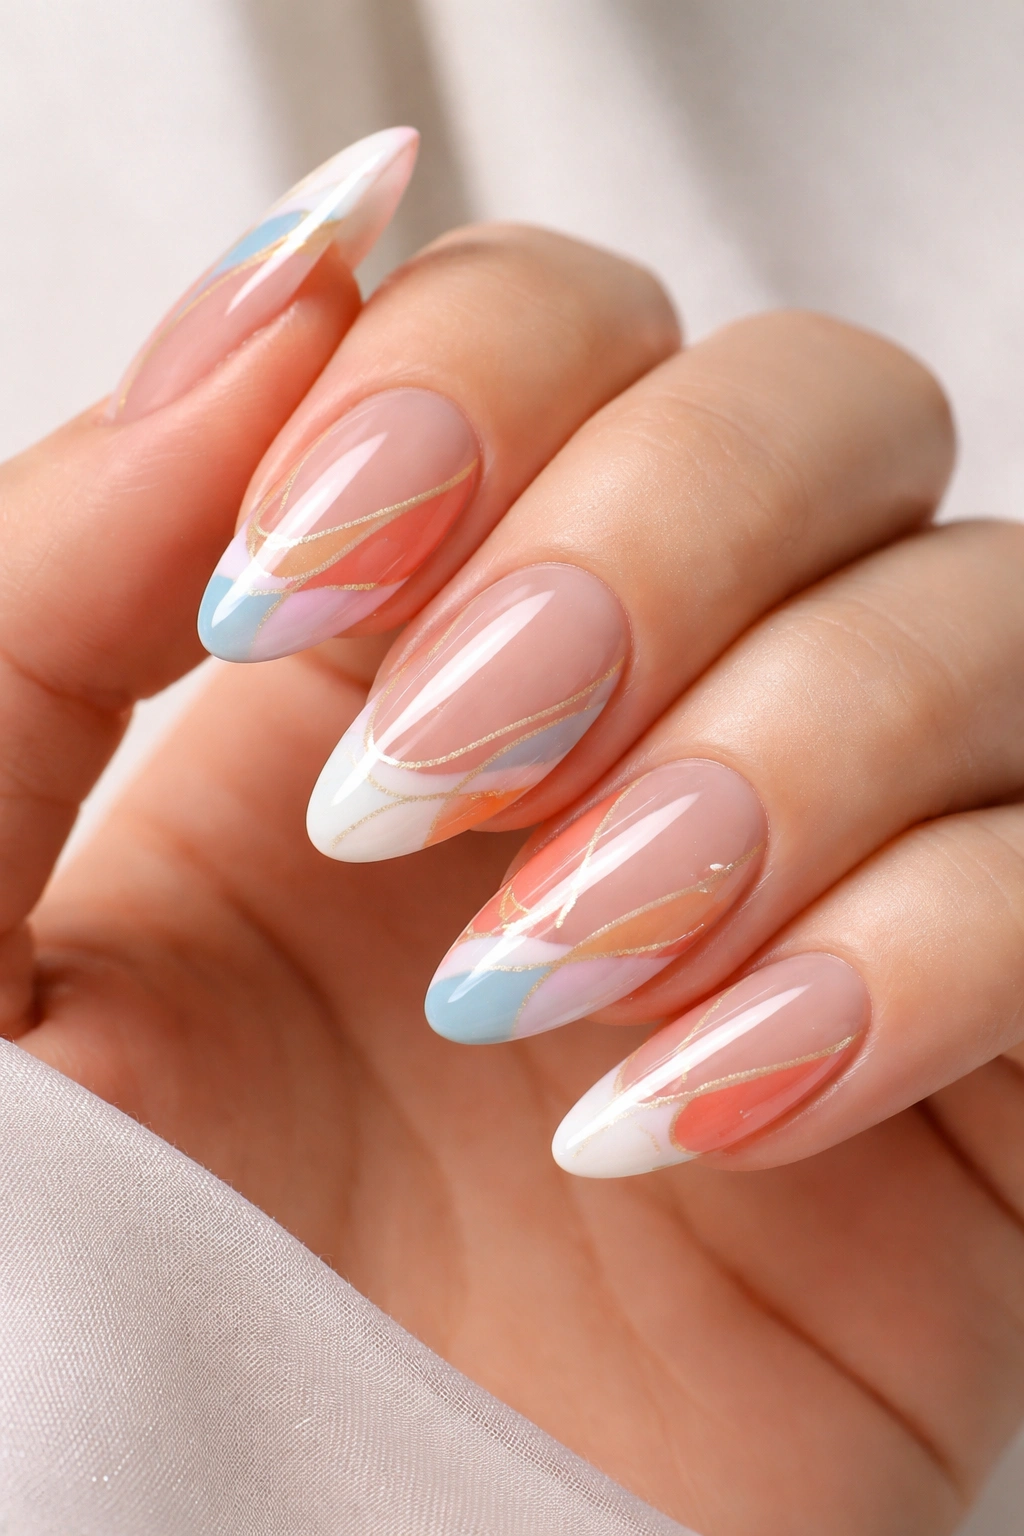
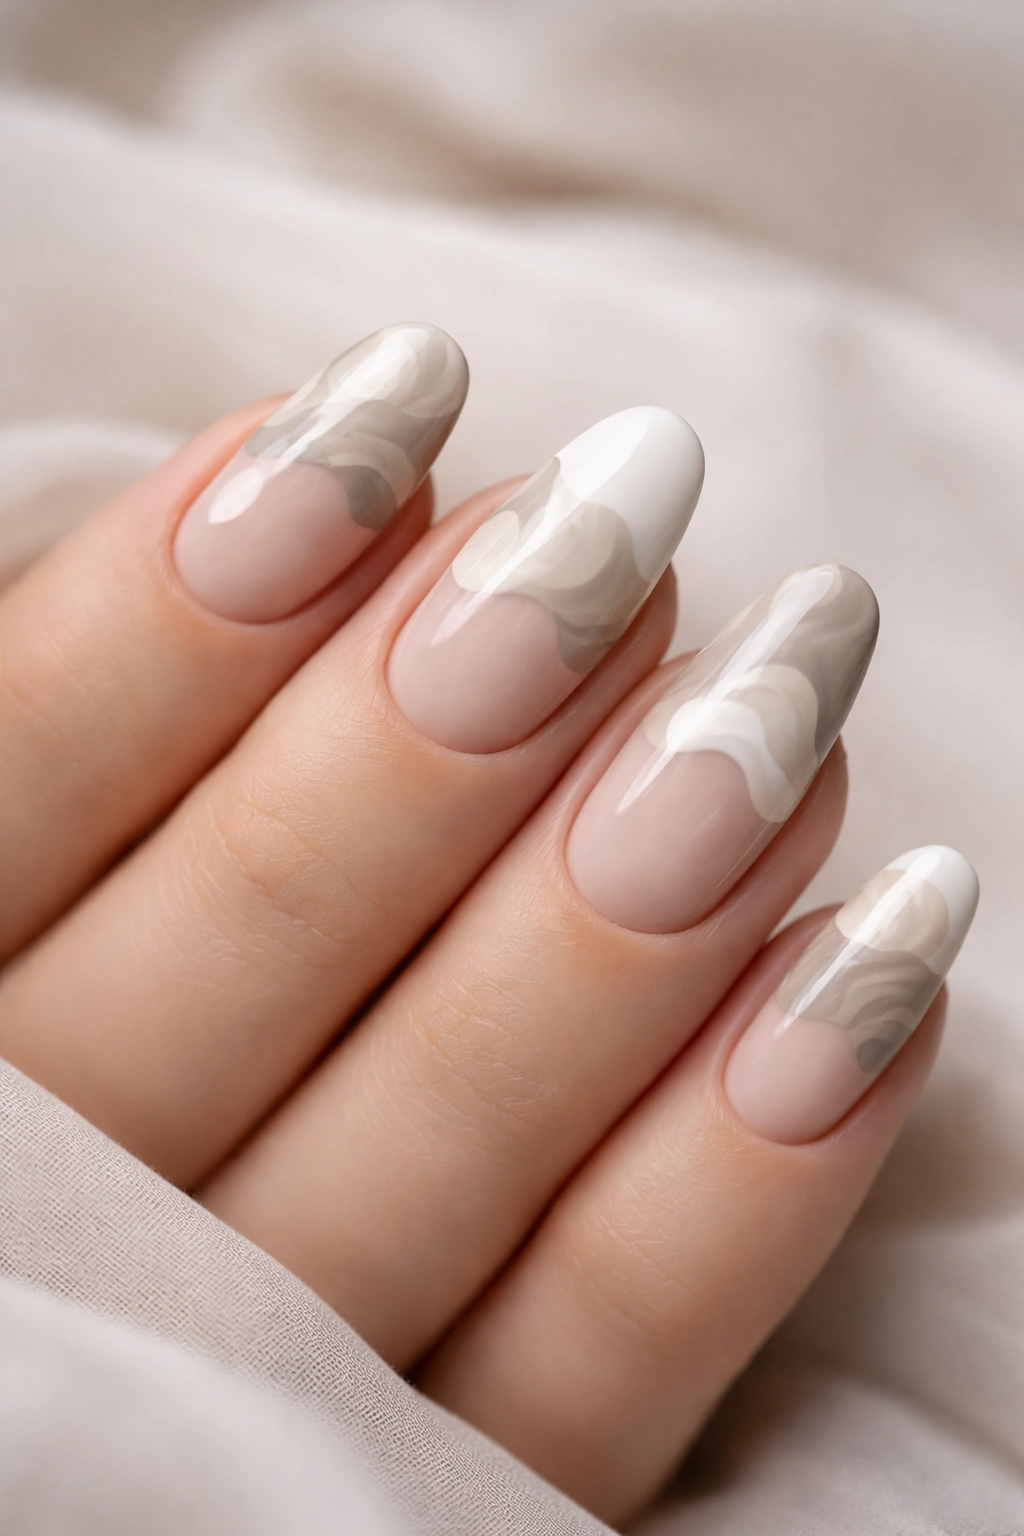
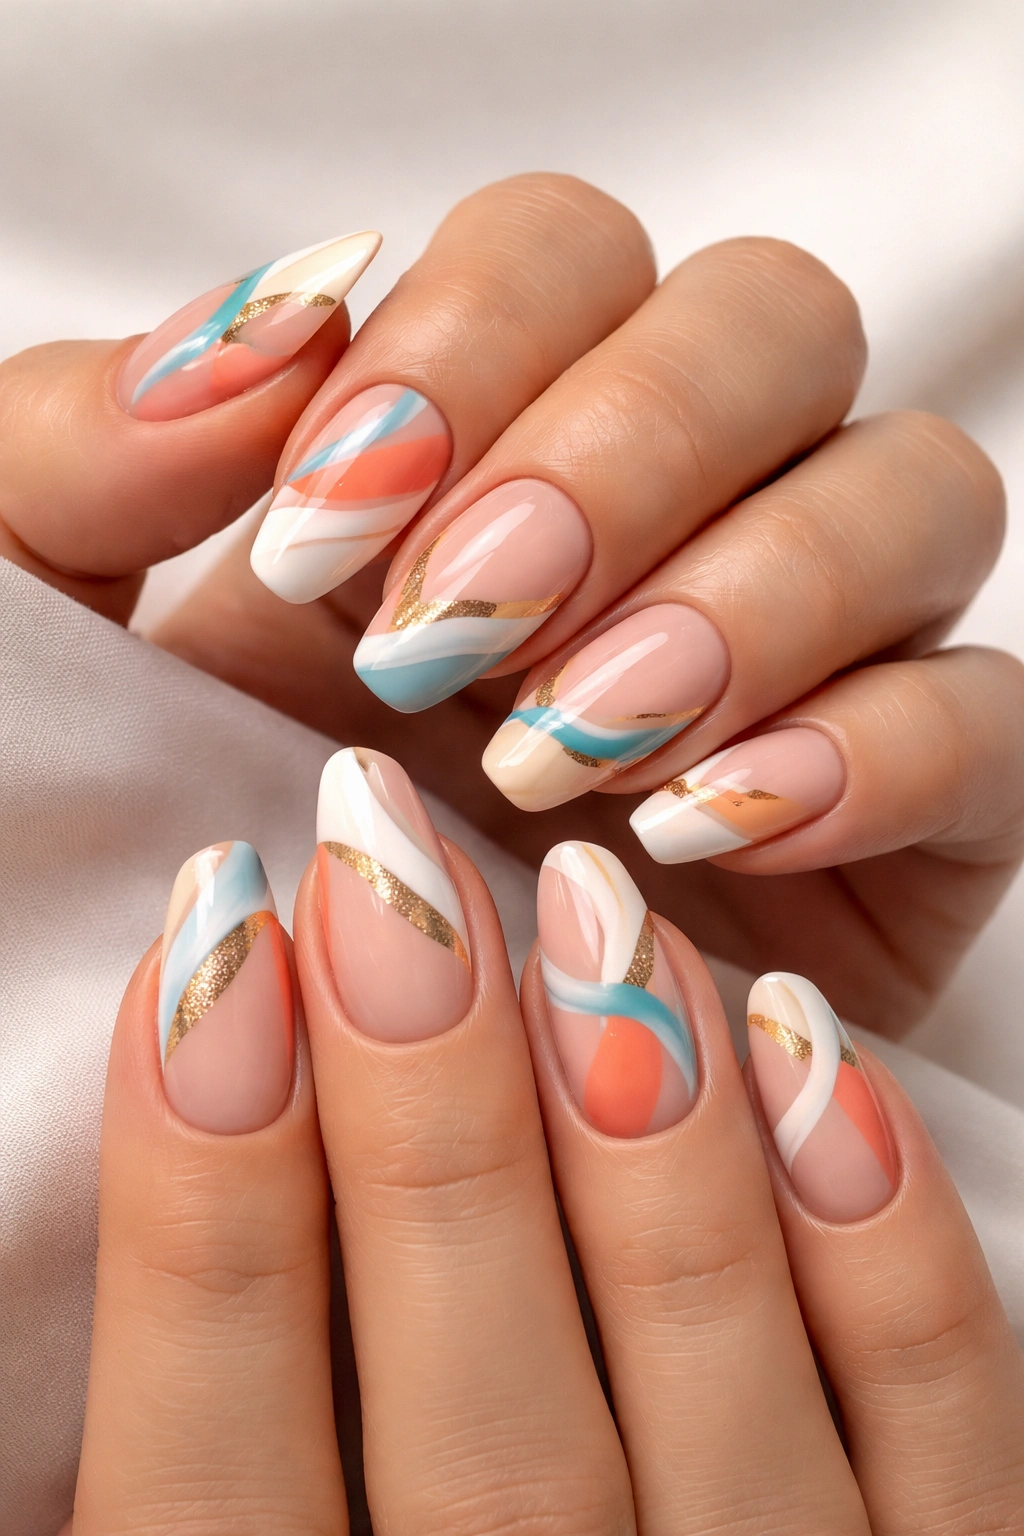
3. Swirled Abstract Tips
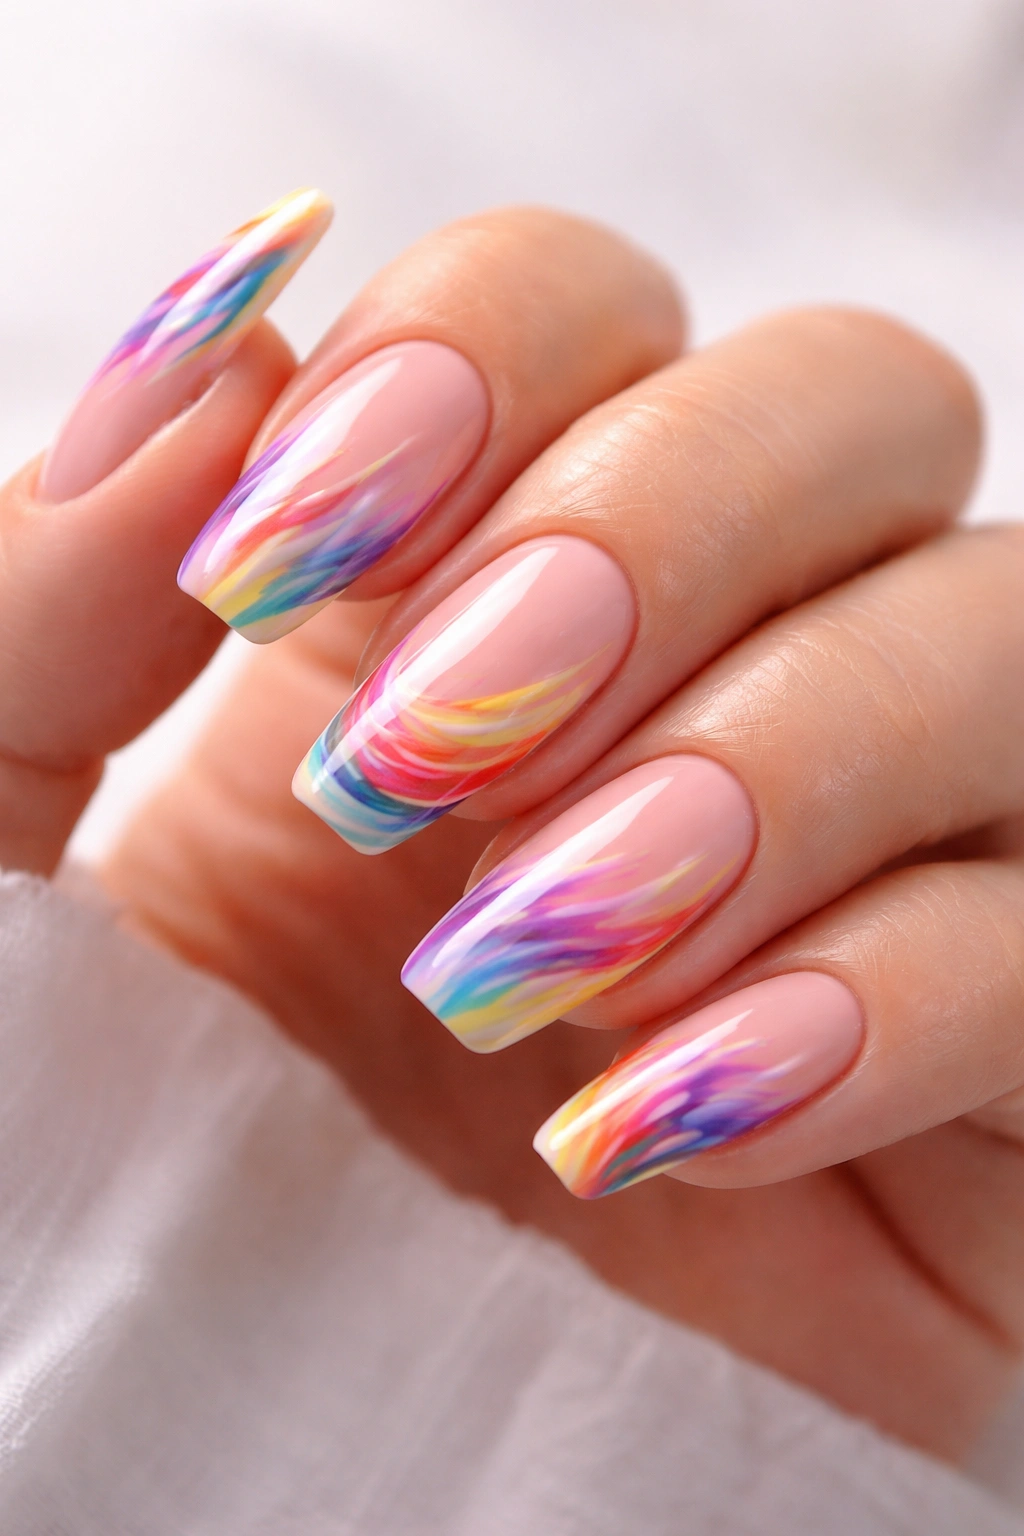
Channel your inner artist with swirled abstract tips that look like miniature paintings. This design combines multiple colors in organic, flowing patterns that never look the same twice.
Key Benefits
Swirls bring a playful, artistic quality to your manicure without requiring expert-level skills. The beauty lies in the imperfection—each swirl will be unique, giving your nails a hand-painted, custom feel. You can work with complementary colors for harmony or contrasting shades for drama.
The technique is forgiving and actually benefits from a loose, freehand approach. Over-thinking it leads to stiff, forced designs, while letting the colors blend naturally creates those gorgeous, organic patterns.
Application Technique
Apply your base color and cure or dry it completely. Add small dots or stripes of your swirl colors on the tip area, then use a thin brush or dotting tool to pull the colors together in circular or figure-eight motions. The polish should still be wet so the colors blend seamlessly.
- Use three colors maximum for cohesive swirls
- Pull colors in the same direction for flow
- Seal with a glossy top coat for depth
- Try chrome powders over gel for extra dimension
Pro tip: Swirls work beautifully with analogous colors on the color wheel—think blues into purples or oranges into reds.
4. Color Block French
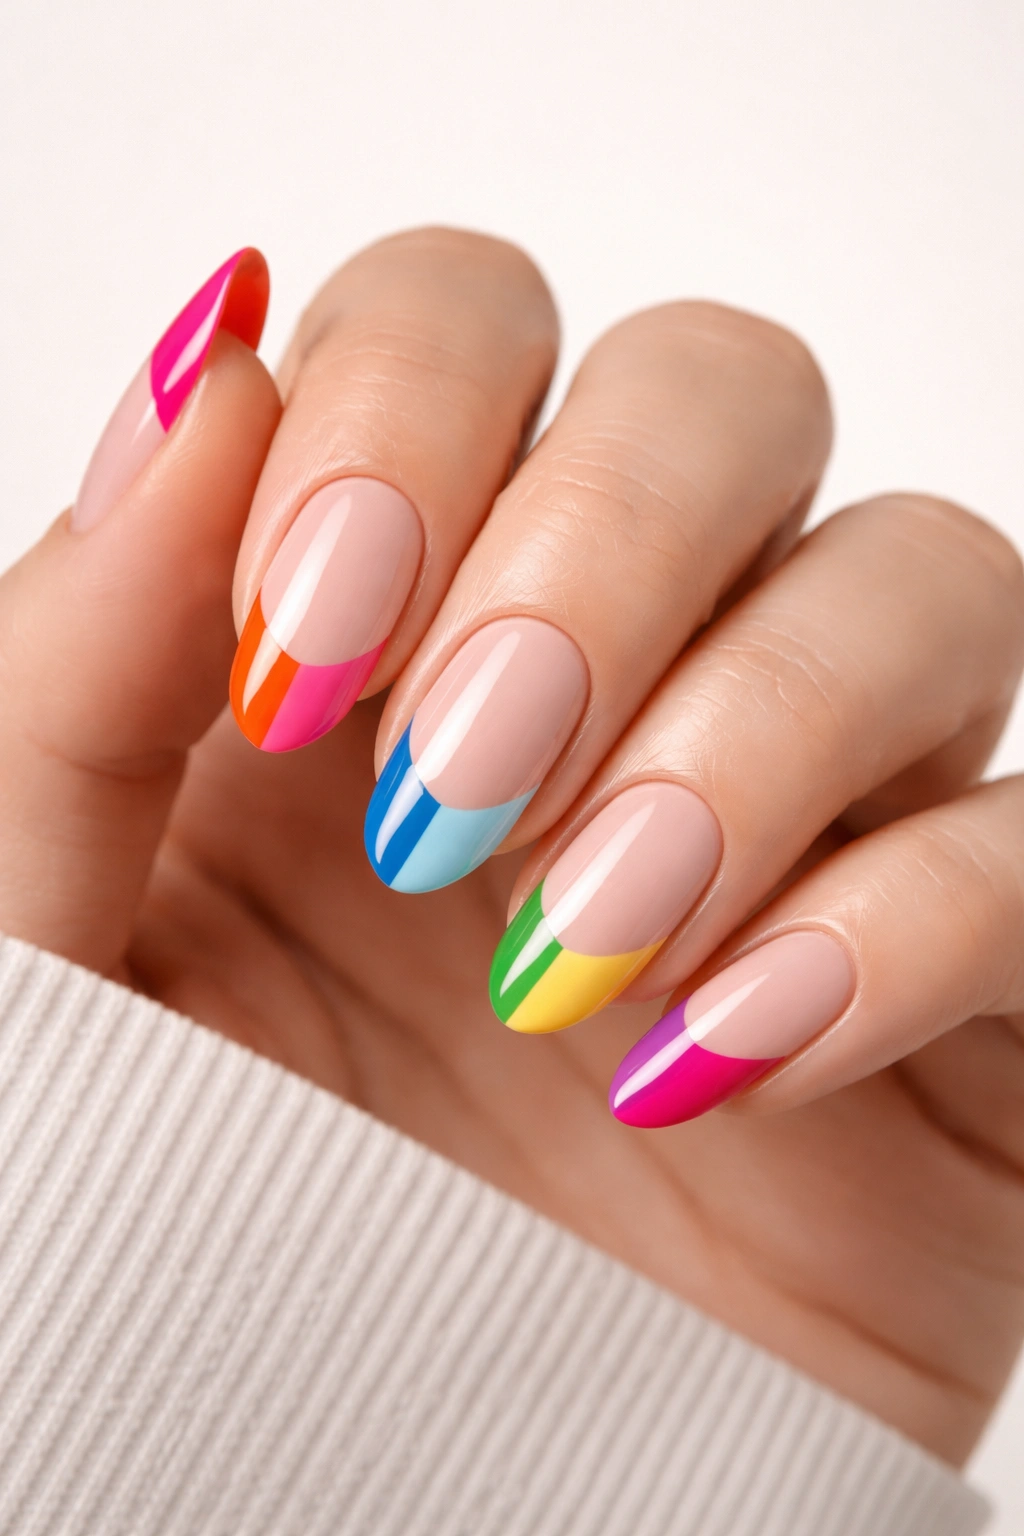
Forget gradual transitions. Color block French tips divide the nail into distinct sections of bold, contrasting colors separated by clean lines. It’s graphic, it’s bold, and it makes a statement.
What Makes It Special
This design borrows from modern art and fashion, bringing a minimalist yet impactful aesthetic to your nails. The blocked sections create visual interest through color relationships rather than intricate patterns. You can go high-contrast with black and white, or explore unexpected pairings like sage green with rust orange.
Color blocking works particularly well when you vary the proportions across your nails. Make some blocks larger, others smaller, or even create asymmetric divisions that differ from finger to finger.
Design Variations
The placement options are endless. Split your tips vertically down the center with two colors, create horizontal bands that stack, or divide diagonally for an angular approach. You can even combine multiple divisions on accent nails while keeping others simple.
- Use tape for sharp, clean divisions
- Choose colors with similar opacity for clean edges
- Add thin metallic strips between blocks
- Vary block sizes across different fingers
This style pairs beautifully with matte top coats for an editorial, high-fashion finish.
5. Splatter Art Tips
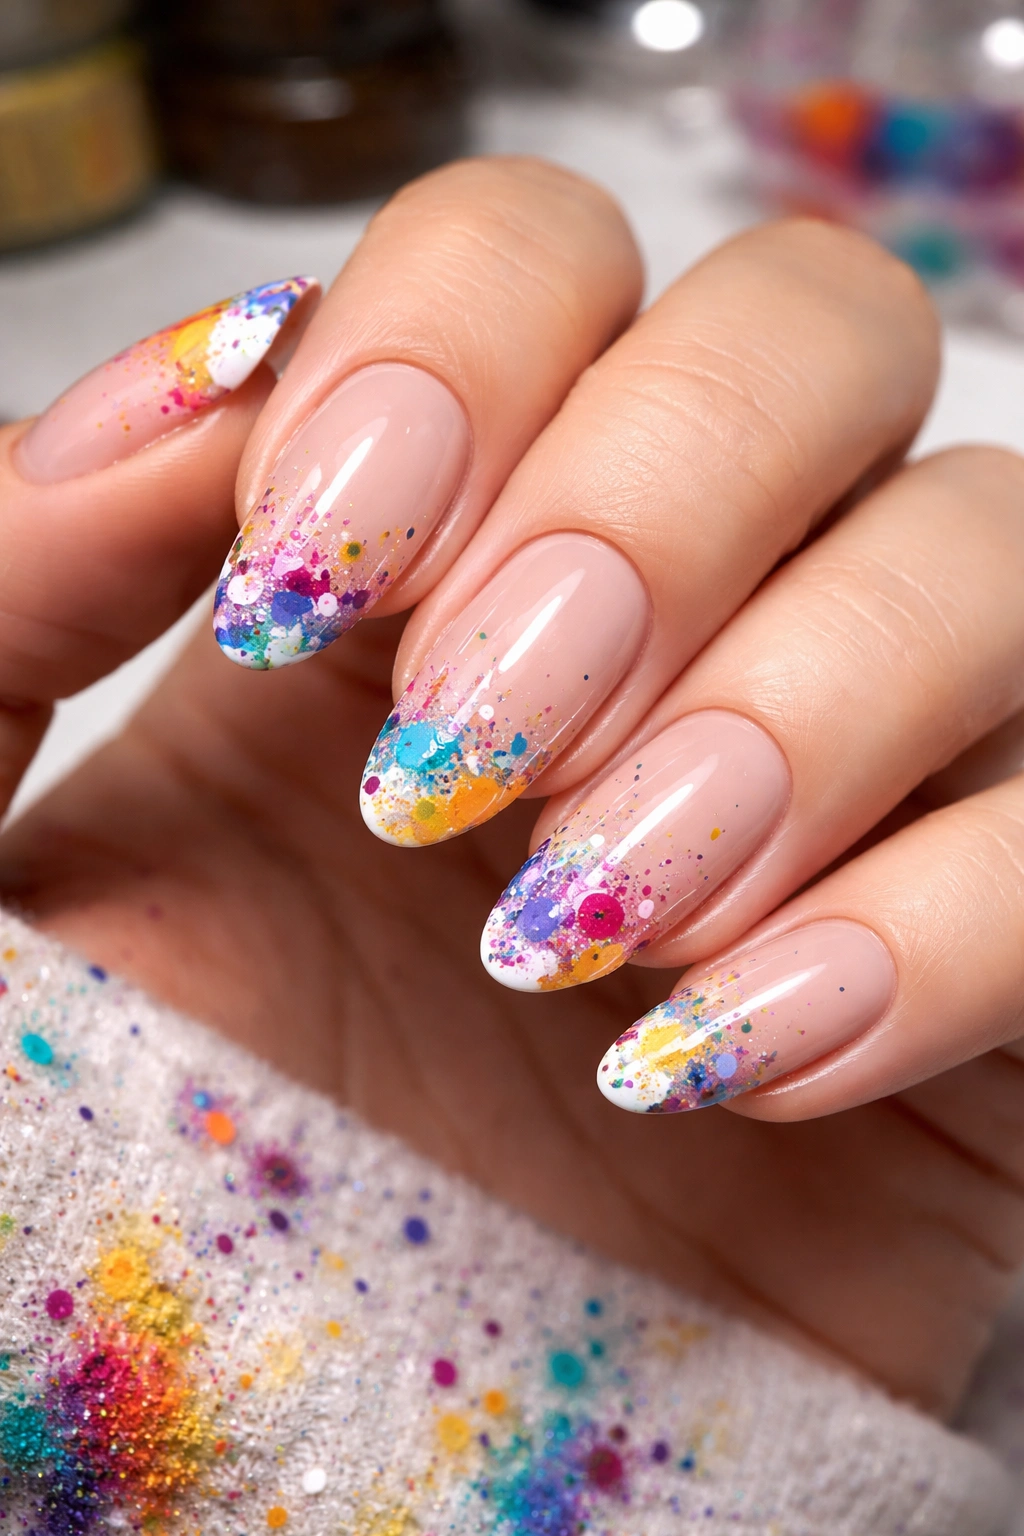
Embrace controlled chaos with splatter art French tips that bring Jackson Pollock vibes to your fingertips. This technique layers tiny dots, drips, and splatters over your tip area for an edgy, artistic look.
Why It’s a Top Pick
Splatter tips capture that cool-girl, doesn’t-try-too-hard aesthetic while actually being quite intentional. The randomness of the splatters means you can’t mess it up—every splatter pattern is meant to be unique. This design works beautifully with both bold neon combinations and sophisticated neutral palettes.
The technique also lets you incorporate multiple colors without the design feeling busy. The splatters blend together visually, creating depth and texture that’s far more interesting than a solid color.
Getting the Splatter Effect
Use a thin brush or even an old toothbrush to flick polish onto your nails. Hold the brush over the tip area and run your finger along the bristles to create fine splatters. Build up layers with different colors for complexity. Make sure to do this over a protected surface—it gets messy.
- Start with your lightest color and layer darker shades
- Seal with top coat to smooth the texture
- Use a peel-off base coat around your nails for easy cleanup
- Combine with solid accent nails to balance the design
Pro tip: Metallic splatters over dark bases create a galaxy-like effect that’s absolutely stunning.
6. Deconstructed French
Take the traditional French manicure and break it apart. Deconstructed French tips feature incomplete lines, floating arcs, and fragmented shapes that suggest the classic look without fully committing to it.
How to Use It
This sophisticated design plays with the concept of negative space and minimalism. Instead of a complete tip line, you might paint just a portion of the arc, or create small gaps in the line, or offset multiple thin lines that don’t quite connect. The result feels modern and intentionally undone.
Deconstructed French works exceptionally well for those who want something interesting but not overwhelming. It’s subtle enough for professional settings while still showing your creative side. The broken elements create visual intrigue that rewards a closer look.
Design Ideas
Try painting just the corners of your tips, leaving the center bare. Or create a double French where one line is complete and the other is broken. You can also offset multiple thin lines in slightly different positions to create a layered, dimensional effect.
- Use fine detail brushes for precision
- Stick to two colors maximum for sophistication
- Vary which part of the line is “missing” across nails
- Add tiny dots where lines break for extra detail
This design is perfect if you’re transitioning from classic French but want to test the abstract waters.
7. Abstract Line Art Tips
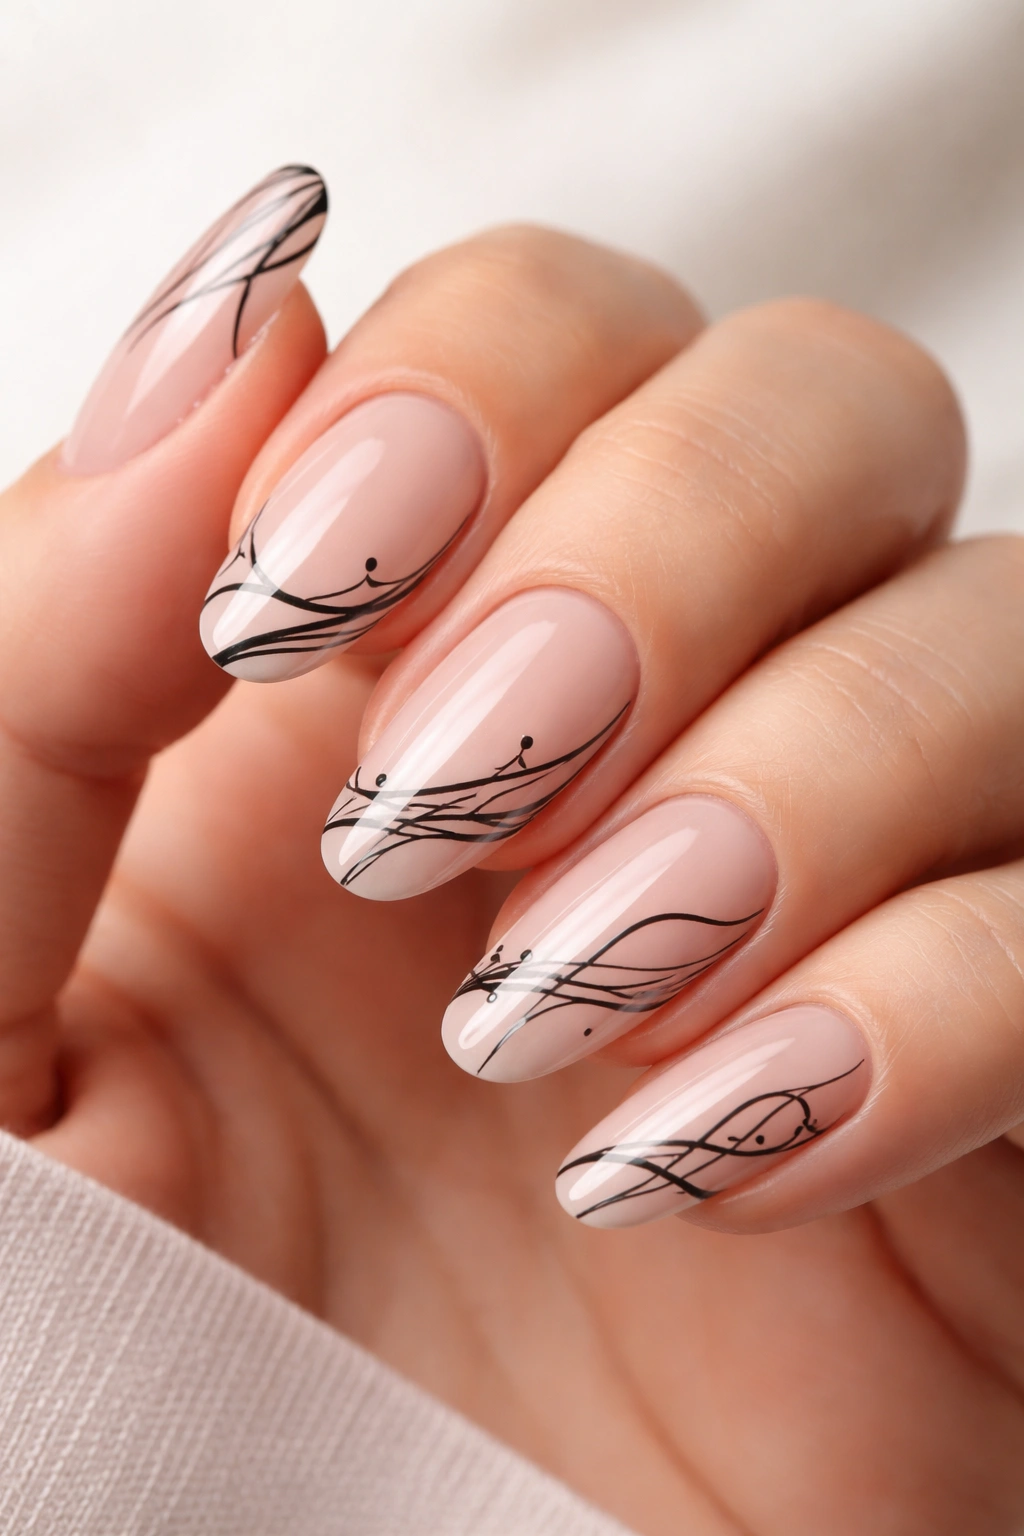
Transform your tips into miniature line drawings with abstract line art that ranges from simple geometric shapes to flowing organic forms. This design channel’s that modern, minimalist aesthetic.
What Sets It Apart
Line art French tips feel artistic without being fussy. The design relies on clean, deliberate strokes that create shapes, faces, or abstract patterns along your tips. You can go architectural with straight lines and angles, or loose and flowing with curves and loops.
The key is keeping the lines intentional but not overly perfect. Slightly wobbly lines actually add to the hand-drawn charm. This style works beautifully in monochrome—black on nude, white on black, or metallic on neutral.
Creating the Look
Use an ultra-thin nail art brush or a striping brush to draw your lines. Work slowly and let each line dry before adding intersecting ones to prevent smudging. Build your design gradually rather than trying to create the entire pattern at once.
- Plan your design loosely but don’t sketch first
- Vary line thickness for visual interest
- Create continuous lines that wrap around the nail edge
- Layer colors for depth
Pro tip: Abstract faces and profile outlines make stunning focal points on one or two accent nails.
8. Brushstroke French
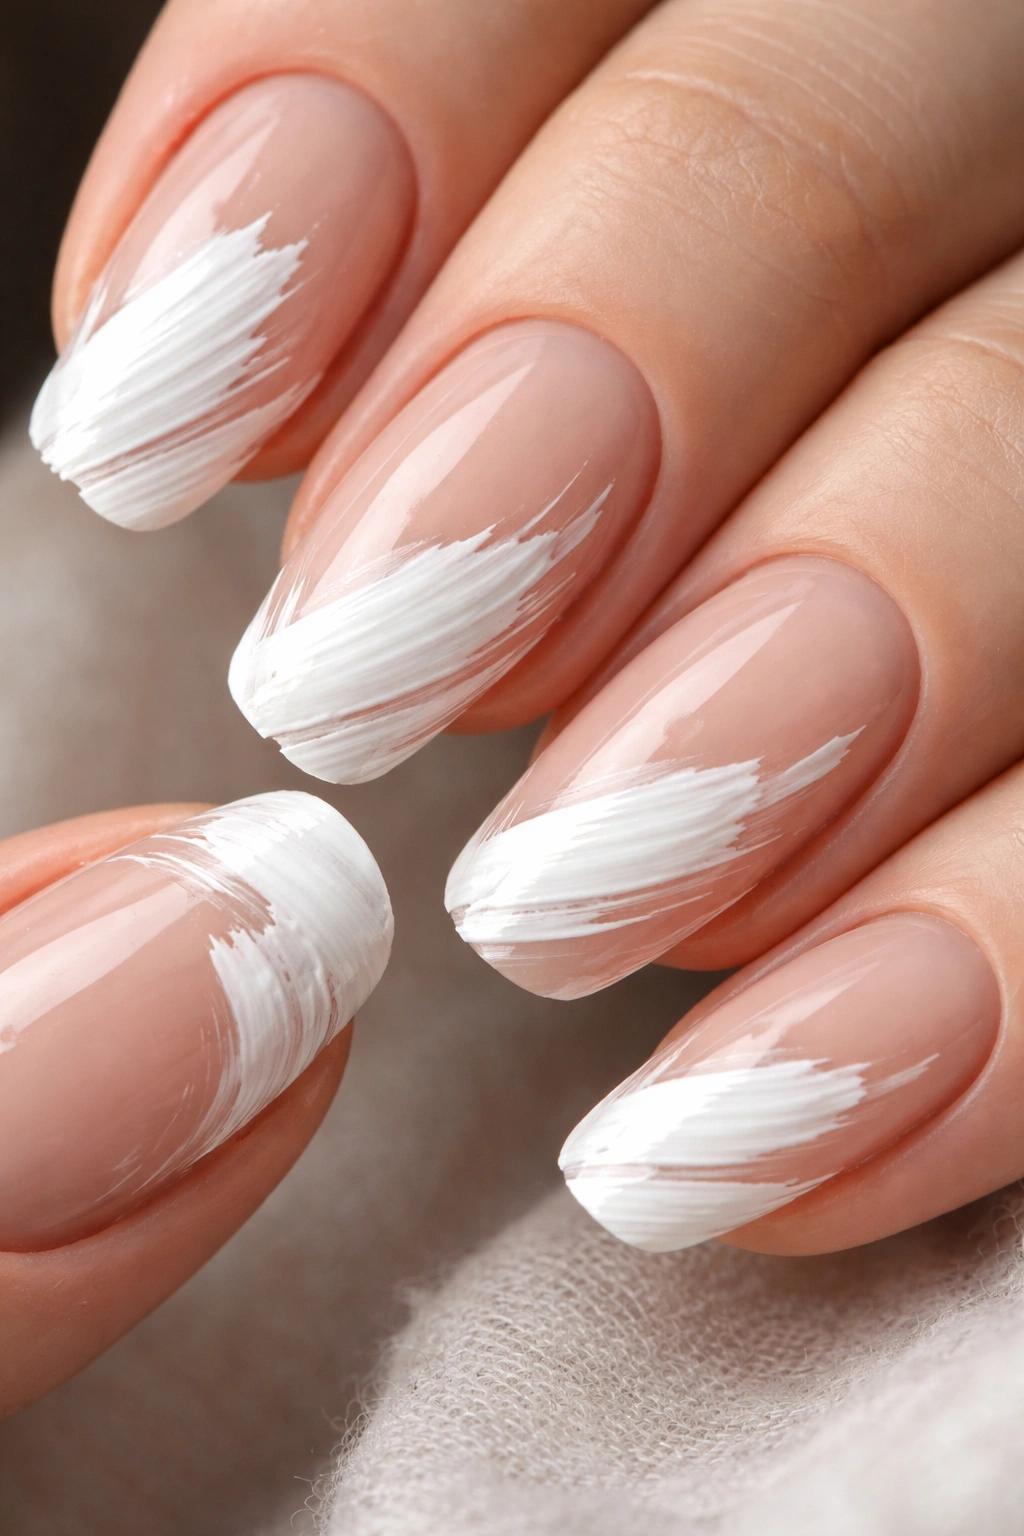
Capture the energy of expressive painting with brushstroke French tips that look like you swept a loaded brush across your nails. This design celebrates visible texture and bold application.
Why Choose Brushstrokes
There’s something undeniably cool about nails that look like art in progress. Visible brushstrokes add texture and movement, creating a design that feels alive and dynamic. The technique works with thick, opaque polishes that hold their shape and show the bristle marks.
This style is particularly forgiving because the “imperfect” application is the look. Streaky? Perfect. Uneven? Even better. The organic nature of brushstrokes means each nail becomes a unique piece.
Application Method
Use a flat nail art brush and load it with polish. Apply it to the tip area in deliberate, visible strokes—don’t go back and smooth it out. The goal is to see the brush marks and create texture. You can use one color or layer multiple shades with visible strokes for complexity.
- Work quickly before polish self-levels
- Vary stroke direction across different nails
- Layer complementary colors for depth
- Use gel polish for more control over texture
Metallic and chrome polishes create especially dramatic brushstroke effects.
9. Negative Space Abstract
Let your natural nail become part of the design with negative space abstract French tips. This approach strategically leaves portions of the nail bare while creating interesting shapes and patterns around the edges.
The Appeal
Negative space designs feel incredibly modern and sophisticated. By incorporating your natural nail, you create contrast and dimension without overwhelming the nail with color. The technique elongates your nails visually and keeps the overall look light and airy despite bold design elements.
This style also tends to grow out more gracefully than fully painted nails, making it practical for those who can’t get to the salon often. The abstract elements draw the eye away from any growth at the cuticle area.
Design Approaches
Create floating shapes along your tips without connecting them to the base, outline abstract forms and leave the centers bare, or paint geometric sections while leaving strategic gaps. The key is balancing painted and bare areas so neither overwhelms the other.
- Keep natural nails well-groomed and buffed
- Use sheer tints instead of full opacity for softness
- Add thin lines connecting negative spaces
- Combine with chrome accents for luxury
Pro tip: Negative space designs photograph beautifully and look especially striking on longer nail beds.
10. Organic Shape Tips
Ditch straight lines entirely and embrace freeform, organic shapes that mimic nature—think clouds, amoebas, or abstract puddles. This design is all about soft edges and flowing forms.
What Makes It Work
Organic shapes bring an unexpected softness to French tips while still feeling contemporary and artistic. The irregular, flowing forms create visual interest without the harshness of geometric designs. This approach works beautifully with earthy tones and natural color palettes, though it translates well to any color scheme.
The beauty of organic shapes is their versatility. You can make them subtle with tonal variations, or bold with high-contrast colors. Layer multiple organic shapes in different colors for complexity, or keep it simple with one flowing form per nail.
How to Create Organic Forms
Work freehand with a detail brush, using smooth, continuous motions to create your shapes. Don’t aim for symmetry—let each shape develop naturally. Think of them as abstract representations of natural elements rather than trying to draw specific objects.
- Use a dotting tool to soften hard edges
- Layer sheer colors for watercolor effects
- Vary shape sizes across your nails
- Add subtle shimmer or chrome for dimension
This design pairs beautifully with pressed flowers or botanical embellishments for a nature-inspired manicure.
Wrapping Up
Abstract French tip nails prove that breaking the rules can lead to stunning results. Whether you’re drawn to bold geometric patterns or soft organic shapes, these designs offer a fresh alternative to traditional French manicures without losing that polished, put-together aesthetic.
The best part? These styles adapt to your skill level. You can keep things minimal with simple line variations, or go all-in with complex, multi-layered designs. The abstract approach celebrates individuality—your interpretation will be uniquely yours, and that’s exactly what makes it special.
Don’t be afraid to experiment and make mistakes. Abstract nail art thrives on imperfection and spontaneity. Mix techniques, try unexpected color combinations, and trust your instincts. Your nails are a canvas, and with abstract French tips, there’s no wrong way to create.
Grab your brushes, pick your colors, and start playing. The only limit is your imagination.
