

Matte gold nails bring something different to the table. While glossy metallics scream for attention, a matte gold finish whispers luxury with a soft, velvety touch that feels both modern and timeless.
The beauty of matte gold lies in its versatility. It’s not as in-your-face as chrome, but it’s far from boring. That smooth, satin-like texture catches light differently—creating depth and dimension that shifts as you move your hands. Whether you’re dressing up for a wedding or just want your nails to feel special during everyday errands, matte gold delivers that effortless elegance.
Here’s the thing: achieving that perfect matte gold finish isn’t as complicated as you might think. You can go full coverage for maximum drama, add subtle accents for understated chic, or mix textures for something truly unique. The matte element softens even the boldest gold shades, making them wearable for any setting—from the office to a night out.
We’ve rounded up ten stunning matte gold nail ideas that showcase the full range of what this finish can do. Each design offers a different take on the trend, so you’re bound to find something that matches your style.
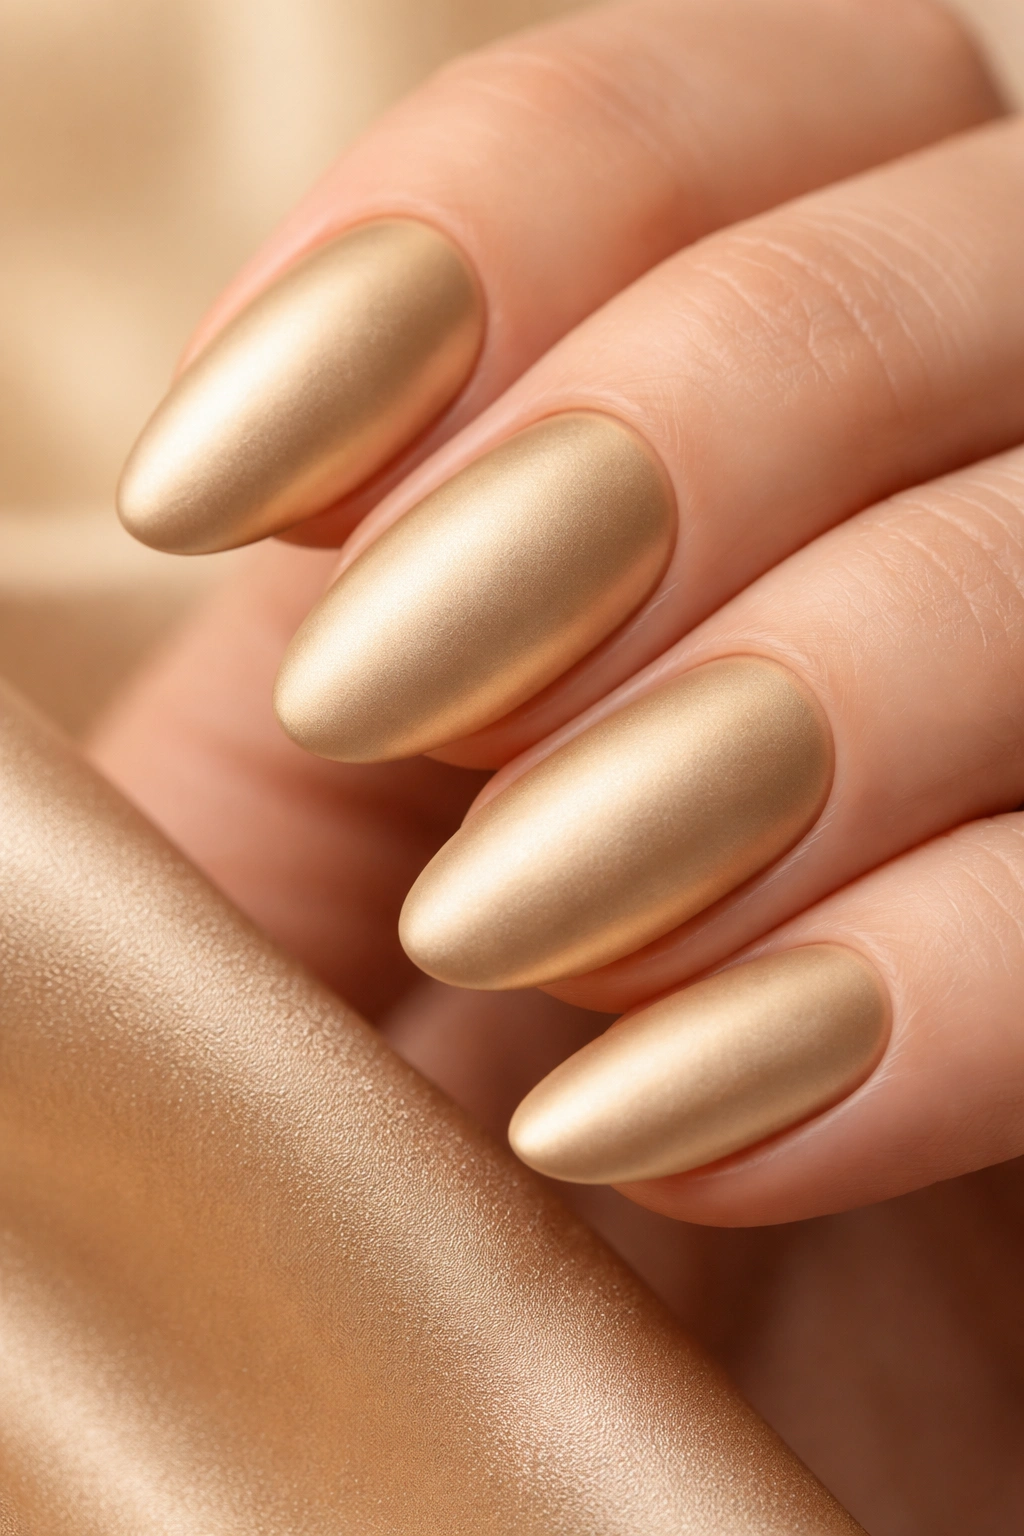
1. Full Matte Gold Coverage
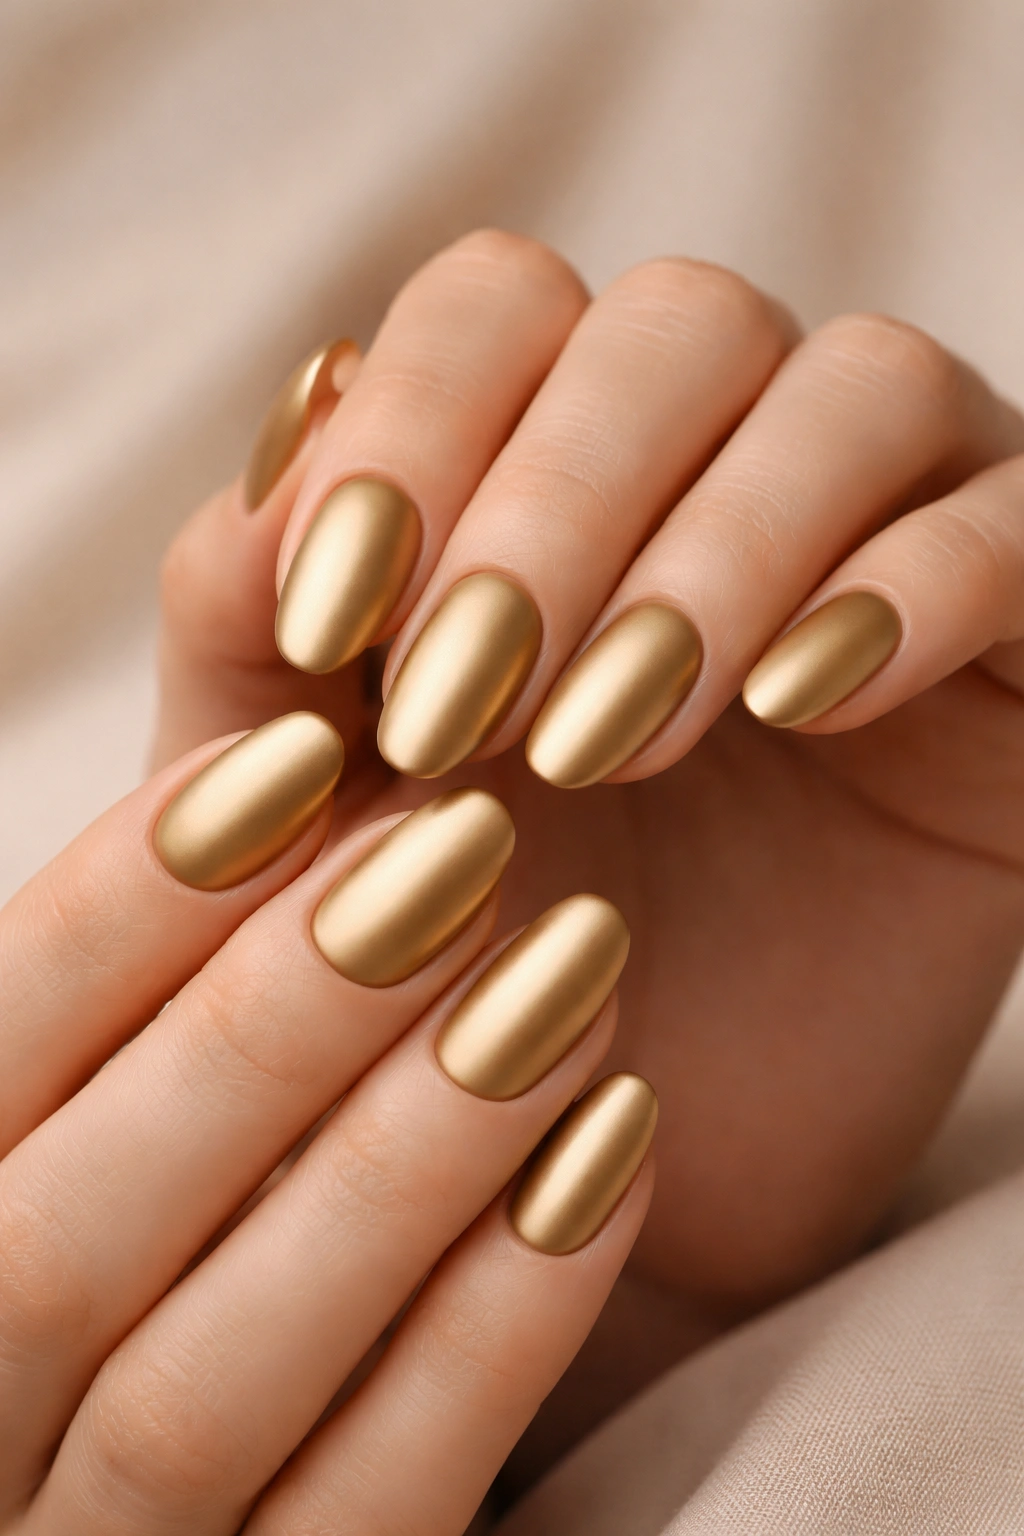
Sometimes you just need to go all in. Full coverage matte gold nails make a statement without being obnoxiously shiny—they’re bold but balanced.
This look works on any nail shape, though almond and coffin shapes really let the color stretch out and shine (well, not literally shine, but you get it). The matte finish gives the gold a soft, almost powdery appearance that feels expensive and refined.
Why It Works
Full matte gold creates visual impact through color saturation rather than reflective shine. Your nails become the accessory, complementing gold jewelry beautifully without competing for attention.
The velvety texture feels surprisingly sophisticated. Unlike glossy gold that can sometimes read as flashy, matte gold maintains elegance while still delivering that metallic richness. It’s particularly stunning on deeper gold shades that lean toward bronze or antique gold.
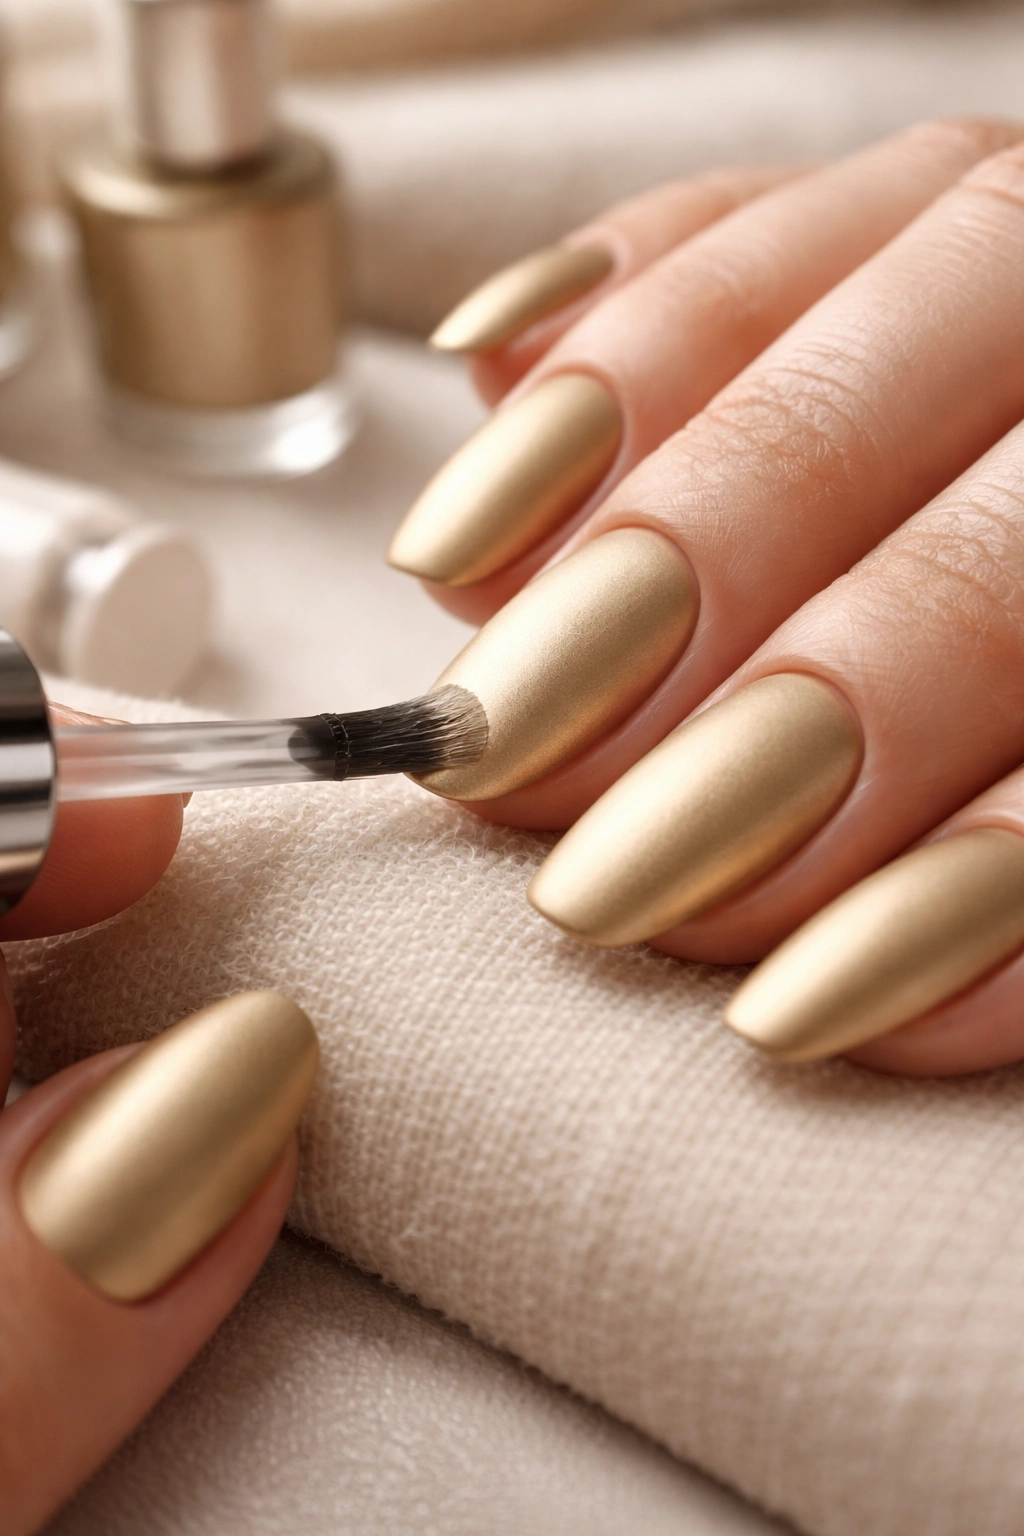
Application is straightforward too. Paint two coats of your favorite gold polish, then seal everything with a matte top coat. The transformation happens instantly—that wet shine disappears, leaving behind a smooth, even finish.
Care Tips
- Avoid oil-based products near your nails—they can create shiny spots on the matte surface
- Wipe your nails with a lint-free cloth if they start looking smudged or streaky
- Reapply matte top coat every few days to maintain that fresh-from-the-salon texture
Pro tip: Black base coat underneath your gold intensifies the color payoff and prevents any transparent patches.
2. Matte Gold French Tips
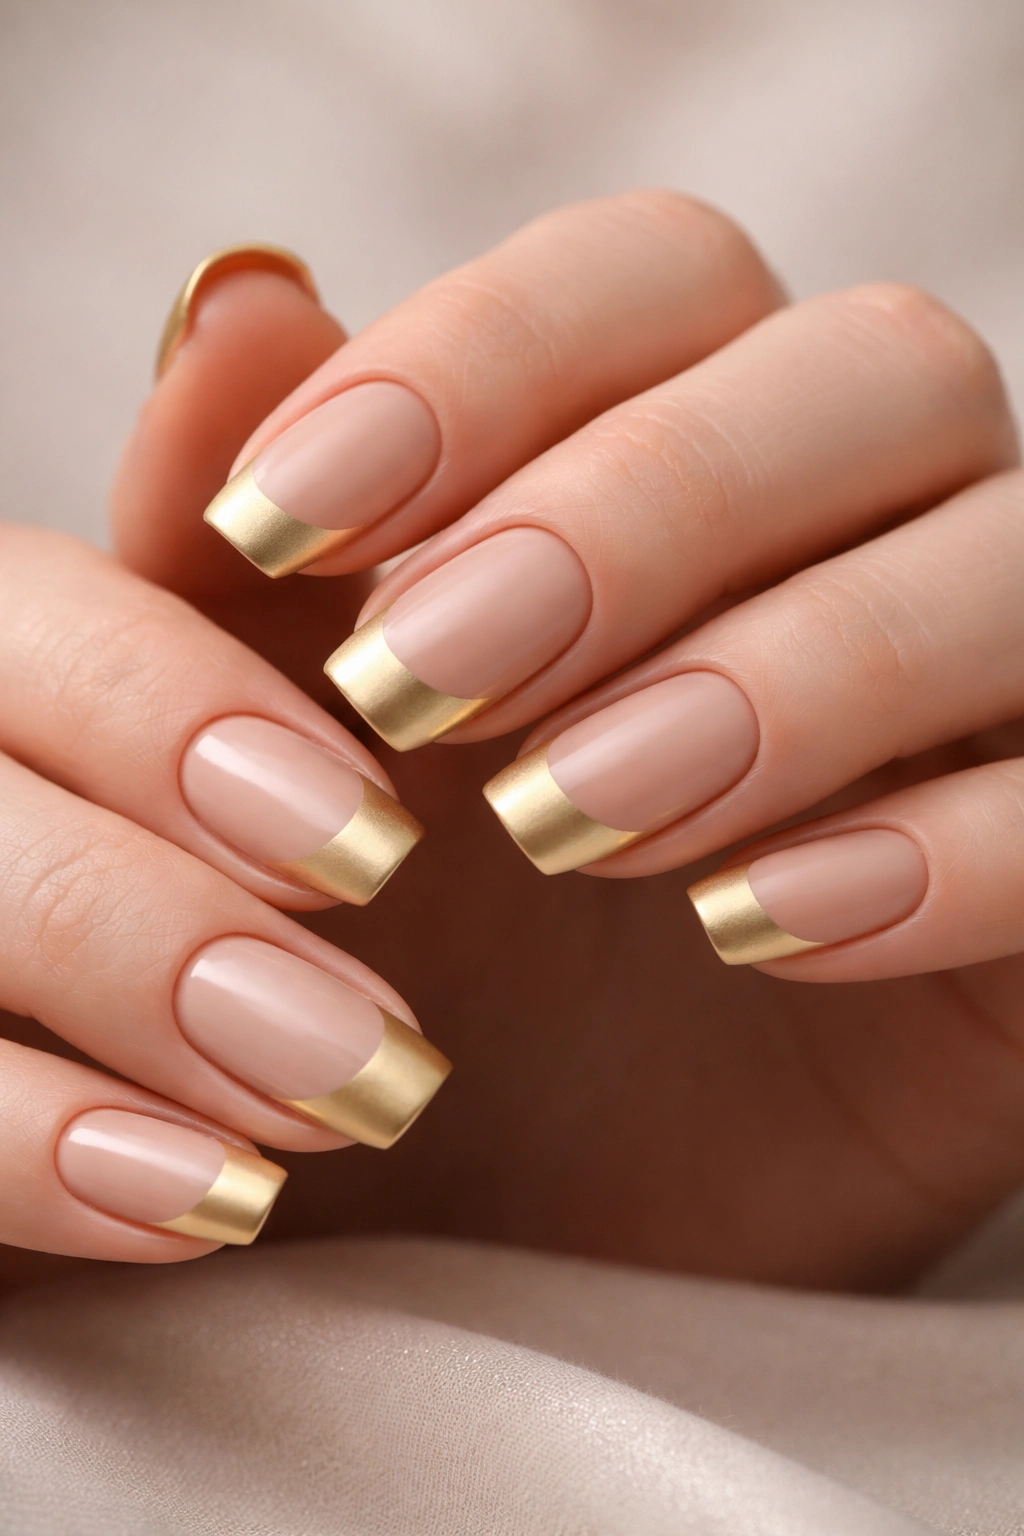
The French manicure gets a luxe upgrade when you swap white tips for matte gold. It’s classic shape, modern finish.
This design gives you the best of both worlds—the timeless elegance of French tips with contemporary metallic flair. The matte element keeps it from feeling too blingy, making it appropriate for practically any occasion.
What Makes It Special
French tips in matte gold frame your nails beautifully while keeping most of the nail natural or nude. The contrast between the base and tips creates visual interest without overwhelming your hands.
You can adjust the thickness of your gold tips based on preference. Thin, delicate lines feel minimalist and refined. Thicker tips make more of a statement. Both approaches work—it just depends on your mood.
The matte finish actually makes application easier to control. You don’t have to worry about brush strokes showing through the way they sometimes do with glossy polish. Any slight imperfections blend into that velvety texture.
Application Method
Start with a nude or clear base that matches your natural nail tone. Apply base coat, then your neutral color if using one. Once dry, carefully paint the tips with metallic gold polish using a thin brush.
Wait for the gold to dry completely—this is crucial. Then apply your matte top coat over the entire nail, including both the nude base and gold tips. This unifies the finish and gives everything that soft, sophisticated look.
Quick tip: Nail guides or striping tape help create those crisp, even lines if your freehand skills aren’t quite there yet.
3. Gold Chrome Base with Matte Top Coat
Want the intensity of chrome but with a softer finish? This technique gives you exactly that—rich, metallic depth wrapped in matte texture.
Chrome powder or chrome polish creates an incredibly pigmented gold base. When you apply matte top coat over it, the mirror finish disappears but the intensity remains. You end up with gold that looks almost solid, like brushed metal jewelry.
Key Benefits
This approach delivers the deepest, most saturated gold color possible. Chrome formulas are already highly pigmented, and the matte top coat preserves that richness while eliminating the shine.
The dimensional quality is unmatched. Light still plays across your nails, but in a subtle way that creates gentle shadows and highlights. Your nails look three-dimensional rather than flat.
It’s also surprisingly durable. Chrome formulas typically adhere well and last longer than standard polish. Add a good matte top coat, and you’ve got a manicure that can handle daily wear without chipping.
How to Get the Look
If using chrome powder, start with a black gel base coat and cure it. While slightly tacky, rub chrome powder onto the nail with a silicone tool or sponge. Buff gently until you achieve full coverage.
For chrome polish, apply two coats over your base, allowing each to dry thoroughly. The color should be completely opaque before moving forward.
Finish with matte top coat applied in thin, even layers. Don’t flood the nail—you want just enough product to transform the finish without disturbing the chrome underneath.
Keep in mind: Some matte top coats work better over chrome than others. Test on one nail first to make sure you like the result.
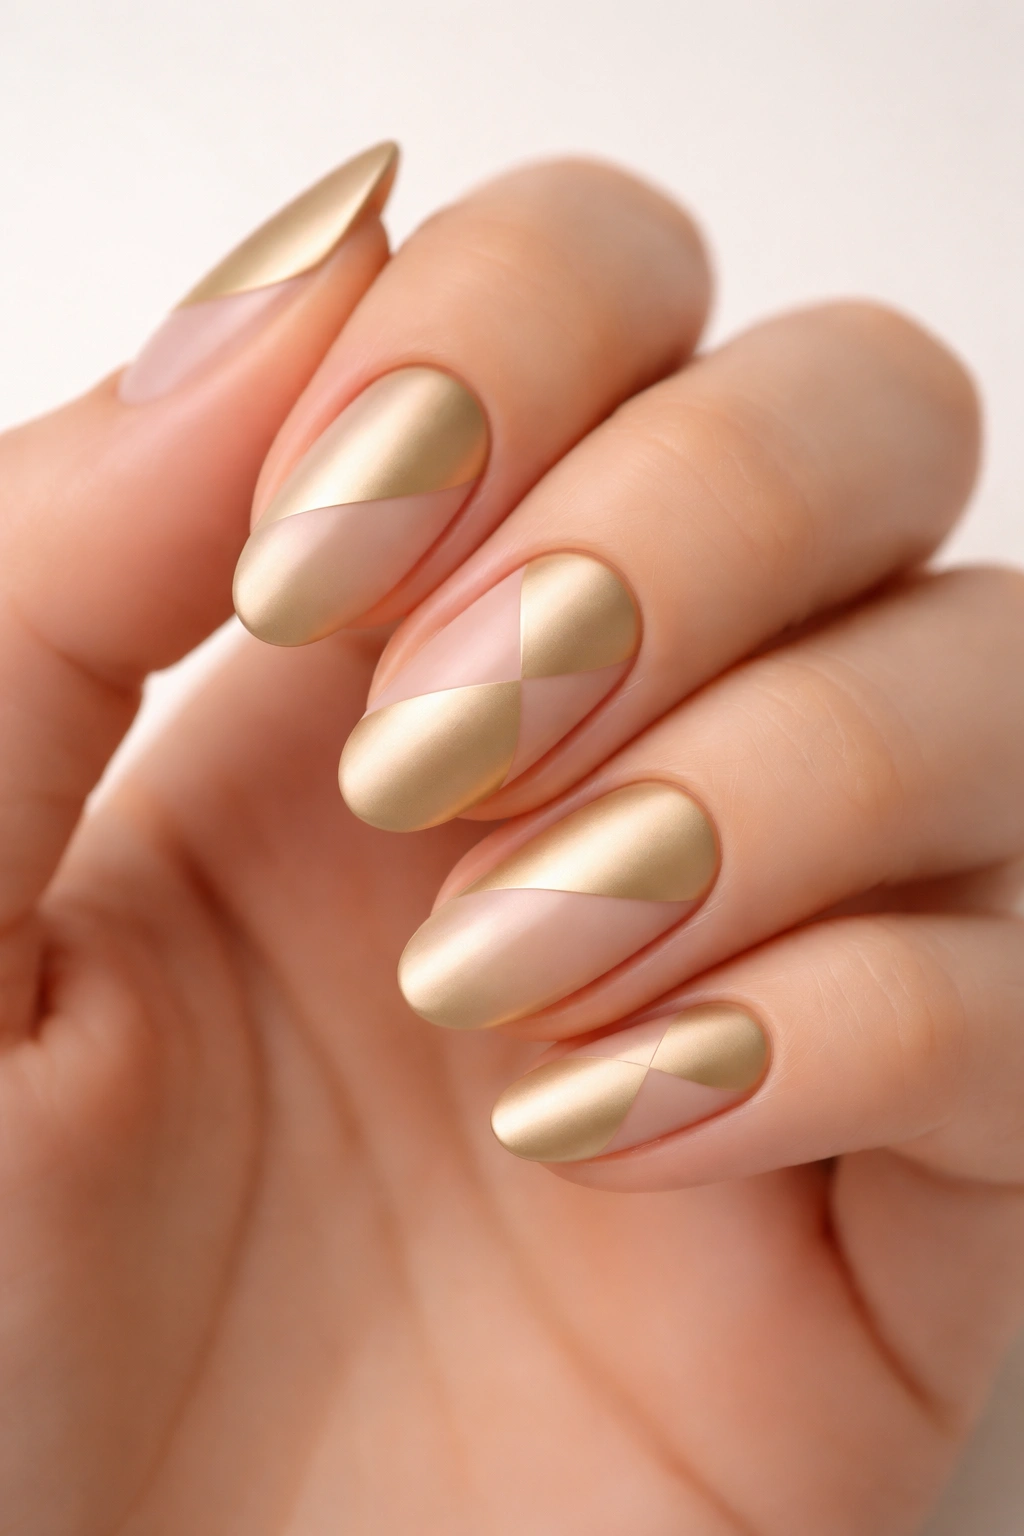
4. Matte Gold with Glossy Accents
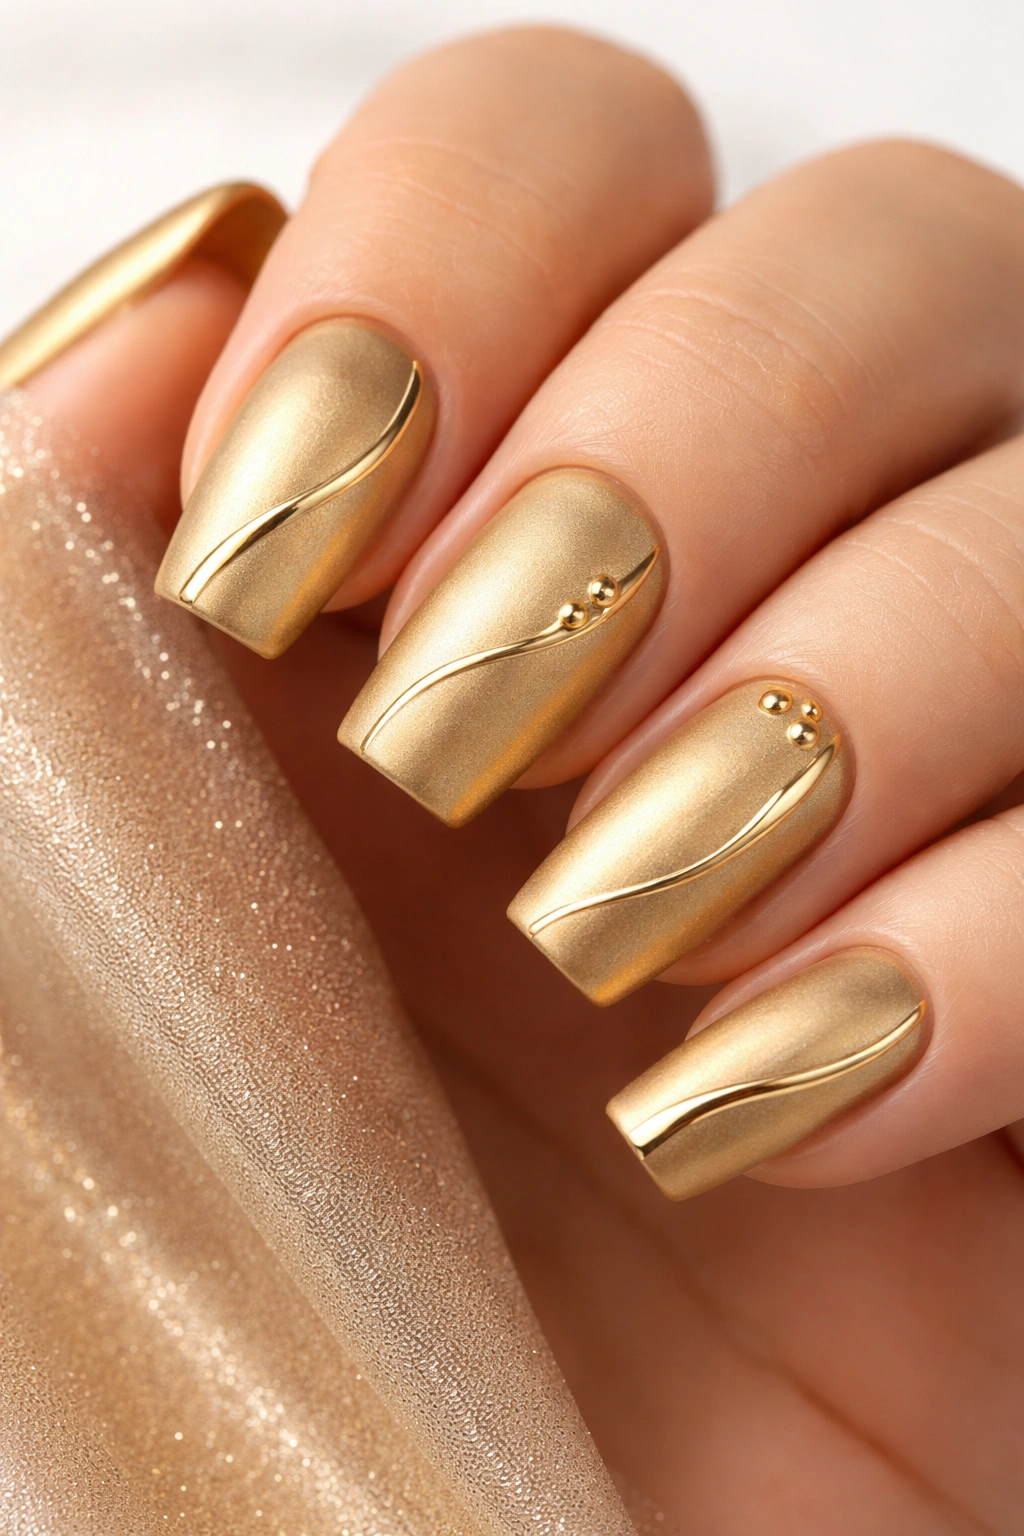
Mixing finishes creates texture contrast that’s visually striking. Matte gold as your base with strategic glossy accents hits that sweet spot between interesting and elegant.
This design plays with your eye’s expectations. The soft matte background makes any glossy elements—dots, lines, or small patterns—pop dramatically. It’s dimension without added bulk or embellishments.
Why It Stands Out
Contrasting finishes on the same nail add sophistication without requiring complicated nail art skills. You’re working with one color but creating visual interest through texture rather than multiple shades.
The glossy accents catch light while the matte base absorbs it. This creates a balanced look that’s eye-catching without being overwhelming. Your nails have movement and depth that solid finishes simply can’t achieve.
You also get complete creative control. Keep glossy accents minimal for subtle elegance, or go bold with larger glossy patterns for something more dramatic.
Design Ideas to Try
- Small glossy gold dots scattered across matte gold nails create a playful confetti effect
- Glossy gold lines—horizontal, vertical, or diagonal—add geometric structure
- A single glossy accent nail among four matte ones provides a focal point
- Glossy gold tips over a matte gold base give you reverse French vibes
Apply your gold base color first, then add your matte top coat everywhere. Once that’s dry, carefully paint your glossy accents using regular gold polish or clear glossy top coat in your desired pattern.
5. Nude Base with Matte Gold Details
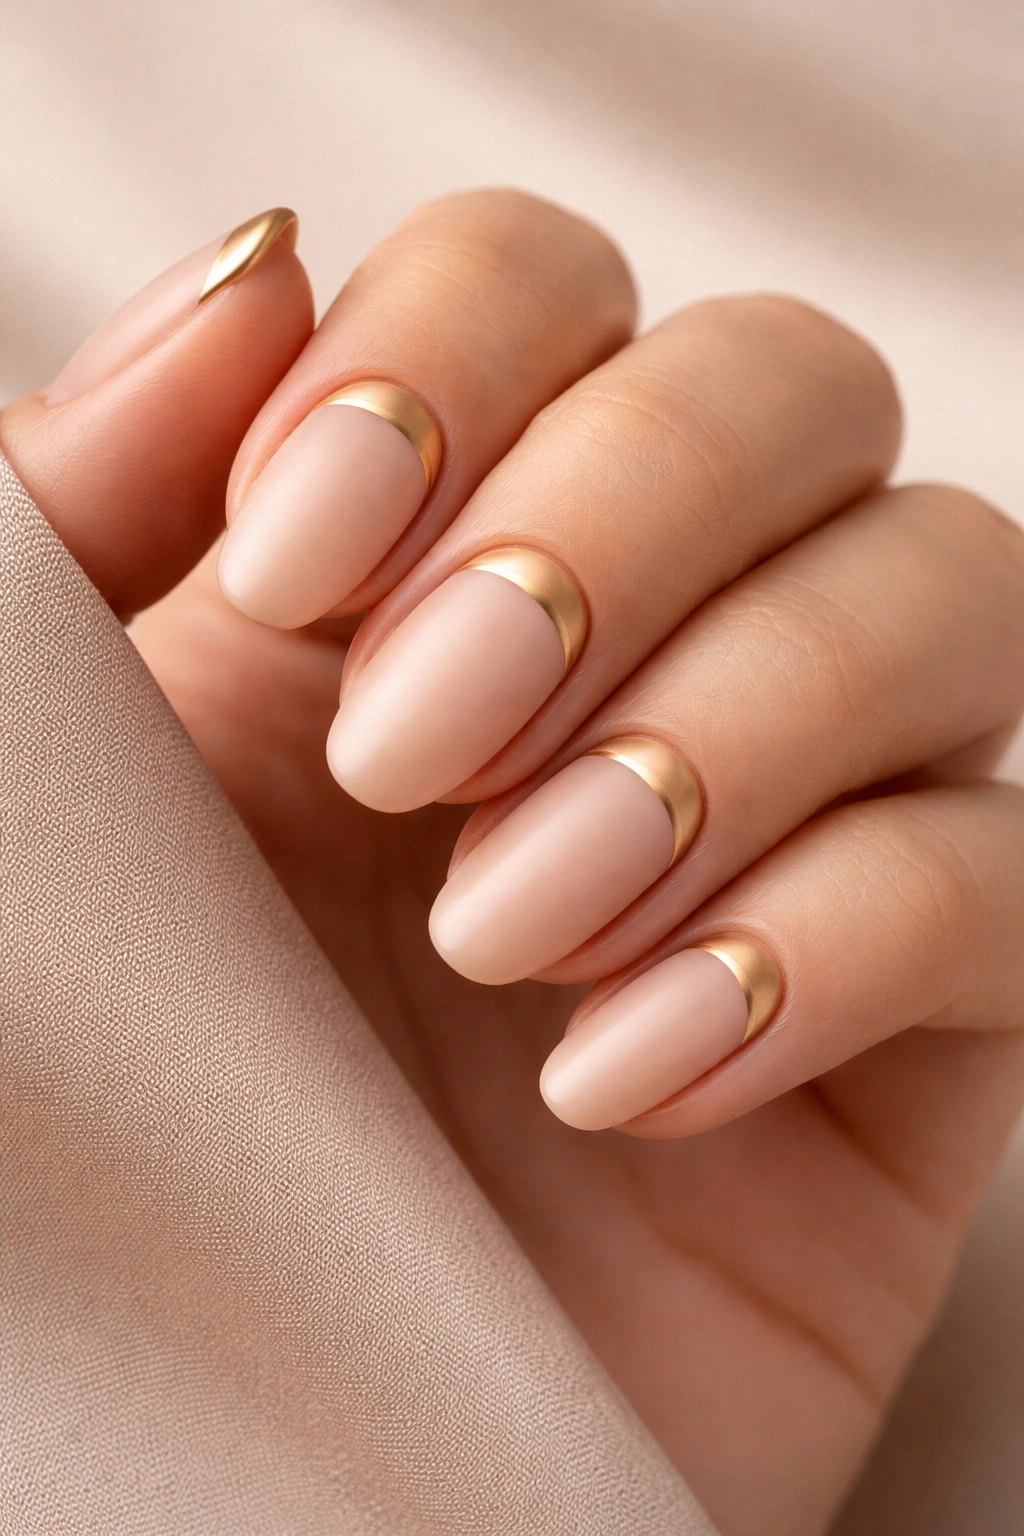
If full gold feels like too much, this softer approach might be your perfect match. A neutral nude base with selective matte gold details feels refined and wearable.
This design works beautifully for those who want gold in their manicure but need something office-appropriate or simply more understated. The nude base keeps things grounded while the gold provides just enough interest.
What Makes It Work
Nude bases are universally flattering and go with absolutely everything. Adding matte gold details gives your neutral manicure personality without compromising its versatility.
The matte finish on the gold keeps the metallic elements soft and integrated rather than jarring. You get elegance and sophistication without any of the “look at me” energy that glossy metallics can sometimes bring.
This approach also allows you to experiment with gold without committing to full coverage. If you’re testing whether you like gold nails, this is a low-risk way to dip your toes in.
Design Variations
Thin matte gold lines along the cuticle create a delicate frame effect. Paint your nude base, apply matte top coat, then carefully brush a thin gold line near your cuticle area. Seal with another layer of matte top coat.
Matte gold half-moons at the nail base give you that reverse French look with a twist. The curved shape feels feminine and artistic.
Small matte gold geometric shapes—triangles, squares, or abstract patterns—add modern flair. Use striping tape to section off shapes before painting with gold.
Single matte gold accent nails (typically the ring finger) provide just a hint of metallic without overwhelming the neutral palette.
6. Black and Matte Gold Combination
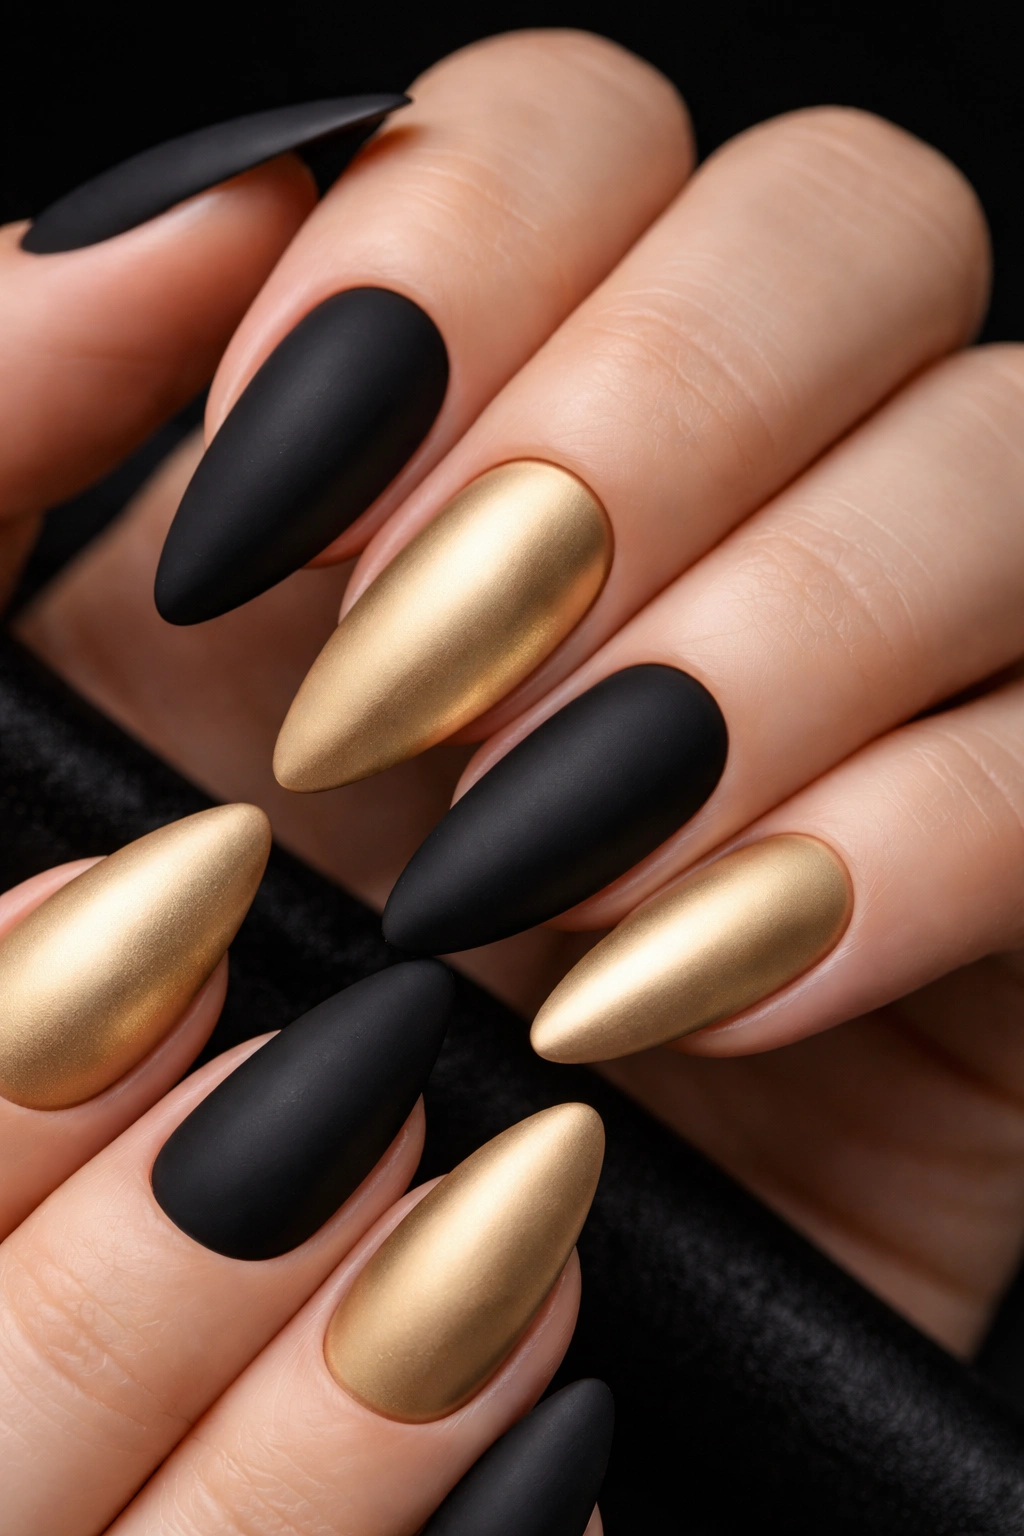
Black and gold is a classic pairing, and the matte finish makes it feel less formal and more fashion-forward. This high-contrast combo works for basically any vibe—edgy, elegant, or somewhere in between.
The depth of black against the warmth of matte gold creates striking visual impact. Whether you alternate colors, create patterns, or use gold as accent details, this pairing never disappoints.
Why This Combo Wins
Black and matte gold together read as expensive and intentional. The color combination has been associated with luxury for ages, but the matte element gives it a contemporary twist that feels less traditional.
The contrast makes both colors appear more vibrant. Black looks deeper, richer. Gold looks warmer and more dimensional. They enhance each other in a way that makes the overall effect greater than the sum of its parts.
Versatility is another major plus. This color combo transitions seamlessly from day to night, casual to formal, season to season. It’s truly a year-round option.
Ways to Wear It
Alternating nails in matte black and matte gold create a bold checkerboard effect across your hands. Simple but impactful.
Black base with matte gold details—stripes, dots, or abstract patterns—keeps the look grounded while adding interest. The black dominates, with gold providing carefully placed accents.
Gold base with black geometric shapes does the opposite, letting the gold shine while black adds structure and definition.
Half-and-half designs split each nail between black and gold, either vertically, horizontally, or diagonally. Finish everything with matte top coat to unify the textures.
7. Matte Gold Glitter Gradient
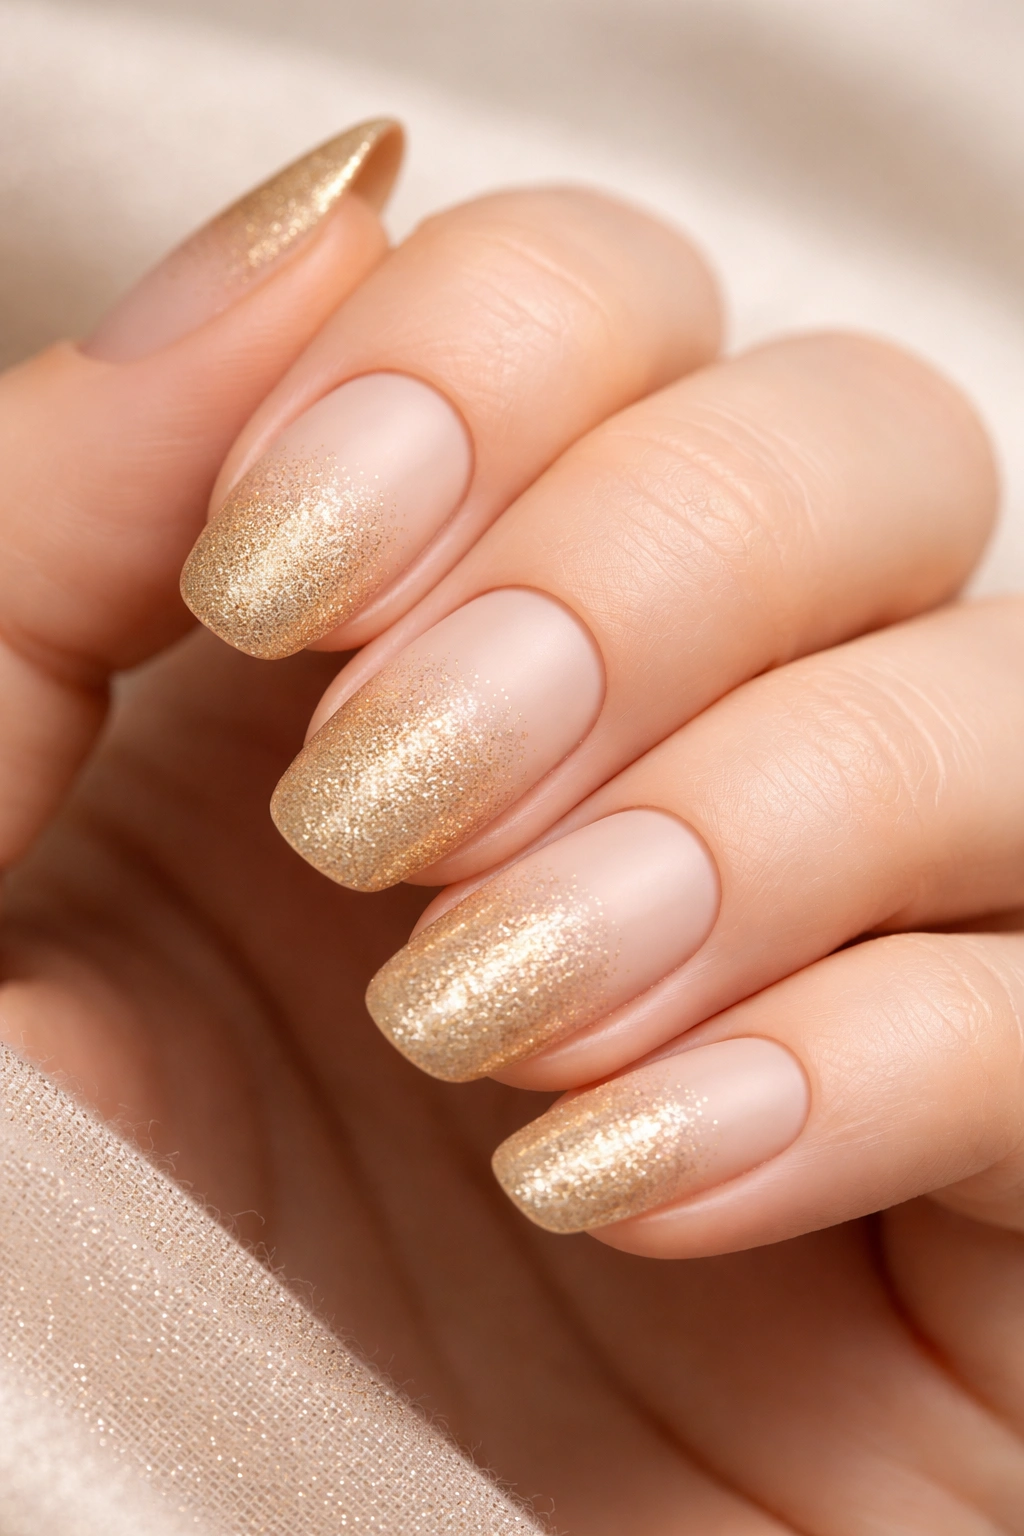
Glitter and matte might seem contradictory, but hear us out. A matte top coat over gold glitter creates a softened sparkle that’s absolutely stunning—kind of like frosted starlight.
The matte finish doesn’t eliminate the glitter entirely; it just tones it down. Individual sparkle particles still catch light, but in a diffused, gentle way rather than an intense disco-ball effect.
How It’s Different
Standard gold glitter can sometimes feel too loud or juvenile. The matte treatment sophisticates it instantly. You keep the dimensional sparkle but lose the aggressive shine, resulting in something that feels more grown-up and refined.
The gradient application adds another layer of visual interest. Concentrating glitter at the tips and fading it toward the cuticle creates movement and depth. Your nails have dimension without looking busy.
This technique also camouflages minor application imperfections. The matte finish blends everything together, so you don’t need perfect precision to achieve professional-looking results.
Application Guide
Start with a nude or clear base coat. Using a makeup sponge, dab gold glitter polish onto the nail tips. Build up the concentration gradually, dabbing more product toward the tips and less toward the cuticle.
Work quickly while the glitter is still wet, using a clean damp sponge to blend and soften harsh lines. You want a smooth fade rather than an obvious demarcation line.
Once the glitter is completely dry—and we mean completely, give it extra time—apply your matte top coat. Use thin layers and avoid going back over areas you’ve already coated, as this can disturb the glitter underneath.
Fair warning: Glitter particles may settle slightly under the matte coat, creating textured spots. Some people love this dimensional effect; others prefer perfectly smooth nails.
8. Matte Gold Foil Accents
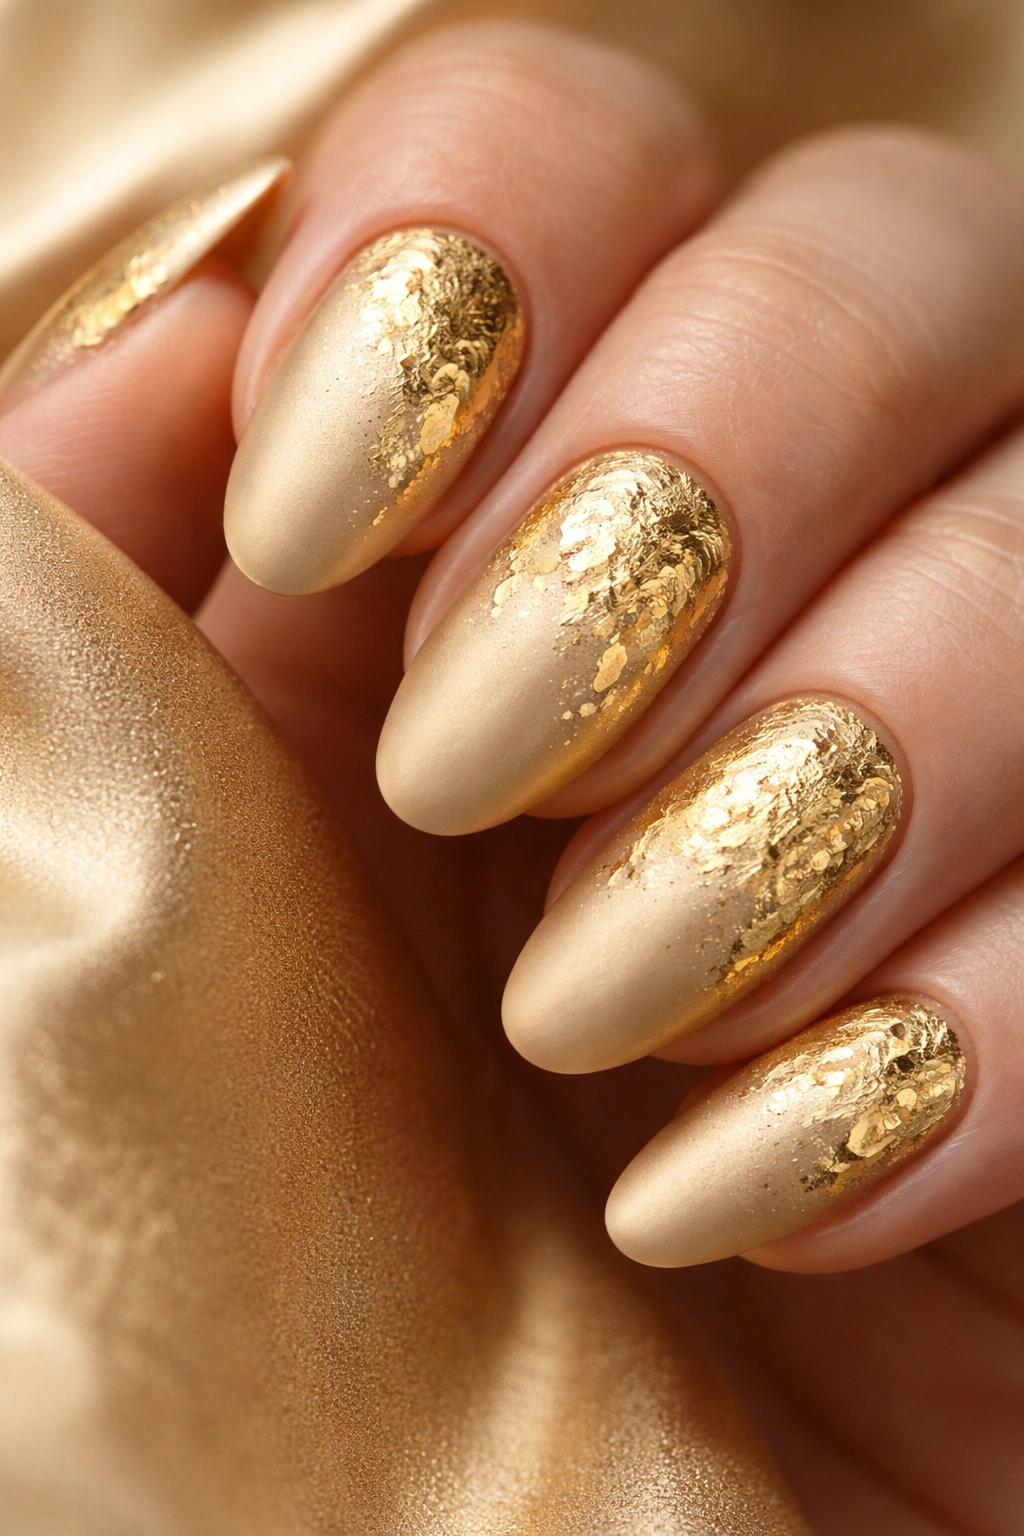
Gold foil pieces add an artistic, handcrafted quality to matte gold nails. The irregular shapes and placement create a look that feels custom and intentional rather than mass-produced.
Foil application gives you complete creative freedom. Scatter small pieces randomly for abstract appeal, or arrange them deliberately for more structured designs. Either way, the matte finish integrates everything beautifully.
What Makes It Special
Real gold foil (or gold leaf) has texture and dimension that polish alone can’t replicate. The torn edges and layered pieces create genuine depth on your nails.
When sealed under matte top coat, foil takes on an almost painted quality. It looks less like metallic decoration and more like brushstrokes of gold incorporated into the nail design.
The organic, imperfect nature of foil application means no two manicures look exactly the same. Your nails become tiny, unique art pieces.
Step-by-Step Process
Paint your base color—nude, black, white, or even a different shade of gold all work beautifully. Allow it to dry completely, then apply matte top coat. Let that dry as well.
Using tweezers, pick up small pieces of gold foil or gold leaf. Apply a tiny dot of nail glue or clear polish to your nail where you want the foil to sit, then gently press the foil piece onto the tacky spot.
Continue adding foil pieces in your desired pattern. You can overlap them slightly for more coverage or space them out for a minimalist effect.
Seal everything with another layer of matte top coat, making sure to fully cover all foil pieces. Press down gently as you apply to ensure good adhesion and eliminate any lifted edges.
Helpful hint: Torn foil edges blend more naturally than clean-cut pieces, creating a softer, more artistic finish.
9. Matte Gold with Negative Space
Negative space designs let your natural nail peek through strategic openings. Combined with matte gold, this technique creates modern, geometric looks that feel both minimal and impactful.
The matte finish plays particularly well with negative space because it doesn’t create harsh contrasts. The soft gold and your natural nail exist in harmony, with the exposed areas feeling intentional rather than unfinished.
Key Benefits
Negative space makes bold colors like gold feel more wearable and less overwhelming. You get the metallic element without full coverage, which can be easier to incorporate into everyday life.
These designs typically last longer because you’re not coating the entire nail. Less polish means fewer opportunities for chipping, especially along the edges where chips most commonly occur.
The geometric shapes create visual interest that draws attention without requiring intricate artwork. Clean lines and thoughtful placement do all the heavy lifting.
Design Ideas That Work
Curved cutouts near the cuticle create elegant arches that frame your natural nail. The matte gold surrounds these spaces, making the negative areas feel like part of the design rather than empty spots.
Diagonal lines split the nail between matte gold and bare nail, typically running from one corner to the opposite edge. This angled approach feels dynamic and modern.
Vertical panels place matte gold on the outer edges while leaving the center section clear. This creates a slimming effect that’s particularly flattering on wider nail beds.
Abstract geometric shapes—triangles, half-moons, or irregular patterns—combine matte gold with negative space in unexpected ways for artistic, fashion-forward results.
Use nail tape or vinyl guides to section off areas before painting with gold. Remove the guides while polish is still slightly wet for the cleanest lines.
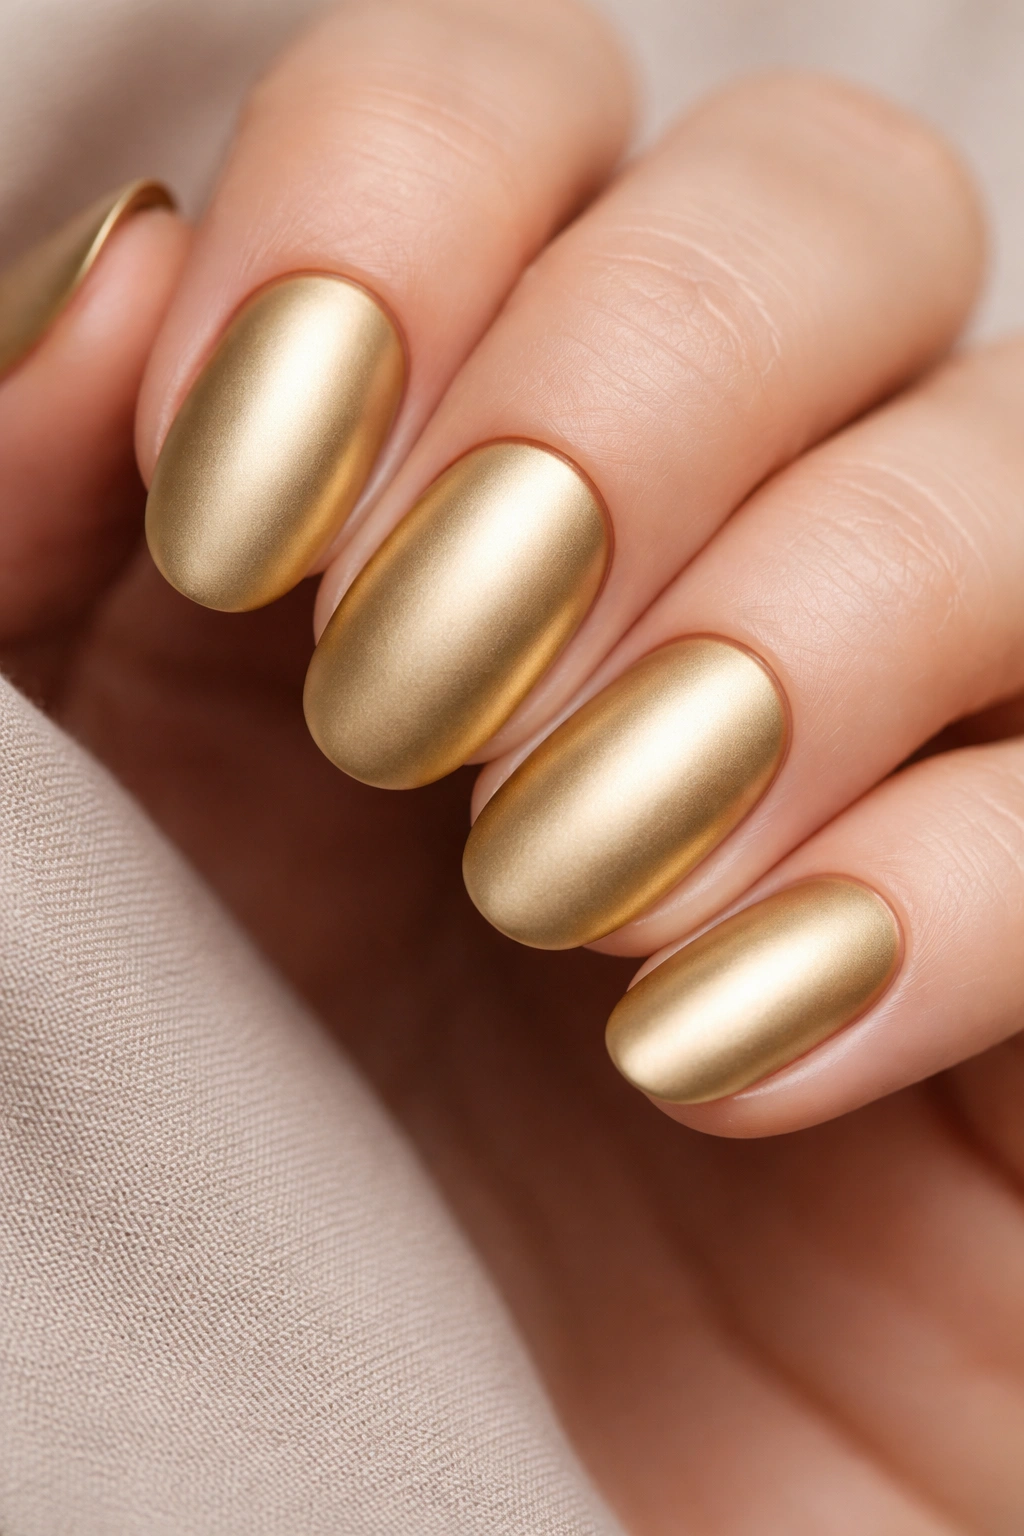
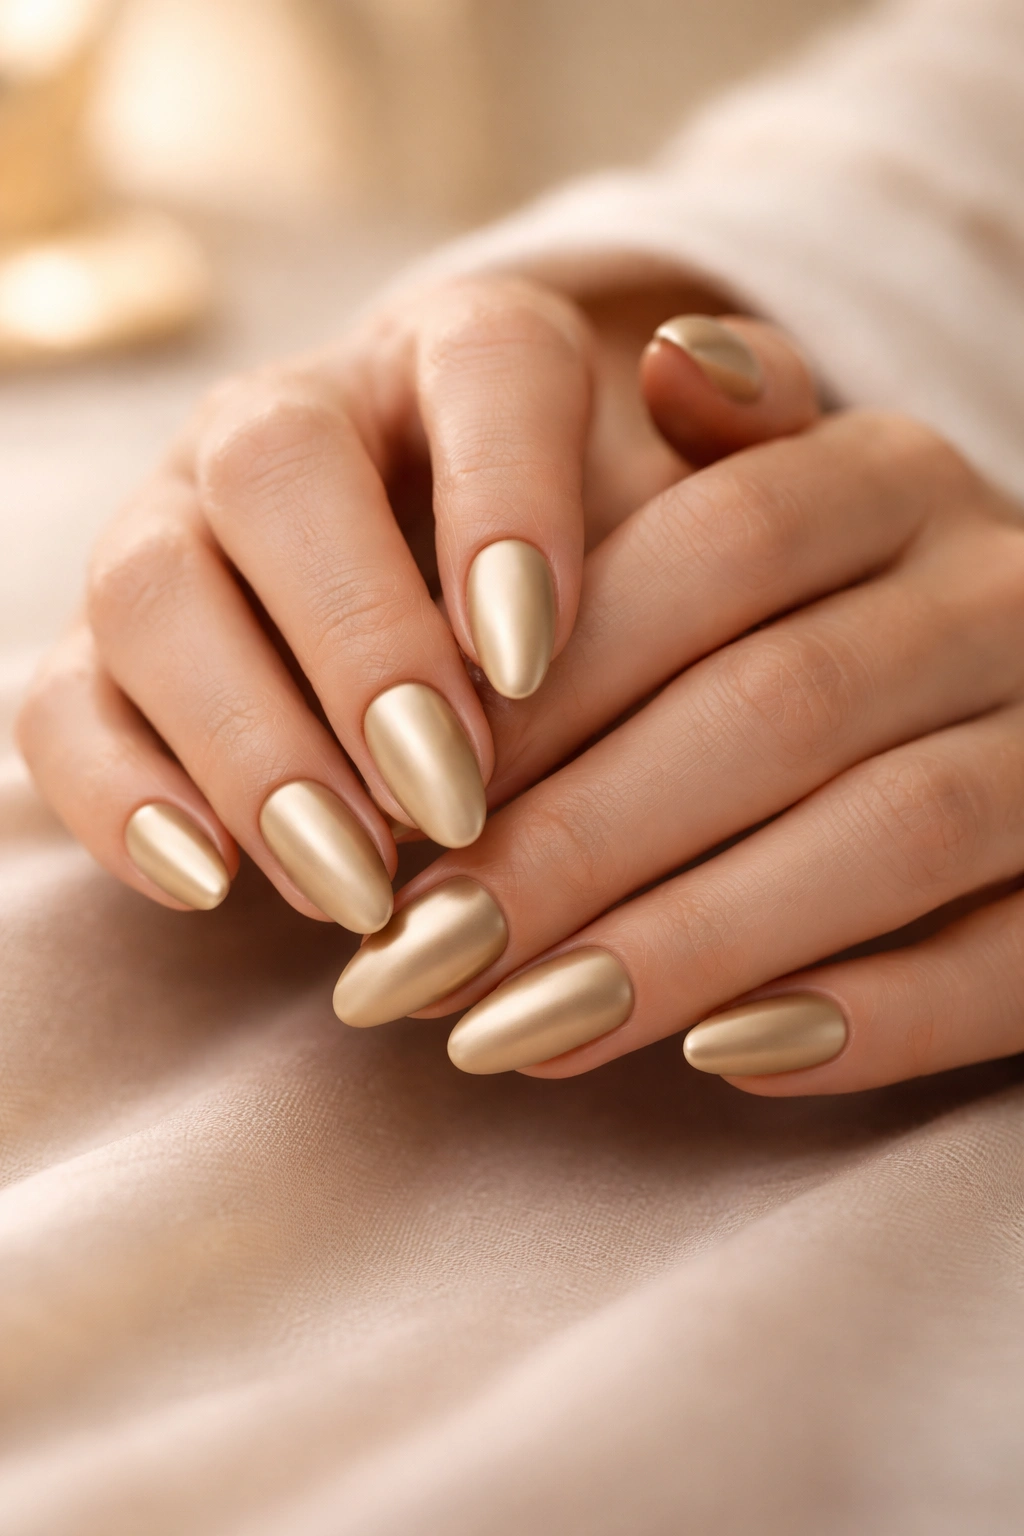
10. Champagne Matte Gold
Not all golds are created equal. Champagne gold—that soft, pale metallic shade—takes on a particularly dreamy quality when finished with a matte top coat.
This lighter gold feels romantic and ethereal rather than bold or dramatic. The matte finish enhances that soft, almost dusty quality, creating nails that look like brushed satin or expensive fabric.
Why It’s Different
Champagne gold hits differently than deeper gold shades. It’s subtle enough for conservative settings but still has that metallic warmth that makes it special. The matte treatment amplifies these qualities.
This shade pairs beautifully with virtually any skin tone. The lightness keeps it from competing with your natural coloring, while the golden undertones add warmth that’s universally flattering.
It also photographs gorgeously. That soft, diffused metallic quality looks expensive and refined in photos without creating the harsh reflective spots that glossy metallics sometimes produce.
Perfect Pairings
Champagne matte gold works beautifully as a solo act—full coverage on all nails creates a cohesive, elegant look that needs no embellishment.
Combine it with white accents for bridal-appropriate elegance. Thin white lines, dots, or delicate patterns stand out beautifully against the soft gold base.
Pair with deeper bronze or antique gold on accent nails for tonal depth. The different gold shades create subtle contrast while maintaining a monochromatic feel.
Add pearl or opal accents for dimensional shimmer. Small pearl studs or opalescent details complement the softness of champagne gold without competing with it.
For application, choose a pale gold or champagne-toned metallic polish. Two coats usually provide adequate coverage, though you may need three if your formula is sheer. Finish with matte top coat applied in thin, even layers for that perfect satin finish.
Making Matte Gold Last
Matte finishes need a bit more attention than glossy manis. The textured surface can pick up oils, show smudges more easily, and sometimes wear unevenly if not properly maintained.
That said, keeping your matte gold nails looking fresh doesn’t require complicated routines. A few simple habits make all the difference in extending wear and maintaining that beautiful satin texture.
Avoid hand creams and oils right after application. These products can create shiny spots on the matte surface or interfere with the top coat’s finish. Wait at least an hour after applying your matte top coat before using any lotions or oils on your hands.
Clean your nails regularly with a lint-free cloth and a tiny bit of rubbing alcohol. This removes surface oils and residue that can dull the finish or create uneven patches. A quick wipe-down every few days keeps everything looking uniform.
Reapply matte top coat every three to four days. Matte finishes tend to wear faster than glossy ones, gradually developing shiny spots through natural wear. A thin refresh coat restores that perfect velvety texture without building up thick layers.
Wear gloves for household tasks like washing dishes or cleaning. Water exposure and cleaning products break down matte top coats faster than glossy formulas. Protection extends your manicure’s life significantly.
Be gentle with your nails during the first 24 hours after application. Matte top coats often need extra time to fully cure, and rough treatment during this window can cause premature chipping or wear.
Wrapping Up
Matte gold nails prove that luxury doesn’t always need to shine. That soft, velvety finish brings warmth and dimension while staying surprisingly versatile and wearable.
Whether you go bold with full coverage, keep it subtle with delicate accents, or mix textures for something unique, matte gold adapts to your style. It works with any nail shape, complements every skin tone, and transitions effortlessly between seasons and occasions.
The real beauty lies in how approachable this trend is. You don’t need salon skills or expensive equipment—just gold polish, a quality matte top coat, and a willingness to experiment. Start with one of these ten ideas, or use them as inspiration to create something entirely your own.
Your nails deserve to feel special, and sometimes the softest finish makes the biggest statement.
