

French tip nails have undergone a dramatic transformation from the classic white-and-pink staple your grandmother might’ve worn. The squoval shape—that perfect hybrid between square and oval—has become the go-to for anyone who wants sophistication without sacrificing durability or wearability. When you pair squoval with the elegant simplicity of a French tip, you get a design that works with nearly any aesthetic while still feeling intentional and polished.
The beauty of long squoval French tips lies in their versatility and the way they flatter almost every hand shape. Unlike purely square nails that can feel boxy or purely rounded ones that lack definition, squovals strike an effortless balance. They elongate the fingers while maintaining enough surface area for creative nail art without becoming fragile. Whether you’re heading to a board meeting, a wedding, or just want to feel put-together on a Tuesday, this shape and design combination delivers.
What makes these nails so appealing right now is that the French tip—despite being timeless—has become a canvas for genuine creativity. We’re no longer stuck with just white and nude. Designers and nail artists have reimagined the French tip with metallic accents, colored tips, geometric play, and dimensional details that transform the entire aesthetic while keeping that core sophisticated vibe intact. The long squoval base simply provides the perfect stage for these innovations.
Let me walk you through twelve of the most striking long squoval French tip designs that deserve a spot on your next salon visit—or your Pinterest board for inspiration.
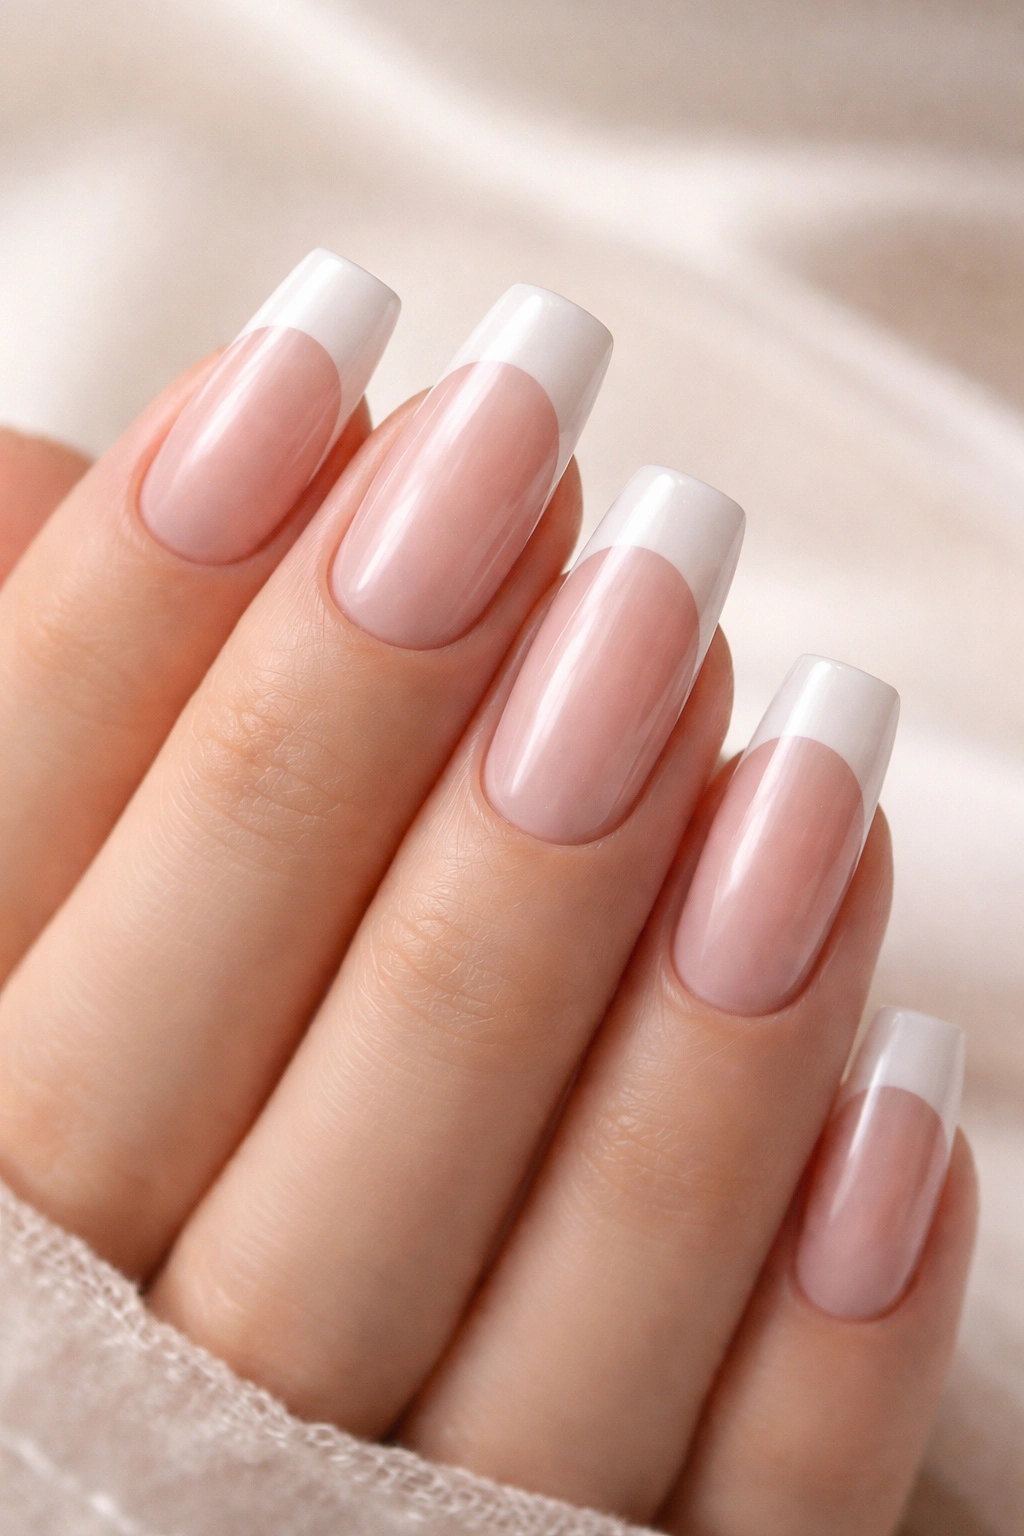
1. Classic White French Tip on Nude Base
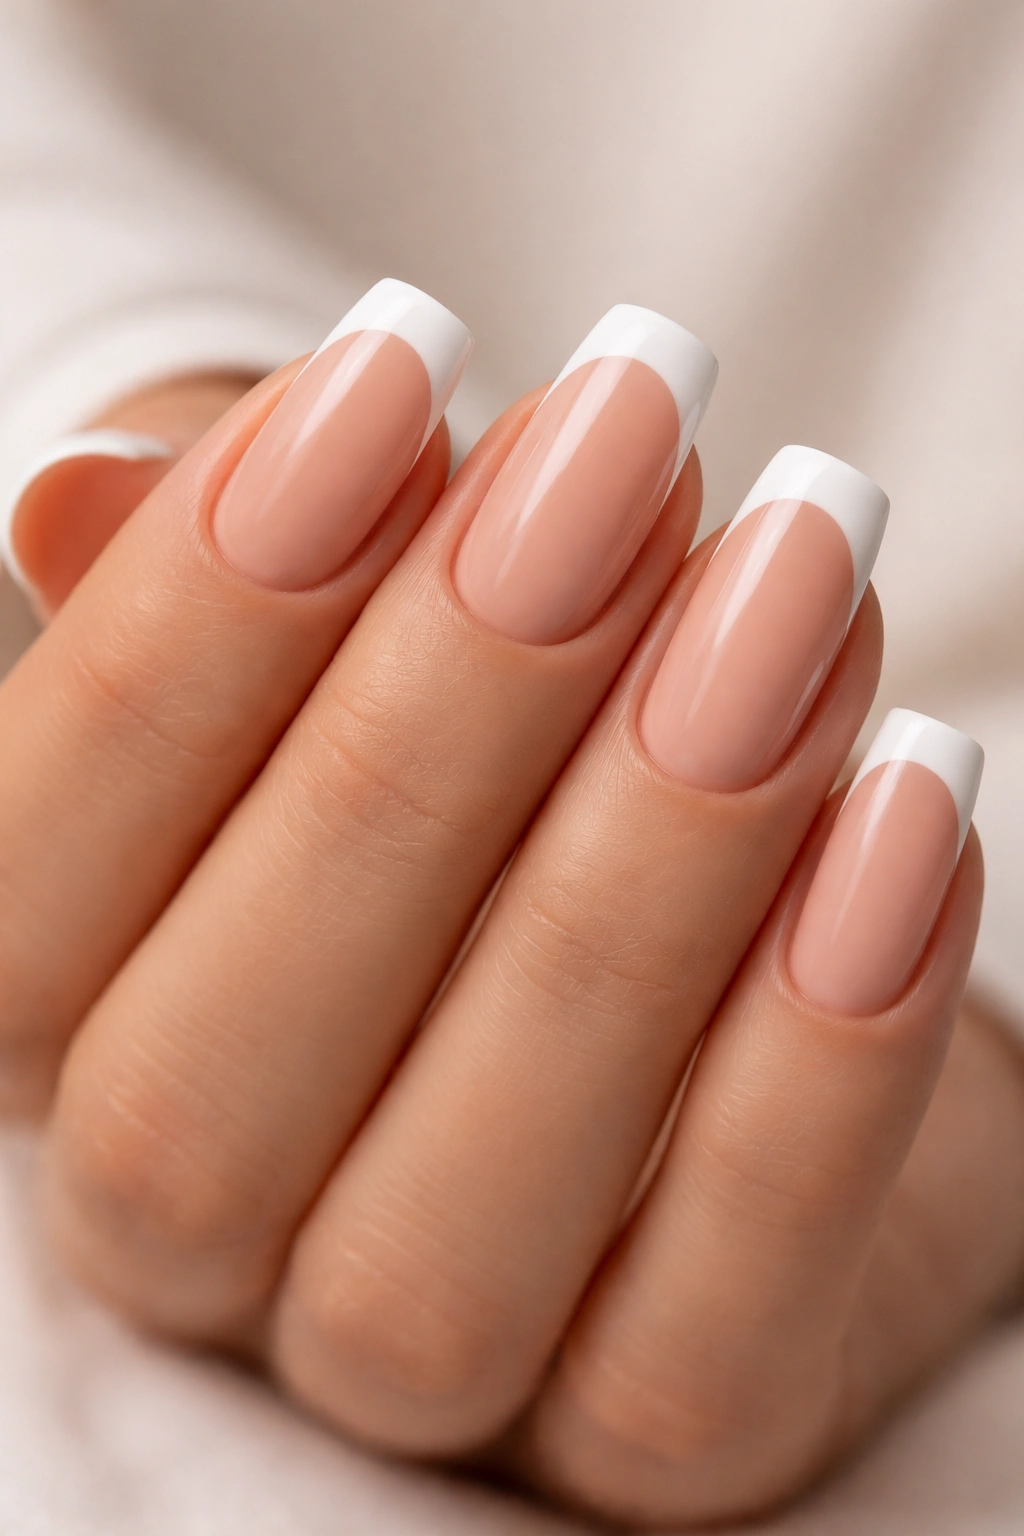
This is the design that started it all, and there’s a reason it remains timeless. A clean, opaque white tip against a soft nude or transparent pink base creates an illusion of length and elegance that photographs beautifully and works in absolutely any setting. The contrast between the warm nude base and crisp white tip gives hands an instantly polished, almost professional appearance that feels simultaneously effortless and intentional.
Why This Design Remains Unmatched
The geometry of this combination is what makes it so flattering—the white tip creates a visual line that extends the appearance of your nail beds, while the nude base keeps the design understated enough for offices or conservative environments. The nude base also hides regrowth better than a pure white base would, meaning you can extend the time between fills without sacrificing appearance. It’s a practical choice that never sacrifices elegance.
Pro Tips for Perfecting the Classic
- Keep the white tip line thin and precise—approximately 2-3mm—for a refined appearance rather than an overdone look
- Use a high-quality builder gel in a warm nude shade that matches your skin tone rather than a cool pink, which can read dated
- Seal the design with a glossy topcoat to enhance the contrast and make the white appear more luminous
- The tip should have a subtle curve that follows your nail’s natural shape—avoid creating an unnaturally thick or blunt edge
2. Chrome Gold French Tips with Nude Base
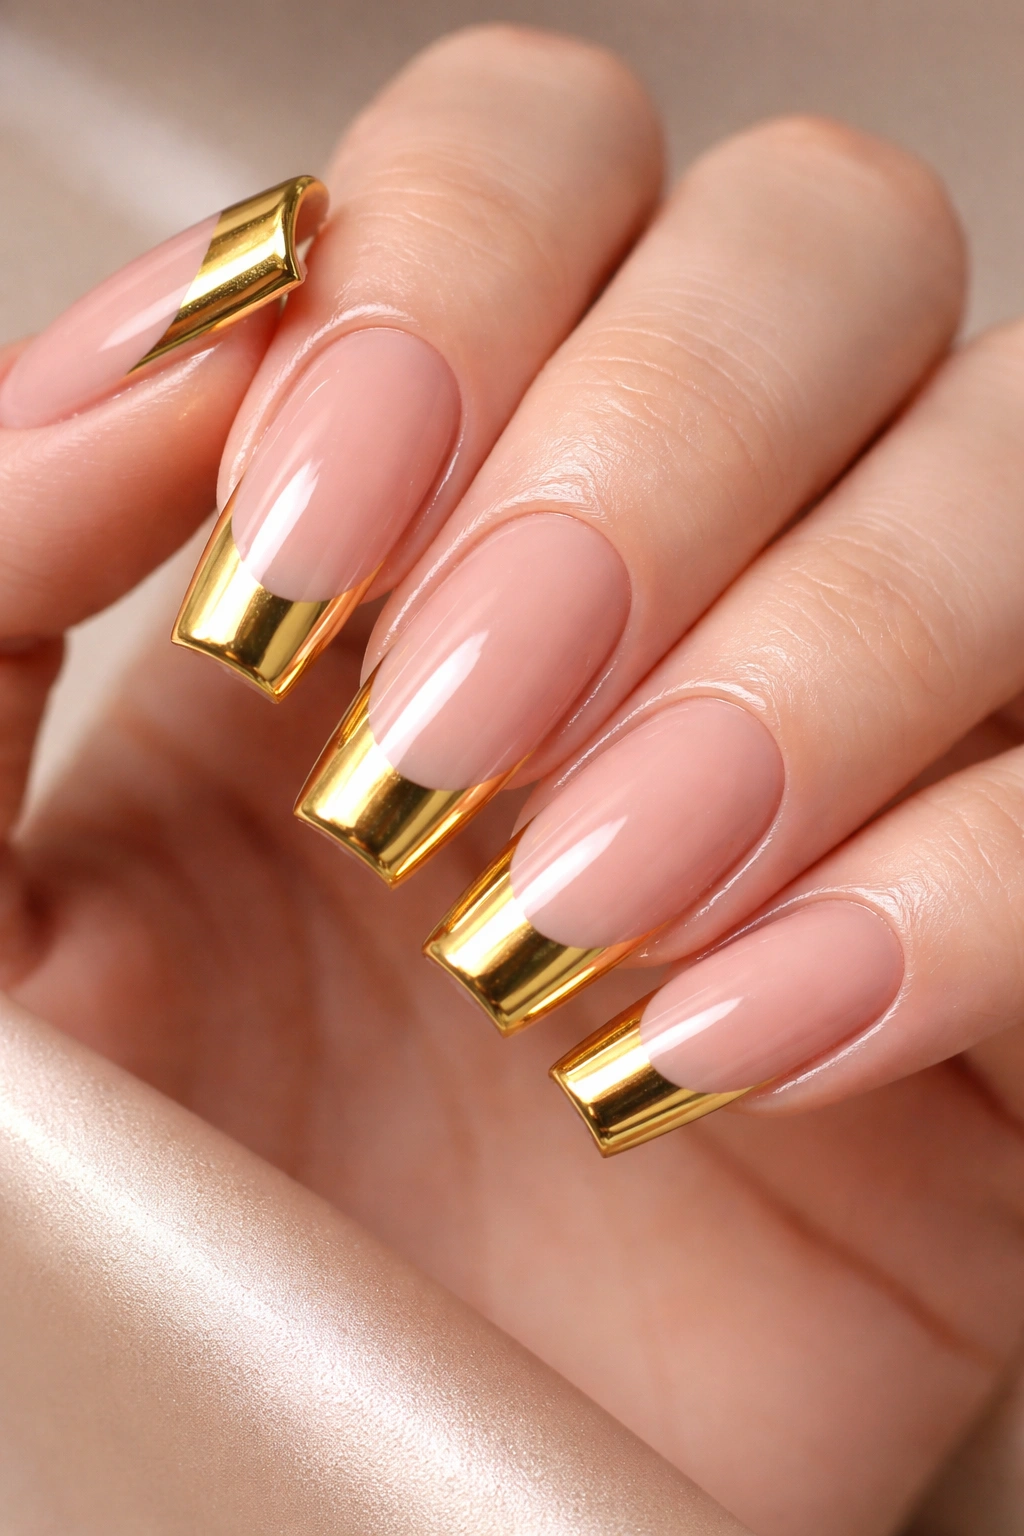
When you apply a liquid metallic chrome in warm gold to the tips of long squovals, you’re instantly elevating the design beyond basic. The reflective quality of chrome transforms something traditionally minimal into something that catches light and attention. Against a warm nude base, gold chrome creates depth and dimension that a matte French tip simply cannot achieve.
The Sophistication of Metallic Finishes
Gold chrome reads expensive and intentional in a way that speaks to quality and confidence. The finish catches light throughout the day, meaning your nails transform slightly depending on lighting—in natural light they glow warmly, under indoor lighting they gleam, and in photos they photograph like jewelry. This is the French tip design for someone who wants the elegance of a classic while making a subtle but undeniable statement.
Application and Maintenance Essentials
- Chrome powder works best over a tacky gel base layer, which allows the powder particles to adhere uniformly
- Use a dense, flat brush to apply the chrome in one smooth direction for maximum shine and minimal buildup
- Seal immediately with a glossy topcoat to lock the chrome and prevent it from shifting or fading with wear
- Plan for monthly fills since the dimensional chrome makes regrowth slightly more noticeable than a flat finish would
3. Soft Ombre Gradient French Tips
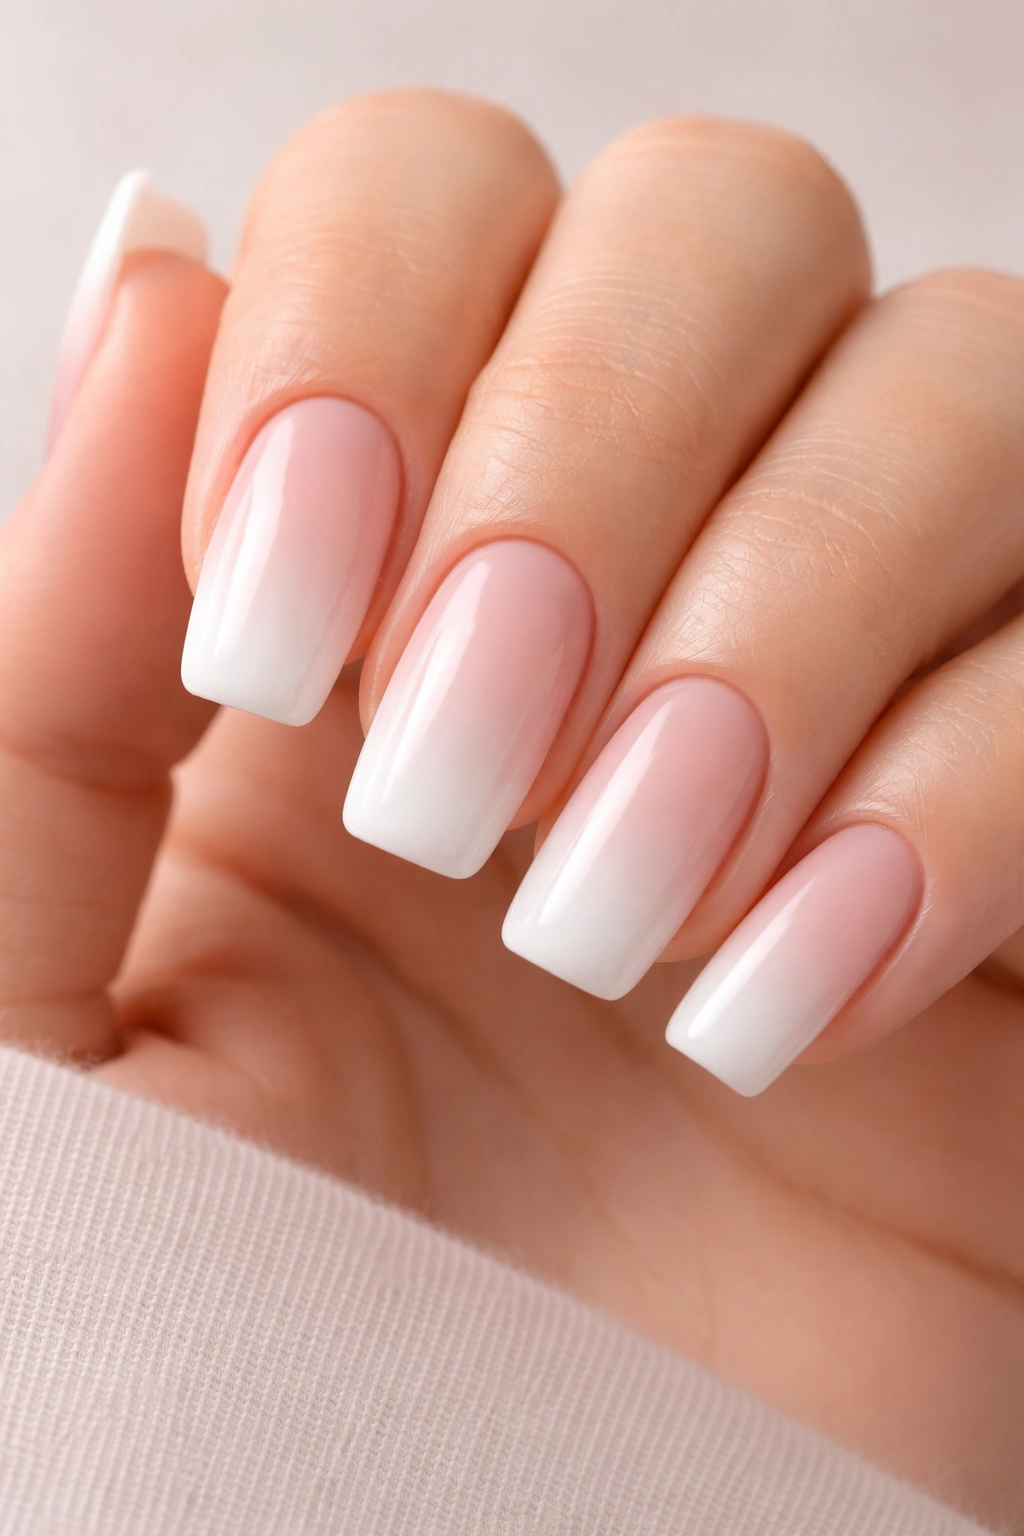
Instead of a hard line separating the base from the tip, an ombre or gradient approach blends soft color into white with a dreamy, intentional fade. You might start with a pale pink or champagne at the nail bed, gradually transition through a peachy mid-tone, and dissolve into a soft white at the tip. The effect feels modern, artistic, and undeniably elegant without looking like a design that requires constant maintenance.
Why Ombre Feels More Refined Than Color-Block
The soft gradient reads as more sophisticated than a dramatic color block because the transition creates visual softness rather than a stark line. It also looks more forgiving as the design grows out—the gradient naturally blurs the regrowth line in a way a traditional French tip doesn’t. The longer your nails are, the more stunning this gradient effect becomes because the color story has room to fully develop.
Creating an Ombre French That Lasts
- Use a gel sponge method to blend multiple shades—apply layers of color and gently sponge them together at the transition points
- Keep your tip color building gradually rather than applying all white at once; blend the last layers of white into the gradient for seamlessness
- Use barely-there glitter or a subtle sparkle at the transition zone to catch light and enhance the gradient effect without overwhelming the design
- The best ombre French tips usually fade from a warm mid-tone into white rather than starting too dark—restraint creates elegance here
4. Minimalist Platinum Tips with Clear Base

For those who prefer a barely-there design that still registers as deliberately French, platinum or silver chrome tips on a completely clear base offer understated luxury. You’re using color and dimension in the tips but letting the nail bed stay visible through clear gel, which creates a design that appears almost naked while still clearly being intentional. It’s minimalism at its most refined.
The Appeal of Negative Space
This design lets your actual nail beds show through while the platinum tips provide just enough visual interest to make the design feel complete. The approach works beautifully for anyone with naturally healthy-looking nail beds—it celebrates the natural nail while enhancing the overall aesthetic. Against tanned skin, the platinum creates beautiful contrast. Against fair skin, it reads elegant and understated.
Achieving That Perfect Subtle Shine
- Use a high-quality silver or platinum chrome that applies thinly without looking patchy or uneven
- Resist the urge to overapply—one or two light applications of chrome create a more refined finish than heavier buildup
- Keep the clear base absolutely immaculate; any streaks or imperfections read more obviously against clarity
- This design pairs beautifully with minimal cuticle work and clean nail lines—the clarity of the design means every detail shows
5. Soft Pink Ombre Tips with Glitter Fade

Take the ombre concept and introduce glitter that gradually appears as you move toward the tip. Start with a soft pink or blush at the nail bed, watch as tiny shimmer particles begin appearing, and let the glitter intensify as it transitions into a white or very pale pink tip. It’s playful without being juvenile, sophisticated without being boring, and absolutely beautiful in both professional lighting and nighttime settings.
Why Glitter Feels Elevated in This Context
When glitter is used as a transitional element in an ombre rather than a solid sparkly base, it feels intentional and curated rather than costume-y. The way the glitter gradually appears creates a sense of movement and texture that draws the eye. Long squovals provide enough surface area for the glitter gradient to fully develop and showcase its dimensions without the nails looking overcrowded or childish.
The Technical Details That Make This Work
- Use a clear gel base in soft pink and sponge on glitter particles gradually as you layer
- Apply glitter in sections—light application near the nail bed, medium in the middle, concentrated near the tip
- Layer the white or pale pink tip over the glitter without completely burying it; you want visible shimmer showing through
- This design benefits from slightly longer wear between manicures since the glitter naturally hides regrowth
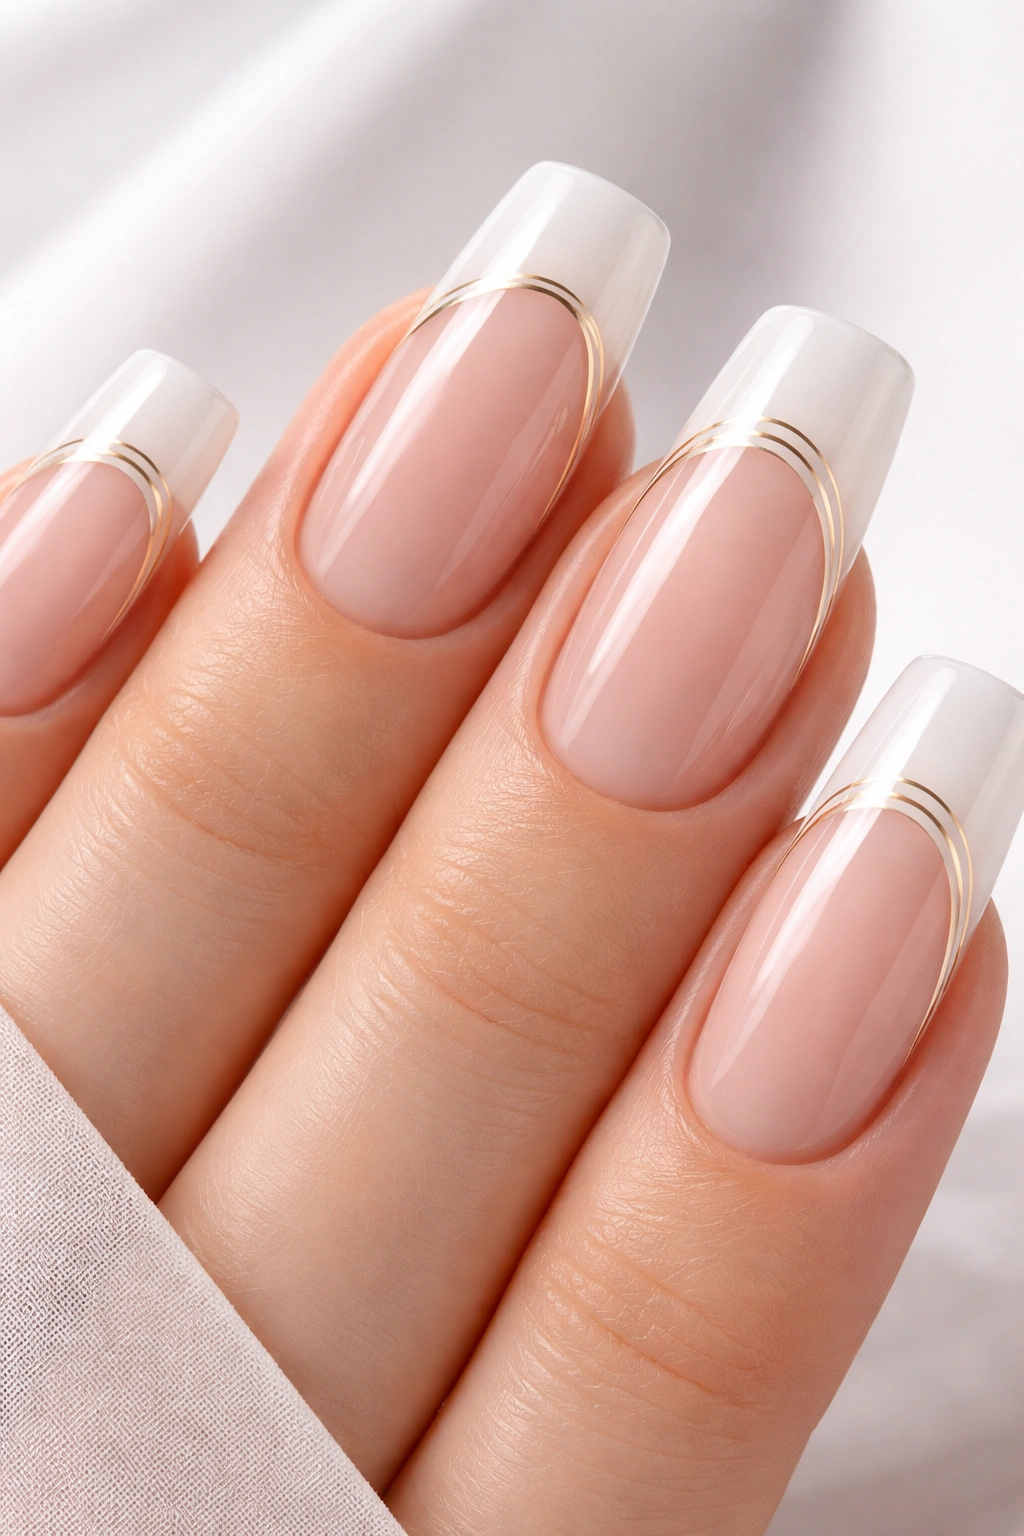
6. Nude Base with Baby Blue Tips and Gold Accent Line
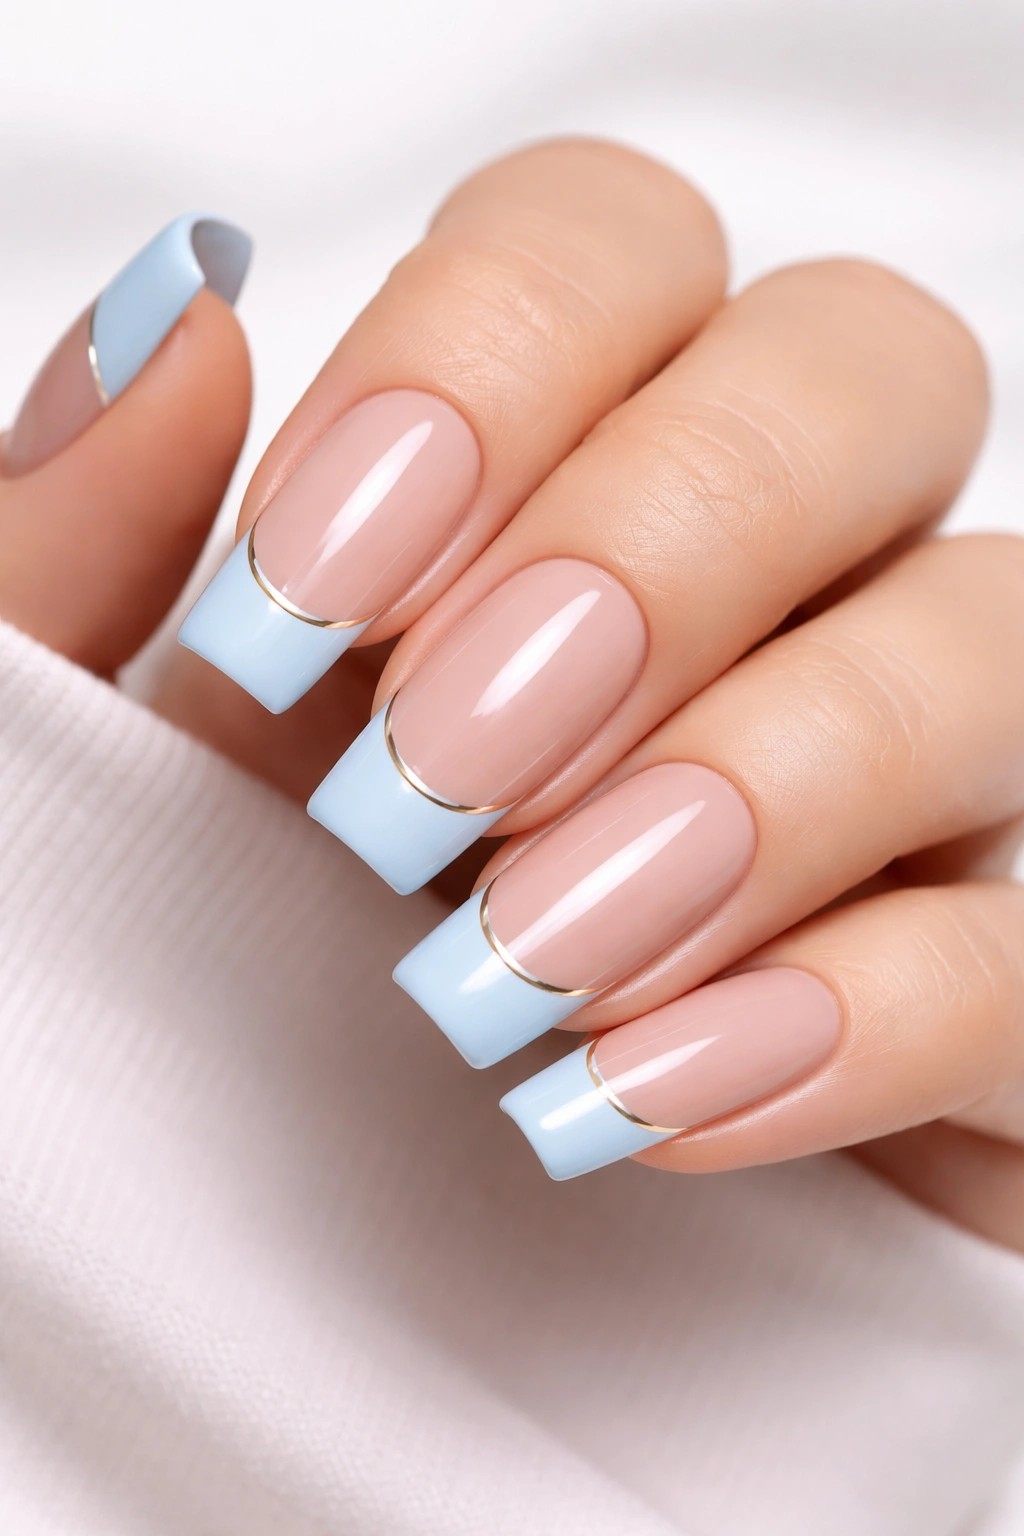
Here’s where French tips escape their traditional white-and-pink box entirely. Imagine a warm nude base with soft baby blue replacing the traditional white in the tip, and a paper-thin gold line separating the two colors at the apex. The result feels both modern and elegant—you’ve broken the French tip rulebook while keeping the design inherently sophisticated.
Expanding the French Tip Color Palette
Baby blue French tips work because the color is soft enough to feel elegant rather than trendy, and it creates beautiful contrast against nude without the starkness of white. The addition of the gold line—barely-there in thickness but significant in impact—adds luxury and intentionality. It signals that this isn’t an accident or a trend; it’s a deliberate design choice. The longer your nails are, the more room that gold line has to shine.
Making Non-Traditional French Tips Work
- Choose tip colors in soft, dusty tones rather than bright or saturated versions—baby blue, soft sage, pale lavender, muted coral all work; hot pink or neon blue do not
- The separator line must be incredibly thin to read as elegant rather than chunky; use an ultra-fine liner brush or a toothpick
- Ensure the line is perfectly straight and consistent in thickness—any wavering or unevenness reads as amateur
- Nude bases work best in warm or neutral tones; match them to your skin undertone for maximum flattery
7. Rose Gold Tip with Soft Pink Gradient Base
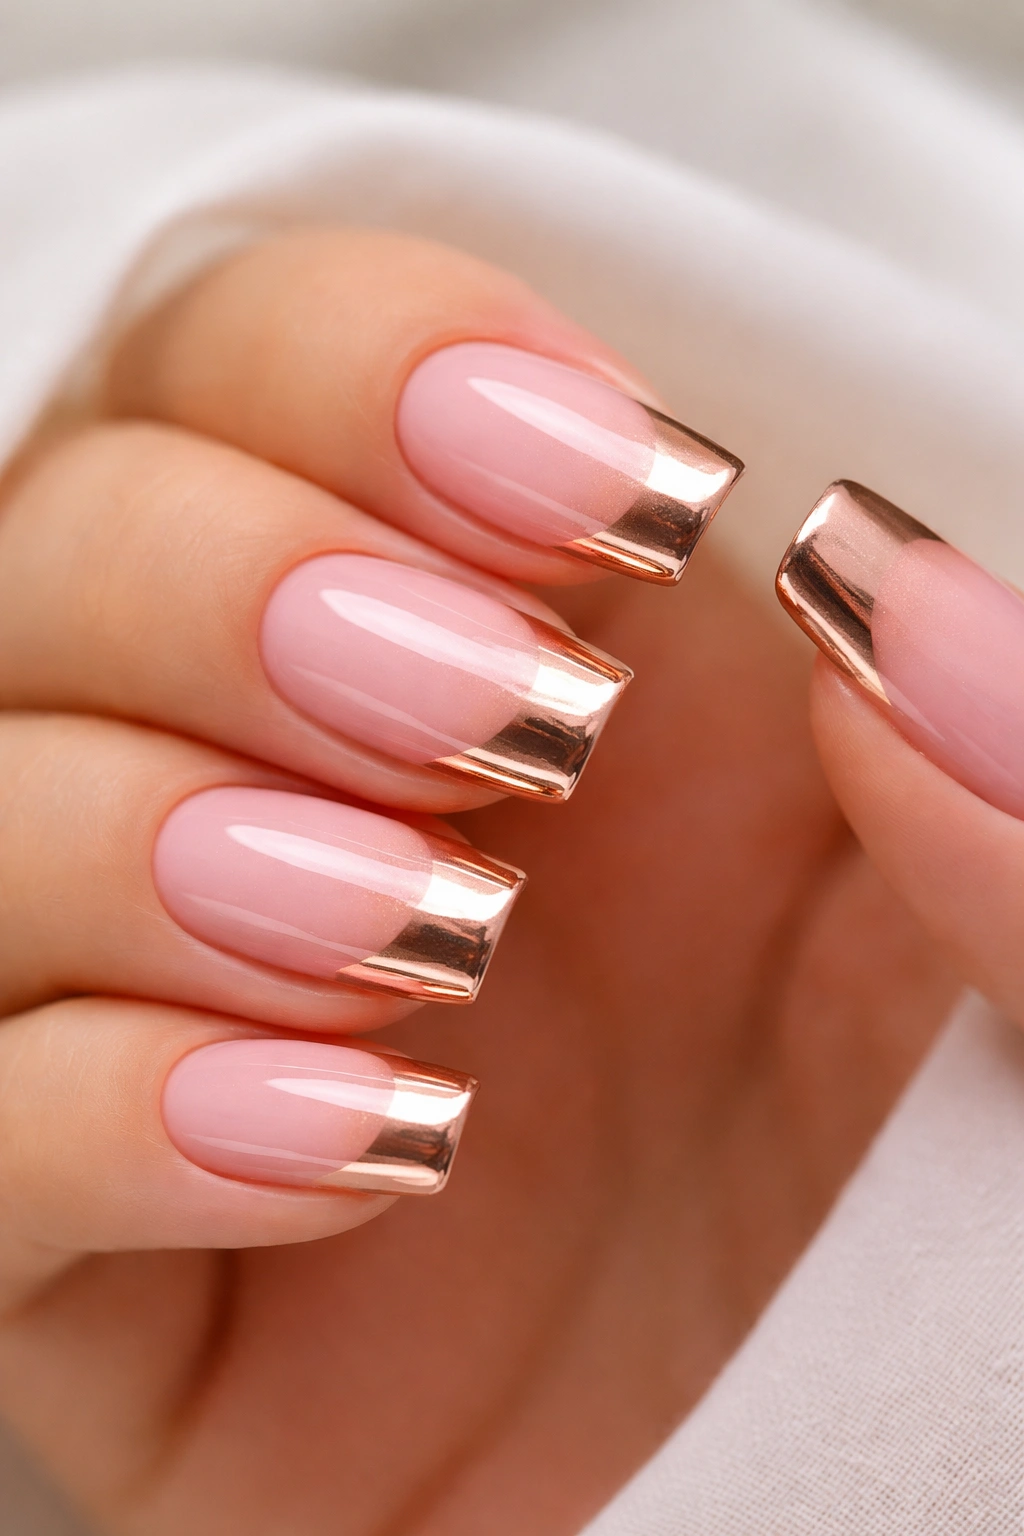
Rose gold chrome tips represent the perfect middle ground between the warmth of gold and the sophistication of silver. Paired with a soft pink gradient base that moves from nearly clear near the nail bed to a peachy pink in the mid-nail zone, this design feels romantic and polished simultaneously. Rose gold complements warm skin tones beautifully and creates a cohesive, luxurious aesthetic that photographs exceptionally well.
The Romance of Warm Metallics
Rose gold has become synonymous with luxury and refined taste over the past decade. When applied as a French tip over a complementary gradient base, it feels intentional and high-end without reading as costume jewelry. The combination of rose gold with a soft, warm gradient creates an aesthetic that feels both current and timeless—not so trendy that it’ll feel dated in a year, not so traditional that it feels boring.
Executing Rose Gold French Tips Professionally
- Apply the gradient base first and allow it to cure completely before introducing the chrome
- Use a very fine, dense brush to apply rose gold chrome—this metal shows streaks more obviously than other finishes, so careful application is critical
- Build the chrome in thin layers rather than one thick application; this prevents dust and creates a more even, luminous finish
- Seal with a matte topcoat for a more modern feel, or glossy topcoat for maximum shine and reflection
8. Sheer White Tips with Delicate Line Work
Keep the French tip structure but replace the solid white with a sheer, barely-there white overlaid with delicate line work—perhaps super-fine gold stripes, a subtle geometric pattern, or the tiniest hand-painted details. The sheer white prevents the design from feeling heavy or opaque, while the line work adds artistry and personality. This design whispers rather than shouts, but it absolutely commands attention once someone looks closely.
The Power of Negative Space and Detail
By using sheer white instead of opaque white in the tips, you’re introducing transparency that prevents the design from feeling blocky or dated. The delicate line work then becomes the focal point—it requires closer inspection to appreciate fully, which means the design has depth and intention that a basic French tip lacks. This approach works beautifully for anyone who wants to express creativity without a loud or trendy aesthetic.
Creating Fine Details at Scale
- Use an ultra-fine detail brush or a toothpick dipped in gel to create lines; pre-drawing them with a gel pen first ensures accuracy
- Work on a completely cured, smooth topcoat surface so your detailing tool doesn’t catch or drag
- Keep the overall design balanced; if you’re adding line work across all ten nails, ensure each nail’s design complements the others
- This style requires more frequent maintenance since fine details can chip or fade with regular activity
9. Two-Tone Tips: Pearl White and Soft Blush Split

Take the tip zone and split it vertically into two colors—one side in pearl white, one side in soft blush pink. Keep the base nude or sheer across the entire nail, creating a French tip that’s playful while remaining sophisticated. The split creates movement and visual interest while the soft colors and long squoval shape keep everything feeling refined rather than trendy.
Why Asymmetrical Design Feels Modern
Symmetry is comfortable; asymmetry is interesting. A split-tip design breaks the expectation of what a French tip should be while still delivering that core sense of elegance. The design looks more artistic and intentional than a standard French tip, and it photographs beautifully from every angle. Long squovals provide enough width that the split-tip design doesn’t feel cramped or poorly balanced.
Executing a Clean Split Design
- Use a thin striping tape down the center of each nail to create a straight line dividing the tip zone
- Apply one color to one side, cure it, remove the tape, apply the other color to the remaining side, and cure again
- Seal with a single topcoat application to keep the line from becoming blurry or uneven
- Ensure both tip colors are similarly opaque in coverage so neither side reads as more solid or substantial than the other
- This design benefits from perfectly manicured nails since asymmetrical designs make any unevenness more noticeable
10. Milky White Translucent Tips with Rhinestone Accent
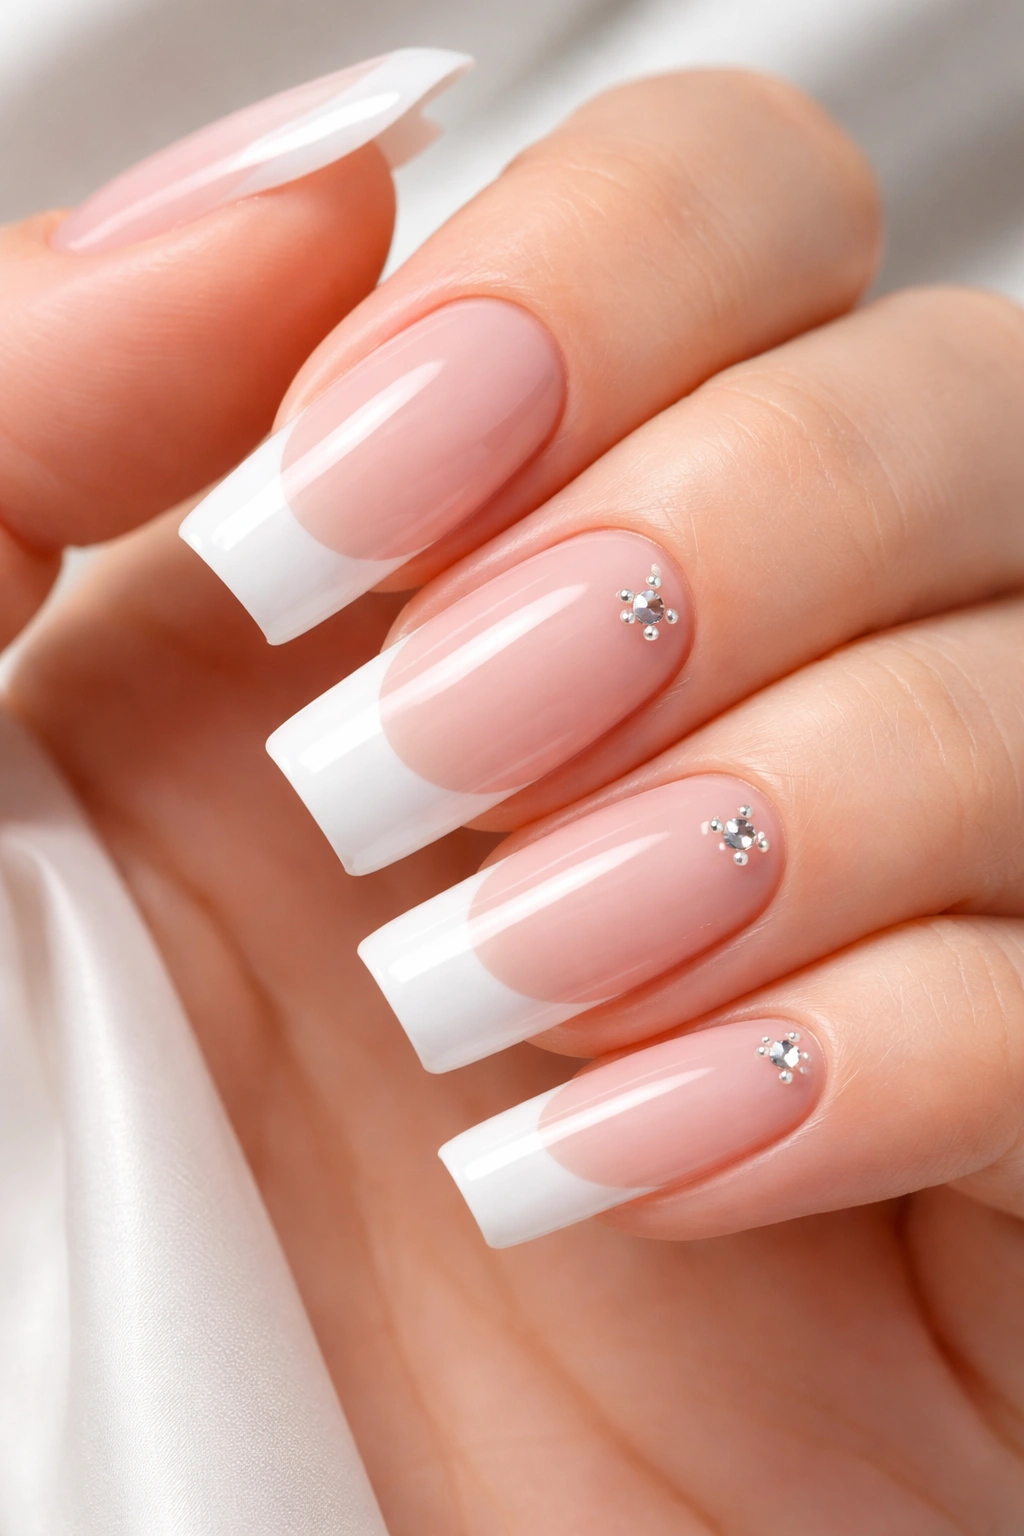
Create a French tip using milky white gel—opaque enough to read as clearly defined, but translucent enough that it maintains a soft, almost creamy quality rather than stark white. Then add a single delicate rhinestone or a tiny cluster of micro-stones right at the apex where the tip meets the base. The result feels bridal without being costume-y, elegant without being overly embellished.
The Sophistication of Subtle Embellishment
A single rhinestone or a carefully placed cluster catches light beautifully and adds dimension without overwhelming the design. The milky white tip keeps the aesthetic soft and approachable while the rhinestone signals intentionality and luxury. This is the French tip design for someone who loves sparkle but knows that a little goes a long way toward elegance.
Placing Rhinestones with Intention
- Apply the milky white tip first and allow it to cure with a tacky layer still intact
- Use tweezers to place rhinestones while the topcoat is still tacky, ensuring they adhere securely
- Position stones slightly off-center at the apex rather than directly in the middle; this creates better balance visually
- Seal with a topcoat applied gently to avoid disturbing the stone placement
- This design typically lasts through the full growth cycle without chipping or losing stones if properly sealed
11. Nude-to-Clear Gradient with Barely-There Gold Tip
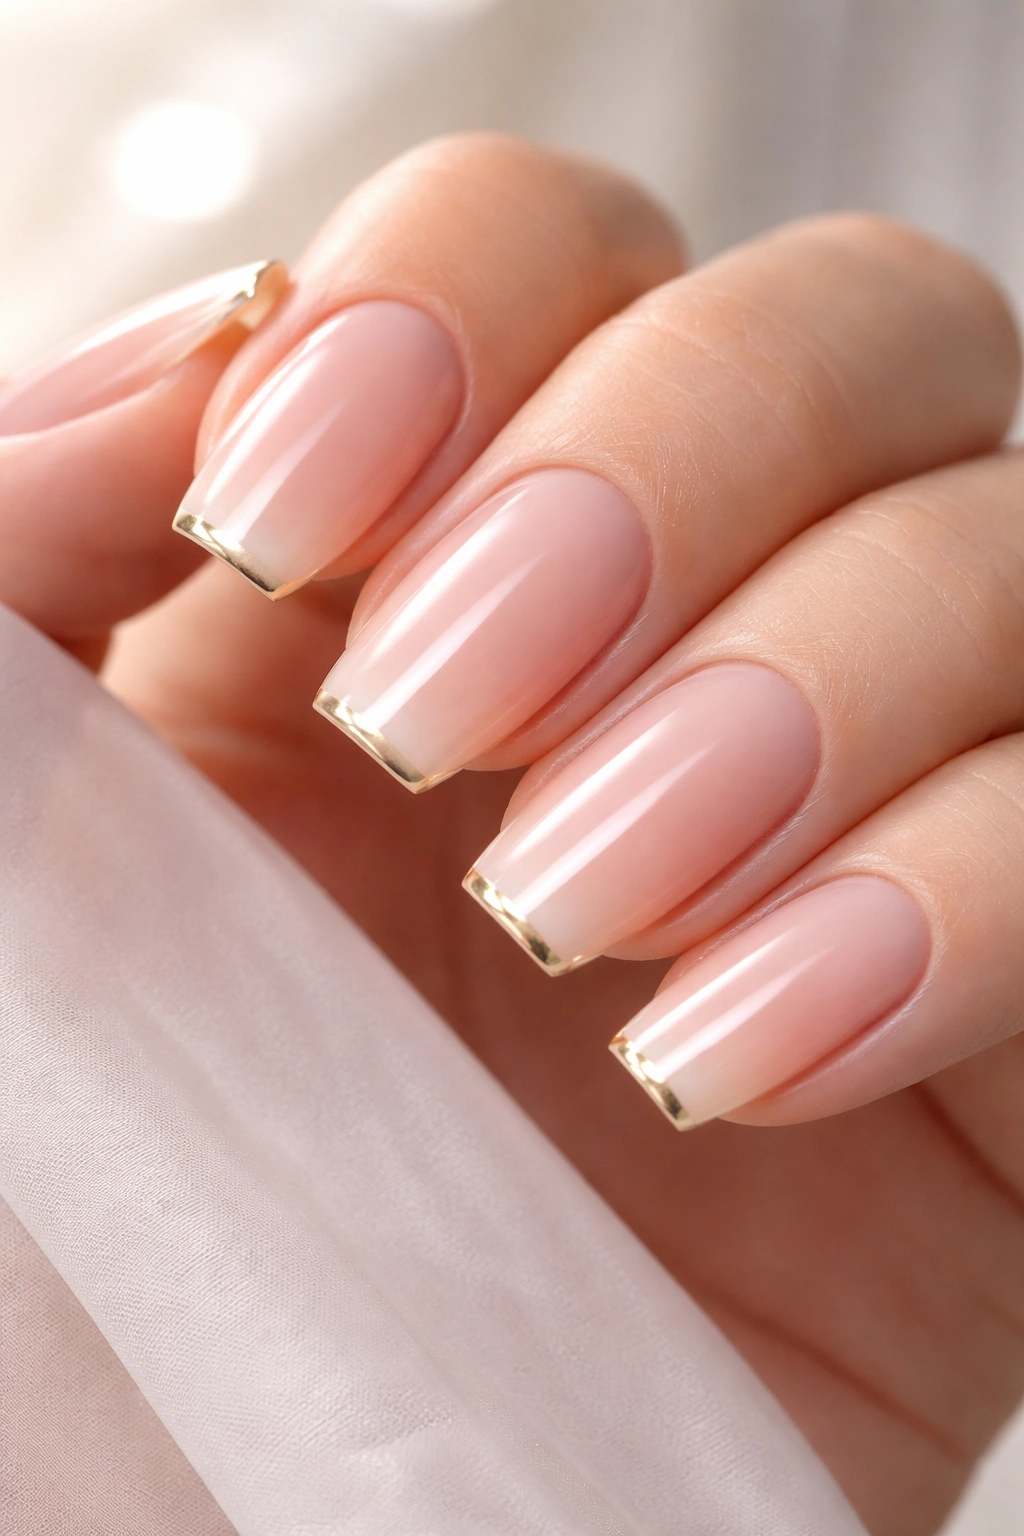
Start with a solid nude base at the nail bed and gradually fade the color, allowing the natural nail to show through more and more as you move toward the tip. Then cap the very tip with the thinnest possible line of pale gold chrome. The result is barely a French tip at all—almost naked except for that whisper of gold that catches the light and signals intentionality. It’s the most subtle design on this list and also one of the most elegant.
Minimalism as Refinement
When you remove almost everything except for a single thin element, what remains must be absolutely flawless. This design works because it celebrates the natural nail while adding just enough artistry to feel complete. The pale gold tip catches light without being flashy, and the gradient base creates dimension while maintaining that barely-there aesthetic. This is a design for someone confident enough to let simplicity speak volumes.
Achieving the Perfect Nude-to-Clear Fade
- Layer nude gel at the base and gradually reduce opacity as you move toward the tip using lighter layers
- The transition should be completely seamless with no visible lines or bands of color
- Use a very pale gold (almost champagne) rather than a rich gold so the tip reads as minimal rather than bold
- This design shows every imperfection, so nail prep, cuticle work, and absolute cleanliness of the base shape are essential
12. White Tips with Reverse Ombre: Deeper Pink Base
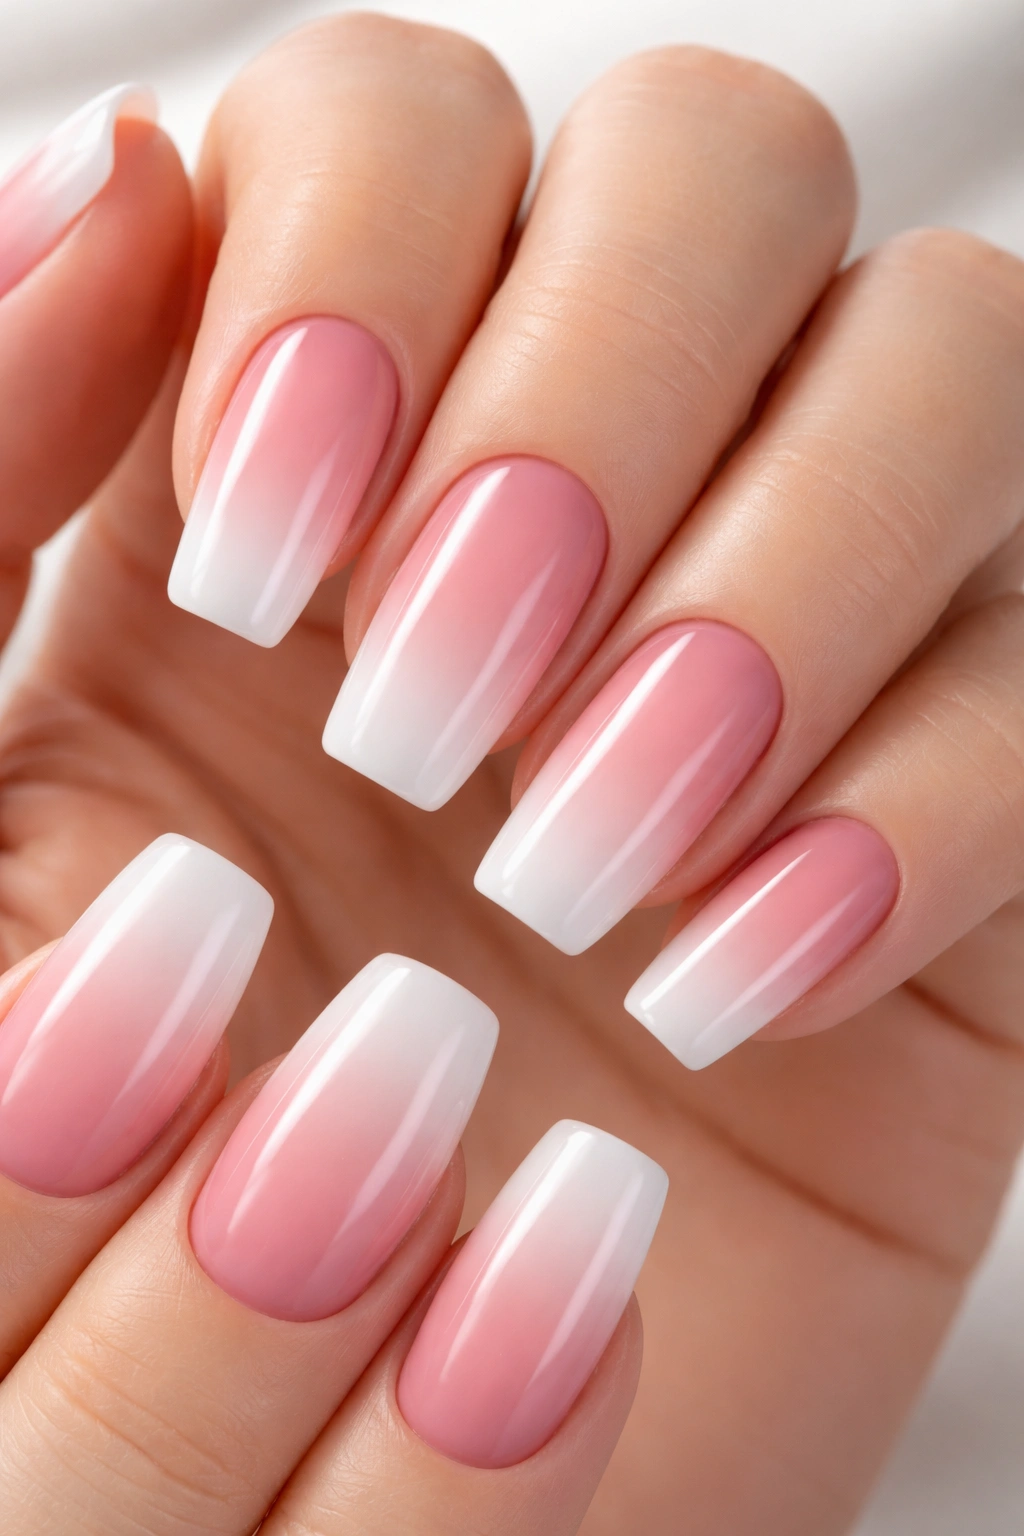
Flip the traditional ombre concept by starting with a deeper, warmer pink at the nail bed and gradually lightening to pale pink mid-nail before capping with crisp white tips. The deeper color at the base draws attention to the nail bed and elongates the overall effect, while the white tip provides that crisp finishing element. It’s a reversal of what you typically see, which makes it feel current and considered.
Why Reverse Ombre Reads as Intentional
Standard ombre gradients work from light to dark or vice versa, but reversing the concept—placing the deeper color at the base where we typically see the lightest tones—creates a design that feels modern and slightly unexpected. Combined with white tips, this approach creates visual movement from rich color at the base toward white at the tip, which flatters the elongation of long squovals beautifully. It’s a sophisticated take on a classic shape.
Creating a Reverse Gradient That Works
- Start your deeper pink shade at the base with full opacity
- Use a sponge method to gradually lighten the shade as you layer toward the mid-nail
- The deepest color should be a warm mauve-pink or dusty rose rather than hot or neon pink
- Transition to white at the tip with a subtle gradient rather than a hard line for seamless sophistication
- Seal with a high-shine topcoat to enhance the depth of color and create dimensional light reflection
Final Thoughts
Long squoval French tips occupy a unique space in nail design—they’re traditional enough to work in any setting while being endlessly customizable for anyone who wants to add personality and intentionality. Whether you choose a timeless classic white tip, venture into metallics, play with color, or embrace pure minimalism, the squoval shape provides the perfect canvas. The designs that stand out are always the ones that combine simplicity with precision, which is exactly why these twelve designs deserve a place at the top of your inspiration list.
The best version of any of these designs is the one that makes you feel confident and comfortable. If something feels too trendy, dial it back. If you prefer more personality, add details. Long squoval French tips work because they’re fundamentally flattering, endlessly adaptable, and always—always—elegant.
