

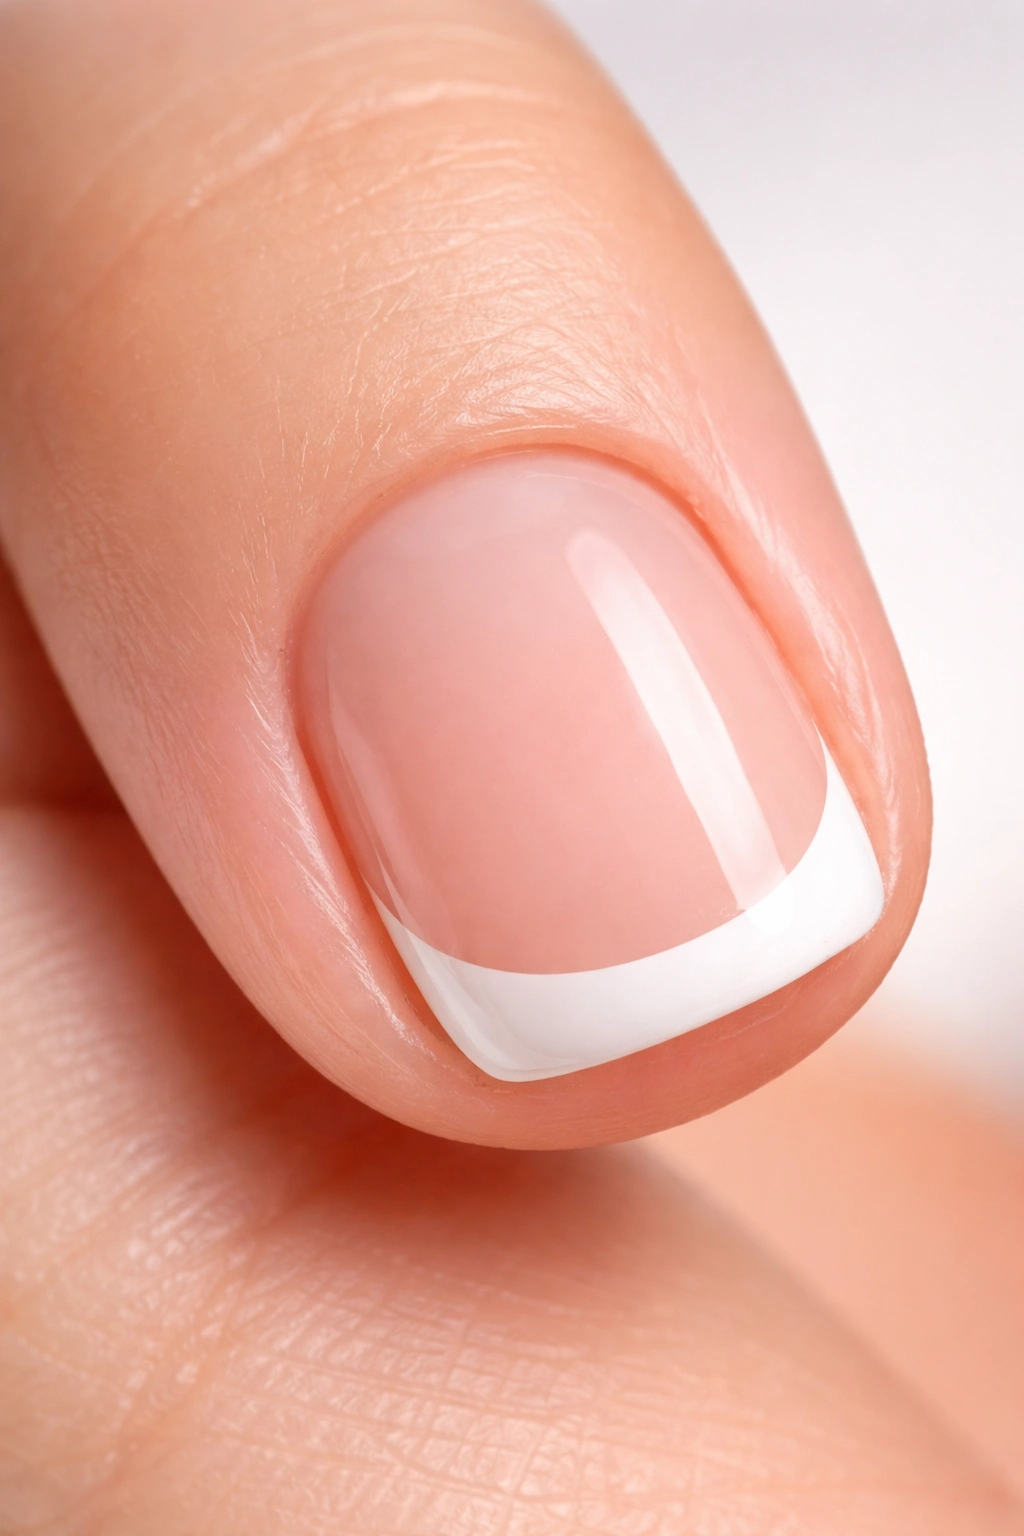
French tip nails are undeniably elegant, but there’s a common misconception that you need long nails to pull off this classic look. The truth? Short nails can absolutely rock French tips — and in many ways, they’re actually easier to maintain and less likely to chip or break. The real challenge isn’t the nail length; it’s mastering the technique and understanding how to adapt the proportions so they look balanced on a smaller canvas.
What makes French tips tricky on short nails is all about proportion and precision. On longer nails, the white tip line can be thicker and more forgiving. On short nails, even a slightly uneven line becomes more noticeable because there’s less overall nail surface to work with. That said, once you understand the specific techniques and tricks that work best for short nail beds, you’ll be creating salon-quality French tips at home with consistent results.
The beauty of doing this yourself is that you can customize the exact ratio of white to nude or pink, adjust the tip thickness to suit your specific nail shape, and redo it whenever you want without waiting for an appointment. You’ll also save money and gain the confidence that comes with mastering a technique that typically requires a professional touch. This guide walks you through every step, from choosing the right supplies to executing perfectly proportioned French tips on short nails.
Essential Tools and Supplies You’ll Actually Need
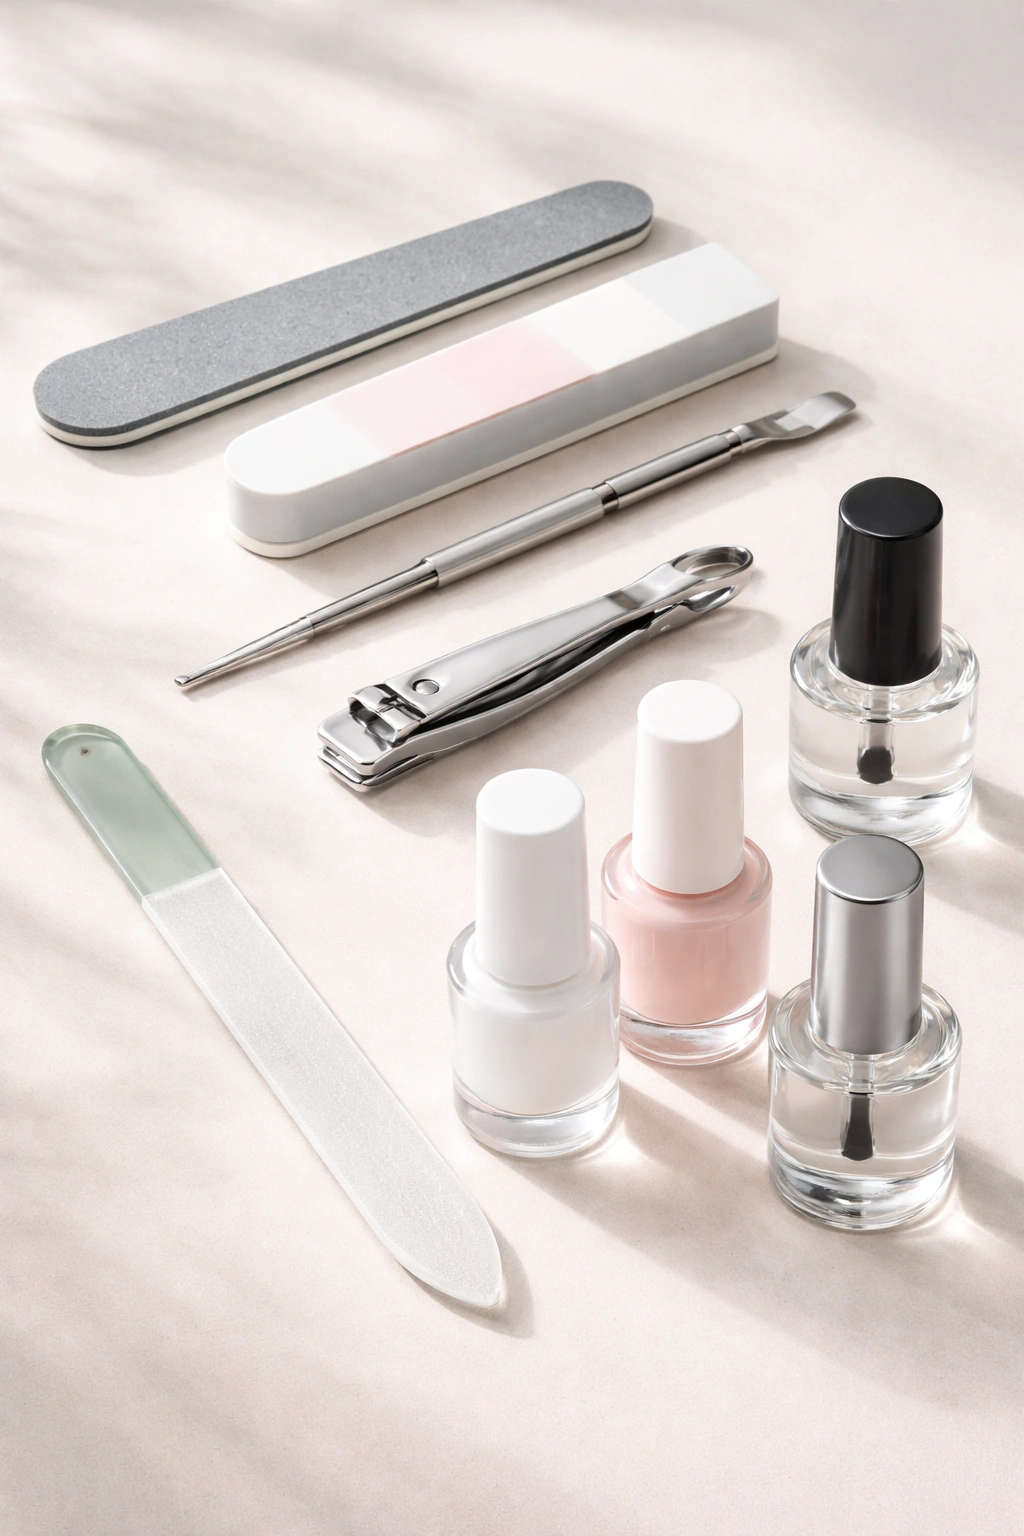
Before you start, gather the right equipment. This isn’t about buying every nail tool ever made — it’s about having the specific items that make short French tips possible without frustration.
For the base and prep: You’ll need a nail file (ideally a fine-grit one around 220-240 grit for smoothing short nails without causing damage), a nail buffer or 3-way buffer block for smoothing the nail surface, cuticle pusher to gently move back your cuticles, and nail clippers or a file for shaping the free edge. A glass or ceramic nail file works best because it seals the keratin at the edge and resists chipping compared to metal files.
For the application: Start with a quality base coat that’s specifically designed to prevent staining — this matters more on short nails because any discoloration becomes more visible. You’ll need white polish (this is crucial — not all whites are created equal, and some appear slightly yellow or gray), a nude or pale pink polish for the nail bed, and a glossy or gel-like top coat. Invest in a few good polish bottles because cheap polish applies unevenly and drags, making precise lines nearly impossible.
The game-changer for short nails: French tip guides or nail stencils. These adhesive strips stick to your nail and create a clean edge where you apply white polish. They’re inexpensive, reusable, and they remove so much guesswork from the equation. Alternatively, thin striping tape (painter’s tape at 1/4 inch width works in a pinch) can create the same effect. For very short nails, look specifically for guides labeled as micro or for short nails — standard guides are often too wide.
Optional but helpful: A thin, precise brush or nail art brush in size 0 or 00 (thinner than a standard polish brush) for hand-painting the tip line if you skip the guides. A dotting tool or toothpick for correcting tiny mistakes while polish is still wet. A small tray of water to dip your brush in for creating thin lines with precision.
Measuring the Right Proportion for Your Specific Nail Length

The classic French manicure has a white tip that takes up roughly 1/8 to 1/4 of the nail length. But on short nails, this ratio needs adjustment or the whole look can feel off — the white tip might be so thick it overwhelms the small nail, or so thin it becomes nearly invisible.
For very short nails (around 1/4 inch of free edge beyond your fingertip), make the white tip roughly 2-3mm thick. This is usually about 1/6 to 1/5 of the nail length. It’s a delicate proportion, which is why guides designed for short nails work so well here — they account for this exact measurement.
For short nails with slightly more length (around 1/2 inch of free edge), you can go slightly thicker — about 3-4mm or roughly 1/5 of your nail length. This is still proportionally correct and becomes much more visible and impactful on the nail.
Measure by placing your nail guide or using a thin piece of tape, and mark the line with a light pencil or nail marker before you apply color. This prevents the common mistake of making the white tip too large, which makes short nails look stubby, or too small, which makes them look unfinished.
Preparing Your Nails for a Perfect Base
Short nails actually have an advantage here — preparation takes less time, but it’s even more critical because mistakes show more obviously. Start by removing any existing polish with acetone or non-acetone remover (acetone works faster, but use it gently so you don’t dry out your nails).
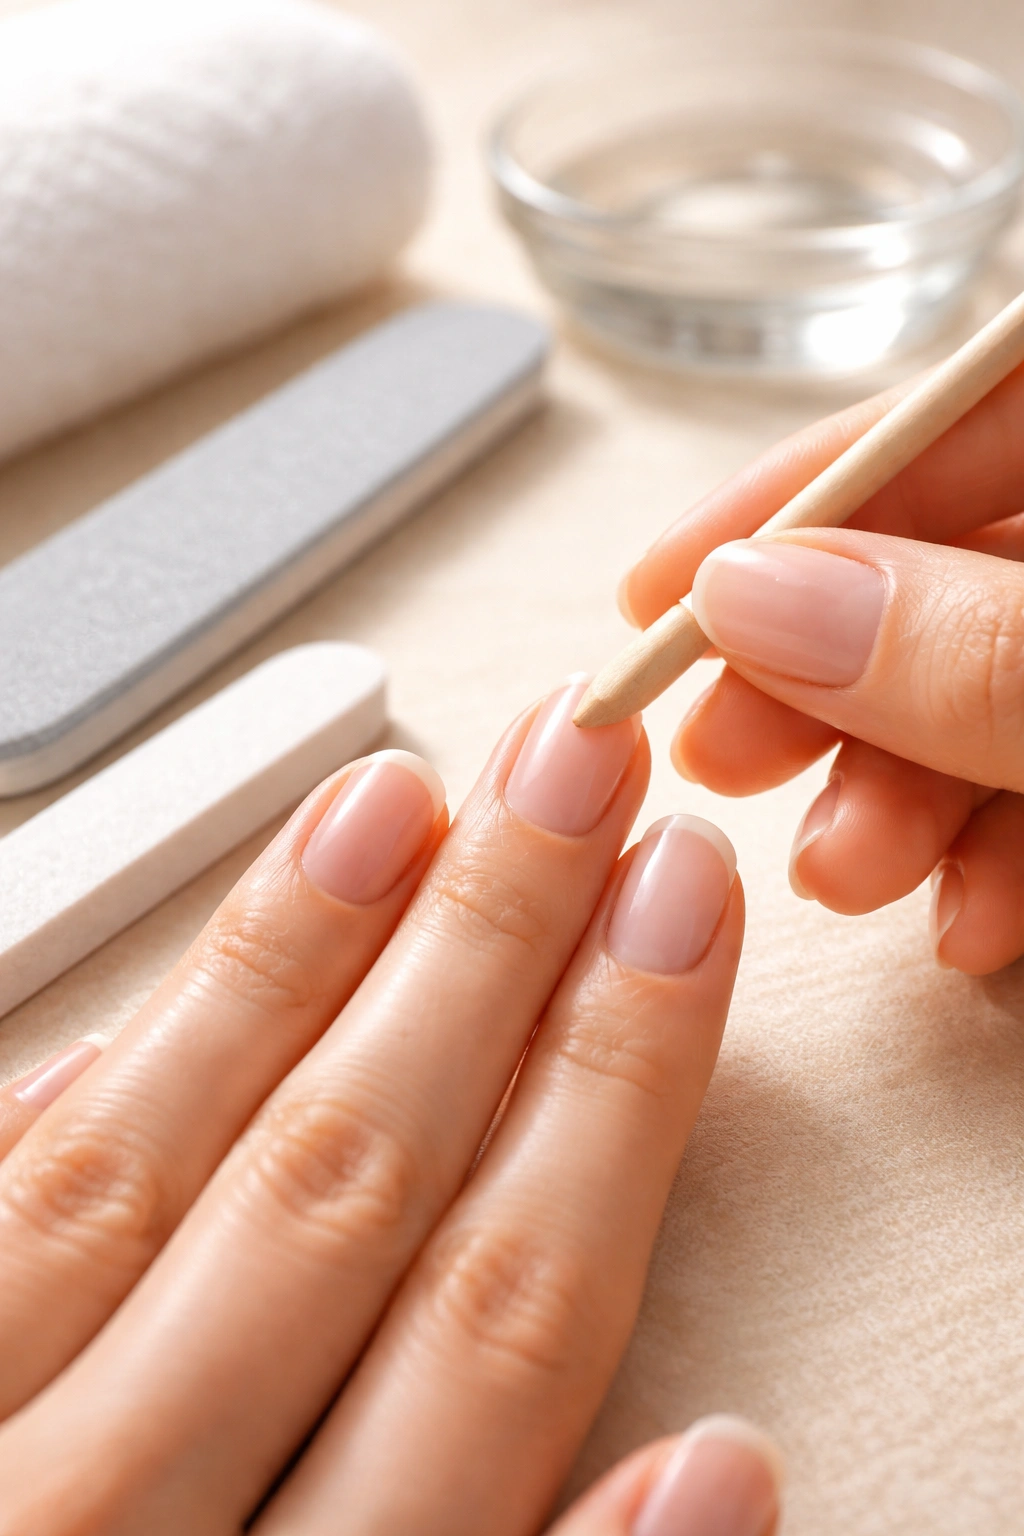
Once your nails are bare, gently push back your cuticles using a wooden or rubber cuticle pusher, moving in a gentle rolling motion. Don’t cut your cuticles — pushing them back is safer and actually better for nail health. Cuticles protect the nail matrix, so removing them completely can lead to weak growth. A little cuticle oil or cream helps this process feel smooth and protective.
Next, file your nails into your chosen shape. For French tips on short nails, rounded or soft square shapes work best because they look balanced and are easier to keep intact day-to-day. File in one direction only, moving from the outer edge toward the center, rather than sawing back and forth — this prevents splitting and peeling at the edge. Aim for a smooth, even edge all the way across.
Buff the nail surface very gently using the fine-grit side of a buffer block. You’re not trying to sand away the nail — just creating enough texture that polish grabs and adheres evenly. Pay special attention to the center of the nail, which tends to be slightly domed. A properly buffed surface means base coat and polish apply without pooling or beading up, and that’s essential for achieving clean, precise lines on short nails.
Wipe away all dust with a damp cotton pad or soft cloth, then let your nails dry completely. Any remaining moisture under the polish causes peeling and lifting, which happens faster on short nails because there’s less surface area holding everything in place.
Applying a Strong Base Coat for Adhesion and Protection
Base coat is not optional — it’s the foundation for everything that comes next. On short nails, a strong bond between the base coat and the nail is especially important because nails this size are handled more frequently and experience more stress from daily activities.
Choose a staining-prevention base coat specifically, not a general base coat. Staining prevention is crucial because white polish can leave a discolored residue on short nails much more easily than on longer nails. Apply a thin, even coat across the entire nail, being careful not to get it on your skin (this prevents the peeling and flaking that happens when base coat edges up your cuticle line).
Let the base coat dry completely — at least 30 seconds to 1 minute depending on the brand. Resist the urge to rush to the next step. A properly dried base coat creates a slick surface that allows the white and colored polish to glide on smoothly without dragging or pooling.
If you’re using a UV or LED lamp (for gel base coats), follow the cure time recommended by the specific product. Regular base coats air-dry, but many people find that gel or hybrid base coats provide superior adhesion, especially on short nails that get washed and handled frequently throughout the day.
Creating a Guide for Your White Tip Line
This is where the magic happens, and it’s the single most important step for getting professional-looking results on short nails. Creating a clean, even white tip line separates amateur-looking French tips from polished, salon-quality work. You have two main approaches: guides or hand-painting.
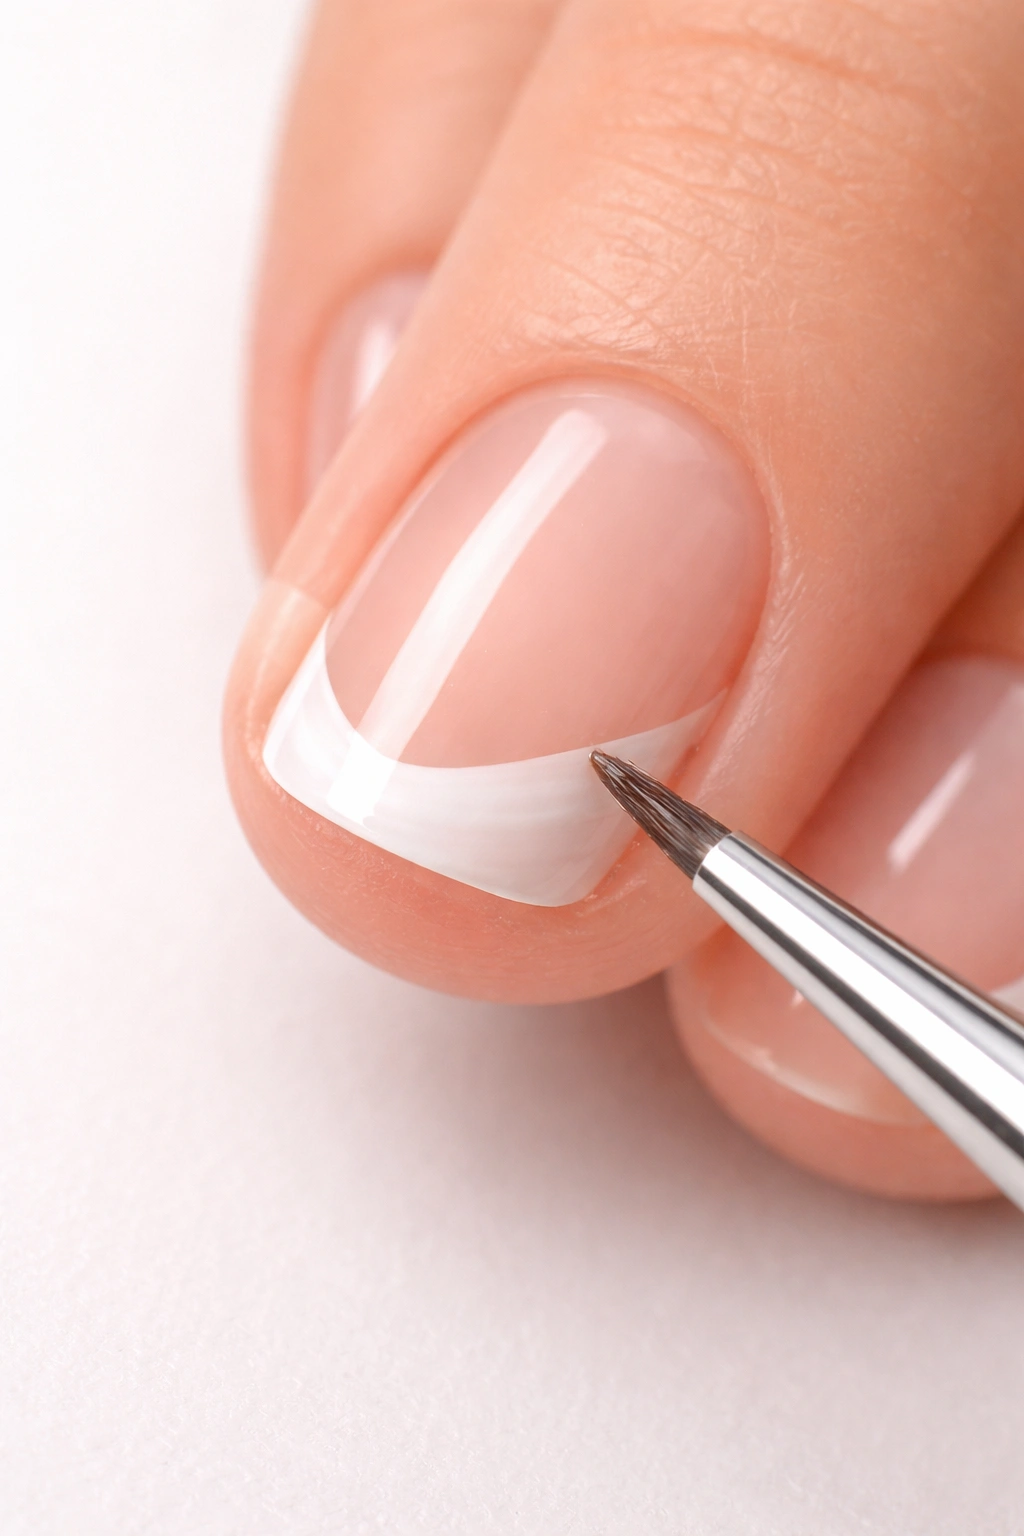
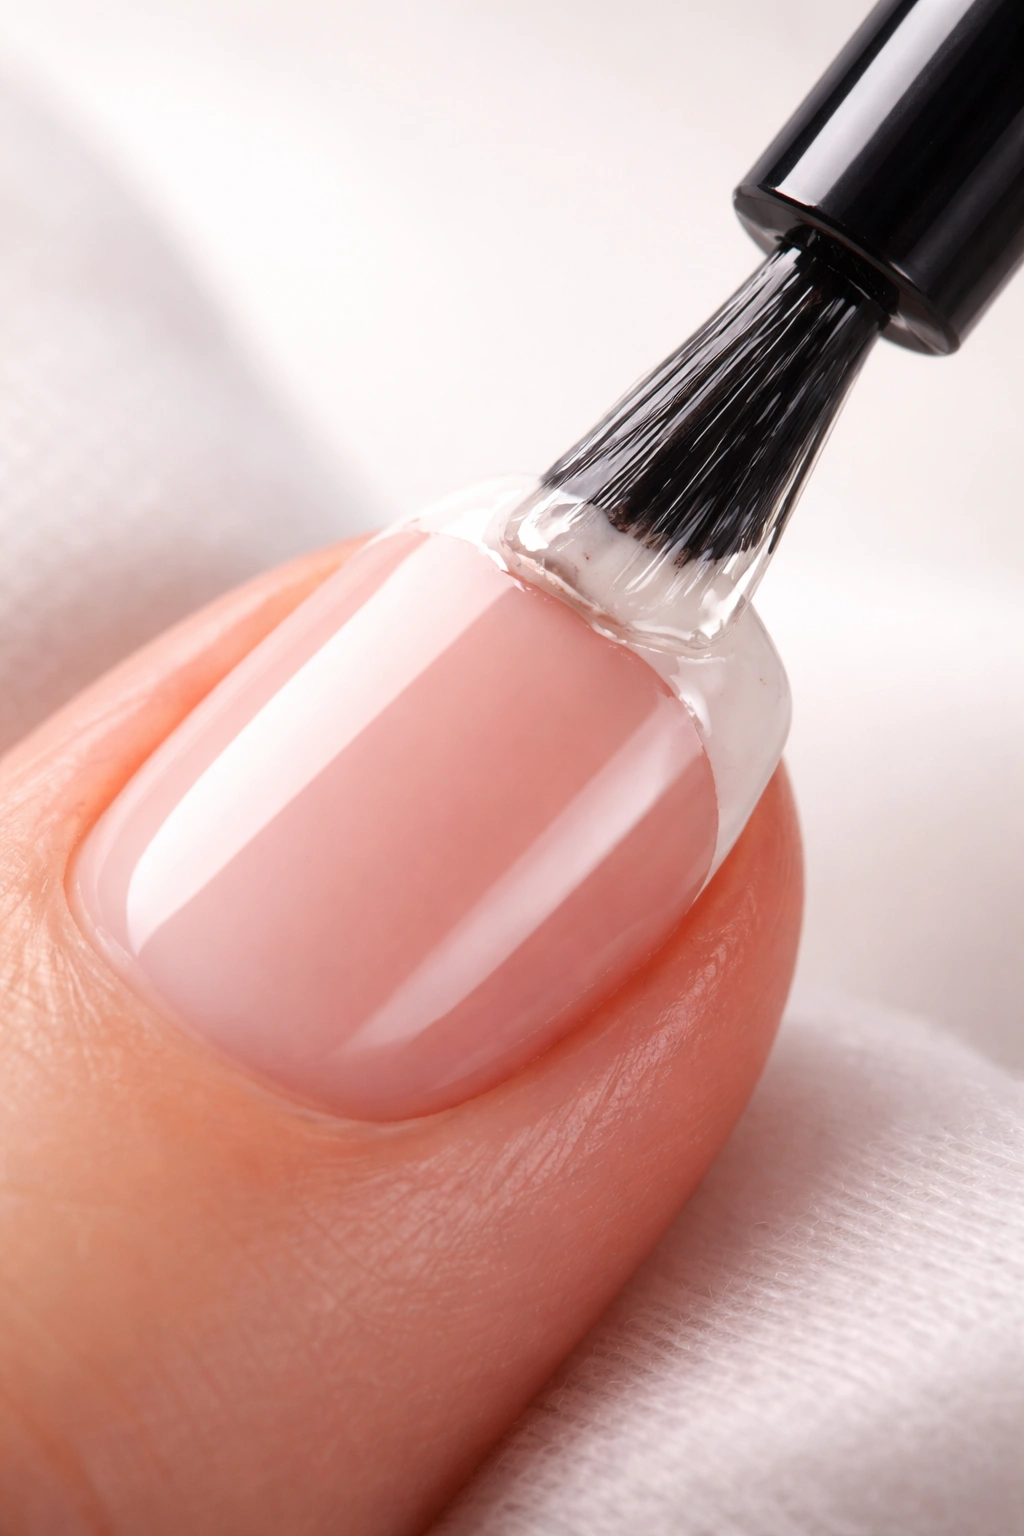
Using French tip guides (the adhesive strips) is the easiest and most reliable method for short nails. Peel off a guide slightly smaller than your nail, and press it onto your nail so the straight edge aligns exactly where you want the white to end. The guides self-adjust to your nail shape, which is helpful. Press down firmly but gently along the entire edge — any lifting or air pockets under the guide will create an uneven white line.
If you’re hand-painting without guides, use a thin striping brush or art brush. Dip the brush lightly in white polish, and rest your hand on a table or pillow to steady it (steadying your hand is absolutely essential for short nails because you’re working in a tighter space). Start at one corner of the nail and draw a thin line across to the opposite corner. On very short nails, you might paint this line in one smooth motion; on slightly longer nails, you can break it into two strokes meeting in the middle if that’s steadier for you.
The line should be slightly curved or angled upward toward the center of the nail, mimicking the natural shape of the fingertip. Completely straight lines often look harsh or artificial, especially on short nails. A very subtle upward curve (almost imperceptible but noticeable when you compare it to a straight line) looks elegant and intentional.
Let any guides sit for a minute before applying polish directly over them. If you’re hand-painting, work slowly and let this first thin layer dry before building it up.
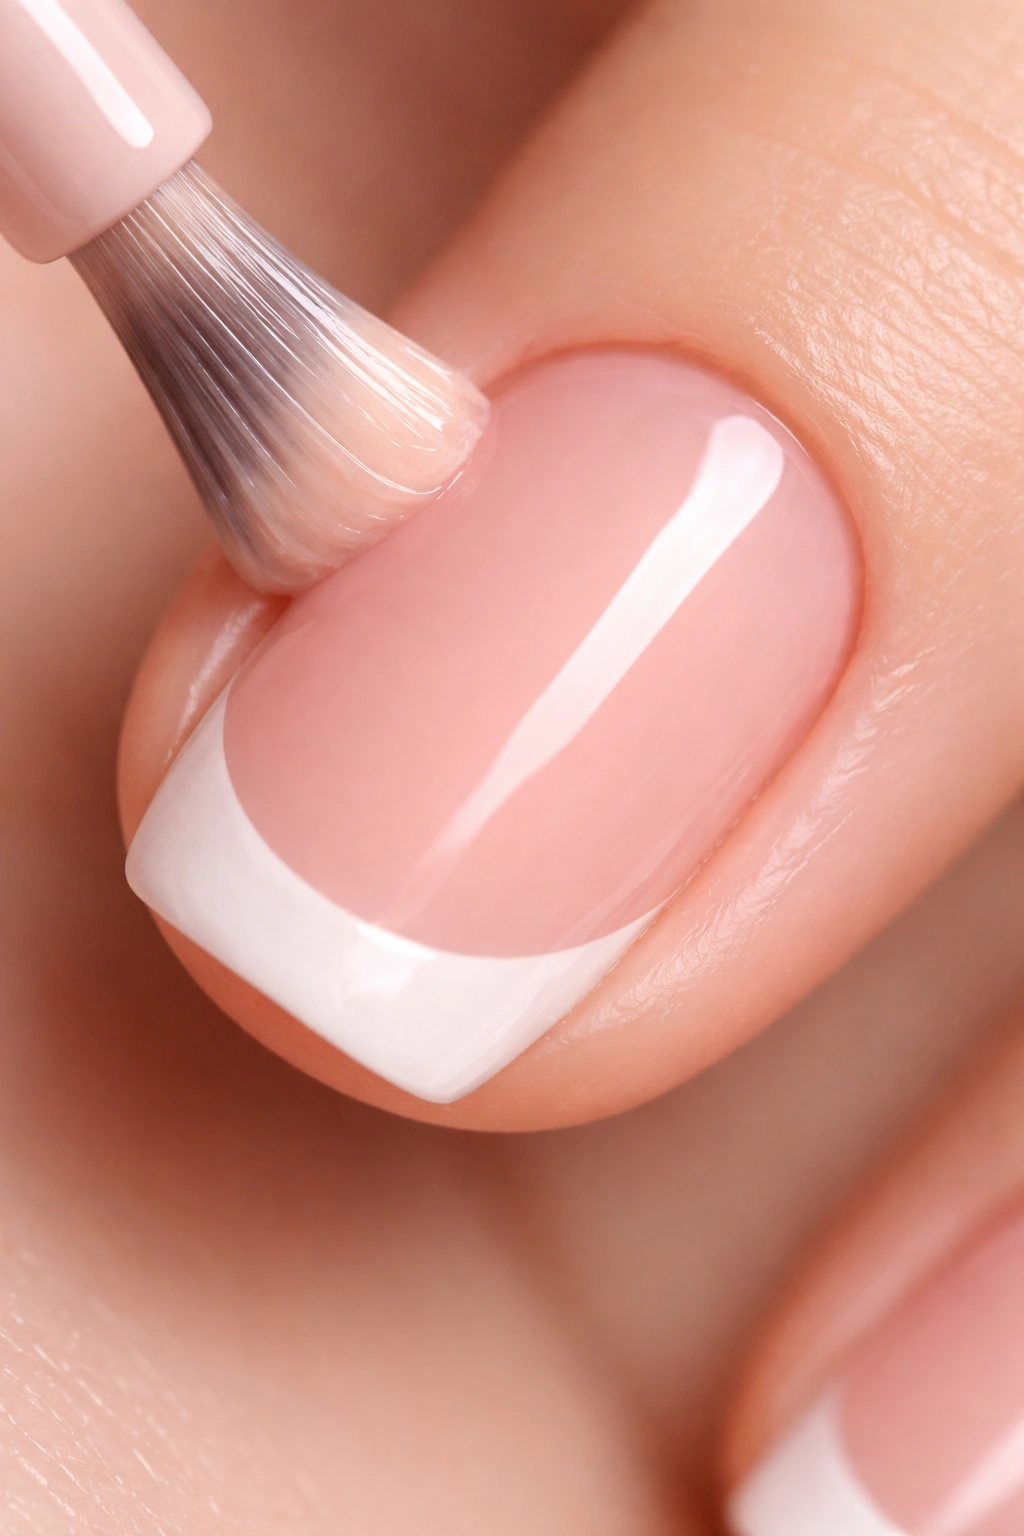
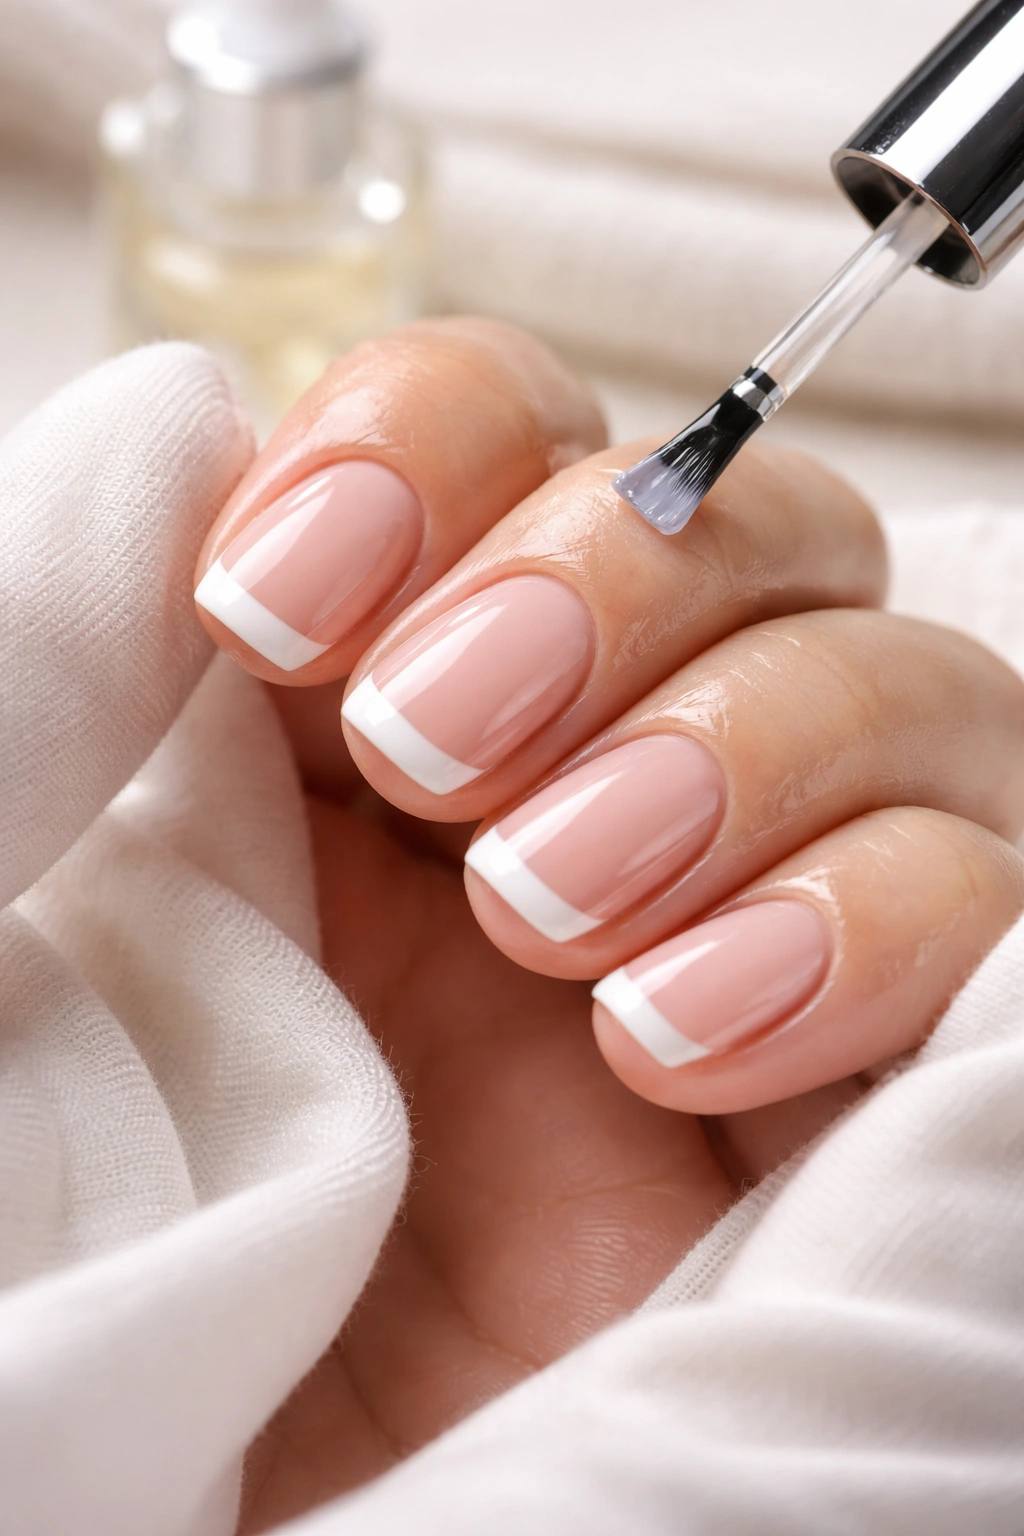
Applying White Polish Over Your Guide or Line
This is where precision and patience matter most. Apply the white polish in thin layers rather than one thick coat. One thick coat of white often looks opaque and flat; multiple thin layers build color gradually while maintaining the line definition and allowing you to correct small imperfections.
Dip your brush into white polish and apply a thin layer across the white tip area, being careful not to apply it thickly or it’ll flow under your guide and create a messy edge. The first coat should be so thin you can almost see through it. Let this dry completely (at least 1-2 minutes).
Apply a second thin coat. You’ll notice the white starts becoming opaque and vibrant. If you need a third coat for complete opacity (some whites are more transparent than others), go ahead and apply it. The final white should look smooth, bright, and evenly opaque — not chalky, streaky, or thin.
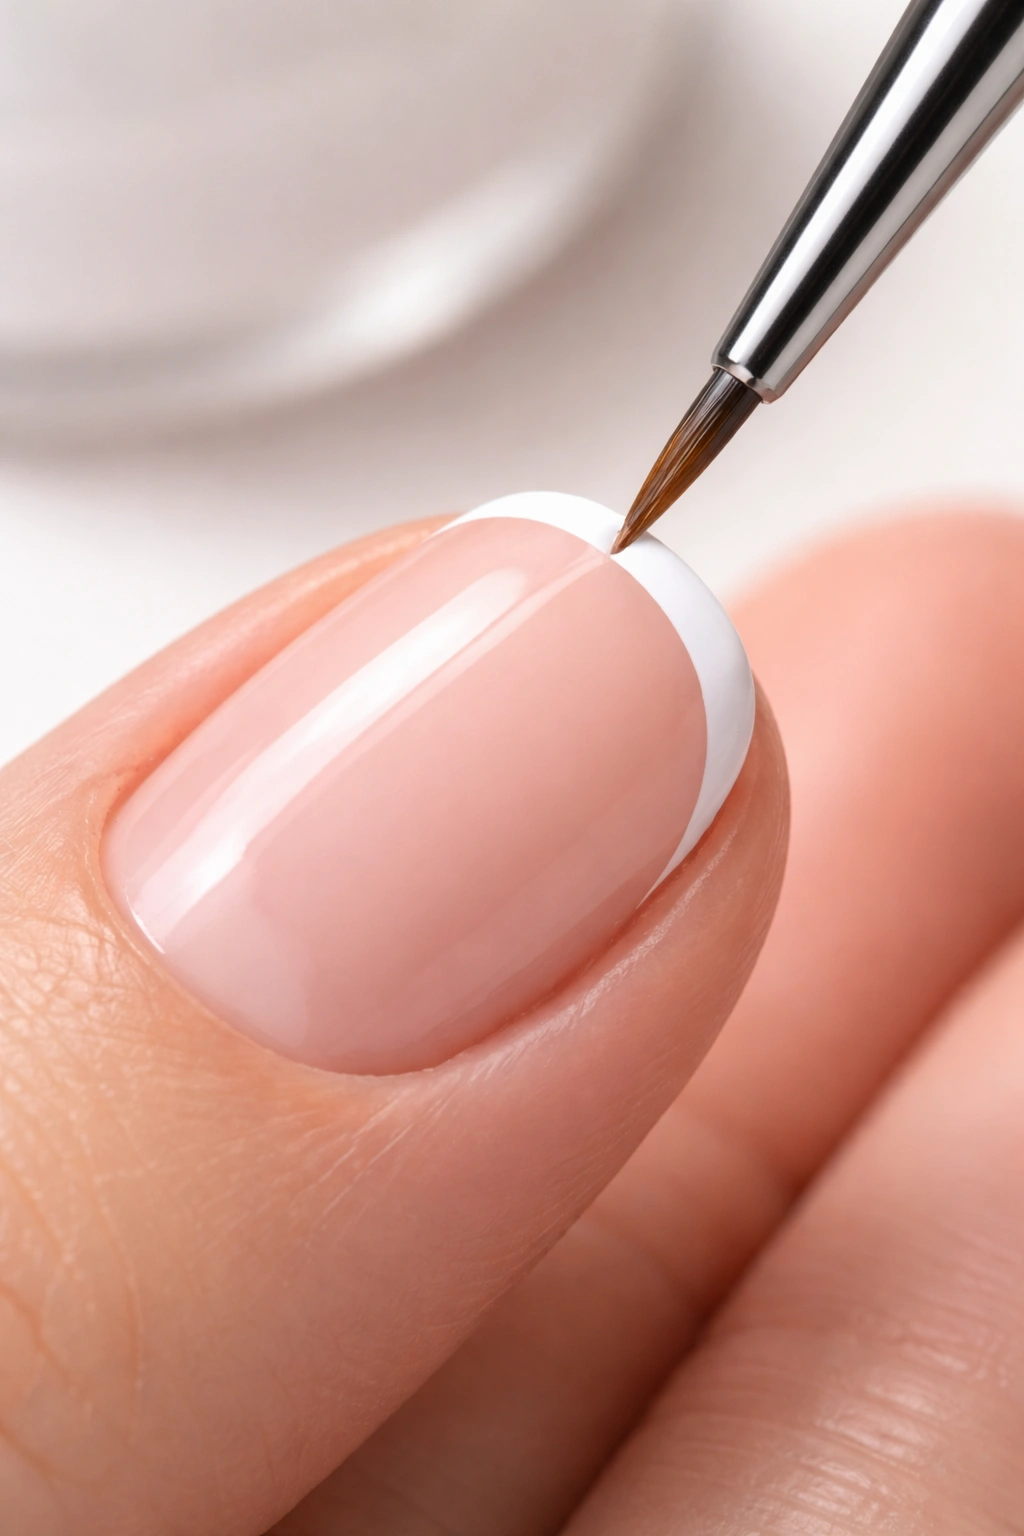
While the white polish is still slightly tacky (about 30 seconds after your final white coat), carefully peel away your guide if you used one. Peel slowly and at a 45-degree angle away from the nail — don’t yank it straight up, or the edge might pull slightly and become uneven. If you hand-painted, inspect the line and use a thin brush dipped in base coat to gently clean up any rough edges or slight bleeds onto the nail bed.
On short nails, this step determines whether your French tips look amateur or professional. A clean, crisp white line is worth the extra 30 seconds of careful peeling.
Coloring the Nail Bed with Your Chosen Shade
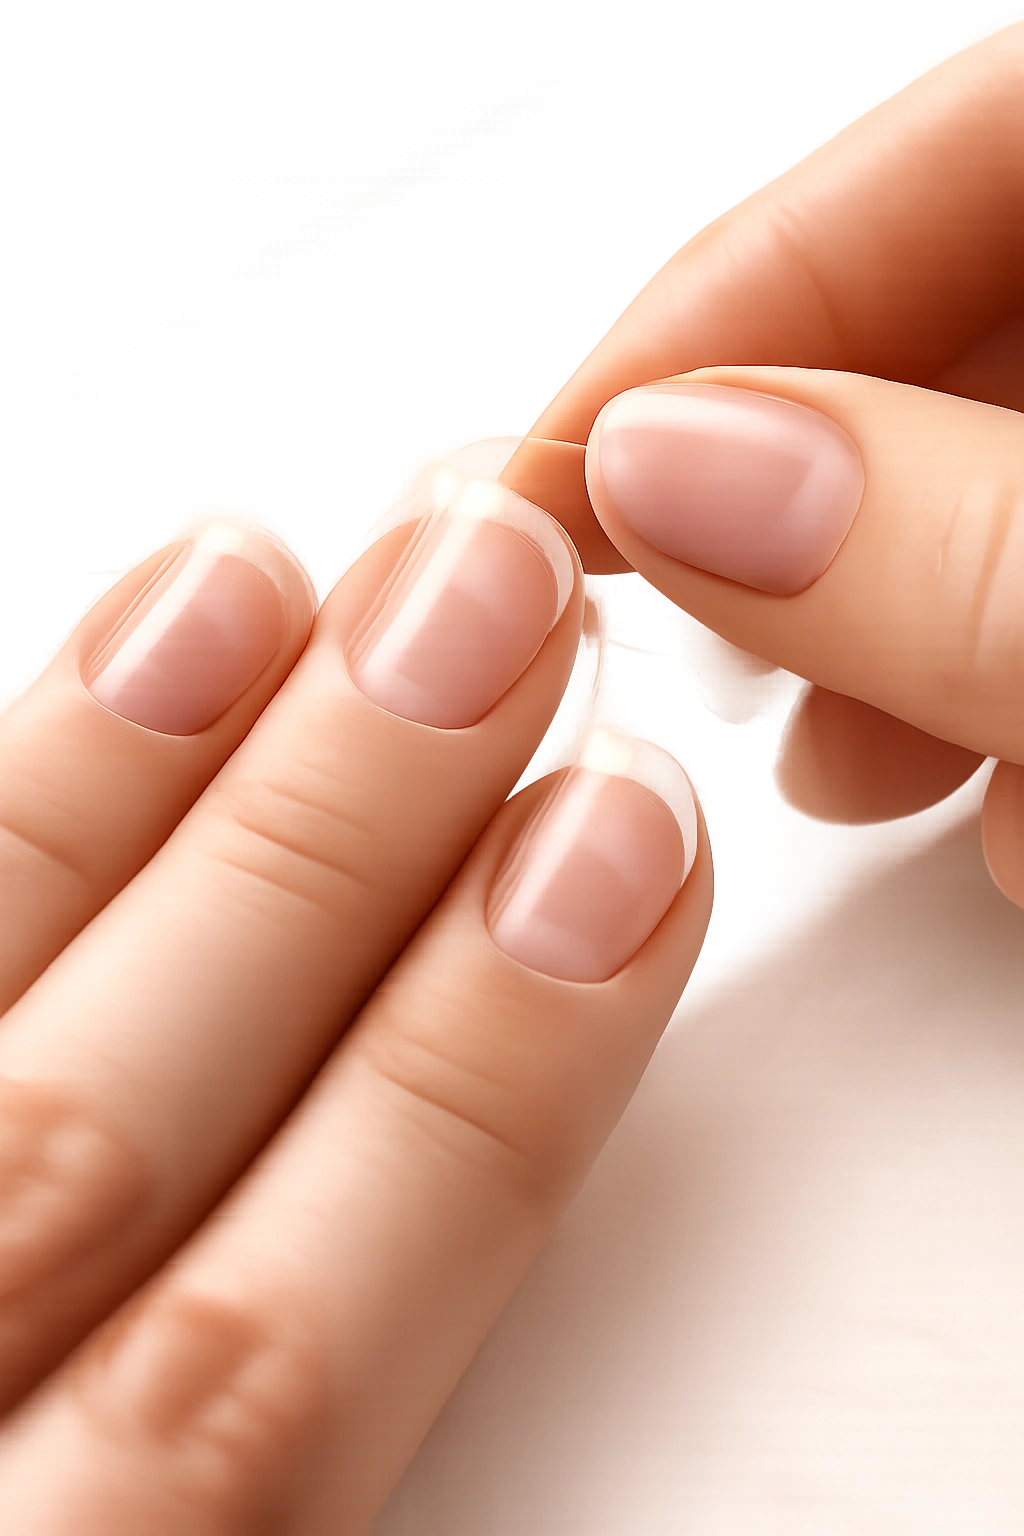
Now that your white tips are perfectly defined, it’s time to add color to the nail bed. Most classic French manicures use pale pink or nude (sometimes called “ballet pink” or “skin tone”), but you can absolutely customize this based on your skin tone and preference.
Choose a shade that’s close to your natural nail or slightly lighter than your skin tone. This creates the elongating effect that makes French tips so flattering. If you choose a shade too dark, it’ll overwhelm short nails and make them look stubbier. A pale, neutral tone has the opposite effect — it creates visual length and makes nails appear more refined even when they’re quite short.
Apply the colored polish in thin, even strokes from the base of the nail to just before the white tip line, leaving a tiny gap between the color and the white (about 1mm). This prevents the two polishes from blending together where they meet, which would blur your crisp white line. The white line should remain completely distinct and separate from the nail bed color — that separation is what creates the classic French manicure definition.
Use two thin coats of the colored polish, letting the first dry completely before applying the second. This builds even color without the thick, uneven appearance that can happen with one heavy coat.
Creating Thin, Precise Lines Without Smudging
If your white line came out slightly thick or uneven, now’s the time to refine it. While both the white and the nail bed color are still drying, you can use a toothpick or very thin brush dipped in base coat to gently clean up any areas where colors bled into each other or where the line is thicker than you’d like.
Work slowly and deliberately. Touch the brush or pick to the area that needs cleaning, and gently drag it along to remove the excess polish while it’s still slightly wet. This is much easier than trying to fix a completely dry line with acetone and a brush.
For the future, here’s the key to preventing thick or uneven lines: apply white polish in thin layers, not heavy ones. A single thick coat that’s overly saturated with polish will flow and pool; three thin, light coats build color while maintaining line precision. Patience with thin layers beats rushing with heavy coats every single time.
If you find your brush is dragging the polish or applying too much, rinse it in water and wipe it nearly dry before dipping it again. A slightly drier brush picks up less polish and gives you more control over how much you’re applying.
Avoiding Common Mistakes That Ruin Short French Tips
The most frequent mistakes on short nails are entirely preventable once you know what to watch for. The white tip is too thick, making short nails look stubby or unfinished. Measure your proportion — on very short nails, white should be no more than 2-3mm. Using a guide sized for short nails solves this automatically.
The white line is uneven, with one side thicker than the other or the curve going different directions. This happens when you apply too much pressure to one corner of the guide or when hand-painting without steadying your hand properly. Always rest your working hand on a solid surface and use guides rather than hand-painting if you’re new to this.
The white bleeds under the guide, creating a messy, undefined edge. This means you’re applying polish too heavily or the guide isn’t pressed down firmly enough. Press your guide down completely before applying polish, and use thin coats rather than heavy ones.
The white polish lifts or peels within a few days. This is usually a base coat issue — either you skipped it, applied it too thickly so it didn’t cure properly, or didn’t let it dry completely before applying white polish. Always use a quality base coat and let it dry fully.
The colored polish looks streaky or uneven. This indicates the nail surface wasn’t properly buffed before application, or you’re using a low-quality polish that applies unevenly. Buff gently before starting, and invest in a good quality nail polish brand — the difference in application is remarkable.
Your tips chip within days. Short nails naturally get more contact and friction, so a strong top coat is essential. Apply two coats of top coat and make sure it cures fully. Avoid getting your nails wet for at least 1-2 hours after application.
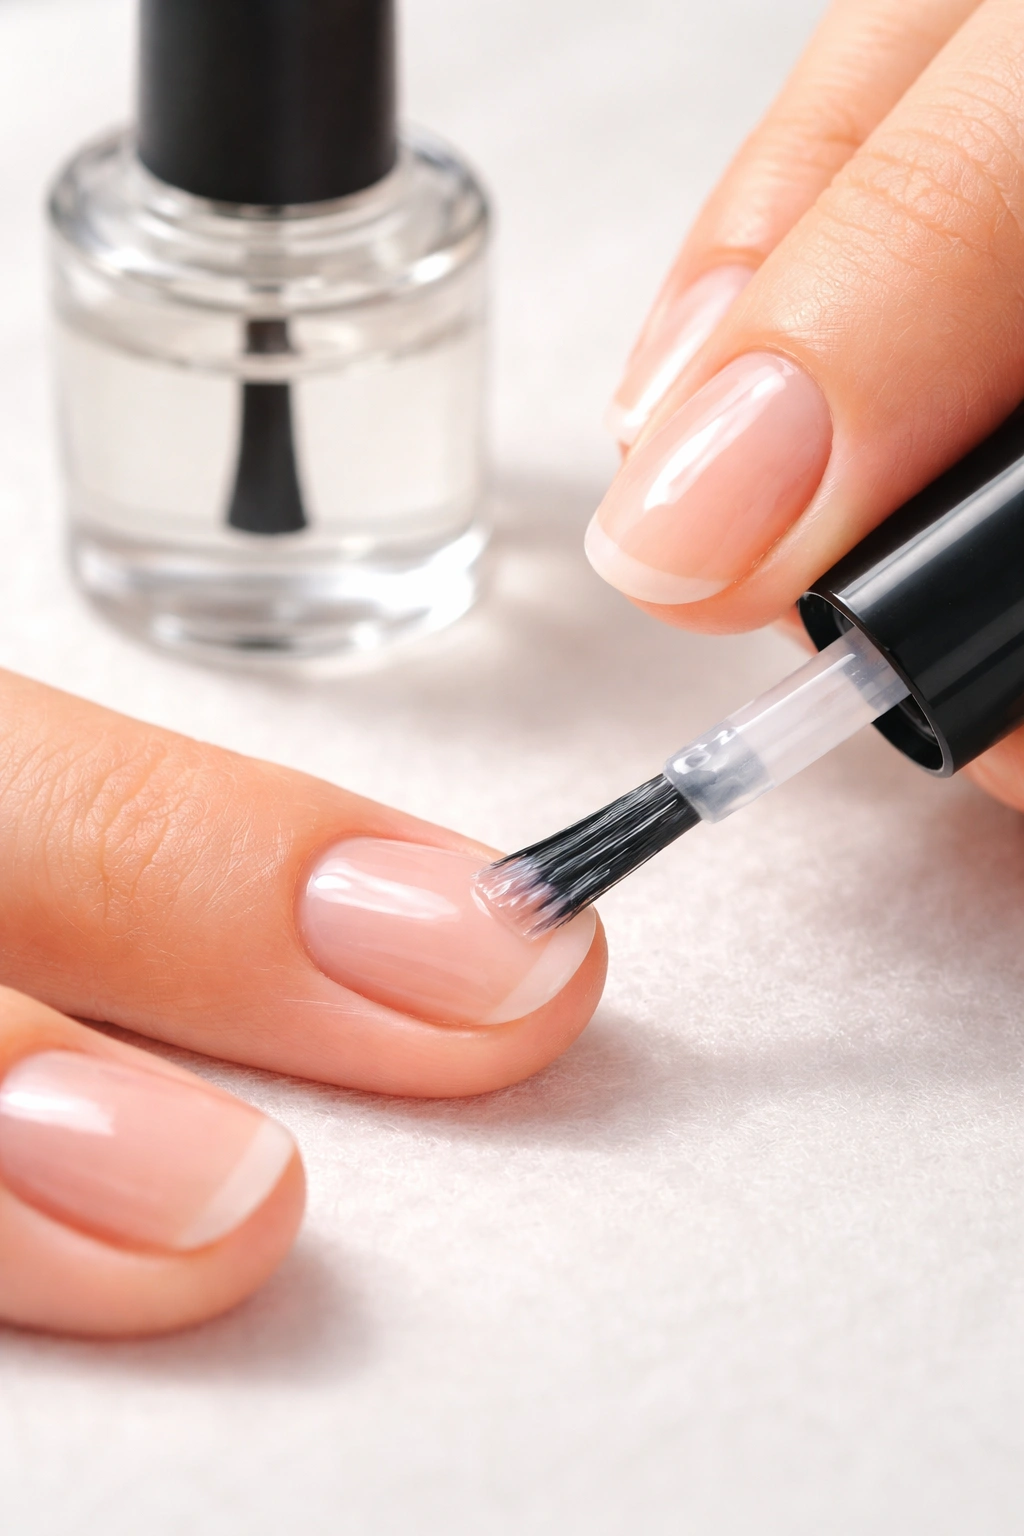
Sealing With a Quality Top Coat
Your French tips are nearly finished, but they won’t last without a proper top coat. This is where many people cut corners, and it’s where French tips fail most often on short nails.
Apply a thick, generous coat of top coat across the entire nail, making sure to wrap the brush under the free edge (the white tip) as well. The undersides of your nails take a lot of contact throughout the day, and sealing the underside prevents water from seeping underneath and causing the polish to lift.
Choose a top coat specifically designed for longevity — many brands offer formulas marketed as “long-lasting,” “chip-resistant,” or “gel-like.” These tend to be thicker than regular top coat and hold up better on nails that get handled frequently. Gel or hybrid top coats (cured under UV or LED light) last noticeably longer than air-dry top coats, especially on short nails.
Let your top coat dry completely. Many people make the mistake of using their nails too soon after finishing, which smudges the top coat or causes indentations. Wait at least 1-2 hours before washing your hands or engaging in activities that put pressure on your nails.
Customizing Your French Tips With Design Variations
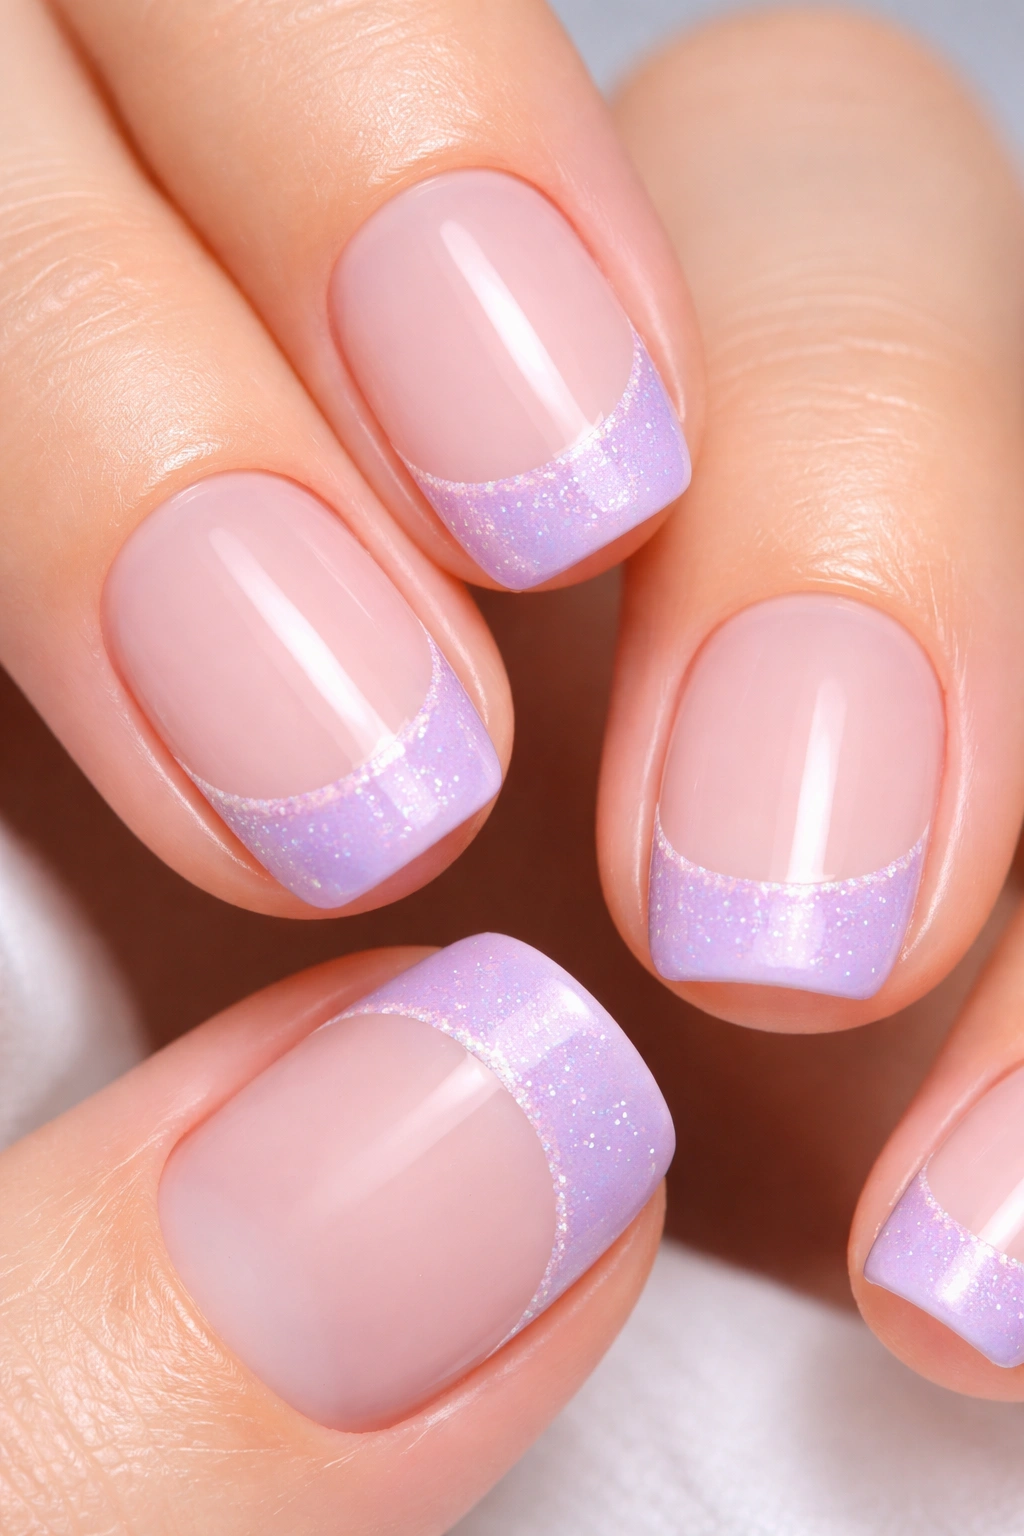
Once you’ve mastered the classic French tip, you can easily customize the look to match your mood or occasion. Colored tips are a modern twist where you use a soft pink, nude, lavender, or even bold color instead of white for the tip line — it’s the same technique, just with a different shade. On short nails, colored tips often look more contemporary and less formal than white.
Glitter or metallic tips add glamour without much extra effort. After your white polish is dry, apply a thin line of glitter or metallic polish over the white (or over a colored tip) for a subtle sparkle. This works especially well on short nails because the small surface area means you won’t end up with too much glitter, which can look heavy.
Ombre French tips blend the white tip into the nail bed color gradually rather than keeping them completely separate. This requires a bit more skill but creates a softer, more blended appearance. Use a damp sponge to gently blend where the white and colored polish meet while both are still slightly wet.
Double-line French tips add a thin accent line between the white and the nail bed color — perhaps a thin gold line or a contrasting shade. This creates more visual interest on the small nail surface and can look very sophisticated.
Reverse French tips put the color on the tip and white on the majority of the nail — this is more avant-garde but can look stunning on short nails if executed with precision. The same technique applies; you’re just reversing which section gets which color.
Maintaining Your French Tips Between Polishes
Short nails mean your French tips might only last 7-10 days before they start chipping or the white begins yellowing from sun exposure or daily wear. Knowing how to maintain them properly extends their life.
Wear gloves when washing dishes or cleaning, as prolonged water exposure softens polish and causes lifting. Even brief daily water contact adds up, so protect your nails when possible. Pat hands dry immediately after washing — don’t let moisture sit under your nails.
Apply a thin layer of top coat every 2-3 days as a refresh. This seals any minor chips or thin spots before they become actual cracks, and it restores shine. This quick maintenance step can add 3-5 days to your manicure’s life.
Avoid using your nails as tools. On short nails, this pressure causes immediate chipping because there’s less surface area distributing the force. Use a proper tool to open packages or scrape off labels.
Moisturize your nail beds and cuticles daily with cuticle oil or hand cream. Healthy nails and cuticles support polish adhesion and prevent peeling. Short nails especially benefit from this care because healthier nail growth means each successive manicure applies to stronger nails.
Troubleshooting When French Tips Don’t Look Right
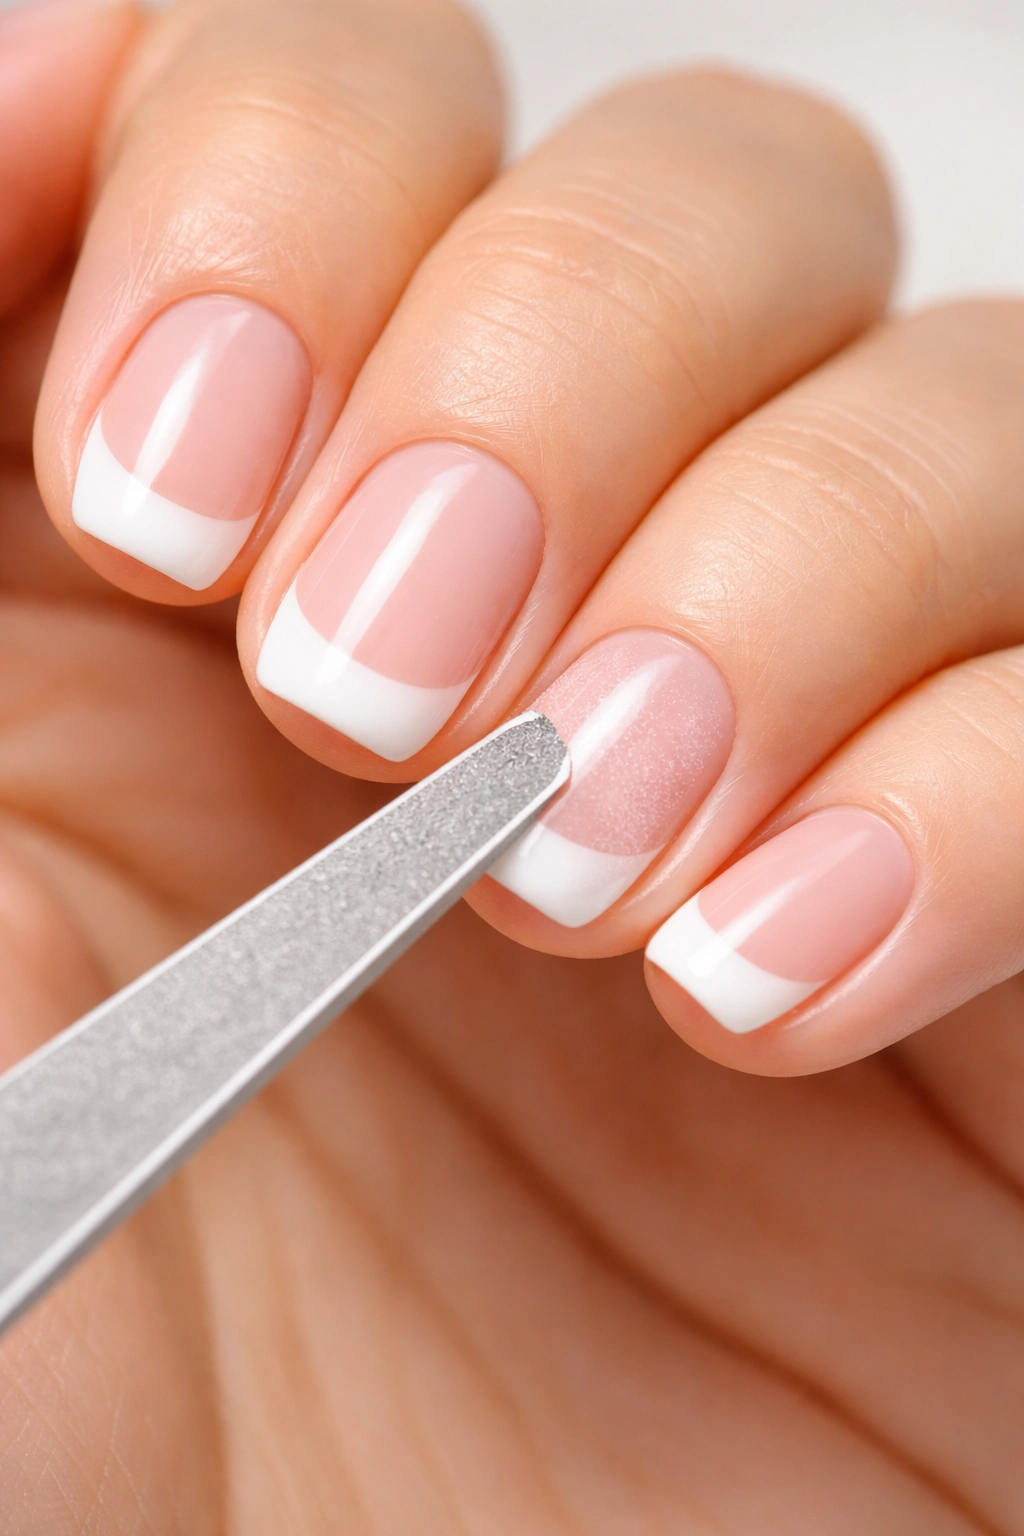
If your tips came out uneven or unfinished-looking, here are quick fixes. If the white line is slightly too thick, you can thin it out using a nail file. Once everything is fully dry, gently file the white tip line from underneath (the underside of your free edge) to reduce the thickness slightly. This is a precision task — file gently in one direction only.
If the white and colored polish blended together where they meet, you can carefully use a thin brush dipped in nail polish remover to create separation again. This is tricky and takes patience, but it’s possible to “redraw” the line while maintaining your overall design.
If the white looks yellowish or dull after a few days, it means you didn’t use a staining-prevention base coat or didn’t apply enough white coats for full opacity. The next time, use a dedicated anti-stain base coat and apply three thin coats of white rather than one or two heavy coats.
If polish is peeling or lifting within 48 hours, the problem is either lack of proper base coat, inadequate nail preparation, or applying polish to damp nails. Your next manicure, invest extra time in the prep phase and let your base coat dry completely.
If you have a significant chip or crack, short nails make it easy to just redo the entire manicure quickly — it takes less time than on longer nails. Use rubbing alcohol to remove the old polish quickly, and start fresh. This is actually an advantage of short nails versus longer ones.
Final Thoughts

French tips on short nails absolutely work, and once you understand the proportions and techniques specific to shorter nail beds, you’ll create polished, professional-looking results consistently. The key is measuring the white tip correctly for your nail length, investing in quality tools (especially guides and a good staining-prevention base coat), and applying multiple thin coats rather than heavy single coats.
Short nails have real advantages — they’re less prone to breaking or snagging, they look elegant and modern, and they’re genuinely practical for people who work with their hands. The French tip style elongates even very short nails when the proportions and colors are right, making your hands look refined and put-together.
Your first attempt might not be absolutely perfect, and that’s completely normal. But by your third or fourth manicure, your muscle memory improves, your guides work faster, and you’ll develop an intuitive sense for the exact proportions that work best for your specific nail shape and length. Before long, you’ll be creating French tips at home that look just as polished as anything you’d get at a salon — and you’ll enjoy the process because you’ve finally cracked the technique that works specifically for short nails.
