

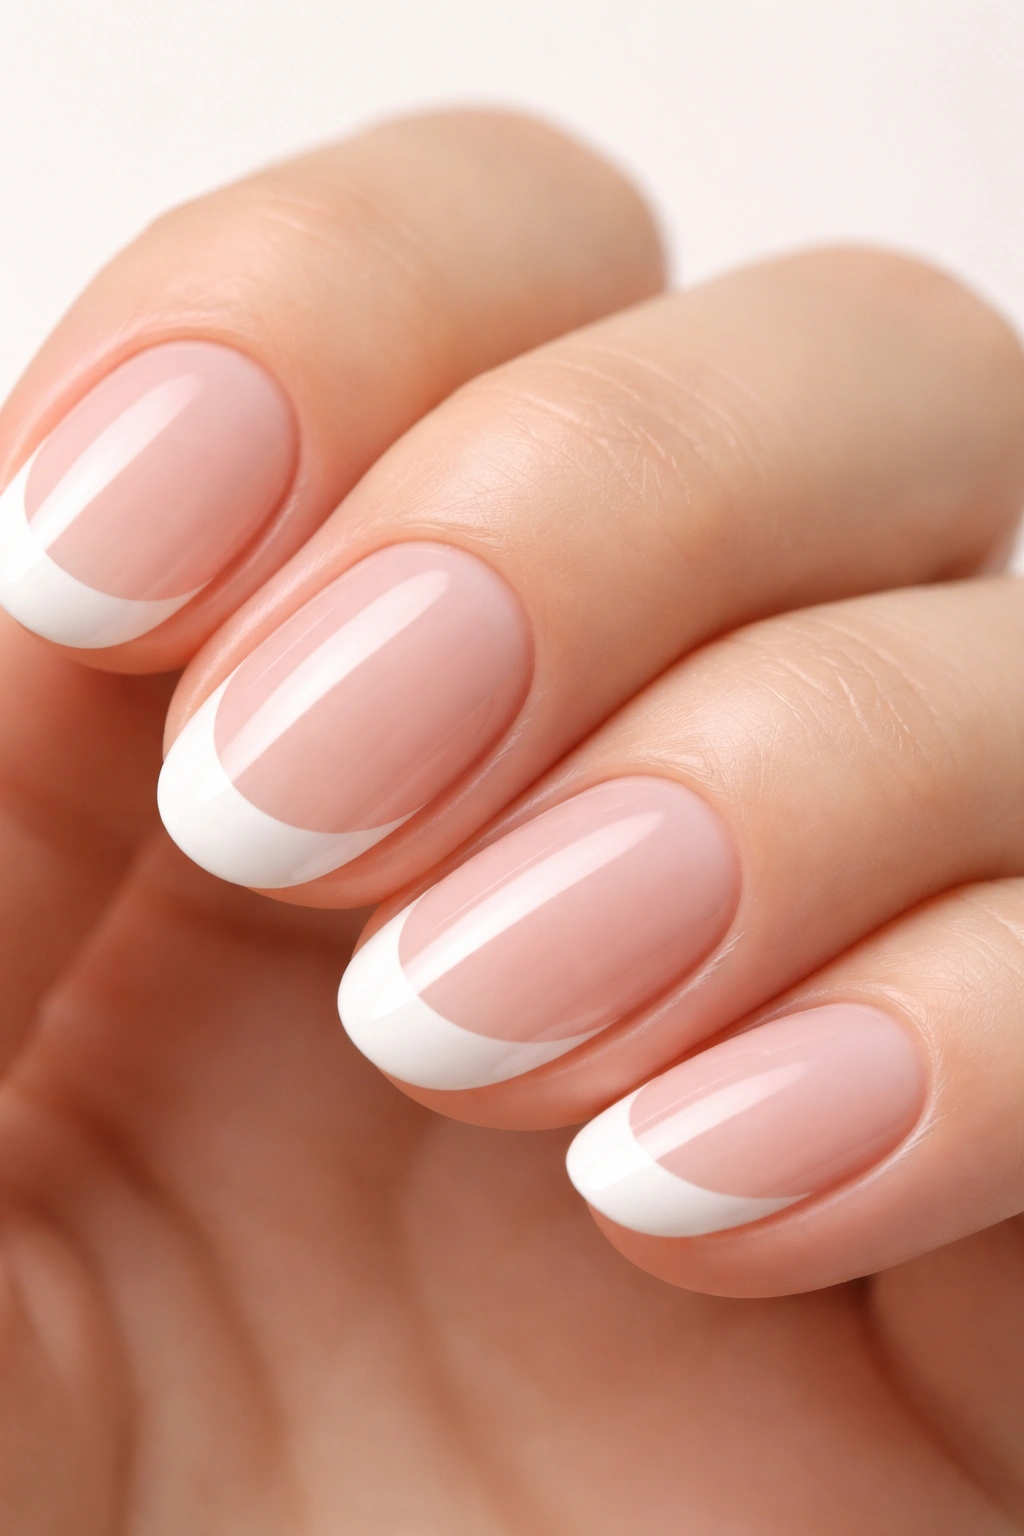
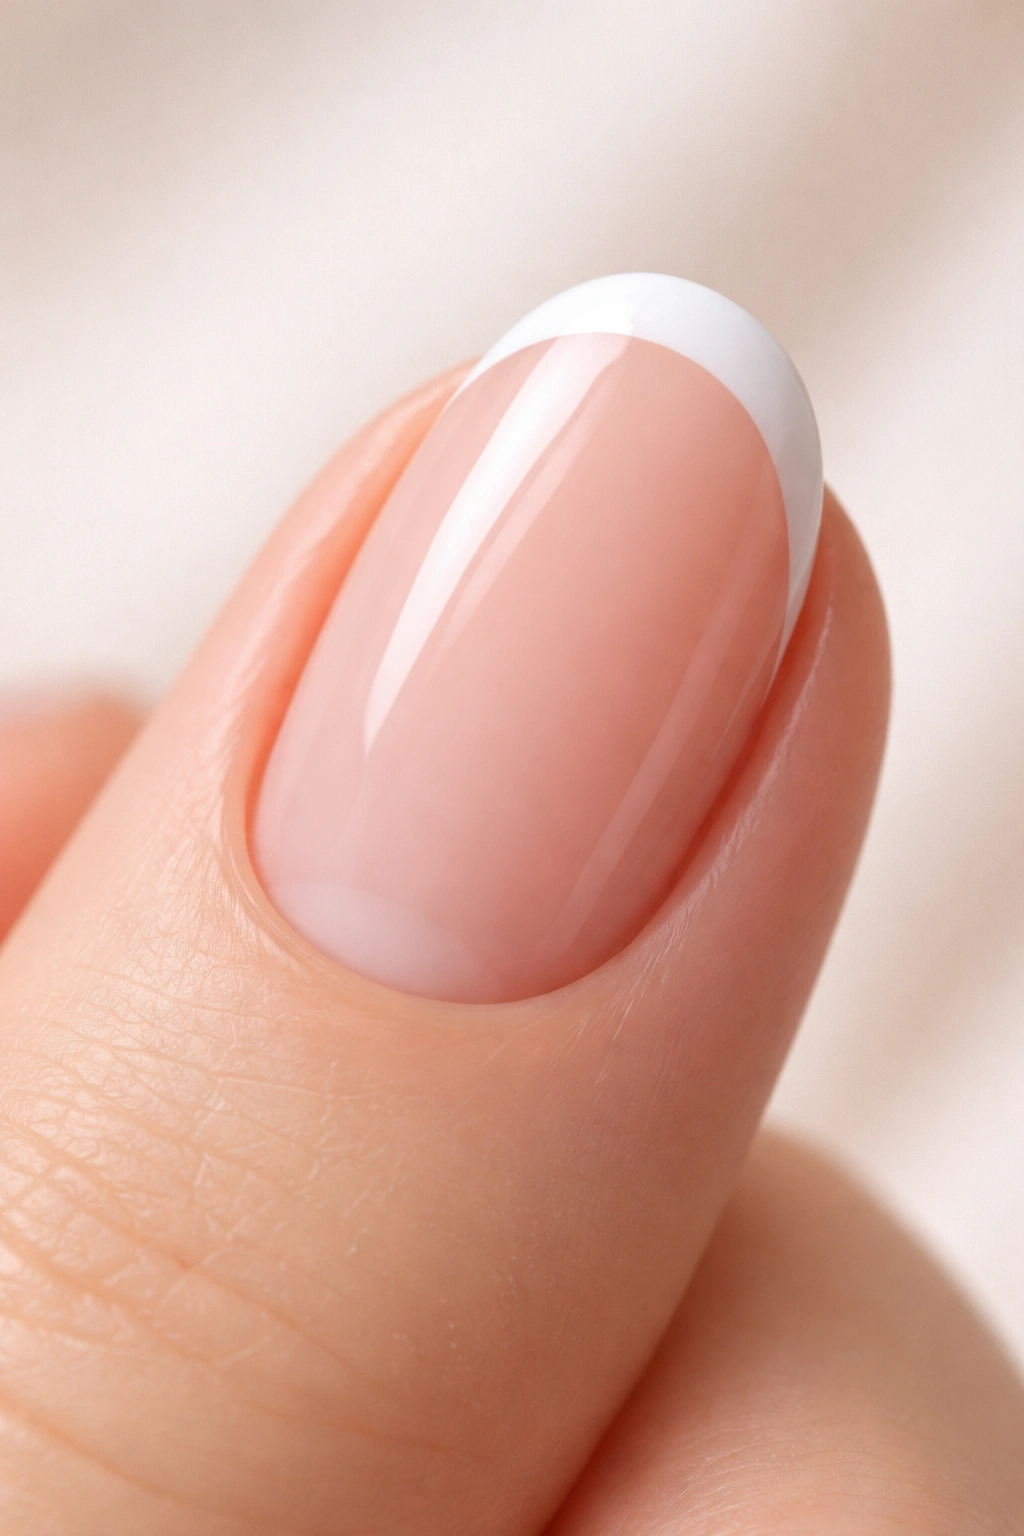
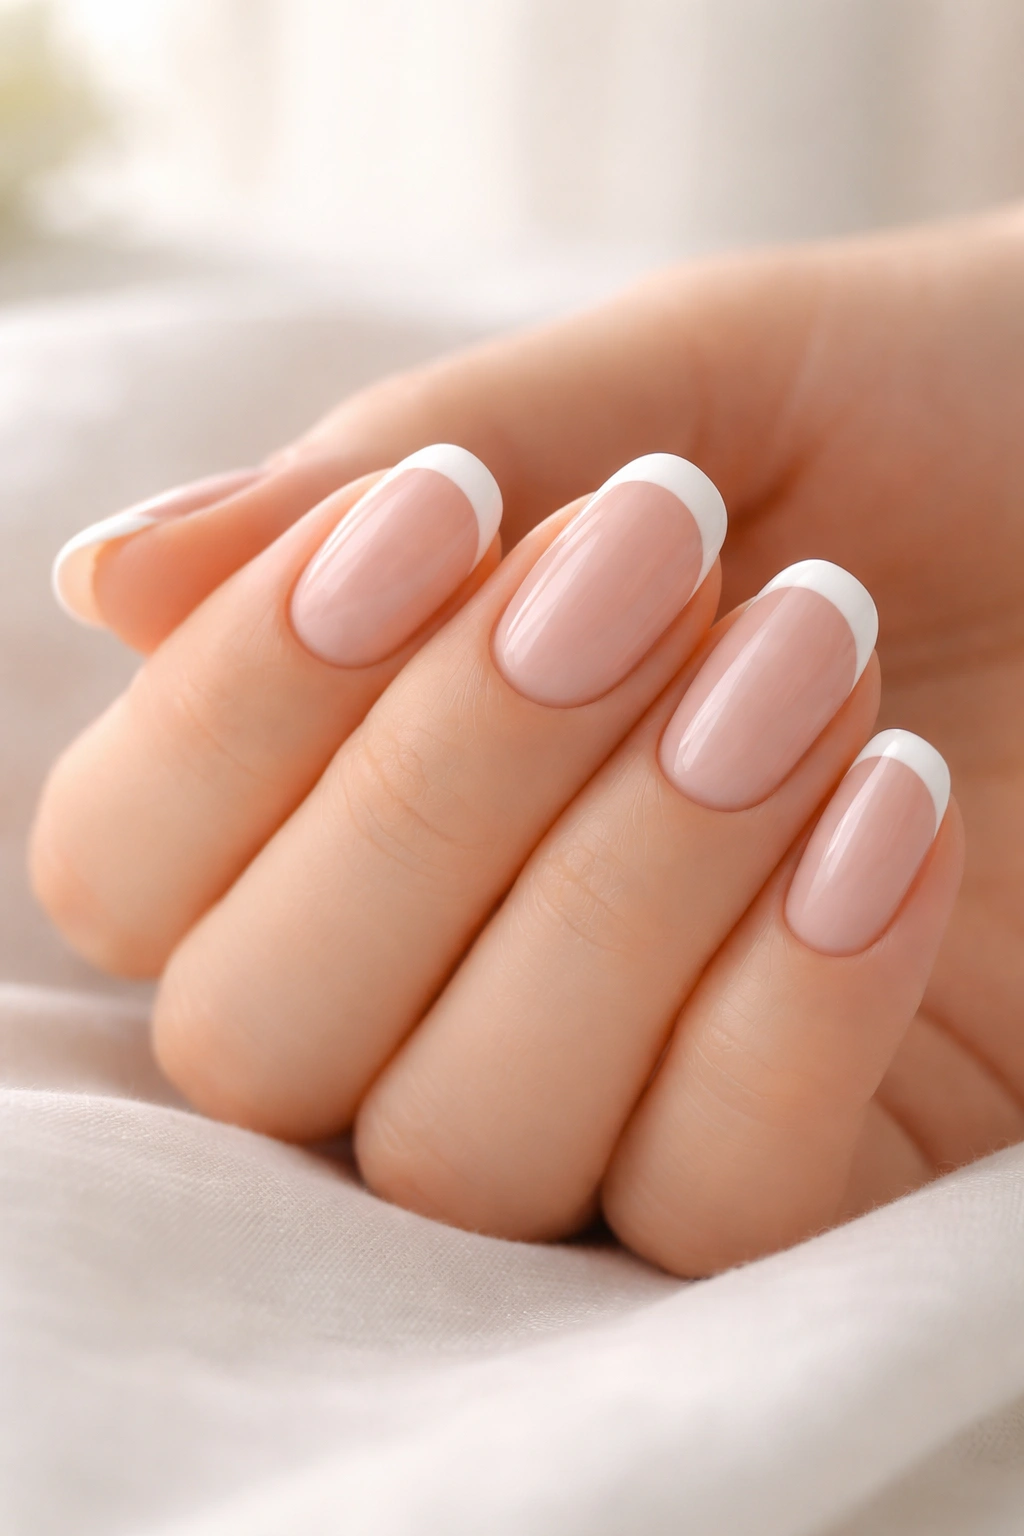
A classic French manicure has an almost timeless appeal—that crisp white tip paired with a clean, rosy-nude base looks polished in virtually any setting. But here’s what most people don’t realize: round nails actually deserve special attention when creating a French manicure. The curved edge of a round nail changes the geometry of that signature white tip line, and executing it perfectly requires a slightly different approach than you’d use on square or almond-shaped nails.
If you’ve struggled to get those white tips to look proportional on your round nails, or if you’ve watched online tutorials and wondered why your results don’t match theirs, the issue usually comes down to understanding how to position the tip line to complement the natural curve of your nail. The good news is that once you learn the specific techniques and proportions for round nails, you can create a French manicure that looks intentional, elegant, and genuinely flattering to your hand shape.
This guide walks you through every step—from nail prep and shaping to the precise technique for painting that perfect white tip on round nails. Whether you’re doing this on yourself or preparing to do it for someone else, these methods will help you achieve salon-quality results at home.
Why Round Nails Are Ideal for French Manicures
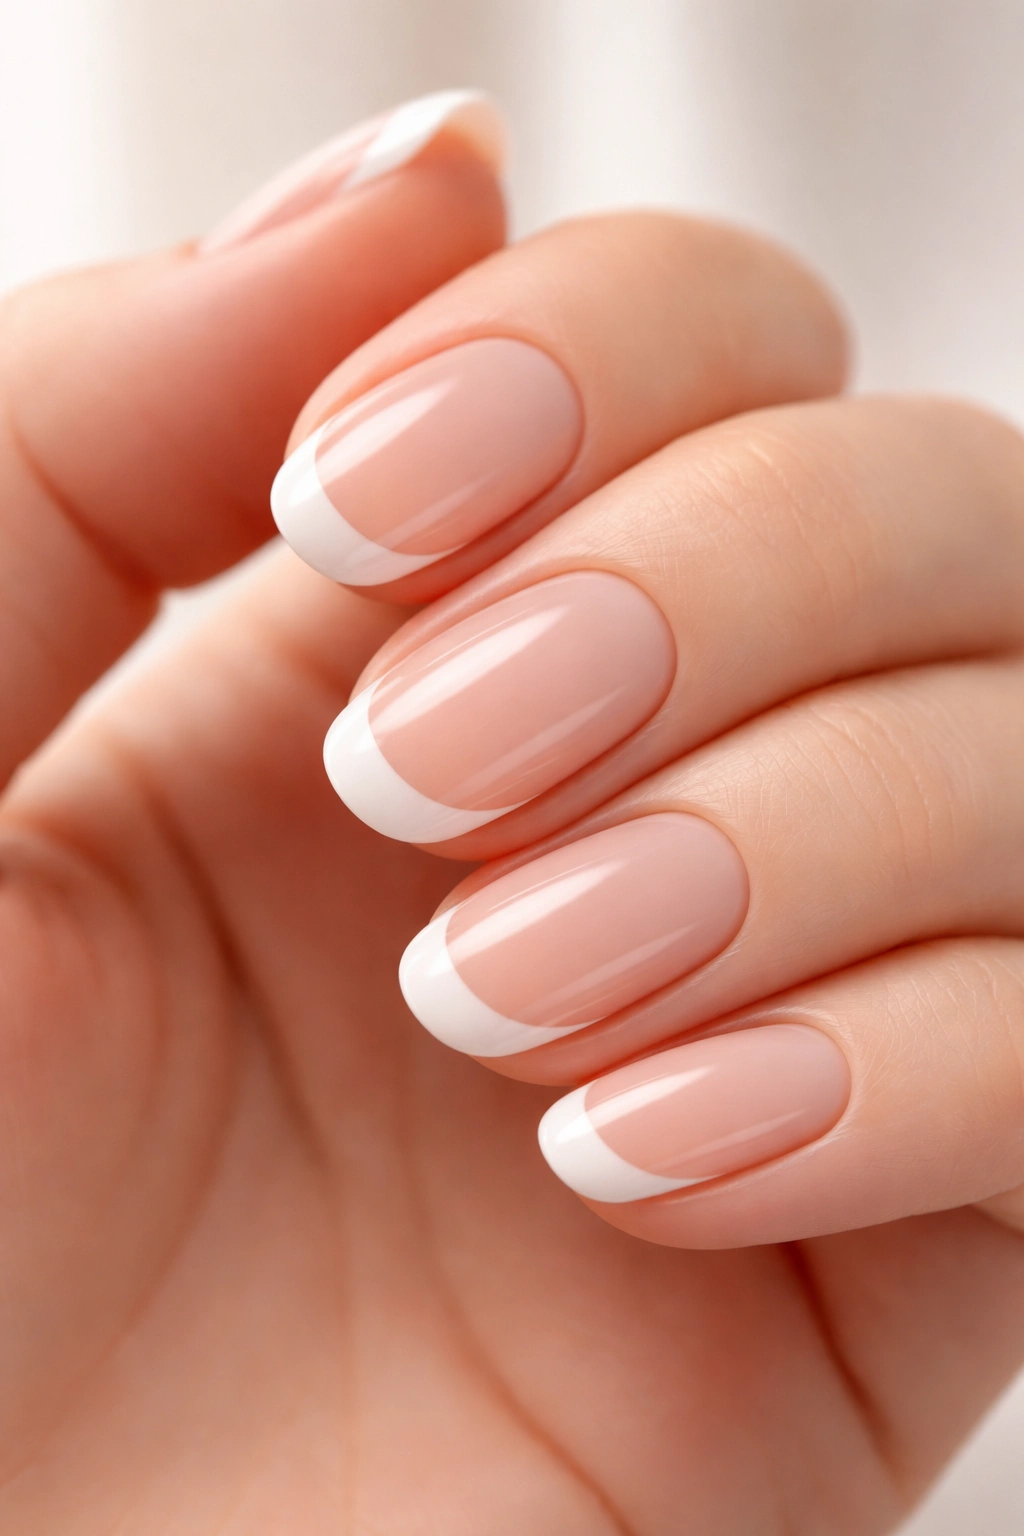
Round nails have quietly become one of the most popular shapes in recent years, and there’s a solid reason why they work so well for French manicures. Unlike square nails, which have a defined corner where the white tip naturally ends, round nails create a softer visual line that demands precision in tip placement—but when executed correctly, they look absolutely stunning.
The curved shape of a round nail actually creates a more forgiving canvas for the tip design in some ways. Because there’s no sharp corner to emphasize, a slightly imperfect white tip line is far less noticeable on a round nail than it would be on a square one. At the same time, the curve means you need to think carefully about where the white tip begins and how it transitions along the rounded edge.
The Visual Appeal of Round Tips
Round nails with a French manicure give hands an inherently softer, more elegant appearance. The rounded shape elongates the fingertip visually and makes the white tip portion feel proportional rather than looking like an afterthought. Many people with round nails worry that the white tip will look too wide or too short, but when you understand the right proportions for curved edges, these concerns disappear entirely.
Durability Benefits
Round nails tend to be more durable than pointed shapes because there’s less stress concentrated at the edges. The French manicure style actually enhances this natural durability advantage—the white tip portion is usually slightly shorter than a full pointed tip would be, which means less breakage and a longer-lasting manicure overall.
Tools and Products You’ll Absolutely Need
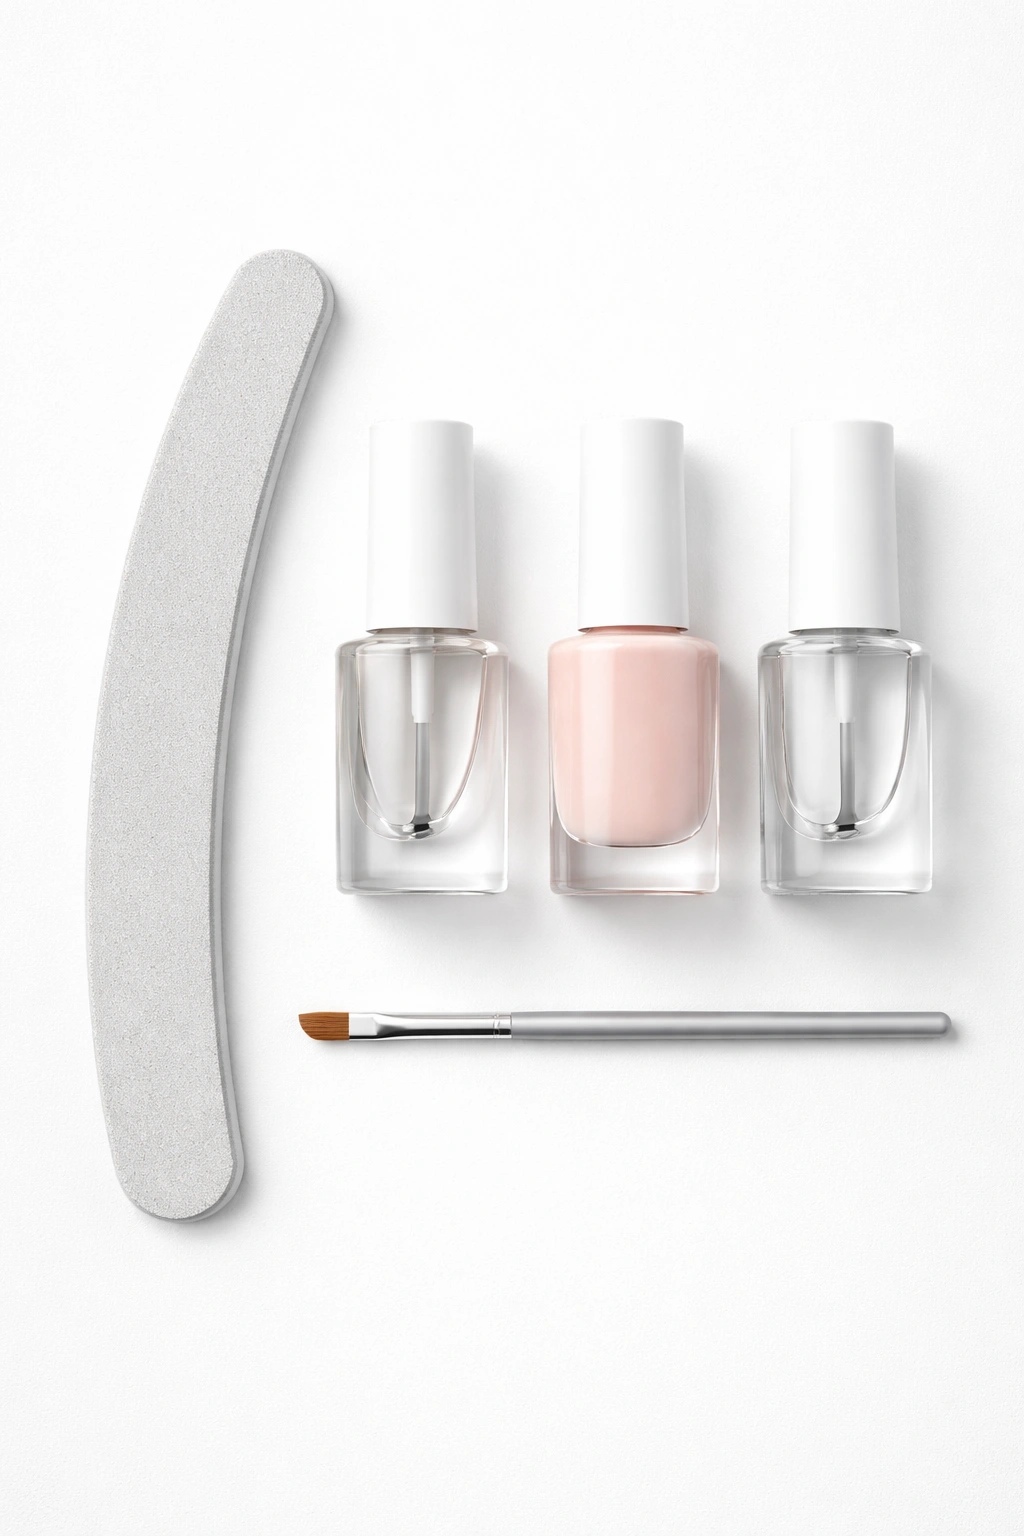
Creating a polished French manicure on round nails requires specific tools that make the difference between a mediocre result and a genuinely professional-looking outcome. You don’t need an enormous collection—just the right ones used the right way.
A high-quality nail file is your foundation. For round nails, you want a file with a slightly rounded edge rather than a completely flat one—this allows you to smooth the edges while maintaining that gentle curve. A 220-grit file works beautifully for this; it’s fine enough to create smooth edges without causing splitting or peeling.
You’ll need quality nail polishes in two shades: a pale pink or nude base color that matches your skin tone, and a crisp white or off-white top coat for the tips. Don’t skip on polish quality here—cheaper polishes often have a gritty texture or require too many coats, which makes the precise tip lines much harder to achieve. A good base coat prevents staining and helps your polish adhere better, while a top coat locks everything in and creates that glass-like shine.
Thin, angled brushes are essential for painting those white tips. The standard polish brush that comes in a bottle can be too thick and unwieldy for precise tip work. A separate small angled brush—typically around a quarter-inch wide—gives you much better control. Some people prefer a flat thin brush; test both to find what feels most comfortable in your hand.
Additional Supplies Worth Having
Cuticle pusher or wooden stick: For gently pushing back cuticles without damaging the nail bed. Metal pushers work fine, but gentler options like ceramic or bamboo reduce the risk of tears.
Nail buffer: A soft buffer with multiple sides smooths the nail surface and creates a subtle sheen. Use this before applying base color to create an even texture that helps polish adhere properly.
Lint-free nail wipes and nail dehydrator: When you wipe away dust between coats, lint left behind creates bumps and uneven surfaces. Nail dehydrator removes oils from the nail bed so polish sticks better and lasts longer.
Nail care oil: Applied after you’ve finished your manicure, a nourishing cuticle oil keeps nails flexible and prevents the brittle cracking that can ruin a freshly painted design.
Preparing Your Nails and Cuticles Properly
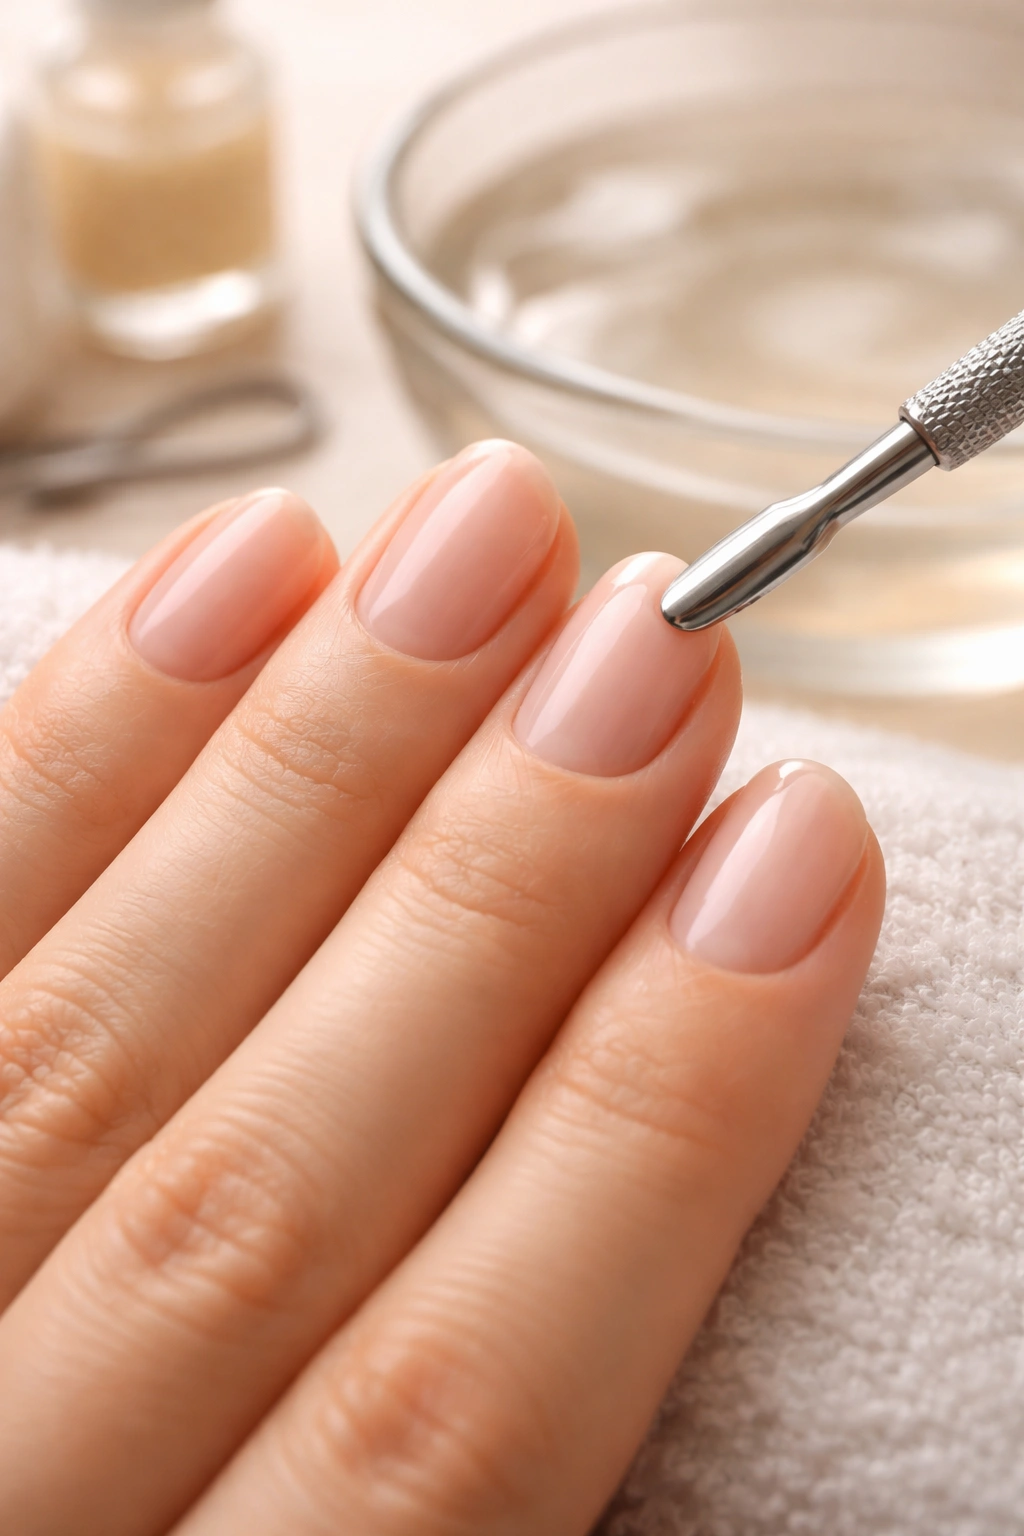
The quality of your finished manicure depends almost entirely on how well you prepare the nail surface. A clean, properly prepped nail provides a smooth canvas for polish and helps it last far longer than it would on an unprepared nail.
Start by removing any old polish completely. Use a non-acetone remover if you have one—acetone dries out nails significantly, and while it works faster, gentler removers protect the integrity of your nail bed. Soak your nails in warm water for a few minutes to soften the cuticles and surrounding skin. This step matters more than it might seem; soft cuticles are much easier to work with and less likely to tear when you push them back.
Once your nails are clean and dry, assess your cuticles. Using a cuticle pusher, gently push them back with steady, even pressure. The goal isn’t to remove cuticles entirely—they serve a protective purpose—but to clear them away from the nail bed so the base color can sit flush against the skin. Work slowly around the entire perimeter of each nail.
Cleaning the Nail Bed
Dead skin cells and oils sitting on your nail surface prevent polish from adhering evenly. Wipe each nail with a nail dehydrator or a lint-free wipe. This removes the invisible layer of moisture and oils that would otherwise cause polish to bubble or peel within a few days. Pay special attention to the edges and sides of each nail—these areas collect the most debris.
If you notice any hang nails or rough cuticle tissue around the edges, trim these away carefully with cuticle scissors. Don’t cut too close to the skin; you’re just removing the loose, torn pieces that would otherwise snag and irritate.
Filing and Shaping Your Round Nails Correctly
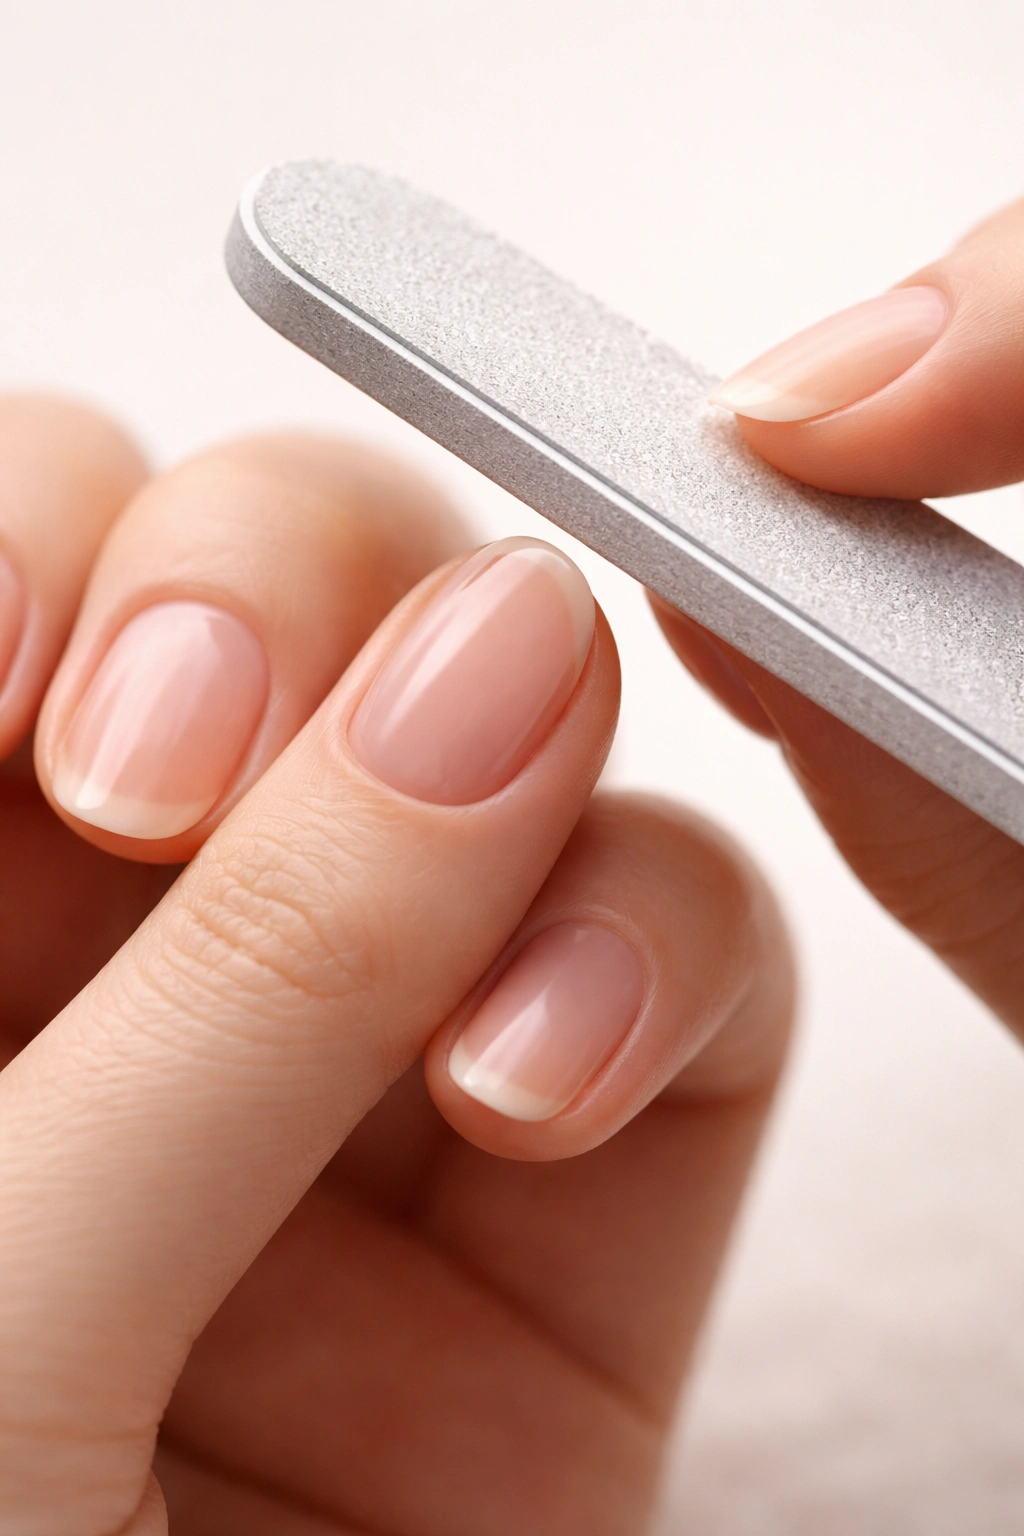
The way you file your nails directly impacts how the white tip line will look, so this step deserves careful attention. Round nails aren’t shaped overnight; they develop their final curve gradually through consistent, proper filing technique.
Hold your nail file at a 45-degree angle to the edge of your nail. This angle is key—too steep and you’ll create flat edges instead of a smooth curve, too shallow and you won’t actually shape anything. File from the outer edges toward the center of the nail, using gentle, overlapping strokes rather than aggressive sawing motions.
The shape emerges from working your way around the entire perimeter. File one side of the nail moving toward the center, then rotate your finger and file the other side toward the center, creating that characteristic rounded tip. This technique prevents creating a squared-off center point; instead, the tip curves smoothly.
Getting the Proportions Right
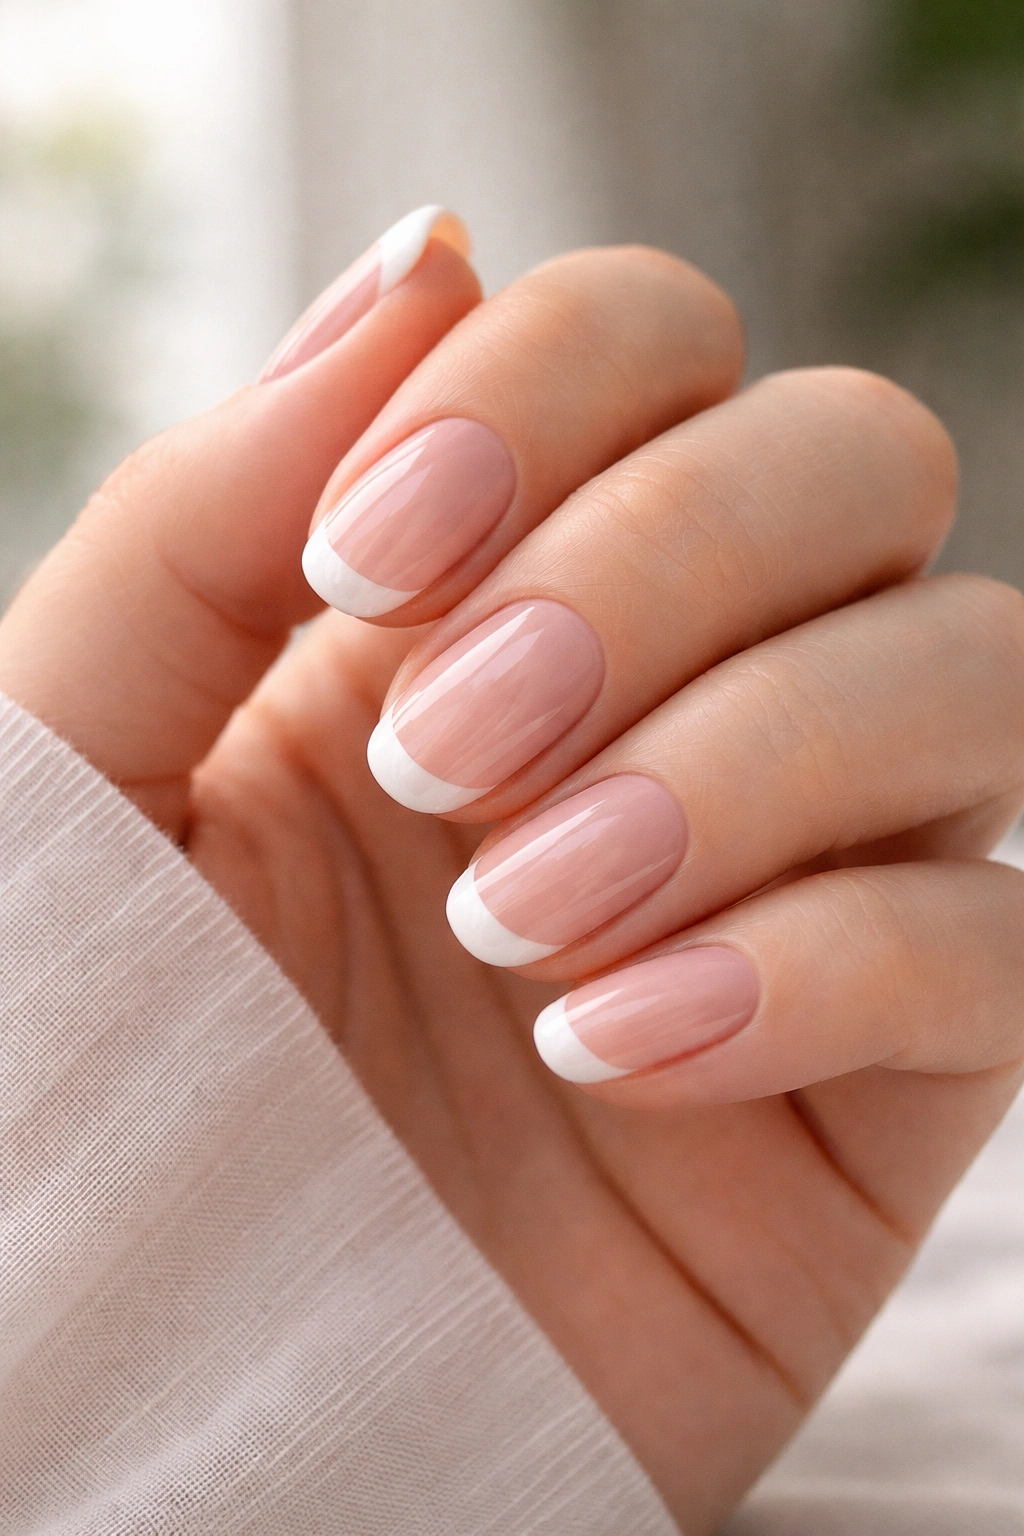
For round nails that will wear a French manicure beautifully, the white tip should take up roughly one-fifth to one-quarter of the total nail length. This proportion prevents the tip from looking too dramatic or too subtle on the curved shape. If you have naturally short nails, a smaller white tip (one-fifth of the length) looks more balanced; if your nails are longer, a larger tip (closer to one-quarter) works better.
Once you’ve filed your nails to the desired shape, smooth any rough edges with a fine-grit buffer. Run this gently across the filed edge in one direction—not back and forth, which can create more splitting. This creates a subtle micro-bevel that’s far less likely to chip or peel when you apply polish.
Polishing the Nail Bed with Base Color

The base color sets the stage for your white tips, so it deserves just as much care and precision as the tip portion. A flawlessly even base color in a shade that complements your skin tone makes the whole manicure feel intentional and expensive-looking.
Choose your base color carefully. Pale pink is the traditional choice and works beautifully on most skin tones—it creates that classic French manicure look. However, sheer nude, subtle beige, or even a very light champagne can all work, depending on your complexion and preference. The key is that the base color should be noticeably different from your natural nail but not so stark that it looks artificial.
Apply base coat first—a thin, even layer that covers the entire nail surface. This step protects your nails from staining and helps the colored polish adhere better. Let it dry completely; this usually takes a minute or two, depending on the product.
Two-Coat Method for Even Coverage
Paint your first coat of base color in three strokes: one down the center, one on each side. Use enough polish to cover completely without drowning the nail—you shouldn’t see the brush bristles through a heavy glob of product. Let this coat dry completely.
Apply your second coat using the same technique. Two thin coats always look better and last longer than one thick coat. If you apply too much polish in one coat, it becomes thick and gloppy, takes forever to dry, and tends to wrinkle or crack as it sets. Patience here pays off substantially.
Once your base color is dry, you’re ready for the tip work. Some people choose to paint the entire nail and let it dry before masking off for the white tip; others prefer to skip the base coat on the tip area and paint it white first, then fill in the base afterward. Experiment to find which feels easier for you—both methods work equally well.
Creating the Perfect Tip Design
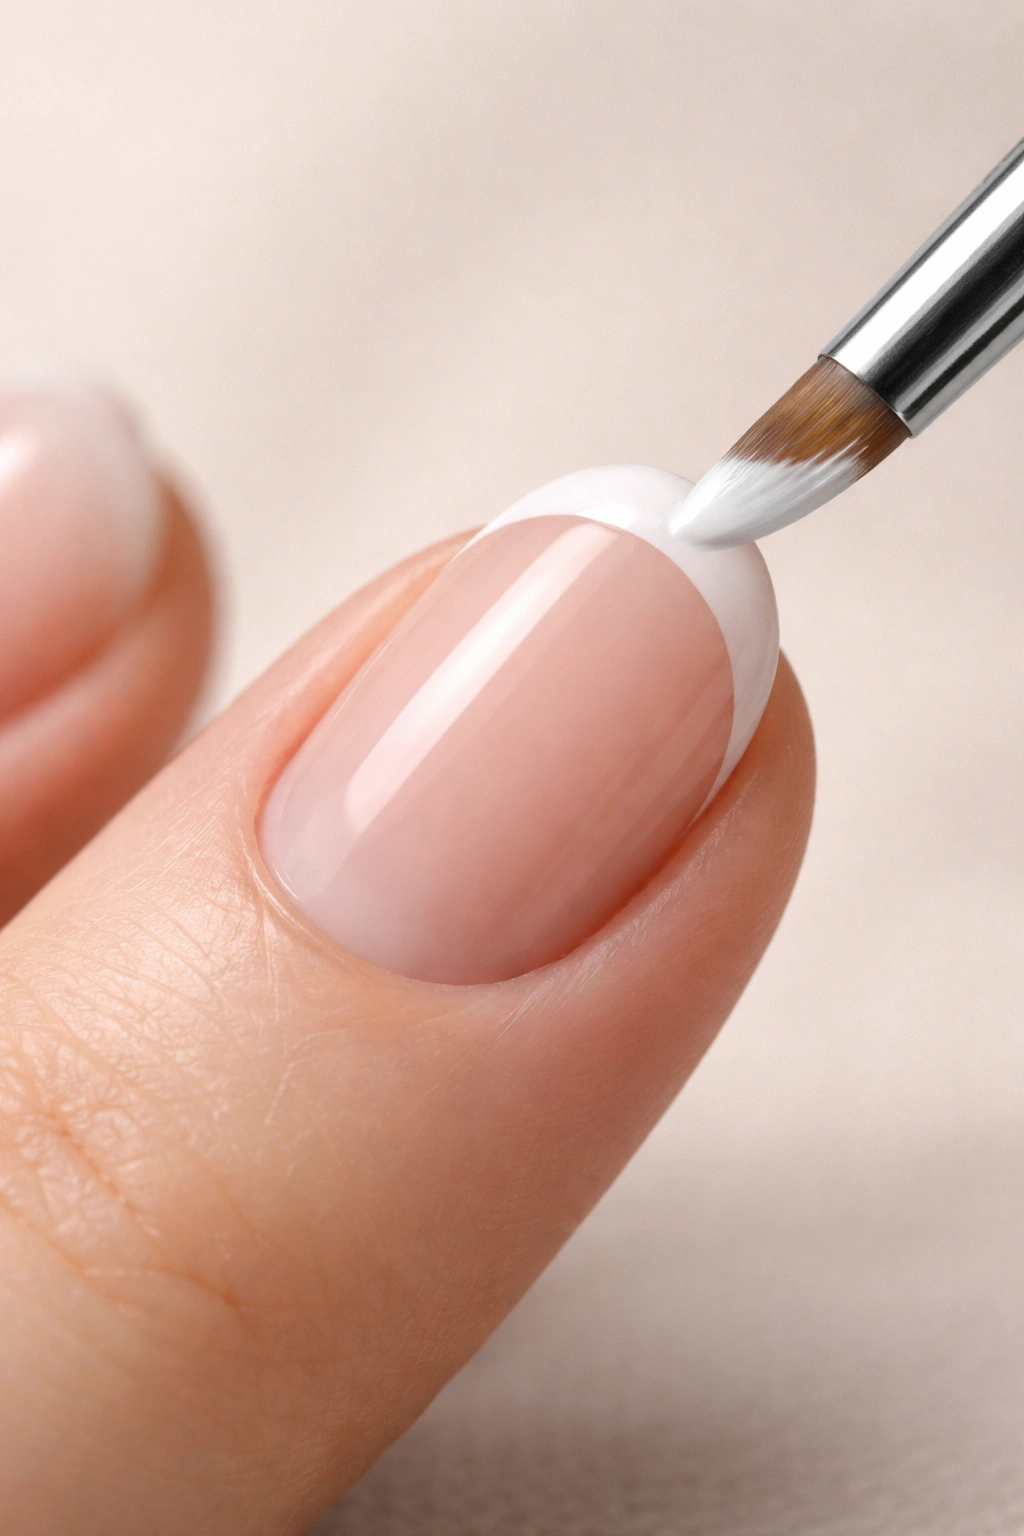
The white tip is what defines a French manicure, and on round nails, the design requires a slightly different approach than you’d use on square or coffin-shaped nails. The curve of the nail means the white tip line will naturally taper as it follows the rounded edge—and working with this curve rather than against it creates the most flattering result.
The standard white tip line should be thinnest at the center of the rounded edge and slightly wider as it meets the sides of the nail where the curve flattens. This creates a visual line that appears consistent in width even though you’re following a curved surface.
Many people make the mistake of trying to paint a perfectly straight white line across the tip of a round nail. This results in the tip looking too narrow in the center and too wide on the sides. Instead, embrace the natural curve and let your white tip follow it.
Technique for Painting the Tip Line
Using your thin angled brush, you have two approaches. The first—and easiest for most people—is to paint a very thin white line at the point where you want the tip to begin, following the curve of your nail. This creates a guide line. Then you fill in above that line with white polish, creating the full tip.
The second technique, which many experienced nail artists prefer, is to paint the entire white tip area in one motion using a steady hand and careful brush control. This requires more practice but creates a crisper, more polished-looking line. You’re essentially painting from the tip of the nail inward, stopping at your desired tip line.
Whichever method you choose, keep the white tip symmetrical. Step back frequently and look at your finger straight-on to assess whether the white portion looks even. The line should be visible from directly in front of your finger, with equal white showing on both sides.
Applying the Tip Polish for Clean Lines
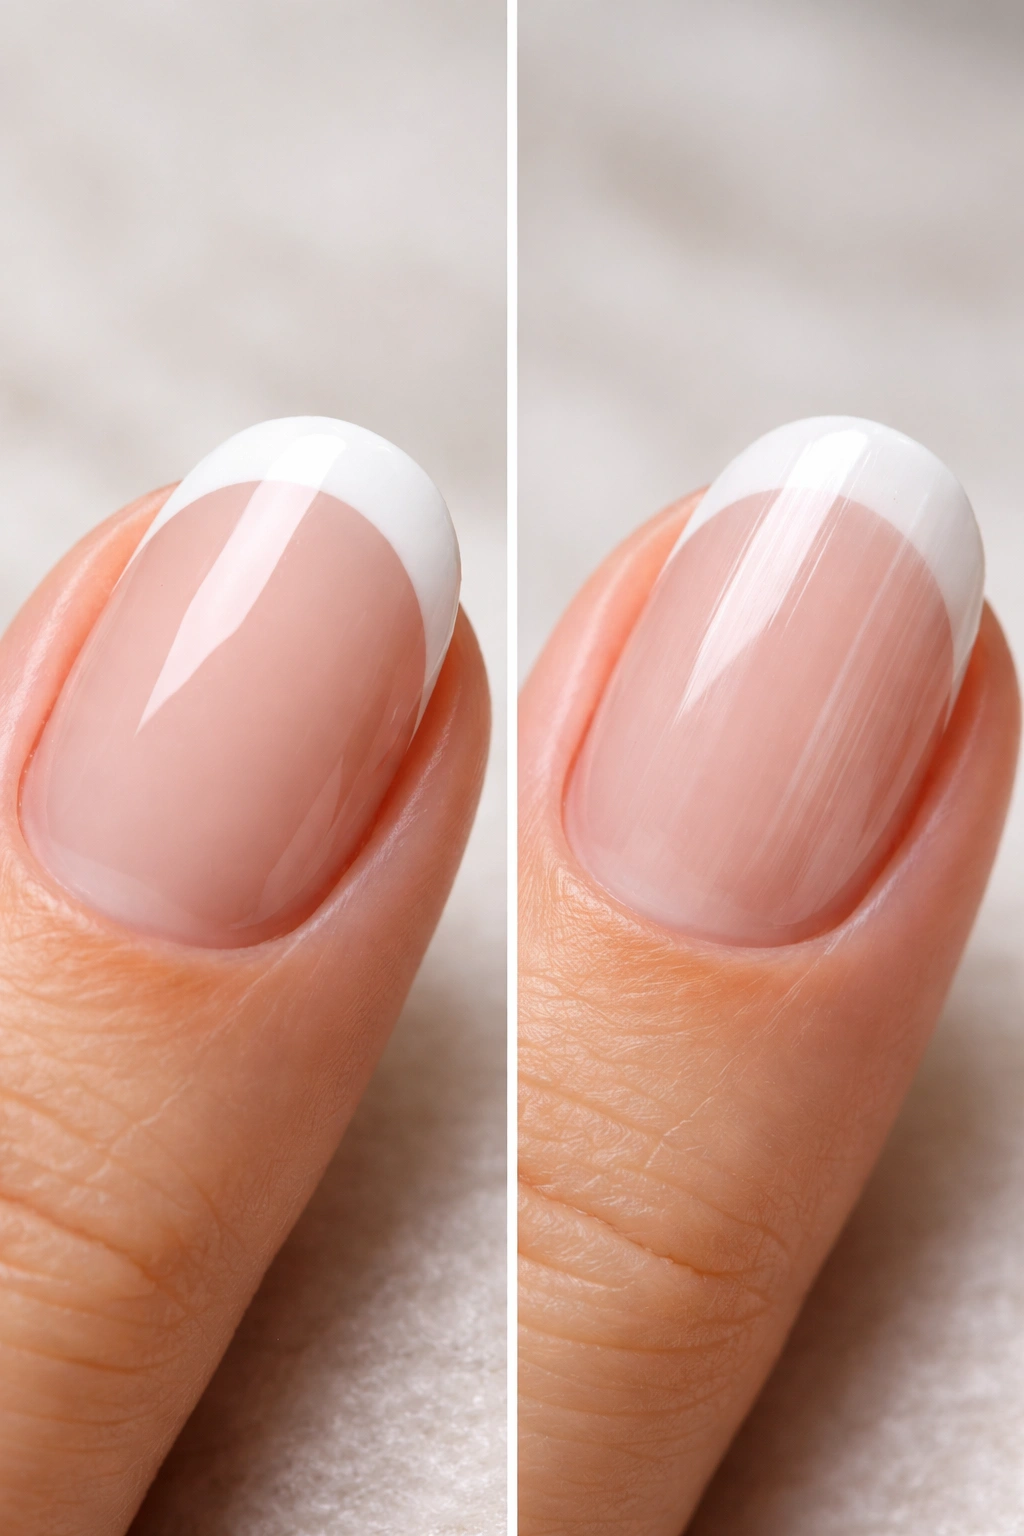
Getting a truly clean, crisp white tip line is where most people struggle. The difference between a smudgy, rough line and a professional-looking sharp one comes down to technique and product quality.
Your white polish should have good opacity—meaning it covers completely in one or two coats rather than requiring three or more. Thin, transparent whites look streaky and unfinished. Test your white polish on a practice nail or even a piece of paper first to make sure you have strong coverage.
Load your angled brush with just enough product—not so much that it floods the nail, not so little that you can barely see the color. The brush should glide smoothly without pooling or dragging. Paint in steady, confident strokes rather than hesitant little dabs. Hesitation creates wobbly lines; confidence creates clean ones.
The Freehand Method
Many people find freehand painting easier than using tape or stencils, especially on round nails where the curve is more forgiving of slight imperfections. Start at one corner of the tip and paint a thin line toward the center point, then return to the other corner and paint toward the center from that side. This technique takes practice, but once you’re comfortable with it, it’s much faster than any other method.
If you’re painting freehand and you make a mistake—a line that’s too thick or goes slightly sideways—don’t panic. A small imperfection on a curved nail is almost invisible from normal viewing distance. The manicure still looks professional and polished.
Using Tape or Guides (Optional)
Some people prefer using nail guide tape to ensure perfectly straight lines. Place the tape just below where you want your white tip to begin, then paint white over the tip area. Remove the tape while the polish is still slightly tacky, and the edge underneath will be sharp and clean.
On round nails, you may need to stretch or manipulate the tape slightly to follow the curve, or you might find that tape works better on some nails than others. If tape doesn’t feel natural to you, skip it—freehand really does work beautifully with practice.
Setting and Protecting Your Manicure
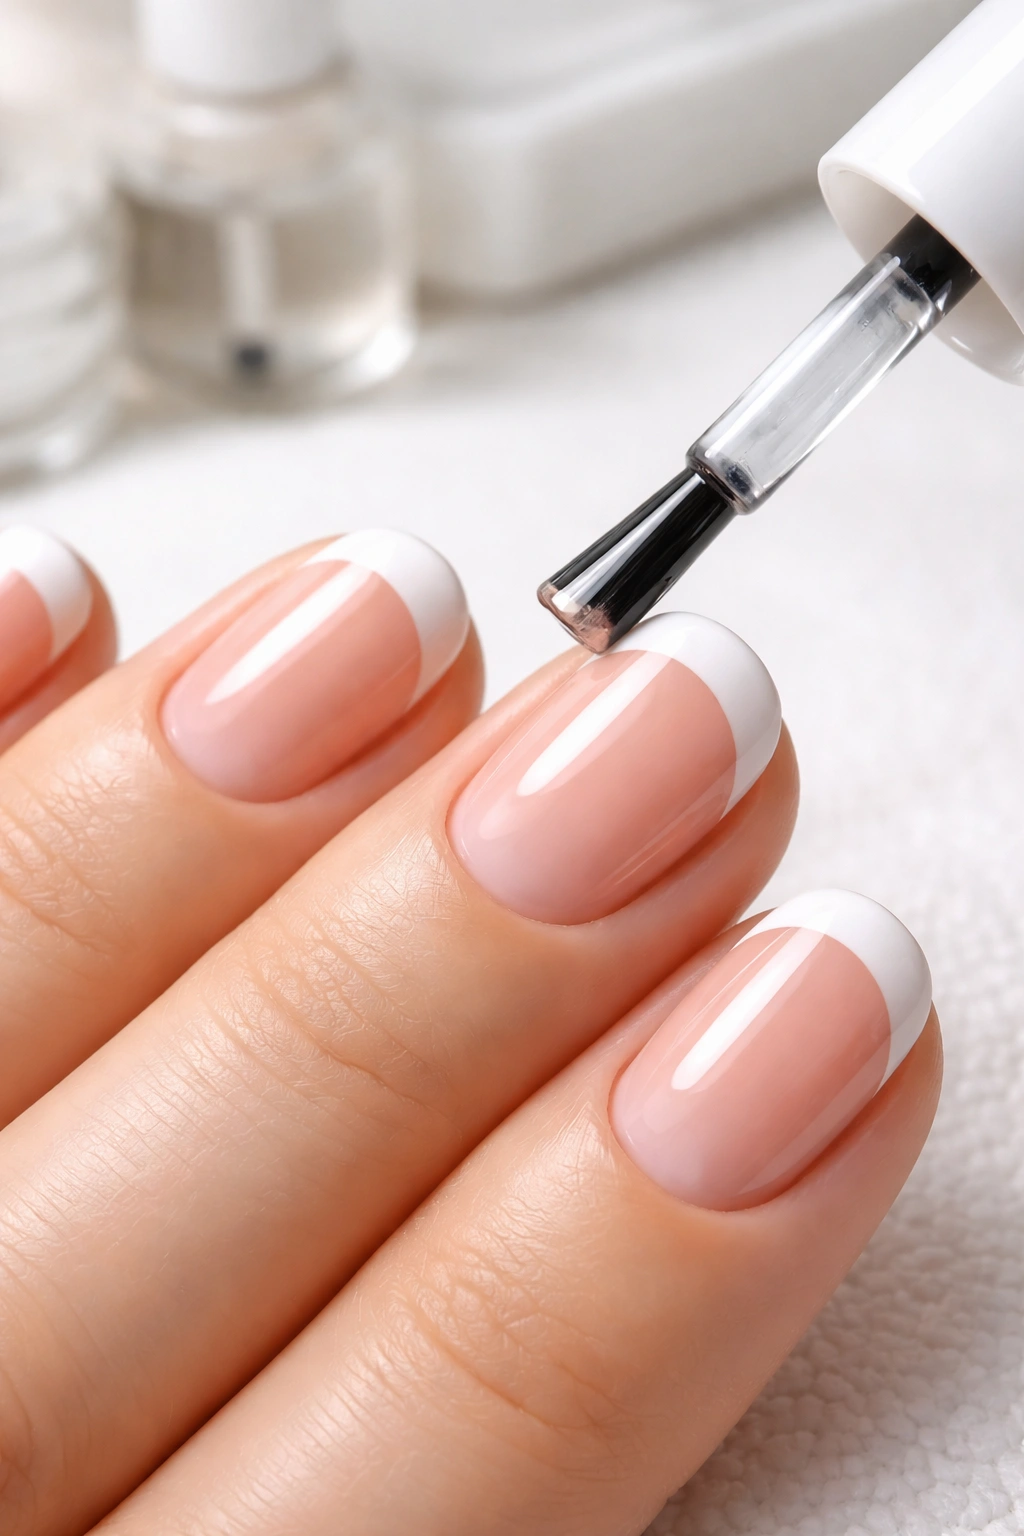
Once your white tips are dry, a top coat seals everything in and creates that glossy, professional finish. Choose a top coat with good shine and durability—this is not the place to save money. A quality top coat protects your design from chipping and extends your manicure’s lifespan by several days.
Apply a thin, even layer of top coat over the entire nail, including the tip edge. The top coat is what actually prevents peeling and chipping; it creates a protective shield over your carefully applied polish. Let it dry completely—most top coats set in 30 seconds to a couple of minutes, depending on the brand.
Once everything is dry, apply a nourishing cuticle oil around the edges of each nail and on the cuticles themselves. This keeps your nail bed hydrated and flexible, which actually helps prevent the tiny cracks that can break through polish and ruin your manicure. Work the oil in gently, massaging it into the cuticles and surrounding skin.
Post-Manicure Care
Avoid submerging your hands in water for at least an hour after you’ve finished—the longer you wait before exposing your nails to water, the better the polish sets. When you do wash your hands, use warm rather than hot water, which can soften fresh polish and cause peeling.
Wear gloves when cleaning or doing dishes. Water and harsh chemicals are the number-one enemy of manicures; a simple pair of latex or rubber gloves extends your French manicure’s life dramatically. This investment in protection pays for itself the first time it prevents your manicure from chipping days before you intended.
Common Mistakes to Avoid
Even experienced people occasionally make small mistakes that can ruin an otherwise beautiful French manicure. Understanding these pitfalls helps you avoid them—or fix them quickly if they happen.
Making the white tip too thick is perhaps the most common mistake. Many people try to create a dramatic white tip, but on natural nails, subtle usually looks better than bold. If your white tip takes up more than a quarter of the nail length, it often looks unbalanced on round nails. Thin, delicate tips have that timeless, expensive look; thick ones can read as amateur or outdated.
Using white polish without enough opacity creates that streaky, incomplete look that suggests a rushed or amateur job. If your white polish requires three coats to cover, either thin it with a drop of transparent top coat to improve flow, or switch to a whiter white with better coverage. This single change can completely transform the quality of your result.
Not allowing adequate drying time between coats causes colors to blend together and polish to wrinkle or bubble as it sets. Each layer of polish needs to dry completely—usually one to two minutes—before you apply the next coat. This means your total manicure time might be 30 minutes, but that patience creates a finish that lasts two weeks instead of three days.
Asymmetrical Tip Lines
Creating tip lines that don’t match between your left and right hand is frustrating but completely fixable. The remedy is to step back and look at your nails straight-on frequently as you work. If one side looks wider than the other, adjust as you go rather than waiting until you’ve finished. A little extra white polish can always be cleaned up with a small brush dipped in acetone if needed.
Applying polish to the skin around your nails happens to everyone eventually. Keep a small cup of acetone and a thin brush nearby for cleanup. Dip the brush in acetone and carefully clean any polish that got on your skin—this takes seconds and looks so much more polished than leaving it.
Design Variations for Round Nails
Once you’ve mastered the classic French manicure, round nails open up a world of creative possibilities. The curved shape actually suits many variations beautifully.
Curved white tips follow the rounded edge of your nail even more dramatically than the traditional straight-line version. Instead of a line, you create a curved shape that echoes your nail’s natural curve. This looks particularly elegant on nails with a very rounded shape and takes advantage of the geometry beautifully.
The reverse French manicure, where the nail bed is white and the tip is colored, looks stunning on round nails. The color on the tip is actually more forgiving than white because it blends with the edge of your nail naturally. Try a soft pink, nude, or even a pastel color on the tip with white on the bed.
Ombre or gradient French tips blend white into your base color rather than creating a stark line. This requires slightly more skill but creates a very modern, artistic look. You’ll apply color to the tip area, then use a makeup sponge to gently blend where the colors meet, creating a soft gradient.
Metallic and Pearl Additions
Adding a thin line of gold or silver just at the white tip line adds dimension and luxury. This technique involves painting your regular French manicure, then adding a very fine metallic line using a detail brush and metallic polish. The thin metallic line separates the white from the base color and catches the light beautifully.
Pearl or glitter accents scattered across the white tip or placed just at the tip edge add sparkle without overwhelming the classic look. Use a sticky base coat designed for nail art if you’re adding any embellishments; regular top coat won’t hold them as well.
How to Make Your French Manicure Last
A beautifully executed French manicure should last 10-14 days with proper care. Protecting your polish during daily activities makes an enormous difference in how long it maintains that fresh, clean appearance.
Moisturizing frequently keeps your nails flexible and prevents the tiny cracks that allow polish to start peeling. Apply cuticle oil or hand cream several times throughout the day, especially after washing your hands. Dehydrated nails break through polish more easily; hydrated nails stay sealed longer.
Avoid exposing your nails to extreme temperature changes—jumping from a very hot shower directly into cold air can cause polish to chip or crack. Let your nails acclimate gradually when moving between very different temperatures.
Protect the tips and edges of your nails from impact whenever possible. Round nails are sturdier than pointed ones, but that durability is only an advantage if you’re not constantly bumping them against things. When you do catch an edge or notice a small chip forming, address it immediately with a tiny dab of matching polish before the chip spreads.
Maintenance Polish for Extended Wear
If your manicure begins showing minor chips after 10 days, a simple touch-up coat of base color and top coat can extend it another few days. This doesn’t mean a full manicure—just painting over any chips or areas where the polish has worn through. You don’t need to repaint the entire white tip unless it’s damaged.
Some people find that applying an additional layer of top coat every few days, without removing the original manicure, extends the life surprisingly well. This adds thickness and protection without requiring you to start over.
Final Thoughts
Mastering a French manicure on round nails is entirely achievable with the right technique and a bit of practice. The curved shape of round nails creates both unique challenges and genuine advantages—once you understand how to work with that curve rather than against it, you’ll find that executing perfect white tip lines actually becomes easier than on square nails.
The investment in quality tools and products, combined with careful attention to prep work and precise application, creates results that rival professional salon manicures. Your first attempt might not be absolutely flawless, but by your third or fourth time through the process, the techniques become automatic and the results become consistently beautiful.
Remember that round nails are forgiving in a way that pointed nails aren’t—small imperfections in your white tip line are far less noticeable because there’s no sharp corner to emphasize irregularities. This means you can afford to be a little imperfect while you’re learning, which takes the pressure off and actually makes the process more enjoyable. With time and repetition, your French manicures will look intentional, elegant, and polished—exactly the look that makes people ask if you’ve just come from a professional salon.
