

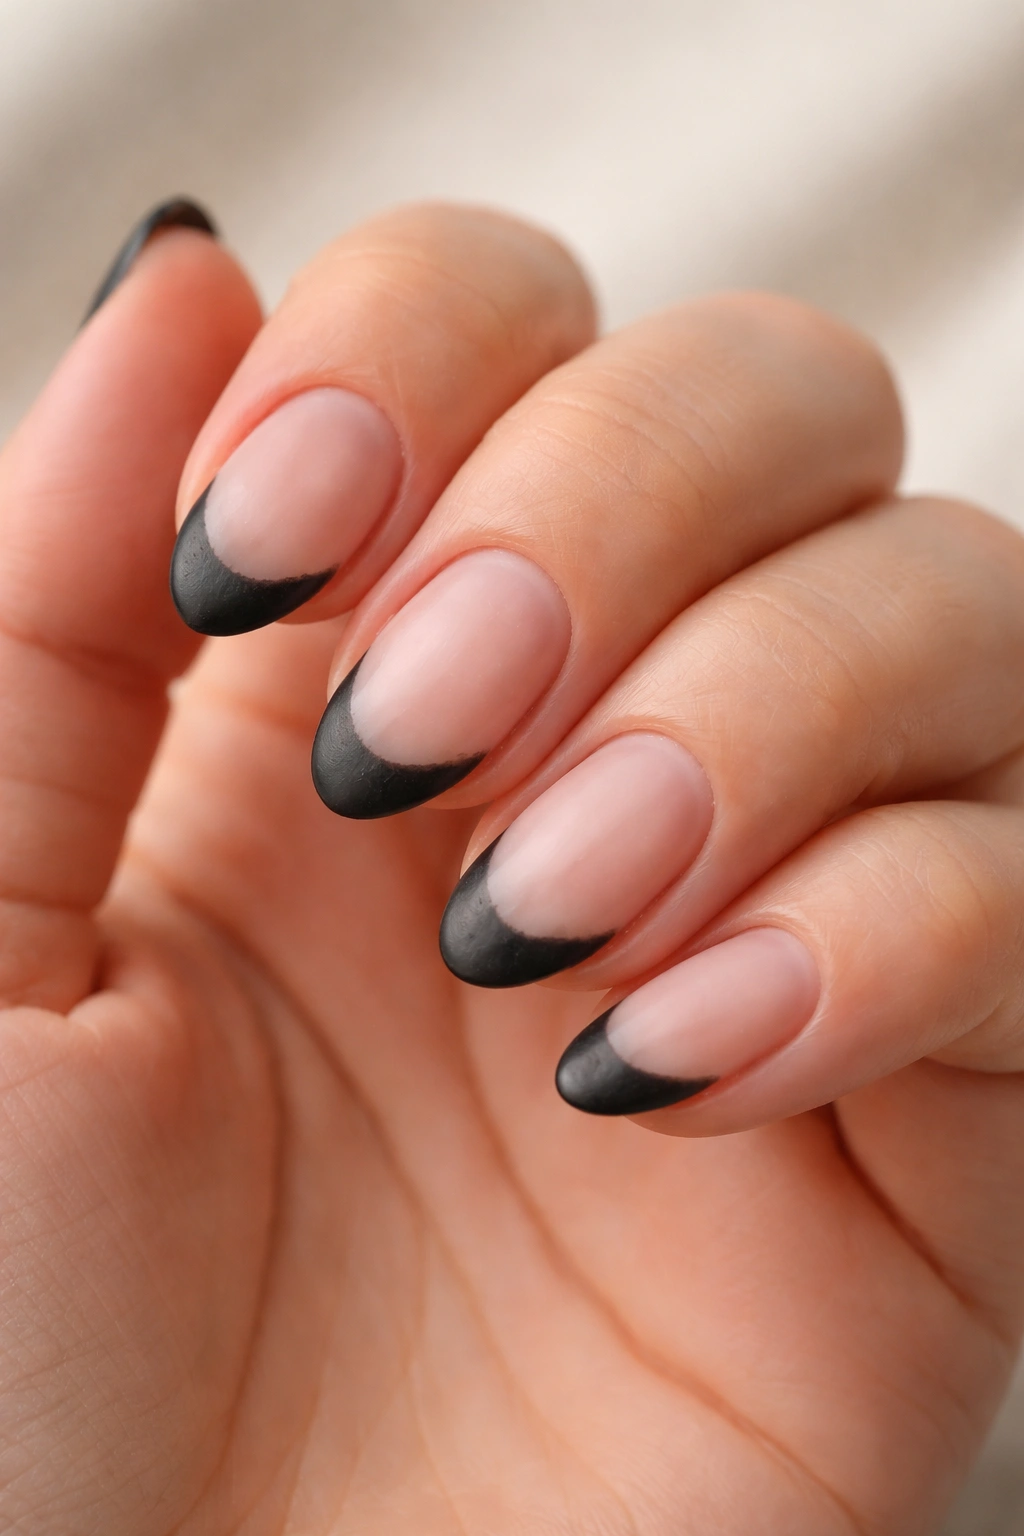
Short almond nails have completely redefined what “professional and polished” actually looks like. Gone are the days when you had to choose between length and elegance — the almond shape delivers that sleek, tapered silhouette in a size that works for actual typing, cooking, and holding your phone without disaster. Add black French tips into that equation, and you’ve got a nail style that somehow manages to feel both minimal and impossibly sophisticated at the same time.
But here’s what makes black French tips different from the nude, pink, and white versions everyone else is doing: black creates contrast. Real, visual punch. The white tip line becomes sharper, more defined, more intentional-looking. The shade refuses to fade into skin tone. When you’re going this route, you’re not trying to blend — you’re making a deliberate statement about wanting something with edge underneath the polish. What’s remarkable is how many directions you can take this one style. The designs that follow prove that black French tips are far from one-note. From subtly textured to boldly patterned, from minimalist to ornate, each of these versions delivers a completely different vibe while keeping that signature clean French line.
Why Short Black French Tips Command Attention
The psychology behind why this style works is worth understanding before we dive into the designs. Black is the ultimate neutral — it pairs with literally every outfit, every season, every occasion. But unlike nude or soft pink, black has presence. It doesn’t apologize. The French tip naturally elongates the finger because your eye follows that white line upward, which means even truly short nails read as elegant rather than stubby. Combine those two elements and you’re working with the most versatile, flattering canvas for nail art.
Short nails also win on practicality that people often overlook. You’re not breaking them at the keyboard, snagging them on sweater sleeves, or discovering one’s cracked in half when you’re already at the office. The French tip design is forgiving with growth — as your nails grow out, that white line maintains its shape beautifully, so your manicure actually looks intentional at two weeks instead of disheveled. And because the design is focused at the tip, small variations in nail length (because we don’t all grow nails at the same speed) don’t throw off the overall look.
1. Glossy Black With Matte White Tips
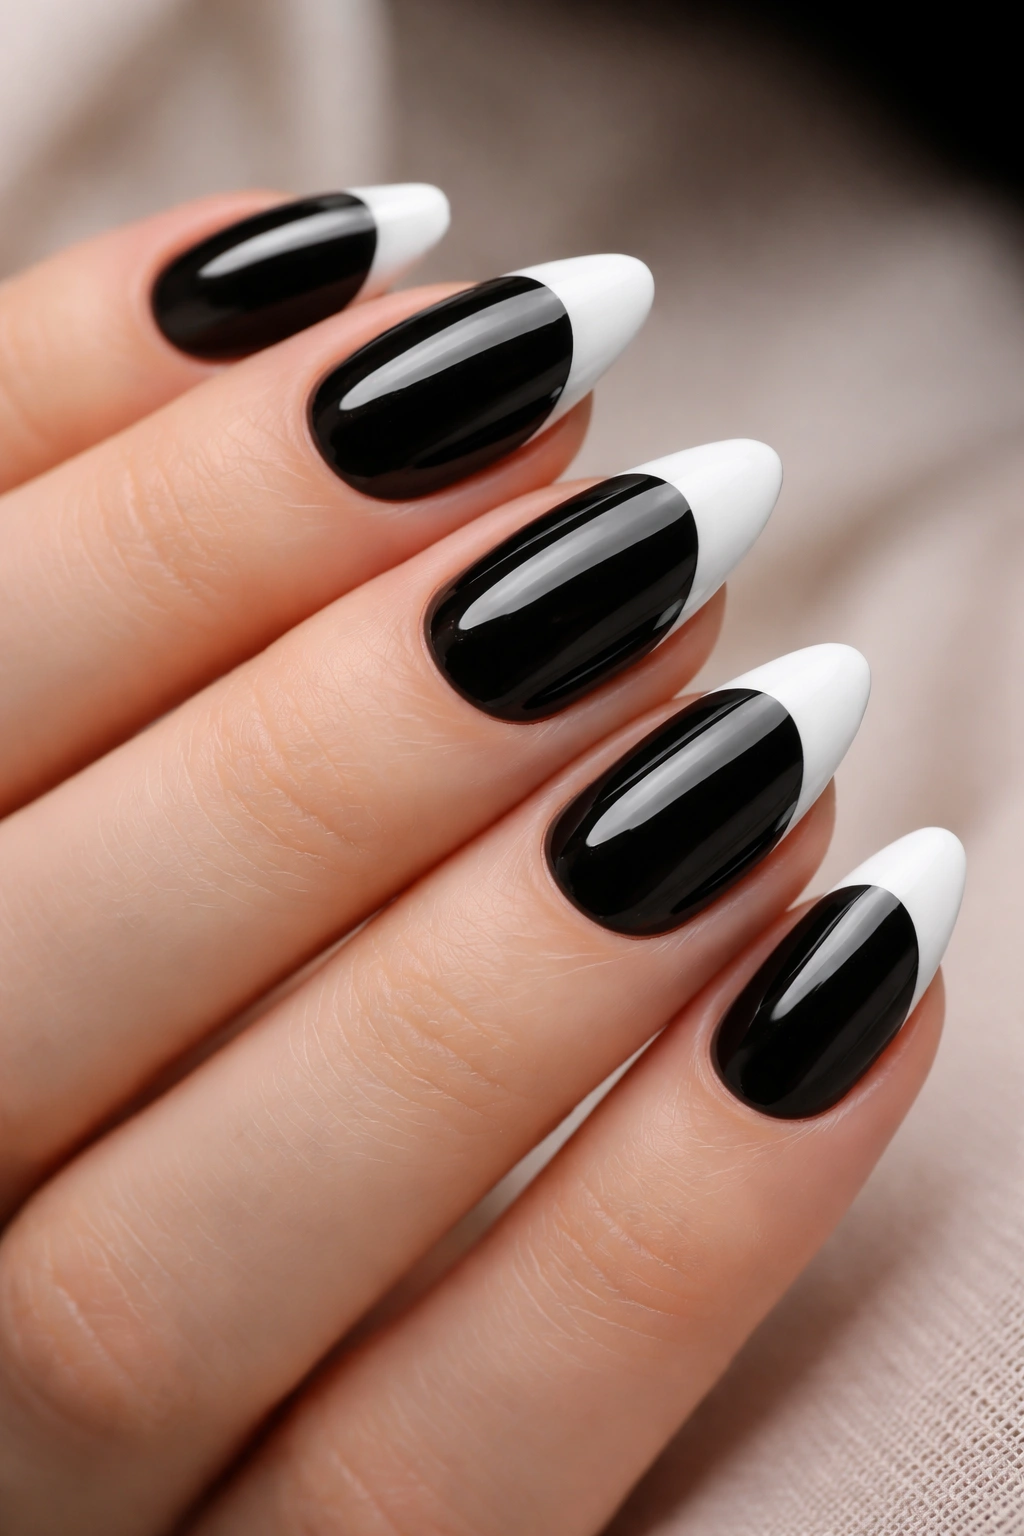
This is the version that makes people say “wait, your nails look so clean right now.” The contrast between a glass-smooth, reflective black base and completely matte white tips creates a visual separation that feels almost architectural. The matte white isn’t grainy or textured — it’s a deliberate flat finish that stops abruptly at the exact point the curve of your almond tip begins.
Application Matters More Here Than You’d Think
The trick is committing fully to the matte top coat on only the tip portion. You’re looking at painting your white tip line and then immediately — while it’s still slightly tacky — applying matte topcoat exclusively to that white area, using a steady hand and stopping at the natural curvature of your nail. Some nail techs swear by applying a stencil strip; others carefully paint the glossy topcoat around the white tip.
The finish stays for three solid weeks without looking dull or faded. Under fluorescent office lighting, this version reads as effortlessly sharp. In natural daylight, the glossy black base catches light in a way that adds dimension. This is the version you choose when you want people to notice your nails without you having to say a word about it.
2. Chrome Black French Tips
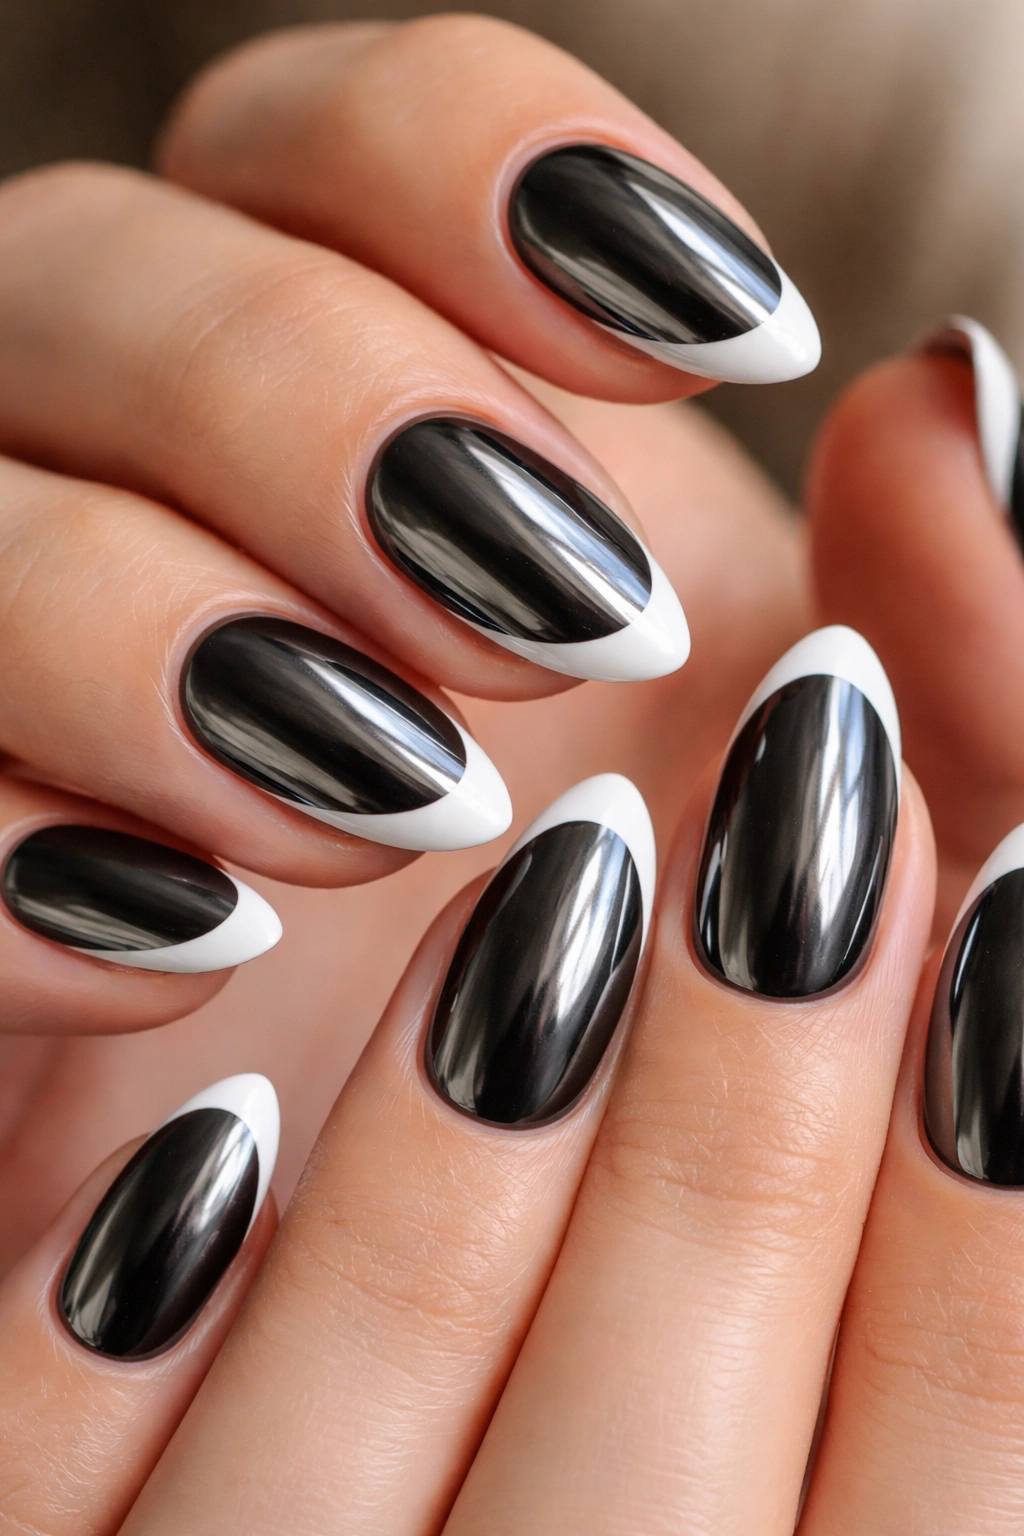
Let’s talk about metallics for a second. A true chrome black isn’t the same as regular black nail polish that just happens to be shiny — it’s a specially formulated, usually powder-based finish that sits on top of the base color and reflects light almost like liquid metal. The white tip line becomes bolder, somehow more defined, when you frame it with that reflective black surface.
Chrome powders applied to a black base create an almost wet, oil-slick appearance. The color shifts subtly depending on the angle and lighting — sometimes it reads darker, sometimes it has an almost purple undertone, sometimes it catches the light with these silvery-gunmetal reflections. The almond shape’s natural curve works perfectly with chrome because that tapering point becomes almost luminous. The contrast between the matt-finish white tip and that hyper-reflective black creates texture through light rather than through physical dimension. This style reads as intentional and modern without feeling trendy or temporary. The chrome finish lasts about two weeks before the powder begins to dull slightly — which is shorter than regular polish, but the look while it’s fresh absolutely justifies the minor maintenance.
3. Negative Space Black French
Negative space designs deliberately leave areas of nail unpainted, usually showing the natural nail or a clear base underneath. In the context of short black French tips, this means you’re painting your standard black base and white tip, but you’re leaving clean geometric cutouts — usually thin vertical lines, thin horizontal stripes, or a delicate gap near the cuticle.
How This Changes the Design
The white French line becomes secondary to those negative space elements. Your eye travels to the intentional gaps first because they break up the solid black field. Common approaches include two thin vertical lines running from cuticle to tip (which actually makes the nail appear longer), horizontal striping that creates a ladder effect, or a negative space band right above the white tip that frames it like a halo. This requires a steady hand or nail stencils, but once it’s done, the design reads as precision-engineered rather than artistic-and-free. It appeals to people who like geometric design but want something more refined than actual geometric shapes painted on top.
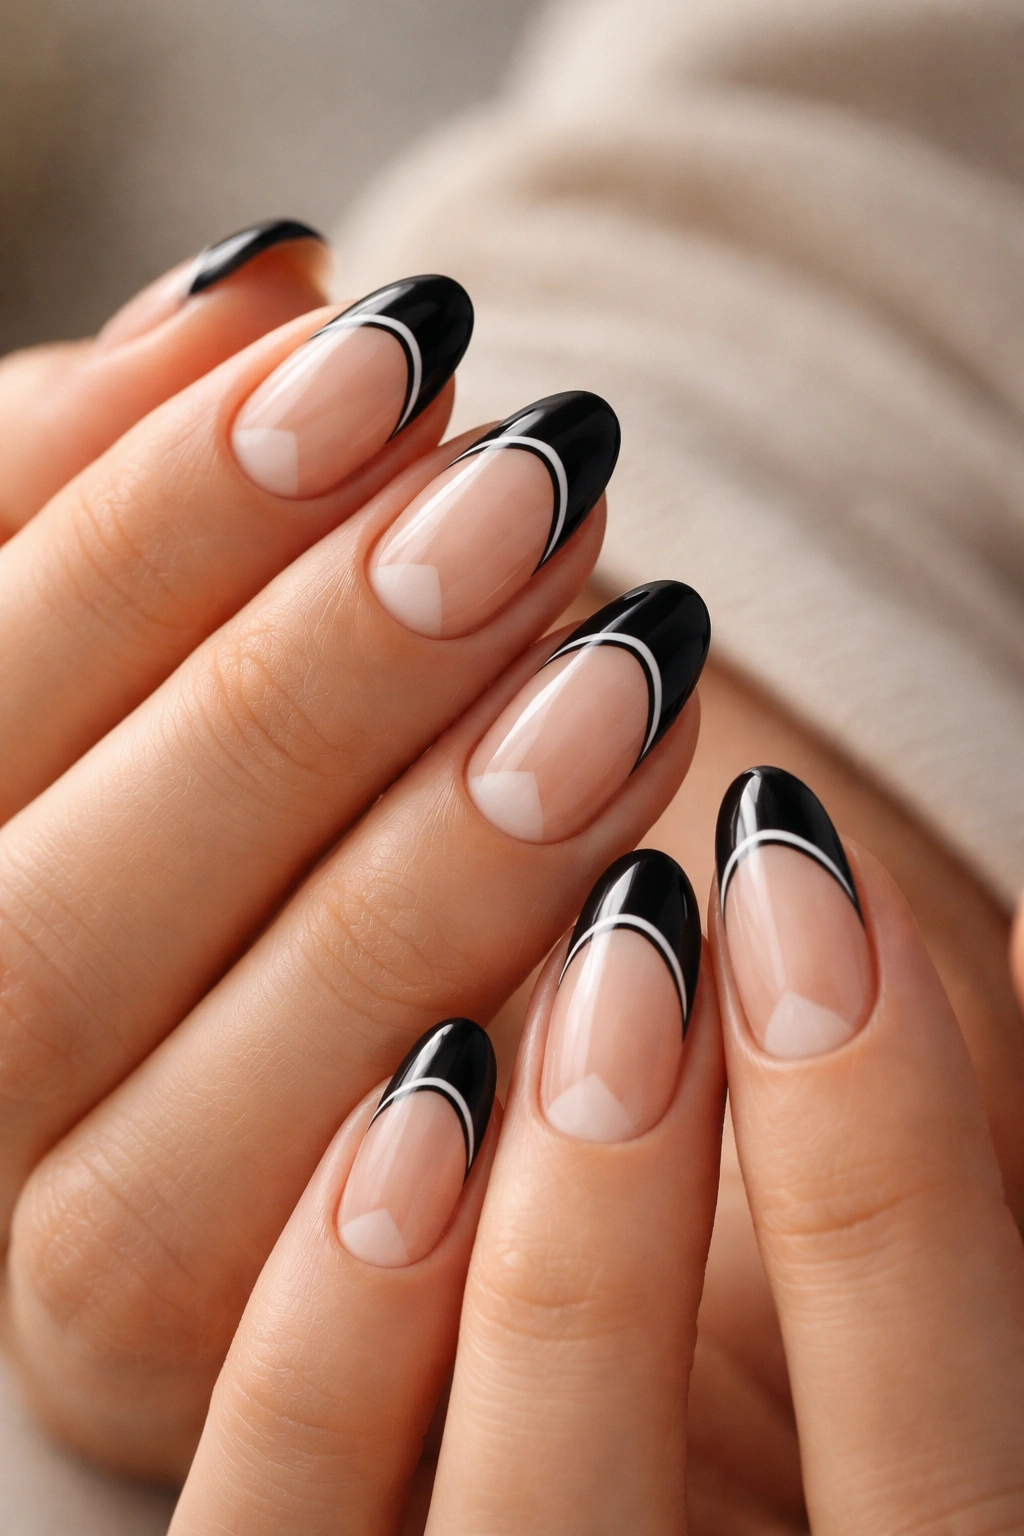
4. Black French With Minimalist Accent Line
A single, impossibly thin accent line running from the base of your nail to the tip in gold, silver, or even white can completely transform the energy of a basic black French design. This line isn’t a stripe — it’s a single moment of intentional contrast that adds visual direction without cluttering the nail.
The Application Reality
You need a 00 brush or a thin detail liner. A single stroke down the center of the nail (though slightly off-center often reads as more intentional), or running just along one side of the nail’s length. Some versions use a metallic pen-style applicator for the cleanest possible line. The accent line draws your eye down the nail’s length, which elongates the appearance of already-short nails. It’s the kind of detail that reads as “this person has an eye for design” rather than “this is a busy nail.” The minimalist approach means this design works for office settings, formal events, and everyday wear without looking overdone.
5. Ombre Black French Gradient Tips
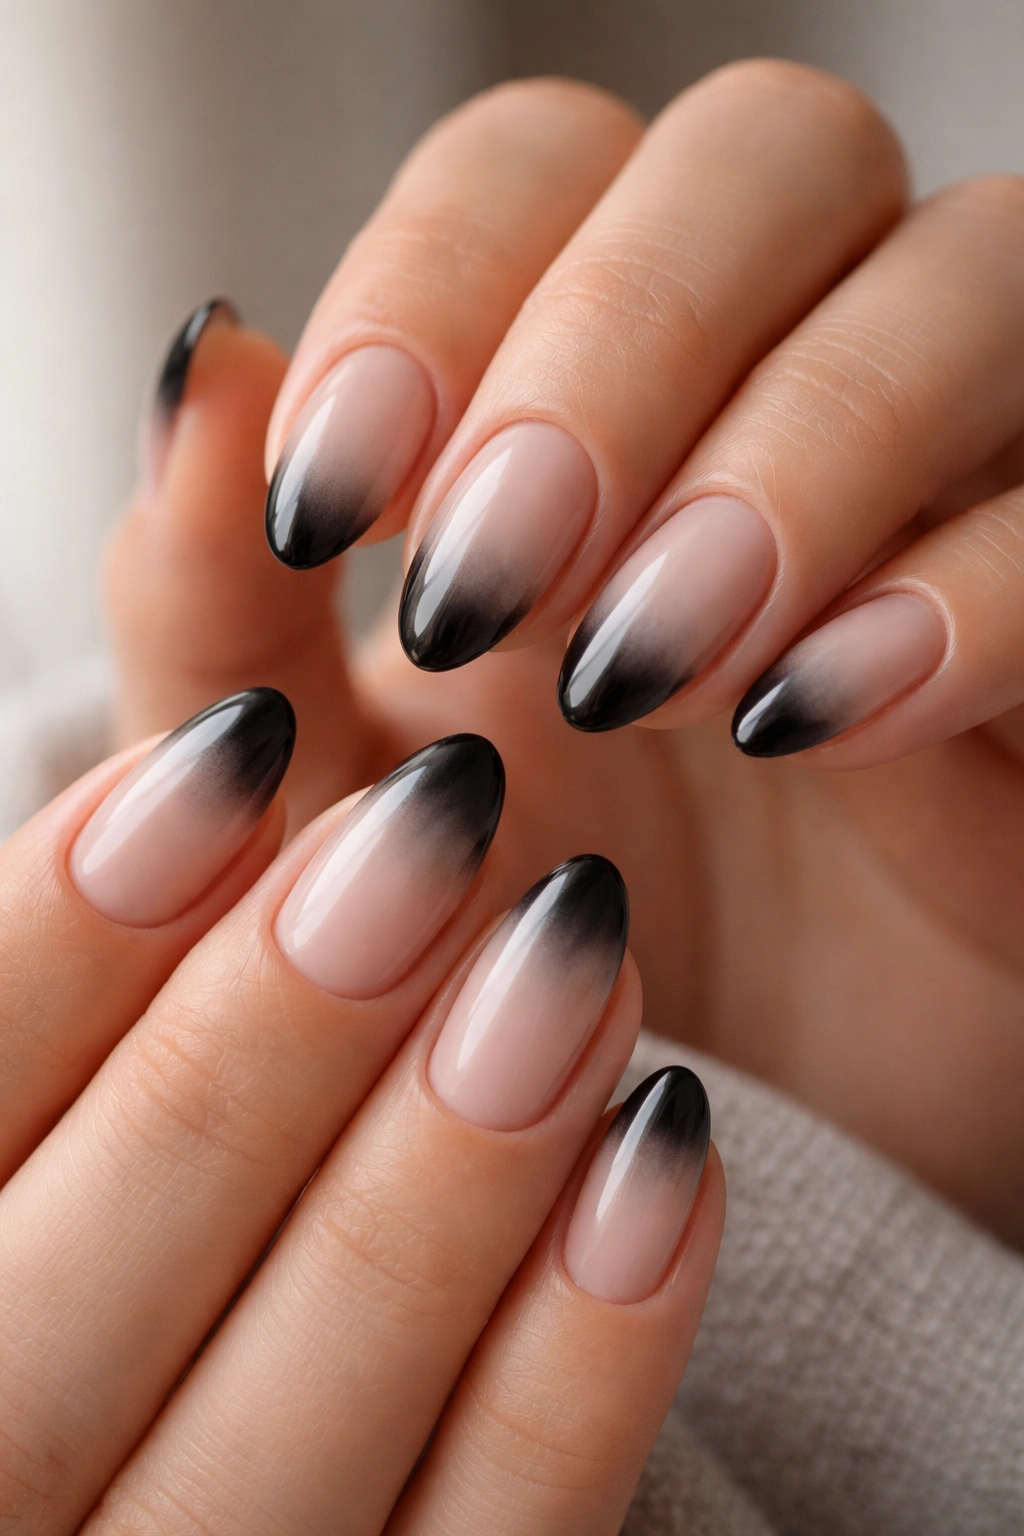
Instead of a crisp white-to-black line, imagine the white tip gradually fading into gray, then darker gray, then black, creating a seamless gradient across the tip area. This softens the traditional French line while keeping the classic structure intact. The gradient requires blending multiple shades — typically white, light gray, medium gray, and black — and feathering them together with a damp brush or sponging technique.
The visual effect is that your white tip melts into the black base rather than sitting sharply against it. Under certain lighting, the gradient can read almost as dimension — like the nail curves away from you at the tip. This version takes slightly longer to execute than a standard French (we’re talking an extra five to seven minutes), but the payoff is a nail design that feels softer and more artistic while maintaining that black-and-white color story. The gradient holds beautifully because you’re working with opaque colors that blend smoothly. Even as the nail grows and the line shifts slightly, the gradient approach disguises that transition better than a sharp line does.
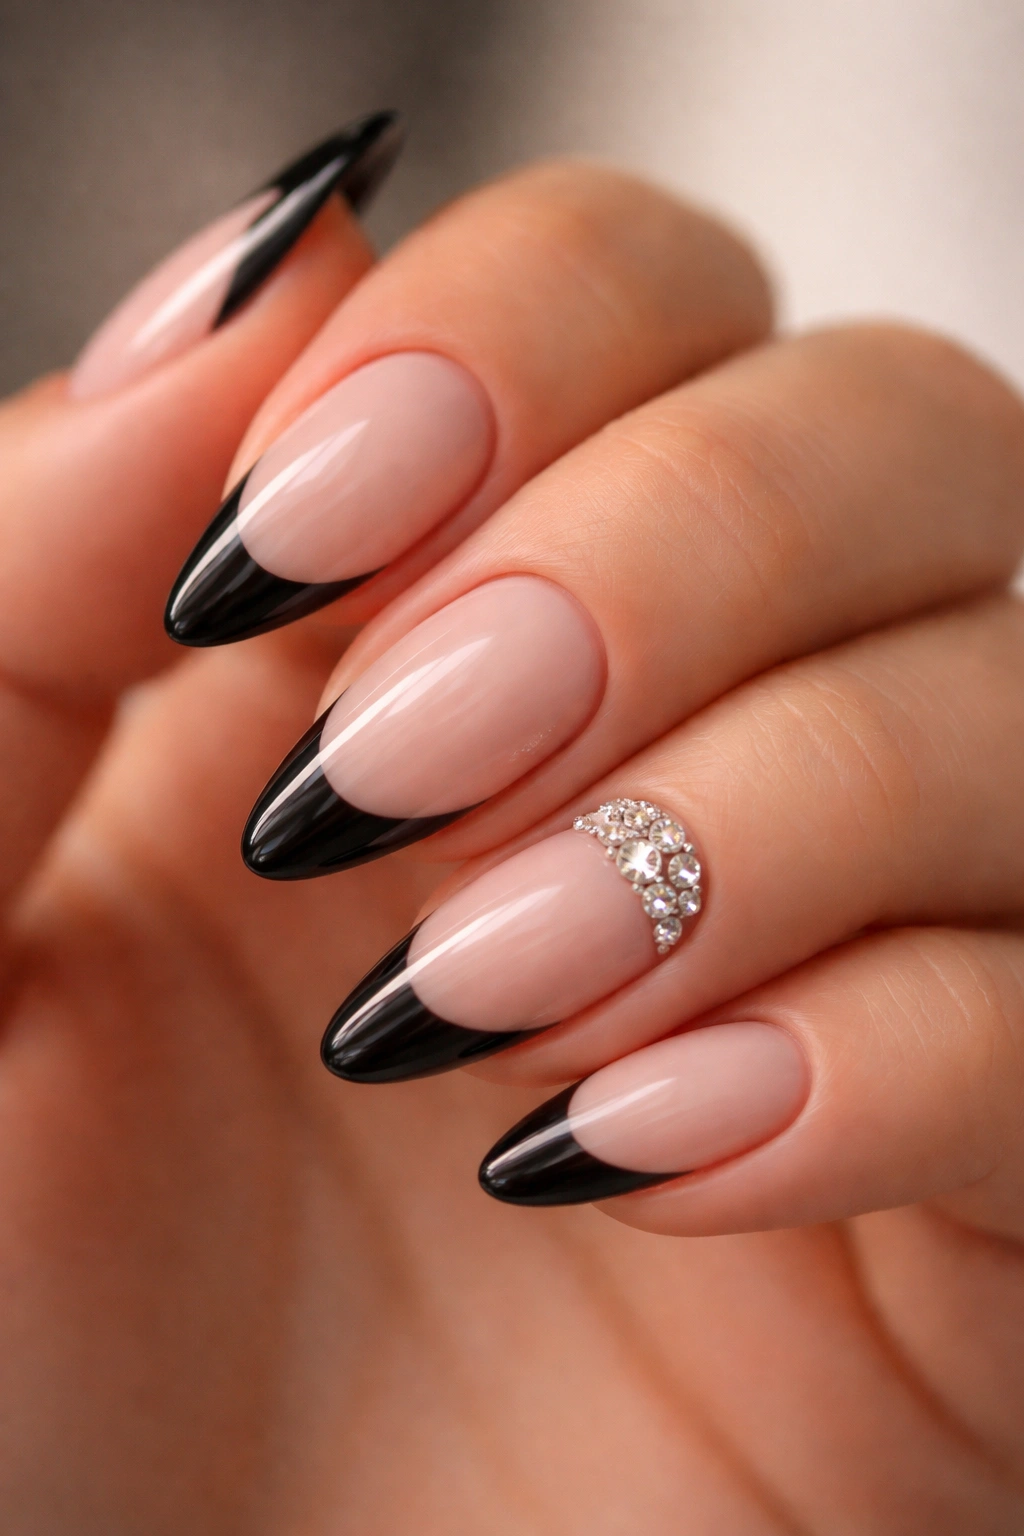
6. Pearl and Stud Embellishments
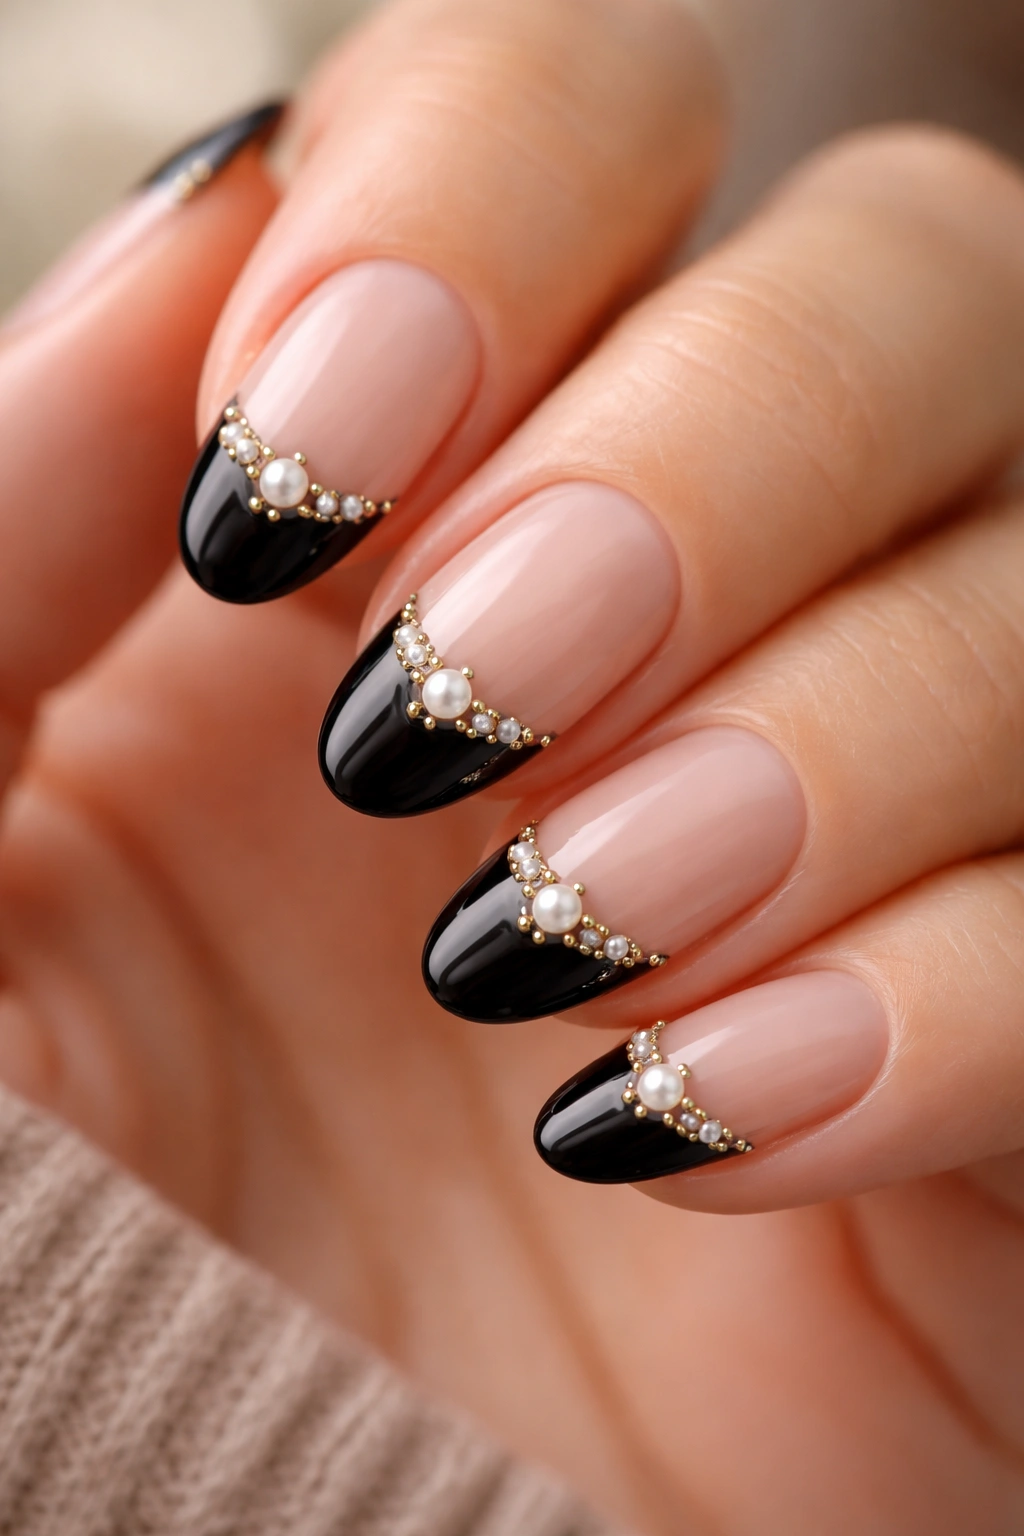
Sometimes the simplest black French nail becomes extraordinary the moment you add one carefully placed pearl or cluster of small studs. These embellishments sit right at the base of the white tip, catching light as your fingers move. A single pearl — whether opaque white, lustrous champagne, or even metallic gold — creates an almost jewelry-like effect on a short nail. Studs can be arranged in a tight cluster (creating a small focal point) or in a thin vertical line (which elongates the nail).
The key to making this work is restraint. Too many embellishments and the nail reads as chaotic rather than intentional. Most nail technicians place the pearls or studs using nail glue (not embedded in polish), which means they’re replaceable if one eventually comes loose. The embellished version of black French is ideal for special occasions, date nights, or any moment when you want your nails to have actual sparkle and presence. The short length means these details don’t feel overwhelming — they enhance rather than distract.
7. Matte Black Base With Glossy White Tip Reverse
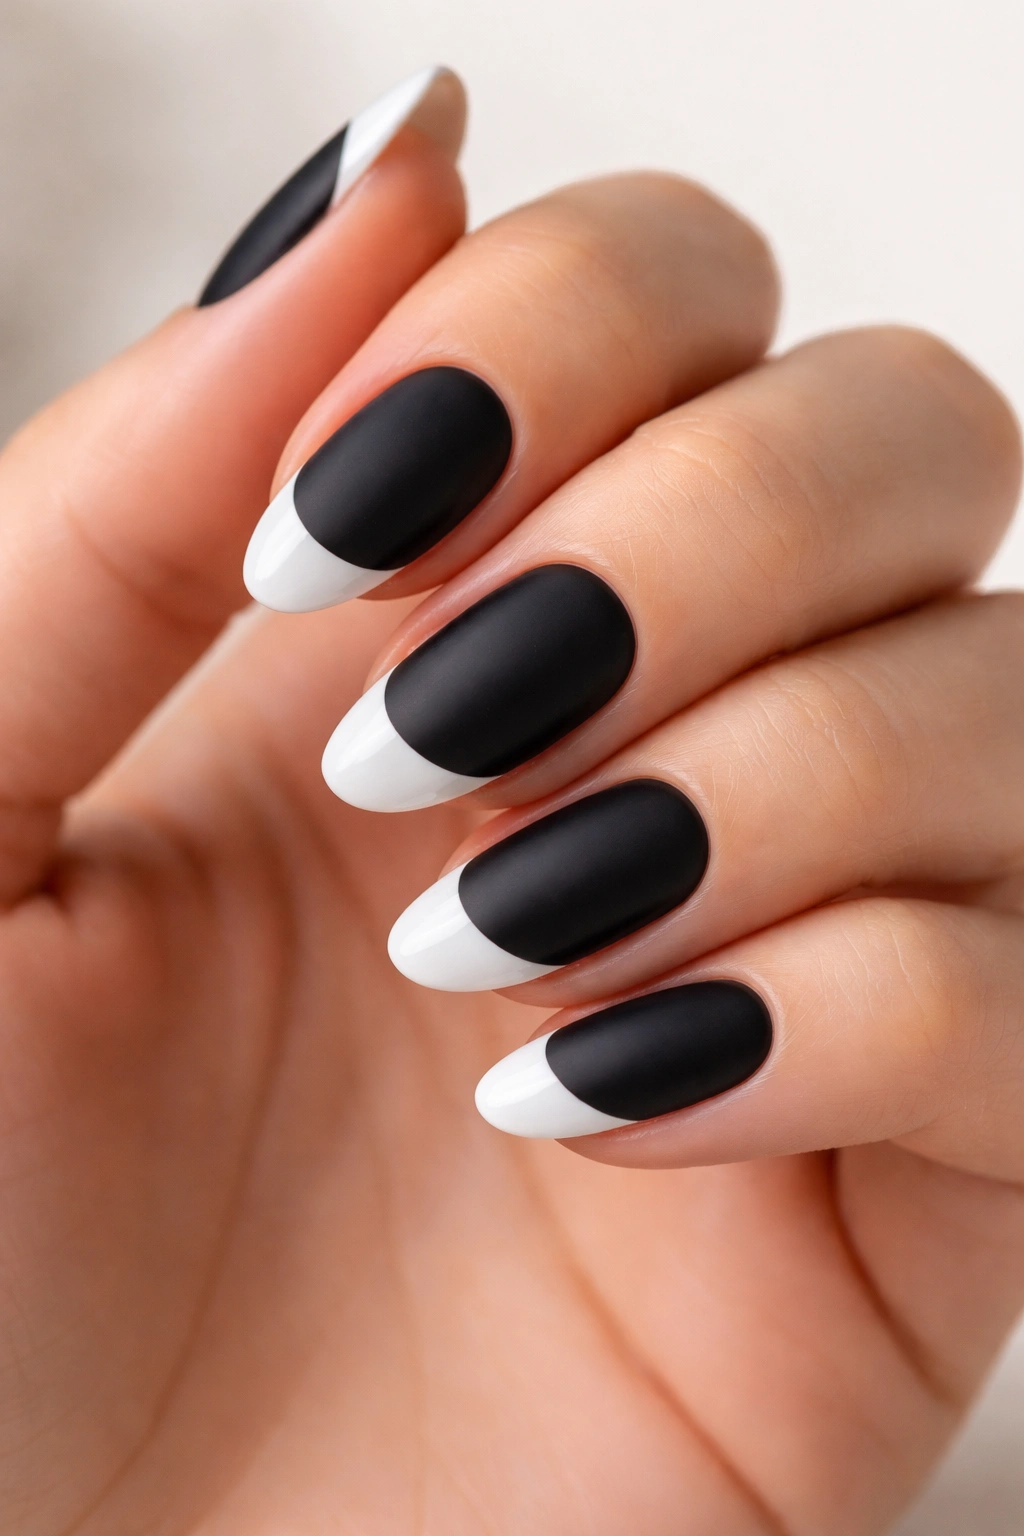
Flipping the traditional finish order — matte black base paired with a high-shine glossy white tip — creates an unexpected visual contrast that reads as more modern than the typical setup. The matte black feels more sophisticated and less reflective, which makes the glossy white tip pop even more dramatically.
The matte finish on black is interesting because it eliminates reflection entirely. The nail becomes a solid visual block of color rather than a light-catching surface. This approach appeals to people who love the elegance of matte finishes but don’t want to lose definition. The glossy tip line becomes almost luminous against that flat black backdrop. The matte finish requires a specific matte topcoat (or a matte powder, though that’s less common in this application) and lasts longer than chrome but may feel less glamorous than straight glossy. For daytime, professional settings, and anyone who prefers minimalist shine, this version absolutely delivers.
8. Black French With Fine Line Nail Art
This is where you add delicate line work within the design — think thin geometric patterns, tiny hand-drawn details, or precise line art that doesn’t cover much real estate but adds meaningful visual interest. Common approaches include single-line florals around the cuticle area, tiny geometric shapes clustered on one nail, or an intricate pattern that frames the white tip.
The white tip itself remains a clean, unadorned white line — the nail art lives either in the black area or subtly frames the transition. This requires a steady hand, appropriate brushes (usually 000 or 00 sizes), and a magnifying lamp if you’re attempting this at home. The result reads as intentional and artistic without being chaotic. This is the version for people who want their nails to be a conversation starter, who have an eye for detail, and who don’t mind spending 30-45 minutes on a manicure. The design works beautifully on short nails because there’s enough space for fine detail without cramping, but not so much space that the art feels lost or oversized.
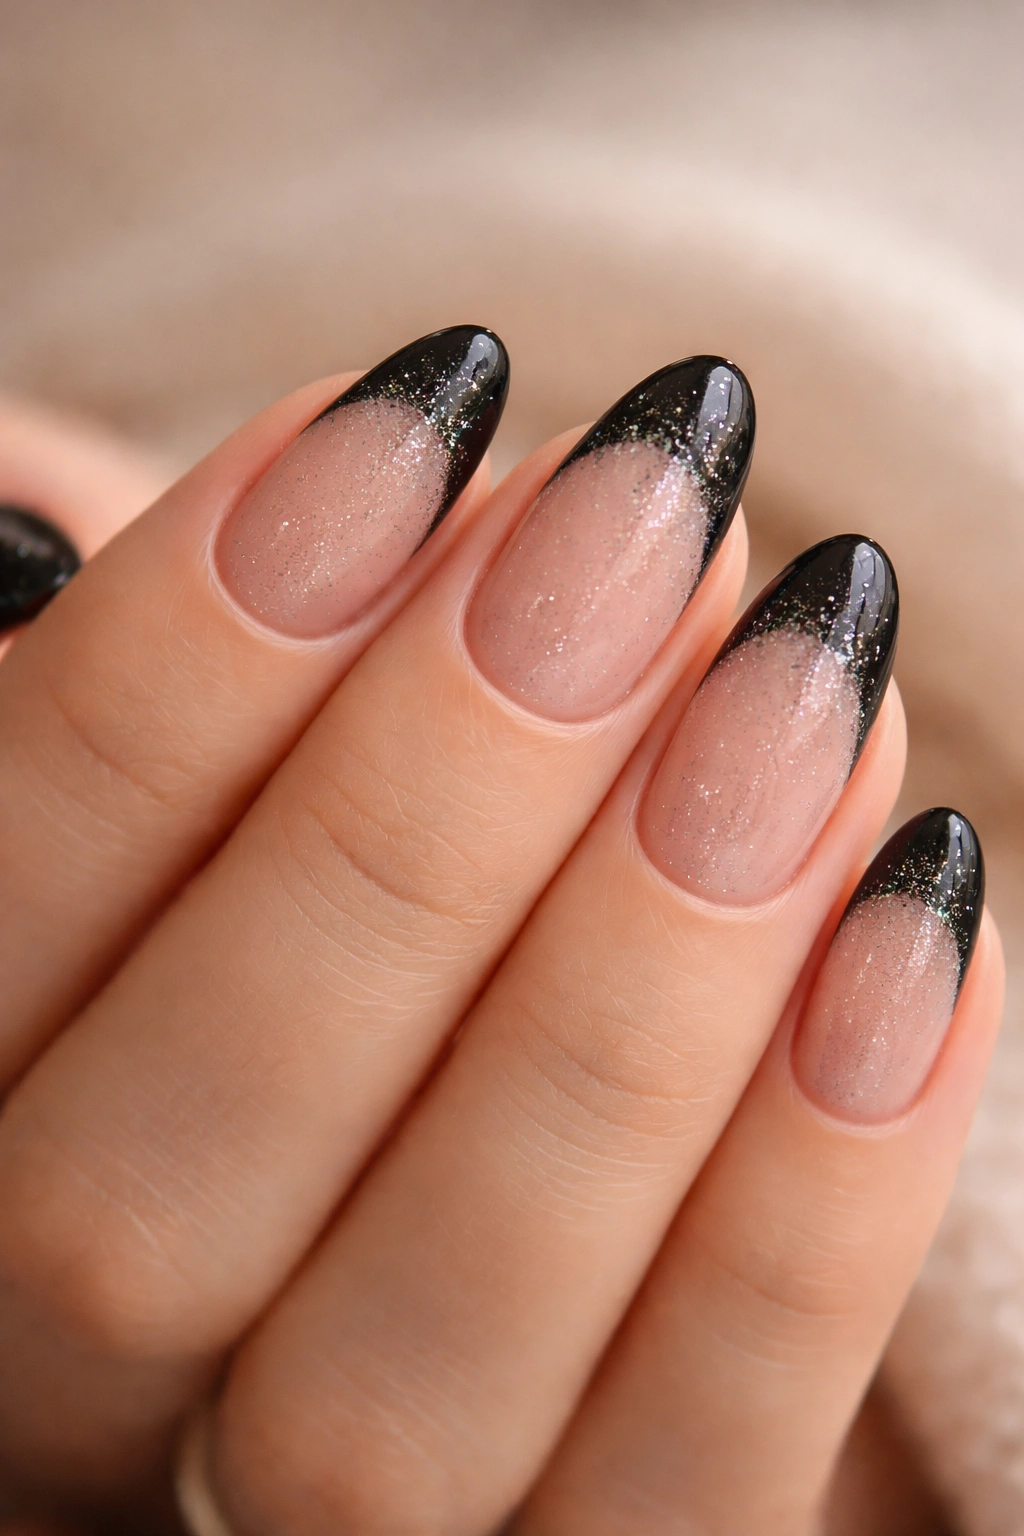
9. Glitter Gradient in the White Tip
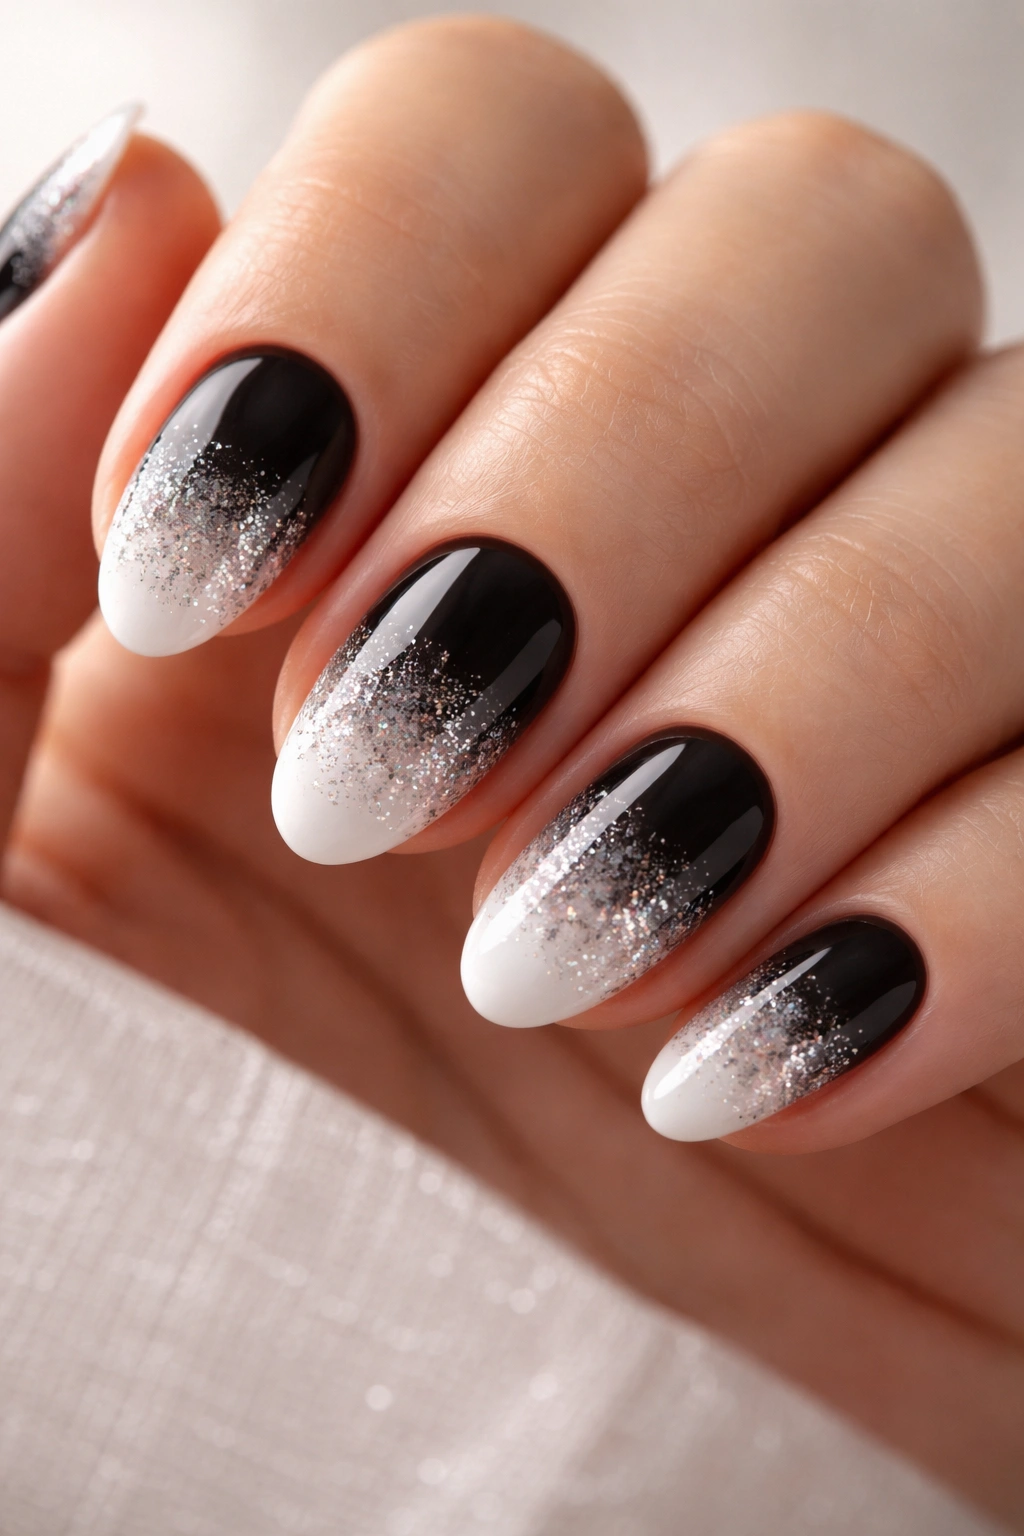
Instead of a solid white tip, imagine that white area gradually packed with increasingly dense glitter — starting with barely a sparkle near the cuticle side of the white tip and building to a full, densely packed glitter explosion at the nail’s edge. The glitter is usually transparent or semi-transparent in shades of silver, clear, or even champagne, so it sits within the white rather than replacing it.
This version looks completely different in person versus in photos. In photos, it reads as textured and dimensional. In person, the sparkle catches light constantly as your hands move. The effect is far more refined than full-glitter nails because the sparkle is contained to just the white tip area. Application involves painting your white tip, then using a brush to pick up glitter (usually with a tiny bit of topcoat or gel medium) and pressing it into the still-wet white nail polish, building density as you go toward the free edge. The glitter-packed version lasts about two weeks before some sparkle naturally sheds, but there’s always enough left to maintain the effect.
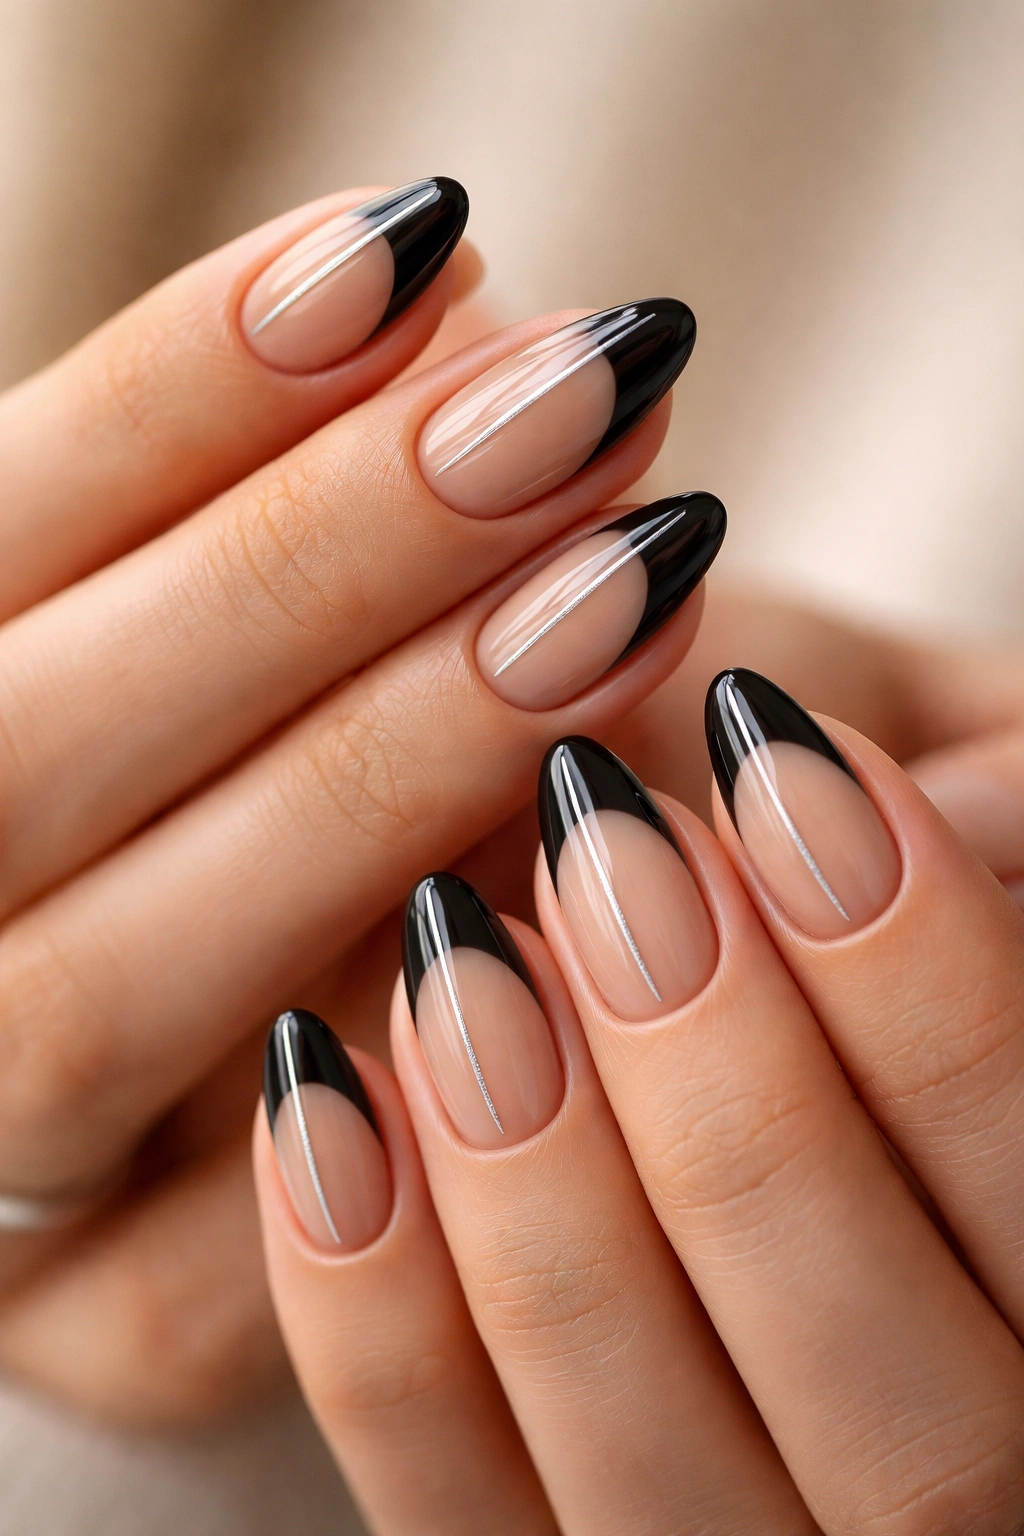
10. Gold Striping and Detailing on Black French
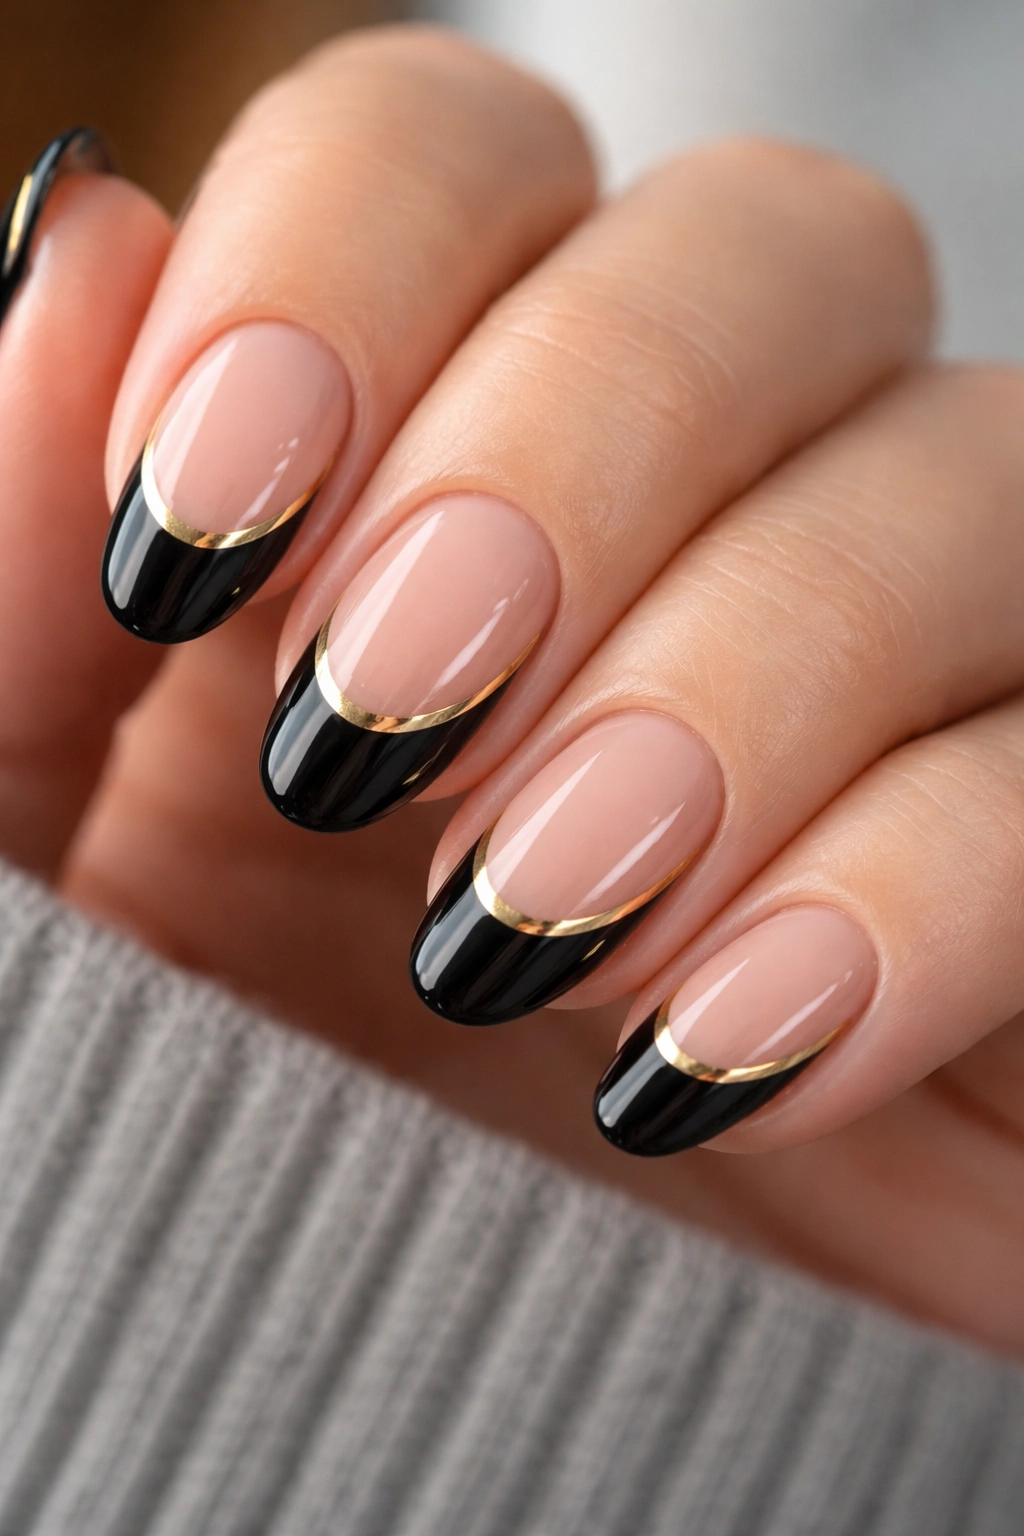
A thin gold line running along the inner edge of the white tip, or a single gold stripe down the center of the nail, transforms a basic black French into something with significantly more presence. Gold and black have a luxurious, almost art-deco feel to the combination.
The gold should be applied with a thin liner brush or a metallic pen-style applicator, creating a single clean line rather than a brushy, textured application. Some versions include a second, even thinner gold accent line on the opposite side of the nail, creating a frame-like effect. The gold catches light from any angle, which makes your hands appear more animated and present. This detail works beautifully under overhead lighting, in photos, and in natural daylight. The gold striping adds maybe two minutes to application time but dramatically increases the perceived sophistication of the final design. For anyone drawn to jewelry-inspired nail designs or luxury aesthetics, this is an immediately gratifying choice.
11. Marble or Texture in the Black Base
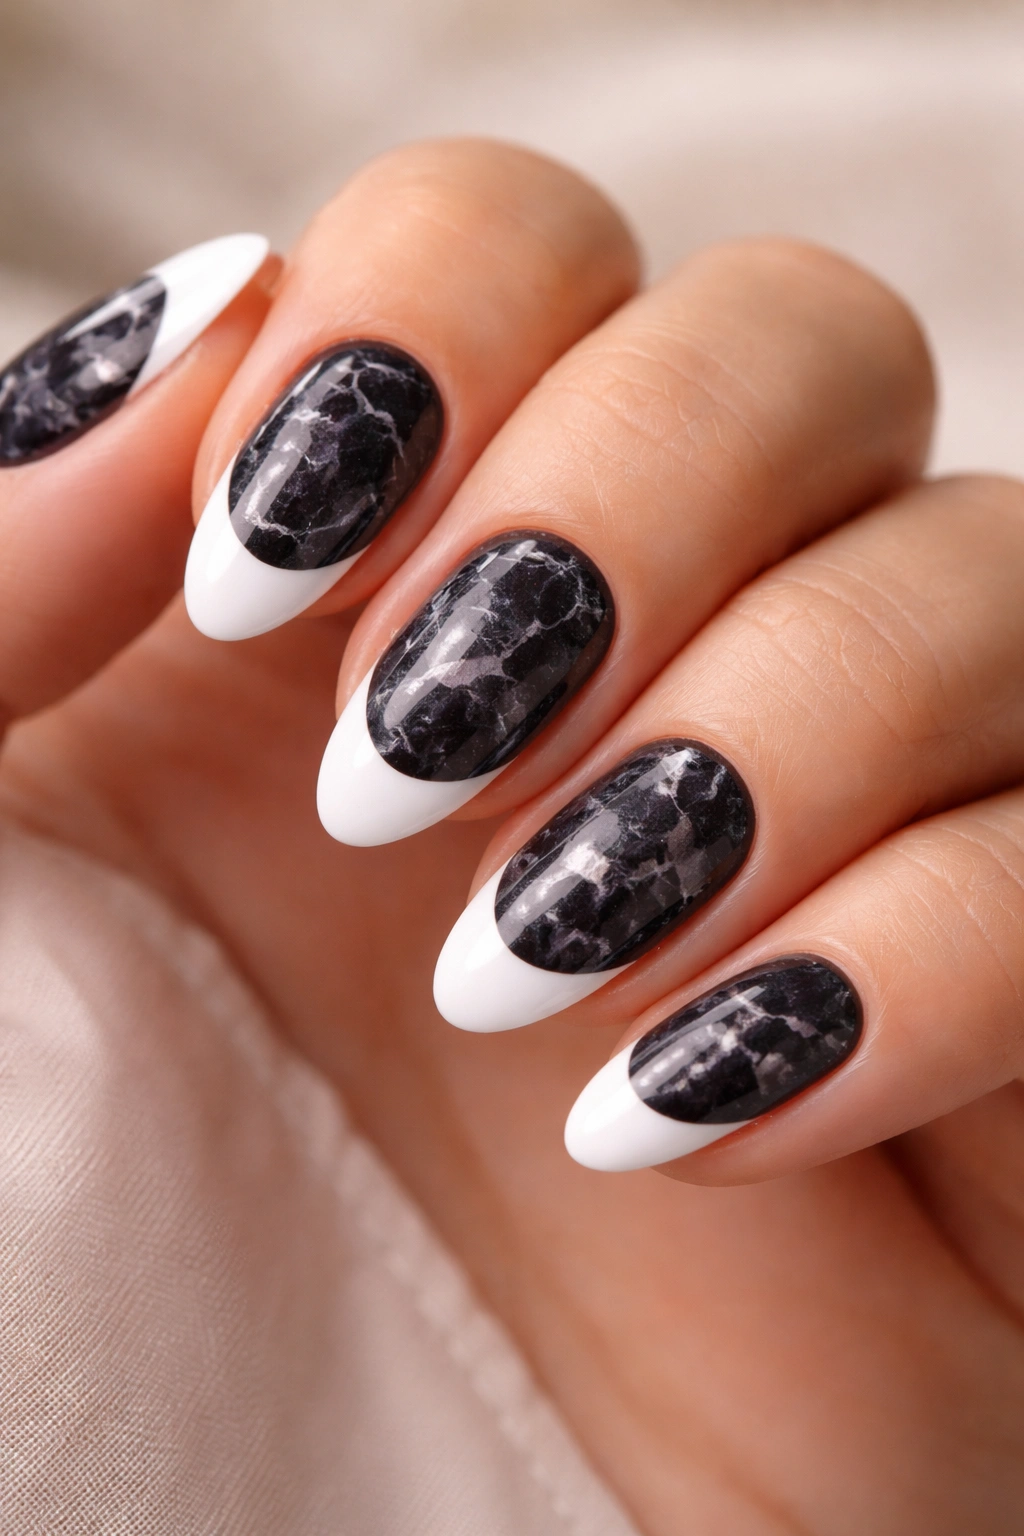
Rather than solid black, imagine swirled or marbled black tones — incorporating charcoal, dark gray, near-white wisps, or even deep purple undertones into the base color. The white tip remains clean and crisp, but now the entire black area has visual movement and depth.
Marble effects are achieved through water marble technique, hand-painted swirling, or specialized marble-effect nail polishes that naturally create veined patterns. The result is that even though your nails are short, the visual interest in the black area keeps them from reading as plain. The white tip becomes almost a visual rest point against all that patterning. This version suits creative people, individuals with artistic sensibilities, and anyone who loves subtle complexity. The marble effect makes growth less noticeable because the patterning naturally disguises the line between new growth and previous manicure. Applied correctly, marble-effect black bases maintain full shine and durability while adding significant visual sophistication.
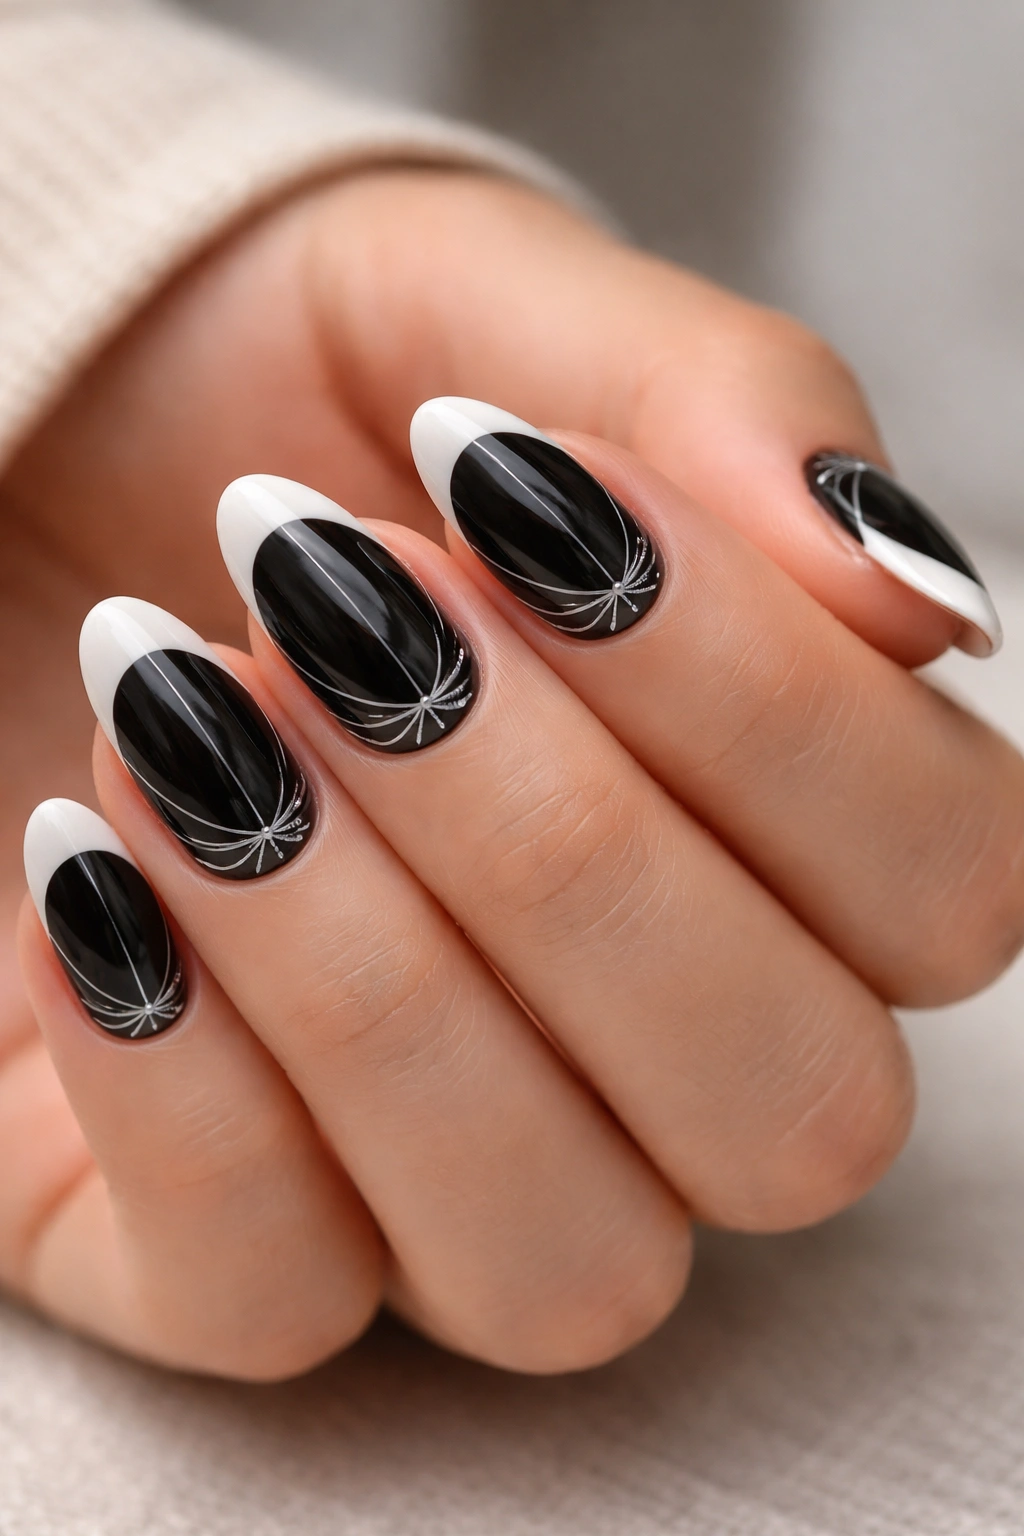
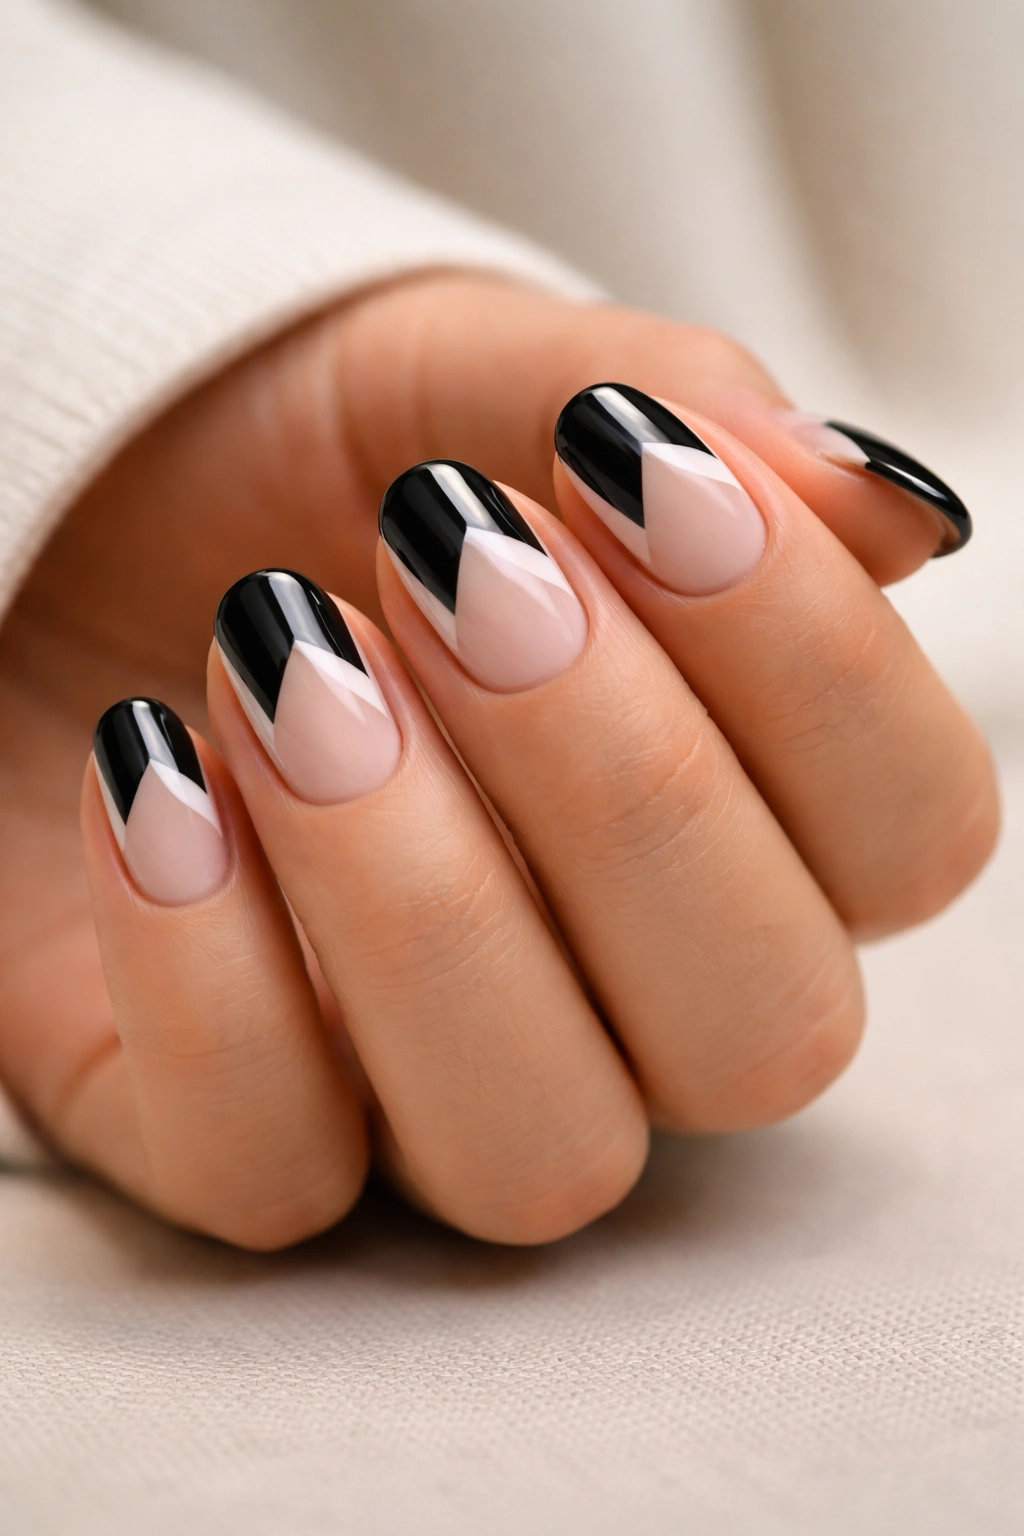
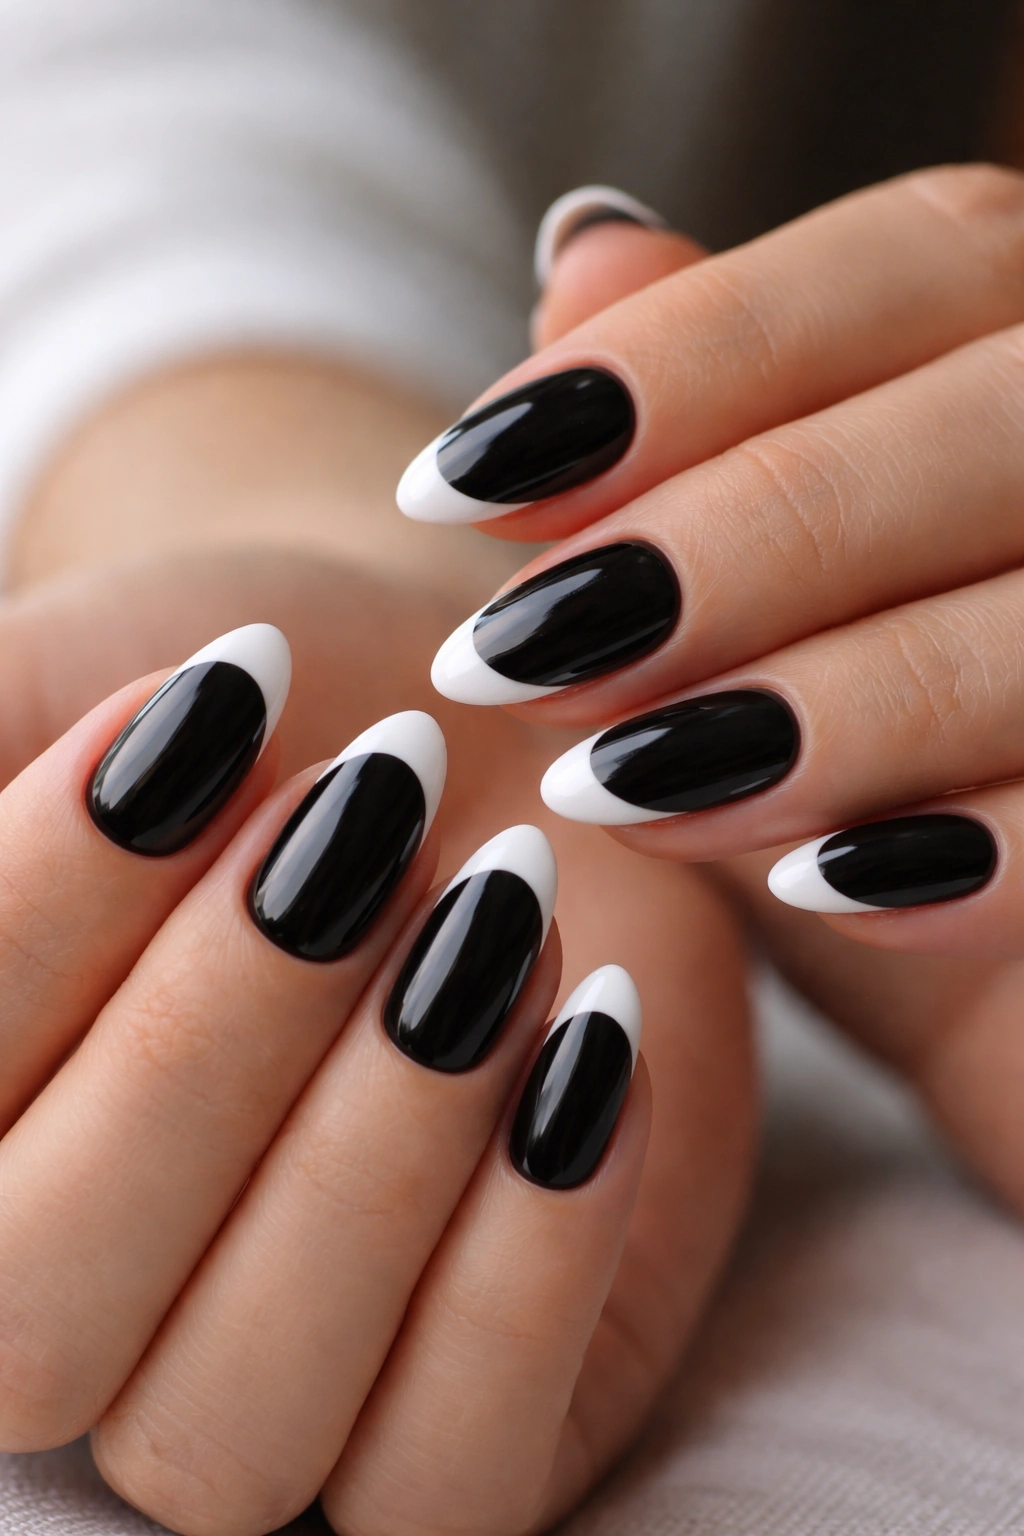
12. Reverse French — Black on Nail Bed, White French Reverse
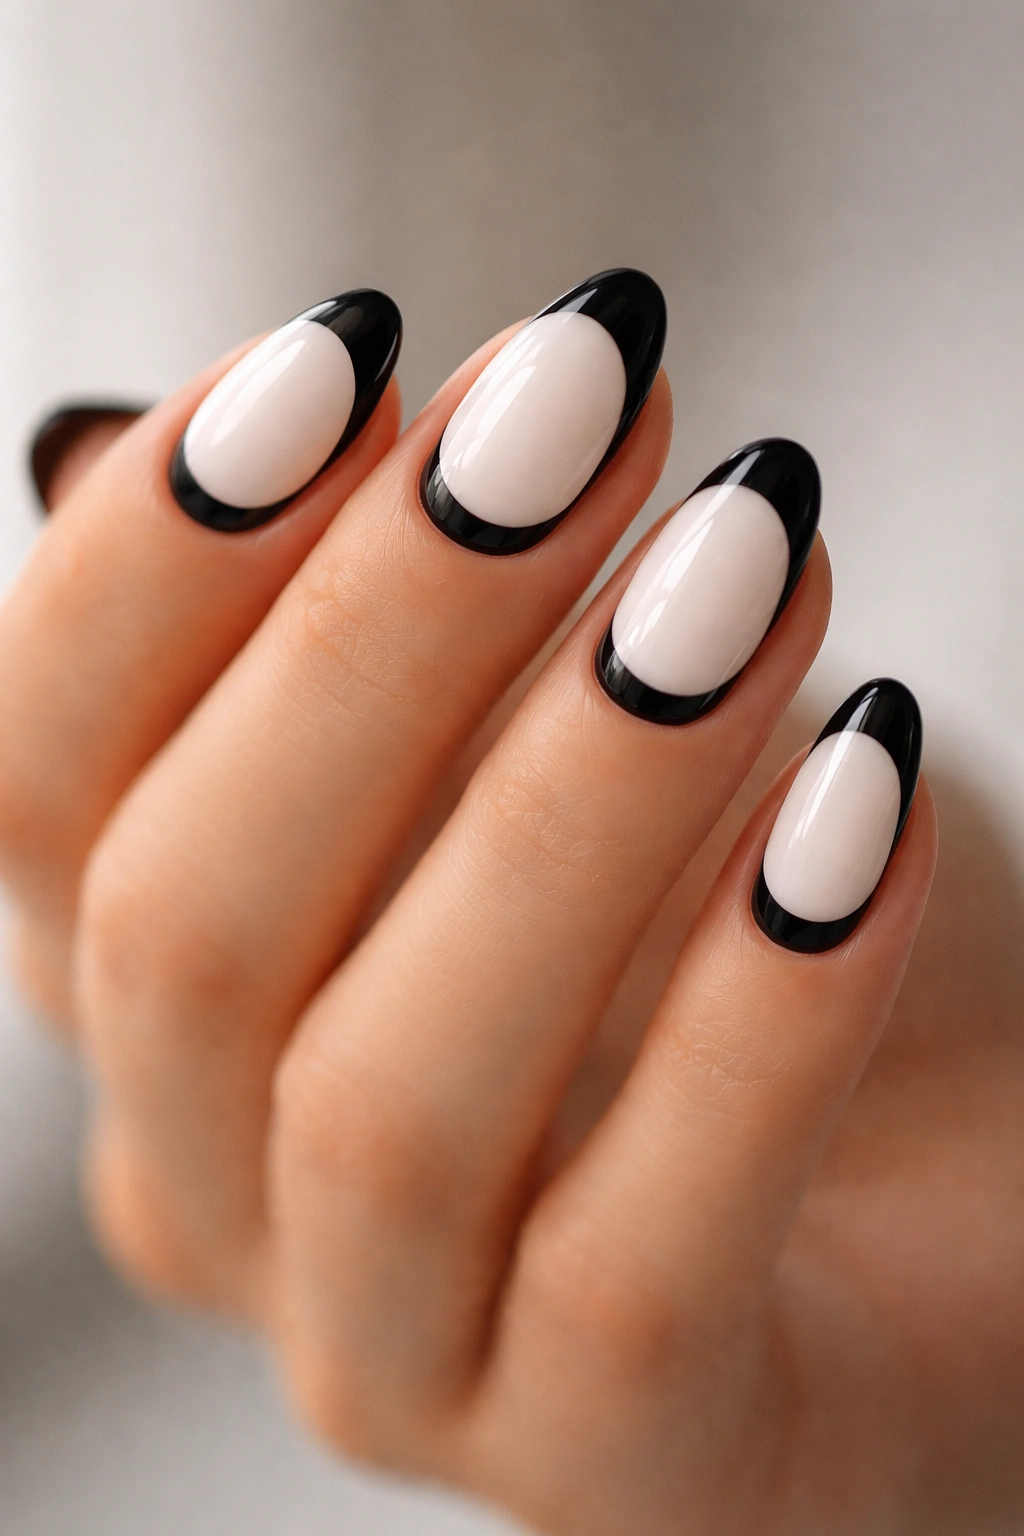
Imagine inverting the entire concept: the nail bed (the main body of the nail) is painted white or pale, and the French tip at the edge is deep black. This completely reverses visual expectations and creates a bolder, more contemporary look than traditional French tips. The eye-catching part becomes the dark edge rather than a pale line.
The reverse French approach actually works beautifully on short nails because the white base elongates the nail visually, and the black edge creates a frame that defines the tip. This version reads as more modern, more fashion-forward, and honestly, slightly more rock-and-roll than traditional French tips. Application is identical — you’re just reversing which areas get which colors. The white base can be cream, off-white, soft pearl, or even translucent pink if you prefer something warmer. The black remains crisp and dark at the edge. This design particularly appeals to people who love the structure of French manicures but want something that feels distinctly their own.
13. Rhinestone or Crystal Accent on One Nail
Choose one nail — typically the ring finger or middle finger — and accent it with a carefully placed cluster of small rhinestones or crystals embedded at the base of the white tip, creating a jewel-like focal point on an otherwise classic black French design. The other four nails remain plain black French.
This asymmetrical approach gives you maximum visual impact while maintaining wearability and practicality. One embellished nail reads as intentional and luxurious without the full-on bling effect of every nail studded. The rhinestones are usually applied with nail glue onto already-cured polish, meaning they’re replaceable if they loosen. Clear rhinestones or champagne-tinted stones are most versatile, though some people choose colored rhinestones that match their jewelry or outfit. For events, date nights, or any time you want subtle glamour, this version delivers without being over-the-top.
14. Black French With Fine Glitter Dust
Rather than chunky glitter, imagine an incredibly fine, shimmery glitter dust brushed across the entire nail surface — both the black base and the white tip — creating an overall subtle shimmer rather than visible sparkle. The fine dust is so small that from a distance it reads as a soft glow rather than glitter.
This creates what’s sometimes called a “dirty glitter” or “dusty sparkle” effect — the nail has shine and dimension without the obvious sparkle of larger glitter pieces. The application involves brushing the glitter dust onto a still-slightly-tacky topcoat, then sealing it with a final clear topcoat. The result is sophisticated, subtle, and catches light beautifully in person while reading as nearly solid in photos. This is perfect for people who want a hint of sparkle without commitment to full glitter. The fine dust integrates so smoothly with the base color that you can wear this version to professional settings and it reads as elegant rather than party-ready.
15. Negative Space Geometric Black French
Create geometric shapes cut out from the black base — perhaps a small triangle, a thin vertical stripe, or a delicate geometric pattern near the cuticle — that reveals either the natural nail or a clear base underneath. The white French tip remains intact as the second visual anchor.
The geometric cutouts create rhythm and structure within the design. These shapes might be symmetrical (matching on both sides of the nail) or asymmetrical (living on just one side), depending on your preference. Thin geometric lines are easiest to achieve with nail stencils or steady-handed precision; more complex shapes might require a thin nail file or specialized tools. The effect is bold enough to be visually interesting but refined enough to work in most settings. The negative space literally lightens the appearance of the nail visually — solid black can sometimes feel heavy on short nails, but strategic cutouts balance that heaviness and create a sense of breathing room within the design.
Achieving These Designs at Home Versus the Salon
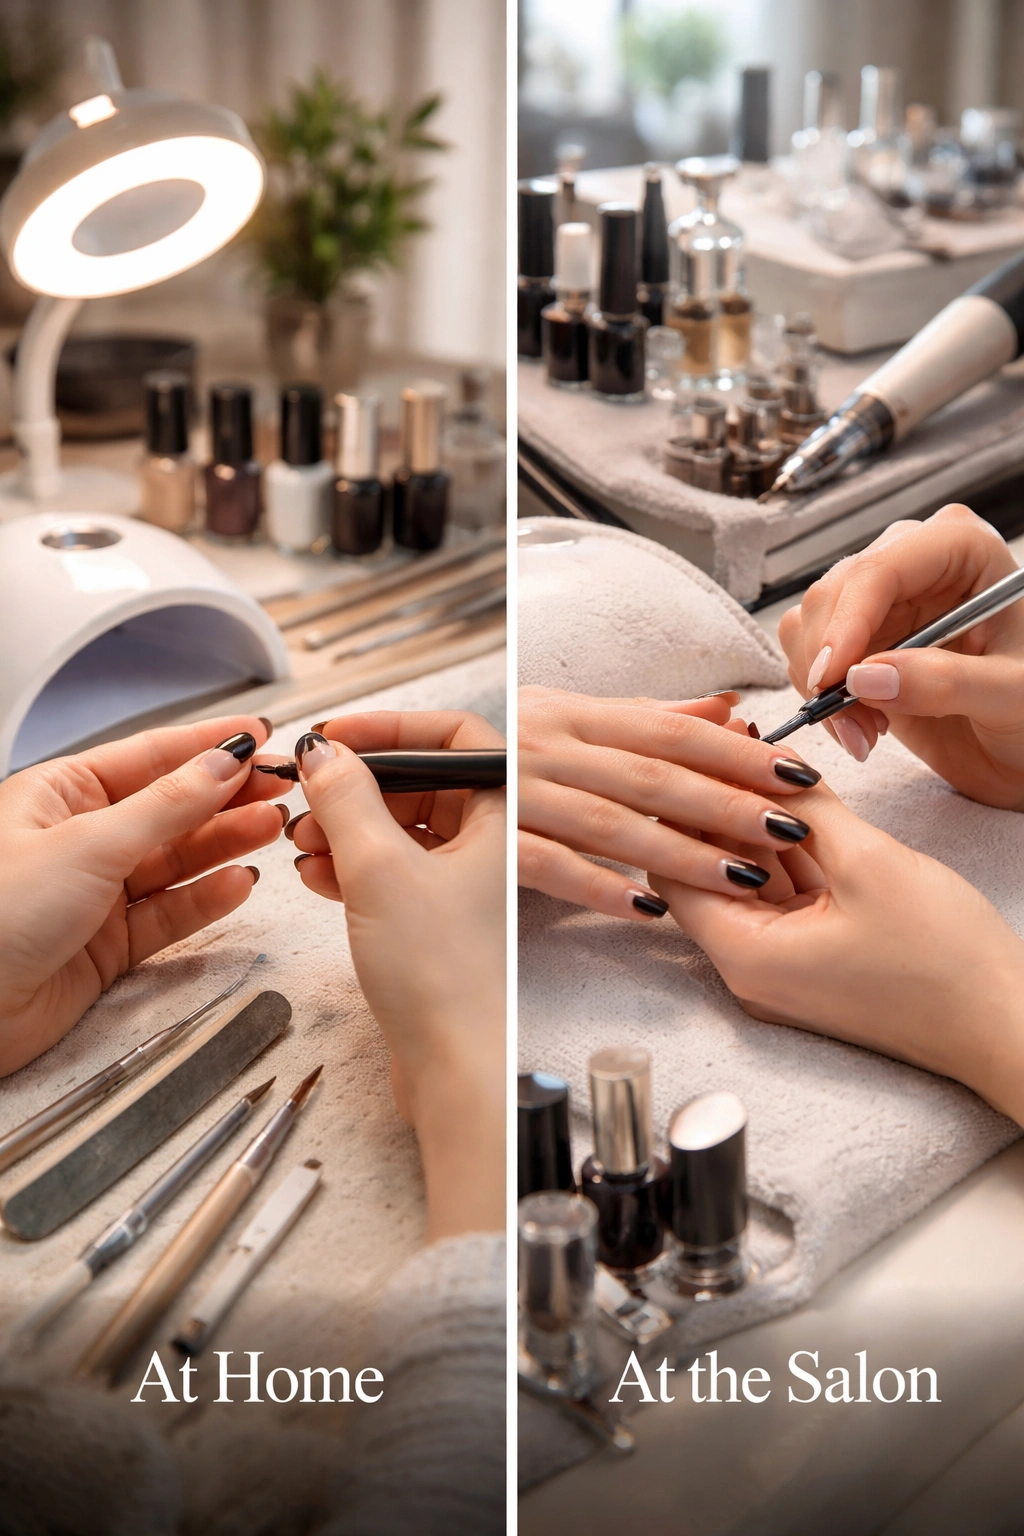
If you’re planning to DIY any of these, invest in a quality base coat, black gel or regular polish (depending on your preferred longevity), white polish for the tip, and a thin-lined detail brush. For designs with any precision element — metallic lines, geometric patterns, marble effects — magnification helps immensely. A ring light positioned above your workspace transforms application accuracy. For designs with embellishments like pearls or rhinestones, nail glue works better than topcoat for permanent placement.
Most salon manicurists can execute any of these designs, though some require more skill than others. The marble, fine line art, and reverse French versions tend to command higher prices because they require more technical skill. When booking, show images of exactly which design you want — the black French universe is expansive, and your reference image ensures you’re getting the right version.
The Maintenance Reality
All of these versions maintain their appearance for at least two to three weeks. The matte finishes may appear duller by week three. Glitter versions naturally shed some sparkle over time. Embellished versions (pearls, studs, rhinestones) might loosen slightly after two weeks. Regular polish-based designs chip slightly at the edges by week two and a half; gel versions maintain crispness longer.
The white tip line is forgiving as it grows out — even at week four, the design still reads as intentional rather than unkempt. This is one of the significant advantages of French manicures over other designs. The growth phase doesn’t destroy the aesthetic the way it does with nail art that lives across the entire surface.
Final Thoughts
Black French tips on short almond nails aren’t just practical — they’re genuinely stylish in a way that feels surprisingly hard to find. You’re getting structure, elegance, versatility, and low-maintenance wearability all in one design. These fifteen versions prove that staying within a defined color palette doesn’t limit your options. If anything, it focuses creativity into more intentional, refined directions. Pick the version that matches your aesthetic, commit to it for three weeks, and let your hands do the talking.
