

Short nails don’t have to mean boring nails. If you’ve been sidelined from dramatic nail designs because you keep your nails trimmed short, squoval shapes change everything — they’re the perfect sweet spot between sophisticated and playful. Add glitter, and suddenly you’ve got something that works for birthdays, celebrations, and honestly, any day you want to feel a little special. Squovals give you enough surface area for real design work without the fragility of longer shapes, which means your birthday nail art actually stays intact long enough to enjoy it.
What makes squoval nails such a smart choice? They’re essentially square nails with rounded corners, which means you get the bold, modern look of a square without the sharp edges that catch on things and break. That slightly rounded edge also photographs better — it catches light differently than a completely square corner would. For glitter designs specifically, the shape lets you play with placement and layering without the nail looking too crowded. A long oval can feel delicate; a short square can feel harsh; but a squoval? It hits that perfect note of modern, wearable, and undeniably chic.
Birthdays call for something celebratory, and glitter does that instantly. The trick is choosing glitter that complements rather than overwhelms — fine holographic glitter reads sophisticated, chunky crystal glitter reads fun and festive, and colored metallics add dimension without feeling childish. Short nails force you to be intentional about glitter placement, which often results in designs that feel more curated and less like an accident.
1. Confetti Burst in Soft Pink
This design starts with a soft pink base and builds excitement through strategic glitter placement. The confetti aspect comes from mixing different glitter sizes — some ultra-fine holographic pieces and some slightly larger metallic confetti mixed together. Paint your squoval nails with two coats of a pale pink shade (think ballet slipper pink, not hot pink). The soft base is important because it lets the glitter read as genuine celebration, not an attempt to hide mistakes.
Once the base is dry, create a small concentrated burst of glitter in the upper corner of each nail, roughly where a star might sit if you were mapping the night sky. The burst radiates outward but stays contained — you’re not covering the whole nail, just suggesting a moment of celebration. Use a thin nail art brush or a dotting tool to place glitter pieces individually rather than sweeping a whole glitter polish across the nail. This approach takes maybe thirty seconds per nail but feels infinitely more refined.
Why This Works for Short Squovals
The burst pattern actually suits short nails better than longer ones. On a longer nail, a confetti burst can feel scattered and chaotic. On a short squoval, the same design feels intentional and chic. The rounded corners of the squoval frame the glitter burst perfectly — it doesn’t disappear into sharp corners or look cramped against the edge.
Application and Drying
Let each nail dry completely before moving to the next one. Glitter can slide around on wet polish, so patience matters here. Once the glitter is set, seal everything with a clear topcoat — this locks the design in place and prevents glitter pieces from popping off prematurely. One thick coat of topcoat works better than two thin ones for glitter designs; thin coats can trap air bubbles around the glitter pieces.
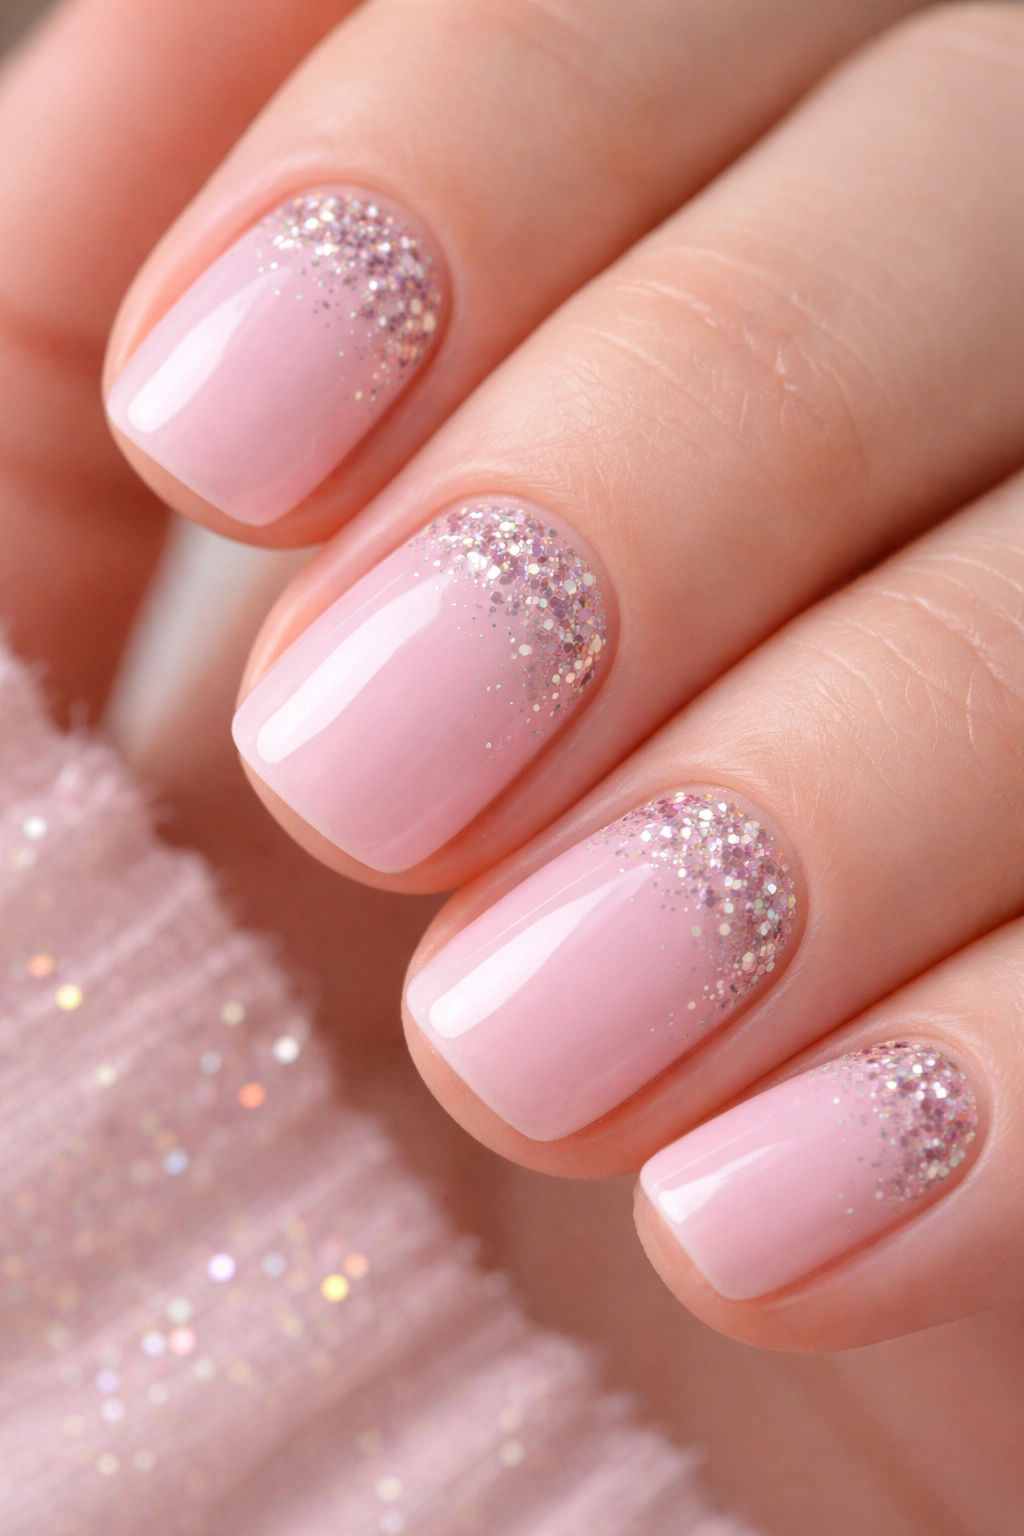
2. Gradient Glitter Ombre from Clear to Champagne
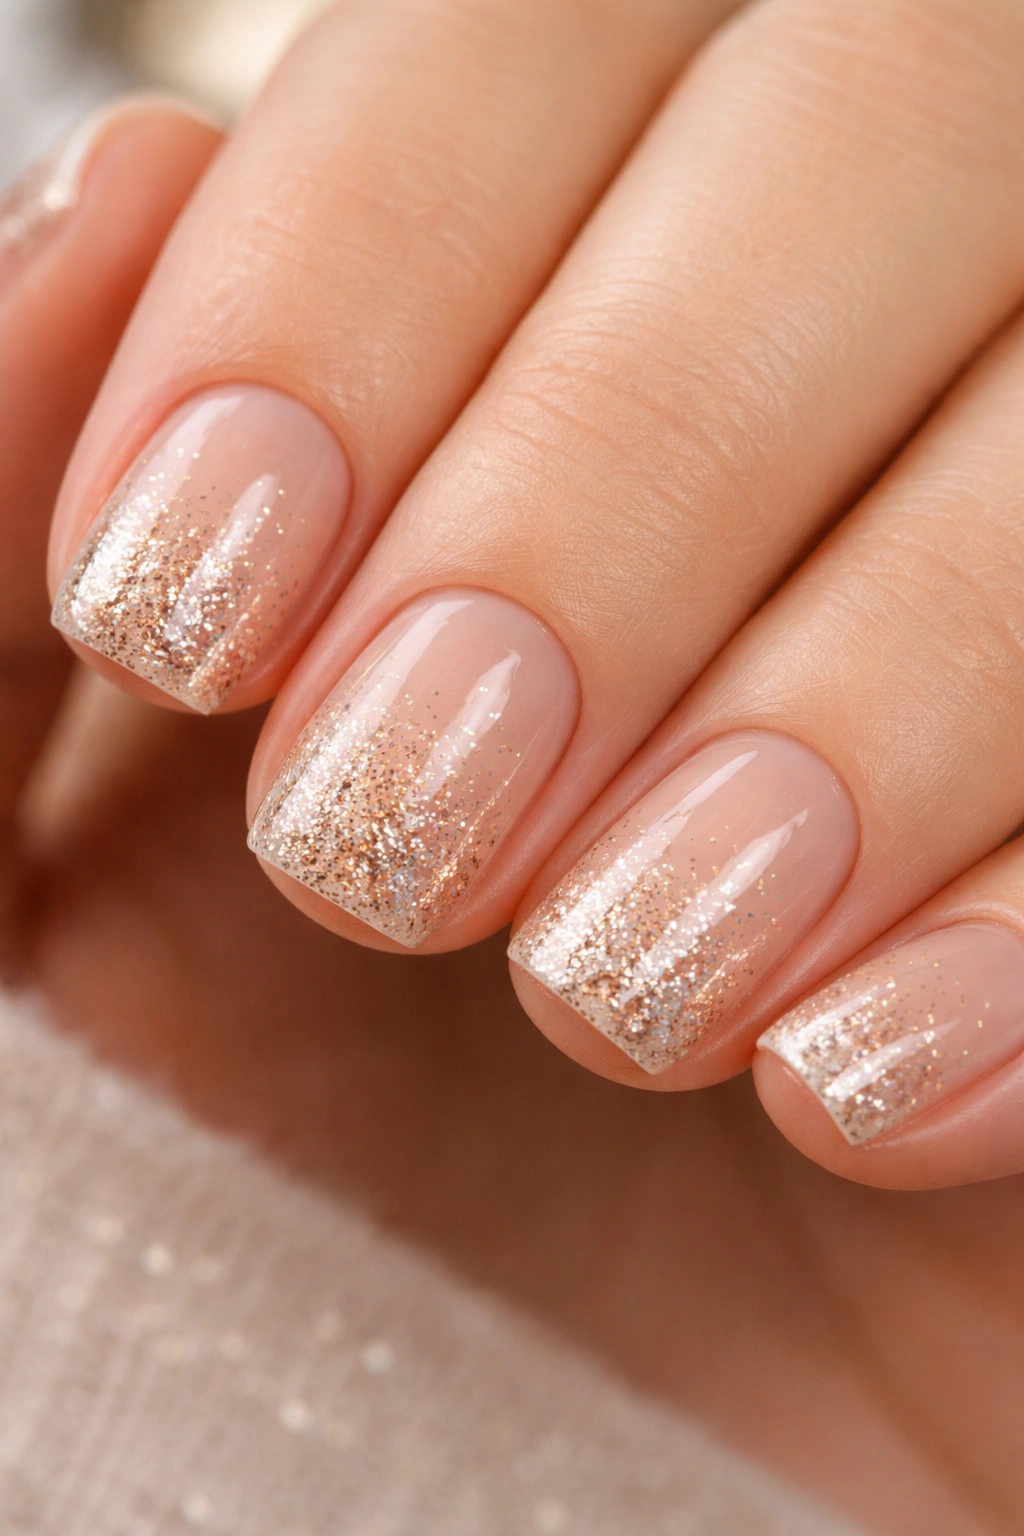
This design uses the natural shape of the squoval to create a gradient effect. Start with a completely clear base — no color, just the shine of your natural nail. Then, working from the tip toward the cuticle, gradually increase the density of champagne-colored fine glitter. The very tip of the nail should be packed with glitter, while the nail bed near the cuticle stays clear with just a whisper of glitter.
The magic of this design lies in the transition. You’re not drawing a hard line between “glitter” and “no glitter.” Instead, you’re layering — paint a thin coat of clear polish mixed with a tiny amount of glitter near the tip, let it dry, then add another layer with slightly more glitter concentration, and continue building toward the free edge. This creates a gradient that catches light beautifully and makes your nail look longer than it actually is.
Getting the Gradient Right
The gradient reads best if you work with a semi-sheer champagne polish rather than trying to mix clear polish with loose glitter (which never distributes evenly). Apply three to four thin layers, each time pushing the concentration slightly further down the nail. The key is thin layers — thick layers of glitter-heavy polish look muddy and will chip faster.
This design photographs incredibly well because the gradient creates dimension and movement that a solid glitter application simply can’t achieve. For a birthday celebration where you know you’ll be in photos, this is the design that keeps looking better in every shot.
3. Rainbow Sparkle with White Base

Think birthday cake sprinkles, but make them wearable. Start with a classic white polish base — two coats, fully opaque. Once dry, use a thin brush or toothpick to create tiny dots of rainbow-colored glitter directly on the white surface. You’re not creating lines or patterns here; you’re essentially hand-placing confetti. Mix holographic glitter pieces with actual rainbow glitter pieces for maximum sparkle without the design feeling costume-y.
The white base is crucial. White is often overlooked in nail art, but it’s essentially a blank canvas that makes every color appear more saturated and every glitter piece more visible. The high contrast between white and sparkly rainbow reads as playful and intentional rather than chaotic.
Color Distribution Matters
Don’t cluster all the red glitter in one area and all the blue in another. Spread the rainbow pieces across all ten nails evenly. This creates a cohesive look when you have all your nails together rather than making individual nails look like they belong to different designs. Step back every few nails and look at the overall effect — your hands should feel like a coordinated set.
Sealing the Design
Use a thick, viscous topcoat rather than a thin runny one. You want the topcoat to hold the glitter pieces in place, and that’s nearly impossible with a thin formula. One generous coat beats two thin ones. Some nail artists swear by matte topcoat over glitter for an ultra-chic finish, but for a birthday design, glossy lets the glitter shine the way it should.
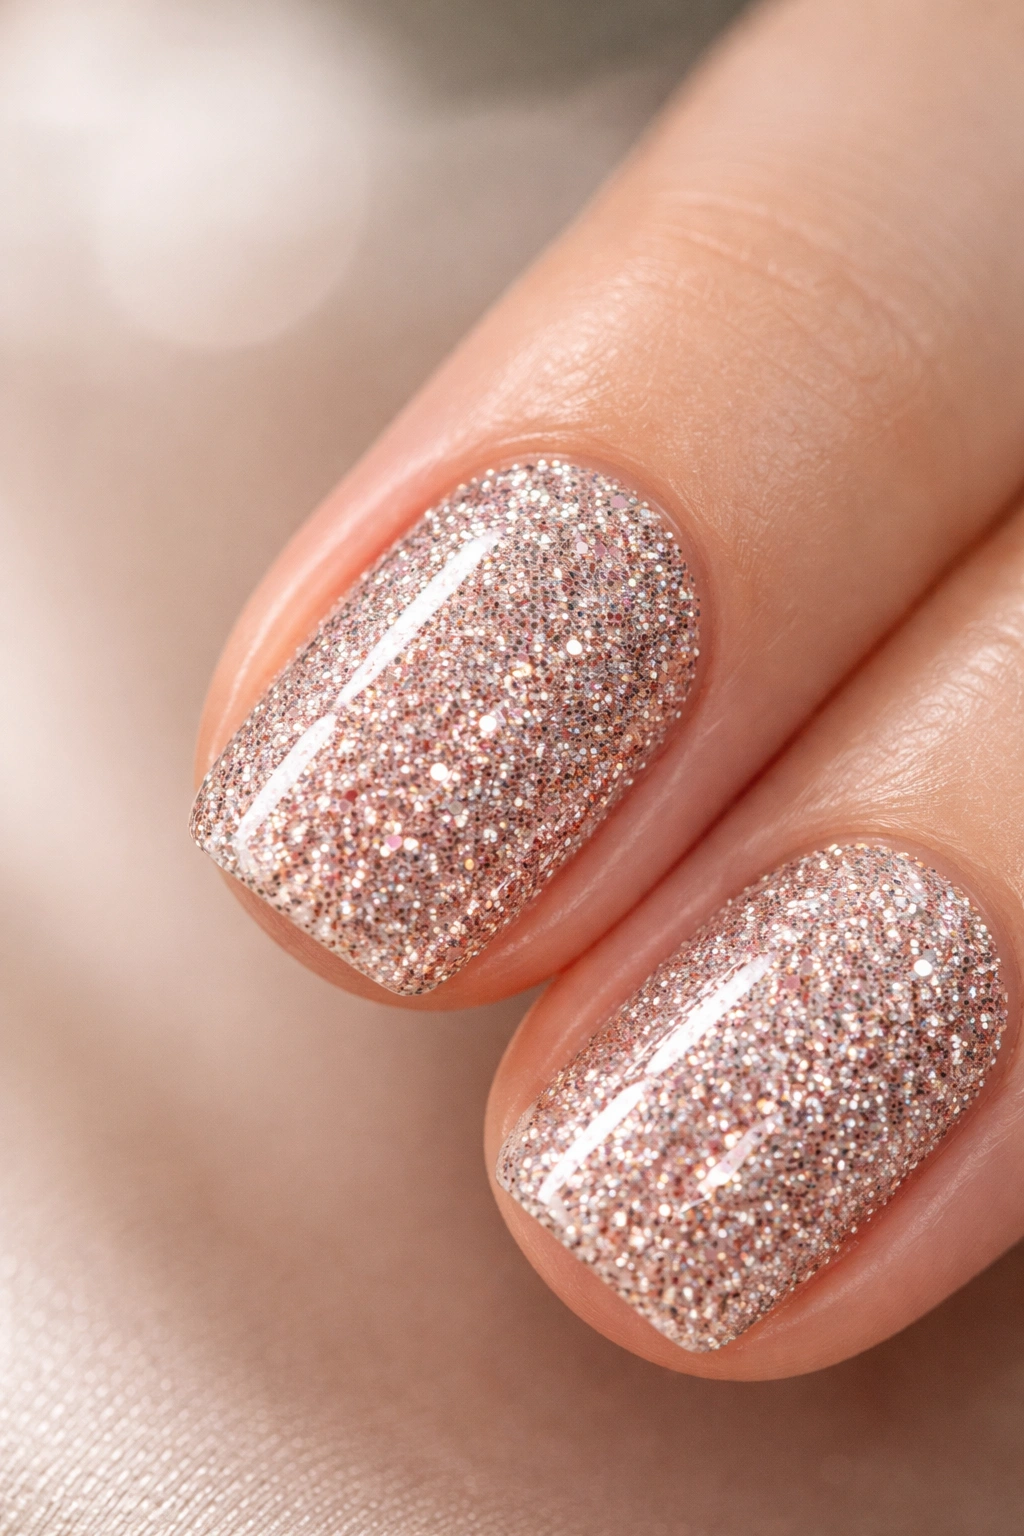
4. Vintage Hollywood Glamour with Gold Dust
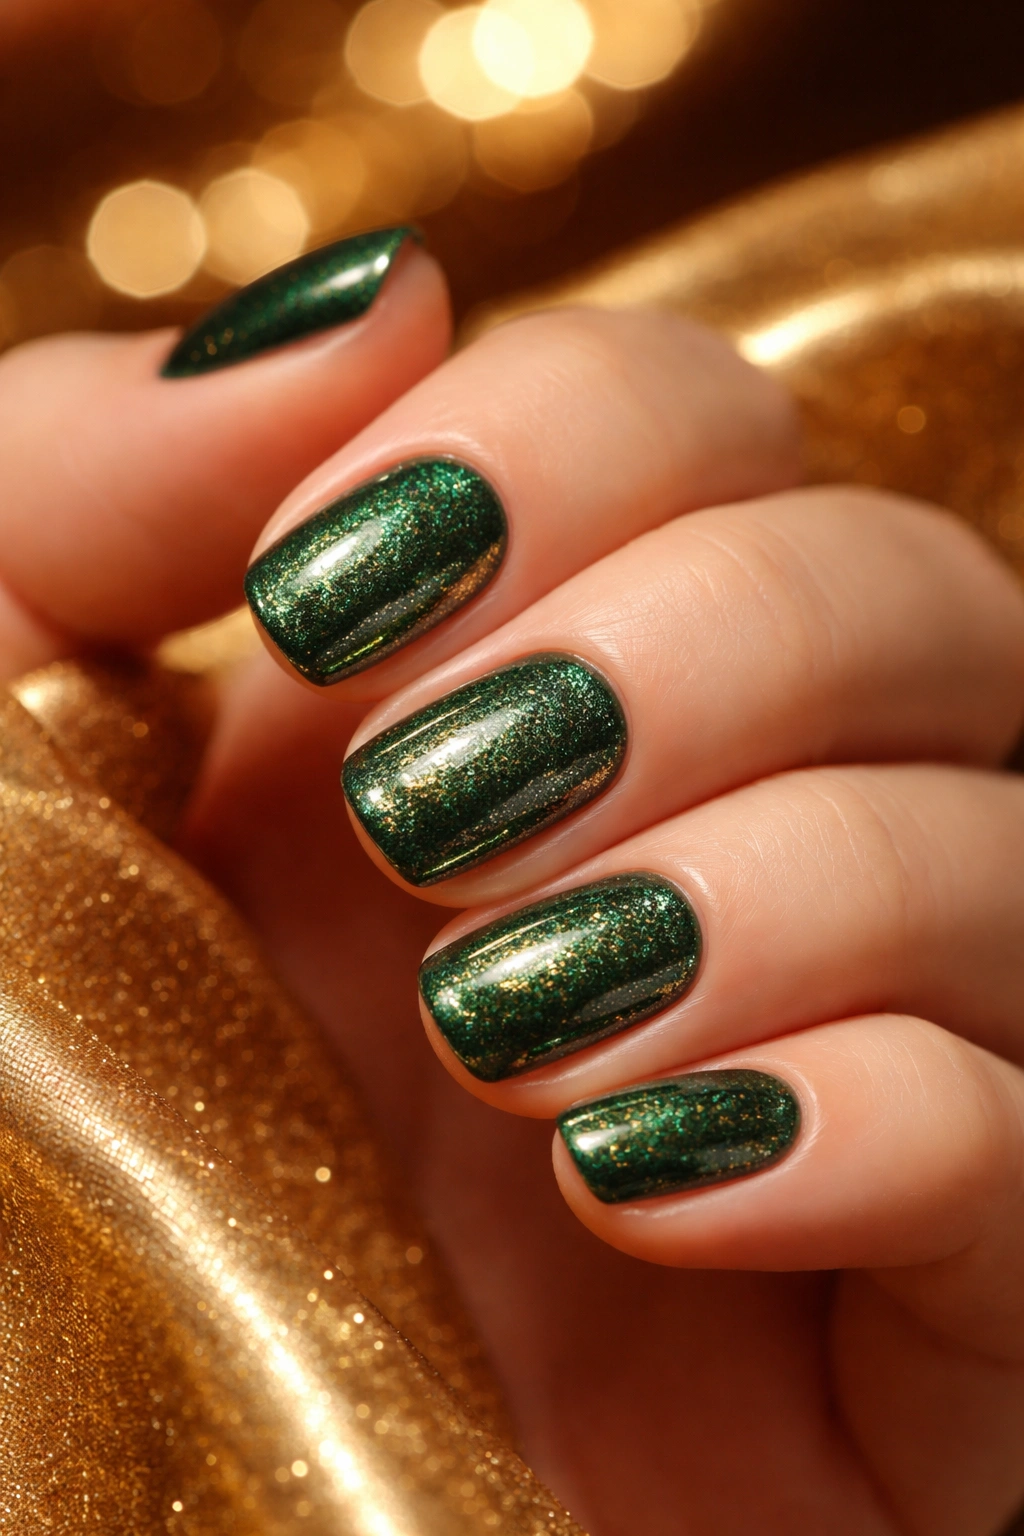
This design leans into elegance rather than pure fun, which works beautifully if the birthday person has sophisticated taste. Use a deep jewel tone base — emerald green, sapphire blue, or rich burgundy. Once that’s completely dry, apply a coat of gold dust glitter or an ultra-fine gold glitter polish over the entire nail. The goal is subtle shimmer, not a thick glitter layer.
The depth of the base color matters enormously here. If your base is a pale, washed-out version of a jewel tone, the gold dust will overpower it and the design reads as cheap. If your base is saturated and rich, the gold glitter simply amplifies the luxury you’ve already established. Test your base color on a practice nail or your pinky before committing all ten nails.
Nail Care Before Application
This design works best on smooth, well-hydrated nails. If your nails have ridges or texture, the glitter will highlight those imperfections rather than glide smoothly over them. Spend a few minutes buffing your nails smooth (gently, you’re not trying to thin them out, just level the surface). Push back your cuticles and apply a thin coat of cuticle oil before polishing — this creates an extra-smooth foundation that makes the glitter application feel flawless.
The Topcoat Decision
For this vintage-glamour vibe, a matte or satin topcoat actually elevates the design more than a glossy one. It creates a sophisticated sheen rather than a “wet” appearance. If you only have glossy topcoat available, use it, but this is one design where experimenting with different topcoat finishes genuinely changes the impact.
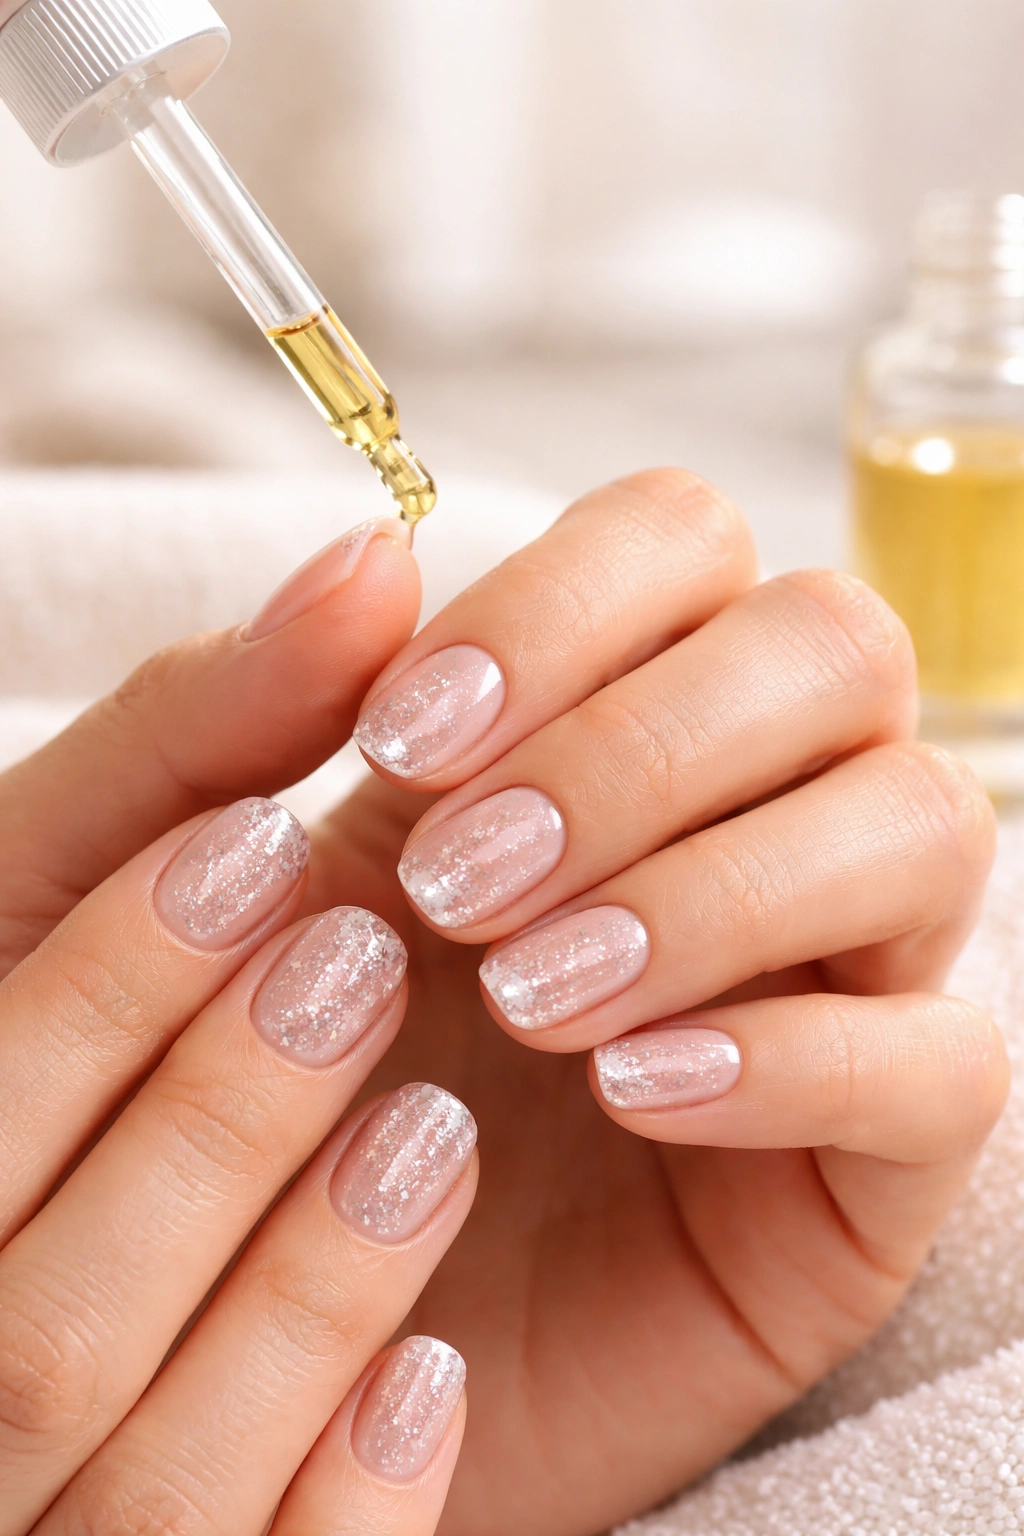
5. Scattered Pearl and Silver Birthday Sparkle
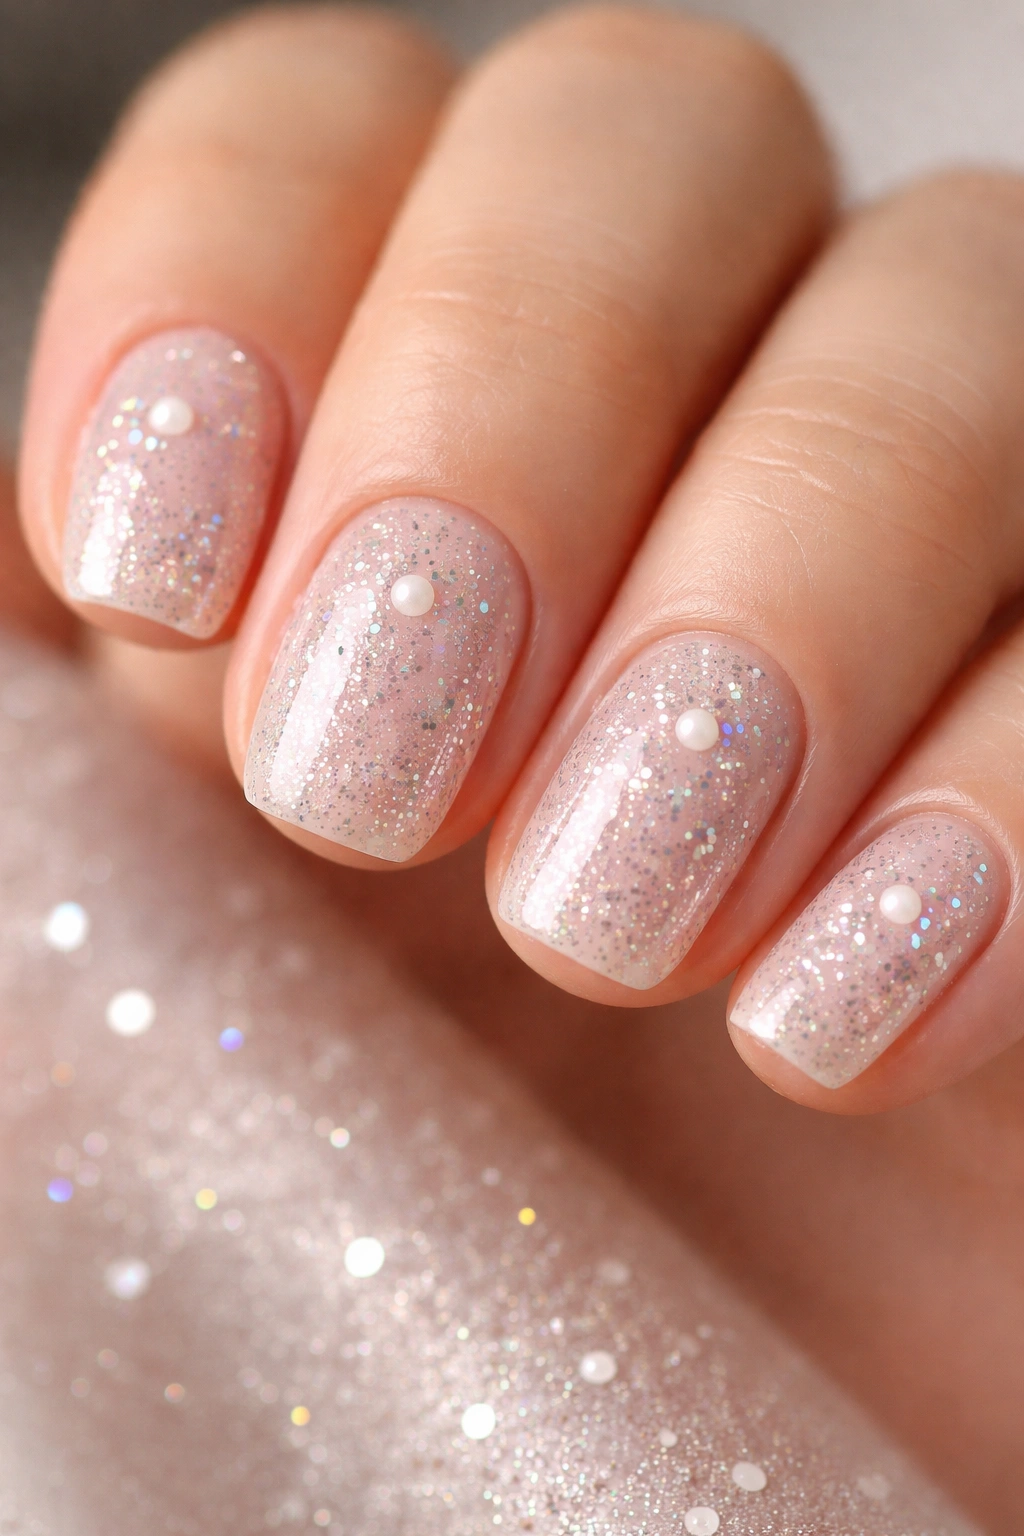
This design combines different textures — tiny pearl-finish glitter pieces mixed with fine silver holographic glitter — scattered loosely across a pale nude base. The beauty of this approach is that it looks effortless and works for any skin tone. Choose a nude that matches your skin tone exactly (test it on your inner arm if you’re unsure). The nude base makes your nails look longer while the scattered glitter reads as intentionally artistic rather than accidentally messy.
The “scattered” approach means placing glitter pieces randomly rather than in rows, grids, or patterns. This actually makes the design easier to execute because you’re not trying to line things up perfectly. Paint the base, let it dry completely, then randomly dot or place glitter pieces across the nail surface. Some nails can have more density, others less. Some can be heavier toward the tips, others toward the cuticle. The inconsistency is the point.
Choosing the Right Glitter Size
For scattered designs, avoid mixing glitter sizes too drastically. If you use both chunky confetti and ultra-fine dust, the design can look like you spilled two different bottles on your nails. Stick with pieces that are roughly similar in scale — maybe fine glitter and small sparkly pieces, or small confetti and medium confetti. This creates visual coherence even though the placement is random.
This design handles real-world life beautifully. It doesn’t show fingerprints the way a solid metallic does, it doesn’t require perfect precision, and it lasts longer than designs with heavy glitter coverage because the polish underneath isn’t as thick.
6. Milestone Birthday Numbers in Glitter

If the birthday marks a specific age, work that into the design. On one accent nail (usually the ring finger or middle finger on your dominant hand, but you can choose differently), use a gold or silver metallic nail art pen to write the age in elegant numerals. Then outline or frame those numbers with a concentrated line of fine glitter in a matching metallic tone.
This design personalizes the birthday in a way generic sparkle can’t. The age itself becomes the focal point of the design. Keep the rest of the nails simple — a matching base color without glitter, or very light glitter scattered subtly. This creates contrast that makes your age-number nail stand out without the overall design feeling overwhelming.
Executing Clean Numbers
If handwriting numbers feels intimidating, buy a thin nail art brush and practice on a piece of paper first. Write the number several times until your hand feels confident with the size and spacing you want. If you’re still nervous, use a pre-made nail sticker with a number and layer glitter around it rather than trying to freehand the numerals. No one will know the numbers came from a sticker, and your design will look intentional rather than shaky.
This design absolutely deserves a bold, glossy topcoat. You want light bouncing off those numerals and the surrounding glitter, which creates the impact that makes this design special.
7. Glitter Ombre Gradient from One Jewel Tone to Another
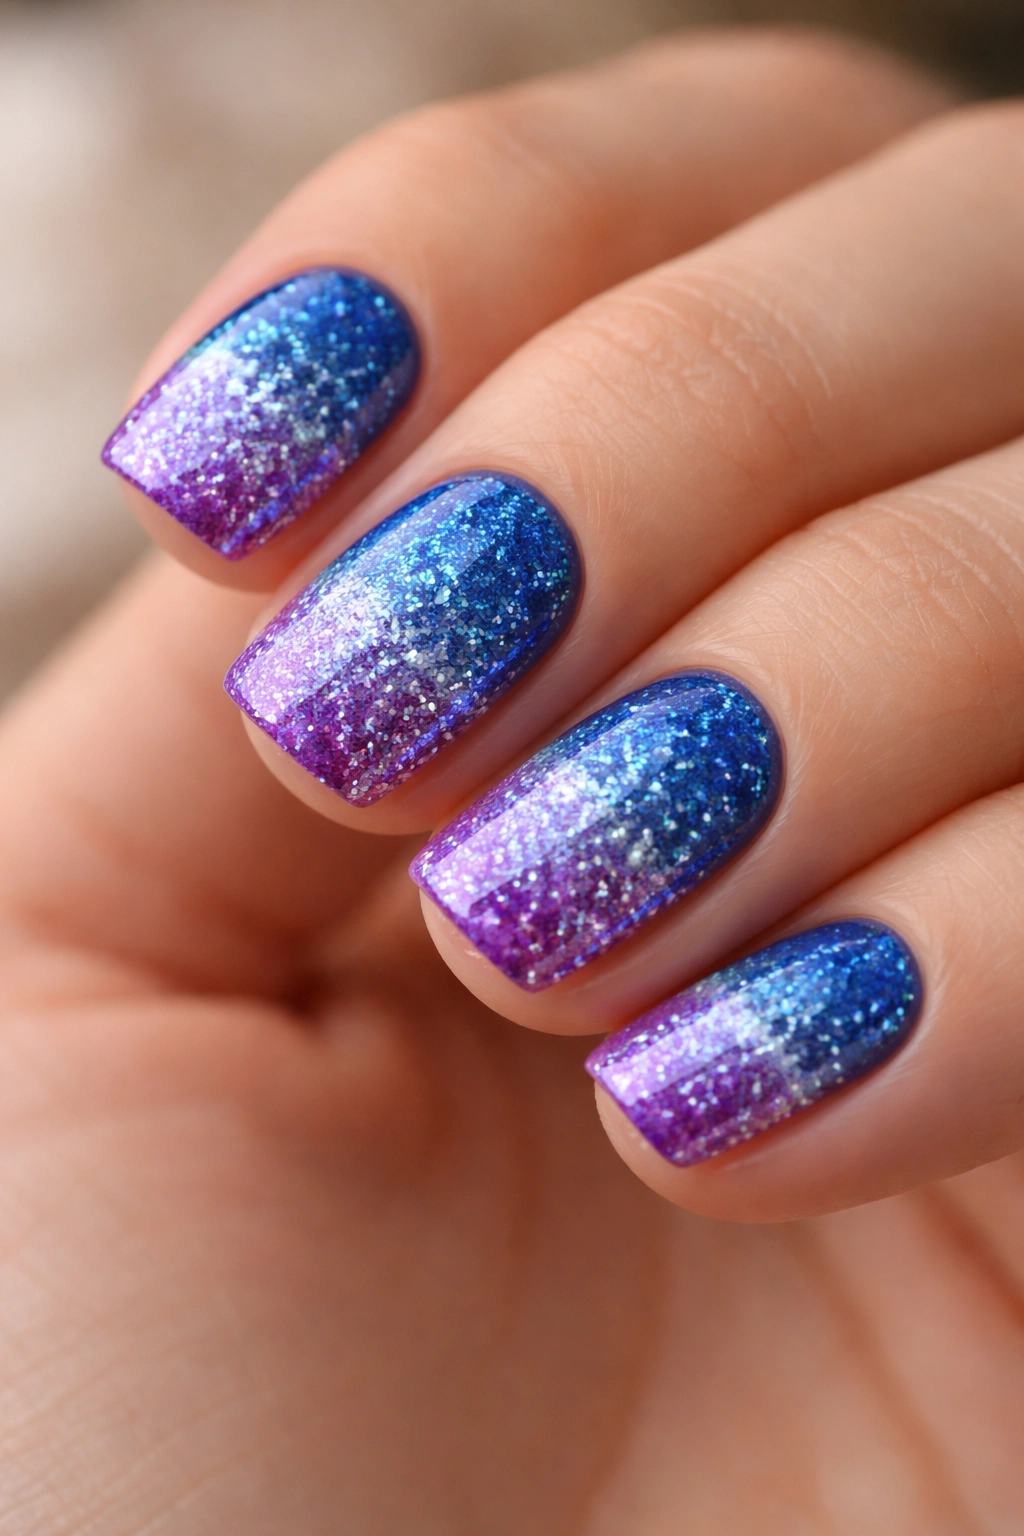
Instead of transitioning from clear to glitter or nude to glitter, transition from one saturated color to another using glitter as the bridge between them. Start with sapphire blue at the cuticle and transition to amethyst purple at the tip, using fine holographic glitter to create the gradient effect. The glitter pieces should be densest in the middle section, where both colors are present, gradually fading toward the pure blue and pure purple edges.
This technique requires patience but creates depth that flat color can’t match. You’re essentially creating a three-part ombre: blue base → glitter-heavy gradient zone → purple tip. Each section should be distinct but connected, with the glitter making the transition feel smooth rather than harsh.
Layering for the Gradient Effect
Paint the blue base first, covering the full nail. Once dry, apply purple polish from the tip toward the middle, stopping roughly halfway down the nail. The two colors will blend slightly where they meet, which is exactly what you want. Then, working on top of this blend, apply fine glitter concentrated in that middle zone where the colors overlap. This makes the transition read as intentional rather than accidental.
The colors you choose matter enormously. Cool jewel tones blend beautifully together (blues to purples, greens to teals), while warm jewel tones have their own magic (emerald to gold, ruby to orange). Avoid pairing warm and cool tones unless you want a more artistic, color-blocked look rather than a smooth gradient.
8. Confetti Glitter with Metallic Nail Art Lines

Create structure with metallic nail art markers, then add glitter to soften the design. Use a thin gold or silver metallic pen to draw delicate geometric lines — thin stripes, tiny triangles, small zigzags, or simple parallel lines. Once those lines are completely dry, add fine multicolor glitter scattered across the nail surface. The glitter softens the geometry and creates a design that feels both structured and celebratory.
This hybrid approach works beautifully for short squovals because you’re not relying entirely on glitter coverage, which can feel heavy on short nails. Instead, the metallic lines create the intentional design while glitter adds shimmer and sparkle. The lines stay visible, the glitter adds celebration.
Keeping Lines Clean
Metallic nail pens work best when the polish base is fully matte and dry. Any residual shine or stickiness can cause the pen to drag or skip. If your base polish is still slightly tacky, give it an extra minute to fully cure before drawing. Use a steady hand and light pressure — you’re not trying to carve into the polish, just mark it with color.
This design works on any base color, but pale, warm neutrals showcase the geometry most clearly. Reserve this design for celebration moments where you want nails that spark conversation, not just casual sparkle.
9. Birthday Cake Inspired with Pastel Gradient and Glitter Sprinkles
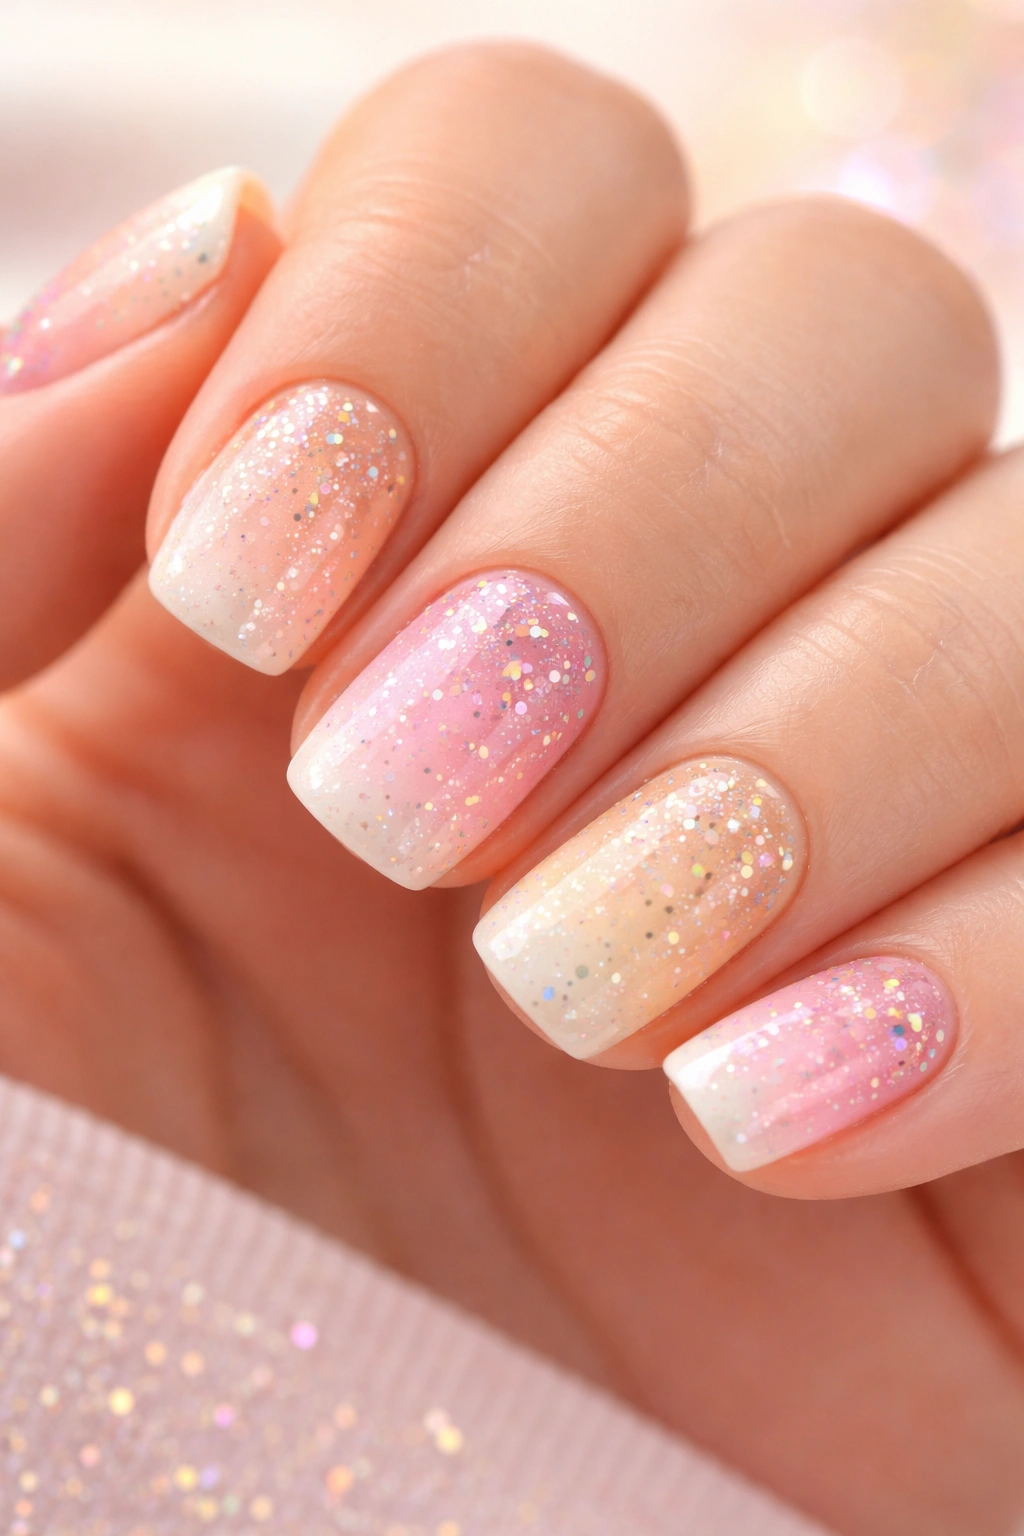
Nails don’t have to literally depict things to feel thematic. Create a soft pastel gradient (maybe pale peach fading to pale pink to pale cream) using three thin layers of slightly different colors blended together. Then add fine glitter in white, gold, and pastel rainbow mixed together, scattered across the surface like frosting sprinkles on cake. The gradient suggests the cake layers, the glitter suggests the celebration.
This design requires a bit of blending skill. You’re not painting hard lines between colors; you’re layering thin coats that blend slightly into each other. Start with the palest color covering the full nail. Once dry, apply the second color over the upper two-thirds of the nail. Once that’s dry, apply the darkest (which might only be slightly darker, depending on your color choice) over the upper third. This creates a subtle gradient.
Choosing Pastel Colors That Blend Well
The colors should all sit in the same family — all warm or all cool. Three shades of warm (peach, pink, cream) blend gorgeously. Three shades of cool (pale blue, pale purple, pale lavender) do the same. But pale blue, pale pink, and pale yellow together can look muddy or accidental rather than intentional.
The glitter here is the final celebratory touch. Apply it once all the gradient layers are completely dry, seal it with topcoat, and you’ve got nails that feel like dessert and sparkle like party.
10. Classic Clear with Embedded Glitter and Rhinestones
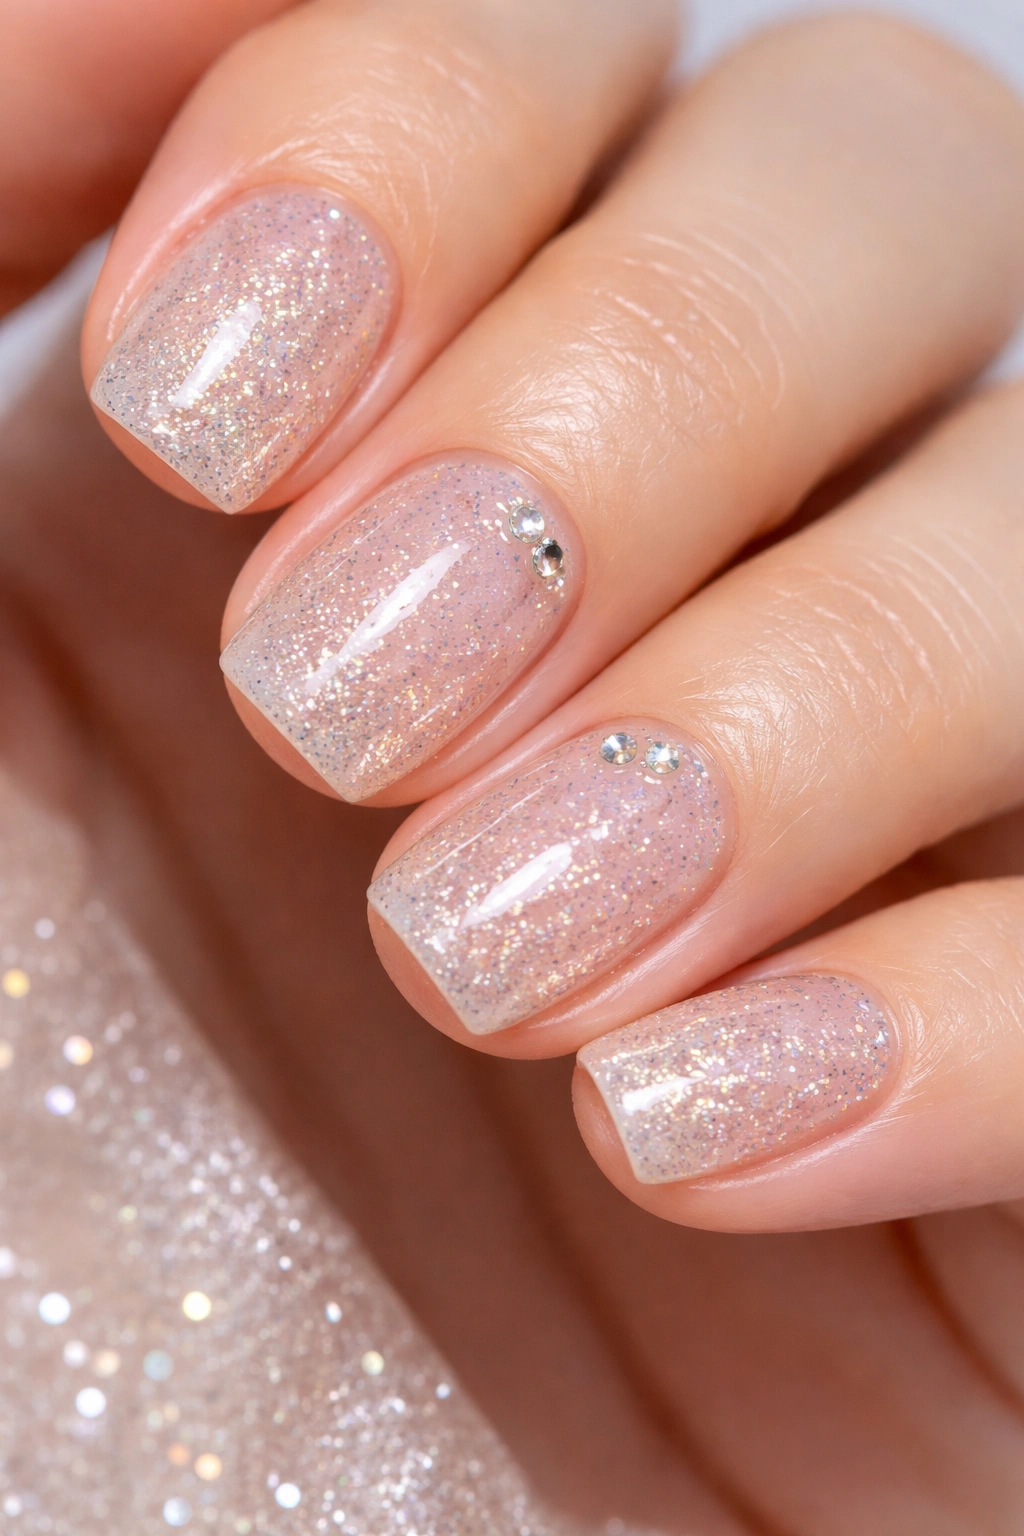
End with elegance. Use a thick, glossy topcoat formula or a specialty clear formula designed to hold embellishments, and layer fine glitter into it while it’s still sticky. Once that dries, add a few carefully placed small rhinestones or flat-back crystals to accent nails (maybe your ring finger and pinky on each hand). The rhinestones catch light dramatically and add dimension without the weight of full glitter coverage.
This design works for any celebration but feels particularly special for milestone birthdays or formal birthday events. The clear nail looks clean and modern while the embedded glitter and rhinestones add just enough sparkle to feel special. On short squovals, this doesn’t read as costume-y because the lack of color base keeps everything sophisticated.
Rhinestone Application
Use a tool specifically designed for rhinestones (usually a little dotted stick or a pen with a tacky end) rather than trying to place them with tweezers. Tweezers can cause stones to skid and slide. Once a rhinestone is placed in the still-sticky topcoat, hold it there for a second and then carefully release. The adhesion happens as the topcoat dries. If a stone doesn’t stick, carefully remove it with the tool and reposition it in fresh topcoat.
This is the design you choose when you want lasting elegance. The glitter won’t pop off as easily because it’s embedded, and the clear base means this design works for any occasion beyond just the birthday. You can wear this design for weeks without it looking like you forgot to change your nails.
Making Glitter Last on Short Nails
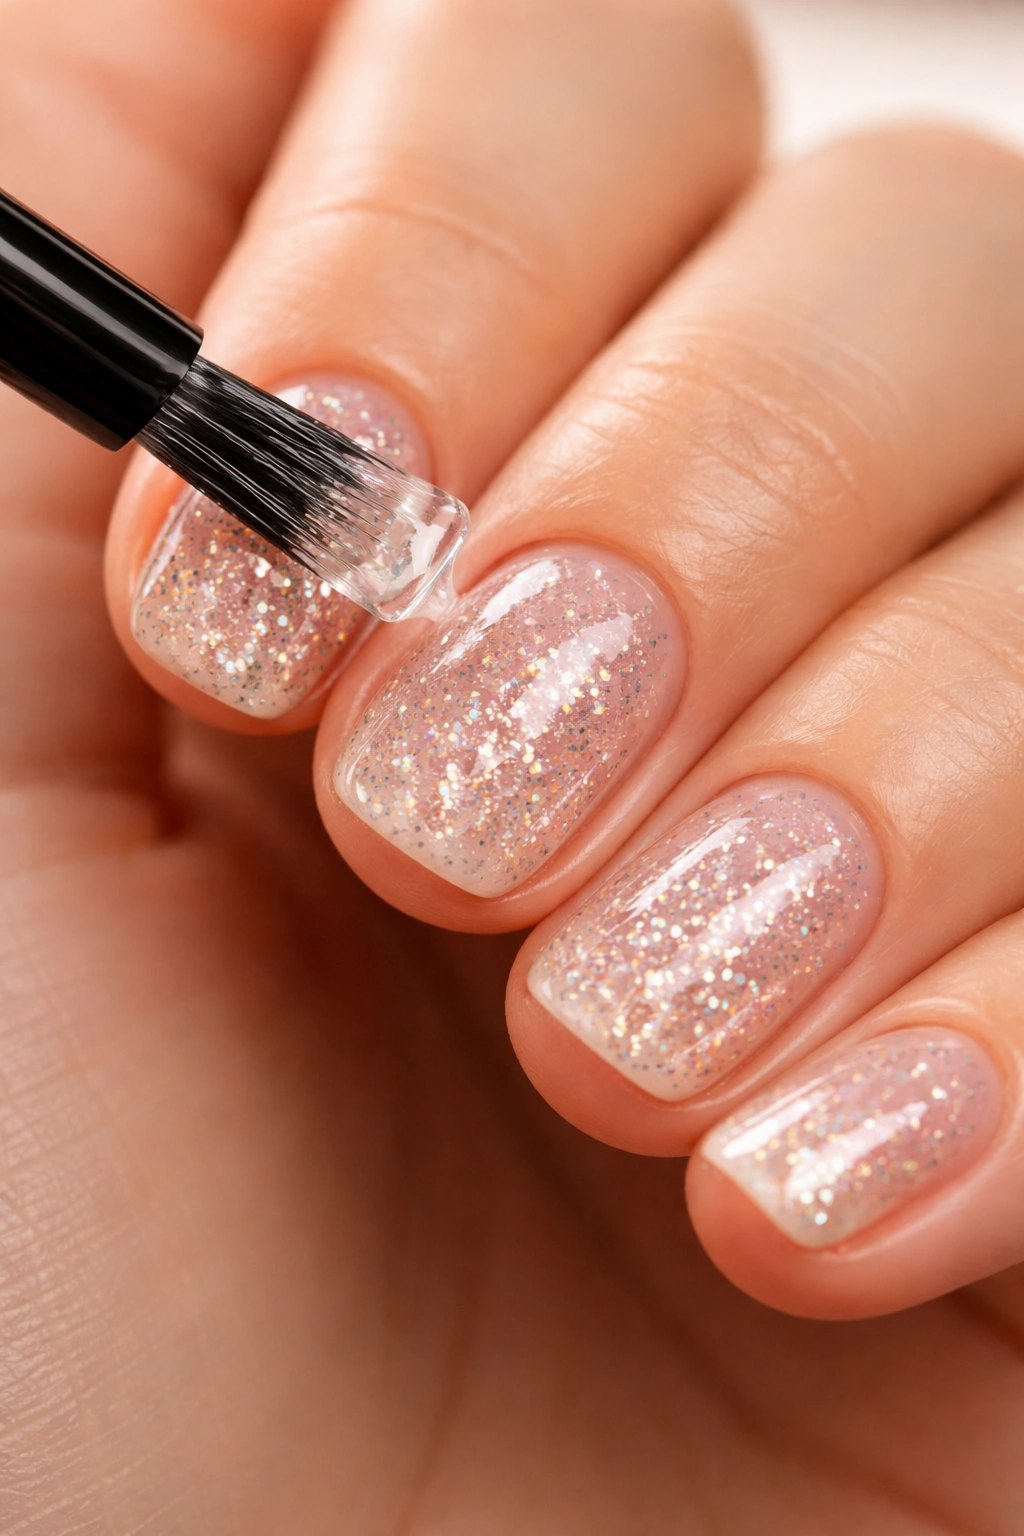
Glitter chips more easily than solid polish, partly because the glitter pieces themselves create tiny lifting points where polish can catch and peel. The solution isn’t to avoid glitter — it’s to apply it strategically. Heavy topcoat coverage prevents most chipping. Apply your topcoat in one thick, smooth coat rather than multiple thin ones. The thickness creates a protective barrier that keeps glitter locked in place.
The other secret is letting each layer dry completely before applying the next one. Rushing your drying times — or worse, using a quick-dry spray on glitter before the base is set — causes the polish layers to separate internally, and that separation leads to chipping. On short nails, where you have less surface area to work with, those internal separations show up much faster.
Your application technique matters too. Apply polish in thin, even coats. Thick coats dry unevenly and create bubbles that burst during wear, taking polish (and glitter) with them. Three thin coats of base color beats one thick coat every single time. Same with glitter application — you’re better off doing multiple thin layers of glitter polish than trying to achieve full coverage with one heavy application.
Choosing Glitter Formulas That Actually Stay Put
Not all glitter products are created equal. Some are suspensions in clear polish (these don’t stay put very well), while others are mixed into color bases or specialty formulas designed specifically to hold glitter in place longer. Look for products labeled “long-wearing” or specifically designed as glitter finishes rather than trying to make a loose glitter work with regular topcoat.
Pre-mixed glitter polishes from reputable brands last significantly longer than DIY attempts to create glitter polish by mixing loose glitter into topcoat. The manufacturer has already optimized the formula to balance coverage, staying power, and drying time. When you mix your own, you’re guessing at proportions and using products designed to do different jobs.
If you love loose glitter specifically (because the variety of colors and finishes is broader), use a specially formulated glitter adhesive under your loose glitter rather than relying on topcoat to hold everything in place. These adhesives are tacky enough to hold loose pieces but thin enough to work smoothly under topcoat.
Caring for Birthday Nails Between Manicures
Glitter designs deserve a bit of extra care to make them last. Keep your hands moisturized — dry skin around the nail beds creates stress on the polish edges, which leads to chipping. Apply cuticle oil daily and hand cream multiple times throughout the day, especially after washing your hands. Hydrated nail beds and cuticles don’t pull at the polish edges the way dry ones do.
Wear gloves when you’re doing anything damp — washing dishes, cleaning the bathroom, handling wet objects. Water seeps under polish edges and causes them to lift. It’s not dramatic, but over a few days it accumulates and eventually a corner of polish pops off. Glitter designs show this chipping more obviously than solid polish because you can see the empty space where glitter pieces lifted away. Gloves don’t have to be awkward — keep cute ones in your kitchen and bathroom.
Avoid picking at your nails or using them as tools. This is always good advice, but it’s extra important with glitter designs. Glitter pieces are the natural weak points where polish can start separating. If you’re picking or prying at anything with your nails, the glitter becomes the first casualty.
Final Thoughts
Short squoval nails in glitter designs aren’t a compromise — they’re a superior choice for anyone who actually wants to enjoy their birthday celebration without worrying that their nails are about to break off. The shape is wearable, the glitter is celebratory, and the combination reads as someone who has genuinely thought about their aesthetic rather than just grabbing whatever was available.
Each of the designs above works beautifully on short squovals specifically because the shape is both bold enough to showcase design work and practical enough to survive actual living. You can wear confetti bursts without catching them on things. You can rock gold dust glamour while cooking dinner. You can show off those milestone numbers while hugging people at your birthday party. The designs don’t compete with the shape; they enhance it.
Pick the design that matches your mood and the celebration’s vibe. Go subtle with scattered pearl and silver if you prefer understated elegance. Go bold with rainbow sparkle on white if you want immediate visual impact. The point is that you’ve got options, and every one of them looks intentional and beautiful on short, squoval-shaped nails. That’s the sweet spot where personality meets practicality, and that’s exactly where the best birthday nails live.
