

There’s something magnetic about short nails that’s hard to explain. Maybe it’s the practicality—no broken tips while typing, cooking, or doing literally anything with your hands. Or maybe it’s the way a perfectly executed short design looks intentional and sharp rather than compromised. Whatever the draw, short nails have become the gold standard for people who want manicures that actually fit their real lives.
Now add green to that equation. Green is having a genuine moment in nail design, but not the overwhelming lime-green phase of 2010. This is sophisticated, nuanced green—from barely-there sage to deep forest, from crisp emerald to mossy sage. Paired with the geometric perfection of squoval nails (that satisfying square-with-rounded-edges hybrid shape), green becomes something completely different from what you might expect. It’s elegant without trying too hard. It’s bold without screaming for attention.
The squoval shape itself deserves serious credit here. Unlike pure squares, which can feel severe or corporate, or pure ovals, which read as safe and traditional, squovals hit a sweet spot. They’re modern and slightly edgy while still feeling wearable for basically any setting—work, casual hangouts, weddings, anywhere. Short squoval nails in green specifically give you a look that feels intentional and current without the maintenance nightmare of longer nails or the constant chipping that comes with very pale or very dark colors on short lengths.
If you’re considering making this switch, you’re probably wondering what’s actually possible with this shape-and-color combo. The answer: so much more than you’d think. Green nails don’t have to be monochromatic. They don’t have to be minimalist. They can be textured, patterned, glittery, matte, glossy, or any combination you dream up. The key is that short squoval shape keeps everything looking polished rather than chaotic, and green somehow makes even detailed designs feel cohesive.
1. Sage Green with Subtle Gold Leaf Detail
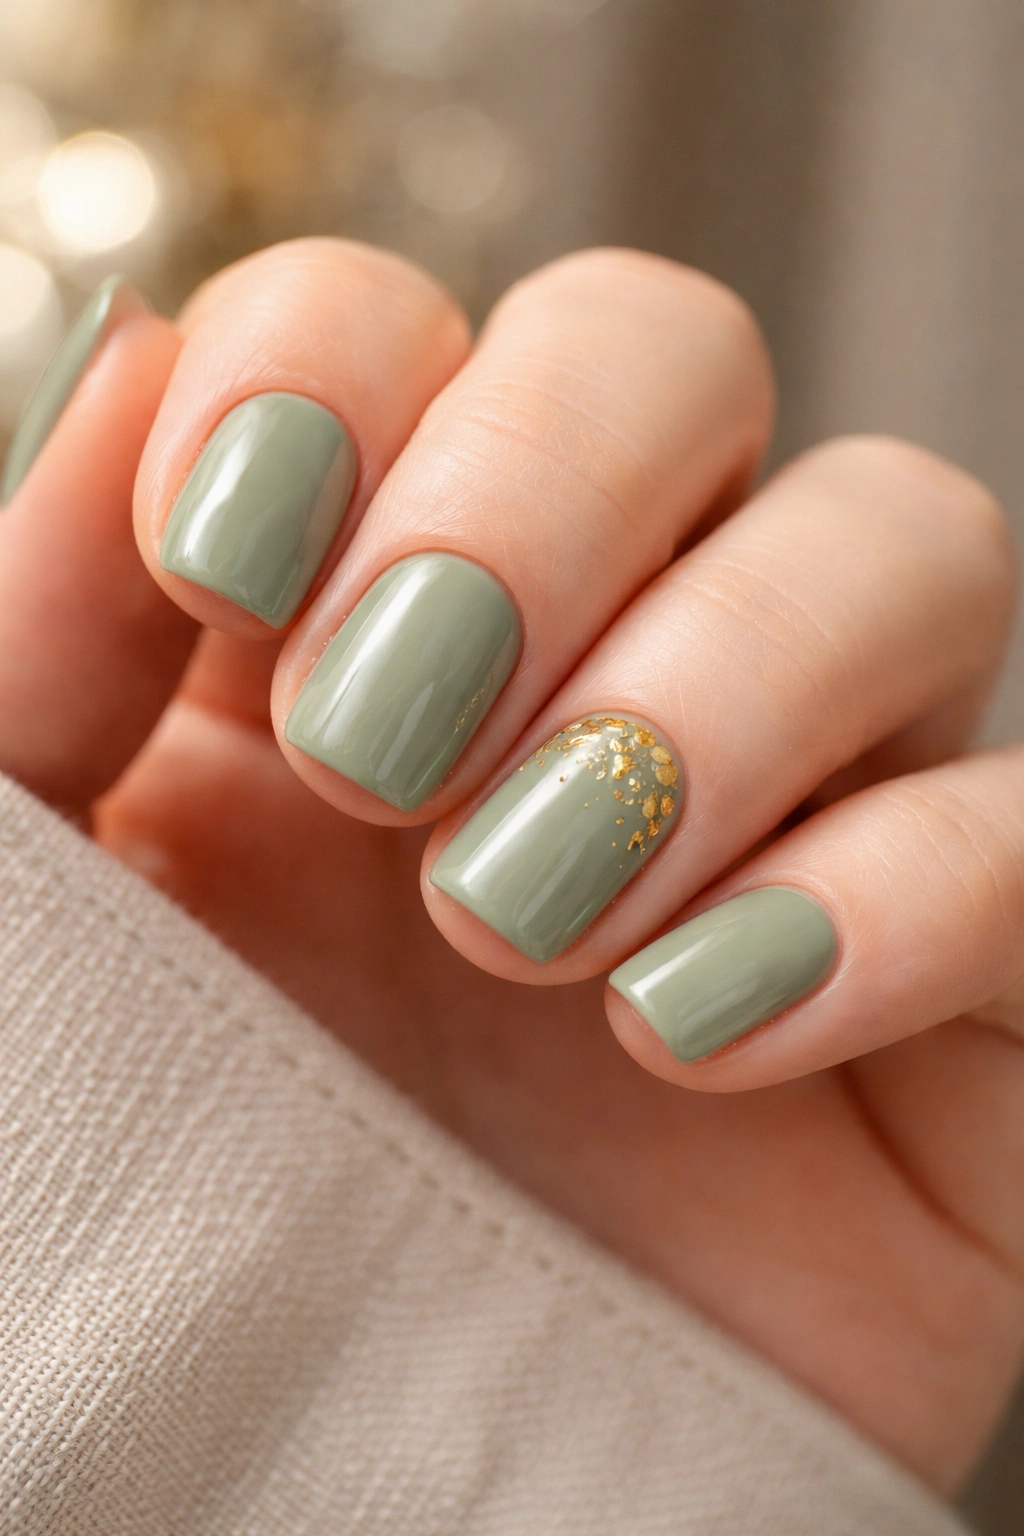
Sage green is the thinking person’s green—soft enough to feel sophisticated, but still decidedly green rather than neutral. On short squovals, this shade hits differently. It’s calming without being boring, and it pairs beautifully with unexpected touches that elevate it beyond basic.
The Perfect Minimalist Luxury Look
This design keeps things deliberately restrained. You’re using a warm sage green as your base—think of it as the color of eucalyptus leaves in soft afternoon light. Then, on just one or two nails (typically your ring finger or pinky), add the smallest whisper of gold leaf. Not a full, dramatic sheet of gold. Just delicate flakes scattered across the surface, almost as if you’ve accidentally brushed up against something beautiful and a tiny bit stuck to your nail.
The genius of this design is that it works everywhere. In a professional setting, it reads as “I have excellent taste.” At a casual brunch, it says you put thought into this without overdoing it. The short squoval shape makes the gold feel intentional rather than accidental—longer nails would make it feel theme-costume-ish, but short nails ground it in reality.
Pro tip: Use actual adhesive-backed gold leaf rather than loose flakes. It adheres better, lasts longer, and gives you way more control over placement. Apply it right after your sage green base coat dries but before your topcoat, then seal everything with a good thick layer of glossy or matte finish depending on the vibe you want.
The maintenance here is minimal. Sage doesn’t show chips as badly as darker colors, and the gold detail is small enough that it doesn’t accumulate daily wear and tear as dramatically as a full pattern would. This design typically lasts 2.5 to 3 weeks before you’re itching for something new.
2. Forest Green Marble Effect
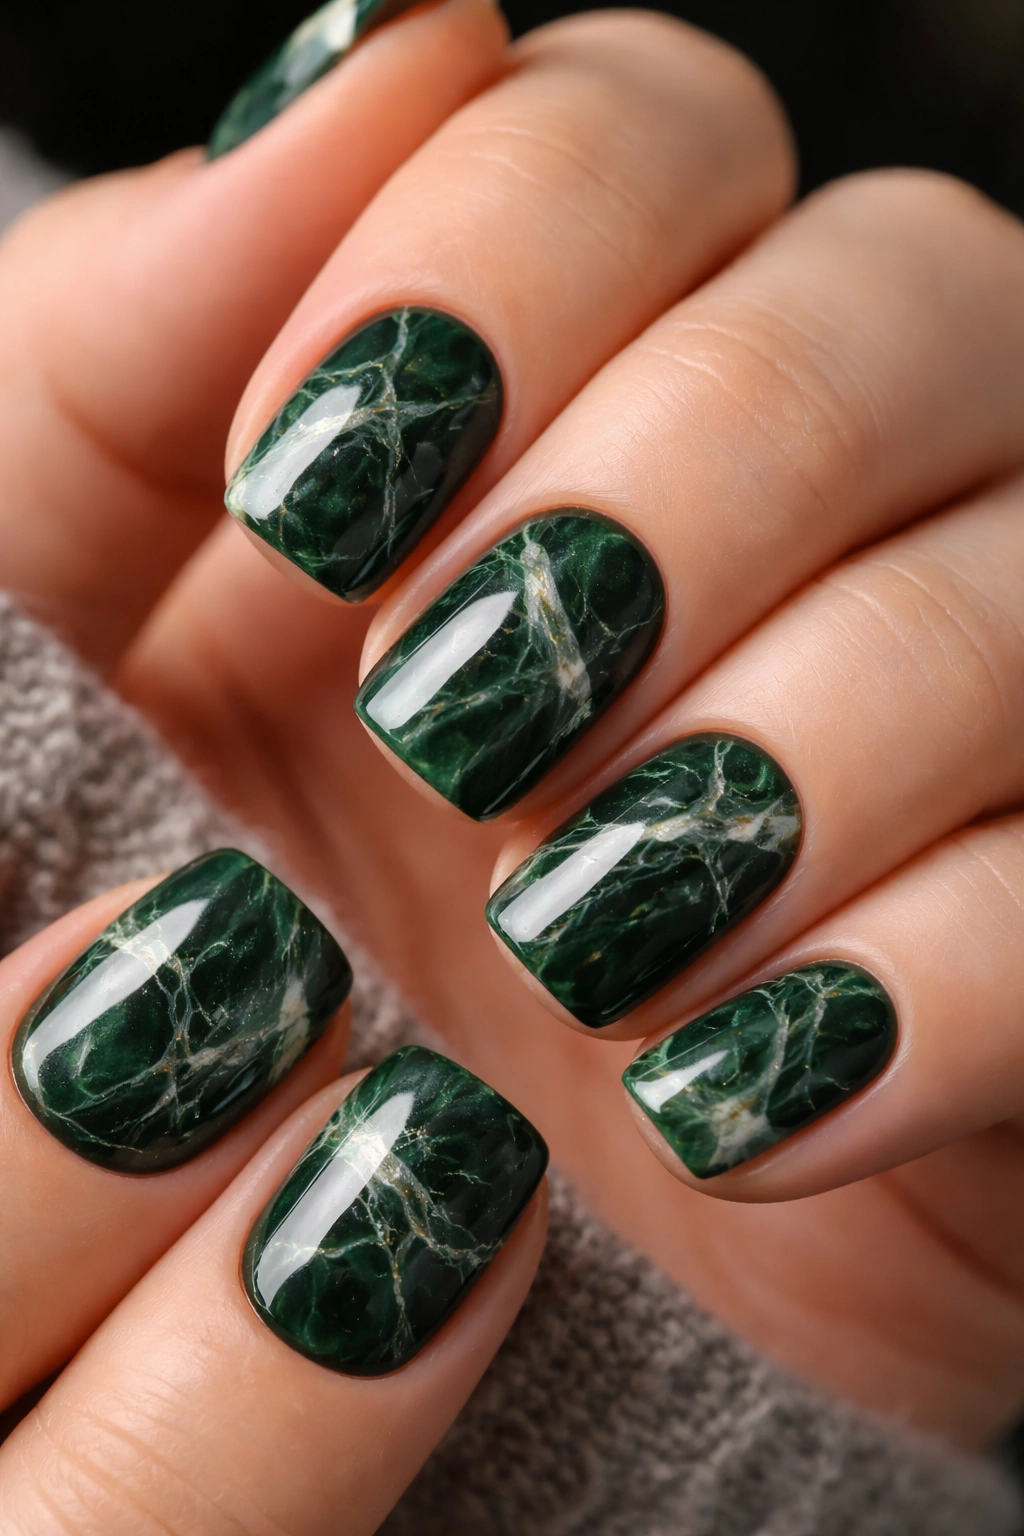
Marble has been having a moment in nail design for years—and rightfully so. There’s something inherently sophisticated about it. But forest green marble is where this trend actually earns its place rather than feeling trendy for the sake of it.
This calls for a deep, jewel-toned forest green as your base—rich enough that it has real depth but not so dark it disappears. Then, using thin lines of black or deep charcoal and white, you create those organic marble veining patterns. The lines don’t have to be perfectly placed. In fact, the slightly imperfect nature of hand-drawn marble is part of what makes it feel real rather than digitally rendered.
Creating the marble pattern takes a steady hand and a thin brush, but it’s more forgiving than it looks. Start with your base green and let it dry completely. Then, using a very thin detail brush and black polish, draw irregular lines across the nail surface. Don’t aim for perfectly straight lines—marble in nature isn’t symmetrical. Curve them slightly. Let them branch off. Then add a few white lines in between to create that classic marble contrast.
The short squoval shape means your marble pattern fits entirely on the nail without looking cramped. You’re not stretching tiny details across a huge surface. Everything feels proportional and intentional. The geometric edges of the squoval actually complement the organic nature of the marble pattern—they create visual balance.
Why Forest Green Works Better Than Other Marble Hues
Light or bright greens with marble tend to look washed out. The marble veining disappears into the lightness of the base. But forest green has enough depth and saturation that the black and white lines pop immediately. Plus, forest green marble skews elegant rather than trendy. You can wear this in any season, any year, without it feeling dated.
3. Matte Emerald with High-Shine Top Nail Accent

This design is all about contrast and the way matte and glossy finishes interact. Emerald green is the shade that makes people think “luxury.” It’s the color of expensive jewelry, high-end fashion, rare gems. When you put it on short squoval nails in matte finish, you get something that feels utterly intentional and refined.
The magic happens when you break your own rule. On one nail—usually the accent nail on your dominant hand—skip the matte finish and go full gloss. This single shiny nail surrounded by matte ones creates a focal point that’s impossible to ignore, but because there’s only one, it doesn’t feel chaotic.
Your choice of accent nail matters. The pinky works beautifully because it’s naturally smaller and draws less attention, so the glossy finish on it feels like a design choice rather than an accident. The ring finger also works for a slightly bolder statement. The middle finger less so—it’s just too prominent and can feel unbalanced.
The short squoval length is crucial here. On longer nails, this much contrast might feel gimmicky. On short nails, it reads as a deliberate design detail, like a designer who knows exactly what they’re doing.
Maintenance note: Matte finishes do show dust and particles more obviously than glossy, but they also hide watermarks and fingerprints beautifully. You’ll notice the matte nails look somehow cleaner throughout the week even if they’ve been in and out of water constantly. The single glossy accent nail will show smudges more readily, so you might find yourself buffing it occasionally to keep it pristine.
4. Pistachio Green with Delicate White Line Art
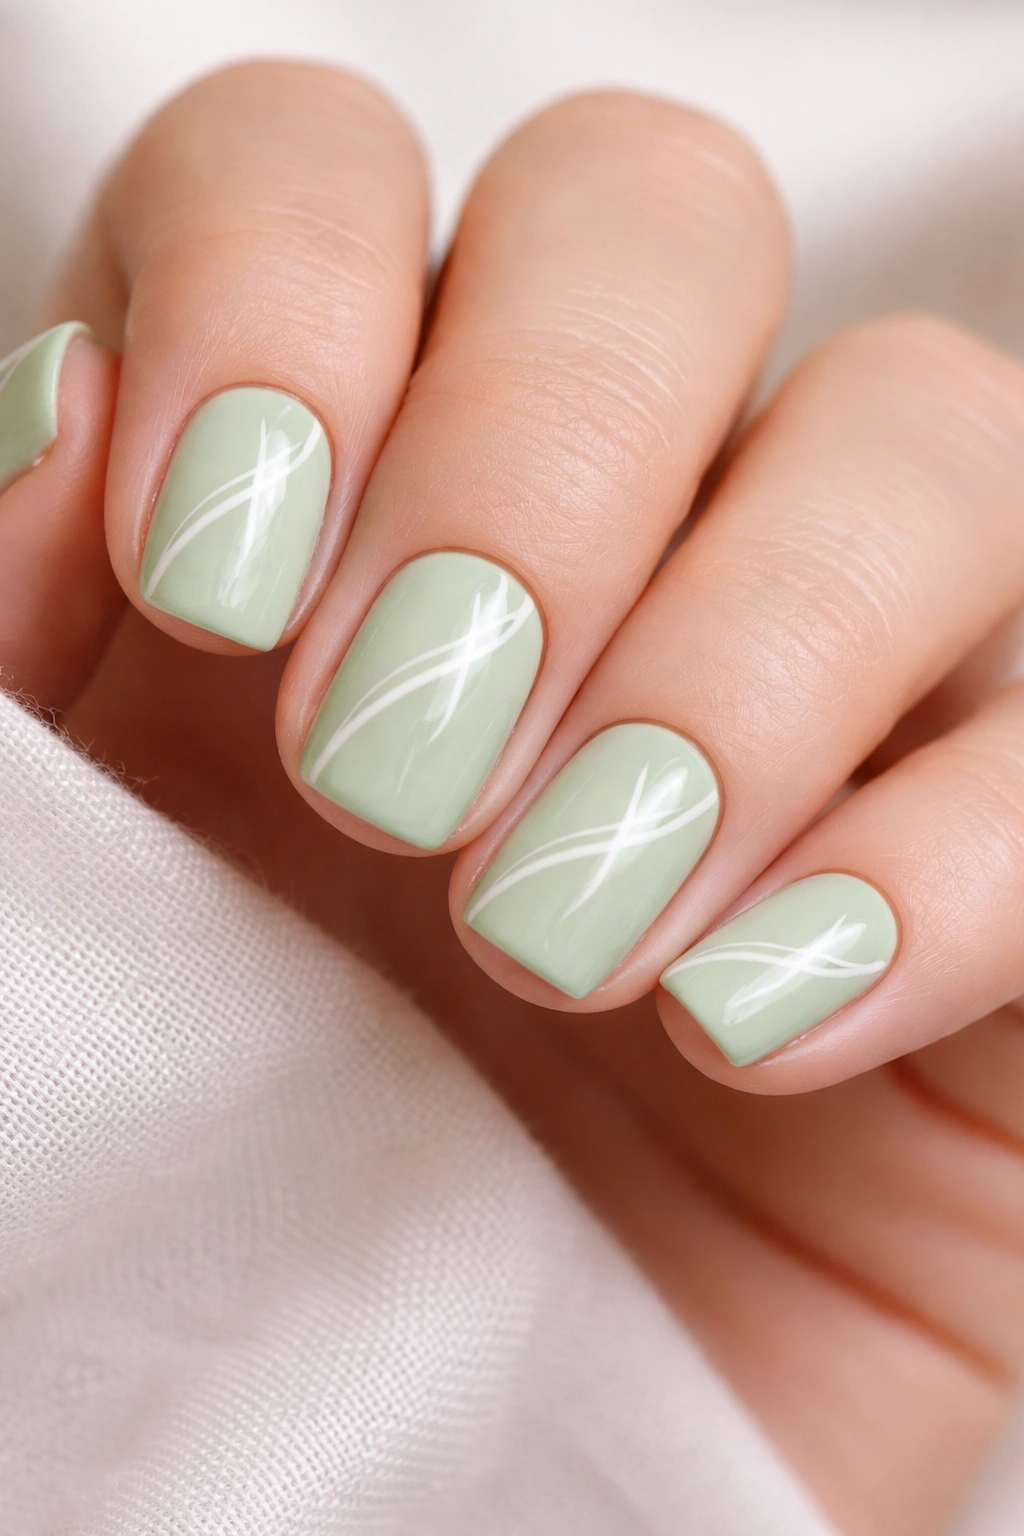
Pistachio is softer than sage but greener than cream—it sits in that beautiful middle zone where it feels both peaceful and clearly intentional. This shade works especially well when you’re going for something understated but still visibly designed.
Pair it with fine white line art and you have something that feels artistic without being illustrative. Think minimal line drawings—a few gentle curves that might suggest a horizon, a leaf, a face in profile, or just abstract shapes that create visual interest without telling a specific story.
The white lines need to be thin. Thin enough that they’re clearly intentional, but not so spidery that they disappear. A good detail brush and white gel or polish will handle this. The beauty of working on short squovals is that you have a manageable canvas. You’re not trying to fit detailed artwork across a huge surface—you’re creating something proportional and neat.
This design works beautifully as a full set where every nail gets the same pistachio base and white line treatment, each nail featuring slightly different line-art details. Or you can do a more dramatic version where most nails stay solid pistachio and one or two nails get the white line art as an accent. Both approaches work depending on your mood and the occasion.
The longevity of this design is strong. Pistachio doesn’t chip as noticeably as darker shades, and white lines on a light base don’t show wear as dramatically as white on a dark base would. You’re looking at a solid 2.5 to 3 weeks of wear before you’re ready for a change.
5. Deep Olive Green with Copper Geometric Pattern
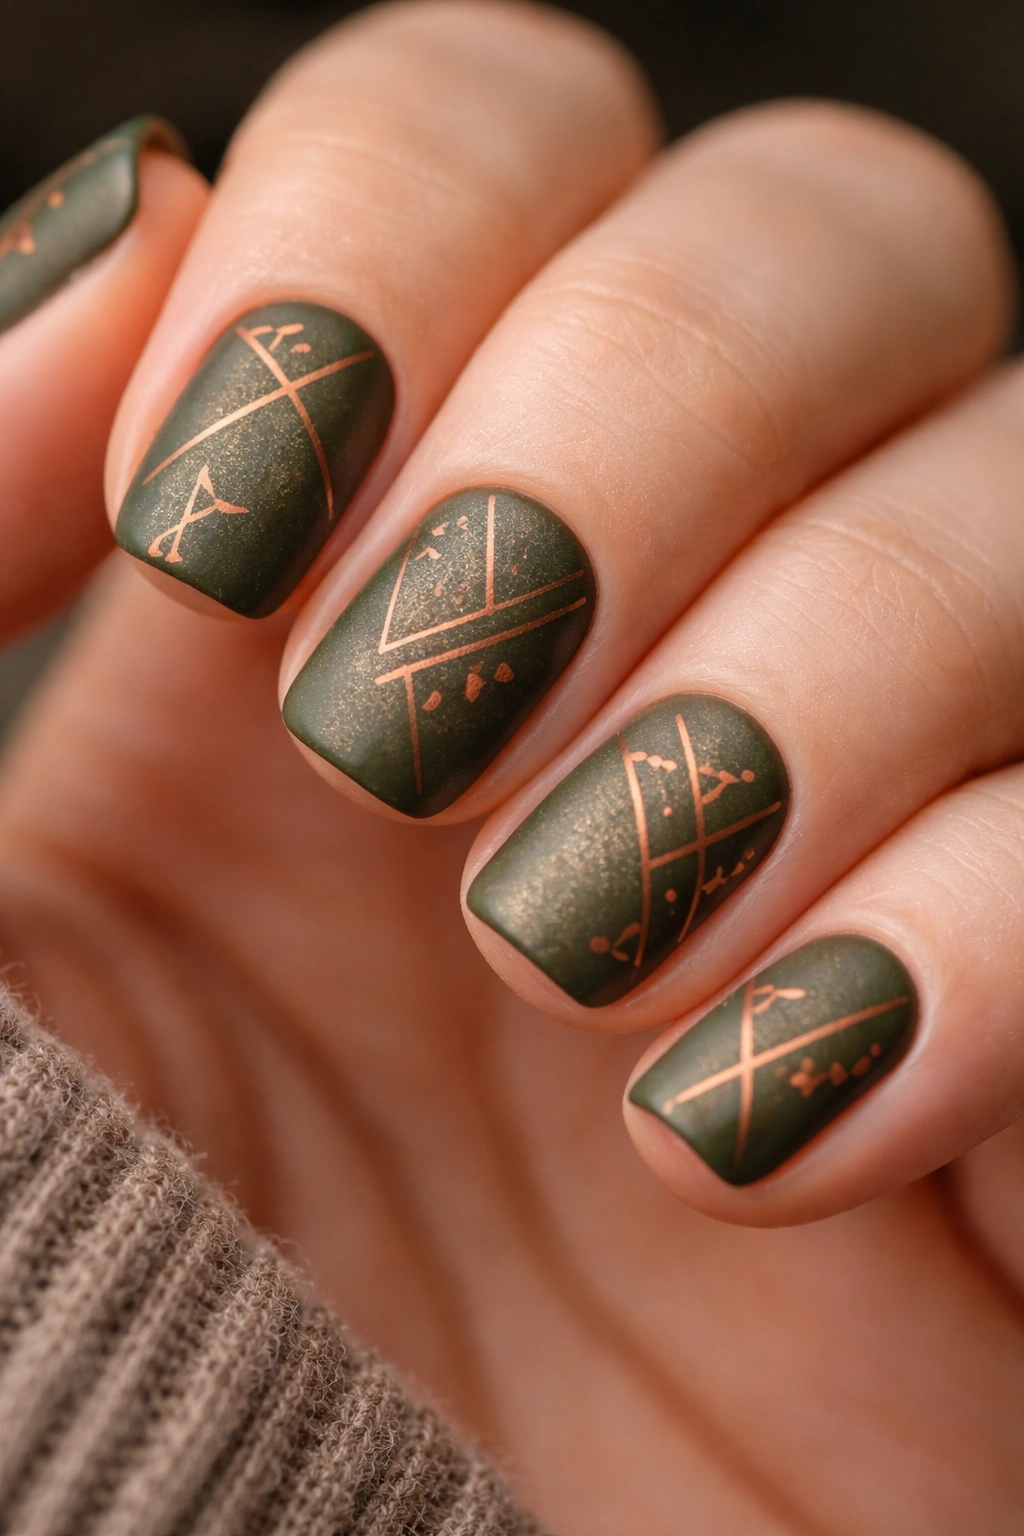
Olive green sits at that mysterious intersection between green and brown—it’s earthy and sophisticated in a way that feels genuinely different from typical green nail designs. It photographs beautifully, especially in natural light, where it shows real depth and complexity.
The copper geometric pattern is where this gets interesting. Using a copper metallic polish, you create clean geometric shapes across the nail—triangles, hexagons, or clean lines that break up the olive base. The pattern doesn’t need to cover the entire nail. Sometimes less is more. A few geometric accents in copper scattered across the nail surface can be more impactful than a full pattern.
Application Tips for Maximum Impact
The contrast between matte olive and shimmery copper is essential. If both finishes are the same (both glossy or both matte), the design loses some punch. You want that matte or satin olive base with the copper providing clear dimension and shine. This creates depth that reads from across a room.
Use a thin geometric brush or a toothpick to create clean lines. Copper can be forgiving because the shimmer disguises slightly wobbly lines better than solid colors do. But geometry demands precision, so steady your hand, take your time, and don’t second-guess yourself once you commit to the line.
The short squoval shape keeps the geometric pattern from feeling overwhelming. Geometry on very short nails can sometimes feel cramped, but squovals give you just enough surface area to make geometric shapes feel intentional rather than squeezed. The rounded corners of the squoval also slightly soften the severity of the geometric shapes, creating visual balance.
6. Seafoam Green with Iridescent Top Coat
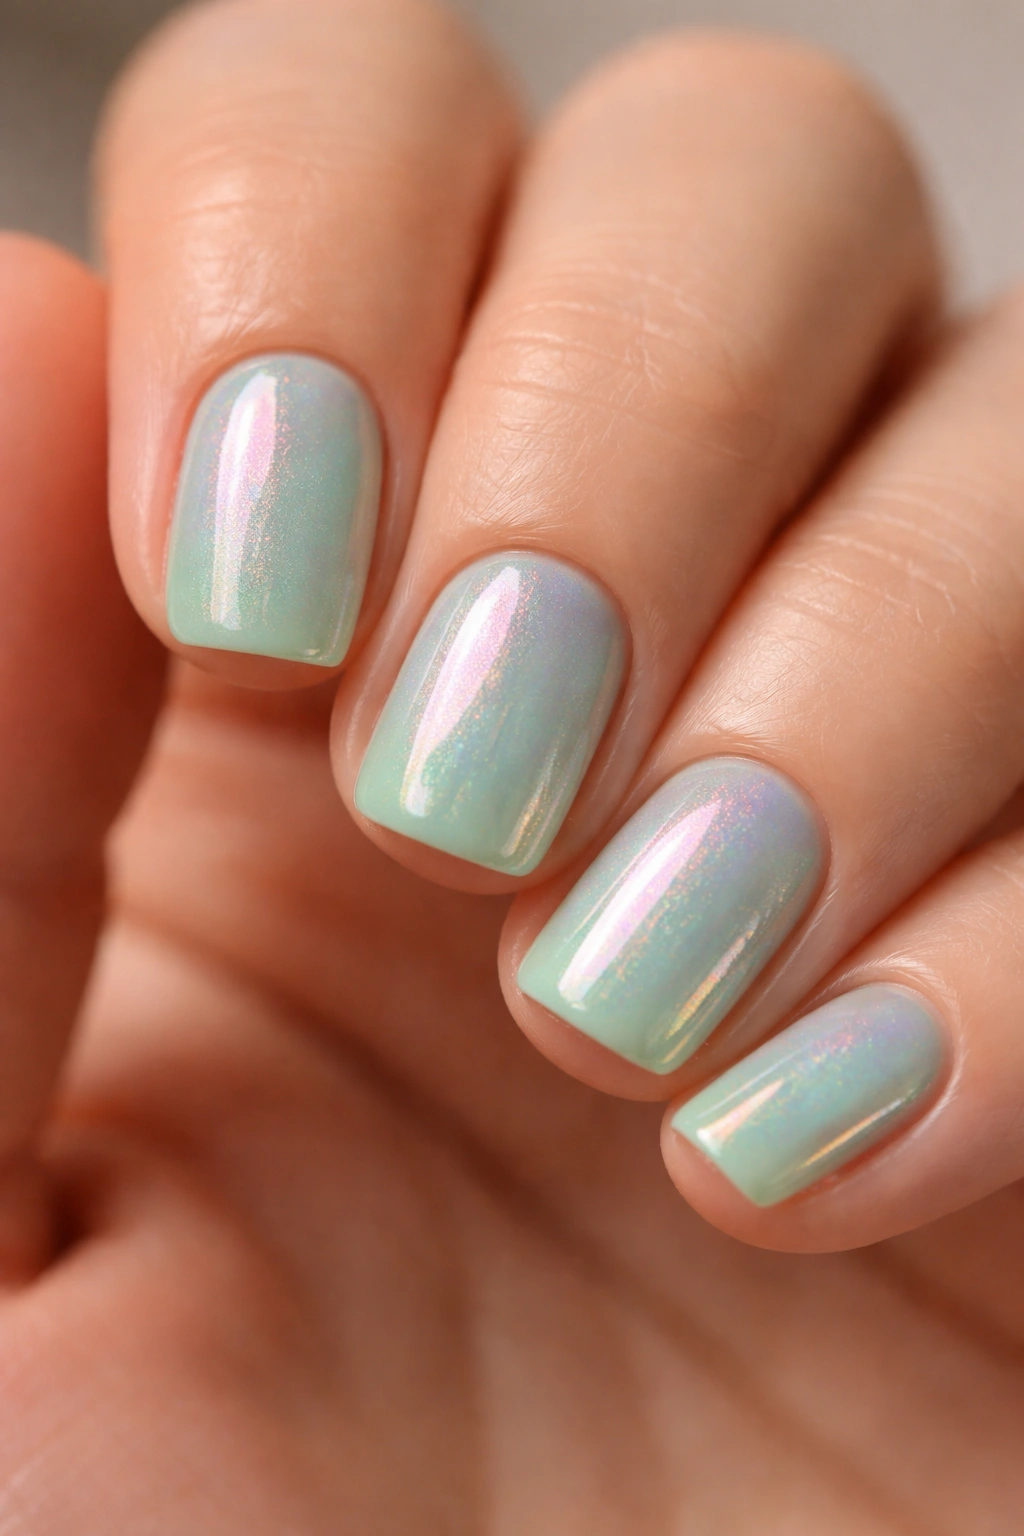
Seafoam is that magical shade that shifts between green and blue depending on the light and angle. It’s playful without being childish, colorful without being loud. On short squovals with an iridescent topcoat, it becomes something that catches light from every angle.
This design is deceptively simple but visually impressive. Your base is seafoam green—a creamy, soft shade that feels gentle and approachable. Then, instead of adding intricate details, you apply an iridescent topcoat that shifts color depending on how light hits it. In bright sunlight, you might see hints of pink or lavender. In indoor lighting, it reads more blue. In certain angles, you’ll catch subtle gold or copper undertones.
The iridescent effect on short nails feels less costume-like than it does on longer nails. There’s something about the proportions that makes it feel like a sophisticated design choice rather than glitter for glitter’s sake. It’s the difference between someone saying “I love how this catches light” versus “Look, I have glitter on my nails.”
This design shows every imperfection on the nail surface. Make sure your base is completely smooth before applying topcoat. Any bumps, dust particles, or dried bits of base color will be magnified by the iridescent effect. This isn’t a design for someone who wants low-maintenance nails—it requires precision application and careful sealing.
The payoff is that people will notice. Iridescent seafoam nails get comments. They photograph beautifully. They make ordinary moments feel slightly more special because you’re literally carrying a little bit of light-catching beauty on your hands.
7. Hunter Green with Glossy Tortoiseshell Accent
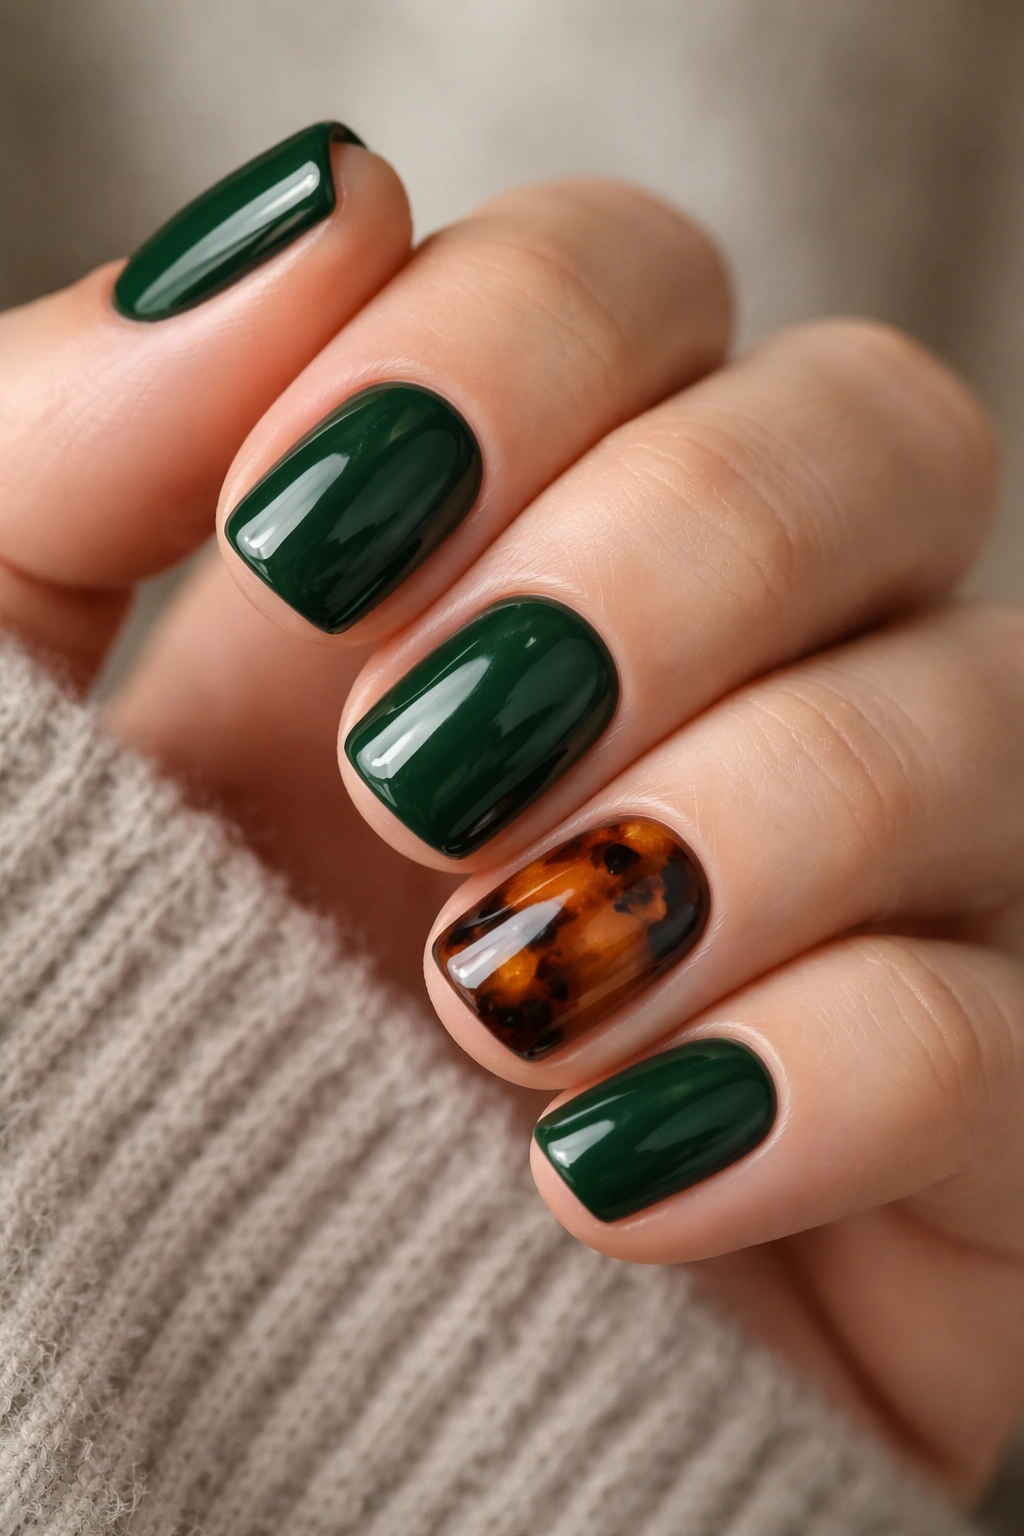
Hunter green is serious. It’s the green of forests and evening wear, of heritage and confidence. Pairing it with tortoiseshell accents adds warmth and visual interest without compromising the sophisticated vibe.
The tortoiseshell pattern works on one or two accent nails. Use warm browns, tans, and blacks to create that organic, layered tortoiseshell effect. Unlike the smooth geometric patterns, tortoiseshell is intentionally slightly chaotic. You’re using a sponging technique or a thick detail brush to dab and blend warm tones together, creating the illusion of layered, semi-translucent materials overlapping.
This works beautifully as a ring-finger-only accent or across two accent nails—perhaps the ring finger and pinky, which creates a neat visual line across your hand. The short squoval keeps the tortoiseshell from feeling oversized or theatrical. It’s a bold accent within proportional bounds.
Longevity and Real-World Wear
Hunter green with a glossy finish shows chips more obviously than matte versions, but it also hides dust and watermarks better than matte would. The tortoiseshell accent nail will show wear faster because the pattern includes so many colors—any fade or chip becomes visible. Plan for this design to look pristine for about 2 weeks, then transition into “beautifully aged” territory where the worn edges start to feel part of the design.
This is intentional aging in the best way. The design doesn’t look broken—it looks lived-in and real.
8. Mint Green with Negative Space Half-Moon
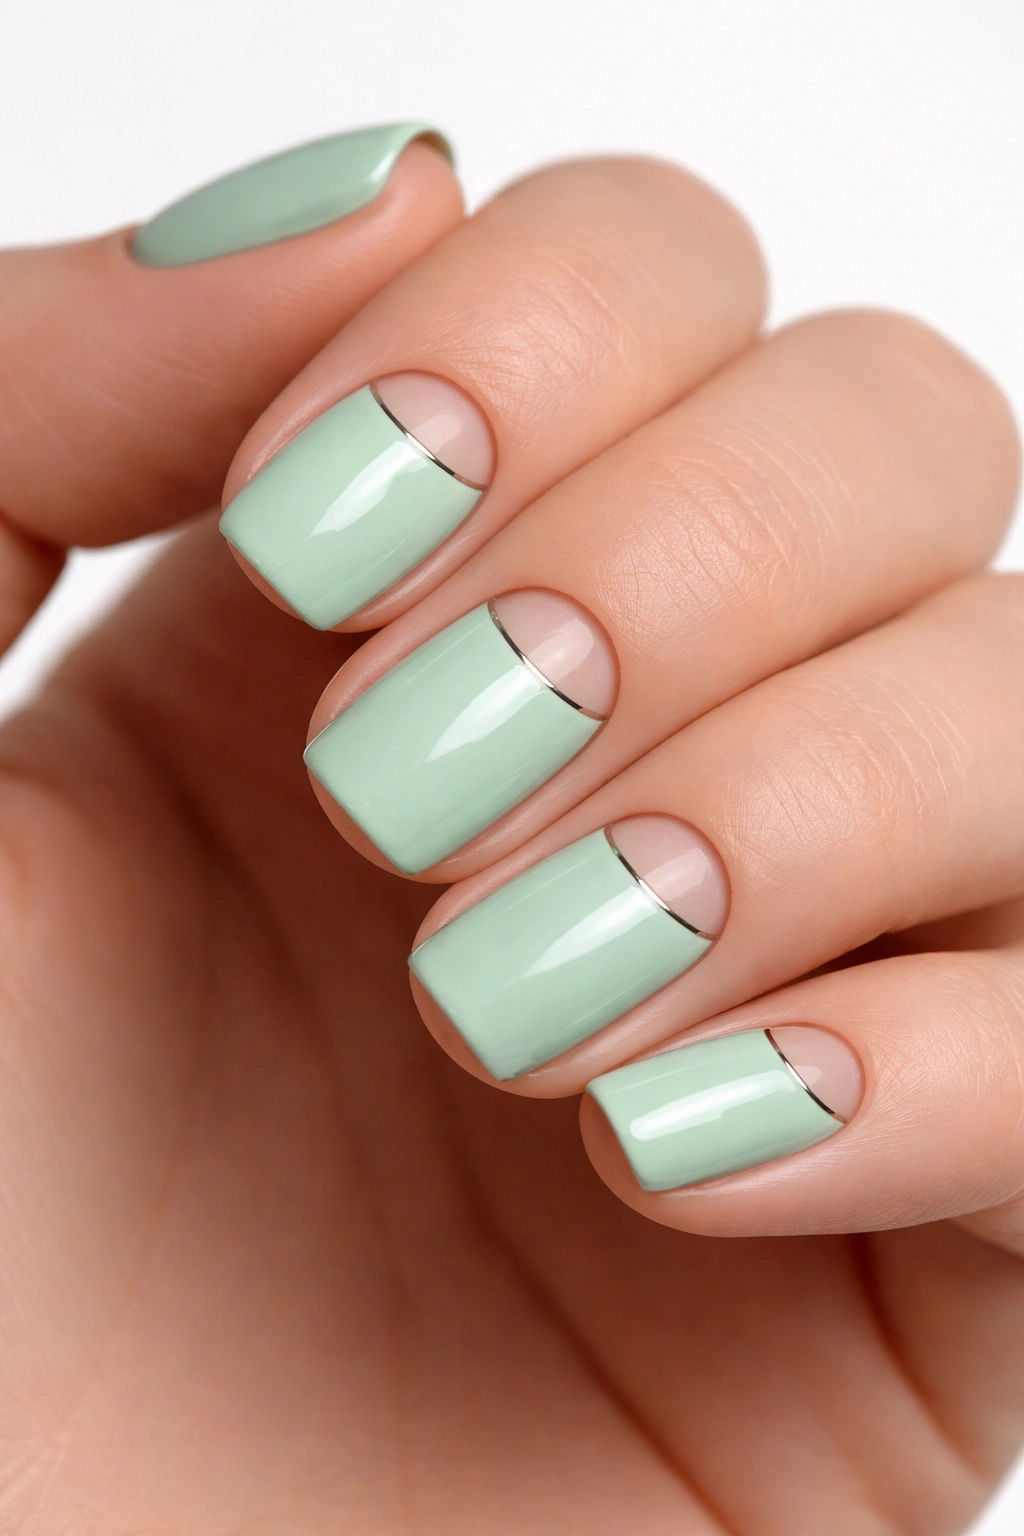
Negative space designs have been having a real moment, and for good reason. There’s something satisfying about what you choose not to paint. A half-moon negative space design in mint green leverages that principle beautifully.
Your base is crisp mint green—bright and fresh without being neon. Then, at the base of each nail (the half-moon area where your nail meets the cuticle), you leave the natural nail visible. No polish, just clean skin tone showing through. A thin black or dark green line separates the mint from the natural area, creating definition and a crisp geometric moment.
This design is surprisingly elegant. It pulls from nail art principles that feel current without being trendy, and the short squoval shape makes the half-moon proportion work perfectly. If nails were longer, the exposed half-moon area might look unfinished. On short squovals, it reads as deliberate design.
The application is straightforward. You’re basically creating a thin curved line at the base of each nail using a thin brush and dark color. Then filling in everything above that line with mint green. If you prefer a more geometric half-moon (a perfect curved boundary), use a half-moon nail guide or a curved stencil. If you like slightly imperfect curves, freehand it.
Maintenance is low. Mint shows chips minimally, and the design doesn’t require constant touch-ups. You’re looking at solid 3-week wear without major degradation.
9. Sage Green with Rose Gold Striping Tape
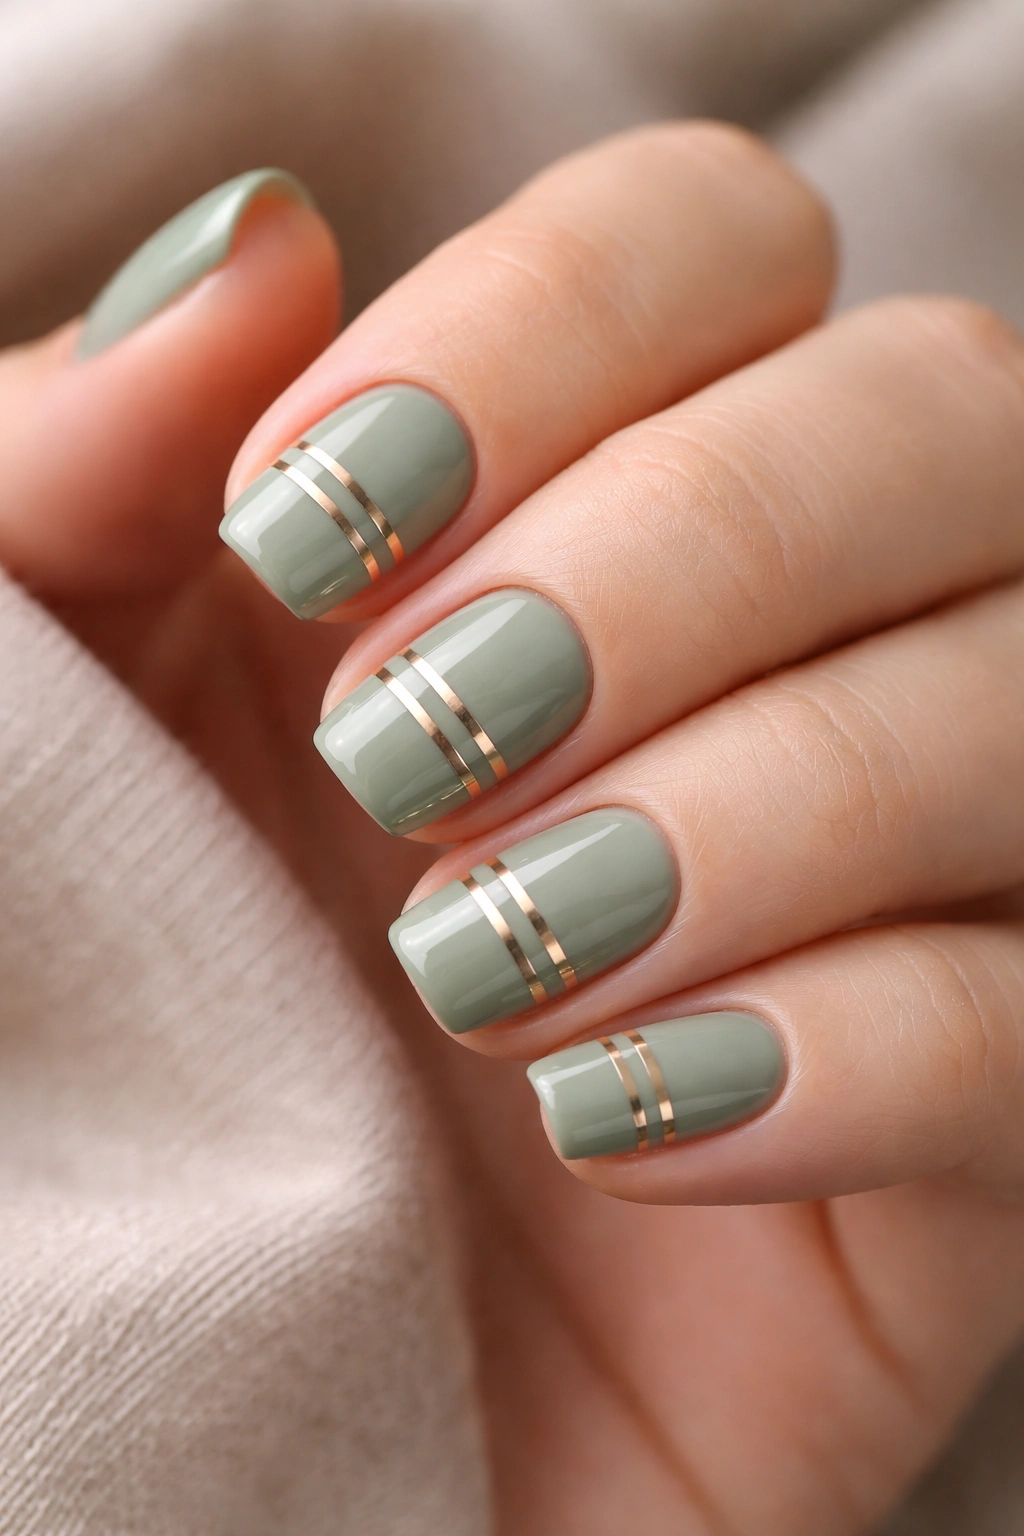
This design walks the line between minimalist and decorated, and does it beautifully. Sage green base with rose gold metallic stripes created using striping tape creates something that feels intentional without being loud.
The striping tape is your secret weapon here. It applies smoothly, creates perfect straight lines, and peels off cleanly once you’ve sealed your topcoat. You can create horizontal stripes, diagonal stripes, or even vertical stripes depending on your preference. The rose gold against soft sage green creates a warm, balanced aesthetic.
Start with your sage green base and let it dry completely. Then apply rose gold striping tape in your desired pattern. Make sure the tape is pressed down firmly on the edges—any lifting will let polish seep underneath. Once tape is applied, paint a coat of topcoat or clear polish over everything, including the tape. This seals the tape edges and prevents polish from creeping. Once dry, carefully peel away the striping tape to reveal clean, perfect lines underneath.
Why This Works on Short Squovals
The geometric precision of stripes feels at home on the geometric precision of squoval shapes. It’s shape speaking to shape. The short length means your stripes don’t stretch or distort—they’re proportional and neat. Every element feels intentional.
This is also one of the most durable designs you can create because metallic tape-based designs handle wear extremely well. Your nails could look pristine for 3+ weeks.
10. Kelly Green with Minimal Black Outline Art
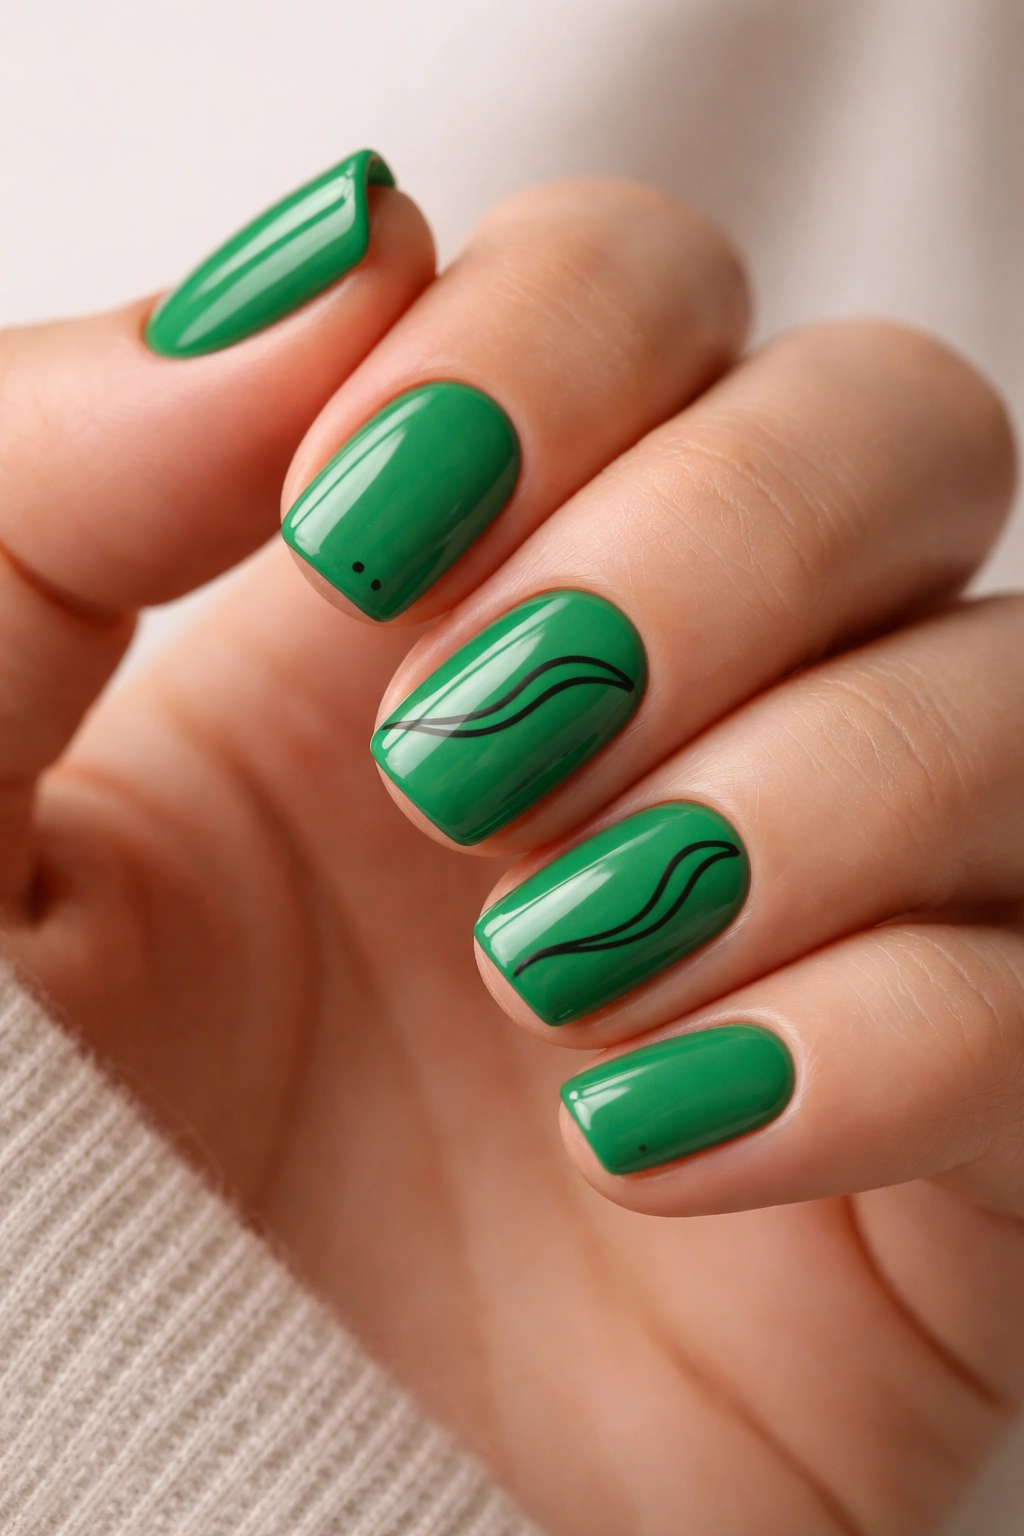
Kelly green is that perfect true-green shade—not too yellow, not too blue, just decisively green. It’s bold without being overwhelming, and on short squovals, it makes a statement that reads as intentional rather than loud.
Pair it with minimal black outline art and you have something that feels slightly artistic without being illustrative. Think of simple line-drawn elements—a single leaf outline on one nail, a few dots connected by lines on another, simple curved lines that create visual interest without depicting anything specific.
The black lines need to be thin and precise. A quality detail brush and glossy black polish will handle this. The contrast between the matte or satin finish of kelly green and the glossy black lines creates dimension and ensures the design reads clearly.
This works as a full set where every nail gets the kelly green base and every nail features different black line art, creating a cohesive set where you can examine each individual nail and discover something new. Or use it as an accent design where most nails stay solid kelly green and one or two nails get the black outline treatment.
The short squoval length keeps the line art from feeling cramped. You have enough space to draw something interesting without it feeling squeezed onto the nail. Plus, the rounded corners of the squoval slightly soften the severity of black lines, creating visual balance.
11. Celadon Green with Subtle Pearl Shimmer

Celadon is one of those colors that doesn’t get nearly enough attention in nail design. It’s soft and pale without being washed out. It feels almost aquatic—like shallow, clear water over green stones. Adding a subtle pearl shimmer turns it into something luminous.
This design is all about understated luxury. Your base is celadon green, and instead of adding intricate patterns or bold accents, you use a pearl-shimmer topcoat. The shimmer is so subtle that in indoor lighting, someone might just think your nails are glossy and well-cared-for. But in sunlight, the pearl awakens and creates a soft iridescence that’s genuinely beautiful.
The application is simple. Base coat, celadon green polish (two coats for opacity), then a pearl-shimmer topcoat. Done. There’s nothing to distract from the color itself, which is exactly the point. Sometimes the design IS the color.
Short squoval nails showcase this approach beautifully because you’re letting the surface shine without interruption. The geometric tidiness of the squoval shape combined with the soft color and gentle shimmer creates something that feels polished and intentional.
This design reads differently depending on the lighting environment. In fluorescent office lighting, it might seem barely visible. Step outside into natural light and suddenly it glows. This quality—this responsiveness to light—is part of what makes it special.
12. Olive Green Ombre with Nude Fade
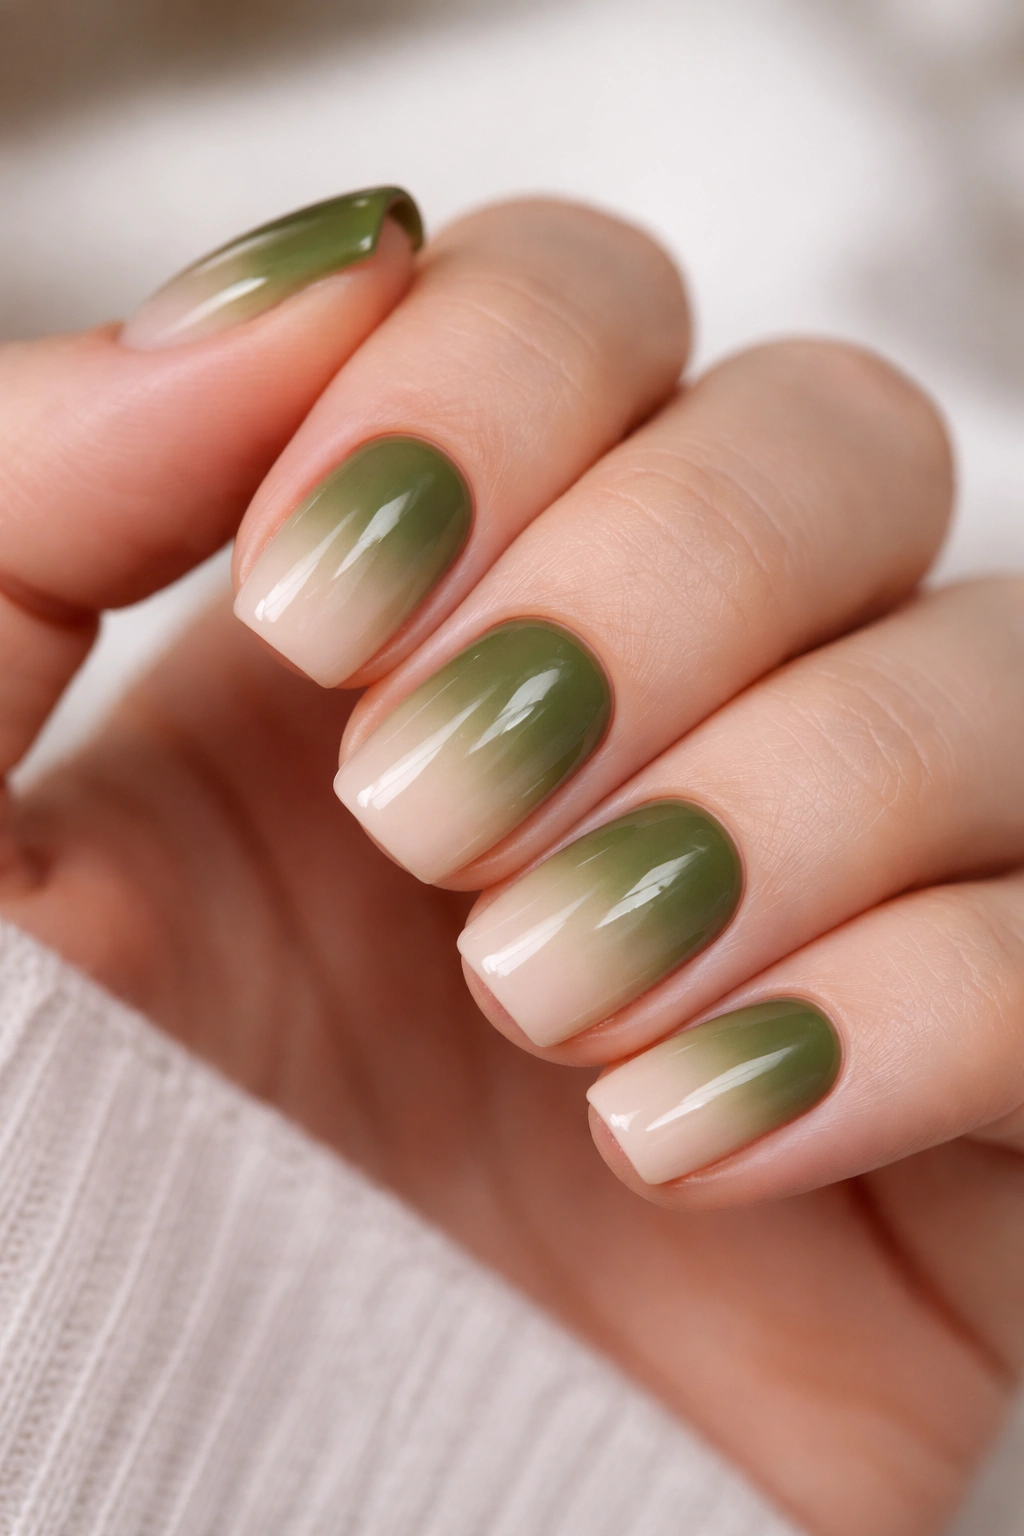
Ombre designs have staying power for good reason. They create gradual visual interest without requiring intricate technical skill. An olive green ombre that fades to nude is sophisticated and wearable for virtually any setting.
Start with olive green at the base of the nail and gradually fade it to nude or pale pink at the tip. The transition should be gradual enough that there’s no distinct line—instead, the color bleeds from one shade to the next. This technique is typically done using a sponge and multiple thin coats, or using a gradient topcoat that already has the color transition built in.
The short squoval shape is actually ideal for ombre because you have enough space for the gradient to be visible without being so long that the transition feels stretched. The rounded edges of the squoval also soften any harsh color transitions, helping the ombre feel smooth and deliberate.
Creating the Ombre Effect
If you’re doing this at home, the sponge method is more forgiving than brush application. You’ll need olive green polish, nude or pale pink polish, a makeup sponge, and a palette or small dish to blend them. Dab a bit of olive on the sponge, then dab a bit of nude next to it. Gently dab the sponge onto your nail starting at the base and working upward, gradually using more nude and less olive as you move toward the tip. You might need 3-4 applications to get a smooth gradient.
Alternatively, many brands now make gradient or ombre topcoats where the color transition is already built in. You apply a clear or nude base, then apply the gradient topcoat and the transition happens automatically.
The payoff is a design that looks expensive and complicated but is actually quite straightforward to execute. Ombre read as high-effort to people observing your nails, even though the actual technique is forgiving and straightforward.
Olive fading to nude is particularly elegant because it respects the natural nail length while adding color and visual interest. It’s a design for someone who wants their nails to look intentional but not theatrical.
Final Thoughts

Short squoval nails in green are having a genuinely good moment right now, and that’s not because of a passing trend—it’s because this combination actually works. The squoval shape is practical and modern. Green is sophisticated without being predictable. Short length is wearable for real lives. Put them together and you have something that functions as both nail art and actual functional manicure.
The designs above represent real possibilities. Some of them are technically simple—the sage with gold leaf, the celadon shimmer, the mint with negative space. Others require slightly more precision or patience—the forest green marble, the olive with copper geometry, the kelly green with black outline art. But none of them are beyond reach for someone willing to spend time, use proper tools, and accept that the first attempt might not be flawless.
The other advantage here is versatility. Green works in literally every season. It doesn’t look summery or wintery—it’s evergreen (pun intended). This means you can choose a design from this list and wear it for months if you want, or rotate through them depending on your mood. Your squoval green nails will look current and intentional regardless of what else is happening in the fashion world.
If you’re considering making this switch from whatever you’re currently wearing, the commit is low. Nail polish grows out, mistakes can be covered, and if a particular design doesn’t work with your skin tone or lifestyle, you can pivot to a different shade or design within two weeks. That’s the beauty of short nails—change is fast and forgiving.
