

There’s something undeniably sophisticated about burgundy nails. Not red. Not maroon. Burgundy — that specific, wine-dark shade that photographs like a luxury goods advertisement and costs a fraction of what someone might assume. The trick is keeping them short and squoval, which sounds like an odd combination if you haven’t been paying attention to nail trends, but it’s exactly what elevates a manicure from “nice” to “did you just walk out of a high-end salon?”
Short nails have made a quiet comeback among people who actually use their hands for things — typing, cooking, scrolling, washing their hair without accidentally scratching themselves. The squoval shape splits the difference between a square’s architectural precision and an oval’s softness. It’s practical. It photographs well. And in burgundy? It becomes a quiet flex that says you care about details without screaming for attention.
The expensive look isn’t about spending more money. It’s about knowing which micro-details matter. A single strategic accent. The kind of finish that catches light. The restraint of less-is-more design. Burgundy is the color that does most of the heavy lifting on its own — it reads as expensive before you add a single embellishment. The best short squoval burgundy manicures know this and work with it, not against it.
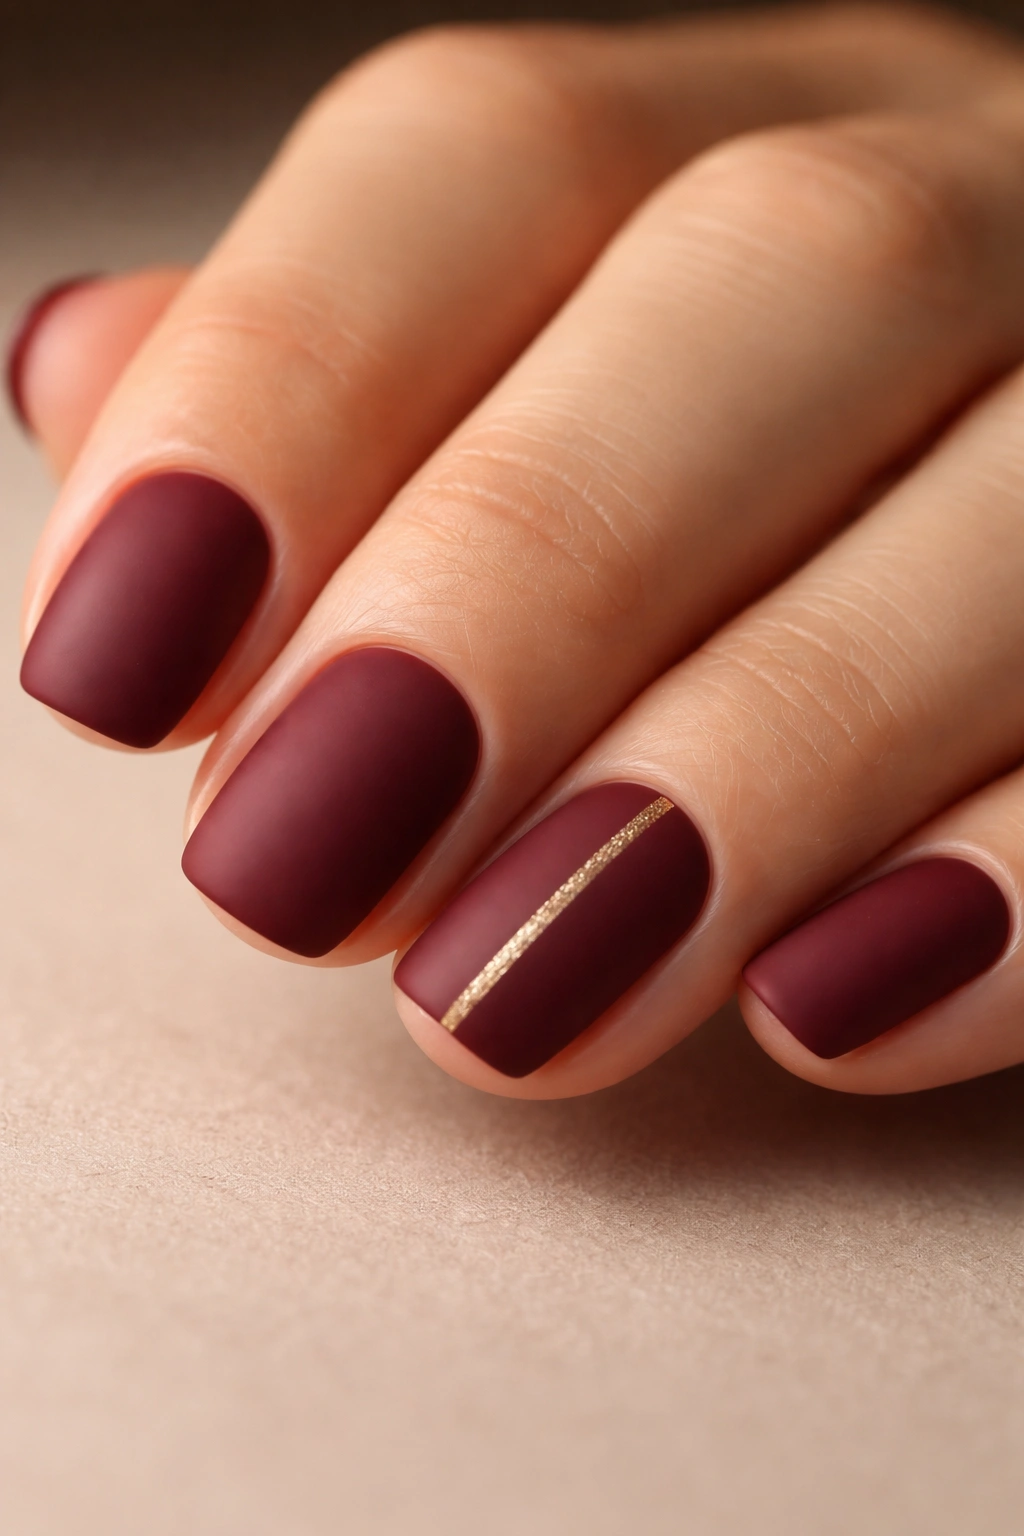
1. Classic Matte Burgundy with Gold Foil Accents
Matte finishes automatically signal luxury because they’re harder to maintain and photograph worse in casual lighting. This is intentional. A matte burgundy asks you to take it seriously, not just glance at it under fluorescent lights. Add a thin strip of gold foil — real metal leaf or the nail-specific version works equally well — down the center of your ring finger, and you’ve got a design that looks like it came from someone’s private nail appointment.
The execution matters here. Your manicurist should apply the burgundy in at least two coats to reach that rich, almost velvety depth that matte finishes deliver. The matte topcoat goes on last, and it completely changes how the color reads. Suddenly it’s less “painted nail” and more “intentional design choice.” The gold foil gets sealed under a shiny topcoat just on that one accent nail, creating a subtle contrast — shiny gold against matte burgundy.
Why this looks expensive: Matte finishes cost slightly more at professional salons and require a steadier hand. Most people stick with glossy because it’s easier. Going matte automatically signals that you’re not rushing through a generic manicure. The gold foil detail, kept minimal and precise, reads as restrained elegance rather than trying too hard.
2. Glossy Deep Wine with Micro Shimmer
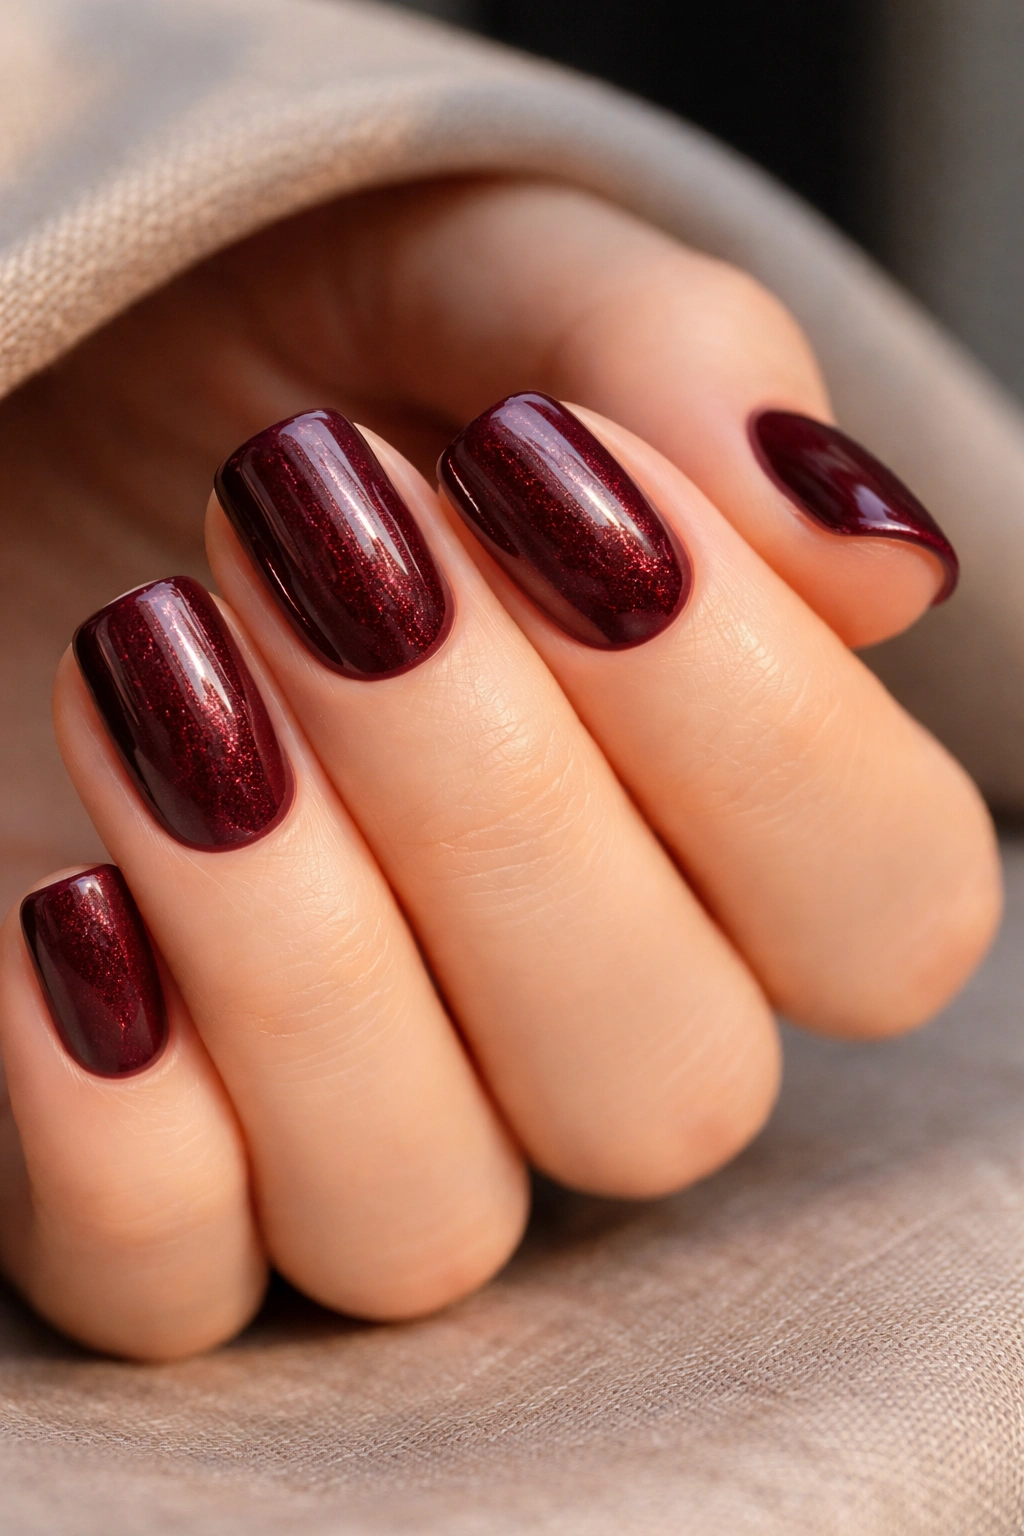
This one walks a delicate line that separates “elegant” from “disco ball.” The shimmer has to be micro — microscopic particles suspended in the burgundy base rather than glitter pieces you can see with your naked eye. The effect is subtle in person but absolutely glimmers when light hits it.
Choose a burgundy that’s almost black in low light and reveals its wine-toned depth in natural daylight. The micro shimmer should only become obvious when you hold your hand up to light or take a photo with flash. This restraint is what makes it expensive-looking rather than party-appropriate.
Apply a clear base coat to protect your nails from staining. Burgundy pigment can be intense, especially in darker shades. Two coats of the shimmer polish, then seal it with a high-gloss topcoat that makes the shimmer catch light without adding additional texture. Your nails should be glossy and smooth to the touch — no bumps, no visible glitter specks.
The details that matter:
- Micro shimmer particles should be invisible unless light is directly hitting them
- Glossy topcoat should be applied in thin, even strokes (thick topcoat looks cheap)
- Color depth should shift visibly between indoor and outdoor light
- Edges should be perfectly clean with no polish seeping under the nail
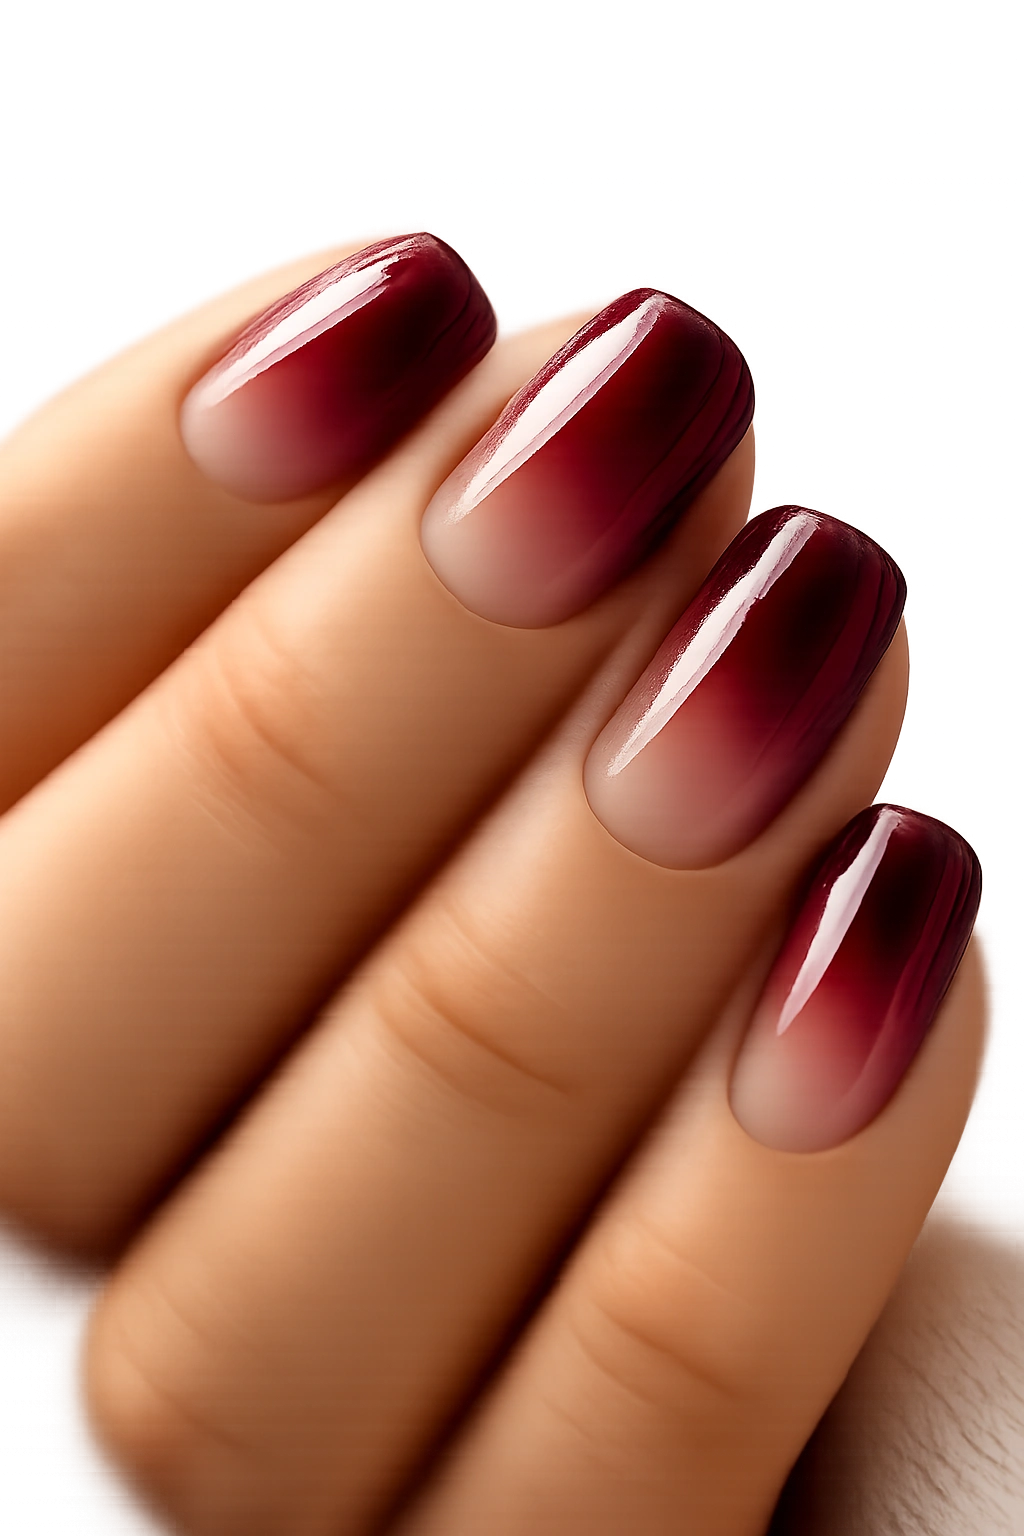
3. Burgundy Ombre Fade to Nude
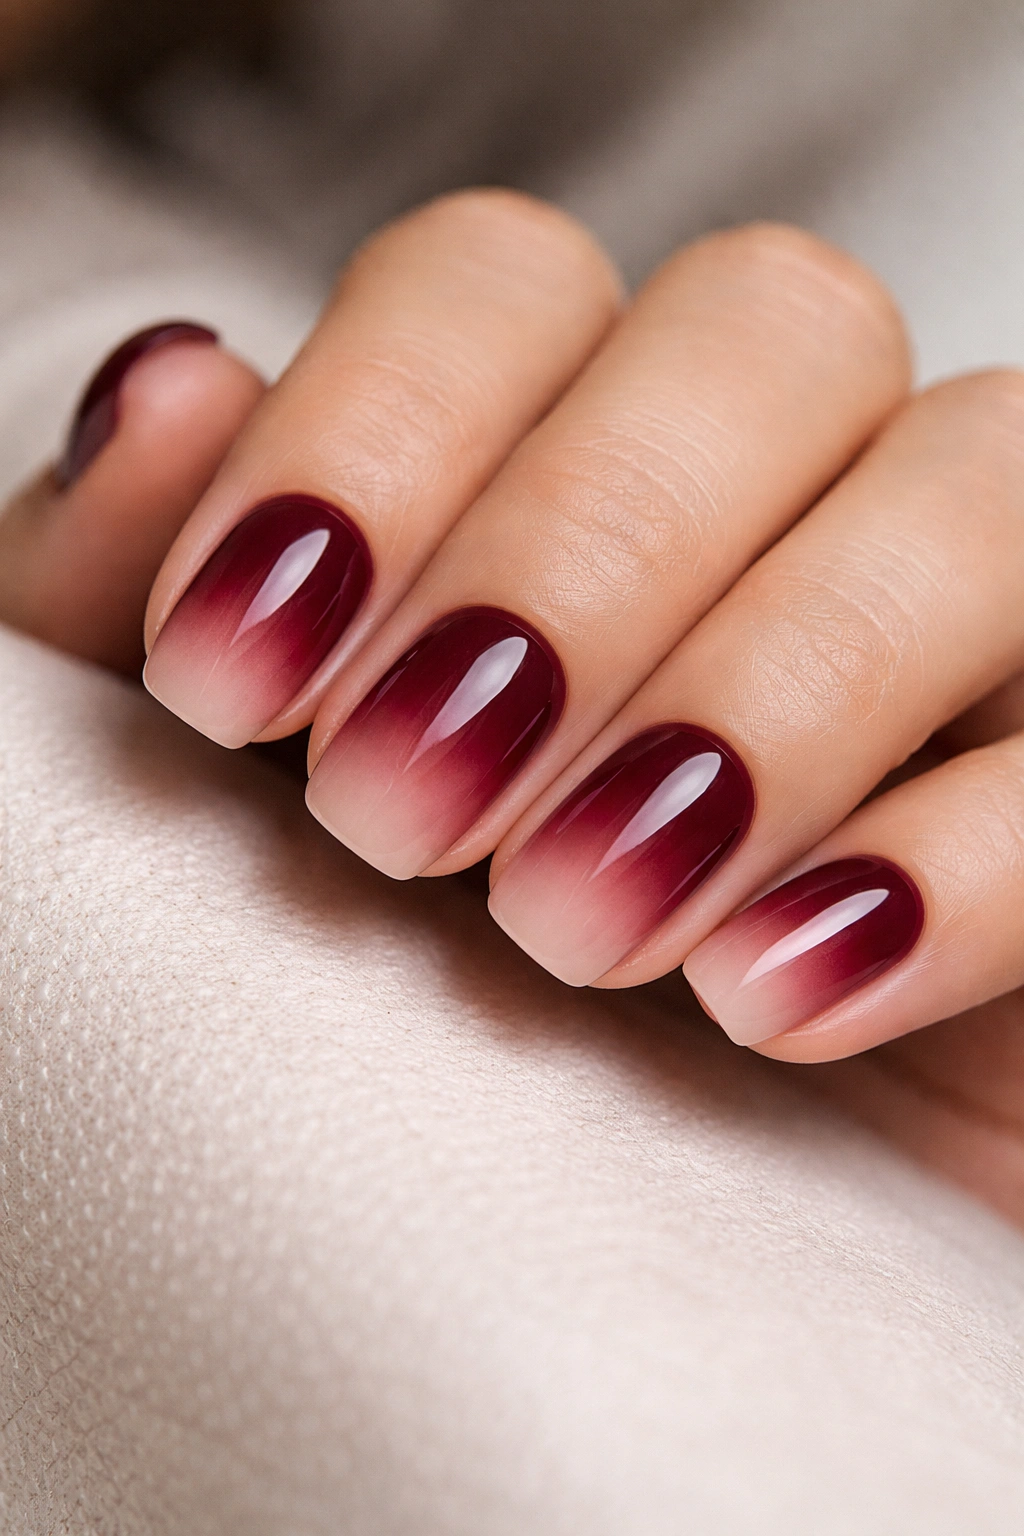
An ombre design creates visual interest and height in a way that solid color nails often don’t. Starting with burgundy at your nail bed and fading to nude at the tips extends your fingers and feels more expensive because it requires precision. This isn’t something you can do on yourself unless you’re already experienced — the gradient has to be perfectly smooth with no visible lines.
The burgundy should be rich and saturated at the base. Think the color of wine you’d actually want to drink, not food coloring. Nude should be a true nude on your skin tone — not pink, not beige, not white. The fade happens in the middle, where the two colors blend imperceptibly into each other.
A quality manicurist applies this using either a sponge technique or an airbrush, depending on their tools and skill level. The sponge method involves dabbing the colors together on a makeup sponge, then pressing it onto your nail in a blotting motion. Airbrush gives you finer control but requires specialized equipment. Either way, the gradient should look natural, not muddy. You should see burgundy, then a transition zone, then nude.
Seal everything with a glossy topcoat. The shine makes the ombre effect more visible and enhances the gradient from rich to light.
4. Minimalist Burgundy with Negative Space
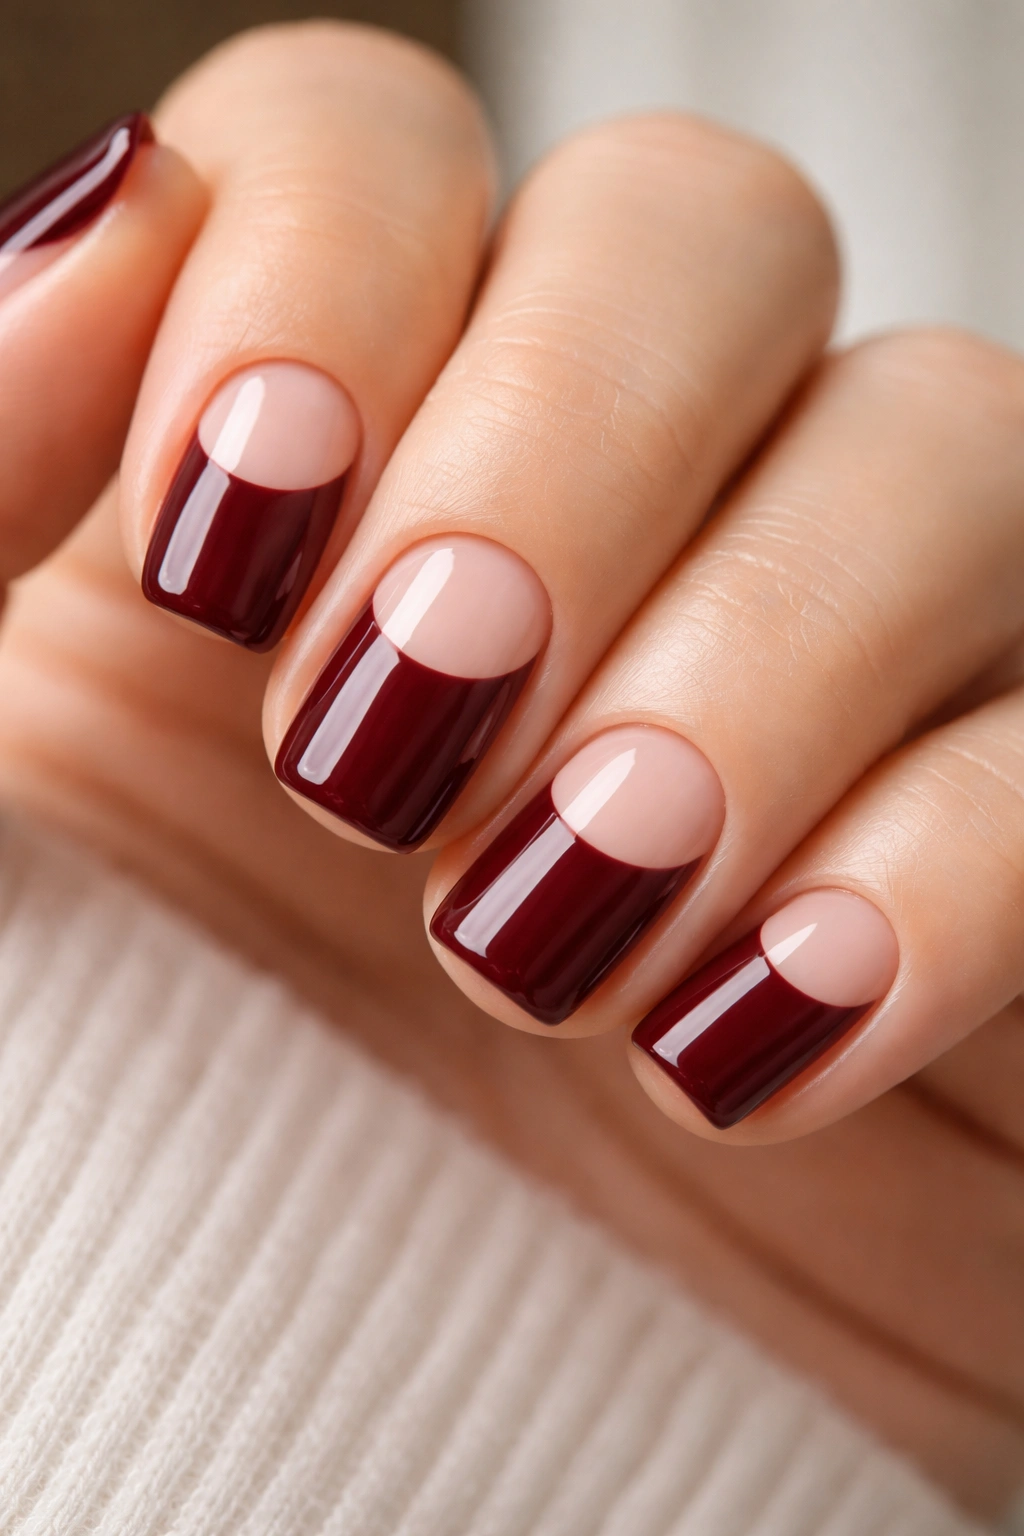
Negative space design means leaving parts of your nail unpainted — showing the actual nail bed underneath the polish. On a short squoval, this looks modern and intentional rather than unfinished. Paint your burgundy, but leave a thin strip on one side unpainted, or create a half-moon shape at the base.
This design requires good nail health. Your natural nail bed needs to be pale, even, and clean. Dark spots or discoloration show up immediately when you’re using negative space. File your nails smooth and apply a cuticle pusher to make sure your cuticle line is clean and defined. The unpainted portion becomes part of the design, so it needs to look intentional.
The burgundy itself should be opaque in one coat — not one of those sheer shades that need three passes to develop color. Paint carefully, staying just inside your design lines. A thin nail art brush makes this easier, or a striping brush if you’re doing a linear design. Seal the unpainted portion with a clear topcoat to protect it and even out the surface.
Expensive minimalist manicures feel deliberate. Every element has a reason. The unpainted portion shouldn’t feel like you ran out of polish halfway through — it should feel intentional because it is.
5. Embossed Velvet Texture in Wine
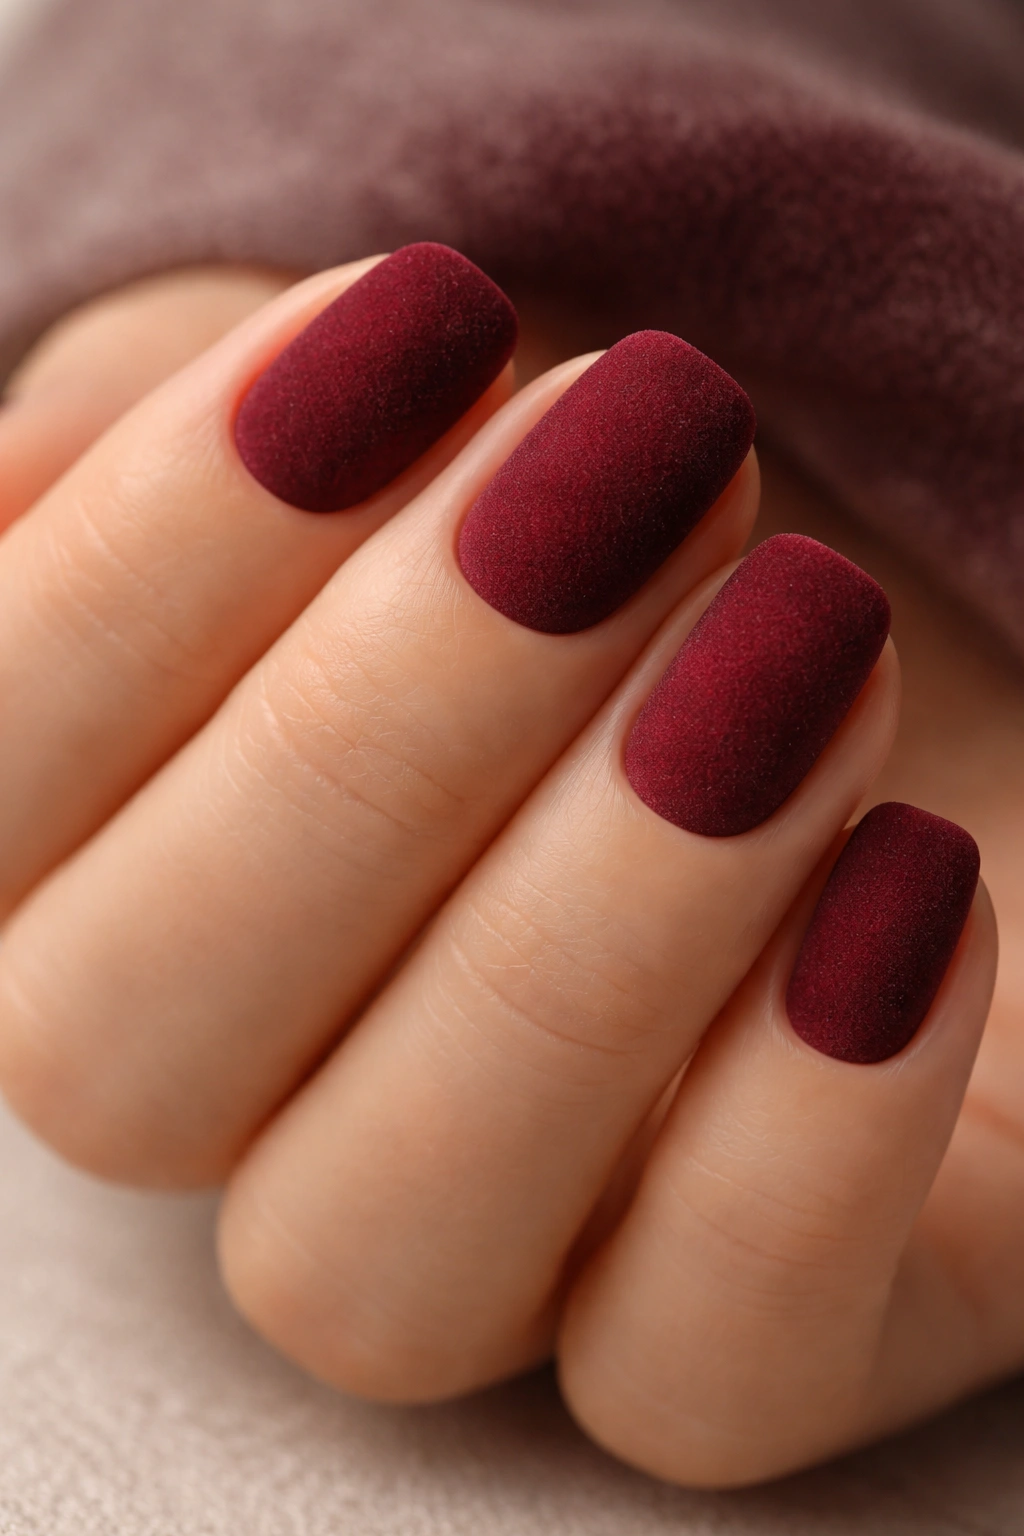
Velvet texture polish creates an effect that looks tactile enough to touch, even though your nails are actually smooth. The texture comes from finely ground materials suspended in the polish — not actual fabric. When light hits velvet nails, it scatters rather than reflects, creating a soft, almost matte appearance that’s richer than regular matte.
Burgundy in velvet texture reads as incredibly sophisticated because the color depth becomes even more pronounced. The texture adds complexity to a single-color design. There’s visual interest without additional patterns or decorations.
Apply velvet polish in thin, even coats. It’s thicker than regular polish, so it requires careful application. Two coats should be sufficient. Do not apply topcoat over velvet polish — topcoat would seal the texture and make it shiny again, defeating the entire purpose. Velvet polish should end with a matte finish.
The texture does make velvet manicures slightly more delicate than regular polish. Your nails will chip sooner if you’re rough with them. But the visual impact in person is undeniable. Velvet burgundy nails feel like touching suede.
6. Burgundy Cream with Chrome Accents
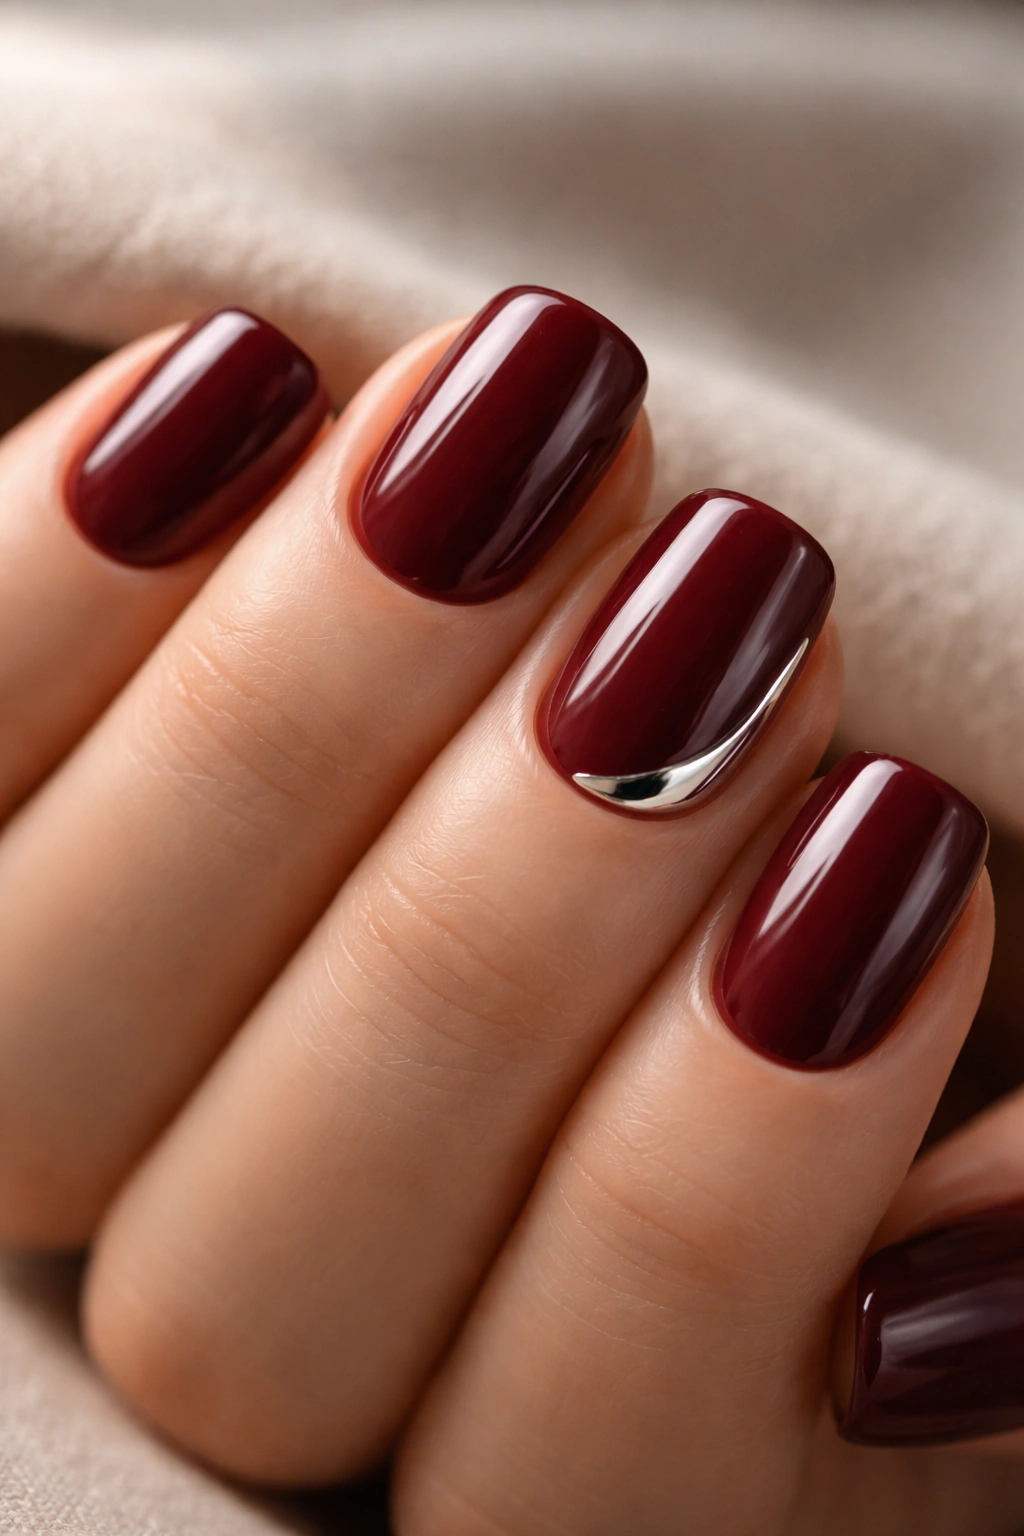
Cream polish sits between matte and glossy — it has a soft finish with just enough shine to be elegant without looking plastic. Add chrome accents to the tips or as a thin line around the edge, and you’ve got a design that reads expensive because it combines two totally different finishes.
Chrome pigment is reflective and requires a special base for application. Most nail artists use a sticky base coat, apply the chrome powder with a brush or applicator, then seal it. Chrome requires practice to apply evenly — too light and it looks dusty, too heavy and it looks cakey. Professional results depend on skill level.
The burgundy cream provides warmth. The chrome provides edge. Together they create contrast that photographs beautifully and draws attention without being loud about it. A tiny chrome accent on just your ring finger nail is more effective than chrome on every nail.
Why this works:
- Cream finish is naturally flattering and feels luxurious
- Chrome details catch light and create a modern edge
- Combining finishes shows intention and technical skill
- Limited chrome placement (one nail or just tips) prevents the design from looking costume-y
7. Striped Burgundy and Champagne Design

Thin stripes in burgundy and champagne (a pale, shimmery gold-pink) create a sophisticated pattern that feels less juvenile than many striped designs. The stripes should be no thicker than a toothpick width — these are thin, precise lines, not thick bands. The spacing matters too. Stripes too close together look busy. Stripes too far apart look sparse.
This design requires a steady hand and thin striping brushes. Paint your base in burgundy first, let it dry completely, then use a striping brush to paint champagne lines, then burgundy lines, alternating. Seal everything with a glossy topcoat that makes the lines crisp and clean.
Vertical stripes lengthen your fingers. Diagonal stripes feel more playful. Horizontal stripes are trickier to pull off but work if the burgundy is dark enough. Choose your direction based on what you want to emphasize. On short nails, vertical stripes generally look best because they counteract the width that short nails naturally have.
The expensive feeling comes from precision. Sloppy stripes look cheap. Clean, perfect lines look professional. If you’re not confident in your brush control, find a manicurist who specializes in nail art details.
8. Transparent Burgundy Over Nude Base
Sheer burgundy polish layered over a nude base creates a stained-glass effect — your nails look like they have depth and luminosity that solid color nails don’t quite achieve. The sheer burgundy tints your nail but doesn’t completely cover it. The nude showing through creates a custom color that’s uniquely yours based on your individual skin tone.
This design requires choosing the right shade of nude for your undertones. Warm burgundy needs a warm, golden nude. Cool burgundy pairs with peachy or rosy nudes. Apply the nude base first — one to two coats, depending on opacity. Then layer the sheer burgundy on top. You might need two or three coats of the burgundy to reach the color depth you want, but because it’s sheer, it won’t feel heavy.
The result is a muted burgundy that’s more wearable than a pure burgundy, especially if you’re going for an everyday professional look. It’s less intense but somehow more interesting because of the subtle depth underneath.
Seal everything with a glossy topcoat for smooth shine. The transparency should be visible — you should see the nude peek through slightly. This is the entire design concept.
9. Burgundy with Pearl Inlay Details
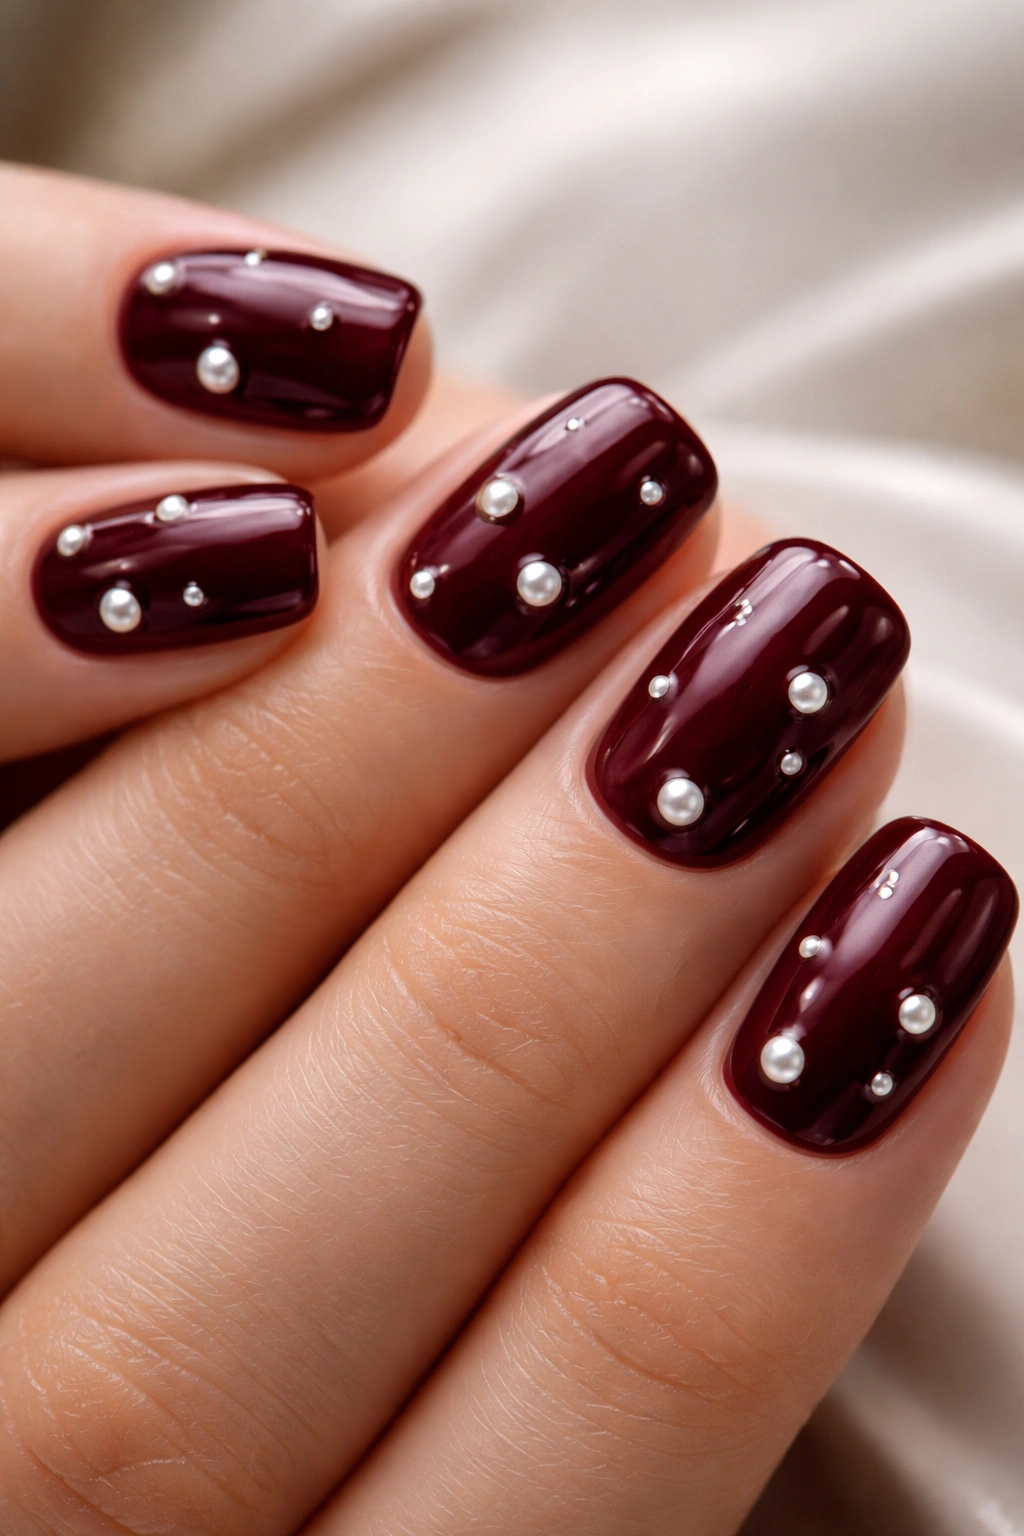
Pearl inlay designs involve setting small pearl or bead elements directly into the nail polish before it dries. The pearls become embedded as part of your nail rather than sitting on top of it. This requires a specific technique and products designed for nail inlay — regular pearls won’t work because they won’t bond properly to the polish.
Paint a thin layer of burgundy first. Before it’s completely dry, use tweezers or a specialized inlay tool to place small pearls or beads into the wet polish. Position them carefully — they should look intentional, not random. Three to five pearls per nail is usually enough. Press each pearl gently to make sure it’s embedded.
Apply a second layer of burgundy polish over the top, sealing the pearls into place. They’ll be visible as dimensional elements under the polish surface. Finish with topcoat.
This design looks expensive because it’s difficult to execute well and because pearl details automatically read as luxurious. The pearls catch light and create visual interest beyond simple color. It’s a detail that makes people look twice.
Pro tip: Use very small pearls (smaller than you think you need) so they don’t look obviously embedded. Subtle is more expensive than obvious.
10. Soft Burgundy Jelly with Gold Flakes
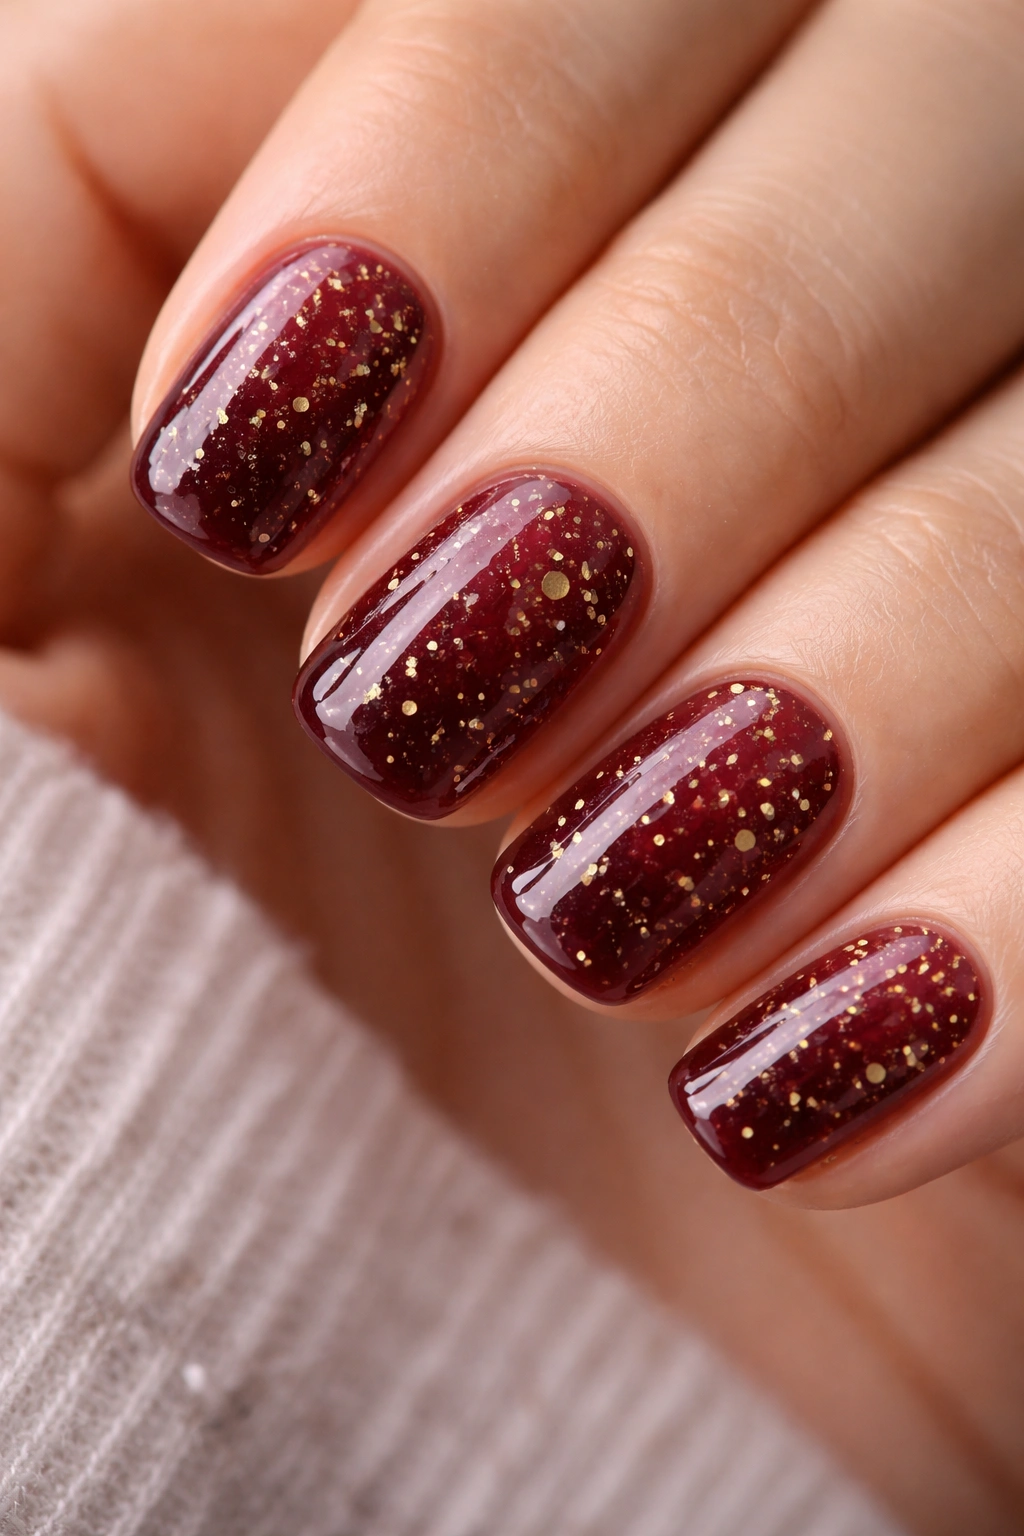
Jelly polish is translucent and slightly gummy when wet, creating a gel-like appearance. Soft burgundy jelly — not a deep wine, but something lighter and more transparent — applied over nude nails creates the impression of your actual nail showing through tinted, stained nails. Add fine gold flakes suspended in the jelly, and you’ve got dimension.
The gold flakes need to be actual nail polish flakes, not loose glitter. They’re mixed into the jelly polish before application. Some brands sell jelly polish with flakes already included. Others allow you to customize by adding your own flakes to clear jelly base and a burgundy tint.
Apply jelly polish carefully in thin coats. It’s easier to control than regular polish because it has a thicker consistency. You can be generous with application without the polish running. Two coats usually gives you good color depth while maintaining transparency. Seal with a glossy topcoat.
Jelly nails have made a major comeback among people who appreciate subtle elegance. They’re not fully opaque, not fully nude, but something in between. The gold flakes add just enough sparkle to catch light without making your nails feel formal or costume-y. It’s a design that works for everyday wear and still feels intentional.
Final Thoughts
Expensive-looking nails aren’t actually expensive — they’re about knowing what details signal quality. A clean base coat, careful application, precise edges, and one strategic design element go further than complicated multi-color designs or heavy embellishment. Burgundy is essentially doing the work for you. It’s a color that reads as sophisticated on its own.
The best short squoval burgundy manicure for you depends on your lifestyle and aesthetic. If you’re in a professional setting where subtlety matters, go transparent or ombre. If you want to wear something that makes you look twice every time you look at your hands, try velvet or pearl inlay. Whatever you choose, take care of it. A perfect manicure that’s been chipped for two weeks looks cheap no matter what it actually cost. Regular touch-ups and gentle handling keep even the most budget-friendly nail color looking expensive.
