

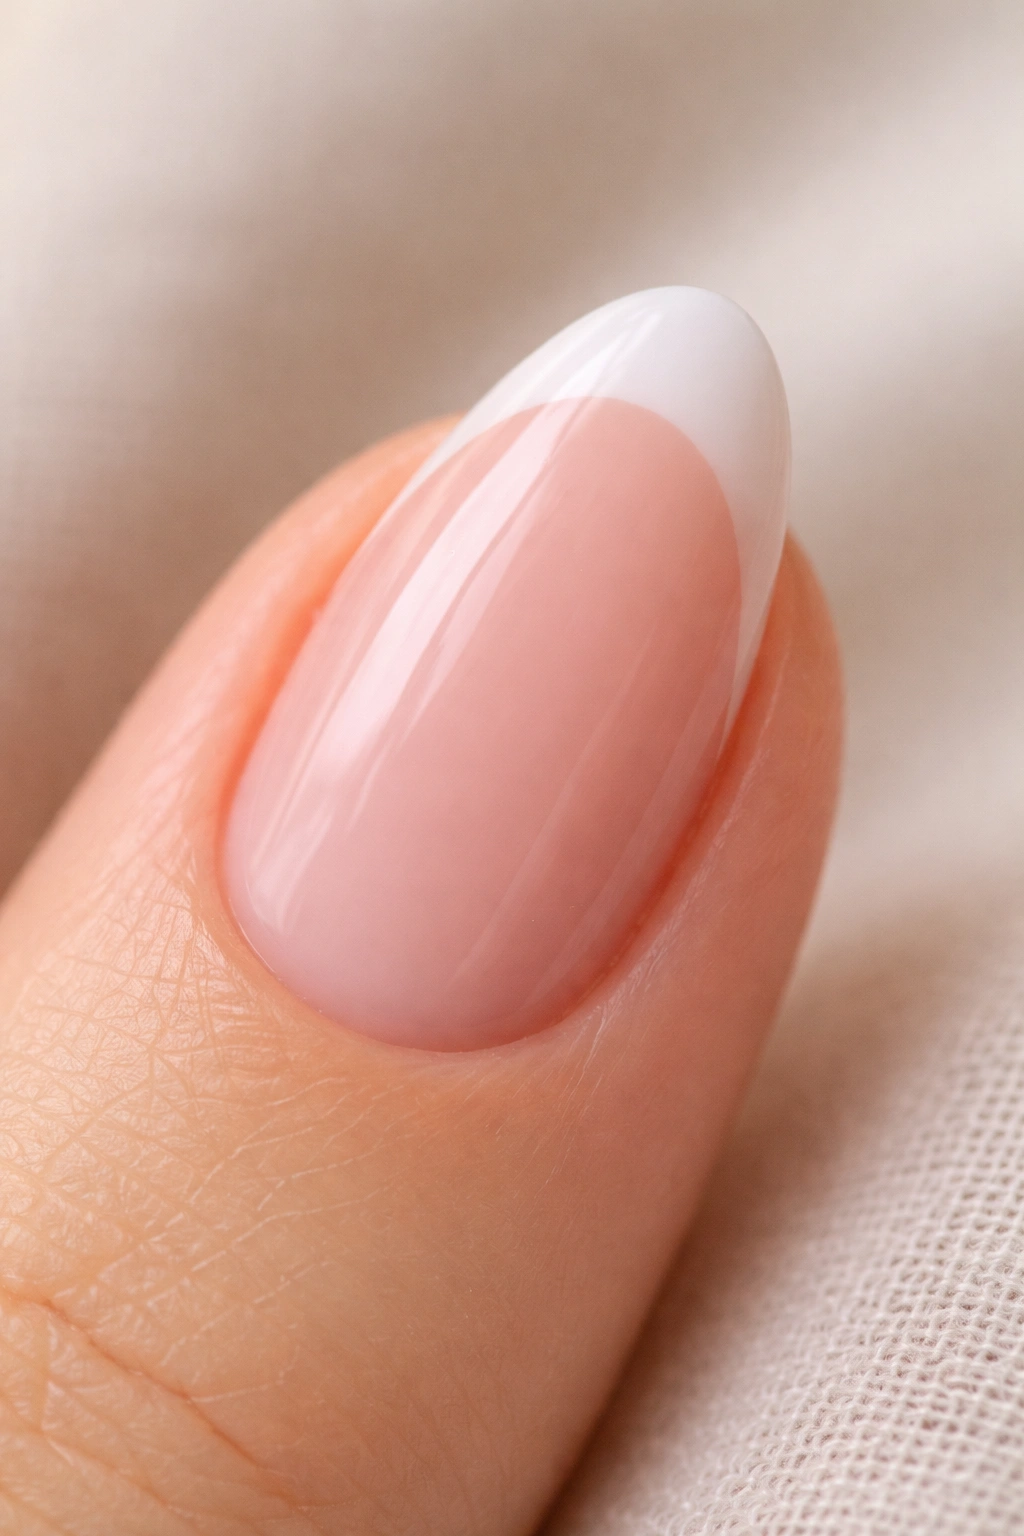
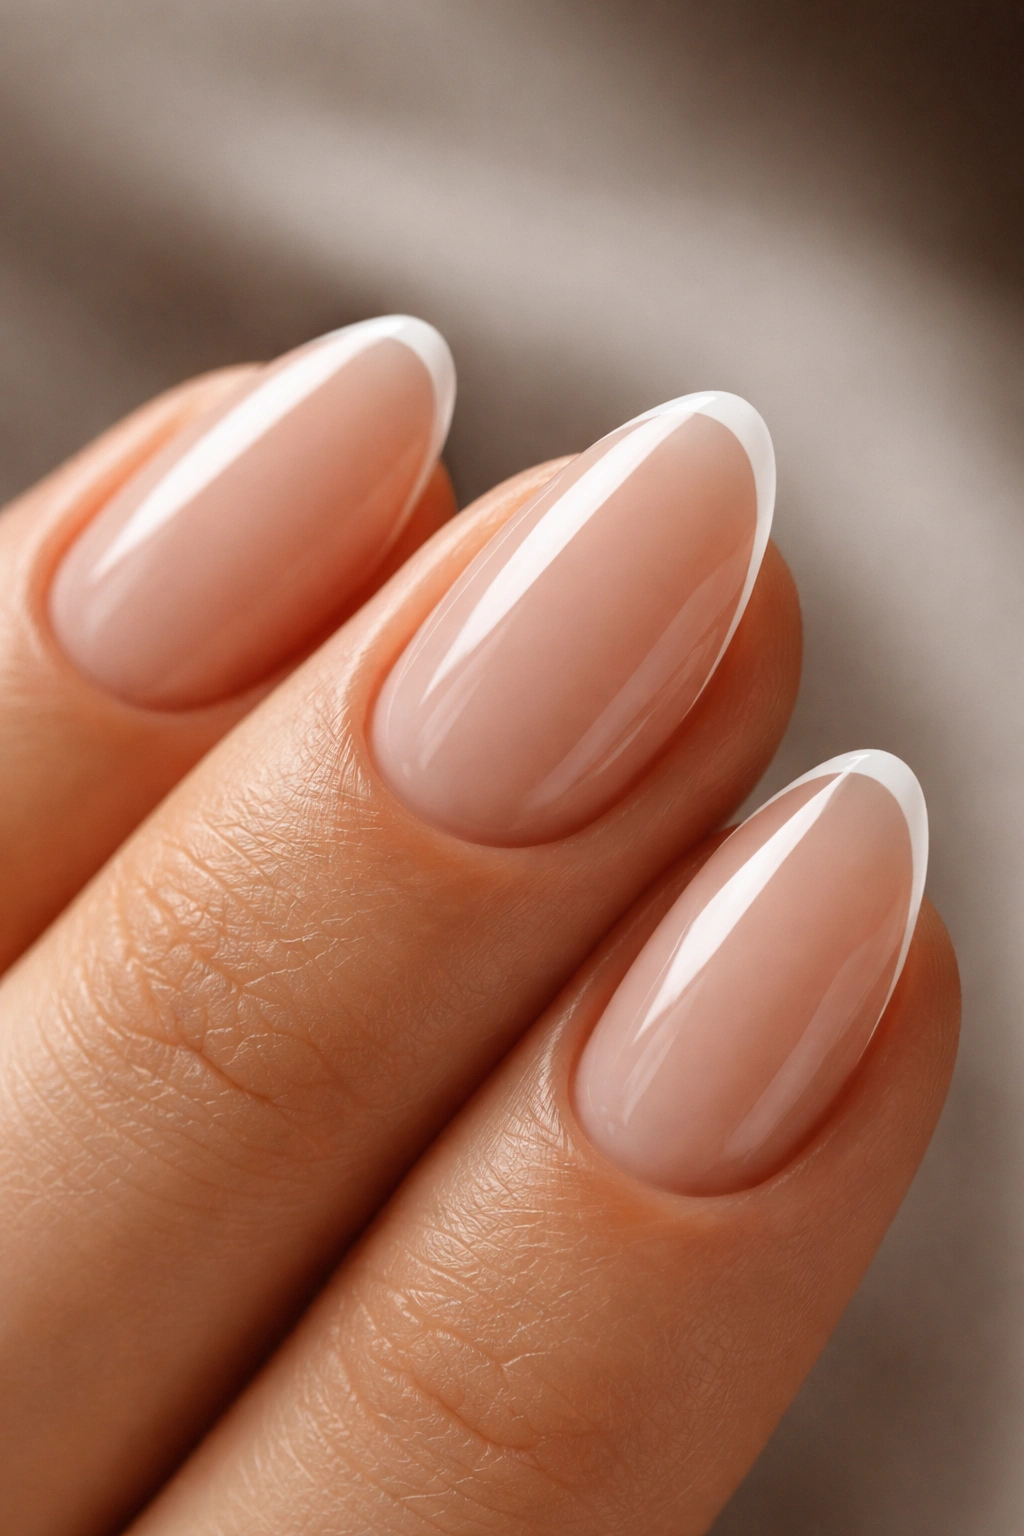
There is something uniquely satisfying about a set of perfectly groomed nails. When you trim your nails to a shorter length, the classic French manicure doesn’t just look tidy; it gains an effortless, architectural quality. The almond shape is the unsung hero of the nail world. It mimics the natural shape of the cuticle and, even on short beds, it creates an elegant, tapered illusion that squares or rounds simply cannot achieve. When you pair that shape with a crisp, clean white tip, you get a look that is perpetually polished, functional for daily life, and never goes out of style.
Many people assume the French manicure requires long, claw-like extensions to look right. That is a myth that keeps people from trying one of the most versatile designs in existence. On shorter nails, you aren’t fighting for real estate; you are working with proportion. The key is in the ratio of the white tip to the nail bed. Get that balance right, and your hands look instantly elongated and refined. Whether you are prepping for a boardroom presentation, a casual weekend brunch, or a quiet evening at home, there is a variation of this style that fits. It is the manicure equivalent of a crisp white button-down shirt—simple, adaptable, and always appropriate.
1. The Ultra-Thin Micro French
This is the look for people who want the French aesthetic without the visual weight of a thick, bold tip. On a short almond nail, a standard, thicker French tip can sometimes swallow the entire nail bed, making the finger look stubby. The Micro French, or “skinny tip,” bypasses this problem entirely. It uses a razor-thin line of white polish that traces the very edge of your natural nail curve.
Why This Style Works for Short Nails
Because the line is so thin, you aren’t sacrificing the length of your nail bed. It creates a “barely there” effect that draws the eye to the tip without dominating the design. It is sophisticated, understated, and arguably the most professional version of a French manicure you can wear.
Application Tip: Use a dedicated liner brush rather than the brush that comes inside the polish bottle. The standard brushes are often too wide and stiff. Dip a long, thin detail brush into your white polish, remove the excess, and drag it steadily across the edge. If you shake, the mistake will be invisible because the line is so microscopic.
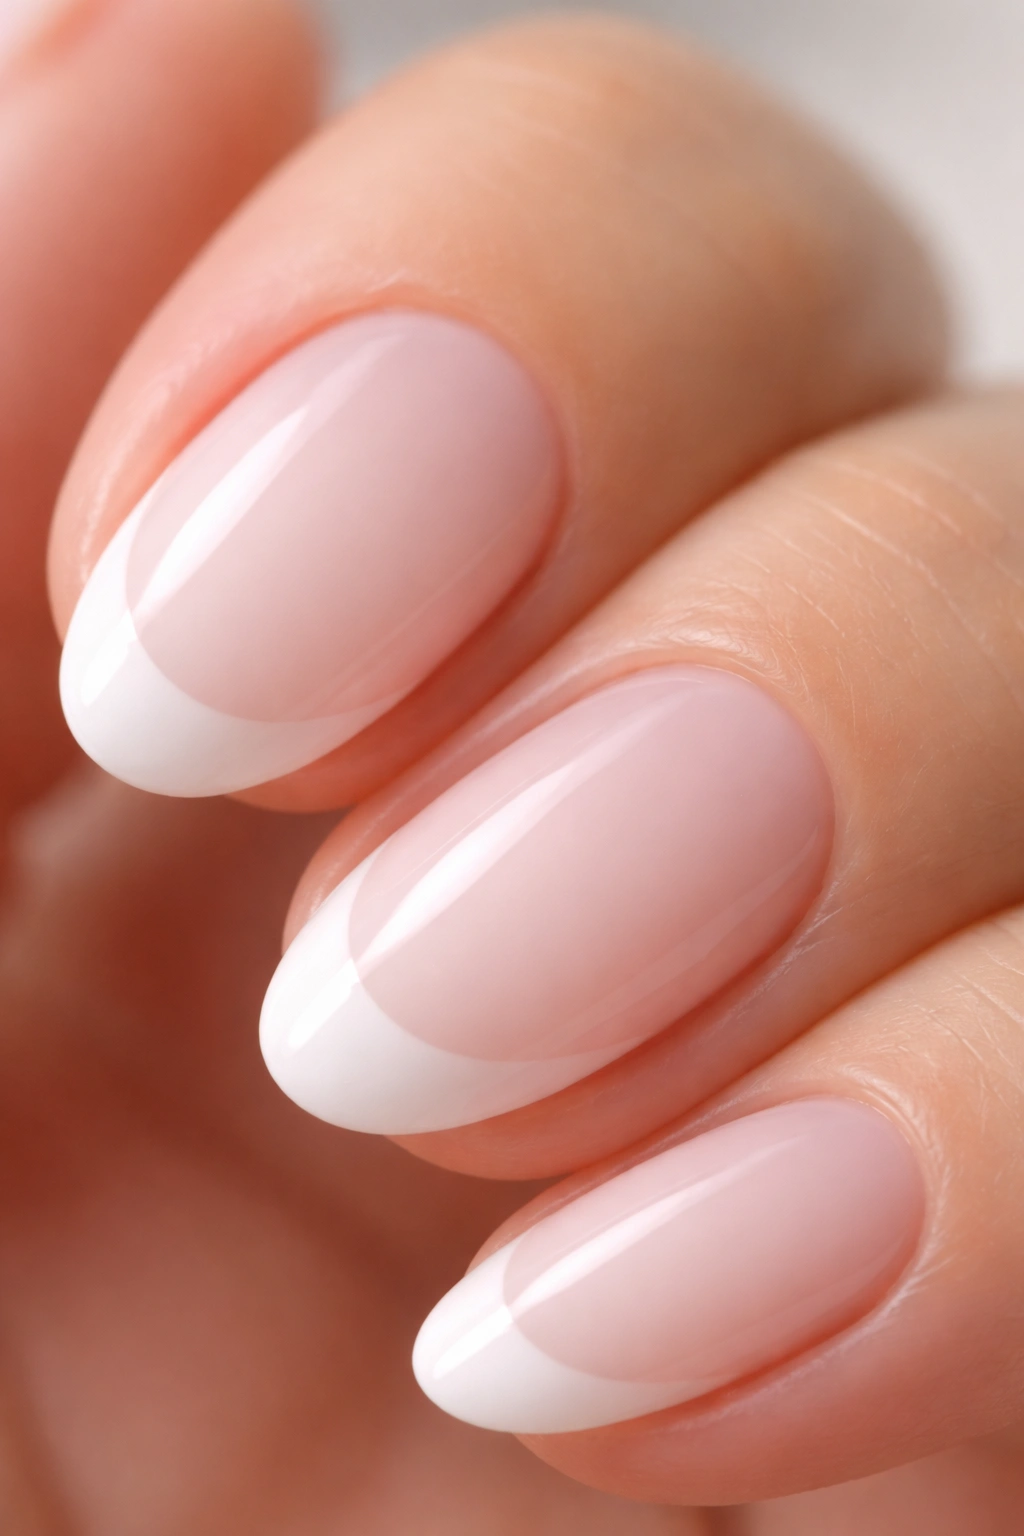
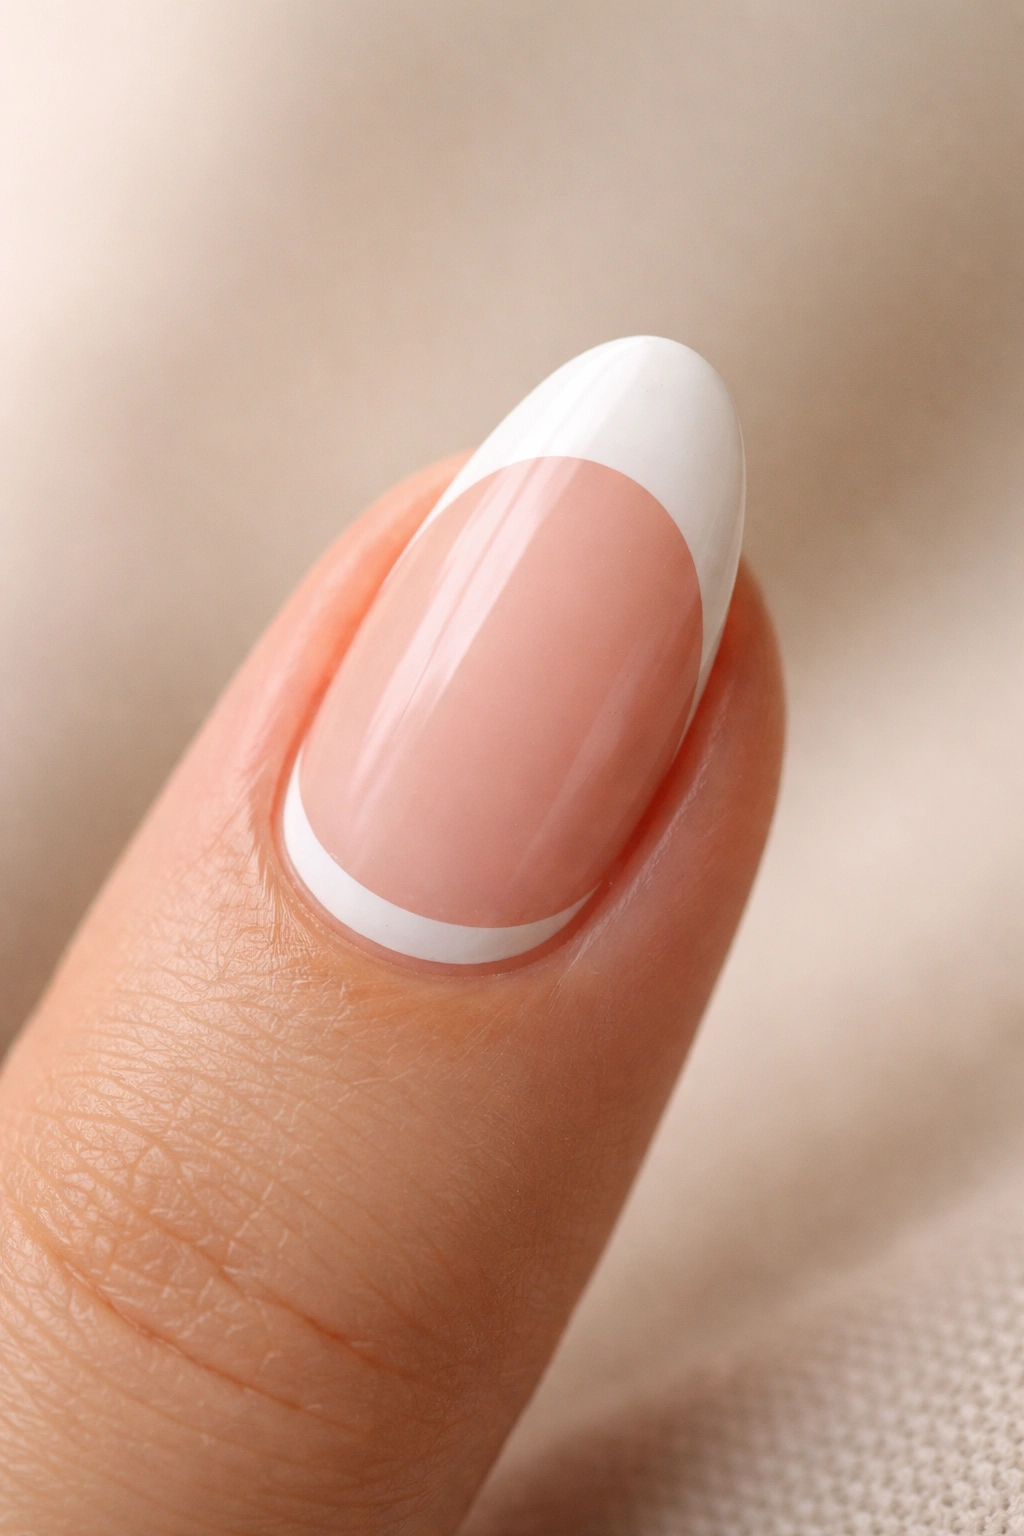
2. The Classic Deep Curve
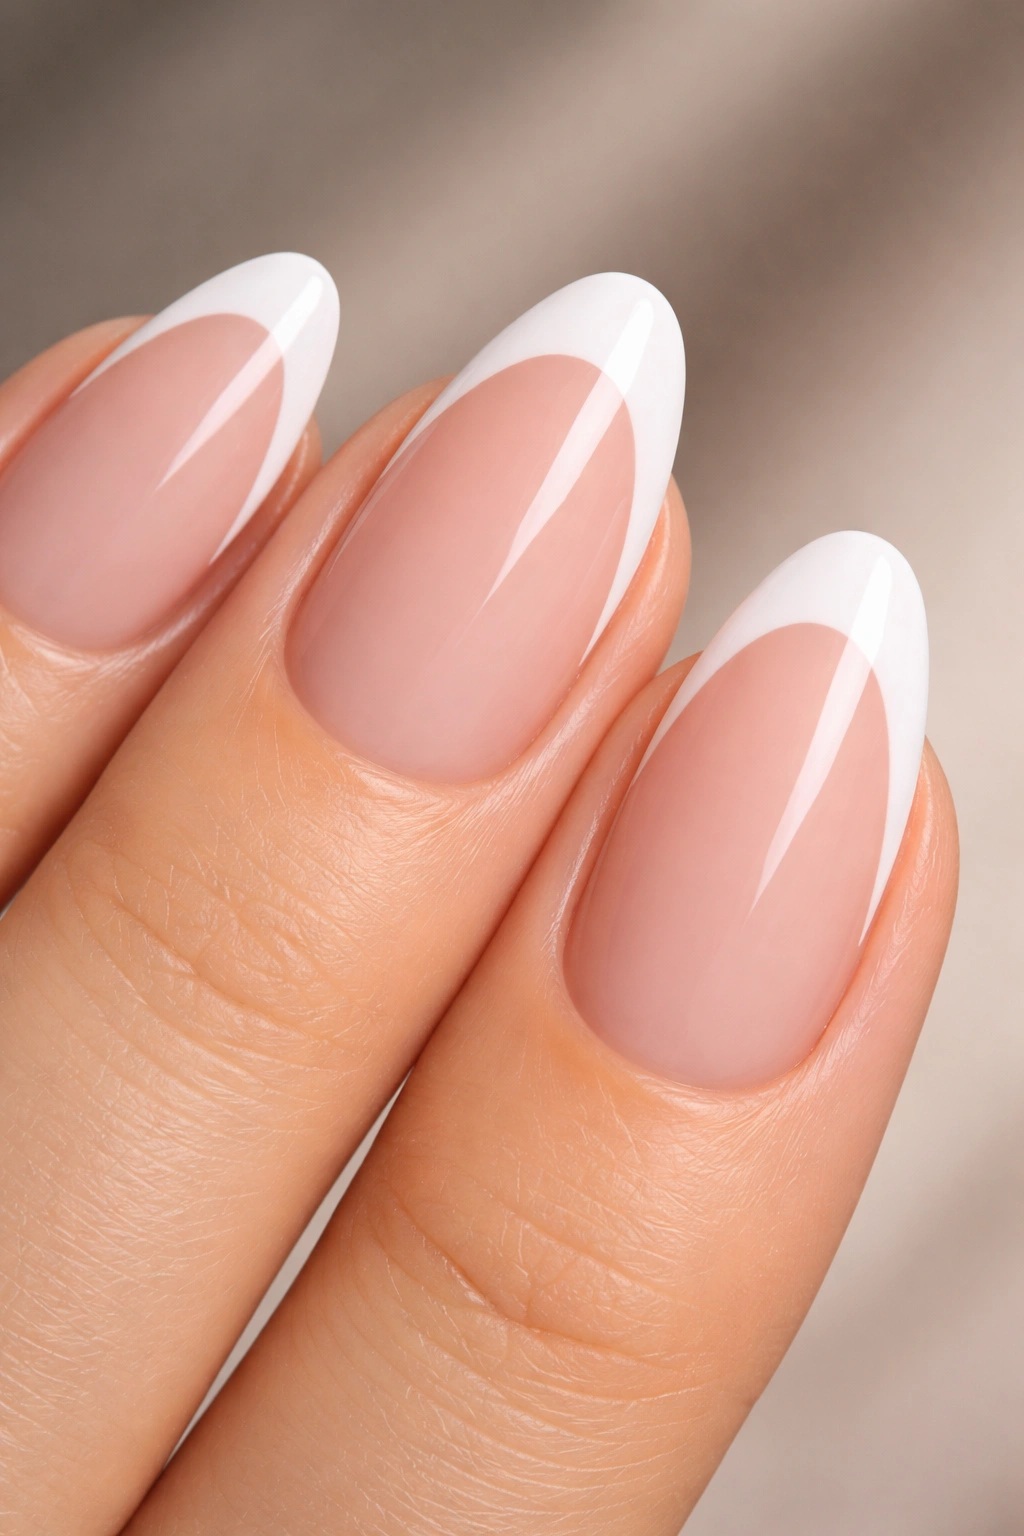
Some people prefer the high-contrast look of the traditional French manicure where the white tip is prominent. Even on short nails, you can pull this off if you adjust the “smile line”—the curve where the white paint meets the base color. A deep, dramatic curve that follows the natural almond shape helps mimic the look of a longer nail.
Getting the Smile Line Right
The secret here is the depth of the arc. Instead of a flat line across the tip, you want the white polish to extend further down the sides of the nail. This mimics the natural slope of an almond-shaped nail. It visually tricks the eye into seeing more length.
Common Mistake: Avoid trying to paint the perfect curve in one stroke. It almost never works. Instead, paint the two side walls of the tip first, then connect them in the center. This gives you much better control over the final shape and symmetry.
3. The Matte Finish Twist
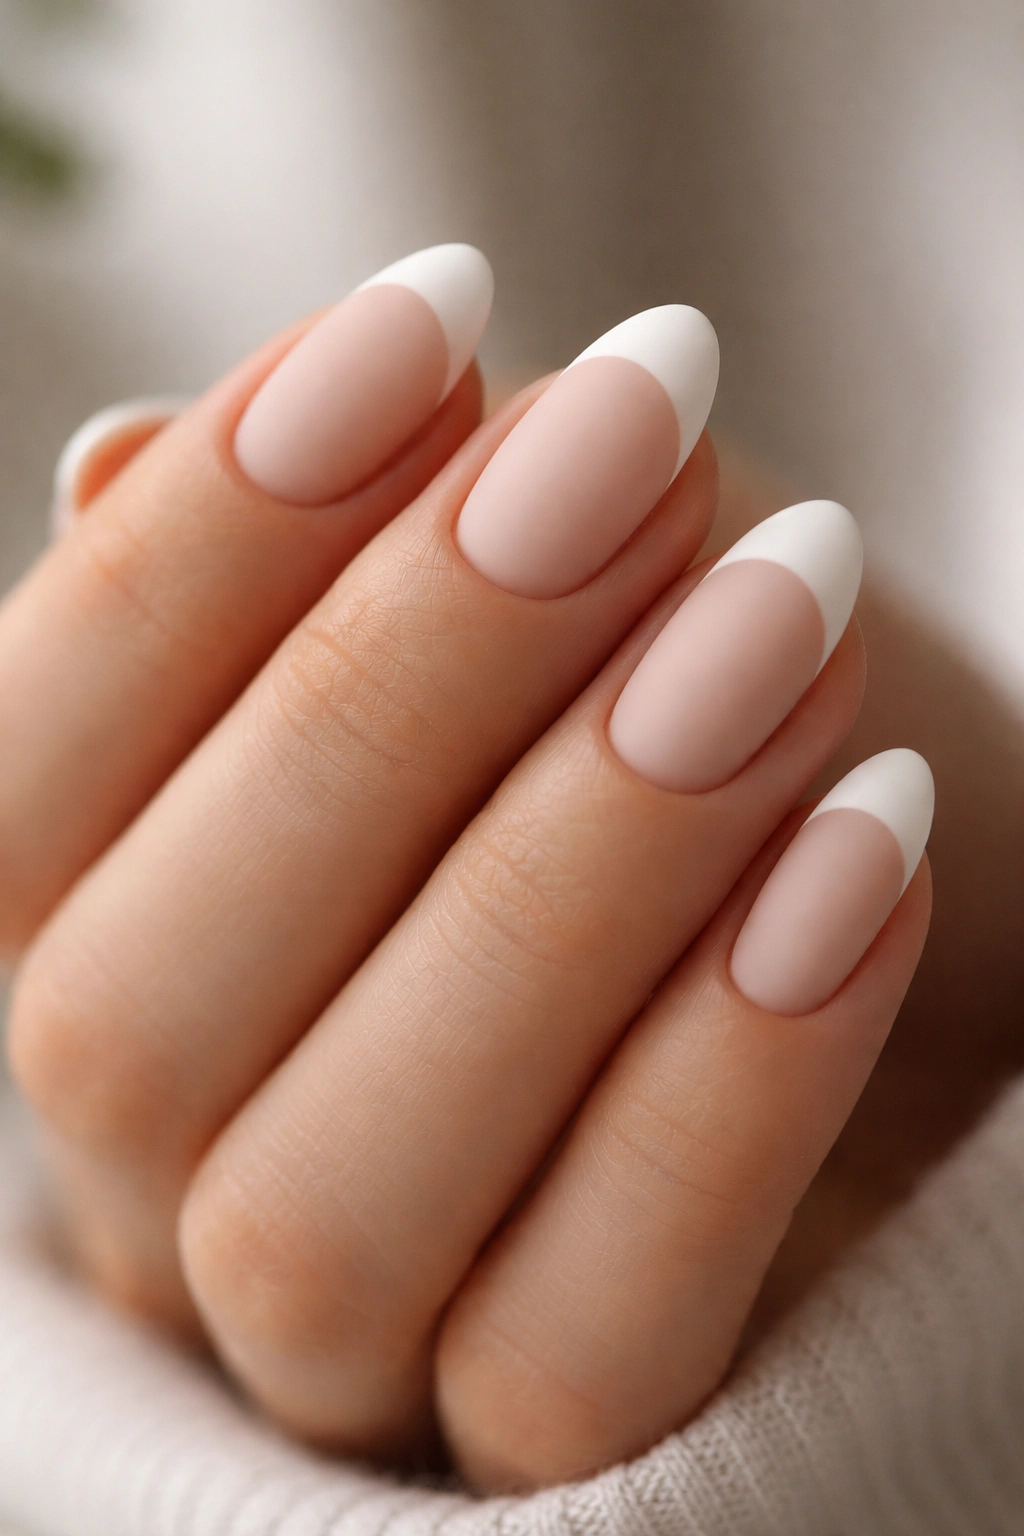
We often associate the French manicure with high-gloss, glass-like shine. While that is classic, switching to a matte finish on the entire nail changes the vibe entirely. It stops looking like a “standard” salon manicure and starts looking like a piece of modern, architectural design.
Why Texture Matters
A matte topcoat removes the reflections that usually hide imperfections. This means your application needs to be very precise. The contrast between a matte white tip and a matte nude base is subtle, sophisticated, and incredibly chic. It feels intentional and thoughtful rather than just “done.”
Pro-Tip: If you do not want to invest in a specific matte polish for the base and tip, simply buy a matte topcoat. One swipe over your completed manicure will transform it instantly. It also tends to be more durable and less prone to showing scratches compared to glossy topcoats, which is great if you use your hands a lot during the day.
4. The Double-Lined Accent
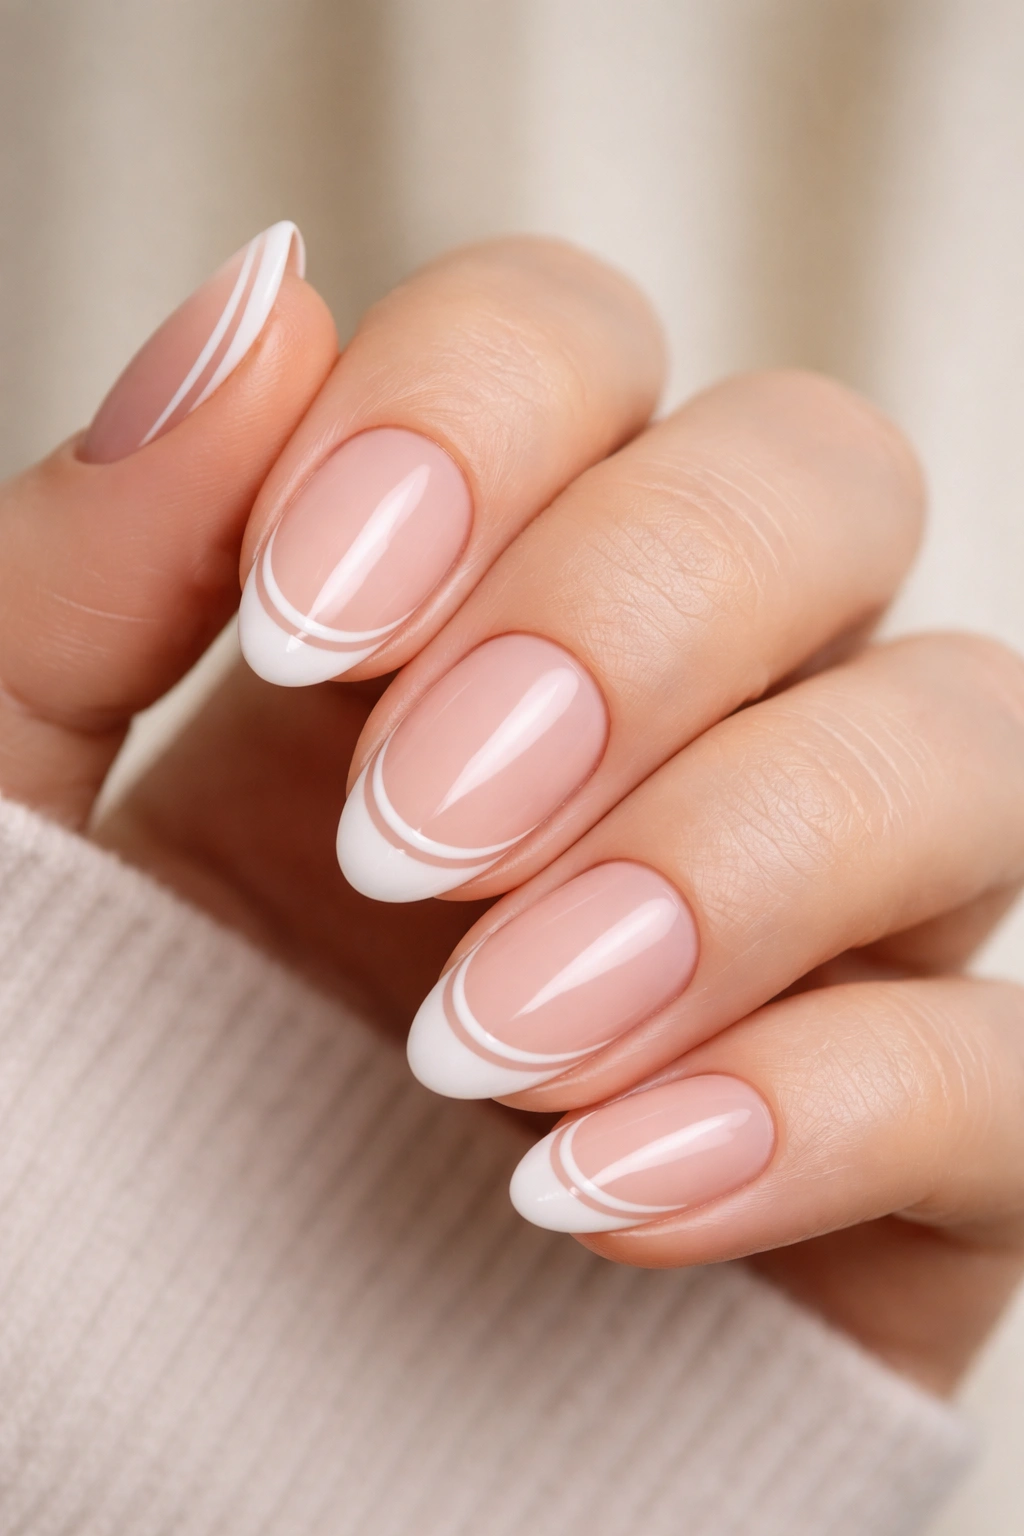
If the classic French feels a bit too plain for you, the double-lined variation adds a layer of graphic complexity. It is essentially a standard French tip with a second, thinner line tracing just below it. It creates a “framed” look for your nail tip that draws attention without being loud.
Executing the Precision
This requires a steady hand, which is why it is best performed on shorter nails where there is less surface area for the brush to wobble. The gap between the two lines can be colored with a sheer nude, or you can use negative space (the natural nail color) for a more modern, minimal aesthetic.
Variation: You can play with the color of the second line. While white-on-white is elegant and monochromatic, adding a silver, gold, or even a soft pastel line as the second accent creates a completely different, custom look. It is an easy way to customize the manicure without needing complicated nail art skills.
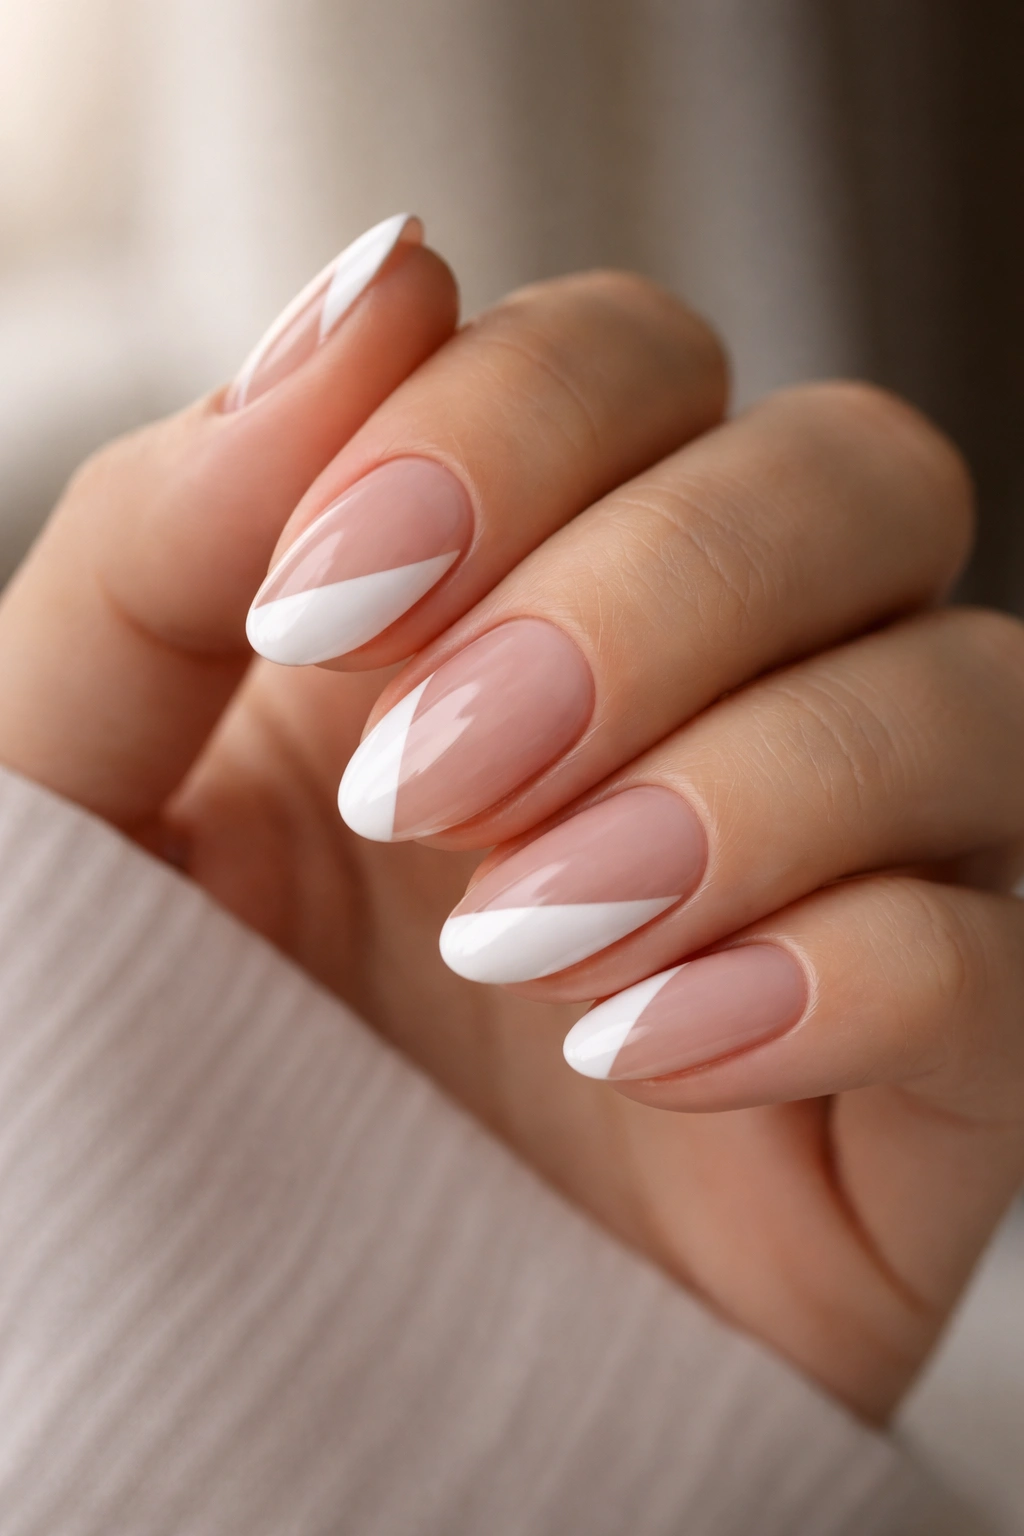
5. The Negative Space V-Tip
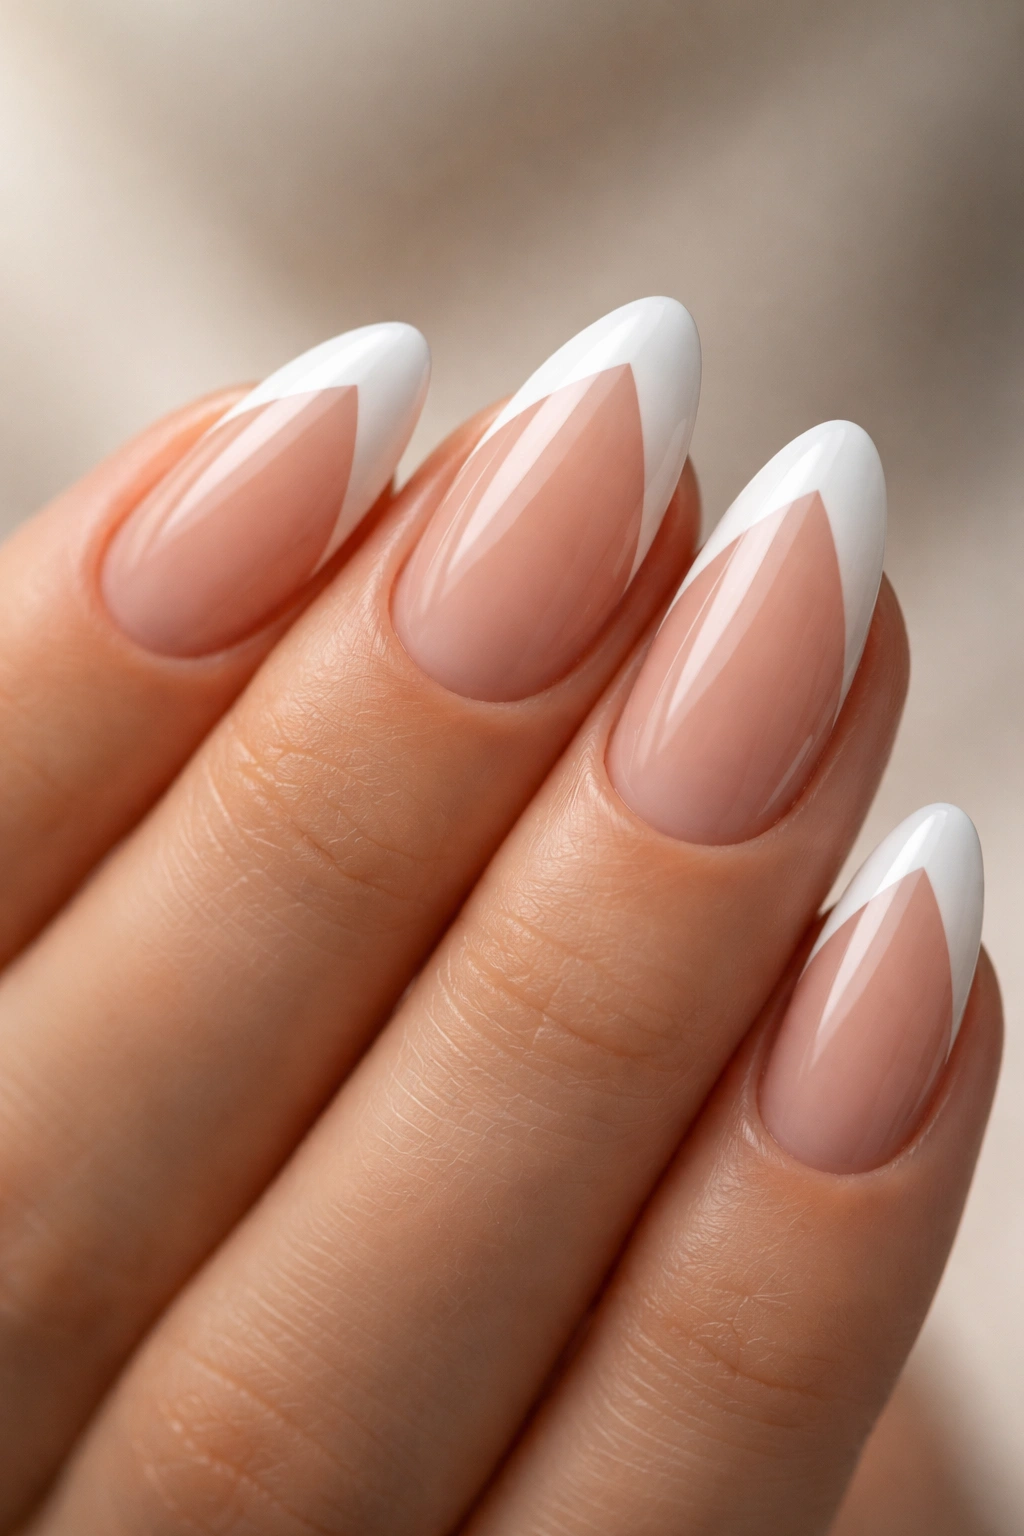
The V-tip is a angular departure from the standard rounded French smile line. Instead of a soft arc, you paint a sharp, triangular “V” shape at the tip. This is particularly effective for almond-shaped nails because the angle of the V complements the natural point of the almond.
The Illusion of Elongation
The sharp peak of the V points down toward your cuticle, which creates a vertical line of symmetry. Vertical lines are the oldest trick in the book for making things look longer and thinner. For someone with very short nail beds, this is arguably the most flattering shape you can choose.
How to Achieve Sharp Lines: Use a piece of striping tape or a small piece of painter’s tape cut into a triangle. Apply it to the nail, paint the white, and peel it off while the polish is still wet. This guarantees the sharpest possible lines without requiring professional-level freehand skills.
6. The Milky White Base
One of the most common complaints about a French manicure is that the base color—usually a sheer pink or beige—doesn’t quite match the user’s skin tone. Enter the “milky” trend. Instead of a clear or pinkish base, you use a sheer, semi-opaque milky white polish across the entire nail before painting the crisp white tip.
Creating the Soft Focus
This technique creates a soft-focus, blurred effect. It makes the nails look clean, hydrated, and expensive. It is the manicure equivalent of a luxury spa treatment. The transition from the milky base to the solid white tip is much softer than the traditional clear-base-and-bright-white-tip combination.
Why It Wins: It covers up any ridges or discoloration in your natural nail bed, which is a common issue with short, untreated nails. If your nails have uneven color or staining, the milky base hides it entirely, giving you a fresh, clean canvas for your French tips.
7. The Diagonal Side-Tip
If you struggle with symmetry—and let’s face it, most of us do—the diagonal side-tip is your best friend. Instead of painting a smile line that goes across the width of the nail, you paint the tip at a sharp, diagonal angle. It looks modern, asymmetrical, and highly intentional.
The Ease of Asymmetry
The best part about this design is that it doesn’t have to be perfect on every finger. Since it’s an abstract design, slight variations in the angle don’t look like “mistakes”—they just look like design choices. It is the most forgiving French manicure variation by a long shot.
Styling Suggestion: You can place the diagonal tip on the left or the right side, or even alternate them for a more playful look. Because it doesn’t cross the entire nail, it keeps the nail bed looking open and prevents the short almond shape from looking cluttered.
8. The Glitter-Dust Tip
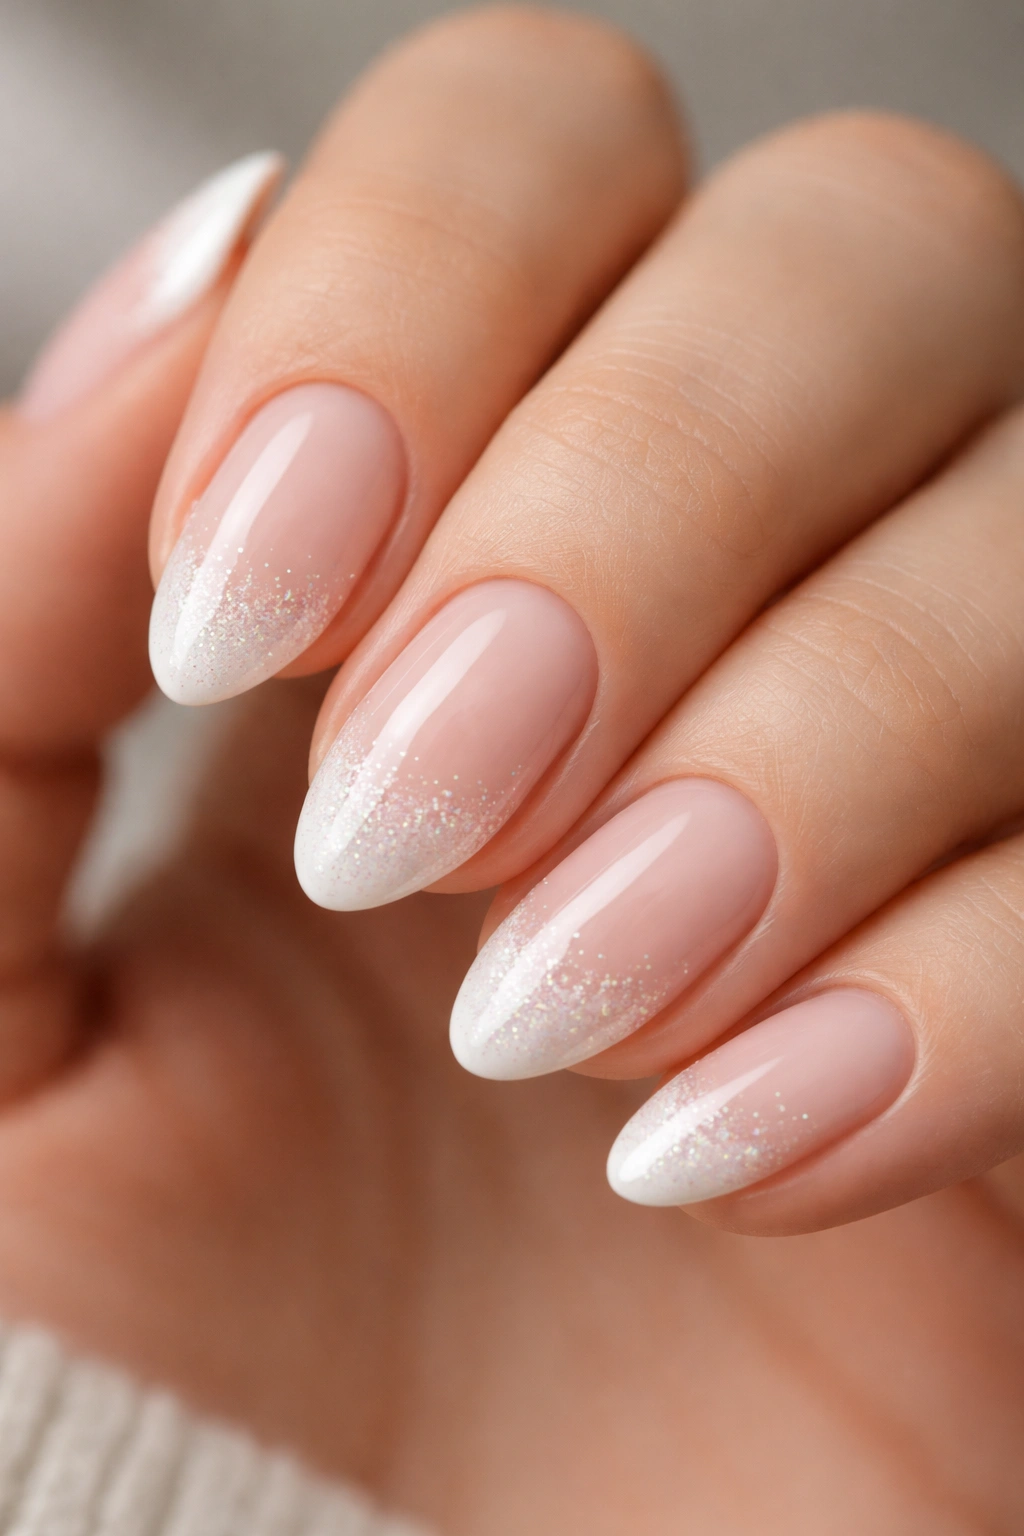
Sometimes, a flat white tip can feel a bit clinical. A simple way to soften that look and add some personality is by incorporating a subtle glitter gradient into the tip. You aren’t doing a “glitter bomb” here; you are just using a sheer glitter topper to fade the white line out.
Blending the Sparkle
Take a sheer shimmer or fine-glitter polish and apply it right over the line where the white tip meets the base. Don’t cover the whole nail. Focus the glitter at the transition point and drag it slightly upward toward the cuticle.
Why It Works: This hides any shaky edges or imperfections in the white line. It is a fantastic trick for beginners. If your smile line isn’t perfectly crisp, a little bit of glitter sparkle over the edge makes the transition look like an intentional gradient rather than a messy paint job.
9. The Pearl-Finish Base
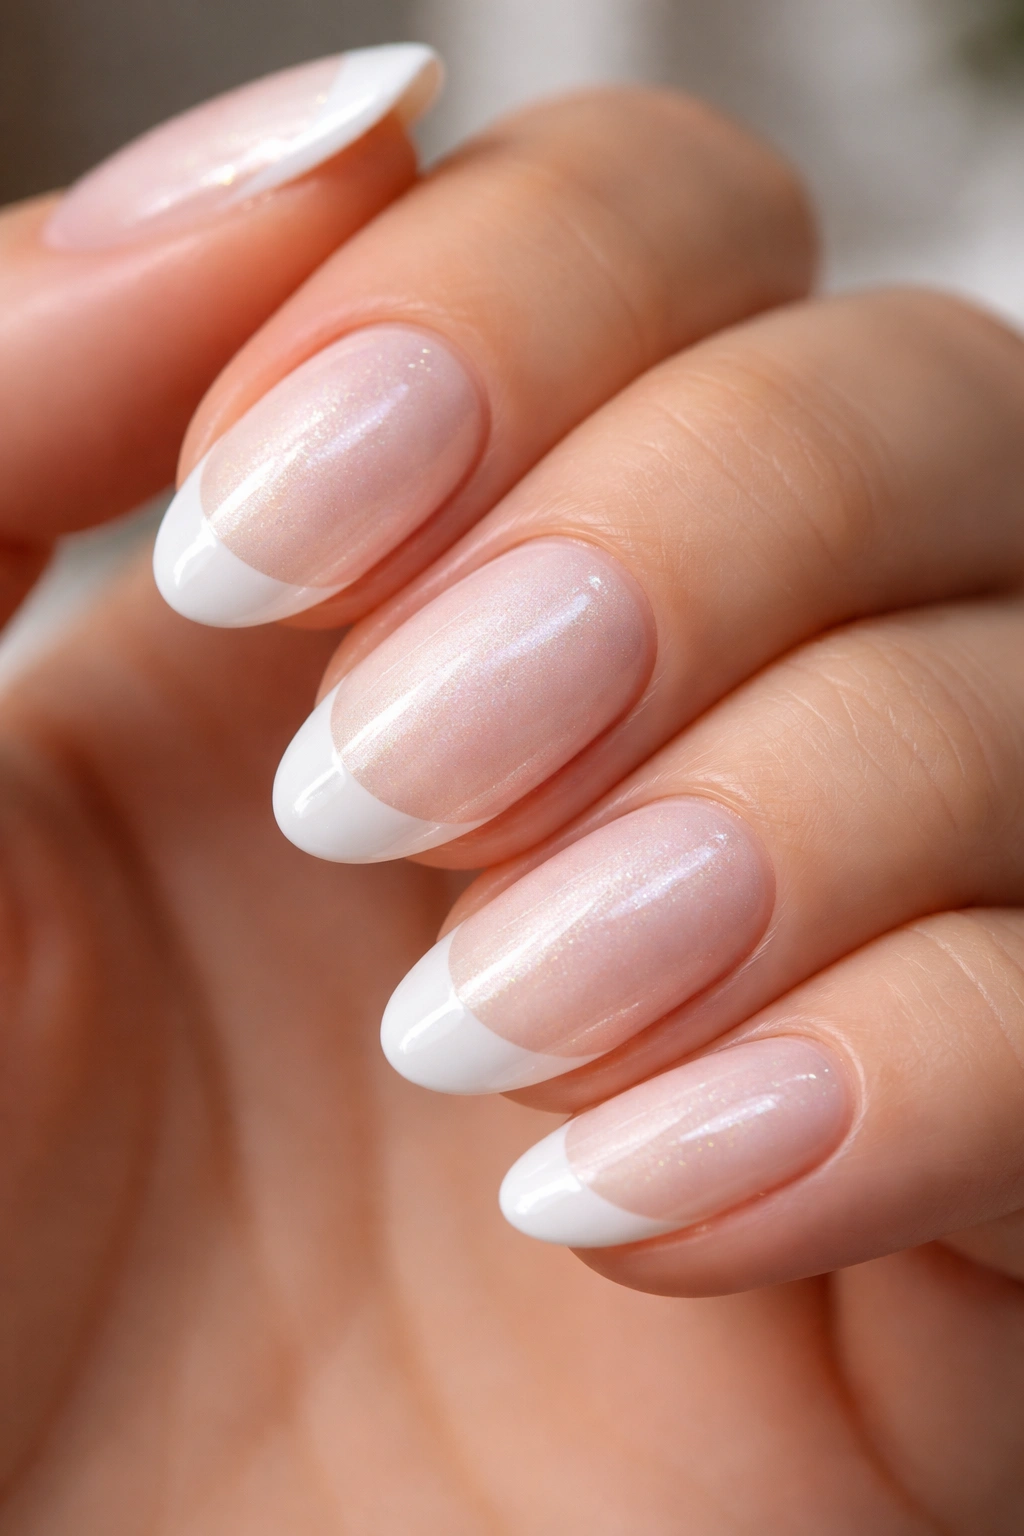
The “glazed donut” or pearl finish has been a huge trend, and it pairs surprisingly well with a classic white French tip. Instead of using a standard cream base, use a pearlescent, iridescent topcoat. The white tip then sits on top of this shimmering, light-reflecting base.
The Luster Factor
The pearlescent base catches the light in a way that standard polish doesn’t. When the light hits your nails, the whole hand looks like it is glowing. It adds a level of dimensionality that makes a simple short manicure look like a high-end salon job.
Maintenance Note: Pearl finishes are notorious for showing streaks if the brush strokes aren’t even. Use a light touch and make sure your base is perfectly dry before you paint your white tips. If you mess up the pearl base, it is usually better to remove it and start that finger over rather than trying to fix a streaky layer.
10. The 3D Chrome Outline
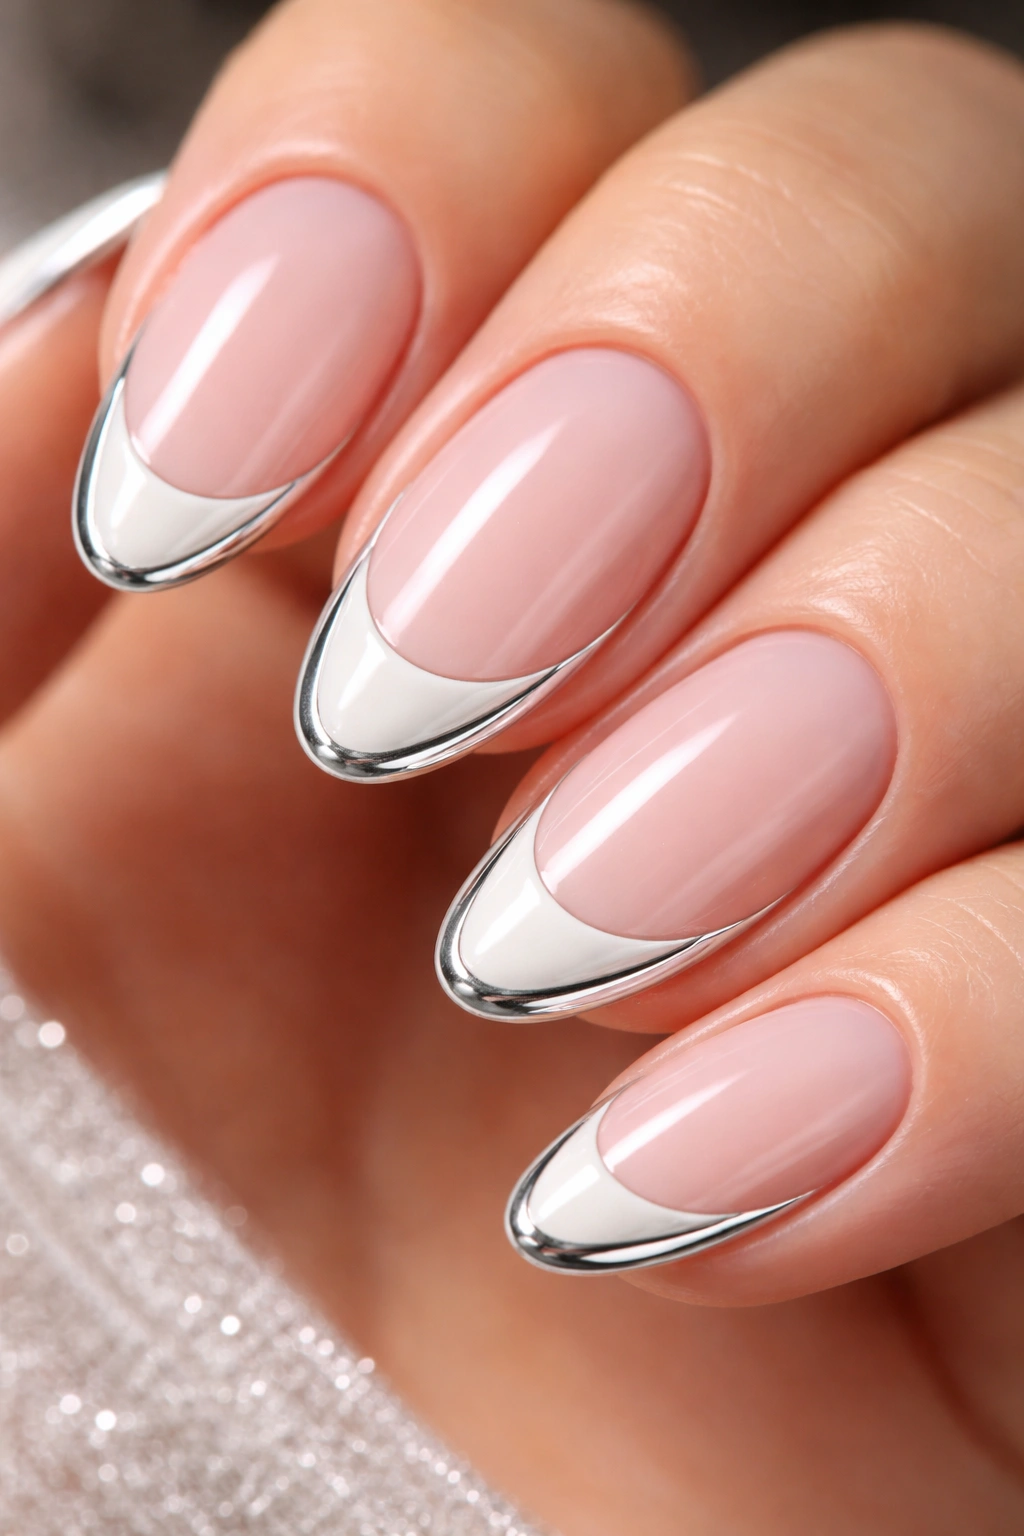
For those who want something that feels modern and edgy, the chrome outline is the answer. You do your standard French tip in white, and then use a metallic silver or gold chrome polish to trace the outer edge of the white tip.
Why Contrast Matters
Chrome provides a stark, high-contrast finish against the soft white. On a short almond nail, this creates a frame. It’s bold, but because it’s limited to just the tip, it doesn’t feel overwhelming. It catches the light differently than the white polish, creating a depth that makes the nail look “expensive.”
Application Technique: Use a very thin liner brush. If you don’t have a chrome polish, you can use a metallic nail art pen. These pens are designed to be held like a ballpoint, which makes drawing that thin, metallic border around the white tip much easier than using a traditional brush.
11. The Floral Accent Corner
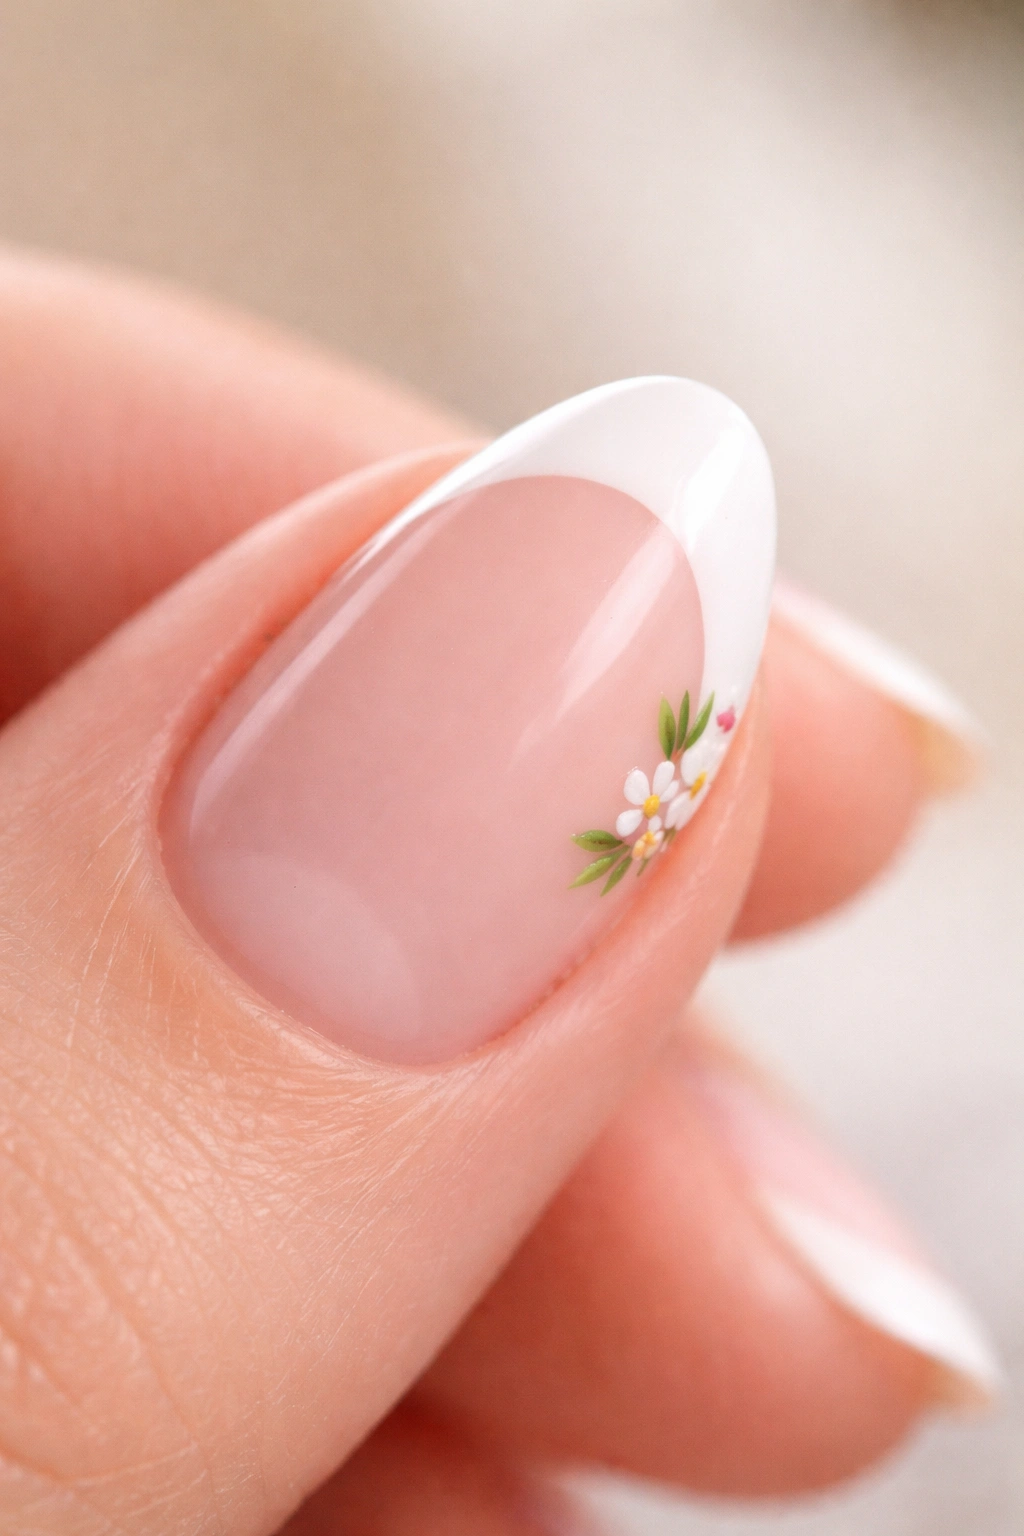
You don’t need a huge canvas to incorporate nail art. On a short almond nail, a tiny, hand-painted flower tucked into the corner of the white tip adds a delicate, feminine touch. It breaks up the monotony of the French design without distracting from the shape.
Placement Strategy
The key here is restraint. Do not put a flower on every nail. Choose one or two accent nails—usually the ring finger or the thumb. Place the flower at the edge where the white tip meets the base, just off-center.
Simplifying the Art: You don’t need to be an artist to do this. Use a dotting tool. Place five small dots of a soft pink or yellow polish around one central dot of a different color. Once it dries, you have a perfect, simple daisy. It is easy, quick, and looks much more complex than it actually is.
12. The Ombré Fade
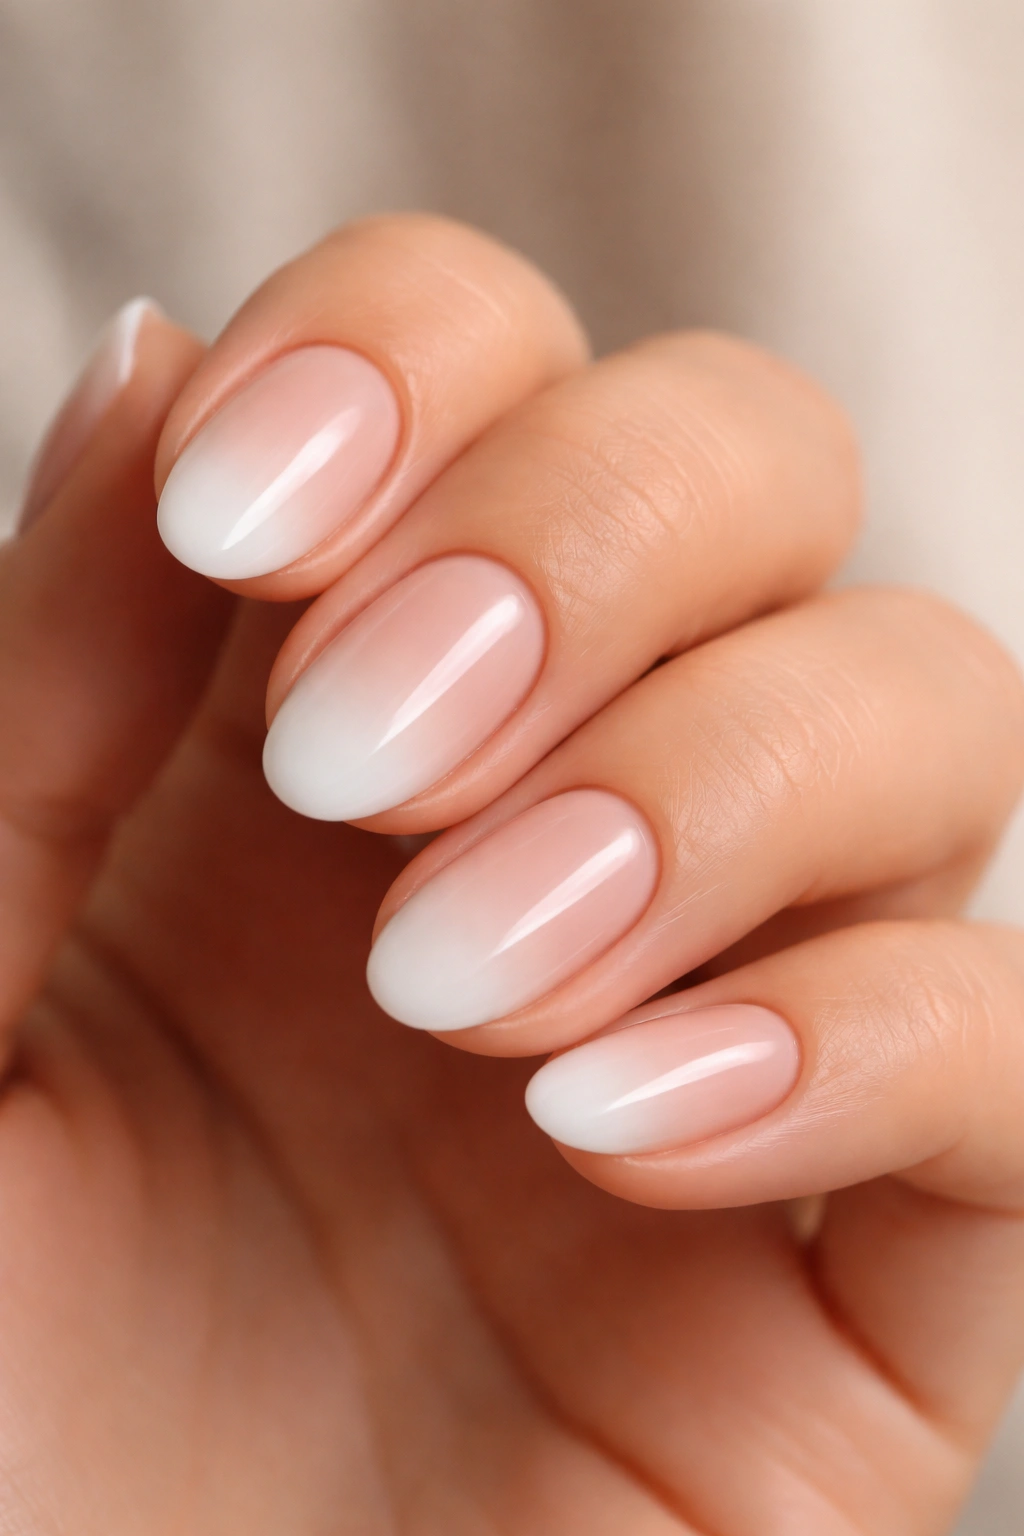
This is often called the “Baby Boomer” nail in some circles. It is the ultimate soft-focus French. Instead of a distinct, crisp white line, the white fades into the pink or nude base. It is elegant, timeless, and very forgiving on shorter nails because there is no harsh line to mess up.
The Sponge Technique
You will need a small cosmetic wedge sponge. Paint a stripe of white polish and a stripe of your nude base color directly onto the sponge, side by side. Dab the sponge onto your nail. The colors will blend together in the middle, creating a seamless, gradient fade.
Why It’s Perfect for Short Nails: Because there is no sharp line, you don’t have to worry about whether your smile line is symmetrical or deep enough. The focus is on the blend, which makes your fingers look long and soft. It is a very flattering, “clean” look that works for any occasion.
13. The Half-Moon Hybrid
This style combines the French tip with a “half-moon” or “reverse French” at the cuticle. You paint the tip white, and then paint a tiny, thin moon shape in the same white color at the base of the nail near the cuticle. It creates a symmetrical balance that looks very vintage and chic.
The Retro Influence
This look feels like it was plucked from a classic beauty editorial from decades past. It’s structured and precise. On a short almond nail, it creates a sense of “bookending”—the white at the tip mirrors the white at the base, which emphasizes the almond curve beautifully.
Precision Tip: For the half-moon, use a hole-punch reinforcement sticker (the kind used for loose-leaf paper). Place it over the cuticle area to create a perfect, clean curve. Paint your moon, let it dry for a few seconds, then peel the sticker off. It is the easiest way to get that perfect, rounded cuticle edge.
14. The Minimalist Pearl Stud
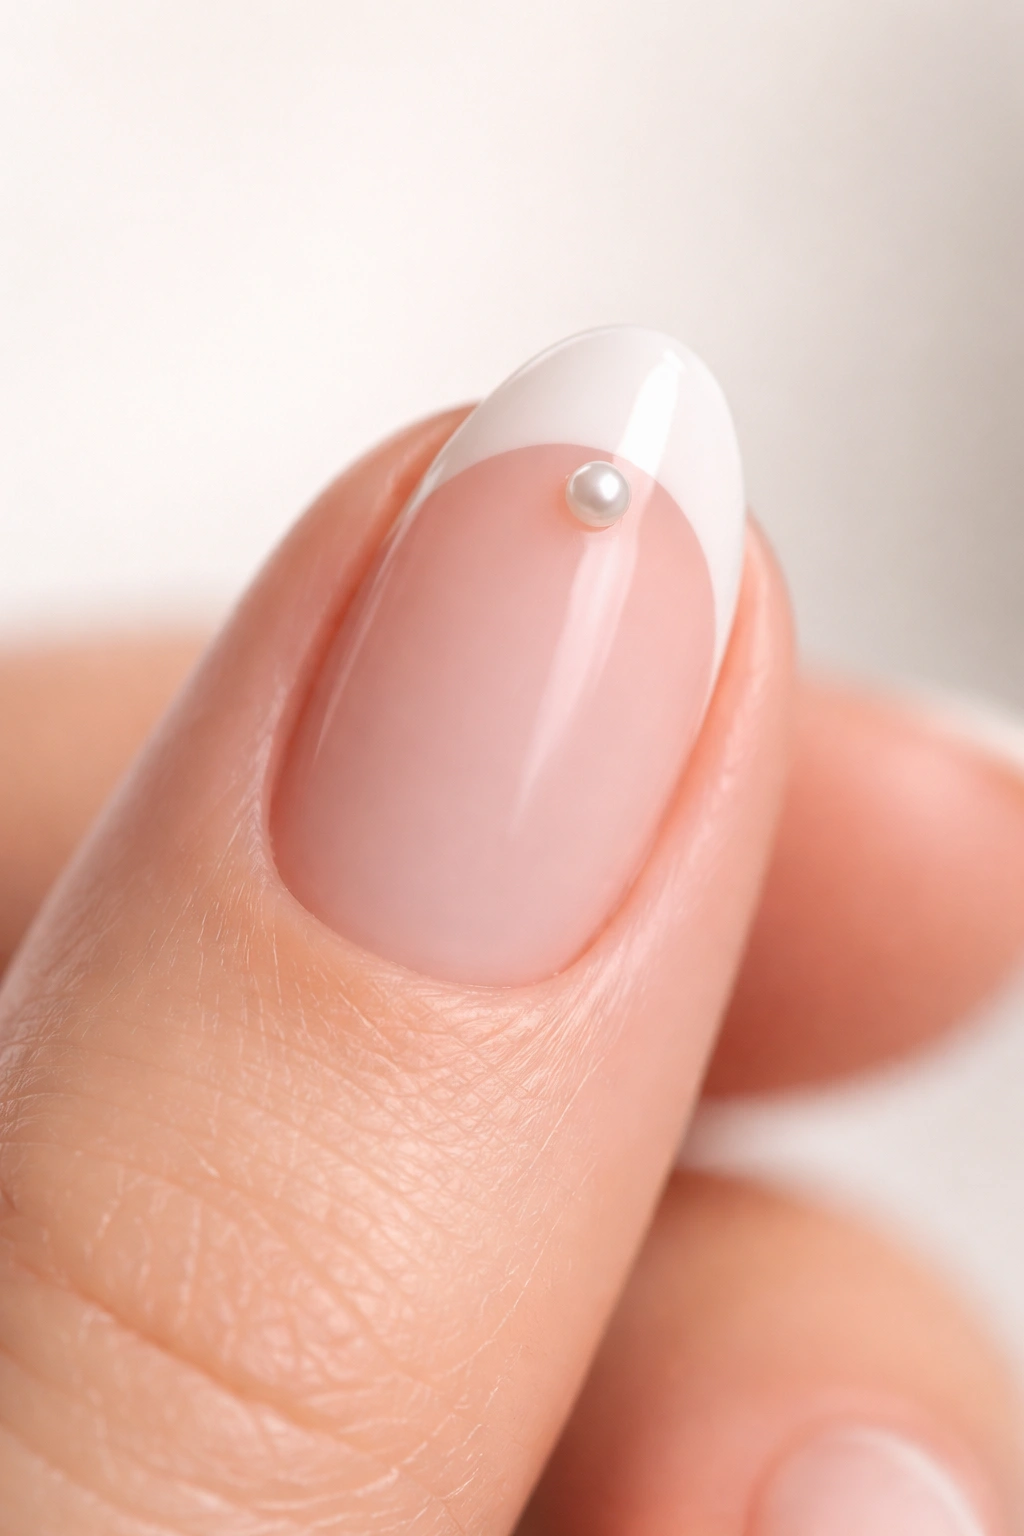
Sometimes, you want the French manicure to be the base for something a bit more dimensional. A single, tiny, flat-back pearl or a gold stud placed at the very center of the smile line (where the white meets the base) adds a touch of jewelry to your manicure.
The Jewelry Aesthetic
This is “quiet luxury” in nail form. A tiny 1mm stud is enough. Do not go for the large, chunky gems—they will snag on your clothes and fall off within a day. A flat-back stud adheres easily with a drop of topcoat or nail glue.
Durability: The most important thing here is the topcoat. If you don’t seal the edges of the stud with a generous layer of high-quality topcoat, it will catch on your hair or fabric and pop off. Ensure you “cap” the edge of the stud so the topcoat flows over and around it, locking it in place.
15. The “Barely There” Blush Base
This is for the person who loves the French look but hates the look of a stark white-on-nude contrast. The blush base uses a very sheer, almost translucent pink jelly polish as the foundation. It makes the nail look like healthy, natural skin.
The Healthy Glow
When you apply a crisp white tip over a translucent, jelly-like pink base, the white doesn’t look like painted-on stripes. It looks like the natural white edge of a healthy nail, just enhanced. It is the most natural-looking variation you can choose.
Why It Wins: It requires the least amount of maintenance. Because the base is so close to your natural skin and nail color, when your nails grow out, the “gap” at the cuticle is much less noticeable than it would be with a heavy opaque base. This is the ultimate “low maintenance” French manicure.
Final Thoughts
The beauty of the short almond French manicure lies in its incredible versatility. You are not locked into one specific look. By playing with the thickness of the tip, the finish of the topcoat, and the addition of subtle accents, you can customize this classic style to fit your personal aesthetic perfectly. Whether you are aiming for a sharp, modern, graphic look or something soft, sheer, and romantic, the fundamental shape remains the same.
Remember that the “perfect” manicure is often just the one that makes you feel most like yourself. Don’t stress too much about the smile line being identical on every finger. In reality, no one is holding your hands under a microscope. Keep your tools clean, invest in a decent liner brush, and embrace the process of refining your technique over time. With a little practice, you will find that these shorter styles are not only easier to maintain but often look far more sophisticated than their longer counterparts. Take your time, focus on the prep, and enjoy the clean, polished result.
