

Black coffin nails are the ultimate statement for anyone who wants bold, sophisticated style without sacrificing elegance. Whether you’re drawn to gothic glamour, minimalist chic, or eye-catching embellishments, the coffin shape—with its tapered sides and squared-off tip—creates the perfect canvas for creativity. Unlike short nails that limit design possibilities or super-long extensions that demand constant maintenance, medium coffin nails hit that sweet spot: they’re dramatic enough to showcase intricate details, practical enough for everyday wear, and absolutely stunning in black.
Black is the unsung hero of nail art. It sounds simple, but it’s genuinely the most versatile color in your arsenal. Black nails work against every skin tone, complement every outfit, and create striking contrast for metallic accents, gemstones, or negative space designs. The coffin shape amplifies this drama—the elongated profile makes each design feel more intentional, more curated, more you. Medium-length coffin nails are also incredibly forgiving for DIY manicures since you’re not fighting with extreme length that snags constantly.
The designs below go far beyond basic solid black. You’ll find sophisticated geometric patterns, delicate minimalist takes, show-stopping embellishments, and moody aesthetic options that range from edgy to ethereal. Each idea works beautifully on medium coffin nails and can be adapted to match your personal style and skill level. Let’s explore the best black coffin nail designs that will have you skipping the salon (or inspiring your next appointment).
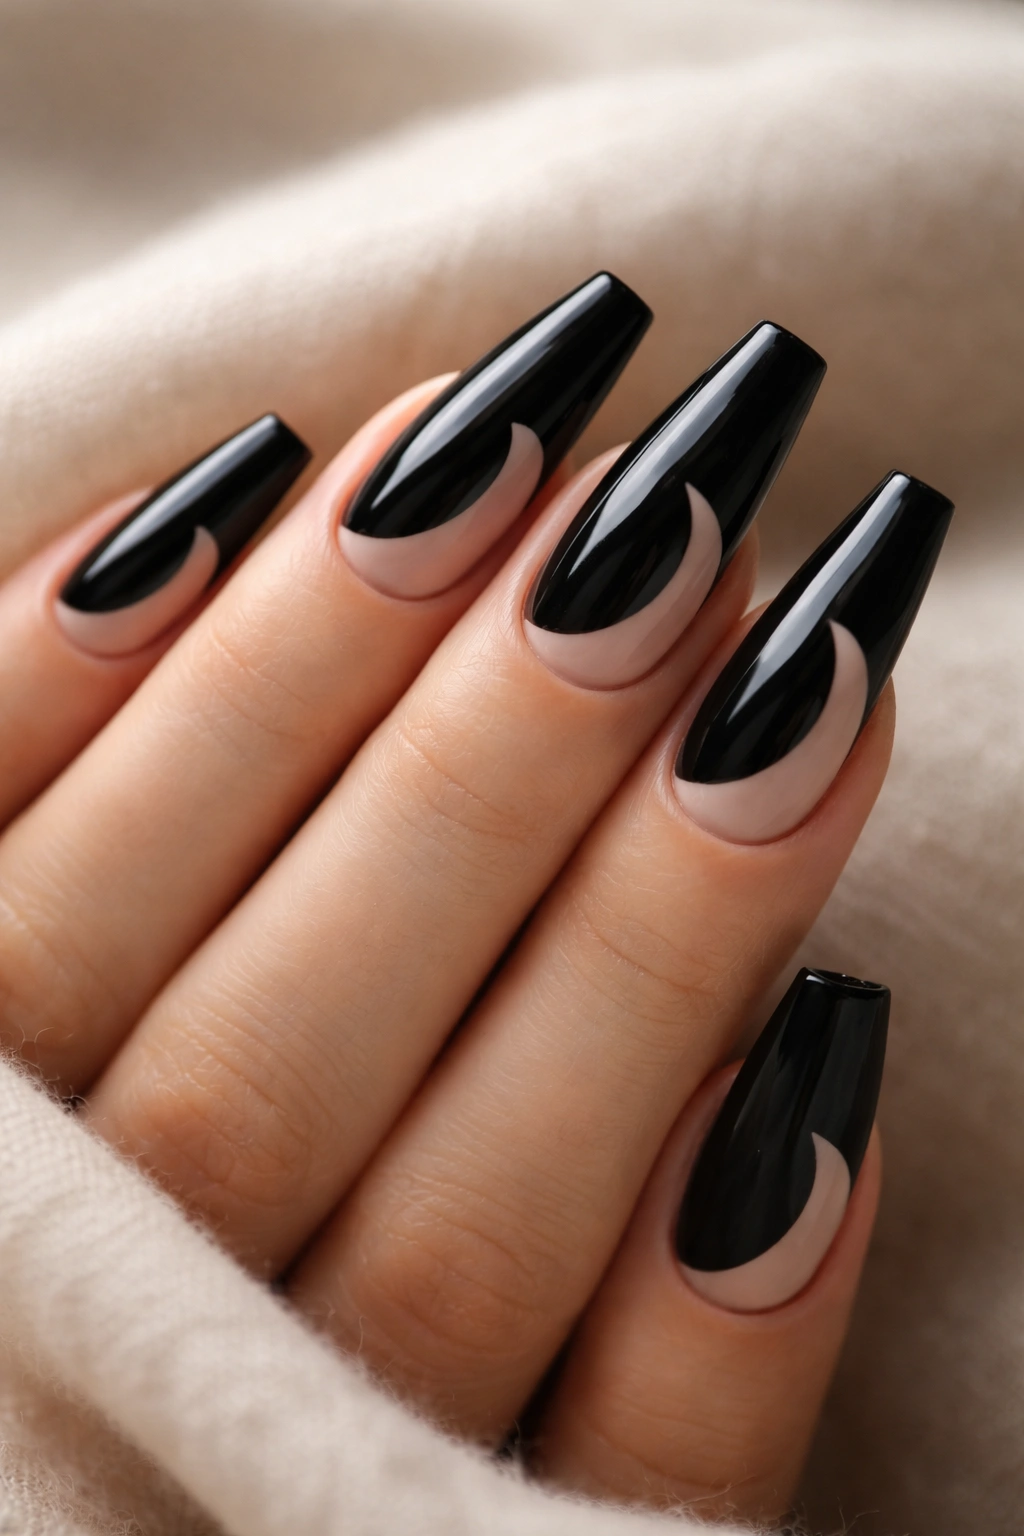
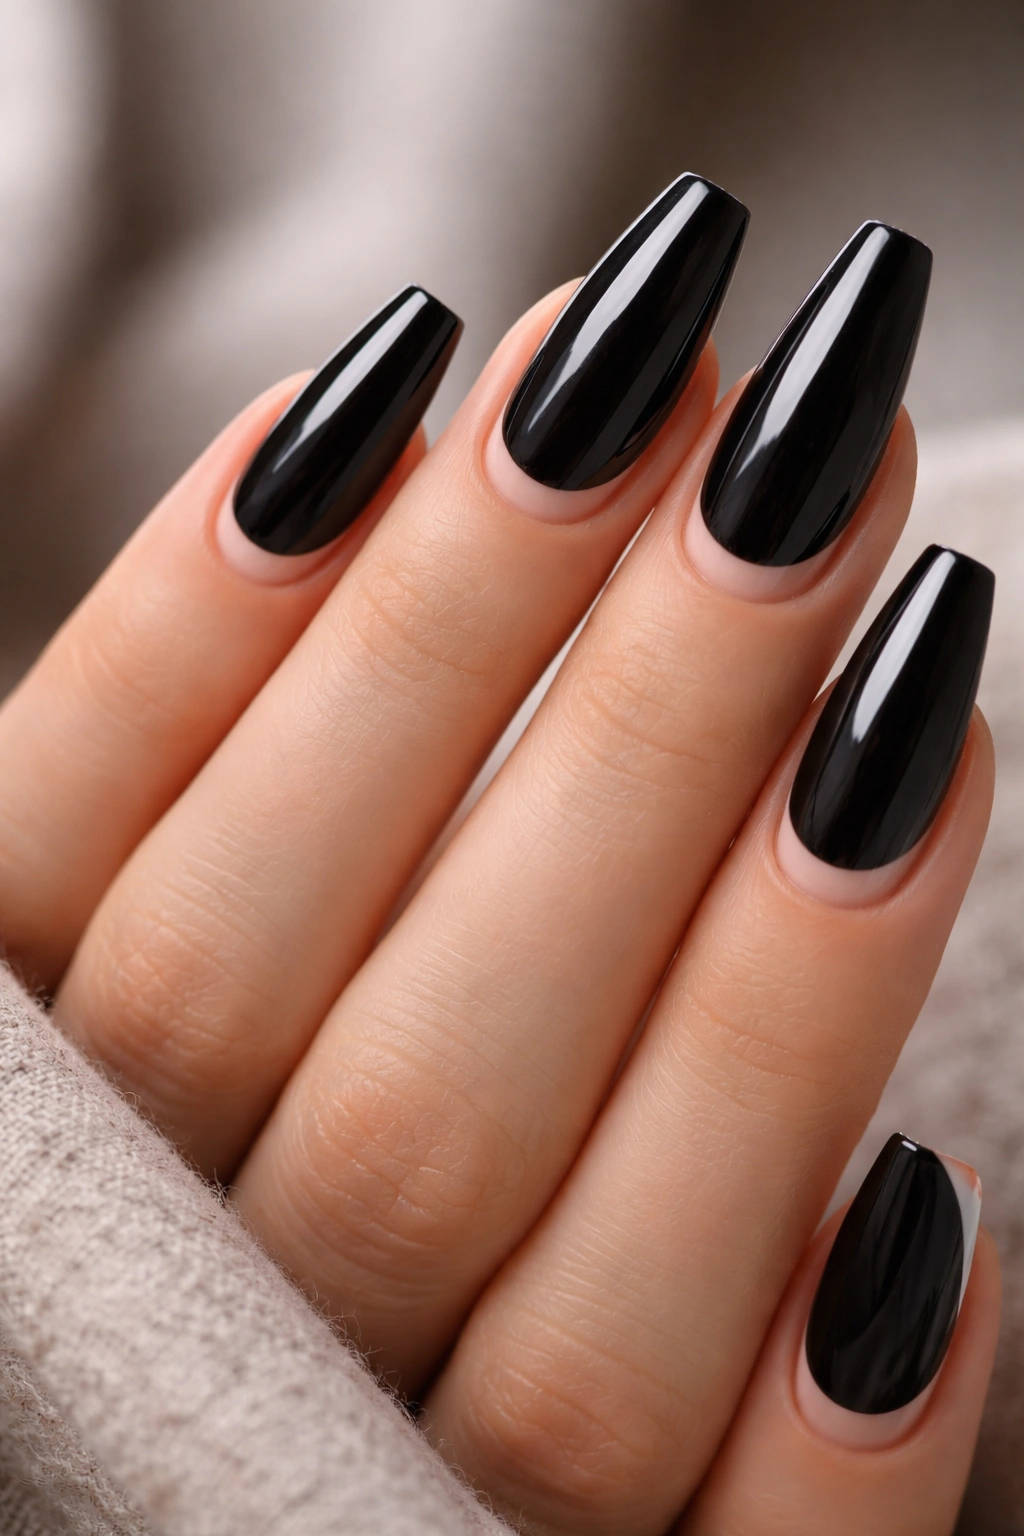
1. Classic Glossy Black with Nude Tips
This design plays with negative space in the most elegant way possible—a sleek glossy black base with a thin nude or nude-pink tip. The contrast creates visual interest without being loud, making it perfect for professional settings or anyone who loves sophisticated restraint. It’s also incredibly easy to execute at home since you’re just applying two solid colors.
Why This Design Works
The nude tip against black creates an optical illusion of length and adds a subtle French mani vibe that feels modern and intentional. Glossy black reflects light beautifully on the coffin shape, emphasizing the geometric nail tip. This design reads as expensive and polished without requiring any special techniques or intricate artwork.
How to Get It Right
- Paint the entire nail with two coats of glossy black polish, making sure coverage is even and streak-free
- Use a thin, precision brush or thin tape along the tip to create a sharp line between black and nude
- Apply nude or nude-pink polish only to the tip area, keeping the line clean and straight
- Seal with a high-shine top coat that deepens the black and makes the contrast pop
- If your brush hand isn’t steady, thin tip guides or striping tape are your best friends
Pro tip: This design looks even more elevated when the nude shade exactly matches your skin tone—it creates an illusion of length that’s almost hypnotic.
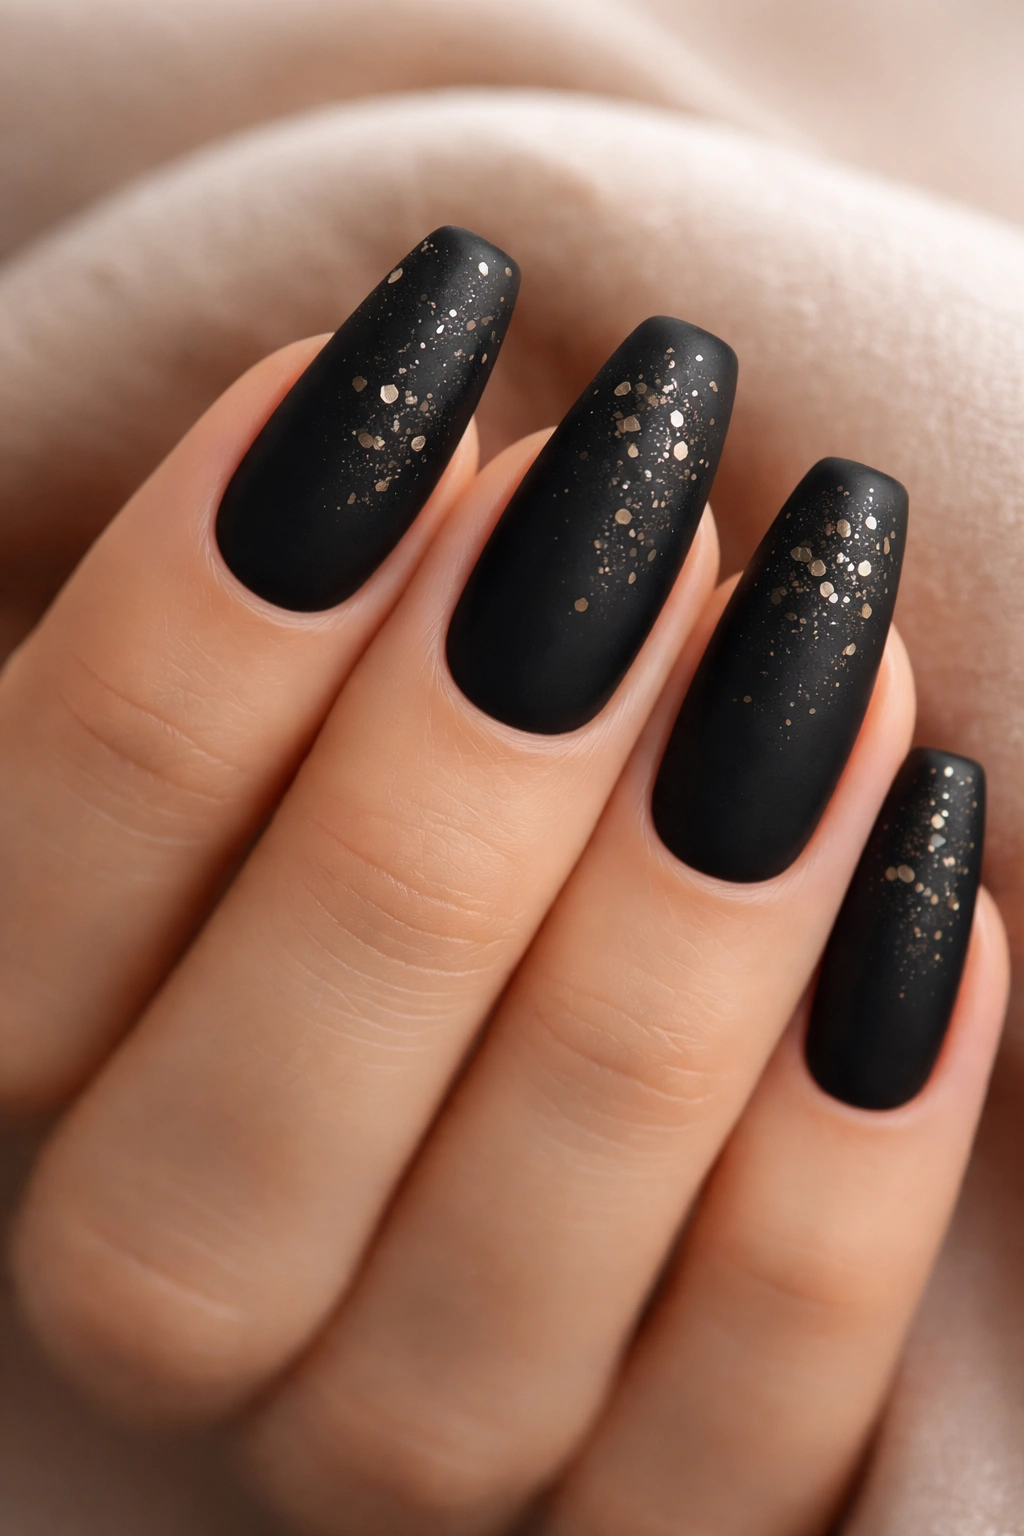
2. Black Matte with Gold Foil Accents

Matte black is moody and undeniably cool, but when you add scattered gold foil pieces across the nail, it transforms into something genuinely luxurious. The matte texture makes the metallic accents pop even more dramatically, creating a luxe aesthetic that reads expensive and intentional.
The Appeal of Matte and Metallic
Matte finishes have a velvety sophistication that glossy can’t quite match, and they feel more editorial and modern. Gold foil against matte black creates stunning visual contrast—the metallic catches light while the matte base absorbs it, creating depth and dimension. The coffin shape gives gold foil the perfect canvas to shine since the wider nail surface lets you create dynamic placement patterns.
Application Tips
- Start with a solid matte black base (two generous coats for full coverage)
- Once completely dry, apply adhesive (tacky top coat, base coat, or nail-safe adhesive) in small areas where you want foil
- Press gold foil pieces into the sticky areas using a foil applicator or gentle finger pressure
- Seal everything with a glossy or matte top coat depending on your preferred finish
- Smaller foil pieces scattered across create a confetti effect; larger pieces create bold statement accents
Insider note: Matte black can look almost charcoal-gray under certain lighting, so test your polish under natural daylight before committing to a full mani.
3. Ombré Black to Deep Purple Gradient
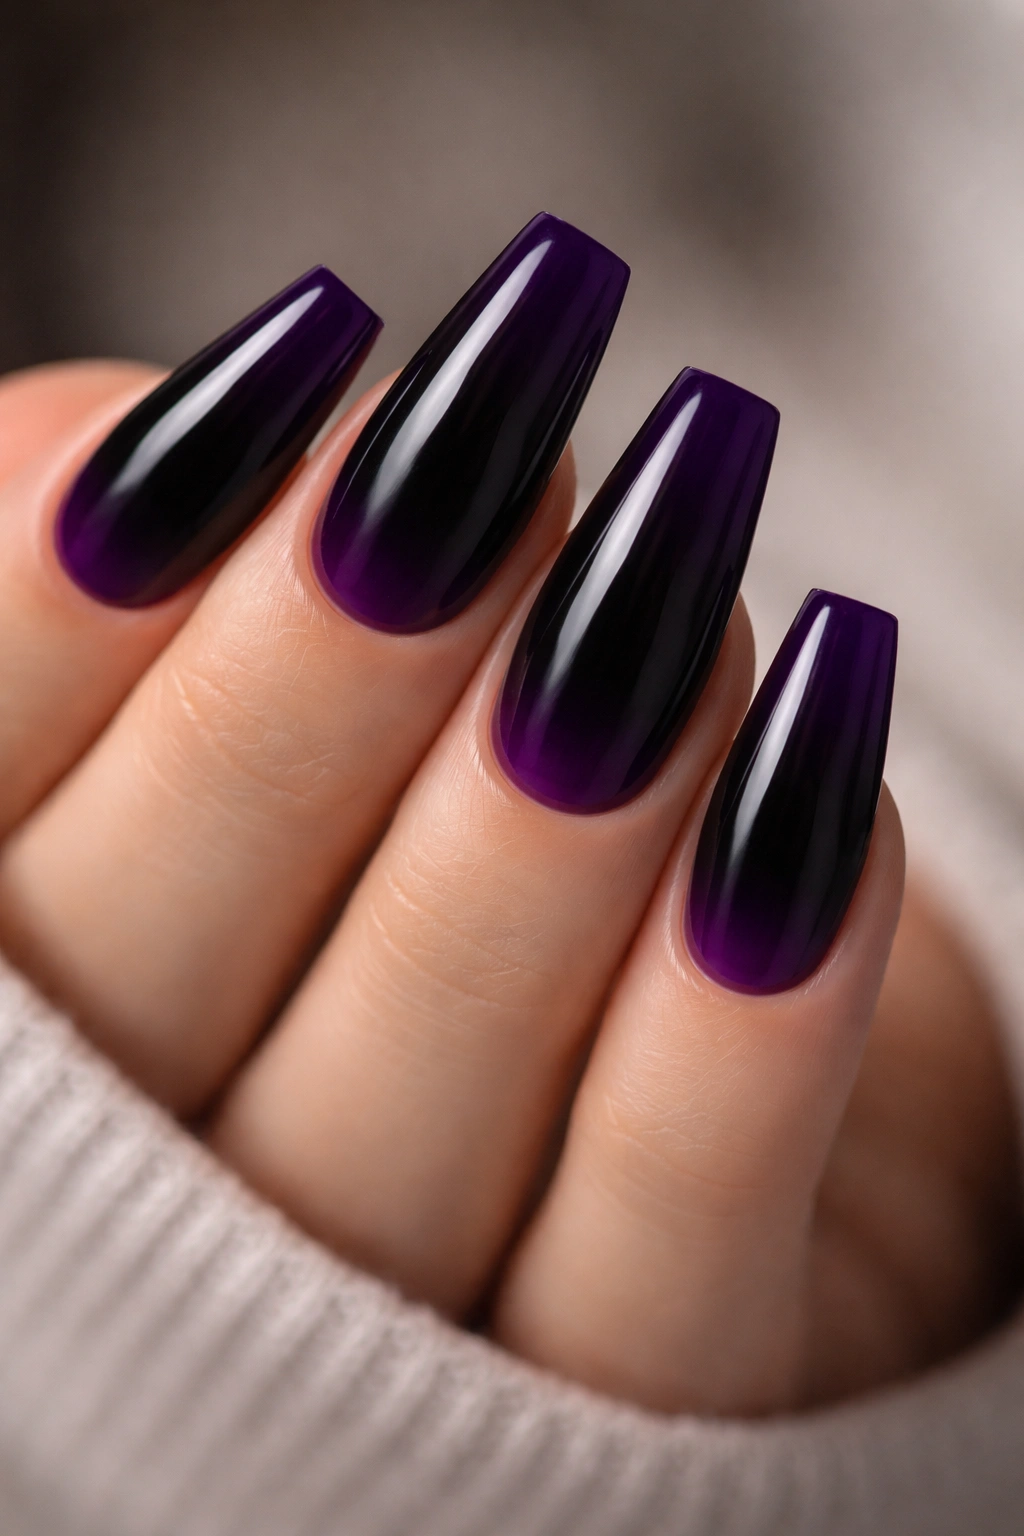
This design uses the coffin’s length to create a stunning gradient that transitions from solid black at the base to deep, jewel-tone purple at the tip. The gradient feels both moody and magical—it’s the kind of design that stops people mid-conversation.
Creating a Smooth Gradient
A gradient manicure requires a sponge and two complementary shades. Black to purple works beautifully because purple reads as a natural extension of black’s darkness. The sponging technique creates a soft, blended transition that looks infinitely more sophisticated than a sharp line. On medium coffin nails, there’s enough surface area to showcase the gradient beautifully.
Step-by-Step Gradient Process
- Apply a smooth base coat to your nails and let it dry completely
- Paint the entire nail with black polish and let it dry
- On a makeup sponge, apply black to one end and deep purple to the other with a small gap between them
- Blend the colors slightly on the sponge by dabbing the edge where they meet
- Press the sponge firmly onto the nail tip area and dab repeatedly until the gradient transfers
- Repeat the sponging process 2-3 times to build color intensity and smooth the transition
- Clean up the edges with a cotton swab and rubbing alcohol
- Seal with a glossy top coat
Worth knowing: Sponging can be messy the first time—practice on a few nails to get the pressure and dabbing motion right before perfecting your technique.
4. Minimalist Black with Thin White Line Art
This design strips everything back to elegant simplicity: solid black with delicate white line work. Think geometric shapes, abstract lines, or tiny minimalist symbols. The coffin shape makes even simple line art feel intentional and curated since the nail’s proportions highlight linear details beautifully.
The Power of Negative Space
White lines on black create maximum contrast, which means even thin, delicate line work reads clearly from a distance. This is minimalist nail art that doesn’t whisper—it speaks confidently but without overwhelming your nails. The geometric coffin shape pairs beautifully with straight lines, angles, and structured designs.
Design Ideas to Try
- Simple geometric shapes: triangles, squares, or broken rectangles scattered across the nail
- Vertical or horizontal stripes of varying thicknesses
- Abstract line work that flows diagonally across the nail
- Tiny minimalist symbols (moons, suns, stars) drawn with a thin brush
- Intersecting lines that create optical interest without visual clutter
Pro tip: A white gel pen or fine-tipped nail art pen gives you more control than a tiny brush if you’re doing this at home, and the opaque white shows up perfectly over black.
5. Black Coffin Nails with Rhinestone Accents
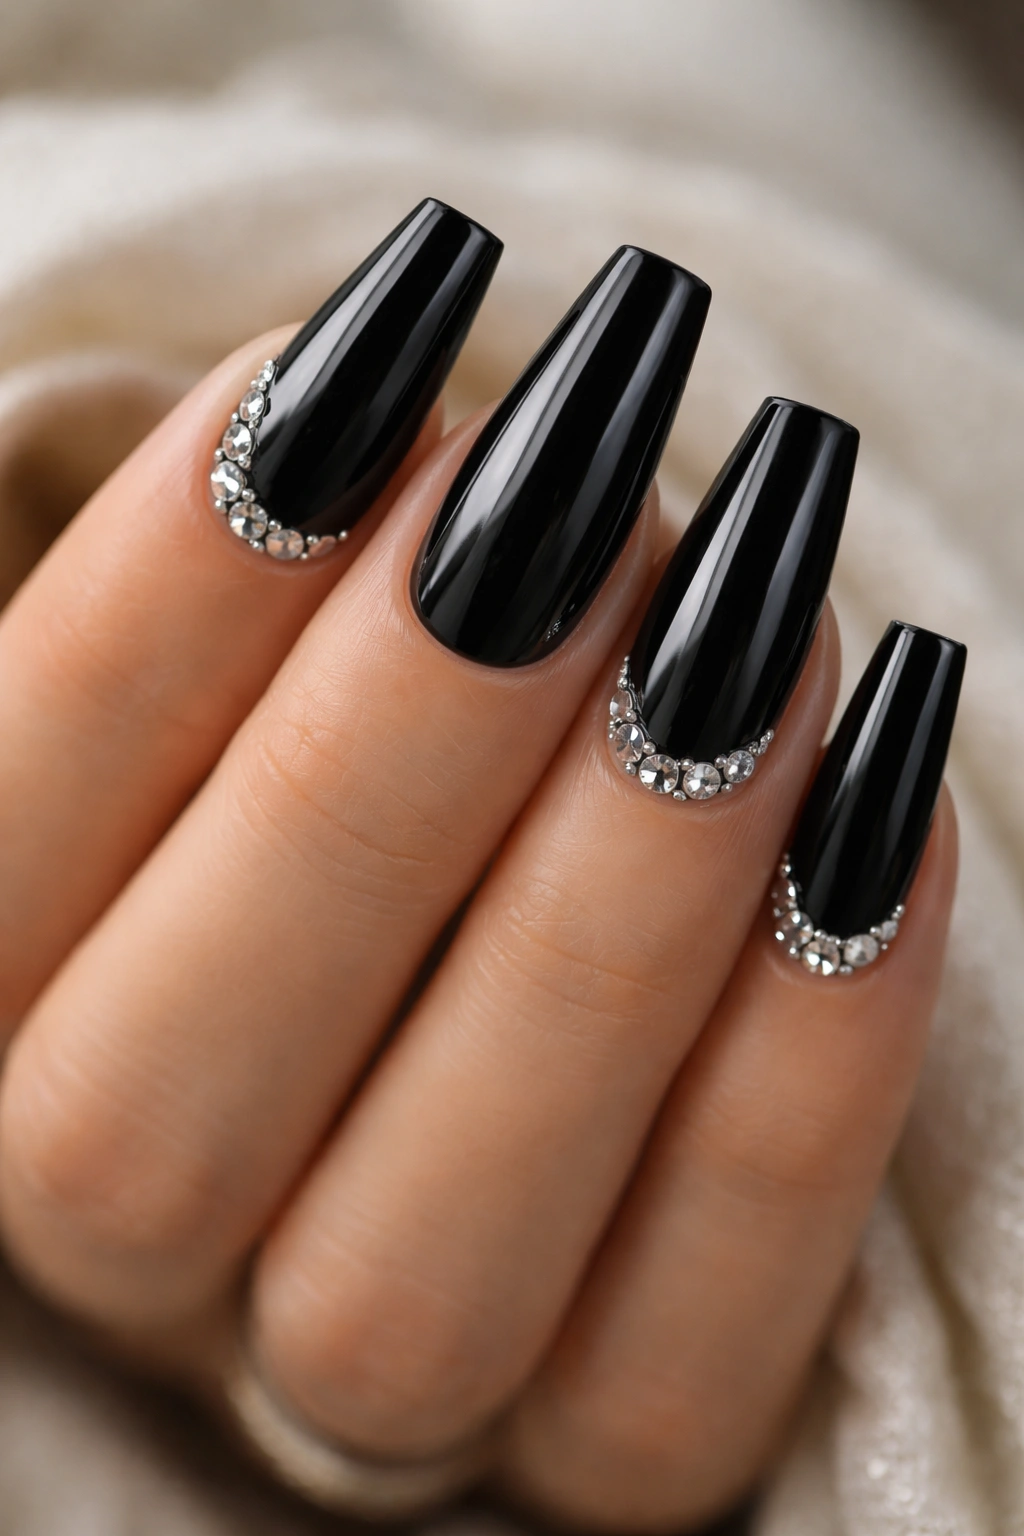
Rhinestones turn any manicure into an occasion-ready design, and they’re stunning on black. The contrast between the matte or glossy black base and the sparkle of crystals creates drama that’s perfect for nights out, special events, or anytime you want your nails to catch light.
Strategic Rhinestone Placement
The key to wearing rhinestones without looking costume-y is restraint and placement. Instead of covering the entire nail with crystals, focus on accent nails or create a specific design pattern. On medium coffin nails, a rhinestone-covered tip with a clean black base is devastatingly elegant.
Application and Arrangement Patterns
- Apply rhinestones to a base of clear gel, adhesive, or thick top coat so they stick securely
- Create an ombré effect with rhinestones: scattered and sparse near the base, denser toward the tip
- Make a symmetrical line of rhinestones down the center of the nail
- Create a gradient where only the tip is covered in stones
- Use different sizes of rhinestones for visual interest—mix larger statement stones with tiny accent crystals
- Hot-fix rhinestones (the ones with a flat back and heat-activated adhesive) work particularly well on black
Worth knowing: Rhinestones will catch and snag if they extend past the natural nail edge, so save heavily studded designs for your shorter accent nails or special occasions when you can be careful.
6. Black Nails with Holographic Chrome Powder
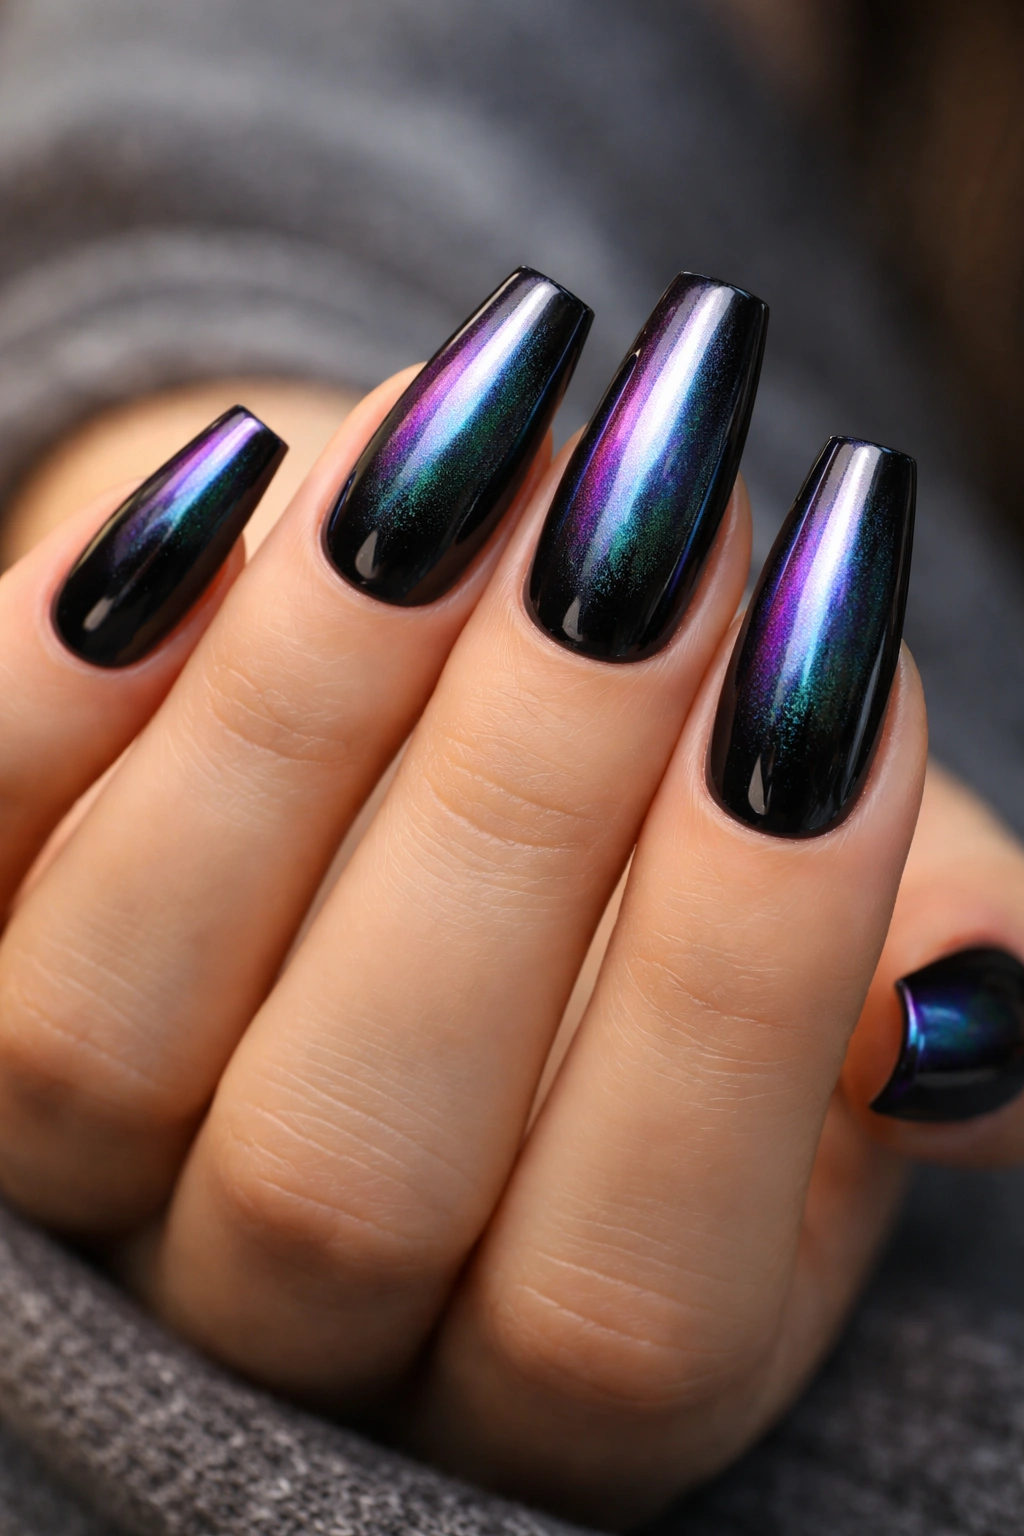
Chrome powder creates an otherworldly, almost alien metallic finish that shifts colors depending on the light angle. When applied over black, holographic chrome creates a stunning opal-like effect that’s genuinely mesmerizing. This is a design that looks completely different indoors versus outdoors, which adds to its appeal.
Understanding Chrome Powder Application
Holographic chrome powder requires specific application technique because it doesn’t stick to regular polish—it needs a tacky base, usually tacky gel or chrome base coat. The powder is ultra-fine and creates that mirror-like metallic finish when applied properly. On black, the effect creates iridescent rainbow shifts that feel luxury and modern.
How to Apply Holographic Chrome
- Apply a base layer of black gel or polish and cure/dry it completely
- Apply a thick layer of tacky gel, chrome base coat, or super-sticky top coat
- Use a soft, dense brush or a specific chrome applicator to gently press the holographic powder into the sticky layer
- Work in sections, applying powder and then brushing away excess
- Build the opacity gradually—multiple light layers look better than one thick layer
- Seal with a smooth top coat to lock the powder in place
- Note: Chrome powder manicures require UV gel or at-home lamp curing
Insider note: Holographic chrome can be challenging for beginners, so if you’re trying it for the first time, consider getting it done professionally to see how it should look, then attempting it at home once you know what you’re aiming for.
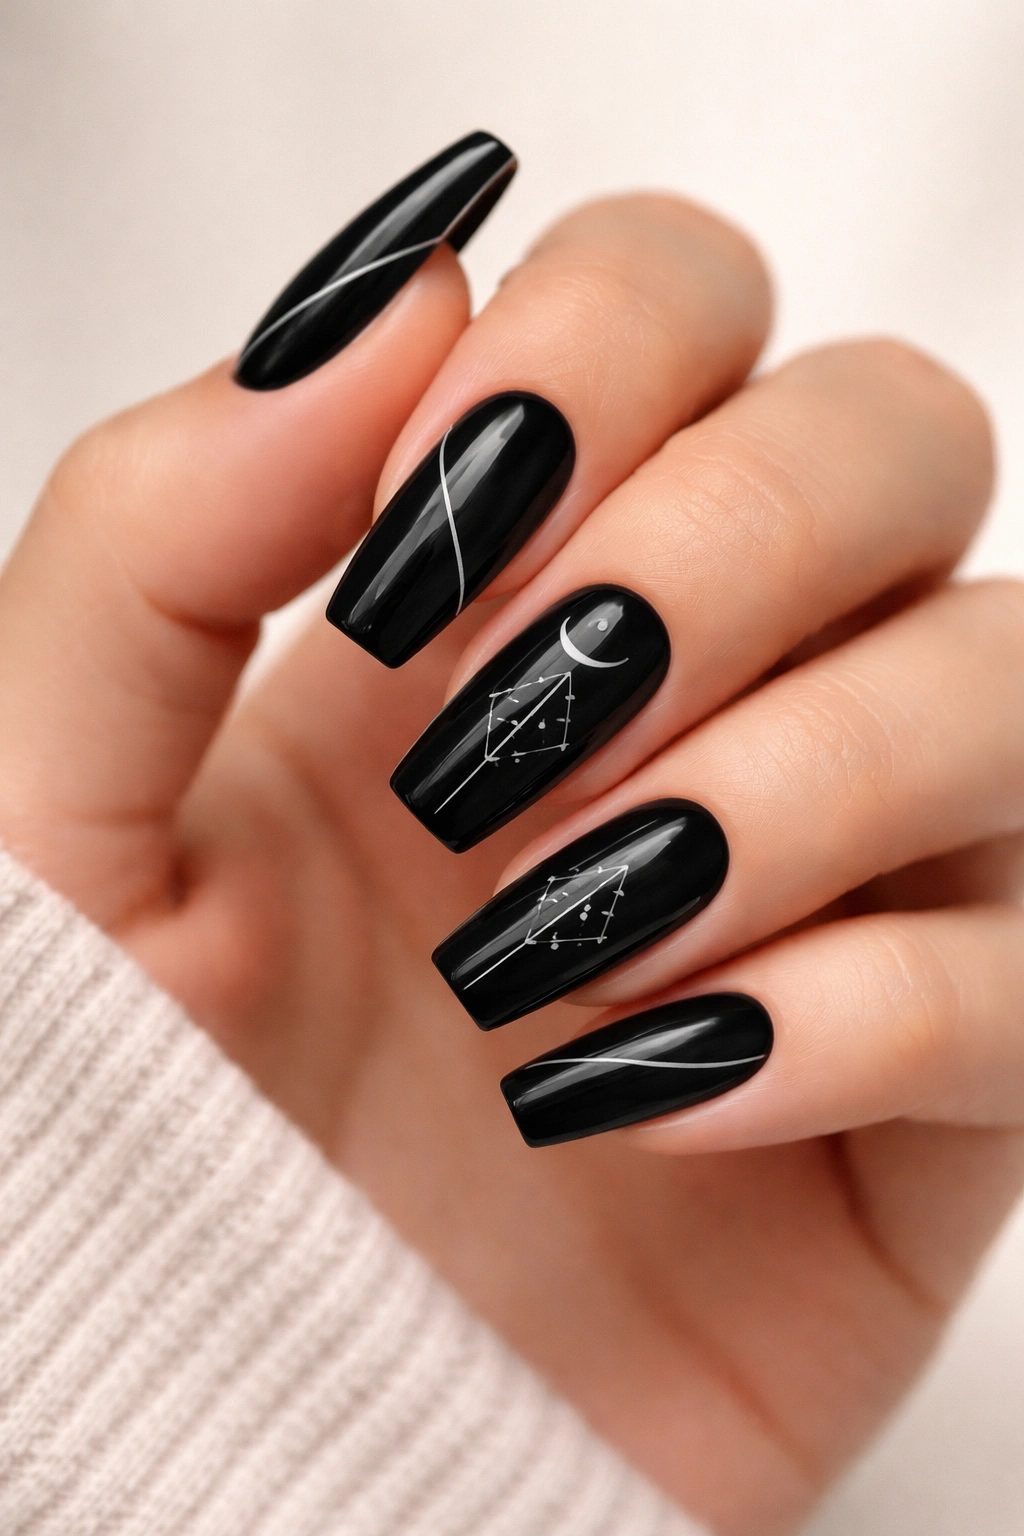
7. Matte Black Nails with Subtle Constellation Design

This design combines matte sophistication with tiny delicate dot work that creates constellation patterns. The dots are small, scattered, and feel whimsical without being childish—they create visual texture while keeping the design refined and celestial.
Why Constellation Designs Work on Black
Constellations naturally pair with darkness, so black is the perfect background color. The coffin shape gives you enough surface area to plot constellation patterns meaningfully. Matte finish adds to the cosmic, mysterious feeling. This design works beautifully as a full set or as a special accent nail design.
Creating Your Constellation Pattern
- Paint all nails with matte black polish (two coats for full coverage)
- Use a thin brush or dotting tool dipped in white gel or white polish
- Create small dots in loose constellation patterns across the nail
- Connect some dots with ultra-thin white lines to complete the constellation picture
- Different fingers can feature different constellations (Big Dipper, Orion, etc.) for a cohesive themed set
- Keep dots small and spacing irregular—real constellations aren’t perfectly symmetrical
- Seal with a matte or glossy top coat depending on your preference
Pro tip: If traditional constellations feel too literal, create abstract dot patterns instead—the beauty is that any scattered dots read as cosmic and intentional when paired with matte black.
8. Black with Metallic Silver Negative Space Design
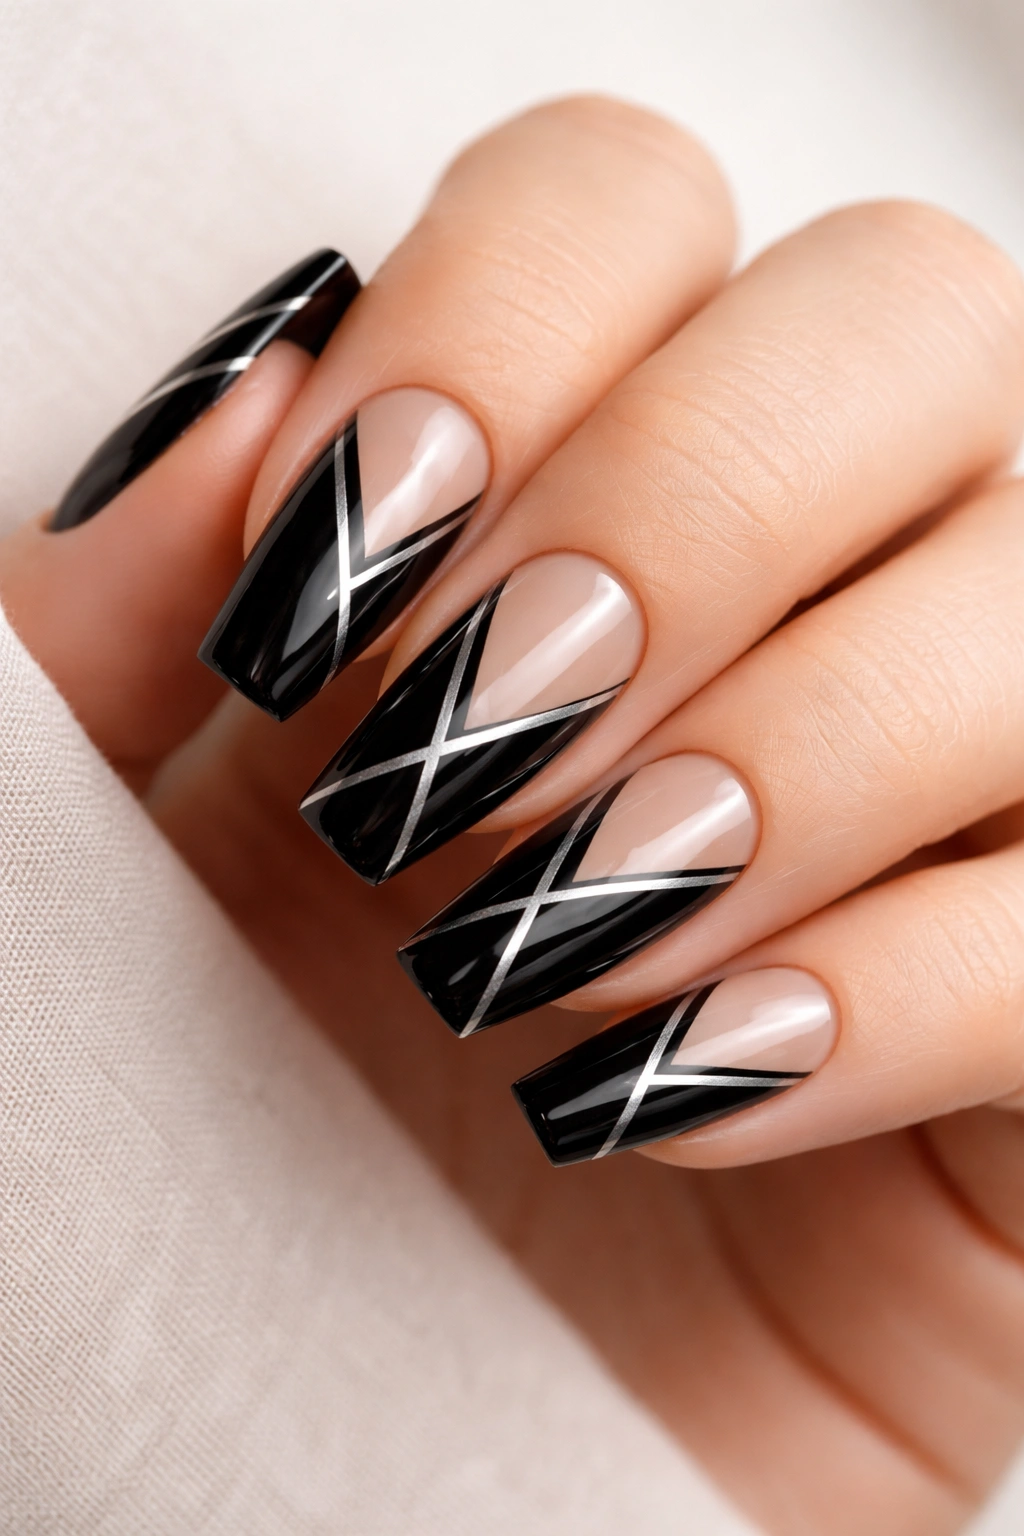
Negative space designs are genius on black because the exposed nail underneath (if it’s nude) or the base color creates striking contrast. A metallic silver pattern layered over black creates depth and dimension, and the coffin shape emphasizes the design’s geometry beautifully.
The Appeal of Negative Space
Negative space designs feel modern and thoughtful because they require precision—leaving areas intentionally bare signals intentionality. When combined with a metallic accent color, the effect becomes luxurious. On medium coffin nails, negative space designs have enough room to feel impactful without looking chaotic.
Negative Space Design Ideas
- Geometric shapes (triangles, diamonds, or angular segments) left bare with silver metallic outline
- A thin silver line running vertically or diagonally with small geometric cutouts
- Abstract wavy lines defining areas of negative space
- Symmetrical shapes (circles, squares) cut out from the black with silver accent lines
- A gradient of negative space shapes that decrease in size from base to tip
Worth knowing: Negative space designs require steady hands or thin-line striping tape to keep edges crisp. Take your time with these designs because precision is what makes them read as intentional versus accidental.
9. Glossy Black with Pearl Accent Detail
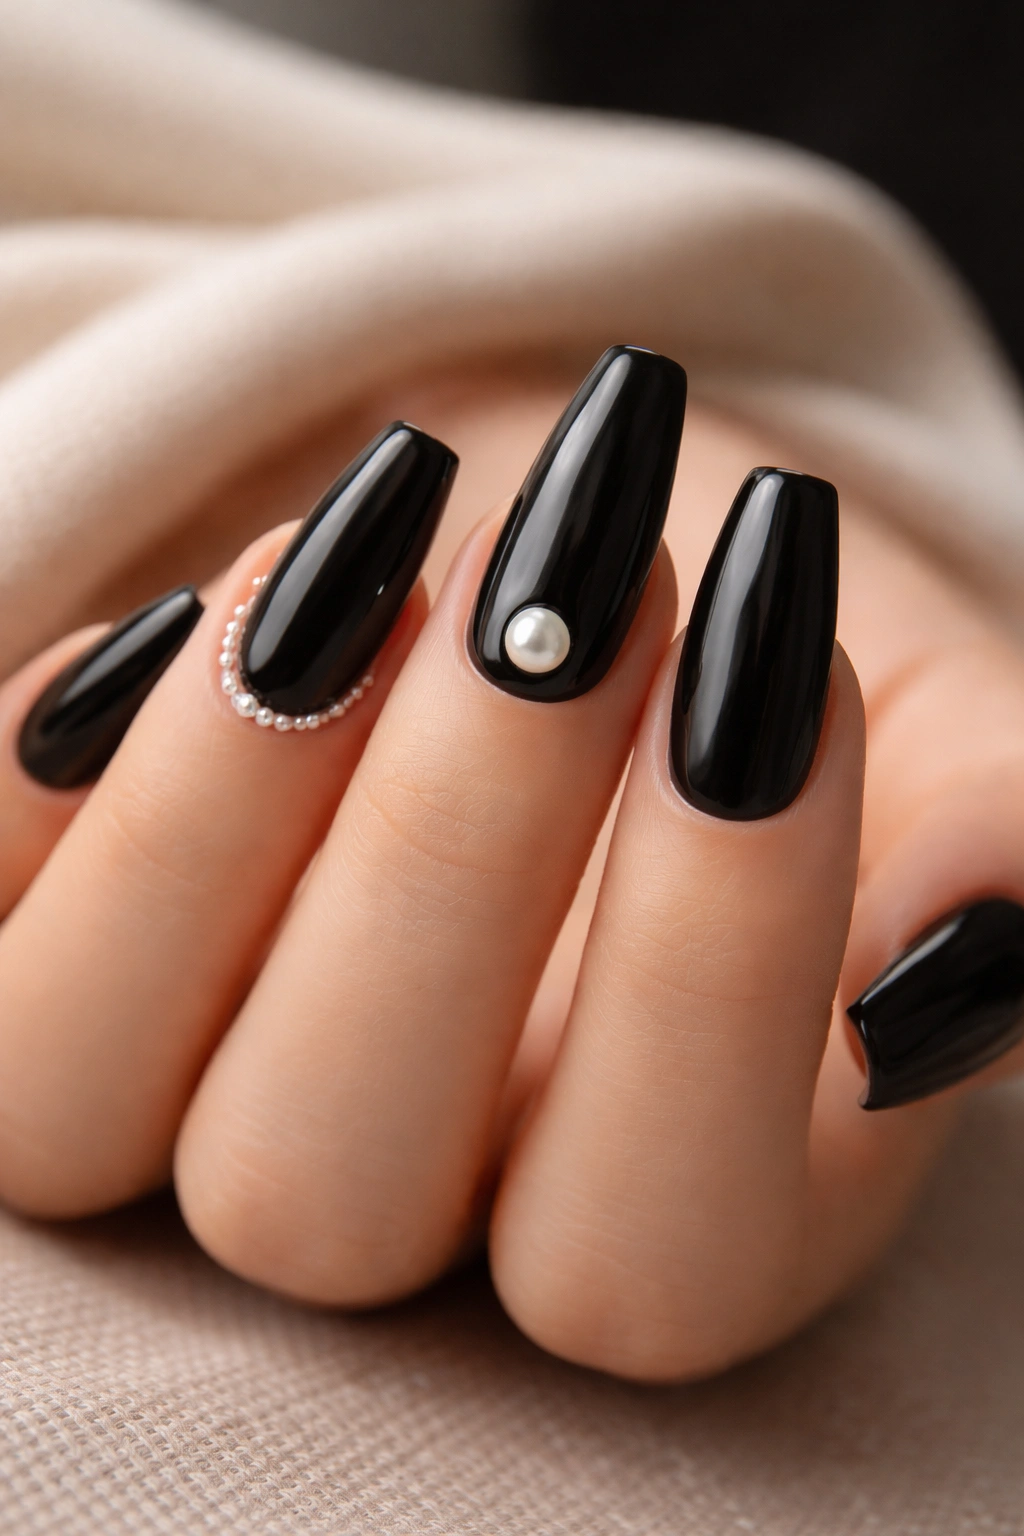
This design keeps the base simple and glossy black while adding a single pearl bead or multiple pearl beads as an accent. Pearls against black feel classic and sophisticated—think luxury jewelry translated to nails. They’re perfect for anyone who wants a statement without committing to a bold design.
Why Pearls and Black Are a Power Couple
Pearls have an inherent elegance, and black is the perfect neutral showcase for their subtle iridescence. This combination feels timeless and sophisticated, appropriate for weddings, professional settings, or everyday elegance. The coffin shape’s length gives you multiple placement options—a pearl on the tip, along the side, or scattered across the nail.
Pearl Placement and Application
- Use pre-glued pearl beads or rhinestones (or use nail-safe adhesive to attach them)
- A single pearl positioned off-center on the tip looks editorial and intentional
- Three pearls arranged asymmetrically down the center create visual interest
- Pearls placed along the outer edge emphasize the coffin’s elongated shape
- Mix pearl sizes for sophistication—one larger pearl with smaller ones around it
- Ensure adhesive is strong enough for daily wear and movement
- Seal the pearls with a clear top coat to protect and stabilize them
Pro tip: If loose beads feel risky, pearl nail stickers are a surprisingly elegant option that stick directly to polish and look remarkably realistic.
10. Black Nails with Delicate Gold Geometric Patterns
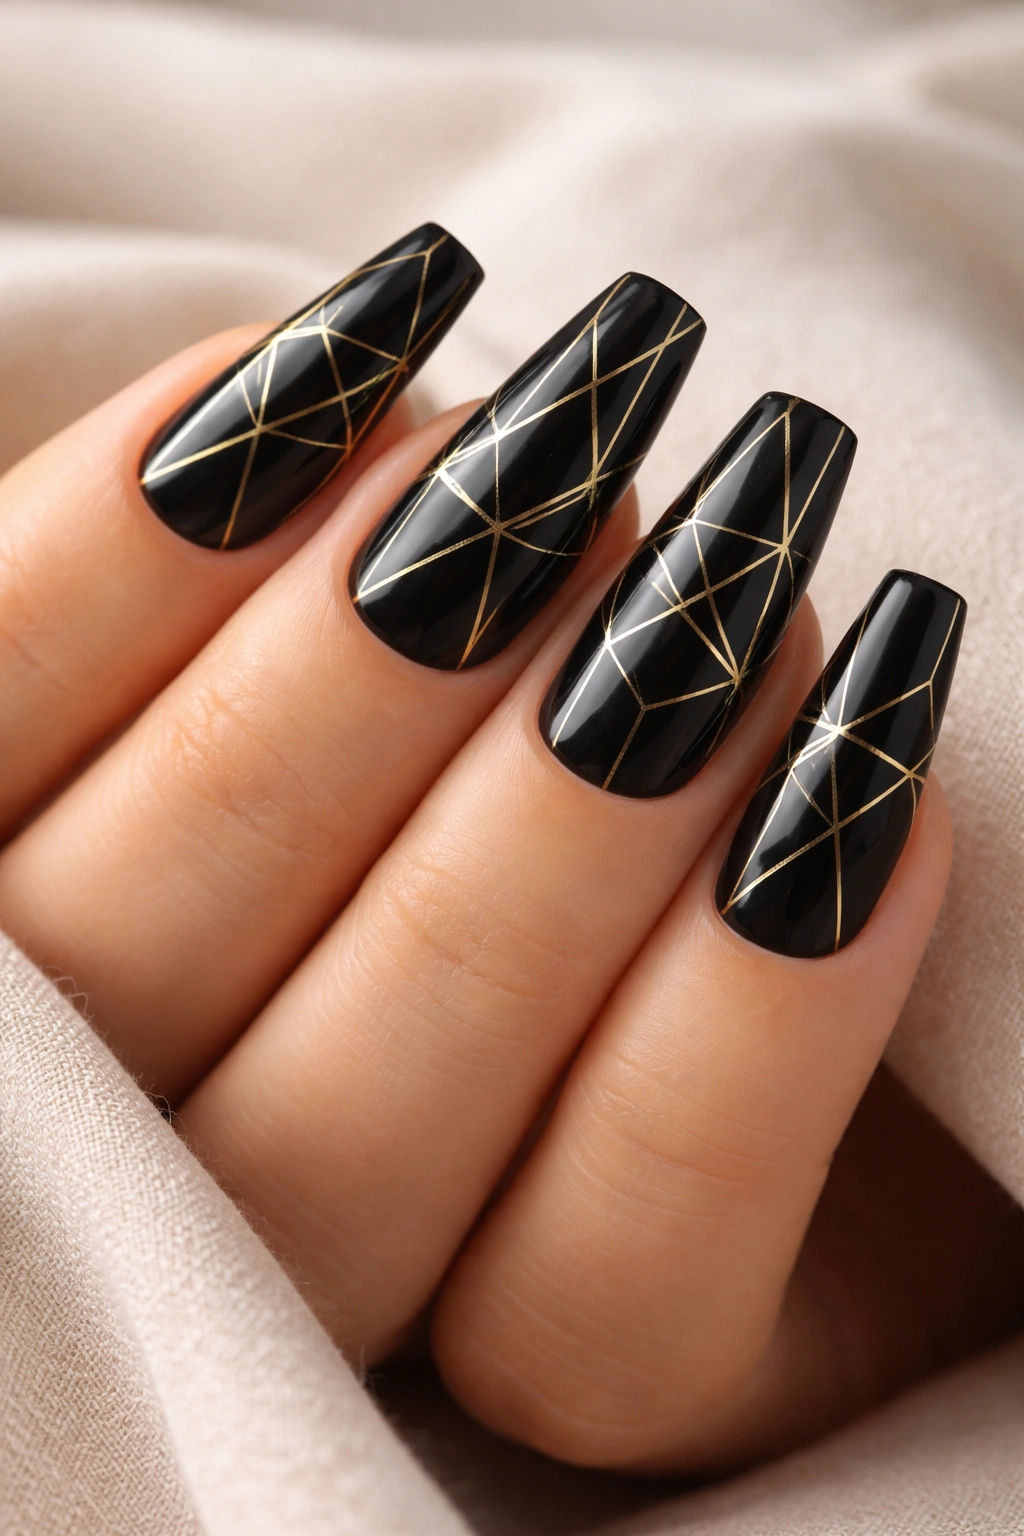
This design uses thin gold lines to create geometric patterns on a glossy black base. Think triangles, hexagons, or interconnected shapes. The patterns can cover the entire nail or create a single statement design on the tip. Gold geometry on black feels both modern and somewhat luxe.
Geometric Design Versatility
Geometric patterns are endlessly customizable—you can go minimal with just a few lines or create intricate all-over patterns. The coffin shape’s straight edges and clean proportions actually complement geometric designs perfectly. Gold is warm enough against black to create visual interest without being too bright.
Geometric Pattern Ideas
- Honeycomb or hexagon pattern covering the entire nail
- Stacked triangles starting at the base and decreasing toward the tip
- Interlocking geometric shapes creating an all-over pattern
- Simple triangles in the corner or along the side of the nail
- Striped geometric sections dividing the nail into distinct areas
- A gold-outlined chevron or zigzag pattern running vertically
Worth knowing: Thin, precise gold lines require either a thin brush and steady hand or thin gold striping tape. If freehand feels risky, tape creates cleaner lines and sharper angles.
11. Matte Black with Embedded Metallic Accents
This design combines matte black polish with embedded metallic accents—metallic flakes, foil pieces, or chrome dust mixed into the polish itself. The effect is sophisticated because the metallic elements are partially submerged rather than sitting on top, creating depth and dimension.
Why Embedded Accents Feel Elevated
Embedded metallic accents create a more integrated, high-fashion aesthetic than surface-level decorations. They catch light beautifully without feeling costume-y. On matte black, the contrast between the velvety finish and the subtle sparkle is genuinely luxurious. This is a design that reveals itself at different angles and under different lighting.
How to Create Embedded Metallic Nails
- Paint nails with matte black polish and let dry completely
- While the final coat is still tacky, sprinkle metallic flakes, chrome dust, or foil pieces onto the nail surface
- Press them gently so they sink slightly into the polish
- Once fully dry, apply a shiny top coat that seals the embedded elements
- The top coat fills in gaps and creates that integrated look
- Alternatively, mix small amounts of metallic flake into matte black polish before applying
- Build color gradually with multiple coats if mixing in metallic elements
Pro tip: Mixing metallic elements directly into polish gives you more control over the coverage level and looks slightly more refined than sprinkling them on top, though both methods are valid.
12. Black Nails with Negative Space Moon Design
This design uses negative space to create a crescent moon shape, leaving the nail exposed or showing a different color underneath. The moon curves along the side or tip of the nail, and the rest is glossy black. It’s celestial, sophisticated, and surprisingly easy to execute.
The Magic of Moon Designs
Moons feel romantic and mystical, and negative space makes them feel intentional and thoughtful. A crescent moon against black creates strong visual contrast, and the elongated coffin shape emphasizes the moon’s curve. This design works beautifully on a single accent nail or across the entire manicure.
Creating a Crescent Moon Negative Space Design
- Paint all nails with glossy black polish (two coats minimum)
- Use a round dotting tool or the end of a makeup brush to outline a crescent moon shape with a light pencil
- Use a thin angled brush or detail tool to carefully remove the black polish from the crescent area, exposing the nail underneath
- Alternatively, apply black polish carefully around a moon-shaped stencil
- If you want the moon visible, you can apply a nude polish or leave the natural nail exposed
- Seal with a glossy top coat to even out any texture differences
- The hardest part is getting the crescent shape clean—practice on a few nails first
Worth knowing: Removing dried polish is harder than painting around stencils, so using thin sticker moon shapes or nail tape to define the design area makes this much easier.
13. Glossy Black with Iridescent Shimmer Top Layer
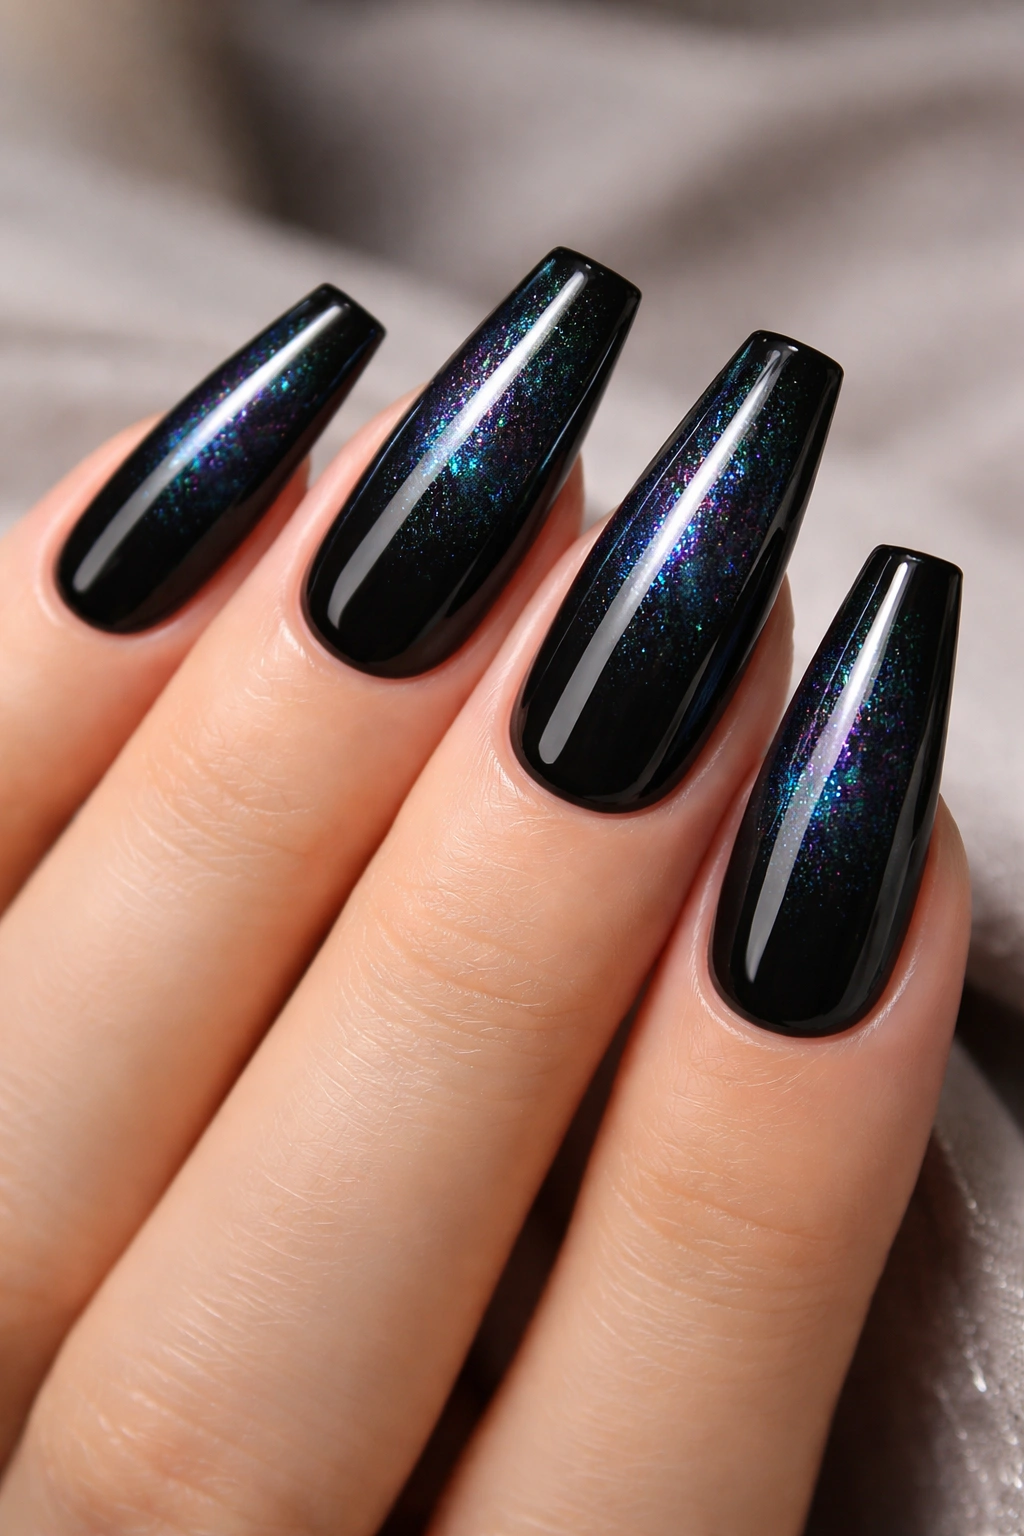
This design uses two coats of polish for subtle dimension: a deep glossy black base with an iridescent or rainbow shimmer top layer. The shimmer is translucent enough that you still see the black underneath, but it creates a multi-dimensional effect that’s genuinely stunning in sunlight.
The Dimension of Shimmer Over Solid Black
A shimmery top layer over black creates depth without being a totally different color. In indoor lighting, the nails appear solidly black and sophisticated. In sunlight or under bright light, iridescent sparkle emerges, making the design feel magical and dynamic. This is subtle luxury—the kind of manicure that people notice but can’t quite identify what makes it special.
Layering Shimmer for the Best Effect
- Apply two coats of glossy black polish, ensuring full coverage and smooth finish
- Wait for the black to cure or dry completely
- Apply a single layer of iridescent, holographic, or chrome shimmer polish over the entire nail
- The shimmer layer should be thin enough that you see the black through it
- Seal with a clear top coat to even everything out
- The layering creates a glass-like effect that’s both sophisticated and luminous
Pro tip: Some shimmer polishes are more pigmented than others—if your shimmer layer completely covers the black, you’ve gone too heavy. Build it with thin layers for the best depth effect.
14. Black Nails with Metallic Gradient Tips
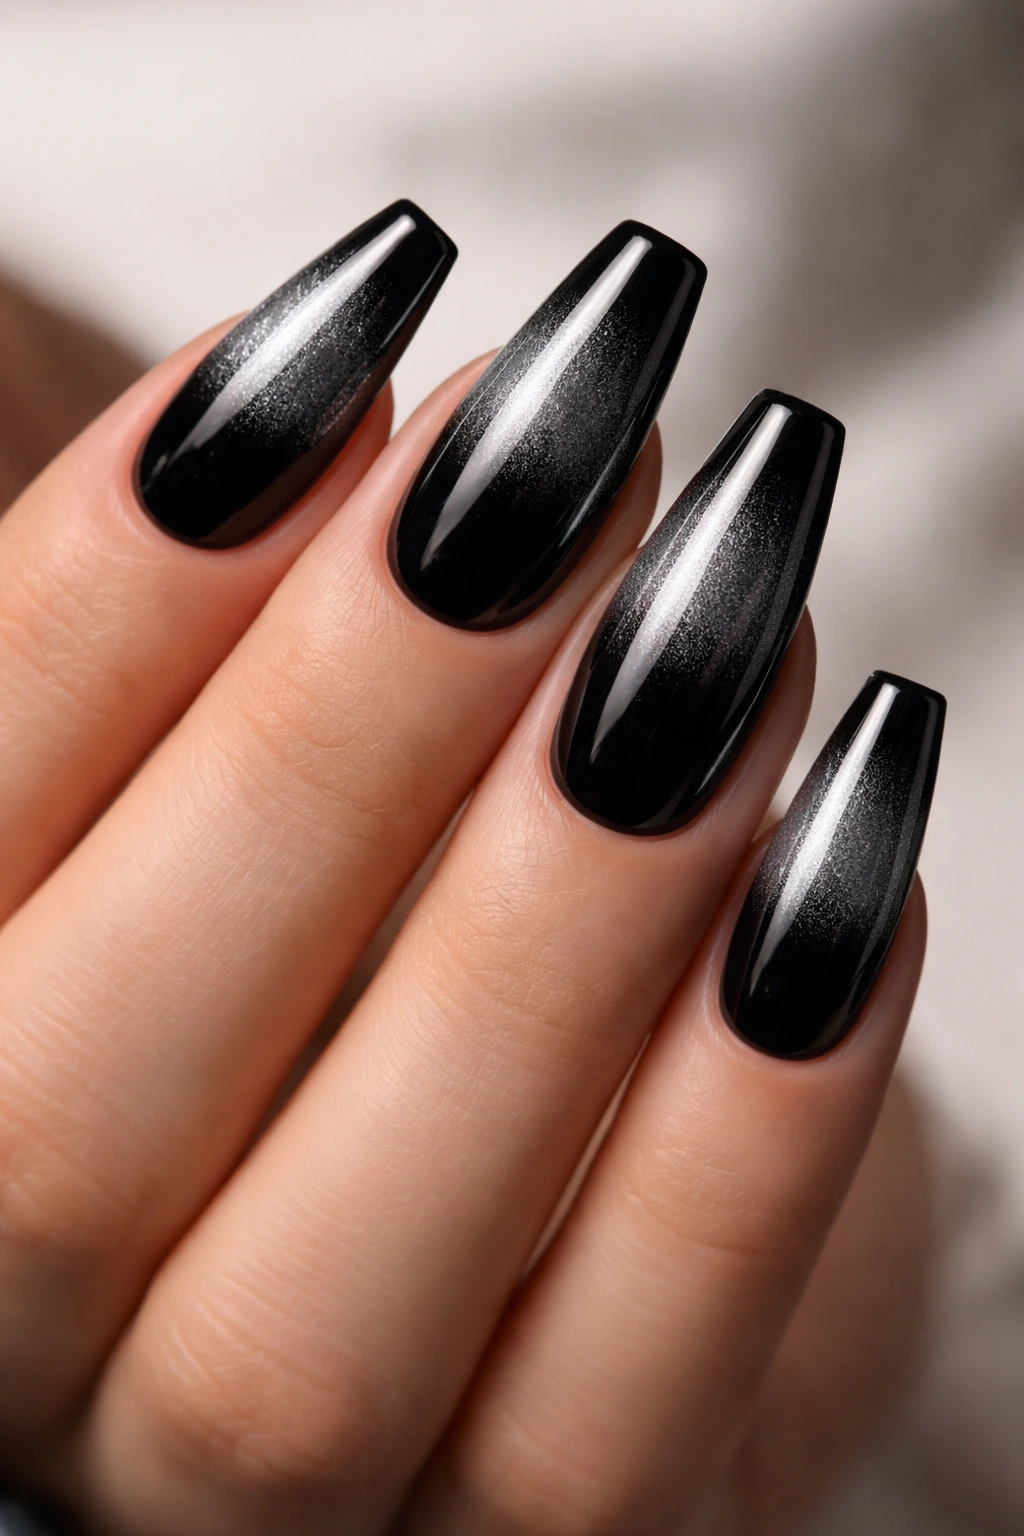
This design pairs matte or glossy black on the base with a gradient that transitions to chrome or mirror metallic at the tip. The gradient creates movement and emphasizes the coffin’s length. The metallic tip reflects light beautifully, creating a statement without requiring full-nail coverage of metallic effect.
Blending Black into Metallic
The transition from matte or glossy black into a reflective metallic creates stunning visual impact. The metallicized tip emphasizes the coffin shape and draws the eye toward the nail tip. This design looks complex but is surprisingly achievable with careful gradient application or strategic color blocking.
Creating the Black-to-Metallic Gradient
- Apply a solid black base and let it dry completely
- Use a sponge to gently blend black into chrome or mirror metallic polish starting around the mid-nail area
- Dab the sponge lightly at the junction where colors meet to create a smooth transition
- Build the metallic intensity gradually with multiple sponging layers
- The tip should be fully metallic while you see black at the base
- Seal with a top coat that harmonizes the chrome effect
- Alternatively, paint the base black and the tip metallic with a slightly blended line between them
Worth knowing: Chrome polishes require specific base coats to activate properly, so check your polish brand’s instructions before applying to ensure best results.
15. Matte Black with Thin Gold Outline
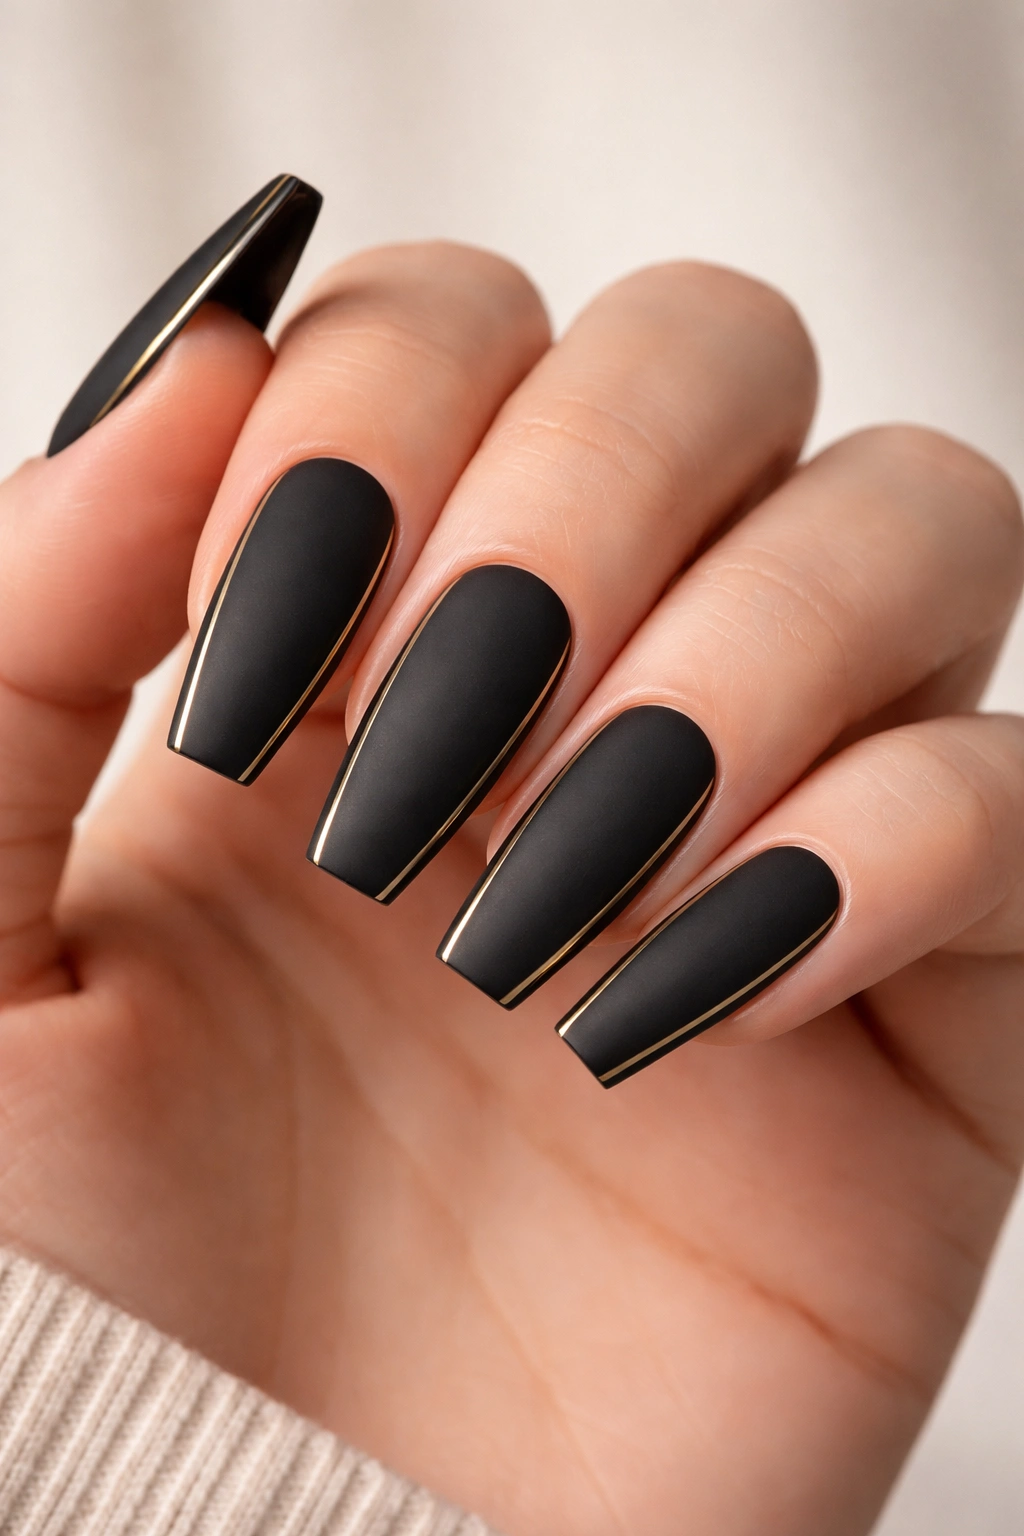
This design is minimalist perfection: matte black nails with a thin gold outline defining the shape of the nail. The gold line runs along the edge where the nail meets the skin, around the tip, or creating a frame around the edge. It’s sophisticated, architectural, and incredibly elegant.
The Geometry of Outlined Design
An outline design emphasizes the coffin shape’s inherent geometry. The clean lines and straight edges make this shape even more striking when framed with metallic gold. Matte black provides the perfect backdrop for thin gold lines—the contrast is high but the look remains refined.
Creating a Clean Gold Outline
- Paint entire nail with matte black polish (two coats for full coverage)
- Use a thin brush or thin striping tape to apply a thin gold line along the edge
- For a full outline: run gold along the outside edge of the entire nail shape
- For a tip outline: frame just the squared-off tip section with gold
- For a half outline: run gold along only the outer edge, not the cuticle area
- Seal with a matte top coat to maintain the matte finish
- The thinner your gold line, the more elegant the design—err on the side of delicate
Pro tip: Thin striping tape gives cleaner lines than hand-painting, but thin brush work looks more intentional and custom if you’re steady-handed enough.
16. Glossy Black with Scattered Tiny Crystal Accents
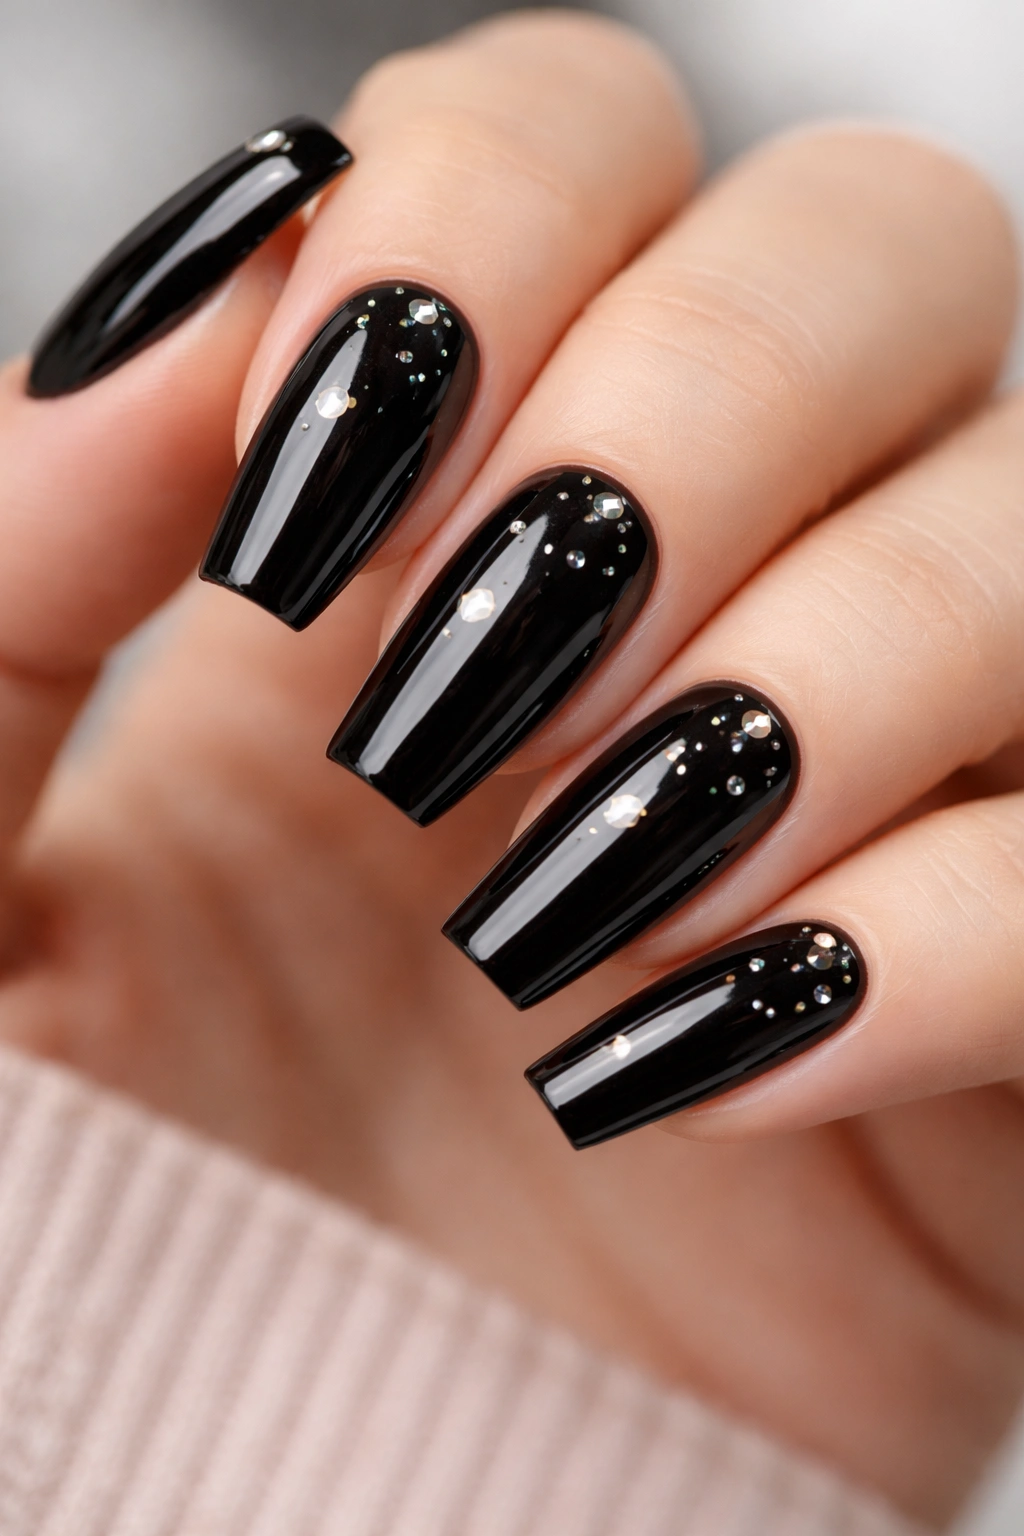
This final design keeps it simple with glossy black and tiny scattered crystal accents. Unlike dense rhinestone coverage, this approach uses minimal crystals placed seemingly at random across the nail. It’s elegant, wearable, and creates subtle sparkle without overwhelming the design.
The Appeal of Scattered Sparkle
Scattered crystal accents feel organic and intentional in a way that full coverage doesn’t. The coffin shape’s length means you have plenty of surface area to create interesting placement patterns. This design is perfect for anyone who wants a hint of glamour without committing to a heavily bedazzled look.
Crystal Placement Ideas
- Tiny crystals clustered near the tip with the rest of the nail bare
- 3-5 small crystals scattered randomly across the nail
- Crystals following a diagonal line from base to tip
- A few crystals along the side edge to define the coffin shape
- Larger crystals mixed with smaller ones for variation
- Crystals concentrated on just the accent nails, leaving other nails solid black
Worth knowing: Using a mix of crystal sizes and shapes (some rounded, some faceted) creates more visual interest than uniform stones, and placement that looks random rather than perfectly symmetrical feels more elevated and intentional.
Final Thoughts
Black coffin nails are a canvas for endless creativity, and the medium length is genuinely the Goldilocks zone for nail art—long enough to showcase detailed designs, short enough to be practical and wearable. Whether you’re drawn to metallic accents, minimalist line work, celestial vibes, or sparkling crystals, there’s a black coffin nail design that speaks to your personal style.
The beauty of these designs is that most of them are totally achievable at home with basic tools and practice. Start with the simpler designs—solid black with gold accents or basic line work—and build your skills toward more complex techniques like gradients and chrome effects. Each design can be customized based on what you have on hand, your comfort level, and the occasion you’re dressing up for.
Black nails never feel boring because the color itself is sophisticated and timeless. Add thoughtful design details and your coffin nails become something genuinely special—the kind of manicure that makes you pause and admire your own hands. Mix and match elements from these designs to create your own signature look, or recreate them exactly for guaranteed polish perfection.
