

The combination of black and gold on coffin nails creates a look that’s simultaneously edgy and glamorous—sophisticated enough for formal occasions yet bold enough to make a statement at any time. Coffin nails, with their distinctive tapered square shape and elongated silhouette, are the perfect canvas for this striking color pairing. The dramatic contrast between the deep richness of black and the radiance of gold creates an undeniable visual impact that works beautifully whether you’re drawn to minimalist designs or ornate nail art.
What makes black and gold coffin nails so versatile is how endlessly customizable they are. You can go monochromatic with a sleek black base and delicate gold accents, or flip the script entirely with a gold background and black details. The length of coffin nails amplifies whatever design you choose—more surface area means more room to express creativity and really showcase intricate patterns, gradients, or 3D embellishments. Whether you prefer understated elegance or full-on glamour, there’s a black and gold coffin nail design that speaks to your personal style.
The beauty of this color combination is that it transcends seasonal trends and occasion limitations. Black and gold works year-round, complements virtually every skin tone, and transitions seamlessly from professional settings to night-out adventures. Real talk—once you’ve experienced how polished and put-together black and gold coffin nails make you feel, you’ll probably find yourself coming back to this combination again and again.
1. Classic Black and Gold Geometric
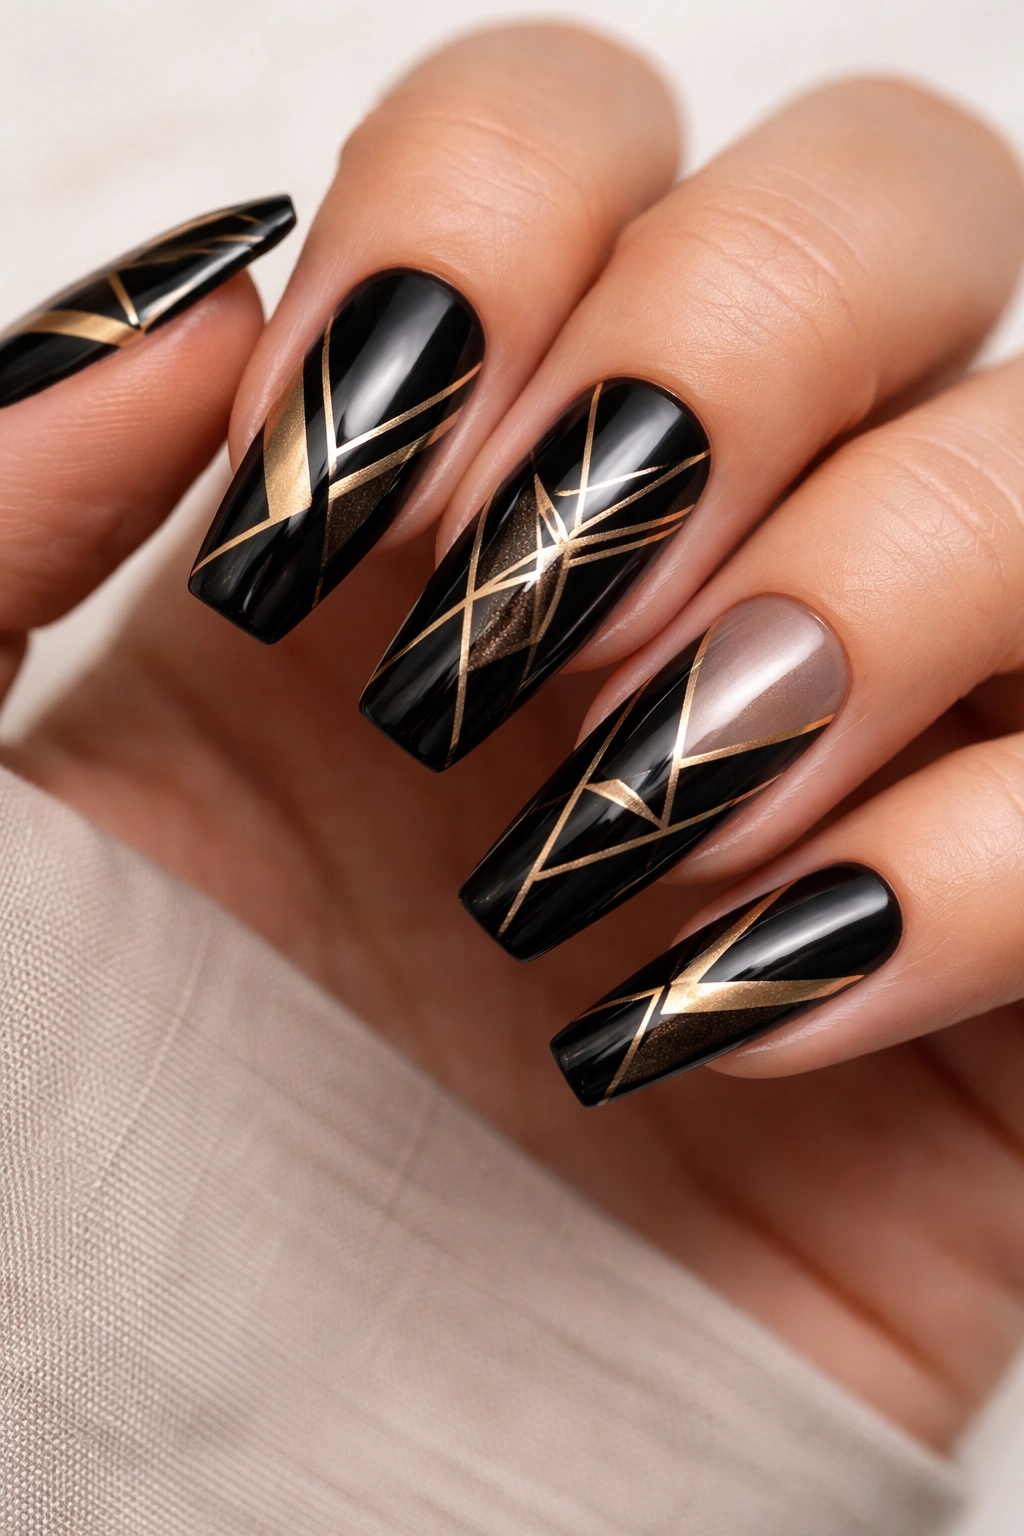
Geometric designs are where precision meets creativity, and when executed on coffin nails, the effect is absolutely striking. This design features a solid black base with clean geometric shapes in rich gold—think triangles, lines, and negative space that create visual depth and movement across the nail surface. The coffin shape elongates these geometric patterns naturally, making them appear even more sophisticated and intentional.
Why This Design Stands Out
The appeal of geometric black and gold coffin nails lies in their clean, modern aesthetic that feels both timeless and contemporary. Geometric patterns have a mathematical precision that feels intentional and curated rather than random or casual. This design works exceptionally well for people who prefer minimalism with an edge—you get visual interest and impact without excessive ornamentation.
How to Create This Look
- Use a jet black base coat as your foundation, applied in thin, even layers for maximum opacity
- Once completely dry, use a fine detail brush or thin striping brush to paint gold lines and shapes
- Create alternating triangles, stripes, or linear patterns across the nail surface
- Leave some black space negative (untouched) to avoid visual chaos
- Seal everything with a glossy topcoat for a polished, intentional finish
Pro tip: Use gold gel or metallic acrylic paint instead of regular polish for lines that won’t chip as easily and will photograph with stunning luminosity.
2. Gold Foil and Black Marble
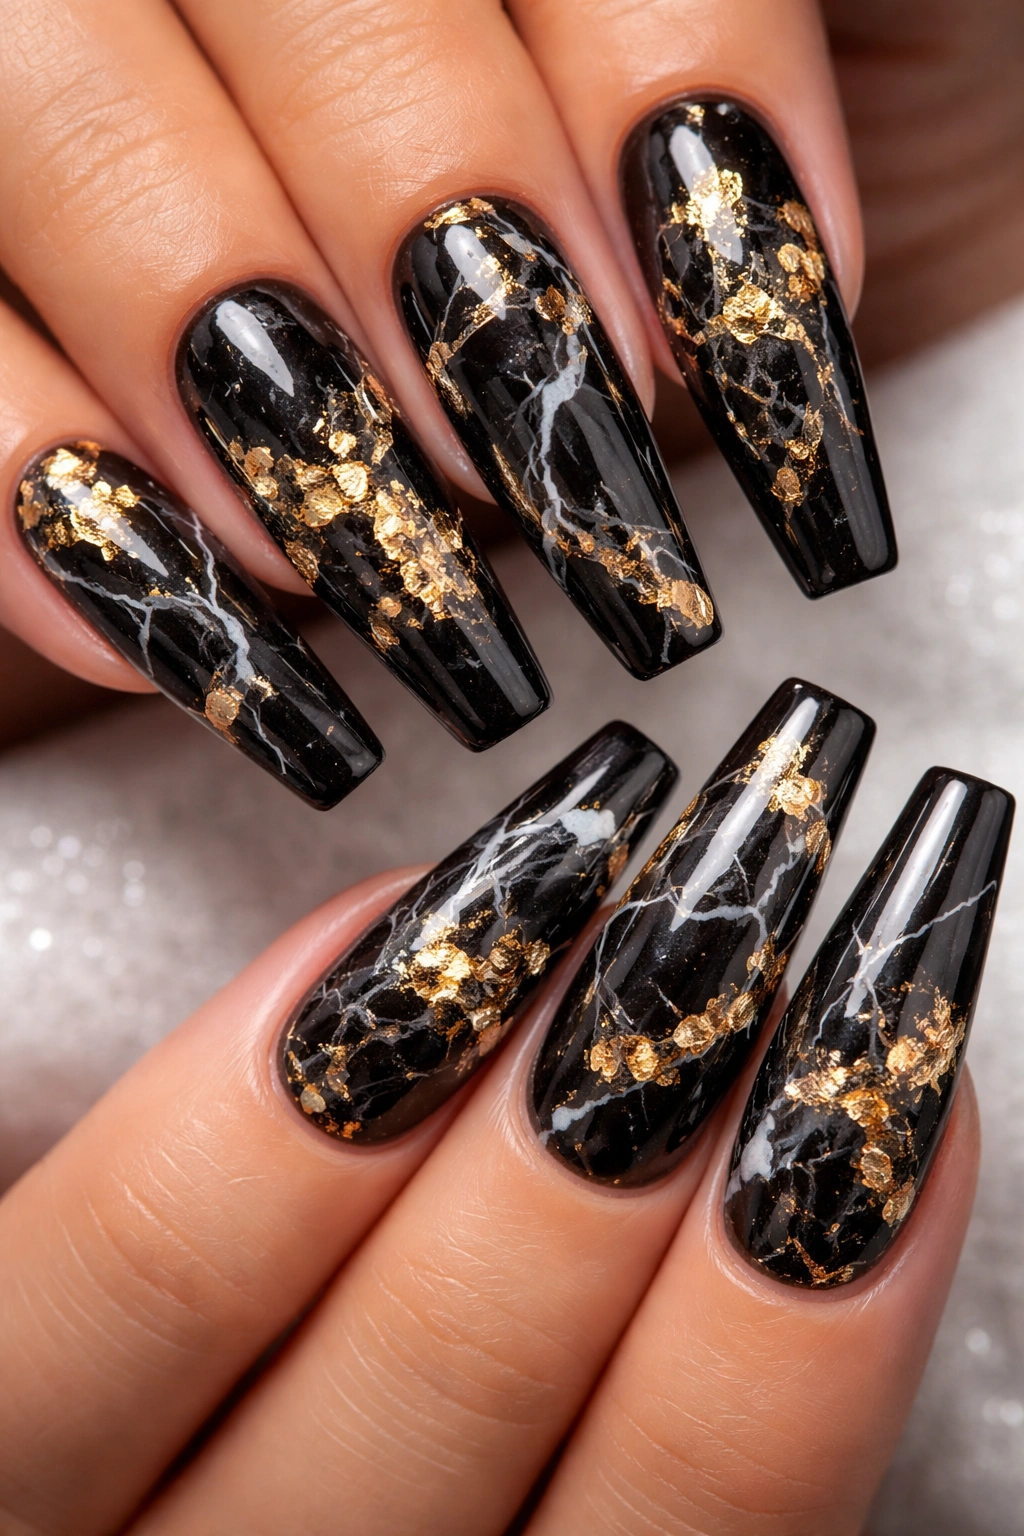
Marble patterns feel luxe and artistic, and combining them with gold foil creates a design that looks like something you’d see in high-end nail salons. This approach layers a black base with white or gray swirled throughout to mimic natural marble veining, then strategically places pieces of gold foil across the design for pops of reflected light and glamorous shimmer. The foil catches the light and creates dimension that flat finishes simply can’t achieve.
What Makes It Different
Gold foil adds a tactile, three-dimensional quality that photographs beautifully and catches light from every angle. Unlike painted gold, foil creates true metallurgic shine that makes nails look more expensive and professional. The organic randomness of marble combined with the deliberate placement of foil creates a design that feels both natural and intentional.
Quick Facts
- Foil application requires foil-specific adhesive or a particularly sticky gel base
- The marble effect works best when the black, white, and gray blend softly rather than having harsh lines
- Foil will last longer if sealed under multiple layers of topcoat
- This design is especially stunning under natural sunlight and UV light
Insider note: If you’re applying foil at home, crumpling it slightly before application creates more visual interest than laying it flat—the wrinkles catch light beautifully.
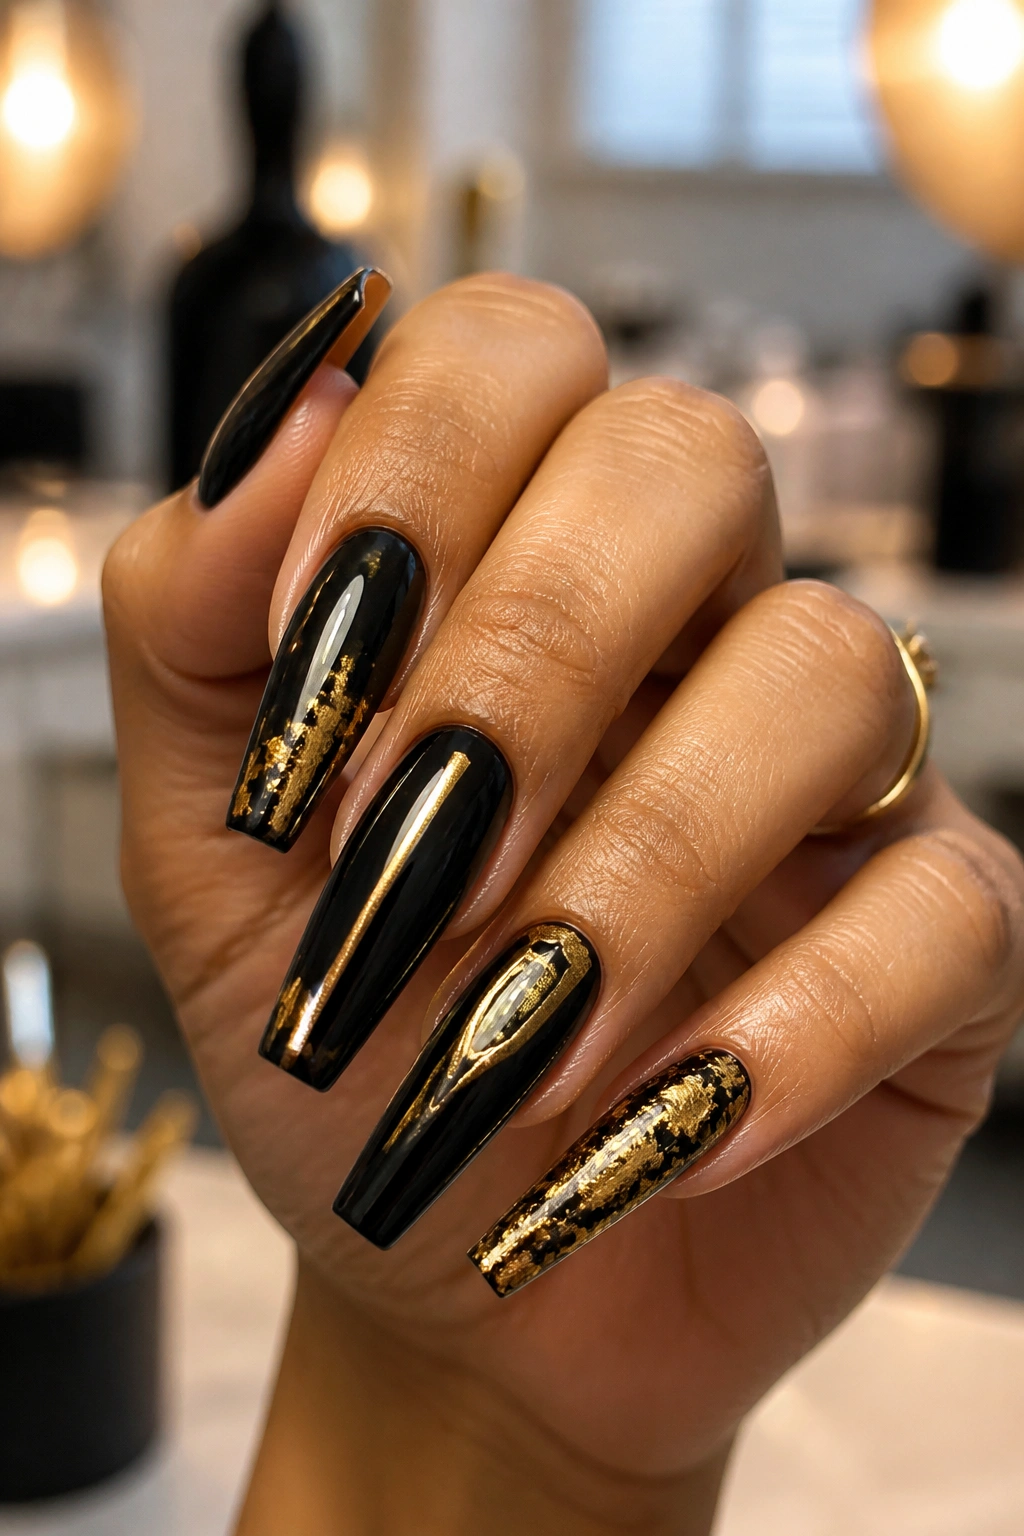
3. Black Base with Gold Leaf Accents
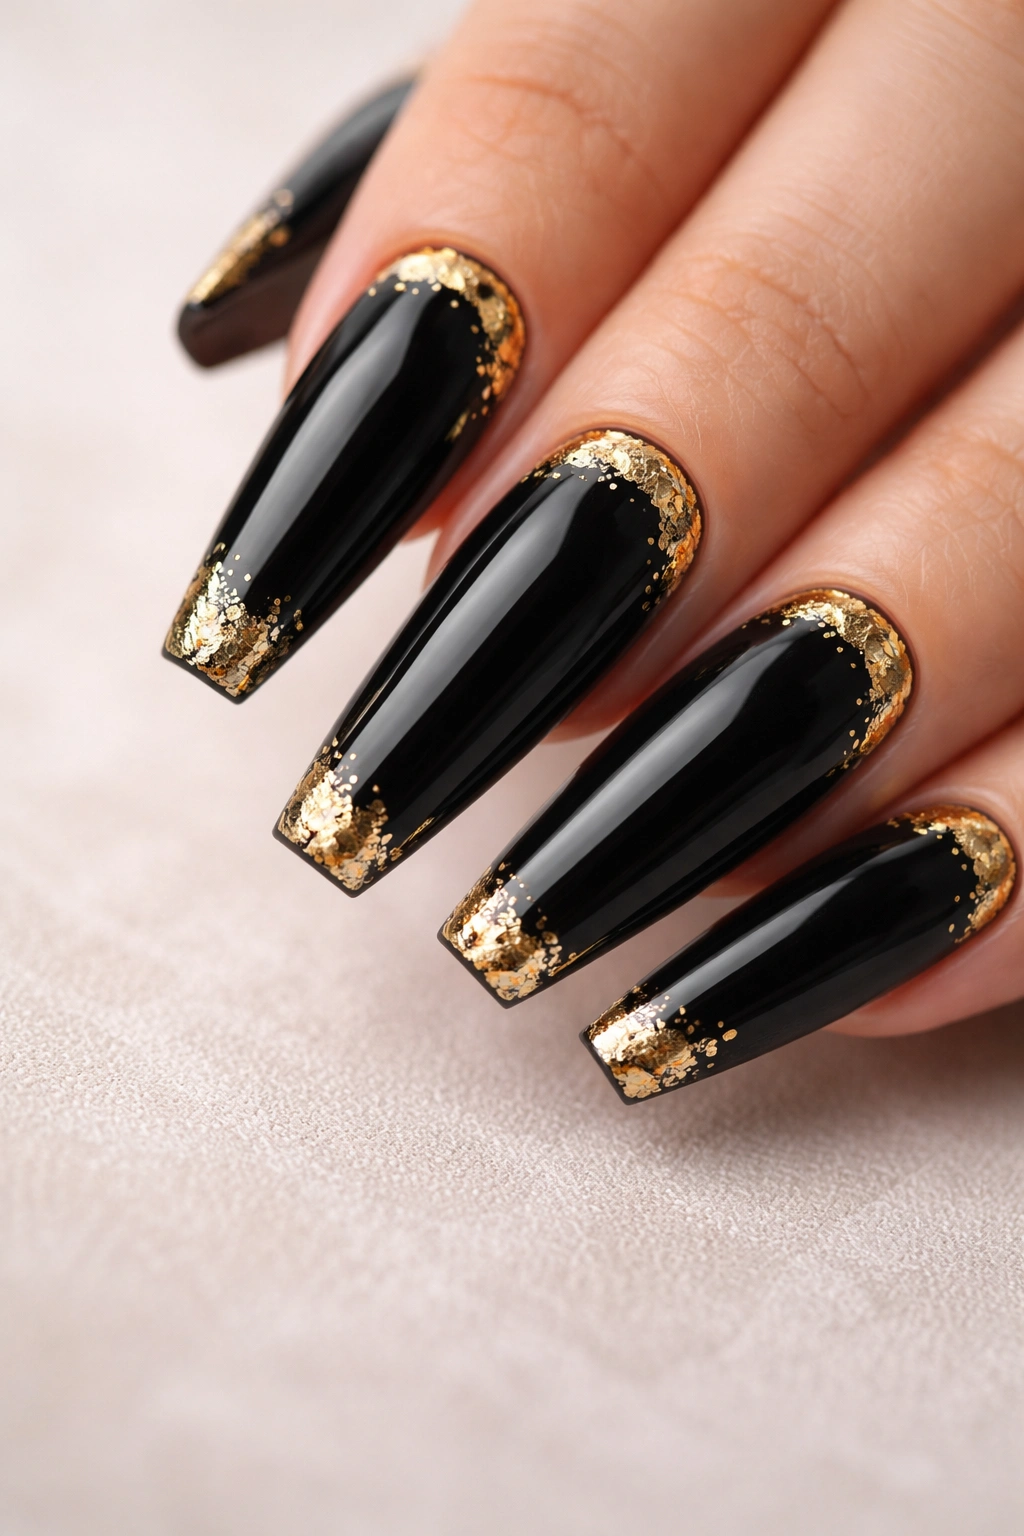
Gold leaf is the refined cousin of gold foil, and it delivers an understated luxury that’s absolutely timeless. This design pairs a deep, creamy black polish with carefully placed gold leaf fragments that seem to float across the nail surface. Rather than covering large areas, the gold leaf is used sparingly and strategically—maybe just around the cuticle area, along one edge, or in delicate scattered pieces that draw the eye without overwhelming the design.
Why It Works So Well
The restraint in this design is what makes it so powerful. Instead of trying to fill every inch of the nail with detail, you’re using negative space strategically. This approach appeals to people who appreciate minimalism and high-end aesthetics. Gold leaf has a delicate, precious quality that makes nails feel special and intentionally designed rather than overly done.
Application Essentials
- Begin with a perfectly smooth black base—any bumps or ridges will show when light hits the gold leaf
- Apply a thin layer of leaf adhesive or sticky topcoat to the areas where you want gold to adhere
- Carefully place gold leaf pieces using a fine brush or tweezers, pressing gently
- Seal with a non-sticky topcoat to prevent the gold from moving or lifting
Gold leaf comes in various karats and finishes—24K gold leaf gives a warm, rich tone, while lower karat options have slightly more subtle warmth. Choose based on how prominent you want the gold accents to be.
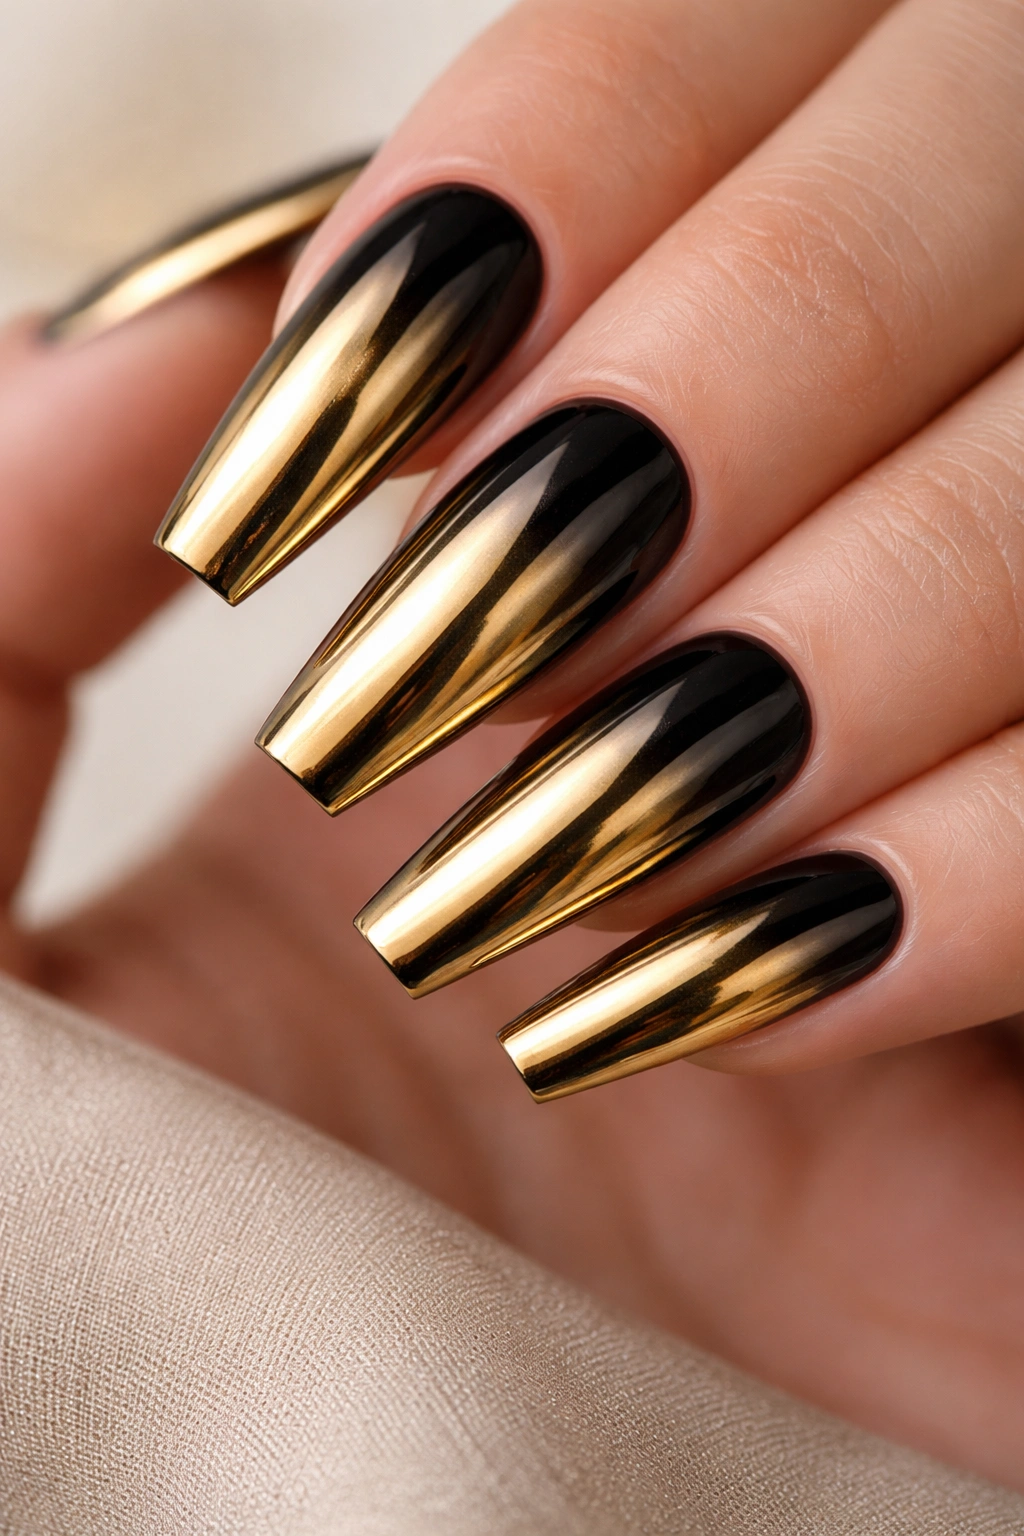
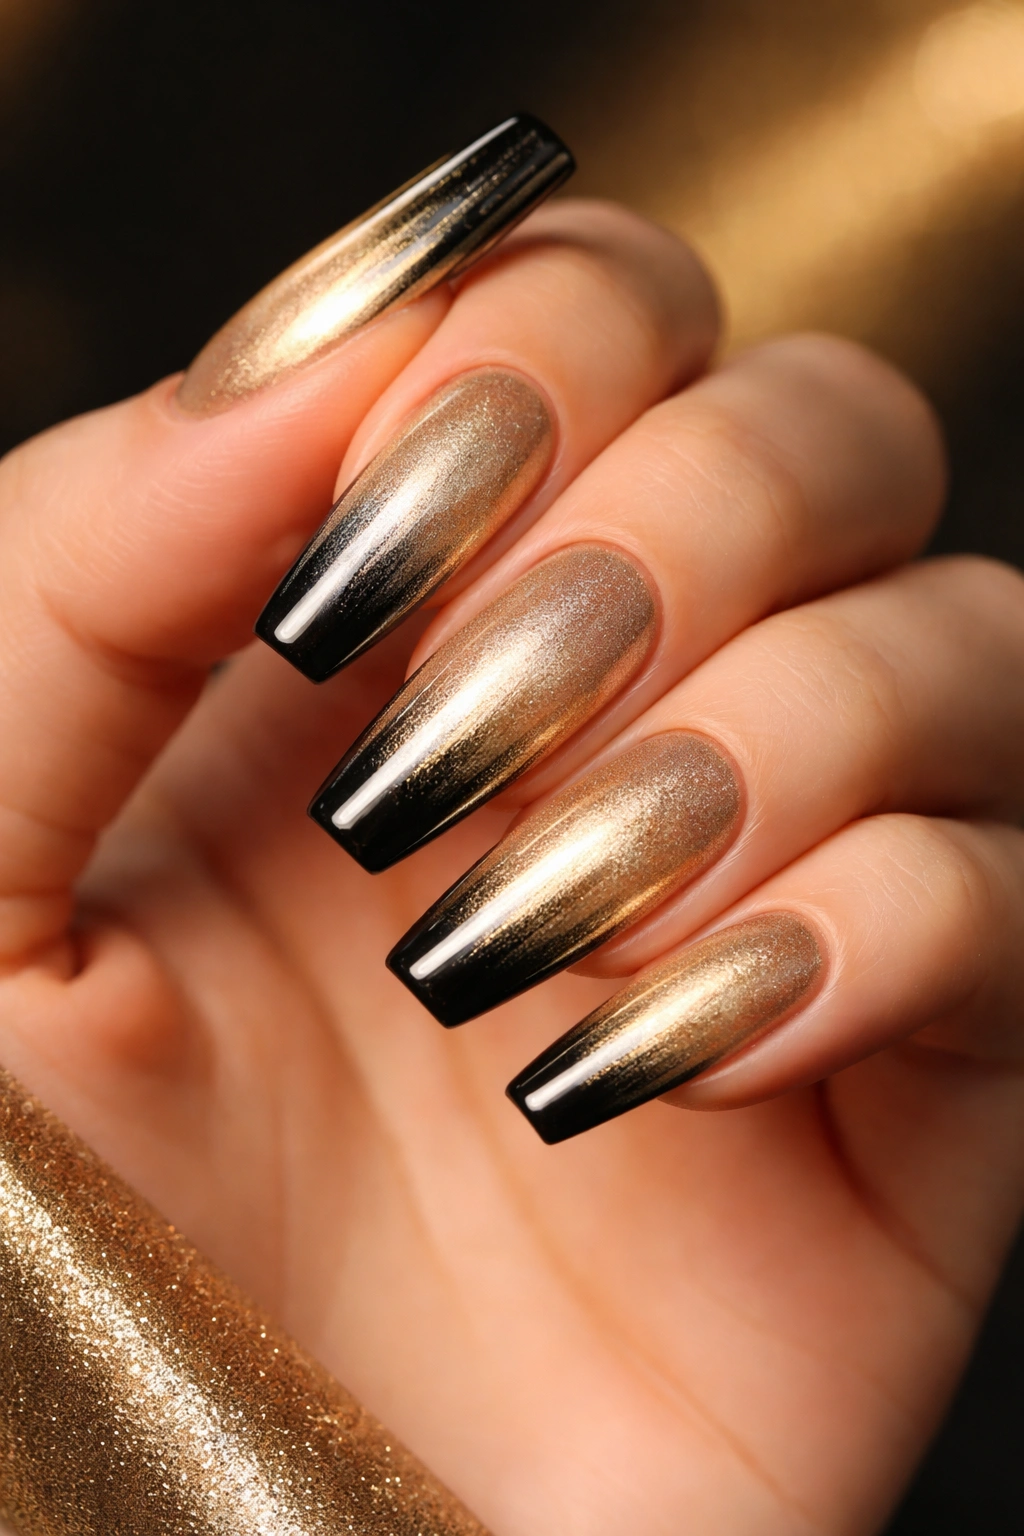
4. Gold Metallic Ombre on Black
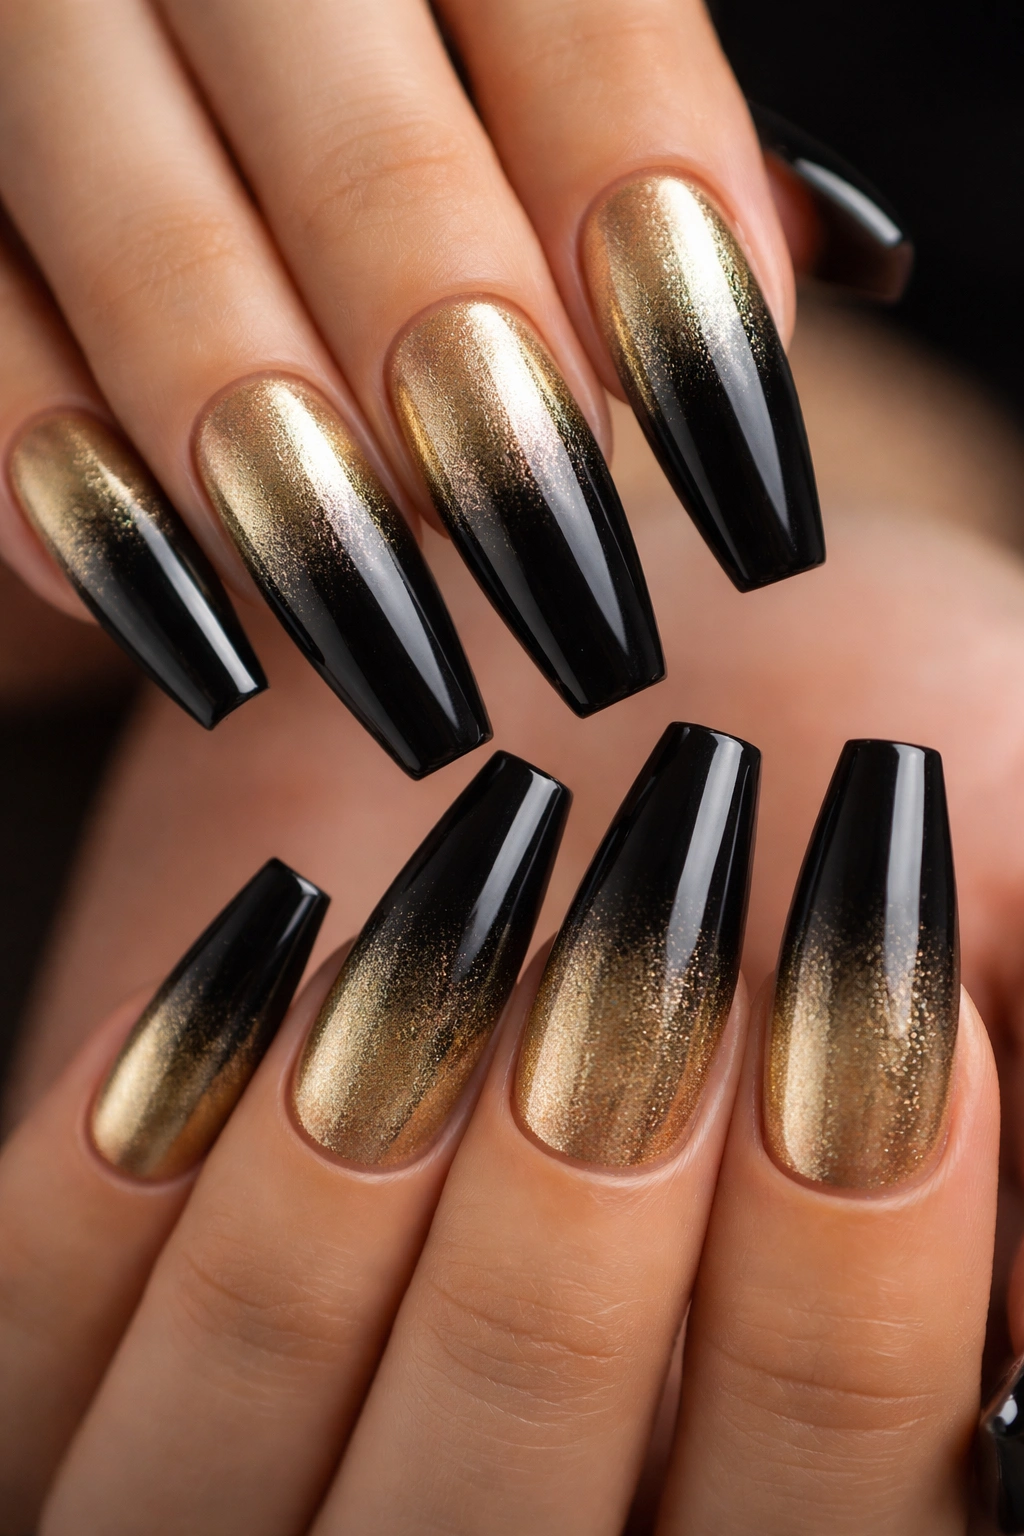
An ombre effect where gold gradually fades into black creates a sophisticated gradient that feels modern and polished. This design typically features a rich black at the tip of the coffin nail (the wide part) that gradually transitions through champagne and lighter gold shades until it reaches a sunny, bright gold at the base near the cuticle. The gradient creates natural movement and dimension that makes the nails appear longer and more elegant.
What Makes It Different
Unlike sharp, geometric black and gold designs, an ombre approach is fluid and organic. The soft transition between colors creates a dreamy quality while still maintaining the bold contrast that makes black and gold so striking. This design flatters longer coffin nails especially well because there’s enough surface area for the gradient to truly shine (literally—the shimmer in gold ombre is unmatched).
How to Get the Perfect Gradient
- Start with a black base applied smoothly and evenly
- Use a makeup sponge or soft blending brush to dab gold polish over the black, creating an overlap zone
- Blend the overlapping area gently by dabbing with a slightly damp brush
- Layer in champagne or light gold in the transition zone, blending as you go
- The coffin nail shape naturally guides the gradient from wide to narrow, so follow that shape
The key to a flawless ombre is patience—don’t rush the blending, and use multiple light layers rather than one thick layer that looks muddy.
5. Black Velvet with Gold Rhinestones
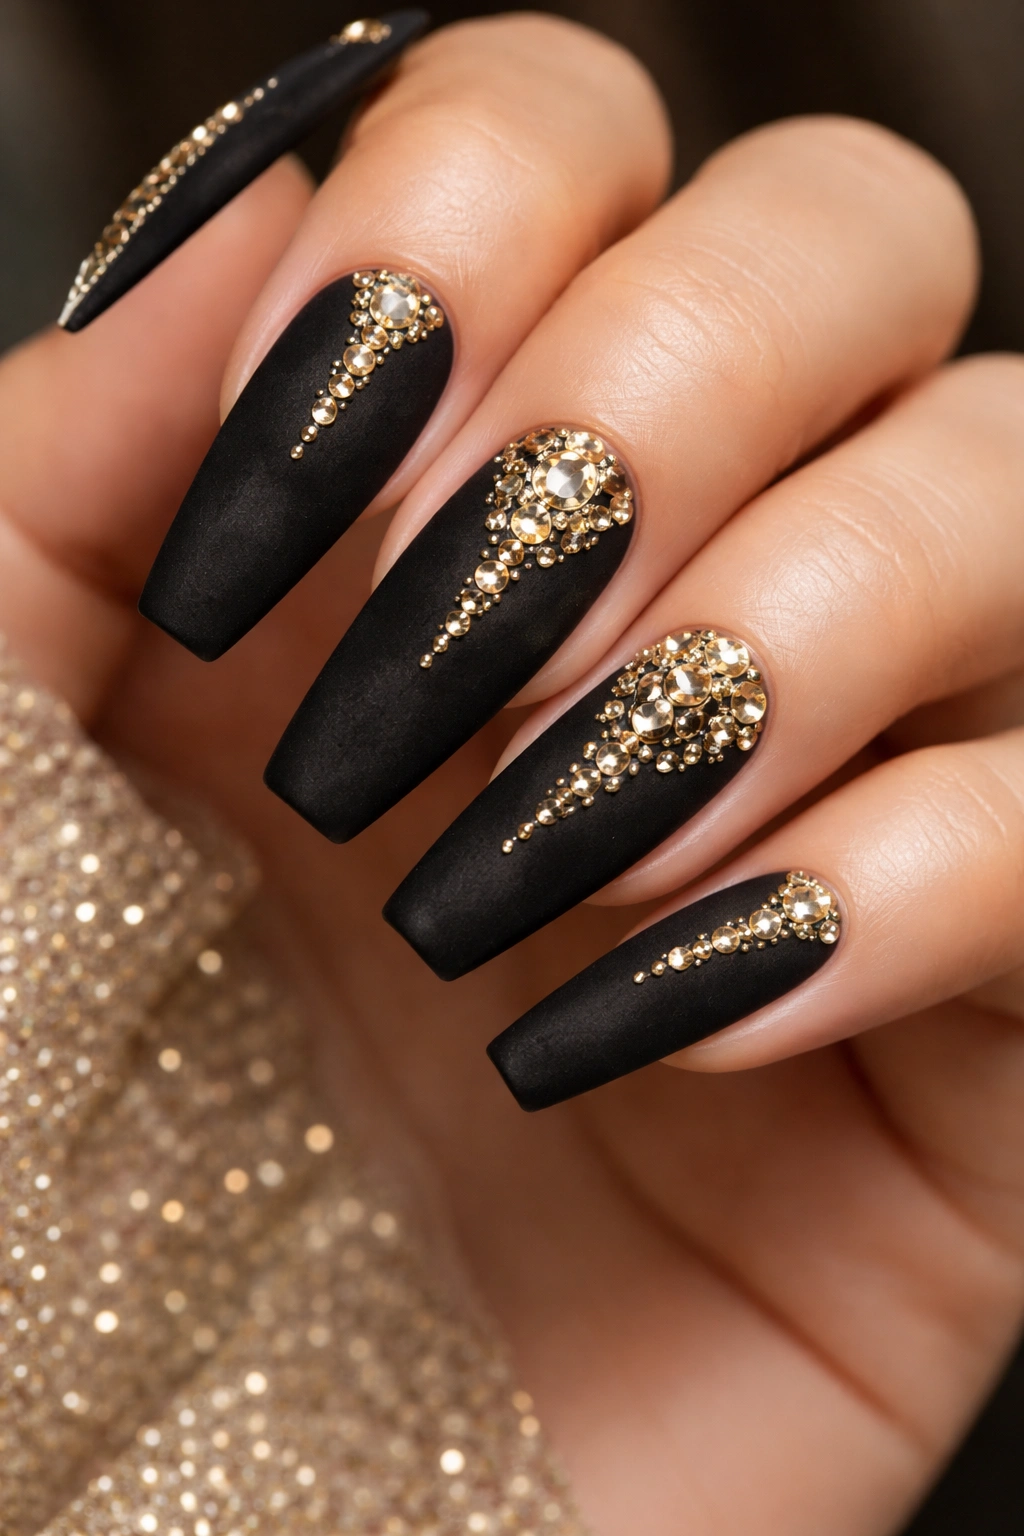
Velvet finishes on nails create an incredibly tactile, sophisticated look, and adding gold rhinestones elevates it into full glamour mode. A matte black velvet base (achieved with velvet powder or matte topcoat) provides a soft, luxe canvas, then strategically placed gold rhinestones add sparkle and refinement. This design works beautifully on long coffin nails because the extra surface area gives you room to create interesting rhinestone patterns—a vertical line, scattered clusters, or an ombré of crystal sizes.
Why It Stands Out
The contrast between the soft matte black and the hard shine of gold rhinestones creates unexpected visual depth. Matte finishes feel modern and intentional, while rhinestones add instant glamour. This combination appeals to people who want their nails to feel special and dressed-up without appearing overly costume-like.
Setting Up This Design
- Apply black polish and allow it to dry completely
- Add a matte topcoat or velvet powder for the soft finish
- Use nail glue specifically designed for rhinestones (not regular nail glue)
- Place rhinestones precisely using a rhinestone picker tool
- Seal the entire design with a glossy topcoat that won’t disturb the rhinestones
Choose rhinestones in champagne gold, yellow gold, or clear crystal—each creates a slightly different effect. Champagne gold blends smoothly with black, while clear crystals create maximum sparkle and reflective light.
6. Gold Striped Pattern on Black

Stripes are endlessly stylish, and gold stripes on a black background create a design that feels both classic and contemporary. This approach uses thin or medium-width gold lines running vertically, horizontally, or diagonally across the coffin nail, creating a pattern that’s orderly yet visually engaging. You can create even spacing for a uniform look, or vary the stripe widths for a more artistic, less-uniform effect that still feels intentional.
What Makes It Different
Stripes are one of the most versatile patterns because they work with virtually every personal style. They’re clean and graphic on one end and artistic and abstract on the other, depending on how you execute them. On coffin nails, vertical stripes naturally elongate the shape even further, while diagonal stripes add dynamic movement and visual interest.
Quick Facts
- Thin stripes (created with a striping brush or thin gel brush) feel more delicate and refined
- Thicker stripes create bolder impact and are easier to execute if you’re doing this yourself
- Metallic gold stripes on matte black create elegant contrast
- Glossy stripes on glossy black create a more blended, cohesive look
The easiest way to create perfectly even stripes at home is using striping tape—apply it to the cured black base, paint gold over it, and remove the tape while the gold is still wet. This guarantees clean edges every time.
7. Black Base with Gold Glitter Tips
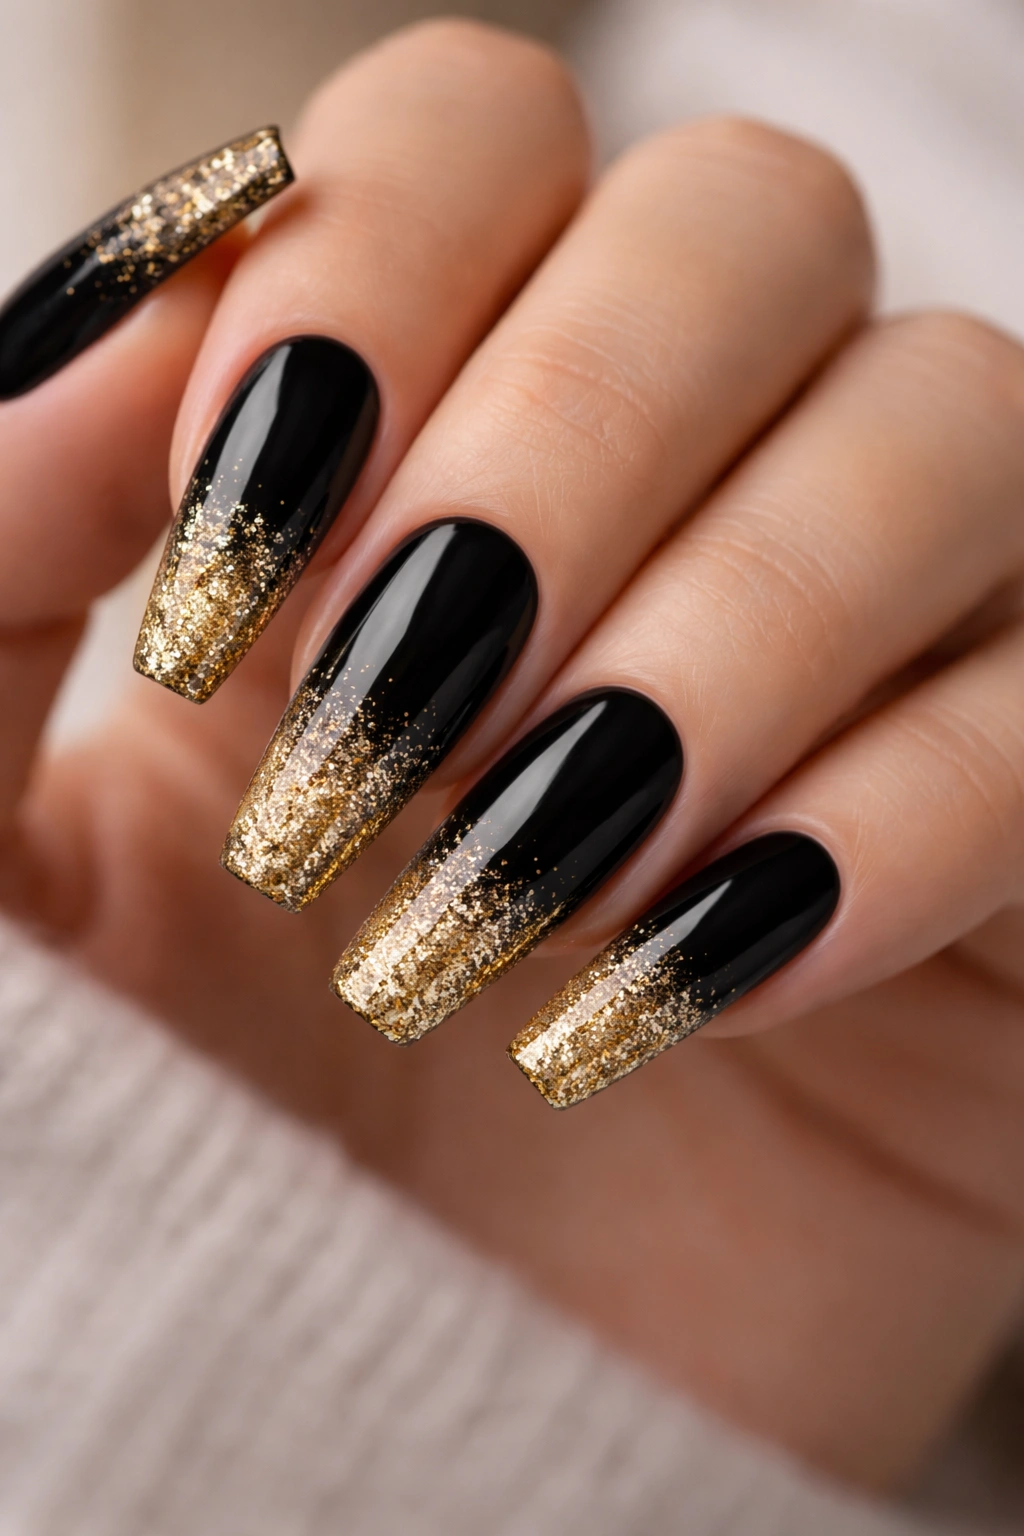
Glitter tips are playful yet polished, and they work beautifully on coffin nails. This design features a solid black base that extends three-quarters of the way down the nail, with the tips (the elongated, pointed part of the coffin shape) filled with chunky or fine gold glitter. The glitter creates a sparkly gradient effect that draws attention to the nail’s most distinctive feature—its dramatic pointed tip. This design is especially stunning when the black and gold glitter have similar undertones, creating visual harmony rather than contrast.
Why It Works So Well
The pointed tip of a coffin nail is its signature feature, and highlighting it with glitter makes a strong style statement. Gold glitter reflects light beautifully and catches attention without being overwhelming when it’s confined to just the tips. This design appeals to people who want glamour with just enough restraint to feel wearable for everyday.
Application Tips
- Create a clean line where black stops and glitter begins using striping tape or a thin brush
- Apply clear base to the tip area before adding glitter (this helps glitter adhere and prevents shifting)
- Press glitter into the wet base, then seal with topcoat
- For longer-lasting results, use gel glitter pressed into tacky gel base rather than regular polish
Chunky holographic or iridescent gold glitter creates extra dimension, while fine gold glitter gives a more subtle, refined sparkle. Combine multiple glitter sizes in the same nail for unexpected depth and visual interest.
8. Black and Gold Floral Design
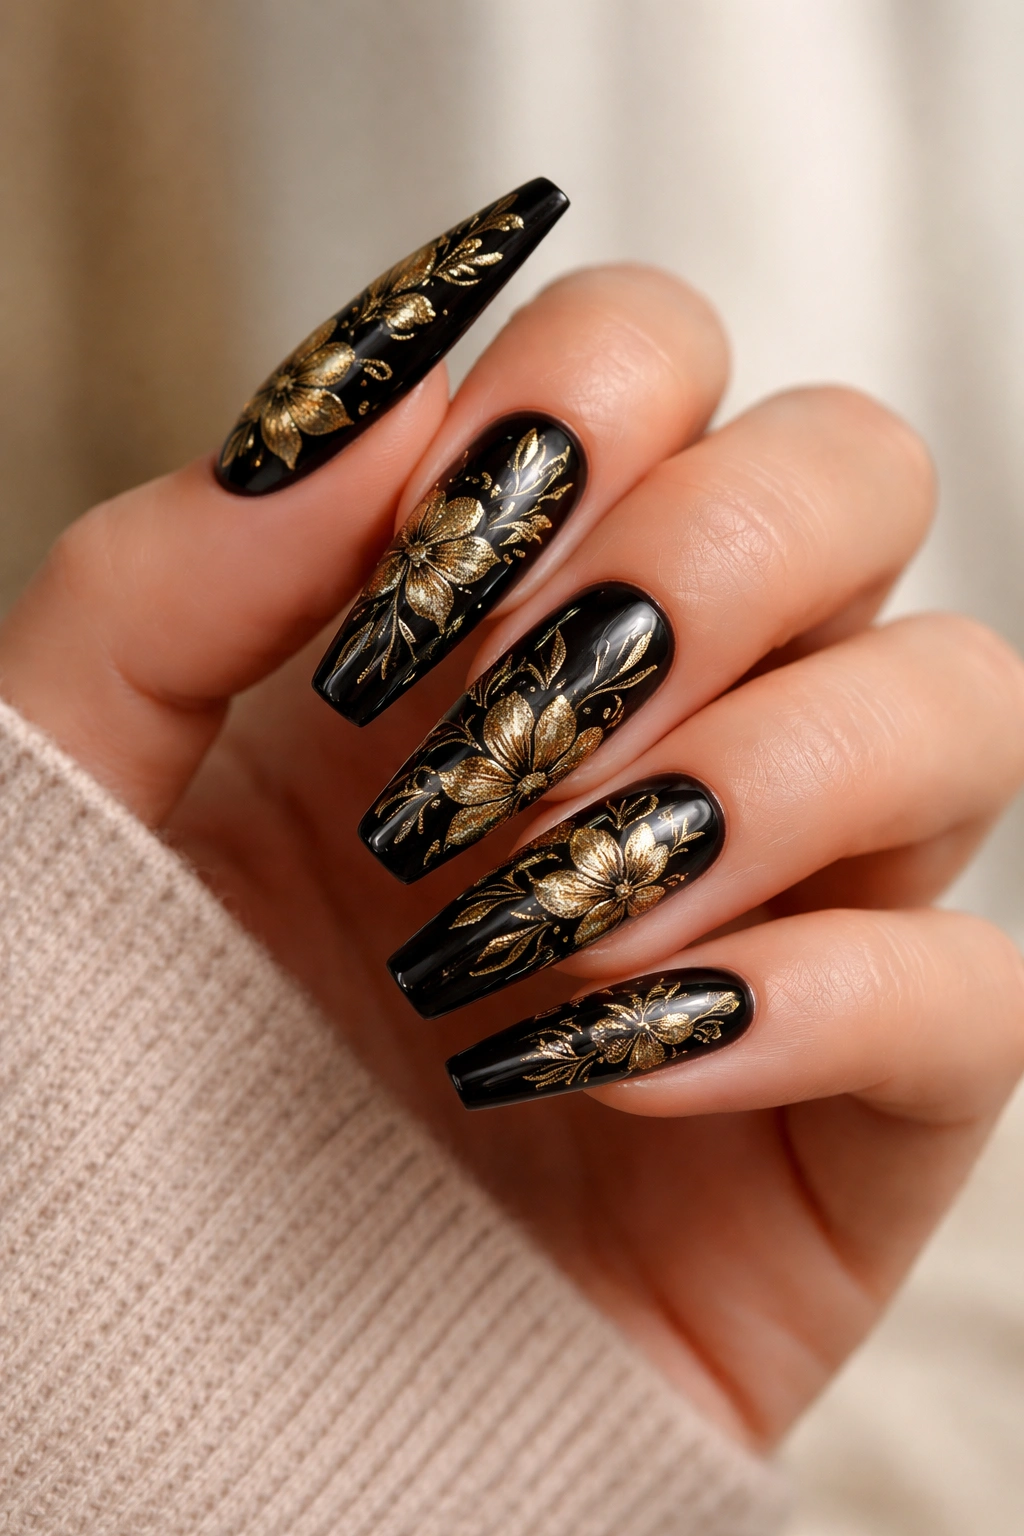
Floral patterns feel romantic and artistic, and they’re surprisingly wearable on coffin nails despite their dramatic shape. This design uses a black base with delicate gold flowers hand-painted or stamped across the surface. Flowers can be realistic and detailed, abstract and stylized, or somewhere in between—the key is that they use the black as a dark backdrop that makes the gold flowers pop visually. The elongated coffin shape provides plenty of room for multiple blooms or one statement flower per nail.
What Makes It Different
While florals can feel delicate and dainty, pairing them with black creates sophistication and edge. The juxtaposition between the romantic nature of flowers and the edginess of black gives this design unexpected depth and personality. It’s elegant without being precious, artistic without being over-the-top.
How to Create This Look
- Start with a smooth black base, fully cured
- Use a fine detail brush and gold gel or acrylic paint to hand-paint flowers
- Alternatively, use stamping plates with floral designs and gold stamping polish
- Add thin gold stems and leaves to connect the flowers
- Seal with topcoat for protection and a professional finish
Hand-painted florals feel more personal and unique, while stamped designs are more uniform and symmetrical. Neither is inherently better—choose based on whether you prefer uniformity or organic variation.
9. Black Base with Gold Chrome Powder
Chrome powder creates a futuristic, mirror-like finish that’s unlike anything else in nail design, and it’s absolutely stunning on black. This design uses a black base topped with gold-toned chrome powder applied to the nail surface, creating a reflective, almost liquid-metal appearance. The chrome catches light differently depending on the angle and creates an almost 3D illusion. It’s eye-catching without being glittery or overly decorative—just pure, sophisticated shine.
Why It Stands Out
Chrome powder is the most modern take on the black and gold combination because it creates a finish that traditional polish simply cannot replicate. The metallic, mirror-like quality makes nails look expensive and professionally done. Chrome powder is also durable when applied correctly, lasting as long as gel polish without the glittery particles that can look dated quickly.
Application Requirements
- Chrome powder requires a sticky gel base to adhere properly
- Apply a thin layer of chrome powder using a specialized brush or applicator
- Some chrome powders require a magnetic tool held above the nail to create pattern effects
- Seal completely with topcoat to prevent the powder from flaking off
- This technique is easier with gel polish than traditional polish
Gold-toned chrome powders range from warm champagne to bright yellow gold. Cooler-toned golds create a more sophisticated, almost silver-gold hybrid effect, while warmer golds deliver full warmth and richness against black.
10. Gold Confetti on Black Background
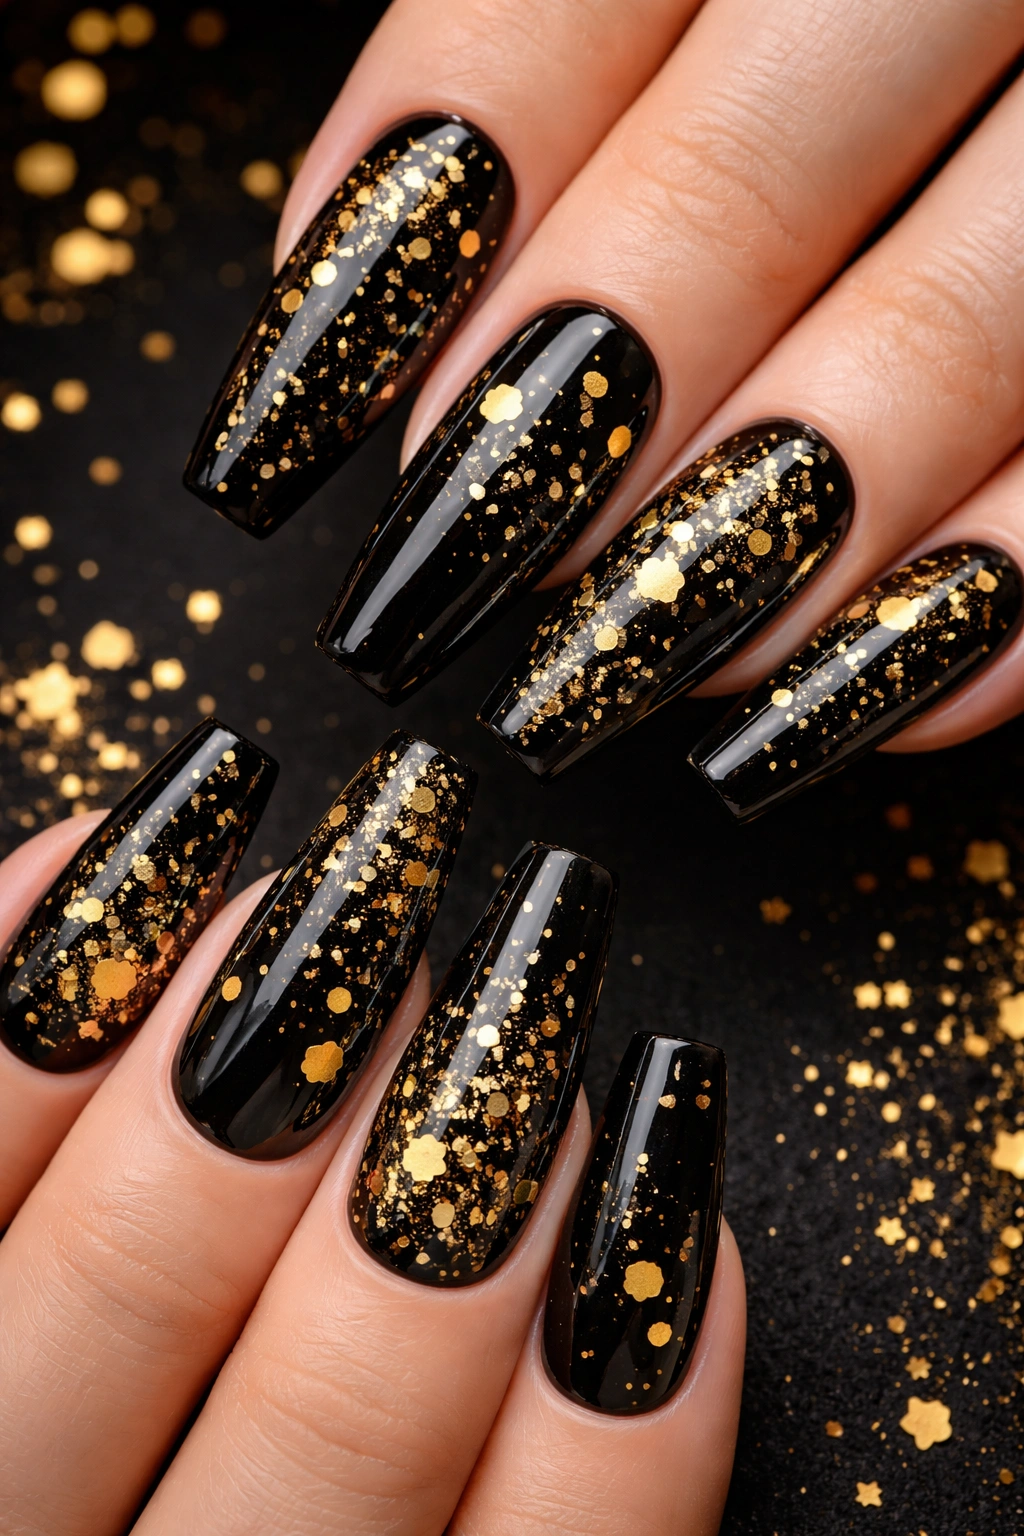
Confetti designs bring playfulness and celebration to black and gold coffin nails while maintaining sophistication through color restraint. This design features a glossy black base scattered with pieces of gold confetti—small shapes like circles, triangles, stars, or irregular organic shapes that create the impression of a festive moment frozen on your nails. The confetti can be achieved through hand-painting, stamping, or using confetti-embed gels, each creating a slightly different effect.
What Makes It Different
Unlike florals or geometric patterns, confetti feels more organic and less structured. This design celebrates imperfection and randomness in a way that feels intentional and curated. It’s playful without being childish, celebratory without being over-the-top. The scattered nature of confetti means no two nails look exactly identical, which many people find more interesting than perfectly symmetrical designs.
Quick Facts
- Hand-painted confetti gives you complete control over size, shape, and placement
- Stamped confetti creates more uniform shapes with less effort
- Clear topcoat can embed actual small confetti pieces, though these are prone to snagging
- The spacing of confetti dramatically affects the overall feel—sparse confetti feels elegant, while dense confetti feels more celebratory
Try scattering confetti more densely at the tips of your coffin nails and more sparsely toward the base for visual balance and to guide the eye toward the signature pointed shape.
11. Black and Gold Art Deco Pattern
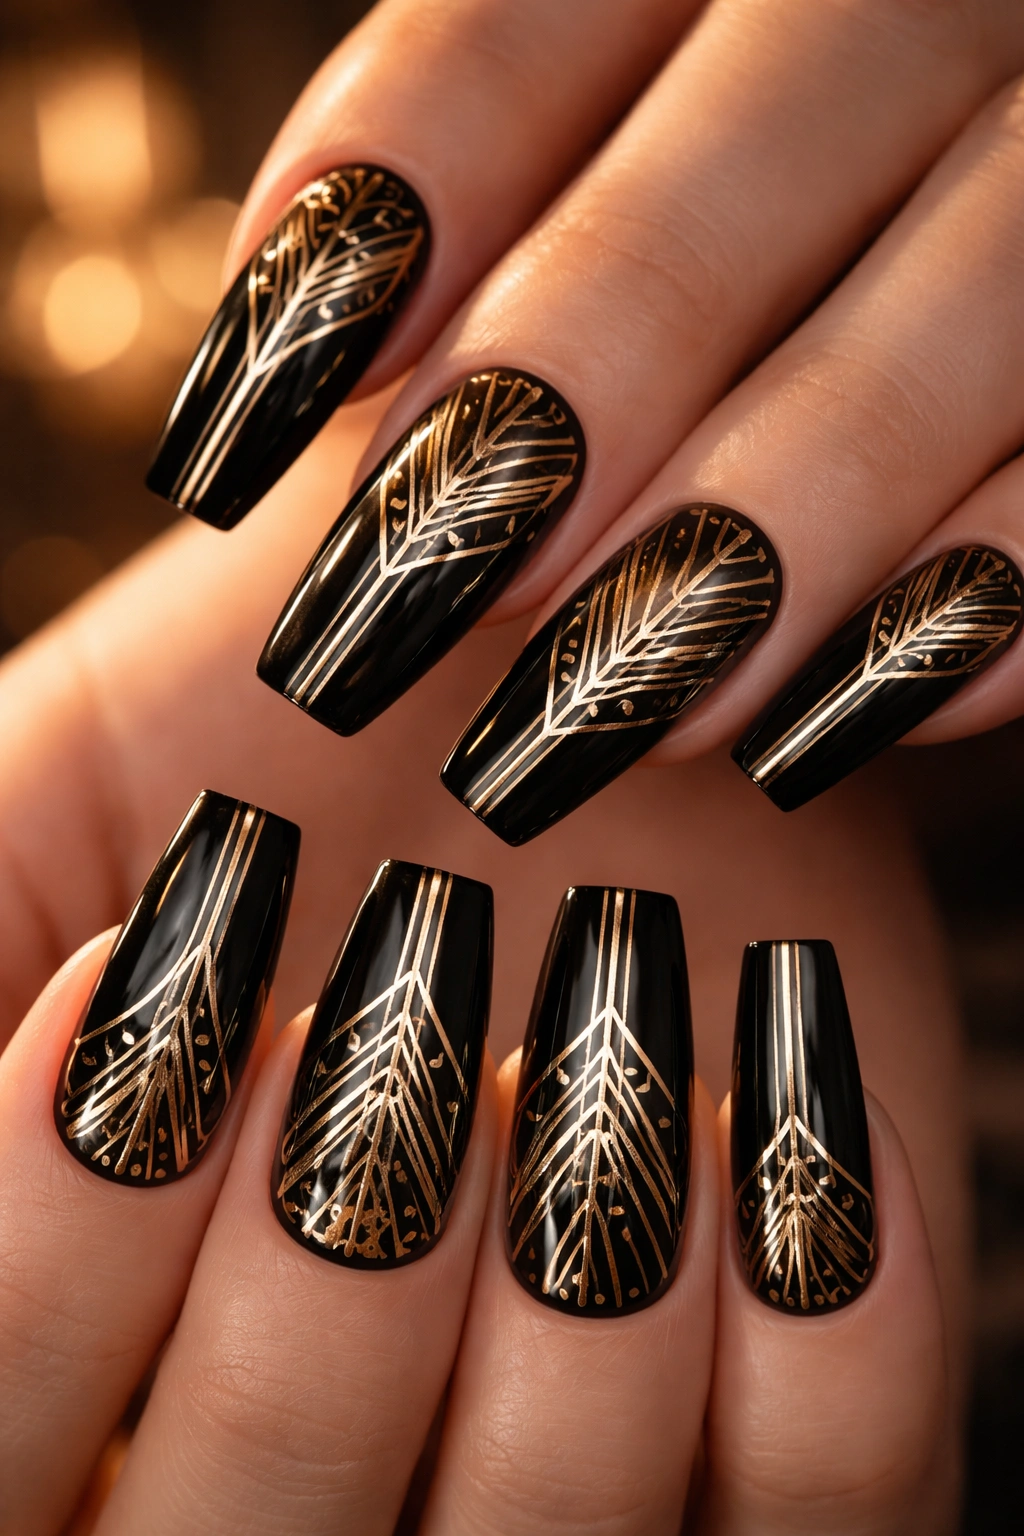
Art Deco design is inherently glamorous, and it translates beautifully to nail art on long coffin nails. This design incorporates the angular, geometric, symmetrical elements of the Art Deco movement—think sunburst patterns, stepped designs, chevrons, and bold linear elements in gold against a black background. Art Deco patterns often feature perfect symmetry, which creates a refined, intentional aesthetic. This design feels simultaneously vintage-inspired and timeless because the geometric principle behind Art Deco transcends any specific era.
Why It Works So Well
Art Deco is associated with luxury, prosperity, and sophistication—qualities that black and gold inherently convey. The geometric precision of Art Deco patterns feels high-end and professionally executed even if you’re doing them yourself. This design appeals to people who appreciate structure, symmetry, and historical design movements.
How to Create This Look
- Use fine striping brushes to paint clean lines and angles in gold on the black base
- Create symmetrical patterns by measuring and marking your nail before painting
- Stamping plates with Art Deco designs make execution much easier if hand-painting feels intimidating
- Negative space is essential to Art Deco—don’t fill every area with color; let the black breathe
- Topcoat creates a polished finish that makes geometric patterns appear even more precise
The coffin nail’s tapered shape actually complements Art Deco patterns beautifully because the geometric lines naturally follow the nail’s contours. The wider base provides space for complex patterns while the narrower tip shows refined detail.
12. Gold Mirror Nails with Black Accents
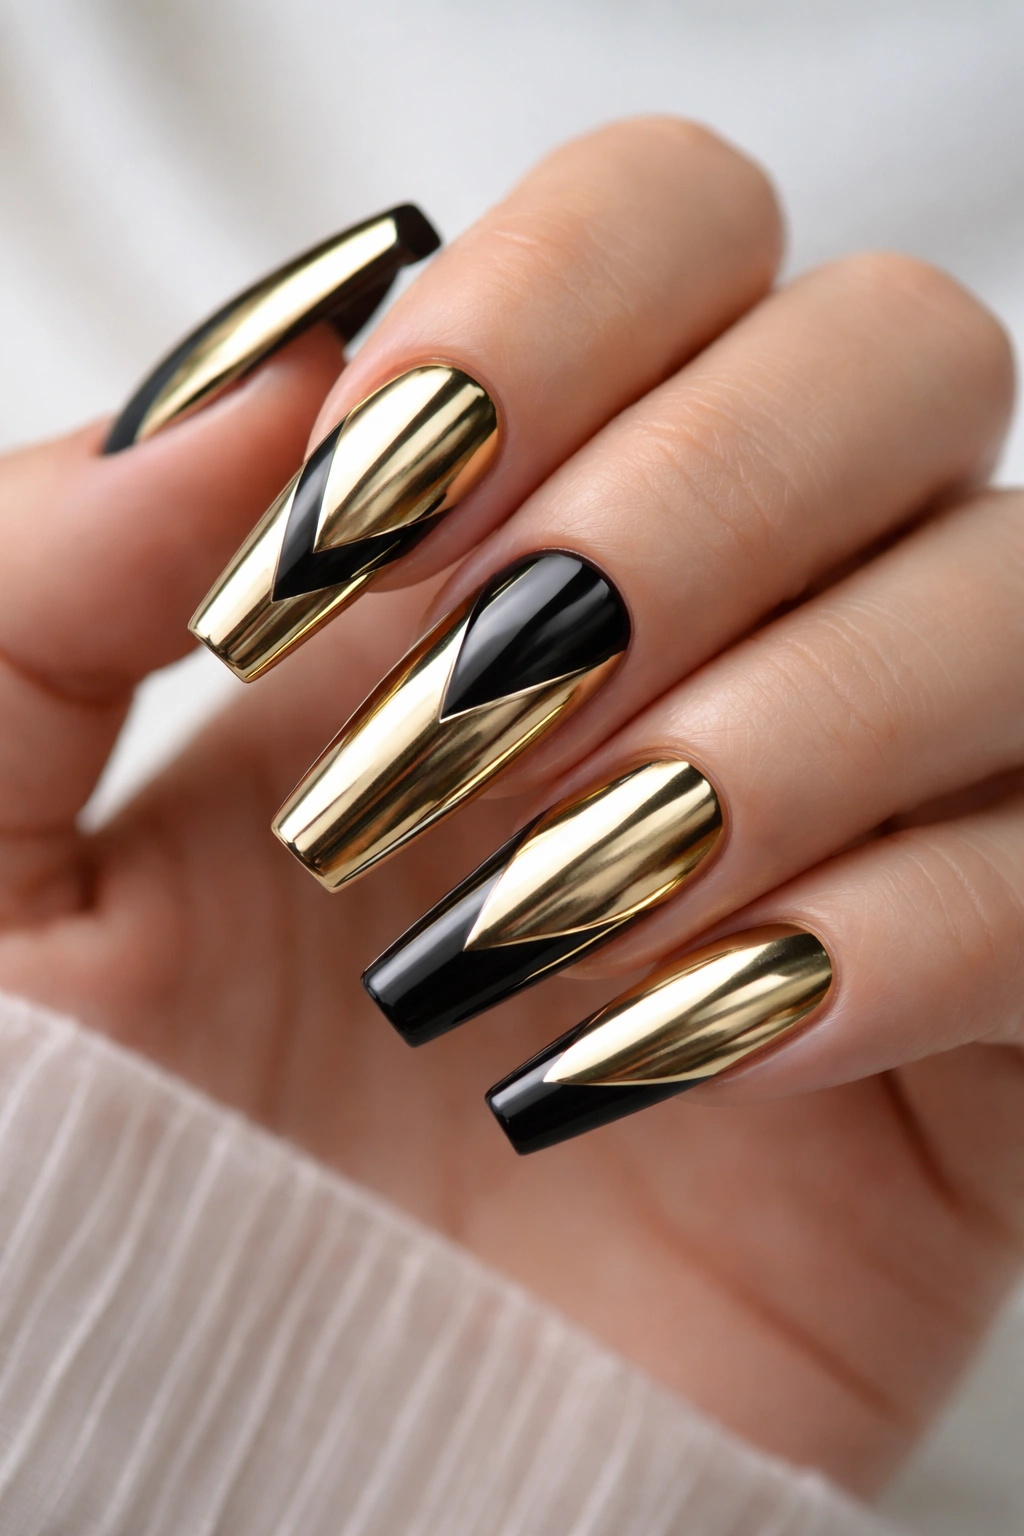
Mirror powder creates an incredibly reflective, almost liquid-metal surface that’s absolutely show-stopping on nails. In this design, the primary effect is gold mirror powder creating that stunning reflective surface, with black used as accent details—perhaps a black ombré shadow at the tips, black geometric shapes, or black stripes that add definition and contrast to the mirror effect. The mirror powder catches light so dramatically that the black accents prevent the nails from becoming one-dimensional.
What Makes It Different
Mirror nails are genuinely eye-catching and feel cutting-edge because the effect is so different from traditional polish. Unlike chrome powder, mirror powder creates an even more reflective surface with an almost liquid-metal appearance. Adding black accents ensures the design reads as intentional black-and-gold rather than appearing like all-gold mirror nails where the color combination is less obvious.
Application Essentials
- Mirror powder application requires a very sticky gel base—this is non-negotiable
- Apply a thin, even layer of mirror powder using a specialized brush or applicator
- The powder will shift and move slightly as you apply it, creating interesting depth
- Black accents can be painted before or after the mirror powder depending on the effect you want
- Multiple layers of topcoat are essential to seal the mirror powder and prevent flaking
Fair warning: mirror nails are higher-maintenance than standard polish and require careful application. The results are worth it, but this isn’t the easiest design to execute at home if you’re new to nail art.
13. Black Matte with Gold Metallic Details
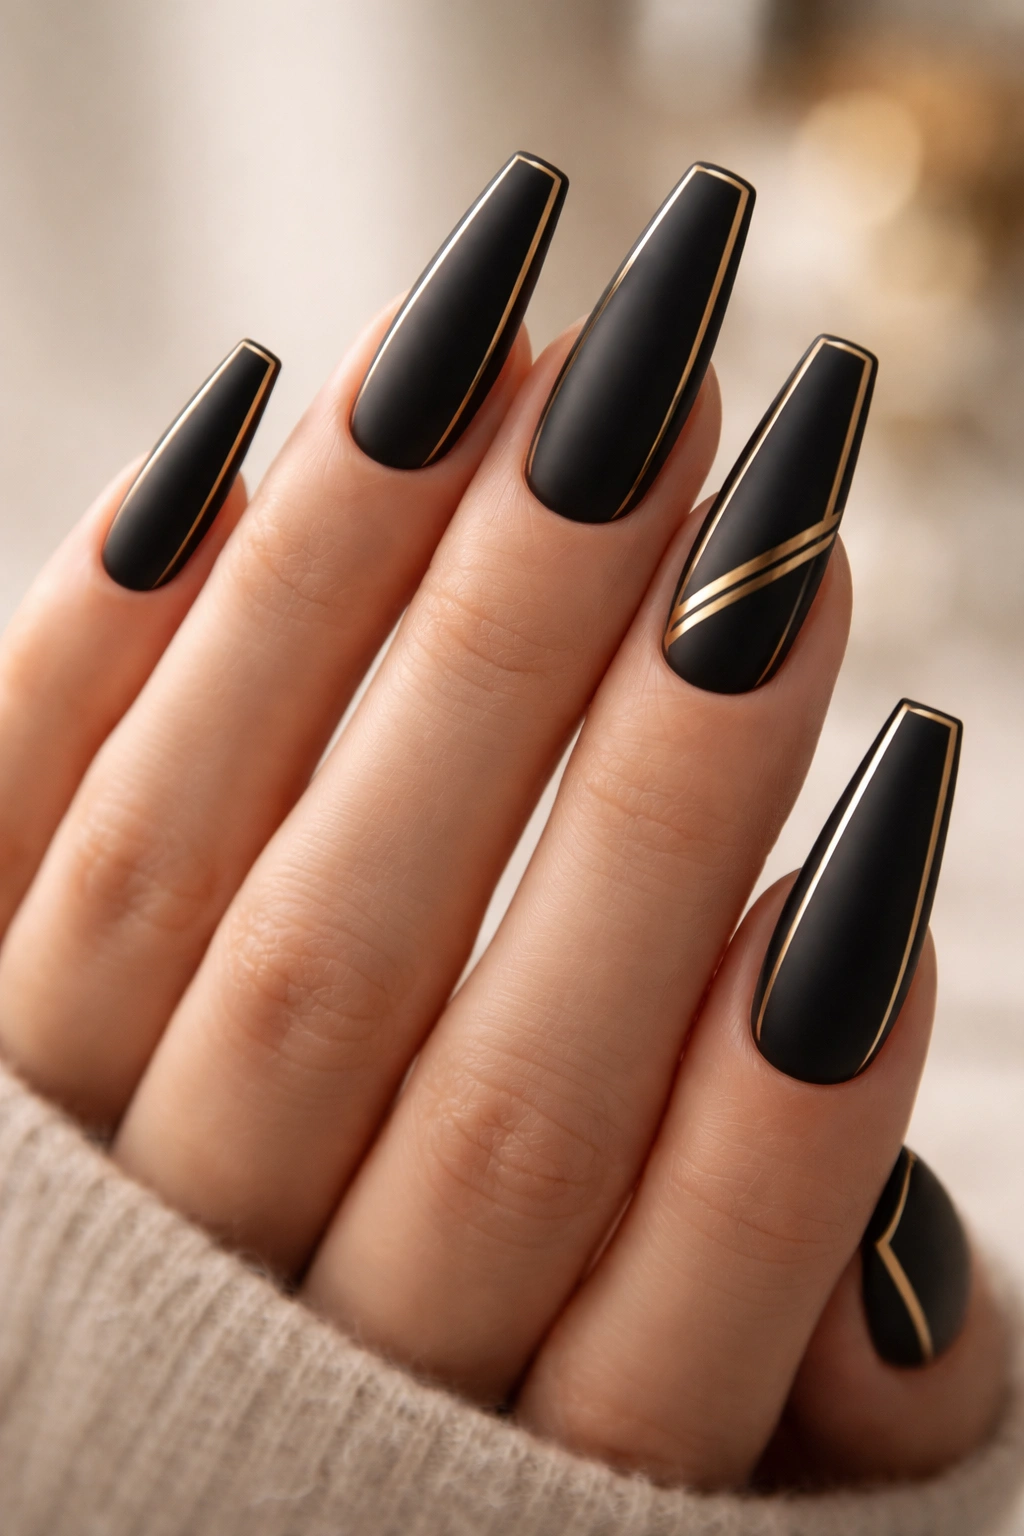
Matte finishes have a sophisticated, modern quality that feels intentional and curated, and pairing them with gold metallic details creates a design that’s both restrained and glamorous. This design features a matte black base with gold metallic accents—perhaps a metallic gold outline around the cuticle, metallic stripes, metallic shapes, or metallic details scattered across the surface. The matte texture makes everything feel premium and high-end, while the metallic elements add just enough shine to keep the design from feeling flat.
Why It Stands Out
Matte finishes were hugely popular in recent years and continue to be appreciated by people who prefer understated sophistication over high-gloss shine. The combination of matte black and metallic gold creates an interesting textural contrast that’s visually engaging even though the color palette is simple. This design works exceptionally well on longer coffin nails because the matte finish makes the nails appear even more elongated and elegant.
Quick Facts
- Matte topcoats are available separately and can be applied over any design
- Metallic gold polish naturally has some shine, so it will stand out against matte black
- This design works with minimal metallic details or with more extensive gold accents
- The coffin shape is complemented by the sleek, modern aesthetic of matte finishes
Create interest in a matte black base by adding metallic gold geometric shapes, dots, or a thin gold outline around the entire nail perimeter. The simplicity of the color combination means even minimal details feel significant.
14. Gold Gradient with Black Shadows
A gradient design using gold as the primary color with black creating shadows and depth offers a more subtle take on the black-and-gold combination. In this approach, the nails transition through champagne, light gold, and deep gold tones, with black used sparingly to create shadows that add dimension and prevent the gradient from looking washed out. The black might appear at the very tips, along the sides, or in a subtle shadow effect that suggests depth without overwhelming the gold gradient.
What Makes It Different
This design inverts the typical black-and-gold equation by making gold primary and using black as a supporting detail. This approach is perfect for people who love the glamour of gold but want some edge and depth from black. The gradient creates a sense of movement and luxury that feels expensive and well-executed.
How to Create This Look
- Start with a light gold or champagne base as your foundation color
- Blend progressively deeper gold shades toward the tips using a blending sponge
- Add subtle black shadows at the very tips or along the sides using a fine detail brush
- The shadows should be visible but not harsh—the goal is depth, not contrast
- Seal with topcoat to blend the layers together cohesively
This design shows beautifully on longer coffin nails because the gradient has room to develop fully. The progression from light to dark feels natural and intentional rather than rushed or abrupt.
15. Black and Gold Foil Swirl Design
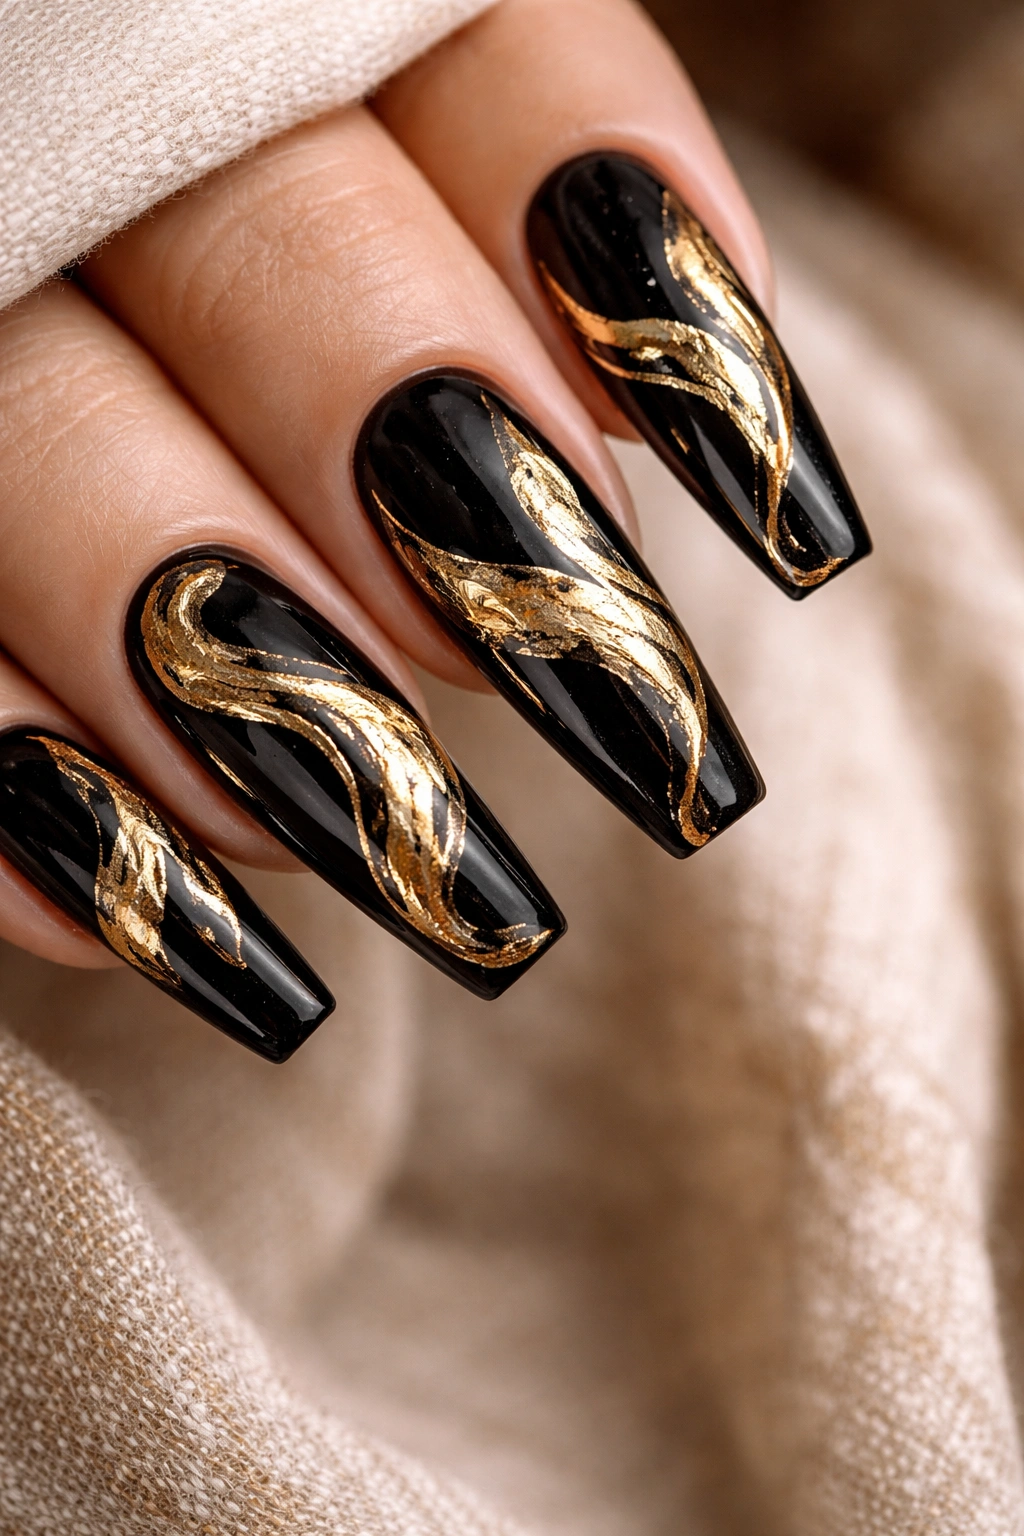
Swirling designs feel organic and artistic, and combining them with black base and gold foil creates a look that’s both free-spirited and refined. This design features a black base with swirled lines or shapes created using gold foil, creating a marbled or swirled effect that feels custom and unique. The swirls can flow vertically down the nail, spiral across the surface, or create abstract organic patterns. Gold foil captures light beautifully in swirled applications because the different angles of the foil catch light differently, creating dimension and shimmer.
Why It Works So Well
Swirled designs feel more artistic and less structured than geometric patterns, which appeals to people who want their nails to feel creative and unique. The combination of the precise pointed tip of a coffin nail with the organic nature of swirled designs creates an interesting juxtaposition. This design photographs beautifully and looks especially stunning in natural light where the foil’s reflective qualities truly shine.
Application Tips
- Apply foil adhesive or a sticky gel base to the areas where you want foil to adhere
- Tear or crumple gold foil into organic pieces rather than using straight pieces
- Press the foil into the adhesive, allowing pieces to overlap and create depth
- The random nature of foil placement actually works in your favor—imperfection is the point
- Seal thoroughly with multiple topcoat layers to protect the foil
Don’t overthink the placement of foil swirls—the beauty of this design is that it’s forgiving and organic. Let the foil fall where it falls, and embrace the randomness that makes each nail unique.
Wrapping Up
Black and gold coffin nails offer incredible versatility whether you’re drawn to minimalist elegance or full-on glamour. The fifteen designs above represent just some of the possibilities when you combine these two powerhouse colors on such a dramatic nail shape. The key to choosing your perfect design is considering what you’re drawn to: Are you a geometric precision person, or do you prefer organic, artistic designs? Do you love maximum shine and sparkle, or do you prefer understated sophistication? Are you comfortable with complex stamping and hand-painting, or would you prefer simpler designs you can execute at home?
The beauty of black and gold coffin nails is that they transition seamlessly across all seasons, occasions, and personal styles. You can wear these designs to professional settings, nights out, casual everyday moments, or special celebrations. Long coffin nails give you the canvas to express creativity boldly while maintaining elegance. Once you find a design that resonates with you, you’ll probably find yourself returning to variations of it—there’s something deeply satisfying about finding a look that feels authentically you.
Whether you’re getting your nails professionally done or attempting these designs yourself, take time to find inspiration and reference images that speak to you. Bring those images to your nail artist, or use them as guides for your own creation. The most stunning black and gold coffin nails aren’t necessarily the most complicated ones—they’re the ones that make you feel confident, beautiful, and authentically expressed.
