

Red nails have been a symbol of confidence and elegance for decades, but there’s something uniquely striking about the combination of a bold red shade with long, rounded nails. The shape itself—soft curves that follow the natural contour of your fingertip—creates a refined silhouette that works equally well for formal events, professional settings, or everyday wear. When you pair that graceful shape with the timeless power of red, you get a manicure that commands attention without screaming for it.
The beauty of long round nails is their versatility within polish color choice. Unlike sharp almond or coffin shapes that can feel edgy or trendy, rounded edges feel sophisticated and classic—which makes red even more impactful. A true red on rounded nails reads as intentional polish, not a bold statement trying too hard to prove something. It’s the difference between wearing a well-tailored red dress versus a bright red costume. The roundness softens what could feel aggressive and instead channels elegance.
What separates a basic red manicure from one that truly stands out? It’s usually the details: the specific shade of red you choose, how you finish the design, and the way you care for the length. A burgundy-red with a cream finish will read completely differently from a classic scarlet with a high shine, which will again feel different from a blue-toned red with shimmer. Then there’s dimension—adding metallics, negative space, marble effects, French tips, or subtle nail art transforms a simple red base into something genuinely memorable.
Whether you’re planning your next salon visit or drawing inspiration for your next manicure appointment, here are fifteen red long round nail designs that actually stand out, each with its own reason to shine.
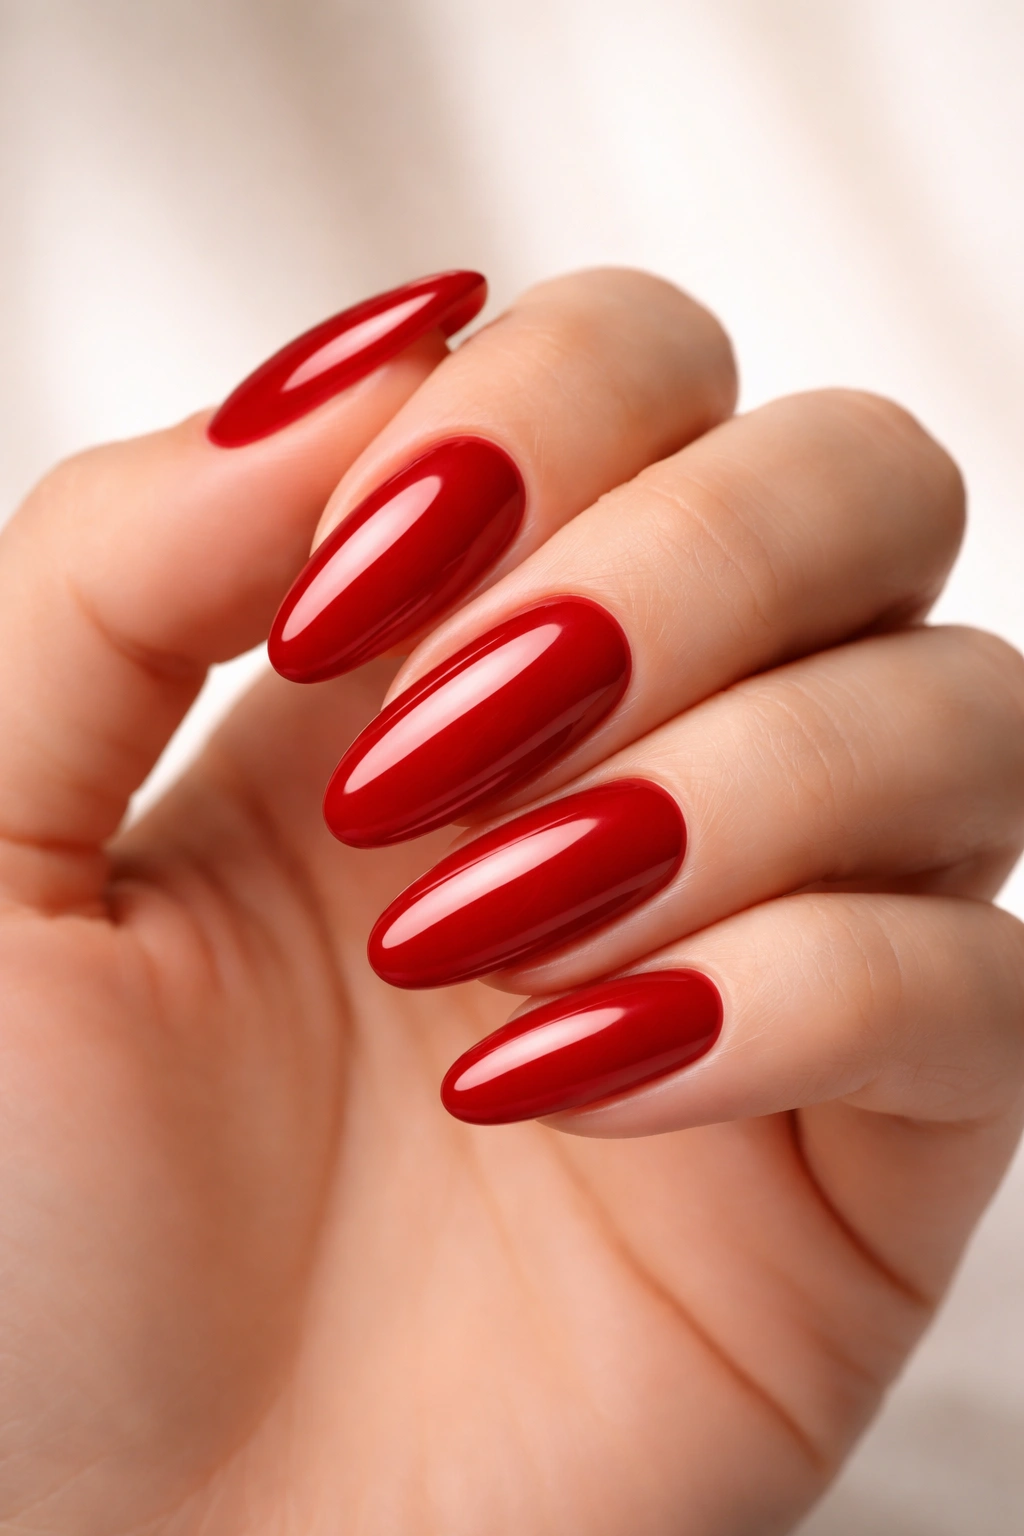
1. Classic Glossy Crimson with Deep Shine
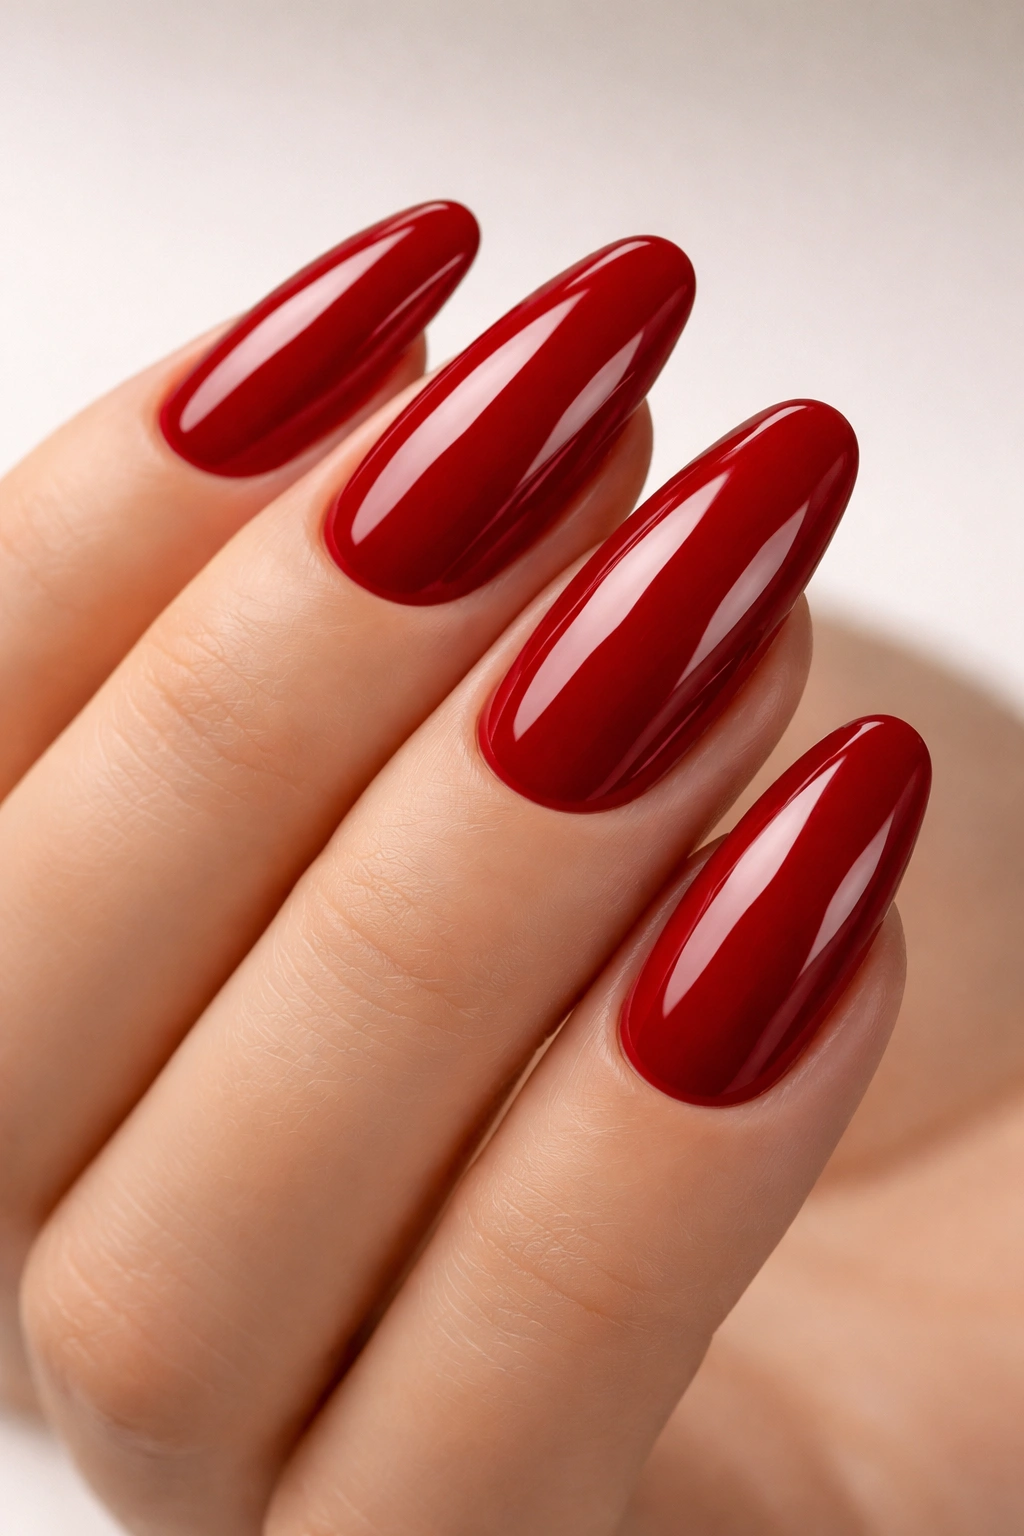
There’s a reason this never goes out of style: a rich, true crimson red with a mirror-like glossy finish is the nail equivalent of the little black dress—it works for literally everything. This particular design skips any embellishment and lets the color and shine speak entirely for themselves. The key to making a basic red manicure stand out is getting the formula right, which means a semi-sheer red that builds to opacity in two coats rather than a thick opaque that requires three layers and looks plastic.
Why This Design Works
A true crimson sits right in the sweet spot between warm and cool red undertones, which means it flatters most skin tones without needing adjustment. The glossy finish amplifies light reflection, which makes even shorter long nails (around 2.5 to 3 inches) look dramatically longer and more elegant. Glossy red also photographs beautifully in natural light, giving your nails a subtle glow that matte versions simply can’t achieve.
How to Keep It Looking Fresh
- Apply a base coat to prevent staining your nail bed
- Use a quality topcoat and refresh it every 3-4 days for sustained shine
- Avoid direct sunlight right after application—let the finish cure fully in indoor light first
- Wear gloves during cleaning tasks; red polish chips most visibly on rounded nail tips
Pro tip: If your chosen red tends to stain, apply a thin base layer of clear polish first, wait 30 seconds for it to set, then apply your red. This single step prevents that frustrating discoloration that can take weeks to grow out.
2. Deep Burgundy with Gold Leaf Accents
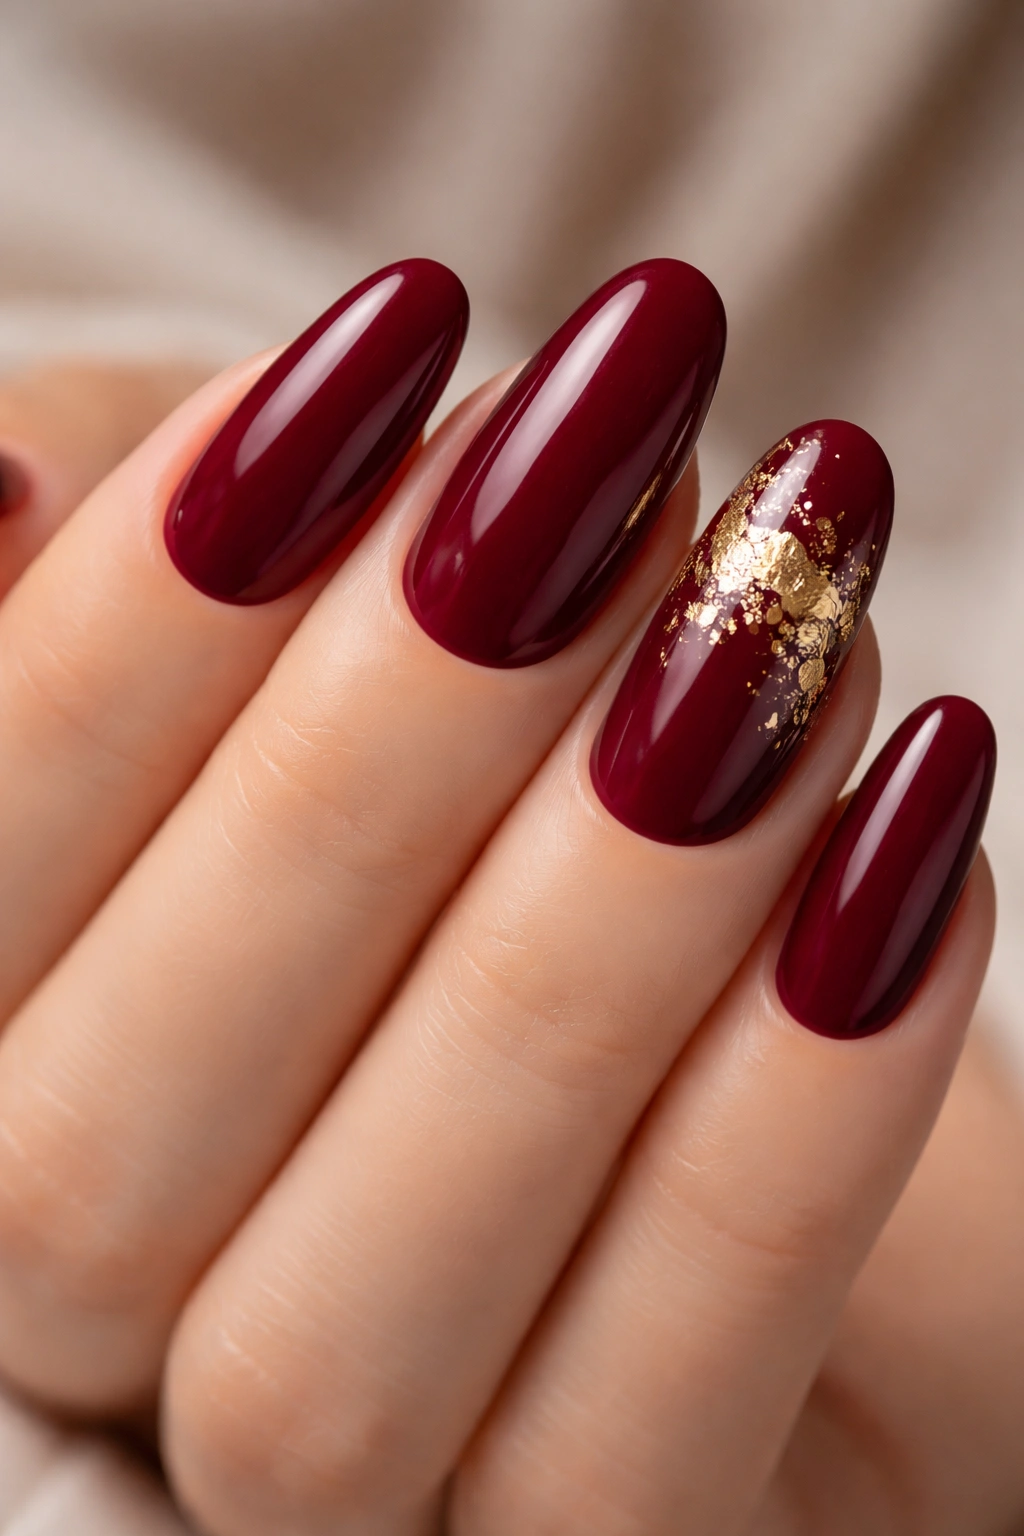
Trading true red for a deeper burgundy shifts the vibe instantly—this shade reads as sophisticated evening wear rather than everyday confidence. Adding gold leaf accents (usually placed as a thin diagonal line across two or three nails, often the ring and pinky fingers) creates just enough visual interest to feel deliberate and curated without crossing into “try-hard” territory.
What Makes This Stand Out
Burgundy is the red that works across seasons and occasions. It looks equally right in winter alongside jewel tones and in summer against sun-warmed skin. The gold leaf adds a touch of luxury that feels special but isn’t flashy—it’s the kind of accent detail that makes people say “that’s such a nice manicure” rather than “that’s so extra.” The two-tone combination also makes the rounded shape feel more dimensional and artistic.
Application Tips
- Gold leaf adheres best over a slightly sticky topcoat layer (don’t fully cure your topcoat before applying)
- Use a thin angled brush to place leaf pieces precisely—random placement looks more intentional than perfectly symmetrical patterns
- Seal gold leaf with one more thin topcoat to prevent it from lifting during daily wear
- Apply topcoat in thin layers after the leaf to avoid covering it with visible topcoat texture
Insider note: You can achieve a similar effect with gold foil tape (much cheaper than actual gold leaf) placed the same way—the visual impact is nearly identical but lasts longer without flaking.
3. Scarlet Red with Minimalist White French Tips
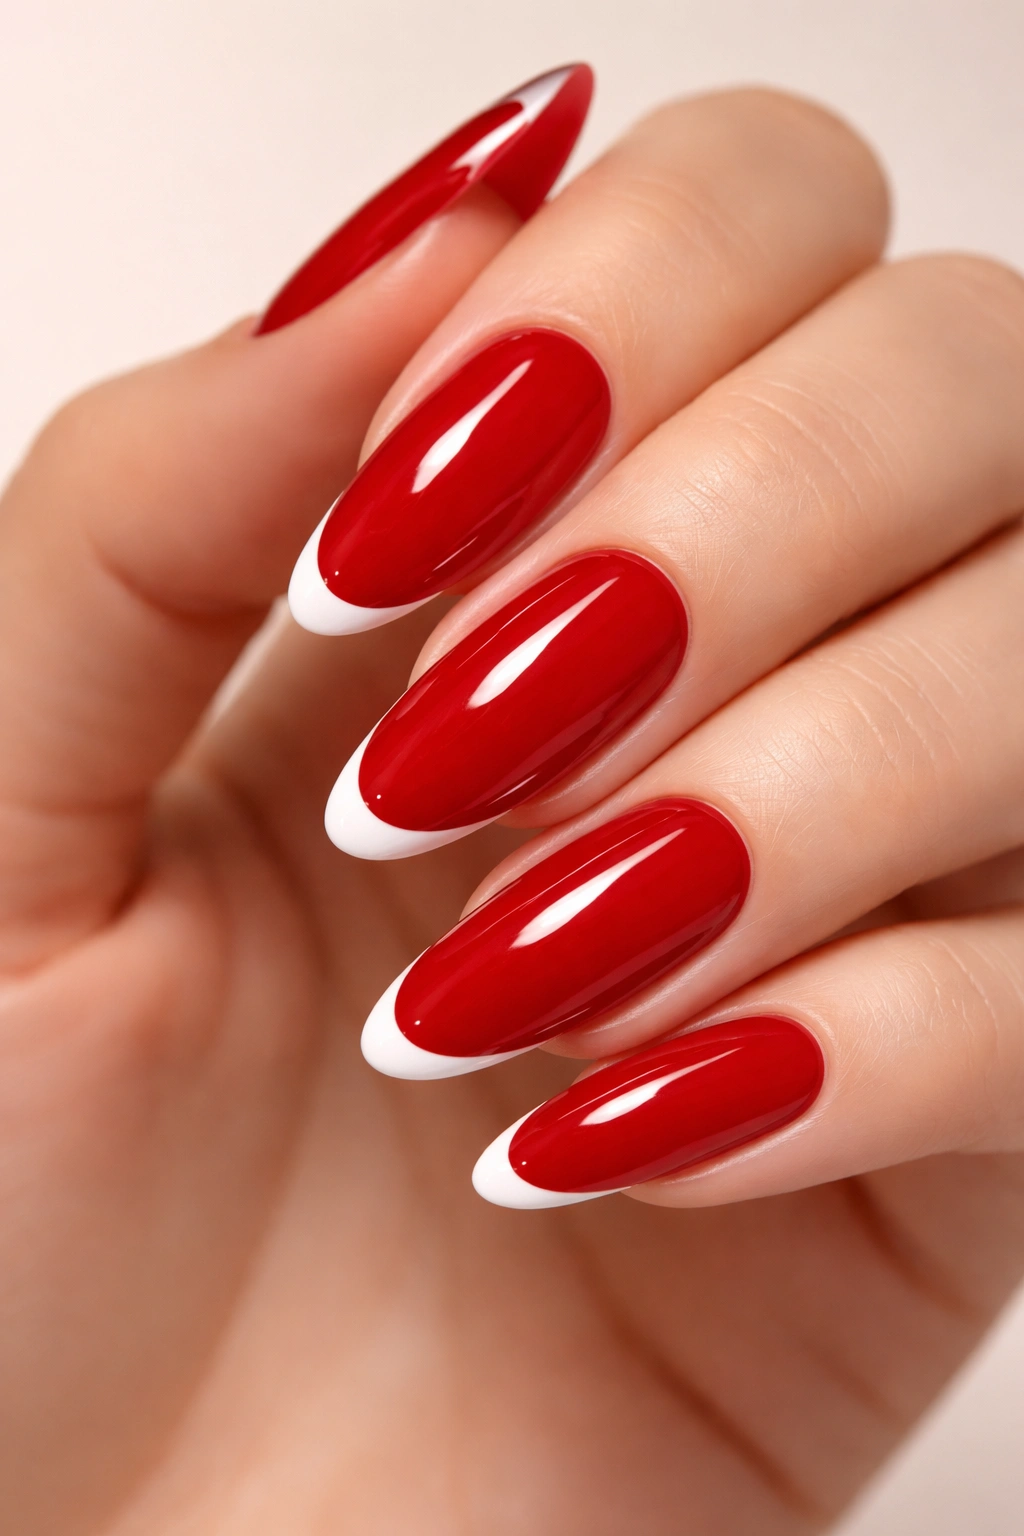
This modern take on the French manicure pairs a traditional scarlet base with an unexpected thin white line at the tip—but reversed from what you might expect. Instead of a thick, obvious French tip line, this design features a minimal 1-2mm white stripe that’s almost delicate. It reads as sophisticated rather than retro, especially on longer rounded nails where the white creates a subtle extension effect.
Why the Minimalist Approach Works Better
A thick white tip can cheapen a red manicure, making it feel more costume than polish. A barely-there white line, though, adds just enough contrast to make the red appear deeper and richer by comparison. This design also makes your nails look slightly longer than they actually are—the white extension creates an optical illusion that tricks the eye into seeing more length.
How to Execute It Cleanly
- Use a thin striping brush or a toothpick dipped in white polish for precision
- Create the white line freehand slightly below where the nail edge actually is (about 1mm before the tip ends)
- The line doesn’t need to be perfectly straight—a slightly wobbly organic line actually looks more modern and intentional
- Seal with topcoat immediately after the white is placed, before it can smudge
Worth knowing: This design shows every speck of dust or debris under the white line, so keep your hands clean and your nail tops sealed well with topcoat.
4. Tomato Red with Chrome Mirror Accents

Chrome finishes (also called mirror nail polish) create that high-tech metallic effect that looks like actual metal on your nail. A tomato red (slightly warmer and more orange-toned than true crimson) paired with chrome accents on select nails creates a contemporary look that’s definitely modern but not overly trendy.
The Visual Impact
The contrast between the warm matte or satin red base and the cool reflective chrome creates visual depth that catches light and draws attention. This design works beautifully on a gradient—red fading to chrome across the nail, chrome only on the tips, or chrome as geometric shapes overlaid on the red base. The rounded shape becomes almost three-dimensional with this treatment because the curves reflect the chrome differently depending on light angle.
Chrome Application Process
- Chrome powder requires a specific sticky topcoat base (usually sold with the powder)
- The red base must be fully cured before applying the sticky topcoat
- Chrome powder is applied by rubbing it directly onto the sticky surface with a soft brush—it’s not paint but rather a reflective pigment that clings to tacky polish
- Seal with topcoat immediately after application to lock the powder in place
- Chrome requires careful maintenance; excessive water exposure can cause it to dull or flake
Real talk: Chrome can look cheap if applied unevenly or with low-quality powder. Invest in a decent chrome powder from a reputable brand—the difference is dramatic.
5. Candy Apple Red with Subtle Glitter Gradient
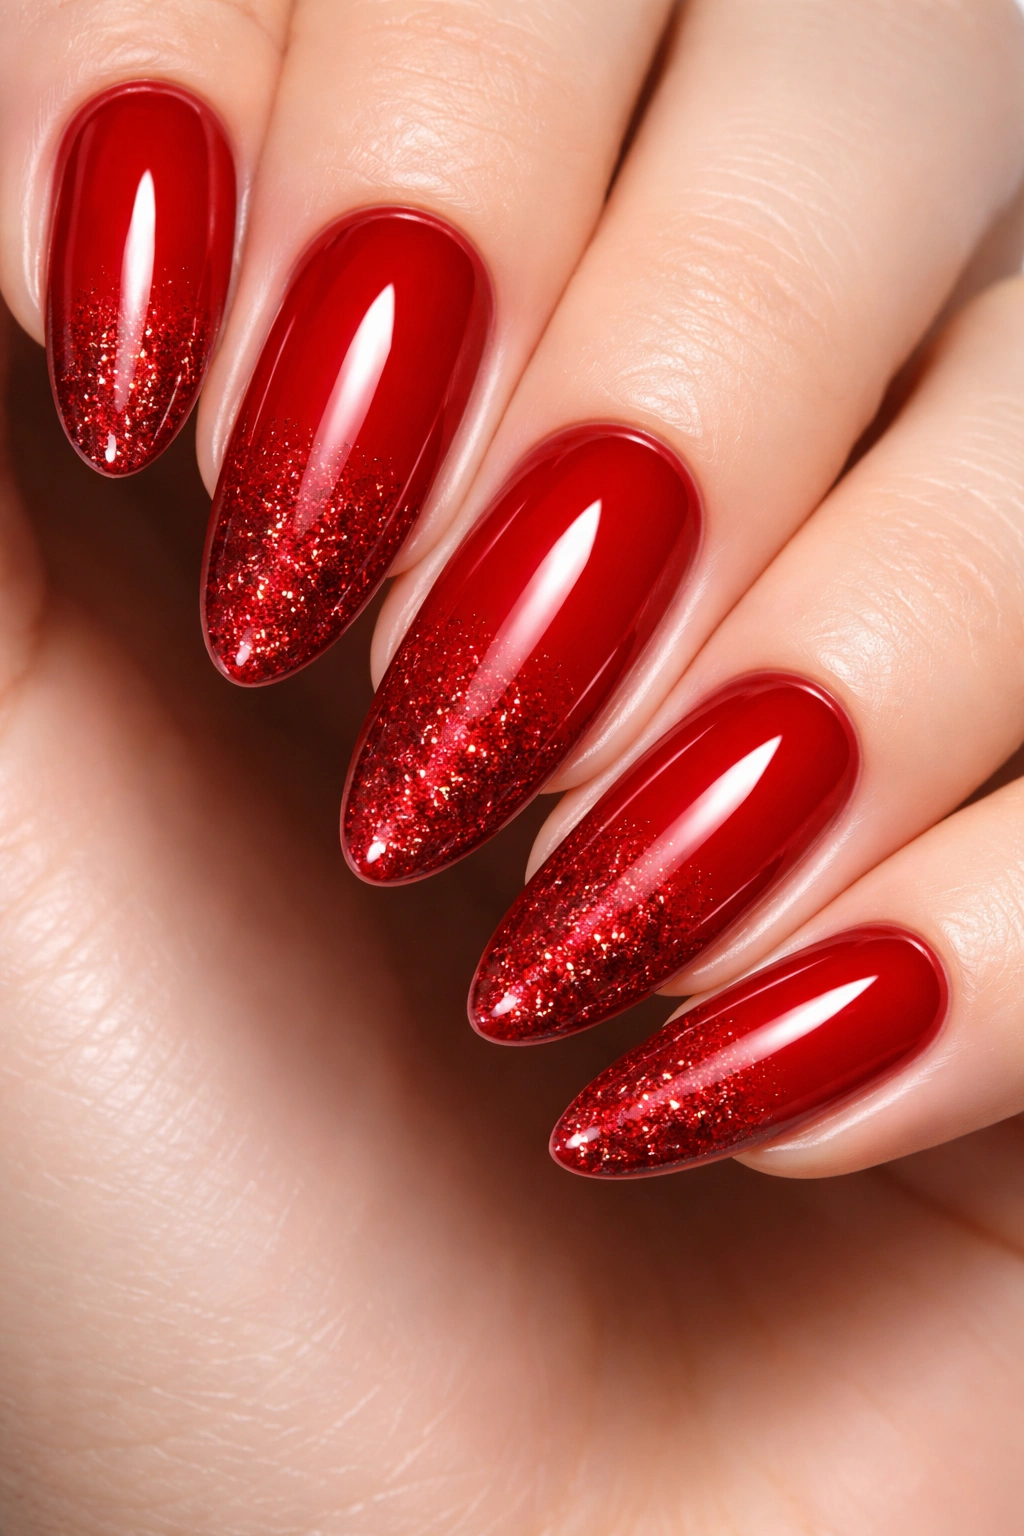
This design starts with a vibrant candy apple red (the kind of red that looks almost neon in certain lighting) and fades to red glitter near the tips and edges. The effect is playful without being childish, especially on long rounded nails where the gradient has more surface area to showcase the transition.
Why Glitter Gradients Feel Fresh
Instead of glitter scattered randomly across the nail or packed into the tips, a gradient effect creates intention and artistry. The glitter catches light differently than the solid polish, creating natural highlights that make your hands look more dimensional. On rounded nails, this effect is particularly striking because the curve of the nail means the glitter catches light from different angles as you move your hands.
Gradient Glitter Technique
- Paint solid candy apple red on all nails first and let fully cure
- Mix your chosen glitter shade with clear polish (or use a pre-mixed glitter polish)
- Using a slightly damp sponge, dab the glitter mixture onto the tips first, then blend it slightly toward the base
- You want denser glitter at the tips and gradually less as you move toward the cuticle
- Seal with topcoat to prevent glitter migration and keep everything smooth to the touch
Pro tip: Using a makeup sponge instead of your nail brush gives you better control over the gradient and creates a softer, more professional blend than traditional painting.
6. Brick Red with Marble White Veining
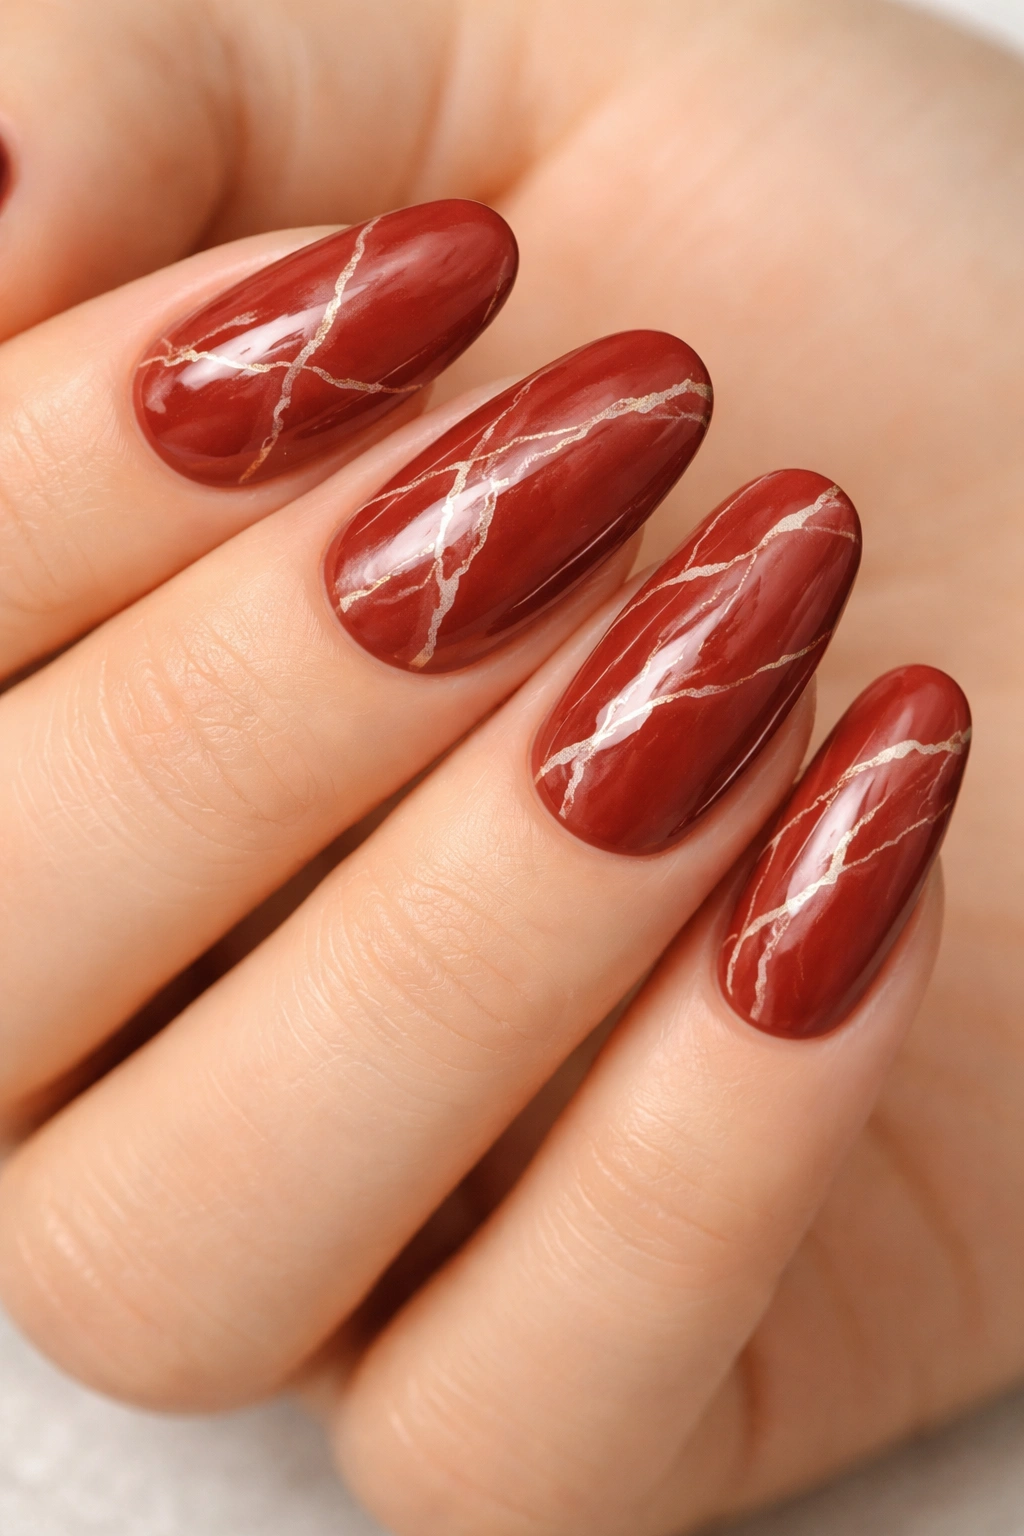
Brick red (a muted, earthy red with brownish undertones) pairs beautifully with white marble veining that looks like natural stone patterns across the nail. This design feels more artistic and less “standard manicure” because it requires actual freehand skill to execute well.
The Artistic Appeal
Marble effects are trendy for a reason—they create a high-fashion, editorial feel that makes people assume you paid premium salon prices. The brick red base provides a warm, sophisticated foundation, and the white veins create contrast without being jarring. On long rounded nails, the white lines can flow with the nail’s natural curves, creating an organic look that feels less stiff than geometric marble patterns.
Freehand Marble Application
- Start with your brick red base fully cured
- Dip a very thin brush (essentially a toothpick with bristles) in white polish
- Create irregular, flowing lines across the nail—don’t aim for perfection; organic imperfection is the point
- Some lines should connect, some should stand alone, and the density of lines varies across the nail
- Go back with a slightly damp, clean brush and gently drag through some lines to soften them and create that classic marble blur
- Seal immediately with topcoat to lock everything in place
Insider note: If freehand marble intimidates you, water marble techniques (floating polish in water and swirling) or marble nail stamps are valid alternatives that create similar effects with less freehand precision required.
7. True Red with Gold Leaf Gradient
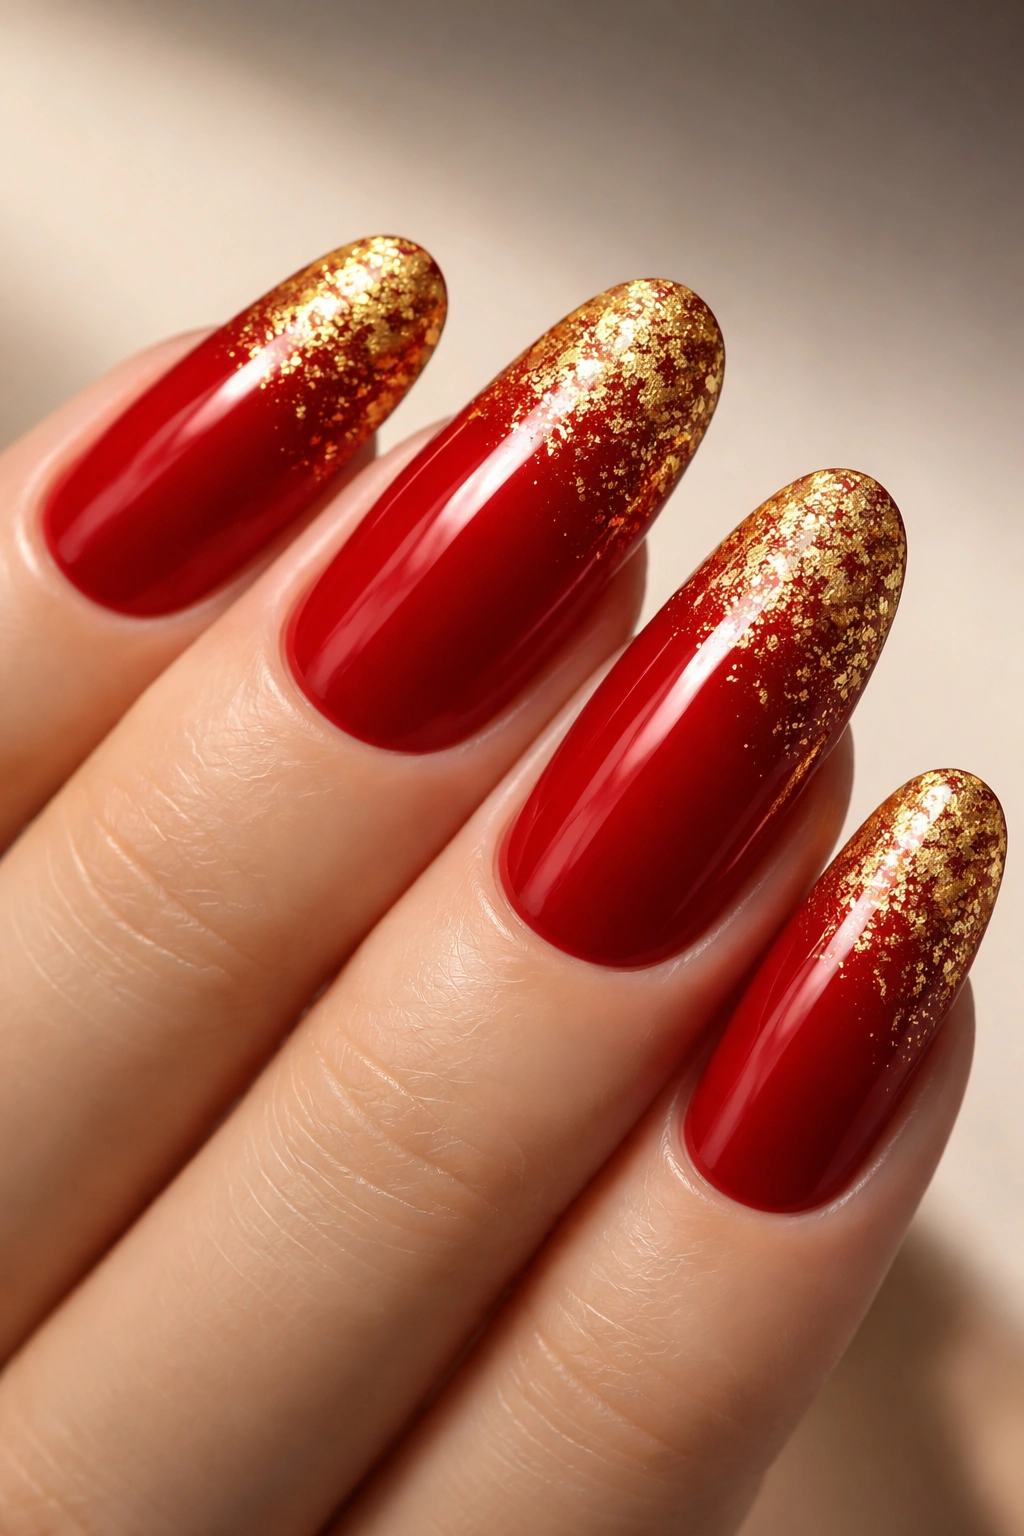
This takes the gold leaf concept further by creating a gradient effect—heavier gold placement at the tips fading to sparser placement toward the cuticle. A true, slightly blue-toned red provides the perfect canvas for warm-toned gold without the colors competing.
Why Gradients Feel More Intentional
A gradient automatically feels more designed and thought-out than flat placement. With gold leaf specifically, a gradient creates the illusion that light is catching and illuminating the tips, which makes the entire nail look longer and more elegant. The rounded shape of the nail naturally follows this light-to-shadow pattern, so a gold gradient actually aligns with how light naturally falls on curved surfaces.
Creating a Gold Gradient Effect
- Apply your true red base and cure completely
- Cure a sticky topcoat layer
- Start placing gold leaf pieces densely at the very tip of the nail
- As you move toward the middle of the nail, space the pieces further apart
- Near the cuticle, place only occasional single pieces or skip the gold entirely
- Seal with a thin topcoat layer to protect the gradient and smooth any rough edges
Worth knowing: The rounded tip naturally shows more gold than the sides of the nail, so you don’t need to be perfectly precise—the shape of your nail does some of the work for you.
8. Wine Red with Champagne Shimmer Overlay
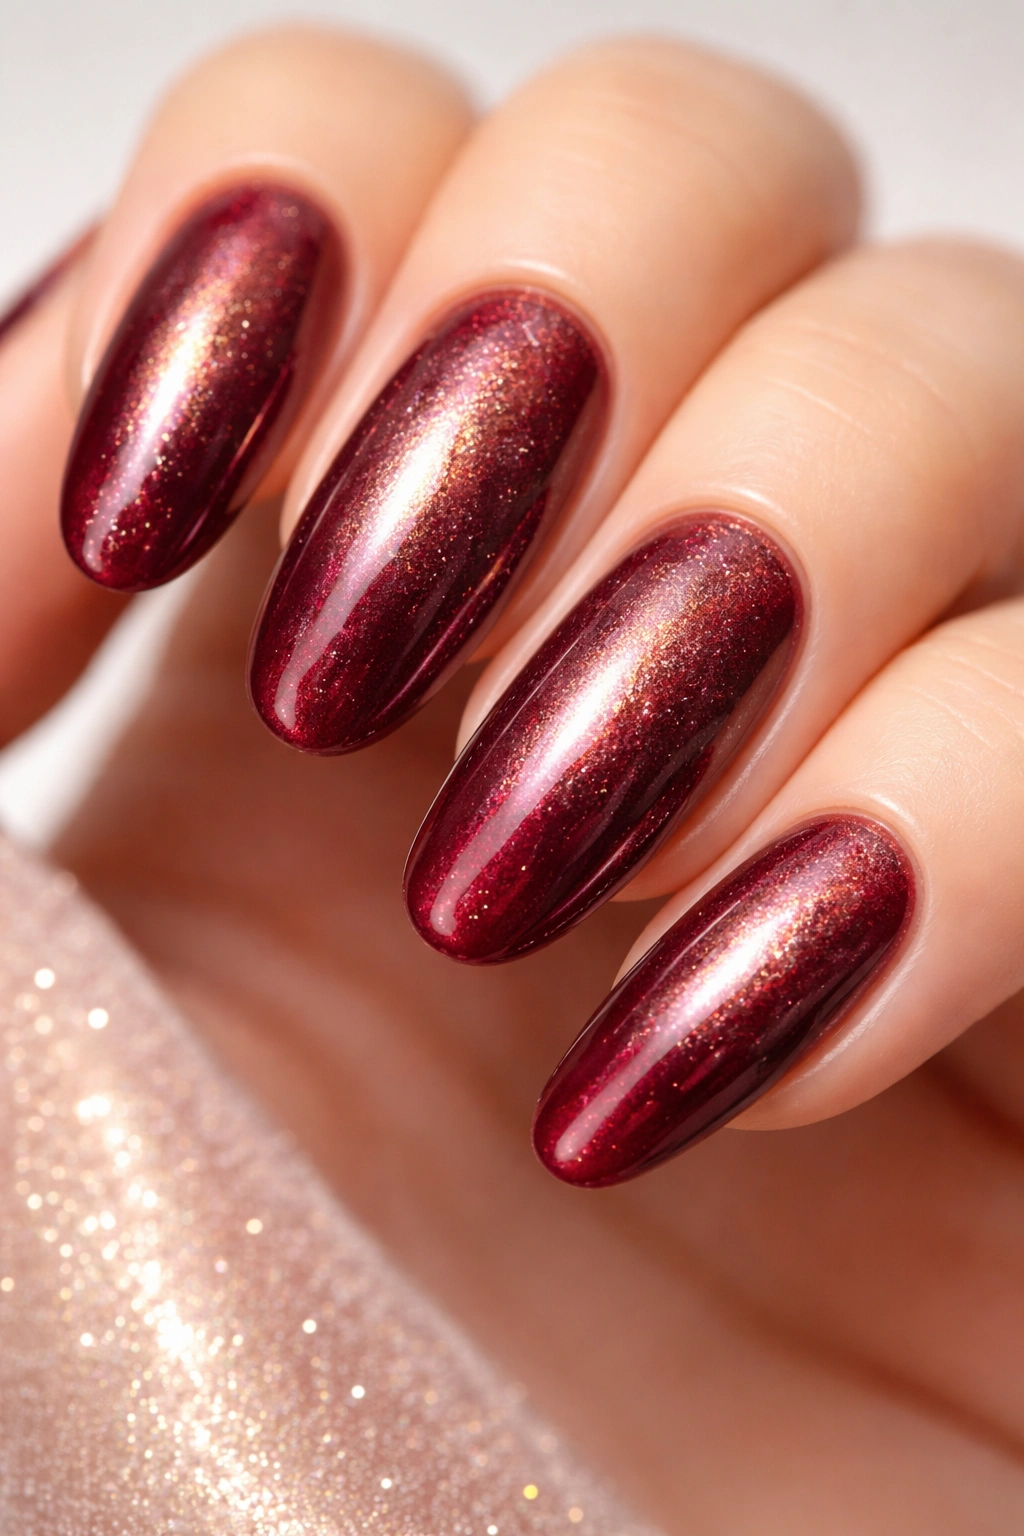
Wine red (a deep, slightly purplish red) becomes absolutely luxurious when topped with a champagne shimmer that adds sparkle without looking glittery. This is the manicure that makes people think you either just returned from an expensive vacation or have access to a celebrity nail technician.
The Luxury Factor
Champagne shimmer adds elegance because it reads as expensive and intentional. Unlike dense glitter that catches light aggressively, shimmer is subtle and classy—it catches light softly, creating highlights rather than sparkles. On wine red, the contrast between the dark base and the light, warm shimmer creates depth and dimension that looks almost three-dimensional.
Application Method
- Paint wine red as your base (two coats for full opacity) and cure
- Apply a champagne shimmer topcoat (these are typically sold as topcoats with shimmer already mixed in, not as polishes that need a base)
- The shimmer topcoat goes on over your cured wine red and doesn’t require additional topcoat (the shimmer topcoat itself is protective)
- One coat of shimmer topcoat is usually sufficient; a second coat can make it look dense or glittery rather than shimmery
Real talk: The difference between affordable and luxury-brand champagne shimmer topcoats is noticeable. Invest in a good one—drugstore versions often look more like glitter than subtle shimmer.
9. Coral-Red with Negative Space Geometric Design
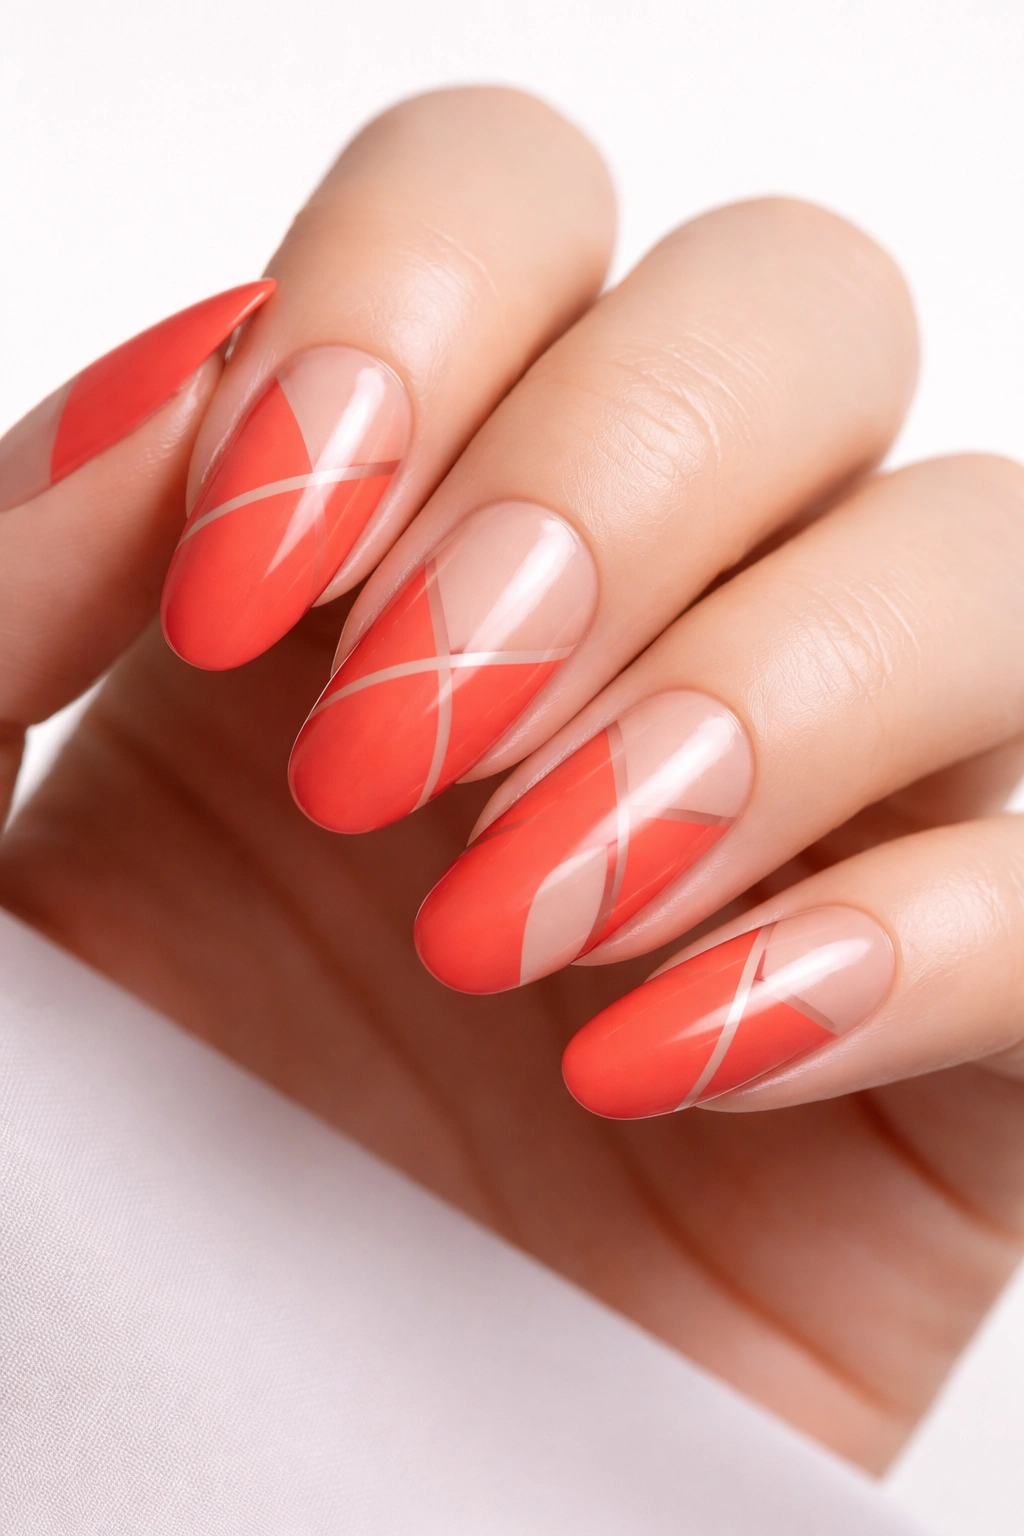
Coral-red (warm, slightly orange-toned red) creates a modern vibe when paired with negative space geometric design—meaning parts of the nail are left bare (showing your actual nail or a base coat) while the coral-red fills in geometric sections. On long rounded nails, this design feels architectural and intentional.
Why Negative Space Modernizes Red
Completely covering the nail in solid color is classic, but leaving strategic sections bare creates a contemporary, editorial feel. Negative space also visually breaks up the nail, which actually makes very long nails feel less overwhelming. The rounded shape pairs well with curved negative space sections or angular geometric shapes—both work beautifully depending on the specific pattern.
Geometric Negative Space Patterns
- Curved half-moon shapes (negative space at the cuticle, coral-red covering the rest)
- Triangular negative space sections at corners or tips
- Diagonal stripe patterns alternating between coral-red and bare nail
- Geometric shapes (circles, squares, hexagons) placed strategically across the nail
- Use nail tape for clean, precise edges, or freehand for a more artistic, imperfect look
Pro tip: Negative space designs actually require less topcoat overall (fewer coats needed), which means they’re gentler on your nails and sometimes last slightly longer without chipping at the edges.
10. Crimson Red with Micro Rhinestone Accent Nail
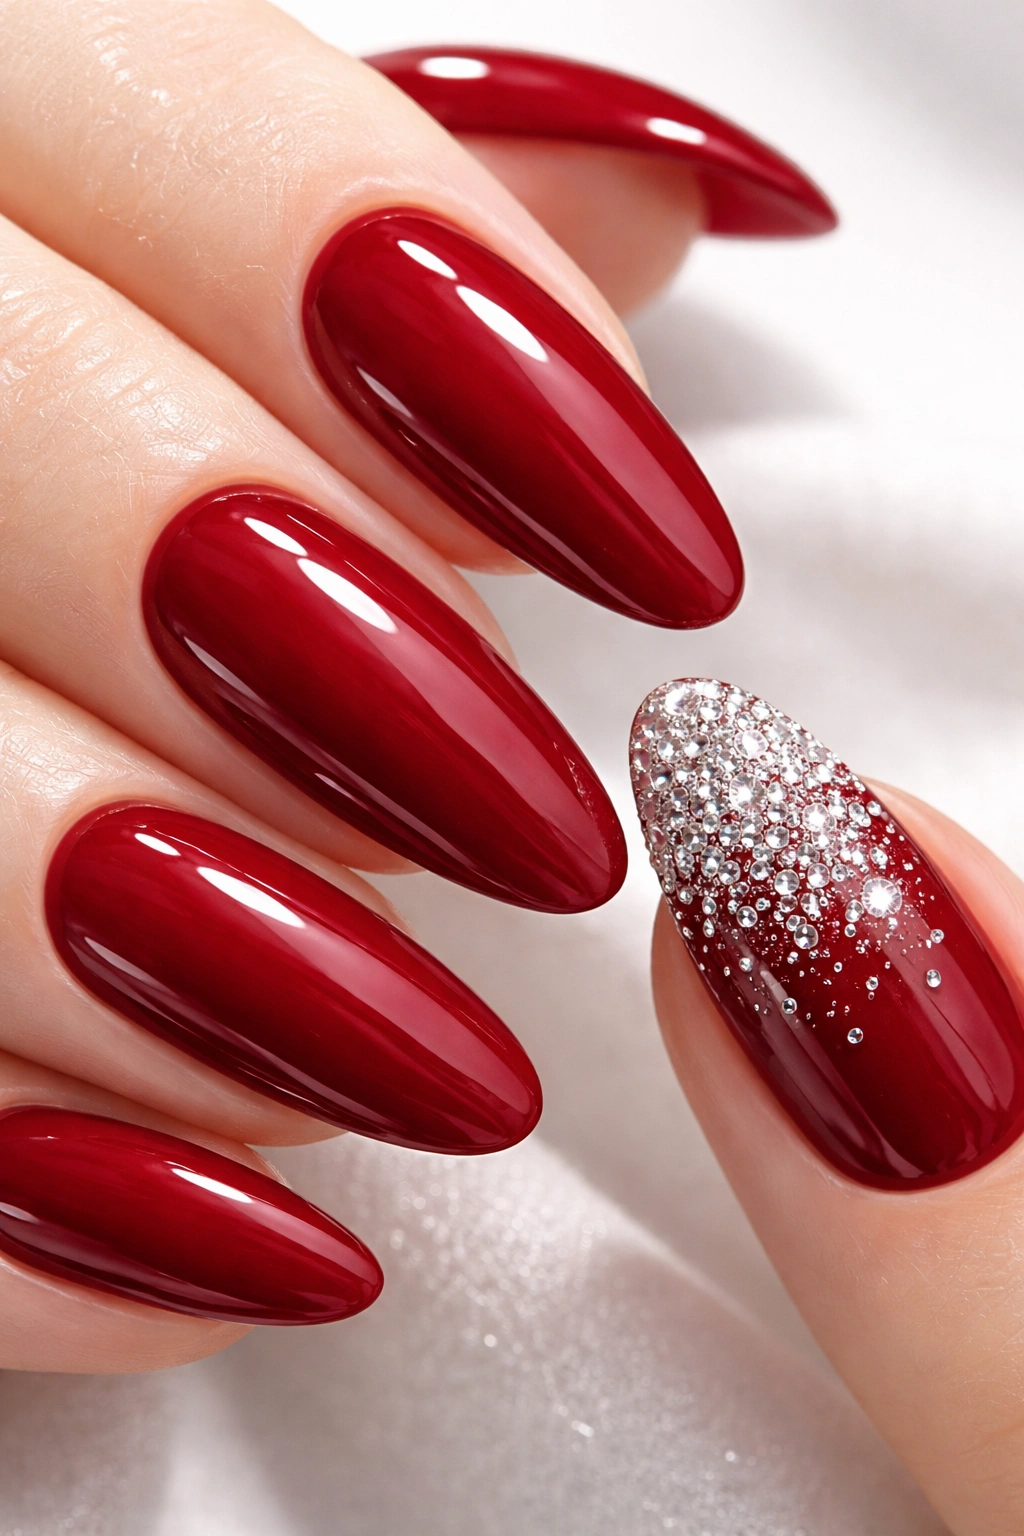
This design keeps most nails a simple, clean crimson red while designating one accent nail (usually the ring finger) as a showcase for a few carefully placed micro rhinestones. It’s an excellent middle ground between “nothing special” and “over the top”—one statement nail without overwhelming the whole hand.
The Psychology of the Accent Nail
Humans are drawn to details and focal points. One sparkly nail naturally becomes where people’s eyes land, which means a single well-decorated accent nail gets more attention than if all five nails were equally decorated. On rounded nails, placing rhinestones strategically creates an asymmetrical focal point that feels intentional and curated.
Rhinestone Placement Strategy
- Paint all nails with crimson red base and cure completely
- On your accent nail, decide on placement: a corner cluster, a diagonal line, scattered across, or a central focal point
- Rhinestones adhere to sticky topcoat, so cure a layer of regular topcoat first
- Use a rhinestone picker tool (or a toothpick) to place each stone precisely into the sticky topcoat
- Different sizes create more visual interest than uniform rhinestones
- Seal with topcoat to lock stones in place, using thin coats to avoid creating bumps over the stones
Insider note: Micro rhinestones catch less light and look more elegant than large, obvious ones—they read as intentional detail rather than sparkly decoration.
11. Fire Engine Red with Holographic Sparkle
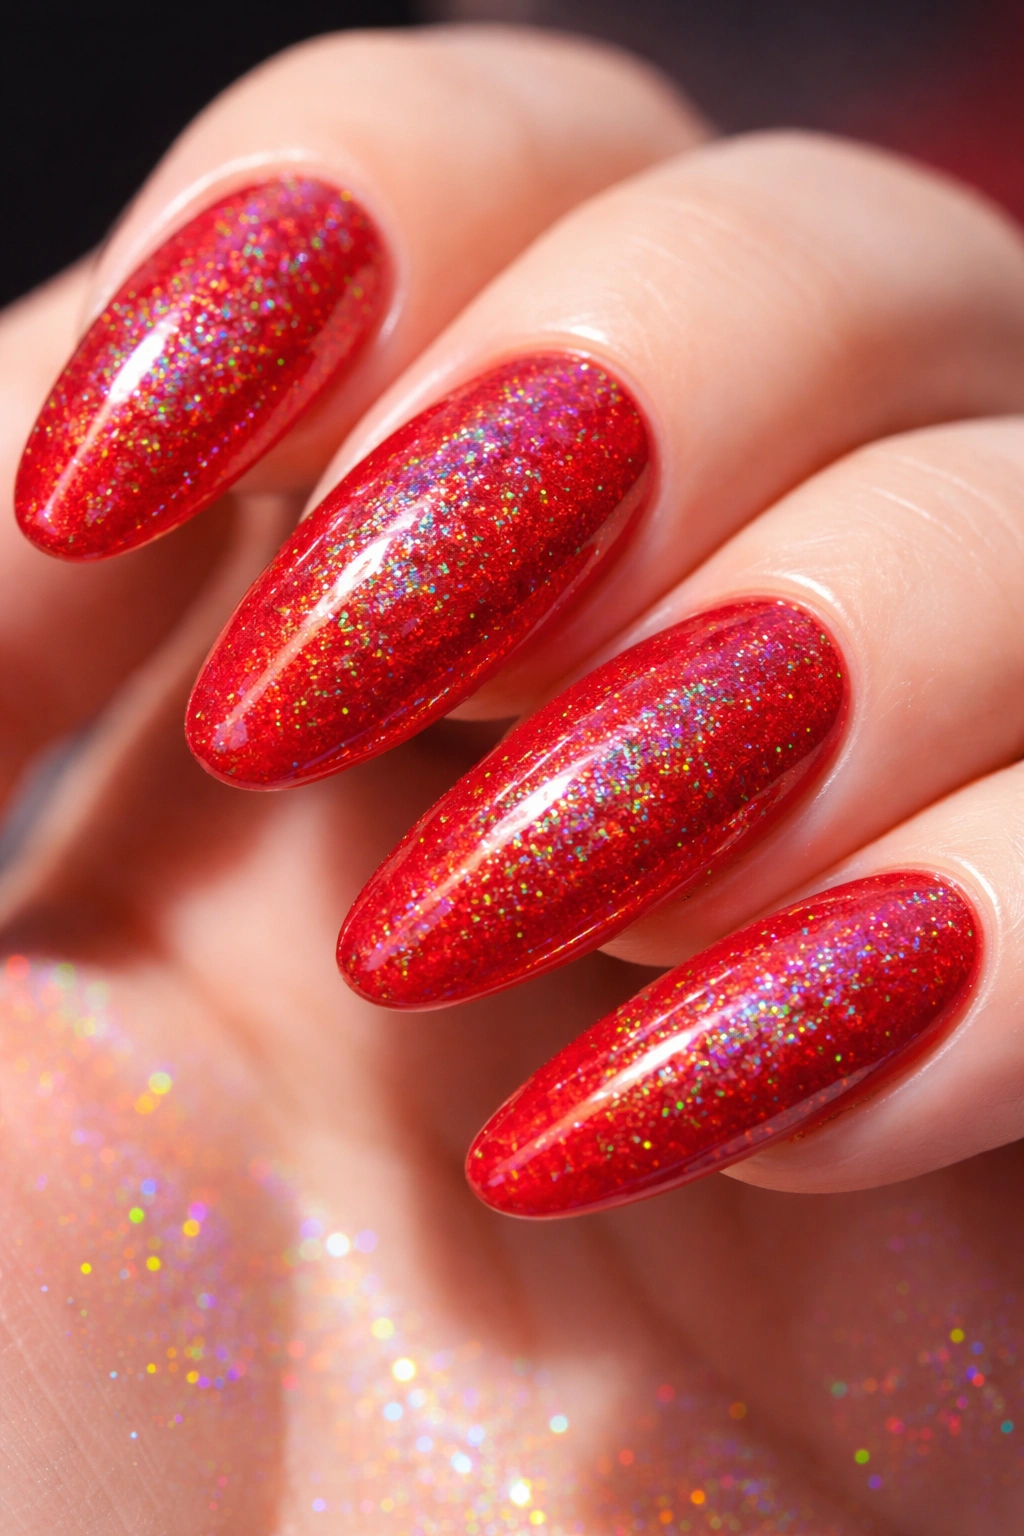
Fire engine red is that perfect, universal red that looks great on virtually every skin tone—bright, confident, and unapologetically bold. Adding holographic sparkle (a multi-color reflective effect rather than single-color glitter) creates depth and movement while staying within the red color family.
Why Holographic Works with Bright Red
Holographic effects are inherently playful and contemporary, but they don’t feel childish when paired with a bold base color. Fire engine red with holographic shimmer reads as editorial and intentional—like you knew exactly what you were doing when you chose these two elements together. The holographic effect means the sparkle changes color slightly depending on light angle and hand movement, creating constant visual interest.
Holographic Application
- Fire engine red base coat (two coats for full saturation) and cure completely
- Apply a sticky topcoat layer
- Sprinkle holographic powder or dust (these typically come as loose powders in small containers) directly onto the sticky surface
- Use a soft brush to distribute evenly or leave it concentrated in specific areas for a gradient effect
- Tap away excess powder gently
- Seal with a thin topcoat to lock everything in place
Worth knowing: Holographic powder is incredibly fine and gets everywhere—apply in a well-lit area and have a lint roller nearby for cleanup. The results are worth the mess.
12. Russian Red with Geometric Gold Framework
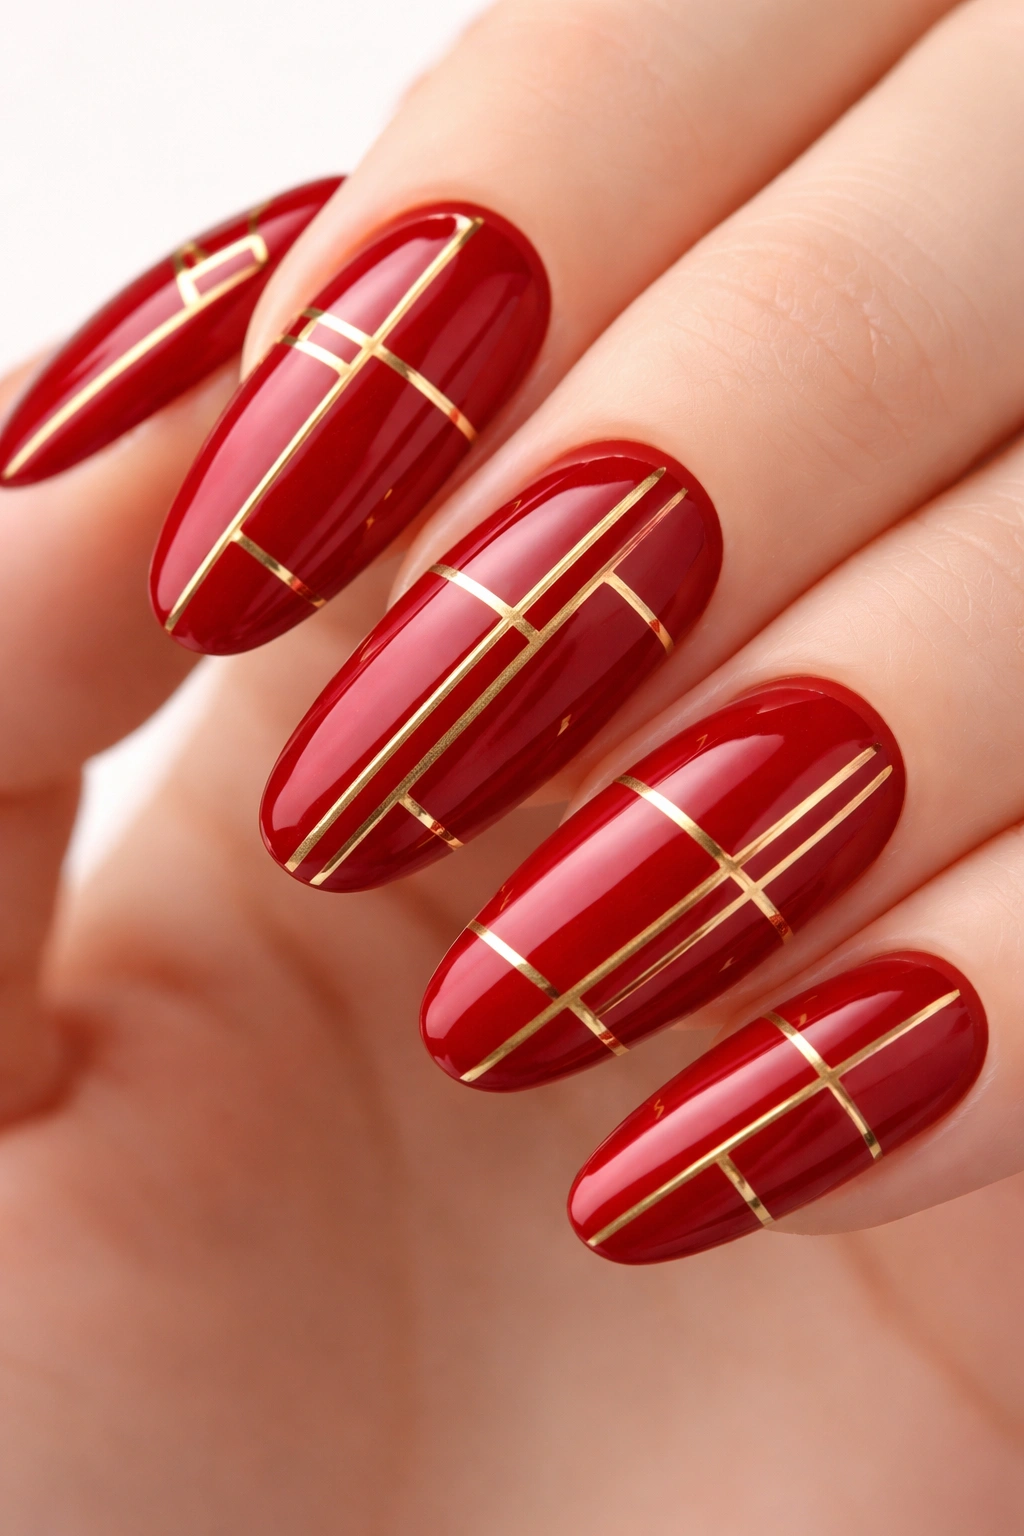
Russian red (a slightly muted, sophisticated red with a hint of brown undertone) becomes architectural when paired with thin geometric gold lines that create a framework or grid pattern across the nail. This design feels intentional and artistic without being overly complicated.
The Geometric Appeal
Geometric designs feel modern and contemporary, and they work particularly well on rounded nails because the curves of the nail shape provide natural contrast with the straight gold lines. The geometric framework also creates visual structure that makes the nail feel more intentional and less like a basic red manicure.
Creating Geometric Gold Framework
- Apply Russian red base (two coats) and cure fully
- Using a thin gold polish and a striping brush, create your chosen geometric pattern: intersecting lines, a grid, triangular sections, or abstract angles
- Precision here matters—use nail guides or tape for straight lines, or freehand for a more artistic, slightly imperfect look
- Allow gold lines to fully cure between applications if layering additional lines on top
- Seal everything with topcoat to protect the gold lines from chipping
Real talk: The more intricate your geometric pattern, the longer this design takes to execute and the more likely it is to require a professional technician. Simple geometric frameworks (just a few strategic lines) are achievable at home.
13. Velvet Red with Matte Finish and Glossy Tips
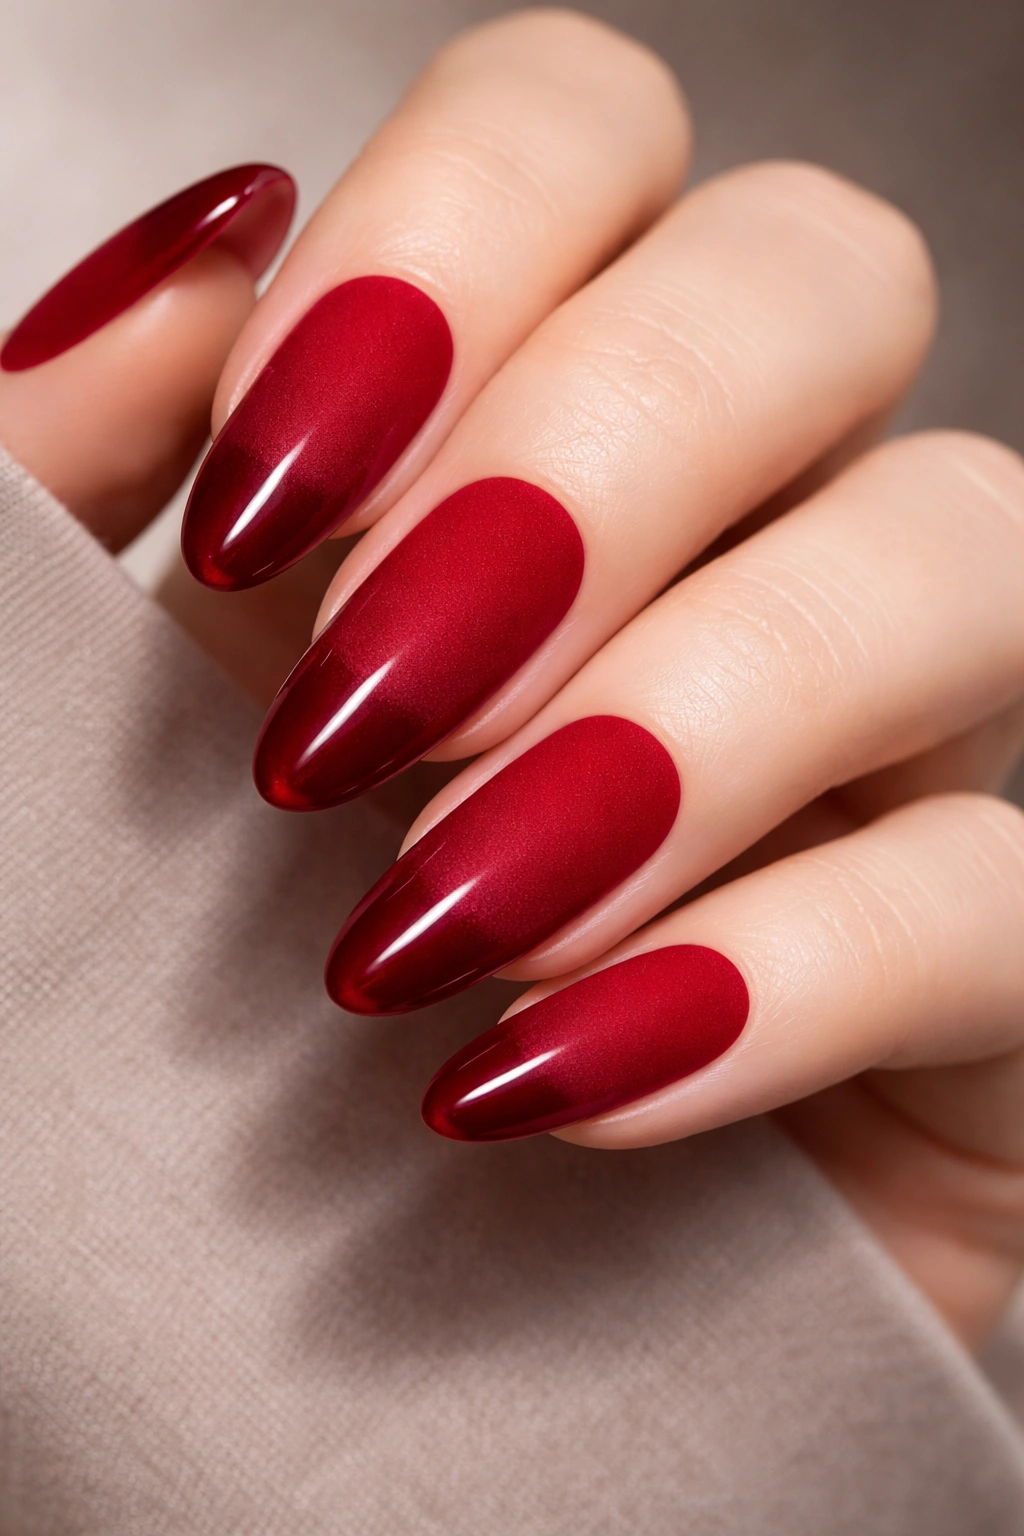
This design pairs the softness of matte red polish with the shine of glossy topcoat applied only to the tips—creating a two-texture effect that’s visually interesting and unique. Velvet red (a deep, rich red with soft undertones) becomes even more luxurious with matte texture.
Why Two-Texture Design Stands Out
Most nails are uniformly glossy or uniformly matte. A two-texture design immediately reads as intentional and stylish because it requires deliberate execution. The matte portion reads as sophisticated and modern, while the glossy tips add subtle shine and dimension. On long rounded nails, this transition creates a focal point at the tip that makes the entire nail appear longer.
Two-Texture Execution
- Paint velvet red base and cure completely
- Apply matte topcoat over the entire nail and cure—this locks in the matte finish
- Using regular glossy topcoat and a thin brush, carefully paint just the tips of each nail (roughly the last 3-4mm)
- Let the glossy topcoat cure separately from the matte base—you’ll see a clear line where they meet, which is exactly the point
- The contrast between matte and glossy should be obvious and intentional
Pro tip: If your matte topcoat and glossy topcoat are similar enough in color, the texture change is the only visual difference, which creates a subtle and sophisticated effect.
14. Red with Dual-Color Ombre (Red-to-Pink Gradient)
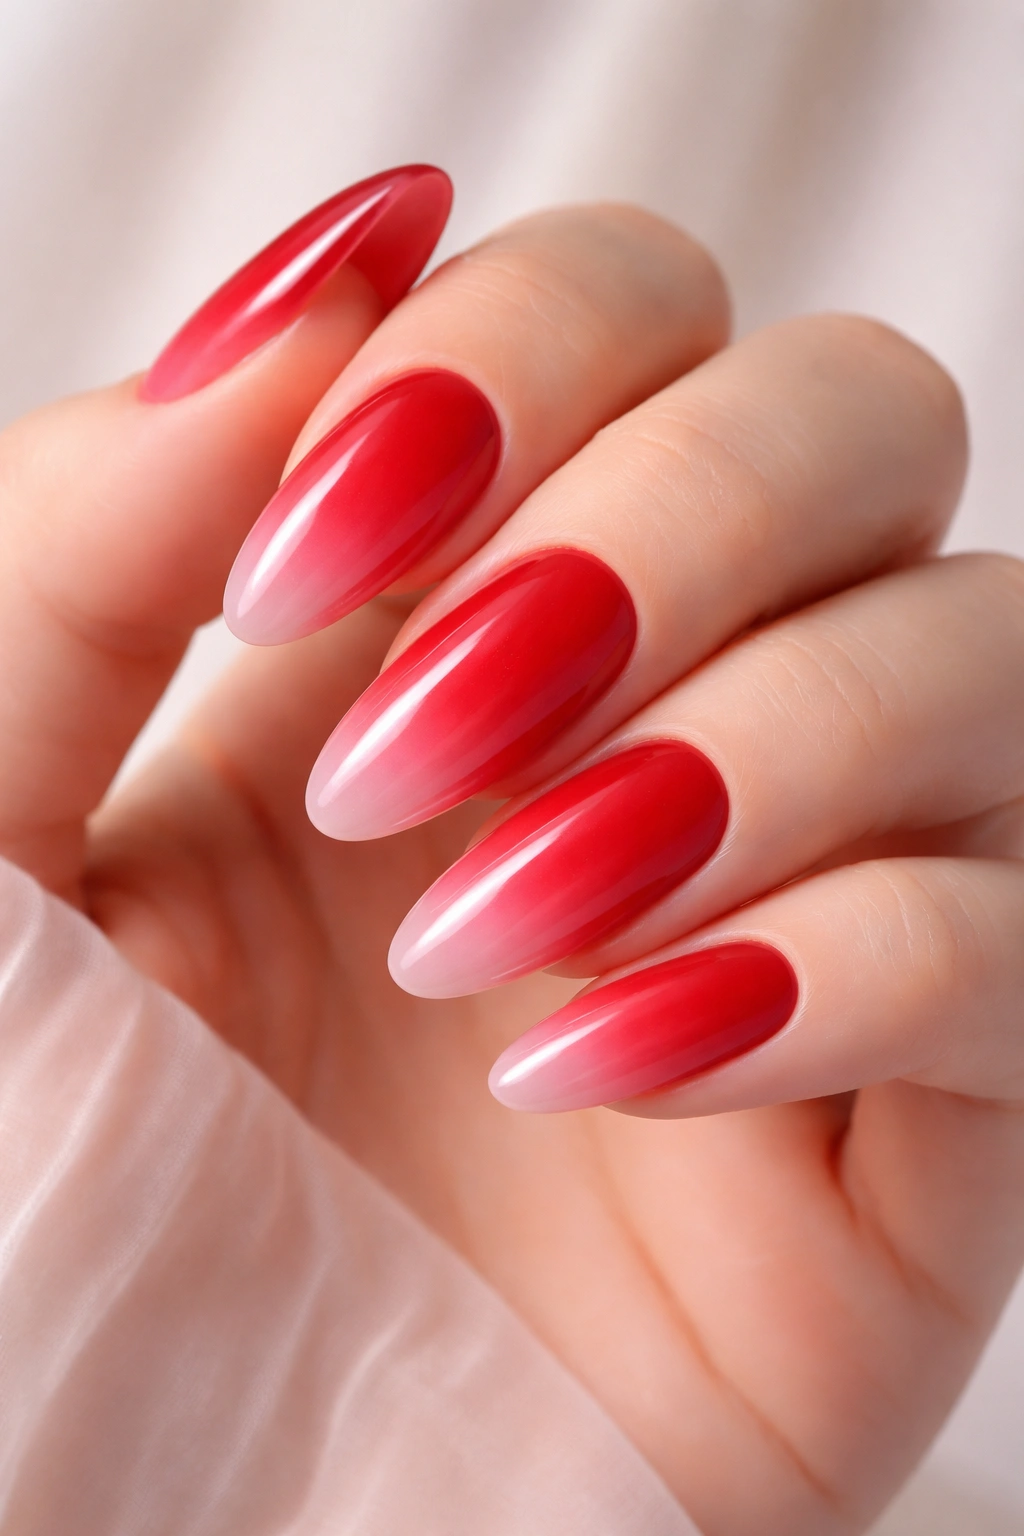
This design creates a gradient from a true red at the base to a lighter pink at the tips. The transition is smooth and deliberate, not a random fade, which creates a sunset-like effect that’s modern and flattering. On long rounded nails, the gradient has plenty of surface area to showcase the color transition.
The Gradient Advantage
Ombre effects make nails look longer because the eye follows the color transition from base to tip, which visually extends the nail. A red-to-pink gradient is inherently flattering because it’s warm-toned throughout and creates a soft, romantic feel without sacrificing the boldness of red. This design works for both everyday wear and special occasions because the gradient feels intentional rather than accidental.
Creating a Smooth Red-to-Pink Gradient
- Paint your true red base on all nails and cure completely
- Mix your chosen pink shade with your red to create an intermediate shade (roughly 50/50 blend)
- Using a damp makeup sponge, create the gradient: red at the base, intermediate shade in the middle, pink at the tips
- Sponge application creates a slightly blurred, ombre effect rather than a harsh line
- Go over the gradient with another sponge application using a lighter touch to blend any visible lines
- Seal the entire gradient with topcoat to smooth any texture and lock the design in place
Insider note: The trick to a convincing gradient is sponging multiple times with increasingly light pressure—heavy pressure creates visible lines, light pressure creates blending.
15. Statement Red with Artistic Hand-Painted Accent
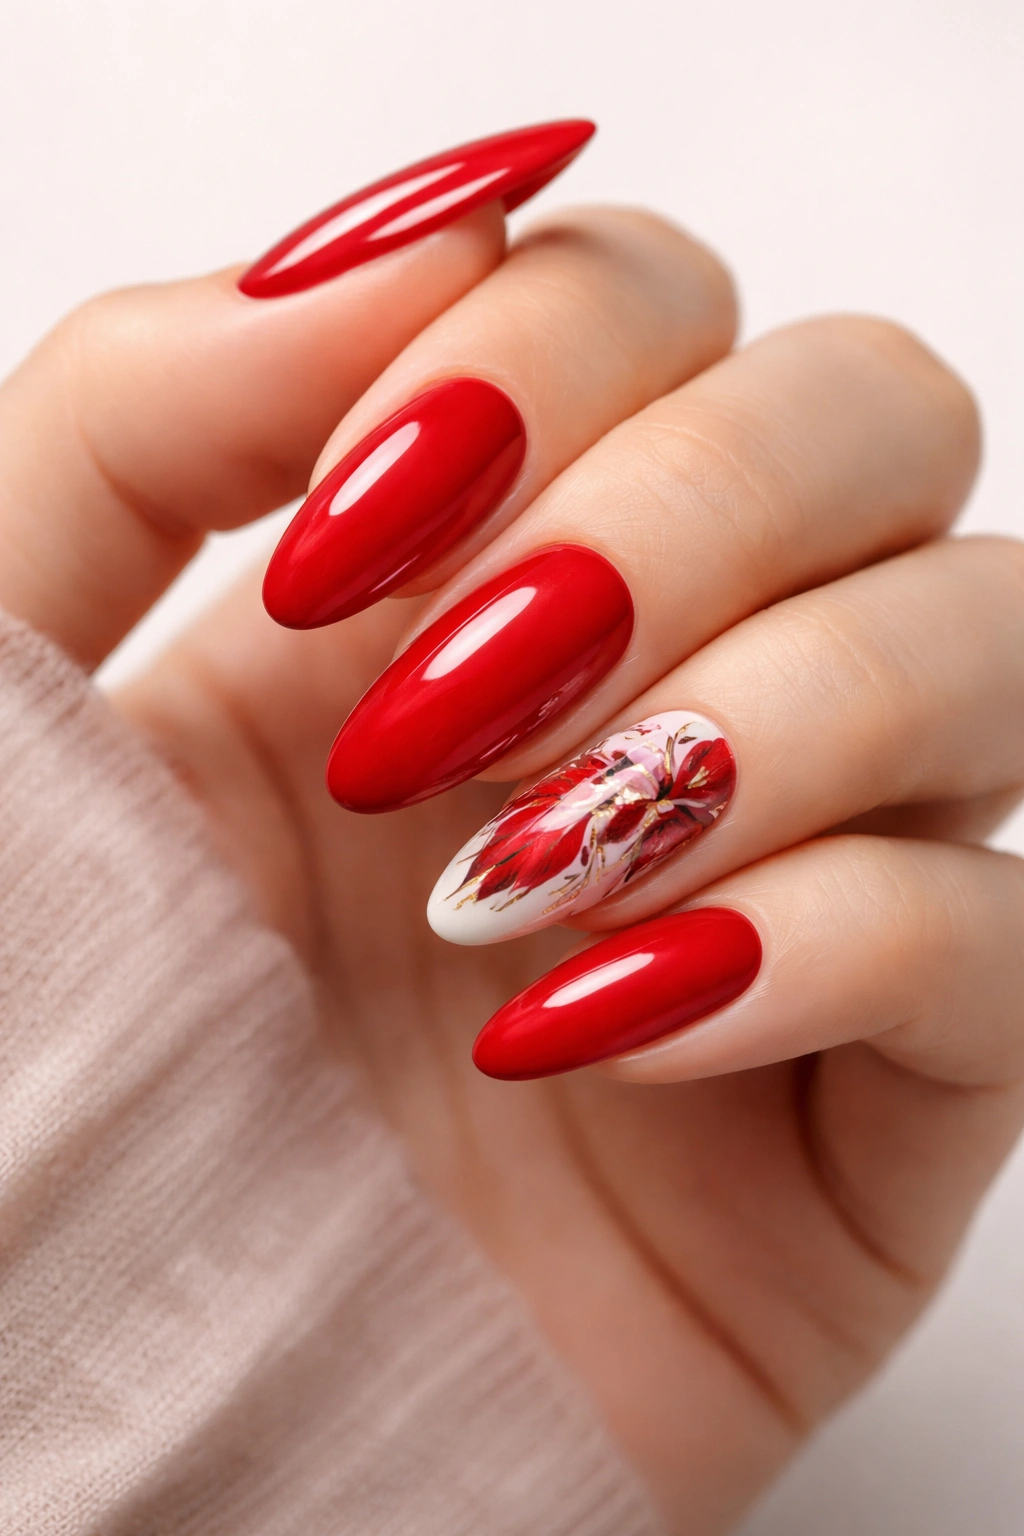
This final design designates one accent nail (or even two coordinating nails) for an artistic hand-painted element—perhaps delicate flowers, abstract lines, a miniature landscape, or geometric art—while the other nails remain solid statement red. This is the design that truly stands out because it combines confidence with creativity.
The Impact of Hand-Painted Art
Hand-painted nail art, even simple versions, immediately signals that someone cares about details and intentionality. A single accent nail with artistic painting transforms a basic red manicure into something memorable. On long rounded nails, there’s enough surface area for the artwork to be visible and appreciated without feeling cramped.
Hand-Painted Design Ideas
- Delicate wildflowers or botanical elements (thin stems, small blooms in white, pink, or gold)
- Abstract lines or splatter patterns in complementary colors
- Miniature scenic elements (small trees, mountains, water reflections)
- Geometric patterns that complement your statement red
- Constellation-style dots connected by fine lines
Worth knowing: Hand-painted nail art requires a steady hand and practice. If you’re new to this, start with simple designs (thin lines, small shapes) and work up to more complex artwork. A fine detail brush and good lighting are non-negotiable for success.
Final Thoughts
Red long round nails work because they combine classic elegance with modern confidence. The rounded shape keeps the look refined while the red demands attention—together, they create a manicure that feels intentional without trying too hard. Whether you choose a simple glossy crimson, a detailed artistic accent, or a textured multi-dimensional design, the foundation is solid.
The designs in this collection work because they build on that classic base with thoughtful additions: metallic elements, negative space, texture variation, or artistic detail. Each one starts with the confidence of red and adds just enough personality to feel memorable. When you’re ready to refresh your manicure, pick the design that resonates with where you are right now—and know that you’re choosing a look that genuinely stands out because it’s built on timeless elements executed with intention and care.
