

Black oval nails are one of those rare nail designs that somehow manages to be both effortlessly sophisticated and unapologetically bold. Whether you’re reaching for them on a Tuesday morning or before an evening out, there’s something about the clean, elongated shape combined with the neutral-yet-commanding color that just works. The oval shape itself is inherently flattering—it elongates the finger, suits most hand shapes, and has the bonus of being sturdier than pointier almond or stiletto styles, which means your designs actually stay intact long enough to enjoy them.
What makes black oval nails so compelling is their incredible versatility. Black pairs with literally everything in your wardrobe, from casual weekend jeans to formal evening wear to business attire. But the real magic happens when you add texture, embellishment, or a secondary color into the mix. A black oval nail can be your canvas for minimalist line art, glossy high-shine glamour, matte sophistication, glittery party vibes, or delicate accent designs that lean into understated elegance. The color provides the perfect neutral backdrop for anything you want to layer on top.
The designs below represent genuinely different approaches to black oval nails—from clean and simple to textured and detailed, from trend-forward to timeless. Each one is structured to work with multiple outfit combinations and occasions, because the best nail designs are the ones you’ll actually want to wear repeatedly. You’ll find everything from glossy classics to matte sophistication, from minimalist geometry to glitzy embellishment, all designed to give you fresh inspiration while working with your existing wardrobe.
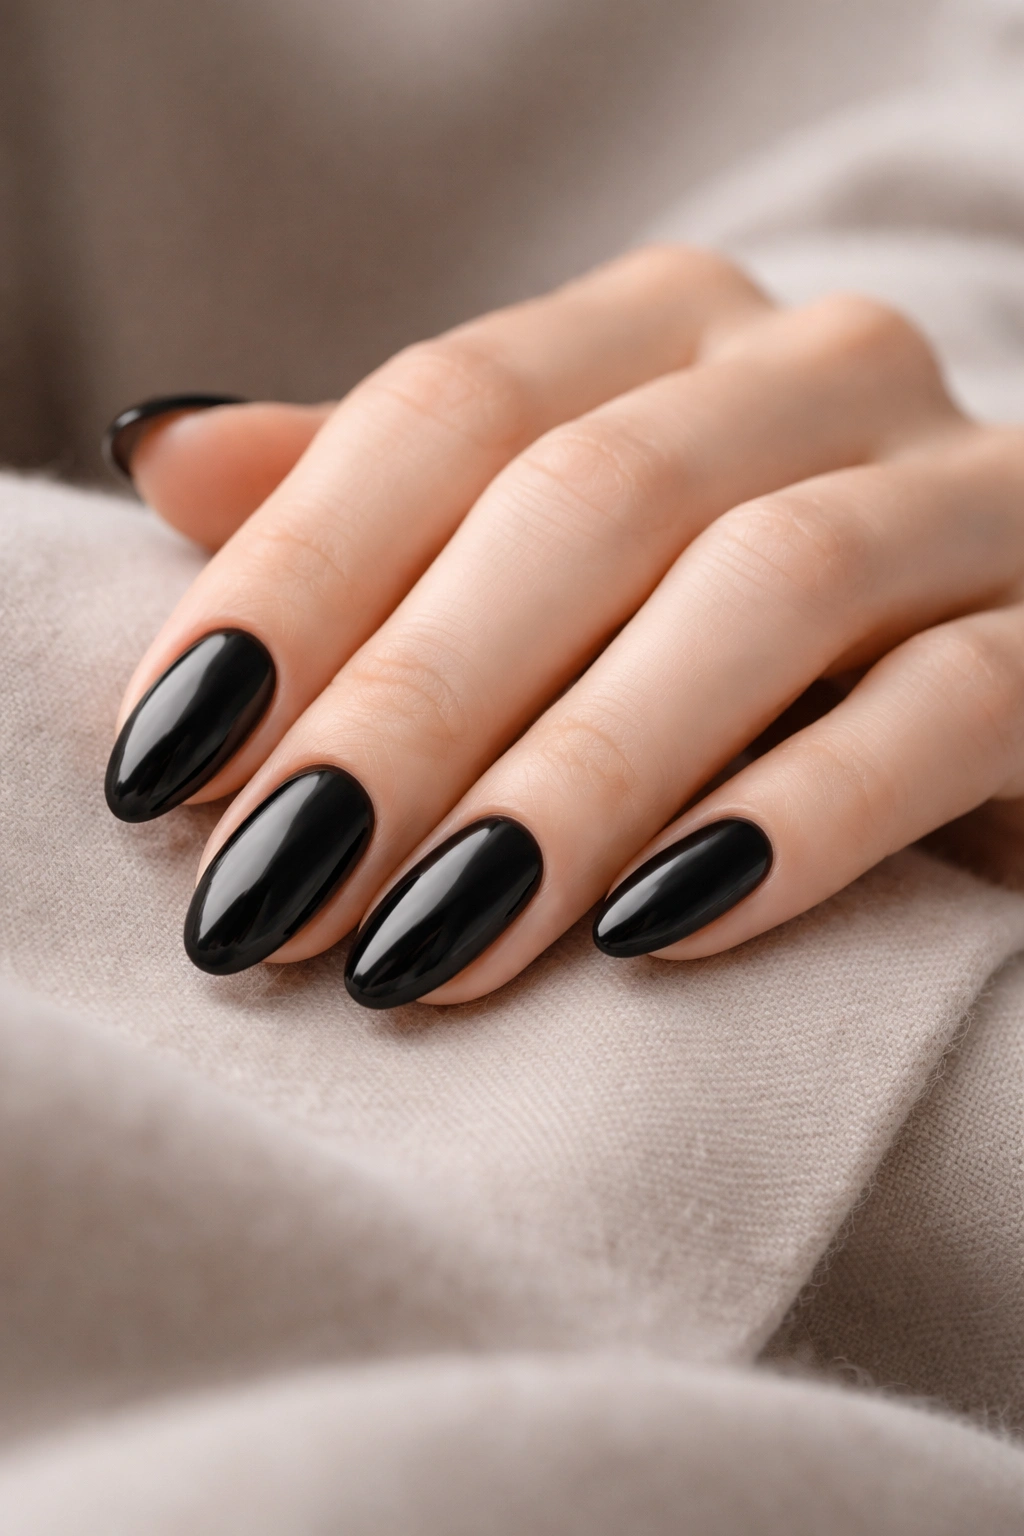
1. Classic Glossy Black
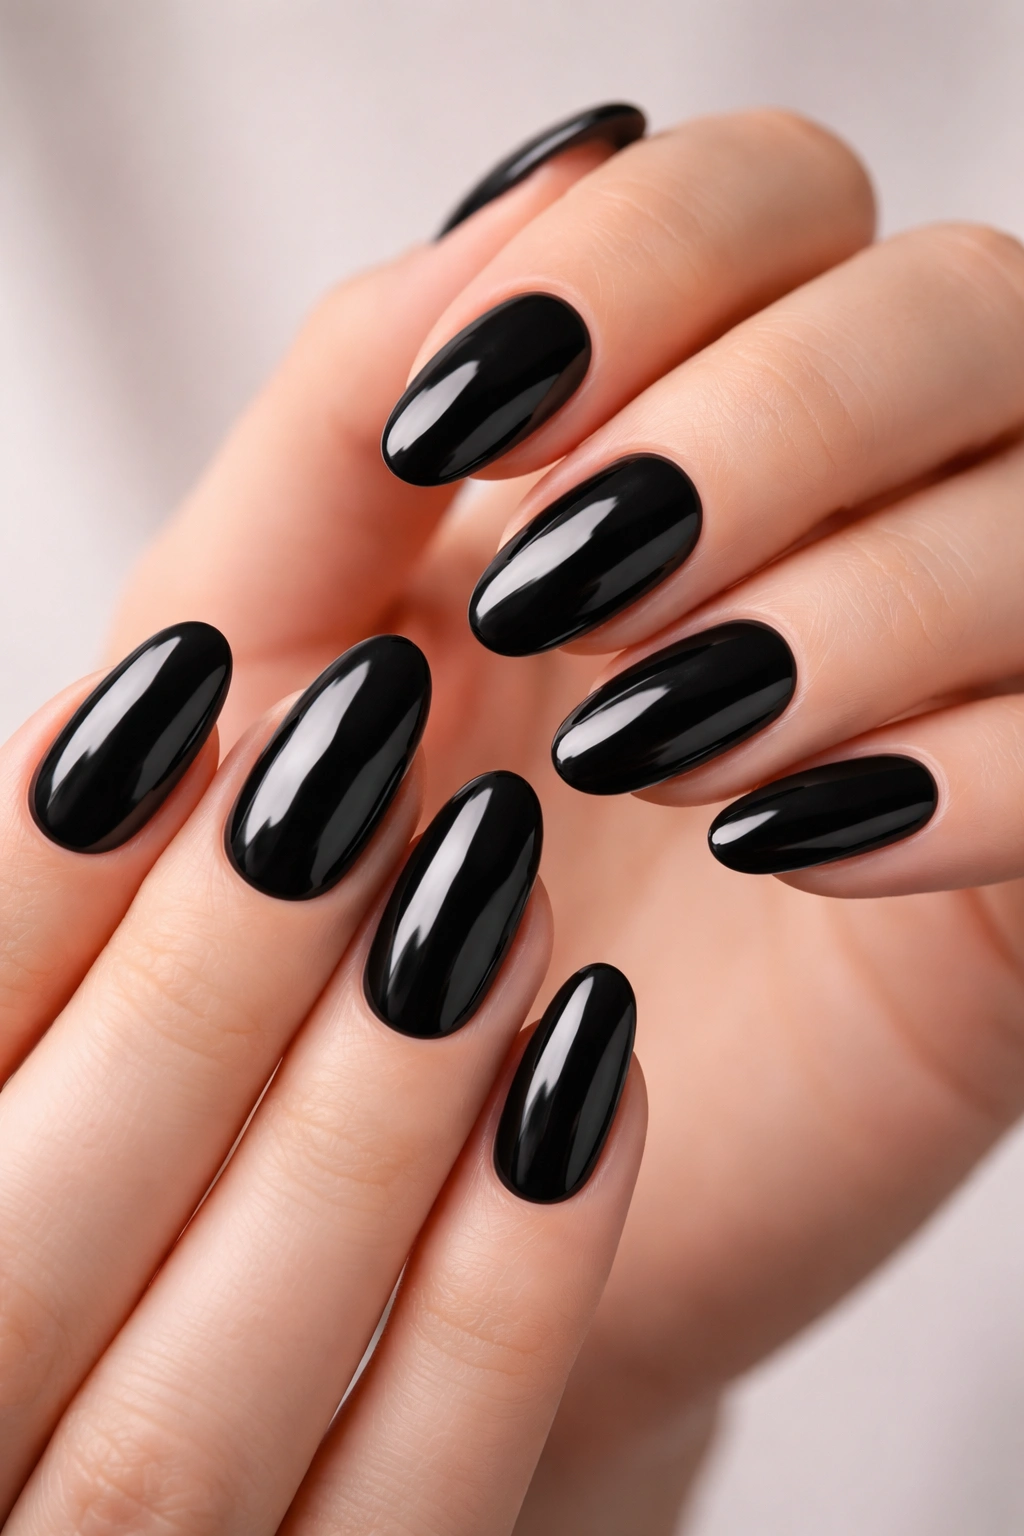
There’s a reason this is the gold standard—a perfectly executed glossy black oval nail is genuinely timeless. The shine catches light in a way that feels polished and intentional, not plain. When you get a high-gloss finish right, it photographs beautifully and makes your hands look manicured even on your busiest days.
Why It Stands Out
The magic of glossy black comes from the formula itself. Quality black polish contains micro-shine particles that create depth rather than a flat, dull finish. When light hits your nails, it bounces around rather than disappearing. Paired with the oval shape, this creates an elegant silhouette that suits professional settings, casual outings, and everything in between.
How to Make It Last
- Apply a thin base coat to prevent staining and promote adhesion
- Use two coats of your black polish rather than one thick coat (thick coats take forever to dry and chip more easily)
- Finish with a glossy top coat that has UV protection to prevent the black from fading to purple-ish tones over time
- Reapply the top coat every 3-4 days to maintain that mirror-like shine
- Keep your cuticle oil handy and massage it in regularly—it keeps the nail bed moisturized and makes the entire hand look healthier, which makes the black look even more striking
Pro tip: Let each coat dry completely between applications. Black polish especially needs time to fully cure before you add the next layer, or you risk streaking.
2. Black With Nude Accent Nail
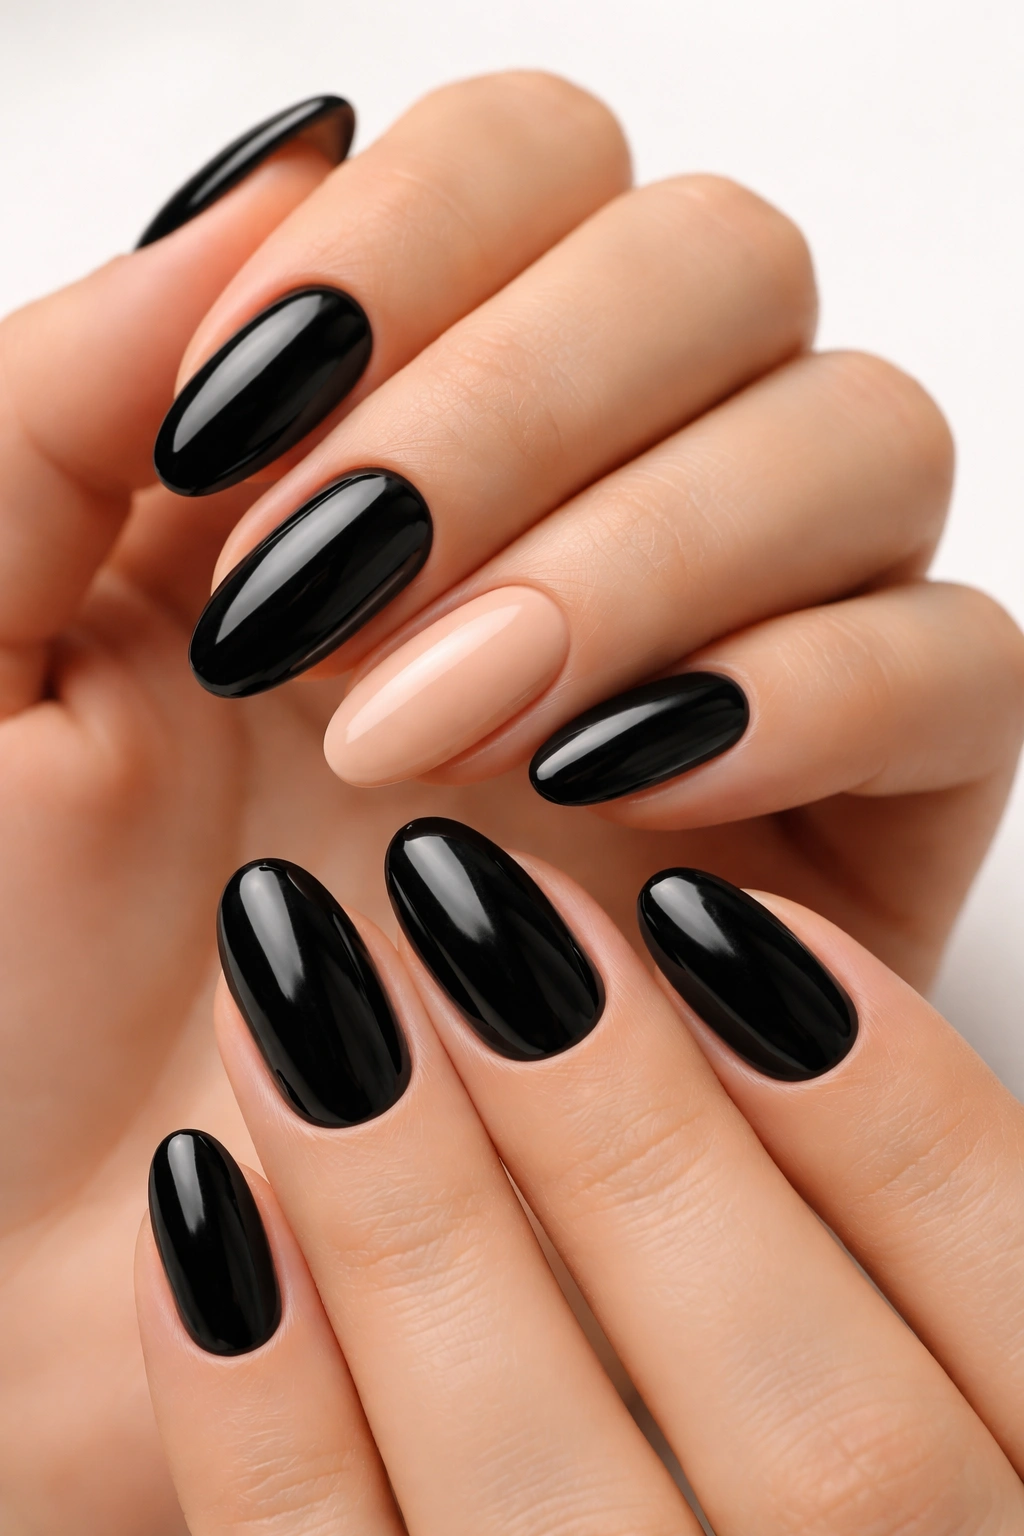
This is the design that bridges the gap between bold and minimalist. You get the impact of black nails without committing your entire hand to one solid color—one accent nail in a warm nude or natural beige breaks up the darkness while keeping the overall look sophisticated and office-appropriate.
Why It Stands Out
The contrast between black and nude is genuinely elegant because they’re so different in mood yet equally neutral. Black reads as formal and modern; nude reads as soft and approachable. Together, they create a nail look that’s interesting enough to be noticed but restrained enough to work in any setting. The eye lands on the accent nail, which creates movement and visual interest.
Which Nude Works Best
- Warm peachy nudes photograph beautifully on cooler skin tones and pair well with jewel-tone outfits
- Rosy beige nudes work across all skin tones and have a subtle warmth that feels more modern than pink
- Slightly deeper nude-brown shades ground the design and complement earth-tone wardrobes especially well
- Apply your nude polish to your ring finger or middle finger for the most natural-looking accent placement
- The nude should be one shade you actually wear as lipstick sometimes—that crossover versatility makes it feel intentional rather than random
Styling tip: This design works beautifully with metallic rings or a delicate gold bracelet that draws attention to the accent nail.
3. Black With Gold Foil Details
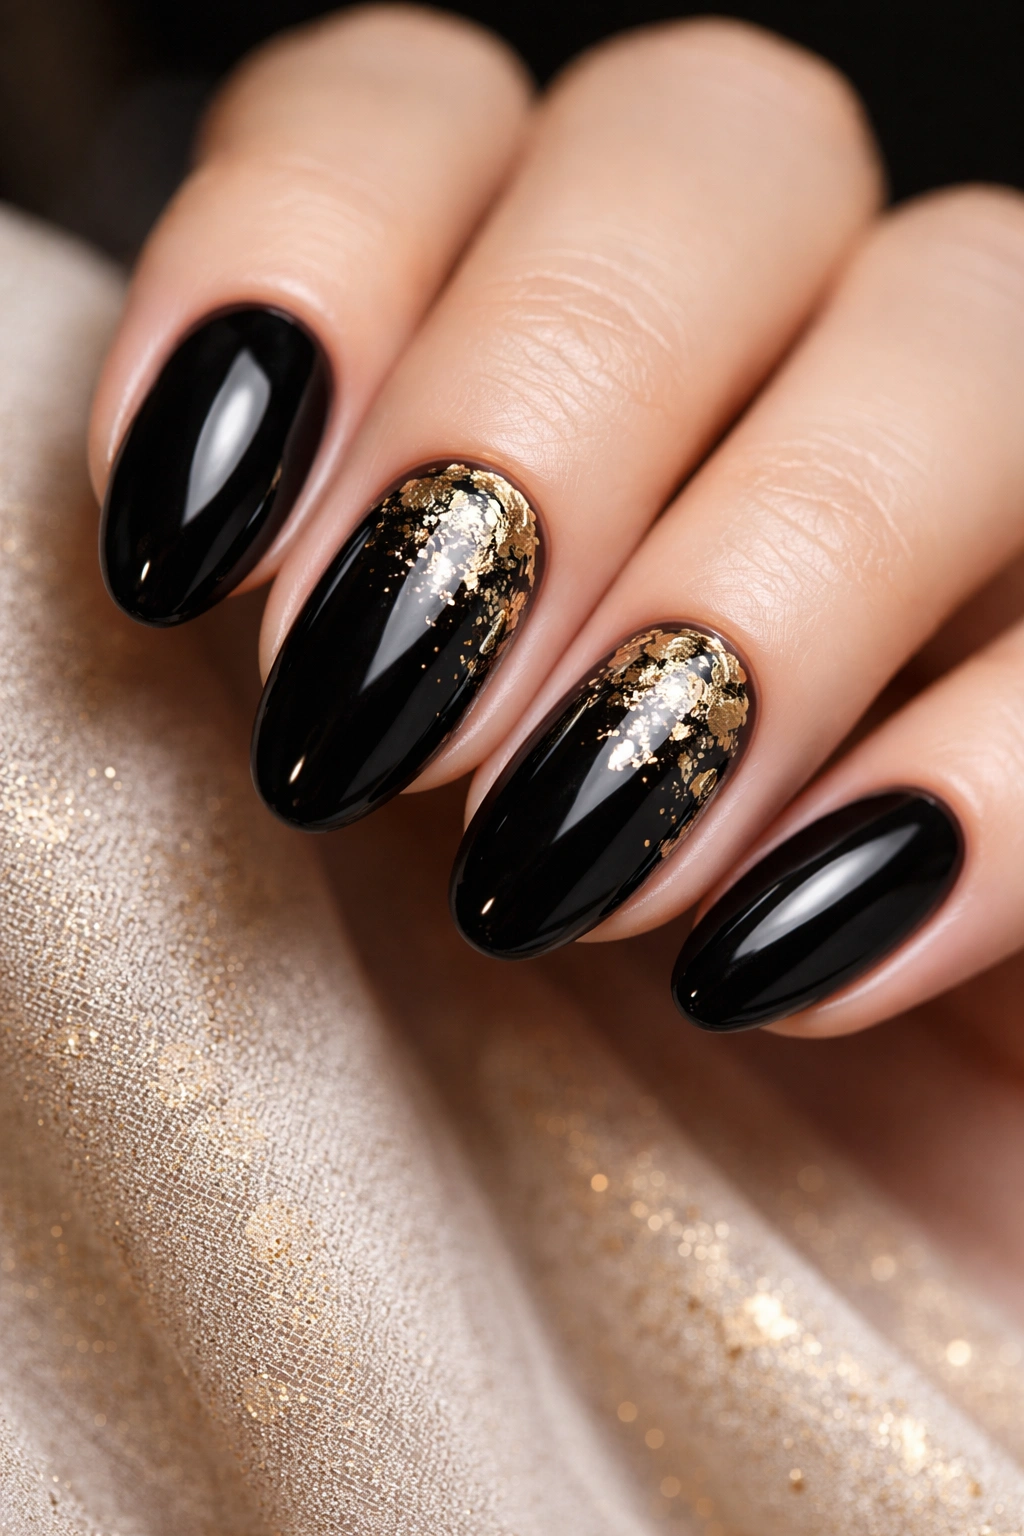
Gold foil pressed into wet polish creates an effect that looks way more complicated than it actually is. Whether you choose geometric patterns, scattered foil, or foil just along the tips, the result is a design that photographs beautifully and feels celebratory without being over-the-top.
Why It Stands Out
Gold and black is one of those timeless luxury combinations—think Chanel, Louis Vuitton, luxury hotels. The foil catches light in a completely different way than polish does, creating dimension and texture. When you angle your hands in different light, the gold shimmers differently, which keeps the design feeling fresh throughout the day.
How to Apply Gold Foil Properly
- Paint your black base coat and let it dry completely (even a tiny bit of tackiness will prevent adhesion)
- Apply a thick layer of glossy top coat to the area where you want foil to stick
- Cut gold foil into shapes or crinkle it into organic fragments, depending on your desired effect
- Press the foil into the wet top coat using a silicone tool or even the back of a clean spoon
- Once the top coat dries, seal the foil with another layer of top coat to prevent peeling
- Keep the foil application on one accent nail to make it feel editorial rather than costume-y
Worth knowing: Not all foil is created equal. Nail art foil works infinitely better than craft foil because it’s specifically designed to adhere to wet polish.
4. Black Ombre
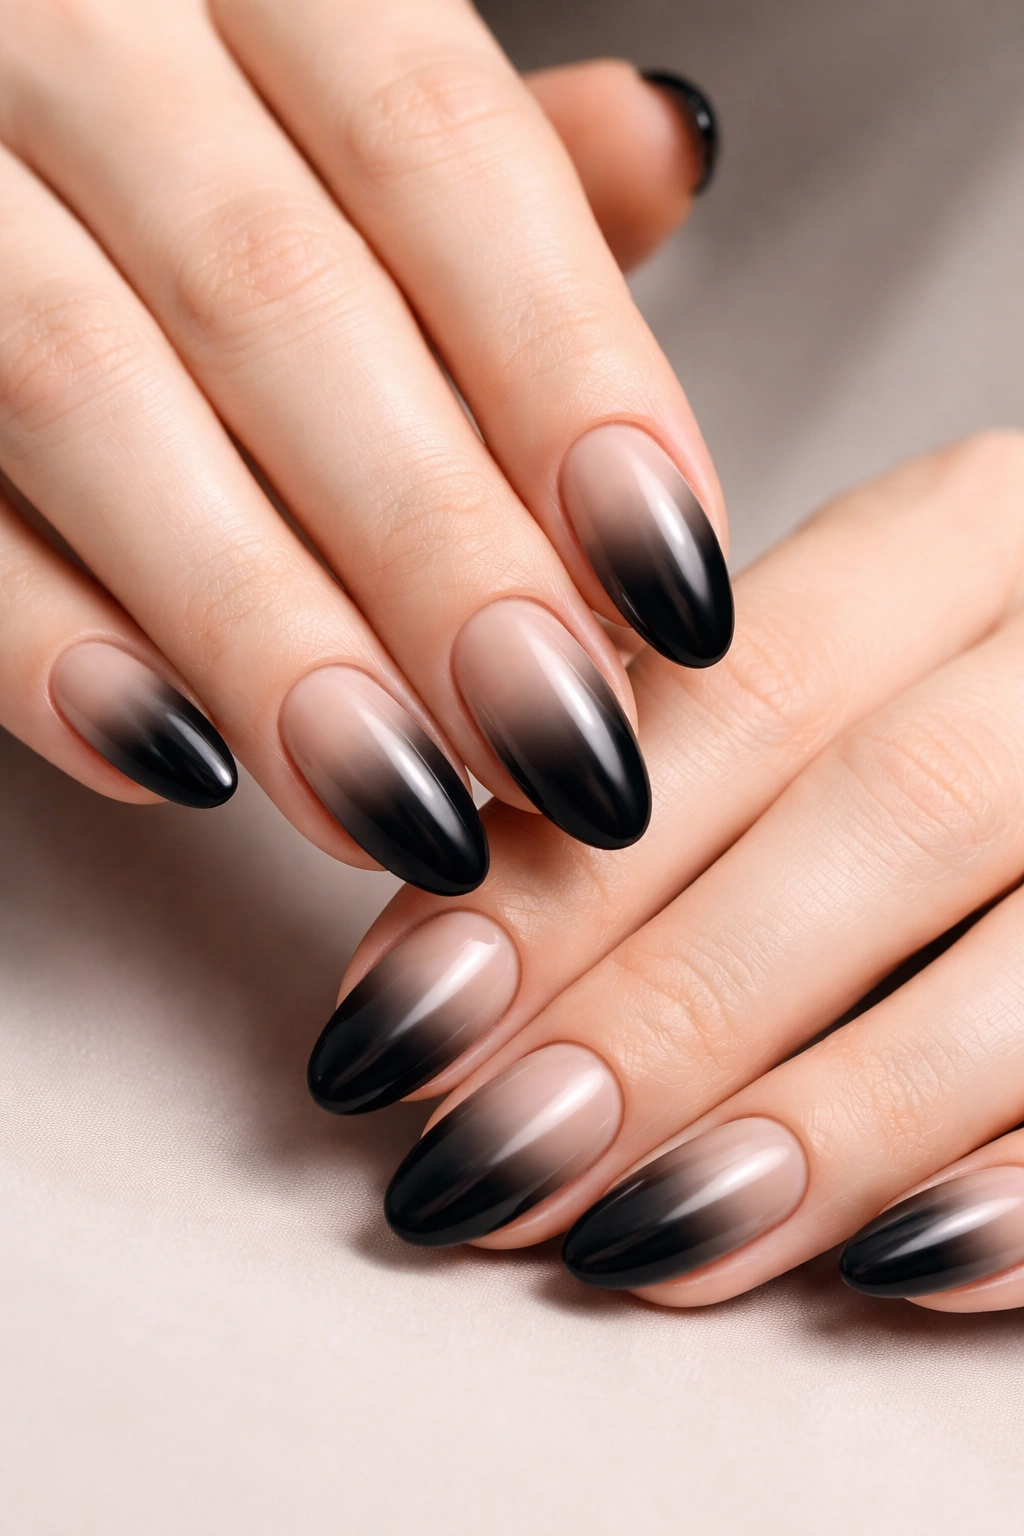
An ombre fade from black to a lighter shade (nude, gray, or even white) across the nail creates movement and visual interest while keeping the design cohesive. The oval shape makes the ombre easier to blend smoothly compared to shorter, squarer nails.
Why It Stands Out
Ombre removes the starkness of solid black while keeping the sophistication intact. The gradient creates an illusion of length and draws the eye upward along the nail, which is especially flattering on shorter nail beds. Black-to-nude ombre reads as high-fashion without looking trendy or fleeting.
Ombre Color Combinations Worth Trying
- Black fading to warm nude reads as wearable and sophisticated
- Black fading to gray creates a cooler, more editorial vibe
- Black fading to white is dramatic and graphic—best for special occasions
- Black fading to pale pink has a romantic edge while staying neutral
- Use a damp sponge to blend the colors rather than a brush—the sponge creates a softer transition
- Practice on a makeup sponge first to get the blending motion right before attempting it on your nails
Pro tip: Apply your lighter shade first, then the darker shade, then blend. Starting light-to-dark makes the blending process smoother.
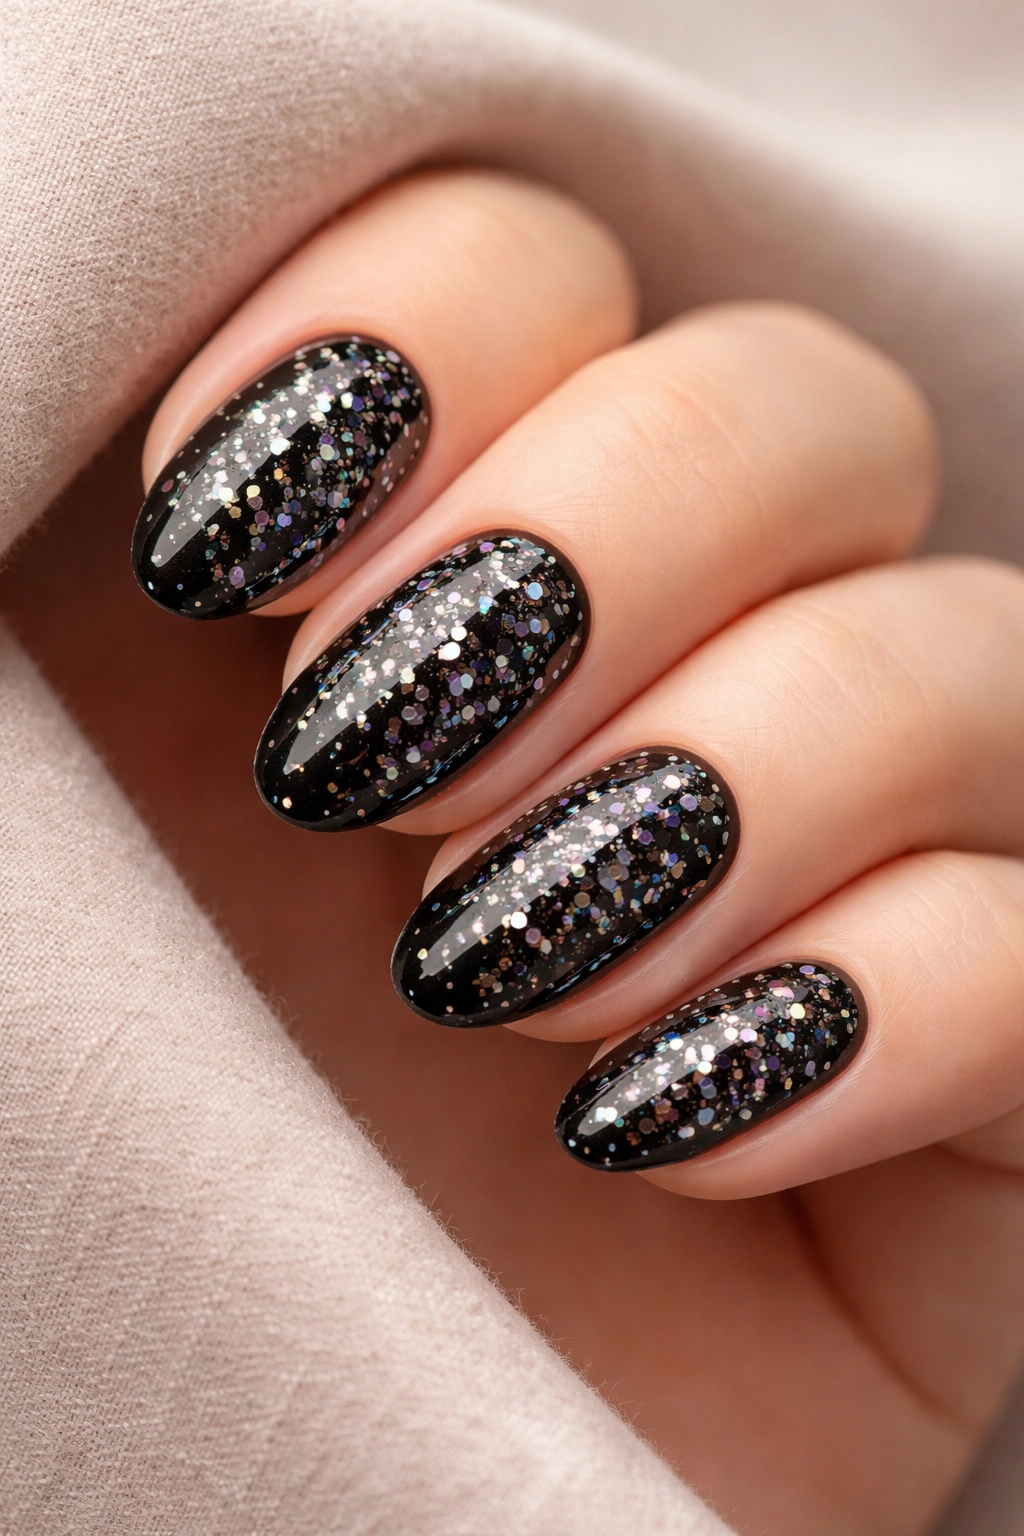
5. Black With Silver Glitter
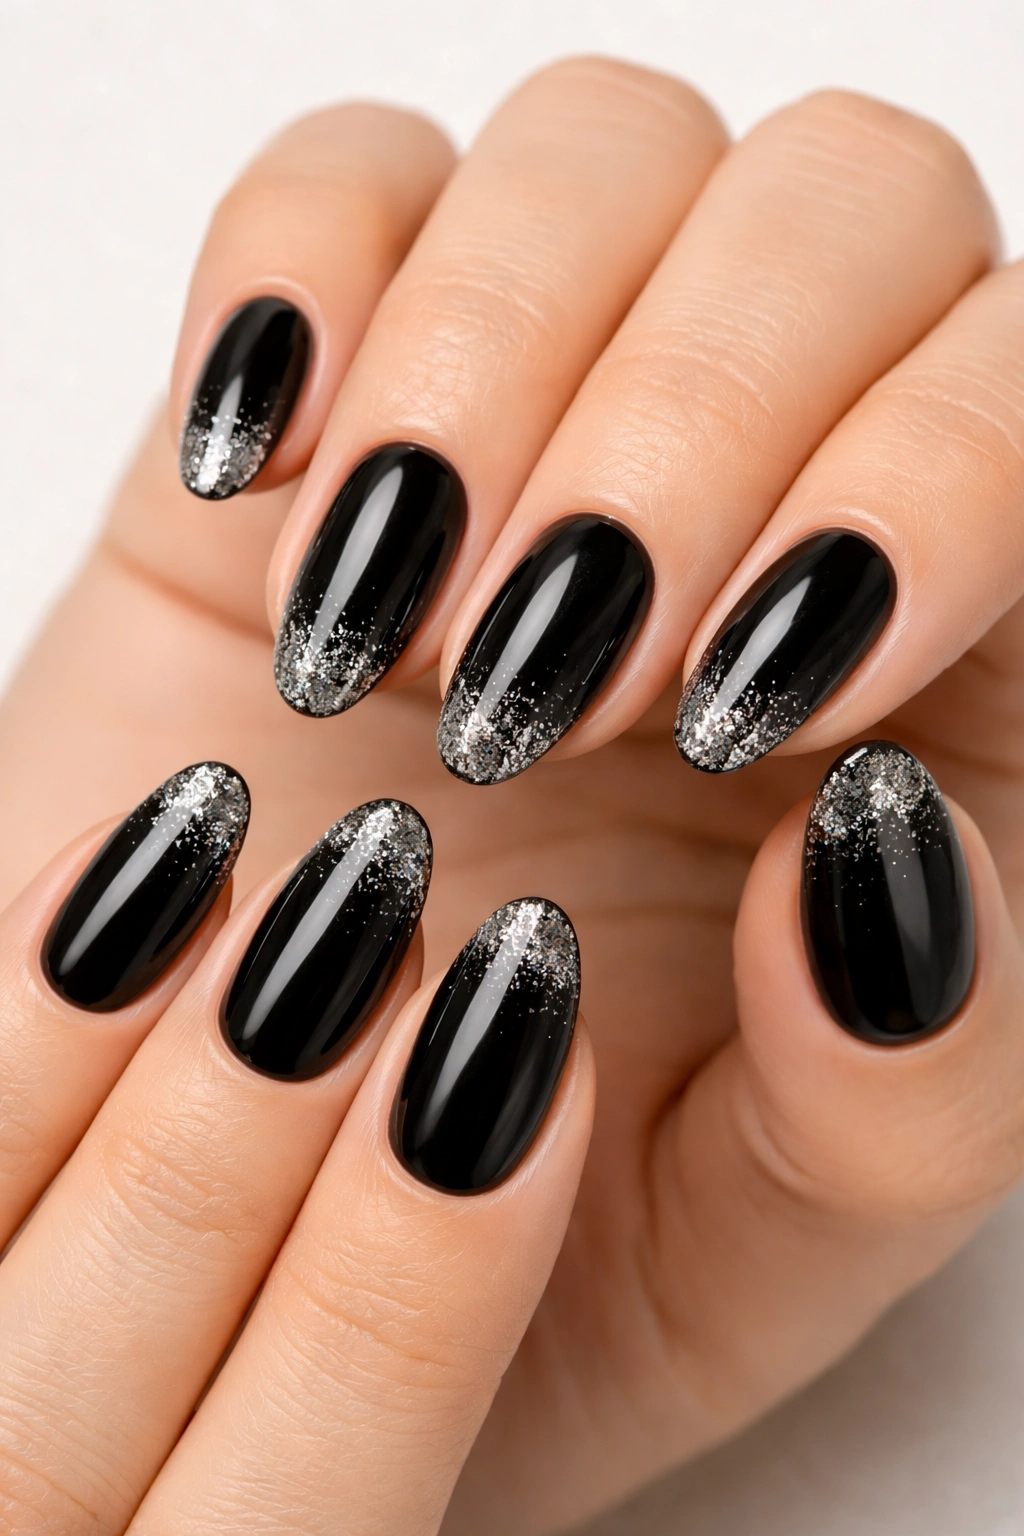
Silver glitter scattered across black polish creates a sparkle that works for both daytime and evening. Unlike holographic glitter that reads as rainbow, silver glitter reads as classic and restrained while still being eye-catching. The key is using glitter strategically rather than covering the entire nail.
Why It Stands Out
Silver glitter + black is a proven combination because silver feels precious and modern while black provides a neutral base that grounds the sparkle. You’re getting shine and light-catching without compromising the sophisticated feel. It’s formal enough for evening events but fun enough for weekend plans.
How to Apply Glitter Intentionally
- Create a glitter gradient by concentrating the glitter on the tips and fading it upward toward the nail bed
- Use a toothpick to place individual glitter flecks for a minimalist scattered effect
- Press glitter into wet top coat with a damp brush for better adhesion than drizzling loose glitter
- Seal everything with a glossy top coat to smooth down the glitter and prevent snagging
- Try mixing fine silver glitter with slightly larger holographic flecks for subtle dimension
Styling note: This design pairs beautifully with metallic eyeshadow or silver jewelry because it creates a cohesive sparkle theme without overwhelming any single area.
6. Matte Black With Metallic Tips
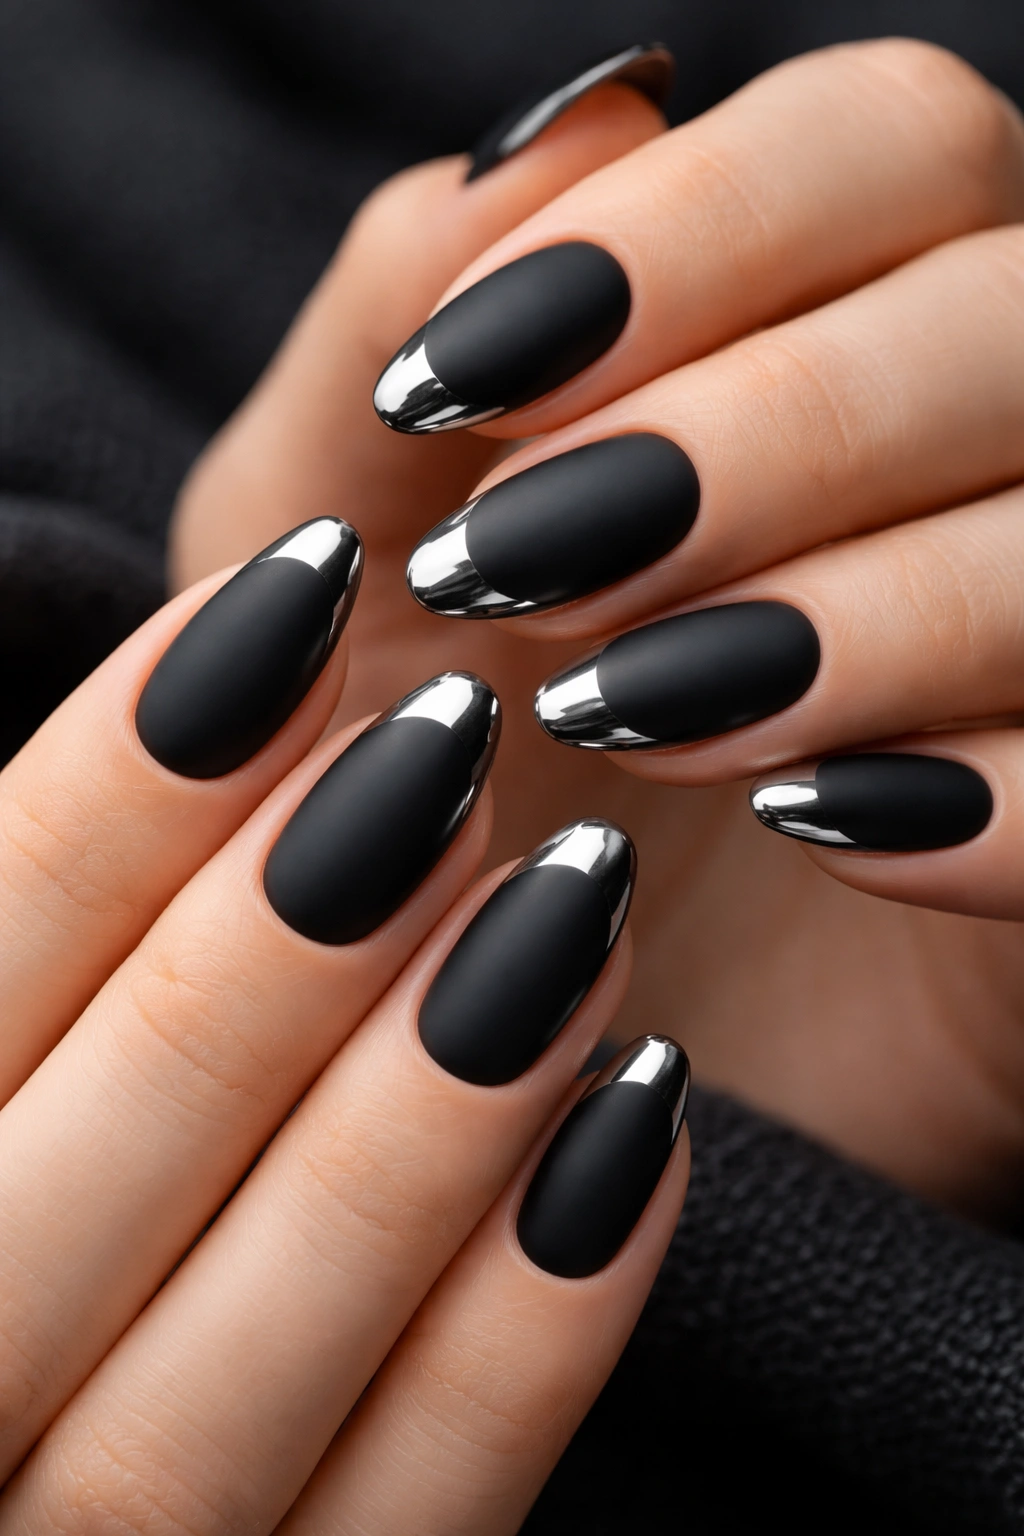
Pairing a matte black finish with chrome or metallic tips creates a modern contrast—the softness of matte against the reflective shine of metal. It’s geometric, it’s current, and it’s infinitely more interesting than solid matte or solid gloss.
Why It Stands Out
This design plays with texture and finish in a way that feels very now without being a passing trend. The matte finish keeps things understated and wearable, while the metallic tips add just enough glamour to catch attention. It’s the design equivalent of a perfectly fitted black blazer with a statement bag.
How to Execute the Metallic Tip
- Paint your entire nail in matte black polish and let it dry completely
- Use chrome powder or metallic gel applied with a brush to create the tip line—the line can be sharp and geometric or slightly curved
- Apply a glossy top coat only over the metallic portion if using powder, to seal and create contrast
- If using metallic gel, apply just to the tip section and cure, then cap with a matte top coat over the black portion for texture contrast
- Keep the line placement sharp and precise—the geometry is what makes this design feel intentional
Pro tip: Gold and copper metallics work beautifully with matte black if you prefer warmth to silver.
7. Black With White French Tips
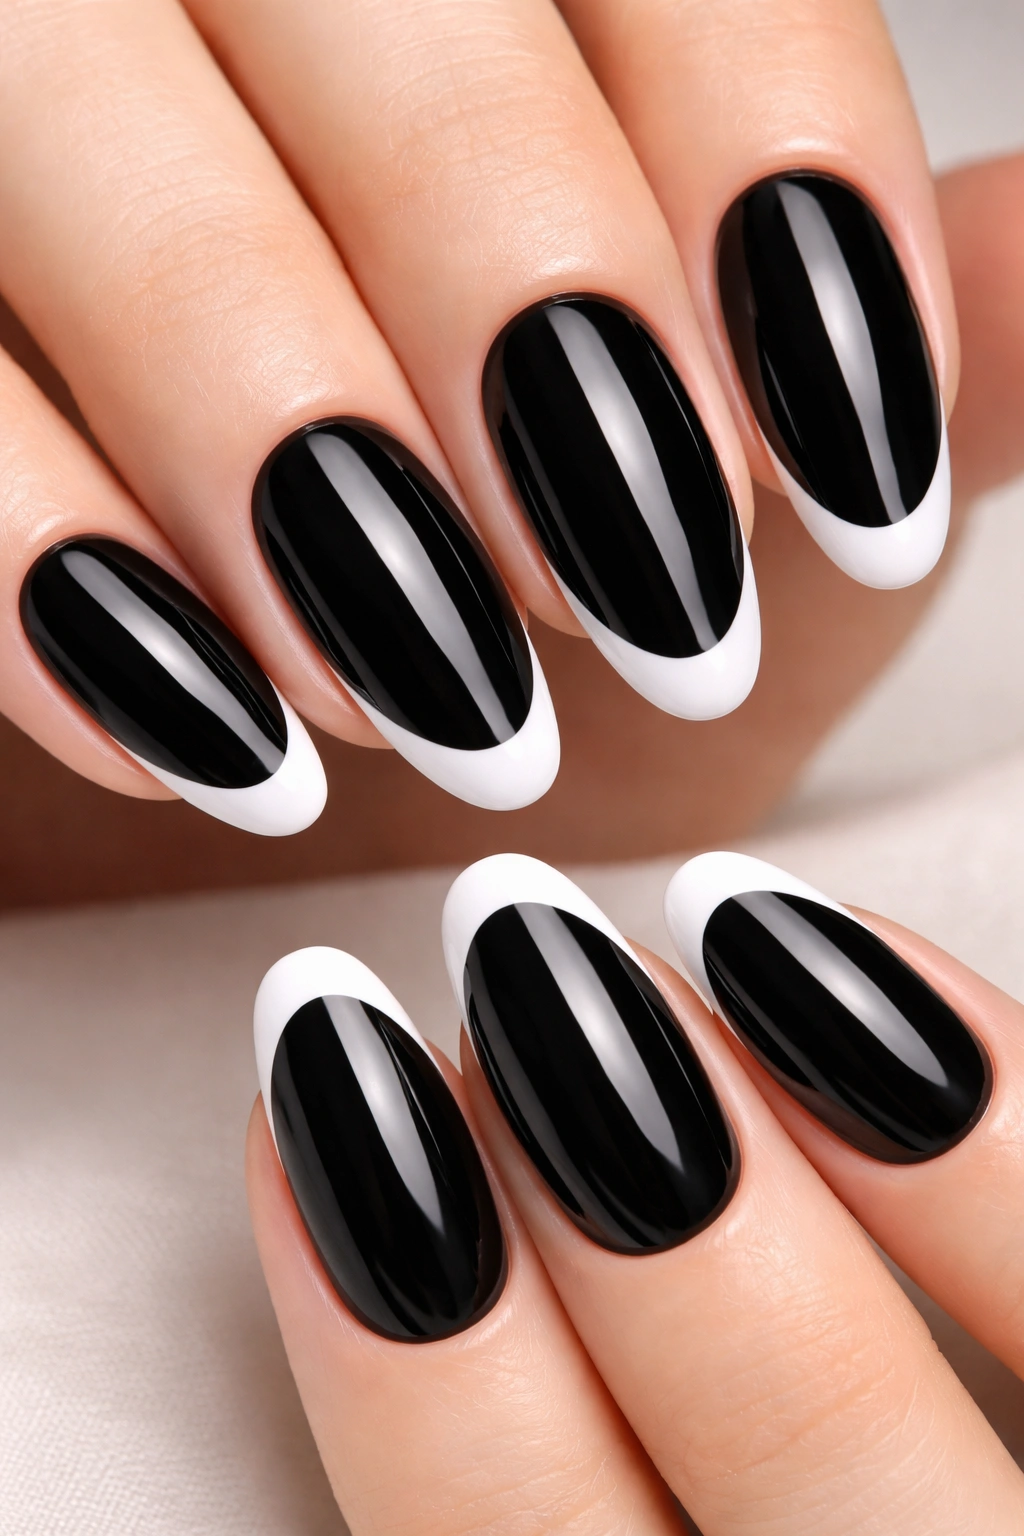
This is the French manicure reimagined for people who want something bolder than traditional nude-and-white. Black with a clean white tip is sharp, graphic, and modern while maintaining that polished, timeless feel of a classic French manicure.
Why It Stands Out
The contrast between black and white is crisp and clean. It reads as very put-together and intentional. The white tip elongates the nail and keeps the overall look feeling light and balanced, so the black doesn’t feel heavy even though it covers the majority of the nail.
Execution Tips
- Use pure white polish (not off-white or cream) for the sharpest contrast
- Keep the white tip line thin for sophistication or slightly thicker for a more contemporary feel
- Use a nail art brush or thin brush to hand-paint the line, or use white nail tape for a perfectly clean edge
- Seal everything with a glossy top coat to make the white really pop against the black
- The white tip should cover approximately the top quarter of the nail—any less and it disappears; any more and it reads as reverse French
Worth knowing: This design photographs beautifully and is especially flattering on longer, more elegant oval shapes.
8. Black With Rhinestone Embellishments
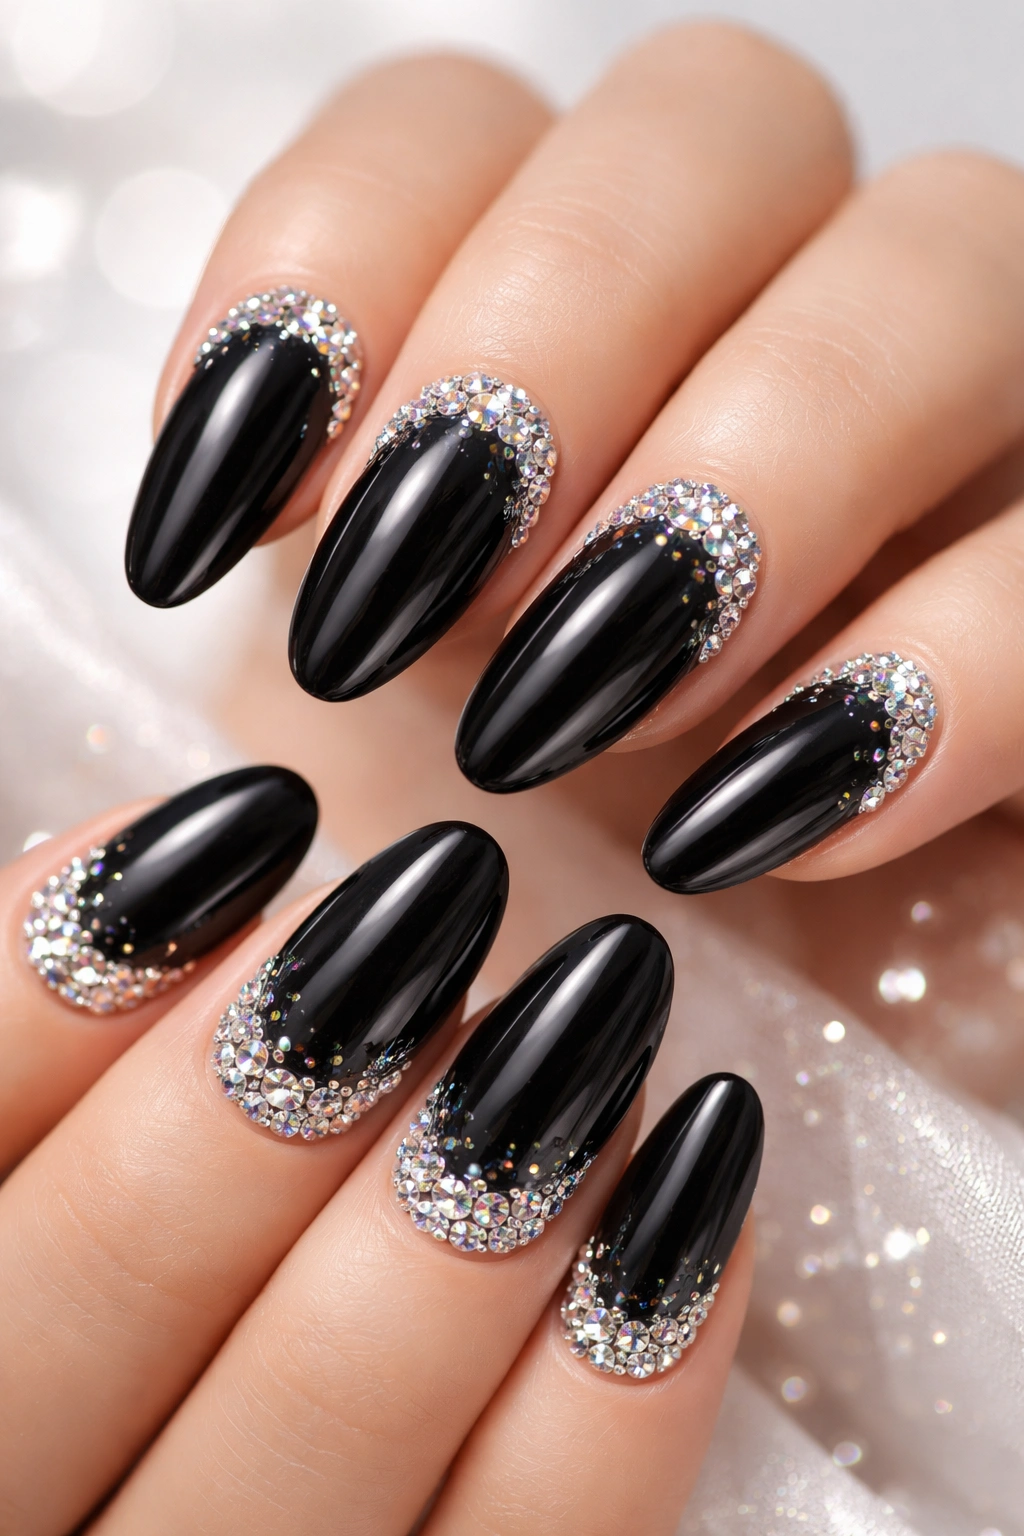
Rhinestones scattered across black polish create an effect that’s genuinely glamorous. Whether you choose full coverage or just a few strategic stones along the tips or edge, the way light bounces through rhinestones creates actual dimension and visual movement.
Why It Stands Out
Black provides the perfect dark base for rhinestones to sparkle against. Unlike light colors where rhinestones can look flat or costume-y, they absolutely come alive on black. The design works for evening wear, celebrations, and any time you want your nails to genuinely catch light from across a room.
Rhinestone Placement Strategies
- Create a gradient with rhinestones concentrated on the tips, fading toward the nail bed
- Place a single line of rhinestones along the edge (grown-out cuticle area) for a subtle shimmer
- Create a geometric pattern using rhinestones and black negative space for an editorial effect
- Mix varying sizes of rhinestones for depth and interest
- Ensure rhinestones are properly adhered with a strong-hold glue designed for nail art—they’ll stay secure through handwashing and daily wear
Pro tip: Grab a small tweezer specifically for nail art. It makes rhinestone placement infinitely easier than using your fingers.
9. Black and White Geometric Patterns
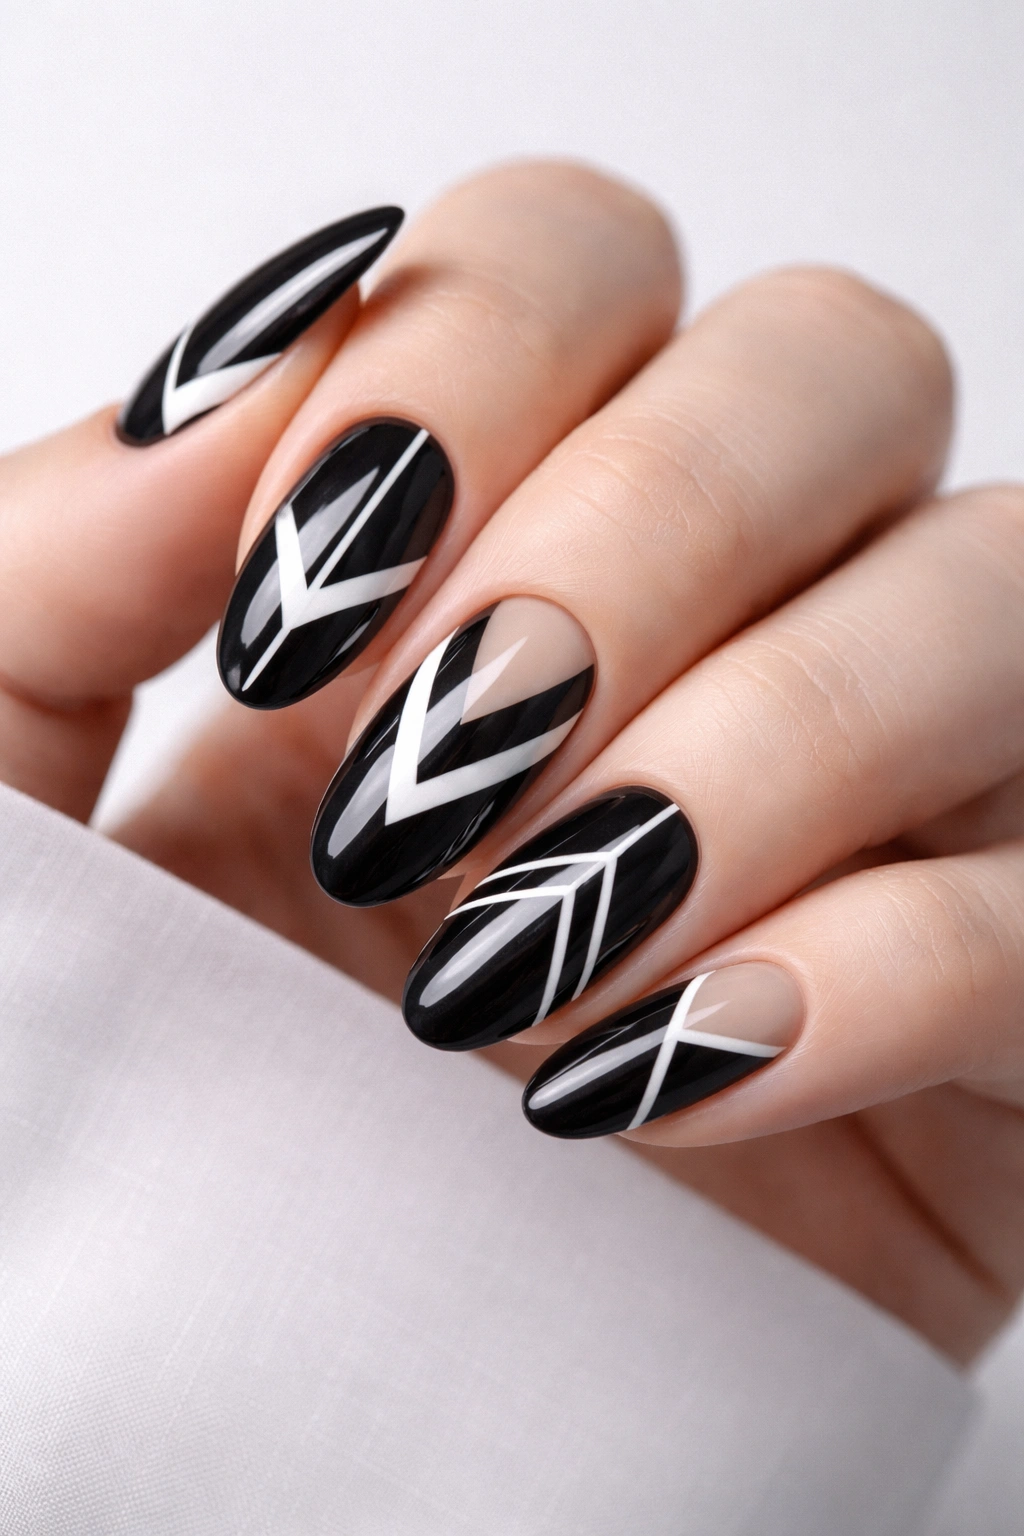
Clean geometric shapes—stripes, triangles, chevrons, negative space designs—on black create a pattern that’s modern, artistic, and surprisingly versatile. The graphic nature keeps the look feeling contemporary while black keeps it wearable.
Why It Stands Out
Geometric patterns are inherently satisfying to look at. Combined with black, they create a design that’s complex enough to be interesting but restrained enough to work in professional and casual settings. The oval shape is perfect for geometric designs because the elongated canvas gives you room to play with pattern and proportion.
Geometric Patterns Worth Trying
- Thin white stripes running vertically or horizontally down the nail
- A minimalist triangle or corner accent in white or metallic
- Chevron patterns using negative space where you leave black showing between white stripes
- A half-and-half geometric color-block design with white or chrome
- Hand-paint designs using a thin nail art brush, or use striping tape for perfectly clean lines
- Keep color placement intentional—every white stripe or shape should serve a purpose rather than feeling random
Styling angle: This design pairs beautifully with black-and-white outfits or graphic prints because it creates a cohesive visual theme.
10. Black Marble Nail Art
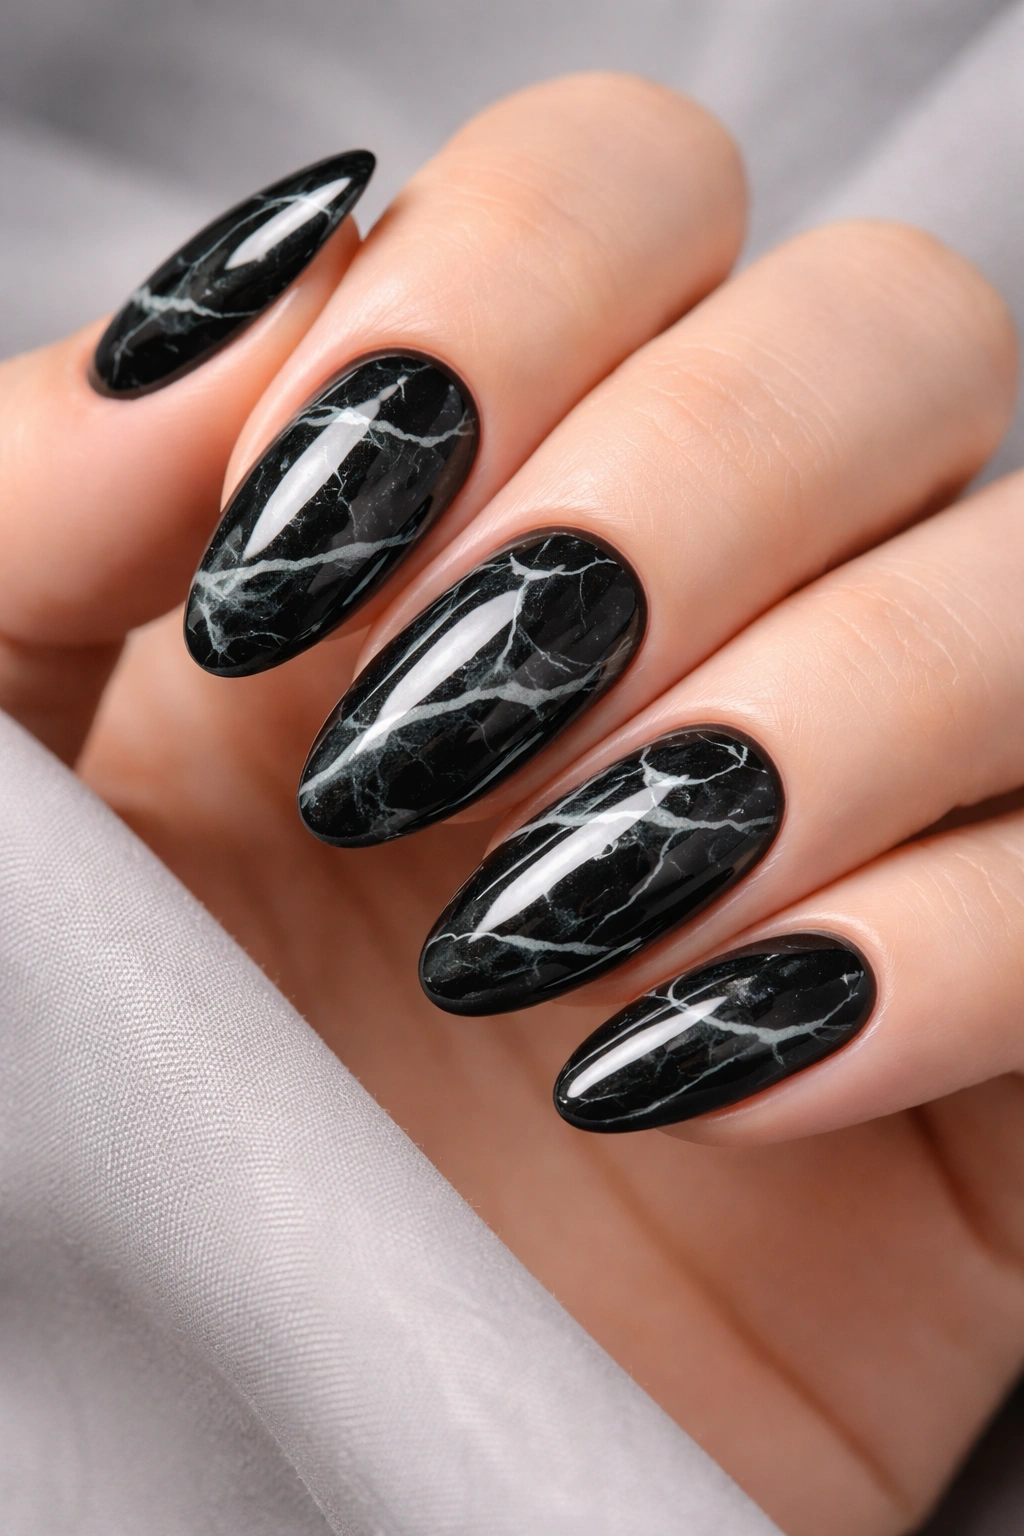
Marble patterns on black look more dramatic and sophisticated than marble on light backgrounds. The veining reads as elegant and artistic rather than accidental, especially when rendered in white, metallic, or even nude shades over the black base.
Why It Stands Out
Marble has an inherent luxury quality—it suggests natural stone, high-end interiors, sophisticated taste. When you create marble effect on black nails, you’re channeling that luxury aesthetic. Each nail is slightly different in its marble pattern, which makes the design feel curated and artistic rather than mass-produced.
How to Create Marble Effect
- Start with black polish as your base
- Use white, gray, or metallic gold polish with a thin brush or toothpick to create vein-like lines
- Keep lines organic and flowing—some straight, some curved, some branching off from each other
- Leave some areas with less veining and some more densely veined for realistic marble appearance
- Seal with a glossy top coat to unify the design and make it seem like a natural surface
- Alternative method: Use water marbling technique with black, white, and metallic polishes for a more blended effect
Pro tip: Look at actual marble images for inspiration—real marble never has perfectly symmetrical veining, so embrace the organic imperfection.
11. Black With Rose Gold Accents
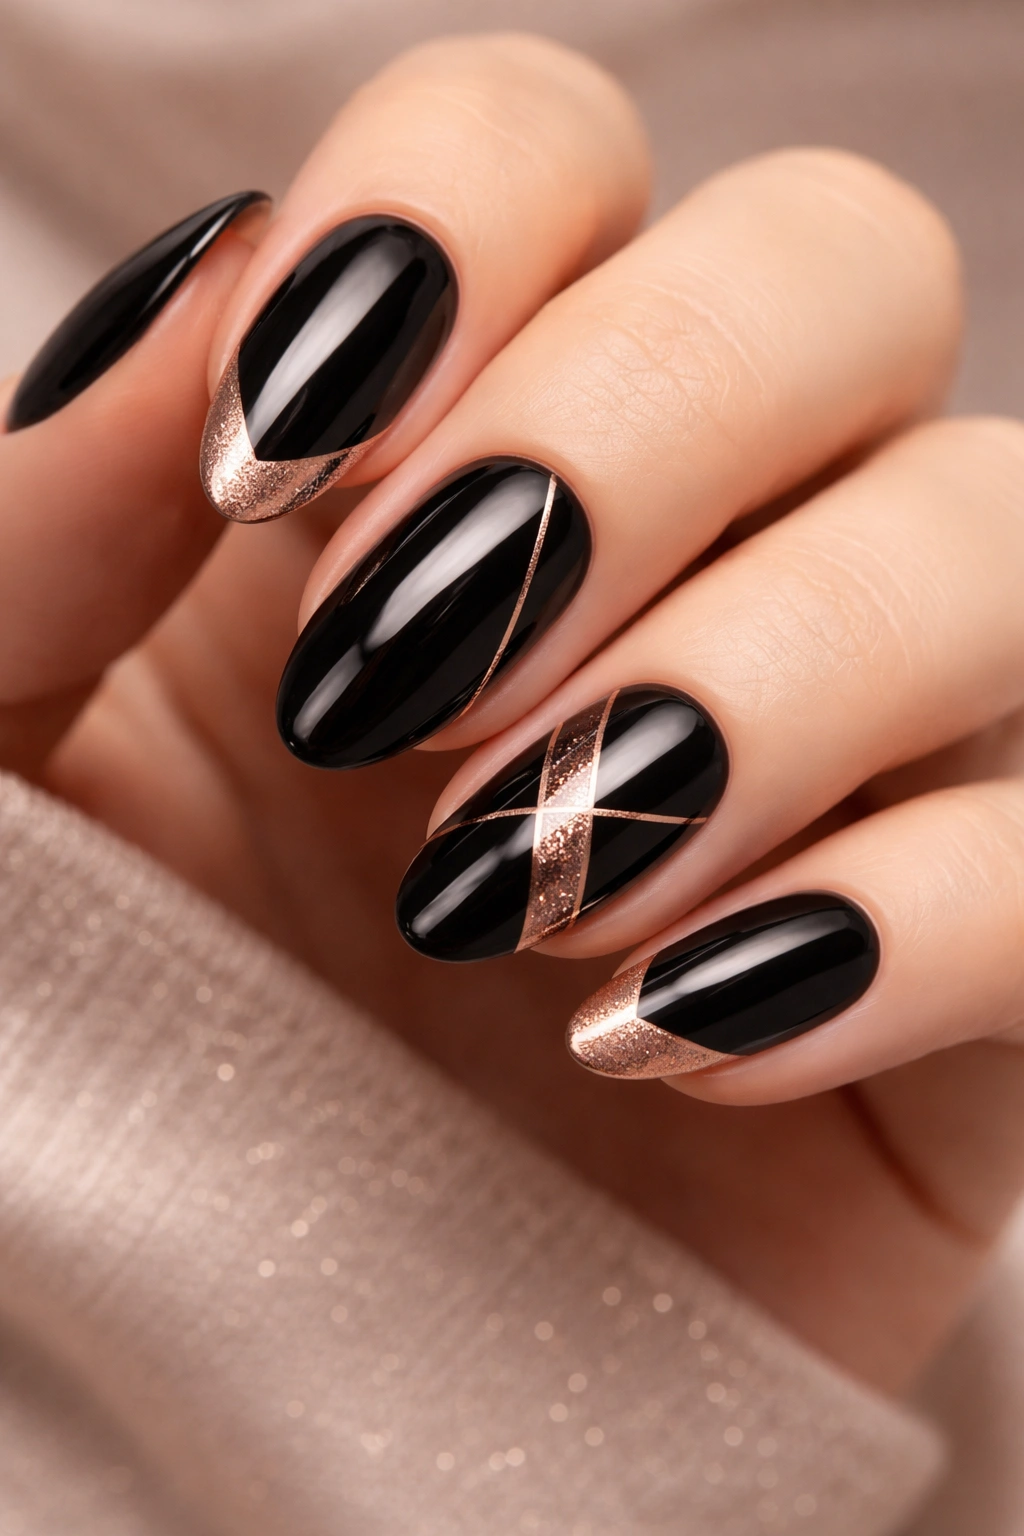
Rose gold is warmer than silver and more wearable for most skin tones when paired with black. It creates a sophisticated contrast that feels both modern and timeless, especially when applied as tips, accents, or geometric shapes.
Why It Stands Out
Rose gold + black is experiencing a moment, but this combination has genuine staying power because it works across seasons, occasions, and clothing styles. Rose gold feels slightly more feminine and warm than silver without sacrificing sophistication. The warmth breaks up the coldness of black while keeping the overall palette neutral.
Rose Gold Application Methods
- Apply rose gold as tips for a modern take on French manicure styling
- Create a rose gold ombre fade from the tips upward
- Use rose gold metallic powder pressed into wet top coat for shimmer without obvious glitter
- Paint rose gold geometric accents like triangles or stripes using a thin brush
- Combine rose gold foil with black for luxury-brand vibes
- The rose gold doesn’t need to cover much—even 25-30% of the nail can create the intended effect
Worth knowing: Rose gold chrome powder creates a mirror-like effect that’s more dramatic than matte rose gold polish.
12. Black With Holographic Shimmer
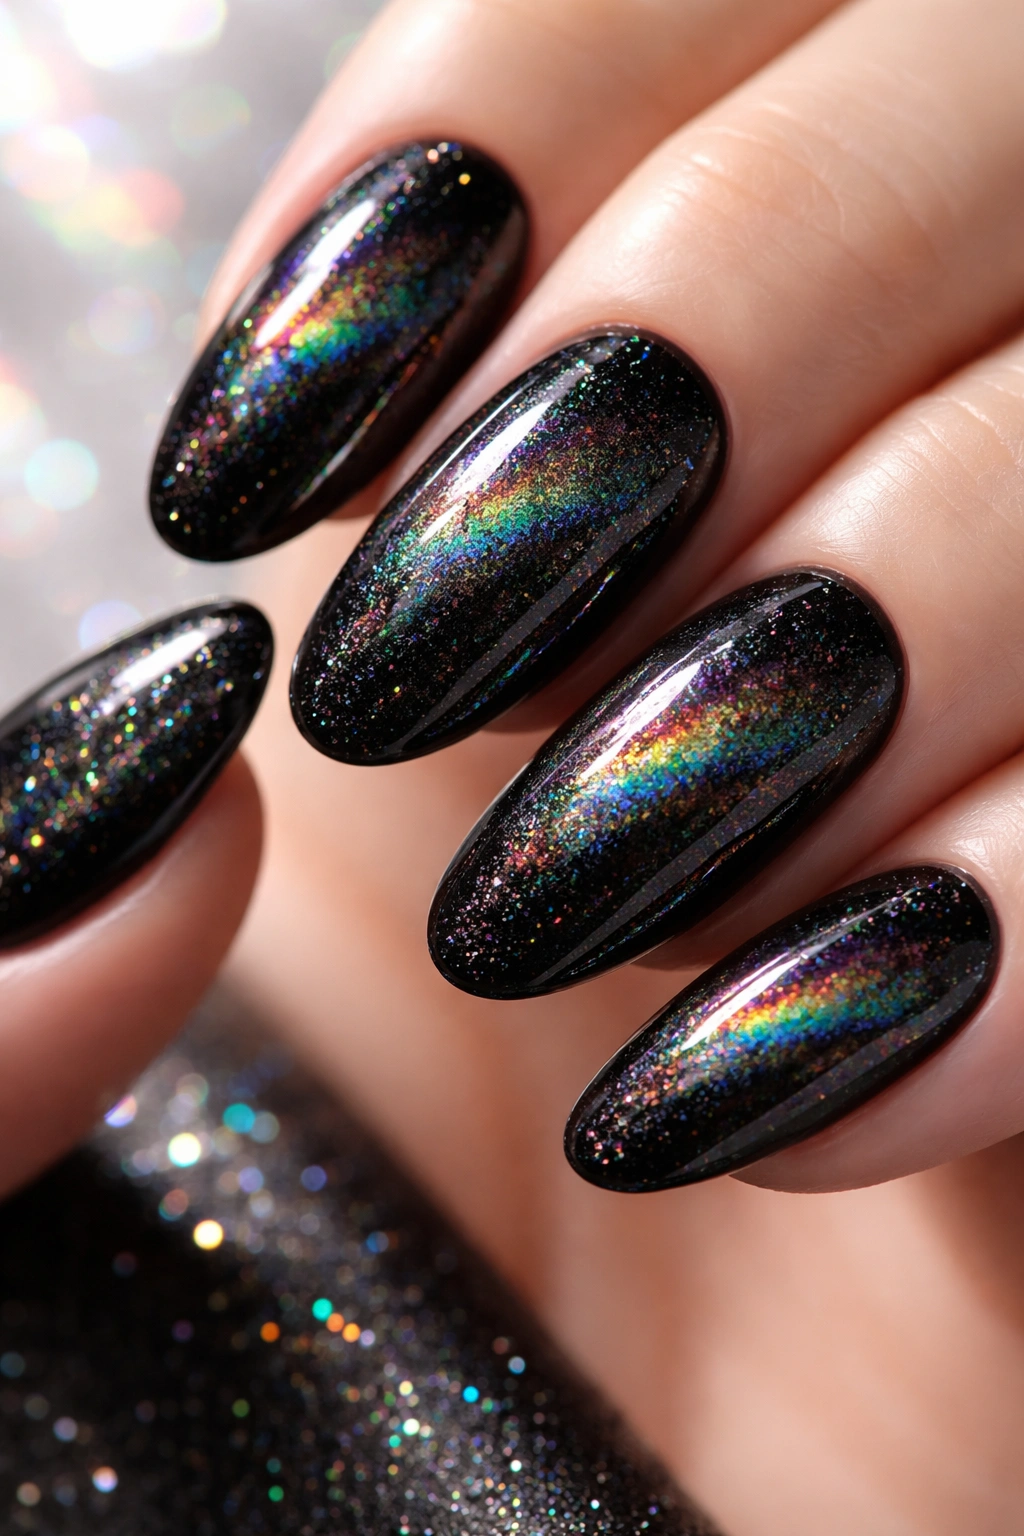
Holographic polish on black background creates a completely different effect than holographic on nude or white. Over black, the rainbow shimmer feels more contained and sophisticated rather than loud. The black base makes the holographic depth more apparent.
Why It Stands Out
Holographic adds visual movement and complexity without adding pattern. The way the finish shifts and changes in different light makes the nails feel more interesting every time you move your hands. It’s sparkly without being glittery, complex without being busy.
How to Apply Holographic Effectively
- Black base coat should be smooth and even—any bumps will show through the holographic
- Apply holographic polish in thin, even layers. One thick coat looks muddy; two to three thin layers look pristine
- Use a glossy top coat to seal and enhance the holographic effect—matte would dull the shimmer
- The holographic effect is most visible in sunlight or bright light, so these nails are especially fun for daytime wear
- Different holographic polishes have different color spectrums—some lean green-blue, others more pink-purple. Choose based on your personal color preferences
Pro tip: Holographic polish is worth the investment because it stays fresh-looking longer than regular shimmer finishes.
13. Black and Nude Ombre
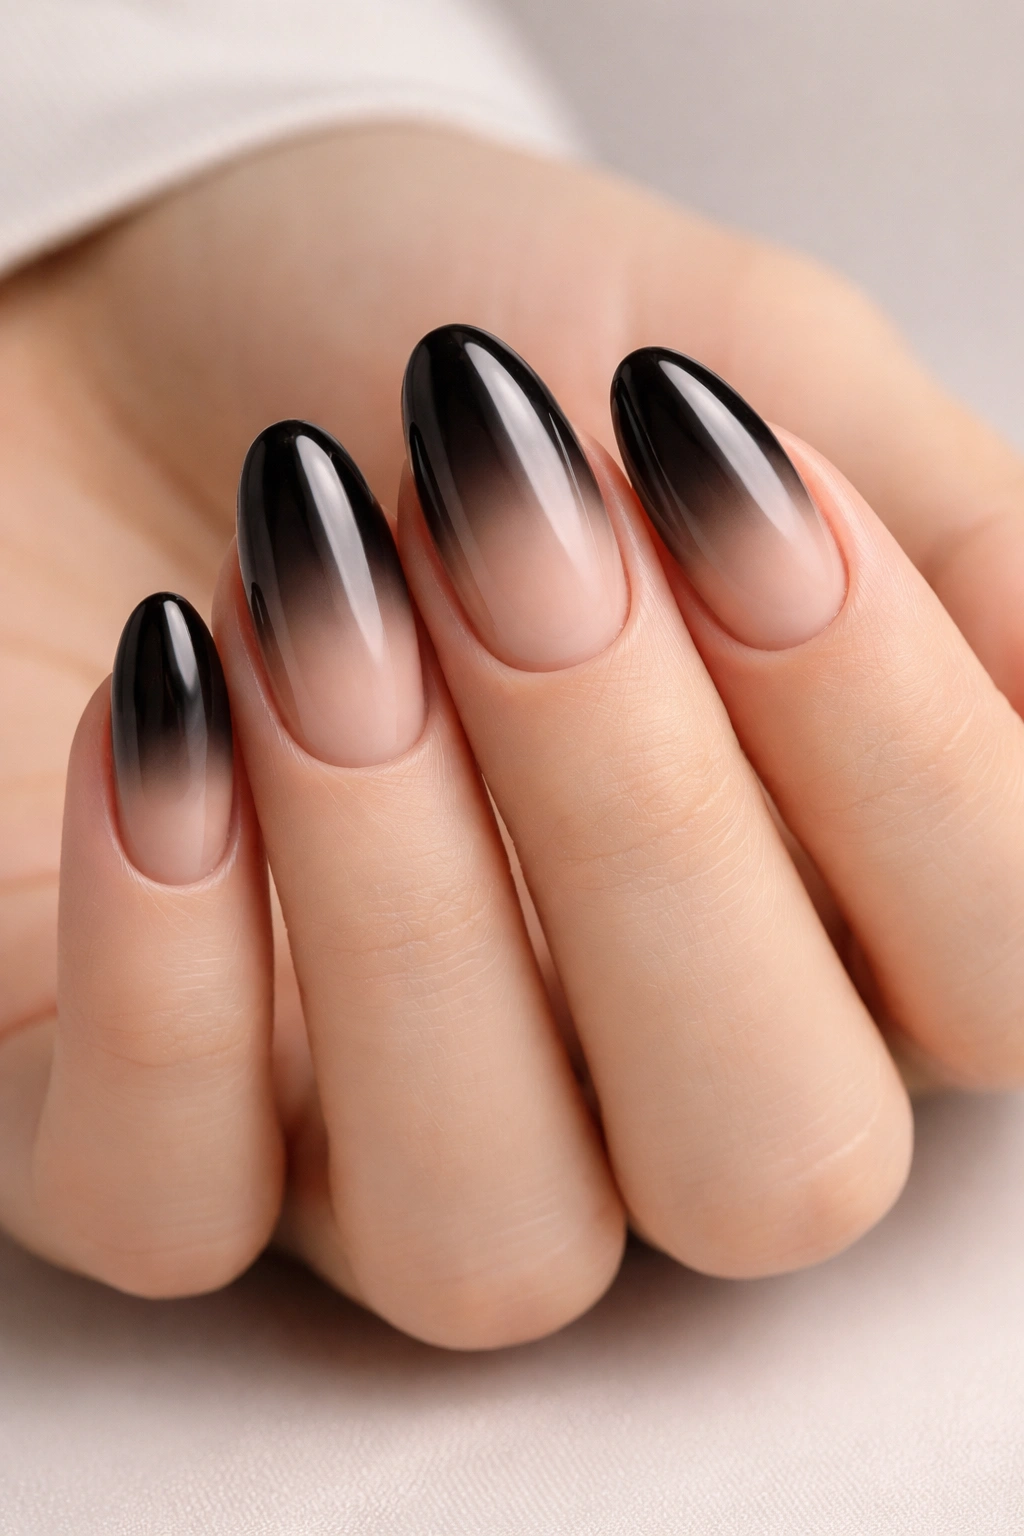
This is a more subtle version of the black ombre, creating a sophisticated fade that reads as wearable and refined. The nude end of the ombre is warm and welcoming while the black end is polished and formal, creating a design that genuinely transitions across occasions.
Why It Stands Out
Black-to-nude ombre is universally flattering because it works with warm undertones, cool undertones, and neutral skin. The design is complex enough to be interesting but subtle enough to work in conservative professional settings. It’s modern without being trendy.
Creating the Perfect Black-to-Nude Gradient
- Choose a nude shade that matches your skin tone or is one shade warmer
- Paint nude on the lower half of the nail and black on the upper half, leaving the middle bare
- Use a damp makeup sponge to blend where the colors meet, working quickly
- Build the blend gradually—it’s easier to add more gradient than to remove it
- Apply a glossy top coat to smooth everything and create a unified finish
- The transition should be gradual enough that you can’t see a hard line, but distinct enough that the black and nude remain distinguishable
Styling note: This design pairs beautifully with both warm and cool jewelry because the combination of colors makes it universally complementary.
14. Black With Metallic Stripes
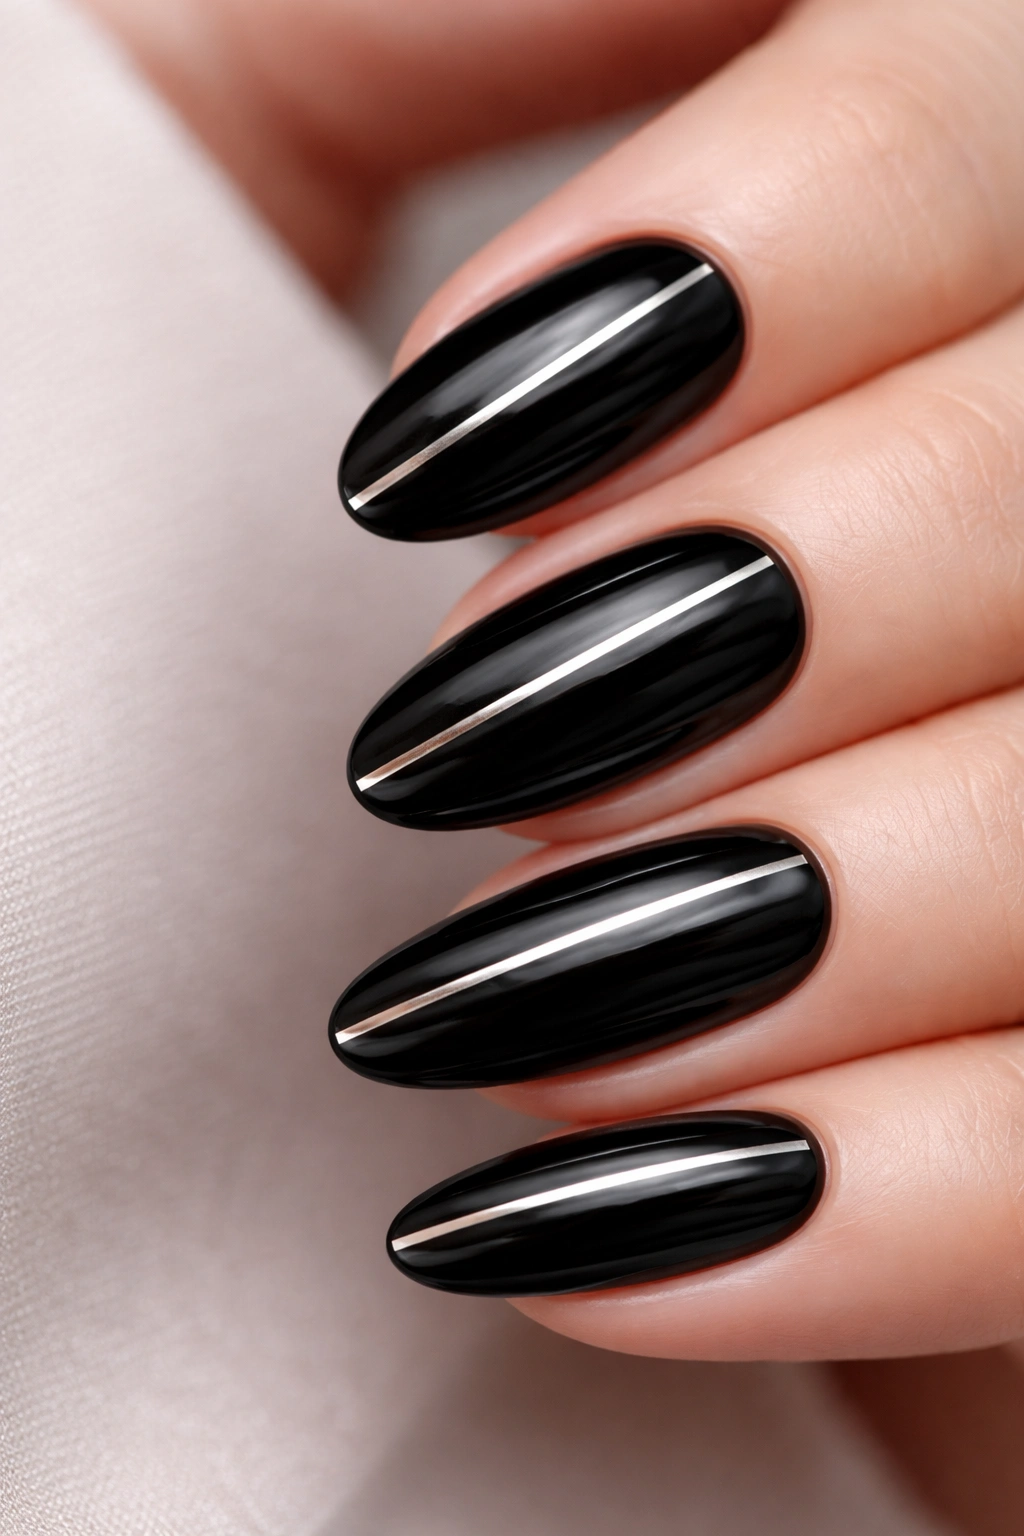
Thin metallic stripes running across or along black nails create a design that’s modern and geometric. Whether you choose gold, silver, chrome, or copper, stripes add structure and visual interest without overwhelming the base color.
Why It Stands Out
Stripes are inherently flattering on nails because they create lines that draw the eye upward and elongate the finger. Combined with black as the base, metallic stripes feel sophisticated and intentional. The design is graphic enough to feel editorial but simple enough for everyday wear.
Stripe Placement and Width
- Vertical stripes are most flattering and elongating
- Thin stripes (1-2mm) feel more refined than thick ones
- Space stripes evenly or unevenly depending on the vibe you want (geometric and perfect vs. organic and playful)
- Horizontal stripes across the tips create a different effect than stripes running the length
- Use striping tape for perfectly clean, sharp lines, or paint freehand for a slightly softer look
- Seal stripes with glossy top coat to make metallic truly pop
Pro tip: Mix metallic colors—try silver and gold stripes together over black for a more luxe effect.
15. Black Cat Eye Nails With Magnetic Polish
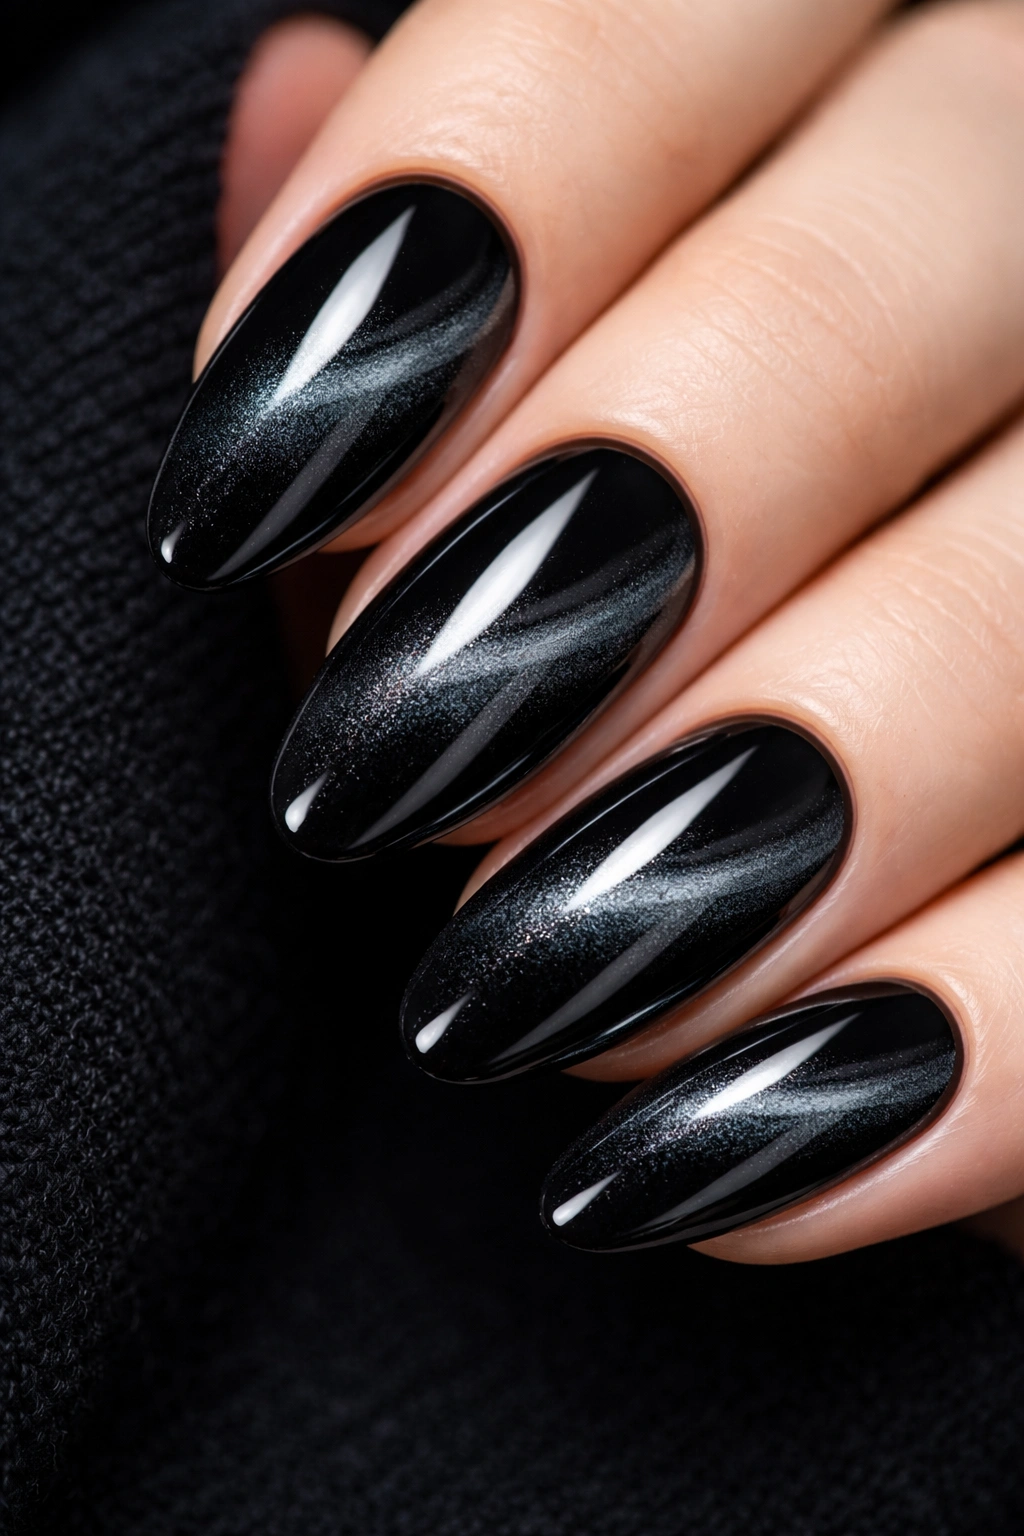
Cat eye polish contains iron particles that respond to a magnet, creating a linear design that looks impossibly complex but is actually very easy to execute. The effect on black background is dramatic and eye-catching.
Why It Stands Out
Cat eye creates movement and dimension that regular polish can’t achieve. The linear effect created by the magnet is perfectly precise and looks intentional in a way that hand-painted designs are harder to accomplish. It’s a high-impact design that requires minimal skill to execute well.
How to Use Magnetic Polish
- Black cat eye base coat applied first and allowed to dry
- Hold the magnet directly above the nail (usually about 1-2mm away) immediately after applying the cat eye polish
- The magnet pulls the iron particles into a linear pattern, creating the distinctive cat eye effect
- Different magnet shapes create different patterns—standard straight bar creates linear effect, while specialty magnets create wave or other shapes
- Let the polish dry briefly while the magnet is still in place, then remove the magnet
- The effect dries quickly and becomes permanent once set
- Seal with top coat to protect the design
Worth knowing: Different brands of magnetic polish respond differently to magnets. Invest in the magnet designed for the specific polish you buy.
16. Black With Pearl Finish
Pearl finish polish has a soft, luminous quality that feels sophisticated. On black background, pearls create subtle dimension and catch light in a sophisticated way that’s completely different from glitter or metallic.
Why It Stands Out
Pearl gives black nails an unexpected softness. The finish feels luxe and expensive while remaining wearable. Pearl over black reads as elegant and understated—you’re not broadcasting sparkle, but those who look closely will notice the quality and sophistication.
Pearl Polish Application
- Pearl polishes often benefit from two coats to build the effect properly
- The luminescence of pearl is most visible in natural light, so these nails are especially beautiful outdoors
- Keep application smooth and even—bumps in the application will show through the pearl finish
- Pearl works beautifully on the entire nail or as a sheer top coat over black for subtle effect
- Different pearl finishes have different undertones—some lean pink, others white or gold. Choose based on your undertone preference
- Seal with glossy top coat to enhance the luminescence
Pro tip: Pearl black nails are especially beautiful for professional settings and evening wear because they feel refined without being flashy.
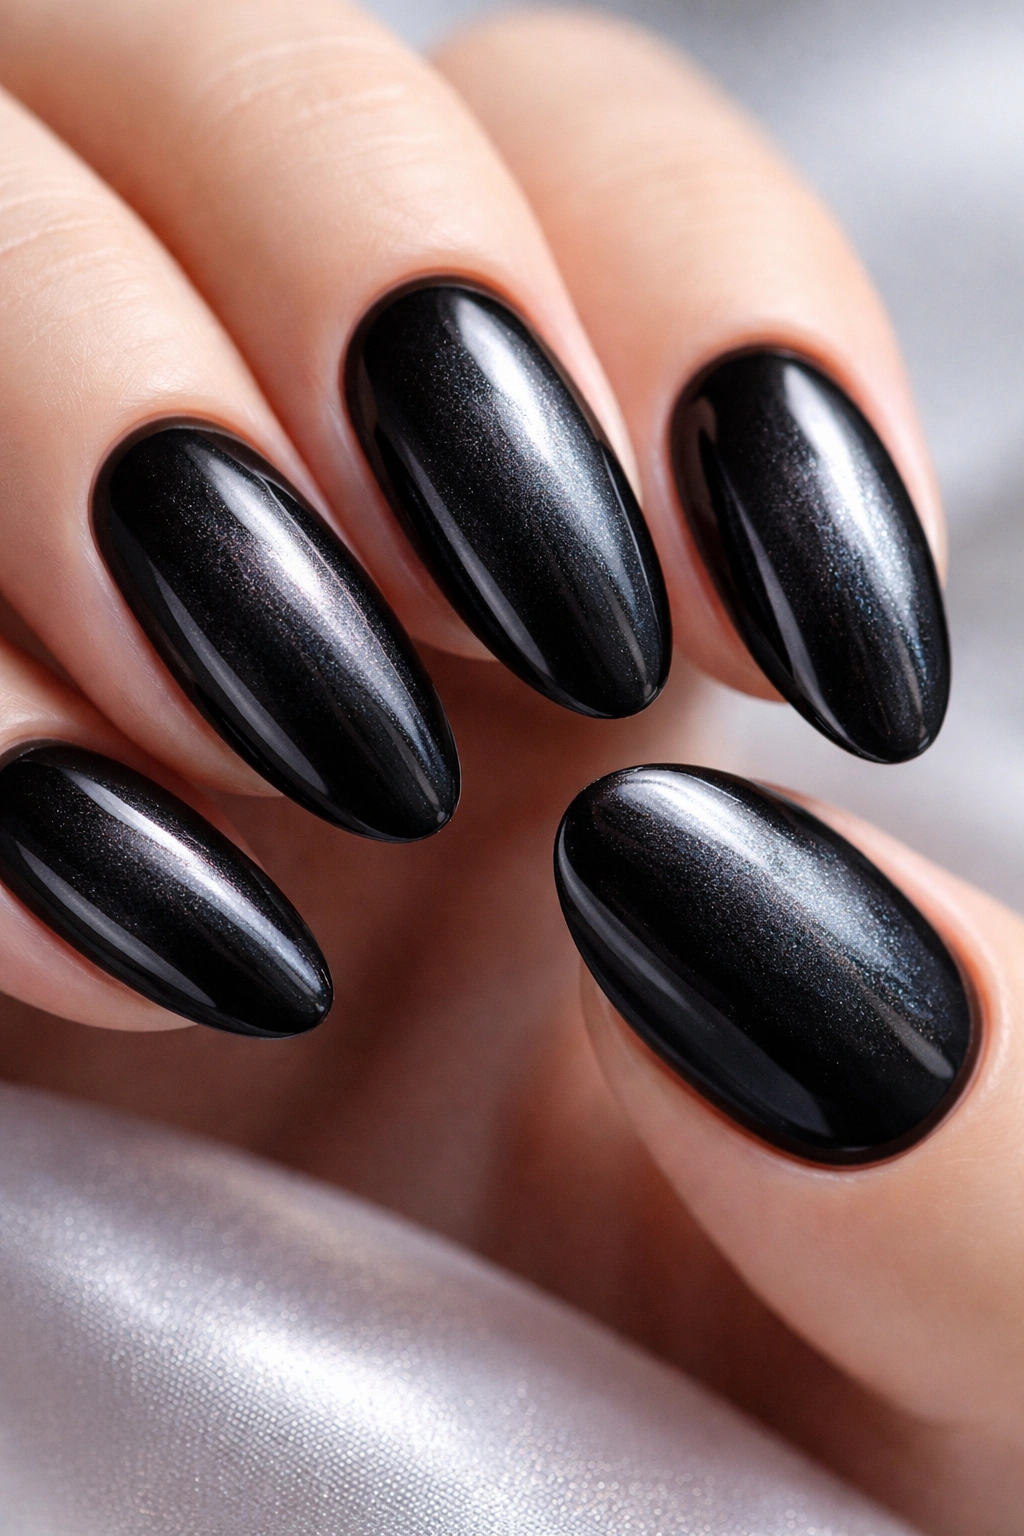
17. Black and Chrome Mirror Nails
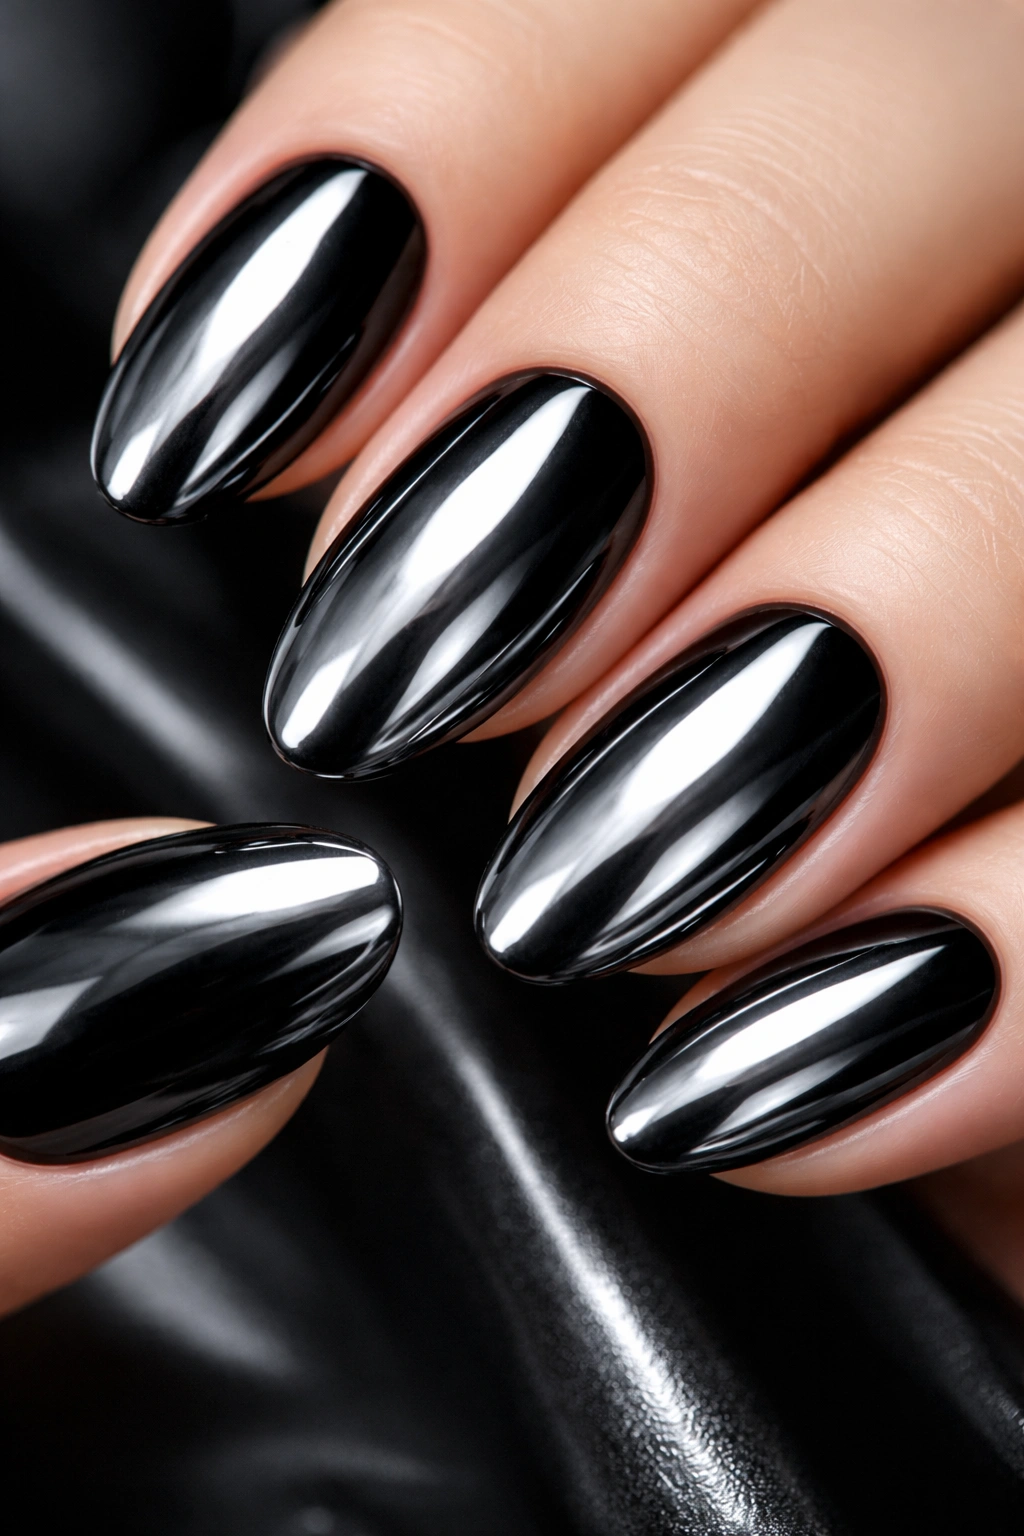
Chrome mirror powder creates a finish that looks like polished metal. On black background, chrome creates an absolutely stunning contrast—the reflective quality makes the black seem deeper and creates a high-fashion, editorial effect.
Why It Stands Out
Chrome on black looks expensive and intentional in a way that most nail designs can’t achieve. The mirror effect is genuinely futuristic and modern while black keeps it grounded and wearable. It’s a design that photographs exceptionally well and catches light in real-world interaction.
How to Apply Chrome Mirror Powder
- Use a gel base coat and cure under UV/LED light
- Apply black gel polish and cure again
- Apply a gel top coat (usually the brand’s sticky base coat works perfectly)
- Use a special applicator brush or a flat silicone tool to press chrome powder onto the wet gel
- Different chrome powders create different finishes—choose holographic chrome for rainbow shimmer or straight silver chrome for pure mirror effect
- Cure under light to seal
- Apply another gel top coat and cure to protect the chrome
Worth knowing: Chrome powder application requires steady hands and practice. Your first attempt might not be perfect, but by the third application, you’ll develop a feel for how much pressure and which angle works best.
18. Black Minimalist Line Art
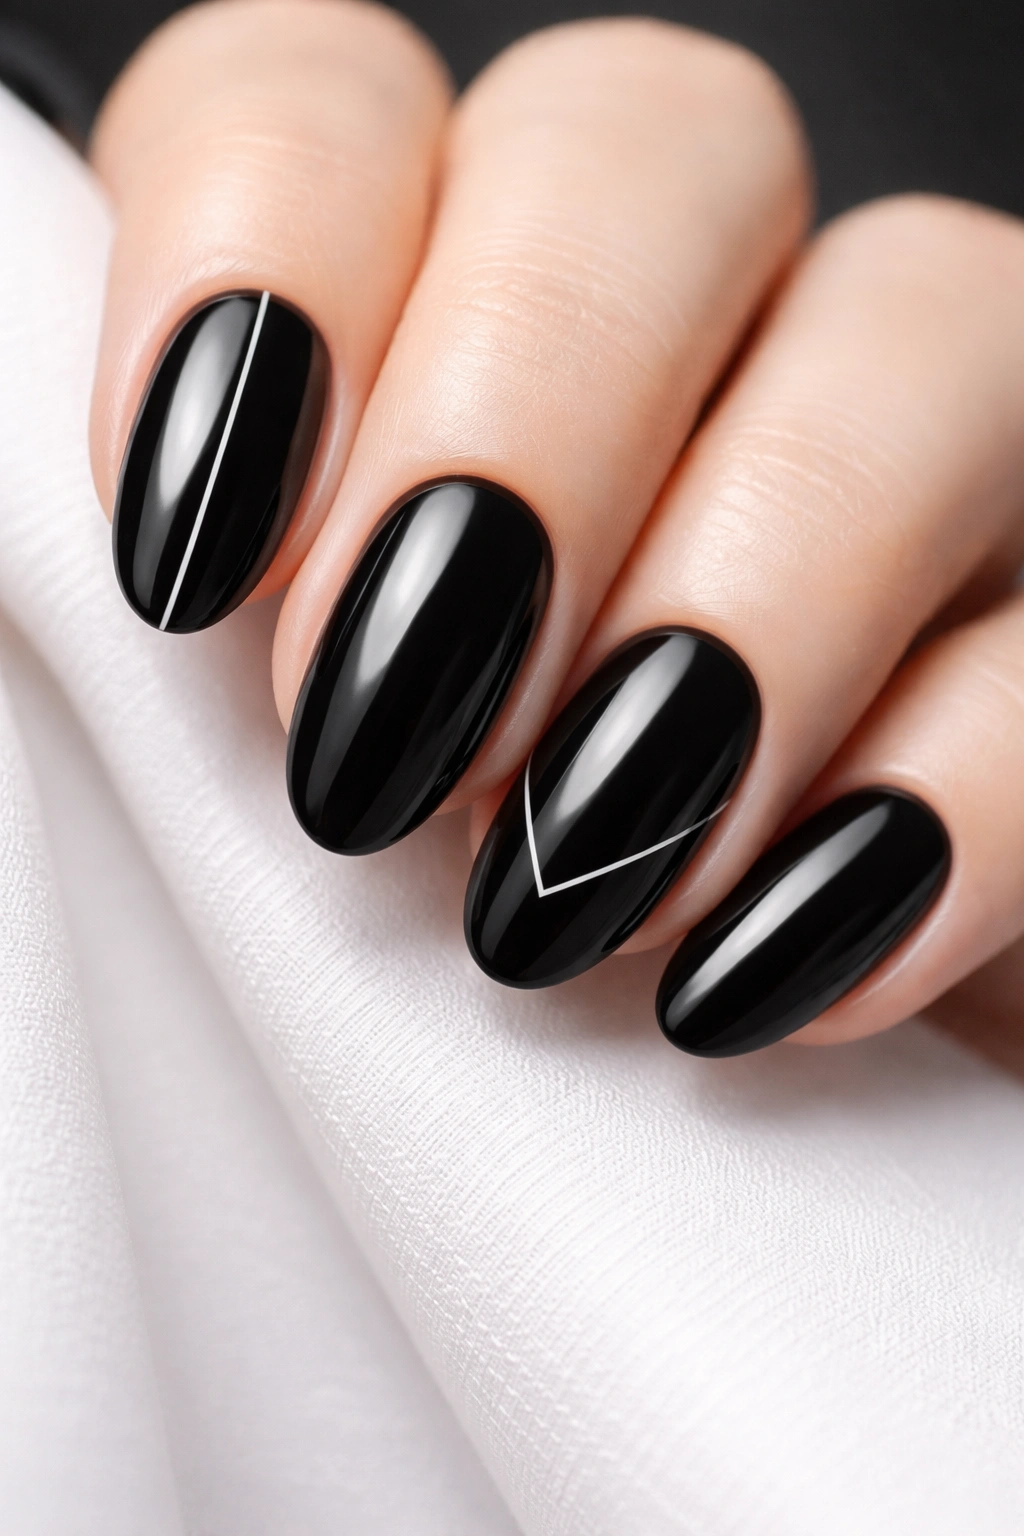
Simple line art—a single delicate line, abstract shapes, or geometric sketches—creates sophistication through restraint. Black nails become the canvas for artistic expression through negative space and thin-lined details.
Why It Stands Out
Line art is inherently elegant because it relies on precision and intentionality rather than color or embellishment. On black background, even simple line designs read as editorial and artistic. The design shows confidence in simplicity, which is a mark of sophisticated style.
Line Art Designs Worth Trying
- A single curved line running down the center of the nail
- Minimalist botanical shapes like a single leaf or branch
- Abstract geometric shapes like a single triangle or rectangle
- Hand-drawn stars, moons, or other celestial imagery
- Use a thin nail art brush and white, nude, or metallic polish for lines
- Keep lines deliberate and intentional—wobbly lines are charming only if they’re genuinely meant to be organic
- Seal with glossy top coat for a finished appearance
Styling note: Line art nails pair beautifully with minimal jewelry and clean, uncomplicated outfits because the nail art becomes the focal point.
19. Black With Confetti Glitter Mix
Confetti glitter is chunky, colorful, and fun—but over black, it reads more sophisticated than it does over lighter colors. The black base grounds the confetti and prevents it from feeling costume-y, creating a design that’s festive without being frivolous.
Why It Stands Out
Confetti glitter on black is the design equivalent of a black outfit with a statement bag. The base is sophisticated and neutral, while the glitter adds just enough celebration and personality. It’s perfect for special occasions, celebrations, or anyone who wants to add visual interest without going full party mode.
Confetti Glitter Application
- Apply black base coat and allow to dry completely
- Mix various sizes of confetti glitter in a small cup (you can customize the mix based on what you have)
- Apply a thick layer of glossy top coat to the nail
- Immediately dip your nail into the glitter mixture and press gently to ensure adhesion
- Let excess glitter fall away and pick off any pieces that landed outside the nail area
- Apply another layer of top coat to seal everything in place and smooth down the glitter
- Avoid getting glitter on the underside of the nail where it will be uncomfortable
Pro tip: Mix various shapes and sizes—fine glitter mixed with larger confetti shapes creates more visual interest than one uniform size.
20. Black Negative Space Design
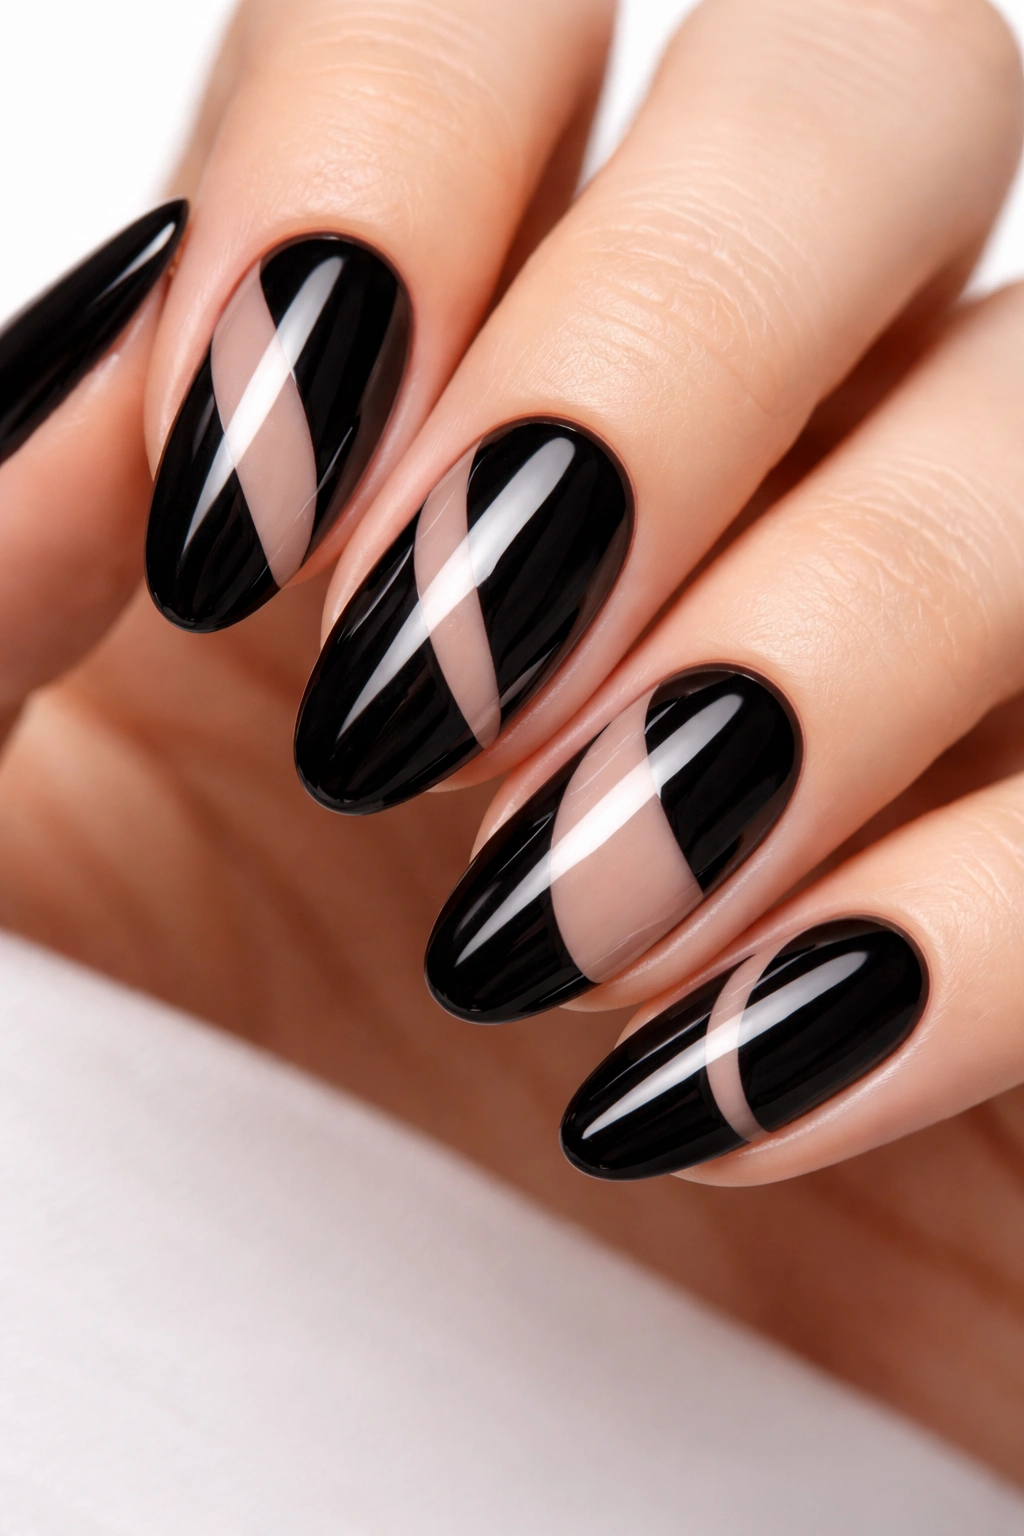
Negative space designs use the natural nail color to create pattern against the black polish. Whether it’s geometric shapes, abstract patterns, or organic designs, negative space creates visual interest through what’s NOT covered with color.
Why It Stands Out
Negative space is a professional design technique used in graphic design, architecture, and fine art for good reason—it creates elegant sophistication through restraint. On black nails, negative space breaks up the color and adds visual movement without adding texture or embellishment. The natural nail showing through adds a fresh, modern quality.
Negative Space Design Ideas
- Geometric cutout shapes like triangles, circles, or rectangles in the tips
- Horizontal bands of negative space with black sections between
- Abstract organic shapes that look like modern art
- Nail art tape or stencils make sharp, clean negative space easier to achieve
- Leave small sections of bare nail, or create designs where more nail shows than polish
- The bare nail should look intentional and clean, not like you forgot to paint it
- Seal everything with glossy top coat to unify the design
Worth knowing: Clean, filed edges on your natural nail are important for negative space designs because the bare nail is visible and part of the aesthetic.
Final Thoughts
Black oval nails sit in this perfect sweet spot where they’re sophisticated enough for professional settings, bold enough to feel intentional and stylish, and neutral enough to pair with literally anything in your wardrobe. Whether you’re drawn to minimalist elegance or glitzy glamour, there’s a black oval design that speaks to your aesthetic. The shape itself is forgiving and wearable, meaning you can experiment with different finishes, embellishments, and techniques without worrying that your nails will look inappropriate or out of place.
The real advantage of choosing black as your base is that it lets you focus on the secondary elements—whether that’s texture, pattern, color accents, or embellishment—without those elements feeling overwhelming. A bit of gold foil, some geometric lines, a touch of sparkle, or careful color blocking all work beautifully over black in a way that might feel busy over lighter colors. You get to play and experiment while maintaining an overall impression of polish and intentionality.
Start with whichever design speaks to you immediately, then branch out from there. Your nail aesthetic will evolve as you discover which techniques feel easiest for you to execute and which designs make you feel most confident. Save images of designs you love, gather inspiration from different sources, and remember that the best nail design is the one you actually feel excited about wearing.
