

Butter yellow might just be the most forgiving, flattering shade to ever grace a nail palette. Unlike harsh brights that demand a specific skin tone or bold jewel tones that read as evening-only, this soft, creamy yellow sits right in that sweet spot where it genuinely looks good on nearly everyone. Pair it with the squoval shape—that modern hybrid between a square and an oval that’s become the go-to for anyone wanting polish without the fragility of full nails—and you’ve got a nail design that’s both on-trend and wearable for everyday life.
The genius of short squoval butter yellow nails is their versatility. They work equally well for summer garden parties, casual office days, or as a base for more intricate nail art. The short length means they’re practical for actual living—typing, cooking, playing sports, scrolling through your phone—while the soft yellow keeps everything feeling polished and intentional rather than accidental. Whether you’re drawn to minimalist elegance or decorative details, this color and shape provide the perfect canvas.
What makes butter yellow so special is that it bridges seasons and moods. It’s cheerful enough to feel summery, but warm enough to work through fall. It photographs beautifully in natural light and reads as sophisticated rather than cutesy, which is something genuinely hard to pull off with any yellow shade. The short squoval length amplifies this sophistication—it’s neat without being severe, modern without trying too hard.
If you’ve been hesitating about trying this look because you worry yellow might be “too bold” or “too trendy,” let this collection convince you otherwise. These designs prove that butter yellow nails have staying power and real elegance.
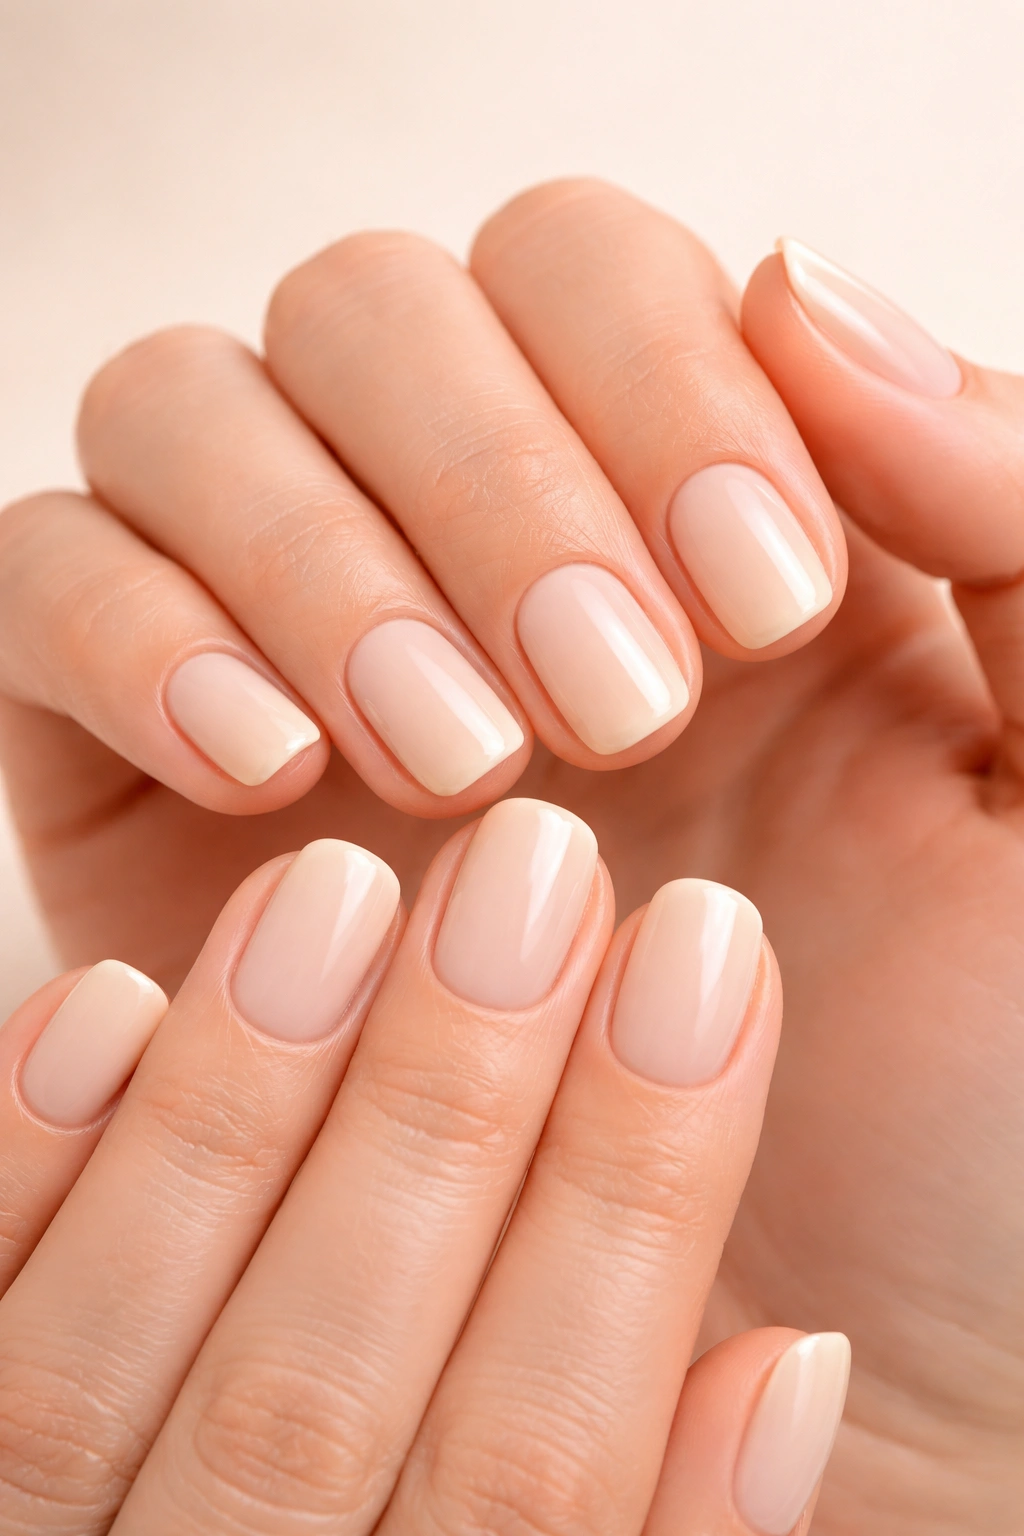
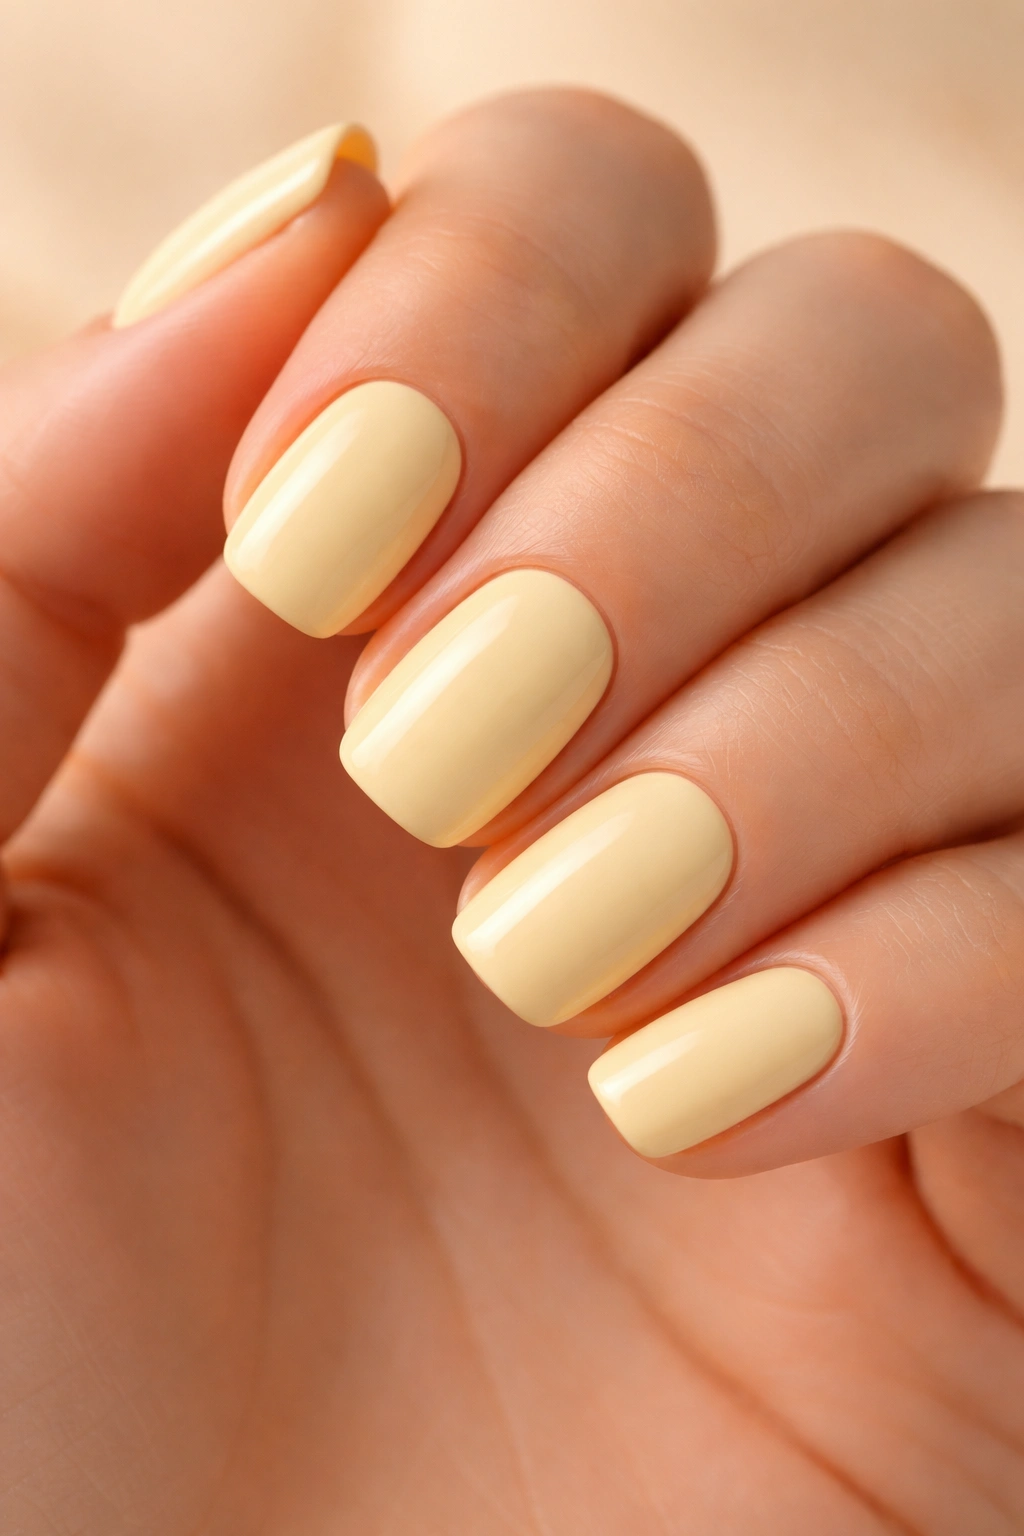
1. Pure Butter Yellow with Subtle Shimmer
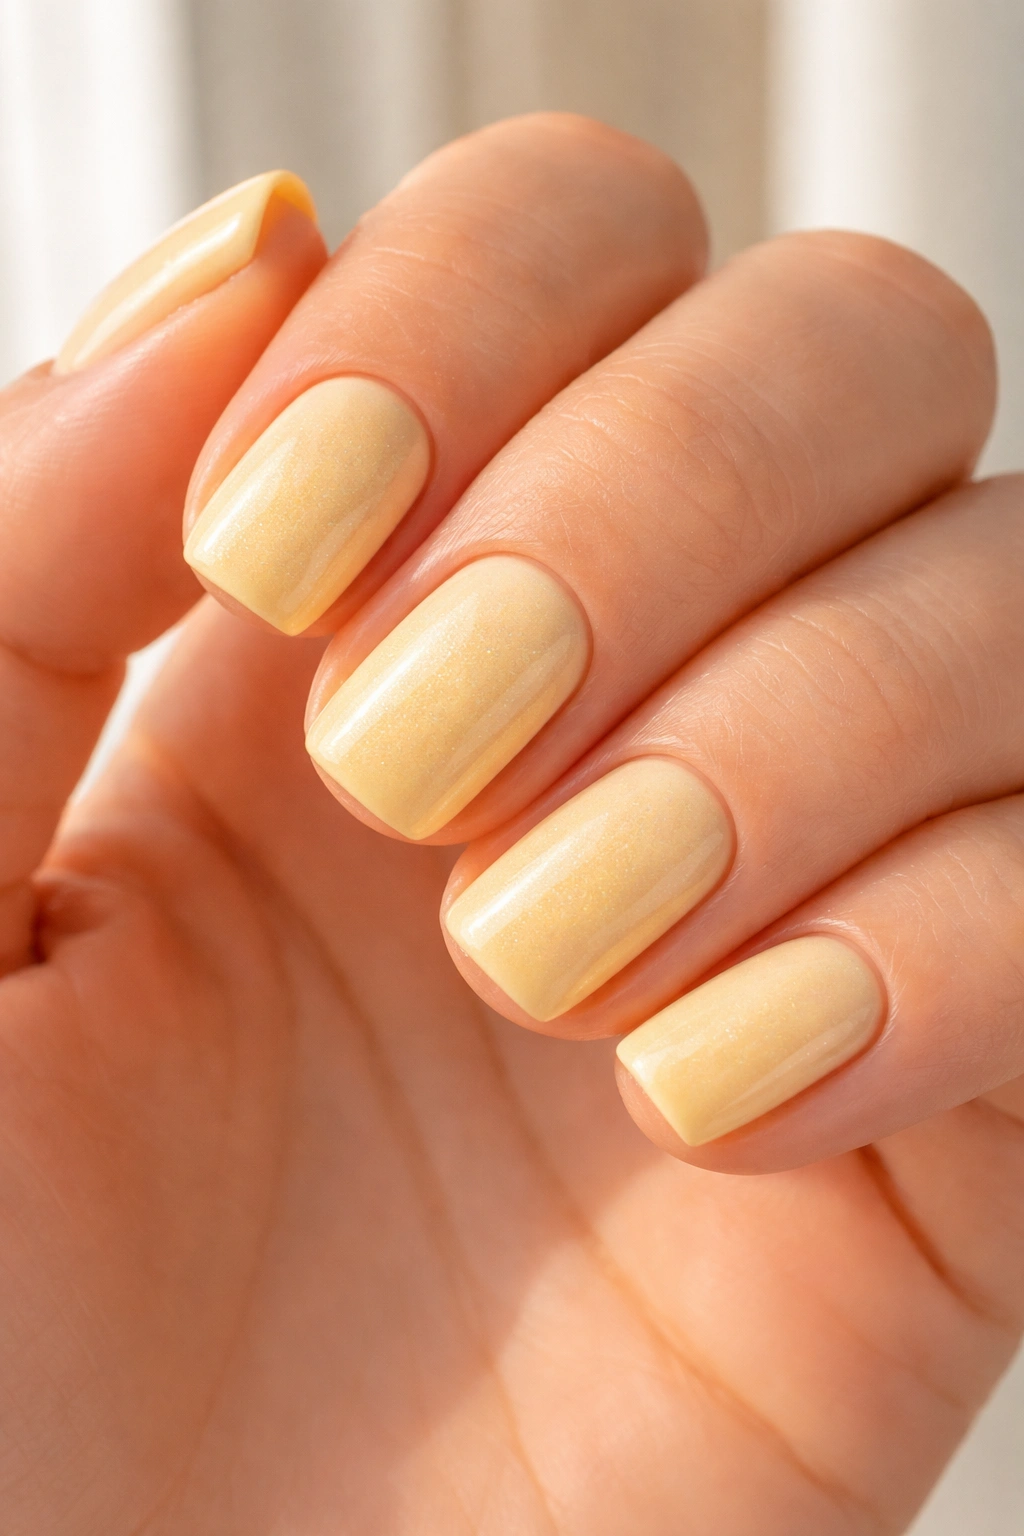
Sometimes the best design is barely a design at all. A clean, creamy butter yellow with just a whisper of shimmer catches the light without being glittery or overdone. The shimmer should be so fine that it’s almost undetectable in indoor lighting but creates a soft glow in natural sunlight—think of it as dimension rather than decoration.
Why This Shines
This design works because it lets the color and shape do all the heavy lifting. There’s no visual clutter, no competing textures, just pure nail color in its most refined form. Short squoval nails with this finish feel intentional and manicured without requiring complex technique or endless upkeep.
What Makes It Work
- A high-quality cream base is essential—drugstore formulas can look chalky or plastic on butter yellow
- Add shimmer through a single topcoat layer rather than mixing it into the base for better control
- The squoval shape should have slightly rounded edges and a modest tip length (about ¼ inch past the nail bed)
- Keep cuticles clean and moisturized—bare nails show everything, so skin health matters
2. Butter Yellow with White Blooming Florals
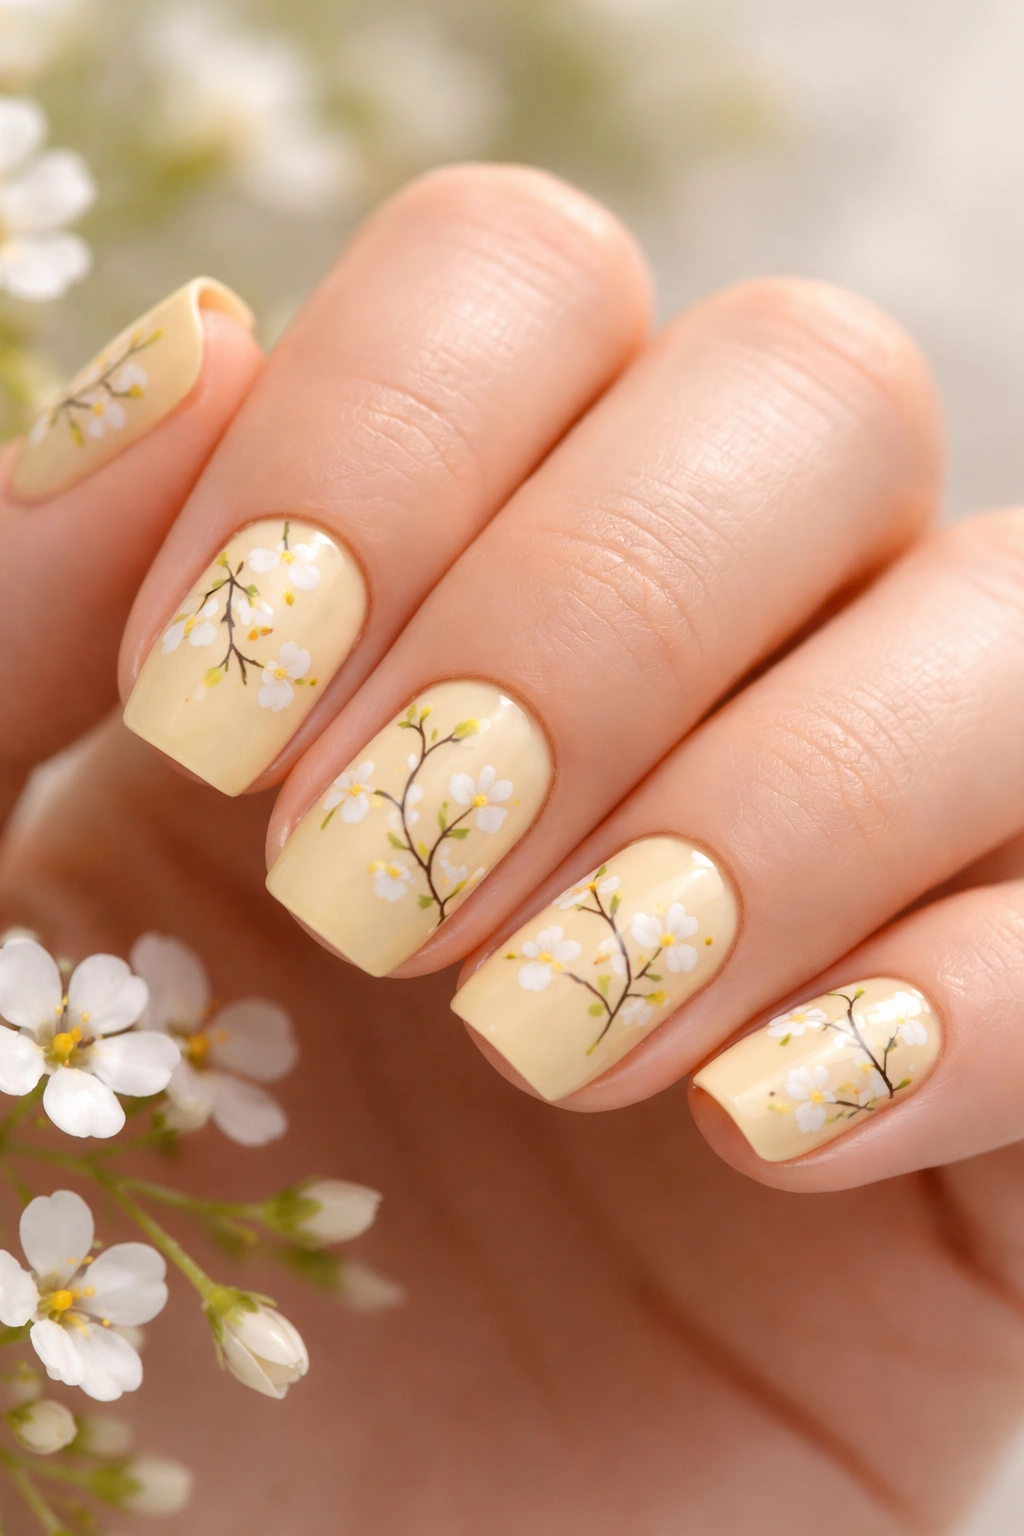
Delicate florals feel fresh on butter yellow, especially when the flowers are painted in soft white with thin black stems and leaves. Think tiny wildflower sprigs scattered across each nail rather than one large design per nail. The randomness is what makes this feel artistic rather than precious.
The Beauty of Understated Florals
White blooms on butter yellow create a naturally spring-garden feel. The combination is inherently soft and approachable, never dramatic or fashion-forward-looking in a way that dates quickly. Scatter three to five small florals per nail, leaving plenty of butter yellow visible so the overall effect feels spacious rather than crowded.
Design Elements to Include
- Tiny white five-petal flowers using a thin dotting tool, about the size of a lentil
- Thin black or dark green stems connecting the flowers loosely across the nail
- Small green leaves interspersed between blooms for organic movement
- Leave at least 50% of the nail bare yellow as negative space
- Seal with a glossy topcoat to keep the delicate lines crisp
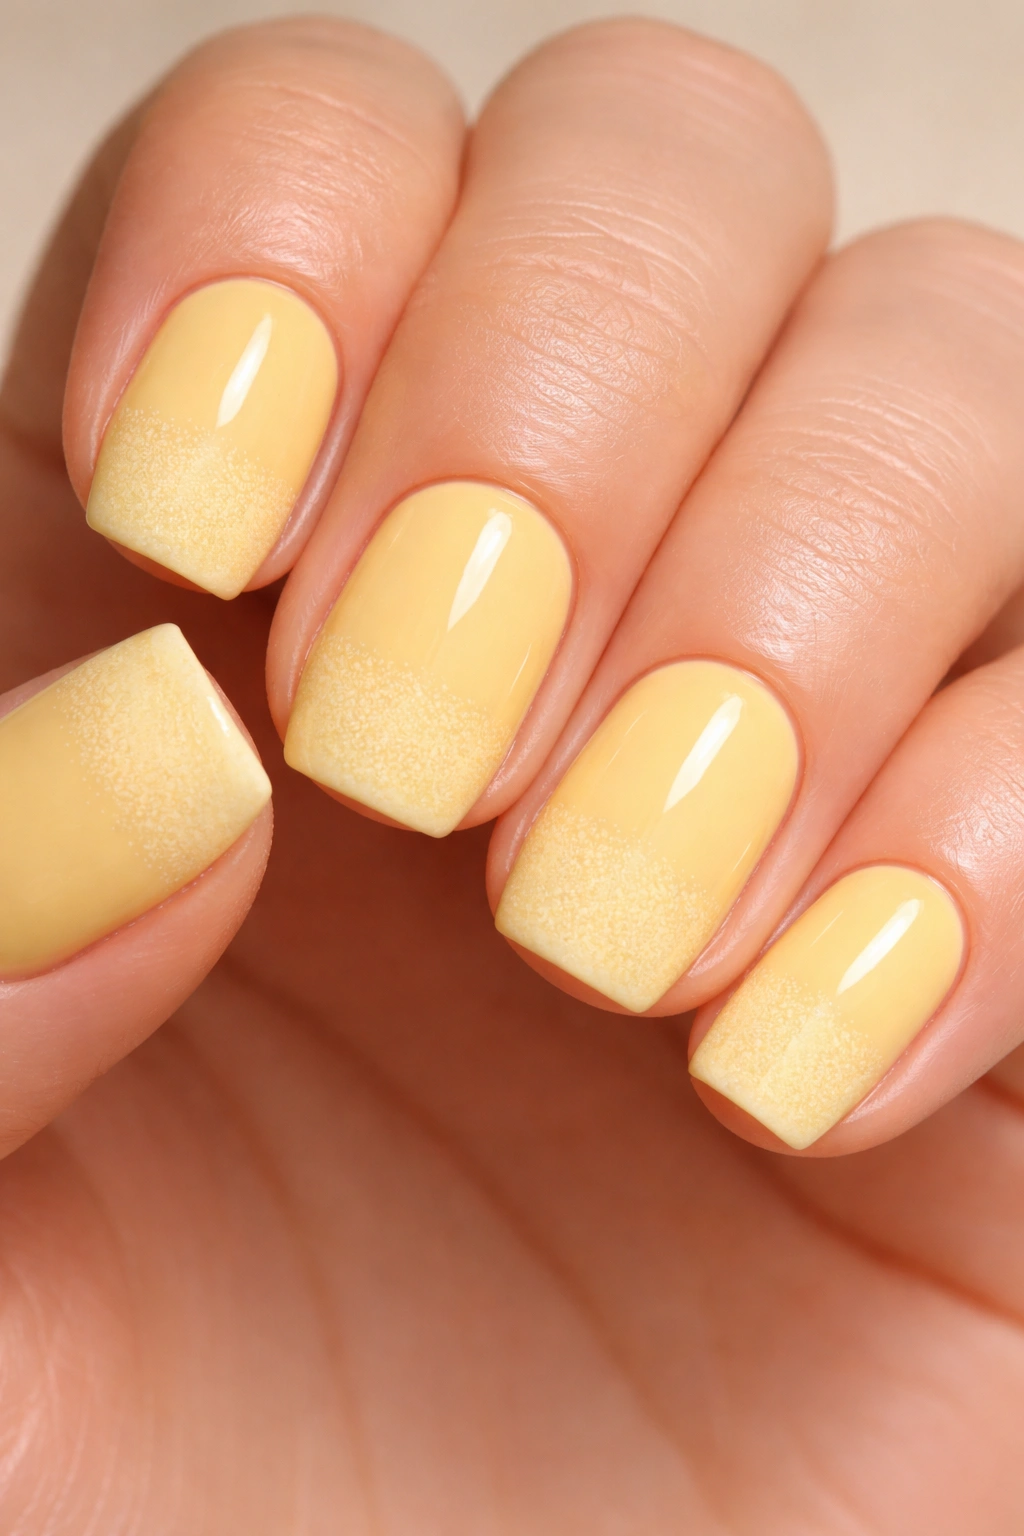
3. Butter Yellow Ombré Fade to Cream
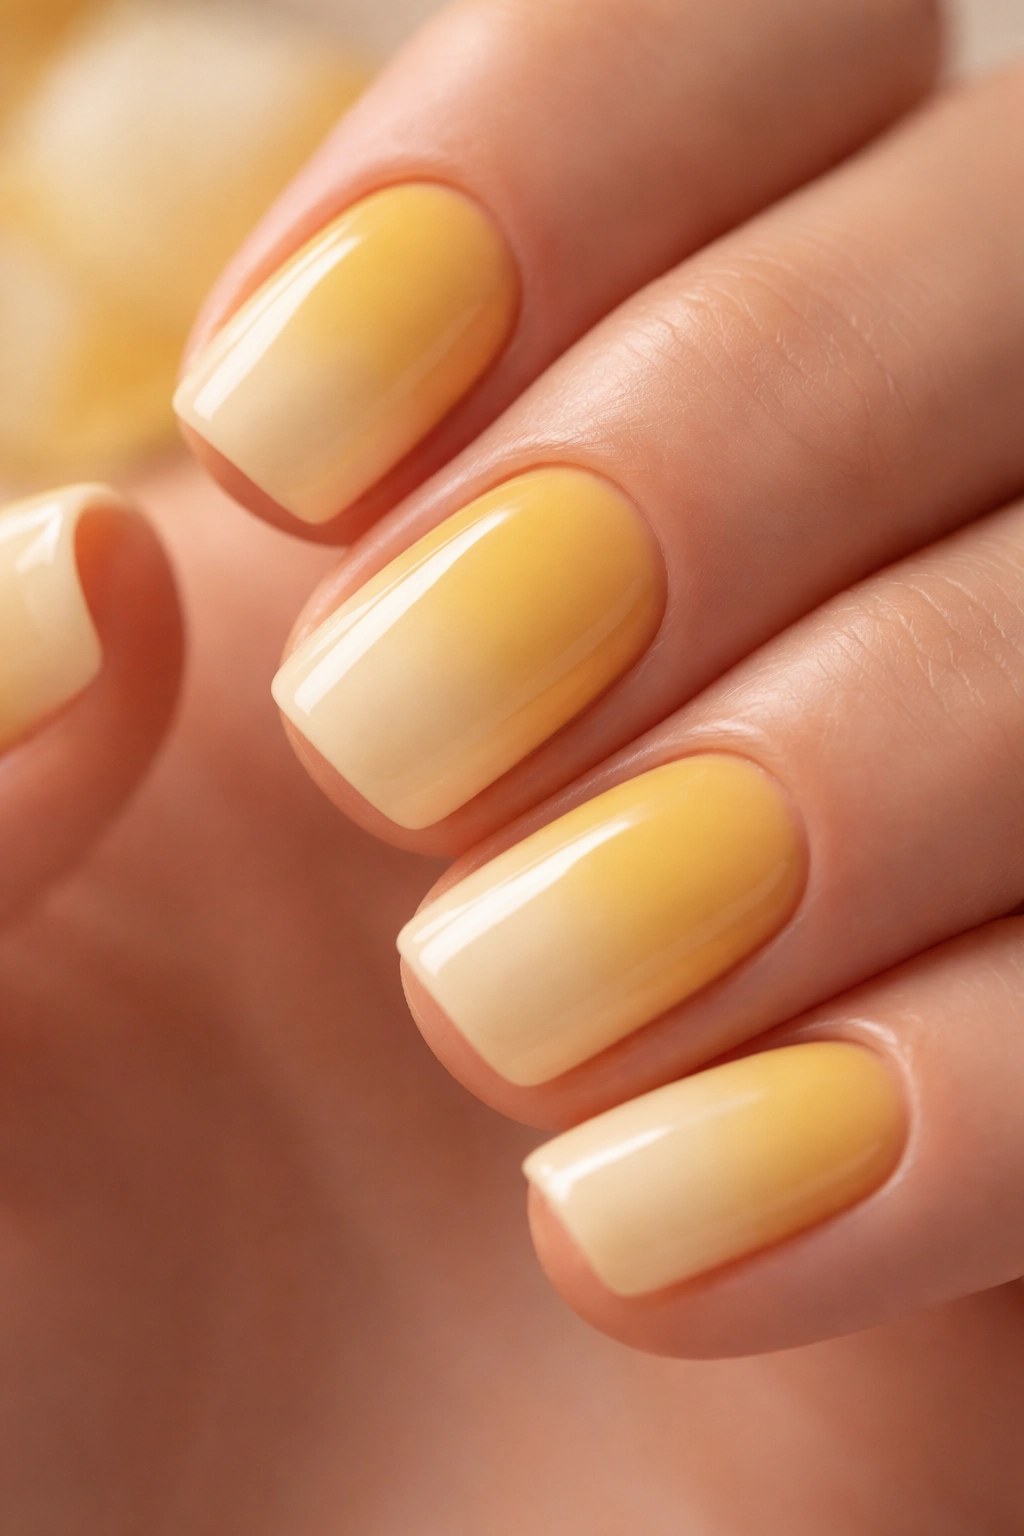
Create a gradient that moves from saturated butter yellow at the base toward a barely-there cream at the tip. Use a sponge and two shades in the same family—the darker butter yellow and a much lighter, almost-white yellow. The transition should be soft and gradual, taking up about two-thirds of the nail.
Why Ombré Works on Squoval
The ombré effect adds dimension and visual interest while staying monochromatic, which keeps things elegant. On short squoval nails, this gradient creates an illusion of length without actually being long—the eye follows the color fade and perceives more nail than is actually there.
How to Execute It Cleanly
- Use a makeup sponge, not a nail sponge—regular makeup sponges have a finer texture and create smoother transitions
- Apply the darker shade to the base and the lighter shade to the tip with slight overlap
- Sponge gently and repeatedly until the transition blurs completely
- Clean up any sponge marks on the nail sides with a small brush and corrector liquid
- Seal with a shiny topcoat to smooth out any texture the sponging creates
4. Butter Yellow with Minimalist Black Line Art
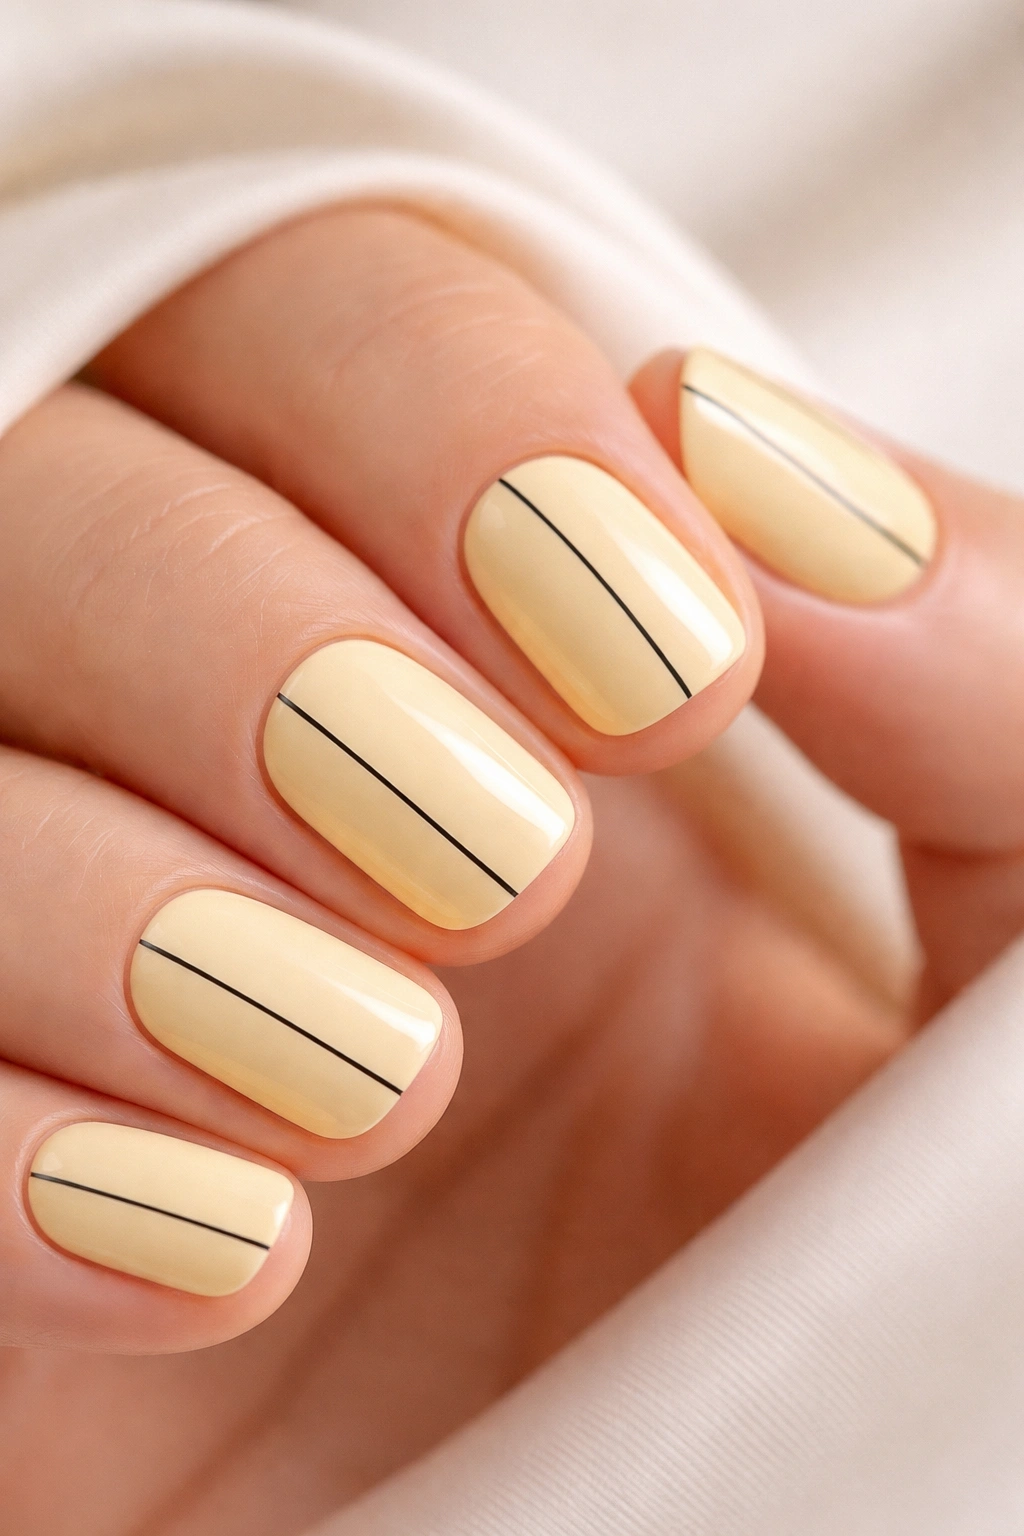
Black line work feels incredibly modern against butter yellow. Paint one clean, simple line design per nail—perhaps a geometric shape like a triangle or abstract wavy line, or something representational like a single leaf or horizon line. The lines should be thin and precise, taking up maybe one-third of the nail surface.
The Appeal of Minimalist Line Art
This design reads as intentional and artistic without being complicated. Minimalist line art is having a cultural moment for good reason—it’s sophisticated, easy to look at repeatedly, and works across ages and styles. On butter yellow, black lines pop without any visual harshness because the base color is so warm and soft.
Executing Clean Lines
- Use a very fine brush or thin striping brush with a steady hand or a nail art pen if you’re not confident free-handing
- Black should be true jet black, not dark gray or charcoal
- Keep lines thin and let them taper slightly at the ends for a more refined look
- One design element per nail is stronger than cramming multiple lines onto each one
- A glossy topcoat will make the lines appear even more precise
5. Butter Yellow Base with Gold Leaf Accents
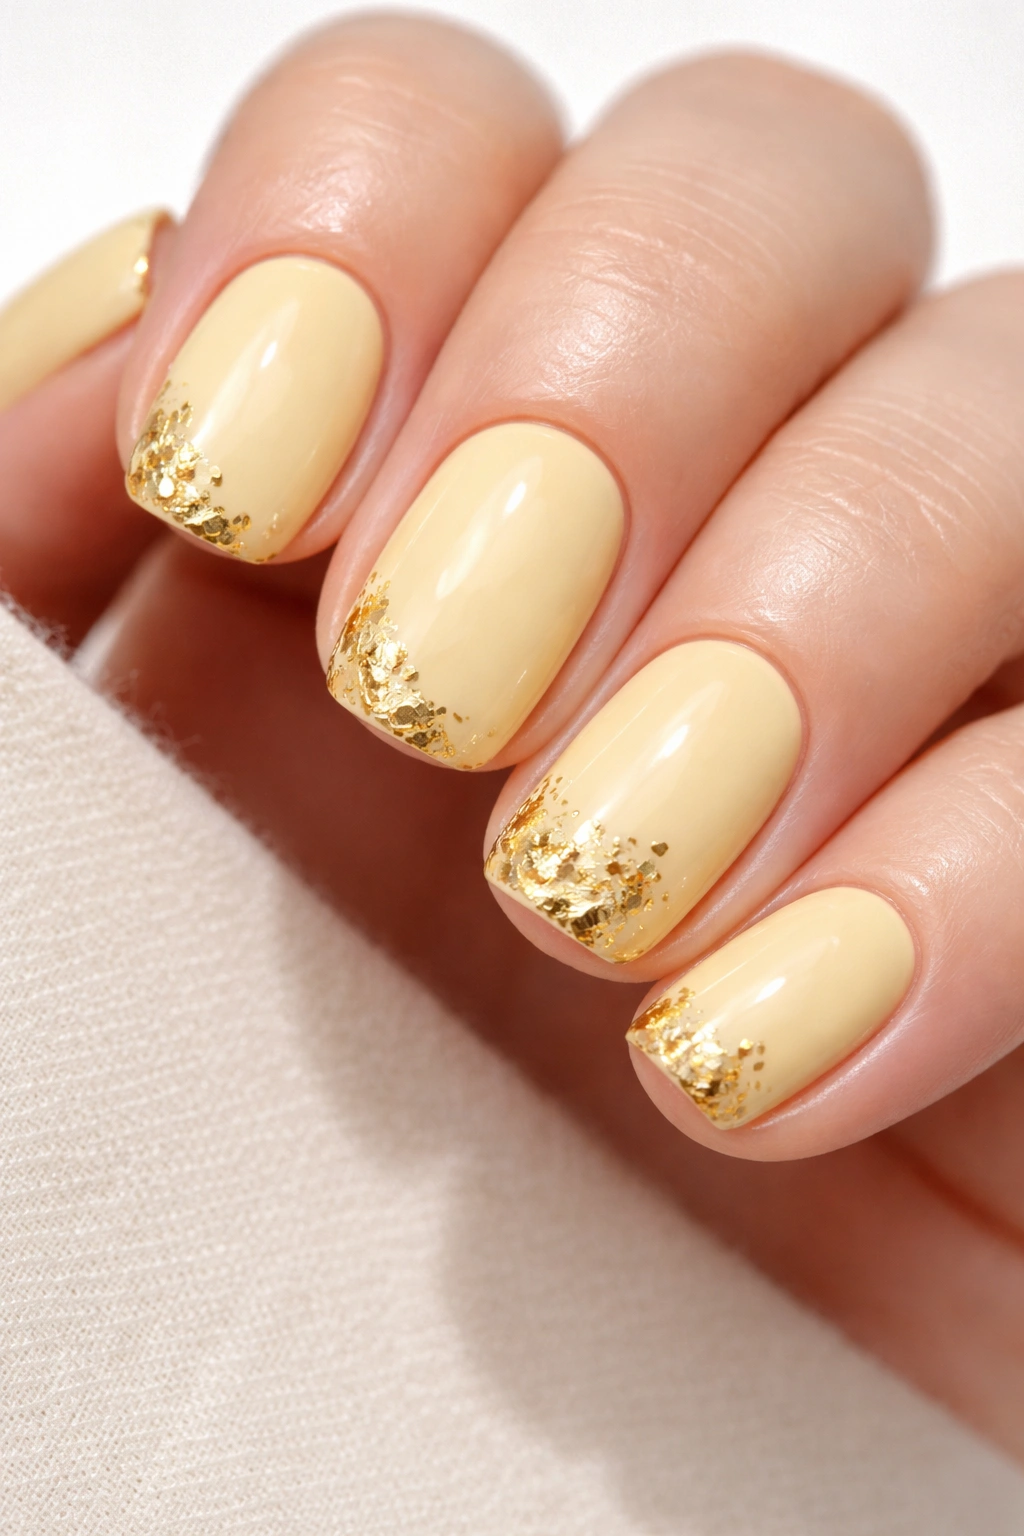
Press actual gold leaf onto the nail while the topcoat is still slightly tacky, then seal with another layer of clear topcoat. Place the leaf fragments strategically—perhaps along one edge or clustered in a corner rather than covering the whole nail. The gold adds subtle luxury without overwhelming the butter yellow.
Why Real Gold Leaf Elevates the Look
Gold leaf feels indulgent and special, which is exactly what short nails deserve when you commit to a full manicure. The subtle shimmer and irregular texture of real gold leaf creates dimension that metallic polish can never quite achieve. It catches light differently depending on the angle and time of day.
Getting Gold Leaf to Stay
- Use a sticky topcoat or tacky base gel designed for nail art, not regular glossy topcoat
- Cut or tear gold leaf into small pieces rather than using full sheets
- Press gently onto the tacky surface—don’t rub or it’ll break apart
- Allow the base to set before applying the final topcoat seal
- One or two small gold clusters per nail feels more intentional than heavily gilded nails
6. Butter Yellow with Soft Brown Negative Space
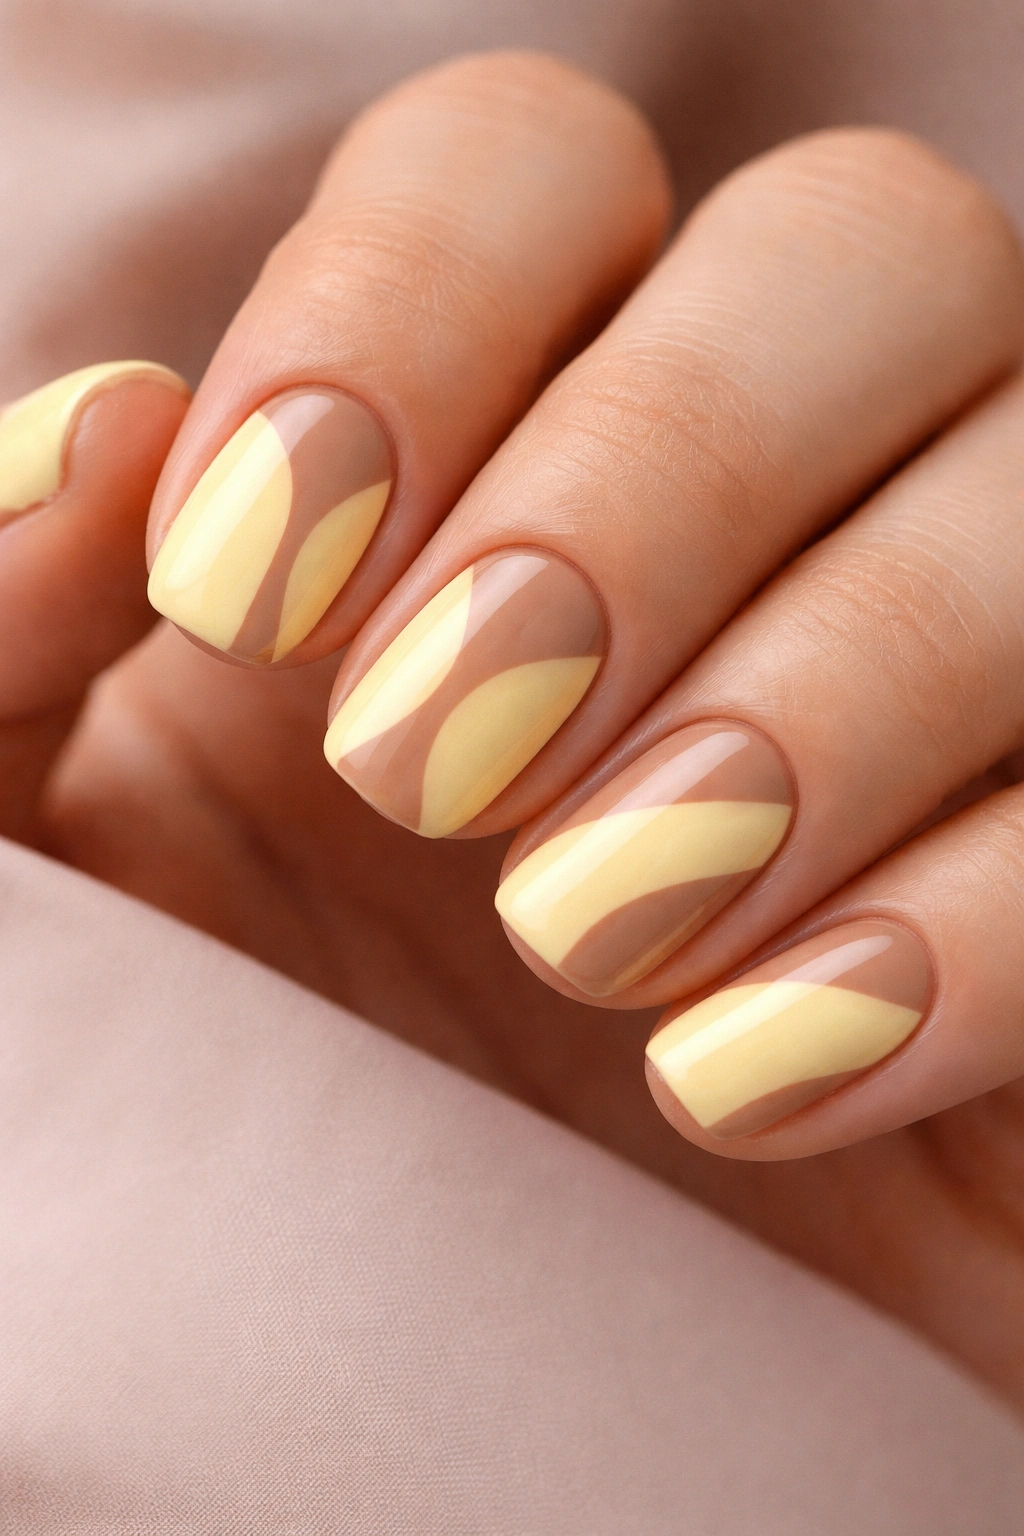
Leave portions of the nail bare (or paint them a matching skin tone) and fill in the rest with butter yellow in abstract shapes. Think more artistic, less geometric. The negative space should follow no particular pattern—maybe a swoosh down one side, a triangle at the corner, an organic amoeba shape at the tip.
The Sophistication of Negative Space
Negative space designs feel current and creative without requiring advanced artistic skill. By working with the nail’s natural color as part of the design, you create a multi-tonal manicure using only one polish shade. It’s clever and visually interesting in a way that feels premium.
Creating Balanced Negative Space
- Sketch the design lightly with a pencil first if you’re worried about placement
- Paint the butter yellow around your planned bare areas using a small, precise brush
- The negative space should take up about 25-35% of the nail for best balance
- Keep edges clean and defined—soft edges can look unfinished
- This design looks best with a matte topcoat rather than glossy, which makes the negative space feel intentional rather than like paint chipped off
7. Butter Yellow French Manicure with Soft Orange Tips
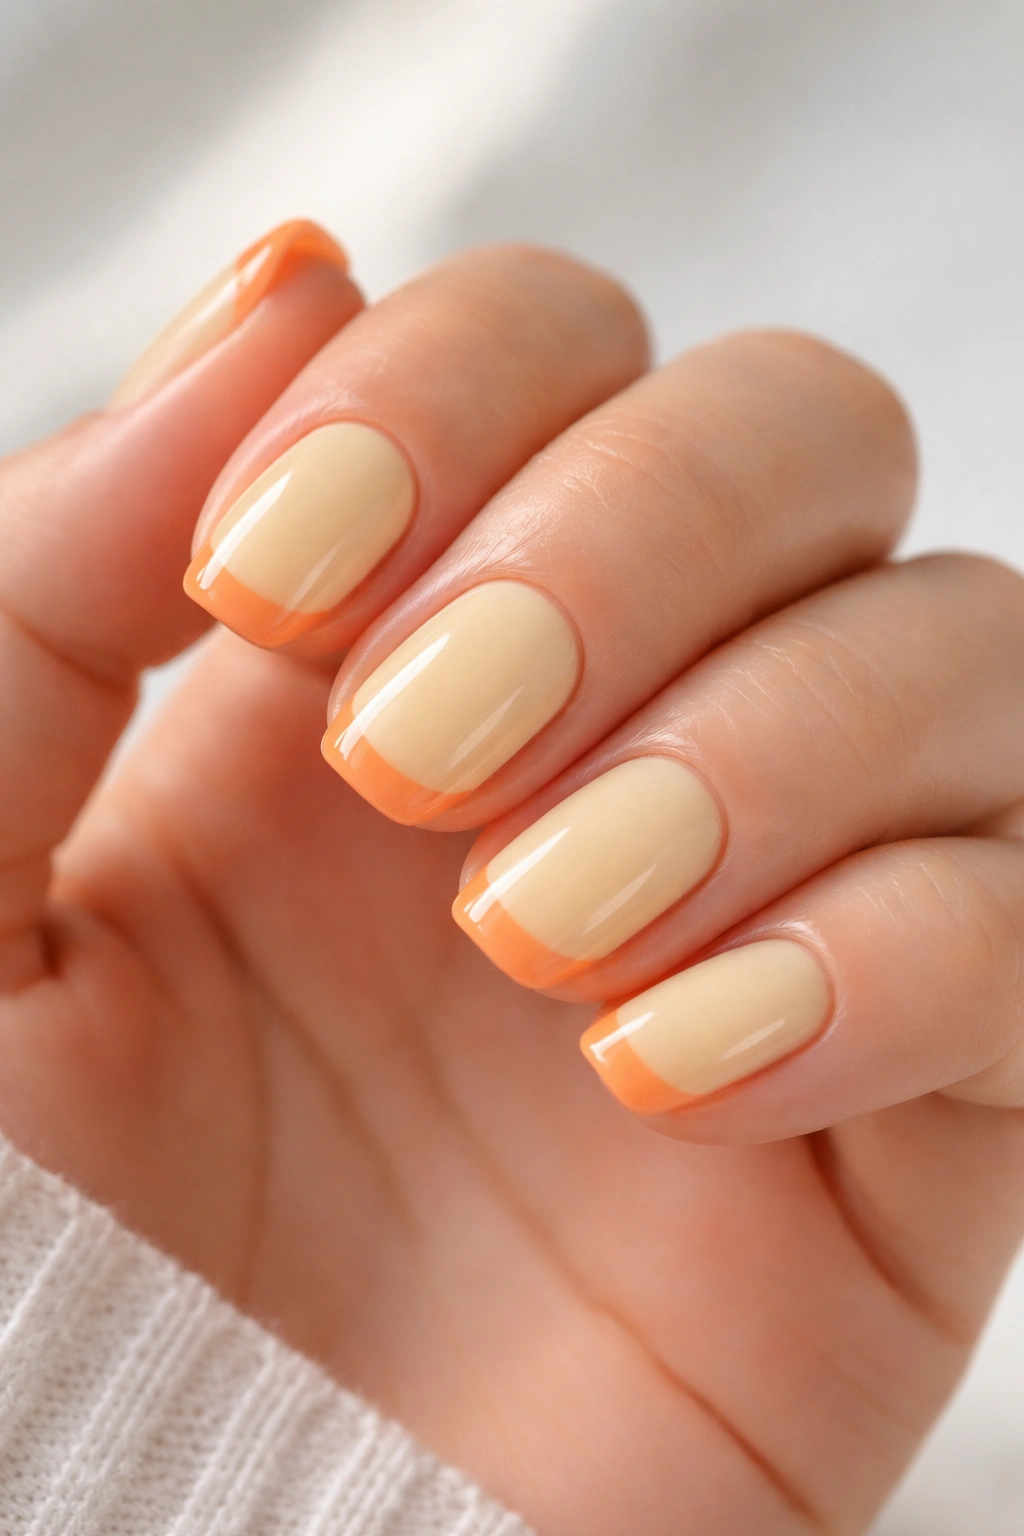
Instead of the traditional white, create a French manicure with a soft peachy-orange tip. The warmth of the orange plays beautifully against butter yellow, creating a gradient effect naturally. The orange shouldn’t be neon or primary—it should be muted and warm, almost a burnt apricot tone.
Why This Twist Works
The French manicure has earned its status as timeless because it’s endlessly adaptable. By shifting the tip color away from white, you make the classic feel fresh and intentional. The butter yellow and warm orange together feel like a sophisticated color story rather than a simple two-tone manicure.
Painting the Perfect French Tip
- Use a semi-sheer orange shade rather than opaque so you can build the color gradually
- Paint the tip with a steady hand or use a French guide sticker for precision
- The tip line should start at the natural smile line of your nail
- The orange should fade slightly where it meets the butter yellow—avoid a harsh line by blending slightly with a clean brush
- Two thin coats of orange create a softer edge than one thick coat
8. Butter Yellow with Delicate Gold Striping
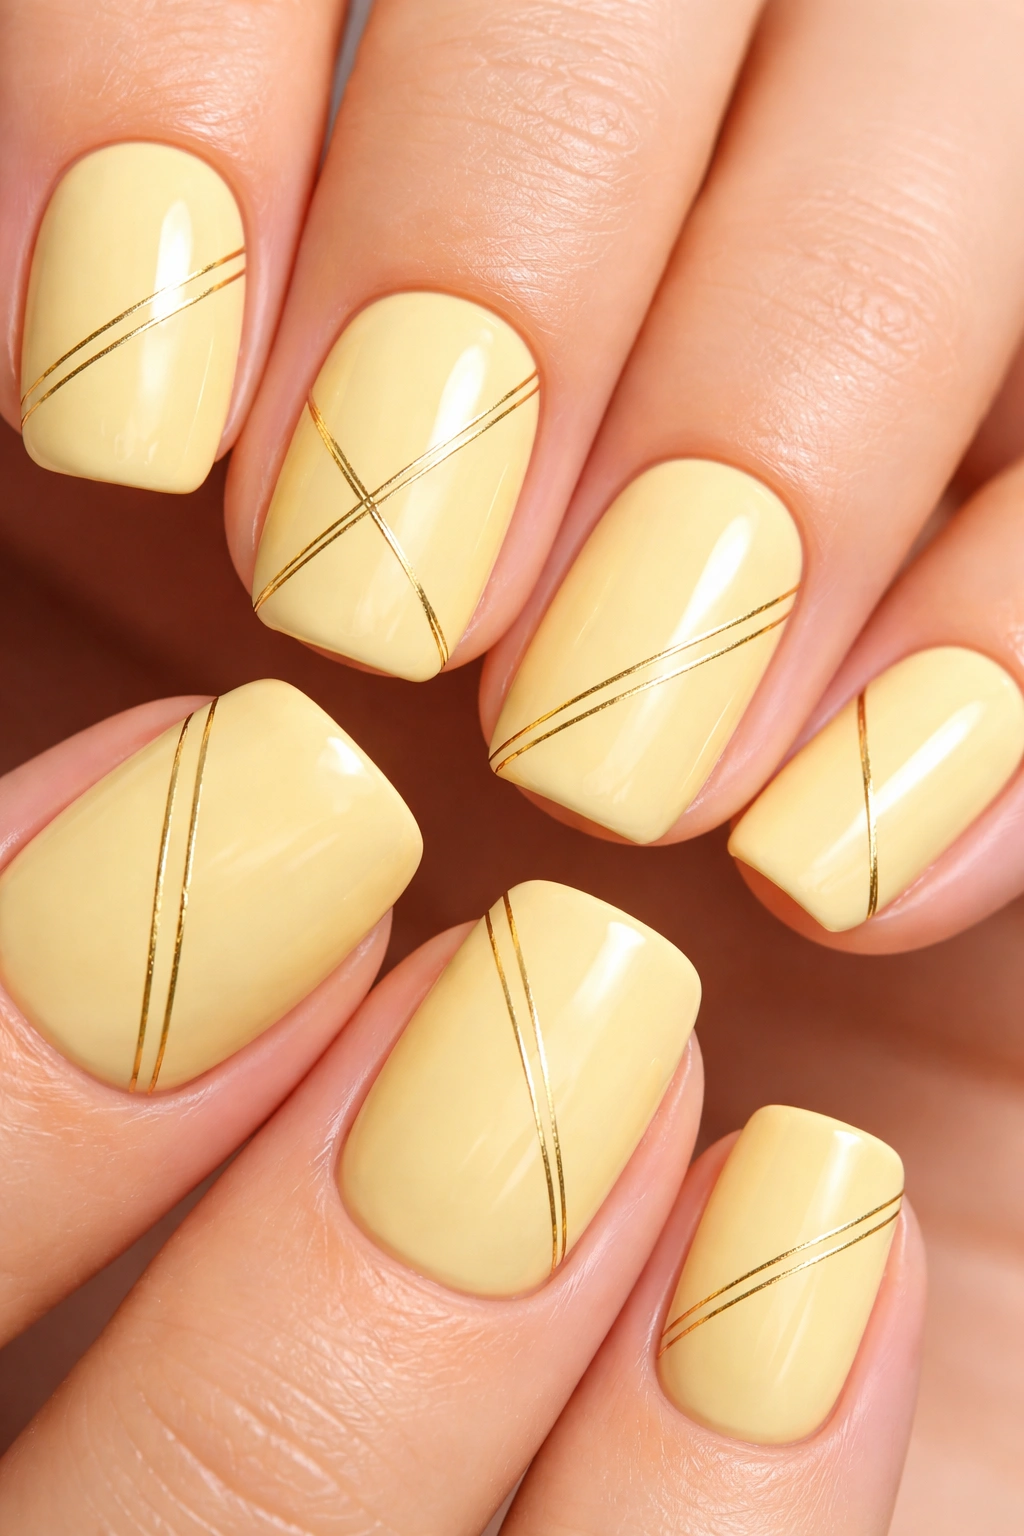
Paint thin gold lines in a geometric pattern across the butter yellow—parallel vertical lines, a grid, or diagonal cross-hatching. Use an actual gold metallic polish, not chrome or rose gold. Keep the lines thin enough that butter yellow remains the dominant color; the gold should feel like elegant detailing rather than a competing design element.
The Elegance of Gold Stripes
Metallic accents can feel costume-y, but when applied with restraint, they read as genuinely luxe. Gold lines on butter yellow create a slightly retro-modern aesthetic that feels intentional and polished. This design works equally well for work settings and special occasions.
Perfecting Your Striping
- Use a striping brush with gold metallic polish—this is not the time for a thin brush and regular polish
- Keep your hand very still and move the brush slowly for the cleanest lines
- Parallel vertical lines are easiest and most forgiving for beginner nail artists
- Space lines about ¼ inch apart for visual impact without overcrowding
- A glossy topcoat will make the gold lines shine without looking plastic-y
9. Butter Yellow with Tiny Pearl Gems
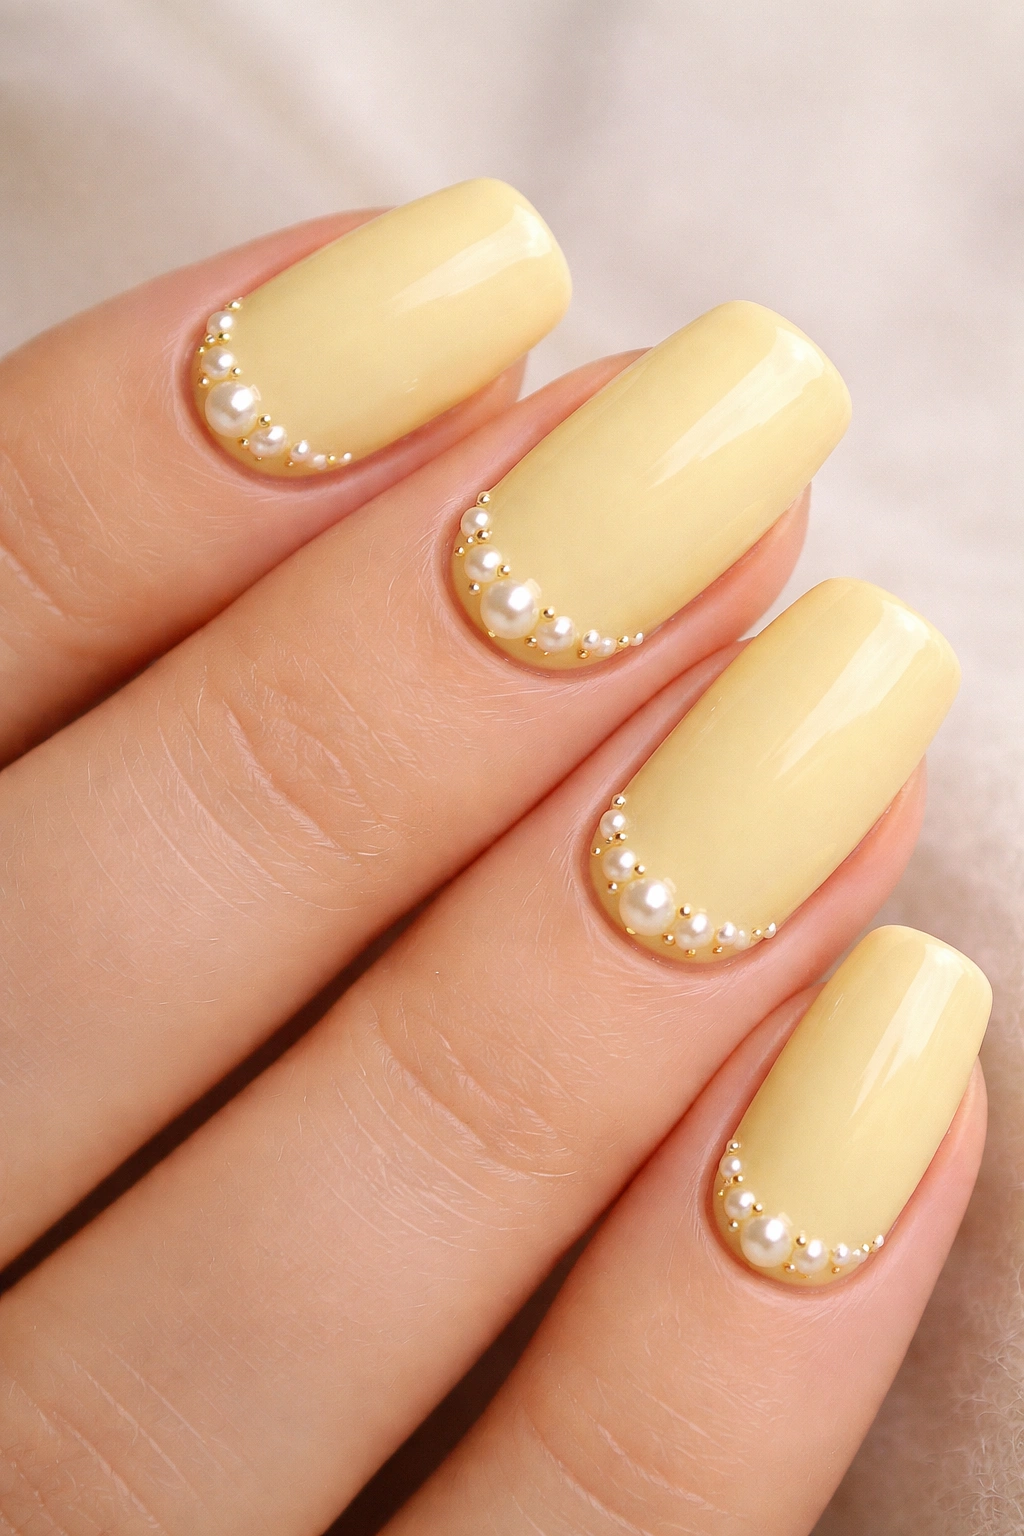
Embellish the nails with small pearl or white glass gems placed strategically. A single gem at the corner of each nail, a line of gems down the center, or a small cluster at the base near the cuticle—each placement creates a different vibe. Pearls feel more refined than rhinestones, even though they cost about the same.
Why Gems Feel Special
Gems add dimension and catch light in a way that 2D polish designs simply can’t. They give the manicure weight and presence, making even short nails feel intentional and styled. Pearls specifically feel sophisticated rather than playful because of their soft finish and natural luster.
Applying Gems Securely
- Use nail glue or jewelry adhesive, not regular polish—gems placed in polish will eventually pop off
- Prepare the nail with a thin base coat layer to give the glue something to stick to
- Press each gem straight down for a second or two; don’t twist
- Place gems before your final topcoat so the topcoat seals around them
- Add topcoat carefully—avoid dragging over gems or it’ll look messy
10. Butter Yellow with Subtle Speckle Pattern
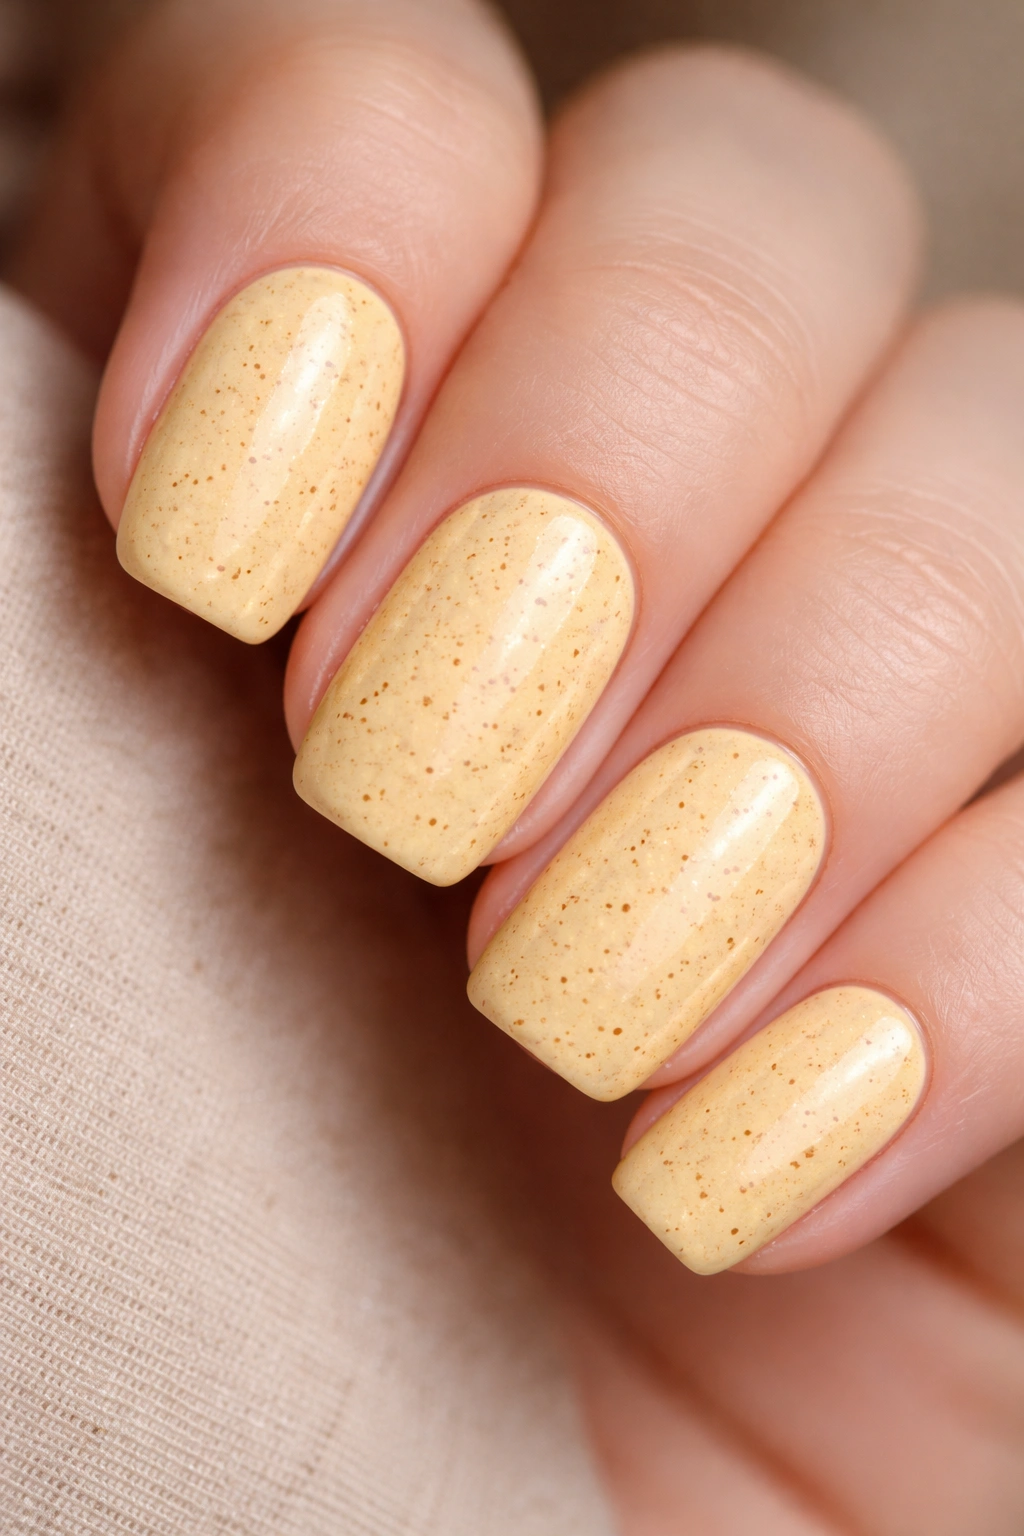
Create a speckled effect by flicking tiny dots of a darker shade across the nail. Use a shade like mustard yellow or warm tan—something in the same color family but noticeably deeper. The speckles should be random and scattered rather than evenly distributed, like flecks of dust caught in light.
The Appeal of Speckled Textures
Speckle patterns add visual interest without feeling busy or complicated. They’re subtle enough that you notice them up close but don’t dominate the manicure from a distance. This design feels artistic and intentional while being quick to execute—no fussy line work required.
Creating Natural-Looking Speckles
- Use a toothpick or dotting tool, not a brush, for the most random distribution
- Dip just the tip into darker polish rather than loading it heavily
- Flick your wrist quickly to deposit tiny dots across the nail
- Vary the size slightly by pressing the dotting tool for tiny dots and flicking it for slightly larger ones
- The speckles should cover maybe 20-30% of the nail for subtle impact
- Let the polish dry between applications if you want to layer speckles in slightly different shades
11. Butter Yellow with Burgundy Accent Nail

Paint one accent nail on each hand in a deep burgundy or wine shade while the rest stay butter yellow. The burgundy nail should be fully opaque and glossy, creating stark but beautiful contrast. This design works best if you choose a burgundy with cool undertones, which plays nicely against warm butter yellow.
Making Accent Nails Work
A single contrasting nail per hand draws the eye without being overwhelming. The contrast between butter yellow and burgundy is naturally sophisticated—burgundy reads as elegant and moody while butter yellow stays cheerful and approachable. Together, they tell a story of intentional styling rather than random color choices.
Coordinating Your Accent Nail
- Choose one nail per hand to paint burgundy—typically the ring finger or index finger
- Make sure the burgundy is truly opaque after two coats—sheer burgundy over butter yellow looks muddy
- The burgundy nail should have the same fineness as the butter yellow ones—no matte while others are glossy
- Keep the burgundy nail the same length and shape as the butter yellow ones for visual cohesion
- Both colors should be sealed with the same topcoat for consistency
12. Butter Yellow with Tiny Clock or Watch Face Design
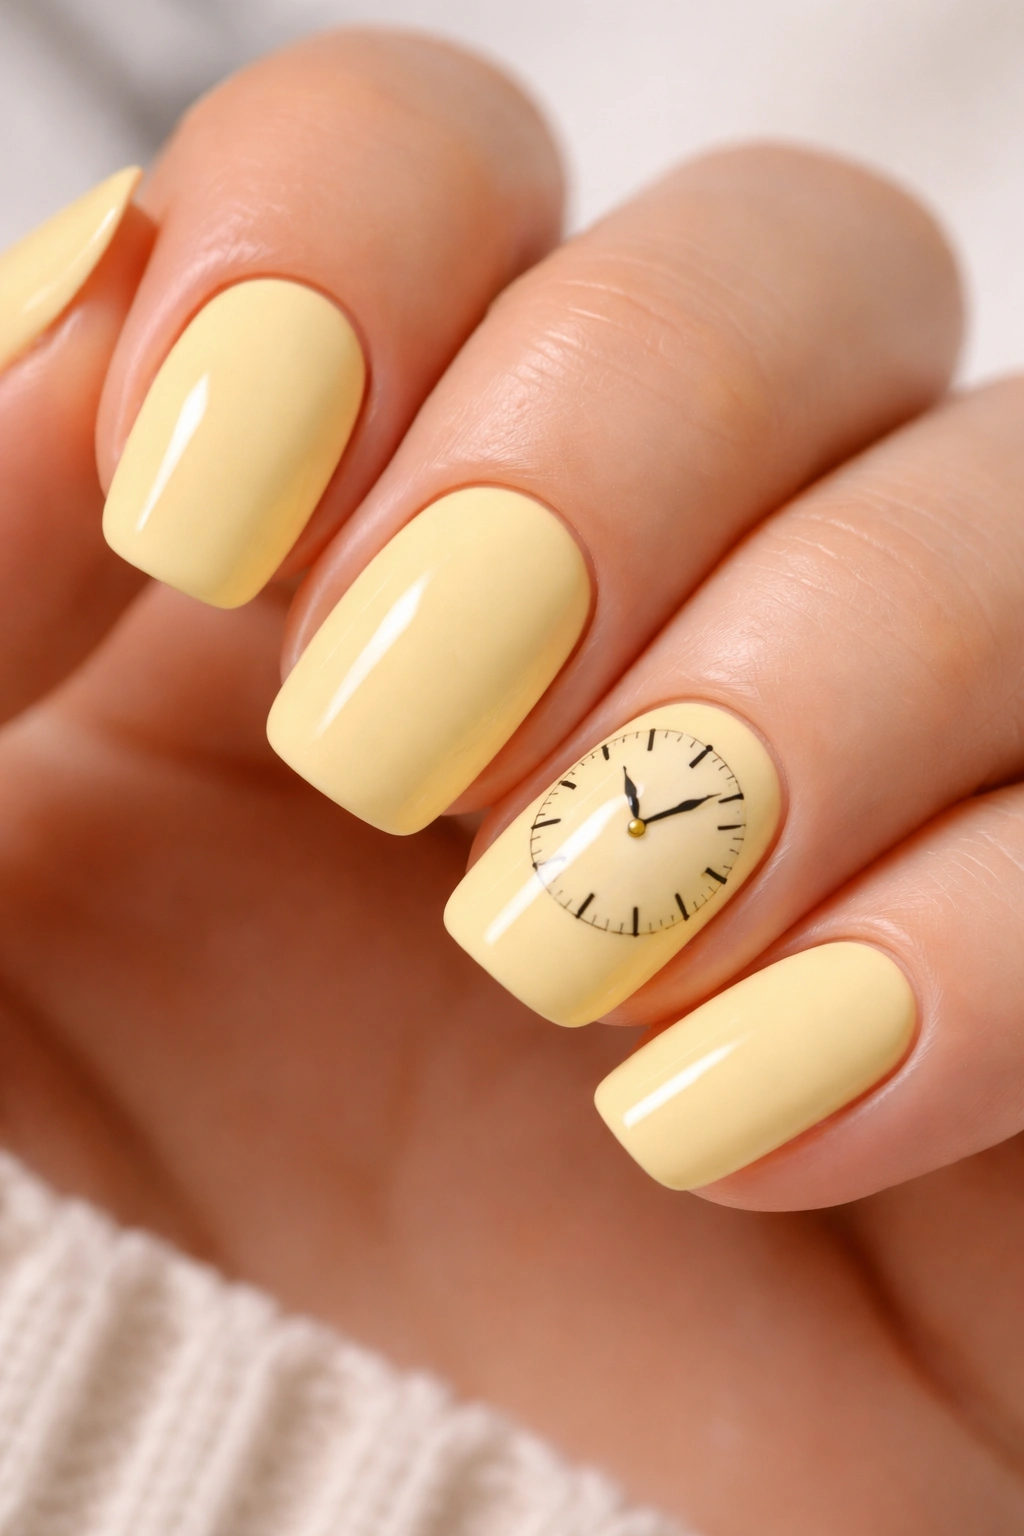
Paint a small, whimsical clock face on one or two nails using black and white details. The clock doesn’t need to tell accurate time—use playful positions like all hands pointing to midnight, or set different times on different nails. This design is quirky enough to feel personal without being childish.
Why Personalized Details Matter
Tiny illustrated details transform a simple color into a statement. A clock face is unexpected and memorable—when someone asks about your nails, you have an actual thing to discuss rather than “oh, it’s just yellow.” These kinds of personal touches are what separate a mani from a memorable mani.
Painting Detailed Designs
- Start with a thin black polish and very fine brush for the clock outline
- Paint a small circle first, then add tiny lines for hour markers around the edge
- Add the hour numbers using a dotting tool or very fine brush—they can be tiny, just barely legible
- Paint clock hands in black, making them different lengths
- Add white highlights to make the design pop if you want, but keep it minimal
- This works best on butter yellow with glossy topcoat, which makes the black details crisp
13. Butter Yellow Base with Textured Matte Top Coat
Apply butter yellow with a glossy finish, then add a matte topcoat to the tips only, creating a two-tone finish effect. The glossy center transitions to a velvety matte at the tip, adding subtle dimension and visual interest. The matte shouldn’t extend too far down—just the very tip should have that soft, non-reflective finish.
The Modern Appeal of Mixed Finishes
Mixing matte and glossy finishes is contemporary nail design at its best—it’s a small detail that creates outsized impact. The contrast makes the nails feel intentional and styled, like you’ve thought carefully about every element. This technique is easy to execute but looks genuinely sophisticated.
Creating Seamless Finish Transitions
- Paint the full nail with glossy butter yellow and let it dry completely
- Apply matte topcoat only to the tip area using a small brush
- The transition line should be slightly feathered rather than razor-sharp
- The matte area should be about ⅓ of the total nail length
- One coat of matte is usually sufficient—two coats can look muddy
- This design works best if you keep the matte area relatively minimal
14. Butter Yellow with Hand-Painted Abstract Watercolor
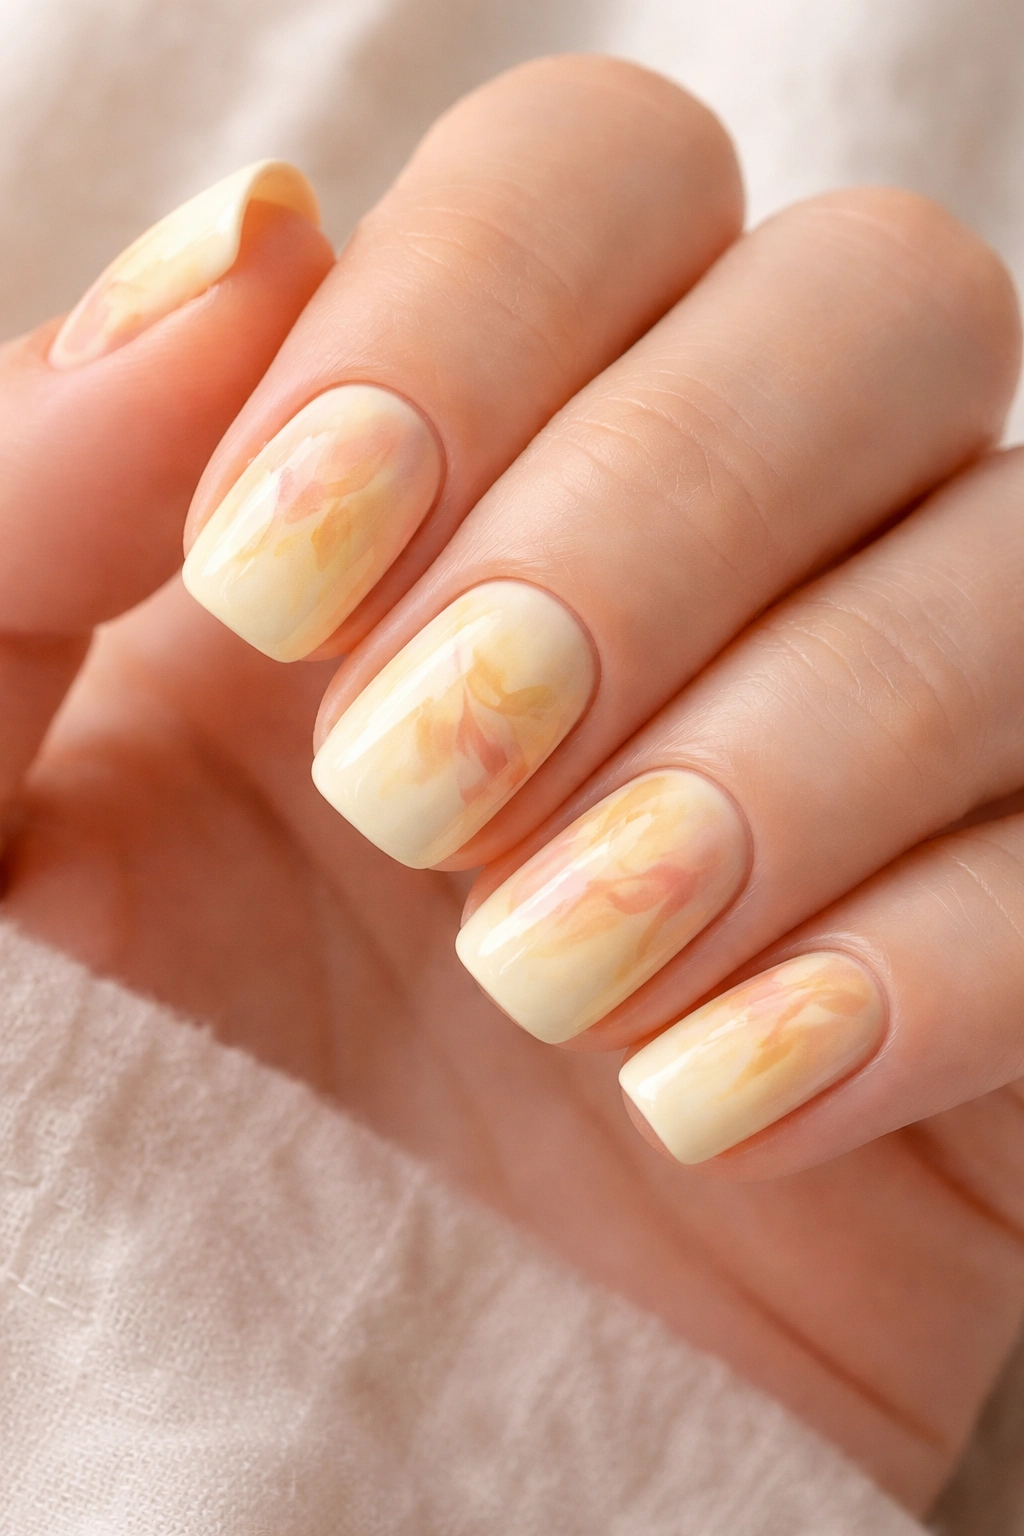
Create a soft watercolor effect by dropping small amounts of different yellow shades and peachy tones onto wet topcoat, then letting them blend organically. Use very thin polish or diluted polish so the colors flow together rather than sitting as distinct puddles. The effect should feel organic and painterly, like sunset clouds captured in miniature.
Why Watercolor Reads as Artistic
Watercolor designs feel fine-art and intentional in a way that controlled geometric designs don’t. The slight unpredictability—the way colors blend slightly differently each time—is what makes watercolor feel genuine. On short squoval nails, this effect creates visual interest without making the nails feel crowded.
Executing Watercolor Effects
- Use very thin polish or mix regular polish with a clear topcoat to create a watery consistency
- Apply a layer of clear topcoat first, then drop colors onto it while it’s wet
- Use a toothpick or thin brush to drag and blend the colors very gently
- The goal is soft transitions, not harsh color blocks—resist the urge to overwork it
- Let gravity help—tilt your hand slightly to encourage the polish to flow
- This design is easier on gel polish than regular polish because you have more working time
15. Butter Yellow with Pressed Flower or Herb Resin
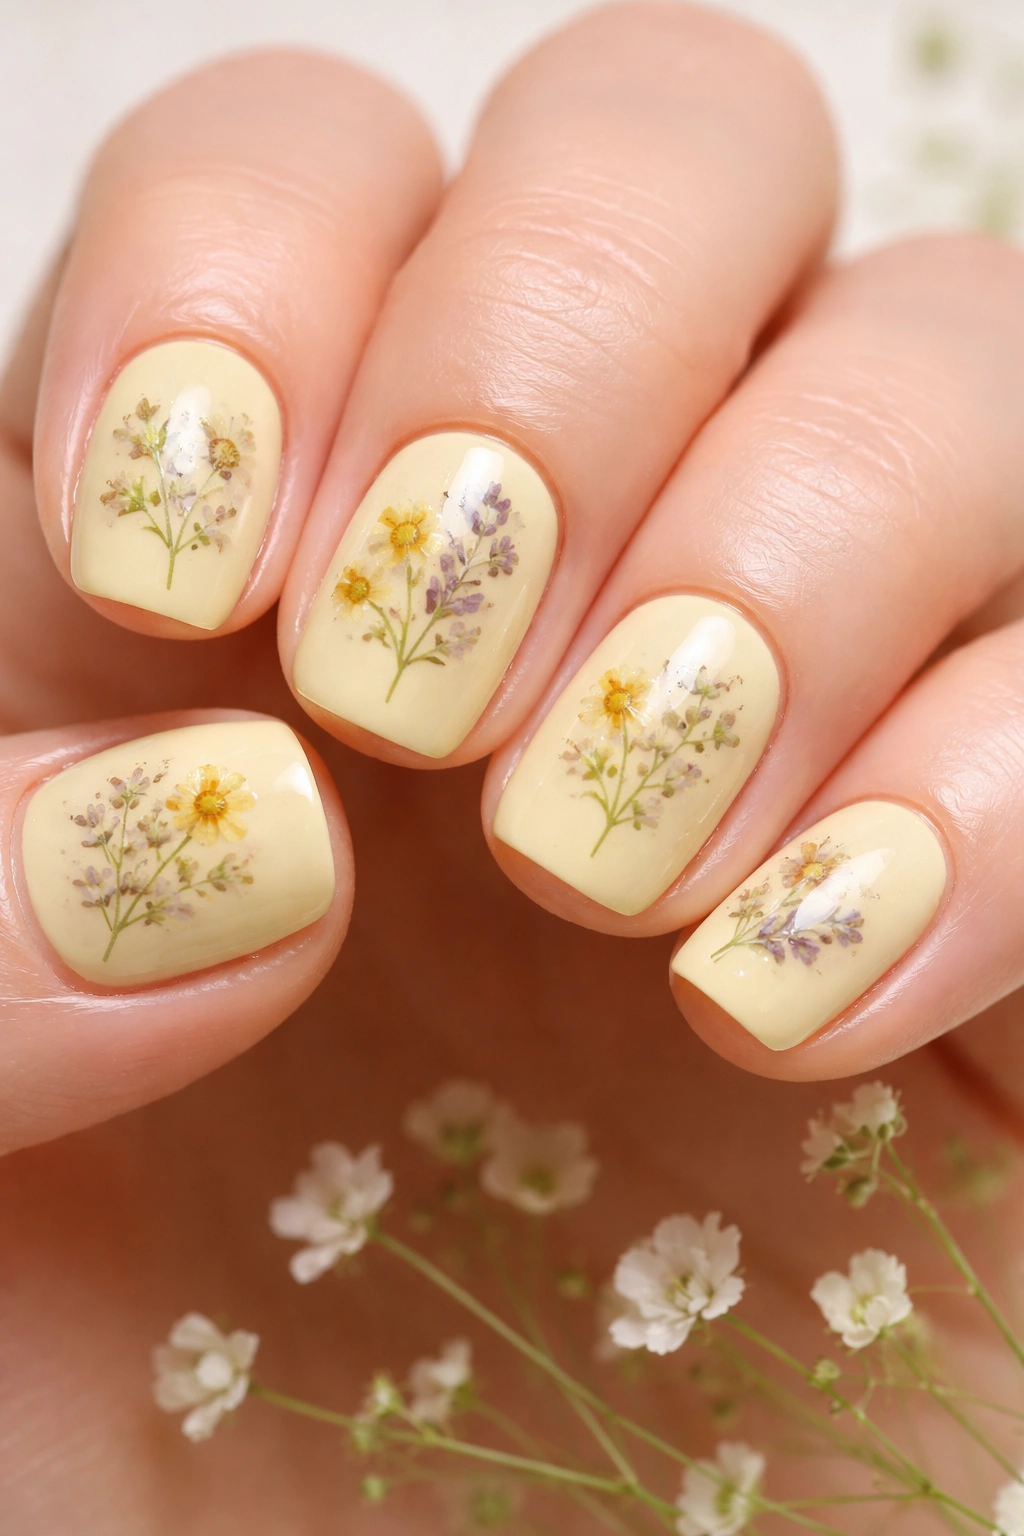
Embed a tiny real flower or herb under resin topcoat for a botanical look. Use something delicate like a small forget-me-not, pressed lavender sprig, or tiny baby’s breath. The flower should be thin and flat so it doesn’t create bumps when sealed. This approach creates a tiny botanical preserve on your nail.
The Uniqueness of Real Elements
Embedding actual pressed flowers elevates the manicure into genuine art territory. Each nail becomes slightly different depending on how the flower lands, making your manicure genuinely one-of-a-kind. This design stops people mid-conversation to ask about it.
Embedding Flowers Safely
- Start with dried, pressed flowers that are paper-thin—fresh flowers trap moisture and will rot under topcoat
- Buy pre-pressed flowers from craft suppliers or press your own between pages under heavy books for weeks
- Apply a thin layer of resin base to the nail before pressing the flower gently in place
- Use tweezers rather than fingers to position the flower—oils from your hands can affect how it looks
- Seal with at least two layers of thick topcoat or resin to fully encapsulate the flower
- The sealed flower should have no rough edges sticking out
How to Achieve the Short Squoval Shape at Home
Getting the perfect short squoval shape is absolutely doable without a professional. Start by filing your nails into a squoval shape using a medium-grit file—slightly more rounded than a square but with a subtle peak at the very tip rather than a full oval. The length should be approximately ¼ to ½ inch past your fingertip for ideal short nail proportions.
Use gentle, one-directional strokes when filing rather than sawing back and forth, which causes splitting and peeling. Focus on creating slightly more rounded corners than a strict square would have—this is the key to the squoval aesthetic. The tip should come to a barely-there point, almost unnoticeable, rather than a sharp peak.
File the sides straight, then very gently round the tip to create that characteristic squoval look. Shape all nails to the same length so they look intentional rather than like you broke a nail. This uniform length is actually part of what makes short nails feel polished—there’s no sense of accident or neglect.
Caring for Butter Yellow Polish and Keeping It Fresh
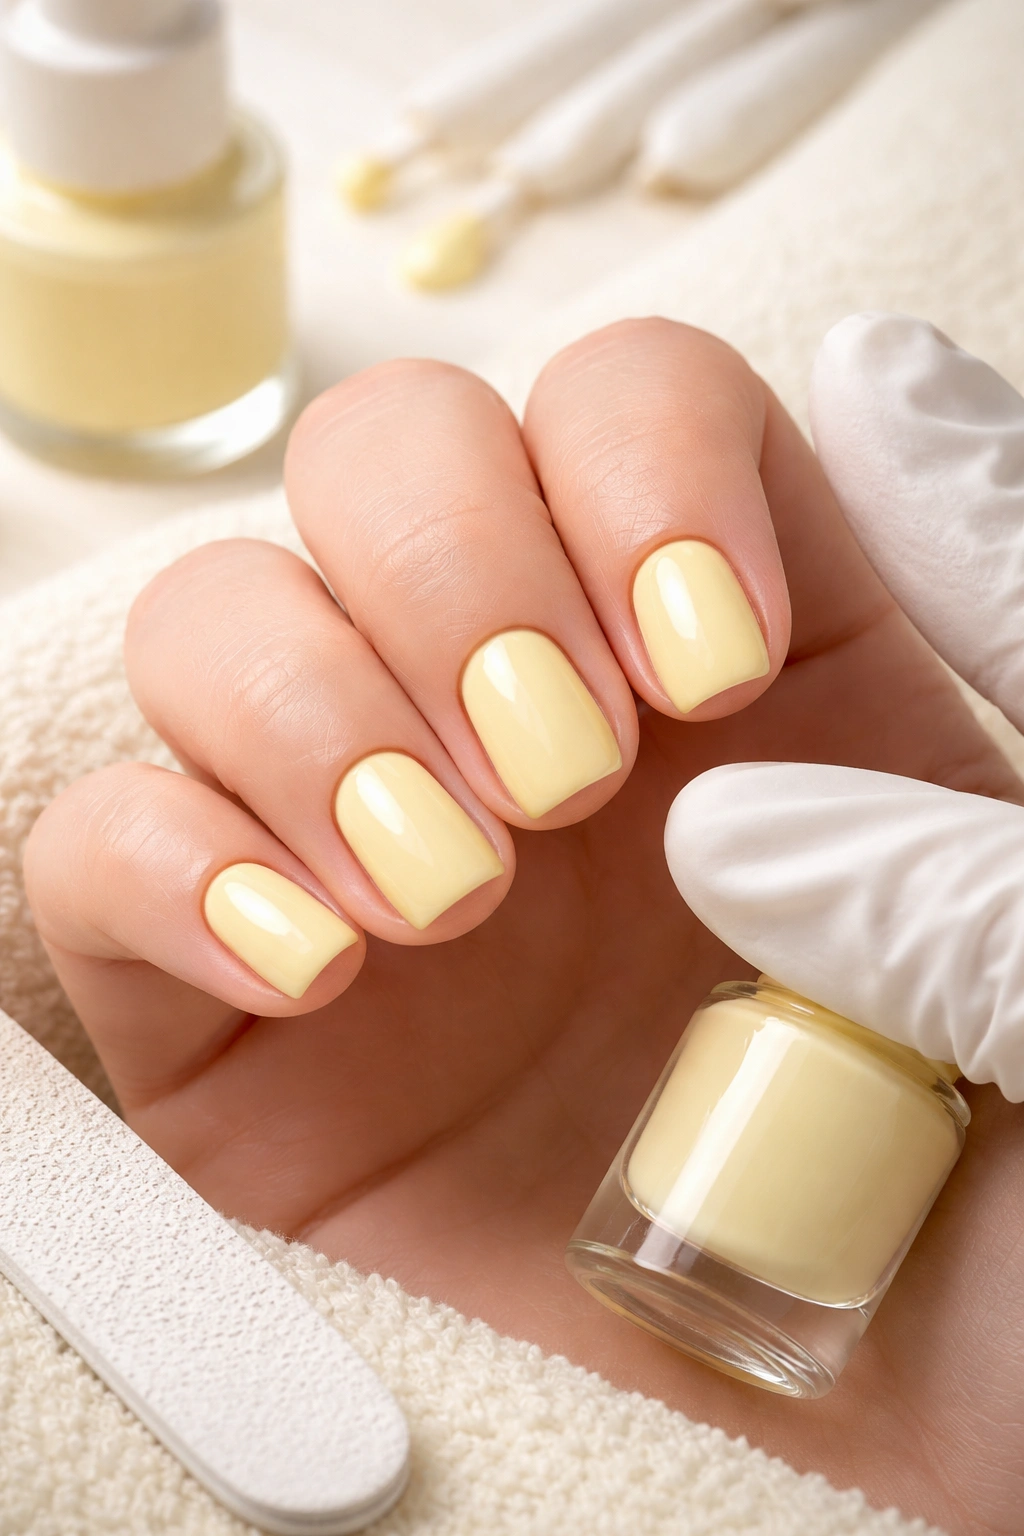
Butter yellow shows imperfections more readily than darker or more neutral shades because light bounces through it so clearly. Keep your nails smooth and even by filing down any lifted edges immediately before they catch on things. File in one direction rather than sawing back and forth to maintain nail integrity.
Refresh your manicure every five to seven days because even small chips are visible on pale polish. Rather than removing the whole manicure and starting over, a thin touch-up layer can extend the life considerably. If you notice yellowing or staining on your natural nail under the polish, soak your nails in a whitening treatment between manicures to prevent permanent discoloration.
Protect butter yellow from staining by wearing gloves while doing dishes or gardening. The longer your polish lasts without chips or discoloration, the more polished and intentional your nails appear. These small maintenance habits mean the difference between a mani that looks fresh all week and one that looks tired after three days.
Why Butter Yellow Works Better Than Other Yellows
Butter yellow is specifically formulated to have warm undertones rather than the cool or greenish casts that some yellows carry. This warmth makes it flattering to nearly every skin tone—it reflects light in a way that feels soft rather than harsh. Neon or highlighter yellows can look clinical or costume-y on nails, but butter yellow reads as intentional and sophisticated.
The word “butter” in the name describes the finish as well as the shade. Quality butter yellow polishes have a creamy, rich appearance rather than a thin, watery look. This creaminess is what makes short nails look polished and put-together—it reads as intentional rather than like you ran out of darker polish.
If you’ve tried yellow nails before and they looked washed out or sickly, you were likely using the wrong undertone of yellow. Butter yellow skews warm and golden rather than bright and primary. This crucial difference is what elevates it from “nail trend” to something that actually works for everyone.
Final Thoughts
Butter yellow nails in a short squoval shape represent the sweet spot between trendy and timeless, bold and wearable, artistic and practical. Whether you opt for minimalist elegance with just a shimmer, delicate florals, or embedded pressed flowers, this color and shape combination gives you a sophisticated base that works for virtually any design direction you want to explore.
The beauty of choosing butter yellow is that you’re not locked into a specific aesthetic. It translates equally well to a corporate office, a casual weekend, or a special occasion—you simply adjust the details. A manicure in butter yellow says you care about how your nails look without screaming for attention.
Short squoval nails deserve real design consideration because short nail real estate matters. Every element shows, every detail reads clearly, and the shape itself becomes part of the design story. These fifteen options prove that short nails have just as much creative potential as longer nails, with the added bonus of being genuinely practical for living your actual life.
