

Burgundy is that color that just works — it’s sophisticated without being severe, warm without being loud, and instantly elevates whatever you pair it with. When you combine that rich, wine-toned elegance with the soft, rounded edges of squoval nails (that perfect hybrid between square and oval), you’re looking at a nail aesthetic that reads expensive, polished, and thoughtfully put together. Short squoval nails, in particular, have this accessibility that longer styles don’t — they’re manageable for daily life, practical without sacrificing style, and surprisingly flattering on most hand shapes.
The beauty of burgundy on short squovals is that there’s room for real creativity. You can play with texture, add metallic accents, layer in negative space, incorporate nail art details, or keep things clean and minimalist. Whether you’re drawn to glossy solid colors, matte finishes, delicate patterns, or statement-making embellishments, burgundy gives you a rich foundation that makes every variation feel intentional and polished. It’s a color that photographs beautifully, reads as put-together in professional settings, and feels genuinely festive without screaming “holiday nails.”
The designs ahead showcase a range of approaches to burgundy short squovals — some are about the color itself, others use burgundy as a base for something more decorative. Each one is achievable either at a salon or with a steady hand at home, and each gives you a different mood depending on where you’re going and what vibe you want to project.
1. Deep Burgundy Glossy Solid
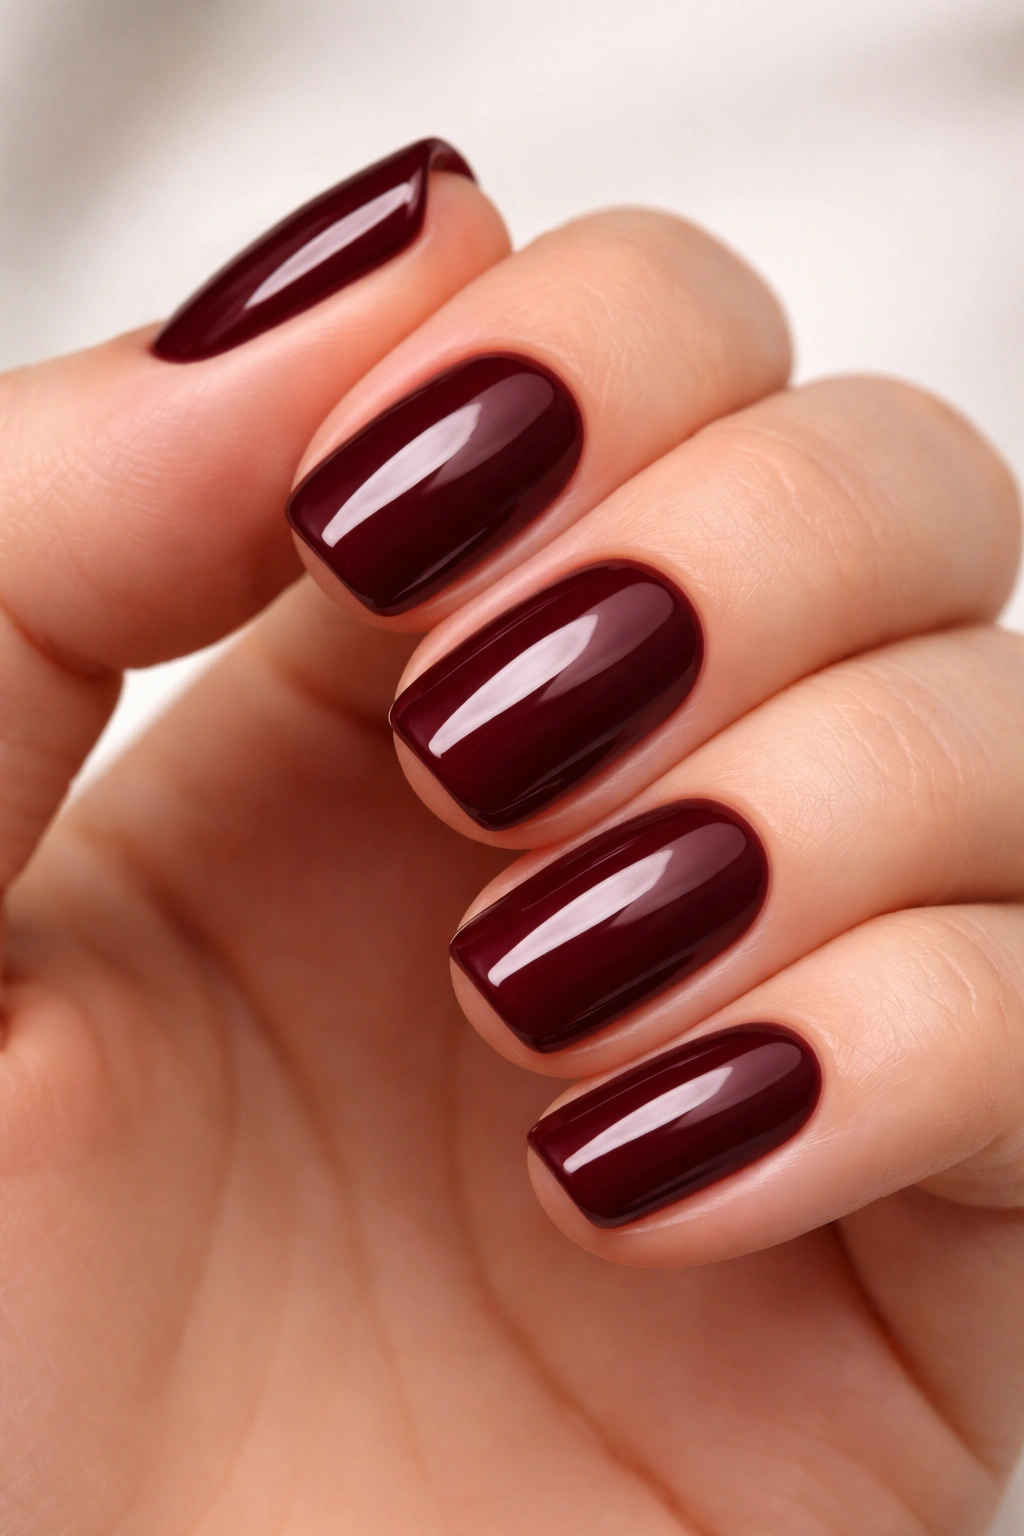
The foundation of any good nail moment is a flawless base color, and this is where you prove that you don’t need decoration to make an impression. A deep, true burgundy with a high-shine glossy finish is the manicure equivalent of putting on the perfect lipstick — it’s instantly complete and doesn’t require anything else to feel polished.
Why This Works So Well
The magic here is in the depth of the color and the quality of the finish. A genuinely rich burgundy (not too red, not too brown, hitting that sweet spot in between) has an inherent sophistication that makes short nails look intentional and elegant rather than utilitarian. The glossy finish adds dimension and reflects light in a way that makes the color appear even more luxurious. This is the style that works whether you’re at a business meeting, a dinner date, or running errands on the weekend.
Application and Maintenance Tips
- Start with a clean, buffed nail bed and a strengthening base coat to protect against staining
- Apply two thin coats of burgundy rather than one thick coat — this prevents bubbling and gives you a smoother, more even finish
- Use a high-quality topcoat (gel or regular polish) to lock in that glossy shine and extend the wear time
- This design typically lasts 7-10 days with regular topcoat maintenance, or 3+ weeks with gel application
- Burgundy pigments can occasionally stain lighter nail beds, so the base coat step isn’t optional
2. Burgundy with Gold Foil Accents
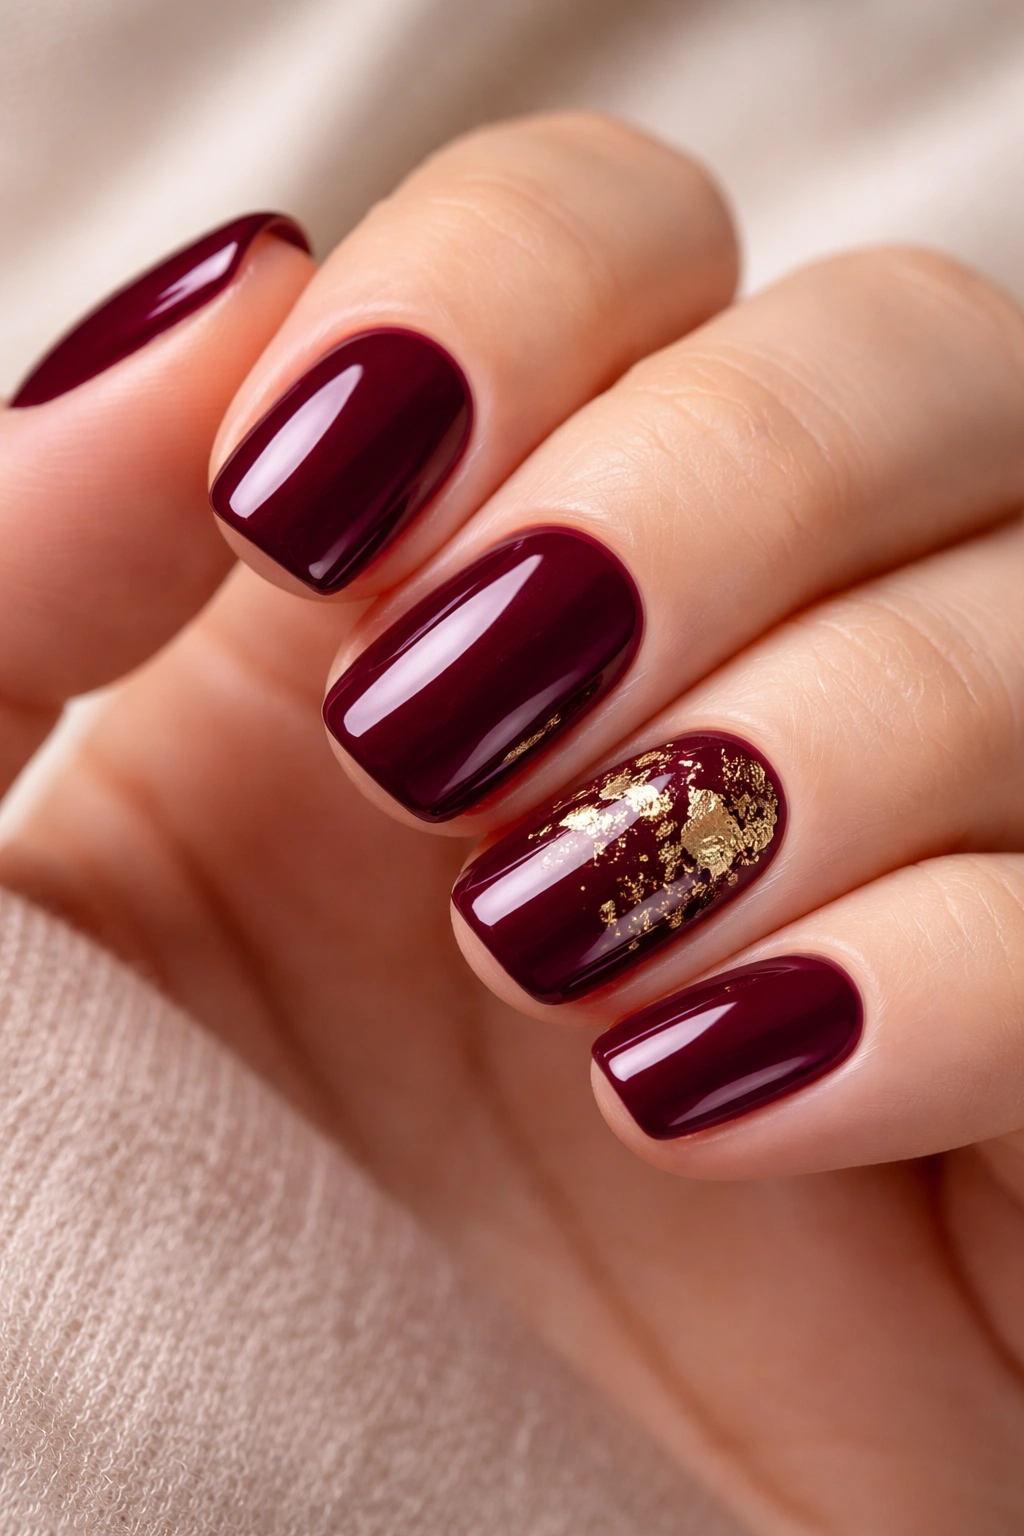
Once you’ve got your rich burgundy base locked in, a strategic flash of metallic gold becomes a game-changer. This design uses gold foil flakes or powder on select nails (usually the ring finger and pinky) to create pockets of shimmer that catch light and add dimension without overwhelming the overall aesthetic.
The Art of Strategic Metallic Placement
Gold and burgundy are a natural pairing — the warmth of the gold complements the depth of the burgundy in a way that feels coherent rather than chaotic. The key is restraint. Rather than covering the entire nail in foil, you’re incorporating it as an accent detail that draws the eye without dominating the design. A accent nail on one or two fingers, or foil concentrated toward the cuticle area or along the tips, creates visual interest while maintaining the sophisticated tone. This design reads as intentional and elevated without tipping into over-decorated territory.
Getting the Foil Application Right
- Use a gel topcoat or adhesive-based topcoat designed to grip foil particles
- Press loose gold foil flakes onto the wet topcoat using a small brush or tweezers, then seal with another layer of topcoat
- Alternatively, use pre-made gold foil nail wraps for a more foolproof application
- If you’re using gel polish, cure between the color coat and the foil, then apply foil to a final uncured topcoat layer before a final cure
- This design stays vibrant for 10-14 days with gel, or about a week with regular polish
3. Burgundy Matte with a Glossy Top Stripe
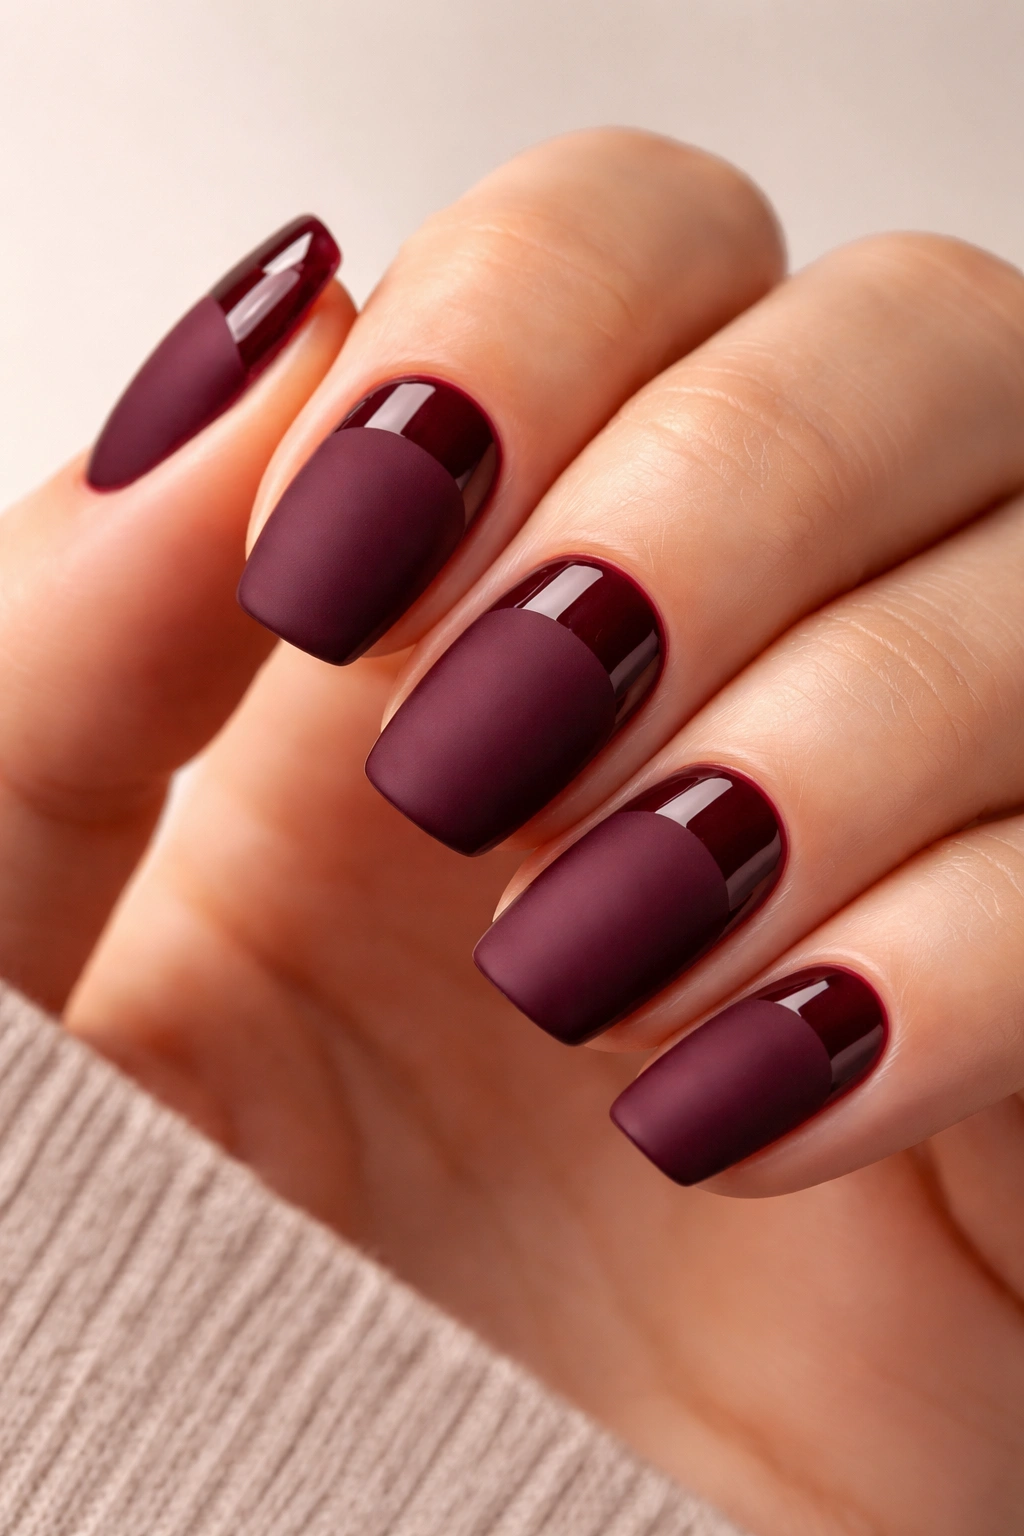
The contrast between matte and glossy finishes on a single nail creates an optical illusion of depth and texture that’s surprisingly striking. This design uses a matte burgundy base with a glossy horizontal stripe across the upper third of the nail (usually near the tip), creating a visual break that makes the nail appear longer and adds a modern, editorial touch.
Why the Matte-Gloss Contrast Is So Effective
Matte finishes tend to absorb light, which makes colors appear darker and more velvety. Glossy finishes reflect light, making the same color appear brighter and more vibrant. By using both on the same nail in different areas, you’re playing with visual perception — the matte portion appears deeper and more grounded, while the glossy stripe feels lifted and contemporary. This contrast is particularly flattering on short nails because the glossy stripe acts as a visual extension, making fingers appear slightly longer. It’s a minimal design that feels surprisingly sophisticated.
Creating the Stripe Effect
- Apply your matte burgundy as the full base color and let cure completely
- Use painter’s tape or a striping tape to create a clean horizontal line about a third of the way down from the tip
- Apply a glossy topcoat (or glossy burgundy if you want to shift the color tone slightly) to the exposed upper portion
- Remove tape carefully while the topcoat is still slightly tacky for the cleanest edge
- Alternatively, use a thin striping brush and glossy topcoat to freehand the stripe
- This design works beautifully for 10-12 days with gel, about a week with regular polish
4. Burgundy with Delicate Gold Leaf Lines
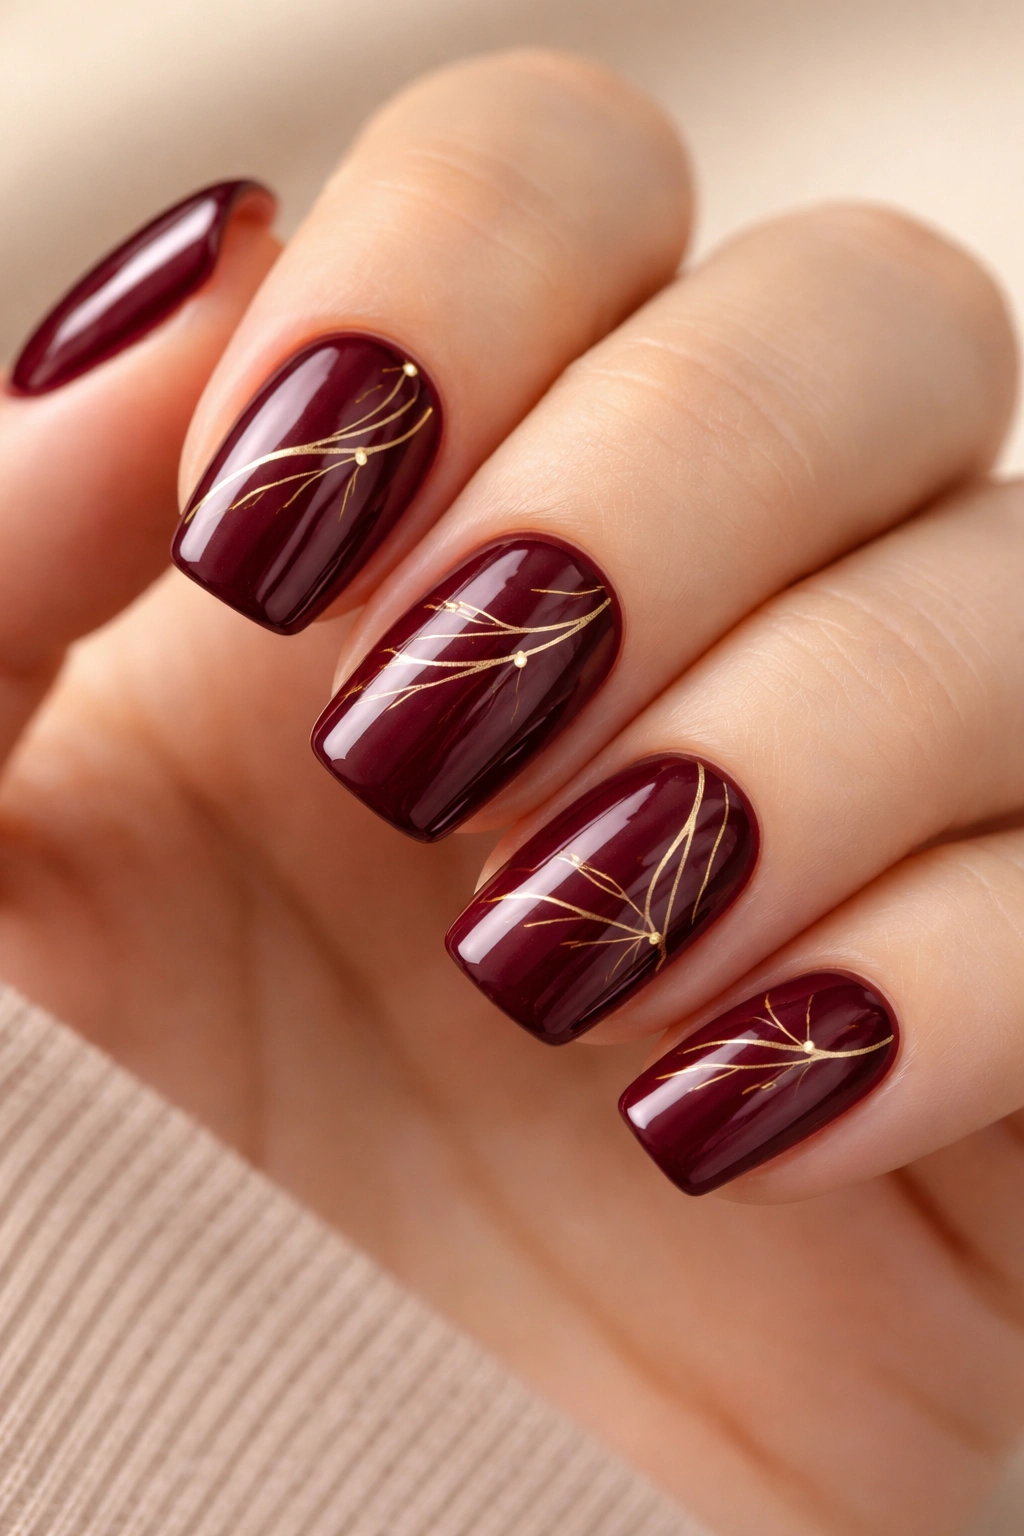
If you want something that feels refined and artistic without being loud, burgundy with hand-painted gold leaf detailing hits that perfect balance. Thin gold lines (painted with an angled brush) create a minimalist botanical or geometric pattern across the nail — perhaps leaf shapes, branches, or simple abstract lines that move across the surface with intention.
The Minimalist Art Approach
Hand-painted details require a steady hand, but they don’t need to be complicated to be striking. A few thin gold lines arranged in a leaf pattern, or delicate geometric shapes placed strategically on each nail, creates a sense of artistry and care. This design signals that thought went into your nails — it’s not mass-produced or rushed. The burgundy base keeps everything grounded and elegant, while the gold detailing adds a touch of luxury without being overwrought. It’s the kind of manicure that makes people stop and ask where you got it done.
Execution and Durability
- Start with your matte or glossy burgundy base and let it fully cure
- Use a very fine angled or detail brush with gold gel or gold nail art paint
- Paint your design with slow, deliberate strokes — rushing leads to wobbly lines
- Seal everything with a clear glossy topcoat to protect the fine details and keep them from chipping
- Thin lines are more forgiving than thick ones if your hand isn’t perfectly steady — the delicate scale reads as intentional rather than imperfect
- Expect 8-10 days of wear before fine details start to show wear
5. Burgundy Ombre into Gold
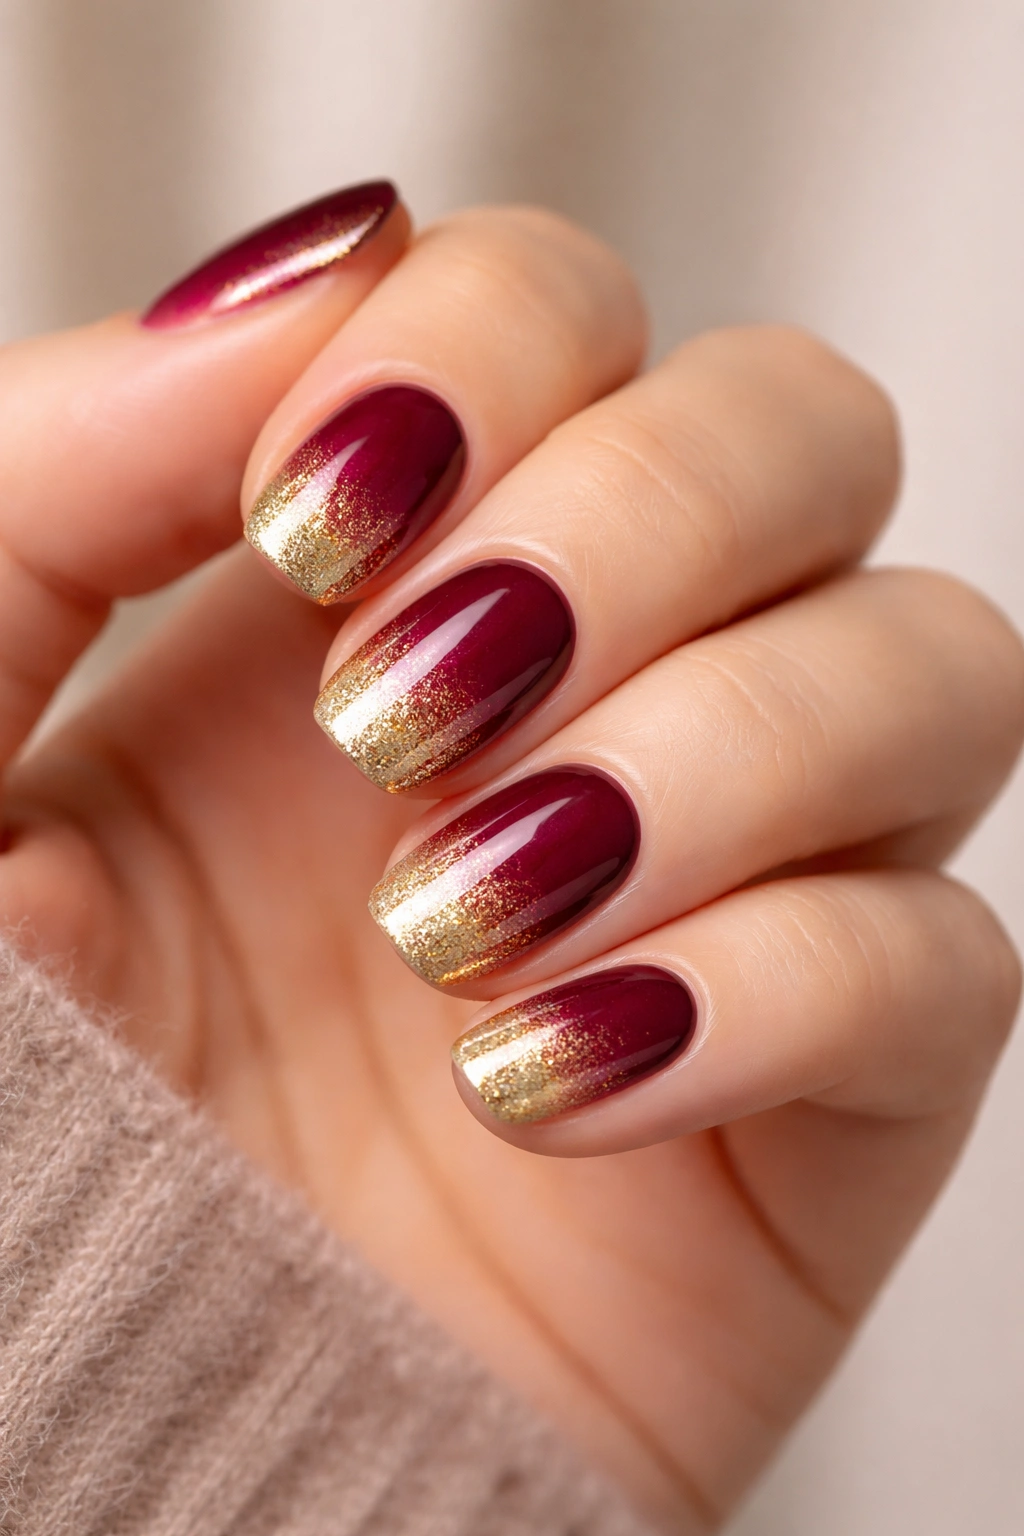
An ombre effect (where one color gradually transitions into another) is an intermediate-level nail technique that creates a gradient from deep burgundy near the cuticle into warm gold at the tips. The effect is warm, dimensional, and feels significantly more complex than it actually is to execute.
Creating a Smooth Color Transition
Ombre works by blending two or more colors where they meet, so the transition feels organic rather than striped. With burgundy and gold, you’re working with complementary warm tones that naturally blend beautifully. The deeper burgundy at the base keeps the design grounded and sophisticated, while the gold tips add brightness and create the illusion of elongation. This is the kind of design that photographs incredibly well because of how the colors play with light — the gold catches highlights while the burgundy adds depth.
Technique and Application
- Apply your burgundy base color and allow it to set completely
- Using a blending sponge, dab a small amount of gold gel or polish onto the sponge, then press it onto the tip area of the nail
- Use the sponge to blend the edges where burgundy meets gold by gently pressing and rolling the sponge back and forth in a dabbing motion
- Apply more gold if needed to intensify the color at the tips while maintaining the gradient
- Seal with a clear topcoat, then cure if using gel
- Ombre can be tricky to get perfectly even, but imperfect gradients are actually more visually interesting than perfect ones
- This design lasts 10-14 days with gel, about a week with regular polish
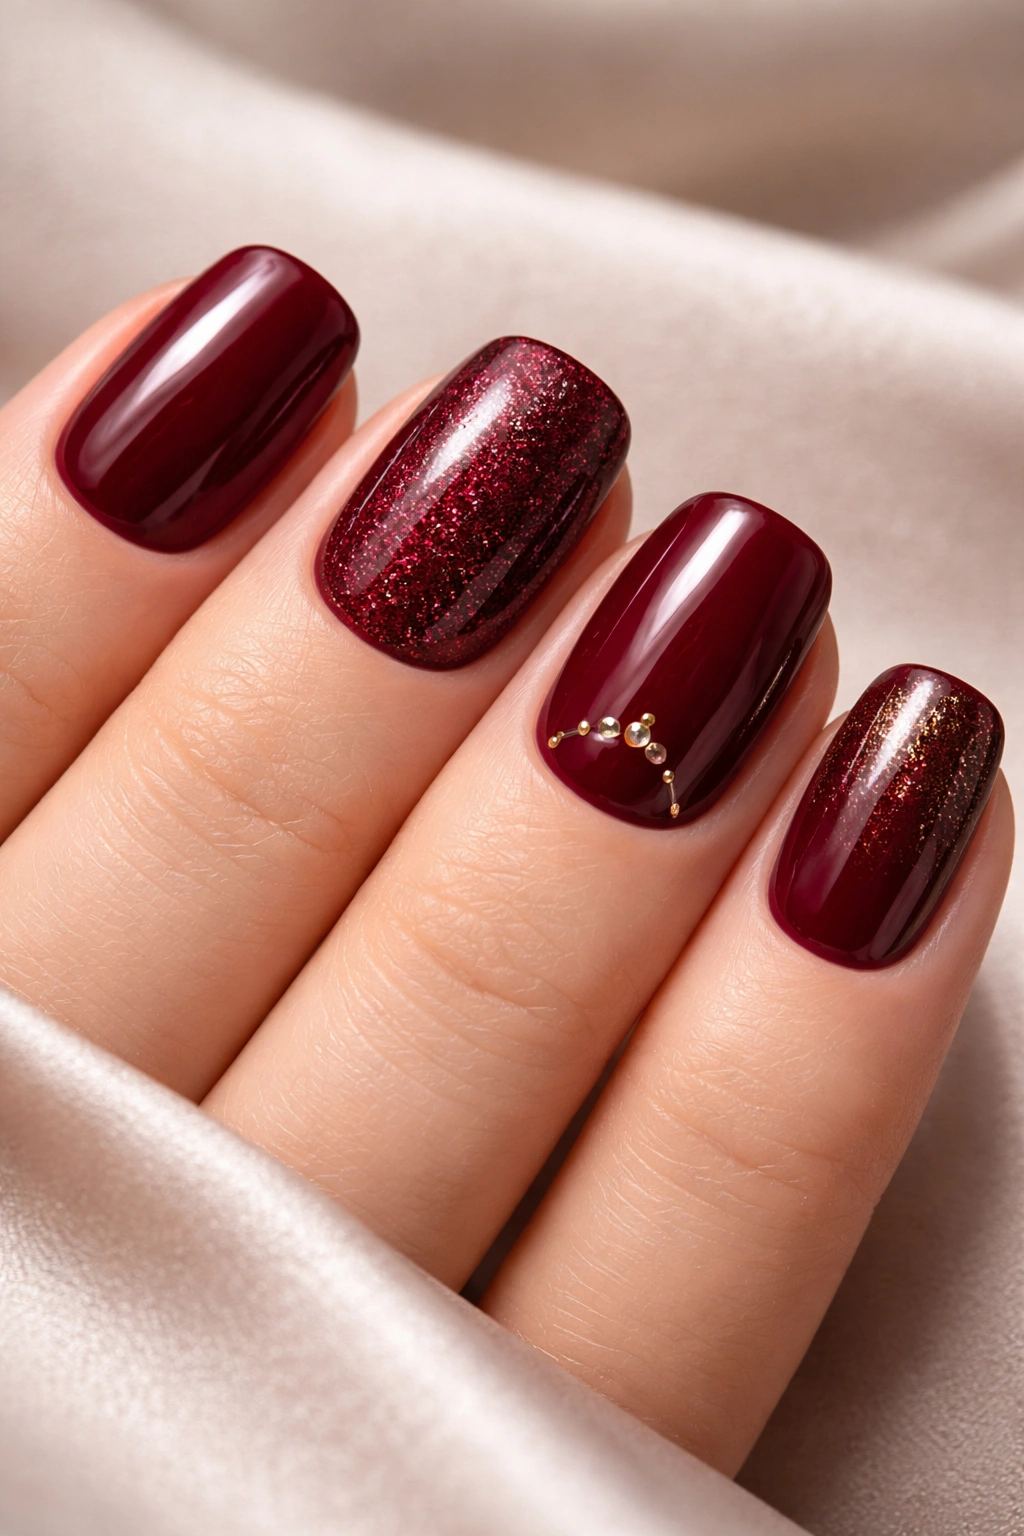
6. Burgundy with Champagne Sparkle Tips
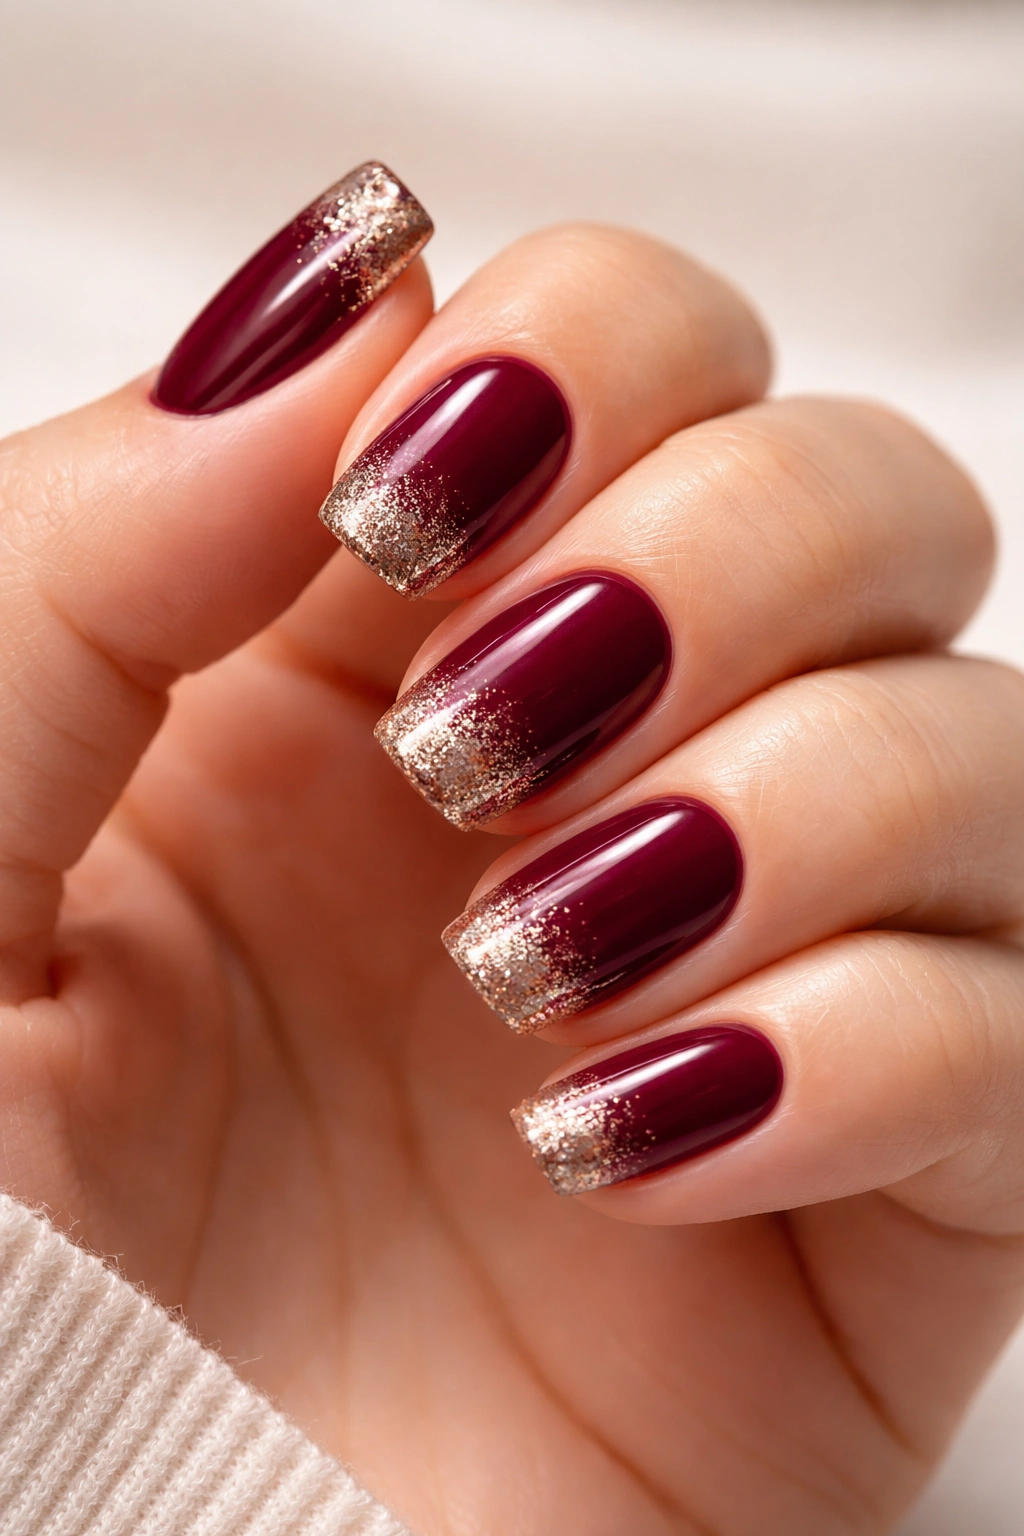
Sometimes you want a touch of glamour without committing to a fully sparkly manicure. Burgundy with champagne sparkle tips gives you exactly that — the solid, sophisticated burgundy base keeps things elegant, while the shimmer tips add just enough sparkle to catch light and feel celebratory.
The Perfect Balance of Understated and Shimmery
This design uses a solid burgundy color that extends about two-thirds of the way down the nail, with champagne or golden shimmer filling in the tip area. The transition can be a hard line (more modern and clean) or a soft gradient (more blended and romantic). Champagne-toned shimmer is particularly flattering against burgundy because it’s warm and subtle enough not to clash. The result feels polished and slightly festive without being over-the-top, making it perfect for dates, special occasions, or just when you want to feel a little fancier than usual.
Achieving the Look
- Apply your solid burgundy base in two coats and cure completely
- Use painter’s tape to mark out where your solid color ends and the shimmer begins, or freehand a soft curved line with your brush
- Apply the champagne shimmer polish to the tip area (usually about a third of the nail)
- If you want a gradient rather than a hard line, use a sponge and dabbing motions to blend the edges slightly
- Seal with a clear glossy topcoat
- Champagne shimmer can sometimes appear too yellow or too pink — test on one nail first to make sure the undertones work with your burgundy shade
- Expect 8-12 days of wear
7. Burgundy with Minimalist White Geometric Shapes
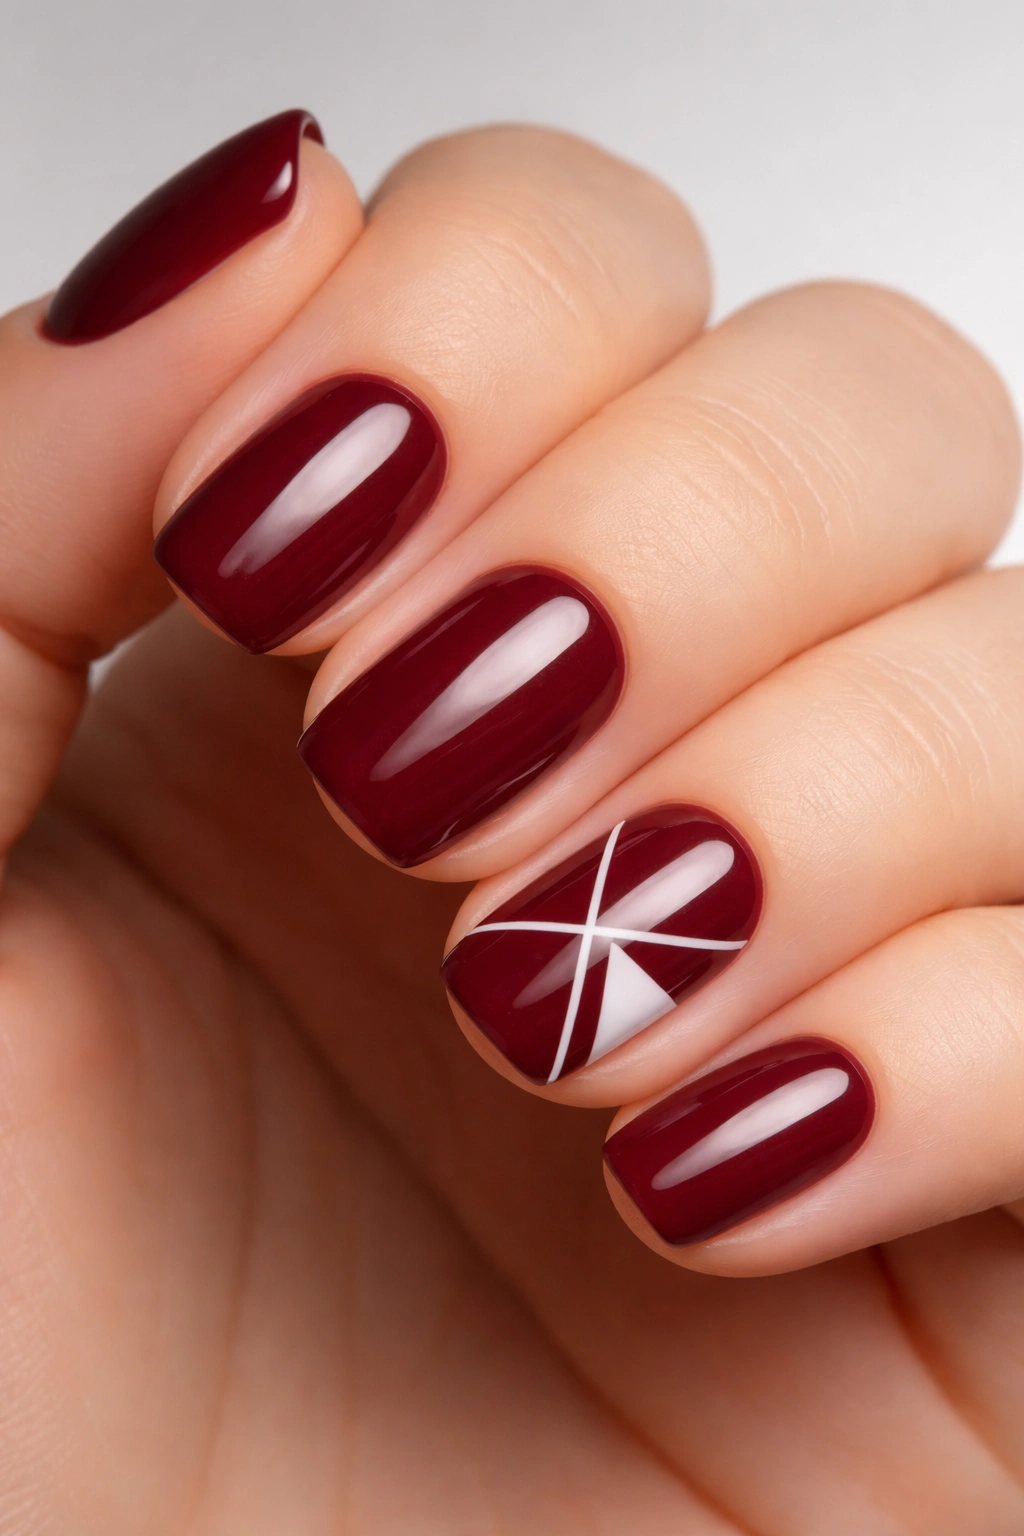
Pairing burgundy with crisp white creates maximum contrast and a very modern, editorial aesthetic. Minimalist geometric shapes — thin white lines forming triangles, a chevron pattern, or simple rectangular blocks placed strategically on the nail — create a contemporary look that feels intentional and design-forward.
Clean Lines and Negative Space
White on burgundy is bold enough that the geometric pattern reads immediately, but the minimalism keeps it from feeling childish or overly cute. Think sleek, sophisticated, almost architectural — the kind of design you’d see in a high-end nail salon’s portfolio. The contrast is so strong that even simple shapes feel impactful. A few thin white lines, or a single white triangle on one accent nail, creates visual interest without overwhelming your short nails. The burgundy base anchors everything and keeps the overall look polished rather than playful.
Creating Clean White Details
- Your burgundy base needs to be completely cured before you add white elements
- Use a very fine detail brush or even a toothpick for the thinnest white lines
- White polish has a tendency to be chalky, so use a high-quality pure white that flows smoothly
- Allow white details to cure fully before topcoating — white details can sometimes lift or smudge if the topcoat is applied while still wet
- A glossy topcoat over the white and burgundy creates a cohesive finish and protects the details
- Thin white lines are more forgiving than thick ones if precision isn’t your strong point
- This design lasts 9-11 days before the white begins showing wear at the edges
8. Burgundy with Nude Reverse Ombre
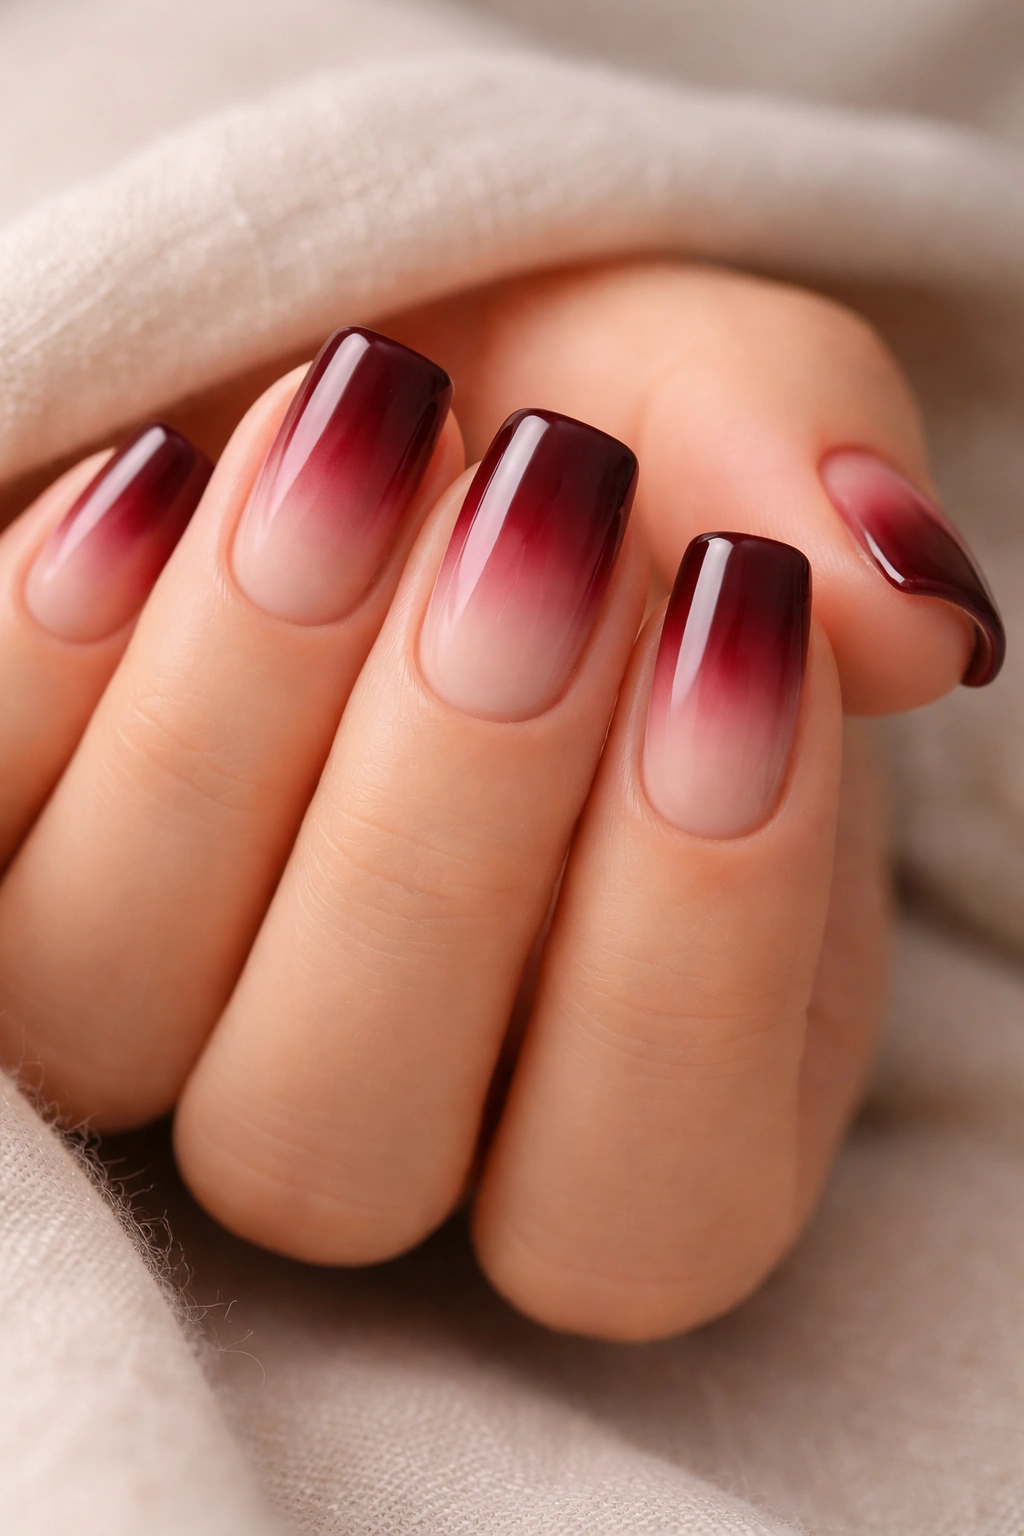
A reverse ombre flips the traditional gradient — instead of light at the tips, you’re creating a fade from burgundy at the tips into a nude or skin-toned color toward the cuticle. This creates an elongating effect and feels extremely elegant and understated.
The Reverse Gradient Trick
By starting with deeper color at the tip and fading to nude at the base, you’re creating an optical effect that makes the nail appear longer and more slender. The burgundy tips remain visible even as they wear, so this design actually ages beautifully — minor tip wear doesn’t dramatically change the overall look. The nude-to-burgundy transition feels very refined and works beautifully on shorter nails because it doesn’t compete with your skin tone. It’s the kind of design that looks effortlessly expensive, like you spent significant time and money at a very good salon, even though it’s actually quite achievable.
Building the Reverse Ombre
- Start with a nude or skin-toned base (match it to your actual skin tone for the most seamless effect)
- Allow the base to set completely
- Using a sponge, apply burgundy starting at the tips and work your way toward the middle of the nail in dabbing motions
- Blend the transition area with the sponge, moving from burgundy toward nude in rolling, gentle motions
- The transition should be gradual — you should see at least three distinct color zones moving from tip to cuticle
- Seal with clear topcoat
- This design is particularly flattering on shorter nail beds because the color gradient draws the eye along the length of the nail
- Expect 11-14 days of wear with gel
9. Burgundy with Delicate Floral Watercolor Details
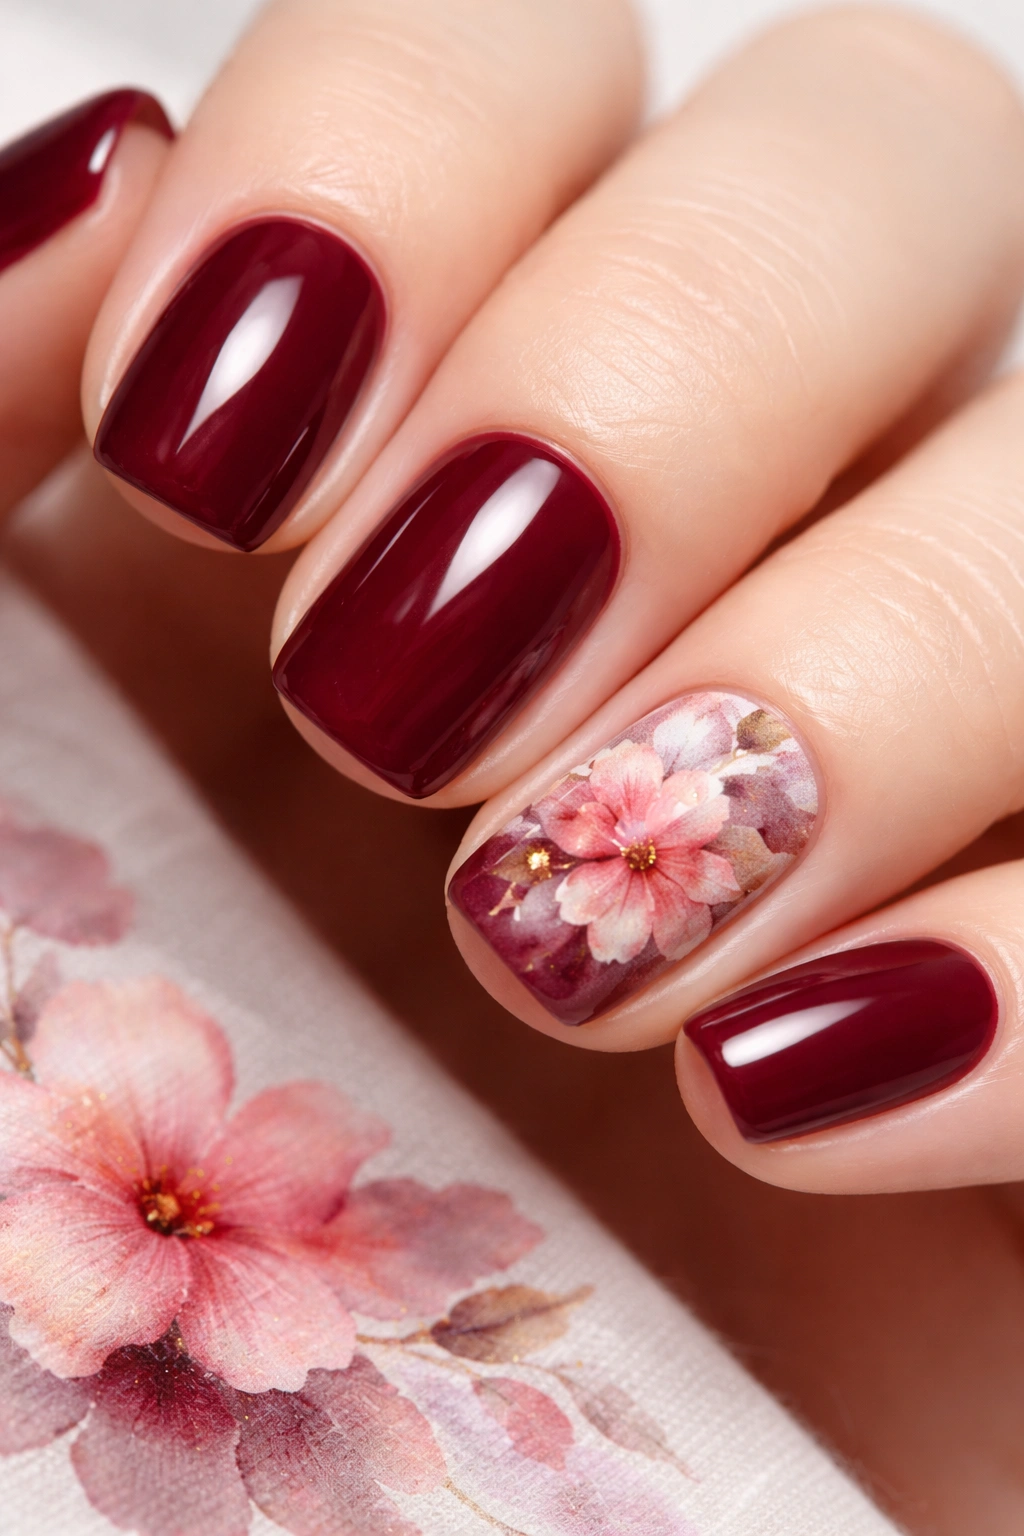
Watercolor nail art is a technique where colors are applied and then softened with a brush or water, creating painterly, organic effects. On burgundy nails, a subtle watercolor floral or abstract pattern (perhaps on accent nails only) creates an artistic, handmade aesthetic that feels uniquely personal.
The Watercolor Technique
Watercolor effects on nails require a light hand and some practice, but the imperfect, organic result is actually part of what makes the technique so appealing. Unlike structured geometric designs, watercolor allows for flowing, artistic expression. Soft peachy, gold, or cream-colored watercolor florals painted over a burgundy base create dimension and movement. The burgundy keeps the overall look grounded and sophisticated, while the watercolor adds an artistic, almost bohemian touch. This is a design that feels special and one-of-a-kind, particularly if hand-painted rather than using pre-made decals.
Executing the Watercolor Look
- Your burgundy base needs to be completely set before you begin watercolor work
- Use a thin brush and diluted gel or nail art paint (add a tiny amount of gel cleanser or water to thin it)
- Apply loose brushstrokes to create the watercolor effect — think translucent, flowing color rather than solid coverage
- You can soften edges further by lightly brushing with a barely-damp brush
- Watercolor effects work particularly well on accent nails (usually the ring finger, thumb, or pinky)
- Allow everything to cure completely before applying topcoat
- The imperfect nature of watercolor means even if your technique isn’t perfect, it will read as intentional
- Watercolor details begin to show wear around the 8-10 day mark
10. Burgundy with Chrome or Mirror Finish Accent
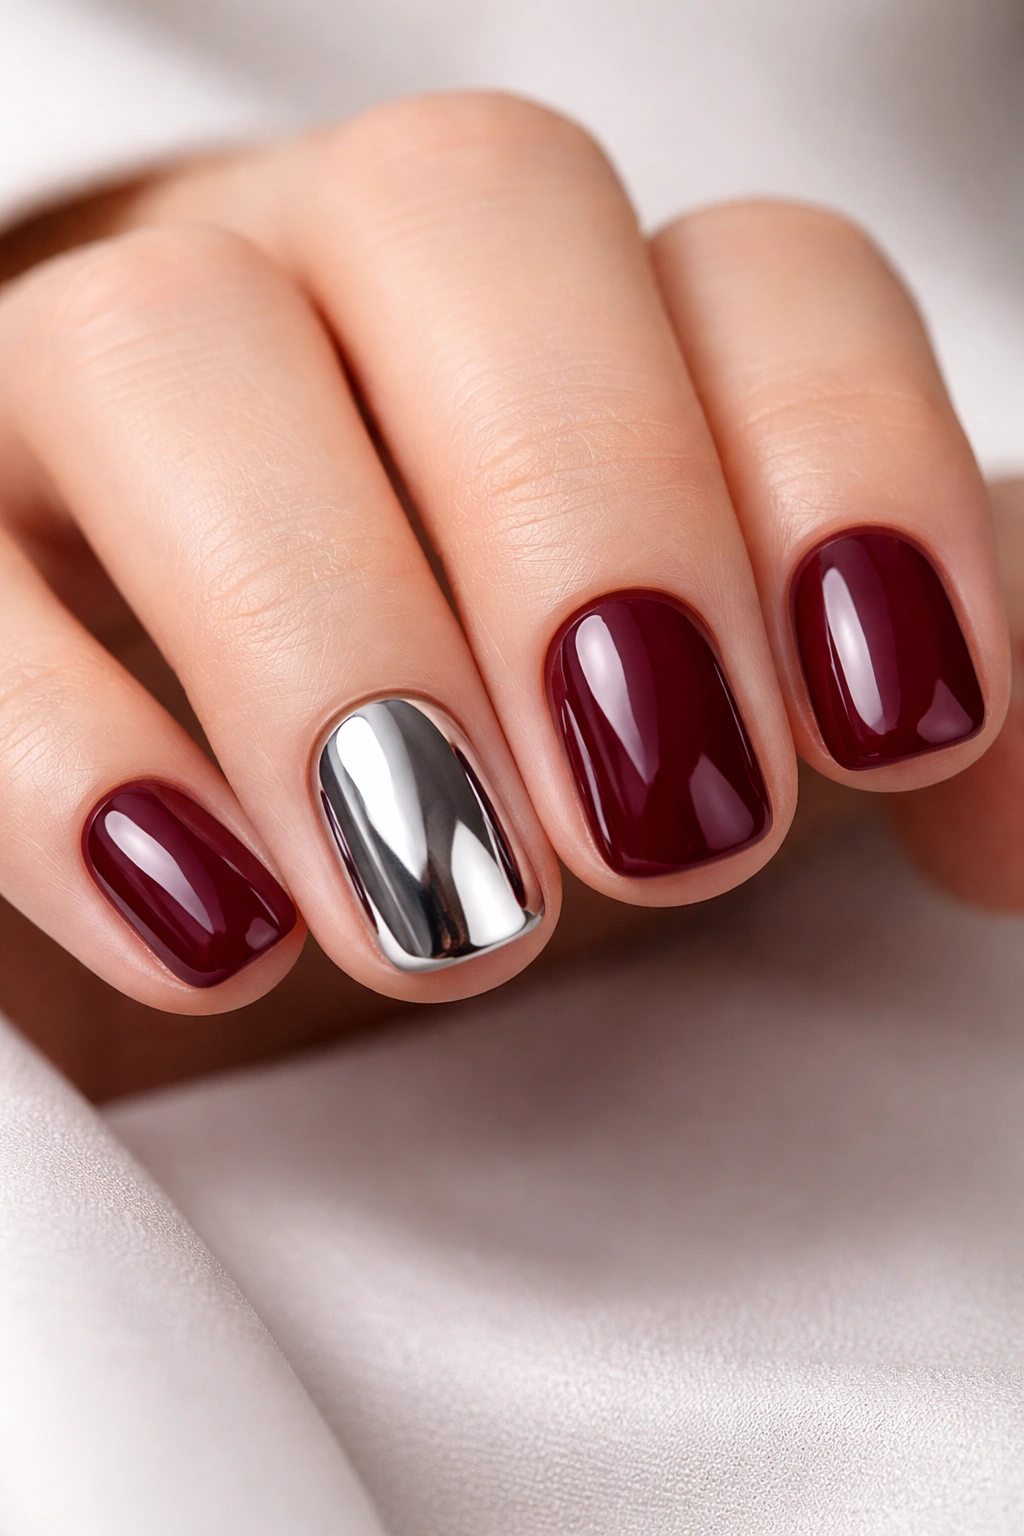
For a truly modern, eye-catching finish, burgundy paired with a chrome or mirror accent creates maximum impact. Chrome nails use a metallic powder that reflects light in an almost iridescent way, creating a nearly holographic effect. Using chrome on just one or two accent nails while keeping others solid burgundy creates contrast without overwhelming.
The Modern Mirror Effect
Chrome and mirror finishes have moved from novelty territory into legitimate design territory in recent years. The effect is undeniably striking — the nail becomes almost reflective, catching every bit of light in the room. Paired with deep burgundy, a chrome accent nail (usually the ring finger or thumb) creates a sophisticated, fashion-forward moment that feels current without being trendy. The solid burgundy nails around it ground the look and prevent it from feeling too costume-like. This is the design that gets compliments and questions because it looks so polished and deliberate.
Applying Chrome Successfully
- Chrome powder requires a very specific application method — it doesn’t stick to regular polish and needs either a special chrome base or sticky gel topcoat
- Apply your burgundy base and let it cure completely on non-chrome nails
- On accent nails, apply a sticky (uncured) topcoat, then use a soft applicator or sponge to press chrome powder firmly into the sticky surface
- Work with small amounts of powder at a time, pressing it in completely before adding more
- Once all powder is applied and pressed in firmly, seal with a clear topcoat and cure
- The first few applications of chrome can be tricky — don’t get discouraged if the coverage isn’t perfect the first time
- Chrome nails require careful maintenance (avoid excessive water exposure immediately after application)
- This design lasts 10-13 days before the chrome begins to dull slightly at the tips
Final Thoughts
Burgundy short squoval nails are the kind of design that works whether you’re trying to look put-together for work, stepping out for something special, or just wanting to feel a little more intentional about your appearance. The squoval shape keeps everything practical and wearable, while the burgundy color does the heavy lifting when it comes to making the overall look feel expensive and thoughtful.
The variations above range from beautifully simple (a solid glossy burgundy, honestly, never needs to apologize for anything) to more artistic and complex (the watercolor florals, the ombres, the geometric patterns). None of them requires expensive equipment or professional-level skill, though having a steady hand definitely helps with some designs. The truth is that even slight imperfections in intricate designs usually read as intentional rather than sloppy when the base color and overall concept are solid.
The real secret to nails that feel polished and curated is consistency — whether you’re doing this at home or in a salon, taking time with the application, using good-quality products, and maintaining them thoughtfully makes the difference between a manicure that lasts a week looking great and one that holds up for two. Burgundy is forgiving in that way. It’s a color that develops character as it wears, that looks good even when it’s not perfect, and that makes you feel pulled together every single time you catch your hands on your coffee cup or your phone. That’s the real win.
