

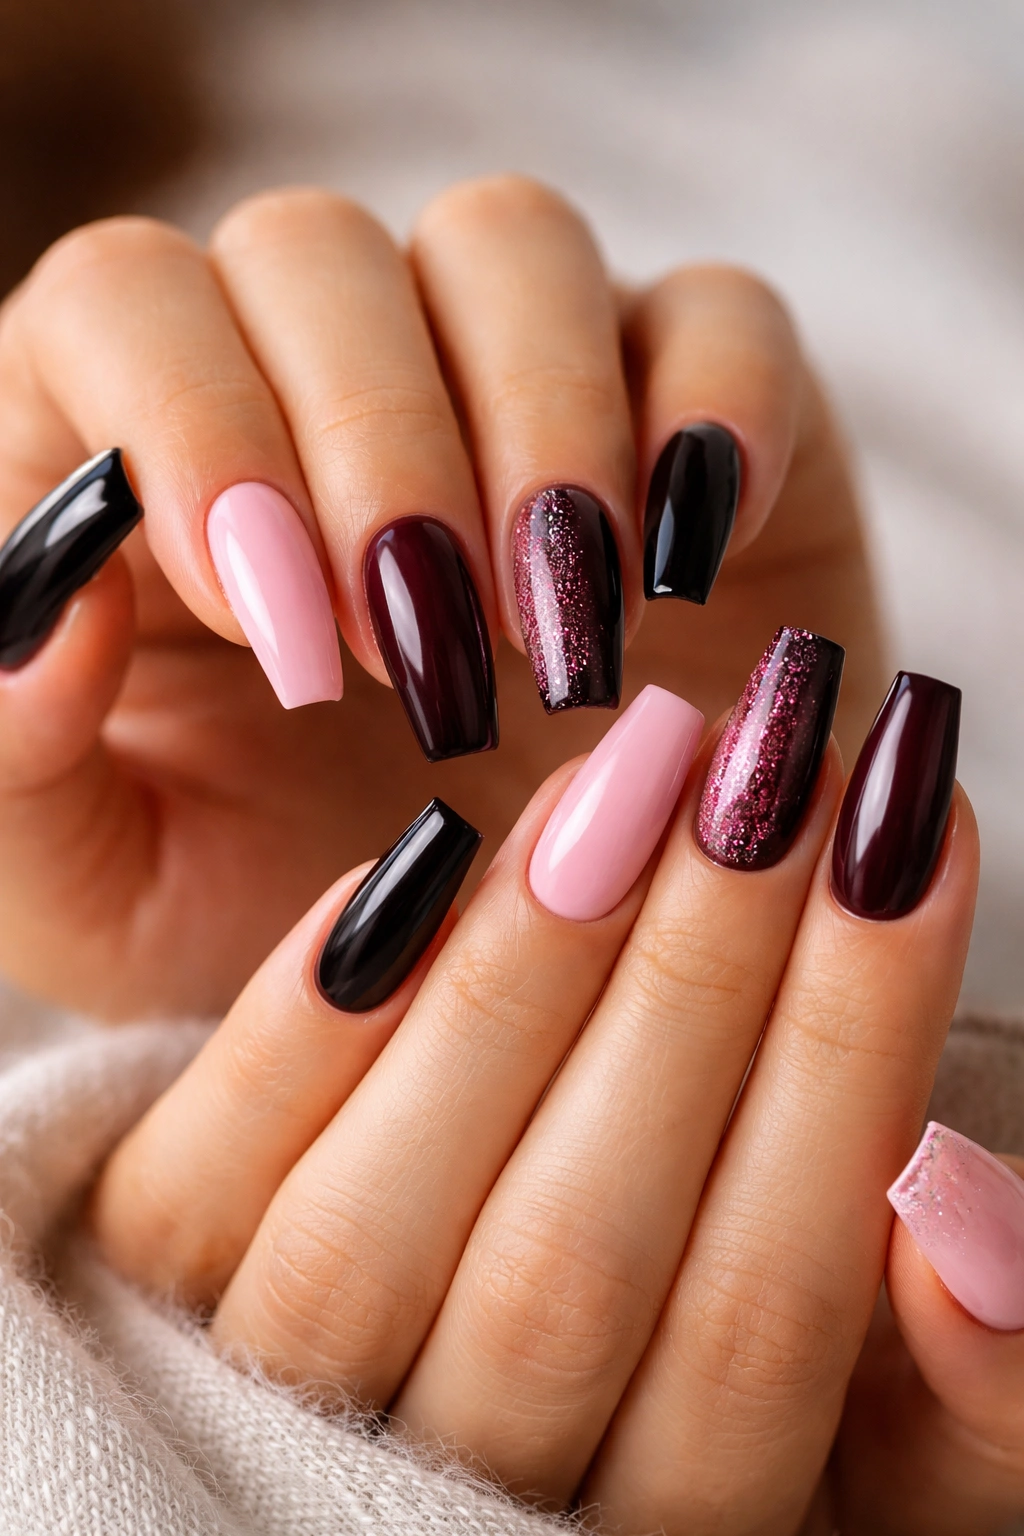
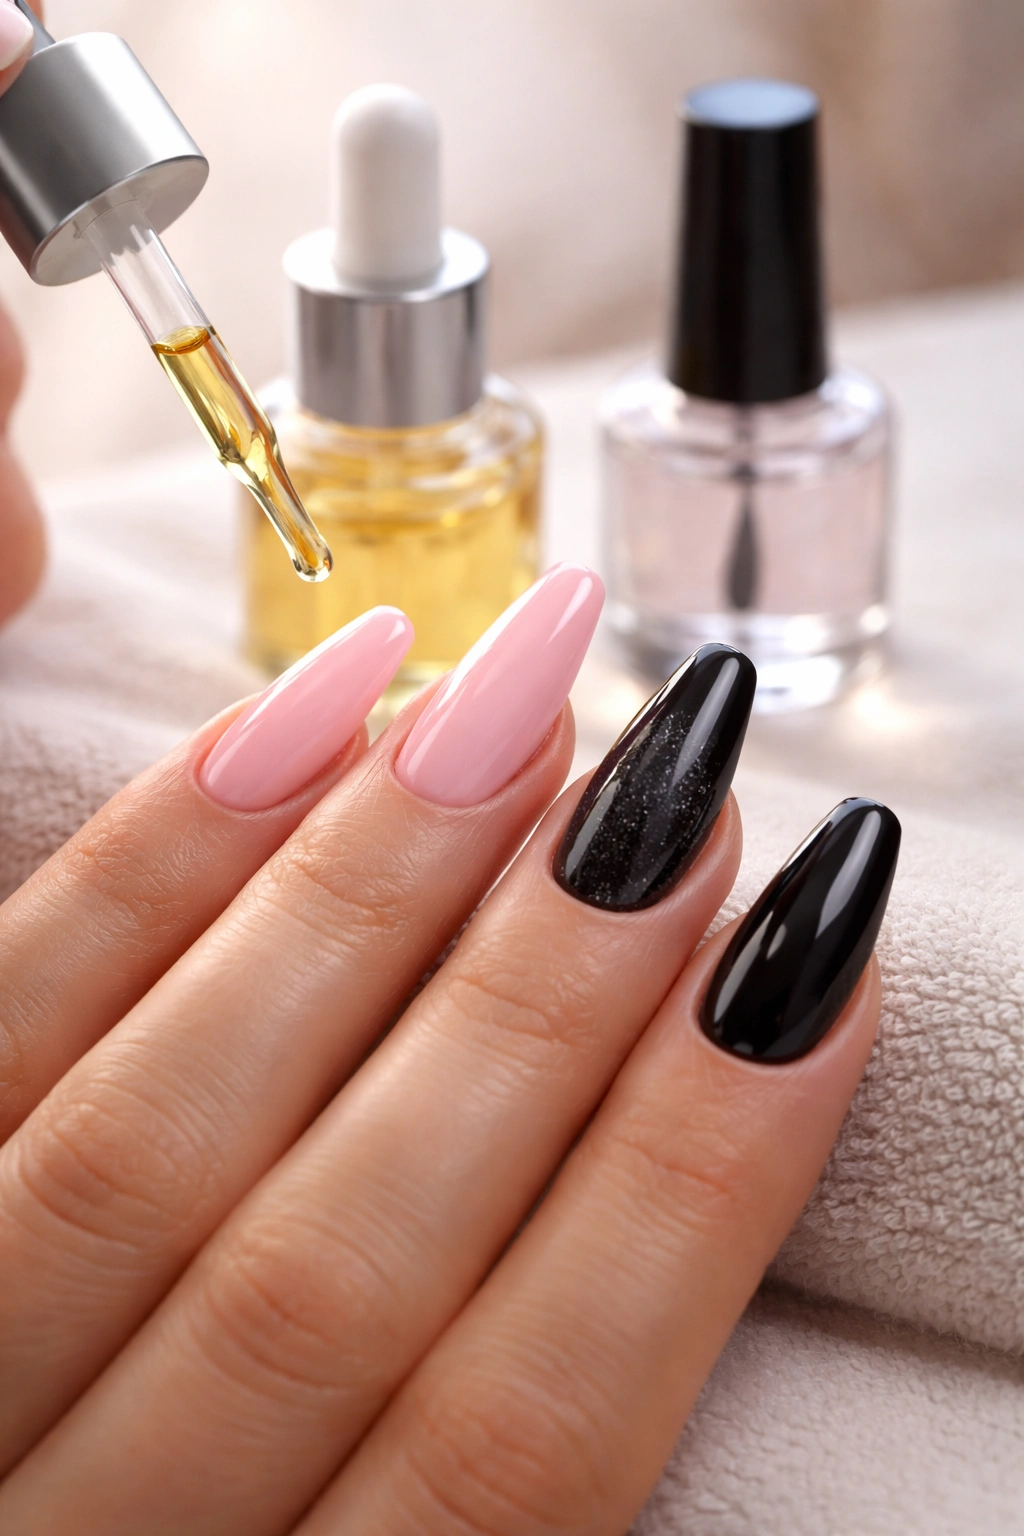
Pink and dark coffin nails do not sit quietly at the ends of your fingers. They flash when you reach for a coffee cup, wrap around a steering wheel, tap across a phone screen. That contrast—soft pink against black, plum, navy, cherry, or espresso—makes the coffin shape look sharper and more deliberate than a plain nude set ever could.
I keep coming back to this color mix because it does two jobs at once. Pink keeps the manicure from feeling heavy, while the darker shade adds edge and structure. On a coffin shape, which already has those straight sidewalls and squared-off tips, the combo can make your hands look longer and the nail art look more expensive than it actually was.
There is one catch, though. Dark polish shows every crooked file line, every lumpy top coat, every messy cuticle edge. And some pinks go chalky or flat once they hit the nail, especially if the base color fights your skin tone. A good set is not only about the design idea; it is also about placement, finish, and knowing when to stop.
Some nail looks are loud in a sloppy way. These are loud on purpose.
Why Pink and Dark Coffin Nails Hit Harder Than Plain Nude Sets

Soft pink on its own can read sweet. Add a dark edge or a deep center, and the whole manicure turns architectural.
That is the real appeal of pink and dark coffin nails. The pink acts like negative space even when it covers half the nail, while the darker color draws the eye exactly where you want it—at the tip, through the center, along a diagonal split, around a frame. Coffin nails already have built-in drama because the sides taper before ending in a flat tip. Dark shades make that geometry easier to see.
Length matters here too. On a short coffin set, dark details look cleaner when they stay thin: a tip, a side-swipe, a moon near the cuticle. On a long coffin set, you have room for gradients, crocodile texture, marble veining, magnetic velvet, and chunkier contrast.
I also think this color family avoids one of the biggest problems with bold nails: visual overload. A full set of black coffin nails can look blunt. A full set of bright pink can skew sugary. Put the two together, and each shade keeps the other in check.
A few design rules help:
- Keep one color dominant. A 70/30 split usually looks sharper than a 50/50 split.
- Match the finish to the design. Chrome, jelly, and aura styles need shine; croc print and drip art often look better matte.
- Repeat the dark shade in at least two places. A single accent nail can look random on coffin shapes.
- Let the sidewalls stay crisp. Dark polish bleeding toward the skin ruins the clean coffin outline fast.
You do not need extra-long tips for this look.
Choosing Length and Finish for Pink and Dark Coffin Nails
What length gives you enough room for detail without turning daily tasks into a wrestling match?
For most people, medium coffin nails hit the sweet spot. They leave enough surface area for ombré, split-color layouts, aura centers, and detailed French tips, but you can still type, button jeans, and dig around in a tote bag without cursing your own manicure. If your natural nails bend, crack, or peel, ask for an acrylic overlay or builder gel with a visible apex about one-third of the way back from the tip. That small hump matters more than people think.
Pick the pink before you pick the dark shade
Warm skin usually looks better with peach pink, rose beige, or dusty blush. Cooler skin tends to flatter blue-based pink, mauve pink, or milky ballet pink. The dark color should not fight that undertone. Espresso works with warm pinks. Gunmetal, navy, and black sit better beside cooler pinks.
Finish changes the whole attitude
Gloss makes dark polish look deeper and gives pinks more life. Matte does the opposite: it softens glare and turns rich shades like plum, charcoal, and cherry into velvet-like color blocks. Chrome is trickier. On coffin nails, chrome looks best when it is used on part of the nail rather than every finger, unless you want a mirror-bright set that steals all the attention in the room.
Quick prep checklist before any bold coffin set
- Ask for straight sidewalls. Coffin nails should taper evenly from both sides, not lean to one side.
- Have the free edge sealed well. Dark polish chips at the tip first.
- Do a color test on one swatch stick. A pink that looks soft in the bottle can turn gray on the nail.
- Check the cuticle area in bright light. Dark shades make flooding obvious.
Once the shape and finish are right, the design ideas get a lot more fun.
1. Glossy Black French Tips on a Sheer Blush Base
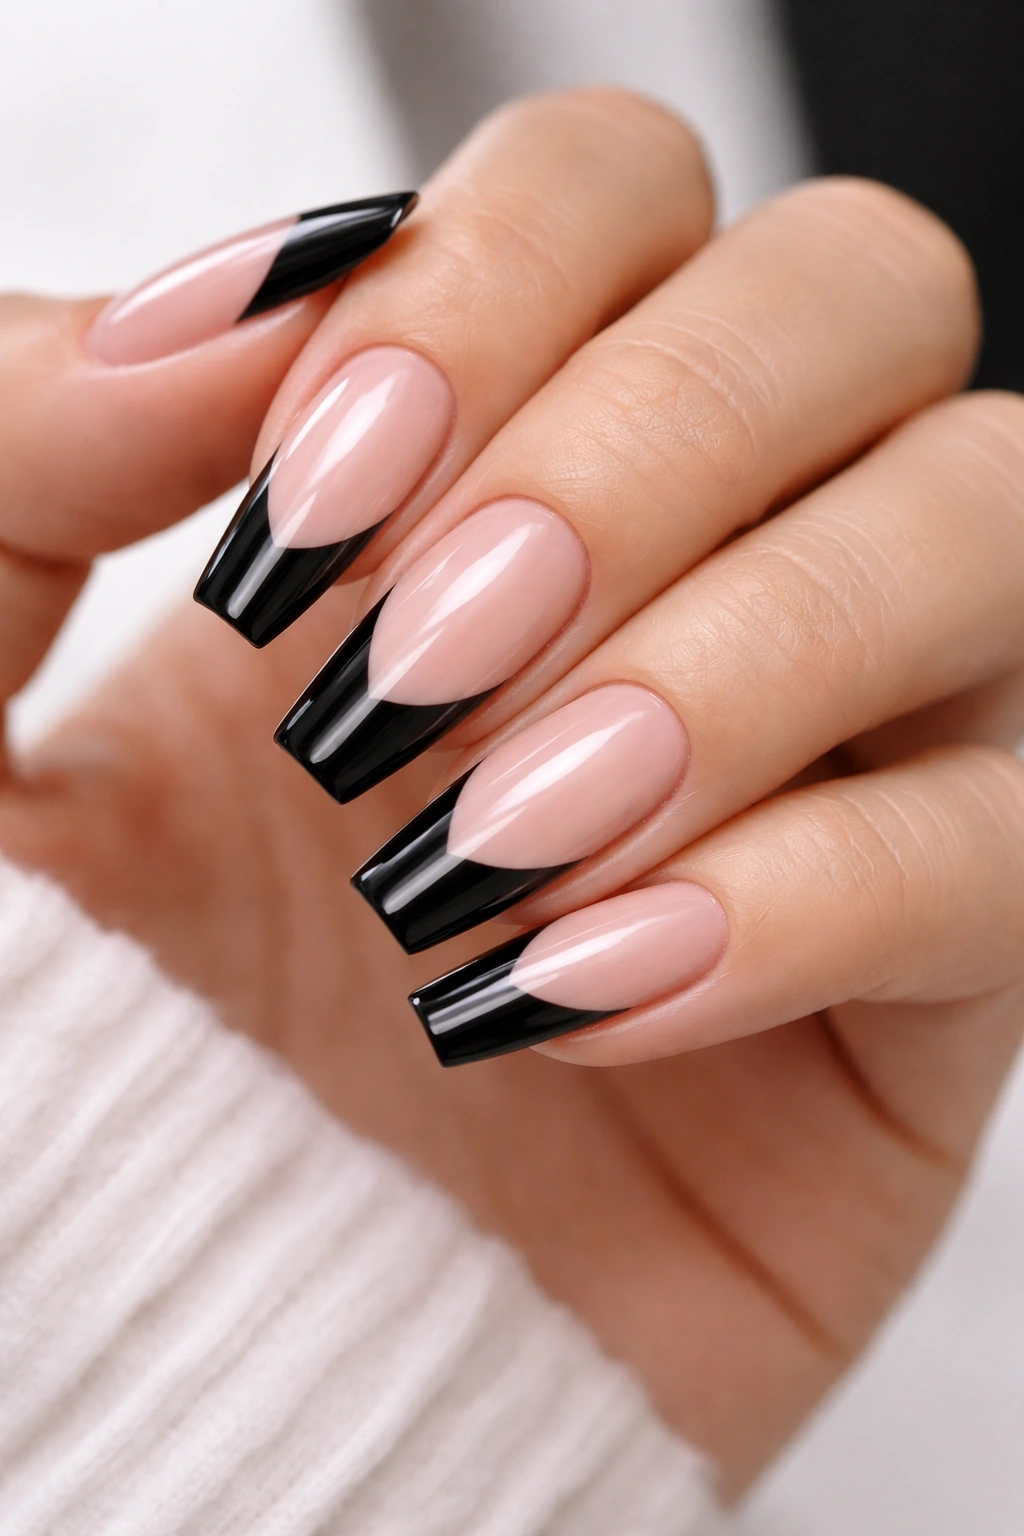
Start with the cleanest contrast in the bunch. A sheer blush base with glossy black French tips gives you that sharp pink-and-dark look without covering the whole nail in heavy color.
What makes this set work is restraint. The pink base stays translucent enough to show a bit of the natural nail beneath, while the black tip sits right on the flat end of the coffin shape and makes it look even crisper. On medium or long nails, that line feels sleek instead of severe.
Why the Contrast Works
Black French tips on coffin nails look best when the smile line is deep and slightly angular, not round like a classic salon French. That angled curve echoes the side taper of the nail. A milky blush base also helps because bright candy pink can make the black feel harsh.
Nail Tech Notes
- Best length: medium to long coffin
- Best finish: high-gloss top coat
- Tip thickness: about 2 to 4 millimeters, depending on nail length
- Best pink tone: sheer rose, soft blush, or milky nude-pink
You can make this look tougher with a black outline under the French tip, or softer with one accent nail done in full blush chrome. I would keep embellishments off this set, though. The whole point is that clean, graphic edge.
Ask for a crisp sidewall and sealed tip, or black French polish will show every flaw.
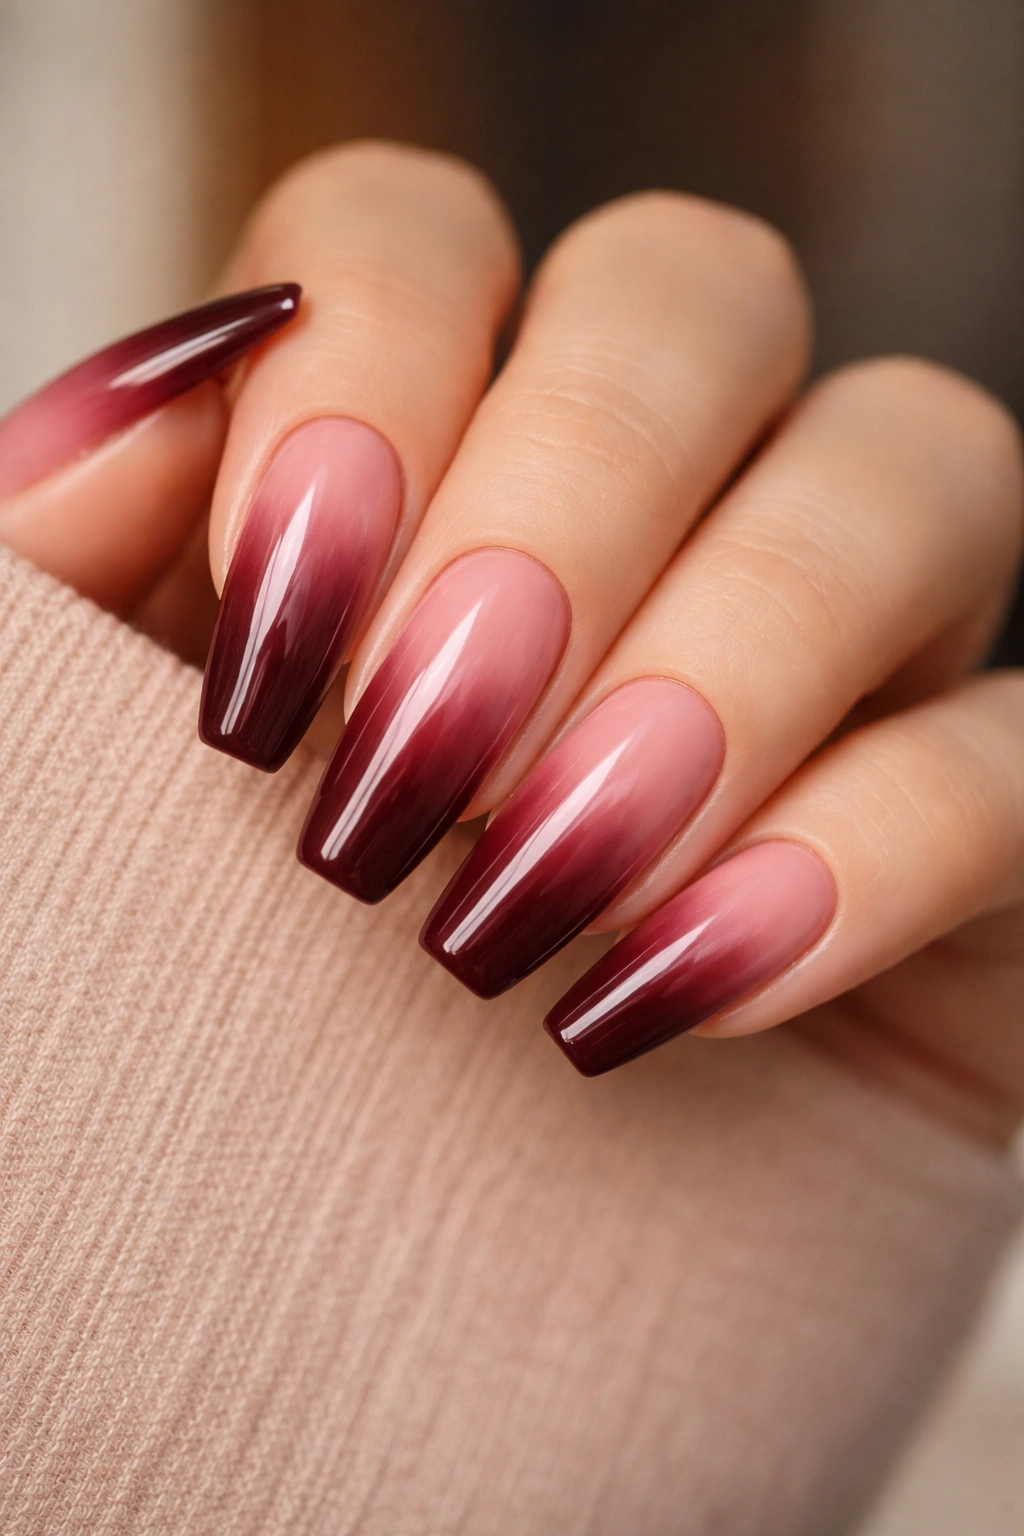
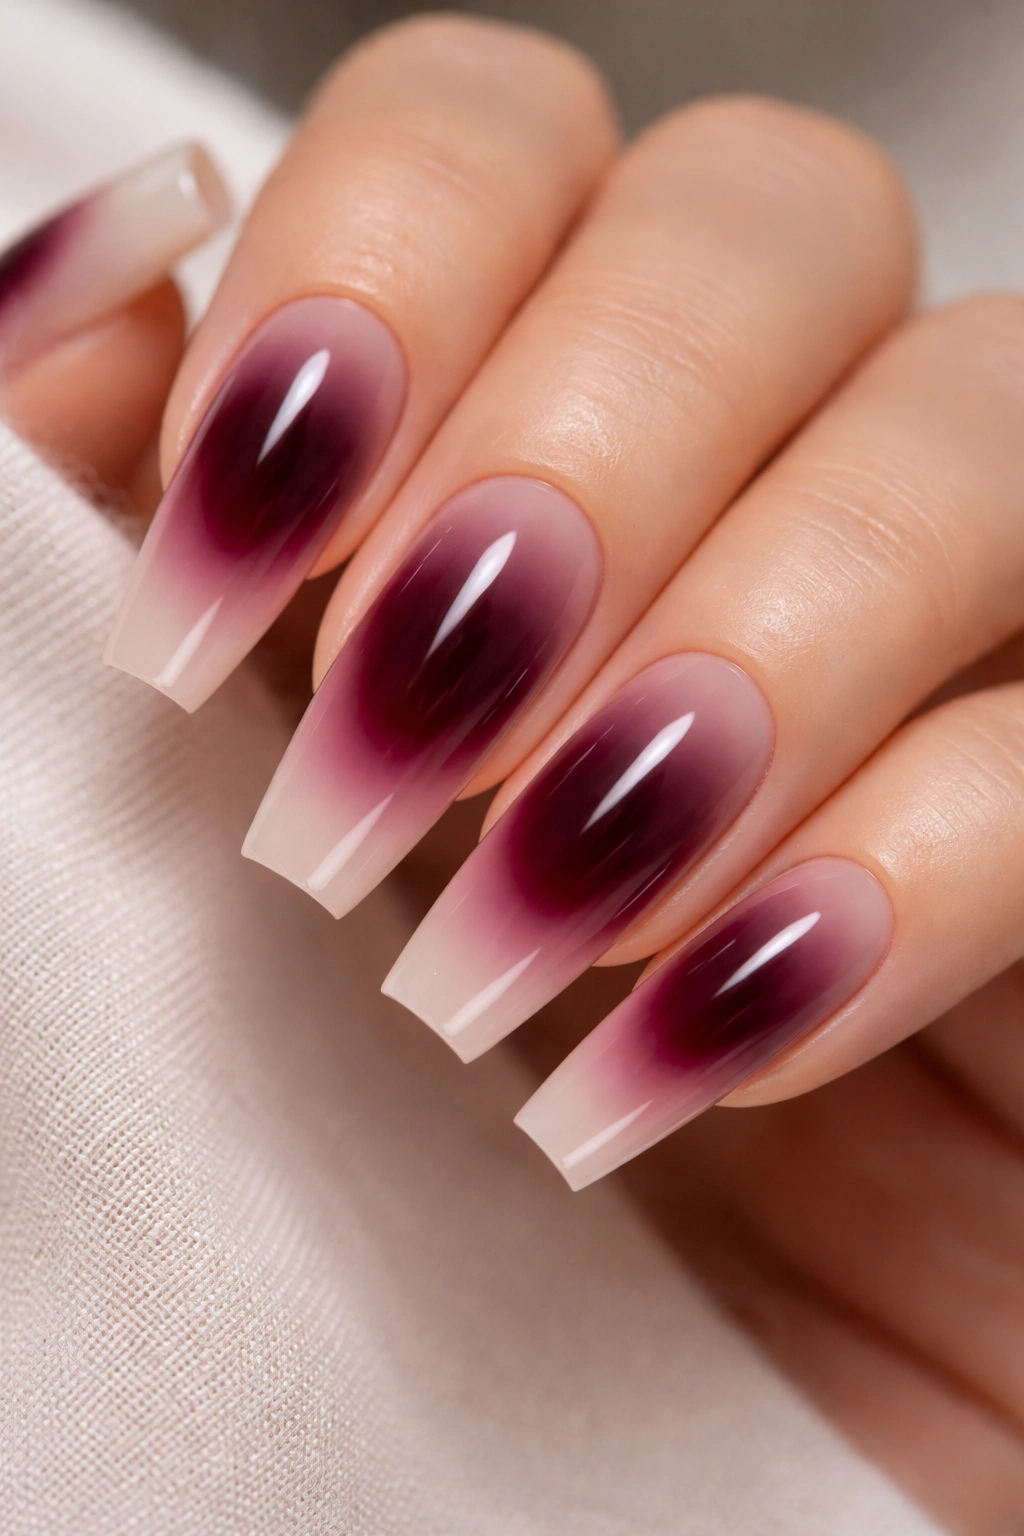
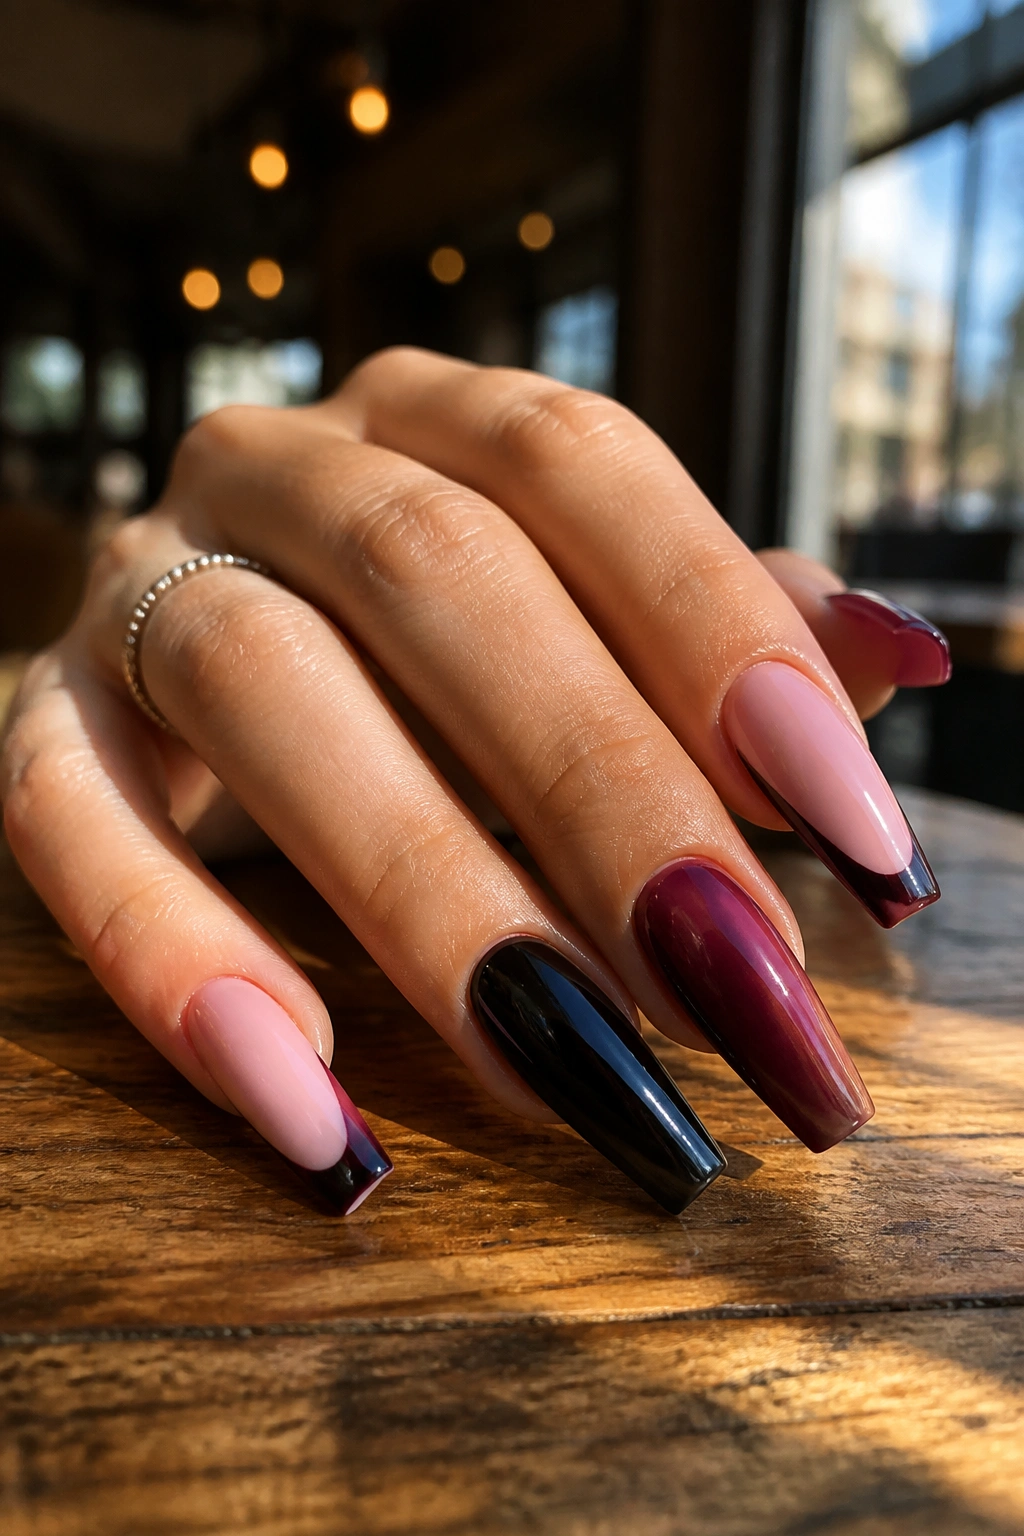
2. Deep Burgundy Fade Into Dusty Rose Ombré
Wine beats jet black here.
A burgundy-to-dusty-rose ombré has more depth than a plain black fade, and it looks richer under warm indoor light. The deep cherry tone blends into pink without creating that muddy gray band you sometimes get when black and blush are mixed too heavily.
This design works best when the darkest color sits at the tip and melts upward. Coffin nails give the fade enough runway to look smooth. On shorter nails, the color shift can get cramped and lose that smoky softness.
Application matters a lot. Airbrushed ombré gives the cleanest blend, though a skilled tech can do it with a sponge or gel brush in thin layers. The key is patience—two or three light passes always beat one thick, streaky coat. If the burgundy looks flat, a syrupy jelly top layer can give it more depth.
I like this set for people who want bold nails without a hard line or graphic art. It feels dressed up, a little moody, and less expected than black. Add one tiny gold stud at the base of the ring finger if you want a small extra detail, then stop there.
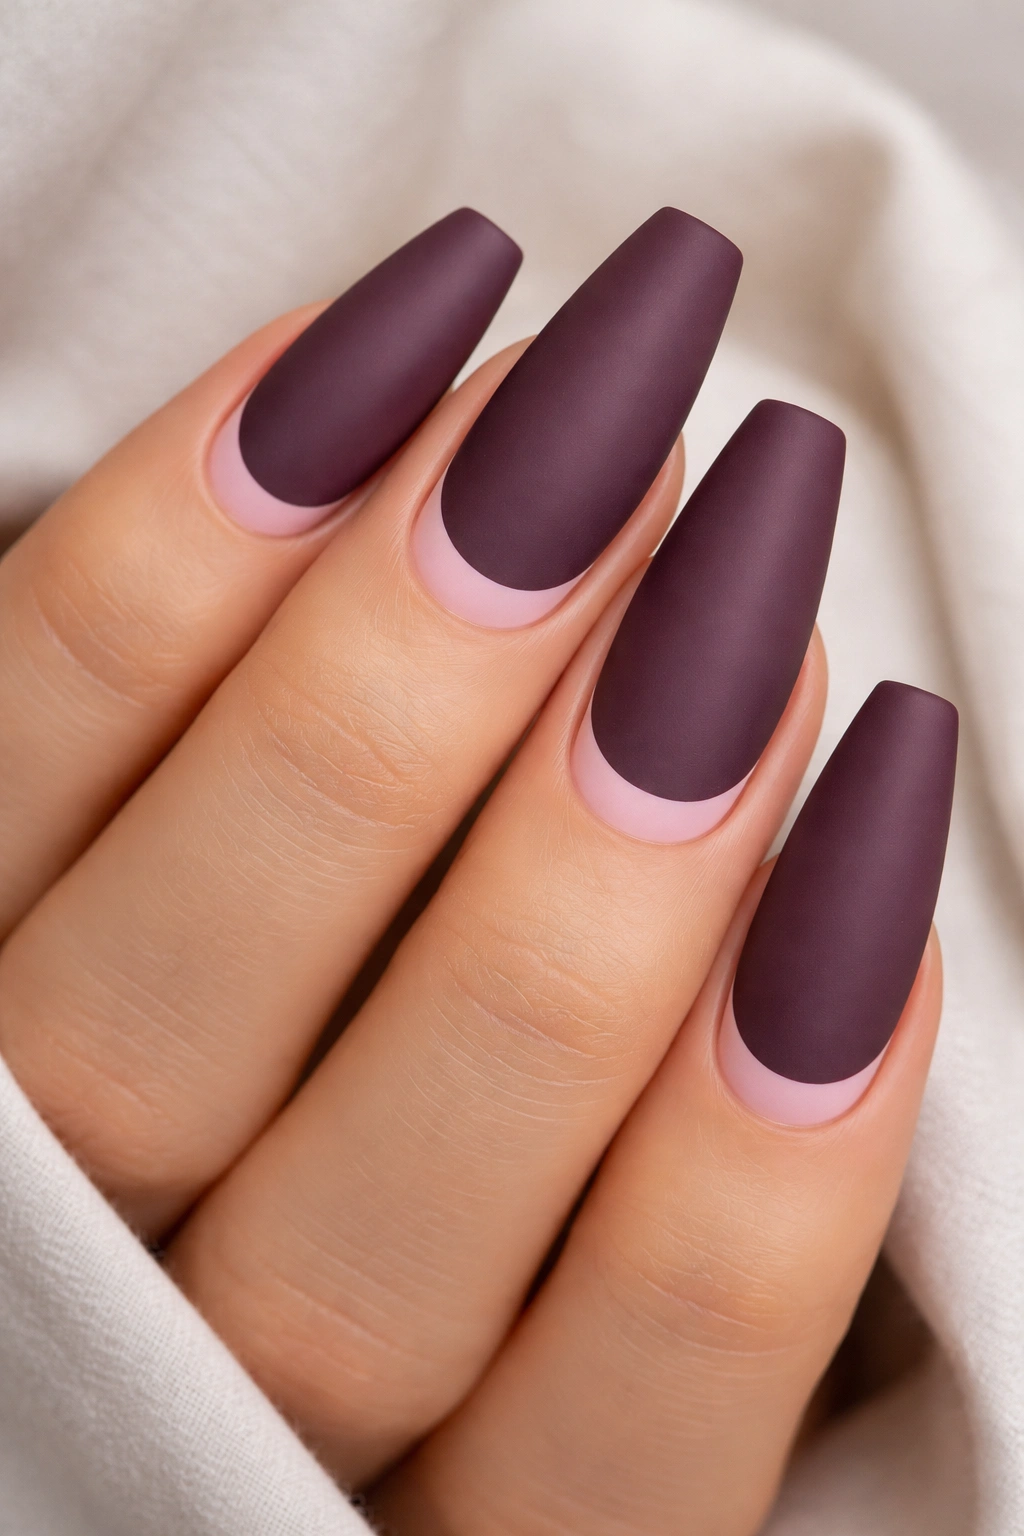
3. Matte Plum Nails With a Thin Baby Pink Moon
Want a dark manicure that still shows some skin and some contrast? Flip the French.
A matte plum nail with a slim baby pink half-moon near the cuticle is one of those designs that looks smarter the longer you stare at it. Most people notice the rich plum first. Then they catch that tiny pink crescent at the base, and the whole set feels more thought-out.
The trick is keeping the moon narrow. If the pink section gets too wide, the design starts to look retro in a way that can fight the sharp coffin shape. A crescent about 2 millimeters deep is enough on most medium nails.
Ask for a Skinny Moon, Not a Fat Crescent
Tell your nail tech you want the pink placed tightly around the cuticle line, with the curve following your natural lunula shape rather than a dramatic arch. Matte top coat should go over the plum only if you want stronger contrast. A full matte finish over both colors mutes the pink too much.
This is also one of the few dark sets that hides grow-out better than you would expect. Because there is already a design element at the cuticle, a little regrowth does not look as abrupt after ten days or so. If you are hard on your hands, that matters.
4. Pink Chrome Base With Espresso Side-Swipe Accents
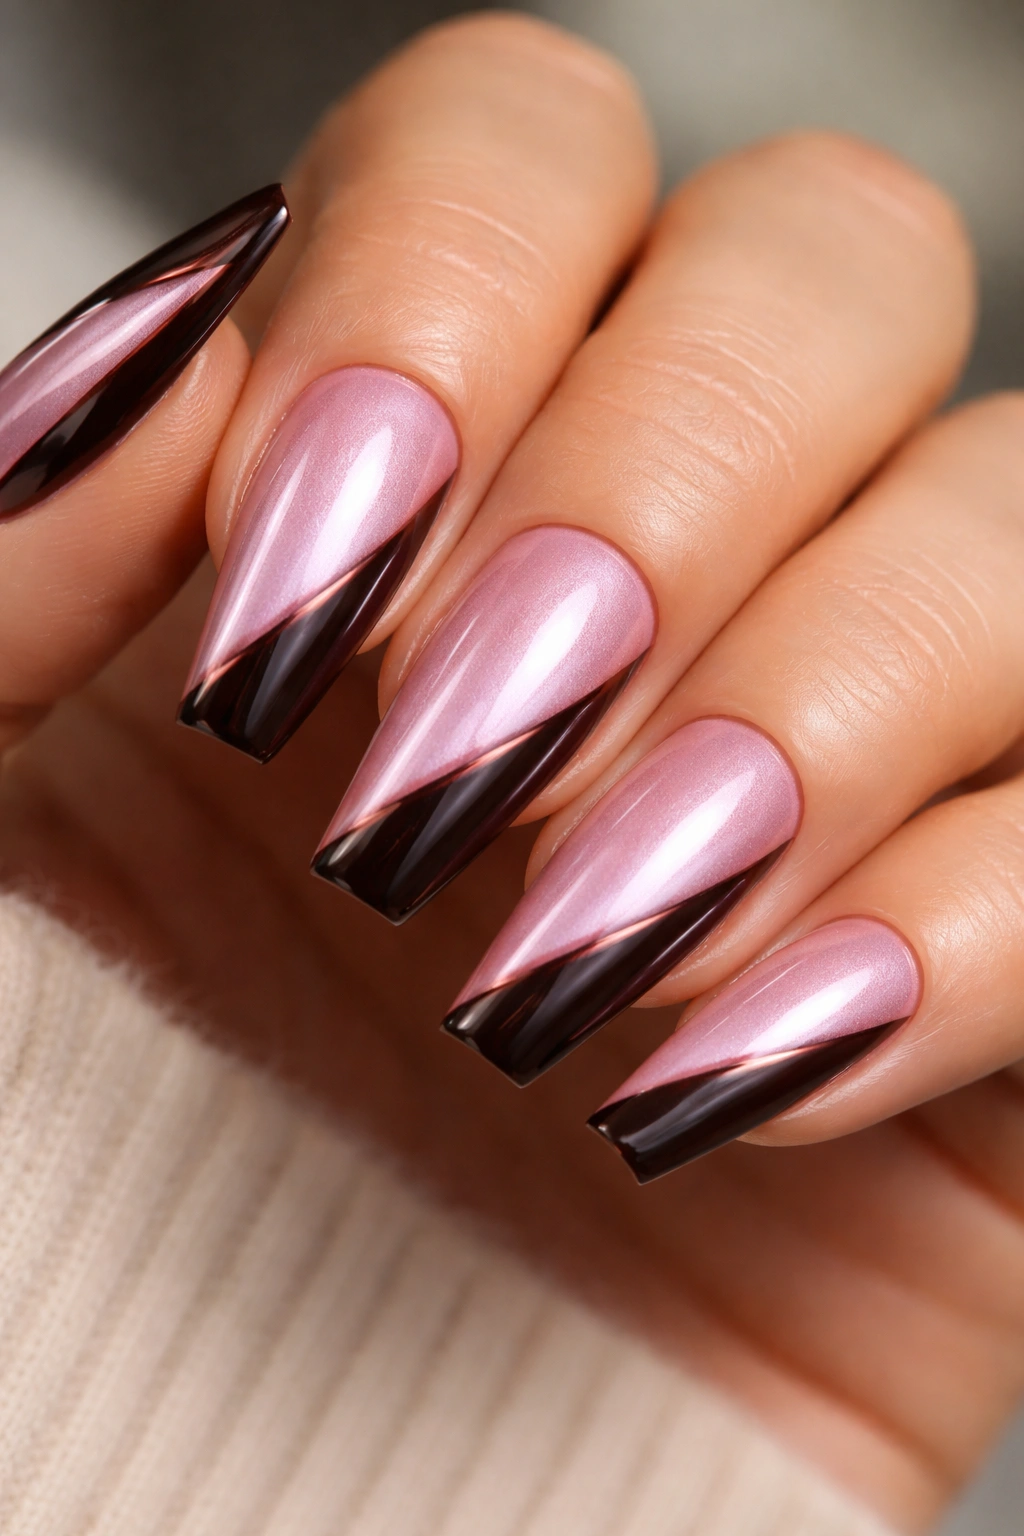
Under store lighting, this one can look almost liquid. The pink chrome catches light across the center of the nail, while an espresso diagonal side-swipe grounds the whole design and keeps it from slipping into full-on mirror-ball territory.
The side-swipe is what makes it work on coffin nails. Instead of splitting the nail down the middle, the dark color glides in from one sidewall and ends near the tip, like a slash of shadow. That angled movement plays well with the tapered shape.
What to tell your nail tech
- Use a neutral pink chrome powder over a smooth gel base, not a frosty silver-pink.
- Paint the espresso accent on 3 to 5 nails, not all 10, unless you want a heavier set.
- Keep the diagonal line sharp and thin at the cuticle, then let it widen toward the tip.
- Finish with high shine, because chrome loses half its punch under a dull top coat.
I would not add stones here. Chrome already reflects enough light, and the espresso swipe gives the design its contrast. More hardware can push it into clutter.
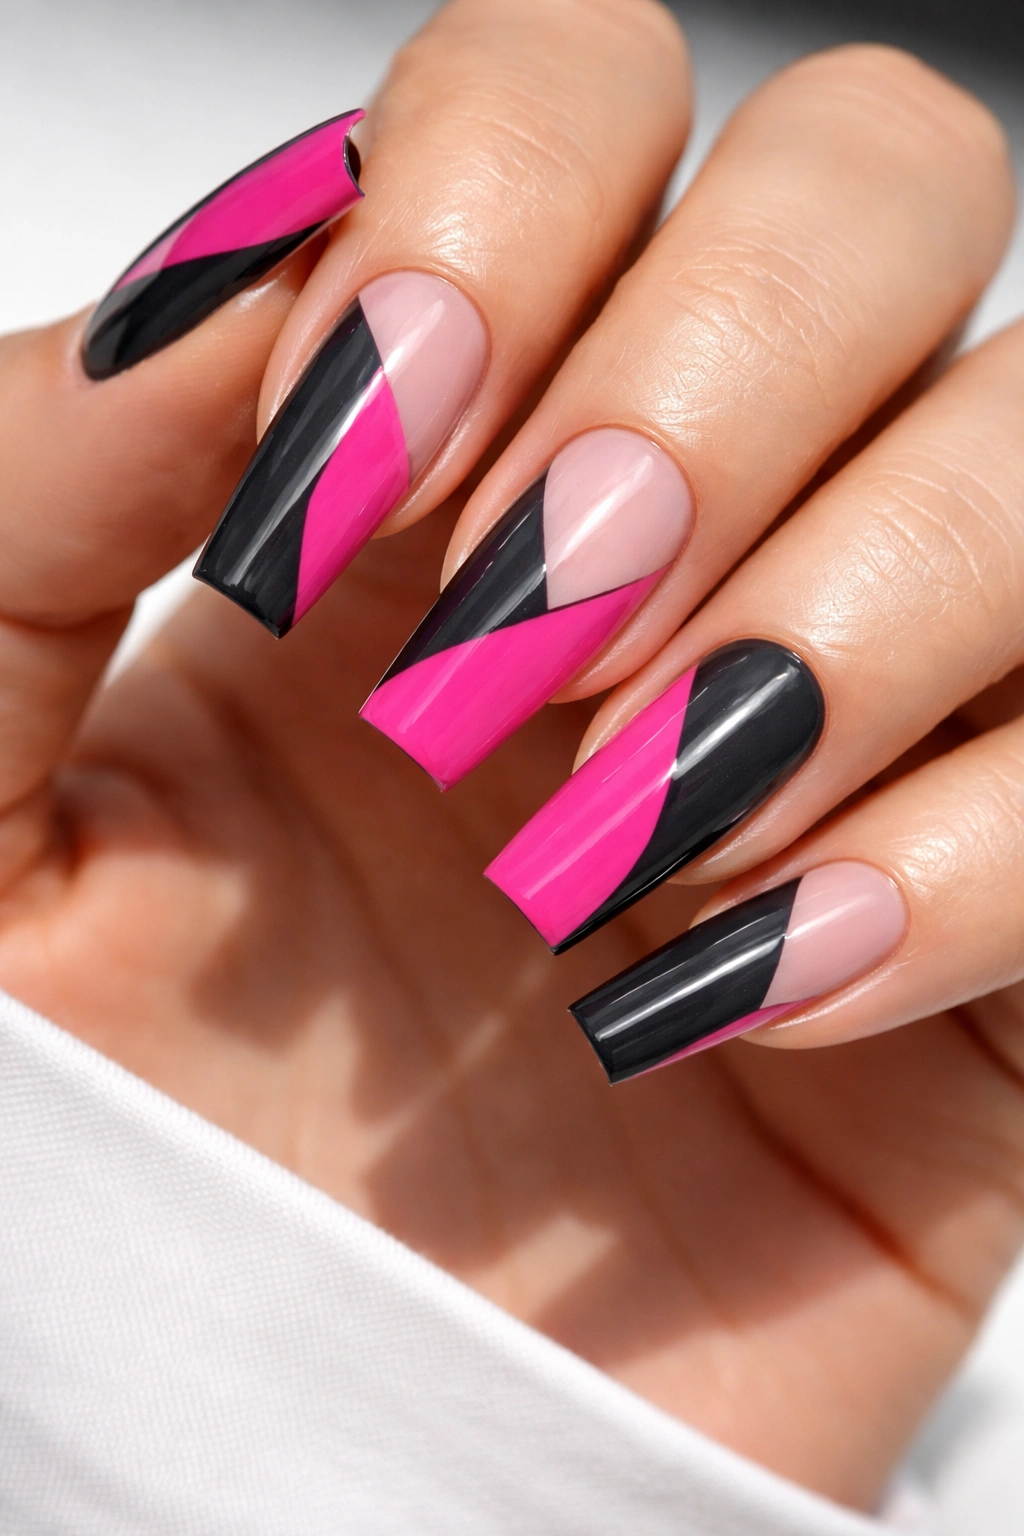
5. Hot Pink and Charcoal Color-Block Coffin Nails
Some nail art needs distance before it makes sense. This one hits right away.
Hot pink and charcoal color-block nails look bold because the contrast is not blended or softened. It is cut into sections—triangles, off-center panels, maybe a diagonal split on one nail and a side block on the next. Coffin nails handle that kind of structure well because the straight edges echo the geometry in the design.
Charcoal is the smarter pick over pure black here. Black can overpower hot pink and flatten it. Charcoal keeps the dark side moody without swallowing all the color. I like a touch of negative space too, even if it is only a sliver near the sidewall or a thin strip left bare between two blocks. That tiny gap keeps the set from looking heavy.
This design needs a steady hand and a smooth surface. Any bump under color-block art shows up fast, especially under glossy top coat. Striping tape, gel paint, and a fine liner brush are the tools that get it done cleanly. If your tech freehands everything, ask to see a sample first.
Wear-wise, this set holds up better than you might expect because the color is spread across the nail rather than concentrated only on the free edge. Chips still show on dark corners, though, so cap the tips well and avoid using your nails as package openers. Yes, I know. We all do it anyway.
6. Rosy Nude Base With Dark Cherry Aura Centers
Unlike a full ombré, aura nails keep the deepest color floating in the middle of the nail. That one change gives the whole set a softer, almost lit-from-within look.
On a rosy nude base, a dark cherry center looks rich and slightly smoky. The pink around the edges acts like a frame, so the coffin shape stays visible even though the strongest color sits away from the tip. If you have ever wanted a moody set that still feels airy, this is one of the best ways to get there.
Aura nails can be done with an airbrush, blooming gel, or a sponge, though the cleanest version usually comes from an airbrush. The cherry pigment should stay concentrated at the center and fade out before it reaches the sidewalls. If the dark shade spreads too far, the nail starts reading as a blotchy ombré instead of a controlled aura.
Who is this best for? People who like bold color but do not want hard lines, French tips, or intricate hand painting. Medium coffin works well. Long coffin looks even better because the floating center has more room to breathe. I would skip matte here. Shine gives the color that subtle depth people notice when your hands move.
7. Soft Pink Marble With Black Ink Veining
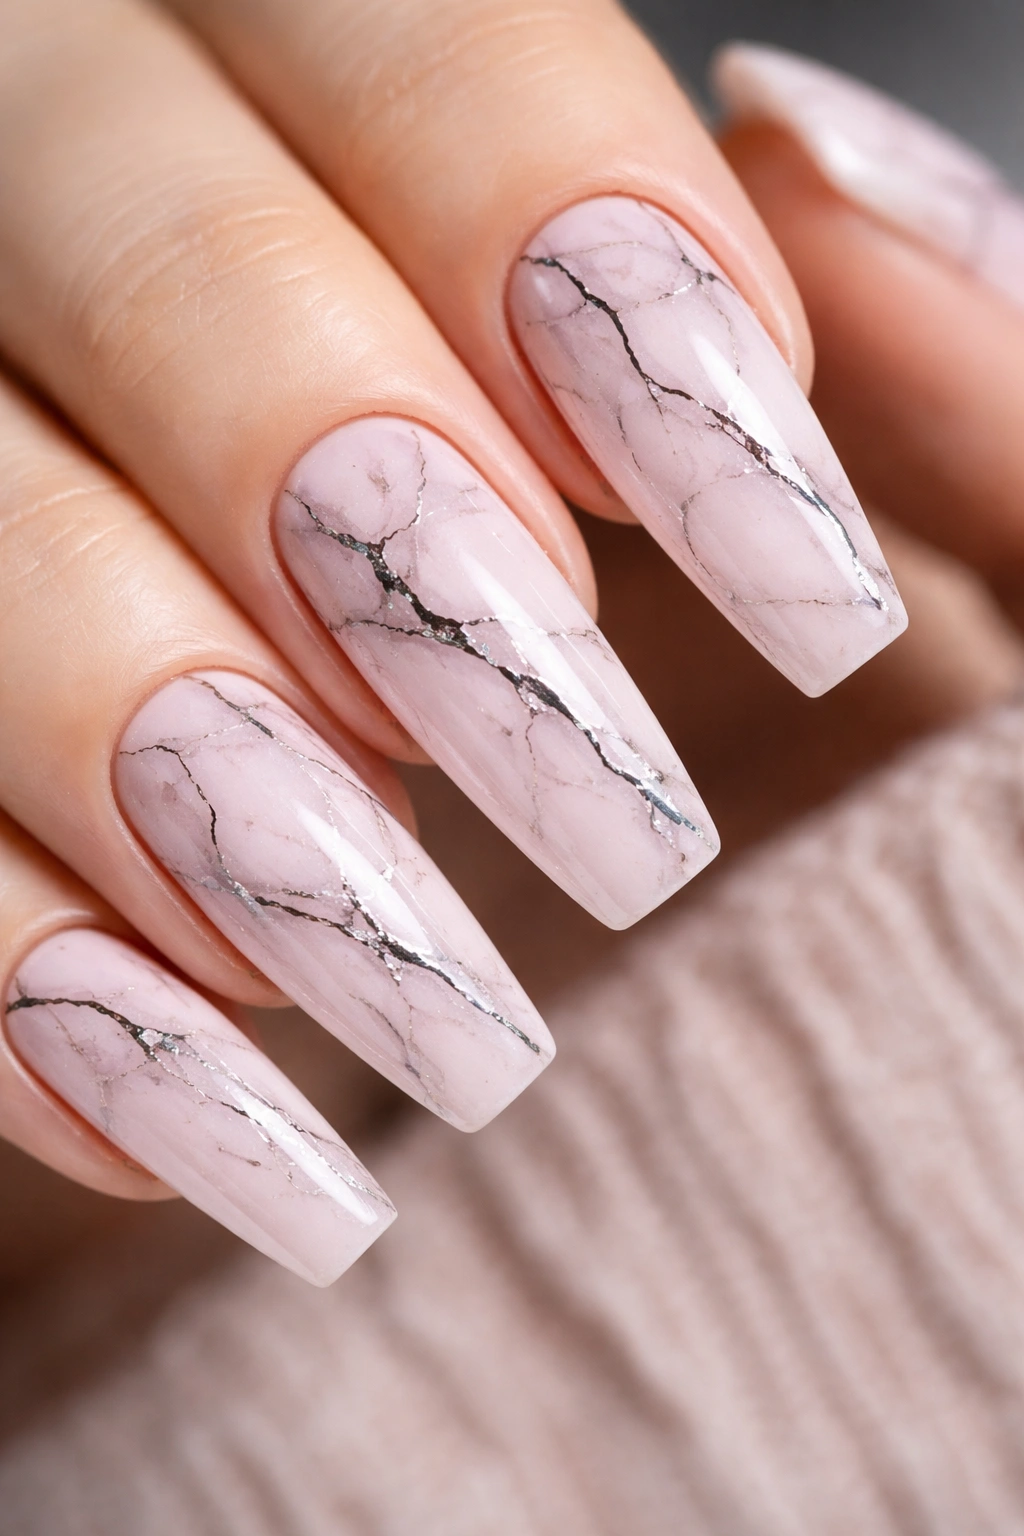
Marble can get messy fast. On coffin nails, the fix is to keep the base pale and the veining thin, almost like spilled ink over rose quartz.
A soft pink marble set with black veining gives you that dark contrast without covering too much of the nail. The pink keeps the design open. The black lines add tension and shape. Tiny touches of silver foil or smoky gray wash can make it look more layered, though I would use them sparingly.
How the Marble Stays Sharp Instead of Muddy
The prettiest versions are usually built in sheer layers. A milky pink gel goes down first. Then a blooming gel or a small amount of alcohol ink creates those feathery veins. Black should never dominate more than about a quarter of the nail surface, or the marble starts looking cracked and heavy.
Quick design guide
- Best pink: milky blush or translucent rose
- Best dark detail: black or deep charcoal veining
- Optional extra: one or two slivers of silver foil
- Best finish: gloss, always
This set looks strongest when no two nails are marbled in the exact same pattern. Real stone does not repeat itself, and nail art should not either. Controlled irregularity is the point.
Ask for fine veins that branch and fade, not thick black lines drawn like lightning bolts.
8. Bubblegum Pink Base With Midnight Navy Celestial Art
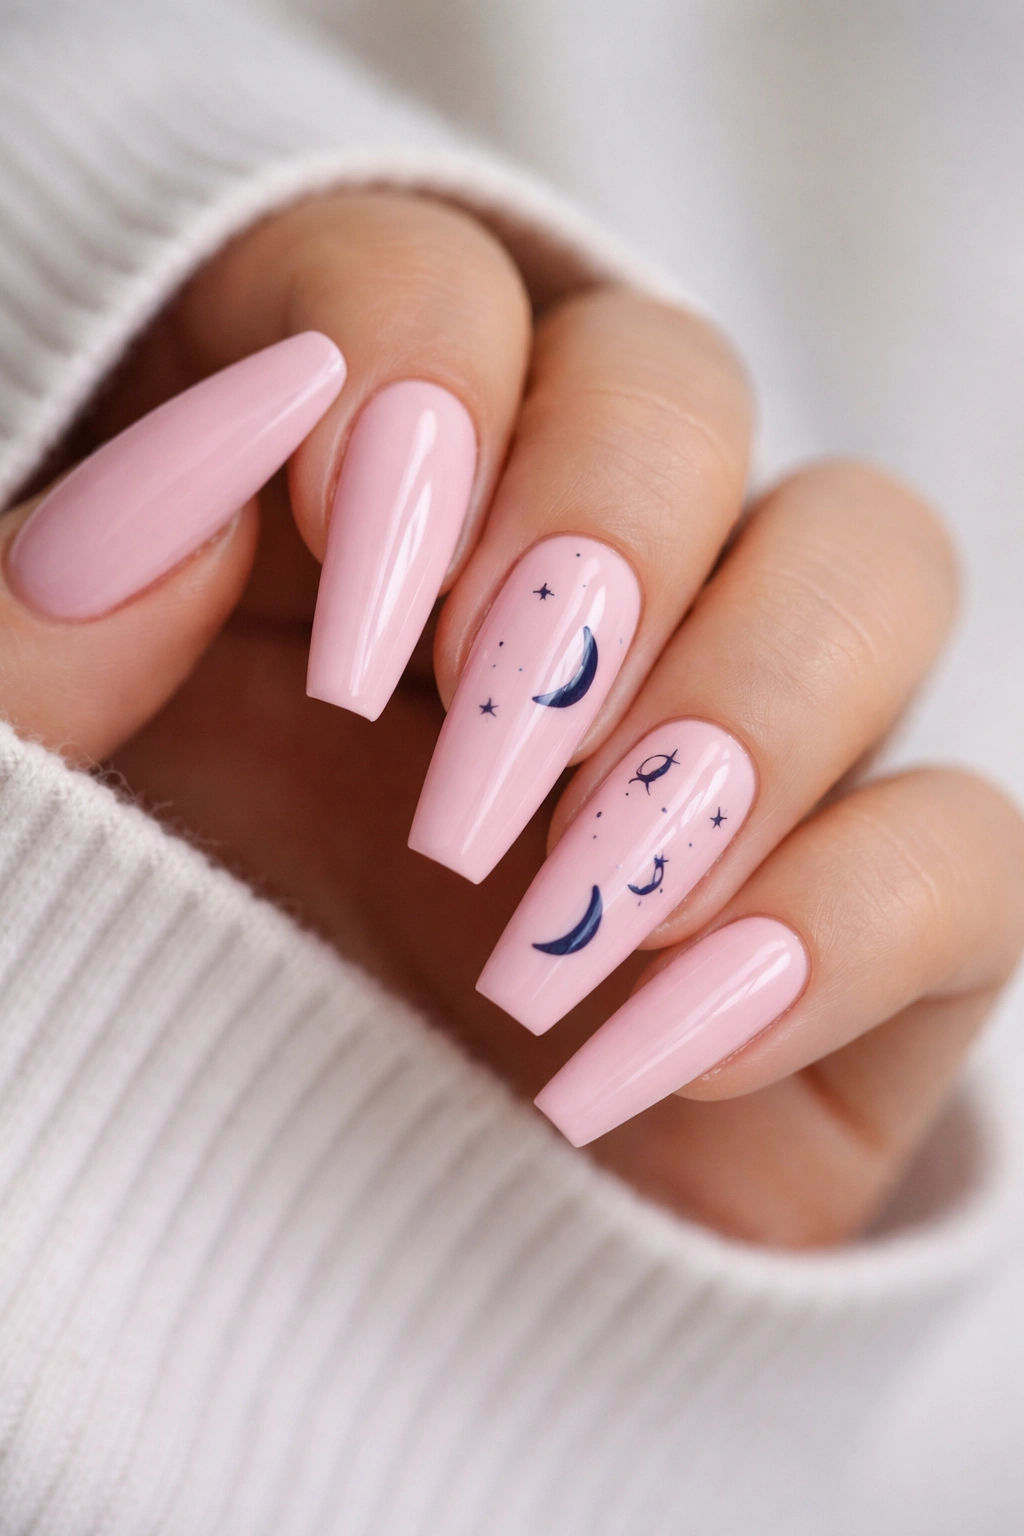
Navy is the underused dark shade in nail design. It gives contrast, it reads deep, and it does not hit as hard as black against a bright pink base.
Bubblegum pink with midnight navy celestial art leans playful without getting childish. Picture tiny stars, crescent moons, a few dots scattered like a small constellation, maybe one nail with a navy French tip and silver starbursts. On coffin nails, the long flat tip gives those small details enough space to stay crisp.
Placement is everything. If every nail has moons, stars, dots, and glitter, the design gets noisy. Keep two or three nails simple—maybe a plain bubblegum base or a navy micro-French—and let the art sit on the others. That spacing makes the set easier to read from a normal distance.
I especially like this design on medium-length coffin nails with a glossy finish. Long nails can handle it too, but the art should stay fine-lined. Chunky celestial decals can cheapen the look fast. Hand-painted navy details or slim stamping plates usually give a cleaner result. If you want one metallic accent, silver suits this set better than gold because it matches the cooler pink-navy temperature.
9. Dusty Pink Base With Espresso Tortoiseshell Tips
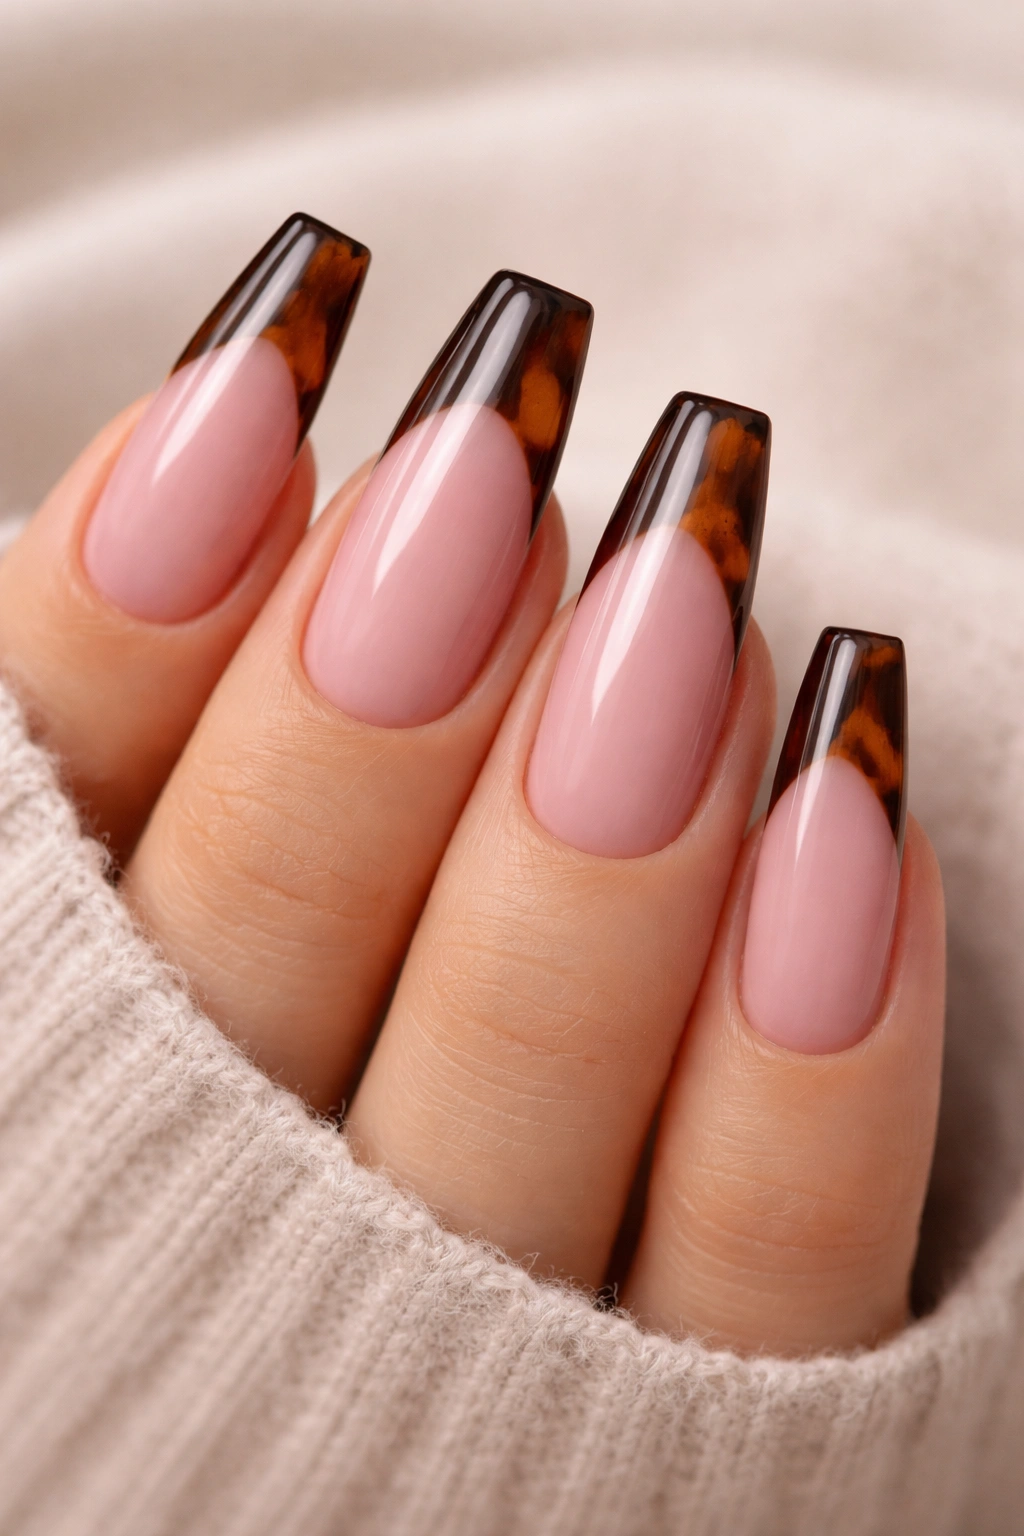
Can tortoiseshell work on coffin nails without turning into a full-on retro costume piece? Yes—if you keep it on the tips.
A dusty pink base with espresso tortoiseshell French tips gives you the warmth of amber and brown without covering the whole nail in pattern. The pink base creates breathing room, while the tip carries all the movement and depth. Because tortoiseshell already has layered color, it looks best when the rest of the nail stays calm.
Keep the Pattern at the Edge
The tortoiseshell effect usually comes from translucent caramel, honey, and dark brown gel dabbed in uneven patches, then softened under a jelly layer. On a coffin tip, that layering creates depth without needing extra texture. Ask for an espresso outer edge to sharpen the shape and keep the tip from looking blurry.
One thing I would avoid is pairing tortoiseshell tips with heavy gems or glitter. Tortoiseshell already has enough visual motion. Add more, and the eye does not know where to land. A single glossy finish is enough.
This set suits warmer pinks best—dusty rose, muted peach-pink, beige pink. Cooler bubblegum shades can make the brown look disconnected. Keep the coffin length medium or long so the tip has room for at least two visible color layers.
10. Neon Pink With Matte Black Drip Art
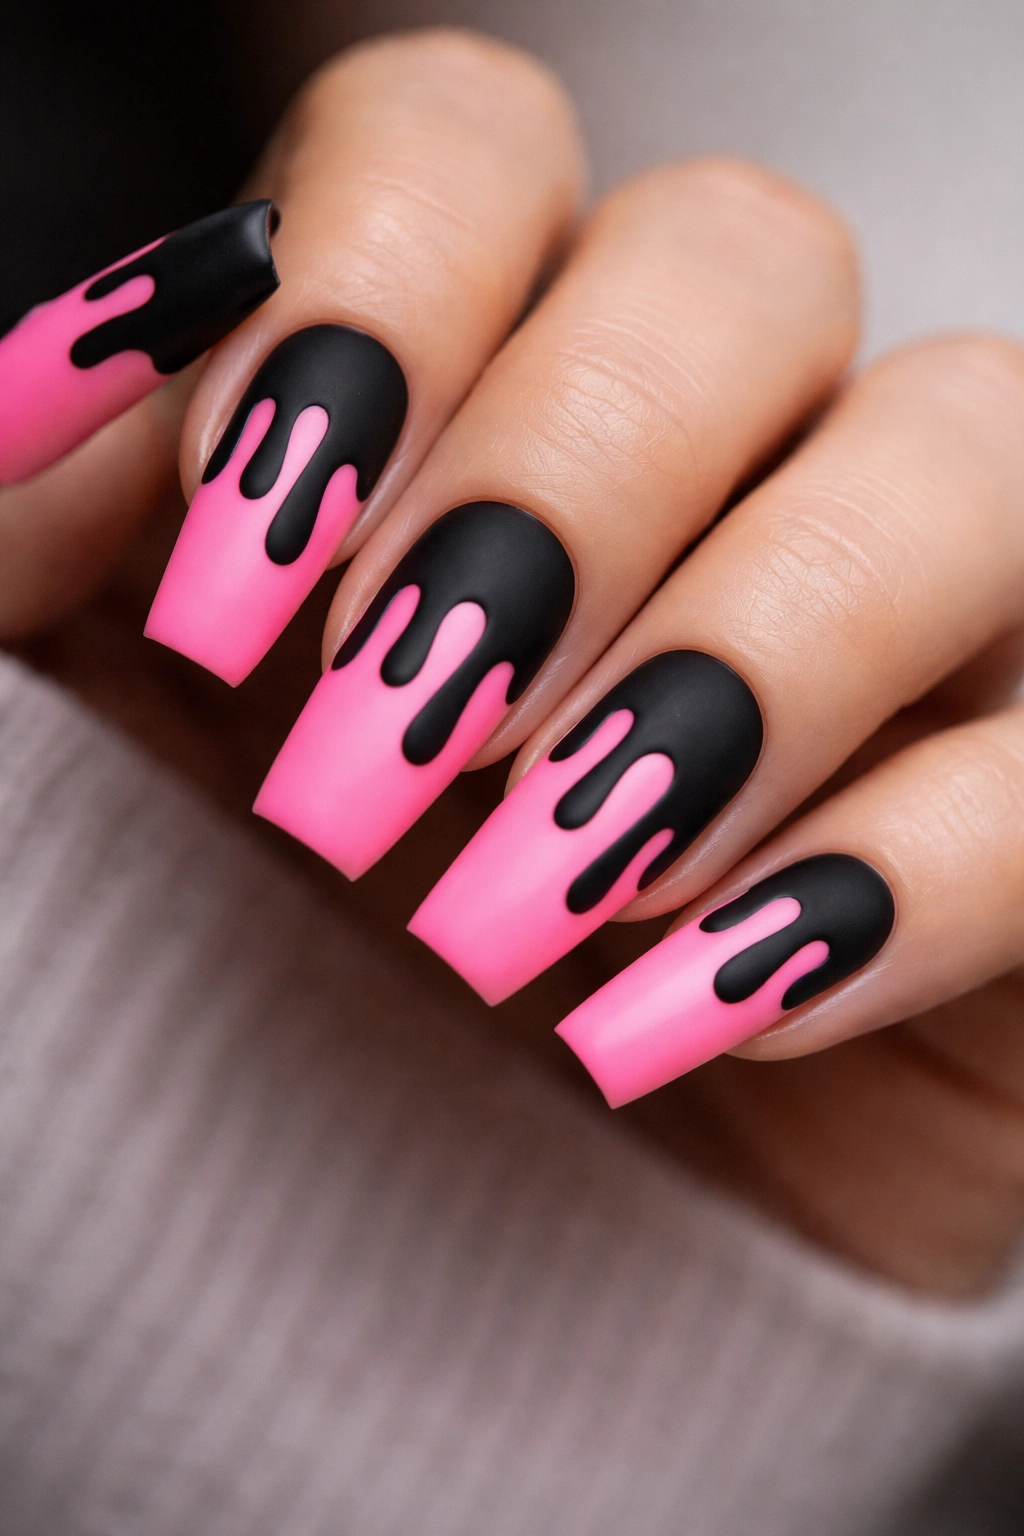
This set looks like it belongs under loud music and dim light. Neon pink supplies the charge. Matte black drips make it feel almost graphic-novel dark.
The reason the design works is the finish contrast. Neon shades already throw light back at you. Matte black absorbs it. That push-pull gives the drips their shape without needing extra outline work.
Quick facts before you book it
- Use a full neon pink base on every nail or on 8 out of 10 nails.
- Keep the black drips irregular, with some stopping halfway and others reaching closer to the tip.
- Choose medium coffin if you want wearability; long coffin gives the drips more room.
- Seal the matte black carefully, because rough matte surfaces can pick up makeup and lint.
I would skip this set if you want something office-neutral. No point pretending otherwise. It is bold, a little rebellious, and best when you lean into that energy rather than trying to soften it with rhinestones or florals.
11. Mauve and Gunmetal Diagonal Split Nails
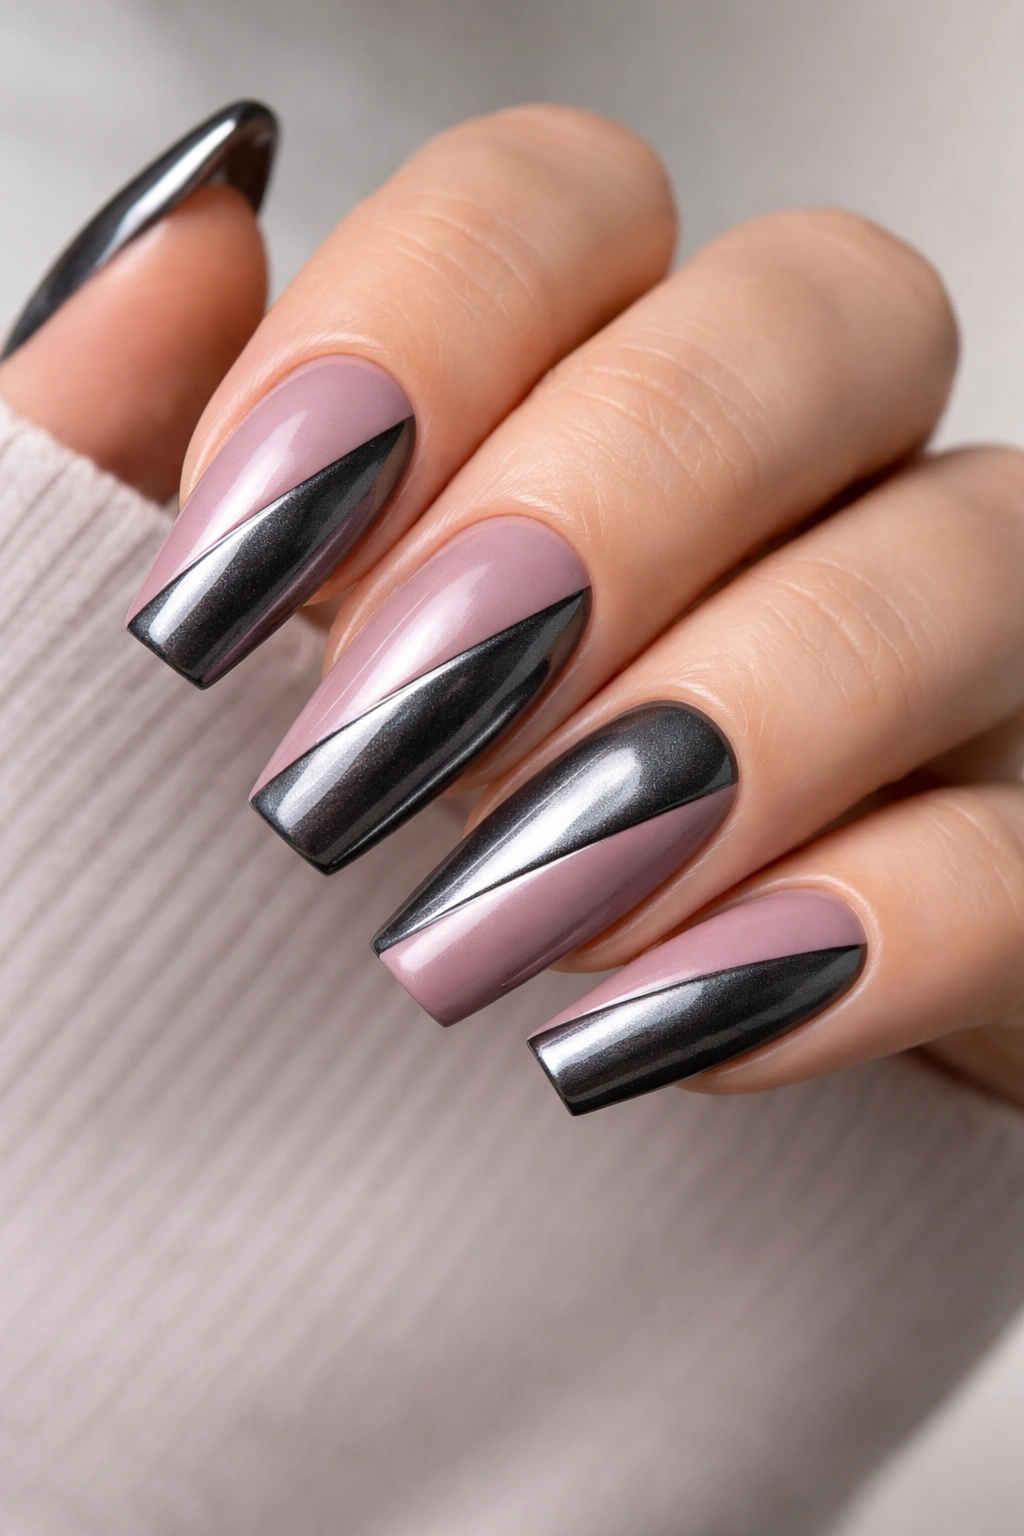
Gunmetal has a cold, steel-like sheen that feels sharper than silver and less flashy than chrome. Pair it with mauve, and you get a dark pink set with a metallic edge that still feels grown up.
The diagonal split is what sells it. A straight half-and-half line can look flat on coffin nails. Cut the color on an angle—from one side near the cuticle down toward the opposite side at the tip—and the nail suddenly looks longer. That line mirrors the taper of the shape and keeps the whole set moving forward.
Mauve matters here more than people realize. A pale baby pink can make gunmetal look harsh. Mauve has enough gray in it to bridge the two sides. You can use metallic gel, chrome over black gel, or a gunmetal cat-eye polish flattened into a simple reflective panel. All three work, though chrome gives the cleanest split.
I like this look best when every nail follows the same angle. If one nail slants left and the next slants right, the set starts to feel busy. Consistency gives it backbone. Keep embellishment minimal—a single thin silver stripe between the two colors if you want extra separation, and that is enough.
12. Pink Jelly Nails With Dark Orchid Encapsulated Glitter
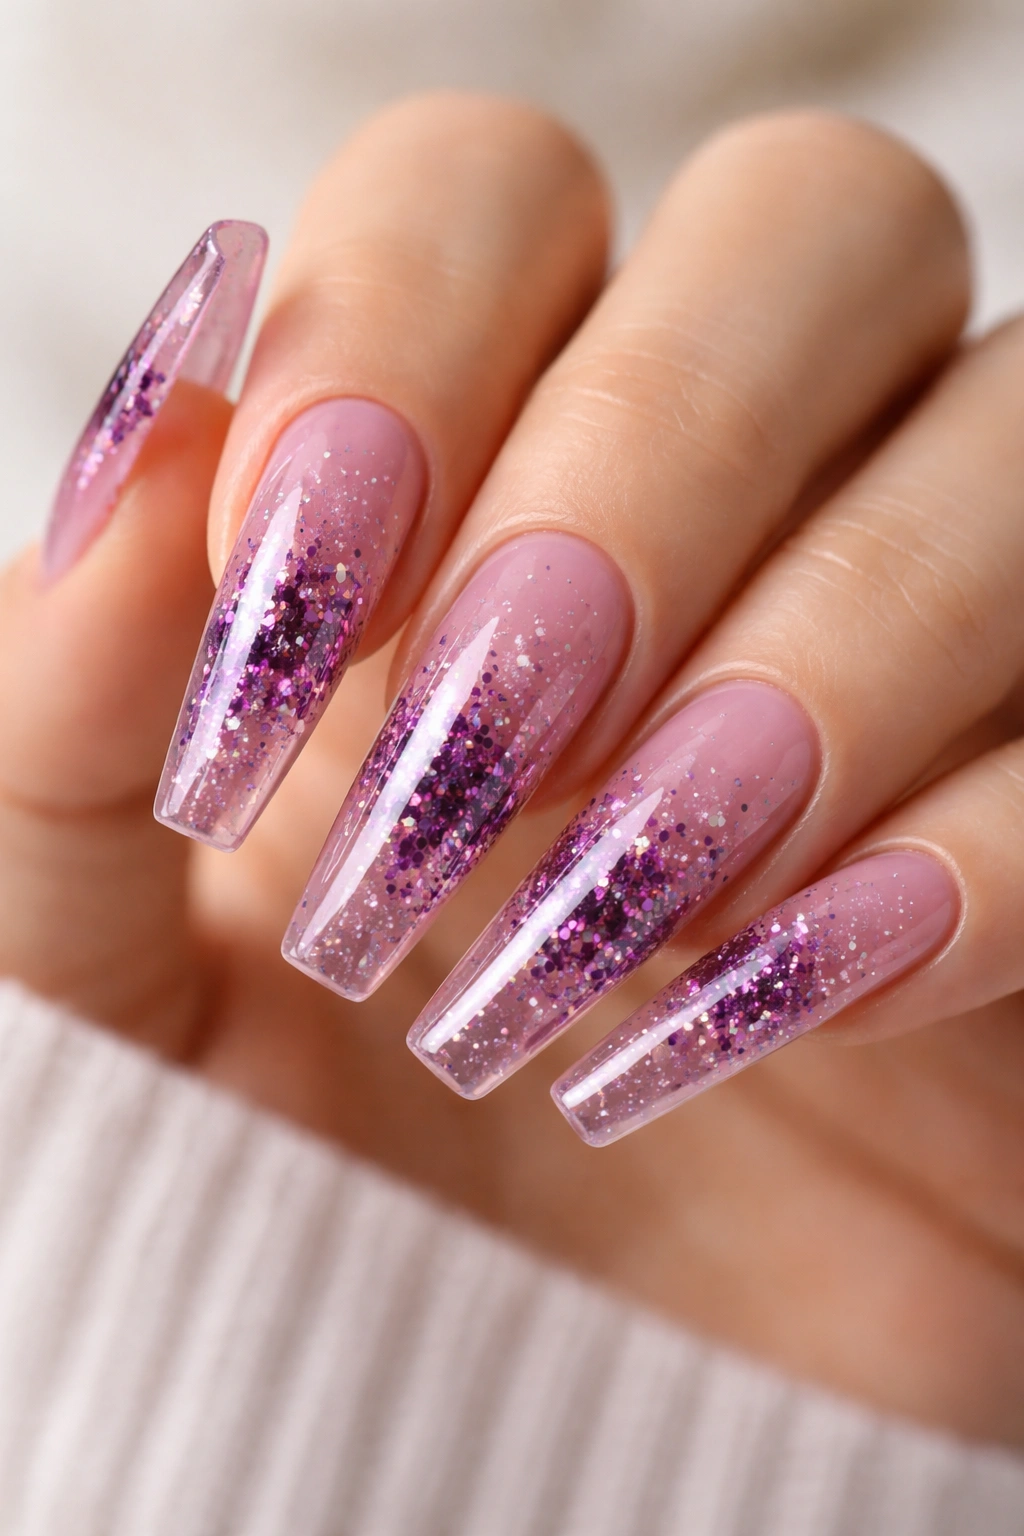
Unlike an opaque acrylic set, jelly nails have depth. Light passes through the pink layer, catches whatever sits underneath, and gives the manicure that glassy, candy-shell effect.
A translucent pink jelly base with dark orchid glitter encapsulated inside the nail creates a bold look without thick surface texture. The glitter sits suspended between layers of clear or pink-tinted builder gel, so it looks like it is floating. Dark orchid is the sweet spot here—deeper than magenta, softer than black-purple, and rich enough to show through the jelly overlay.
This design needs length. Long coffin nails give the encapsulated pieces room to spread and keep the nail from looking cramped. Medium length can work if the glitter is fine and sparse. Chunky glitter on a short nail tends to bunch up and lose the floating effect.
I would also be picky about glitter shape. Fine hex glitter, micro flakes, or small irregular pieces look cleaner under jelly than big stars or hearts. Keep the top surface smooth, high-gloss, and fully sealed. If you can feel glitter through the top coat, the encapsulation was not done well and the set will snag your hair within two days.
13. Blush Acrylic With Dark Chocolate Croc-Print Tips
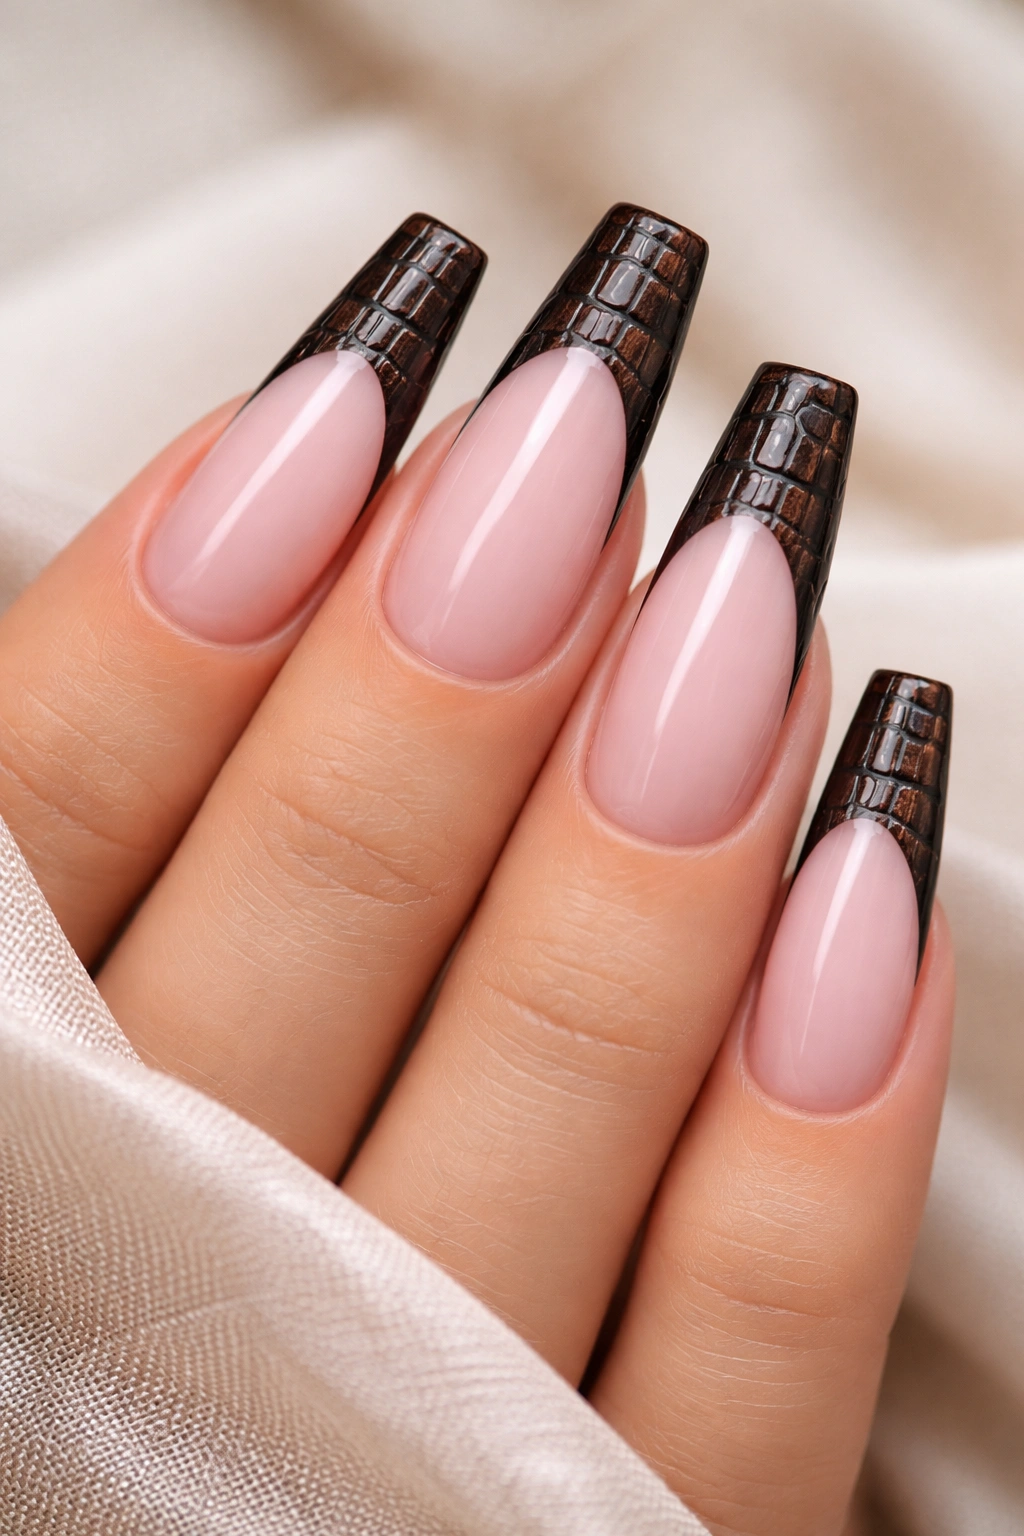
Black croc tips can look hard. Dark chocolate croc tips look richer and a little less predictable.
On a blush acrylic base, that embossed reptile pattern adds texture right where coffin nails can handle it best—at the flat tip. The pink keeps the set light through the nail bed, while the chocolate tip gives weight and pattern without turning the entire manicure into costume art.
Where the Texture Should Sit
Croc print works best as a raised or glossy pattern over a matte dark brown base, or the reverse: matte pattern over a glossy base. The finish contrast is what makes the scale effect visible. Keep the texture on the top third of the nail only. Once it creeps too far toward the middle, the set starts to feel crowded.
Best way to wear this design
- Base color: blush acrylic or milky rose
- Dark shade: chocolate, espresso, or cocoa brown
- Best finish combo: matte base with glossy croc pattern
- Best length: medium-long coffin
This is one of those designs that looks sharper with clean styling around it. No extra glitter. No cartoon art. Let the texture do its job.
Ask for the croc pattern to vary slightly across nails so it looks like texture, not wallpaper.
14. Ballet Pink Base With Black Crystal Cuticle Lines
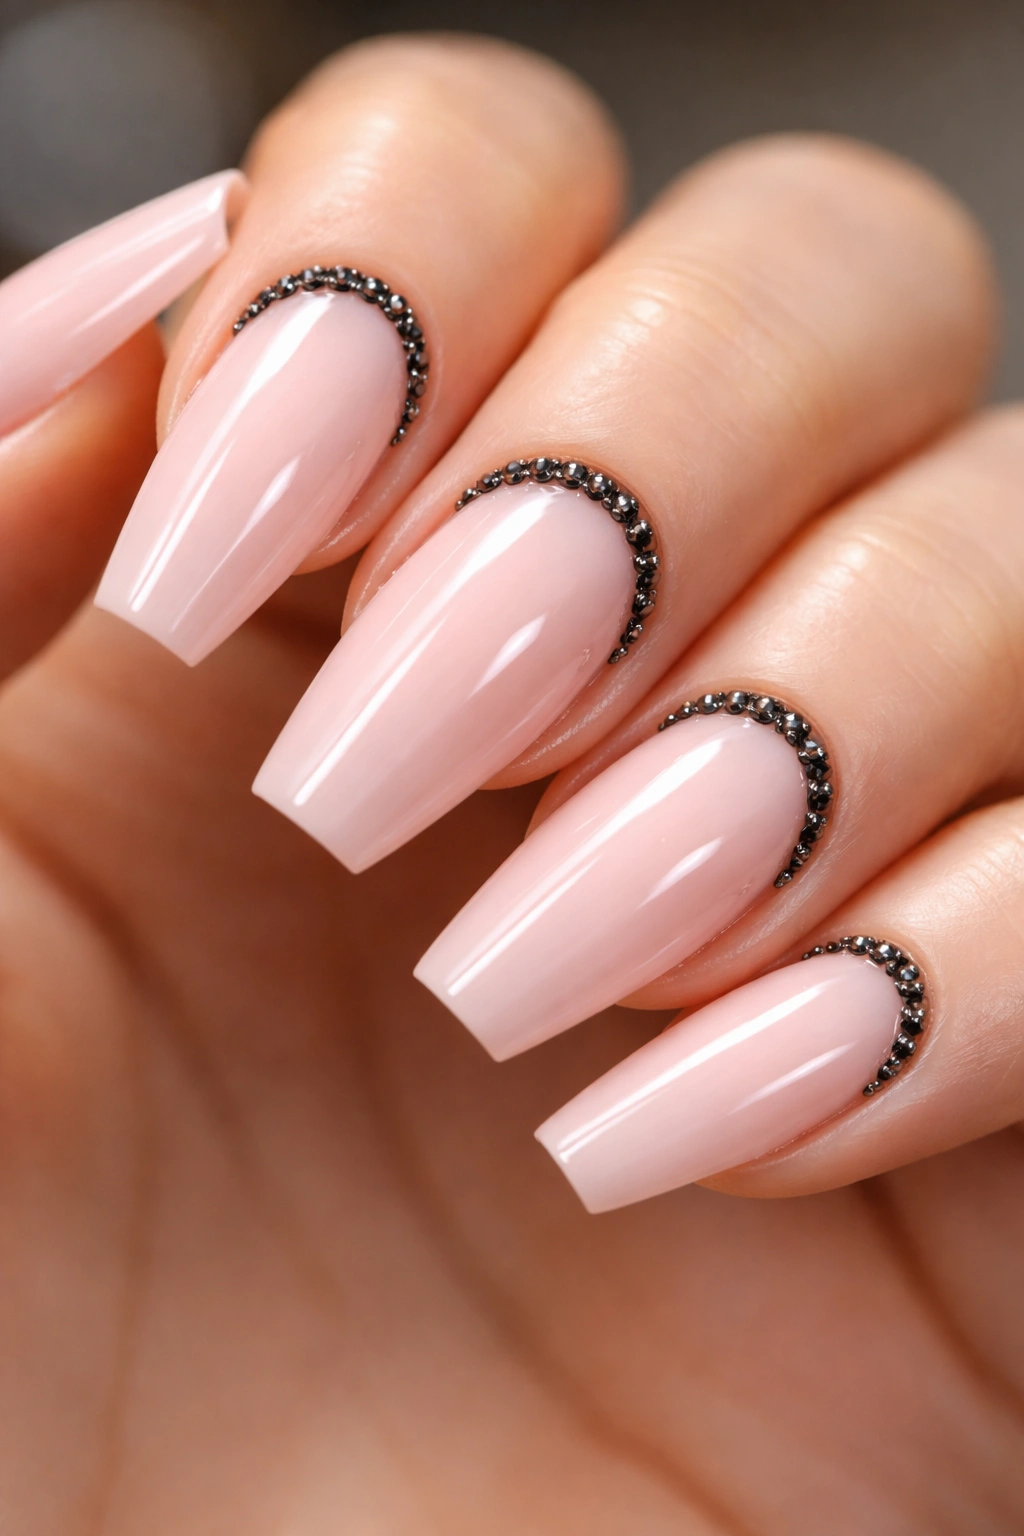
This is the closest thing to wearing jewelry on your nails.
A ballet pink base with a black crystal line curving around the cuticle gives you contrast, shine, and a dark accent without covering the nail in deep color. The base stays clean and soft. The black stones—or black crystal caviar beads mixed with tiny rhinestones—trace that half-moon area and pull the eye straight to the cuticle.
Placement decides whether this looks polished or tacky. The stones should sit tight against the cuticle line, not halfway down the nail. Small sizes matter too. SS5 and SS7 stones usually look cleaner than chunky gems on coffin nails, unless you are building a full statement set for one night out and do not care what happens when you wash your hair later.
This design is less durable than plain polish art. No way around it. Stones near the cuticle catch more friction from pockets, gloves, shampooing, and skin care. A good nail tech can anchor them with builder gel and top coat around the base, but you still need to baby them more than a standard painted set.
Still, for photos, events, dinners, or any moment when you want your manicure to look like it was planned down to the last detail, this one earns attention fast.
15. Magnetic Plum Velvet Nails With Pink Framed Edges
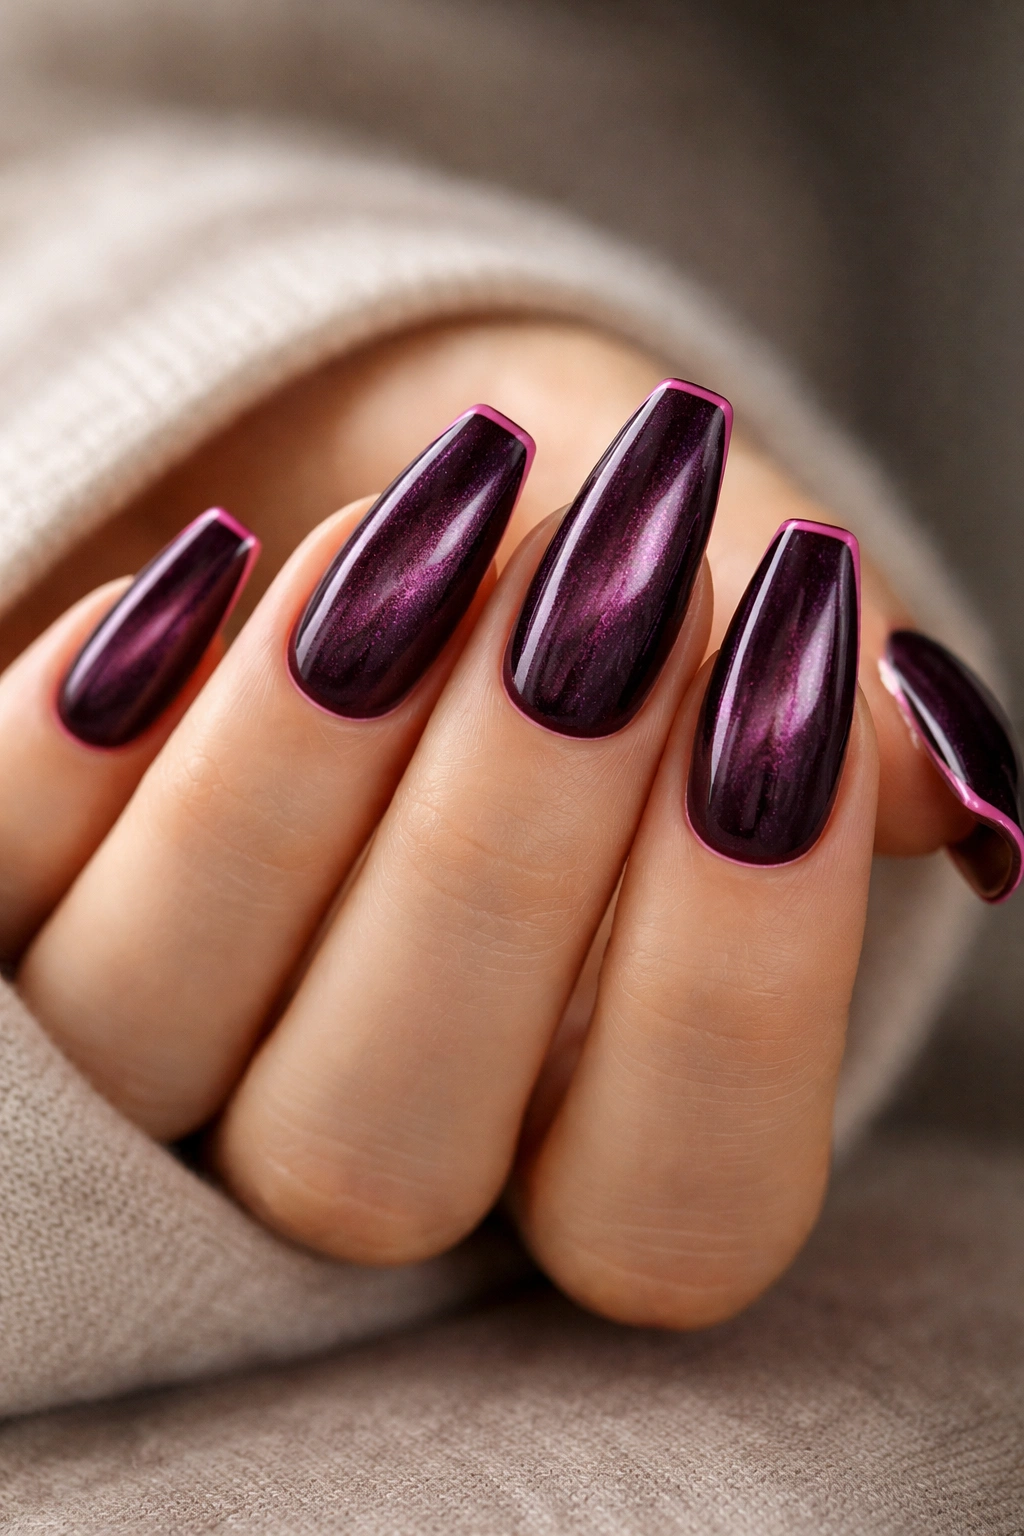
If you want the set people stare at when you reach for your phone, this is the one.
Magnetic velvet nails use cat-eye gel polish and a magnet to pull reflective particles into a soft band of light. In deep plum, the effect looks plush and shadowy, almost like fabric under low light. Add a thin pink frame around the outer edge of each coffin nail, and the whole design gets that sharp pink-and-dark contrast without losing the velvet illusion.
How to Order It Without Losing the Effect
The pink border should stay slim—about 1 millimeter around the sidewalls and tip. Any thicker, and it starts fighting with the magnetic center. The plum needs to be deep enough to read dark even before the magnet hits it. I would avoid pale lavender cat-eye shades here; they do not deliver the same punch.
This design looks strongest on medium-long to long coffin nails, because the framed edge helps emphasize the taper. Gloss top coat is non-negotiable. Matte kills the movement in magnetic polish and flattens the whole point of the design.
You can wear this set with all 10 nails matching, which is rare for bold nail art. It has enough motion built into the finish that it does not need extra accent nails to stay interesting.
Making Pink and Dark Coffin Nails Last Longer
Dark polish tells on you fast. The first chip shows at the tip, the first lift shows near the cuticle, and a rough file line along the sidewall suddenly looks twice as obvious.
A few maintenance habits stretch the life of bold coffin nails by several days:
- Use cuticle oil twice a day. Jojoba-based oil helps the enhancement flex a little instead of turning brittle.
- Wear gloves for dishwashing and heavy cleaning. Hot water and detergent dull top coat and loosen stone work.
- Apply a fresh clear top coat every 5 to 7 days if you are wearing standard polish or a non-gel top layer.
- Do not scrape labels, boxes, or stickers with the free edge. Coffin tips look strong, but they are still leverage points.
Refill timing matters too. Most medium coffin acrylic or builder-gel sets need maintenance around the 2- to 3-week mark. Longer nails, heavy 3D art, and encapsulated sets can need attention sooner if the balance shifts and the apex starts sitting too far forward as your natural nail grows.
One more thing. Dark shades stain the underside of free edges more easily than pale shades, especially if you cook with turmeric, handle self-tanner, or use strong hair color. A small nail brush and soap help. Skip metal tools under the nail unless you want to lift product from the hyponychium and create a whole new problem.
Final Thoughts
The best pink and dark coffin nails are not the ones with the most art packed onto each finger. They are the ones that know where the eye should land—at the tip, through the center, around the cuticle, or along the edge.
If I had to narrow the list to the strongest three, I would start with glossy black French tips for clean contrast, dark cherry aura nails for a softer moody finish, and magnetic plum velvet with pink frames for full drama. Each one uses the coffin shape in a smart way instead of treating it like a blank square.
Pick the design that matches how you actually use your hands. A manicure can look sharp in a photo and still drive you crazy by day three if the finish, length, or texture does not fit your life. Get the shape crisp, keep the color placement intentional, and pink plus dark will do the rest.
