

A tiny bow can change the whole mood of a manicure.
That sounds like a small claim until you see bow ballerina nails done well: a soft tapered shape, a crisp flat tip, and one detail that turns a plain set into something sweeter, sharper, and more memorable. Ballerina nails already have that long, elegant line that makes fingers look leaner. Add a bow—painted, sculpted, metallic, pearl-centered, whatever suits your taste—and the shape suddenly feels dressed up.
What I like about this style is how much range it has. You can go milky pink and quiet enough for work, or lean into coquette territory with ribbon art, pearls, and raised gel bows that sit on the nail like tiny fondant decorations. The difference between a set that looks polished and a set that looks cluttered usually comes down to placement, scale, and texture. A 6 mm charm on a medium-length ballerina nail can look top-heavy. A slim painted bow near the cuticle often lands better.
And there’s a practical side to all this. Long ballerina tips already have corners that can catch on knitwear, hair, and bag linings if the apex is weak or the free edge is too thin. Add a bulky charm in the wrong spot and daily life gets annoying fast. Good bow nails are not only cute; they’re built with some common sense.
A few designs do this better than others, and the sets below are the ones I’d actually save, book, and wear.
Why Bow Details Look So Good on a Ballerina Shape
Ballerina nails give bow art room to breathe. That flat tip matters more than people think. On almond nails, a bow can sometimes look squeezed toward the center because the point narrows too fast. On square nails, the bow has space, though the whole look can turn blunt if the length is short. Ballerina sits in the middle—soft sides, enough width across the end, and a shape that already feels a little dressed up.
Scale is the first thing I look at.
A bow should echo the nail shape, not fight it. On a short-to-medium ballerina set, painted bows, fine ribbon lines, or tiny metal charms tend to look cleaner than oversized 3D acrylic bows. Once the nail gets longer—think 14 to 18 mm past the fingertip—you can carry a larger bow without the design feeling heavy.
Texture matters too. A glossy nude base with one satin-finish bow has contrast. A matte taupe base with a matte bow reads soft and editorial. Chrome plus pearls plus glitter plus ribbons on every nail? That can drift into costume territory fast unless your nail tech has a disciplined eye.
I keep coming back to one rule: leave some nails quiet. Bow manicures almost always look stronger when two or three nails do most of the talking.
Choosing Length, Color, and Bow Placement Before You Book
Bring reference photos, though do not stop there. A good appointment starts with a few decisions that your inspo collage cannot make for you.
Pick the bow type first
Different bows wear in different ways:
- Hand-painted bows sit flat and snag the least.
- Raised gel bows give a soft sculpted look and feel smoother than metal charms.
- Metal bow charms give the sharpest detail, though they need stronger adhesion and smarter placement.
- 3D acrylic bows have the most drama, and they are the first ones I’d skip if you type all day.
Match the bow to your nail length
A short ballerina shape—around 8 to 12 mm past the fingertip—usually looks best with micro bows, line art, or one accent charm. Medium length can take a pearl-centered bow or small sculpted ribbon. Long sets can hold larger art at the center or tip, especially if the base color is calm and the rest of the nails stay restrained.
Decide where the bow should sit
Placement changes everything:
- Cuticle area looks neat and tends to last longer.
- Center placement grabs attention and photographs well from straight on.
- Near the tip feels playful, though it chips sooner if the tip takes daily impact.
- Off-center bows often look more expensive because the design feels intentional rather than stamped on.
Color does half the work. Blush, milky white, cream, pale blue, soft lavender, and nude are the easy winners. Black bows on nude can look sharper than pink on pink, especially if you want a cute set that still reads grown-up.
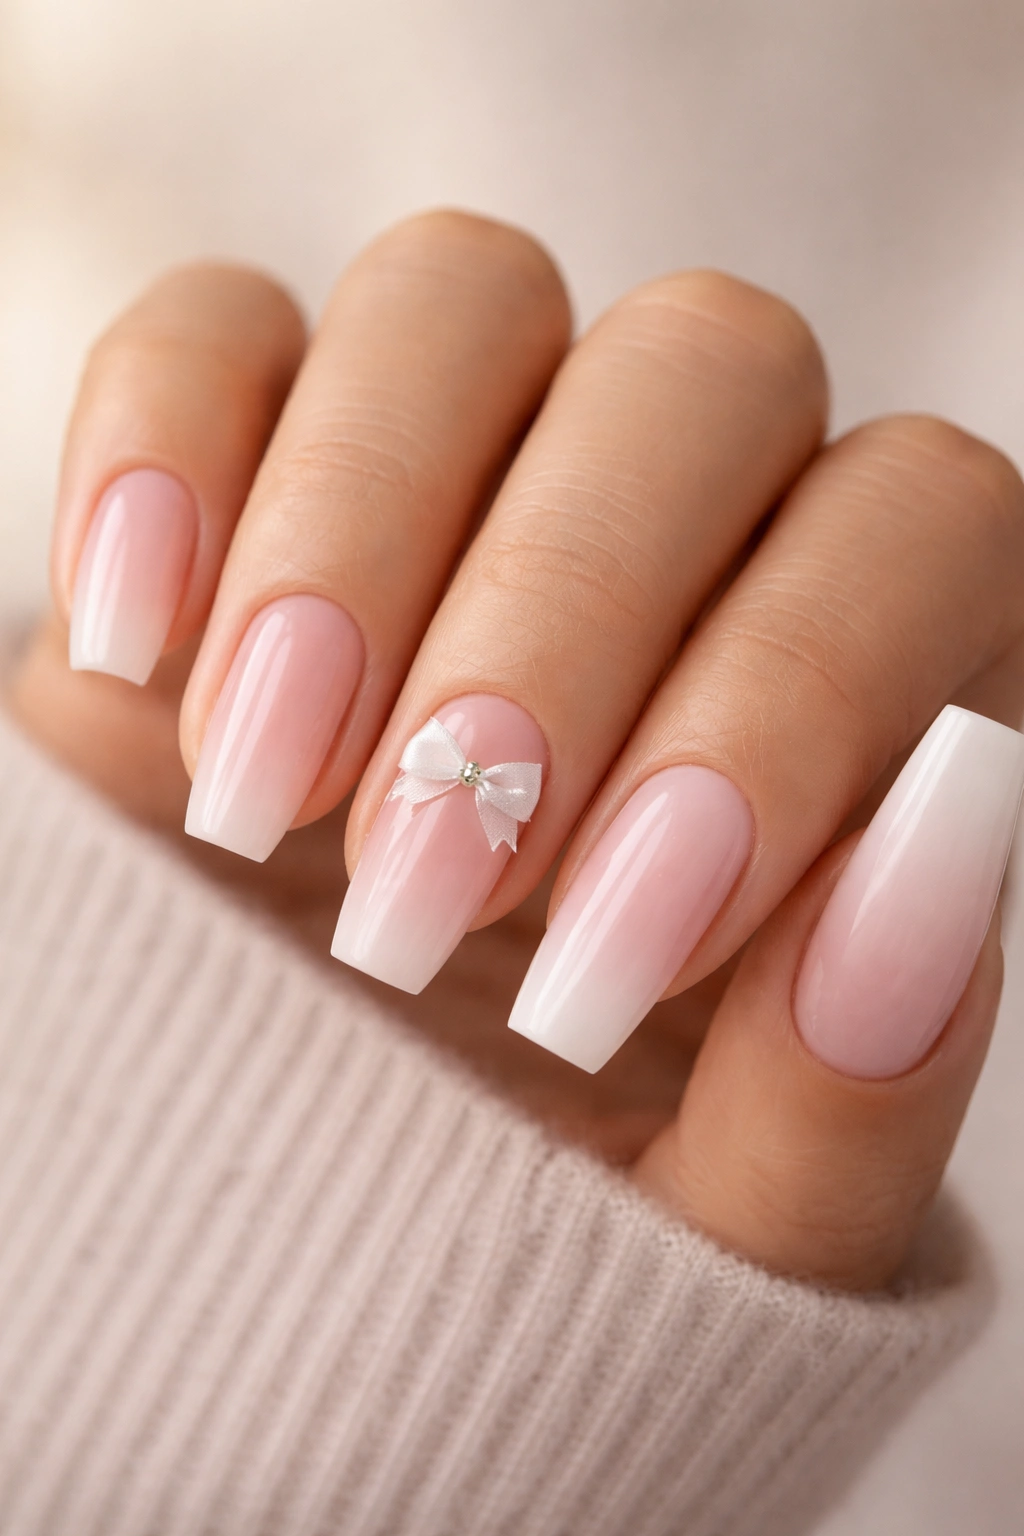
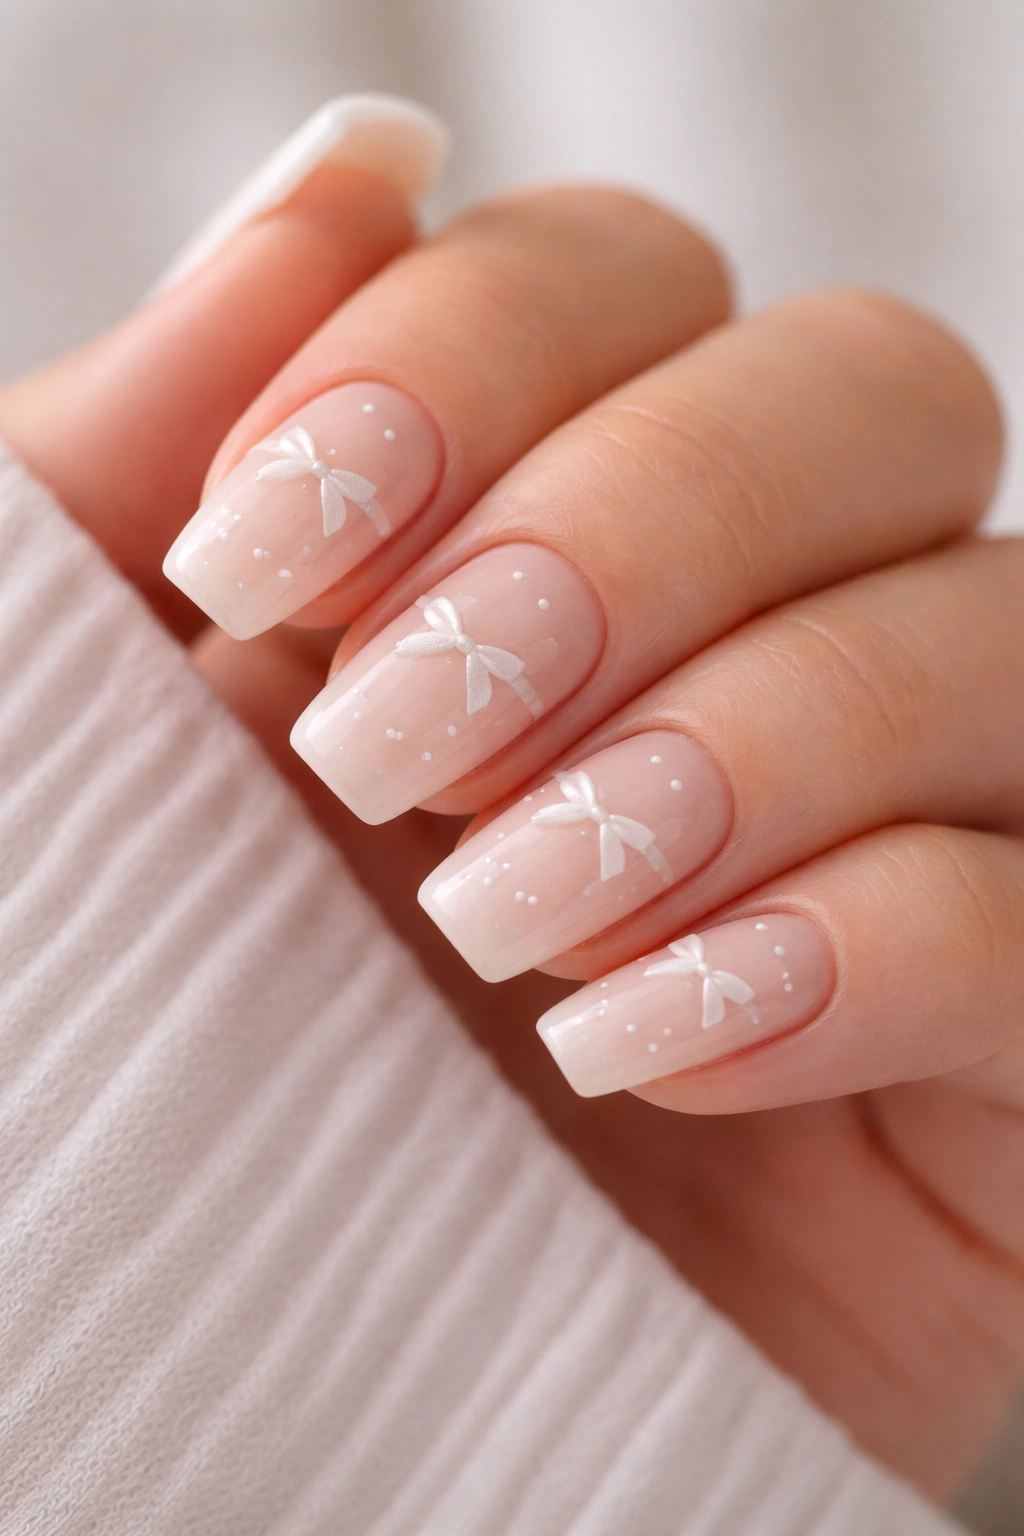
1. Milky Pink Ballerina Nails With Tiny White Bows
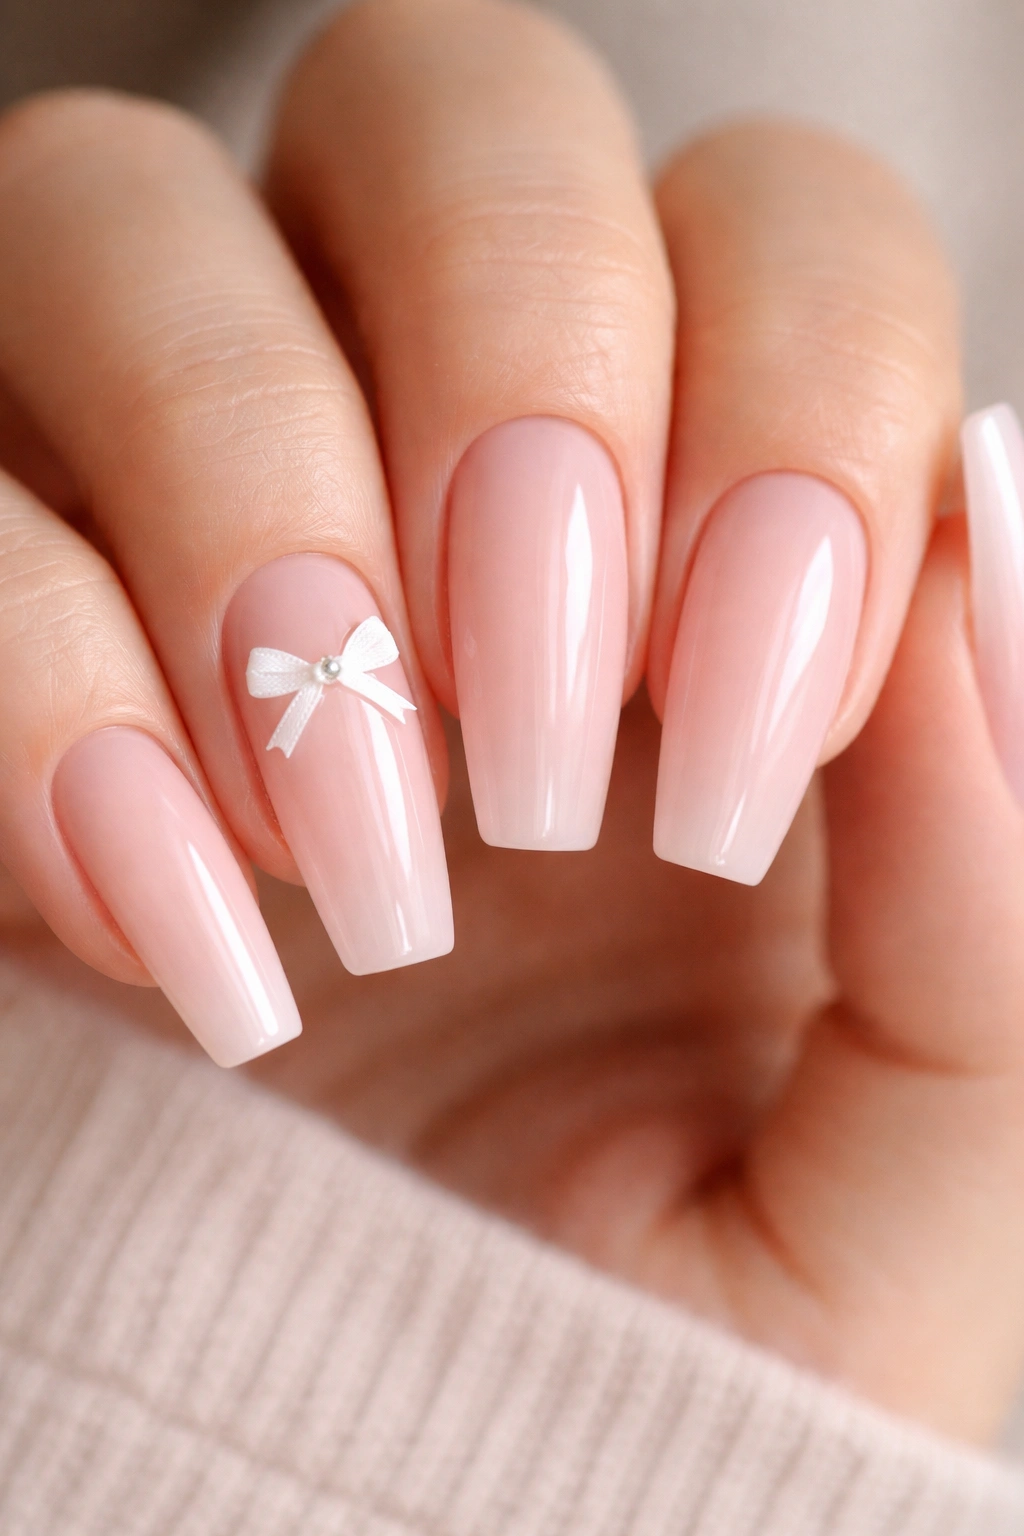
If you want the safest starting point, this is it. A milky pink base softens the hand, and tiny white bows add detail without turning the set into a costume.
Why this combo works
Milky pink has that semi-sheer, creamy look that hides grow-out better than an opaque baby pink. Ask for two thin coats over a sheer nude builder base so the free edge still peeks through a little. That translucency keeps the manicure from looking chalky. Then place white bow art on two accent nails—ring finger and thumb is my favorite split—using a fine liner brush around 5 to 7 mm wide.
A small pearl or silver bead in the center of each bow can work, though I’d keep it to 1.5 mm. Bigger than that, and the bow starts reading chunky against such a soft base.
Quick design notes
- Use a glossy top coat rather than matte; the syrupy shine suits milky pink.
- Keep the nail length in the short-to-medium range so the look stays sweet.
- Ask for ultra-thin white line work instead of thick cartoon ribbon loops.
- Leave at least six nails plain for balance.
Best move: pair this set with a slightly brighter blush on the nail bed than you think you need. Pale pink can wash out on some skin tones, while a warmer milk-pink keeps the hand alive.
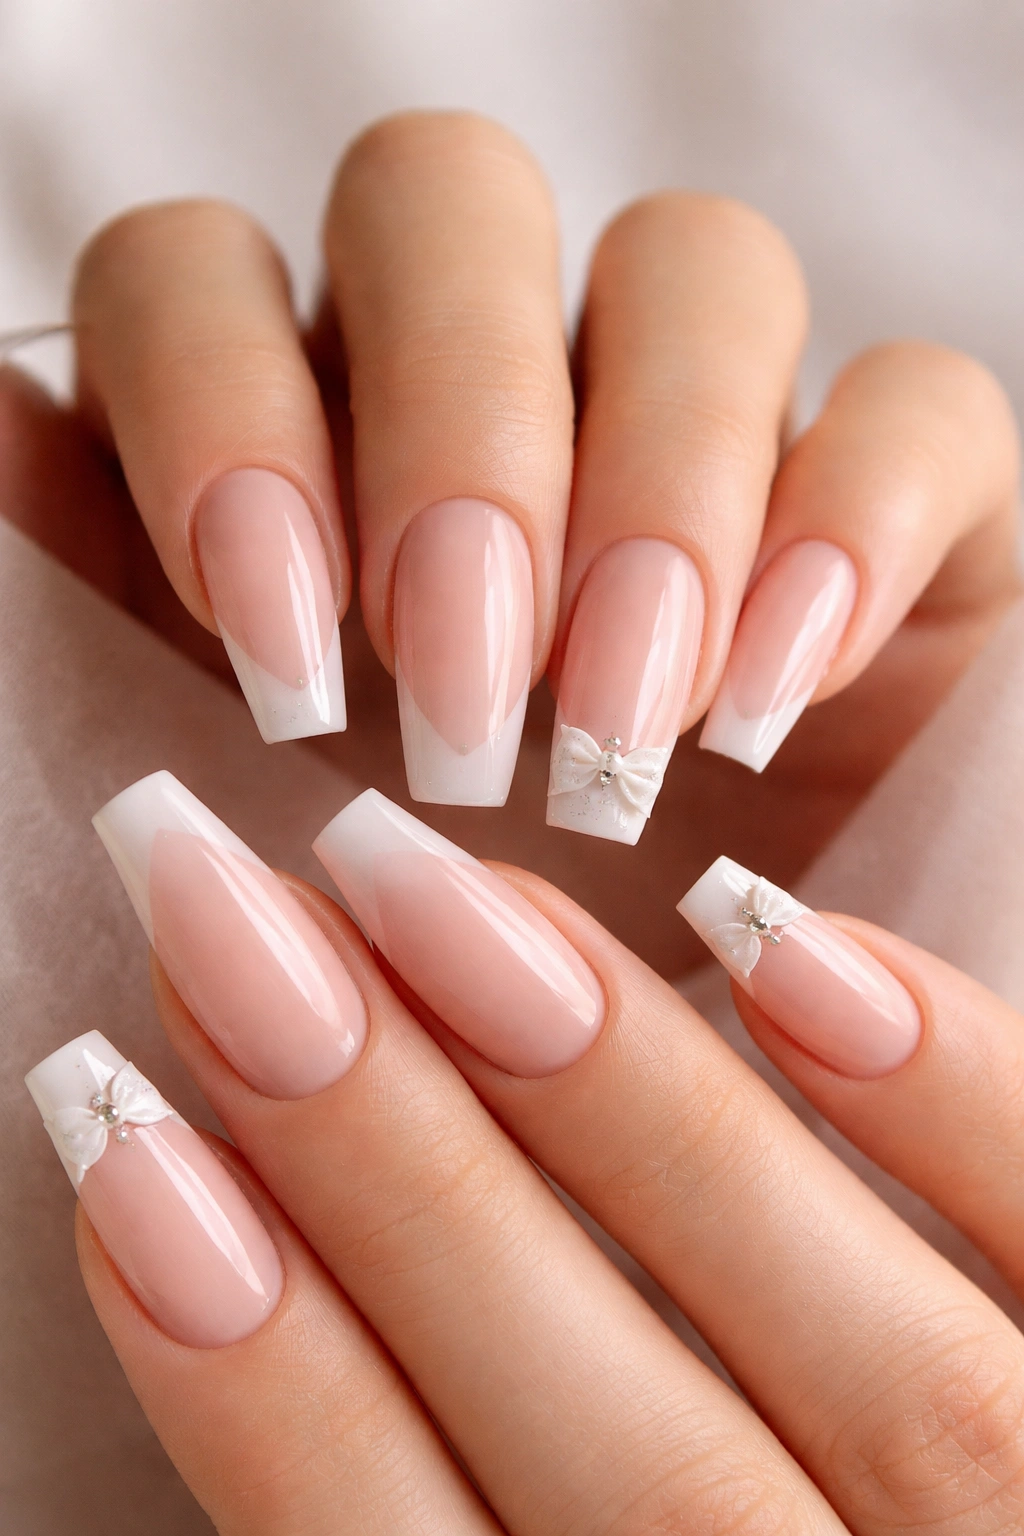
2. French Tip Ballerina Nails With Bow Charms at the Cuticle
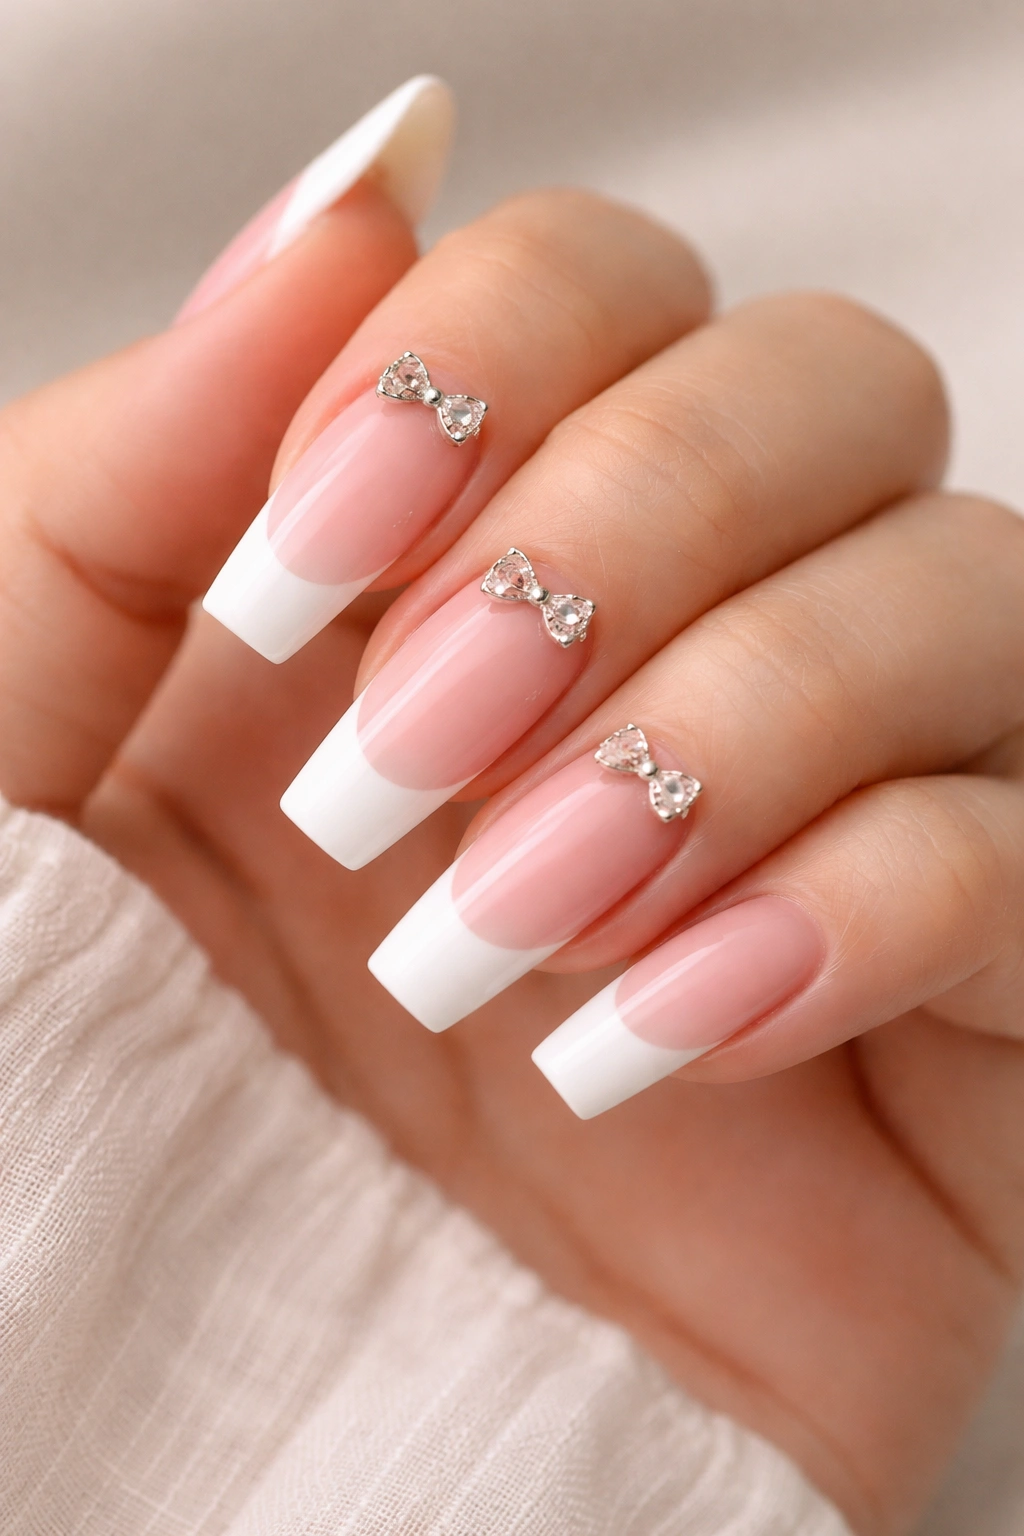
French tips do not need to be boring. Put a tiny bow charm near the cuticle and the whole manicure shifts from bridal-basic to something with personality.
The reason this design holds up is contrast. You’ve got the sharp smile line at the tip, then a second point of attention down near the base. Your eye travels the length of the nail, which makes the ballerina shape look longer. On a medium set, I’d go for a soft pink base, crisp white French tips about 3 to 4 mm deep, and silver or pearl bow charms placed low enough that they do not crowd the cuticle.
Placement matters more here than the charm itself. Set the bow about 2 mm above the cuticle line so the tech can seal around it with top coat and builder gel. Too low, and lifting starts early. Too high, and the bow floats awkwardly in the middle third of the nail.
One more thing: keep the charm count low. Two or three bows across both hands is enough. Once every nail gets a charm, the French tip loses its elegance and the set starts clicking on every keyboard you touch. I love this look for parties, dinner dates, engagement photos, even work if the bows stay small and the base stays clean.
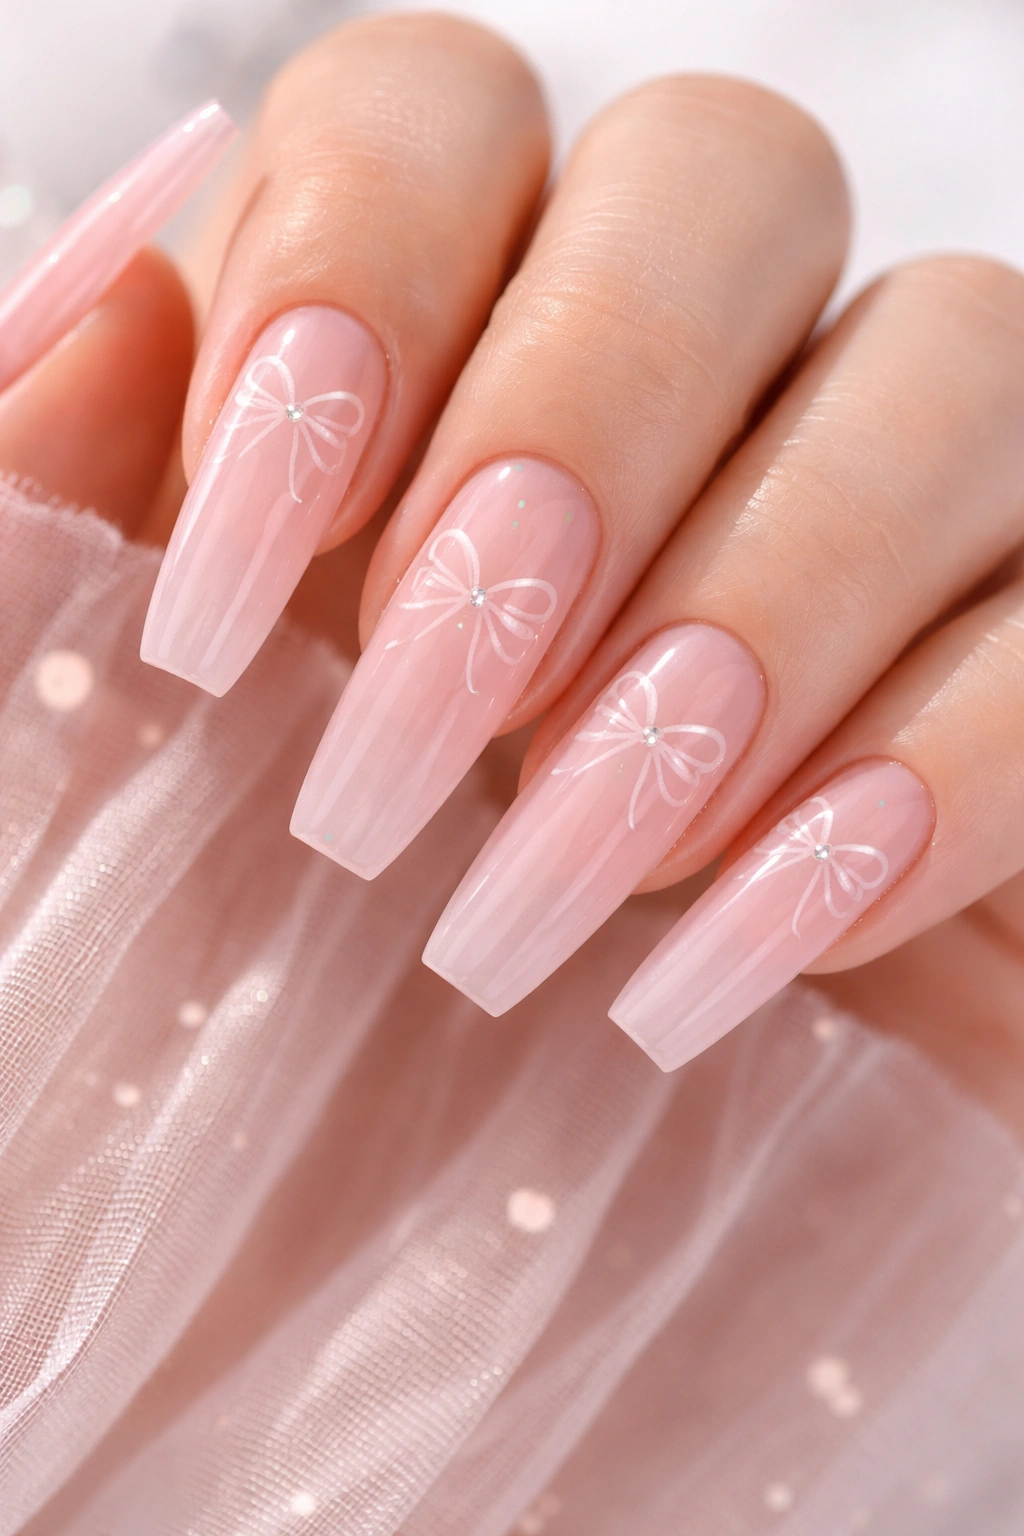
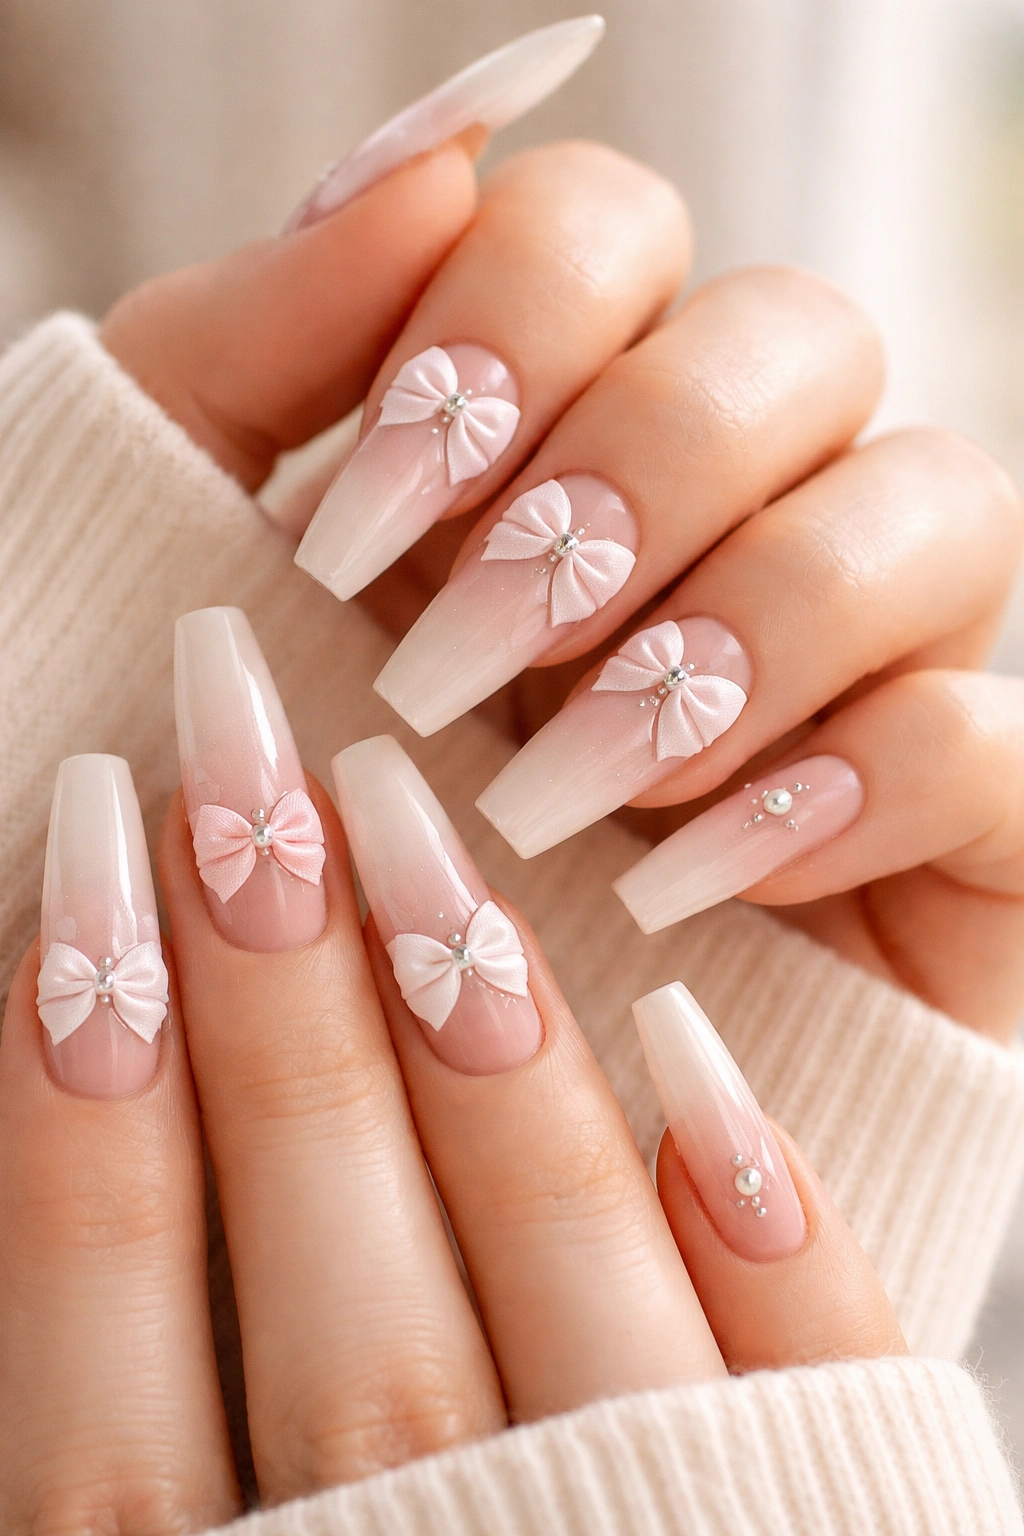
3. Blush Ombré Ballerina Nails With Pearl-Center Bows
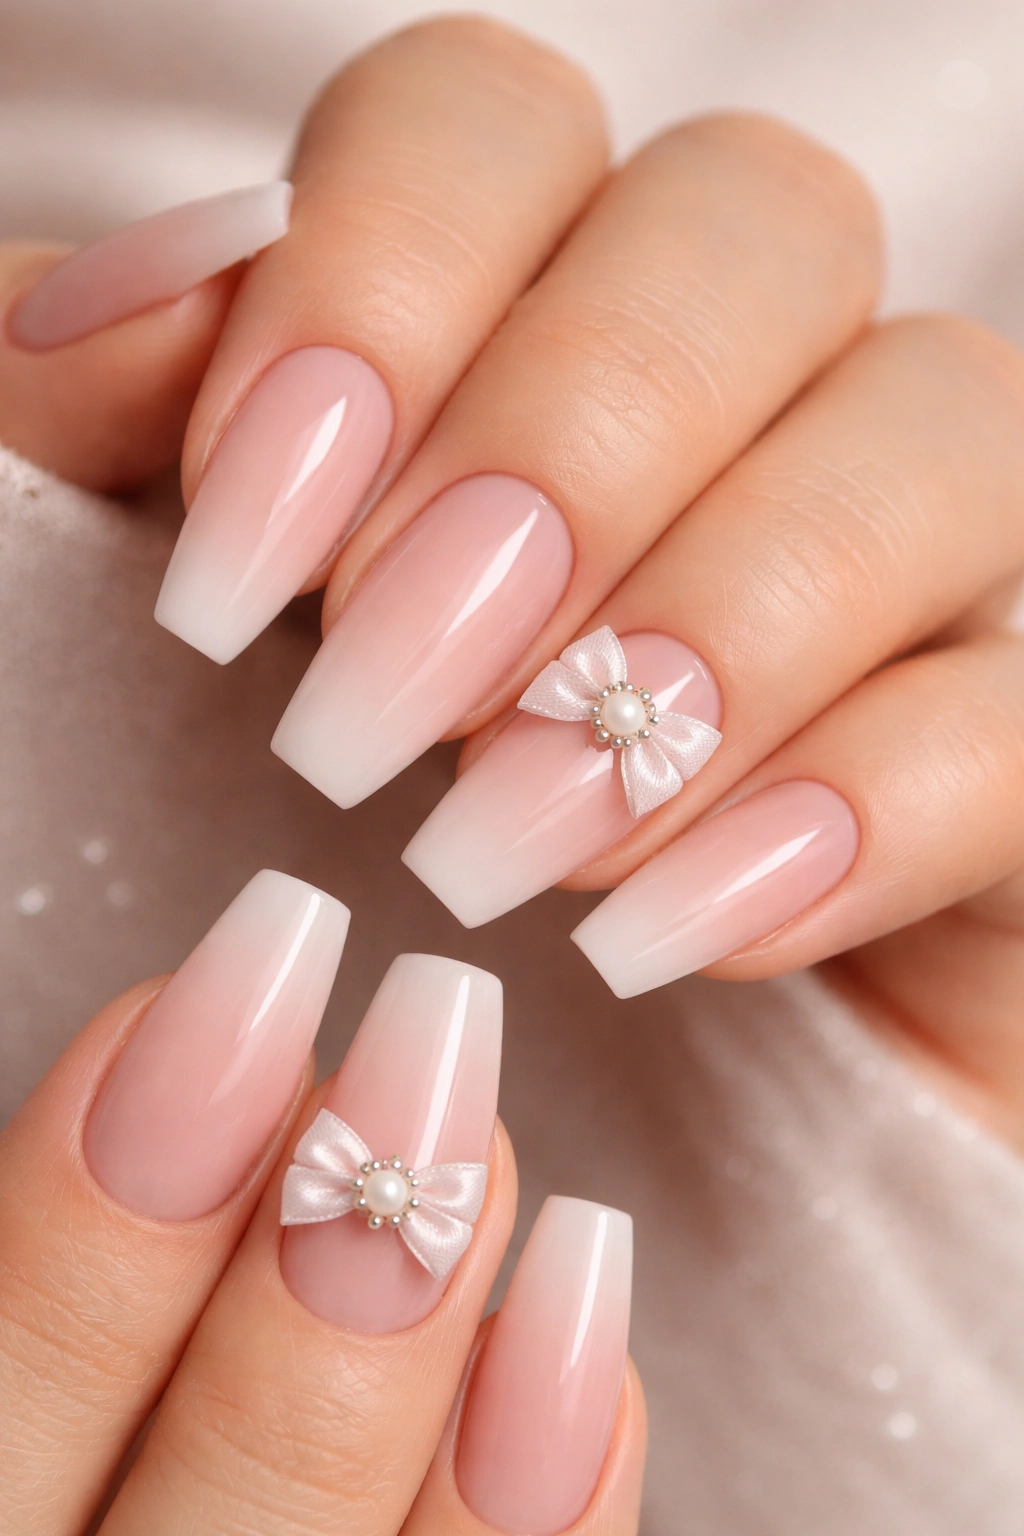
Why does this design look softer than a full pink set? Because the color fades instead of stopping.
A blush ombré on ballerina nails has a clouded edge where nude melts into pale rose. That fade mimics the softness of ribbon, so when you add a pearl-center bow, the whole set feels coherent rather than decorative for decoration’s sake. Ask for the ombré to start sheer at the cuticle and build toward the tip. Airbrushed ombré gives the smoothest fade, though a sponge blend can still look good if the top coat levels nicely.
What makes the pearl detail worth using
The pearl center gives the bow a tiny point of structure. Without that center dot, a painted bow can disappear into the pink base under indoor lighting. A half-pearl around 1 to 2 mm catches enough light to define the ribbon shape, though it still feels soft.
I’d use this detail on one or two nails only.
How to wear it well
Keep the bow lines thin and slightly elongated rather than round and puffy. Rounded loops can veer juvenile fast on a long ballerina shape. A narrow bow with longer ribbon tails feels more graceful. If your nail tech offers hand-painted white gel art with a pearl gel center instead of a glued pearl, that’s often the smarter route for wear.
This set earns its keep during weddings, showers, and dressier weekends, though it doesn’t need a formal event. Paired with a cream knit and gold rings, it has enough charm all on its own.
4. Glossy Nude Ballerina Nails With a Black Ribbon Accent

I once saw a nude-and-black bow set on medium ballerina nails and stopped scrolling hard enough to go back twice. That color pairing has bite.
A sheer beige or rosy nude base gives you that clean manicure look. Then one or two nails get a black ribbon accent—either a painted bow, a fine outline bow, or a narrow vertical stripe with a tied loop at the center. Black on nude reads sharper than pink on pink, and that edge is what keeps the design from feeling sugary.
Here’s where the technique counts:
- Use a nude with enough warmth that the black does not look stark.
- Keep the black line work thin, ink-like, and controlled.
- Place the bow on the ring finger or middle finger rather than every nail.
- Add a high-gloss top coat so the contrast looks smooth, not dusty.
The beauty of this design is that it works with shorter ballerina nails too. You do not need huge length for it. If anything, shorter lengths make the black bow feel more intentional because there’s less room for extra clutter. Gold jewelry looks especially good with this combo. Silver works too, though gold warms up the beige base in a way I prefer.
One caution: black line art shows wobble. If your tech does crisp French tips but shaky detail work, ask for a tiny black bow charm or sticker under gel instead of freehand ribbon.
5. Baby Blue Ballerina Nails With Side-Tied Bow Art
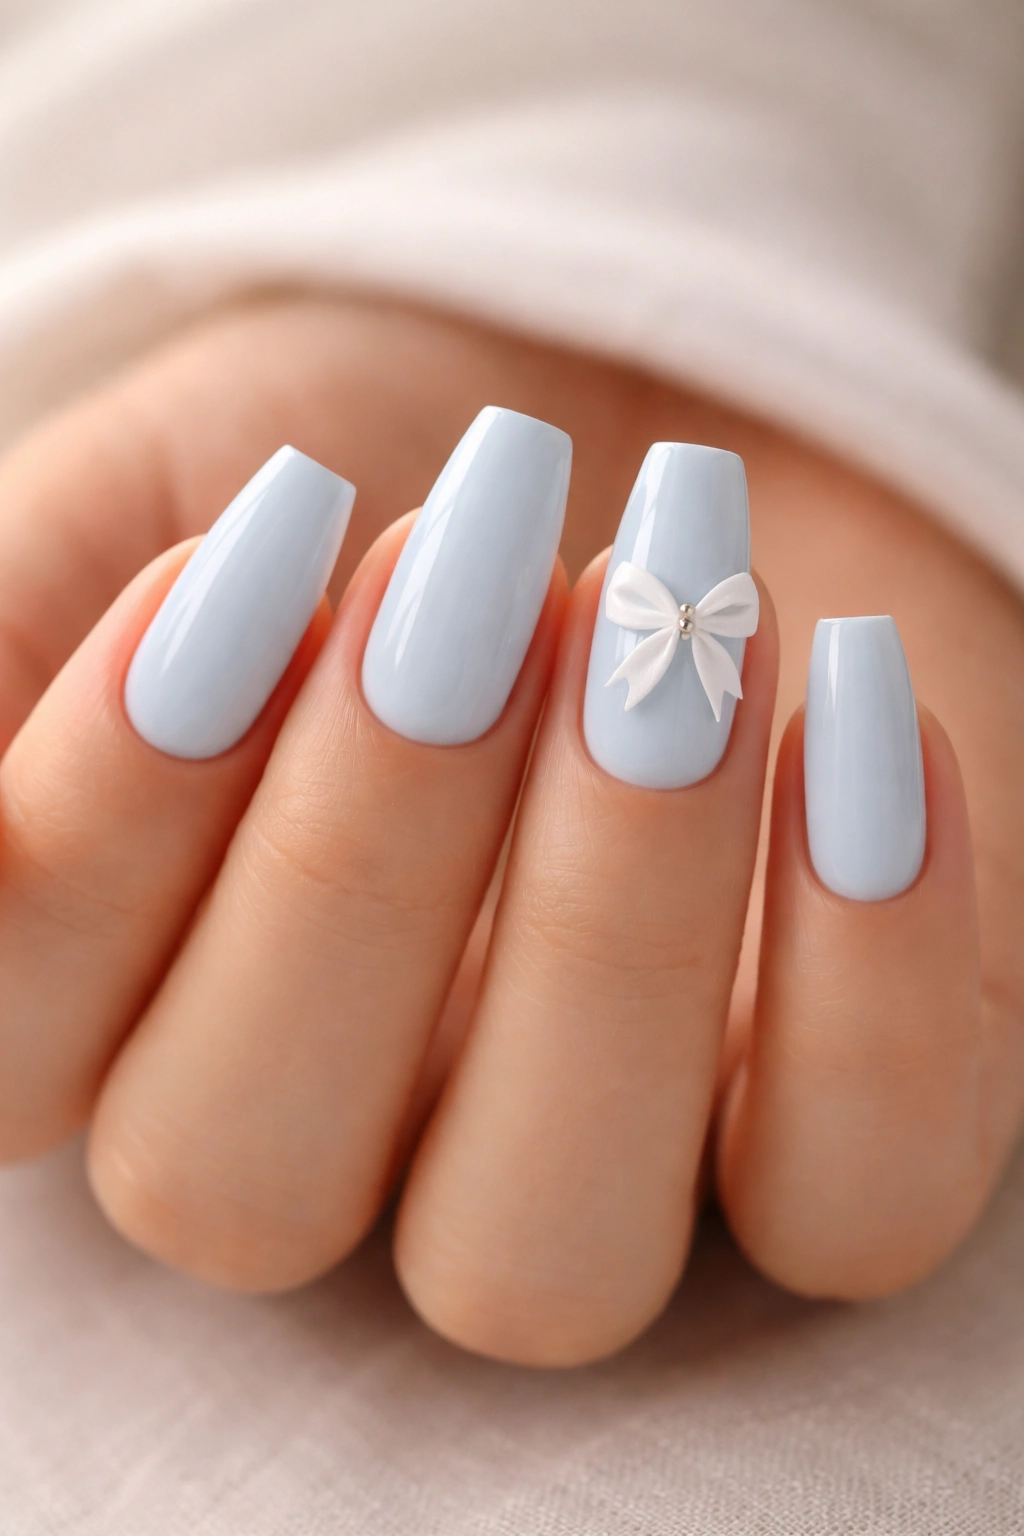
Pastel blue can go one of two ways: icy and clean, or nursery-sweet. The side-tied bow is what pushes it toward the first one.
A full baby blue set on ballerina nails already has a cool, polished feel, especially in a creamy gel finish. When the bow sits off to one side—near the upper corner or the lower sidewall—the design feels more relaxed. Centered bows can look posed. An off-center bow looks styled. That small shift is enough to make the manicure feel less like a sticker pack.
I’d keep the blue creamy rather than sheer here. One coat often looks streaky and flat, while two controlled coats over a neutral base give a smoother, almost porcelain finish. White line-art bows are the easy choice, though pale silver can work if the rest of the hand jewelry is cool-toned.
No bullets here because the design is straightforward. Keep the nail length medium, leave at least half the nails solid blue, and use the bow art on alternating fingers so the set does not get repetitive. A glossy finish helps the pastel stay fresh. Matte blue can look dry unless the color is mixed with enough pigment and sealed well.
This one has a quiet charm to it. Spring brunch, baby shower, weekend trip, office with a soft dress code—it fits all of them without trying too hard.
6. Short Ballerina Nails With Mini Coquette Bows and Micro Dots
Unlike long sculpted bow sets, this style works for people who still need their hands for real life. Typing. Cooking. Opening a car door without scraping the paint.
The base here is short ballerina—still tapered, still flat at the edge, though no dramatic length. Then you add mini coquette bows in white, pink, or black, plus a few micro dots placed with a dotting tool. The dots matter because they stop the design from feeling empty while keeping it flat and wearable.
Short nails need tighter spacing. A bow that looks elegant on a 16 mm extension can swallow a 9 mm nail whole. Ask for bows around 4 to 5 mm across, with the dots no bigger than a pinhead.
Who this style suits
- People who want a cute manicure without long extensions
- Anyone using a laptop for 6 to 8 hours a day
- Nail biters growing out their natural nails with builder gel
- First-timers who like coquette details but do not want full-on 3D charms
I like this design best on milky beige, pale pink, or soft cream bases. The shape still gives your fingers that longer look, though the shorter length keeps the whole thing grounded. If you’ve ever thought bow nails were too fussy, this is the set that changes minds.
7. White Chrome Ballerina Nails With Raised Gel Bows
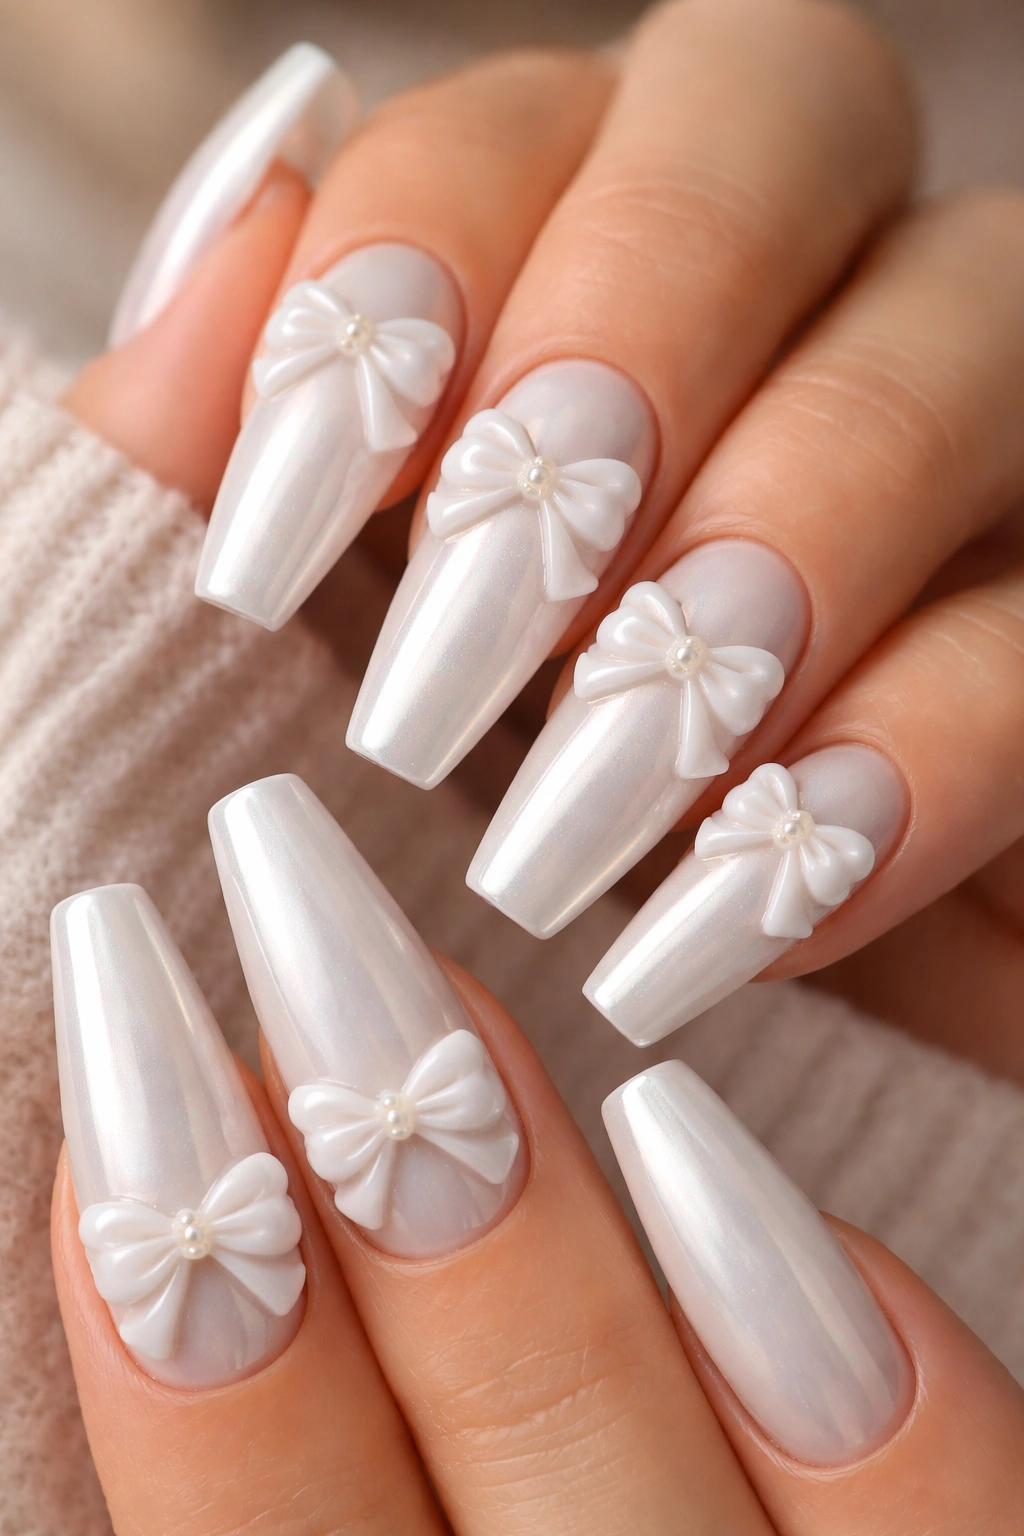
Chrome and bows can look cheap fast. Done right, though, this set has a glazed, shell-like finish that feels fresh and expensive.
The science behind the shine
White chrome works because it reflects light across the flat ballerina tip without the harshness of silver mirror chrome. Ask for a milky white or sheer ivory base, cured smooth, then rubbed with pearl chrome powder. Over that, a nail tech can sculpt raised gel bows using thick clear or white art gel. The bow sits on top like piped icing, though smoother and more controlled.
Raised gel is a smart choice here because it has softer edges than a metal charm. You still get dimension, though it snags less on fabric and hair.
What to watch for
A chrome nail shows every lump. If the base is wavy, the powder makes that wave louder. The bow should be sculpted after the chrome is sealed, then top-coated around—not over—the highest ridges if you want the texture to stay visible. Some techs top-coat the whole thing heavily, and the bow loses definition.
This design shines on medium-to-long nails. Keep the rest of the hand clean: no giant rings stacked on every finger, no competing glitter on all ten nails. One or two raised bows are enough, especially because chrome already gives the set a strong personality.
8. Sheer Jelly Pink Ballerina Nails With Floating Bow Outlines
Jelly pink has a younger energy, though a thin ballerina shape keeps it from feeling childish. That balance is why I like this set.
A jelly base should look translucent, almost candy-like, with the nail bed still visible underneath. Over that, floating bow outlines—white, silver, or iridescent—sit a little higher on the nail plate rather than hugging the cuticle or tip. Because the base is sheer, the bow looks like it’s suspended in syrup.
The trick is restraint. One floating bow per accent nail is enough. Add rhinestones, confetti glitter, and heavy white French tips on top of jelly pink, and the effect falls apart. Keep the bow line thin, maybe even leave the loops open instead of fully closed so the design feels airy.
This is one of the few bow looks I prefer on longer nails. The extra length gives the floating placement room to make sense. On short nails, the same art can feel lost in the middle.
I’d wear this on a vacation, a birthday weekend, a concert—somewhere playful. It has a glossy, almost toy-like sweetness, and I mean that in the best way. Not every manicure needs to act serious.
9. Matte Taupe Ballerina Nails With Satin-Effect Bow Details
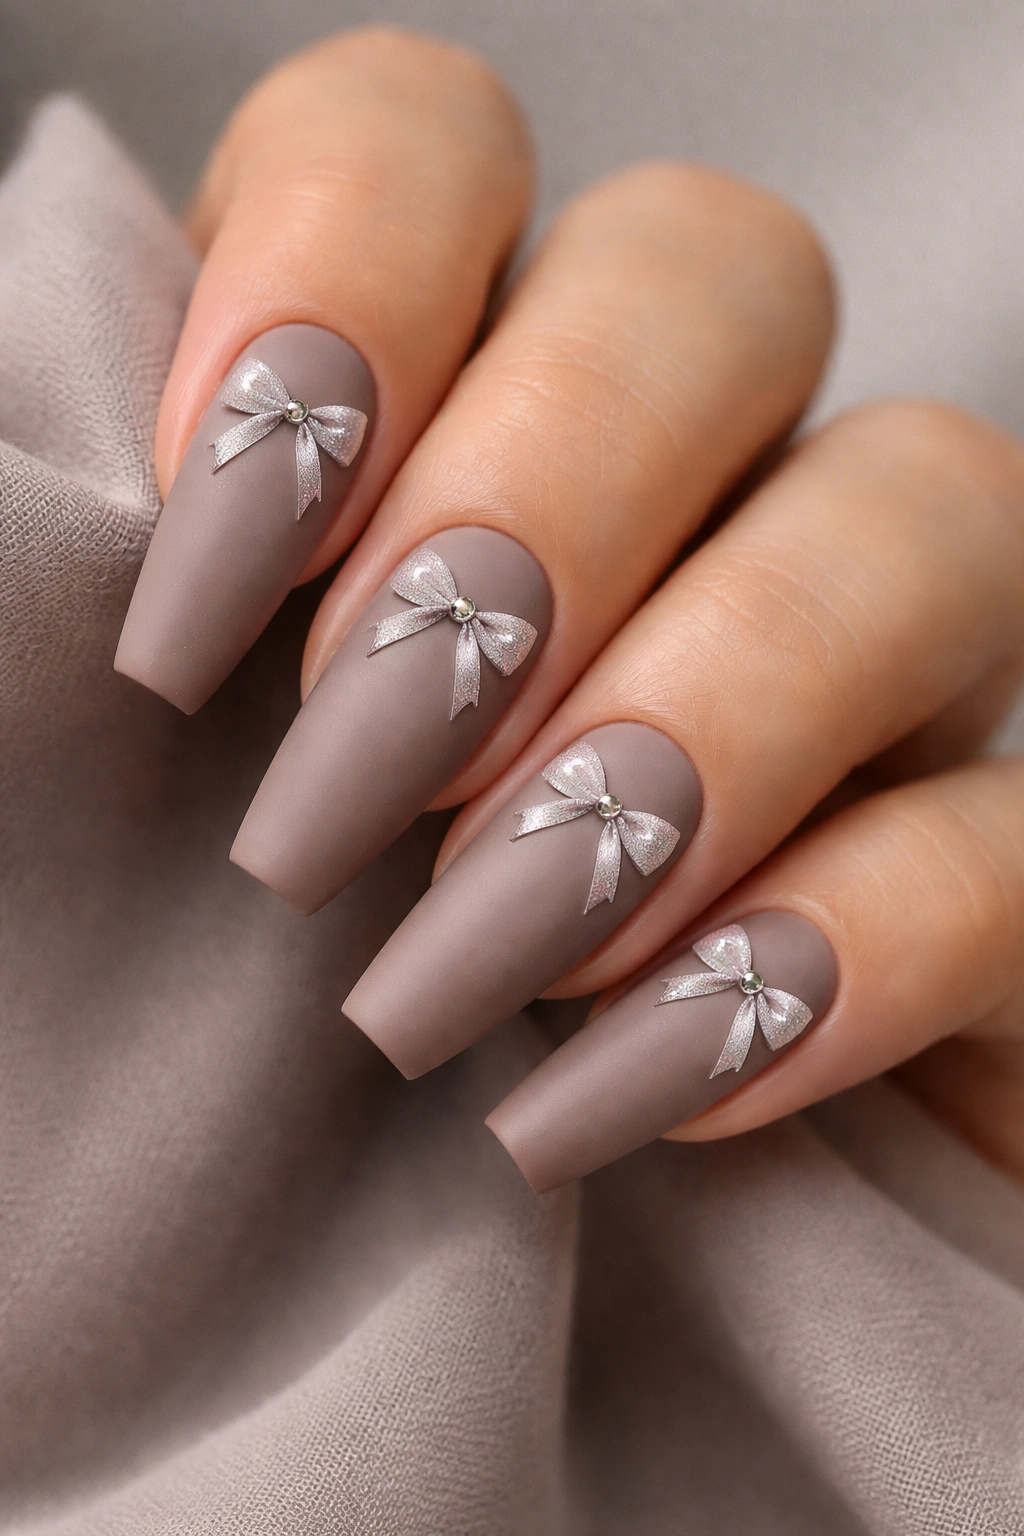
Want bow nails without the sugar rush? Go taupe.
A matte taupe ballerina set with satin-effect bows lands in a softer, moodier place than pink or white. You get the ribbon idea, though the color keeps the manicure grounded. Taupe also flatters more skin tones than people expect because it sits between beige, grey, and brown. Pick a shade with a touch of warmth if your skin leans golden, or a cooler mushroom tone if your undertone is rosier.
Why the texture shift matters
The bow should not be the same finish as the base. Put a glossy or satin-finish bow over matte taupe and the design becomes visible through texture rather than color contrast alone. That kind of subtle difference often looks more expensive than obvious white line art.
Nail artist notes worth mentioning
Use a velvet-matte top coat on the base, then paint the bow after, sealing it with gloss while leaving the rest untouched. A builder-gel bow can work too, though keep it low-profile. Taupe and raised 3D shapes can look heavy if the nail length gets too long.
This set has an editorial feel that works with wool coats, neutral knits, brown leather, and simple jewelry. If bows usually feel too sweet for your taste, this design is probably the one to screenshot.
10. Red Ballerina Nails With Gift-Wrap Ribbon Lines
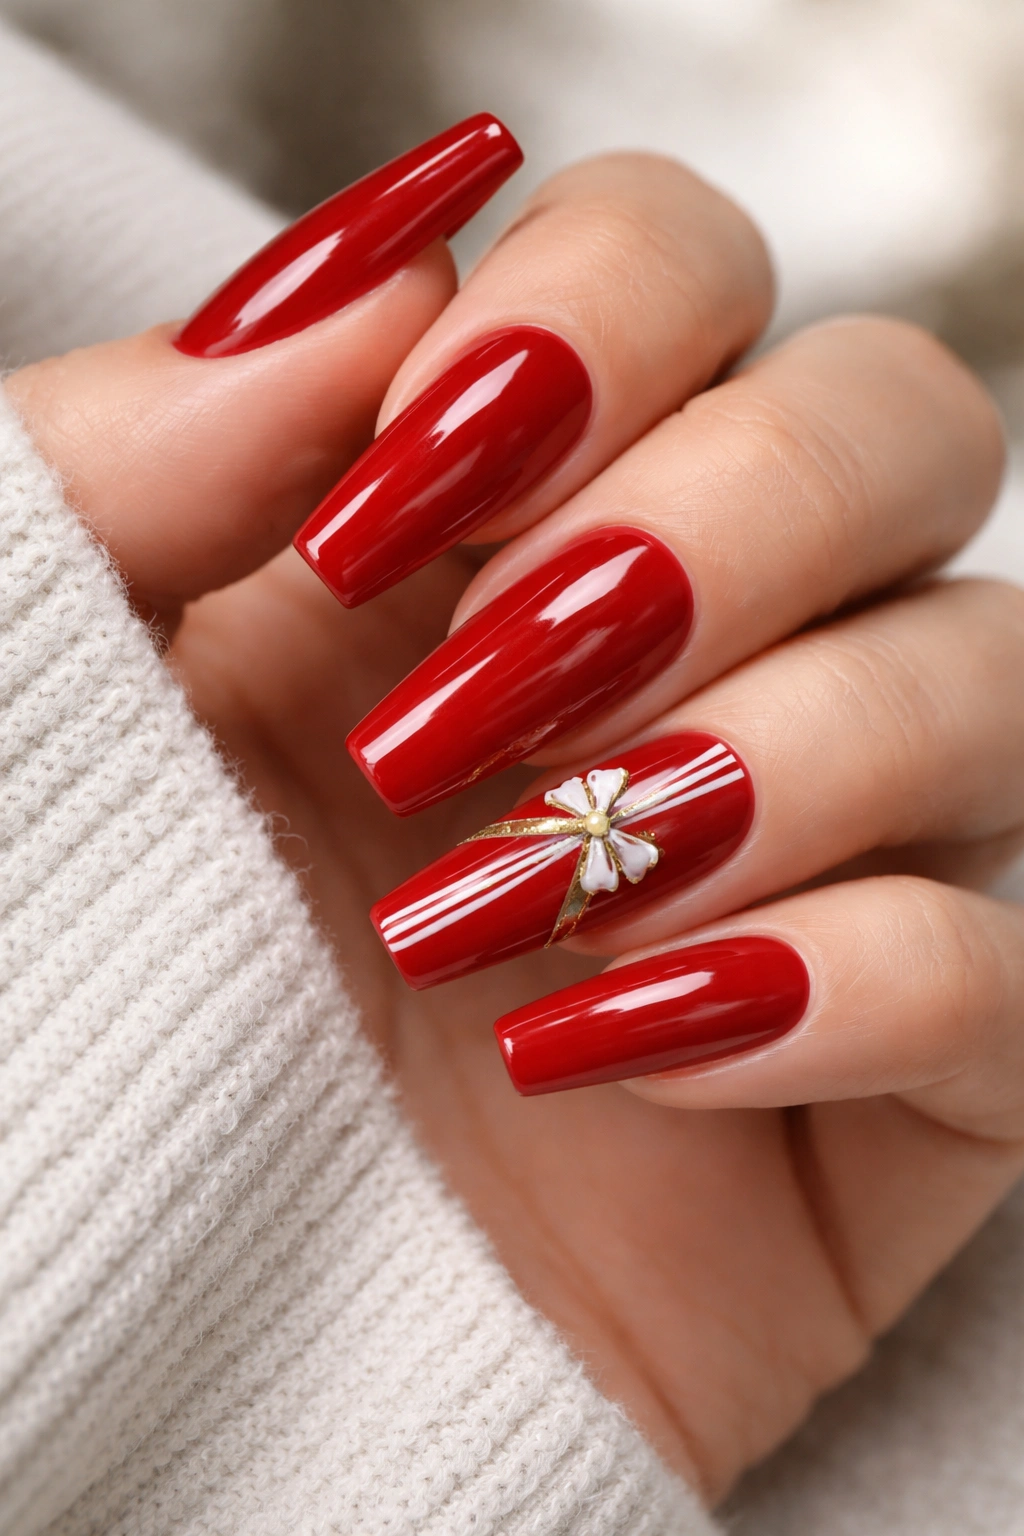
Red nails already carry enough attitude. Add gift-wrap ribbon lines and the whole manicure feels playful instead of severe.
I like this look best in a blue-red or cherry-red gel with high shine. Paint most nails solid, then turn one or two into wrapped “gift” nails with a vertical line, a horizontal line, and a small bow at the crossing point. The bow becomes part of a full composition, not a lone motif dropped on top, which makes the design read smarter.
A design like this does not need extra stones. The color does the heavy lifting. If you want more texture, use a tiny gold stud at the center of the bow or a thin gold striping line beside the ribbon. That’s enough.
Quick placement guide
- Ring finger gift-wrap nail for a classic layout
- Thumb accent if you want the bow visible in photos
- Medium ballerina length so the ribbon lines have room
- Keep the ribbon width under 2 mm for a neat finish
This one has obvious holiday energy, though it also works well for birthdays, date nights, or any time you want red nails with a wink. Skip bulky 3D bows here. Flat art suits the crispness of red much better.
11. Lavender Ballerina Nails With Bow French Corners
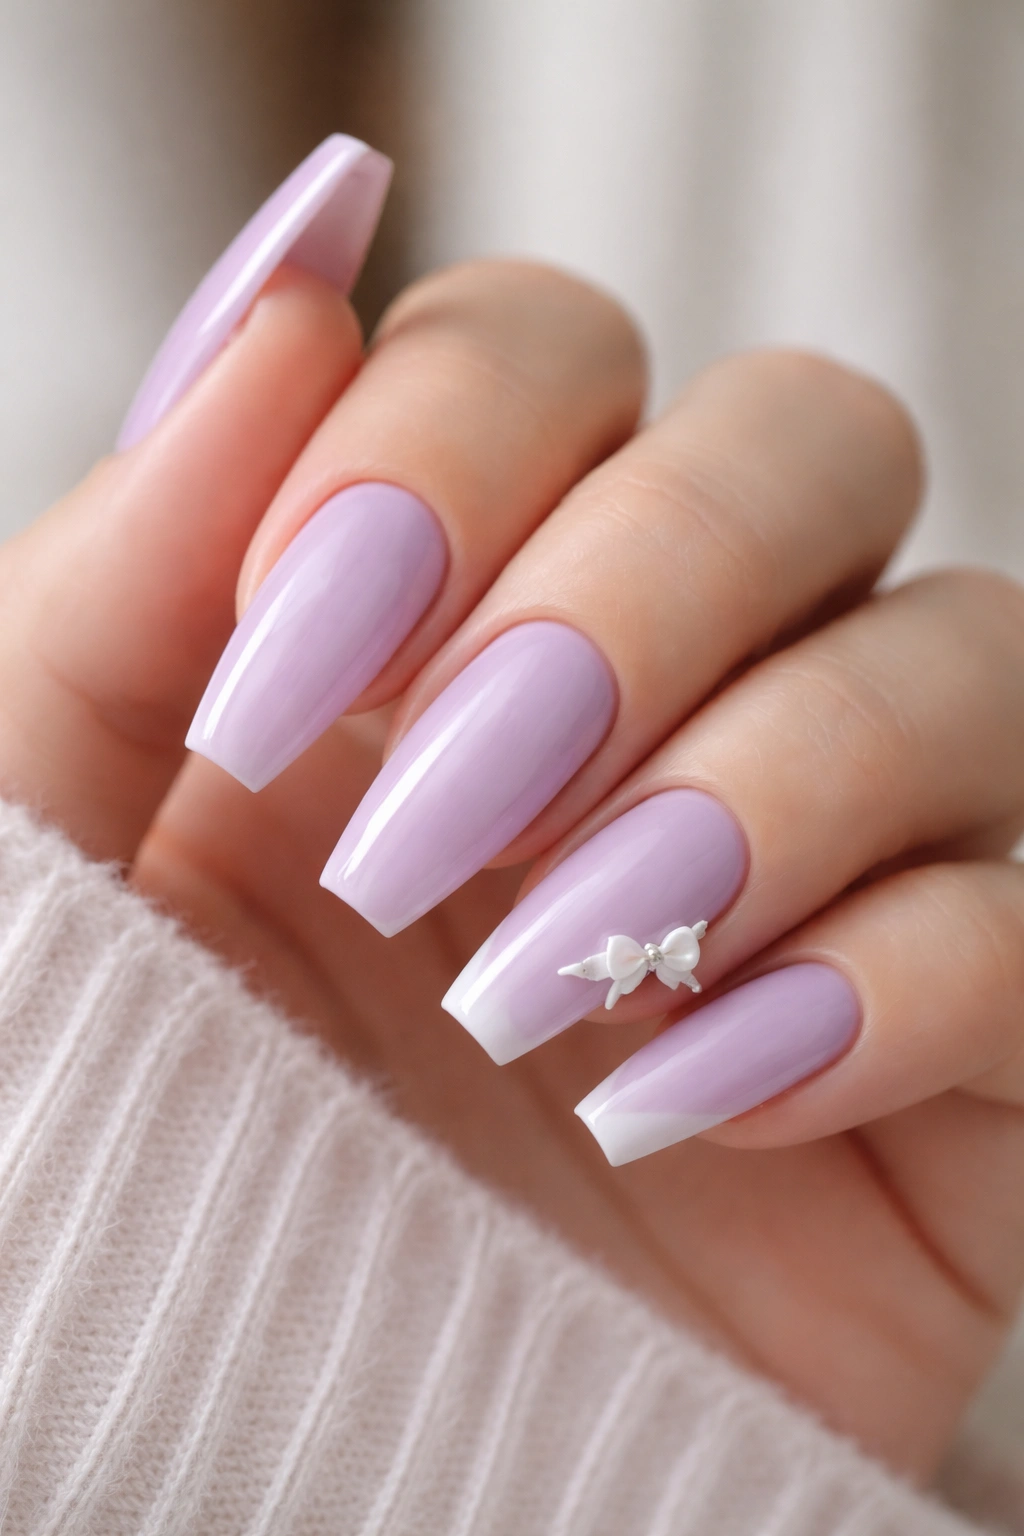
Some nail designs look best straight on. This one comes alive when your hand turns.
A lavender base with bow French corners places the ribbon detail on the side of the tip rather than across the whole free edge. Picture a diagonal micro-French, then imagine the corner tied off with a tiny bow. It’s unexpected, and that little twist is what makes the set memorable.
I prefer a cool lilac with a drop of grey rather than bright candy purple. Softer lavender makes the bow detail look grown-up. Use white line art if you want contrast, or stay in the same color family with a slightly deeper violet bow for a more tonal effect.
No need to crowd every finger. Two corner bows, two clean micro-French corners, and the remaining nails in glossy lavender give the set enough movement. The asymmetry keeps the design from looking mass-produced. When everything mirrors perfectly on every nail, bow manicures can start feeling stiff.
This is one of those sets that people notice up close. You reach for a coffee cup or tuck hair behind your ear and the little corner detail appears. That delayed reveal has charm. It rewards a second look.
12. Clear Acrylic Ballerina Nails With Encapsulated Bow Glitter
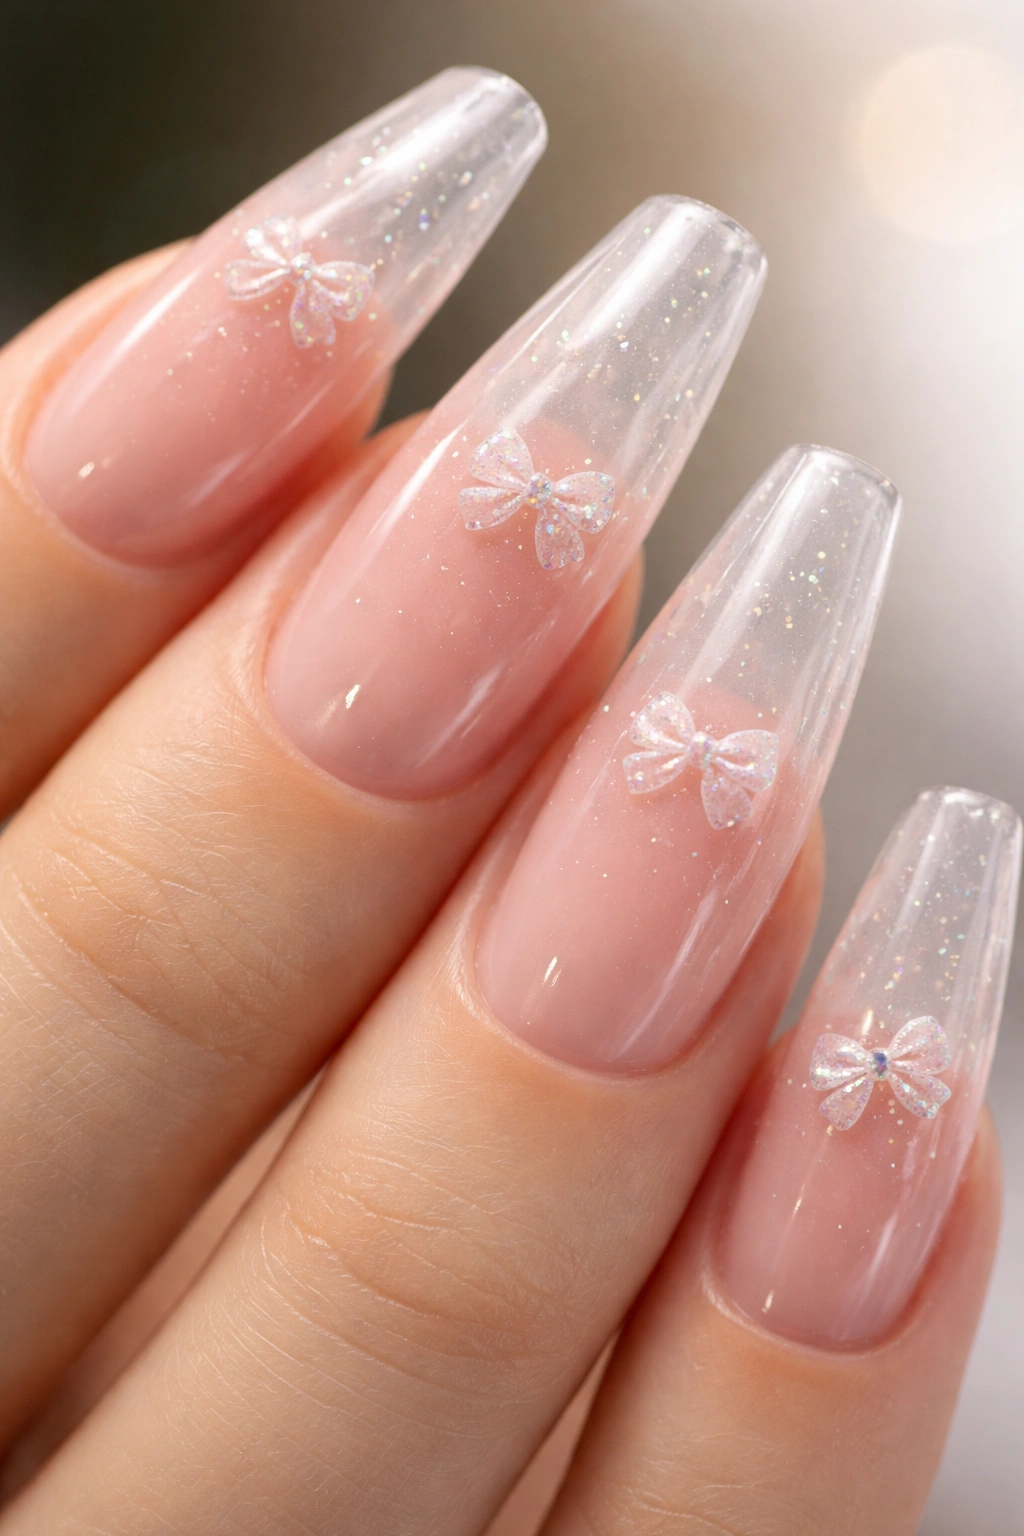
Unlike surface art, encapsulated details sit under the structure of the nail, which means there’s nothing raised to catch, peel, or disappear after a week.
That’s the main appeal of clear acrylic ballerina nails with bow glitter sealed inside. The base stays transparent or lightly tinted, and tiny holographic or iridescent bow pieces are embedded between acrylic layers. Done neatly, the bows look suspended under glass. Not flat. Not bulky. Floating.
The acrylic work has to be clean for this to land well. If the nail is too thick, encapsulated glitter starts looking gummy. Ask for the free edge to stay slim and the apex to sit around the stress area rather than ballooning across the whole nail. Clear designs reveal every construction flaw.
This style works best when the glitter pieces stay small—around 2 to 4 mm—and scattered. Cover the whole nail with bow glitter and the set loses depth. A few bows placed near the tip or down one side look richer because the empty clear space around them lets the eye focus.
I’d pick this if you like longer extensions and want a bow theme that lasts. Surface charms can pop off. Encapsulated glitter doesn’t. You’ll still need fills, though the design itself remains tucked safely inside the nail.
13. Soft Peach Ballerina Nails With 3D Bow and Rhinestone Mix
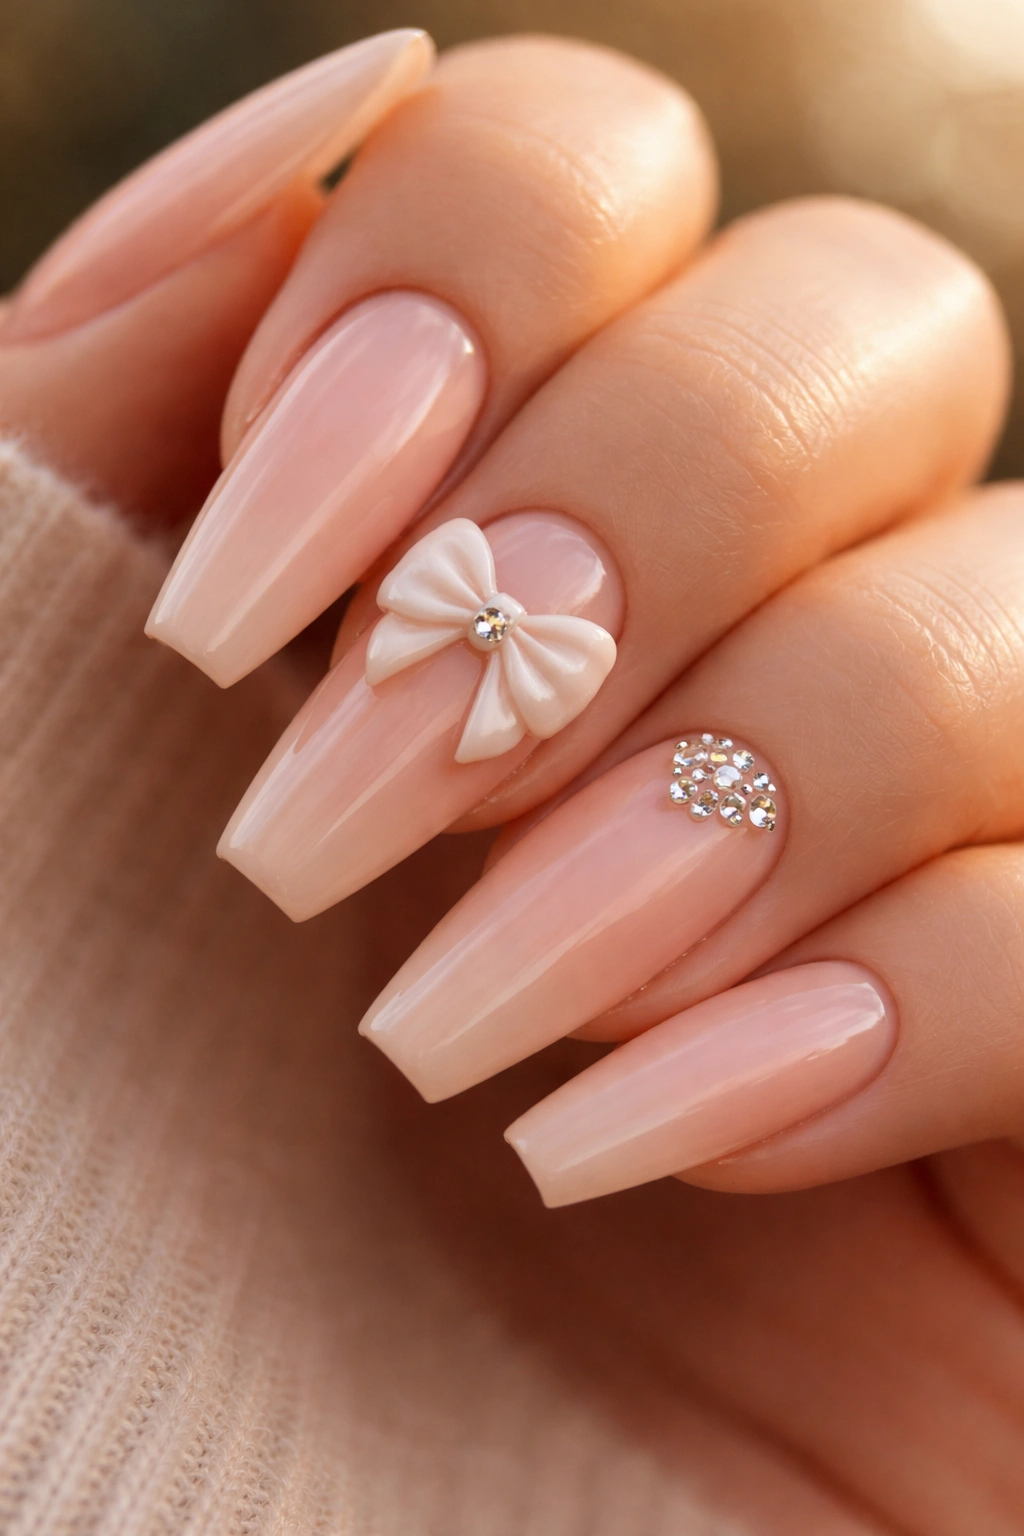
A soft peach base warms up the hand in a way pale pink doesn’t always manage. Add one sculpted bow and a restrained rhinestone cluster, and you get a manicure with enough sparkle for an event without crossing into pageant territory.
What keeps this one from going overboard
The answer is distribution. Put the 3D bow on one nail only—middle or ring finger—and keep the rhinestones to one nearby accent nail. Use tiny stones, around 1 to 2 mm, rather than a full crystal cascade. Peach is already doing some lifting here; it brings glow and softness before any embellishment enters the picture.
Raised bows look best when the loops are defined but not bulky. Ask for a bow with slim ribbon tails and a center knot that sits low. A bow that rises too high will catch on sweaters and hairbrush bristles by day two.
A good booking note
Tell your nail tech whether you want peach-nude or peach-coral. Those are different moods. Peach-nude feels bridal and gentle. Peach-coral pushes brighter, sunnier, and a little more playful.
This set works especially well for warm skin tones, though a muted peach can suit cooler tones too. Gold jewelry pairs nicely with it. White outfits do too. There’s something clean and expensive-looking about peach against cream fabric that I keep coming back to.
14. Black-and-Blush Ballerina Nails With Lace Bow Art
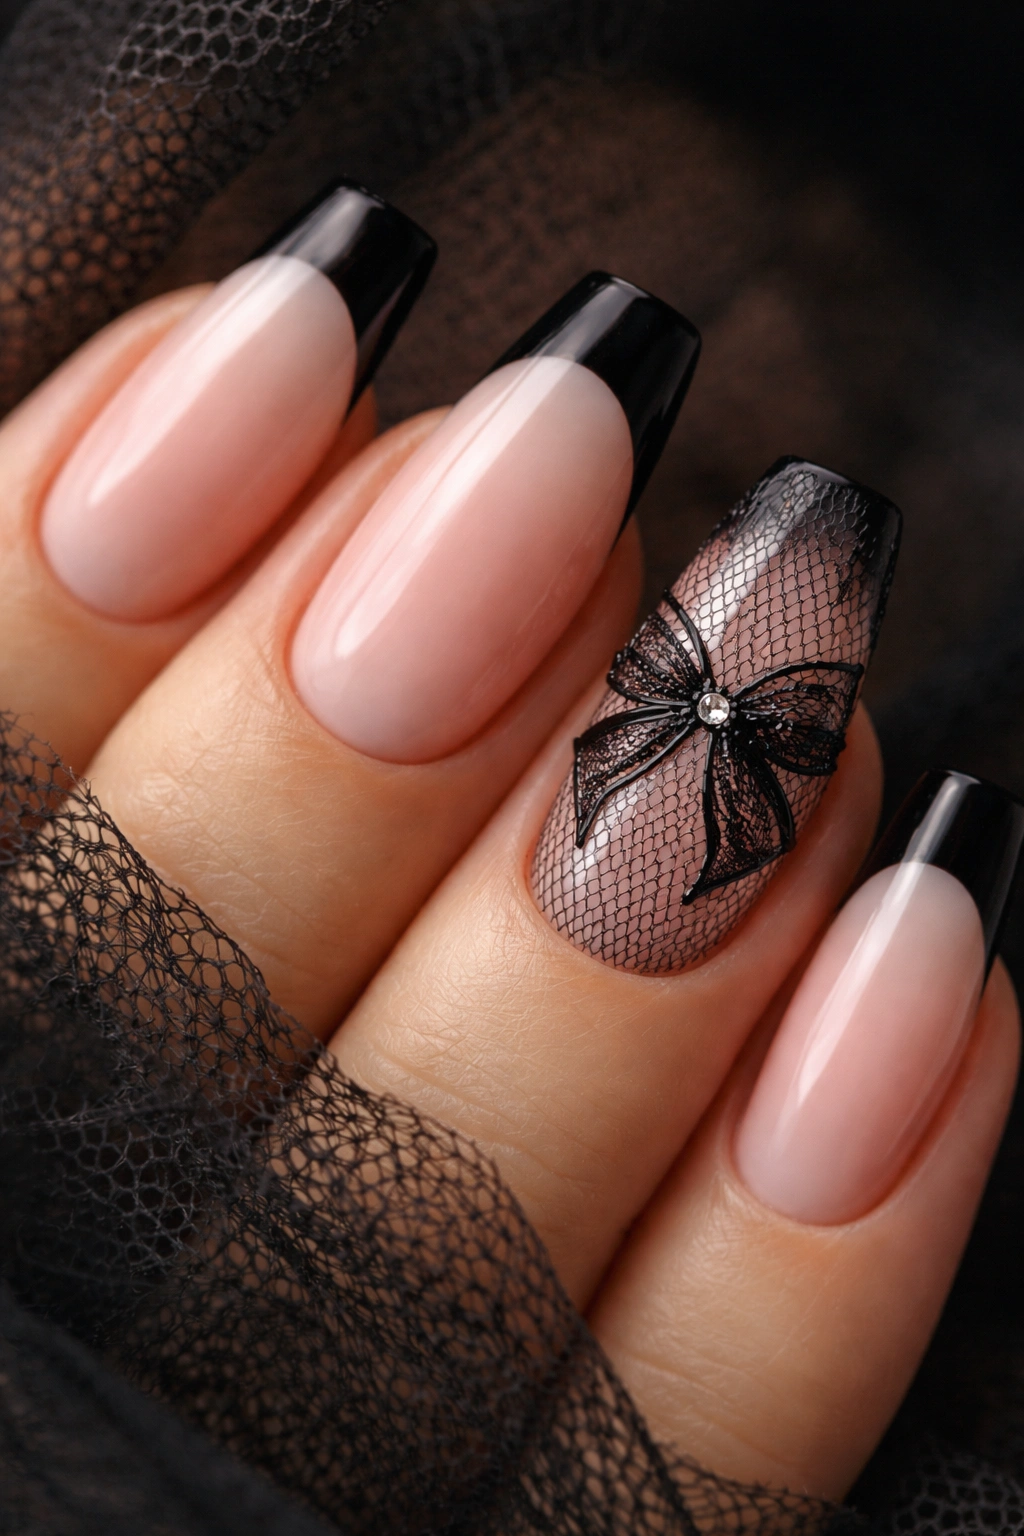
Black lace bow art on a blush base has a touch of drama that pink-on-pink nails can’t touch. It’s flirtier, moodier, and a little sharper around the edges.
The base should stay sheer blush rather than opaque bubblegum pink. You want skin and nail bed to show through a bit, because that transparency lets the black lace detailing stand out without looking heavy. A fine liner brush can create mesh panels, scalloped edges, or a lace-inspired net behind the bow itself. The bow becomes part of a fabric story, not a single icon floating in empty space.
I would not put this on every nail. One lace-bow nail, one black micro-French, one plain blush nail, repeat in a loose rhythm. That gives the set movement. Full black lace on all ten nails can turn dense fast, especially on long ballerina tips.
This is the set I’d point someone toward when they want “cute” with a little edge. Dinner out. Party. Photo-heavy weekend. It has enough contrast to stand up against dark clothes, leather, and evening makeup. Still, keep the crystals light or skip them entirely. Lace plus bows already gives you enough texture and visual pull.
15. Creamy Ivory Ballerina Nails With Tiny Bow Bouquet Accents
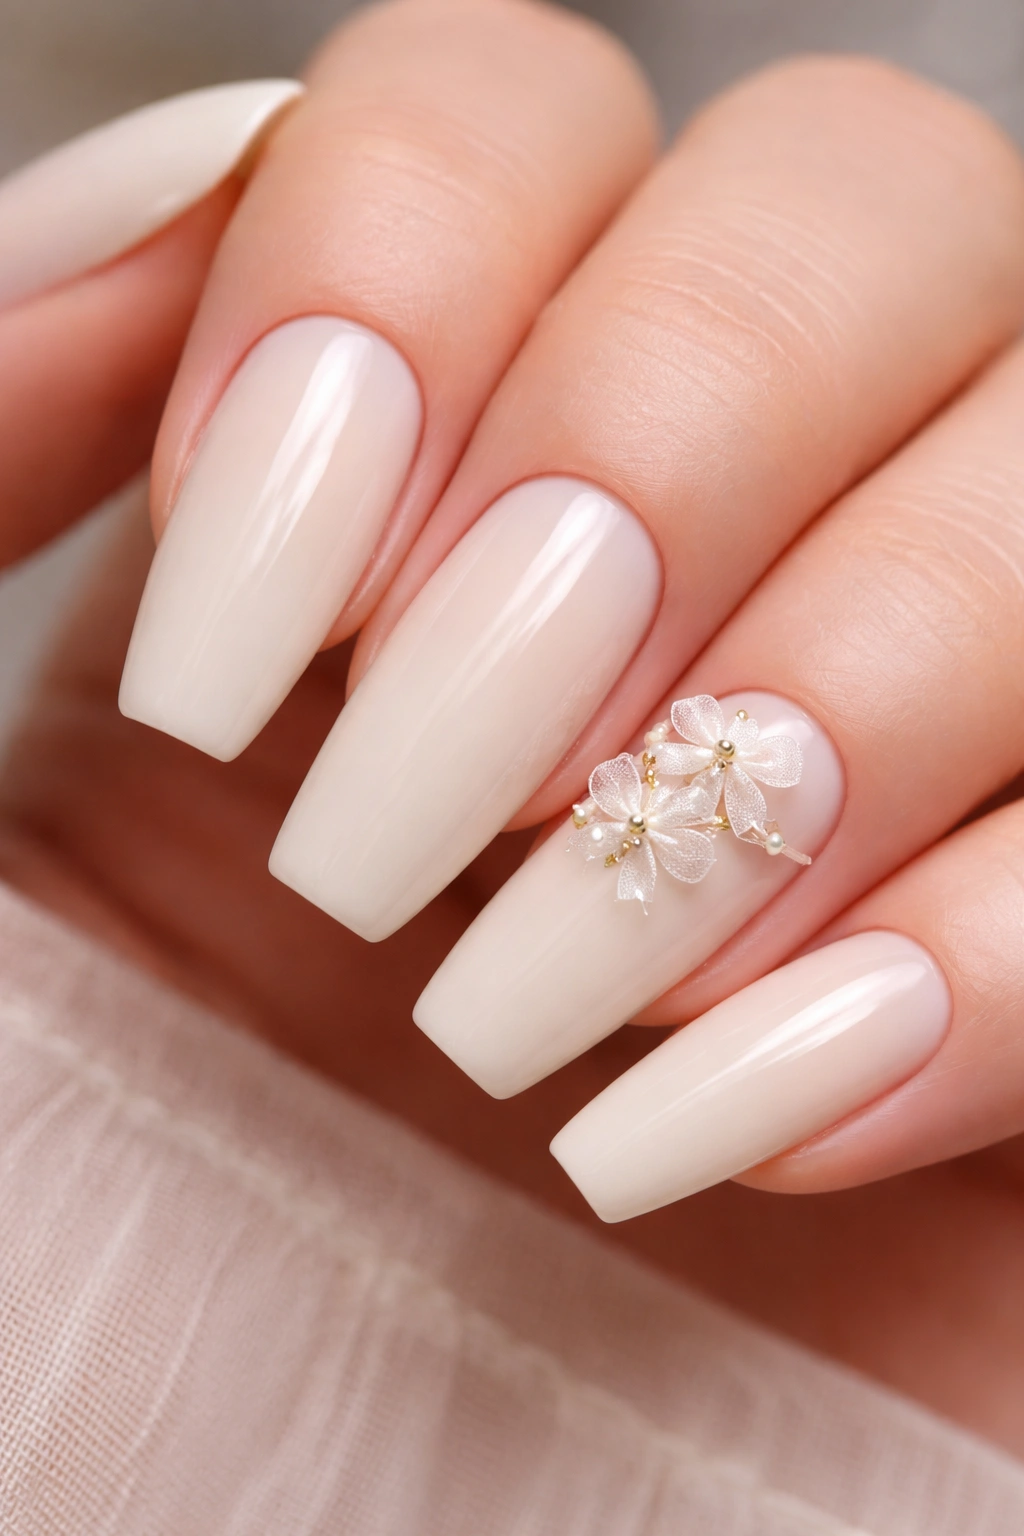
A bow bouquet accent is exactly what it sounds like: two or three tiny bows grouped together on one nail, almost like a small corsage made of ribbon.
That could sound like too much. On a creamy ivory base, though, it can look delicate and expensive if the scale stays tiny. Think micro bows in white, soft beige, or pearl, clustered near one corner of the nail while the rest of the set stays plain ivory or gets a whisper-thin outline detail. Ivory is the secret weapon here. It softens the bow cluster and keeps the manicure from veering pastel.
Here’s how I’d build it:
- Medium ballerina length, not extra long
- Creamy ivory base with a smooth, high-gloss finish
- One bouquet accent nail per hand
- Tiny pearl center dots or metallic beads under 1.5 mm
- No more than three bows in the cluster
What I like about this design is its restraint. The idea sounds decorative, though the final look can still feel calm because the color palette stays muted. Brides, bridesmaids, engagement shoots, dinner parties, or plain old Sundays in a cream sweater—there’s room for all of that here.
If you want the bow theme without the obviousness of one giant ribbon front and center, this design takes the softer route.
Keeping 3D Bows Attached Through Daily Wear
Long ballerina nails with 3D details need a little strategy. Otherwise, the cutest nail on day one becomes the missing charm on day four.
First rule: do not use your nails as tools. Pull tabs, boxes, tight jean pockets, key rings, and seat belt buckles are the usual trouble spots. Side pressure is what snaps corners and loosens charms. Use the side of your finger pad or a key instead.
Oil helps more than people think. A drop of cuticle oil twice a day keeps the surrounding skin supple, which makes the manicure look fresher and can reduce tiny dry lifts around the cuticle area. Dry skin makes even a well-done set look rough.
A few practical habits go a long way:
- Wear gloves for dishwashing and cleaning sprays
- Avoid picking labels off bottles with the free edge
- Pat hair products through your lengths instead of raking bows through your scalp
- Book fills before the apex grows too far down the nail, usually around 2 to 3 weeks depending on growth
One more opinionated note: if you know you are rough on your hands, choose painted bows or raised gel art over metal charms. The flatter profile lasts better. Cute nails are fun. Babysitting a giant charm every waking minute is not.
Final Thoughts
Bow nail art works best when the shape, color, and detail all agree with each other. Ballerina nails give bows that clean runway they need, though the design still has to be edited. A tiny painted ribbon on a milky base can hit harder than five charms and a pile of crystals.
If I were choosing only three from this list, I’d pick milky pink with tiny white bows, nude with black ribbon accents, and matte taupe with satin-effect bows. Those three cover sweet, sharp, and subtle without drifting into novelty.
Start with the version that fits your actual life, not only your saved photos. The best cute manicure is the one you’ll still enjoy after three days of typing, errands, coffee cups, and coat sleeves.
