

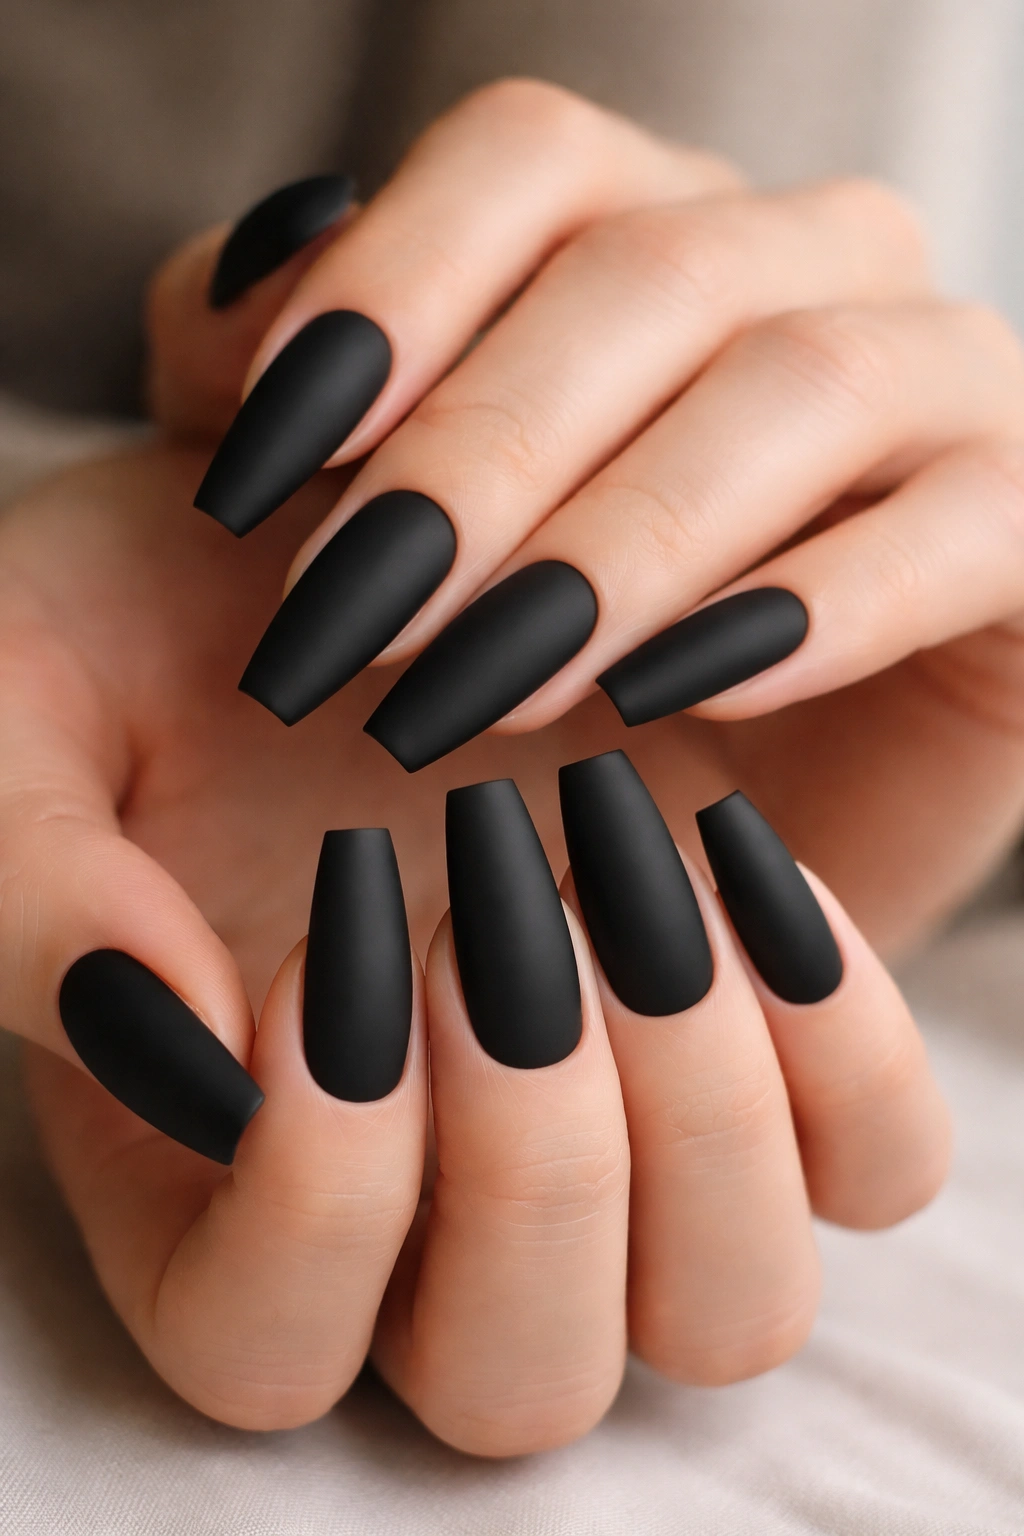
Matte black can make a bad manicure look harsher, and that’s exactly why it looks so good when the shape is right. Black matte ballerina nails have almost no place to hide sloppy filing, bulky product, or streaky polish. Give them clean sidewalls, a flat tip, and a soft matte finish, though, and they read sharp, expensive, and pulled together from the first glance.
That shape matters more than people think. Ballerina nails—often called coffin nails in salons—need a straight taper that narrows toward the tip without turning pointy. If the nail gets too wide, the look turns blocky. If it gets too narrow, you lose the ballet-slipper feel that makes the shape flattering in the first place.
Black changes under a matte top coat, too. Glossy black bounces light and feels dressy. Matte black absorbs it. The color looks deeper, flatter, moodier, and a little stricter. I like that. It forces every detail to earn its place.
And once you start playing with black-on-black contrast, negative space, tiny metal accents, and sharp lines, the manicure stops feeling plain and starts feeling tailored.
Why Black Matte Ballerina Nails Look So Sharp
A clean matte black set works because the color and the shape are doing two different jobs at once. Black gives weight. Ballerina shape gives lift. Put them together and you get that long, narrowed silhouette without the dagger feel of a stiletto nail.
The shape has to be balanced
Short ballerina nails can work, but the shape gets better once you have at least 5 to 8 mm of free edge past the fingertip. Medium length—about 8 to 12 mm—is the sweet spot for most people. You still get the tapered line, yet the nails stay wearable for typing, texting, and everyday stuff that wrecks long corners.
Longer sets look dramatic, no question. They also show every mistake.
A proper ballerina file should leave you with:
- Straight sidewalls that taper in evenly from the stress area
- A flat free edge instead of a rounded or pointed tip
- A soft apex placed around the upper third of the nail, not a hump in the center
- Slim proportions that match your nail bed rather than fighting it
Matte changes the mood
Glossy black can feel dressy or classic. Matte black feels cleaner to me—more fashion, less cocktail hour. It also makes small design details stand out in a smarter way. A glossy stripe on a matte base looks sharper than a glitter line. A bare crescent at the cuticle feels more deliberate than a cluster of rhinestones.
That’s the key with this color family: restraint looks stronger than excess.
How to Make Black Matte Ballerina Nails Last Longer
Black matte nails show dust, lotion smears, tip wear, and surface scratches faster than pale shades. Not because they chip more, but because the contrast is brutal. A tiny flaw that would disappear in beige can stare back at you in matte black by day two.
Prep does most of the heavy lifting. If you’re using gel, the base needs a smooth, even surface before color goes on. Matte top coat doesn’t blur ridges; it highlights them. Two thin coats of black usually look cleaner than one thick coat, and the free edge needs to be capped each time or the tip starts flashing lighter underneath.
The small upkeep habits matter
Use cuticle oil, but don’t leave it sitting on the nail plate. Matte top coats can look patchy when oil builds up on the surface. Wash your hands, dry them well, then wipe the nails with a lint-free pad and a drop of isopropyl alcohol if they start looking cloudy.
Try these habits if you want the manicure to stay crisp:
- Wear gloves for dishwashing and cleaning products
- Avoid using your nail tips to open cans, boxes, or tabs
- File tiny snags early with a 240-grit file instead of waiting for a full crack
- Ask your tech for a velvet-matte or no-wipe matte top coat that cures flat, not chalky
- Book a refresh before the corners get thin, since ballerina tips take hits at both outer edges
One more thing. Matte finishes often start looking shiny at the tip first. That usually comes from friction, not product failure. If your manicure is still intact, a fresh layer of matte top coat can bring the whole set back to life.
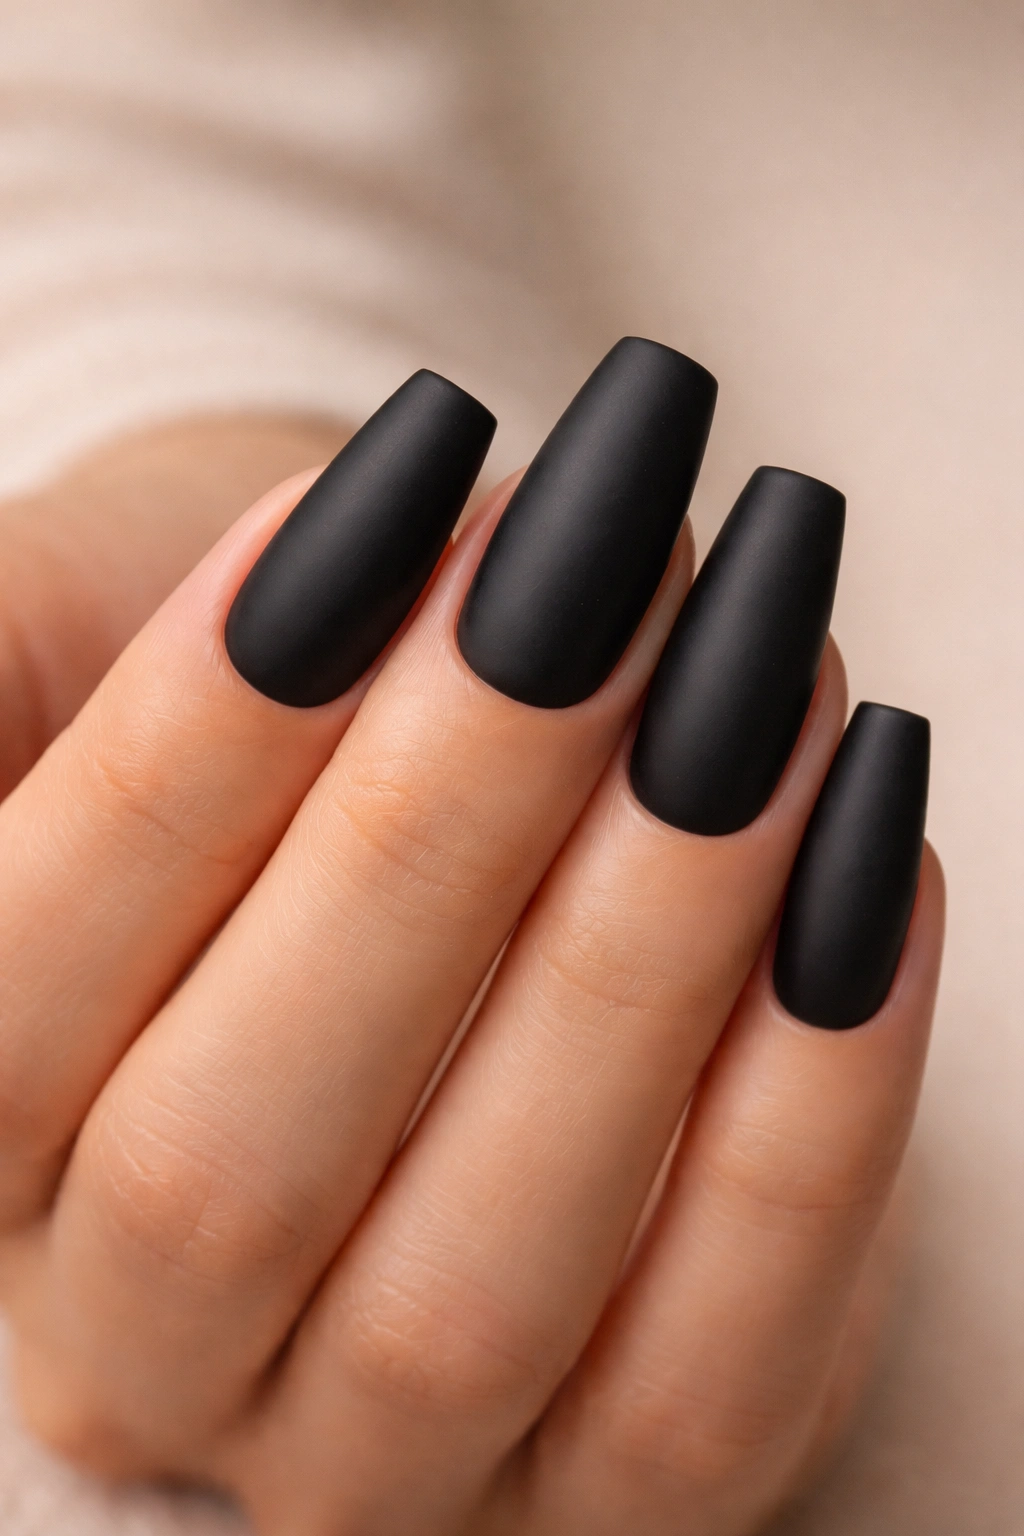
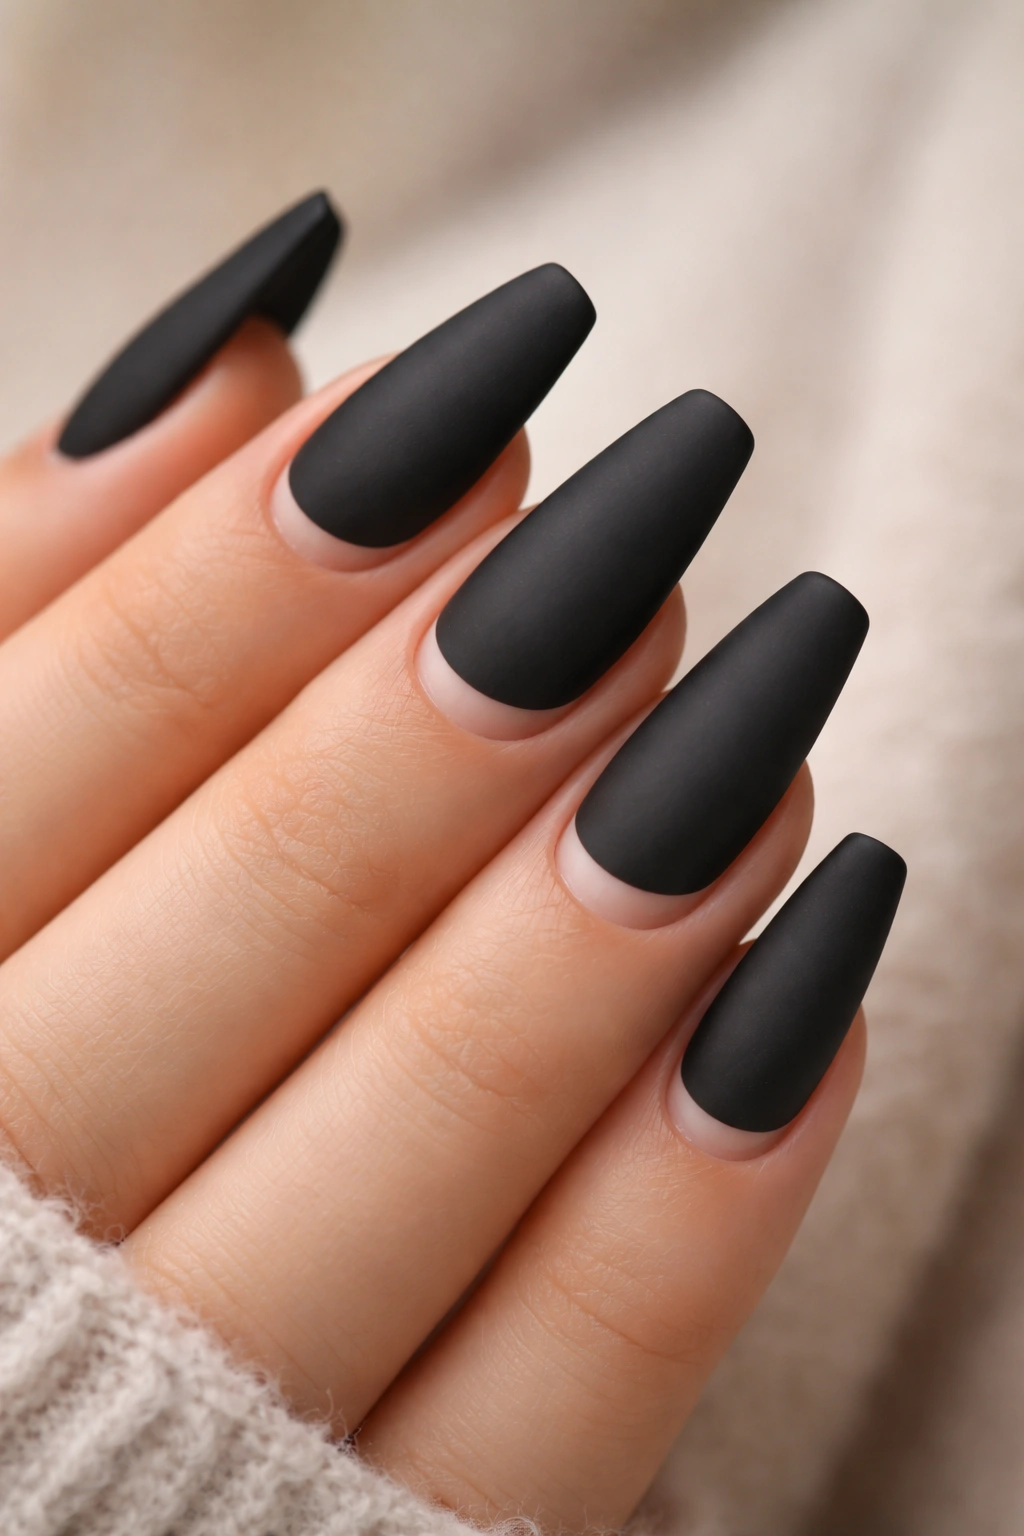
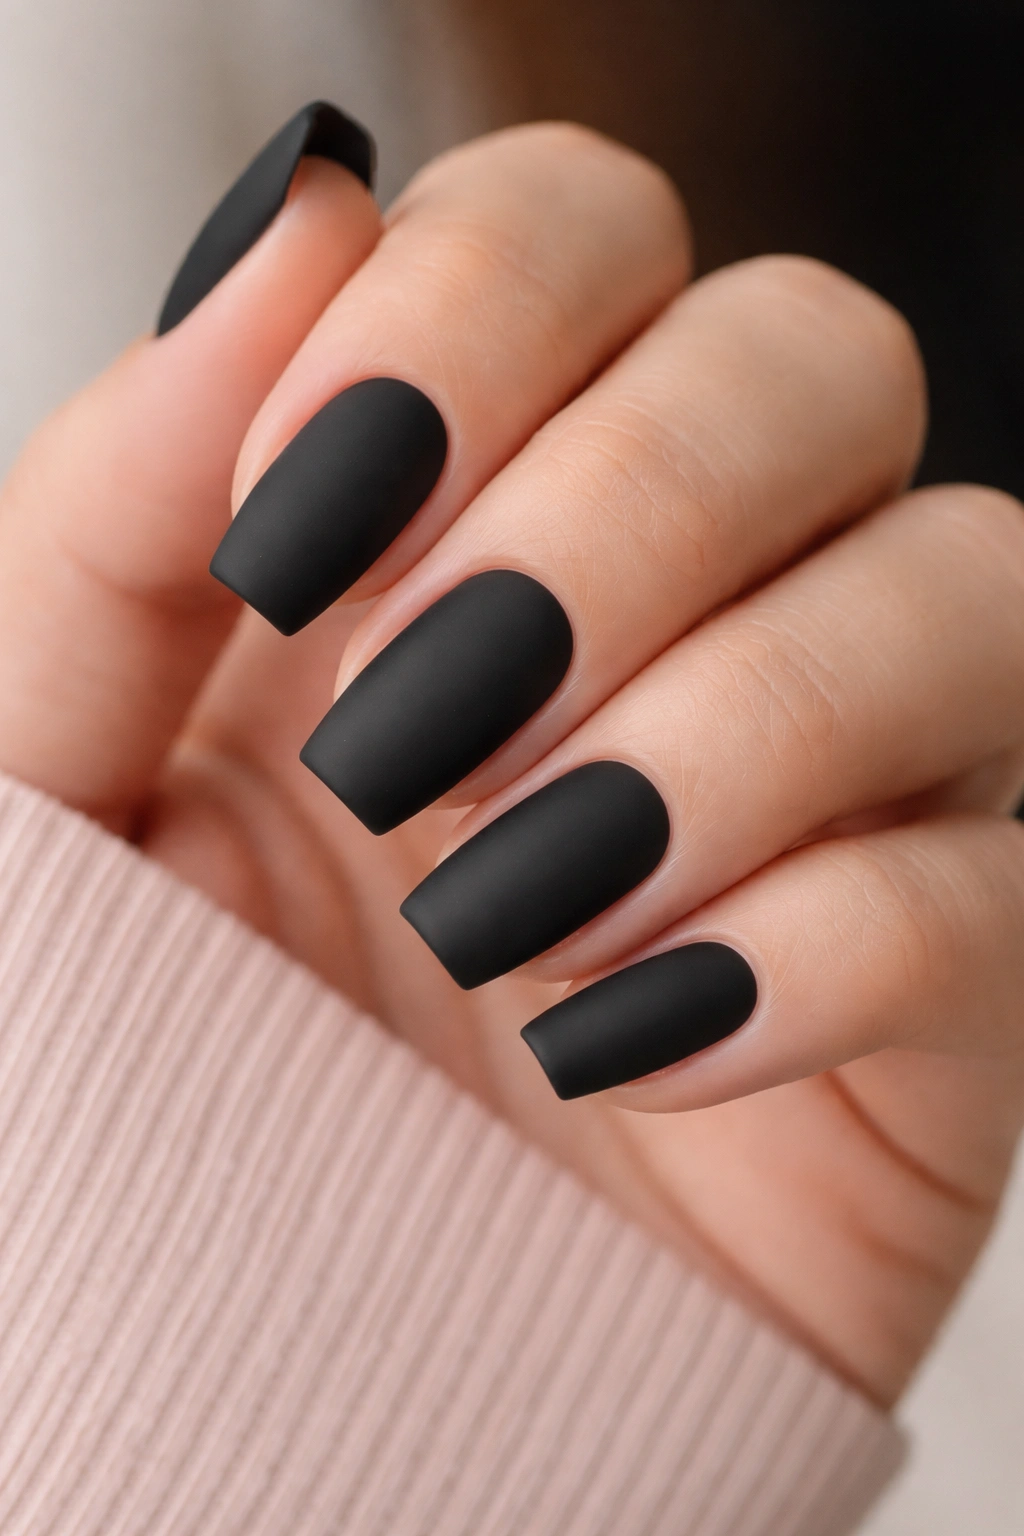
1. Classic Full-Coverage Black Matte Ballerina Nails
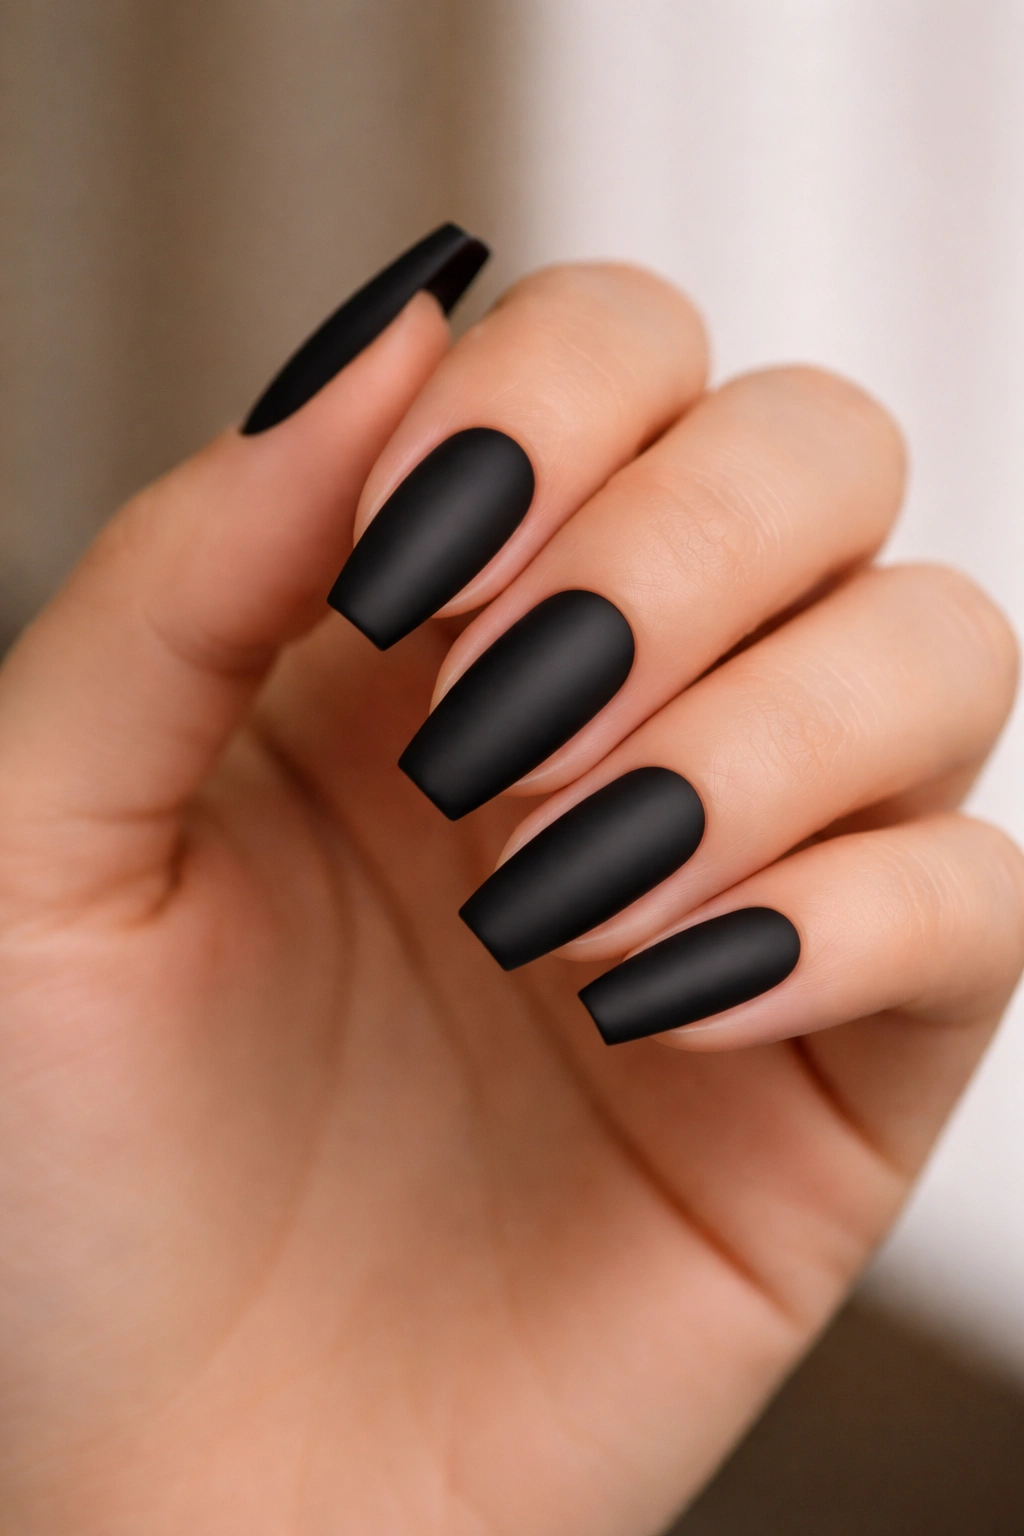
If you want the cleanest version of this trend, skip the art and let the shape do the talking. A full-cover matte black set is blunt in the best way. It looks neat, graphic, and intentional—especially at a medium length where the silhouette stays slim.
This design lives or dies by prep. The sidewalls need to match, the tip has to be straight, and the surface should look level from cuticle to edge. Any dip or hump shows right away once the matte top coat goes on. That sounds harsh, but it is also what makes the style so strong. Nothing distracts from the architecture.
Why it works so well
A solid black matte finish turns ballerina nails into a single visual line. Your eye follows the taper from cuticle to tip without getting pulled sideways by stones, foil, or busy detail. That makes the fingers look longer, even on a medium set.
Quick style notes
- Best length: 8 to 12 mm past the fingertip
- Best finish: Soft matte, not dusty chalk matte
- Salon note: Ask for two thin coats of black gel, then matte top coat
- Best pairing: Silver jewelry, monochrome outfits, sharp tailoring
Best move: keep the edges crisp and the rest bare—no accent nail, no glitter, no apology.
2. Glossy French Tips on a Matte Black Base
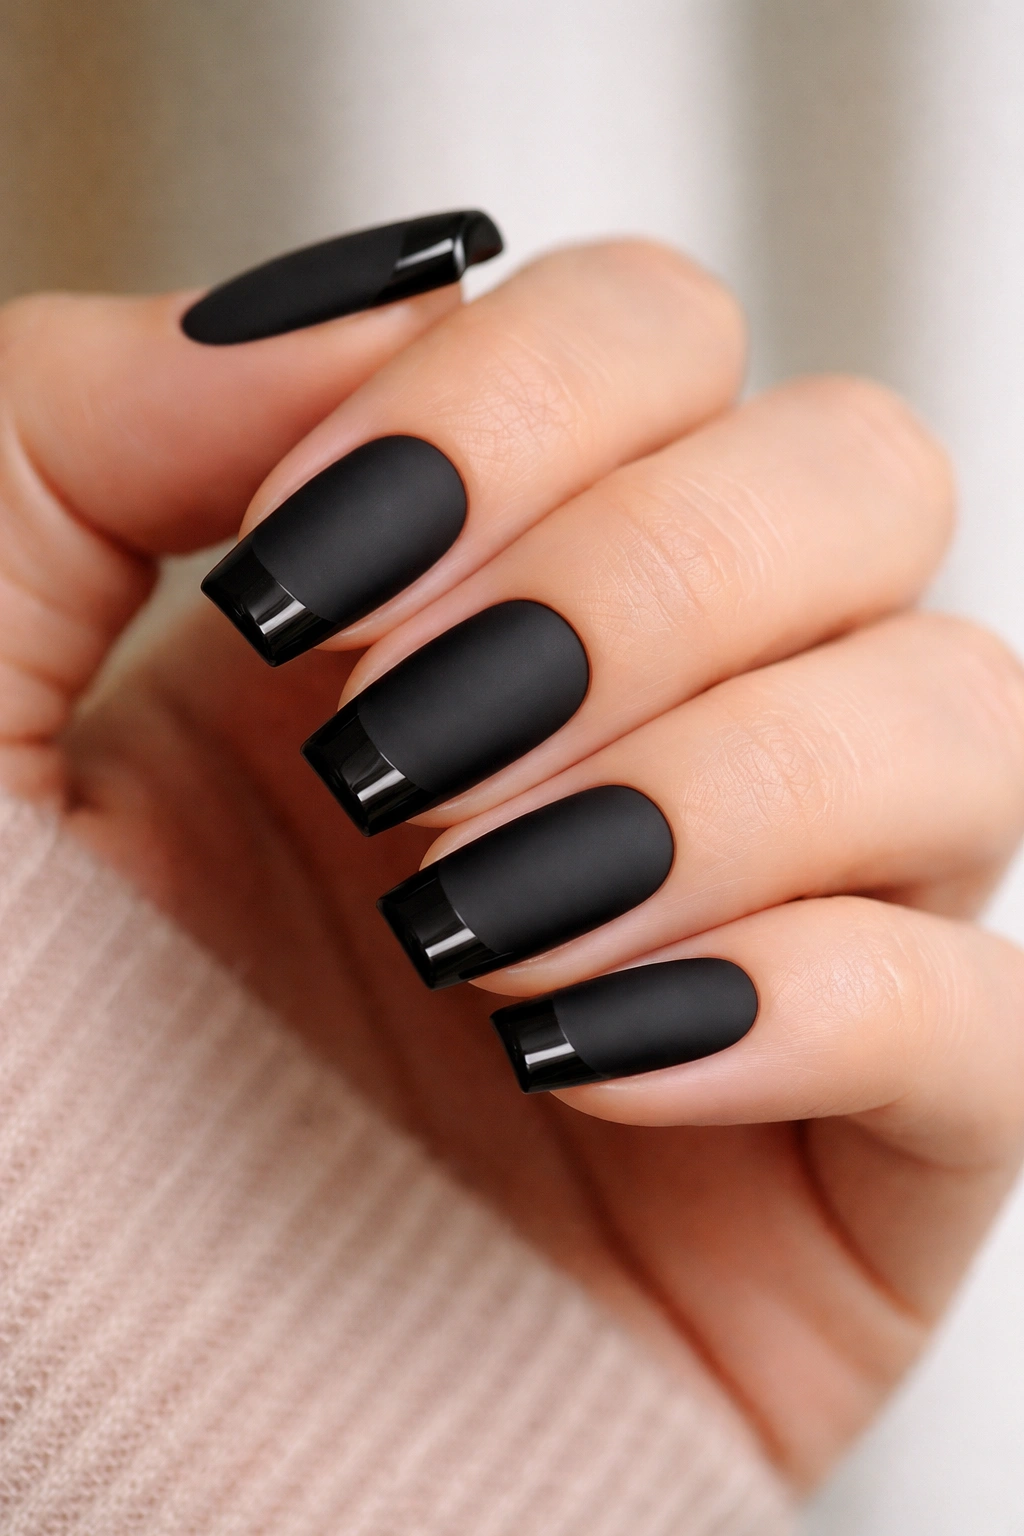
What looks sharper than black matte? Black matte with a glossy black tip.
The contrast is quiet, but your eye catches it right away because light hits the tip differently. You get that French manicure structure without the usual nude-and-white softness. I like this version for anyone who wants detail without breaking the all-black mood.
Keep the glossy line thin if the nails are short. Around 2 mm is enough. On longer ballerina nails, the tip can widen to 3 or 4 mm without swallowing the shape. A deep smile line looks dressier; a straighter tip looks cleaner and more modern.
Placement matters here. If the glossy French sits too low, the nail looks shorter. If it curves too hard, the shape can start leaning almond instead of ballerina. Ask for a French that mirrors the flat edge and keeps the corners crisp.
A black-on-black French also wears well between appointments. You’re not dealing with chipped white tips or obvious color contrast. You’re getting texture contrast, and that tends to age in a calmer way. If you want nail art that whispers instead of shouts, this is one of the smartest picks on the list.
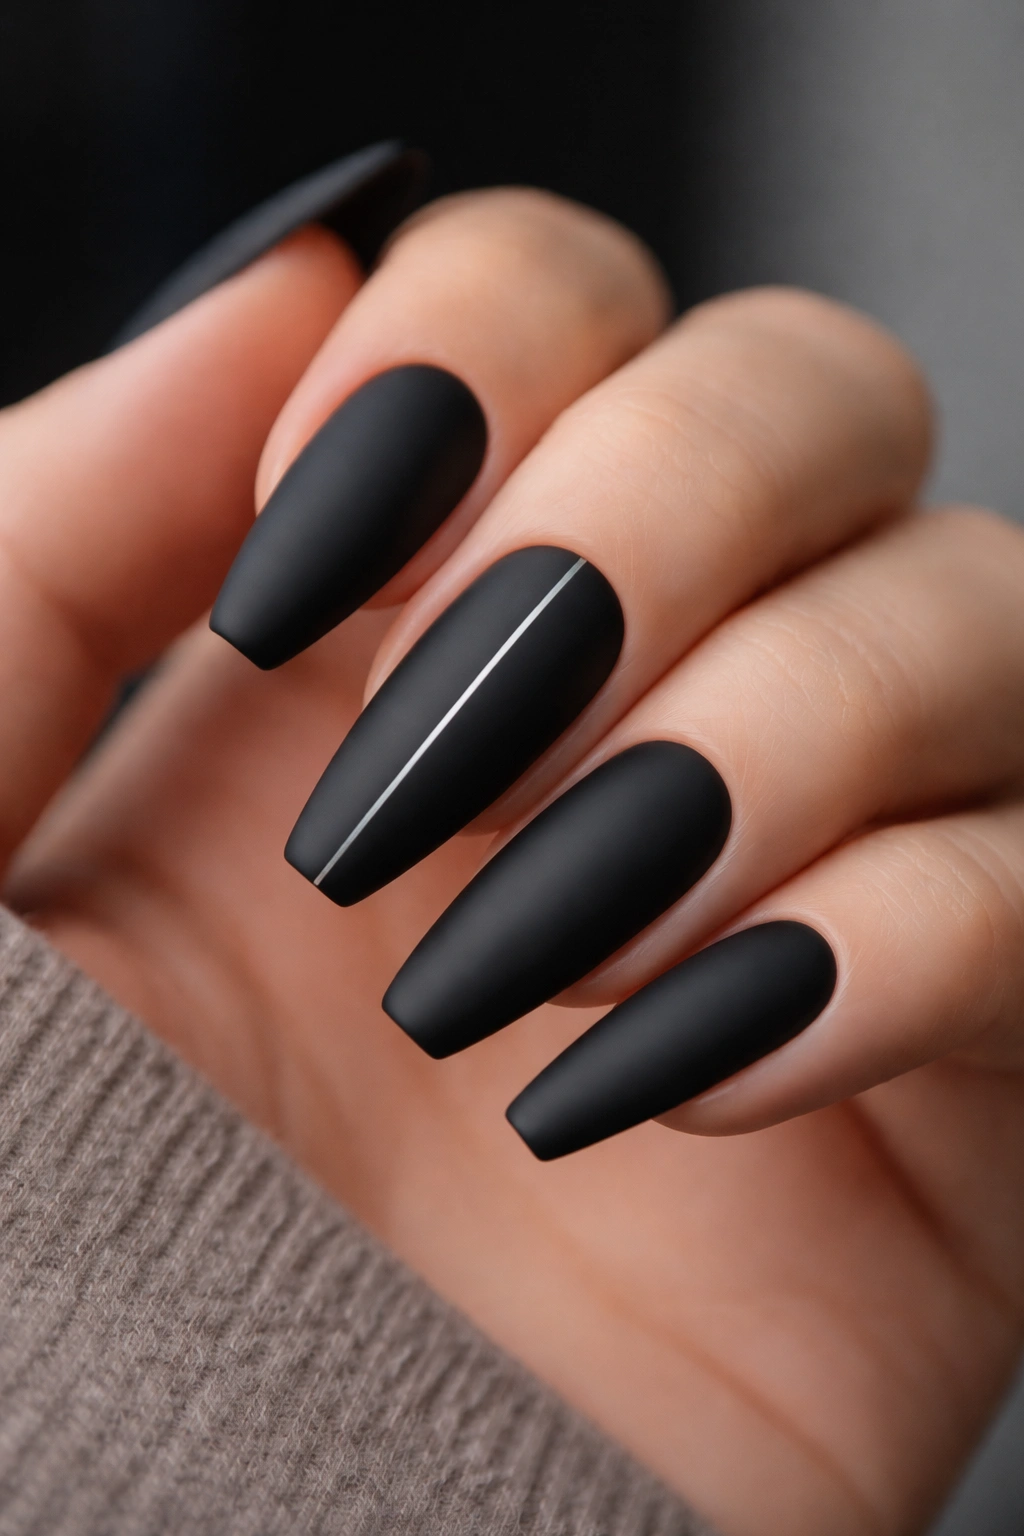
3. Thin Side-Stripe Negative Space
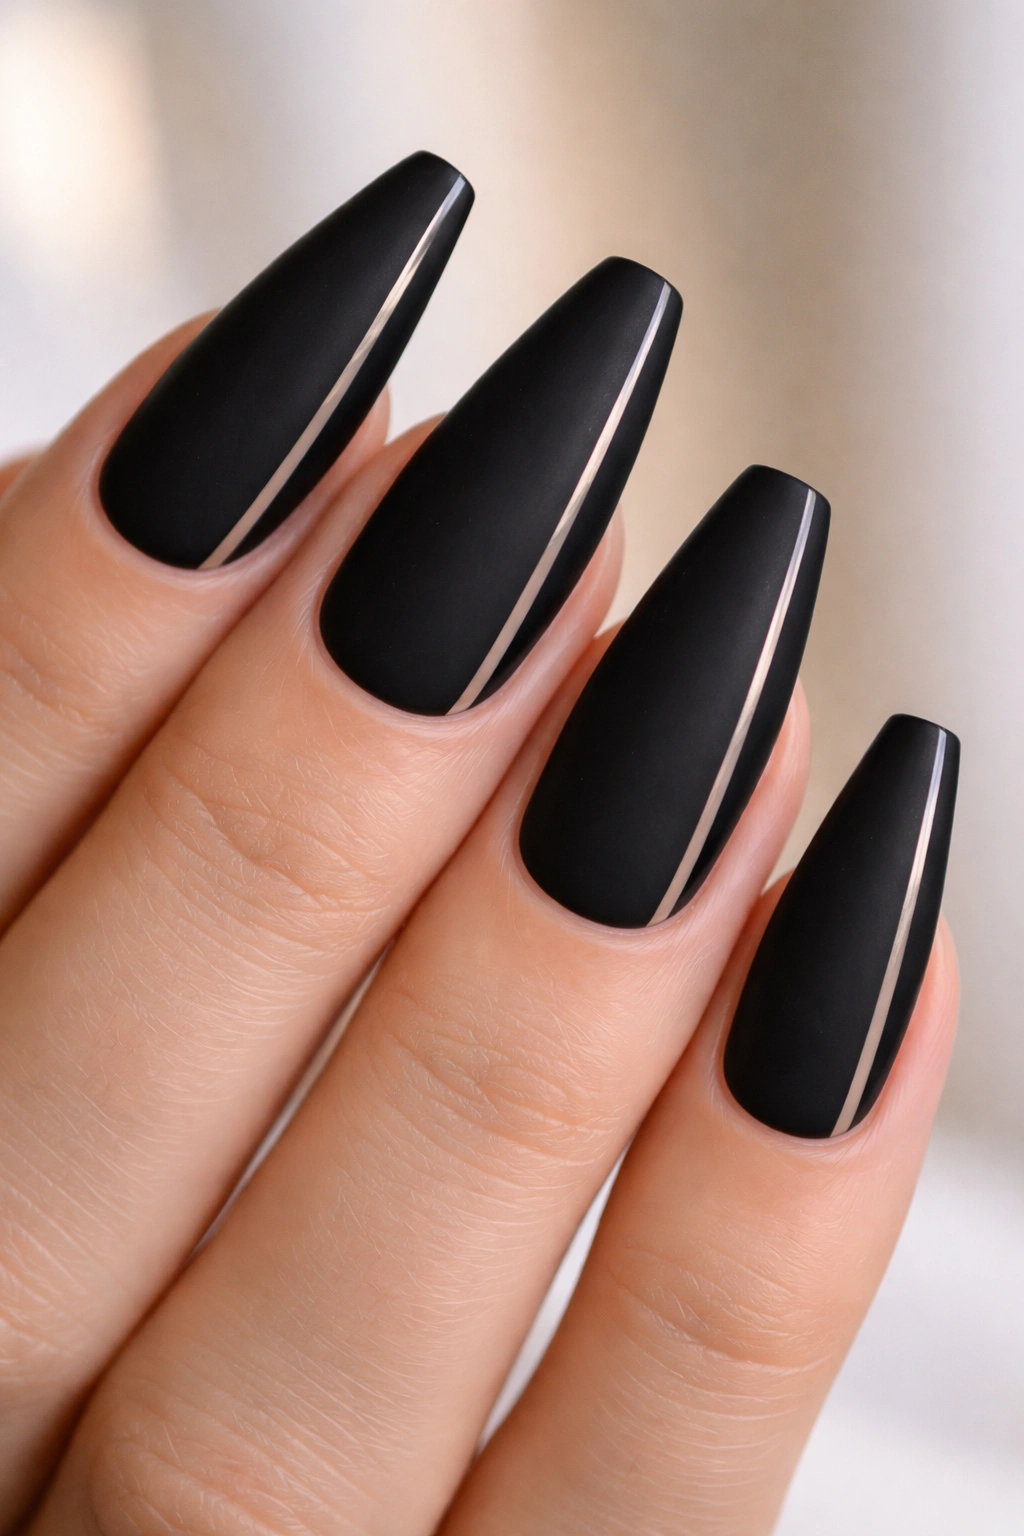
Why does a 1 mm bare stripe make such a difference? Because it changes the proportions of the nail without changing the base color.
A side-stripe negative space design leaves a slim vertical strip along one outer edge of the nail, with matte black covering the rest. On wider nail beds, it creates a longer, leaner look. On medium or long ballerina nails, it adds a tailored edge that feels almost architectural.
You do need a steady hand for this one. A wobbly stripe ruins the point.
How to wear it
Keep the stripe narrow—1 to 1.5 mm is enough—and place it on the same side of each nail for a cleaner set. Some techs use striping tape to block the line before painting. Others freehand it with a liner brush and clean the edge with acetone on a detail brush. Either way, the border has to stay sharp.
This style works best when the natural nail underneath looks healthy and even in tone. If discoloration or strong ridges are visible, a sheer nude base under the clear strip can tidy things up without losing the negative-space effect.
The mood is spare, a little severe, and polished in that cold-blooded way matte black does so well.
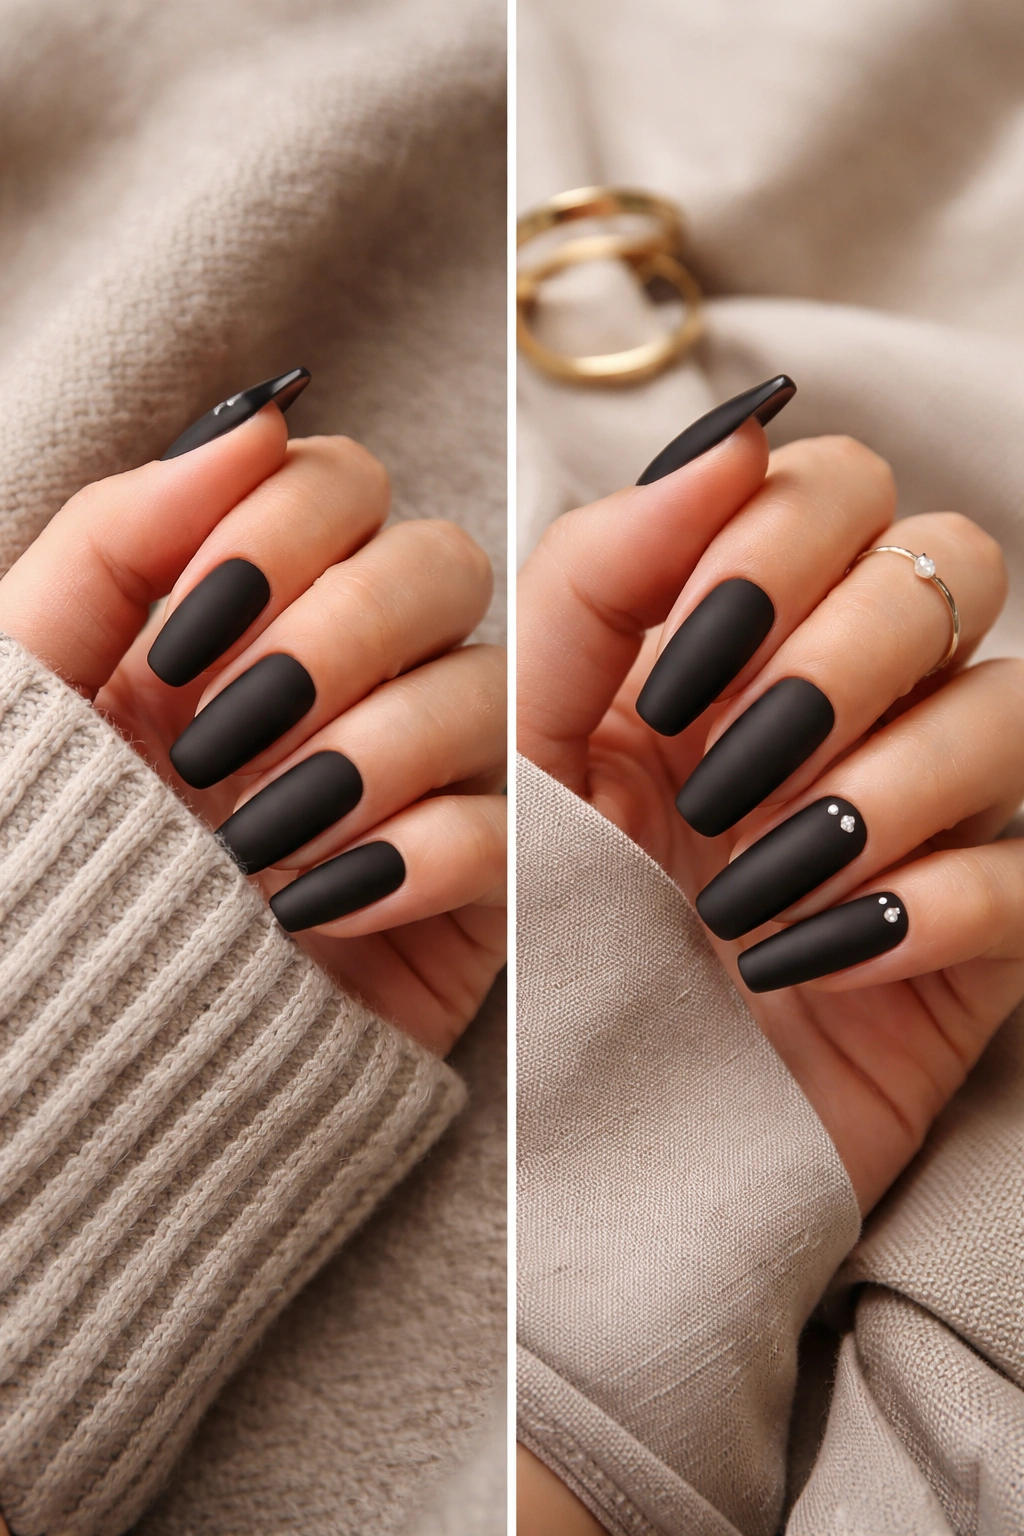
4. Reverse Half-Moon at the Cuticle
Picture a matte black nail with a tiny bare crescent hugging the cuticle line. No glitter. No gems. Just a deliberate little gap that makes the whole set feel lighter.
The reverse half-moon design works because it gives the eye a resting point near the base of the nail. On a full black manicure, that matters. Without it, long sets can start looking heavy. With it, the design breathes.
A clean half-moon should follow the natural curve of the cuticle and sit about 1 to 2 mm away from the skin. Any farther and it starts looking grown out instead of intentional.
Here’s where it earns extra points:
- Growth is less obvious after the first week
- The cuticle area looks cleaner from a distance
- Shorter ballerina nails gain detail without losing shape
- The design still feels office-friendly if you keep the moon slim
I prefer this look on medium lengths with a soft, even apex. If the product near the cuticle is too thick, the moon line looks bulky and the crispness disappears. Done well, though, it feels like the manicure version of precise tailoring.
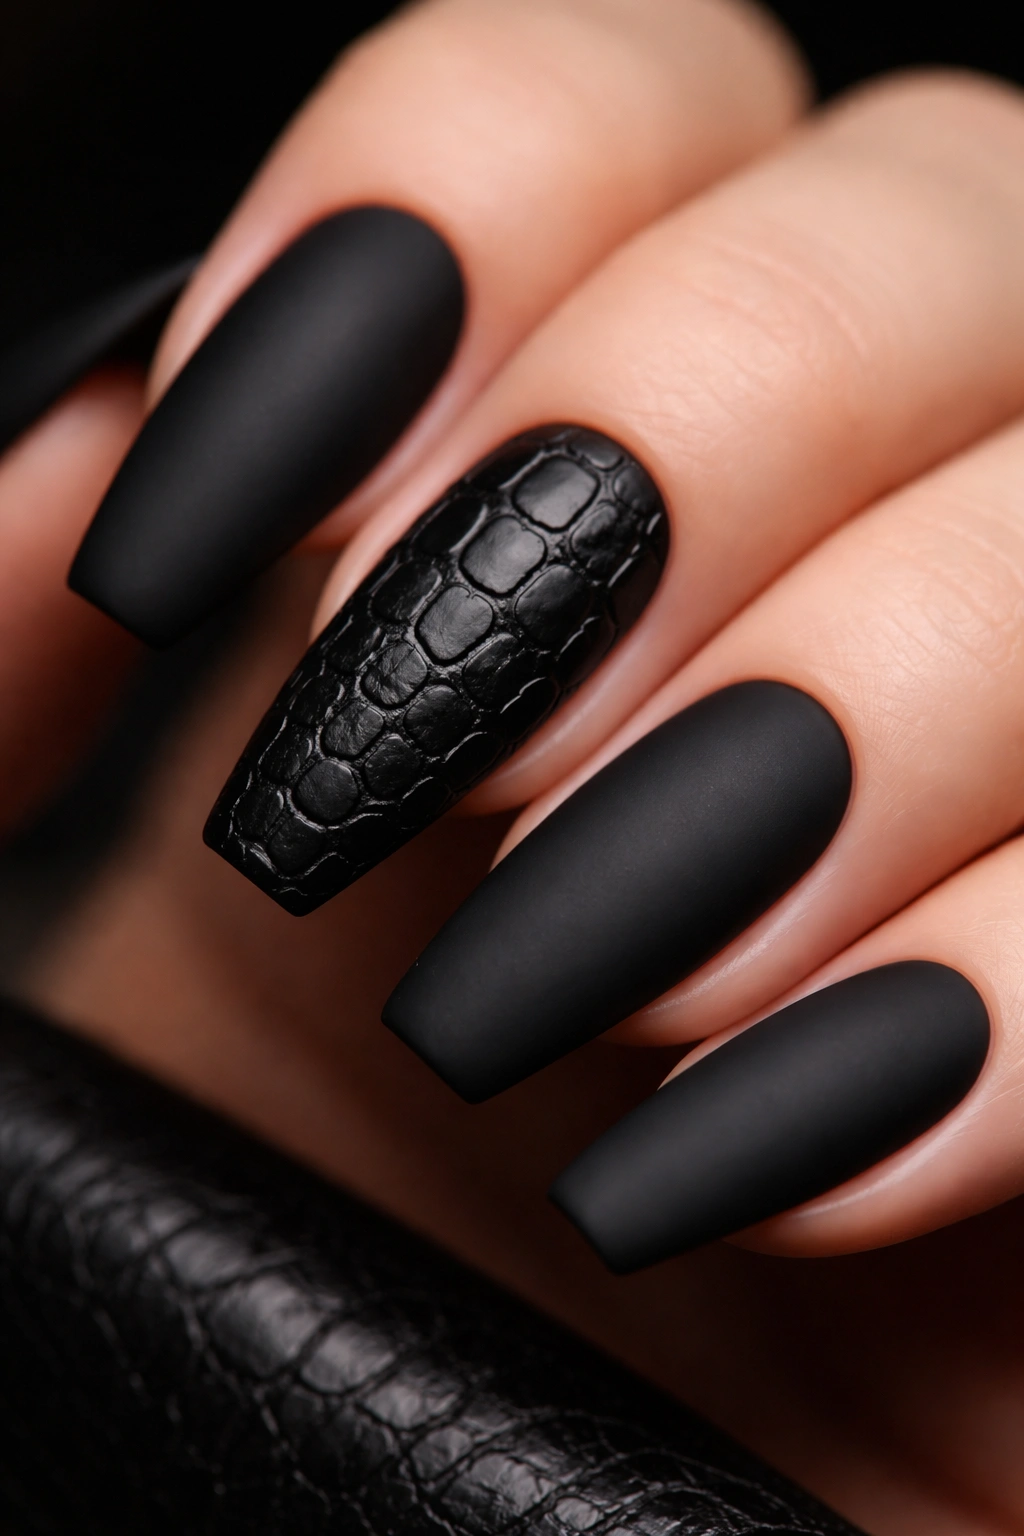
5. Black-on-Black Croc Texture Accent
This one has more attitude. Still sleek, though.
A croc-texture accent nail uses raised gel or builder gel to create a reptile pattern, then covers it in matte black so the design shows through texture instead of color. That last part is what keeps it from turning gaudy. You see the pattern because light hits the high and low spots differently, not because someone threw three finishes and six charms at one hand.
I would not put croc texture on all ten nails. One accent nail per hand is enough. Two if the rest of the set is bare matte black and the shape is medium length. Any more than that and the manicure gets busy fast.
The texture should stay low-profile. Think subtle embossing, not thick blobs sitting on top of the nail. A good tech can map the pattern with a fine brush, cure it, then matte top coat the whole thing so the surface still feels refined when you run a fingertip across it.
This is a strong choice if you wear black often and want something moodier than a plain set, but still controlled. No sparkle. No extra color. Just texture and shadow.
6. Diagonal Gloss Bands Across Matte Black
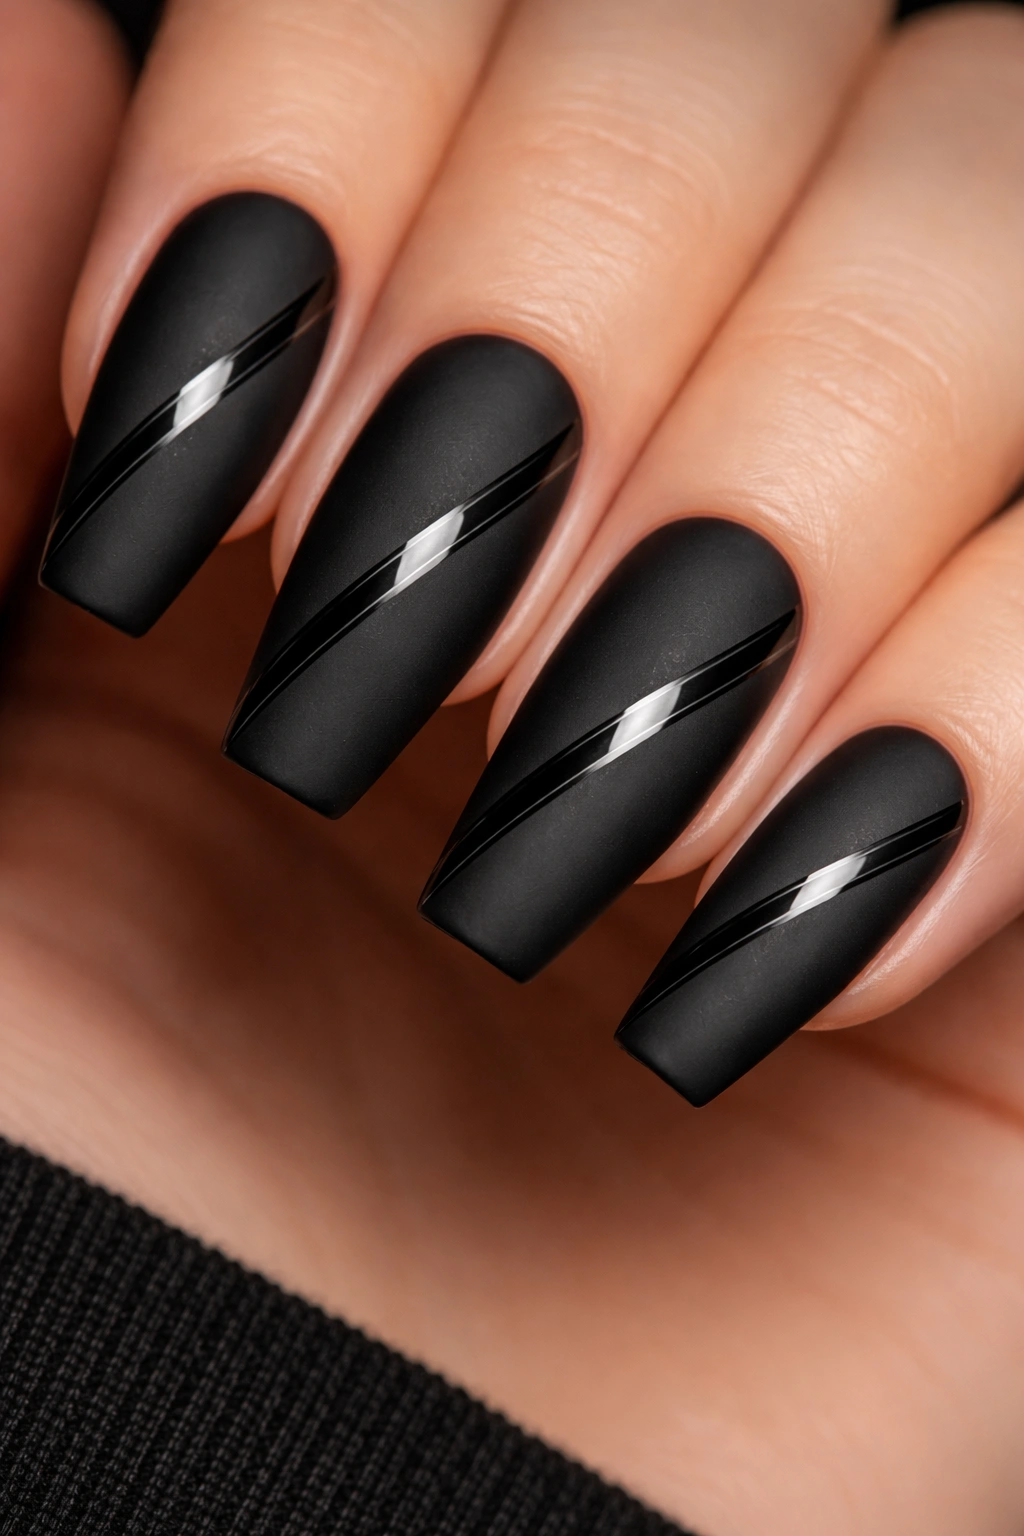
Unlike a French tip, which cuts across the nail in one predictable place, a diagonal gloss band changes the direction of the whole manicure. It pulls the eye from one sidewall to the other and makes the ballerina shape feel longer.
You can place the band near the tip, across the center, or in a stacked pair if the nail is long enough. The cleanest version uses a 30- to 40-degree angle and keeps the glossy strip around 2 mm wide. Thicker than that, and it starts reading like color blocking.
This design earns its keep on longer nails. A short set doesn’t always leave enough room for the angle to look intentional. On a long ballerina shape, though, that slanted line adds movement without softening the silhouette.
Best on:
- Medium-long to long lengths
- Slim or average-width nail beds
- Monochrome wardrobes
- Clients who want art with zero sparkle
There’s also a nice practical perk. Because the gloss is raised only by shine—not by stones or foil—you don’t have extra bulk catching on fabrics or hair. That matters more than people admit. Nail art can look sharp and still be easy to live with.
7. Charcoal-to-Black Matte Ombre

A matte ombre in the same color family has a softer edge than most black nail art, which is why it works. You’re not breaking up the set with a hard line. You’re letting charcoal fade into deep black so the shape stays long and smooth.
The fade should stay subtle
This is not the place for a dramatic gray-to-black jump. The best matte ombre sets use shades that sit close together—think soft charcoal, smoked graphite, and ink black. Once the matte top coat goes on, the fade looks blurred and velvety instead of stripey.
Airbrush gives the smoothest result. A sponge blend can work, too, though it needs patience and thin layers to avoid a bulky surface. If you’re getting gel, ask for the fade to start around the middle of the nail and deepen toward the tip. That keeps the free edge sharp and hides wear better than a light tip would.
Where it shines
This one is strong on long ballerina nails where the gradient has room to stretch out. On a shorter set, keep the fade tight or it turns muddy.
Best call: pair the ombre with plain matte black on the thumbs or ring fingers so the set has some visual rhythm instead of ten identical fades.
8. Gunmetal Micro-Stud Accent
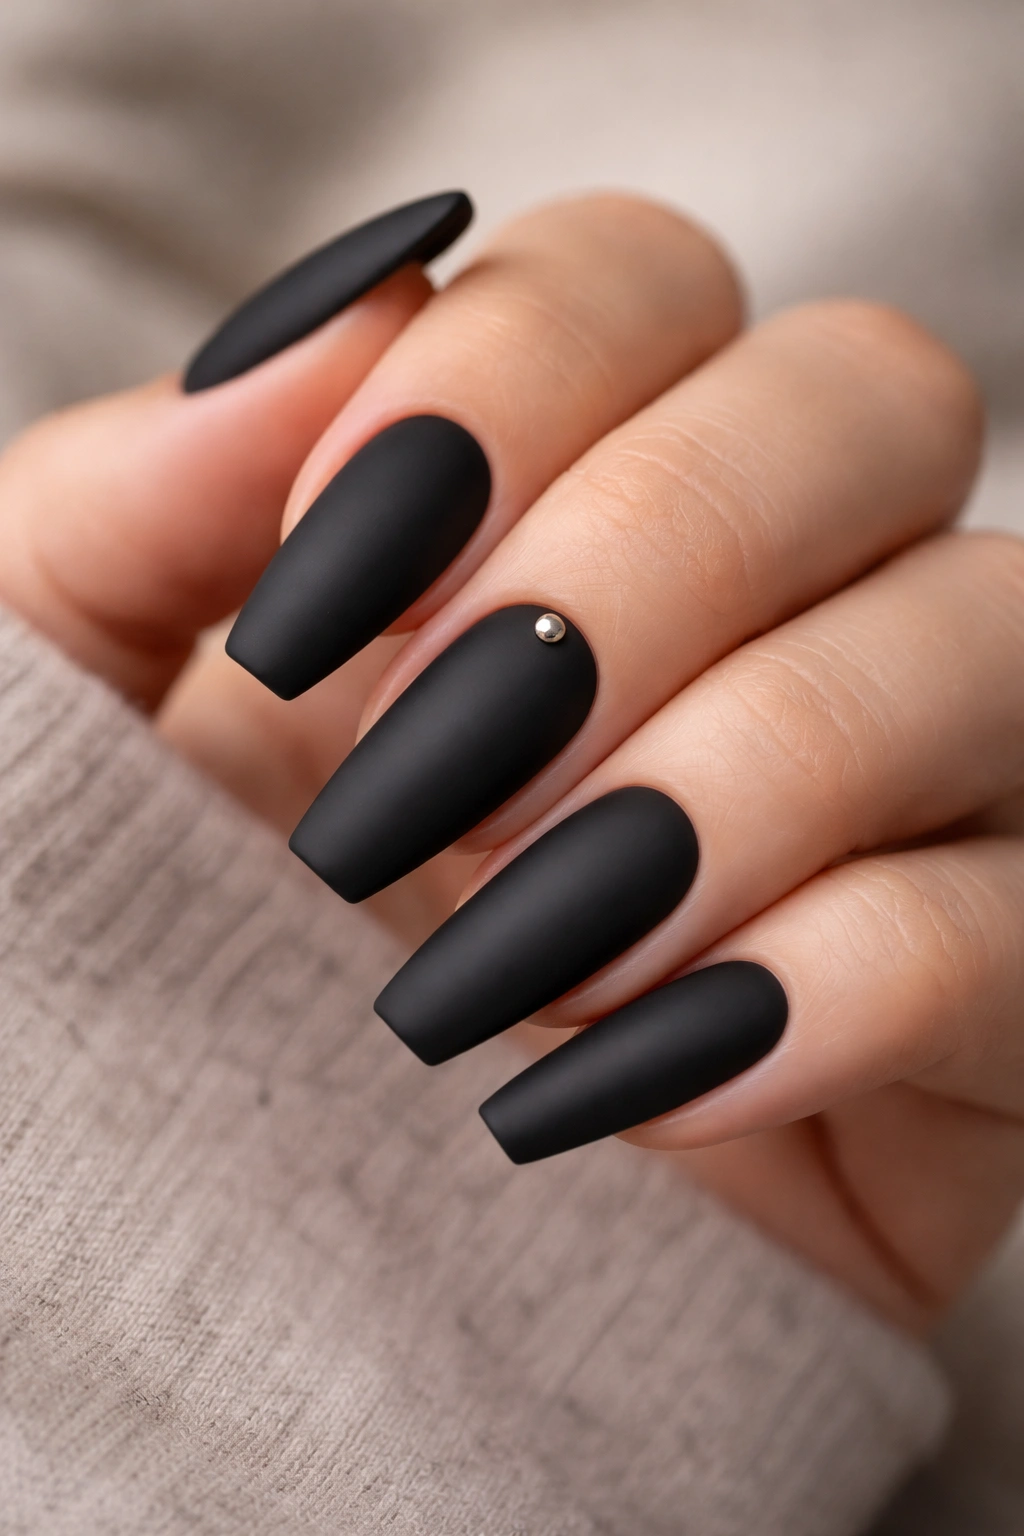
A single gunmetal stud can do more for a black matte set than a full rhinestone cluster ever will. I’m firm on that.
The trick is scale. Use one tiny round or square stud—around 1.5 to 2 mm—placed near the cuticle on one accent nail per hand. Ring finger is the safe choice. Middle finger works if the set is long and clean. Anything larger starts tipping the manicure away from sleek and toward costume.
This detail works because the metal catches a small hit of light against the flat matte base. Your eye lands on it, then moves on. That’s enough. You don’t need a whole constellation of hardware.
Placement matters if you use your hands hard. A cuticle placement sits lower on the nail and tends to snag less than a stud near the tip. The tech should seat it into builder gel or a gem adhesive gel, then seal the edges without flooding the metal. If the stud perches on top, it won’t last.
I like gunmetal more than silver here because it keeps the set dark and tight. Silver can work too, but gunmetal feels closer to the polish—less contrast, more edge.
9. Thin Silver Pinstripe Over Matte Black
A silver pinstripe is one of those designs that can look expensive or cheap depending on one thing: line control. If the stripe is thin, straight, and placed with purpose, the manicure looks crisp. If it’s thick or wobbly, the whole set falls apart.
Ask for a stripe no wider than 0.5 to 1 mm. That’s it. One vertical line down the center works on medium-long nails. One diagonal line near the outer third looks a bit sharper. I would skip multiple stripes unless the set is long enough to give each one breathing room.
The finish matters, too. Chrome silver hits harder than metallic silver gel paint. For a sleeker set, I’d pick the softer metallic line. Chrome can dominate matte black if the stripe gets even a hair too wide.
This style has a nice fashion-editor feel to it—strict, clean, and not trying too hard. It also gives you room to tie in jewelry. Silver hoops, a watch case, a brushed metal bag clasp—small stuff, but it helps the whole look feel connected.
One caution: silver lines show placement mistakes fast. Go to a tech with a good detail brush hand or use striping tape if you’re doing them at home.
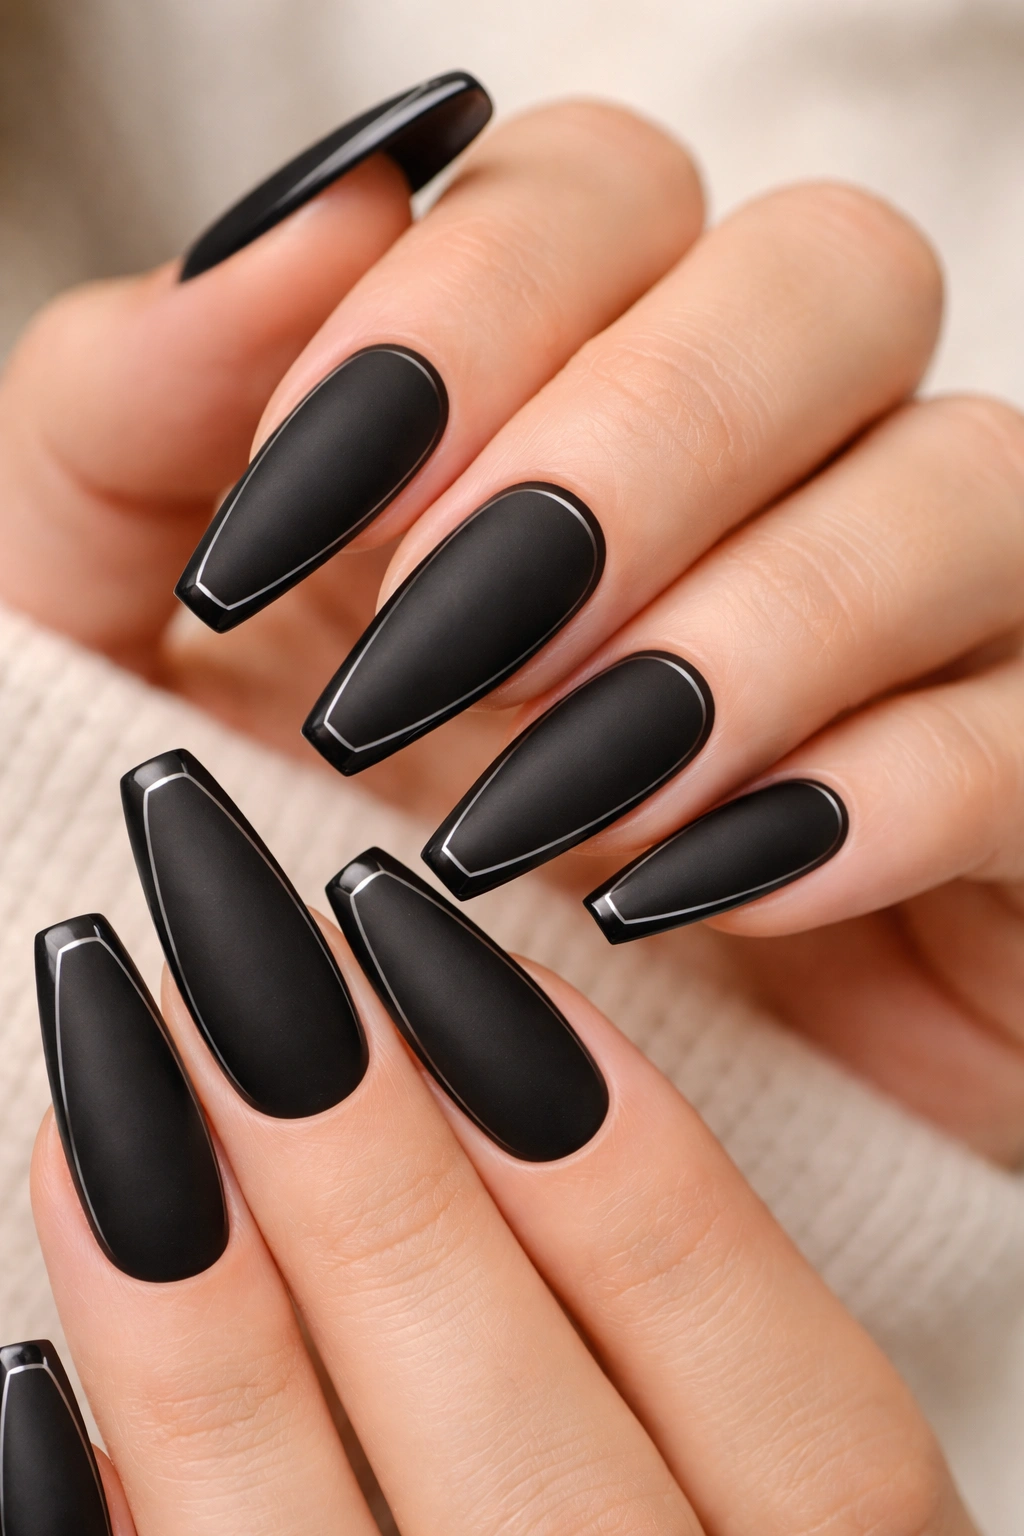
10. Double French Frame
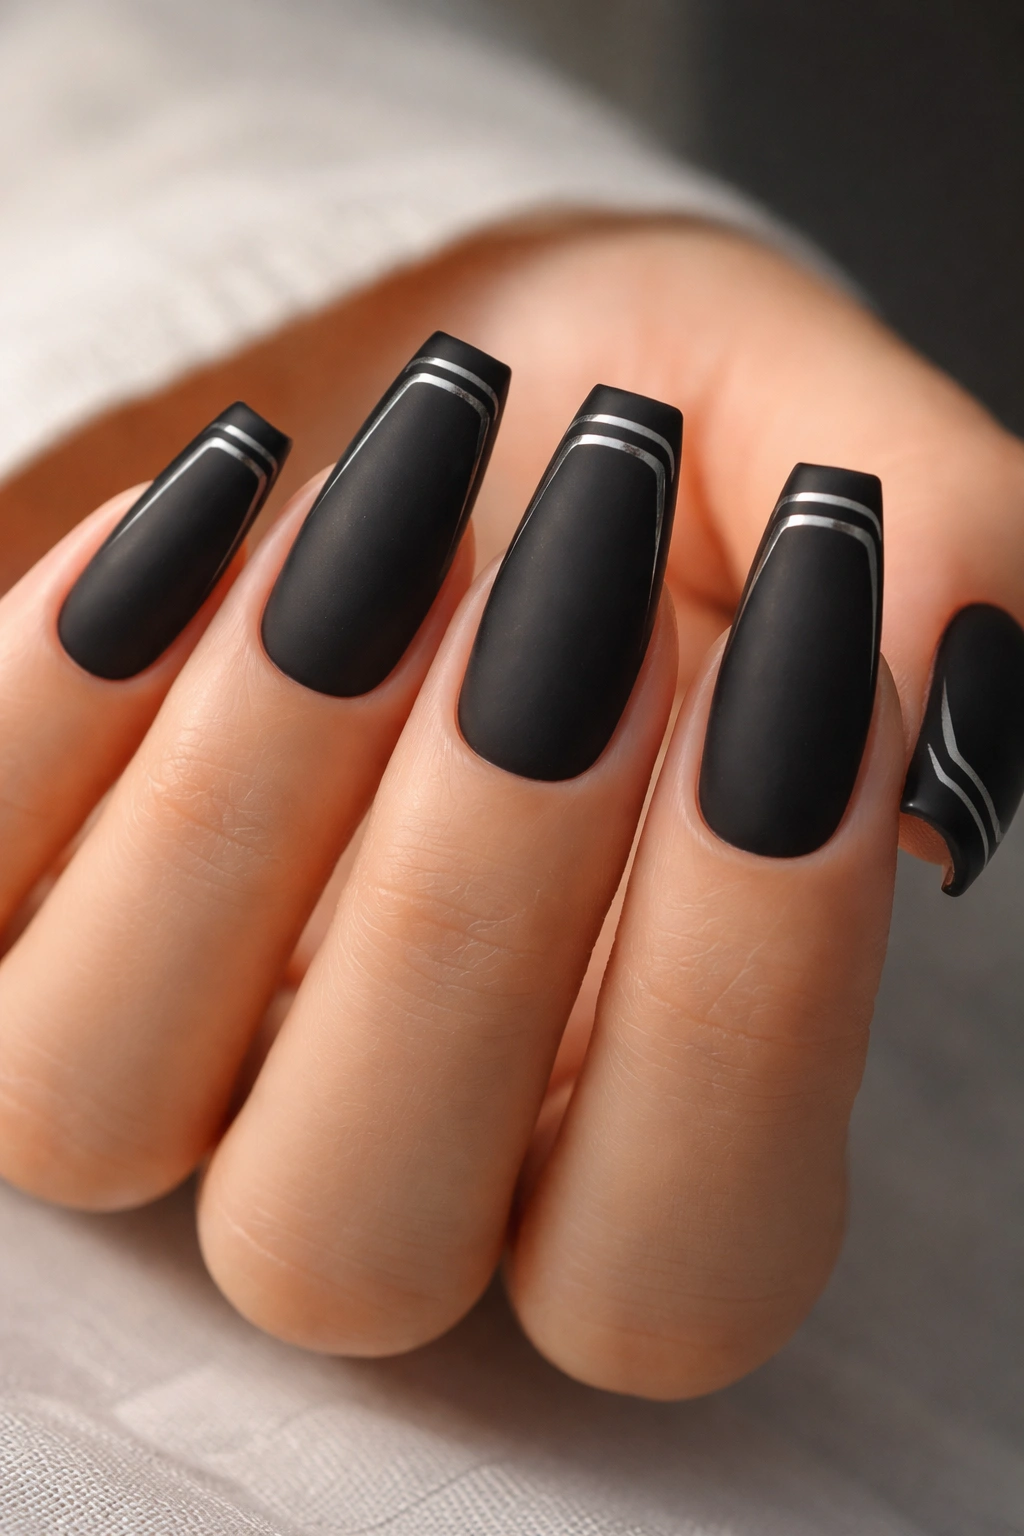
Start with a matte black base, then add two fine lines around the tip area instead of one. That double frame can be done in gloss black for a tonal look or in metallic silver for more contrast. Either way, it gives the nail structure without filling it up.
This design works best when the lines follow the flat free edge and echo the taper of the sidewalls. Think of it as outlining the architecture you already have. A thick, curved French would fight the ballerina shape. A slim double frame supports it.
I like the tonal version more than the metallic one. Gloss on matte is quieter, and that restraint keeps the manicure useful across more outfits and settings. Silver is better if you want the nails to be a stronger accessory.
A few details make or break it:
- Keep each line under 1 mm
- Leave a tiny gap between the two lines so they read separately
- Use this on medium to long nails, not short
- Keep the rest of the nail plain
This is one of the smartest ways to make black matte ballerina nails look custom without drifting into heavy nail art.
11. Smoky Black Marble Accent Nail
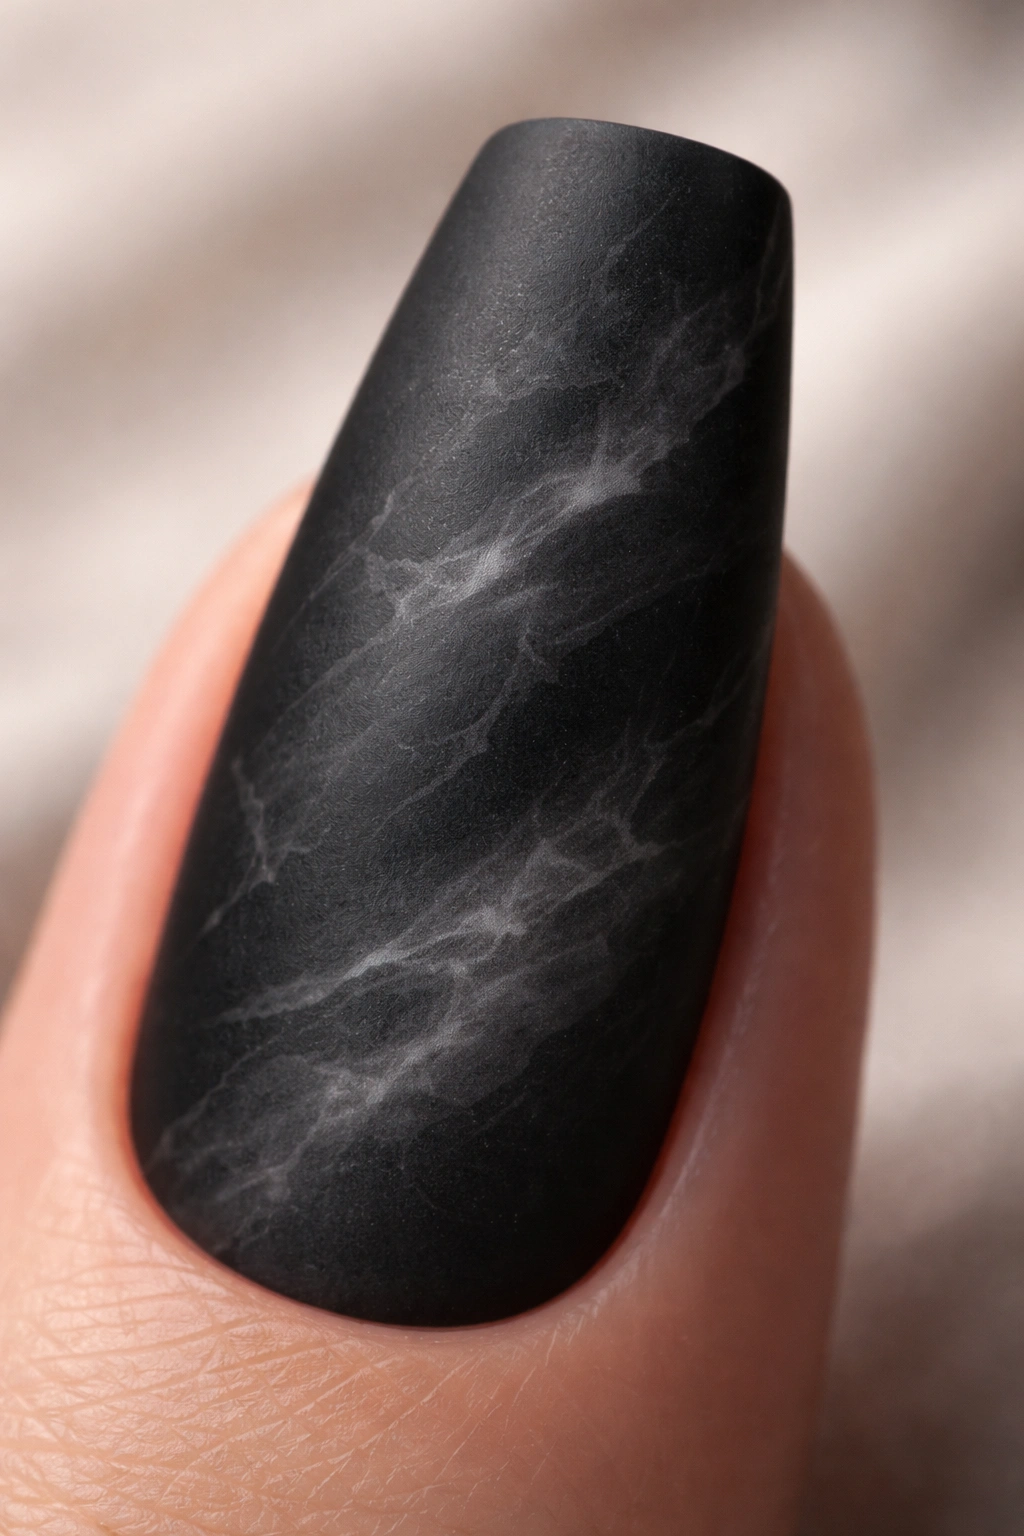
Not all marble needs white veins and high contrast. A smoky black marble accent nail uses layers of charcoal, black, and a whisper of gray to create movement that stays inside the dark palette.
On a matte finish, the marble takes on a stone-like look. The sharp shine drops away, and the cloudy swirls look softer, almost dusty. I would use this on one nail per hand, maybe two if the rest of the set is plain matte black and the marble pattern stays low-contrast.
The key is restraint in the veining. Thick white lines wreck the mood. What you want are soft smoke trails, blurred patches of charcoal, and maybe one slim glossy black vein left un-matted if you want depth. That tiny finish change reads smarter than adding extra color.
Medium-long nails give the pattern room to spread out. On short ballerina nails, marble can get cramped and start looking accidental. Long nails let the smoke move diagonally, which flatters the taper.
This one leans a little moodier, a little artsier. Still sleek. Still black. Just less strict than a solid set.
12. Center-Slit Negative Space Panel
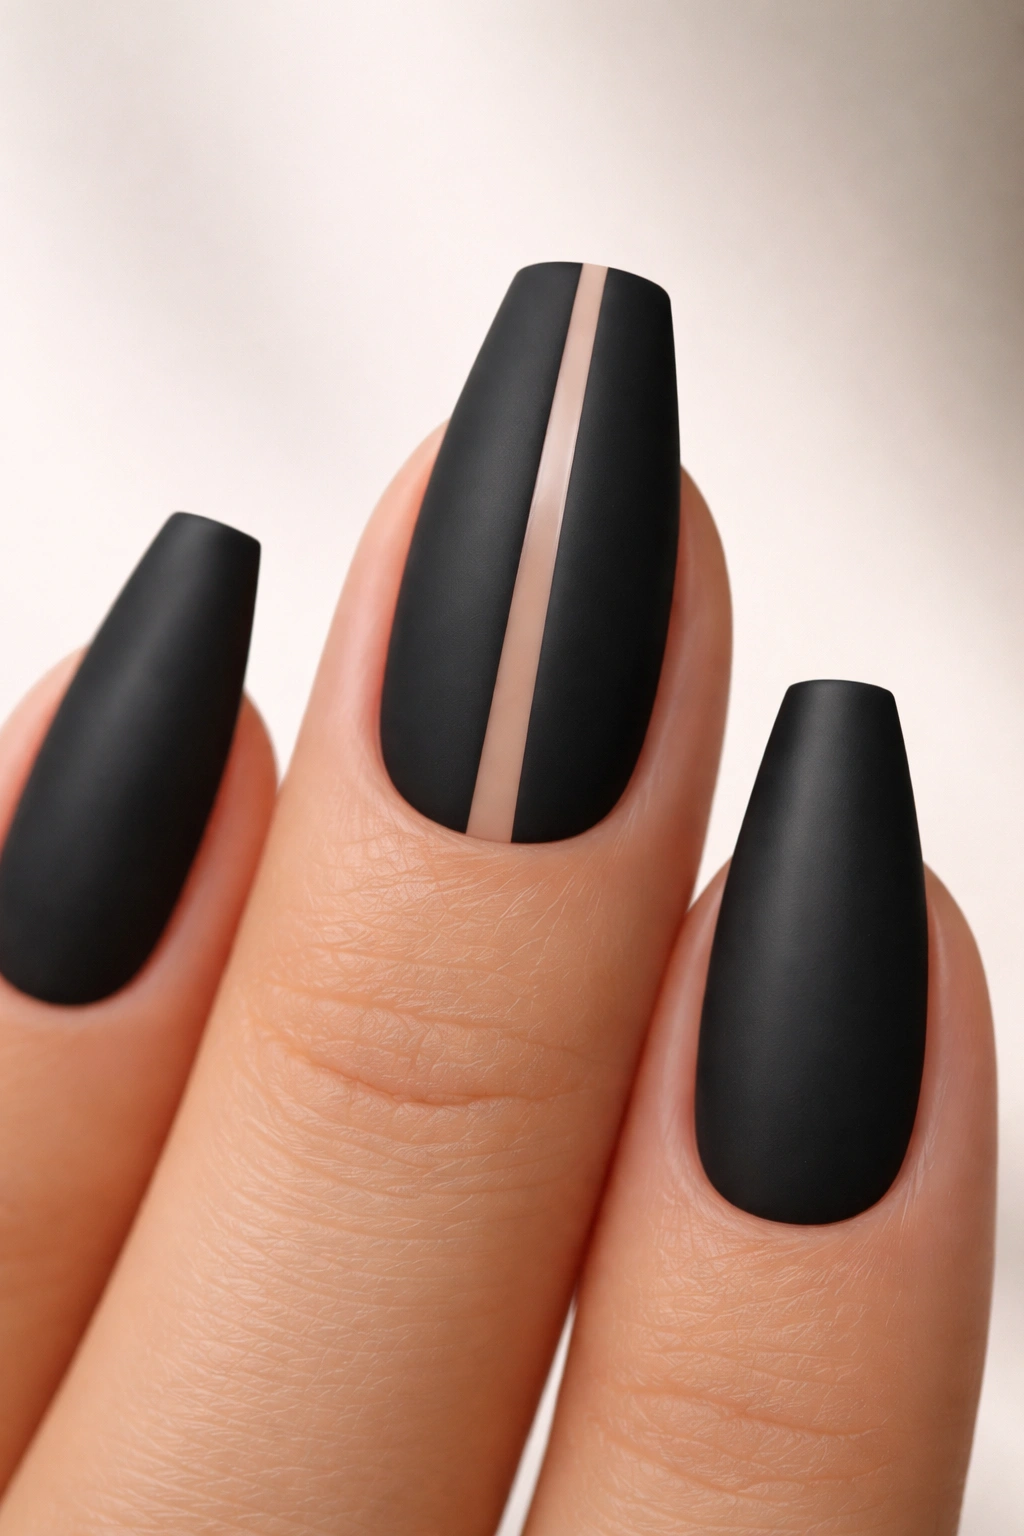
This design cuts a narrow bare strip down the center of the nail, with matte black on both sides. It sounds simple. It isn’t forgiving.
A center-slit panel works because it exaggerates length. Your eye follows the vertical opening from cuticle to tip, and the side panels make the nail bed look narrower. On broader nails, that can be a small miracle.
The negative space should stay tight—1 to 2 mm wide—and dead center. If it drifts off line, you’ll see it from every angle. Some techs leave the strip fully bare. Others put a sheer nude beneath it so the center looks cleaner and more uniform. I lean toward the sheer nude option. It tidies the look without losing the cutout effect.
This style suits medium and long ballerina shapes best. A short set can still wear it, though the slit may need to stop before the tip so the free edge stays strong.
It has a graphic, almost runway feel. Sharp line. Strong symmetry. No fluff. If you like your manicure to look tailored rather than decorative, this one earns a place high on the list.
13. Short-Length Matte Black Ballerina Set
Not everyone wants long nails. Fair. You can still get the ballerina feel on a shorter set if the file work is disciplined.
A short ballerina usually sits around 4 to 6 mm past the fingertip. That gives the nail enough length to taper and flatten at the end without looking like a blunt square. Done right, it has the same sleek mood as a long coffin set, only cleaner and easier to wear day to day.
This is the version I’d point toward if you type all day, handle contacts, button shirts in a hurry, or just don’t want your nails entering the room before you do. Matte black on a short ballerina shape looks sharp in a stripped-back way. No one can accuse it of trying too hard.
A few things matter more on short sets:
- Keep the taper gentle, not dramatic
- Avoid chunky 3D art
- Use thinner French lines, stripes, or moons if you add detail
- Ask your tech not to overbuild the tip, since thickness kills the sleek profile
Short black matte ballerina nails have a blunt charm. Less drama. More control.
14. Tonal Chevron Panels in Matte and Gloss
A tonal chevron design uses V-shaped panels in black matte and black gloss so the pattern shows through light, not color. That contrast is subtle, but the geometry gives the manicure bite.
The best version places the chevron in the upper half of the nail, pointing toward the tip. That direction matters. It reinforces the ballerina shape and makes the nail look longer. Flip the V the other way and the set starts feeling heavier near the center.
You can go with one large chevron on an accent nail or a fine layered chevron if the nails are long enough. I’d keep the rest of the set plain matte black. The design has enough structure on its own.
A liner brush and steady placement are non-negotiable here. Clean points, crisp edges, even spacing. Matte top coat also needs to stay smooth, because any texture or wrinkling around the chevron line ruins the light contrast that makes the design worth doing.
This is a strong option if you like geometry but don’t want the manicure to turn loud. It reads sharp from close up, then almost disappears from a distance until the light shifts and the pattern shows itself.
15. Glossy Perimeter Outline on Matte Black
A glossy perimeter outline is one of my favorite black-on-black ideas because it highlights the whole nail shape at once. Instead of putting art in the middle, you run a slim glossy border around the edge of the matte black nail—sidewalls, tip, and sometimes the cuticle line too.
That border should stay thin. About 0.5 to 1 mm is enough. Any wider and the nail starts looking boxed in. A full perimeter on every nail looks sharp on long ballerina sets. On medium lengths, I like it best on two or four nails with the rest left solid matte.
This design flatters a well-filed set because it literally traces the work. If the sidewalls are uneven, the outline announces it. If the shape is clean, the manicure looks precise from every angle. That’s why I keep coming back to it. It respects the structure instead of covering it up.
You can stop the border before the cuticle if you want a softer finish. You can frame the whole nail if you want more edge. Both work, though the full outline has the stronger editorial punch.
Minimal design. Maximum payoff.
Choosing the Right Version for Your Nail Length and Lifestyle
A design can look sharp on a photo card and still be wrong for your week. Length, hand use, and maintenance tolerance matter more than most trend roundups admit.
If you use a keyboard for hours, handle kids, work with boxes, or wash your hands every twenty minutes, go for a medium or short ballerina set with fewer raised details. Solid matte black, a thin glossy French, a side stripe, or a reverse moon will wear more calmly than studs or texture. If your nails are an accessory first and a tool second, then the longer shapes and graphic details make more sense.
Here’s a quick way to narrow it down:
- Low maintenance: classic full matte, short ballerina, glossy French
- Best for longer nails: diagonal gloss bands, double French frame, center-slit panel
- Best accent options: croc texture, smoky marble, gunmetal stud
- Sharpest black-on-black ideas: glossy perimeter outline, chevrons, tonal French
Skin tone and outfit color matter less than people say. Matte black is more about finish and proportion than undertone. What does matter is whether the set suits your pace. A manicure you can’t live in will sit wrong on your hands no matter how good it looked in the chair.
Final Thoughts
Black matte ballerina nails work best when the shape stays clean and the detail stays disciplined. That’s the whole game. A flat tip, even taper, and smooth matte finish will carry more style than a pile of extras ever could.
If you want the safest entry point, start with a solid matte black set or a glossy black French tip. If you want something sharper, the center-slit panel, tonal chevron, or perimeter outline gives you that tailored edge without leaving the dark palette.
And if your nail tech is good with line work, matte black is one of the strongest canvases you can hand them. It asks for precision—and rewards it.
