

Your wedding day deserves nails that make a statement without screaming for attention. Coffin nails — that elegant tapered shape that’s wider at the base and dramatically pointed at the tip — have become the go-to choice for brides and wedding guests who want something sophisticated, modern, and utterly wedding-worthy. The coffin shape is particularly flattering on long nails because the elongated silhouette creates a graceful, elongated look at your fingertips that photographs beautifully and catches light in all the right ways.
What makes coffin nails perfect for weddings specifically is their ability to balance drama with elegance. Unlike stiletto nails, which can feel aggressive, or almond shapes, which read more casual, coffin nails hit that sweet spot where you look polished, intentional, and decidedly bridal. They work equally well whether you’re going full classic white-on-white, incorporating glitter and gemstones, or choosing a sophisticated neutral with interesting texture. The shape itself is already interesting enough that it doesn’t need to rely on overly trendy designs to feel current and special.
The real magic happens when you pair the coffin silhouette with wedding-appropriate color choices and details. Whether you’re drawn to the timeless elegance of a French ombre, the romantic softness of blush and ivory, the bold glamour of deep metallics, or even a subtle nude base with meaningful accent nails, there’s a coffin nail design here that will feel authentically you on your wedding day.
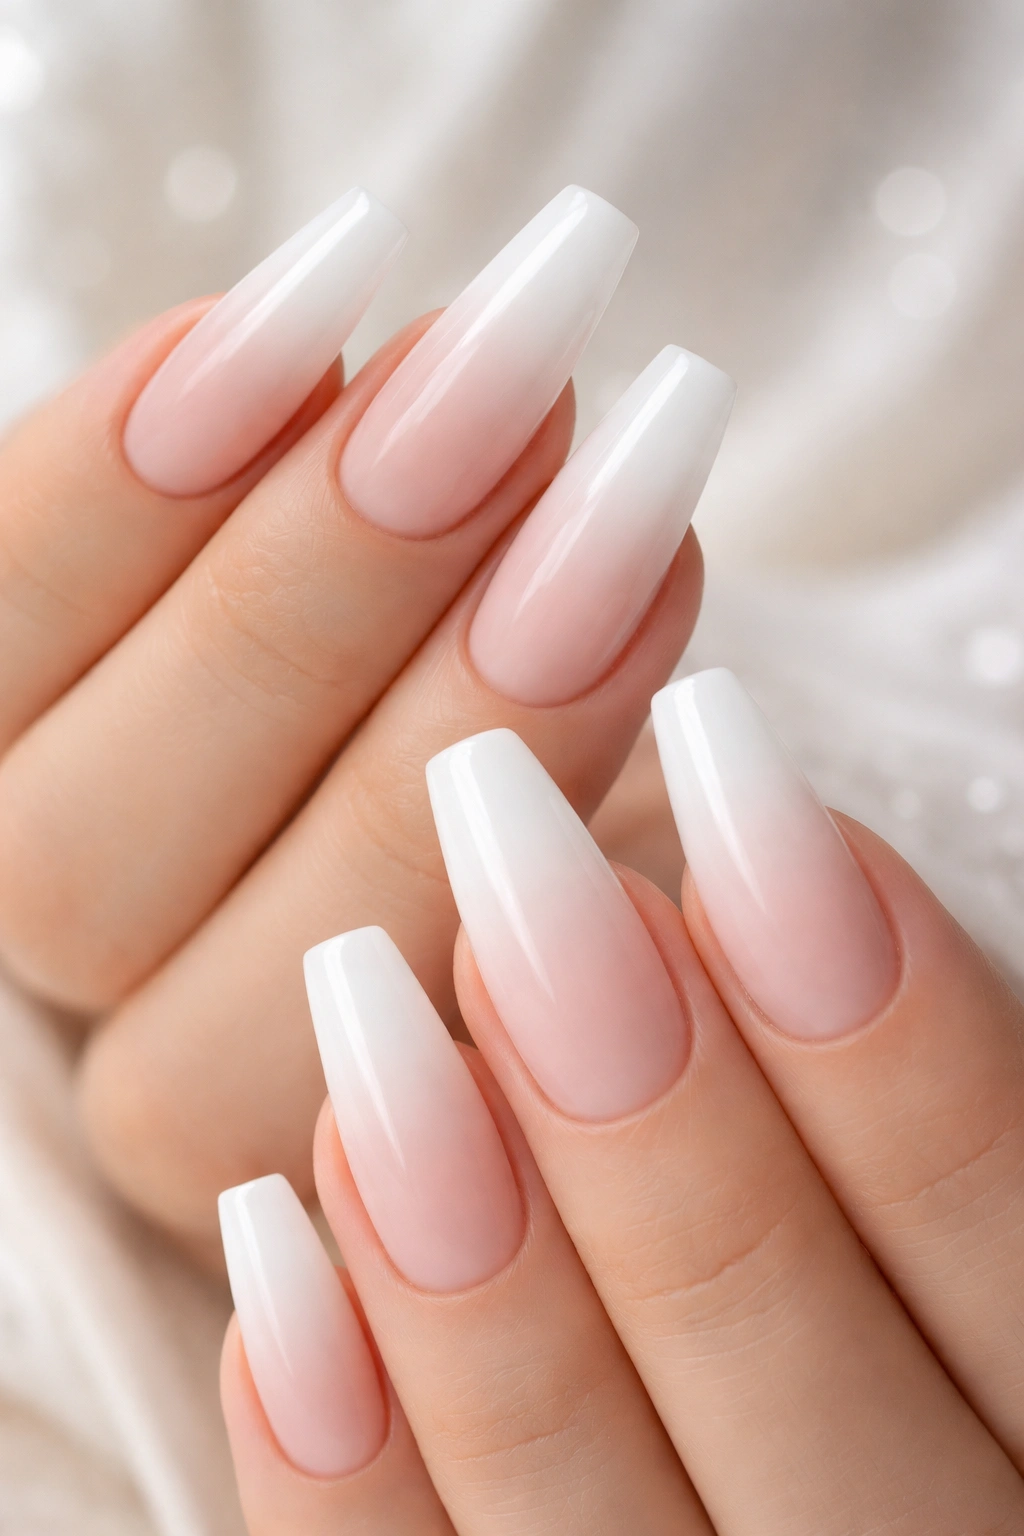
1. Classic White French Ombre Coffin Nails
There’s a reason the French ombre remains the most-requested bridal nail design — it’s impossible to get wrong, photographs like a dream, and it works with literally every wedding dress, bouquet color, and venue imaginable. The white French ombre on coffin nails is the modern take on traditional bridal manicures, giving you that clean, timeless aesthetic without feeling dated or overdone.
Why This Design Dominates Wedding Instagrams
The white ombre gradient creates an optical illusion that makes your nails appear even longer and more elegant than they actually are. The gradient itself is forgiving — slight imperfections in the application actually read as intentional shading rather than mistakes. Most importantly, white has the unique property of reflecting light and appearing luminous in every type of wedding photography, from bright outdoor ceremonies to dimly lit receptions. Your nails will literally glow in flash photography without any glitter or gemstones needed.
How to Achieve It and Keep It Fresh
- Book your appointment 2-3 days before your wedding (not the day-of, which feels rushed)
- Request a very soft, gradual gradient rather than a harsh color block — the subtle fade is what makes this design look expensive and intentional
- Ask your nail technician to seal the gradient with a matte topcoat rather than glossy for a more sophisticated, less plasticky appearance
- Pair it with a simple clear or nude base if you want an even softer, more natural-looking version — the ombre still reads as intentional
- Bring a photo reference showing exactly the opacity level you’re imagining (some clients want a whisper of white at the tips, others want a bolder statement)
Pro tip: Request a gel manicure rather than acrylic for this design — the thinner application looks more refined and feels less heavy on your hands all day.
2. Blush Pink and Gold Leaf Coffin Nails
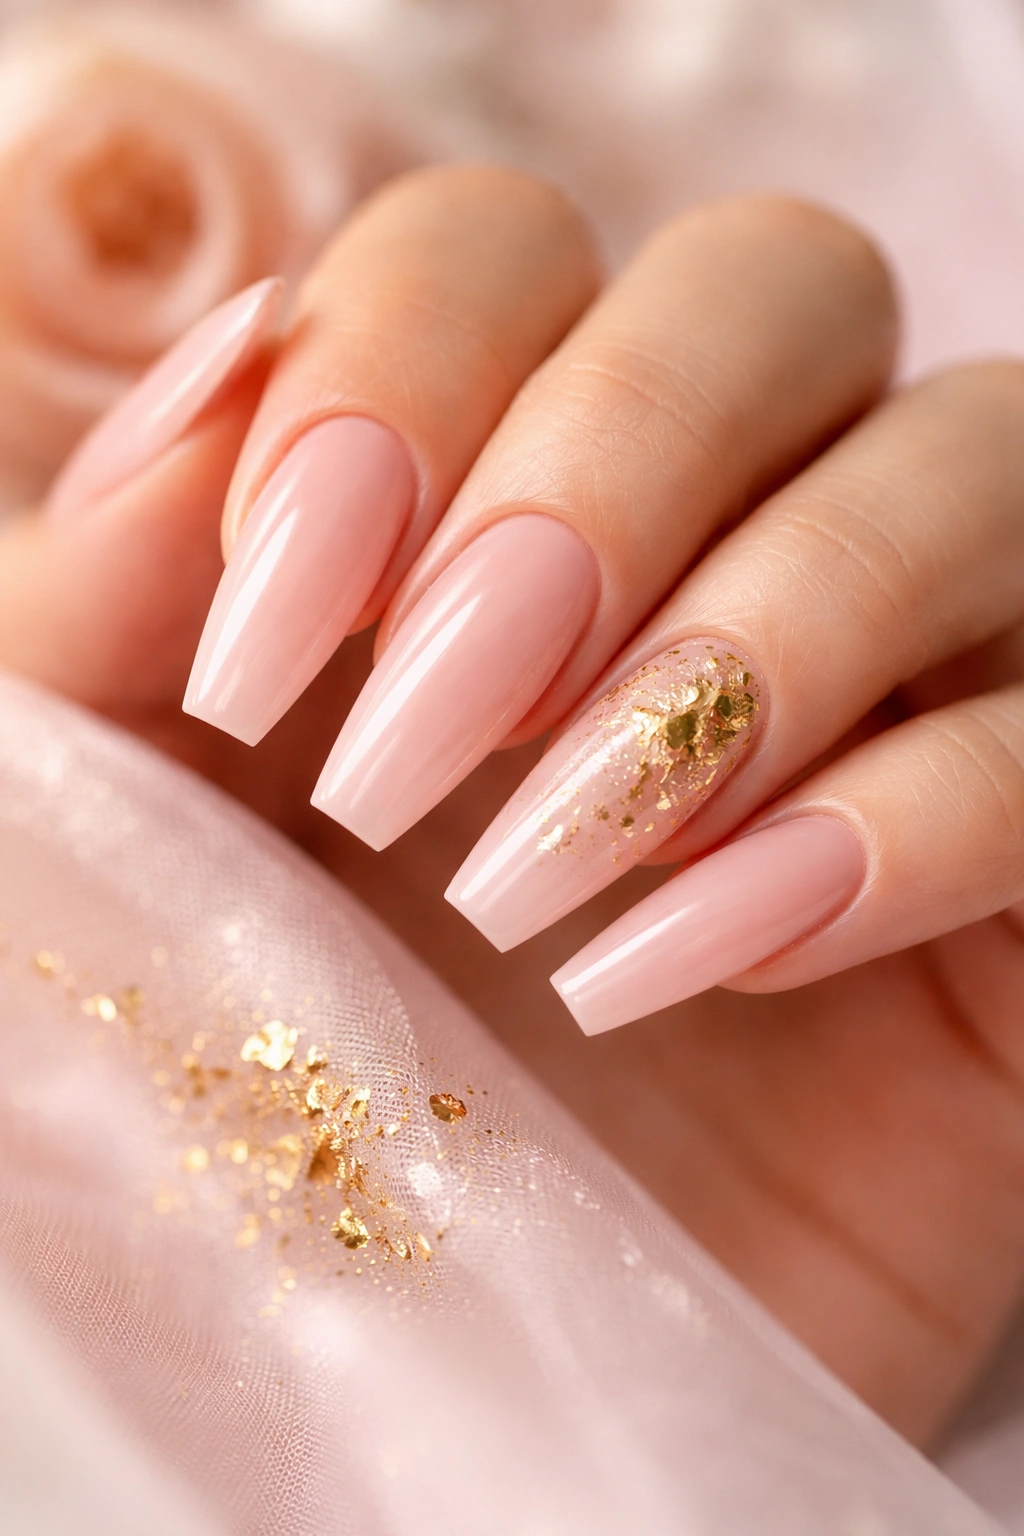
For brides who love romance without saccharine sweetness, blush pink coffin nails with hand-painted gold leaf accents offer that perfect balance of feminine and modern. The soft pink creates an intimate, romantic mood while the gold leaf details add just enough glamour and intentionality to make sure this look feels sophisticated rather than simply pretty.
The Psychology of This Color Combination
Blush pink is the wedding color that actually makes brides look good — it’s warm enough to complement most skin tones without the harshness of pure white, and it creates a flattering, soft-focus effect in photographs. Gold is the metal that looks expensive and pairs beautifully with nearly every metal choice in wedding jewelry (rose gold, white gold, platinum, yellow gold all work). Together, they create a cohesive, luxury aesthetic that feels intentional rather than trendy.
Application and Design Details
- Work with a technician who has experience with hand-painted nail art — this design lives or dies based on execution quality
- The gold leaf works best scattered across 2-3 accent nails (typically your ring finger and possibly your pinky and thumb) rather than covering all nails
- Request a semi-sheer or opaque blush base, depending on whether you want the natural nail to show through slightly (semi-sheer feels more intimate and less matchy) or want a solid, bold pink statement
- Add subtle depth by asking for a very light gradient from slightly deeper blush at the cuticle to lighter blush at the tip — this creates dimension without reading as heavy
- Seal everything with a glossy topcoat to make the gold leaf pop and catch light beautifully
Worth knowing: Gold leaf requires extra care in the weeks following your wedding because the delicate leaf can snag on fabrics and chip. Plan accordingly if you want this design to last through your honeymoon.
3. Ivory with Delicate Lace Pattern Coffin Nails
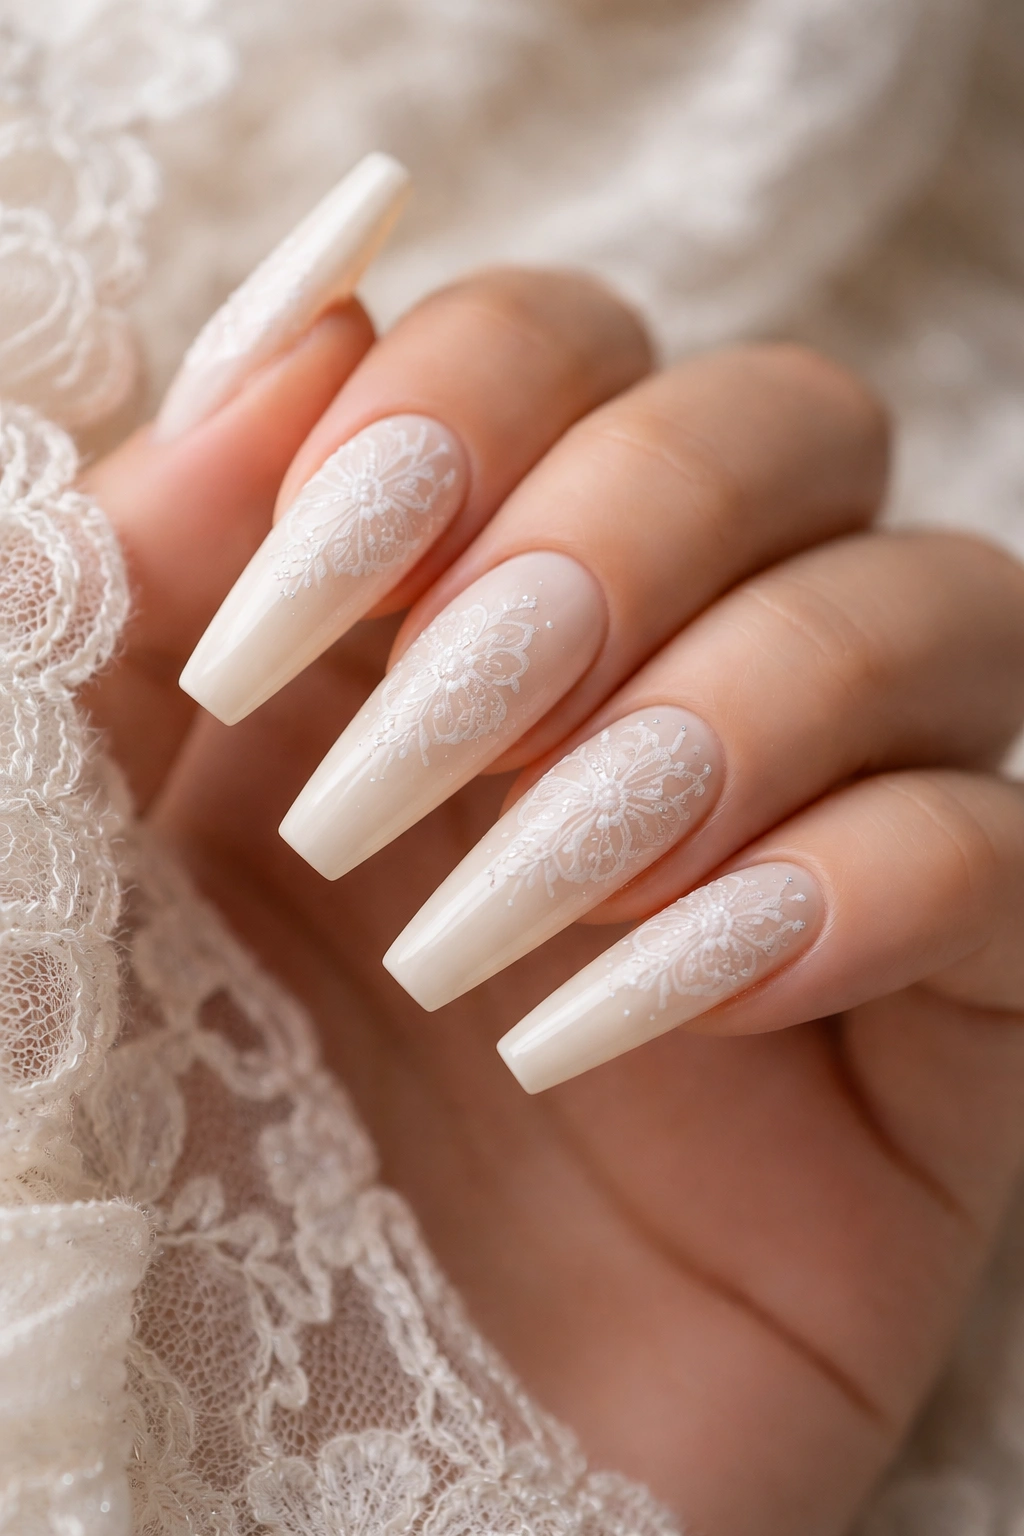
If you’re wearing a lace wedding dress, the opportunity to echo those same delicate patterns on your nails is almost impossible to resist — and for good reason. Ivory coffin nails with hand-painted lace details create a cohesive, intentional bridal look that feels like every element of your styling has been carefully considered and coordinated.
Why Matching Patterns Actually Works
The key to this design reading as elegant rather than costumey is keeping the lace pattern genuinely delicate — think fine lines and small, intricate details rather than large, busy florals that overwhelm the nail bed. The ivory base keeps everything soft and romantic, while the nail shape itself (coffin nails are already visually interesting) prevents the whole look from feeling too dainty or fragile. Together, the shape and the pattern create an aesthetic that feels both romantic and strong.
Creating a Cohesive Wedding Look
- Request a reference image of the actual lace from your dress, if possible — your nail technician can recreate small sections of that pattern at a miniature scale
- Decide whether you want the lace pattern on all nails or just accent nails — full coverage reads more bridal and cohesive, while accent nails feel a bit more modern and less committed to the matchy aesthetic
- Ask for either a matte topcoat (for a softer, more romantic feel) or a glossy topcoat with a subtle shimmer (for slightly more glamour)
- Pale ivory is more forgiving than bright white if you’re worried about cream yellowing over time — ivory naturally deepens slightly with age
- Consider adding tiny rhinestones or pearls at strategic points in the lace pattern if you want extra sparkle without reading as over-the-top
Insider note: This design photographs beautifully in detail shots (ring photos, getting-ready photos, flat lays) but the delicate pattern is honestly lost in full-hand shots and ceremony photos. Choose this design because you love it for the intimate up-close looks, not because you expect it to be dramatic from across a room.
4. Nude Coffin Nails with Bling and Gemstones
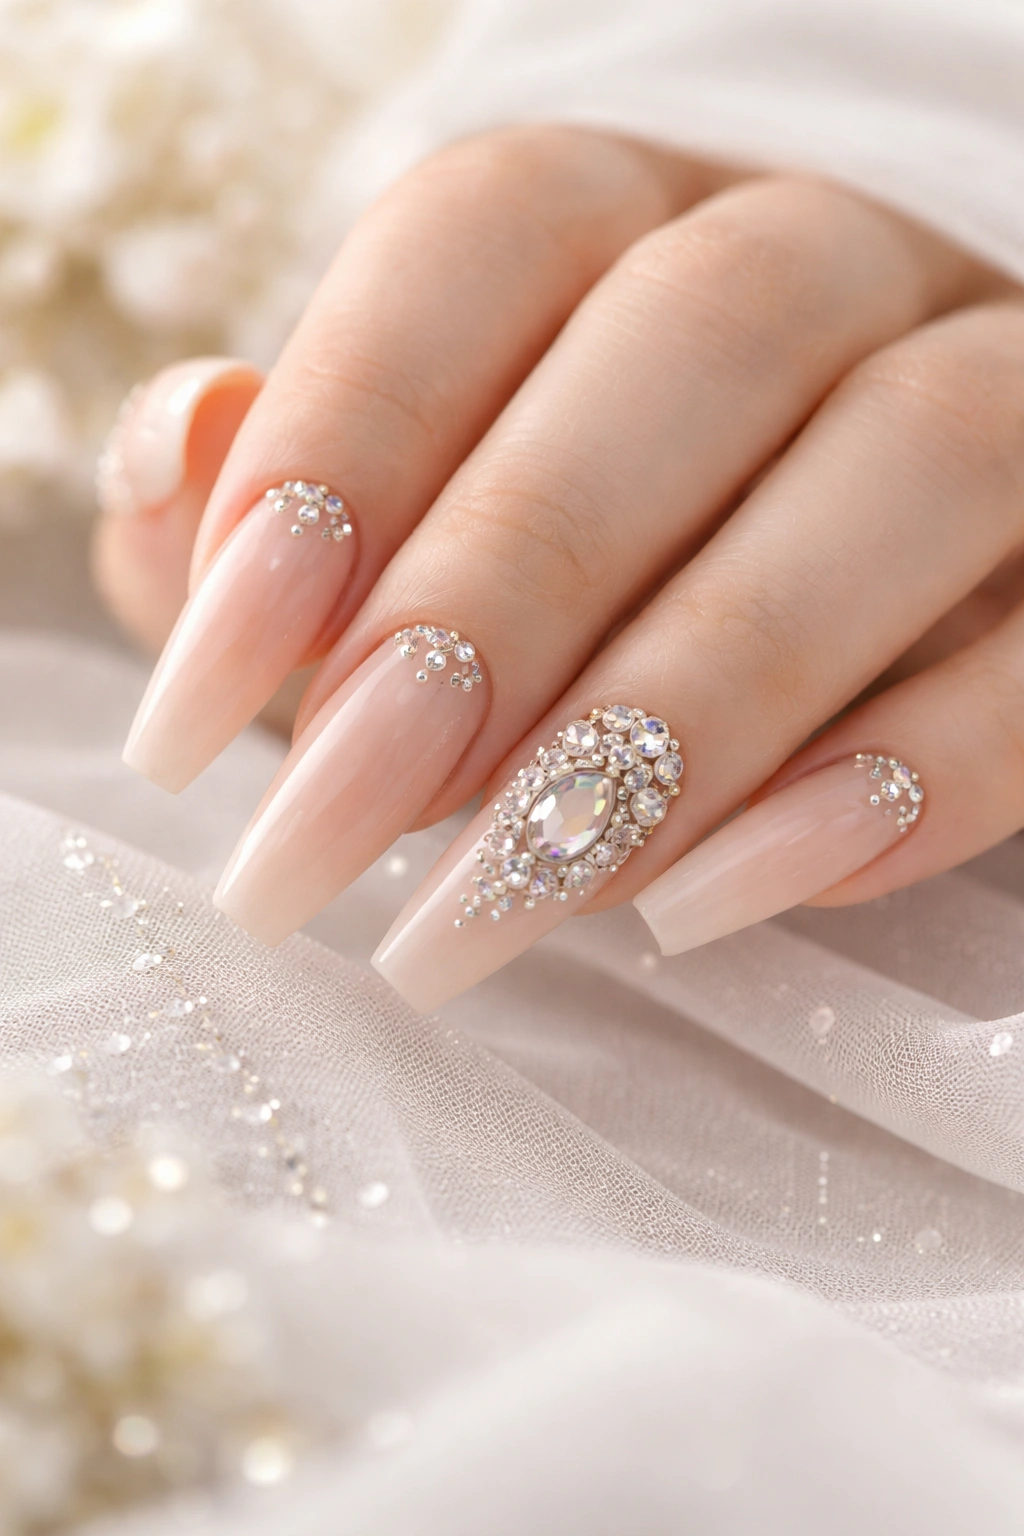
For brides who want understated elegance with a hit of unexpected glamour, nude coffin nails with strategically placed gemstones and rhinestones deliver that sophisticated look while still catching light and looking intentionally bridal. The nude base keeps things refined and elongates your hand beautifully, while the sparkle details add just enough interest and celebration.
Why Nude + Sparkle Is Actually a Timeless Combination
Nude nails have a way of making your actual fingertips and hand shape look longer and more elegant — it’s a pure optical illusion, but it works. Adding gemstones to a nude base makes them feel like intentional jewelry rather than decoration, which is the difference between a thoughtful bridal look and one that reads as trying too hard. The sparkle becomes a feature, not a distraction.
Gemstone Placement That Actually Works
- Focus the heaviest concentration of gems on your ring finger and accent fingers (pinkies or thumbs), leaving your other three nails nearly clean
- Create a gradient of gem density from smaller stones at the cuticle to larger statement stones at the tip — this creates movement and visual interest
- Mix stone sizes and finishes (some clear, some champagne, some rose gold-toned) rather than using identical stones, which reads as less expensive and less intentional
- Request that gems be placed in the nail surface itself (not just glued on top) using a specialized resin application — this makes them last way longer through your wedding day
- Leave the very tip of the nail slightly clear of gems so you can see the coffin point shape clearly
Real talk: Gemstone nails require a commitment to not-doing certain activities for a few hours after application (avoid running your hands under cold water immediately, be gentle with the first meal you eat). Plan your day so your manicure happens 3-4 hours before your ceremony, giving the resin time to fully set.
5. Burgundy Coffin Nails with Gold Accents
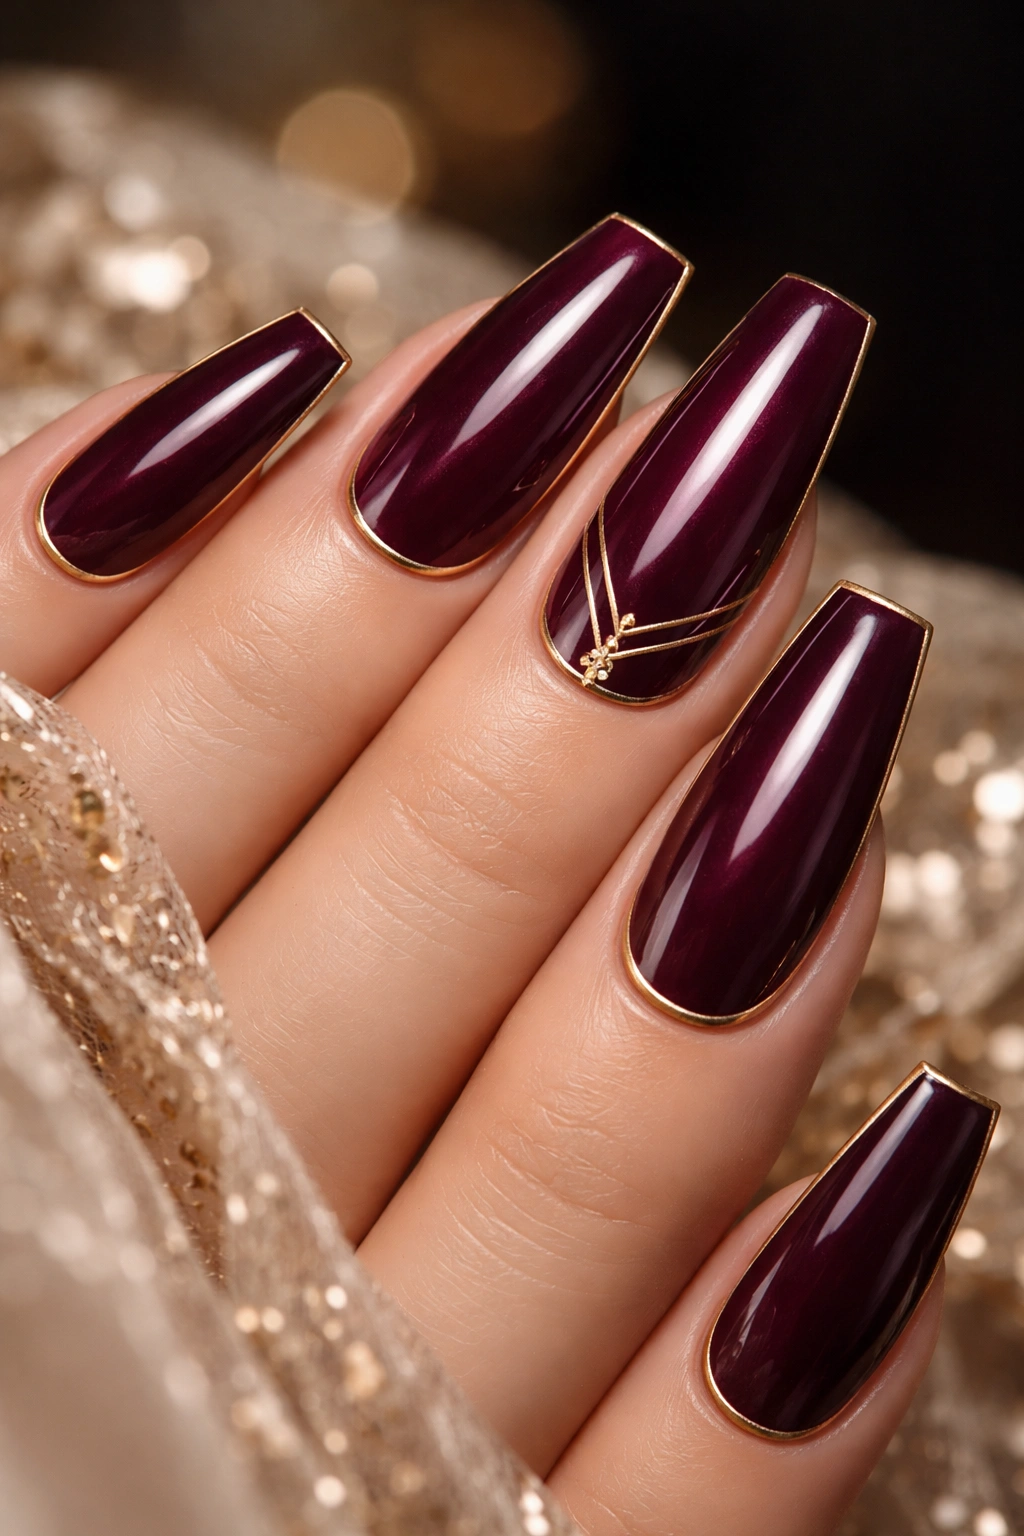
For brides wearing jewel-tone wedding dresses, burgundy or wine-colored coffin nails with gold accents create an entirely different mood than traditional soft pinks and whites — rich, sophisticated, and decidedly bold without feeling inappropriate for a wedding. This is the nail design for brides who know what they want and aren’t interested in blending into expectations.
The Drama of Deep Wine Tones
Burgundy is a color that’s grown up, confident, and photographs beautifully in nearly every lighting situation. It’s deep enough that it reads as intentional luxury rather than just “a darker pink,” and it pairs naturally with gold metals, making your engagement ring and any other gold jewelry you’re wearing feel like a complete, coordinated look. The coffin shape amplifies the drama — the elongated point in a wine tone feels almost regal.
Gold Detailing Options That Actually Complement Burgundy
- A thin gold line running along the very tip of the coffin point (like an edge) is subtle but visually striking
- Hand-painted geometric shapes (triangles, half-moons, or abstract lines) in gold across the nail bed add interest without feeling busy
- Gold foil applied to one accent nail (typically the ring finger) creates a high-impact statement
- A burgundy base with gold ombre fading to deep gold at the tips creates a sunset effect that’s both romantic and dramatic
- Small gold dots arranged in a pattern across the burgundy base (think constellation scattered across a burgundy sky) adds whimsy without feeling childish
Pro tip: If you’re worried burgundy might feel too winter or too bold, request a wine shade that leans slightly toward brown-burgundy rather than pure red-burgundy — this reads as more refined and universally flattering.
6. Soft Peach Coffin Nails with Pearlescent Shimmer
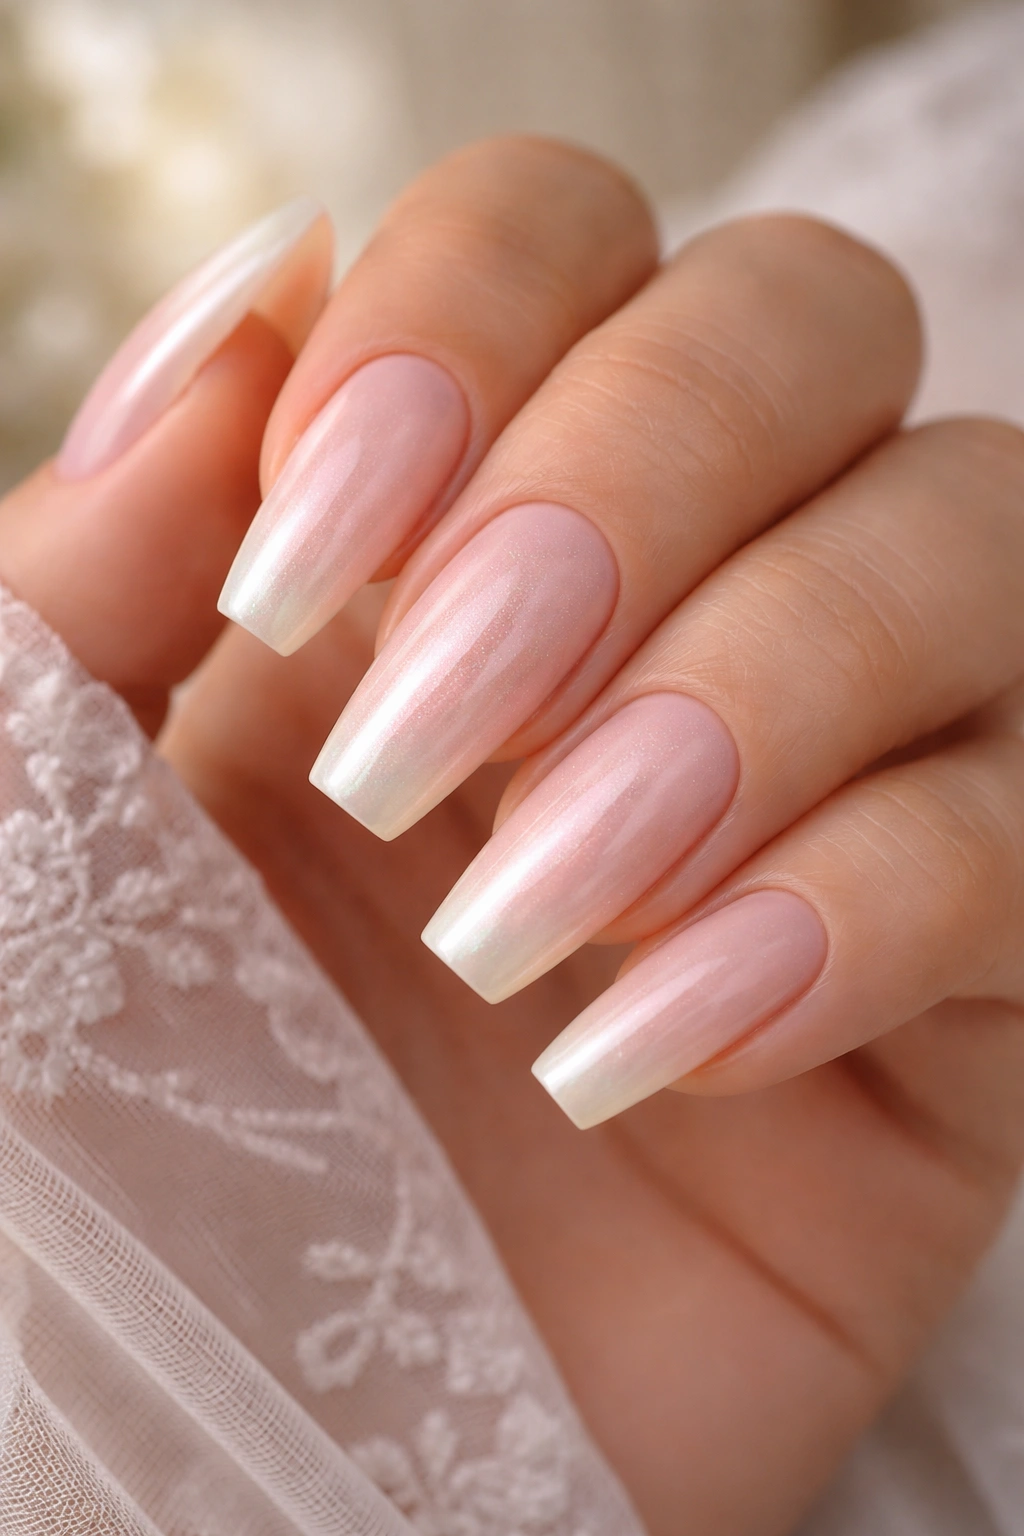
Peach occupies a gorgeous middle ground between pink and nude, making it one of the most universally flattering nail colors for a diverse range of skin tones. Coffin nails in soft peach with a pearlescent shimmer create a look that’s romantic without being precious, glamorous without being overdone, and modern without feeling trendy.
Why Peach Is the Ultimate Underrated Bridal Color
Peach has a unique warmth that complements most complexions better than pure white or pink — it reads as sophisticated rather than safe. When you add a pearlescent shimmer to peach, you’re not changing the color, you’re just making it luminous and dimensional. This is the nail equivalent of a good skincare routine — it enhances what’s already there rather than covering it up.
Achieving the Perfect Peach-Pearl Combination
- Request a semi-opaque peach base so the shimmer has something to sit on top of but the natural nail still reads through slightly
- Ask for a fine, subtle pearlescent shimmer rather than chunky glitter — you want the effect to be “lit from within” rather than “covered in sparkles”
- Consider a very light peach gradient, slightly deeper at the base and lighter toward the tips — this adds dimension and elongates the nail shape even further
- A glossy topcoat is essential for peach-pearl nails because it makes the shimmer glow and gives everything a luminous, dewy finish
- Seal with a UV topcoat if you’re using gel rather than traditional polish — the UV process actually enhances the pearlescent effect slightly
Worth knowing: Peach nails look absolutely stunning in natural light and outdoor wedding photos, but can sometimes look almost peachy-nude in indoor flash photography. Ask your photographer about the lighting at your venue and mention this to your manicurist — they can adjust the tone slightly if needed to ensure it reads well in both situations.
7. Champagne and Ivory Ombre Coffin Nails
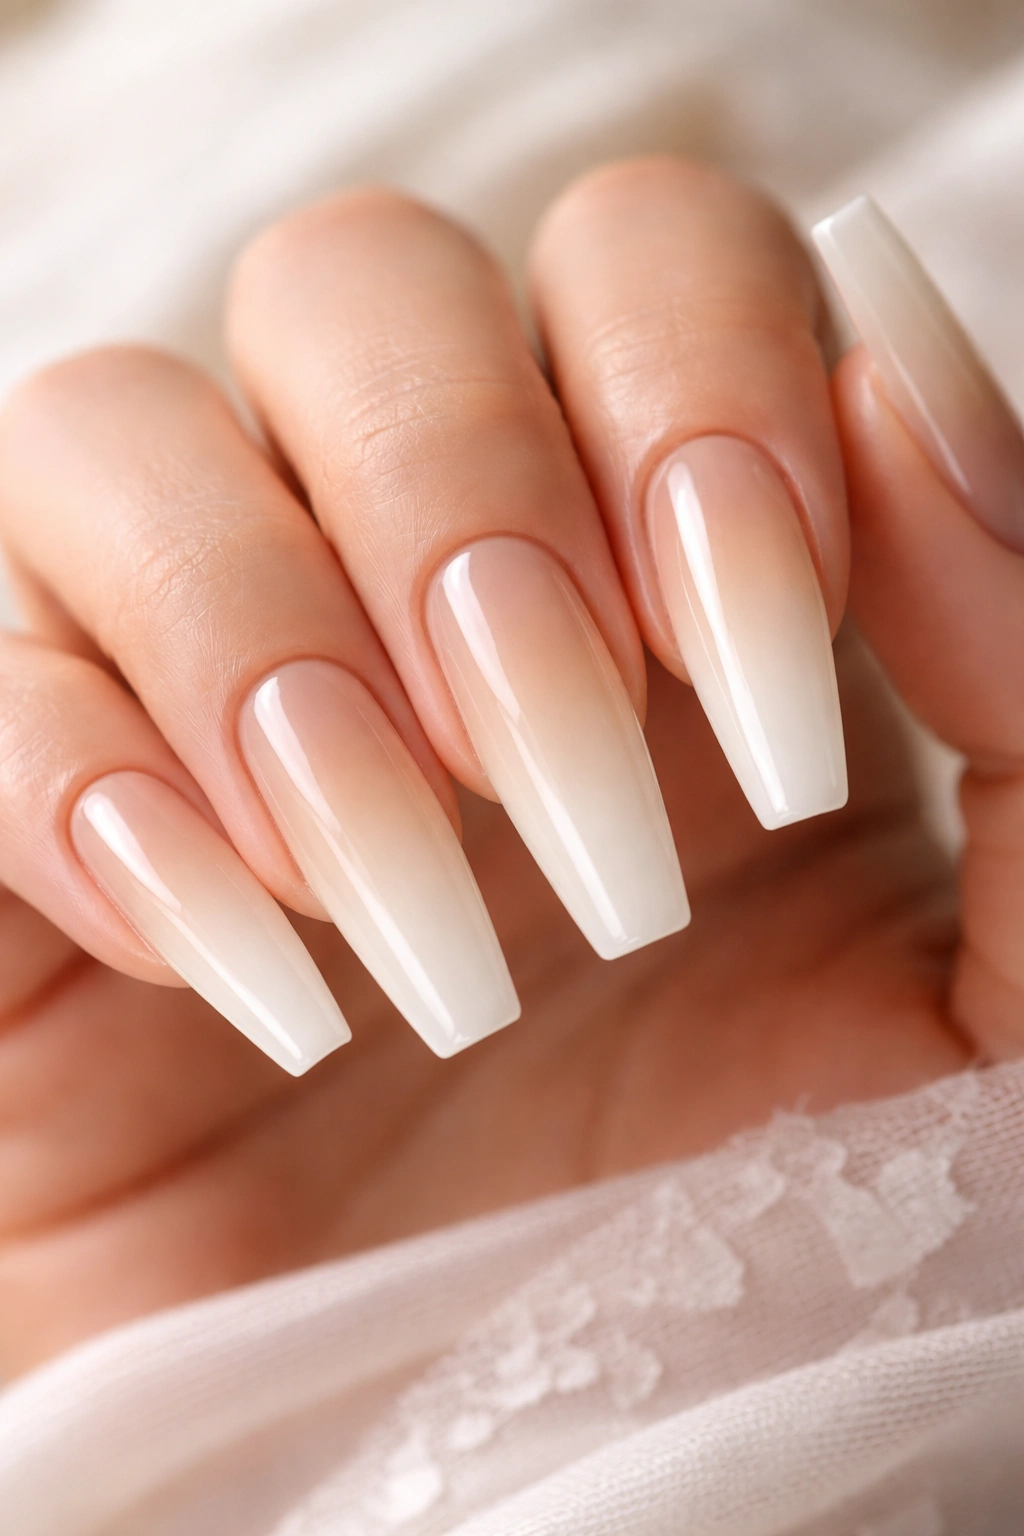
The champagne-to-ivory gradient sits at the intersection of classic bridal and modern luxury — it’s more interesting than a solid ivory or white, but not so bold that it reads as trendy or experimental. The subtle color shift creates visual movement and elongation without requiring any complicated art or details.
The Science of Why Ombre Works on Coffin Nails
An ombre gradient on the natural coffin shape creates multiple optical illusions simultaneously: the gradient makes the nail appear even longer, the two-tone effect prevents the look from reading as flat or one-dimensional, and the transition from warm champagne to cool ivory feels sophisticated and intentional. The coffin point is already an interesting enough shape that it doesn’t need additional design elements to feel special.
Champagne-to-Ivory Application Tips
- Request a very gradual gradient where the transition spans the entire nail bed rather than happening abruptly at the tip — this looks more expensive and more intentional
- Ask whether your technician will hand-blend the colors or use a sponge technique — sponge typically creates a softer transition, while hand-blending allows for more control
- Specify whether you want the champagne at the cuticle and ivory at the tip (classic ombre) or reversed (which reads more modern and unexpected)
- A glossy topcoat is essential — it makes the gradient glow and gives the whole manicure a high-shine, luxe appearance
- Bring reference photos from high-end nail Instagram accounts showing the exact opacity level and gradient slope you’re envisioning
Insider note: This design sits in a sweet spot where it photographs beautifully in every type of lighting — outdoor natural light, indoor flash, dim reception lighting — without requiring any extra glitter or sparkle. If you’re a bride who loves wedding day photos, this is the design that will look elegant in every single one.
8. White with Delicate Diamond Line Accent Coffin Nails
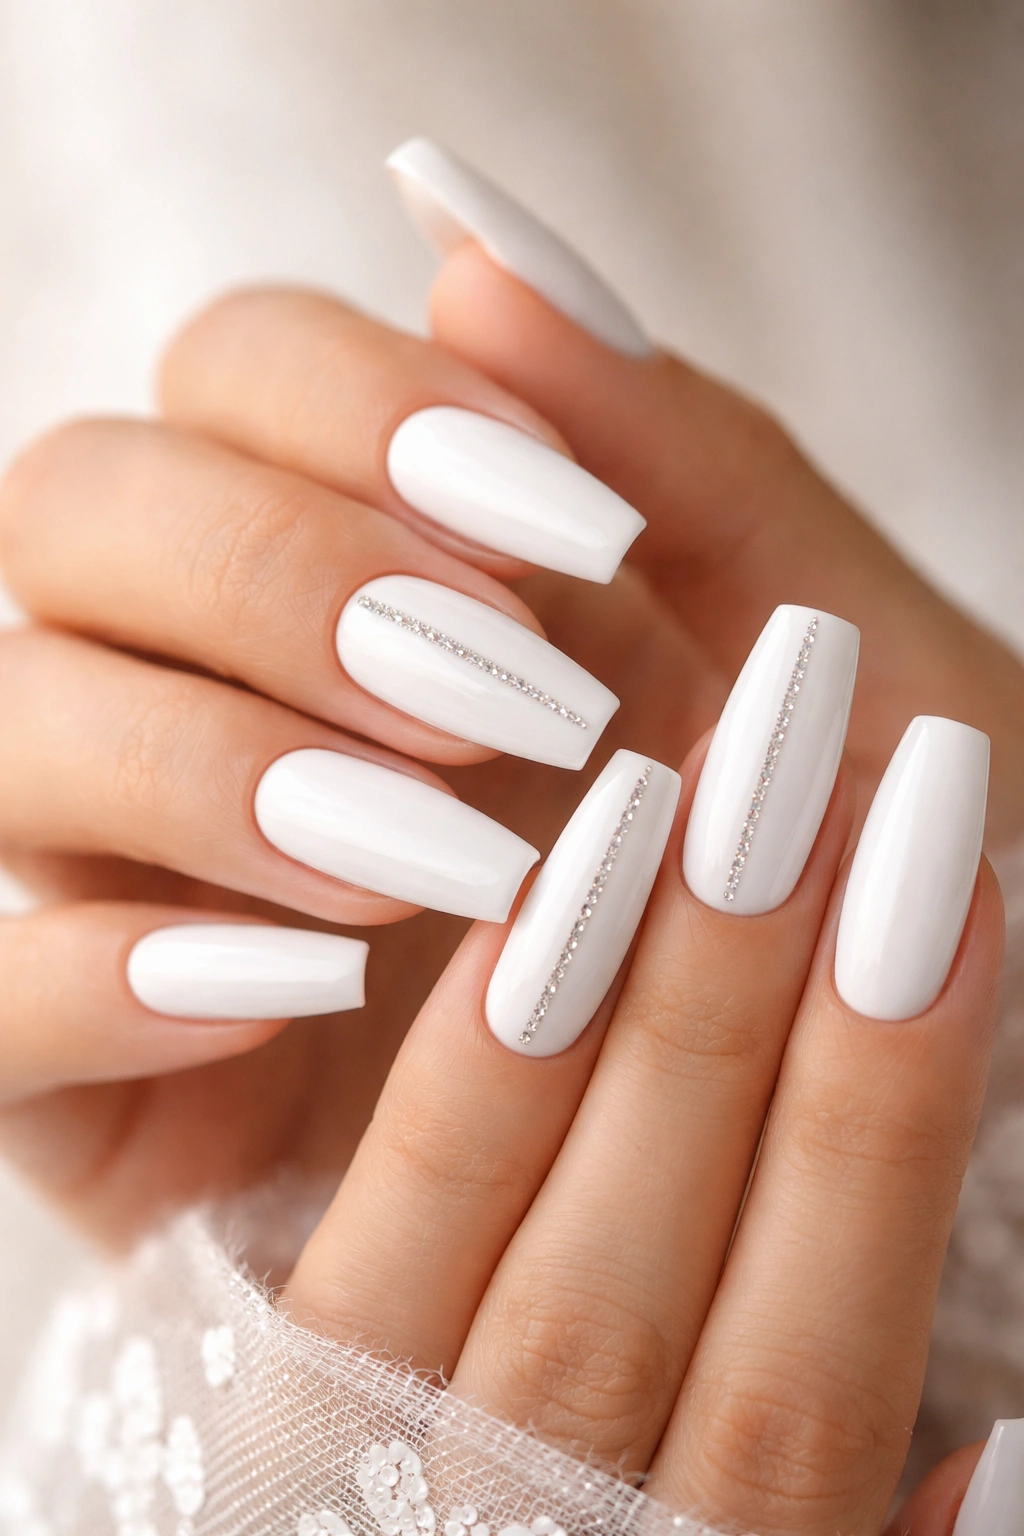
For a maximalist-minimal approach (if that makes sense), white coffin nails with a single thin line of tiny diamonds running down the center of one or two accent nails creates a look that’s bridal, modern, and surprisingly versatile. The white keeps everything clean and timeless, while the diamond line adds just enough detail and sparkle to feel intentional.
The Strategic Power of Minimalist Accent Details
The reason this design works so well is that it respects the shape of the nail rather than fighting it — the center line follows the natural flow of the coffin point and actually enhances the elongated silhouette. Adding diamond details only to accent nails (ring finger and possibly pinky) means the design feels balanced rather than overwhelming. Your eye goes to the diamonds without forgetting that the whole manicure is beautiful.
Diamond Line Application and Upkeep
- Request hand-placed tiny diamonds (not rhinestones, which look less precious) set into the nail surface itself with a clear resin
- A single line of diamonds running vertically down the center is more striking than multiple scattered lines
- Ask your technician to taper the line slightly (more diamonds at the tip, fewer at the cuticle) to enhance the coffin point shape
- Glossy white topcoat is essential to make the diamonds sparkle without any competing texture or matte finish
- These diamond details require a bit of extra care — avoid prolonged contact with water for at least 24 hours after application and be gentle when eating
Pro tip: Request that your technician use a specialized clear resin adhesive rather than just gluing diamonds on top of the polish. This makes them dramatically more durable and likely to last through your entire wedding day and reception.
9. Dusty Rose Coffin Nails with Matte Finish
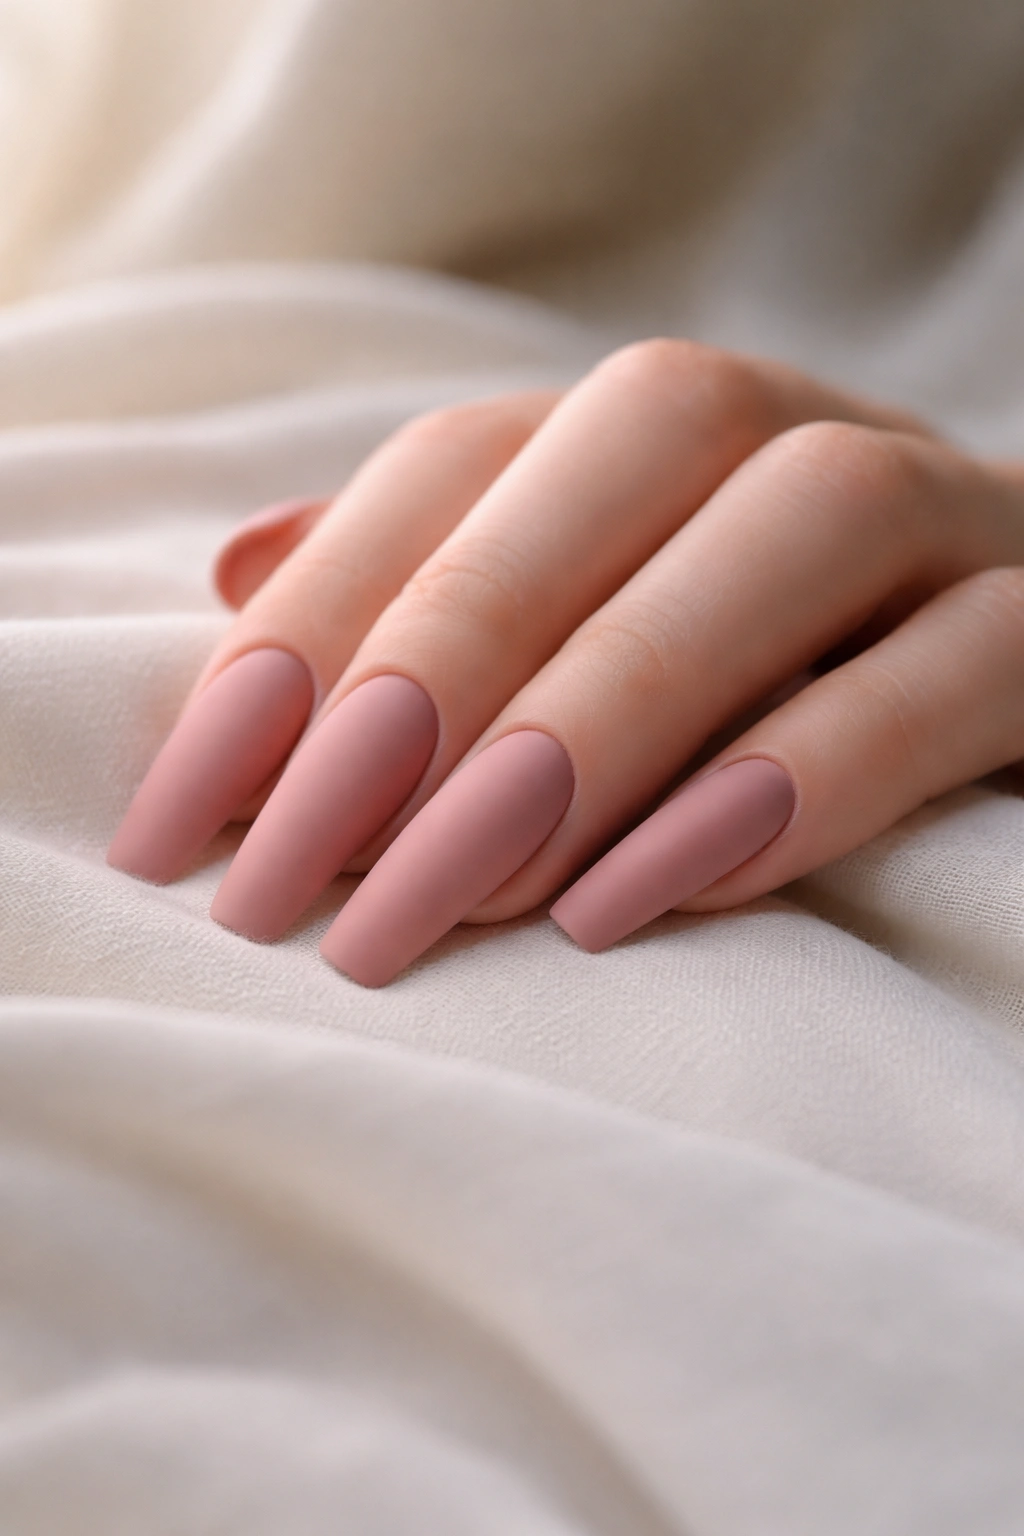
Dusty rose is the nail color that feels maturely romantic without veering into princess territory — it’s sophisticated, photogenic, and flattering on almost every skin tone. Applying it in a matte finish (rather than glossy) adds an unexpected modern edge and creates a velvety, luxurious texture that feels expensive and intentional.
Why Matte Finish Changes Everything
A matte topcoat transforms how a color reads on the nail — glossy makes things look shiny and bright, while matte makes them look deep, sophisticated, and more refined. Dusty rose in matte finish feels like a color you’d see in high-end bridal editorials, while dusty rose in glossy finish reads as softer and more traditional. The matte texture also hides minor imperfections and unevenness better than glossy finishes, which can make everything look slightly less polished.
Achieving a Flawless Matte Dusty Rose Manicure
- Request a high-quality matte topcoat specifically — cheap matte finishes can look chalky or dull, while premium versions look intentional and luxe
- The dusty rose base should be opaque and smooth with no visible brush strokes — this matters more with matte finishes because there’s no shine to hide minor imperfections
- Consider adding a very subtle shimmer under the matte topcoat (ask your technician about this option) — it creates depth without reading as glossy
- A coffin shape in matte dusty rose photographs absolutely beautifully in both natural and artificial lighting
- Plan on a gel manicure with a gel matte topcoat rather than traditional polish, which can chip and look streaky
Real talk: Matte finishes can feel a bit dry or dull if the application isn’t perfect, so invest in an excellent nail technician who has experience with matte designs. A mediocre matte finish looks worse than a mediocre glossy finish.
10. Clear Coffin Nails with Gold Leaf and Pressed Flowers
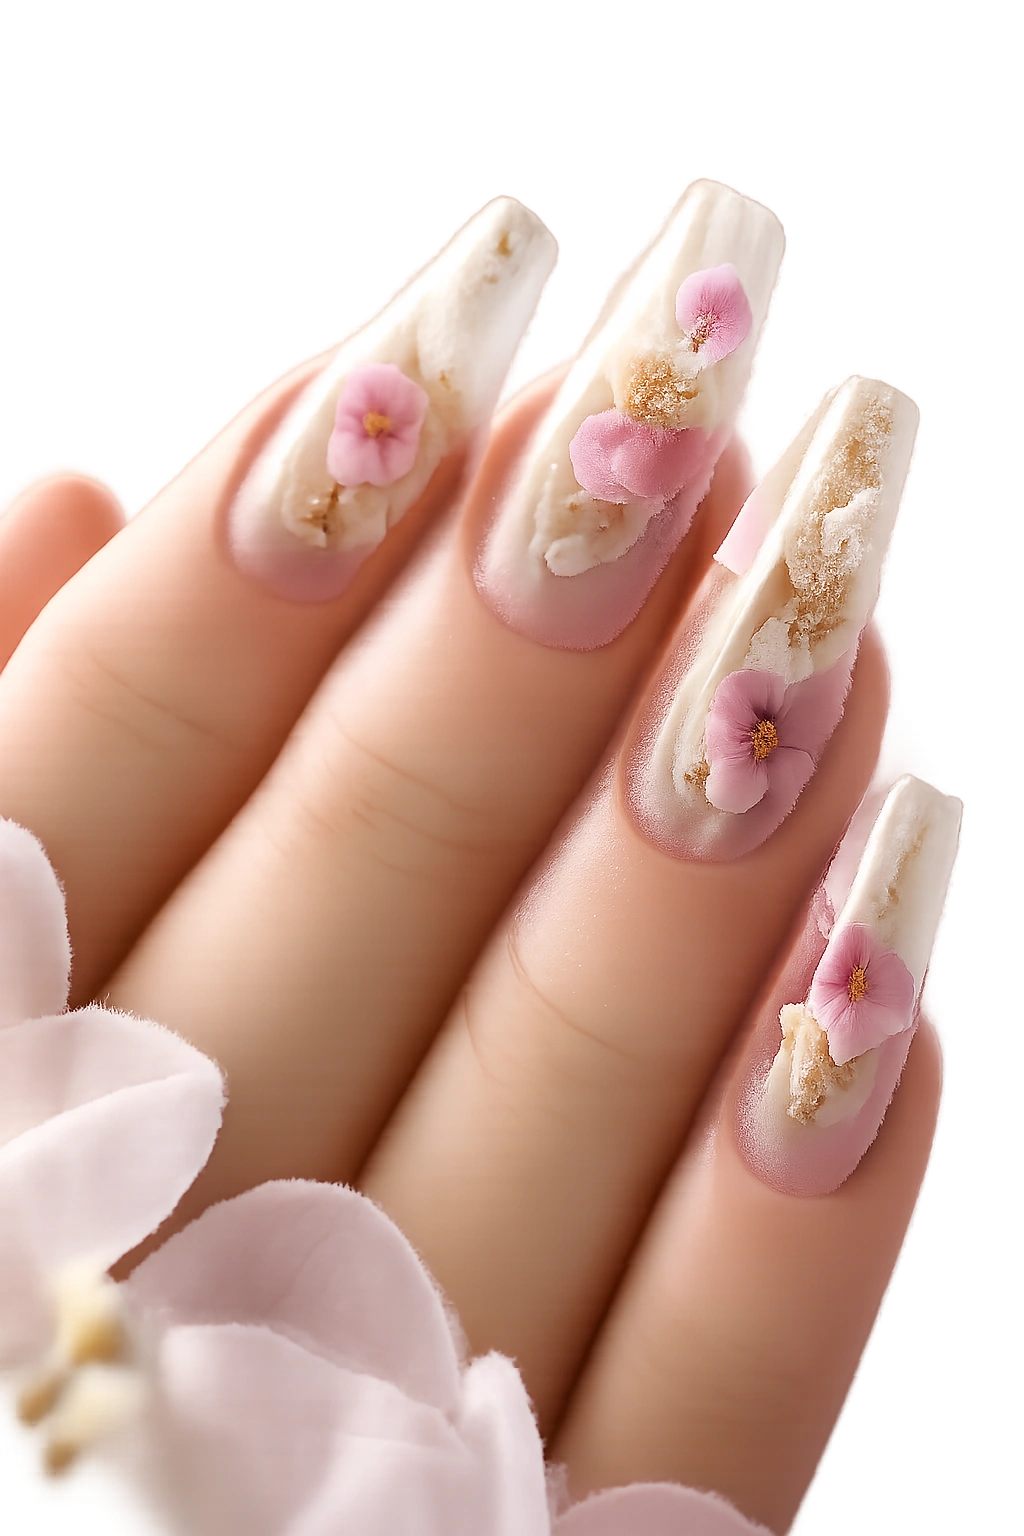
For brides who want something artistic and slightly unconventional, clear gel coffin nails with gold leaf and real pressed flowers create a look that’s wedding-day special while still feeling natural and wearable. This design walks the line between bridal tradition and artistic self-expression beautifully.
The Artistry Behind Pressed Flower Nail Designs
Pressed flowers in nails appeal to the same part of our brains that loves botanical weddings, wildflower bouquets, and nature-inspired design — there’s something romantic and meaningful about preserving actual flora in jewelry you’ll wear every day. The gold leaf adds just enough glamour and intentionality to prevent the whole design from reading as too earthy or hippie. Clear gel allows the flowers to be the star while still giving you a durable, long-lasting manicure.
Creating a Meaningful Flower Nail Design
- Work with a technician who has experience with pressed flower applications — this requires specific expertise
- Decide whether the flowers will be actual pressed flowers (more romantic and unique) or high-quality silk flowers with a realistic appearance (more durable)
- Consider using flowers that match your bouquet, your wedding colors, or flowers with personal meaning to you and your partner
- Placement matters — flowers look best on accent nails (ring finger, pinky, thumb) rather than spread across all nails
- Add thin gold leaf lines running through or around the flowers to add intentionality and tie the design to your wedding jewelry
- Request a glossy gel topcoat that’s extra durable to protect the flowers — the flowers themselves are fragile and need extra protection
Worth knowing: Pressed flower nails have a shorter lifespan than traditional manicures because the flowers can fade or discolor over time. Plan on these lasting about 2-3 weeks before they start to look slightly dated. This is perfect for wedding purposes (your manicure will be pristine through your wedding day and photos) but not ideal if you want long-lasting nails.
11. Nude with Subtle Rhinestone Gradient Coffin Nails
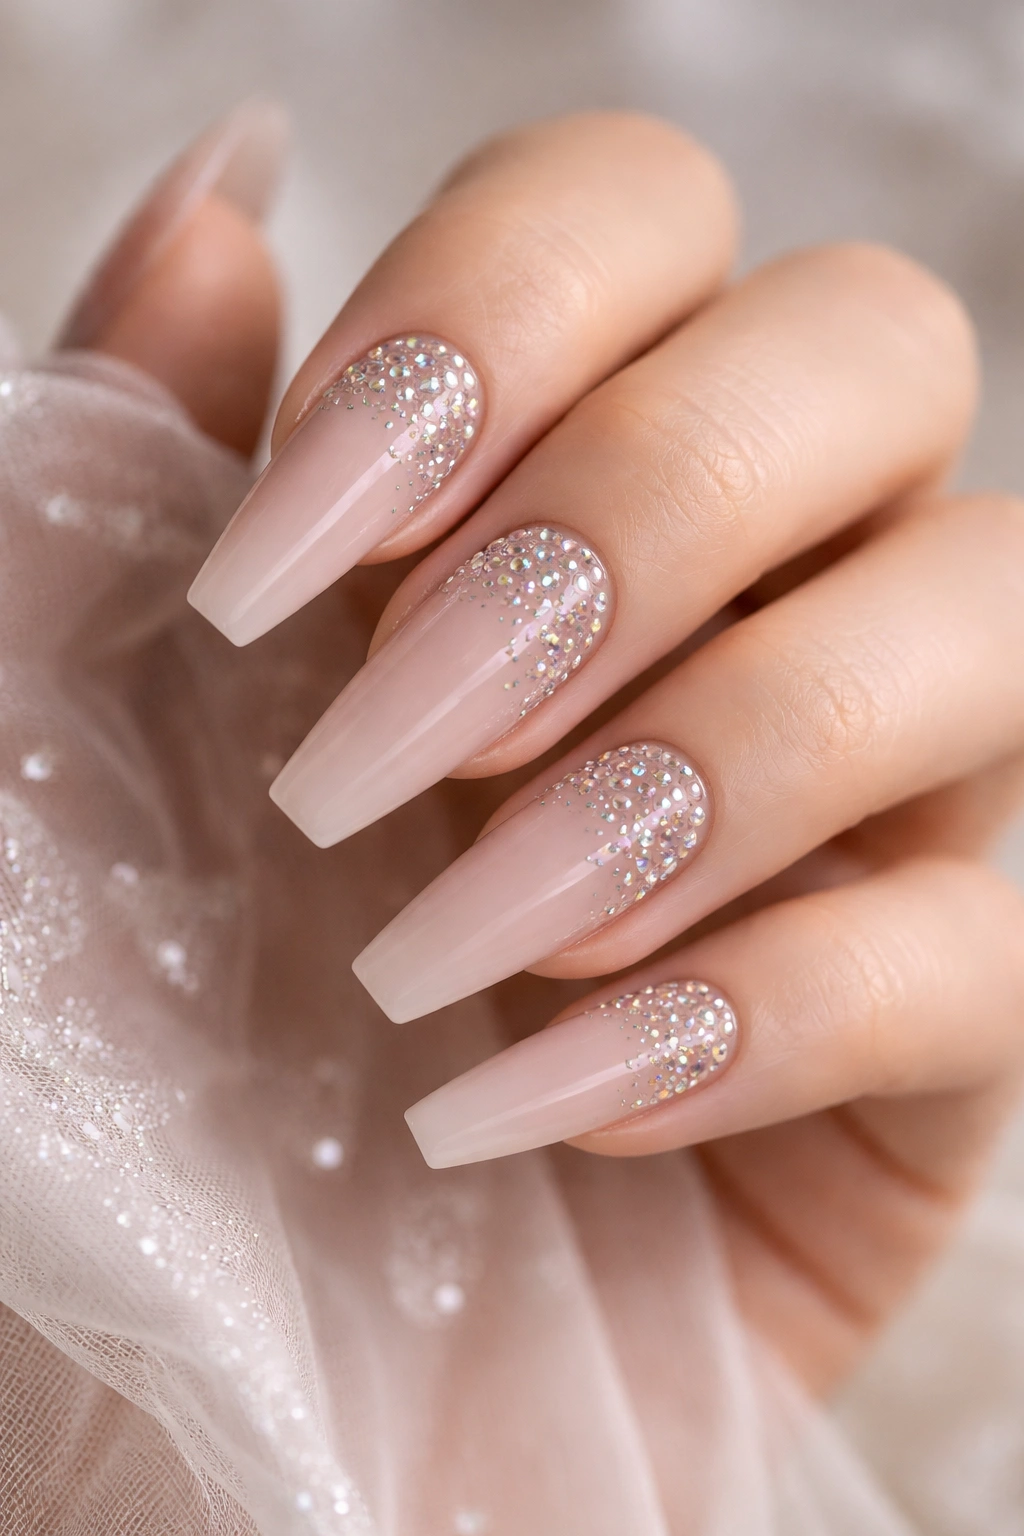
The final design is for brides who want glamour that whispers rather than shouts — nude coffin nails where the rhinestones gradually increase in density from the cuticle (nearly no stones) to the tip (dense sparkle). This creates a subtle ombre of sparkle that feels modern, expensive, and photographable without feeling like overkill.
The Elegant Logic of Gradient Density
A gradient of rhinestones works visually because it echoes the natural coffin point shape — your eye is drawn downward along with the increasing sparkle toward the point of the nail. This creates movement and visual interest without requiring multiple colors or complicated art. The nude base keeps everything refined, while the sparkle adds celebration and bridal glamour.
Rhinestone Gradient Application and Care
- Request small- to medium-sized rhinestones (not huge stones that look costume-y) in a single color family (all clear, all champagne, all rose gold)
- Ask your technician to apply rhinestones in a specific pattern: very few at the cuticle area, gradually increasing density toward the tip, with maximum concentration at the very point of the coffin nail
- Each stone should be individually placed and sealed with resin — not all at once in a rushed application
- A glossy or gel topcoat locks everything in place and makes the stones catch light beautifully
- Bring reference photos from luxury nail accounts so your technician understands the exact aesthetic you’re envisioning
Pro tip: If you’re worried about rhinestones feeling too matchy-matchy, request a mix of stone cuts — some faceted round stones, some more angular cuts — which creates visual interest and reads as more expensive and intentional than uniform stones.
Final Thoughts
The coffin nail shape paired with thoughtful color and design choices creates an immediately elevated look that works for virtually every wedding aesthetic — whether you’re going ultra-traditional, wildly modern, or somewhere in between. The key to choosing your perfect bridal nail design is thinking about what makes you feel most like yourself on your wedding day, not what you think you’re supposed to choose.
Coffin nails photograph beautifully, feel elegant on your hands all day, and — this matters more than you might think — make you feel confident and intentional every time you catch a glimpse of your ring finger. Your wedding day is about celebrating your relationship and your personal style, and your nails are a small but visible part of that story. Whatever design speaks to you from this list, commit to it fully and enjoy feeling gorgeous from your fingertips to your heart.
