

Gold stiletto nails represent one of the most versatile and glamorous nail design choices available—they work for everything from an evening out to everyday luxury. There’s something undeniably confident about wearing long, pointed nails in gold, a color that instantly elevates your entire aesthetic while remaining surprisingly wearable across different skin tones and personal styles. Whether you’re drawn to mirror finishes, intricate patterns, or minimalist elegance, gold stilettos offer endless creative possibilities that go far beyond basic manicures.
The appeal of gold stiletto nails lies in their ability to balance drama with sophistication. Unlike trendy colors that come and go, gold has remained a timeless choice among nail enthusiasts and professionals alike because it photographs beautifully, catches light in flattering ways, and pairs seamlessly with countless outfit combinations. The stiletto shape itself—with its sharp, tapered point—amplifies the impact of any color or design, making even simple gold finishes feel statement-making and intentional.
This guide explores eleven distinct interpretations of gold stiletto nails, each offering a different mood and level of complexity. You’ll find designs that suit your personality whether you prefer minimalist elegance, bold maximalism, artistic flair, or anything in between. Each idea includes practical tips for achieving the look at home or requesting it from a professional nail technician, plus variations you can customize to match your preferences.
1. Classic Gold Mirror Finish
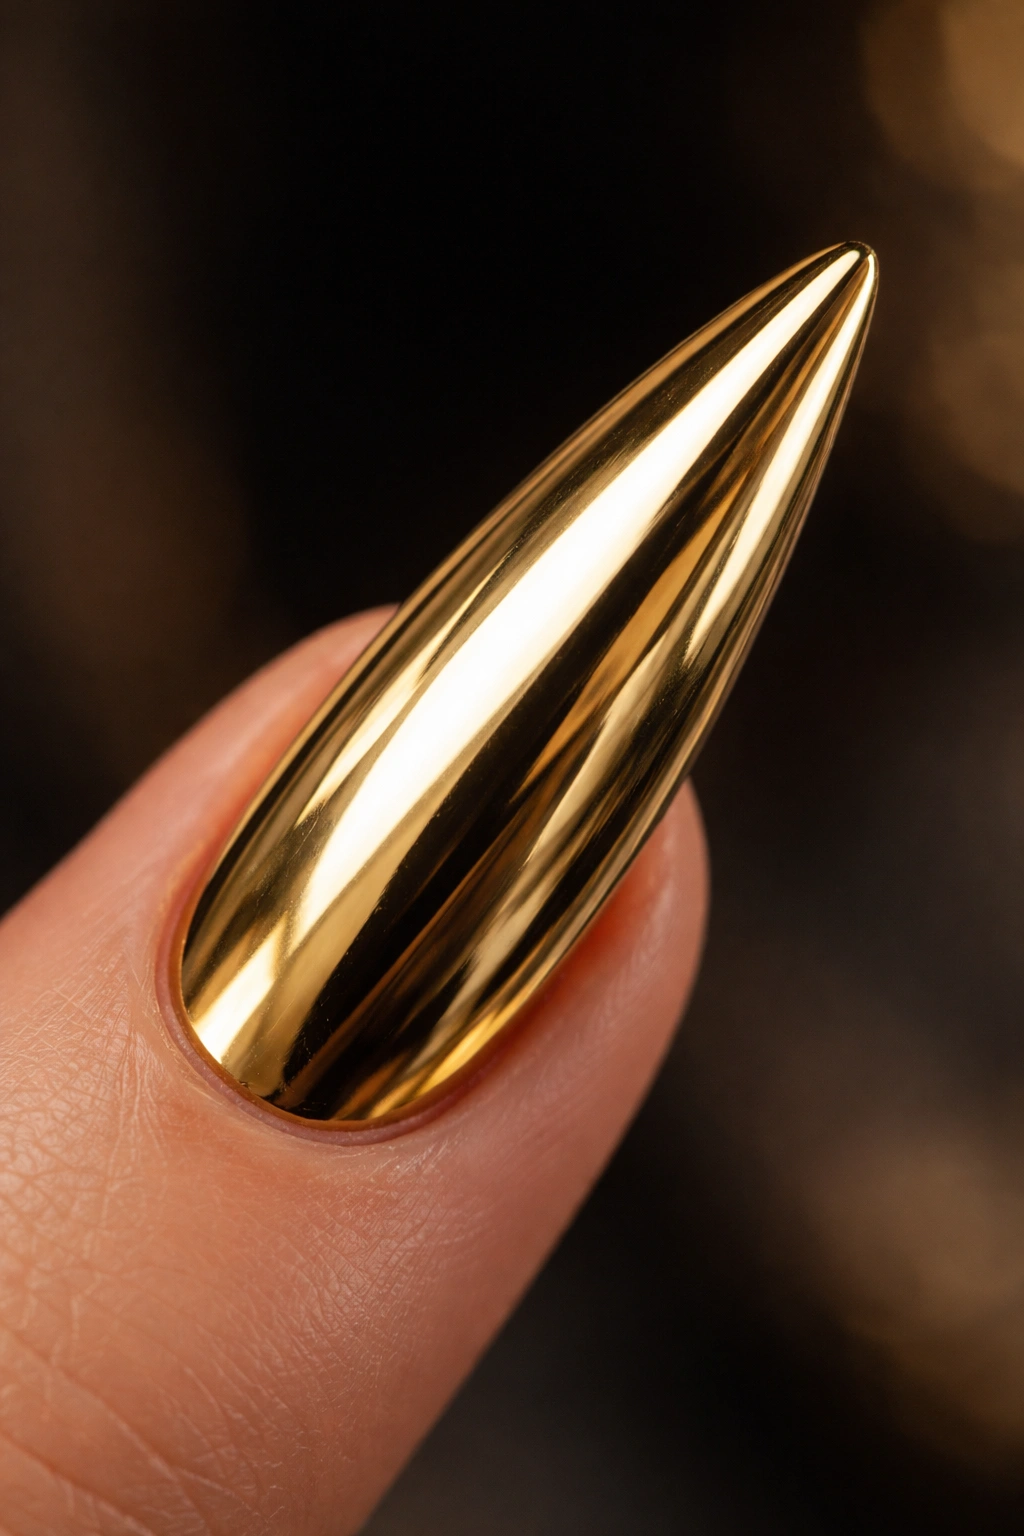
The mirror finish—sometimes called chrome or metallic gold—represents one of the most striking nail designs possible. This finish uses specially formulated powders that reflect light like polished metal, creating an almost three-dimensional appearance that catches attention instantly. A mirror gold stiletto appears almost liquid, with light bouncing across the nail surface in ways that shift as you move your hands.
Why This Design Stands Out
The mirror finish works because it requires minimal additional embellishment to look expensive and intentional. The reflective quality does all the visual work, creating depth and dimension that flat polish simply cannot achieve. This is one of the few nail designs where simplicity actually increases impact—there’s nowhere to hide with a mirror finish, which is exactly why it looks so professional when executed well. The shimmer also works with any jewelry or skin tone, making it genuinely universally flattering.
Application Tips and Techniques
- Use a chrome powder specifically designed for nails—standard glitter or metallic powder won’t create the mirror effect you’re after
- Apply a thin layer of gel base, cure, then gently press the chrome powder onto the uncured surface with a soft brush or sponge applicator
- Seal immediately with a glossy top coat before curing to lock in the powder and maximize the reflective quality
- The key to a flawless mirror finish is patience during application—rushing the powder application creates patchy coverage that looks unfinished
Pro tip: If you’re doing this at home, work over a small dish or paper to catch excess powder, and apply the powder in light, dabbing motions rather than brushing, which can disturb the placement.
2. Gold Ombre with Rhinestone Cascade
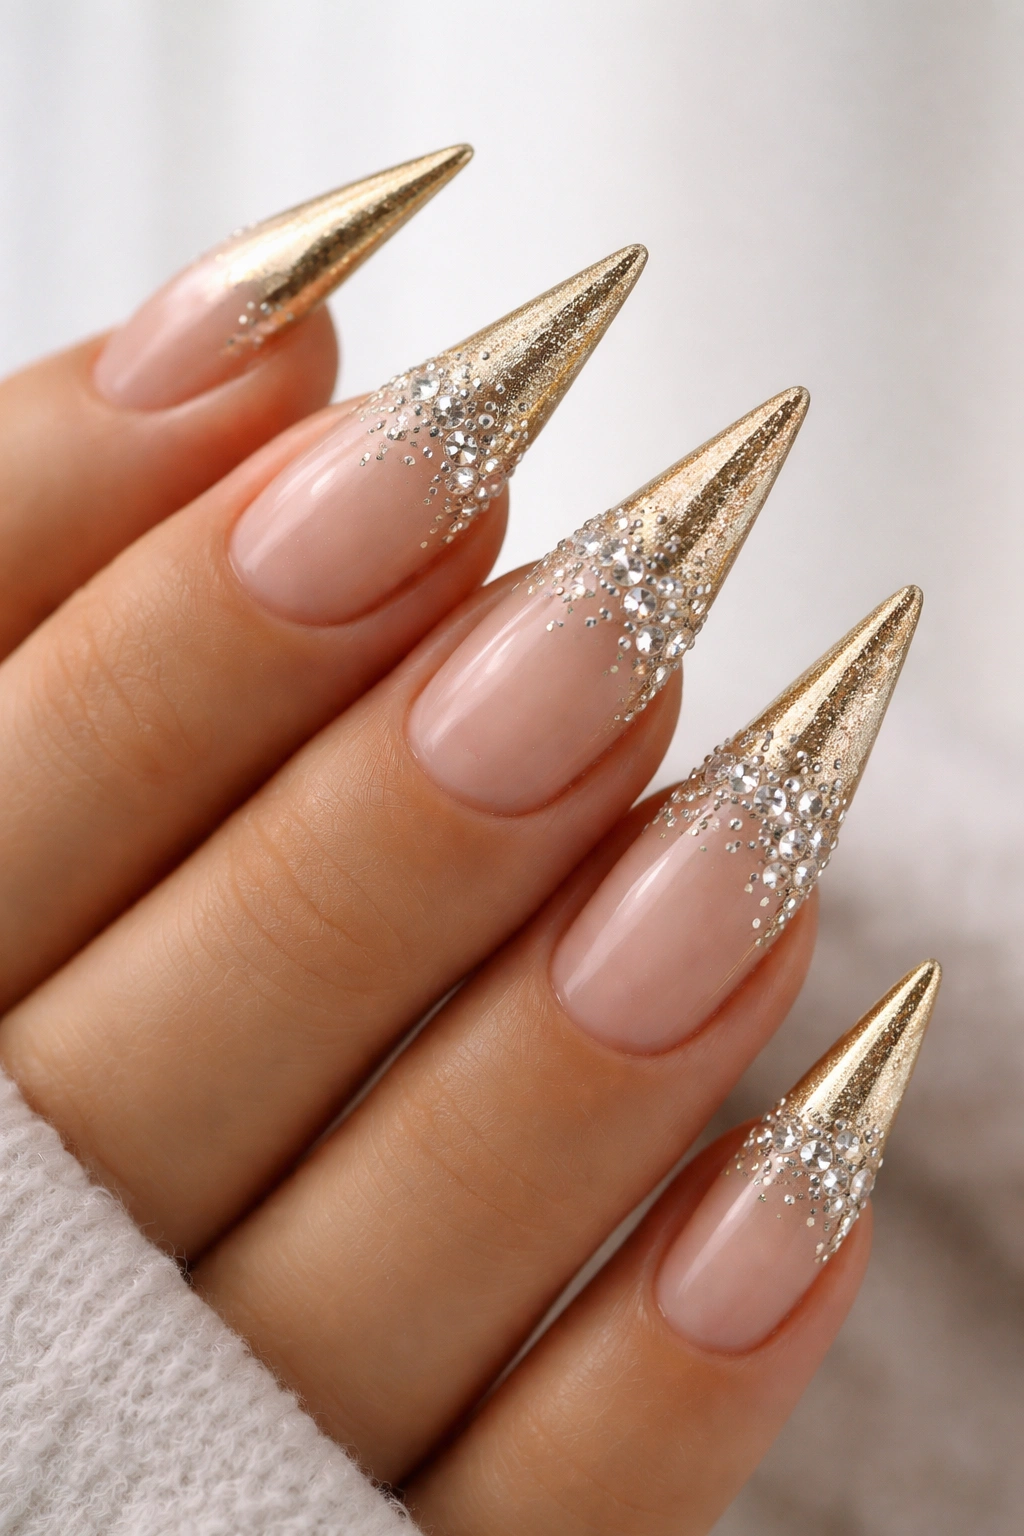
An ombre design on stiletto nails creates a gradient effect that flows from one color into another, and when combined with gold tones, it delivers sophisticated visual movement. The rhinestone cascade—a trail of crystals that descends from the top or sides of the nail—adds dimensionality and catches light from multiple angles, creating a genuinely eye-catching manicure that photographs exceptionally well.
Creating Dimension Through Gradient and Sparkle
The ombre effect works by blending two shades together on the nail surface using a sponge dabbing technique, creating a soft transition rather than a hard line. When one shade is gold and the other is white, champagne, or a deeper gold, the result feels luxurious and intentional. The rhinestones amplify this effect by adding physical texture and light-catching elements that make the gradient appear even more dynamic. This combination feels festive without being costume-like.
Design Customization Options
- Create a vertical ombre that transitions from gold at the cuticle to champagne or nude at the tip
- Use a horizontal gradient where gold concentrates around the sides and fades to nude or white in the center
- Position rhinestones in a deliberate pattern along one side edge or scattered in graduated sizes
- Combine matte gold with glossy ombre sections to add unexpected texture variation
- Mix rhinestone sizes—larger crystals as anchors with progressively smaller stones for visual movement
Worth knowing: Rhinestones stay attached better when placed on uncured gel rather than over a finished manicure, so plan your rhinestone placement before sealing your final top coat.
3. Matte Gold with Metallic Accents
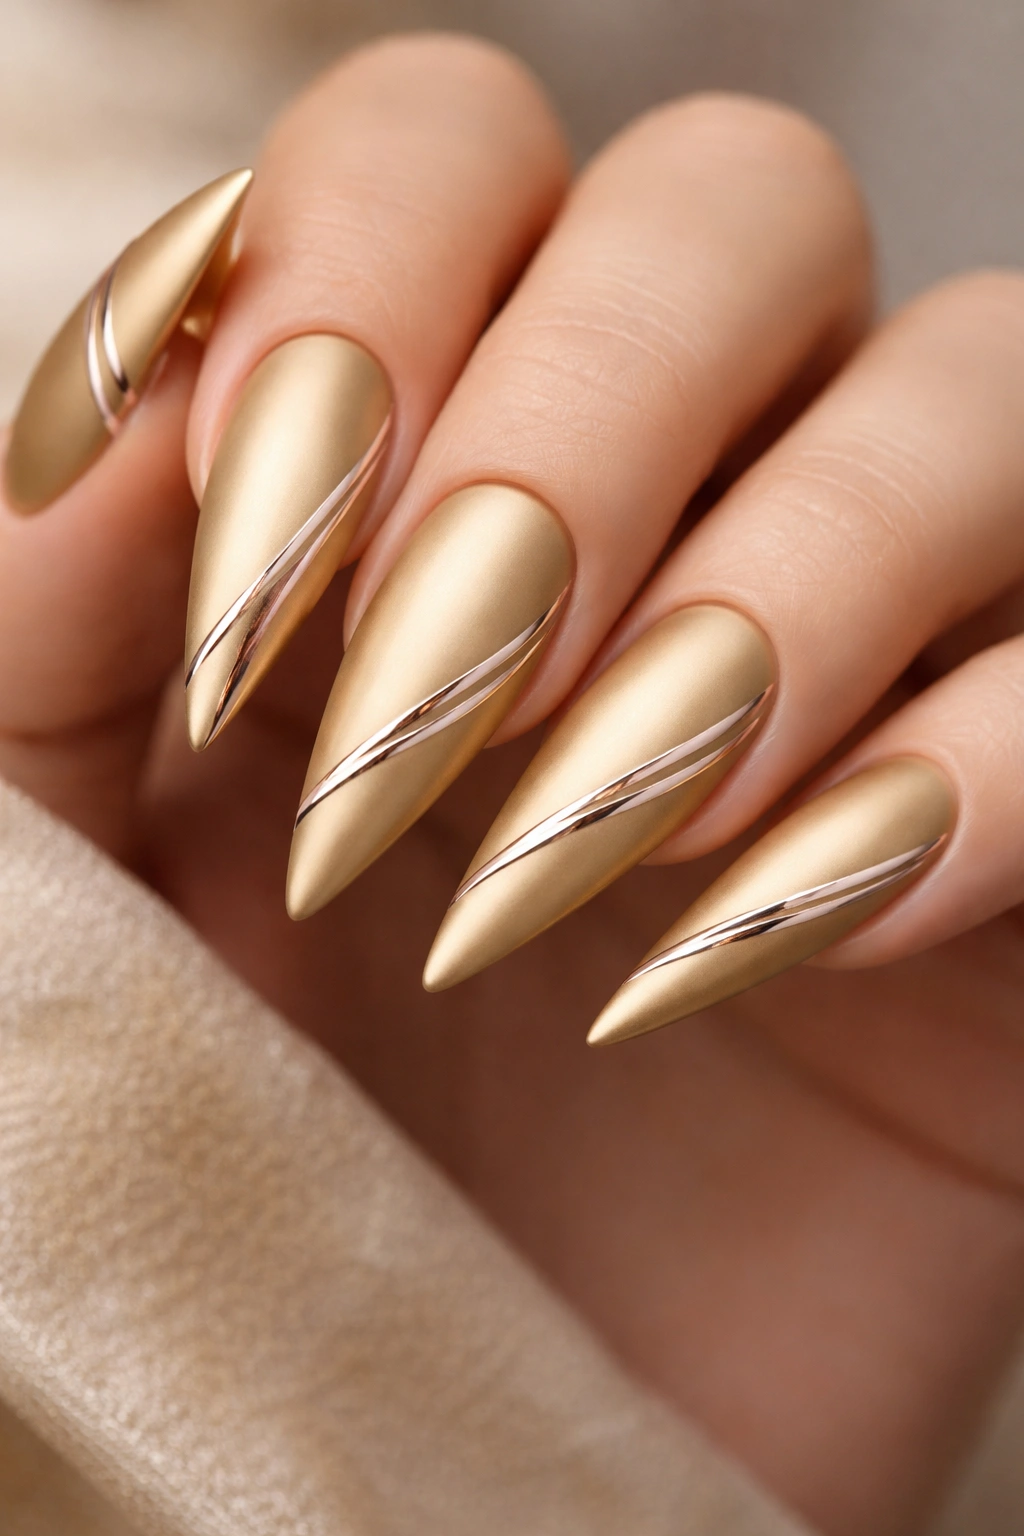
Matte gold nails offer a completely different aesthetic from glossy finishes—they feel more modern, sophisticated, and surprisingly wearable for everyday styling. The matte texture absorbs light rather than reflecting it, which makes the gold color appear richer and deeper. Adding metallic accents in silver, copper, or contrasting gold creates visual interest without overwhelming the overall design.
The Modern Appeal of Matte Finishes
Matte finishes have gained serious traction among nail artists and enthusiasts because they read as intentional and high-end—there’s something inherently more luxe about choosing matte over glossy. On stiletto nails specifically, matte gold creates an almost velvety appearance that feels softer and more wearable than high-shine finishes. The contrast between matte and metallic accents (thin lines, geometric shapes, or minimalist designs) makes those accents pop visually while keeping the overall aesthetic grounded and elegant.
Accent Design Ideas That Work
- Paint thin metallic lines along the side or center of each nail for a minimalist linear effect
- Create a metallic stripe down the middle of matte gold with both colors sharing equal visual weight
- Use metallic polish to outline the tip or create a small geometric shape near the cuticle
- Apply metallic accents only to your accent nail (usually the ring finger) for subtle sophistication
- Combine matte and metallic in a color-blocking design where each section has clean, defined edges
Insider note: Matte top coats work best when applied to fully cured gel—if you apply matte over semi-cured gel, the finish can appear streaky or uneven.
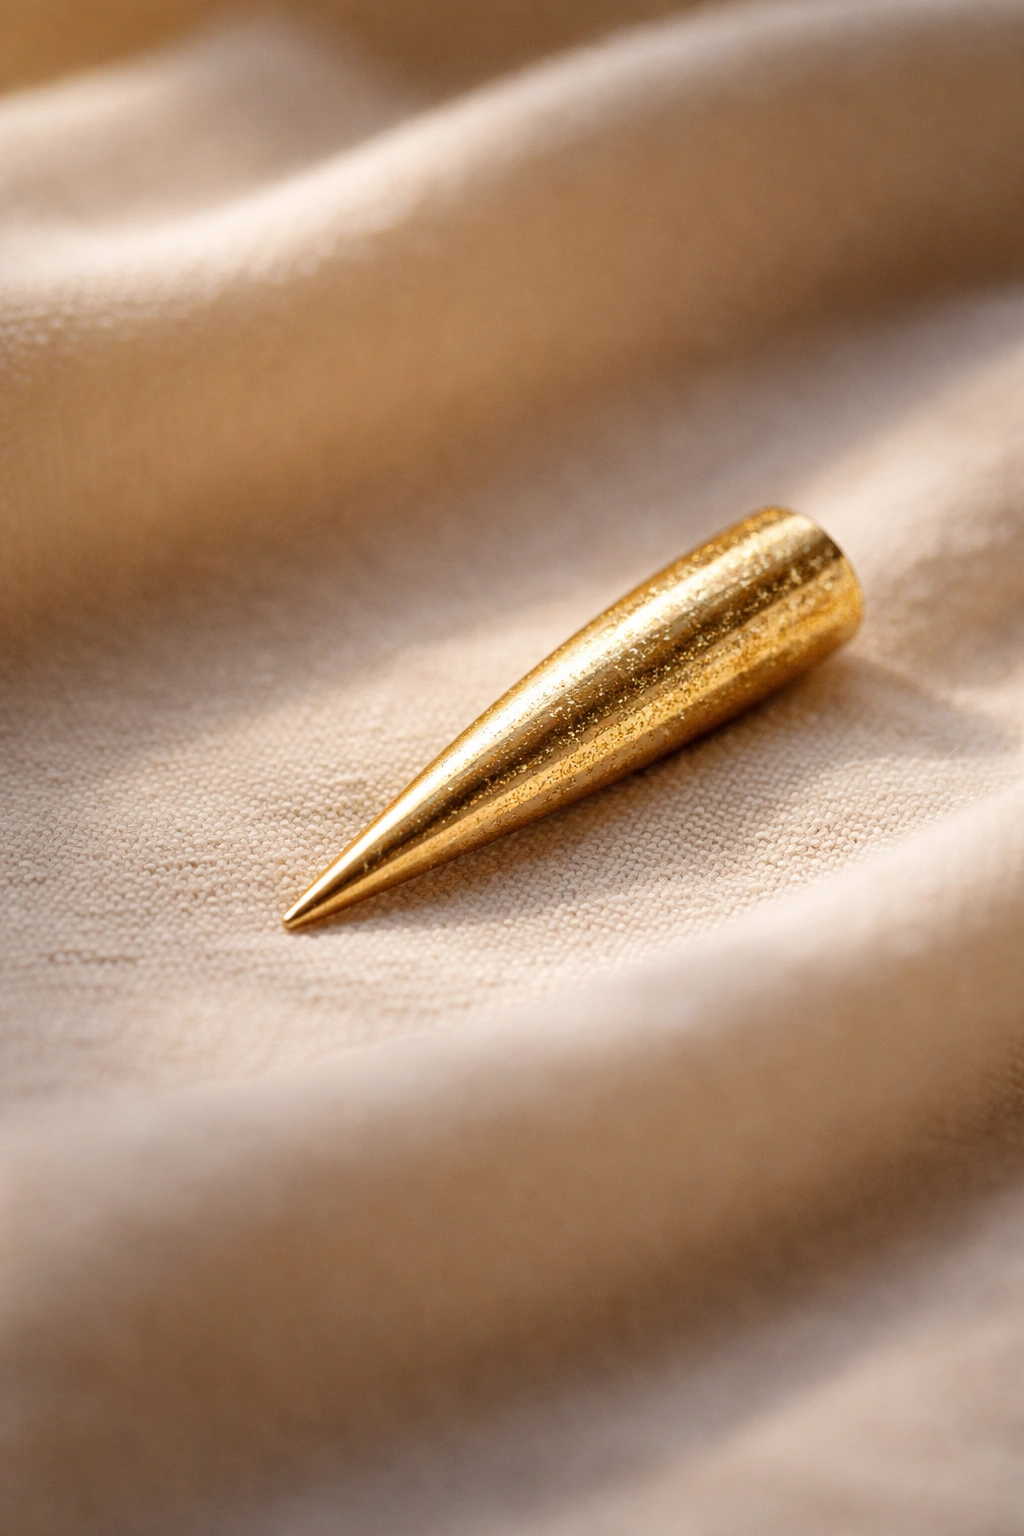
4. Gold Glitter Gradient
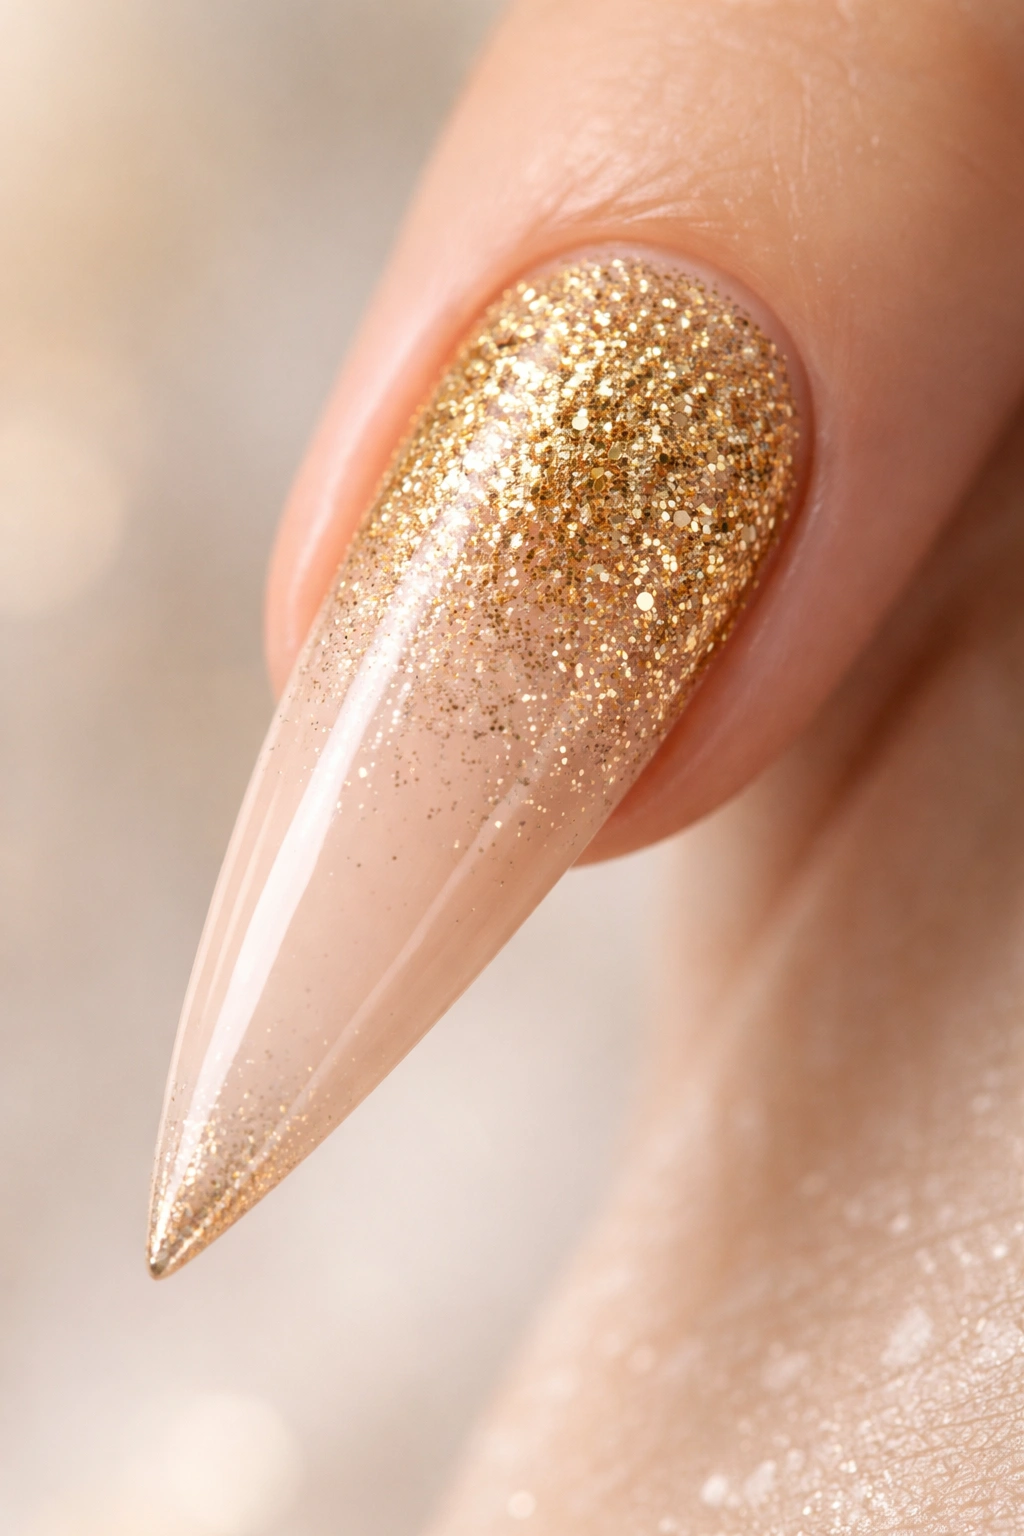
A glitter gradient draws your eye through the nail with visual movement, and when executed in gold tones, it creates elegance rather than chaos. The gradient technique involves concentrating glitter heavily at one end of the nail and gradually reducing concentration toward the other end, creating a subtle transition that feels intentional and refined. This works beautifully on stilettos because the pointed shape naturally guides the eye along the gradient’s direction.
Building a Flawless Glitter Gradient
The gradient effect requires patience and layering—you’ll apply glitter-saturated gel at one end, then progressively apply less glitter-dense gel as you move toward the other end. Thin, careful application creates the smoothest transitions. The gradient can flow from cuticle to tip, from one side to the other, or even diagonally across the nail. Gold glitter gradients work best when the base color is a neutral nude, champagne, or a lighter shade of gold, allowing the glitter to show dimension.
Glitter Selection and Application
- Choose mixed-size gold glitter rather than uniform pieces—varied sizes create more visual interest and catch light differently
- Apply a nude or champagne base first, cure it fully, then apply gel with embedded glitter in graduated layers
- Use a thin brush to precisely control where glitter density is highest and where it fades
- Seal with a glossy top coat to lock everything in place and smooth the surface
- Consider adding a small metallic or chrome accent at the very tip to anchor the design
Pro tip: If you’re concerned about a glitter gradient looking too busy, use fine glitter rather than chunky sparkle pieces, which reads as more sophisticated and elegant.
5. Geometric Gold Patterns
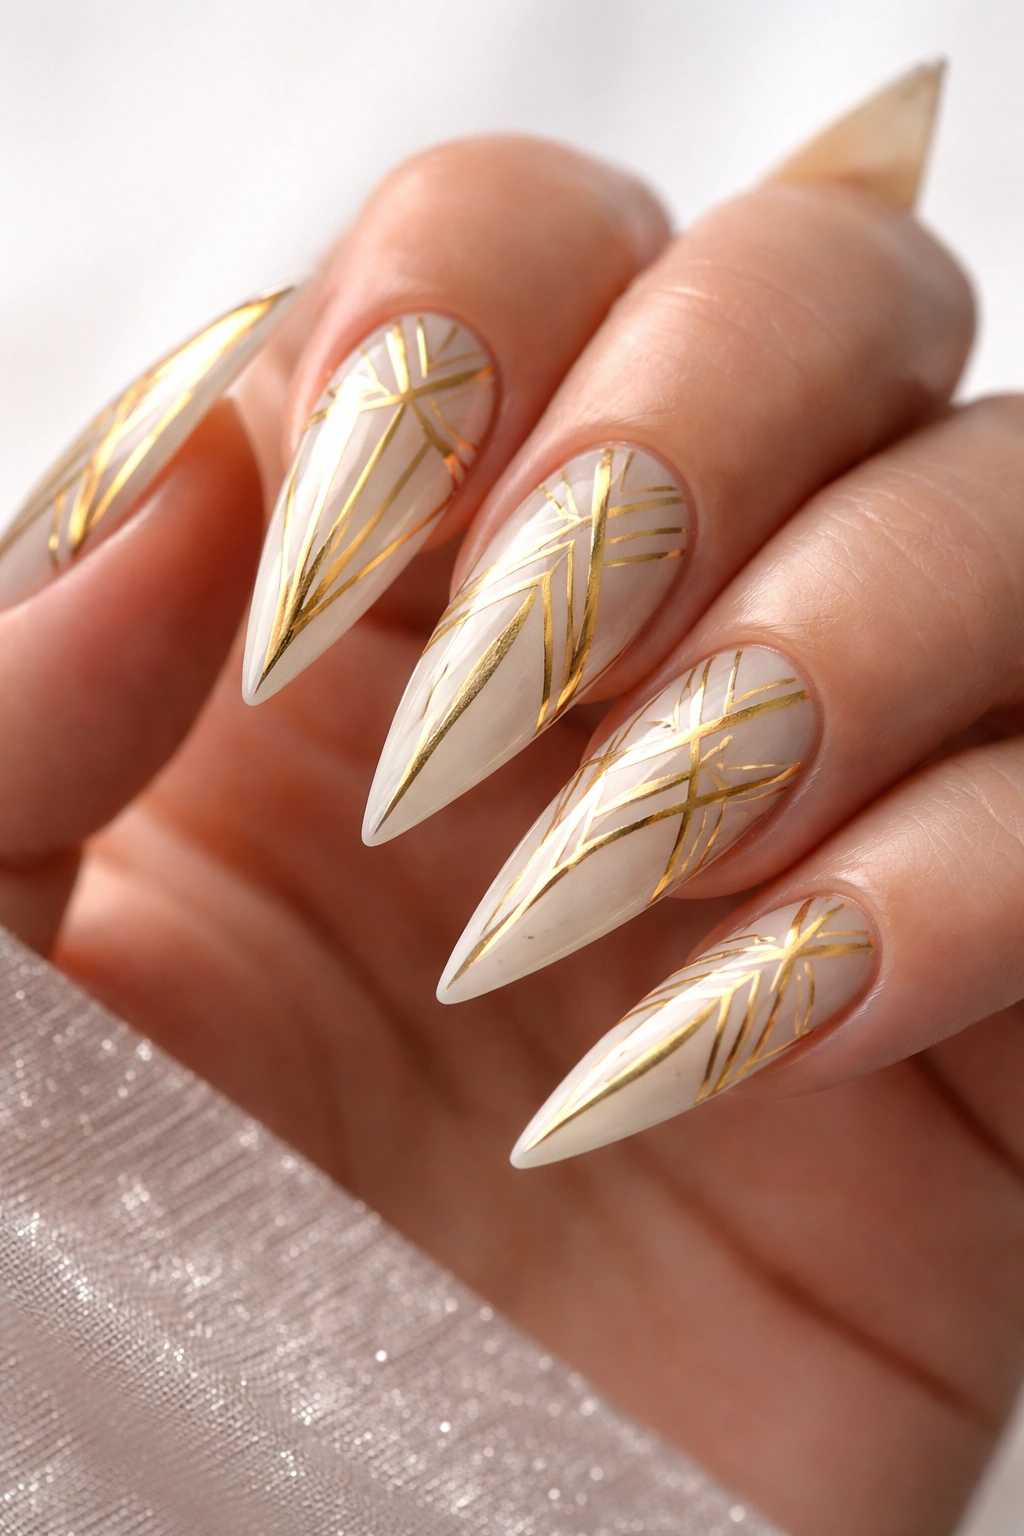
Geometric designs use shapes—triangles, hexagons, stripes, angles—to create structured, modern patterns that feel artistic without being chaotic. On stiletto nails, geometric gold patterns benefit from the elongated shape, which gives you more canvas for intricate line work. Geometric designs feel contemporary and intentional, appealing to people who love clean lines and visual precision over organic, flowing patterns.
Creating Clean Geometric Lines
The key to professional-looking geometric designs is using thin nail art brushes, a steady hand, and thin coats of polish that you build up rather than attempting in one heavy stroke. Many nail artists recommend using a toothpick or thin liner brush to create precise lines and shapes. Geometric patterns work best when colors have clear contrast—gold against white, nude, black, or even contrasting metallic finishes. The pointed stiletto shape naturally creates an anchor point for geometric patterns, which often look even more striking when they’re oriented toward the tip.
Geometric Pattern Ideas for Gold Stilettos
- Create a series of thin vertical stripes in gold and nude alternating across the nail surface
- Paint triangle or diamond shapes at different angles, combining solid gold with outlined versions
- Use horizontal lines that are staggered or asymmetrical for a modern, architectural feel
- Create a pattern where one nail is fully geometric while others have minimal accents, allowing variation
- Combine matte and glossy gold in the same geometric pattern for unexpected texture contrast
Worth knowing: Thinner lines require multiple thin coats rather than one heavy coat, and patience between coats prevents the polish from running into other sections of your design.
6. Gold Leaf Design

Gold leaf nail art brings an organic, nature-inspired elegance to stiletto designs. Real or faux gold leaf creates texture and dimension by layering actual metallic sheets onto the gel surface, creating an effect that photographs beautifully and feels genuinely luxurious. Gold leaf designs work especially well on nude or white bases where the metallic leaf becomes a prominent visual element rather than blending into the background.
The Appeal of Textured Metallic Elements
Gold leaf stands out because it creates actual physical texture—your nail doesn’t just look shiny, it actually has a slightly raised surface where the leaf adheres. This texture catches light differently depending on the angle and lighting, making the nail appear dimensional and living. Gold leaf also feels more artistic and crafted than standard nail polish, which appeals to people who see their nails as wearable art rather than just color application.
Application Methods and Design Placement
- Use a thin adhesive gel or specialized leaf glue to create a sticky base where you’ll place the leaf
- Press the gold leaf carefully onto the adhesive, using a soft brush or tool to smooth it gently
- Seal immediately with a glossy top coat to prevent leaf from lifting at the edges
- Position leaf on the tip of the nail for a modern, pointed emphasis
- Create scattered leaf placements across the nail surface for an artistic, organic feel
- Combine partial leaf coverage (leaf on only half the nail) with a complementary matte or glossy finish
Pro tip: Faux leaf (foil-based) is easier to work with than real gold leaf for home manicures, as it adheres more predictably and doesn’t tear as easily.
7. Nude Base with Gold Details
Sometimes the most sophisticated approach is restraint—a soft, skin-toned base with carefully placed gold accents creates elegance precisely because it doesn’t overwhelm. This design works beautifully on stilettos because the nail shape itself is already a statement, and the color combination feels upscale without requiring heavy embellishment. This approach suits people who want their nails to enhance their overall aesthetic rather than dominate it.
Why Nude and Gold Is Enduringly Chic
The nude-and-gold combination works because these two elements complement each other perfectly without competing for attention. Nude elongates the appearance of the nail and the finger, while gold catches light and draws the eye, creating balance. This pairing feels expensive and intentional—it’s the kind of manicure you see on people who have a refined personal aesthetic. Nude and gold is also genuinely versatile across seasons, occasions, and outfit types.
Subtle Detail Placement Ideas
- Paint a thin gold stripe along one side edge of each nail for linear elegance
- Create small gold dots near the cuticle or scattered asymmetrically for visual interest
- Paint just the tips in gold, creating a reverse French tip effect
- Add a single line of rhinestones along the edge for sparkle without covering the nail
- Paint the ring and pinky finger nails fully in gold while keeping the others nude for understated variety
- Create a small geometric shape (triangle, line, or abstract mark) in gold on each nail
Insider note: The best nude shades for this design are ones that match your actual skin tone—not pink nudes or overly warm orangey-nude, but your true undertone, which creates the most elongating effect.
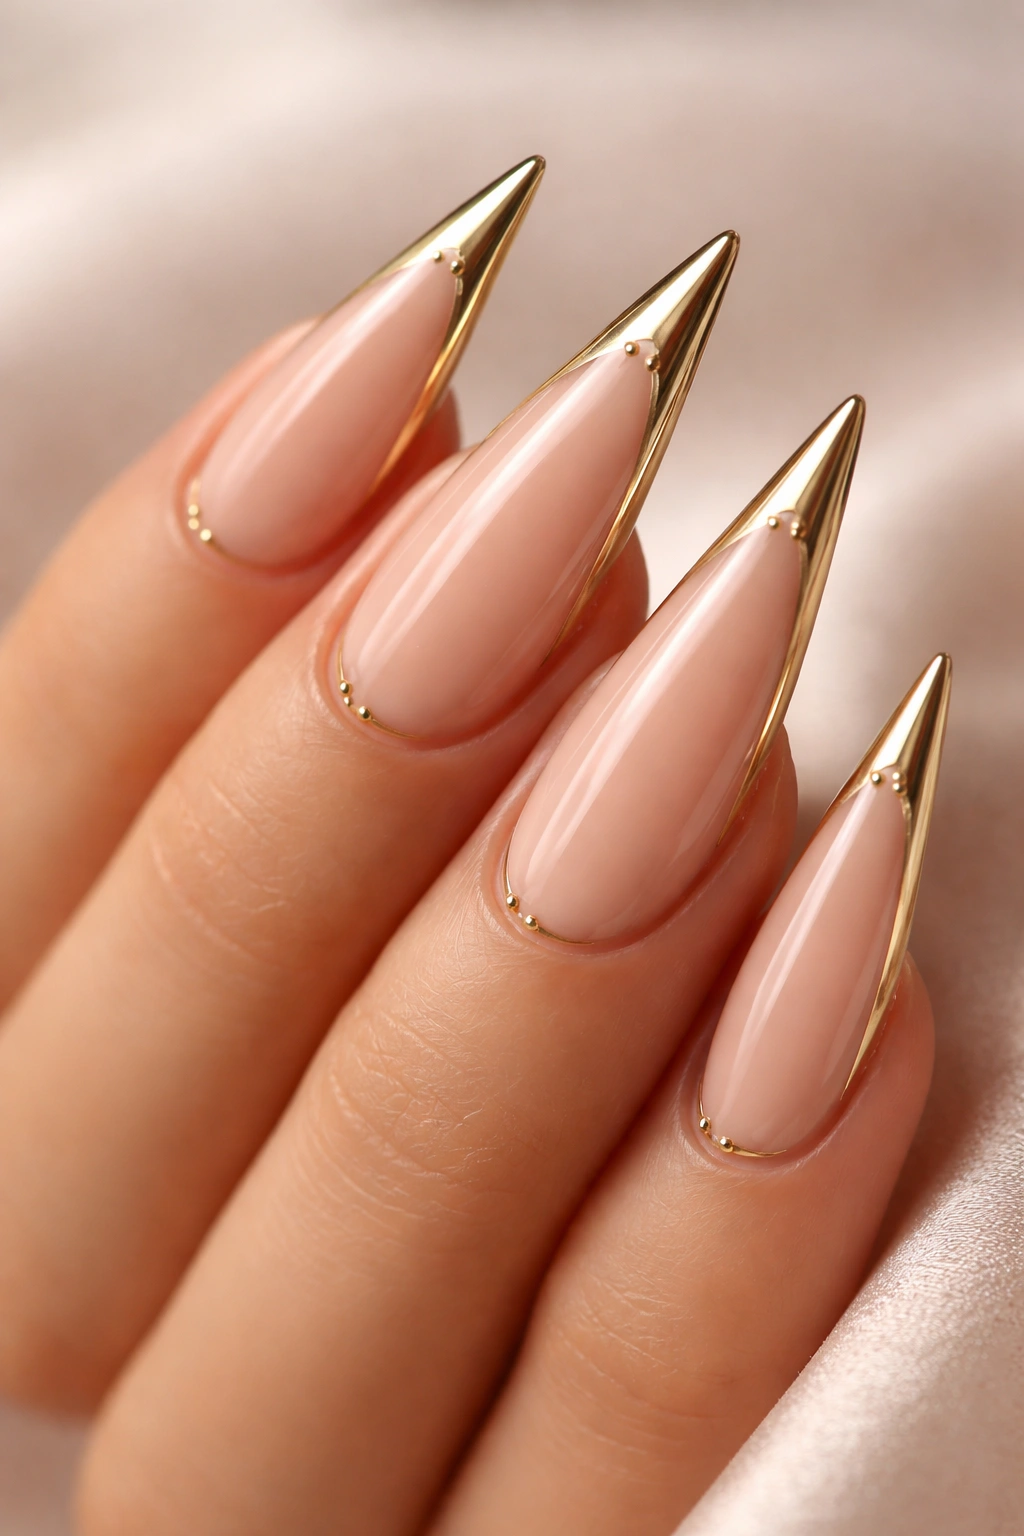
8. Gold French Tips with Modern Twist
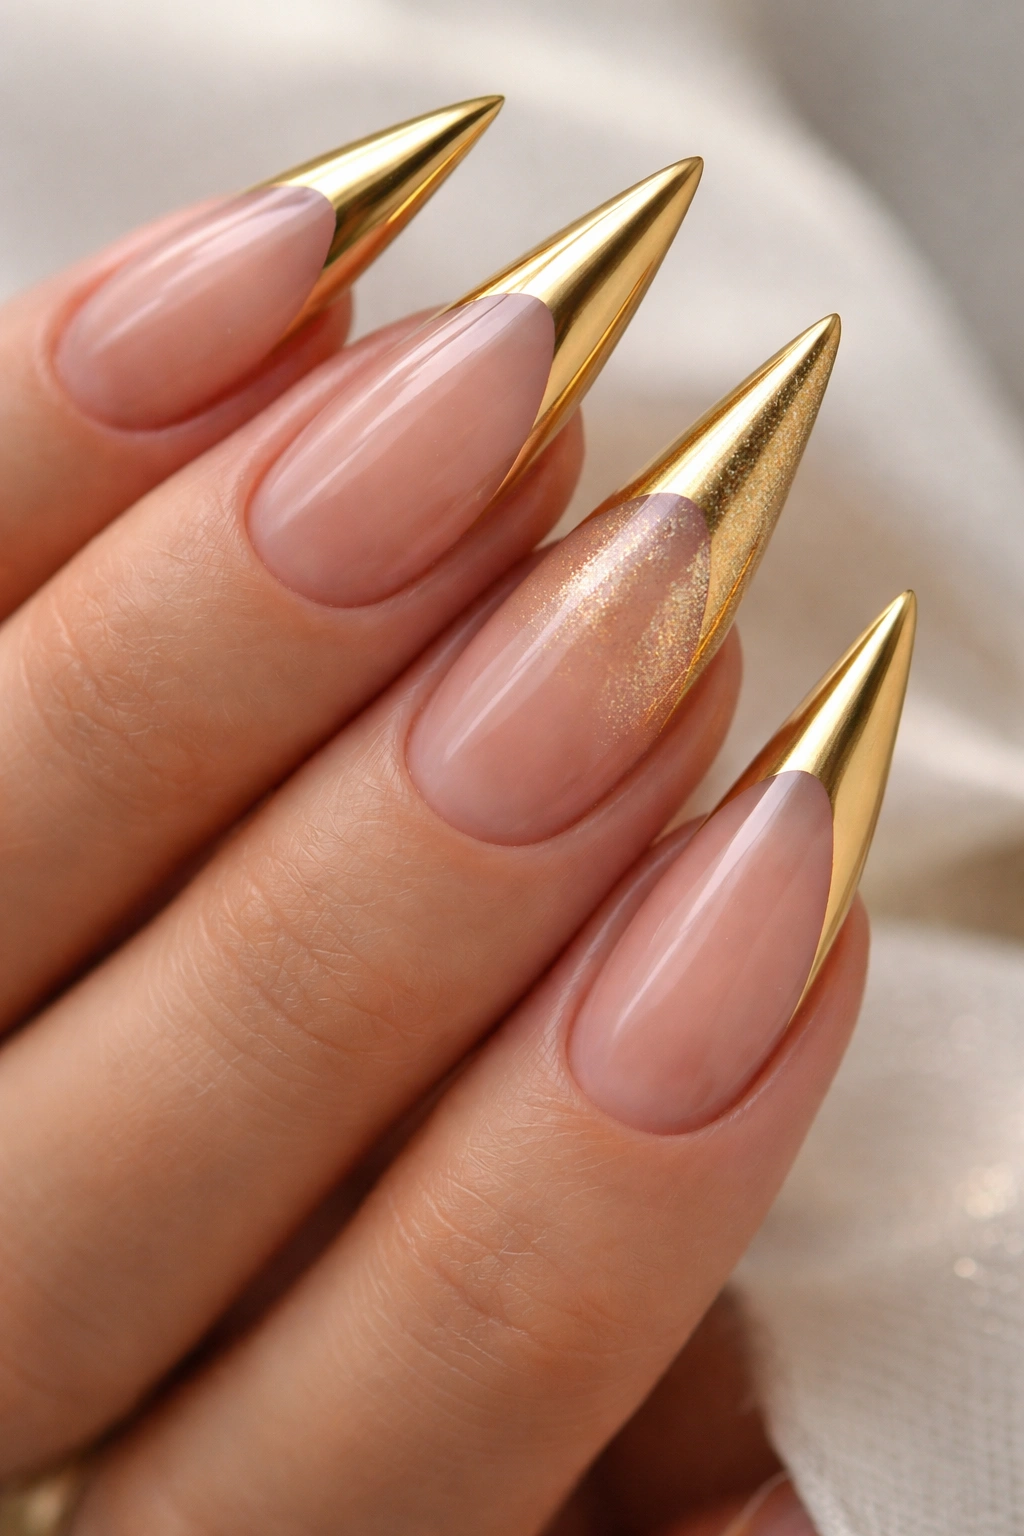
The French tip is the ultimate classic nail design—but when you execute it in gold and add unexpected elements, it becomes modern and fresh. Rather than traditional white tips, gold tips on stilettos create a luxurious, contemporary look that reads as more intentional than a standard manicure. Modern variations might include angled tips, gradient tips, or colored tips rather than the traditional straight-across white line.
Reimagining the Classic French Manicure
A gold French tip works by painting the last third of the nail (or the pointed tip) in gold while keeping the rest of the nail nude, white, or pale champagne. The traditional straight line across can be replaced with an angled line that follows the natural slope of the stiletto point, creating visual harmony between the tip color and the nail shape. Some modern variations blur the line between gold and the base color, creating a soft gradient rather than a defined edge.
Modern Gold French Tip Variations
- Paint an angled tip that mirrors the natural angle of the stiletto point rather than a straight horizontal line
- Create a gradient where the gold tip fades into the base color rather than having a hard line
- Paint only the very pointed tip in gold, leaving most of the nail nude for extreme subtlety
- Combine glossy gold tips with matte base nails for unexpected texture contrast
- Add a thin metallic line between the base color and the gold tip as a visual separator
- Create an asymmetrical design where only some nails have the gold tip element
Worth knowing: The cleaner your line between the base color and the gold tip, the more precise and expensive your manicure will appear—invest in a thin, quality nail art brush for this detail work.
9. Marble Gold Nails
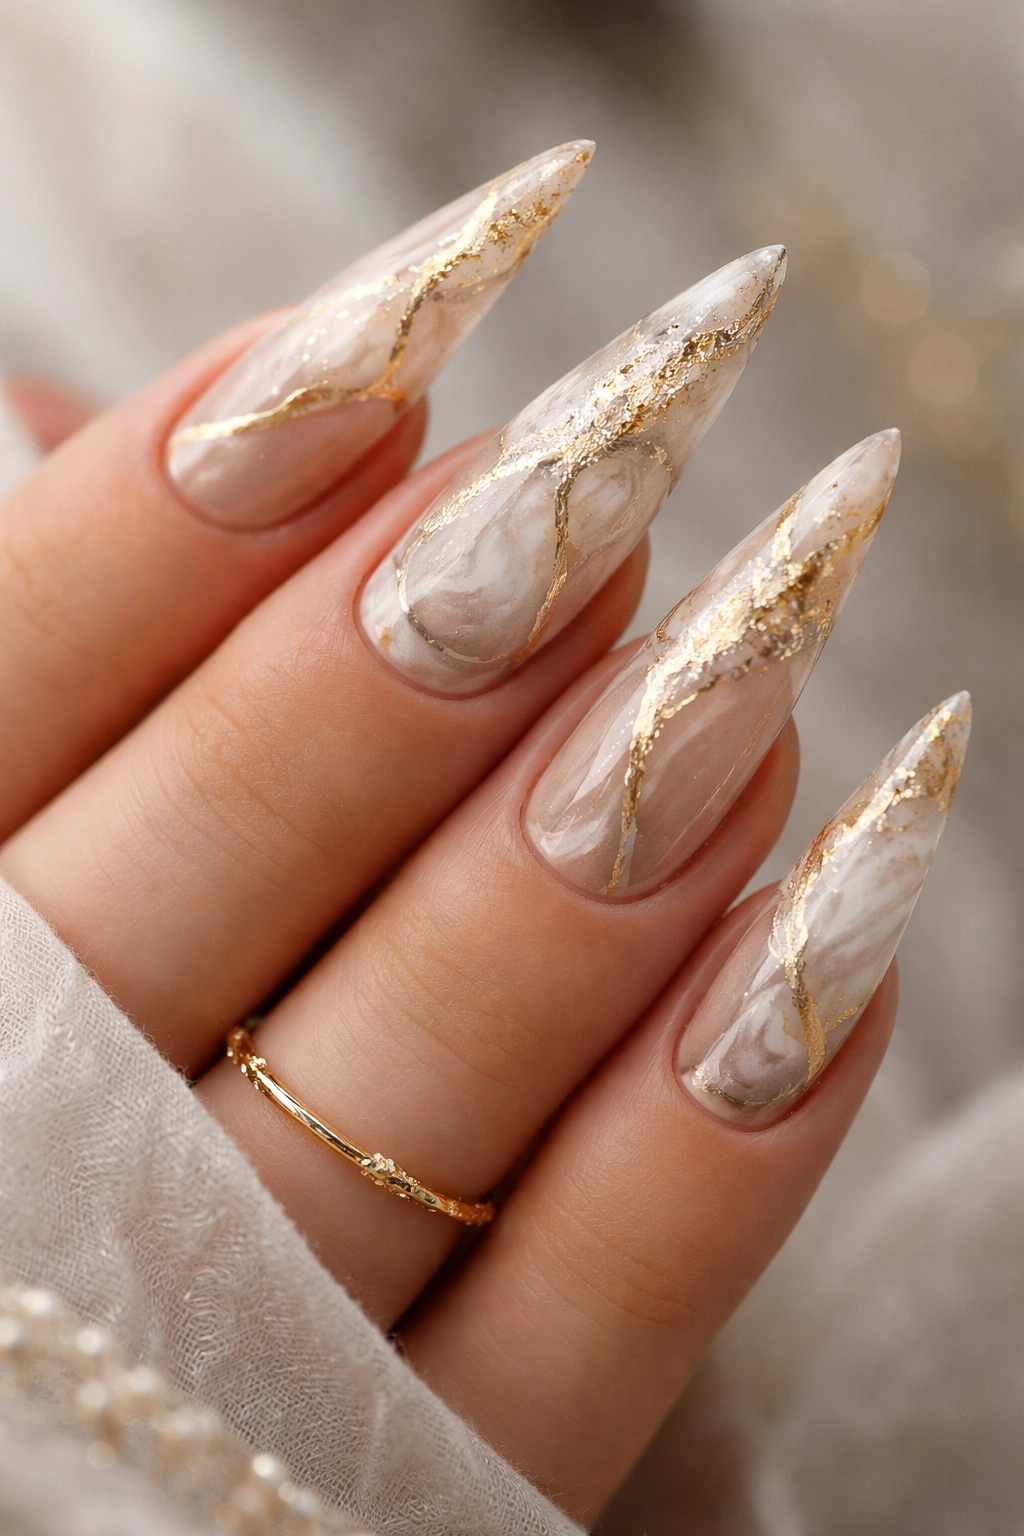
Marble designs create an organic, sophisticated pattern that mimics the appearance of natural stone, and when executed in gold tones, it feels both artistic and elegant. The marble effect uses the water marble technique or gel marble application to create flowing, organic patterns rather than structured geometric designs. Gold marble can be combined with white, grey, nude, or black to create contrast and visual interest.
Creating Authentic Marble Patterns
Marble designs work by blending two or more colors together on the nail surface in a way that creates natural-looking veining and variation rather than uniform color. This requires patience and often experimentation—no two marble nails are identical, which is part of their charm. The technique involves either a water marble method (floating polish on water and dipping the nail) or a gel marble method (applying multiple colors of gel and using tools to swirl and blend them).
Marble Design Approaches for Gold Stilettos
- Create a classic grey, white, and gold marble that mimics natural stone veining
- Use champagne, nude, and gold for a warmer, more subtle marble effect
- Paint a full marble design across all nails, or feature marble on accent nails only
- Combine matte and glossy finishes within the same marble design for texture variation
- Add thin metallic lines or gold leaf over marble for an extra dimension of luxury
- Create a gradient marble where gold is concentrated at the tip and fades into other colors
Pro tip: Water marble can be tricky to master, so don’t be discouraged if your first attempts don’t look perfect—even imperfect marble designs look intentional and artistic on stiletto nails.
10. Gold Foil Texture Design
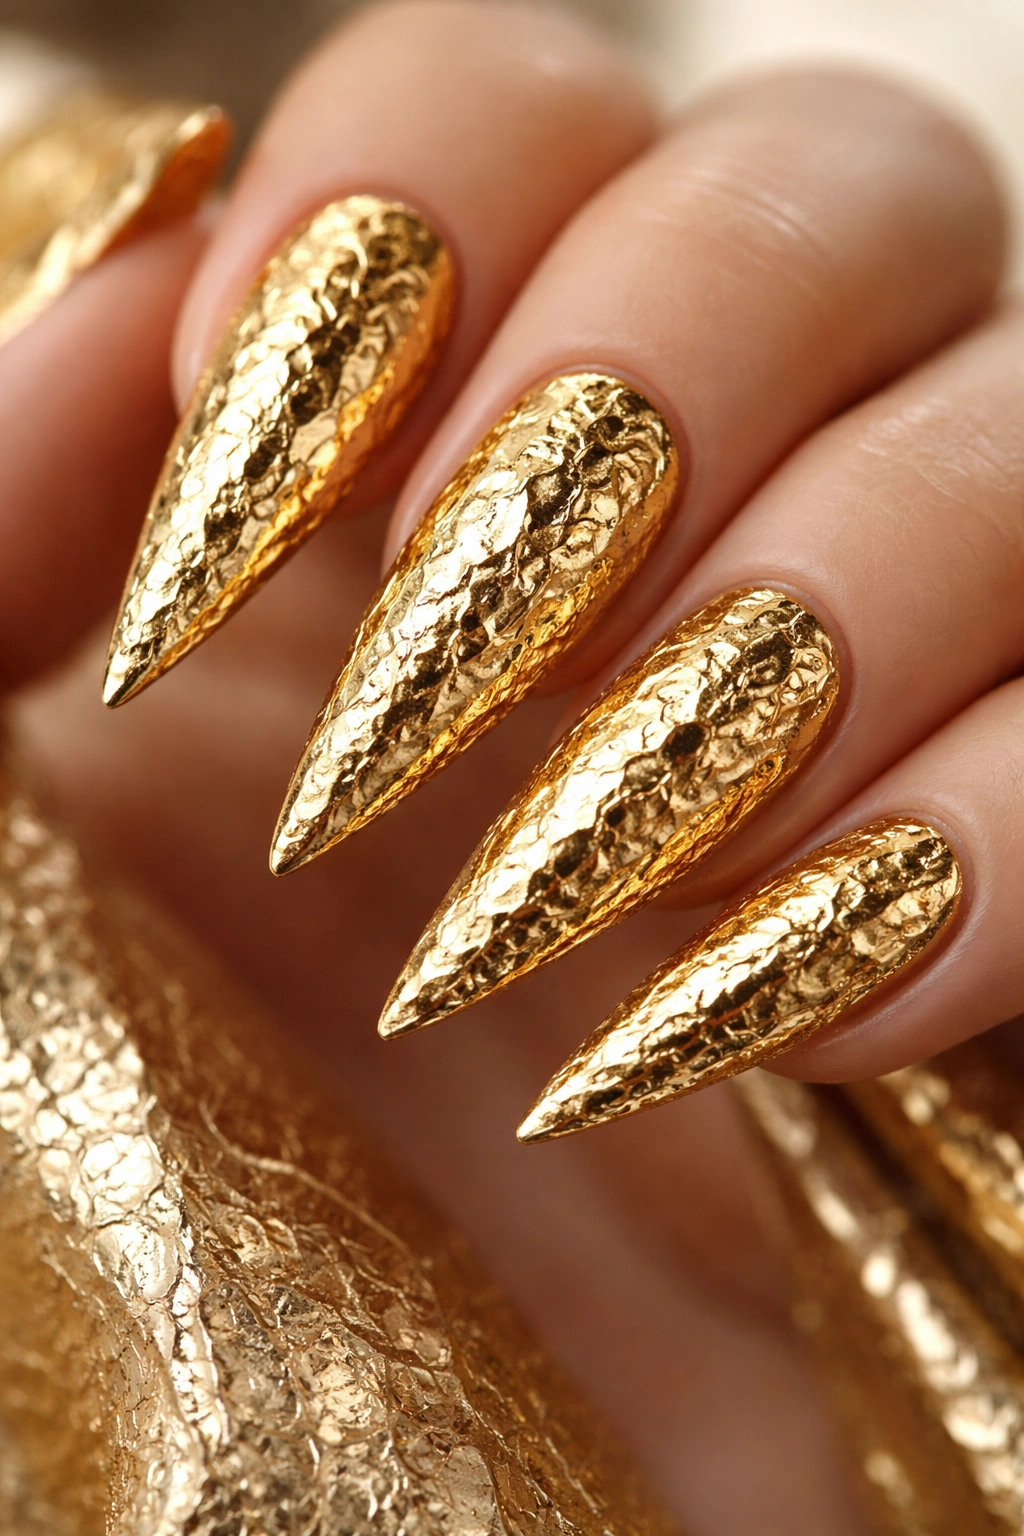
Foil textures create a crinkled, almost metallic-paper appearance that’s visually striking and surprisingly modern. Unlike smooth finishes, foil textures have actual physical texture that changes how light interacts with the nail. Gold foil creates a design that’s immediately recognizable and feels artistic without requiring detailed hand-painting skills. This approach appeals to people who want high-impact designs without the time investment of intricate nail art.
How Foil Effects Are Achieved
Foil effects use specially formulated foil polishes or adhesive materials that create a textured surface when applied and cured. The crinkled, paper-like appearance happens because the polish or foil material shrinks and creases as it cures, creating natural variation and visual interest. Some foil effects are created by layering foil sheets under clear gel, while others use foil polish applied directly. The result always looks intentional, high-end, and artistic.
Texture and Design Combinations
- Apply foil polish as a full coverage color on all nails for a cohesive, textured look
- Use foil on accent nails only (ring and pinky fingers) for subtle texture variation
- Combine gold foil with glossy nude or matte gold for contrast between smooth and textured surfaces
- Create a design where foil covers only the tip of each nail while the base remains smooth
- Layer foil partially over the nail surface, leaving some areas smooth and others textured
- Combine gold foil with metallic or chrome accents for maximum visual interest
Insider note: Foil effects photograph beautifully because the texture catches light in multidirectional ways, creating dimension that reads differently from various angles and lighting conditions.
11. Gold Chrome Stilettos with Accent Colors
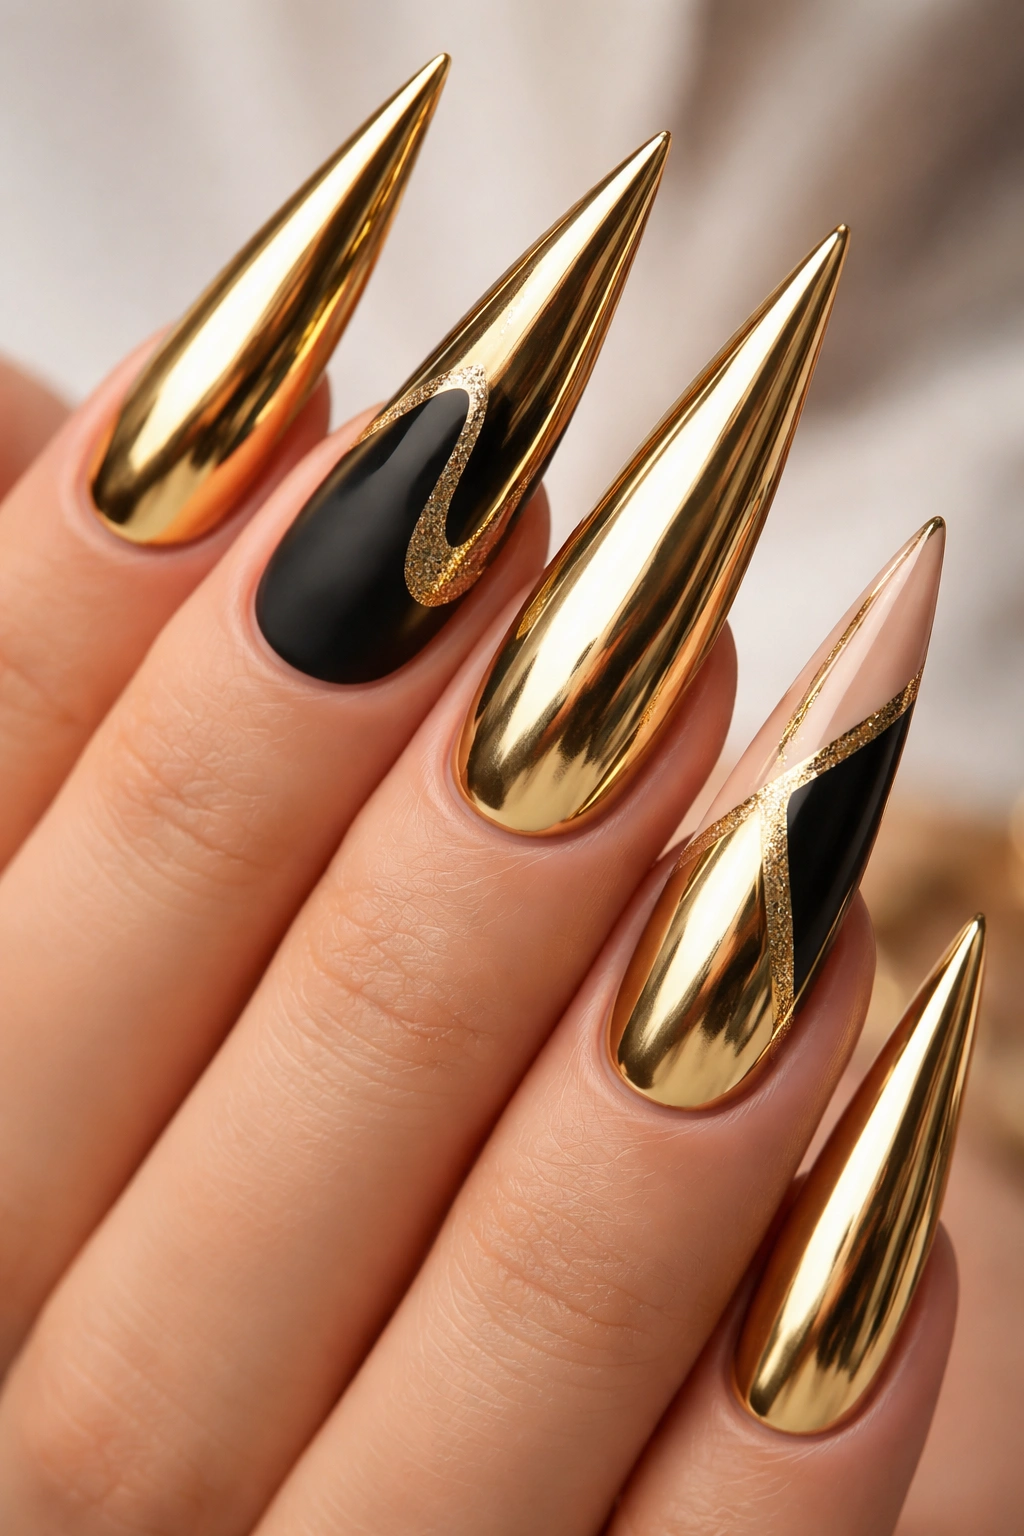
Chrome nails—that mirror finish we discussed earlier—reaches another level of sophistication when combined with secondary accent colors. Full chrome in one tone is stunning, but strategic use of chrome alongside other colors creates a modern, gallery-worthy design. On stiletto nails, chrome combined with color accents feels contemporary and intentional, mixing high-shine elements with matte or glossy finishes for unexpected contrast.
Combining Chrome with Strategic Color Elements
Chrome works as a base color across most of the nail, with carefully placed accents in complementary hues. This might mean a chrome-covered nail base with a colored geometric shape on the tip, or one nail painted full chrome while others feature chrome mixed with other finishes. The key is balance—letting chrome be the dominant element while other colors add accent and definition rather than competing for attention.
Chrome and Accent Color Combinations
- Paint nails in full chrome gold, with accent nails featuring a single stripe or line in matte black or nude
- Create a design where chrome covers the base two-thirds of each nail and a contrasting color (white, black, or nude) occupies the pointed tip
- Use chrome on alternating nails with solid color or pattern on the others for visual rhythm
- Combine gold chrome with rose gold or copper chrome accents for a warm, multitonal effect
- Paint chrome on some nails and matte gold on others, creating subtle variety across your manicure
- Add a thin line of chrome to one side of each nail while the rest features a complementary solid color
Pro tip: The most striking chrome designs balance the intensity of the chrome by limiting how much real estate it covers—if every nail is fully chrome, the effect feels overwhelming rather than sophisticated. Strategic placement makes it feel intentional.
Final Thoughts
Gold stiletto nails offer a genuine spectrum of possibilities, from understated elegance to bold artistry, and the right choice depends entirely on your personal style, lifestyle, and what makes you feel confident. Each of these eleven designs can be executed professionally at a nail salon or recreated at home with practice and quality tools—the most important element is choosing a design that resonates with you rather than forcing yourself into a style that doesn’t feel authentic.
The beauty of gold as a color choice is that it genuinely works across skin tones, outfit types, and occasions. Whether you’re drawn to the mirror-like sophistication of chrome, the artistic appeal of marble and geometric patterns, or the timeless elegance of a simple gold French tip, you’re choosing a design that photographs well, complements most aesthetics, and feels intentional rather than trendy.
When you’re ready to commit to a design, either visit a professional nail technician with reference photos or invest in quality tools if you’re doing it yourself—thin brushes, a steady hand, and patience make far more difference than expensive products. And remember that your first attempt might not be perfect, and that’s completely okay. Even slightly imperfect gold stiletto nails look intentional and lovely, and each time you do it, you’ll develop better technique and cleaner results.
