

Stepping into a world of sparkle, shimmer, and soft elegance doesn’t require a royal birthright. All you need? The perfect princess-inspired manicure. These aren’t your average nails—they’re tiny masterpieces that channel everything from glass slippers to enchanted roses, capturing that magical feeling you get when you watch your favorite fairy tale unfold.
Princess nails have exploded across social media, and it’s not hard to see why. They blend understated elegance with just enough sparkle to make you feel like royalty every time you glance at your fingertips. Whether you’re drawn to the classic soft-pink aesthetic favored by real-life royals or you want to embrace the glittery, sunken-shimmer designs taking over TikTok, there’s a princess nail look that’ll make your heart flutter.
What makes these designs so special? They strike that perfect balance between “I woke up like this” and “I spent three hours at the salon.” The beauty lies in the details—the way light catches a chrome finish, how glitter melts seamlessly into a milky base, or how a simple nude shade can look incredibly sophisticated when paired with the right shape and shine.
From ocean-inspired pearlescent finishes to golden sunset gradients, each design tells its own story. Some whisper quiet luxury, while others shout celebration. But they all share one thing: that undeniable fairy-tale magic that makes you want to twirl in a ballgown (or at least feel like you could).
Ready to find your perfect princess moment? Let’s explore ten enchanting nail designs that’ll transform your everyday look into something straight out of a storybook.
1. Classic Rose Quartz Princess Nails
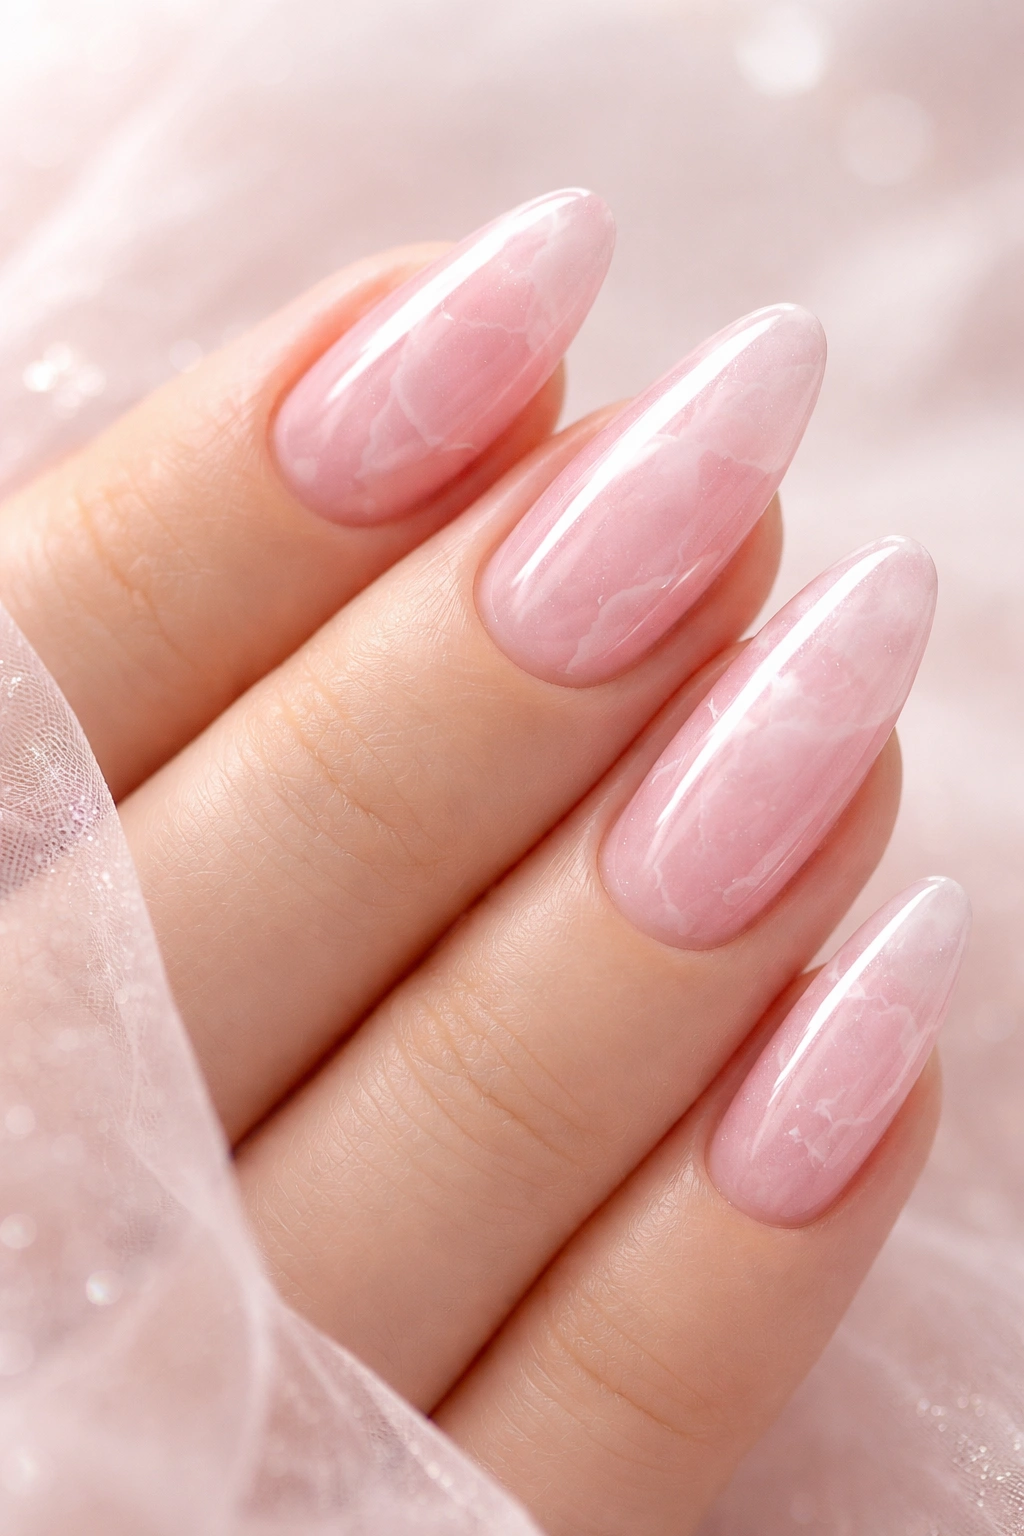
Picture the most delicate blush you’ve ever seen—that’s the essence of rose quartz princess nails. This look embraces soft, sheer pink tones that give your nails a naturally polished appearance without screaming for attention. It’s the kind of manicure that makes people wonder if you’re just blessed with perfect nail beds or if you’ve discovered some beauty secret.
The magic here is in the subtlety. Unlike bold, opaque colors, rose quartz nails use translucent formulas that let your natural nail peek through. This creates dimension and depth that solid colors can’t match. Think of it as the “your lips but better” approach to nail polish—enhancing what’s already there rather than covering it up.
Why It’s Timelessly Elegant
Rose quartz princess nails work for absolutely everything. Heading to a job interview? Perfect. Going to brunch with friends? Ideal. Walking down the aisle? Couldn’t be more appropriate. The versatility comes from how the color adapts to different lighting and settings, looking fresh and appropriate no matter where you are.
This style also happens to be incredibly forgiving as it grows out. Because the color is so close to your natural nail, you won’t see that harsh line of demarcation that darker polishes create. Your manicure stays looking polished for weeks, making it a budget-friendly choice for those stretching time between salon visits.
How to Get the Look
Start with a milky pink polish in a sheer formula—you want to see your nail bed through the color. Apply two thin coats rather than one thick one for the most natural effect. Finish with a high-shine top coat that adds that glossy, just-left-the-salon glow. Keep nails on the shorter side with a soft square or rounded shape for maximum princess vibes.
Pro tip: Layer a sheer pink over a white base for extra opacity while maintaining that soft, dreamy finish.
2. Sunken Glitter Gradient Magic
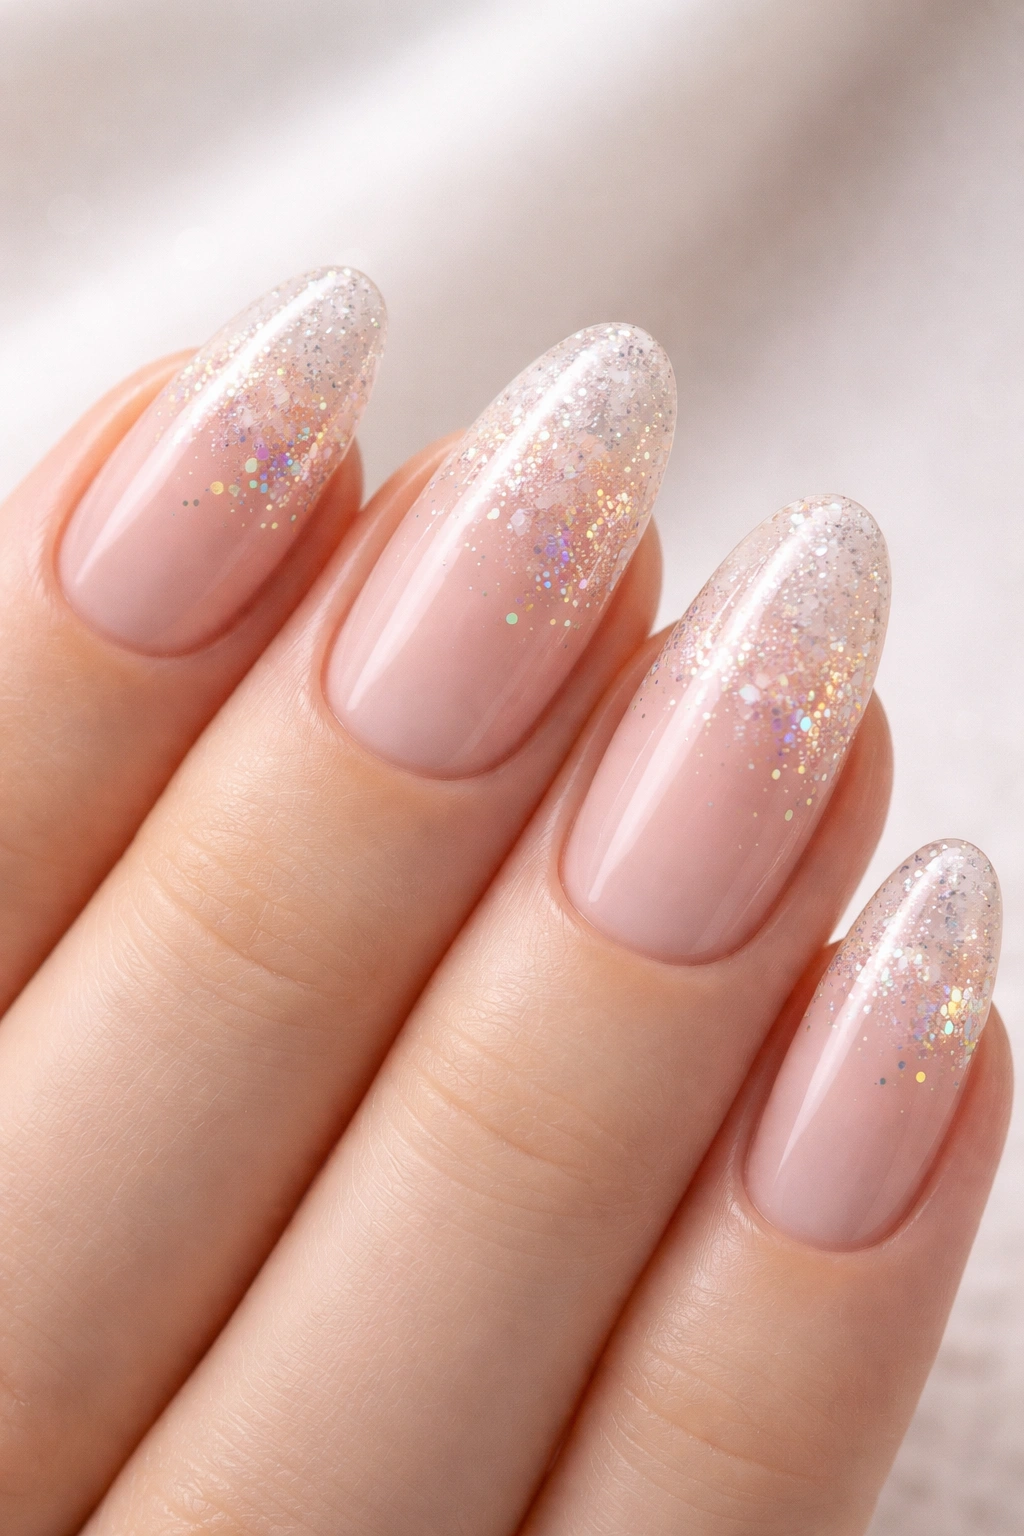
This is where princess nails get playful. Sunken glitter gradient nails—sometimes called the “princess effect”—involve embedding sparkle particles into your base coat, then covering them with a sheer or milky polish. The result? Glitter that looks like it’s floating inside your nail rather than sitting on top of it, creating a dreamy, three-dimensional sparkle.
The technique gives you all the glamour of glitter nails without the chunky texture. Your nails feel smooth to the touch, but they catch light from every angle like tiny disco balls (in the chicest way possible). The gradient aspect means the sparkle is densest near your cuticles and fades toward the tips, creating a soft, romantic effect.
What Makes It Stand Out
Unlike traditional glitter manicures that can look a bit costume-y, the sunken effect feels sophisticated and intentional. The sparkle is subtle enough for everyday wear but special enough to make you feel dressed up even in jeans and a T-shirt. It’s that perfect sweet spot between understated and eye-catching.
The gradient placement is also genius for growing out your manicure. As your nails grow, the design moves with them naturally, and new growth blends seamlessly rather than creating an obvious gap. You’ll get an extra week or two out of this design compared to styles with hard lines.
Application Tips
Apply your base coat, then dust loose glitter powder heavily at the cuticle area and gradually decrease toward the tip. Cure or dry completely, then apply one or two coats of a sheer milky pink or nude polish over the entire nail. The glitter gets “sunken” beneath the color layer, creating that magical embedded effect. Seal everything with a glossy top coat.
Fun fact: This technique works with any glitter color—try silver for an ice princess vibe or gold for something warmer and more ethereal.
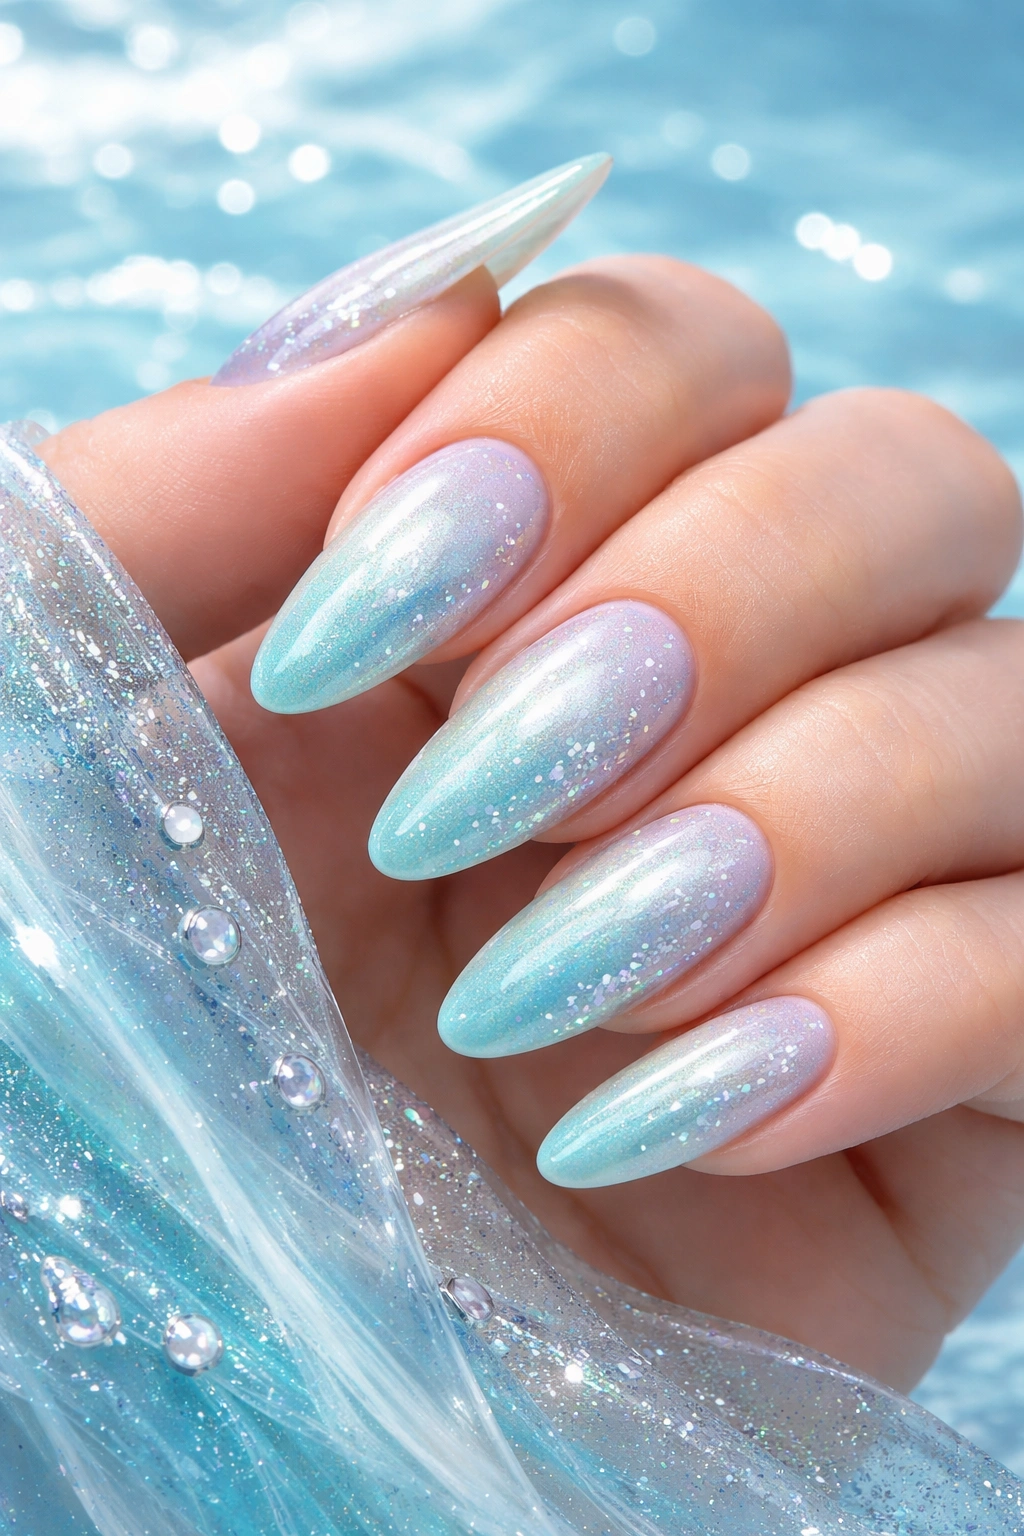
3. Cinderella’s Glass Slipper Chrome
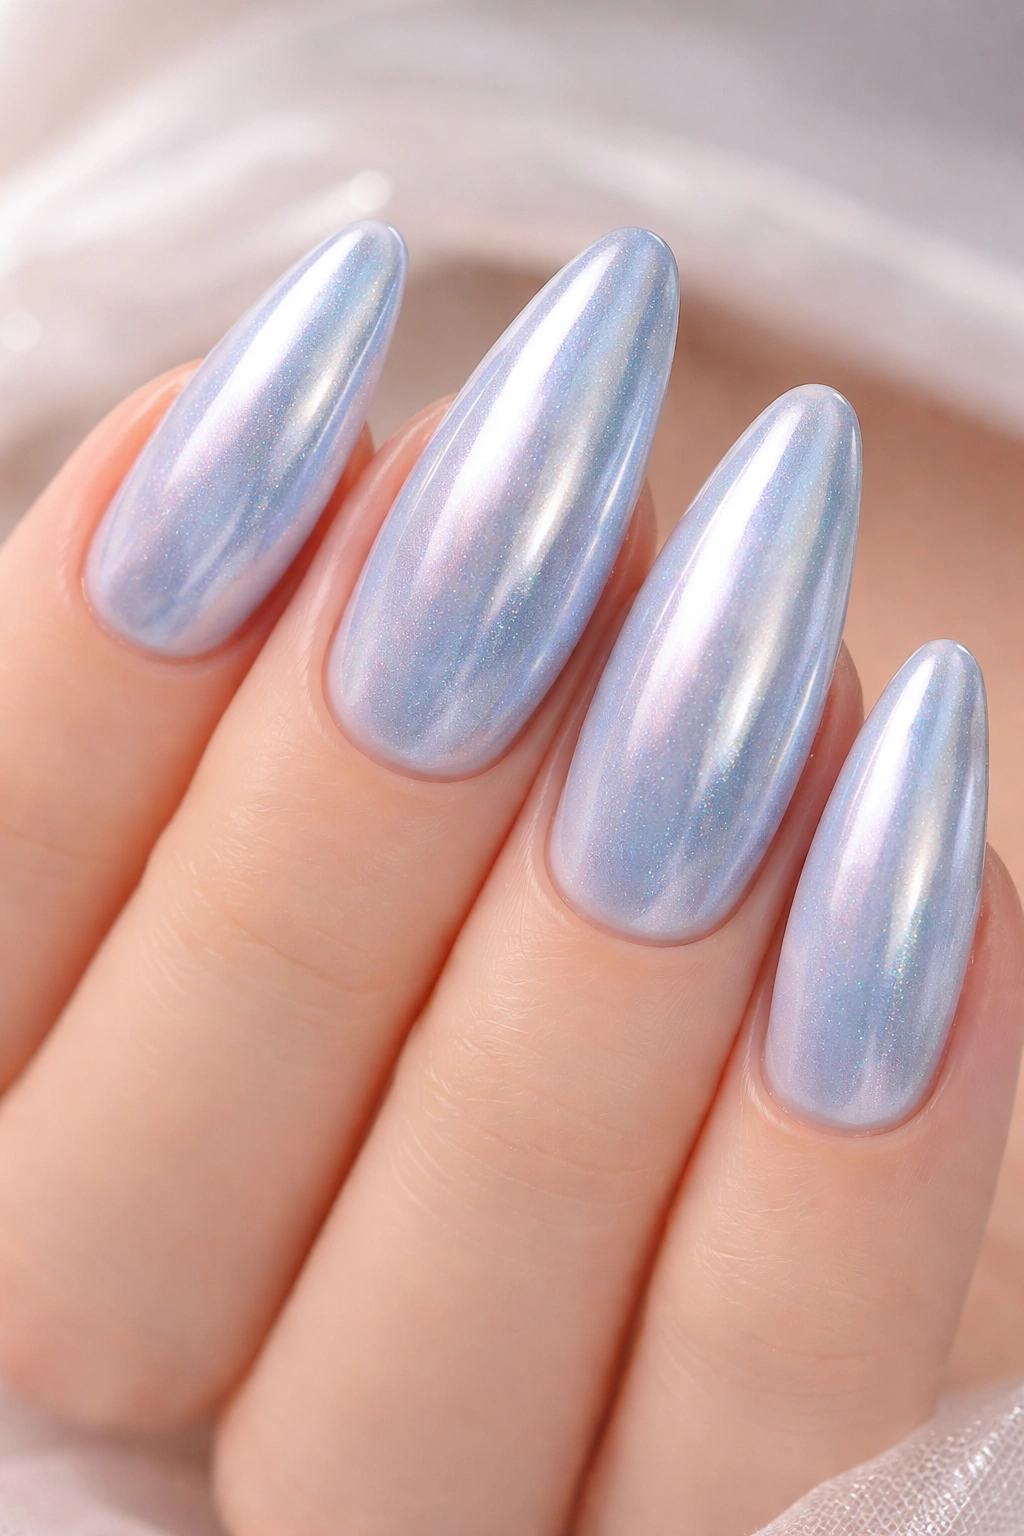
Channel your inner princess with nails that shimmer like Cinderella’s iconic glass slipper. This look combines soft blue tones with iridescent chrome powder, creating a finish that shifts between pale blue, silver, and hints of purple depending on how the light hits it. It’s ethereal, it’s magical, and it’s surprisingly wearable.
Chrome nails have come a long way from the super-bold metallic looks you might remember. The glass slipper variation uses a much softer approach, with sheer blue or lavender bases topped with a light dusting of chrome powder. The result mimics the way light reflects off glass—delicate, multidimensional, and absolutely mesmerizing.
Why It Works
The beauty of glass slipper chrome nails is how they walk the line between fantasy and wearability. The blue tones are soft enough to complement most skin tones and wardrobes, while the chrome finish adds just enough “wow” factor to make your nails feel special. You get to feel like you’re headed to the ball without looking like you’re in costume.
This style also photographs beautifully. The reflective quality means your nails will look stunning in photos, catching light in ways that flat polish never could. Your Instagram stories are about to get a major upgrade.
Creating the Effect
Start with a pale blue or soft lavender base (two coats for full coverage). Apply a no-wipe gel top coat, then use a silicone applicator or your finger to rub chrome powder onto the tacky surface. Buff it gently until you achieve that smooth, reflective finish. Seal with a gel top coat to protect the chrome. For regular polish, use a chrome powder designed for air-dry formulas.
Pro tip: Keep nails short to medium length with an oval or almond shape to really capture that delicate glass slipper aesthetic.
4. Belle’s Enchanted Rose Garden
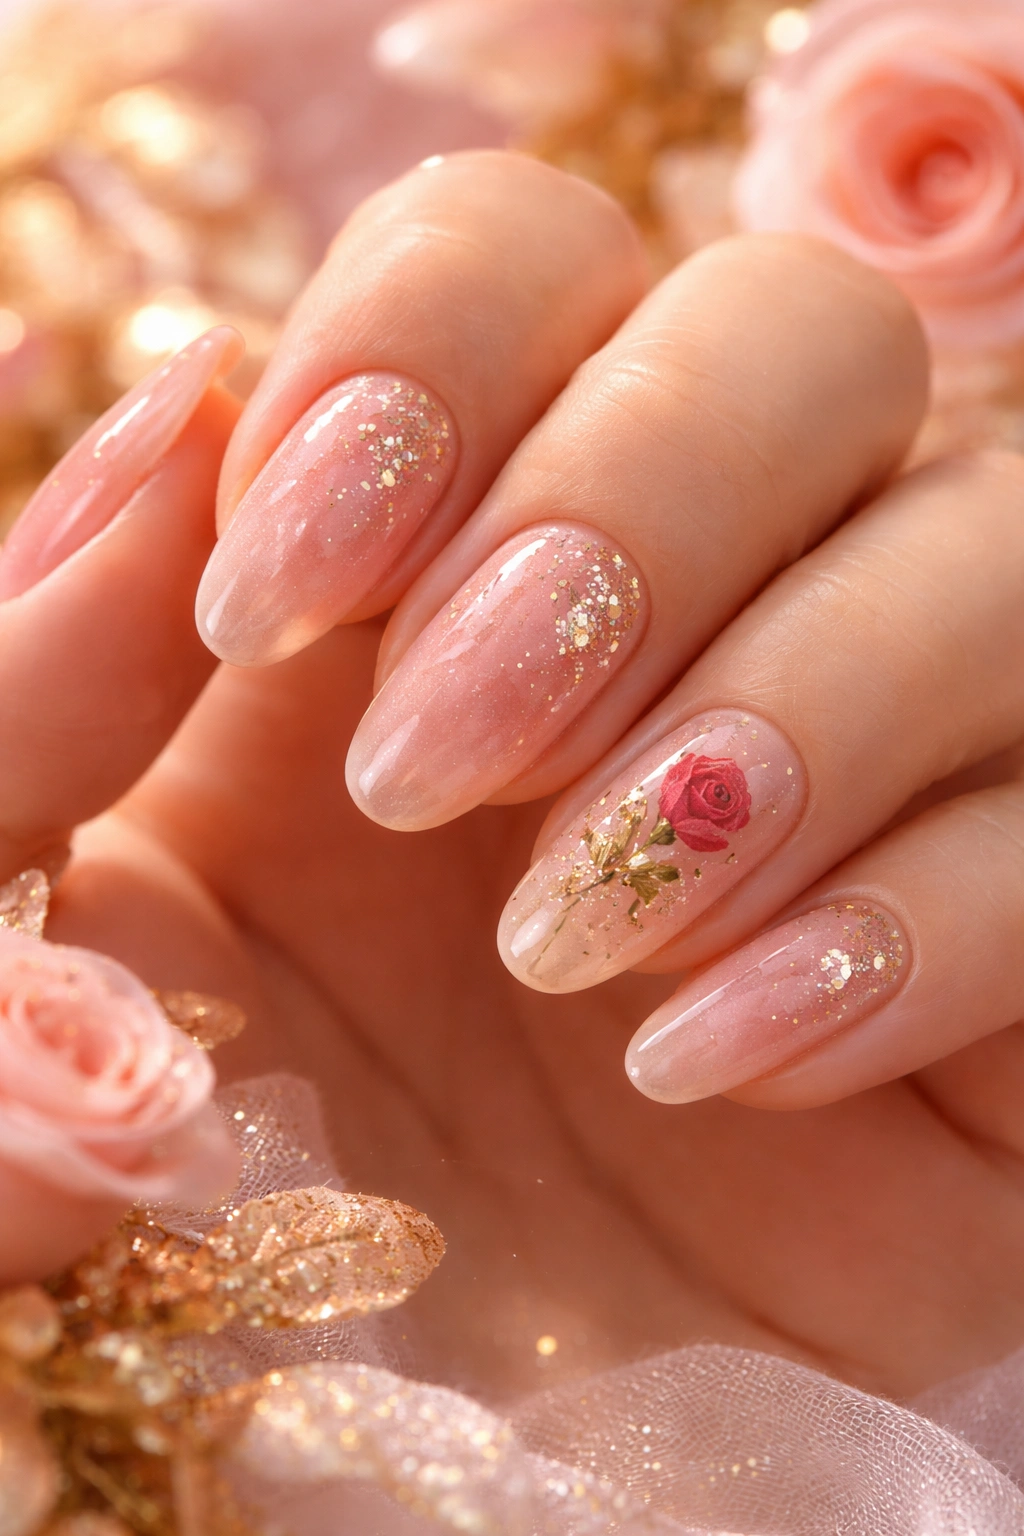
Inspired by Beauty and the Beast’s iconic enchanted rose, this design brings together soft pinks, subtle golds, and delicate rose motifs. But don’t worry—you don’t need to be a nail art expert to pull this off. The simplest version uses a warm pink base with tiny gold foil accents or a single pressed flower on one accent nail.
The enchanted rose aesthetic is all about romantic femininity with a touch of luxury. Think garden party meets gilded palace. The color palette is warm and inviting, with peachy pinks and champagne golds that feel both classic and fresh.
Key Benefits
This design lets you get creative without going overboard. You can keep it minimal with just a pink-and-gold color block, or you can go all out with hand-painted roses and gold leaf details. The flexibility means you can adjust the look to match your skill level and personal style.
The warm tones also make this incredibly flattering across different skin tones. Pink and gold have a way of adding warmth to your hands, making them look healthy and glowing. Plus, the combination feels luxe without being flashy—quiet luxury at its finest.
Getting the Look
Paint nails with a soft peachy-pink or rose polish (two coats). On one or two accent nails, add tiny pieces of gold foil, small gold studs, or even a pressed dried flower sealed under gel top coat. For those who want to try nail art, use a thin brush to paint simple rose outlines in a darker pink or burgundy shade. Finish with a glossy top coat to make everything pop.
Fun fact: Pressed baby’s breath flowers look absolutely magical sealed into clear or sheer pink gel—very enchanted garden vibes.
5. Ariel’s Ocean Pearl Shimmer
Dive under the sea with nails inspired by Ariel’s underwater treasure trove. This design uses aqua, turquoise, and seafoam green shades with a pearlescent finish that mimics the way light filters through ocean waves. The shimmer is soft and dimensional, not chunky or overwhelming—more mermaid princess than fish scales.
Pearl finishes are having a major moment, and for good reason. They offer shimmer without glitter, giving you that coveted luminous effect that looks sophisticated rather than sparkly. When done in oceanic blues and greens, the effect is absolutely hypnotic—your nails literally look like they’re glowing from within.
Why It’s Special
Ocean pearl nails stand out because they’re colorful without being loud. The soft aqua and turquoise tones are refreshing and unique, but the sheerness keeps them from feeling too bold or costume-like. You get to wear fun color while maintaining that princess-appropriate elegance.
This finish is also incredibly forgiving. The pearlescent shimmer diffuses light in a way that makes imperfections disappear. Minor application mistakes? The shimmer camouflages them. Natural ridges in your nails? The pearl finish smooths the appearance.
How to Create It
Look for polishes labeled “pearl,” “iridescent,” or “duochrome” in aqua or seafoam shades. Apply two thin coats over a white or nude base to make the pearl effect really pop. For extra dimension, layer a sheer turquoise over a white base, then top with a pearl top coat. The layering creates that underwater light effect that’s absolutely magical.
Pro tip: Add one tiny shell-shaped stud or a small piece of crushed shell on your ring finger for an accent that really commits to the ocean theme.
6. Aurora’s Dreamy Lavender Gradient
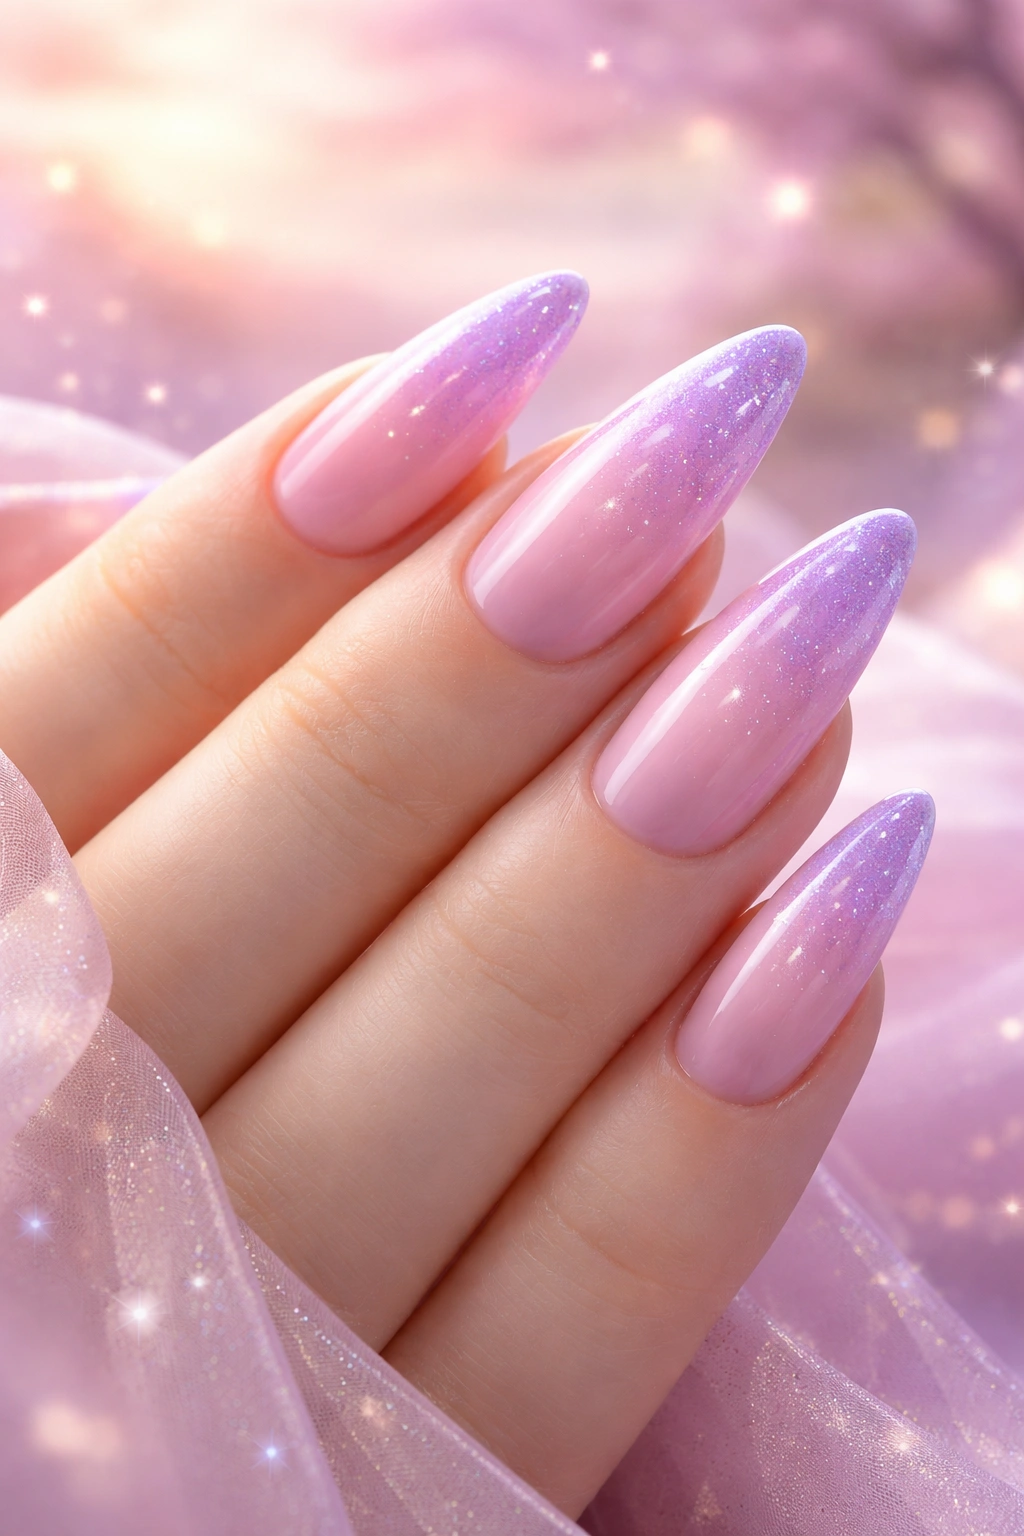
Channel Sleeping Beauty with nails that blend soft pinks and purples in a dreamy gradient. This design captures Aurora’s signature color palette—that perfect blend of rose and lavender that feels both romantic and whimsical. The gradient effect makes it feel artistic and special while remaining totally wearable.
Gradients (or ombré nails) have staying power in the nail world because they’re genuinely flattering. The color transition creates visual interest without needing any nail art skills. Plus, the soft purple-to-pink fade has a sunset quality that feels peaceful and pretty—very “sleeping in a castle tower” energy.
What Makes It Magical
The pink-to-purple palette is universally flattering, complementing both warm and cool skin tones. The colors are soft enough to feel neutral-ish but distinct enough to make a statement. It’s that rare design that works equally well with a business suit and a sundress.
The gradient technique also means you’re essentially getting multiple colors in one manicure. Depending on the angle and lighting, sometimes your nails look more pink, sometimes more purple. It’s like having several manicures in one, giving you more versatility for pairing with different outfits.
Creating the Gradient
Use a makeup sponge to create the fade. Paint a soft pink on one side of the sponge and a lavender on the other, with the colors slightly overlapping in the middle. Dab the sponge onto your nail in a rolling motion, reapplying polish to the sponge between nails. This might take 2-3 applications to build opacity. Clean up the edges with a small brush dipped in nail polish remover, then seal with top coat.
Fun fact: Adding a subtle shimmer or pearl finish to gradient nails makes the color transition look even smoother and more dimensional.
7. Snow White’s Ruby Elegance
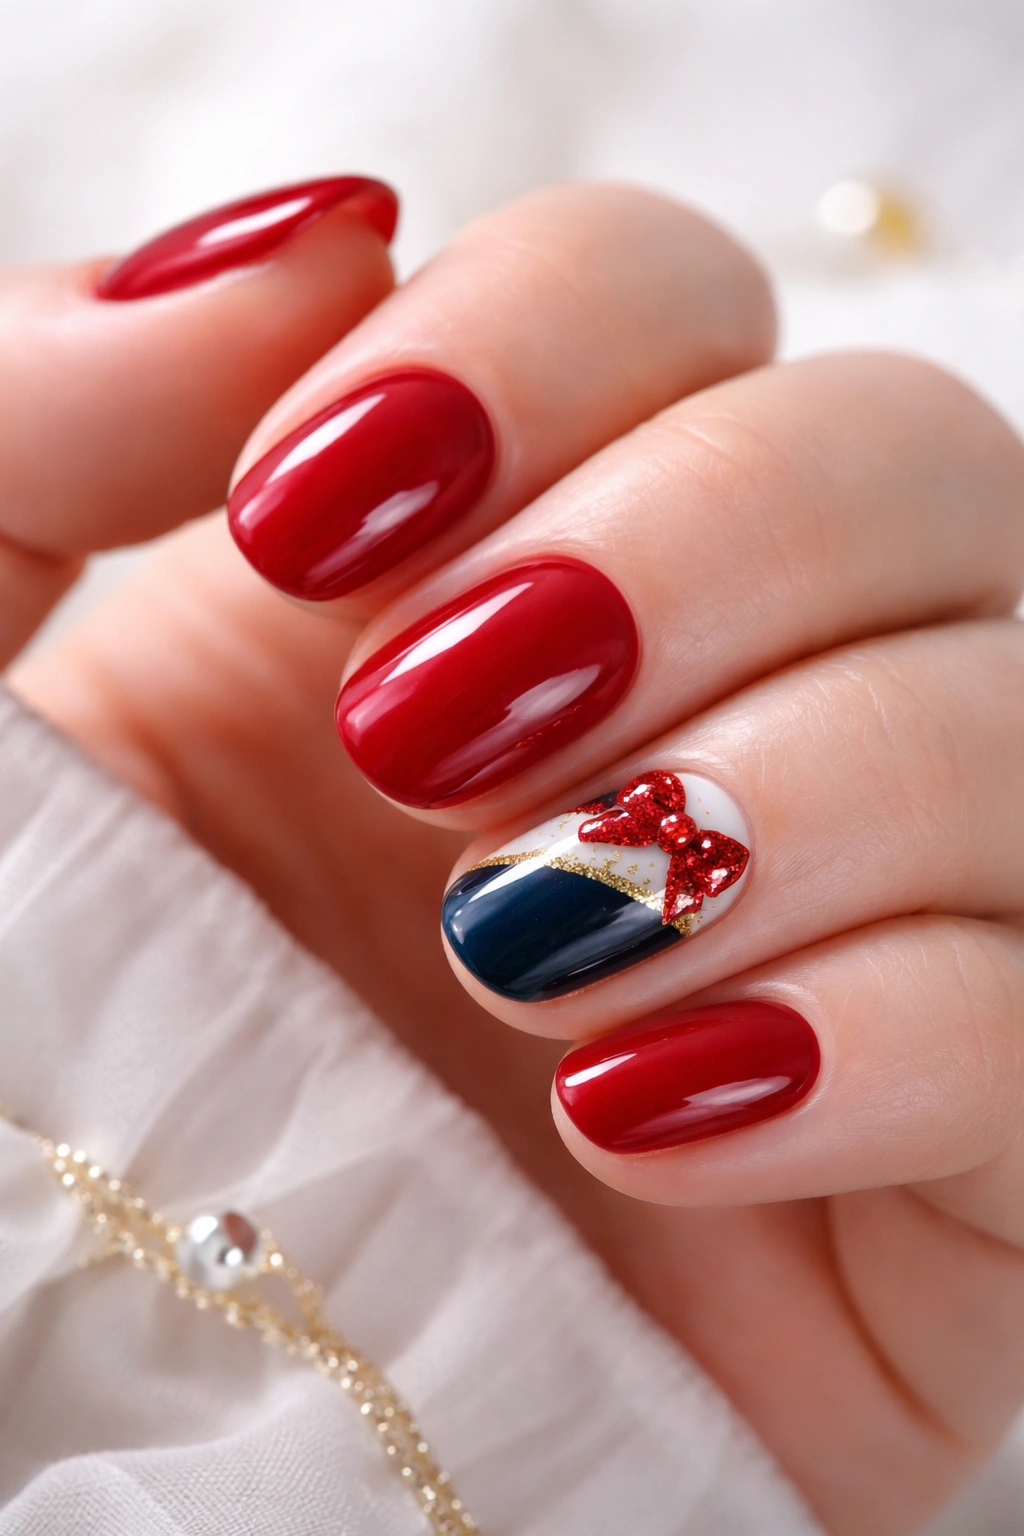
Not all princess nails have to be pastel. Snow White’s signature palette of red, black, and white translates beautifully into a sophisticated manicure that’s bolder while maintaining that royal elegance. The key is choosing the right shade of red—not neon or orange-based, but a true, deep ruby or classic blue-toned red.
This look leans into old Hollywood glamour, that timeless red lip and red nail combination that’s been making people feel powerful and polished for generations. But with princess-inspired styling—like a glossy finish, perfect application, and shorter nail length—it feels refined rather than vampy.
Why It’s a Standout
Red nails make a statement without saying a word. There’s something inherently confident about a classic red manicure. It signals that you pay attention to details and aren’t afraid to embrace a timeless look. In a sea of neutrals and pastels, red stands out while remaining completely appropriate for any setting.
The color is also incredibly versatile seasonally. Red works just as well with summer sandals as it does with winter sweaters. You’re investing in a shade that’ll look perfect year-round, making it worth the salon visit.
How to Nail It
Choose a true red polish—blue-based reds look most universally flattering and feel most “royal.” Apply a ridge-filling base coat first, then two thin coats of red (thin coats prevent bubbling and ensure smooth application). Clean up any mistakes with a small brush dipped in remover. Finish with a super glossy top coat. Keep nails short to medium with a rounded or soft square shape for maximum princess elegance.
Pro tip: Red polish shows every imperfection, so take your time with application. Patience pays off with a flawless, expensive-looking finish.
8. Rapunzel’s Golden Sunset Glow
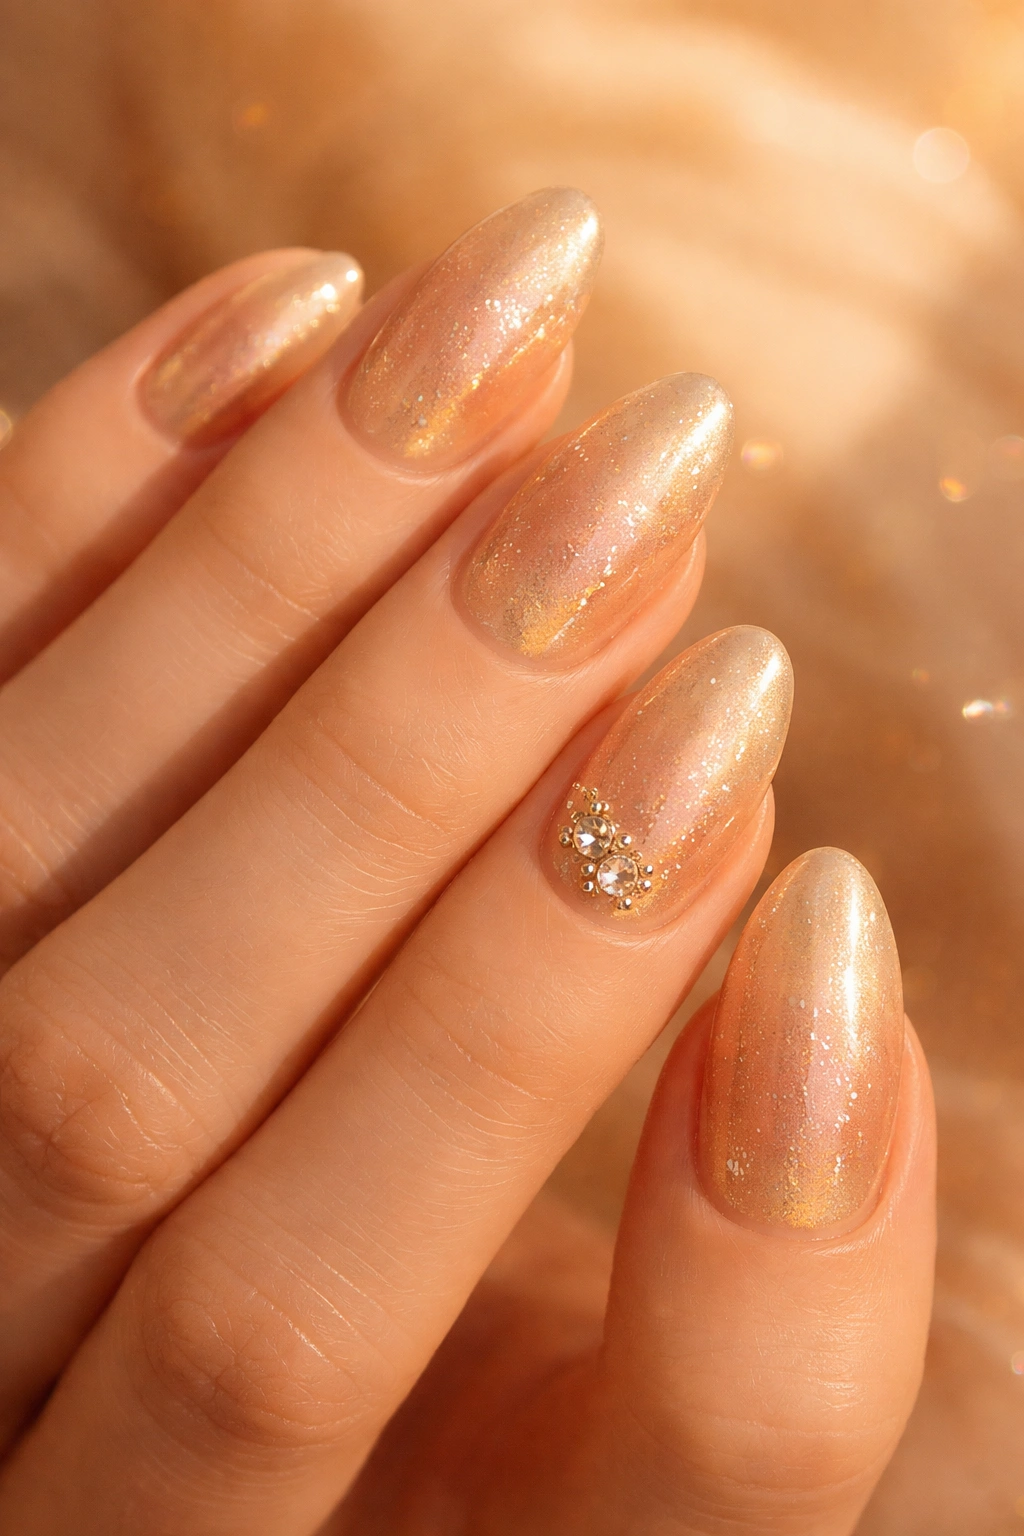
Inspired by Rapunzel’s golden hair and the magical glowing flowers from her story, this design uses warm yellows, peachy golds, and champagne tones to create nails that look like they’re lit from within. The effect is cheerful and warm, perfect for anyone who wants princess nails with a sunny disposition.
Golden shimmer nails occupy a unique space—they’re eye-catching without being loud, and they bring warmth to your overall look in a way that cooler-toned nails don’t. The color literally reflects light, making your hands look radiant and adding a glow-up effect to your entire presence.
What Sets It Apart
Yellow and gold tones can be tricky, but when done right, they’re absolutely stunning. The key is choosing shades that lean more champagne or peachy-gold rather than bright banana yellow. These warmer metallics complement a wide range of skin tones and add a touch of sunshine to your everyday style.
This design also stands out from the typical princess nail palette. While everyone else is wearing pink and purple, you’re bringing something different to the table—literally golden. It’s unexpected in the best way while still fitting perfectly into the fairy-tale aesthetic.
Creating the Look
Start with a sheer peachy-nude base, then layer on a golden shimmer polish. For extra dimension, apply gold chrome powder over a sticky base coat for that true metallic glow, then seal with a sheer yellow or gold-toned top coat. The layering creates depth and makes the gold look lit from within rather than just painted on top.
Fun fact: Adding tiny gold flakes or gold leaf pieces to one accent nail takes the Rapunzel theme to the next level—very “tower full of treasures” vibes.
9. Frosted Ice Princess Chrome
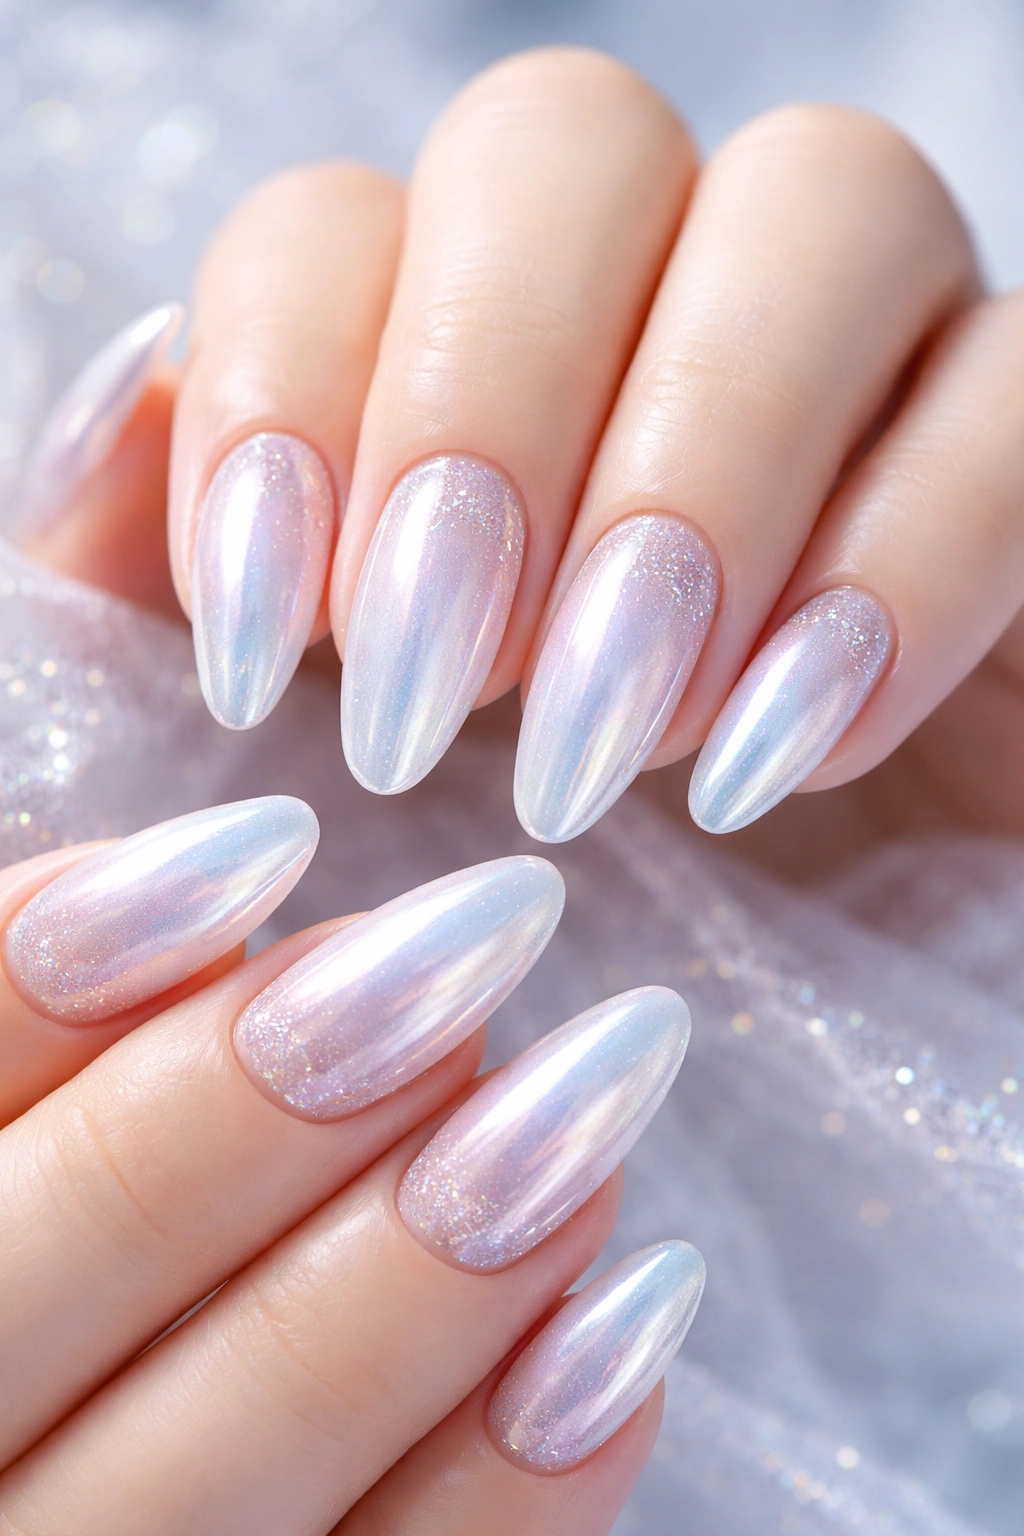
If Elsa and classic princess aesthetics had a baby, it would be frosted ice princess nails. This design combines icy whites and silvers with chrome or iridescent finishes to create nails that look like they’re made of frozen crystal. The effect is cool, ethereal, and absolutely mesmerizing—especially when light hits the chrome at different angles.
White chrome nails might sound intense, but the frosted approach uses softer application techniques and sometimes layers chrome over sheer white rather than opaque white. This creates a more wearable, less “robot hand” effect. You get all the futuristic shine with a softer, more romantic execution.
Why It’s Worth Trying
White and silver tones are incredibly versatile with wardrobes. They act almost like a neutral, complementing virtually every color you’ll wear. But unlike actual neutrals, they have enough presence to feel special and intentional. It’s the best of both worlds.
The chrome finish also adds a modern edge to the princess aesthetic. While soft pinks and nudes lean traditional and romantic, chrome brings in a contemporary, fashion-forward element. You’re giving princess vibes with a twist—showing you can honor tradition while embracing innovation.
How to Achieve It
Apply a white or very pale blue base (two coats). For gel polish, apply a no-wipe top coat and then rub silver or iridescent chrome powder onto the tacky surface using a silicone applicator. Buff until smooth and reflective. Seal with gel top coat. For regular polish, use chrome powders designed for air-dry formulas, or opt for a white polish with built-in iridescent shimmer for an easier application.
Pro tip: Almond or coffin nail shapes look especially stunning with this design, elongating fingers and enhancing the ice-crystal effect.
10. Midnight Ball Milky French
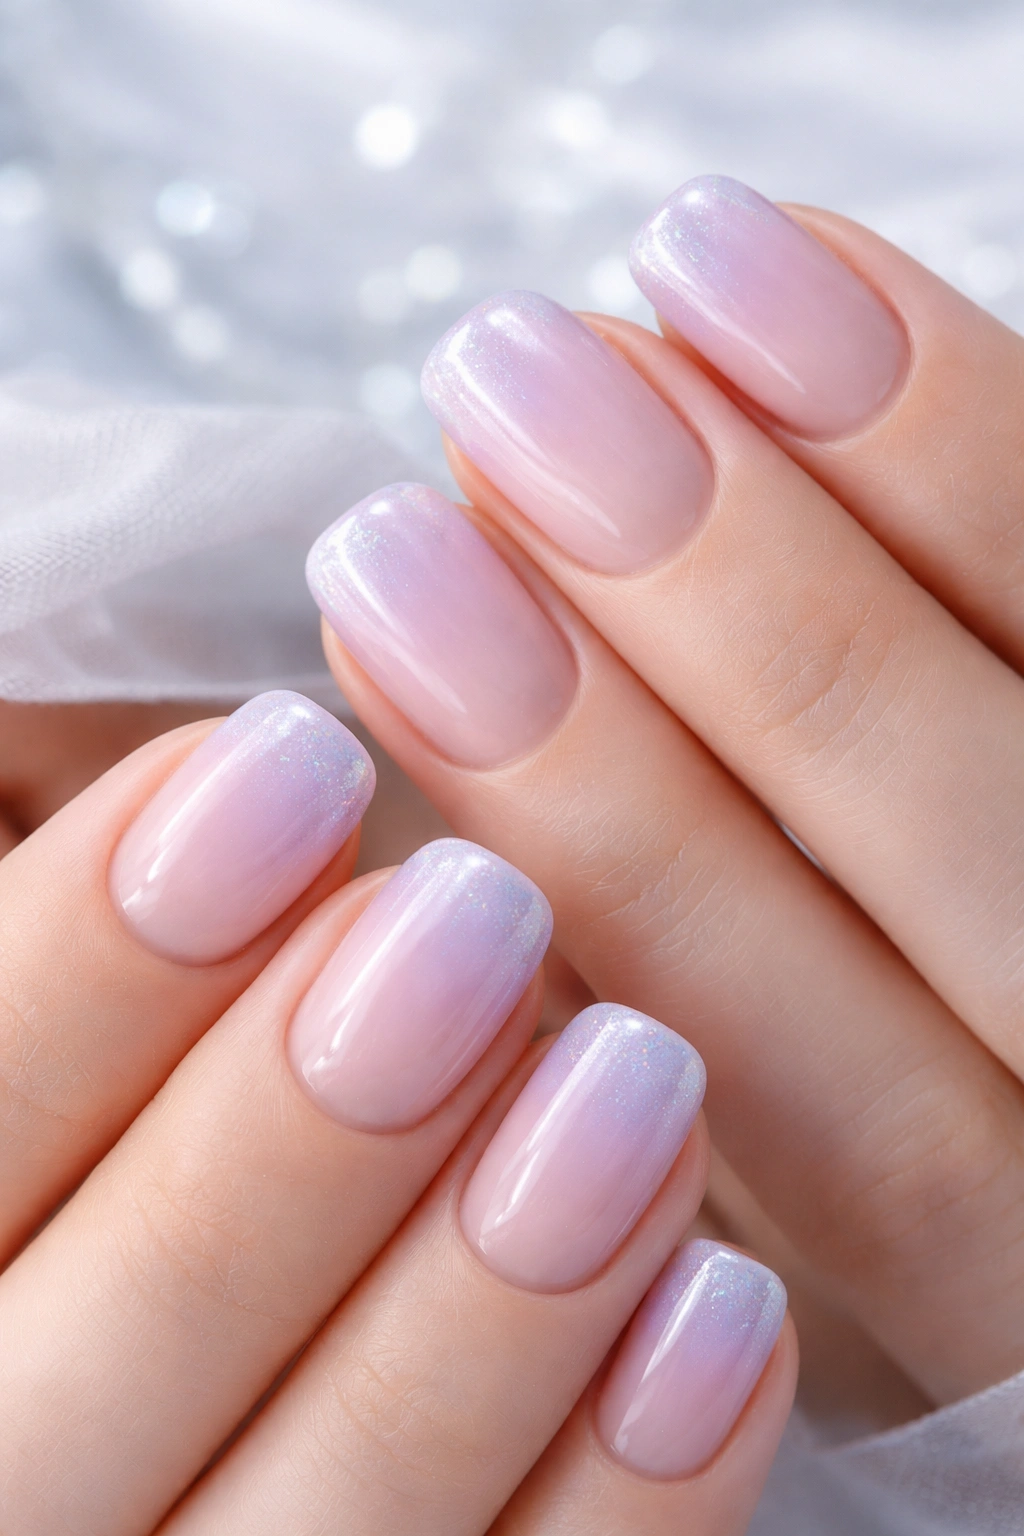
The French manicure gets a princess upgrade with this milky, sheer take on the classic design. Instead of stark white tips, this version uses soft, translucent colors—milky pinks, nudes, or even lavenders—for the tip with an equally sheer base. The result is a French mani that feels fresh, modern, and absolutely enchanting.
This design captures that “just left the ball at midnight” energy—slightly undone but still elegant, with a dreamy quality that makes it feel special. The sheerness means it’s appropriate for absolutely any occasion while still giving you that polished, put-together feeling that makes you stand out.
Key Appeal
Milky French nails solve the biggest problem with traditional French manicures: the harsh line between tip and nail bed. With sheer colors, the transition is soft and blended, creating a much more natural and modern look. You get the elongating effect of a French tip without the dated ’90s vibe.
The style also grows out beautifully. As your nails grow, the design moves naturally with them, and the sheer colors mean new growth doesn’t create a stark, obvious line. Your manicure looks fresh and intentional for weeks instead of days.
Getting the Look
Apply a sheer pink or nude base color to the entire nail (two thin coats). Once dry, use a slightly more opaque version of the same color—or a milky white—to paint just the tips in a classic French smile line. Keep the tip line thin and delicate rather than thick and obvious. Finish with a glossy top coat for that glass-like shine. For the softest effect, use a sheer builder gel in a natural shade for both base and tips.
Fun fact: Painting the tips in a soft lavender or pale blue instead of pink creates a unique twist on the milky French that still feels totally princess-appropriate.
