

Your fingertips deserve the same attention as your outfit, and nobody understands this better than the celebrities gracing red carpets and Instagram feeds worldwide. From award shows to casual coffee runs, A-listers have transformed nail art into a powerful form of self-expression. The best part? You don’t need a celebrity budget or a personal manicurist to recreate these stunning looks.
Whether you’re drawn to minimalist elegance or maximalist glamour, there’s a celebrity-approved design waiting to elevate your next manicure. These aren’t just pretty nails—they’re conversation starters, mood boosters, and tiny canvases for creativity. Let’s break down the most covetable celebrity nail looks that you can actually pull off, either at home or at your next salon appointment.
1. Hailey Bieber’s Glazed Donut Nails
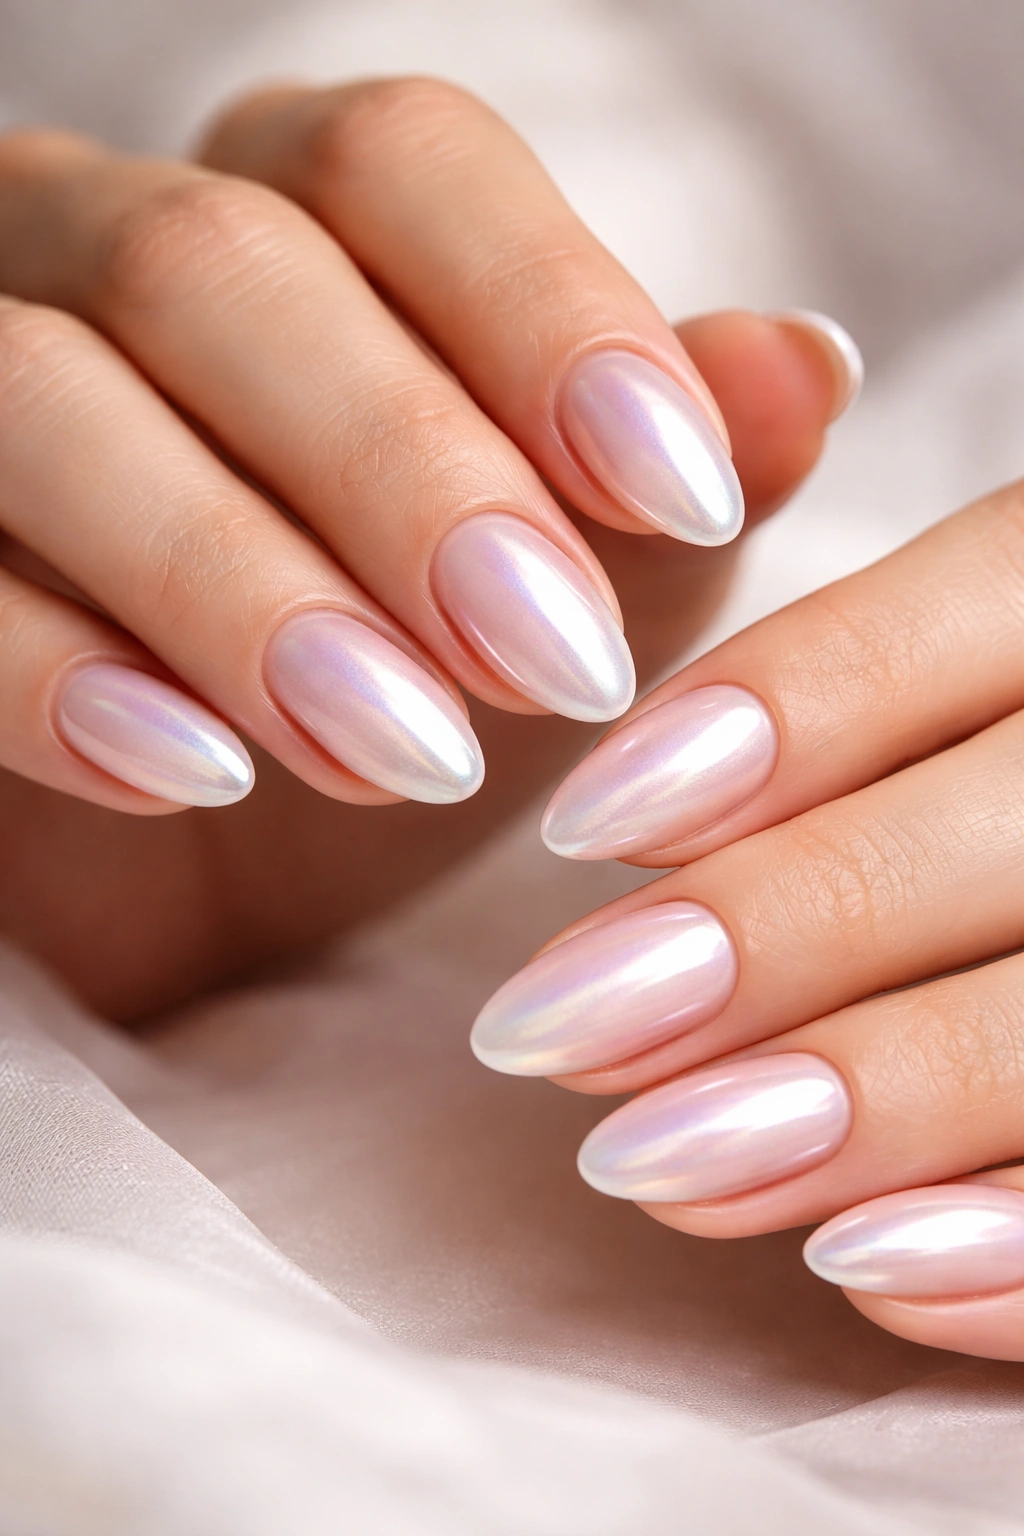
Hailey Bieber didn’t just start a trend—she launched a movement. Her glazed donut nails took over social media and salon request lists for good reason. This pearly, iridescent finish catches light like morning dew on glass, giving nails an ethereal quality that feels both luxurious and understated.
The magic lies in layering. You’ll want to start with a sheer milky base coat in soft pink or nude. Apply two to three thin layers, building up that translucent quality gradually. Between your final color coat and top coat, buff on chrome powder using a silicone applicator or even your fingertip.
Work in gentle circular motions until you achieve that signature glass-like shimmer. Seal everything with a high-gloss top coat—don’t skimp here, as the shine is what makes this look truly special. For an extra dimension that really mimics Hailey’s signature style, add a layer of clear builder gel before your final top coat.
The beauty of this design? It works on any nail length or shape, though short to medium ovals or almonds really let that pearly finish shine. It’s professional enough for the office but catches enough light to feel special for evening events.
2. Selena Gomez’s Skittles Manicure
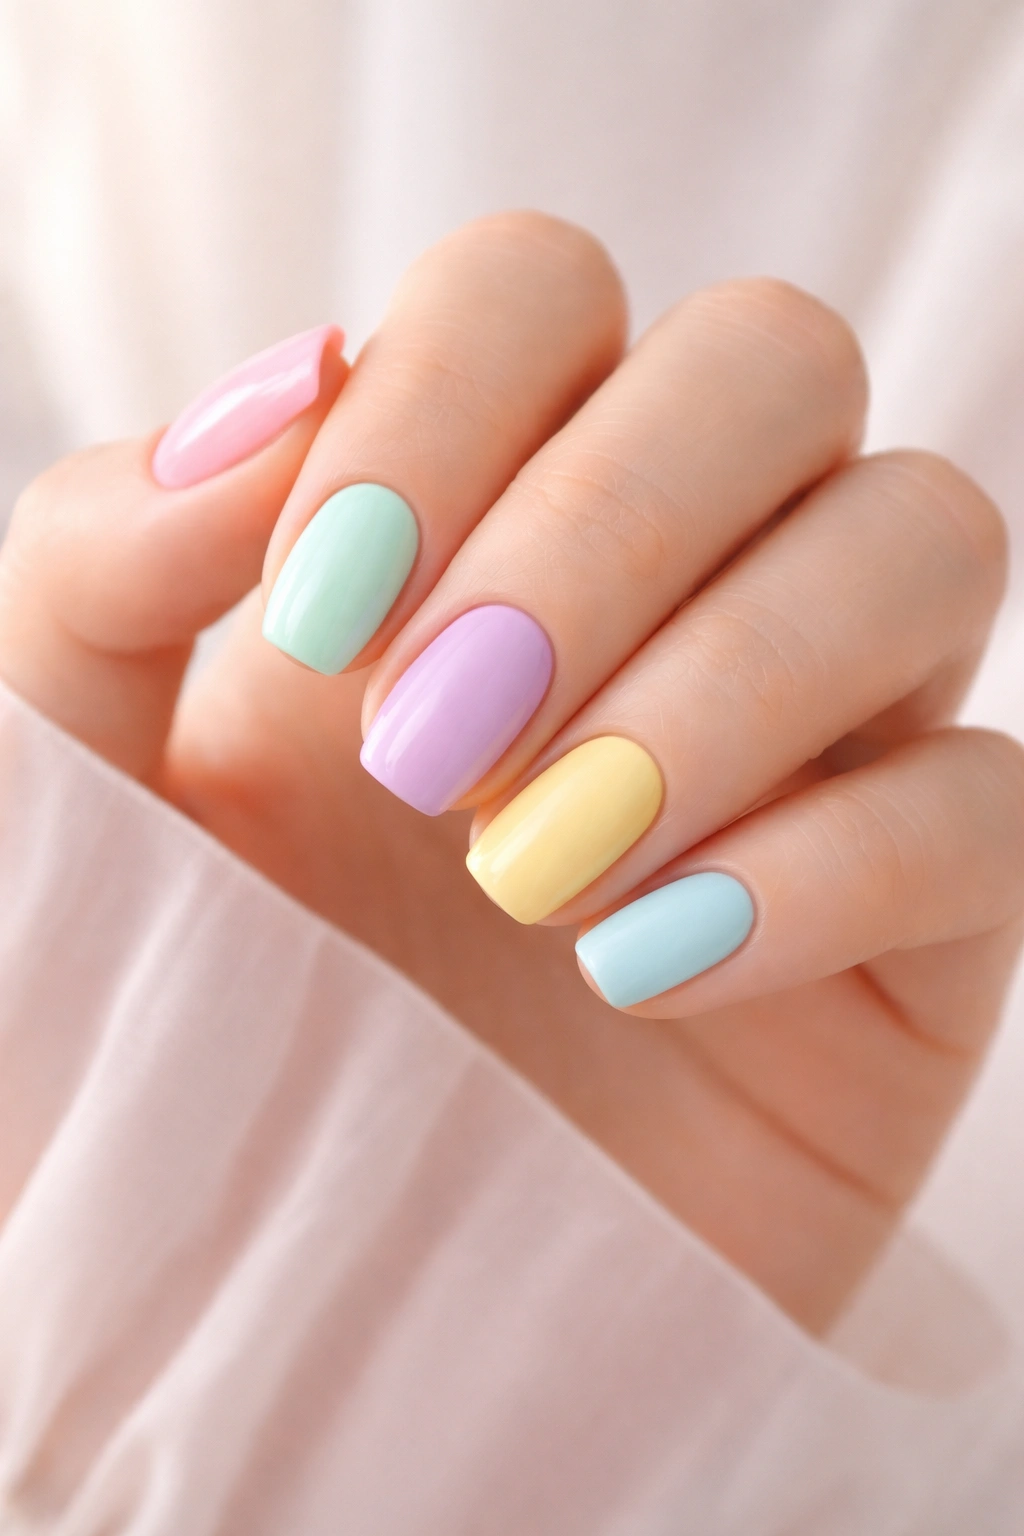
Remember when matching all your nails felt like the only option? Selena Gomez threw that rulebook out the window with her playful Skittles nails. Each finger sports a different pastel shade, creating a rainbow effect that’s fun without feeling juvenile.
The trick to pulling this off successfully is sticking within the same color family or intensity level. Selena’s version featured soft pastels—think baby pink, mint green, lavender, buttery yellow, and sky blue. This cohesion prevents the look from feeling chaotic or like you just couldn’t decide on one color.
If you’re recreating this at home, lay out all your chosen shades first to see how they play together. You’ll want them to have similar undertones (all warm or all cool) and the same finish (all creams or all shimmers). Apply two coats of each shade to ensure even opacity across all nails.
This design is incredibly forgiving and budget-friendly since you’re using up those half-empty bottles sitting in your collection. It’s also a great way to test-drive multiple colors before committing to a full manicure in any single shade. Bonus: if one nail chips, you can simply repaint that finger without worrying about perfect color matching.
3. Zendaya’s Classic Red Manicure
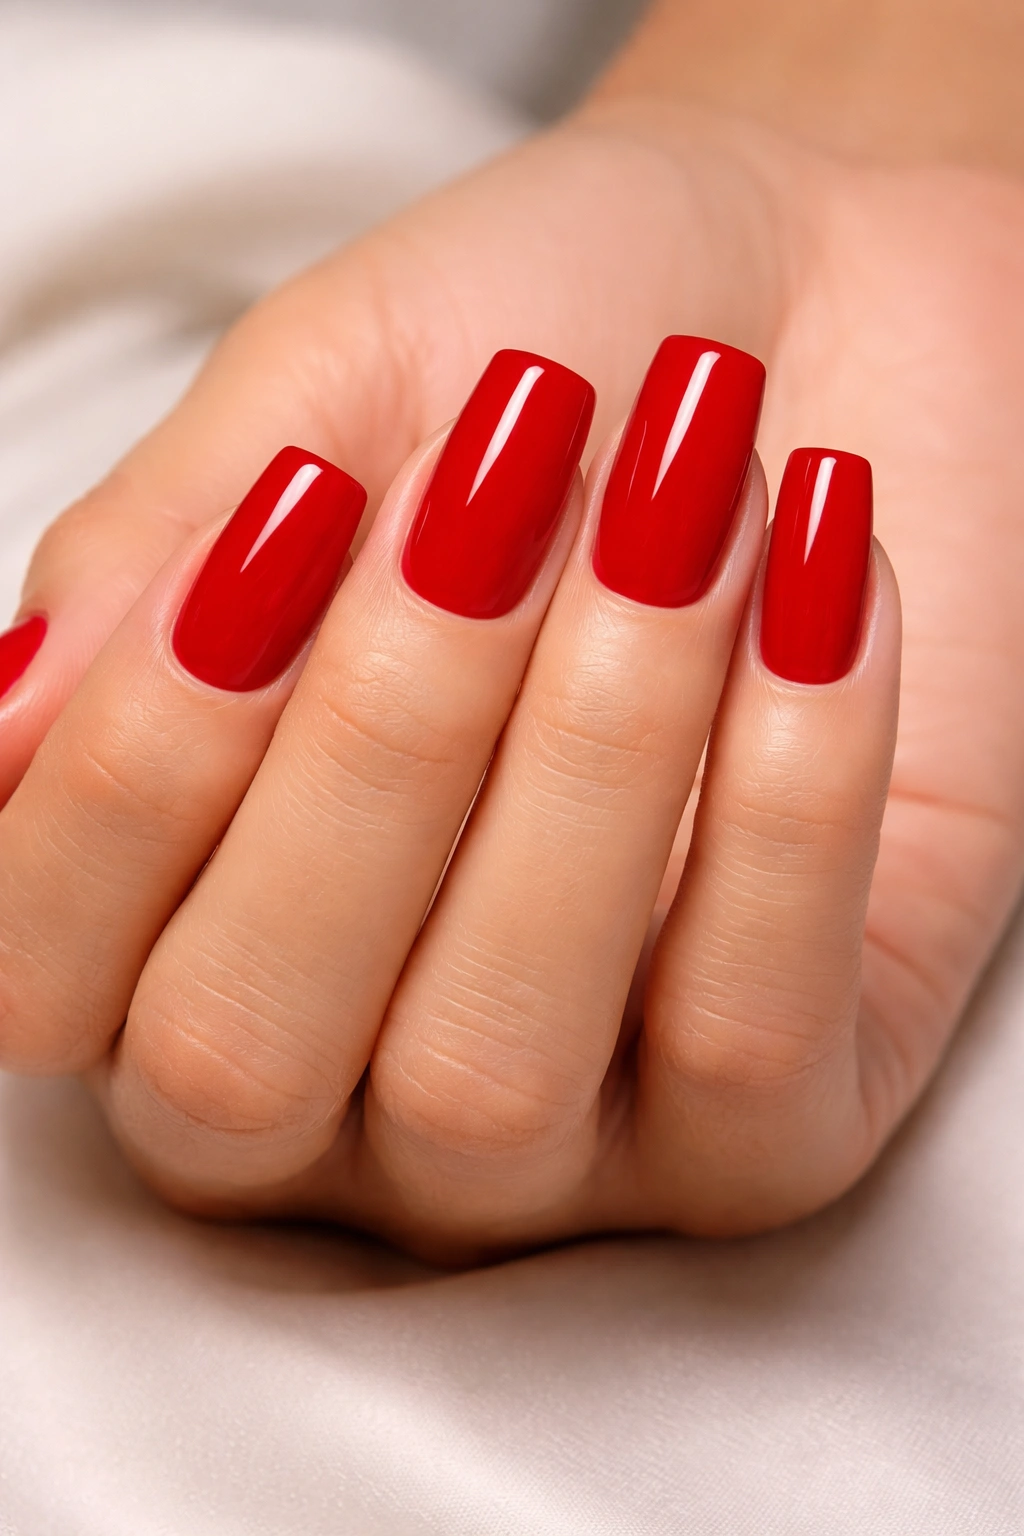
Sometimes the most powerful statement is a classic done exceptionally well. Zendaya proved this at Wimbledon with her perfectly executed red square manicure. There’s nothing trendy or temporary about a bold red nail—it’s been sophisticated for decades and will remain so for decades more.
The key to nailing this look (pun intended) is choosing the right red for your skin tone. Cooler undertones look stunning in blue-based reds or cherry shades. Warmer complexions glow with orange-based or tomato reds. When in doubt, a true red with balanced undertones flatters everyone.
Shape matters tremendously here. Zendaya’s square tips create sharp, defined lines that amplify the boldness of the color. If you prefer something softer, a squoval (square with rounded corners) offers a similar vibe with less maintenance. Keep the length moderate—you want impact without impracticality.
Application technique separates amateur from professional-looking red nails. Always use a base coat to prevent staining, then apply thin layers of color rather than one thick coat. Two to three thin coats dry faster, apply more evenly, and last longer. Clean up any mistakes around your cuticles with a small brush dipped in nail polish remover for that salon-crisp finish.
4. Kylie Jenner’s Snakeskin Design
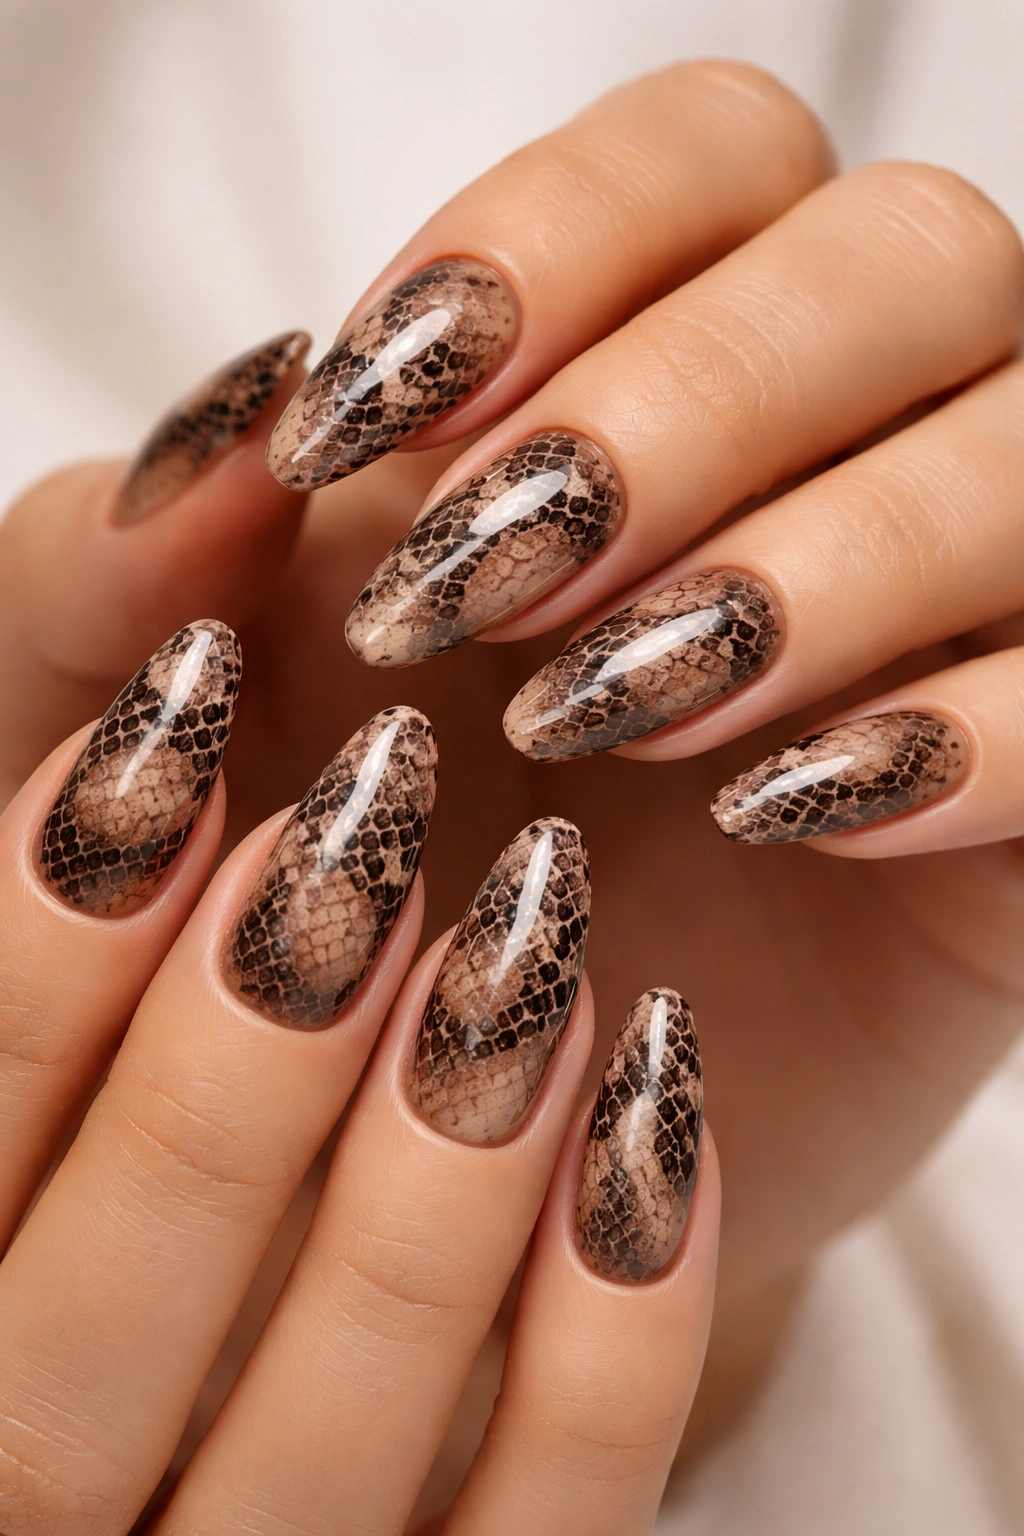
Kylie Jenner revisited her KingKylie era with fierce snakeskin nails that blend edgy with elegant. This animal print manages to feel both bold and neutral, making it surprisingly wearable for everyday life while still turning heads.
Creating snakeskin nail art might look complicated, but it’s more approachable than you’d think. Start with a nude or light taupe base coat—this serves as the “skin” between your snake scales. Once dry, use a thin nail art brush to create irregular, organic shapes across the nail in a slightly darker shade.
The pattern doesn’t need to be perfect. In fact, imperfection makes it look more authentic. Think about drawing random ovals and curved lines that connect at some points and separate at others. After your scale outlines dry, go back with an even darker shade (or black) to add tiny accent lines within some scales and around others.
For those who’d rather skip the hand-painting, snakeskin nail wraps or stamping plates offer shortcuts to the same effect. Finish with a glossy top coat to make those scales pop, or try a matte finish for a more sophisticated, fashion-forward interpretation. The design works beautifully on almond or coffin-shaped nails where you have more canvas to showcase the pattern.
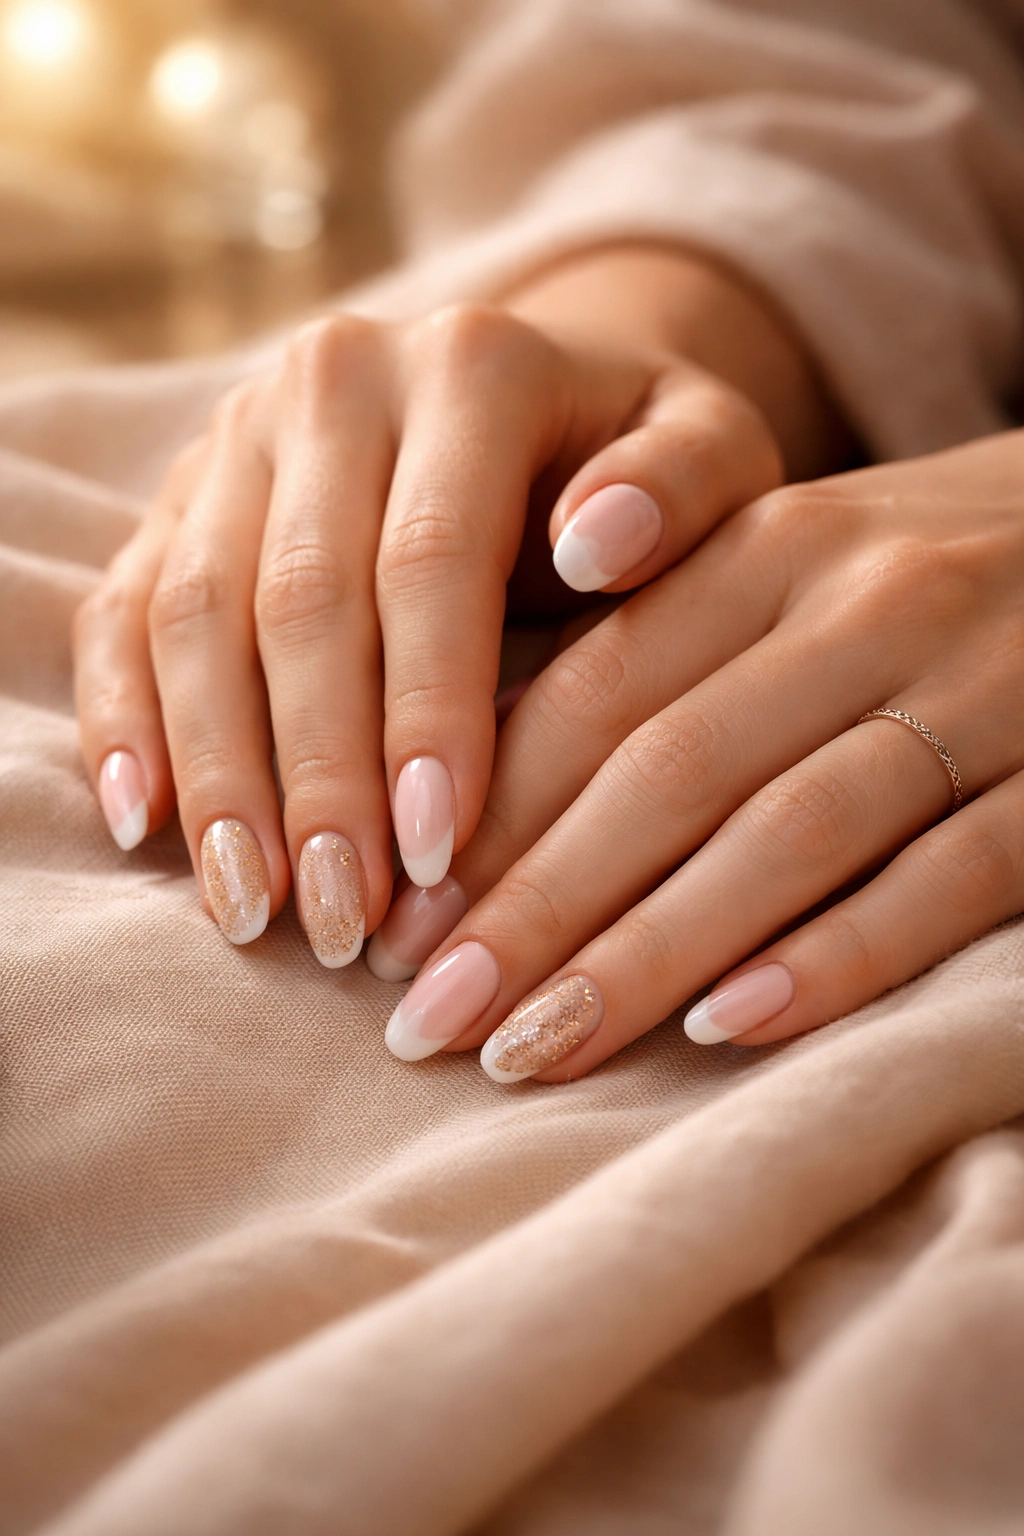
5. Lizzo’s Glossy French Tips
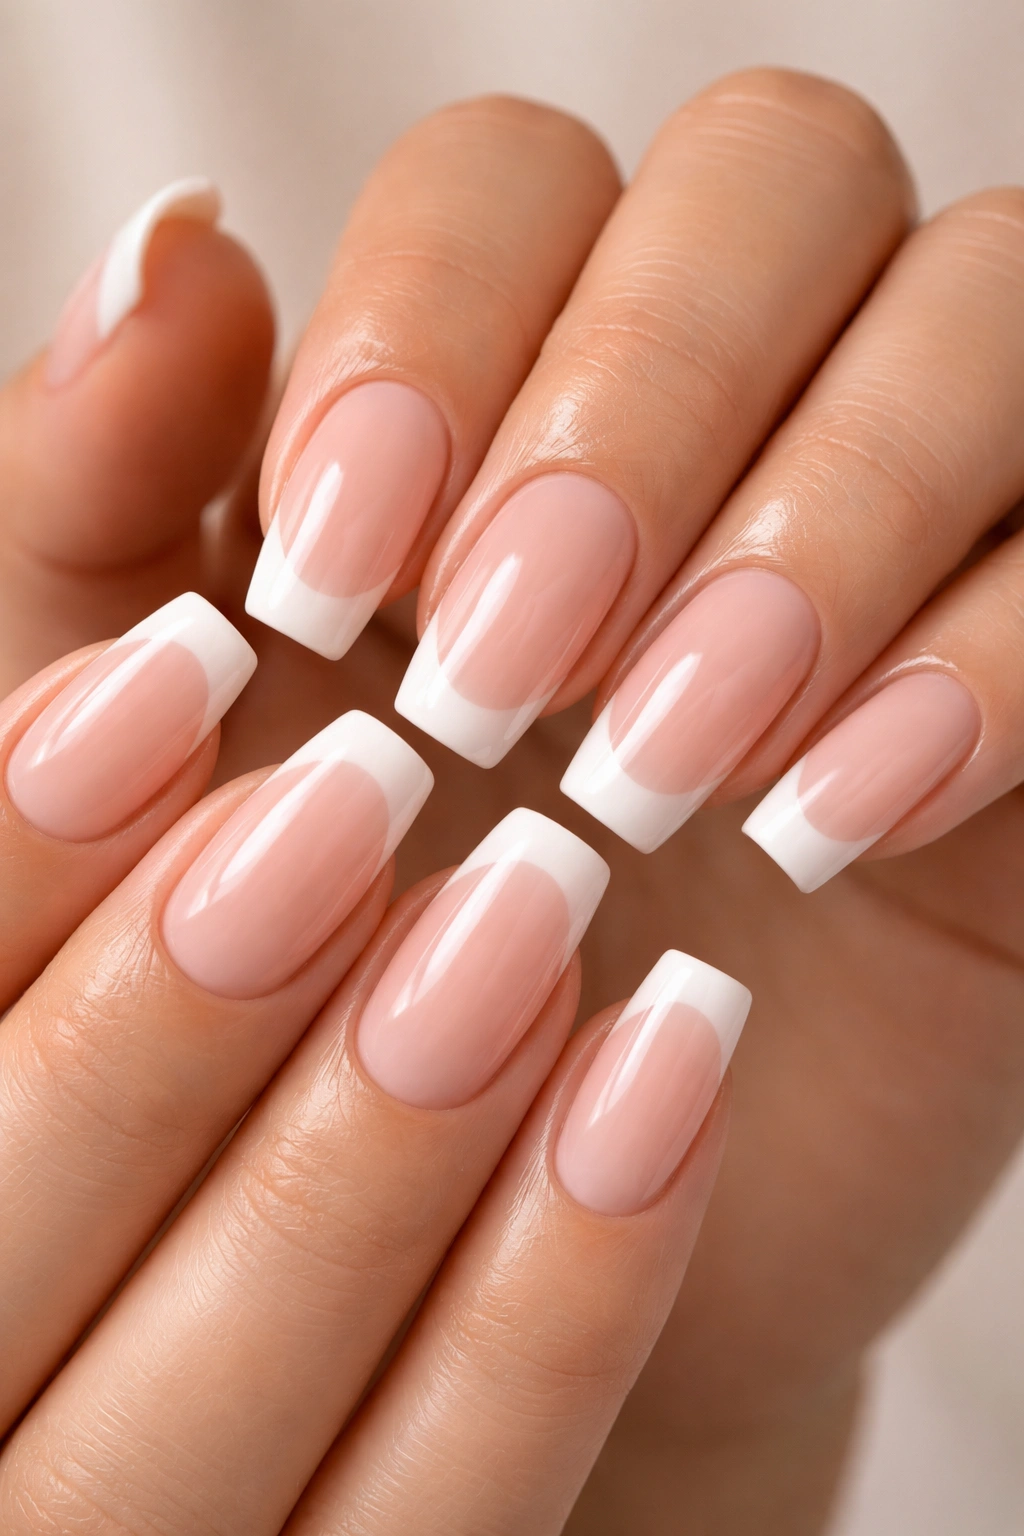
French manicures have been having a moment, and Lizzo’s take at the 2023 BAFTAs shows exactly why this classic has staying power. Her version featured an ultra-glossy finish that elevated the traditional style into something that photographs beautifully and feels thoroughly modern.
Recreating this requires a bit of precision but nothing you can’t handle with practice. Apply a sheer pink or nude base—Essie’s Bodice Goddess works beautifully for this. Once that’s dry, it’s time for the white tips. You can use nail guides or striping tape to create perfectly straight lines, or freehand it if you’re feeling confident.
The secret to Lizzo’s look was layering. Her manicurist ombréd the white tip slightly into the base color rather than creating a harsh line. This softer transition feels more current than the stark contrast of 90s French manicures. Use a small brush to blend where the colors meet while everything’s still wet.
Here’s where the magic happens: that glossy top coat. Don’t settle for any old top coat—invest in a gel-effect or high-shine formula that really amplifies the glass-like finish. Apply it generously, capping the free edge of your nail to seal everything in. The result is nails that look professionally done and catch light from every angle.
6. Margot Robbie’s Pink Jelly Nails
Margot Robbie brought Barbie energy to the SAG Awards with pink jelly nails inspired by those iconic Barbie shoes. This translucent, candy-like finish feels nostalgic and modern simultaneously, which is no small feat.
The jelly effect comes from building up sheer color in multiple thin layers. You’ll need a translucent pink polish—not opaque. Apply the first coat and you’ll see your natural nail showing through. That’s exactly what you want. Each additional layer deepens the color while maintaining that see-through quality.
Most people need three to four coats to achieve the perfect jelly depth. The key is patience—let each layer dry completely before adding the next. Rushing this process leads to dragging and those frustrating bubbles. If you’re working with regular polish, give each coat five minutes to set.
Finish with a glossy top coat to enhance that jelly-like sheen and protect your manicure. The final look should remind you of stained glass or hard candy—colored but not completely opaque. This technique works with any translucent polish color, though pinks, corals, and reds create the most convincing jelly effect. Keep nails on the shorter side to maintain that delicate, feminine vibe.
7. Cardi B’s Rhinestone Extravaganza
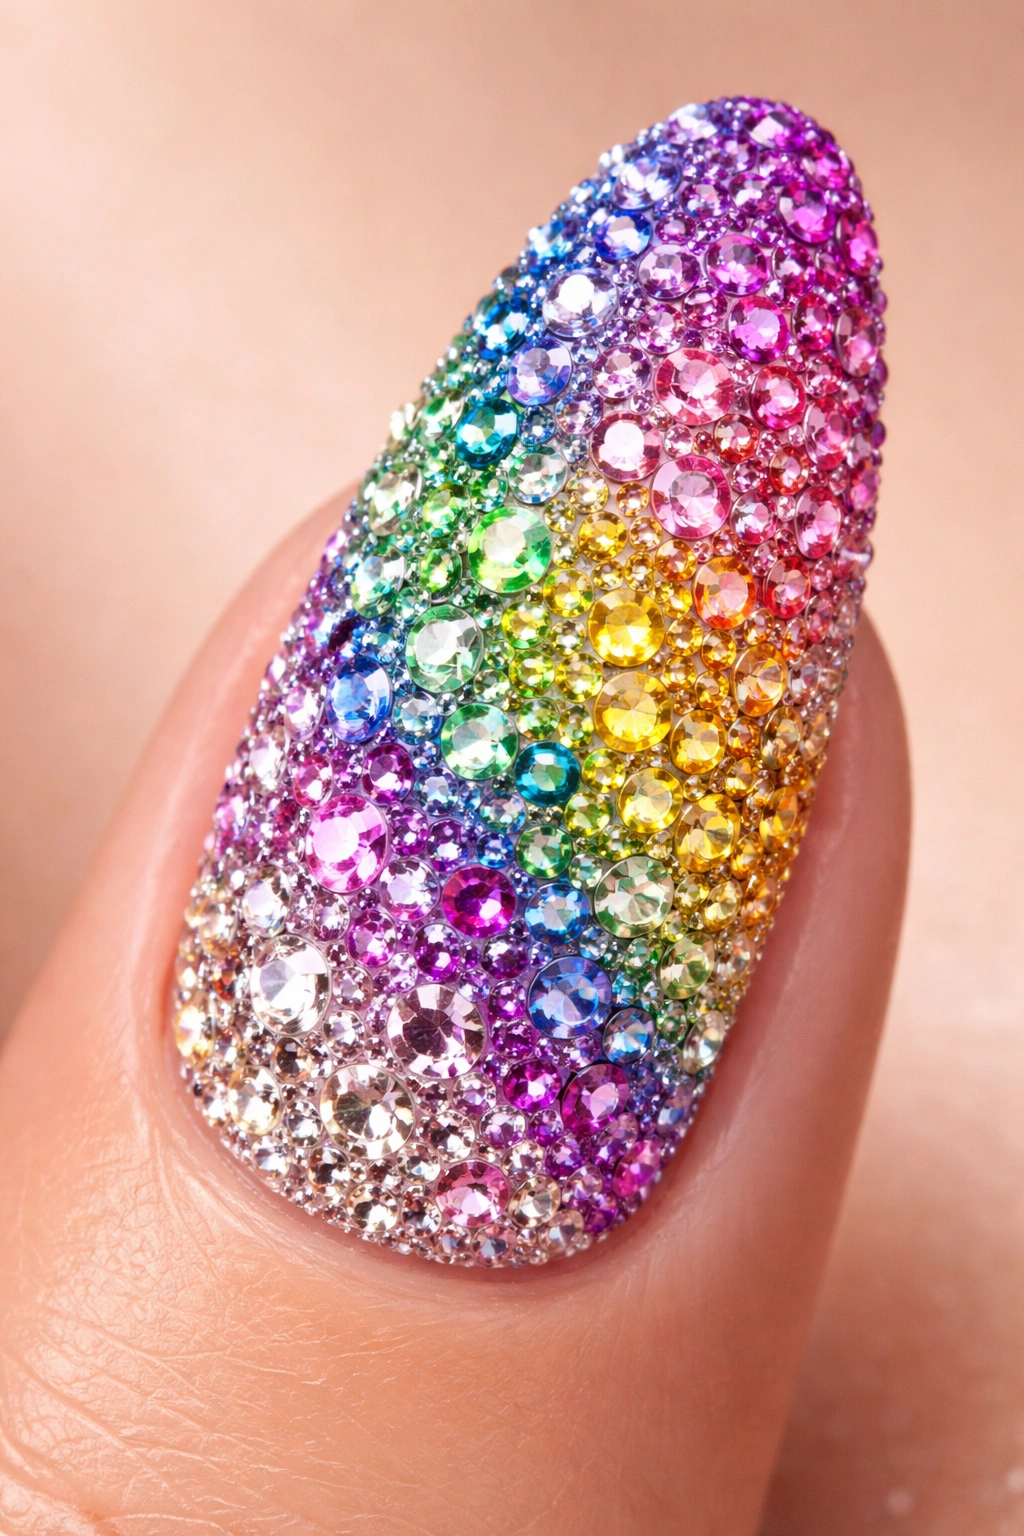
Nobody does maximalist nails quite like Cardi B. Her bedazzled creations turn fingertips into jewelry, with rhinestones in every color, size, and shape imaginable. While her award show looks might take hours, you can capture the essence of her glamorous aesthetic with a scaled-down version.
Start by choosing your statement finger or two—you don’t need to cover all ten nails to make an impact. Apply your base color (Cardi often favors nudes, blacks, or bold colors) and let it dry completely. Rhinestones need a stable surface to adhere properly.
Use nail glue or a thick builder gel to attach stones. Place a small dot where you want each rhinestone, then use a dotting tool or orange stick to pick up the stone and press it into position. Work quickly before the adhesive dries. Start from the cuticle and work toward the tip for the most professional appearance.
Cardi’s looks often feature rhinestones in gradient sizes or rainbow arrangements. You might create an ombré effect from large stones at the cuticle to tiny ones at the tip, or arrange colors in a pattern that tells a story. Once all stones are placed, seal everything with a thick top coat, carefully coating around each stone. You might need to apply top coat twice—once to secure, once to smooth.
8. Sabrina Carpenter’s Rainbow French

Sabrina Carpenter elevated the French manicure to art-gallery status with rainbow rhinestones replacing the traditional white tips. This design walks the line between minimalist and maximalist in the most satisfying way.
The base should be sheer or nude—you want that classic French foundation. Once your base is set, map out where your “French tip” line will fall. Instead of painting a white tip, this is where your rhinestones will live.
Apply a thin line of clear builder gel or nail glue along that French tip line. Before it dries, start placing flat-back rhinestones in rainbow order. You might go red-orange-yellow-green-blue-purple across all fingers, or create a mini rainbow on each nail. Use 2-3mm stones for the most wearable size.
The spacing matters here. Stones should touch or nearly touch each other to create a solid “tip” of sparkle rather than scattered gems. Use a fine-tipped tool to adjust positioning before everything sets. Seal with a generous top coat, making sure to coat over and around each stone to lock everything in place.
This design photographs beautifully and adds just enough sparkle to complement rather than compete with your outfit. It’s surprisingly versatile—fancy enough for events but creative enough to express personality in everyday settings.
9. Vanessa Hudgens’ Leopard Print Tips
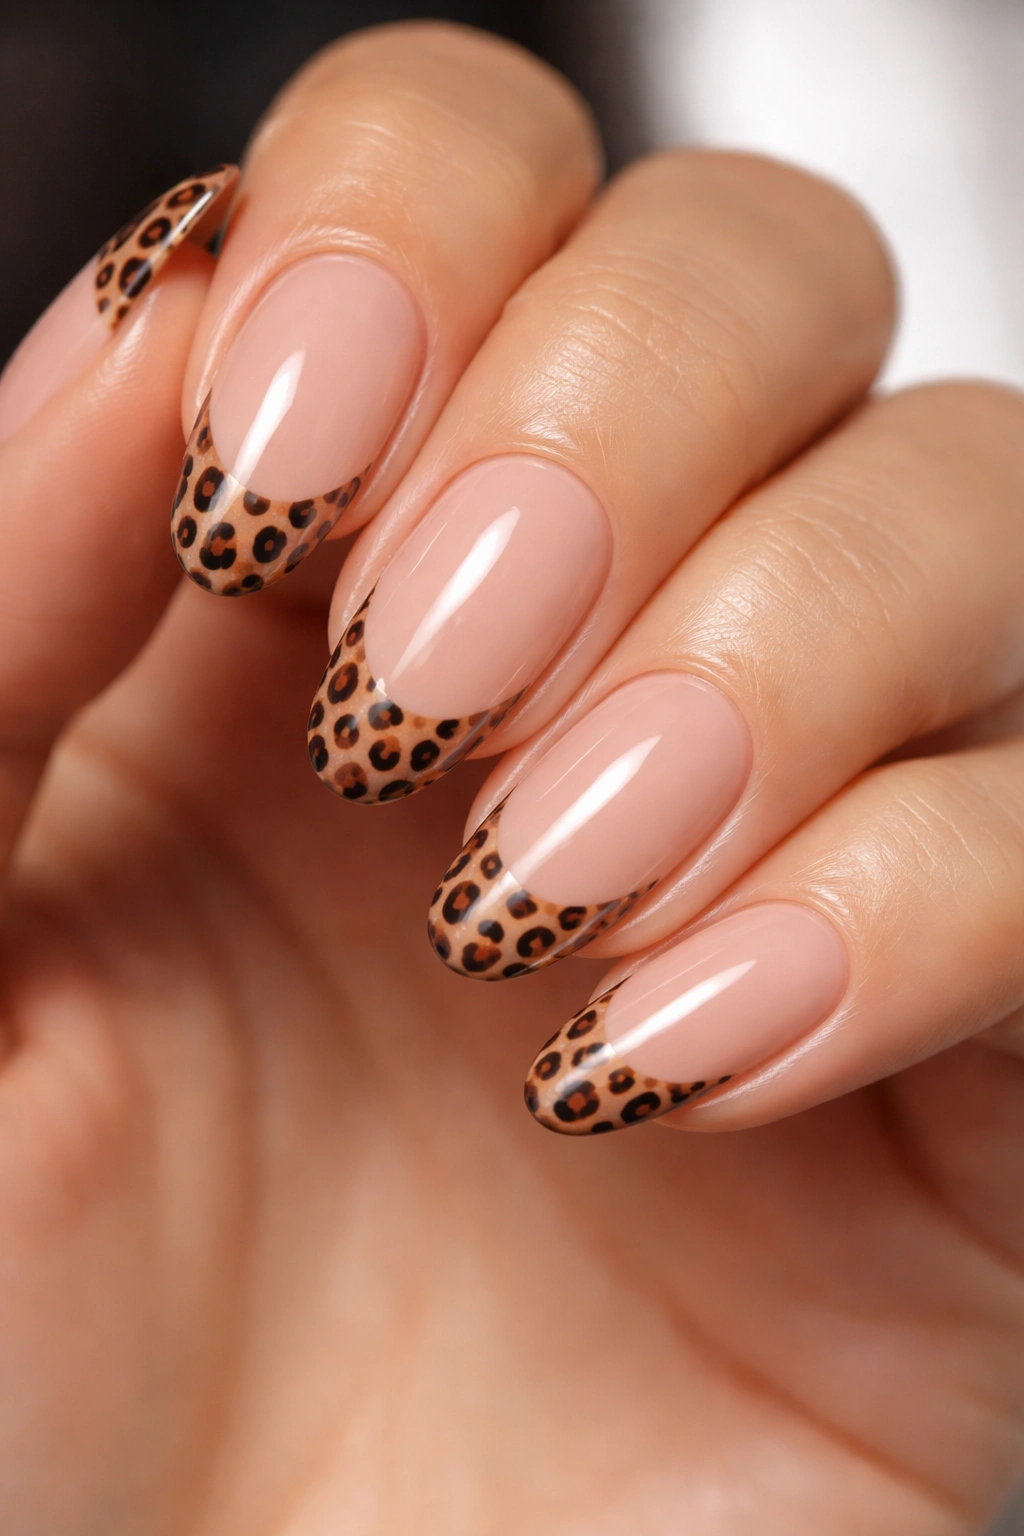
Animal print nails cycle in and out of trend conversations, but Vanessa Hudgens proved they’re here to stay with her leopard-tipped manicure. This design offers a fun neutral that pairs with everything while still making a statement.
Begin with a nude or soft pink base on the entire nail—this represents the animal’s fur between the spots. Apply two coats for even coverage. Once completely dry, it’s time to create those characteristic leopard spots on your tips.
Use a thin nail art brush or even a toothpick to create irregular C-shapes or U-shapes in a warm brown or chocolate shade. These don’t need to be perfect circles—in fact, organic, imperfect shapes look more authentic. Cluster some shapes together and leave others alone. Vary the sizes for visual interest.
After your brown shapes dry, add accent marks. Use black polish to create smaller curved lines along the edges of some (not all) of your brown shapes. These incomplete outlines are what makes leopard print recognizable. Step back and look at your work—if it feels too busy, that’s actually correct. Leopard print should have that slightly chaotic energy.
Seal with your choice of top coat. Glossy creates a more glamorous look, while matte gives it an unexpectedly chic, fashion-forward finish. This design works on any nail shape but looks particularly striking on almond or coffin shapes where you have more “tip” real estate to showcase the pattern.
10. Dua Lipa’s Tiny Floral Details
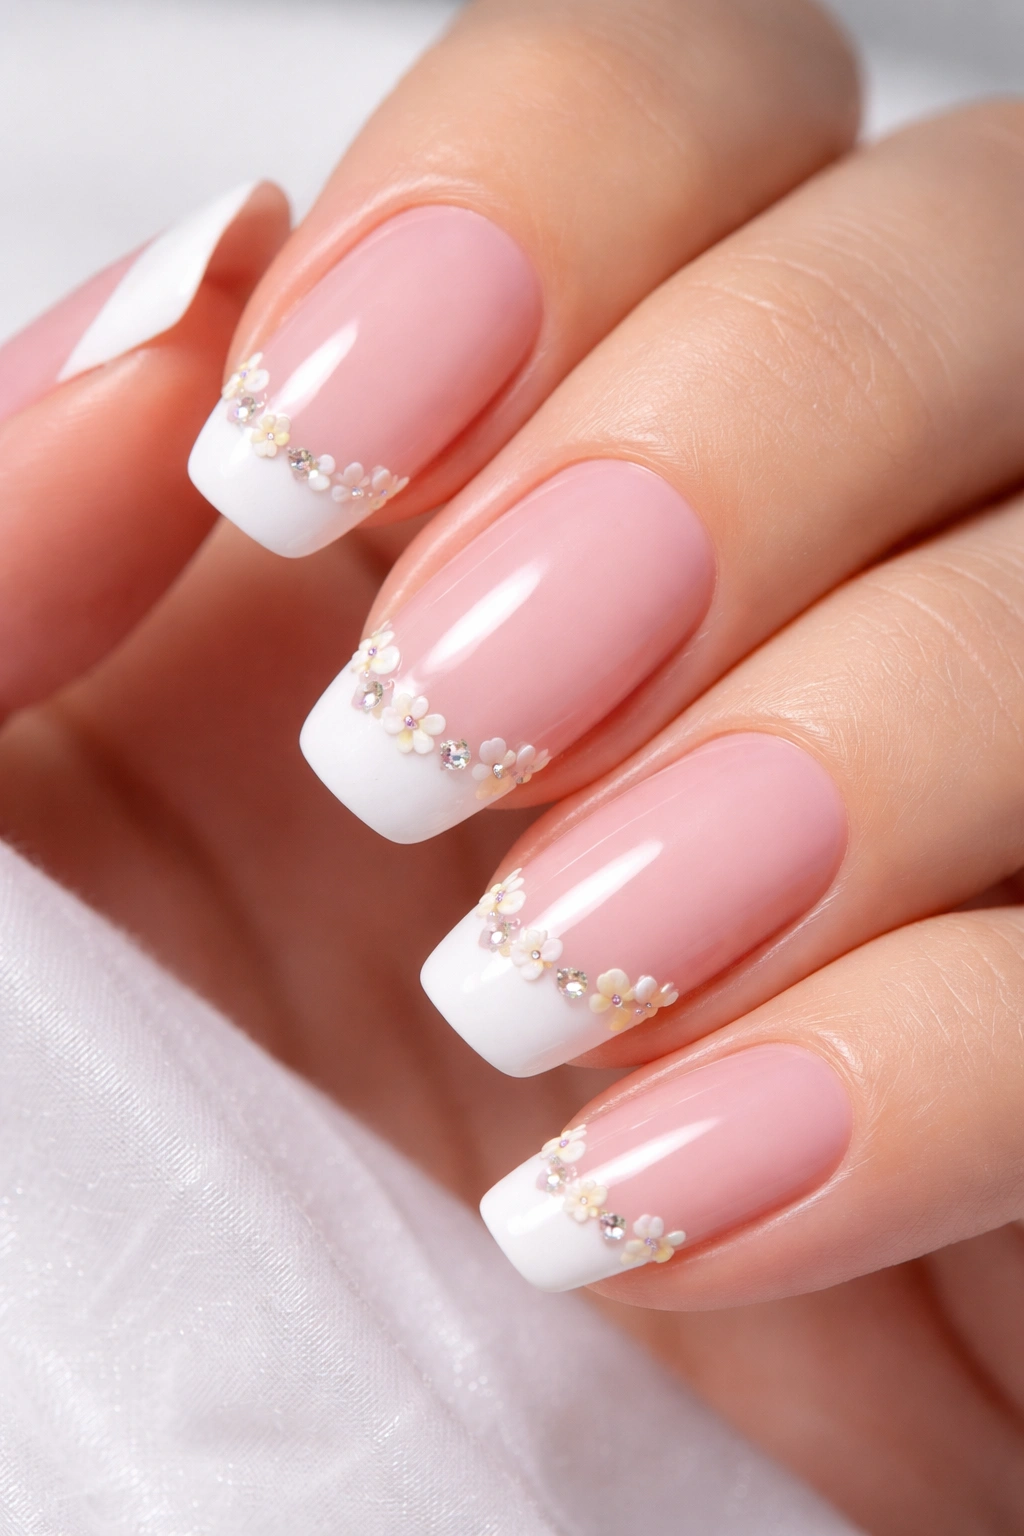
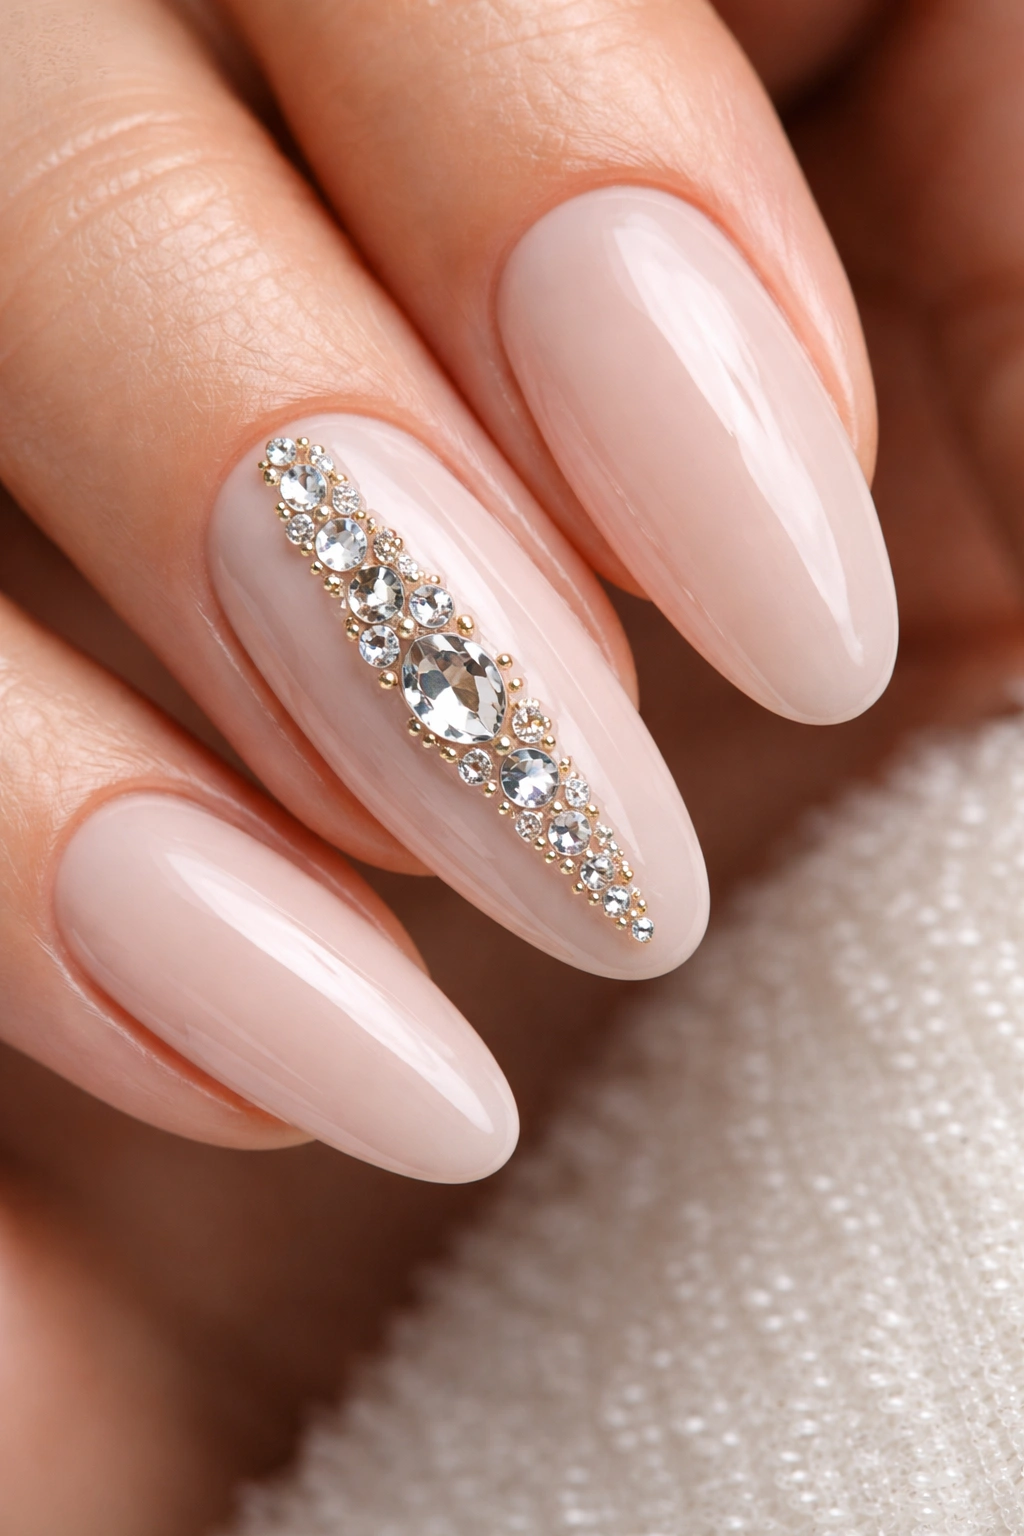
Dua Lipa’s delicate floral French manicure proves that nail art doesn’t need to be loud to be impactful. Her oval nails featured classic French tips adorned with tiny rhinestone flowers that added just enough detail to feel special without overwhelming.
Start with your French base—nude or soft pink polish across the entire nail. Create your white French tips using your preferred method, whether that’s guides, tape, or freehand. Keep the smile line subtle and elegant rather than thick and bold.
Once your French tips are dry, it’s time to add those flower accents. You can hand-paint tiny flowers using a fine detail brush and white or pastel polish, or use pre-made nail stickers for easier application. Dua’s version featured rhinestone flowers placed strategically near the French line.
To create rhinestone flowers, place a small crystal in the center, then surround it with five or six smaller crystals to form petals. Use clear nail glue or gel, applying tiny dots for each stone. You might add flowers to just one or two nails per hand—accent nails work beautifully for this level of detail.
The elegance of this design lies in its restraint. Less is genuinely more here. One or two small floral elements per nail (or per hand) creates sophistication. Cover every surface and you’ve lost the delicate quality that makes this look so appealing.
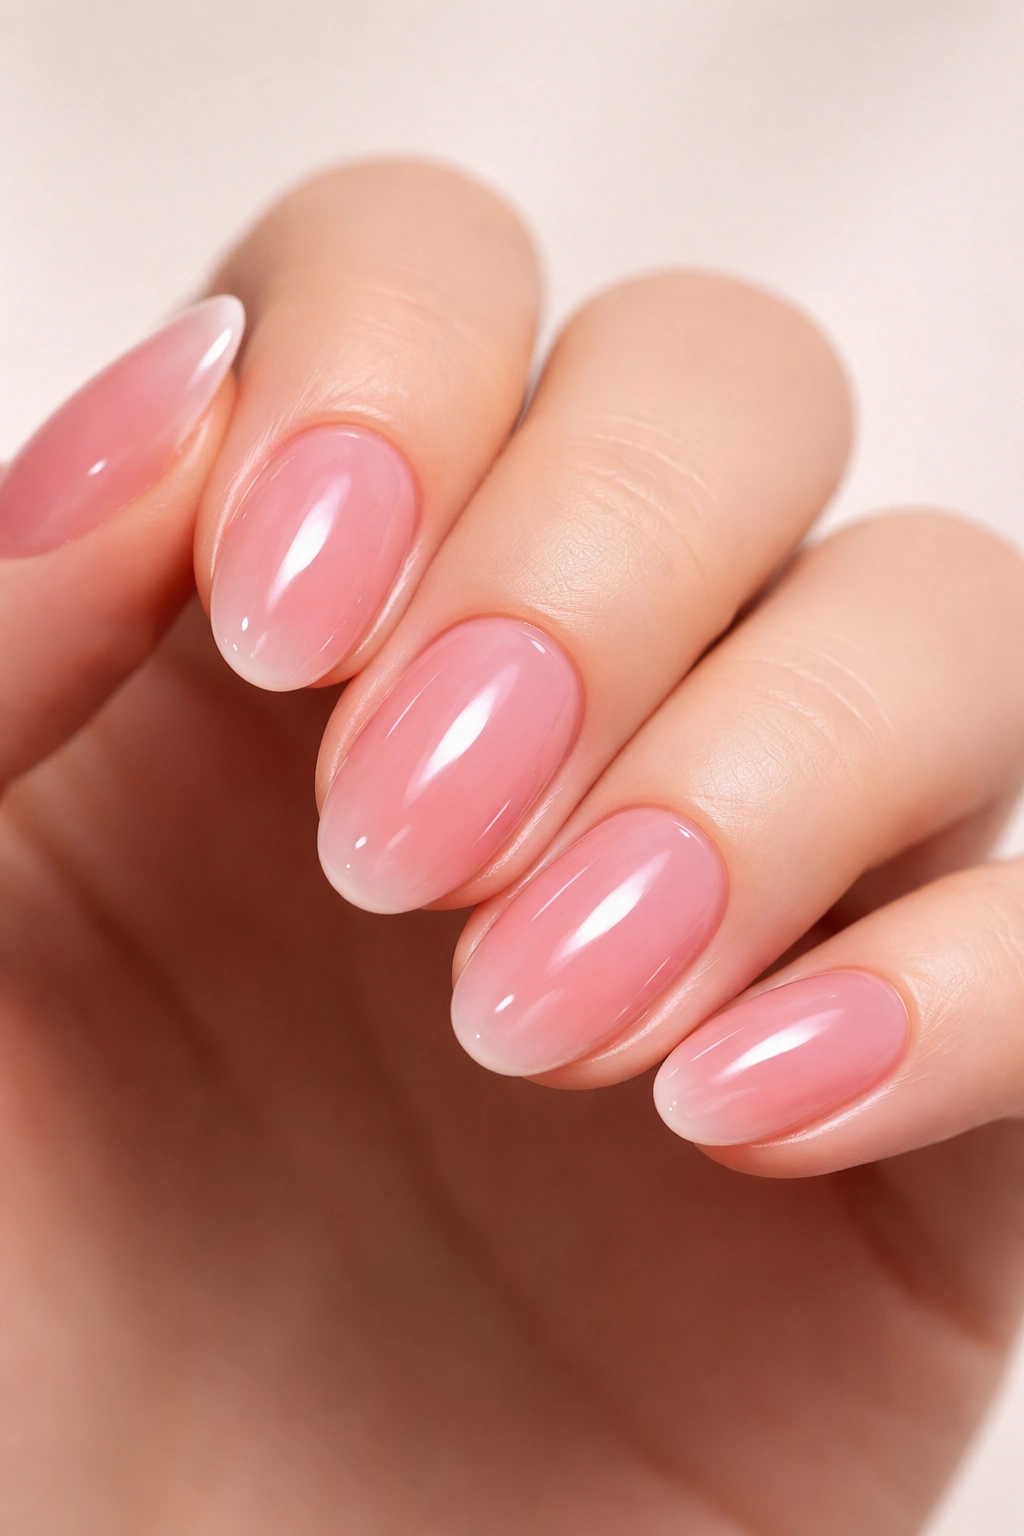
11. Jennifer Lopez’s Milky Ombré
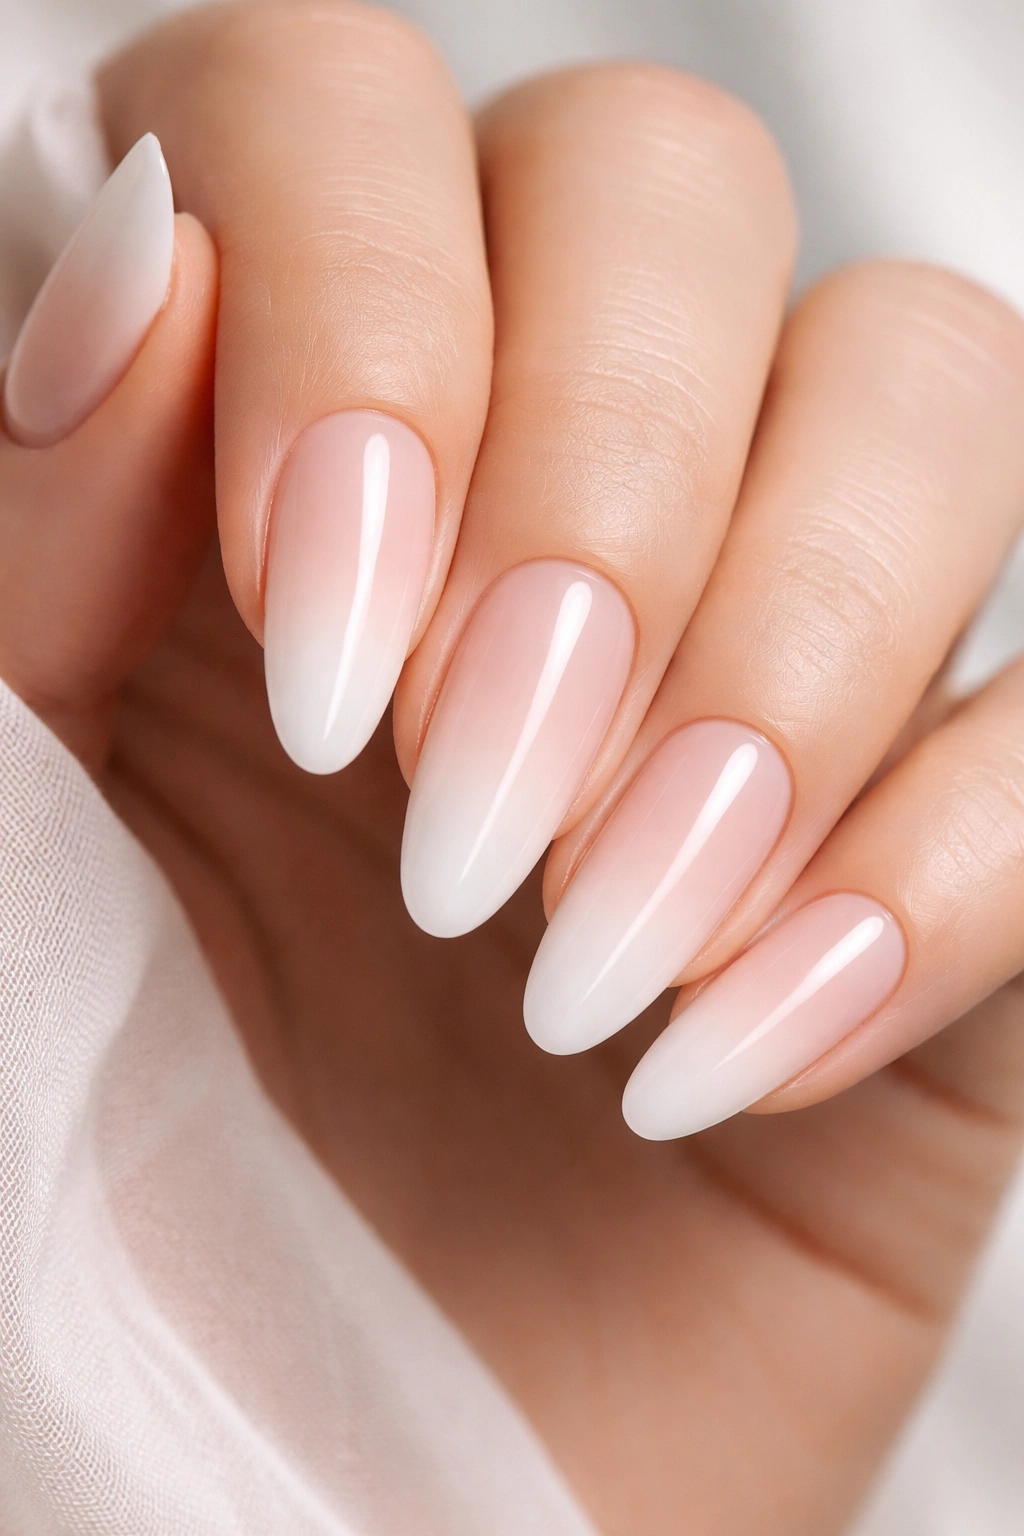
J.Lo knows timeless elegance, and her milky ombré nails embody that philosophy. This design features a gradient from nearly clear at the base to milky white at the tips, creating dimension that feels expensive and sophisticated.
Creating a seamless ombré requires blending while your polish is still wet. Apply your sheer nude or pink base color to the entire nail. While that’s still tacky, apply milky white polish to just the tip. Quickly use a clean brush (or a makeup sponge) to blend where the two colors meet.
The blending motion should be gentle and sweeping, not harsh. You’re persuading the colors to merge, not forcing them. This might take a few practice runs to get comfortable with the timing. Work on one nail at a time since you need everything wet to blend properly.
Build up the opacity gradually with multiple thin layers rather than trying to achieve the perfect ombré in one application. Each layer should be fully dry before you add the next. By the third or fourth coat, you’ll have that dreamy gradient effect.
Finish with a high-shine top coat to unify the look and add that luxurious gleam. The milky ombré works on any nail length or shape but looks particularly elongating on almond or oval shapes. It’s one of those universally flattering designs that suits every skin tone and occasion.
12. Megan Thee Stallion’s Citrus Fruit Art
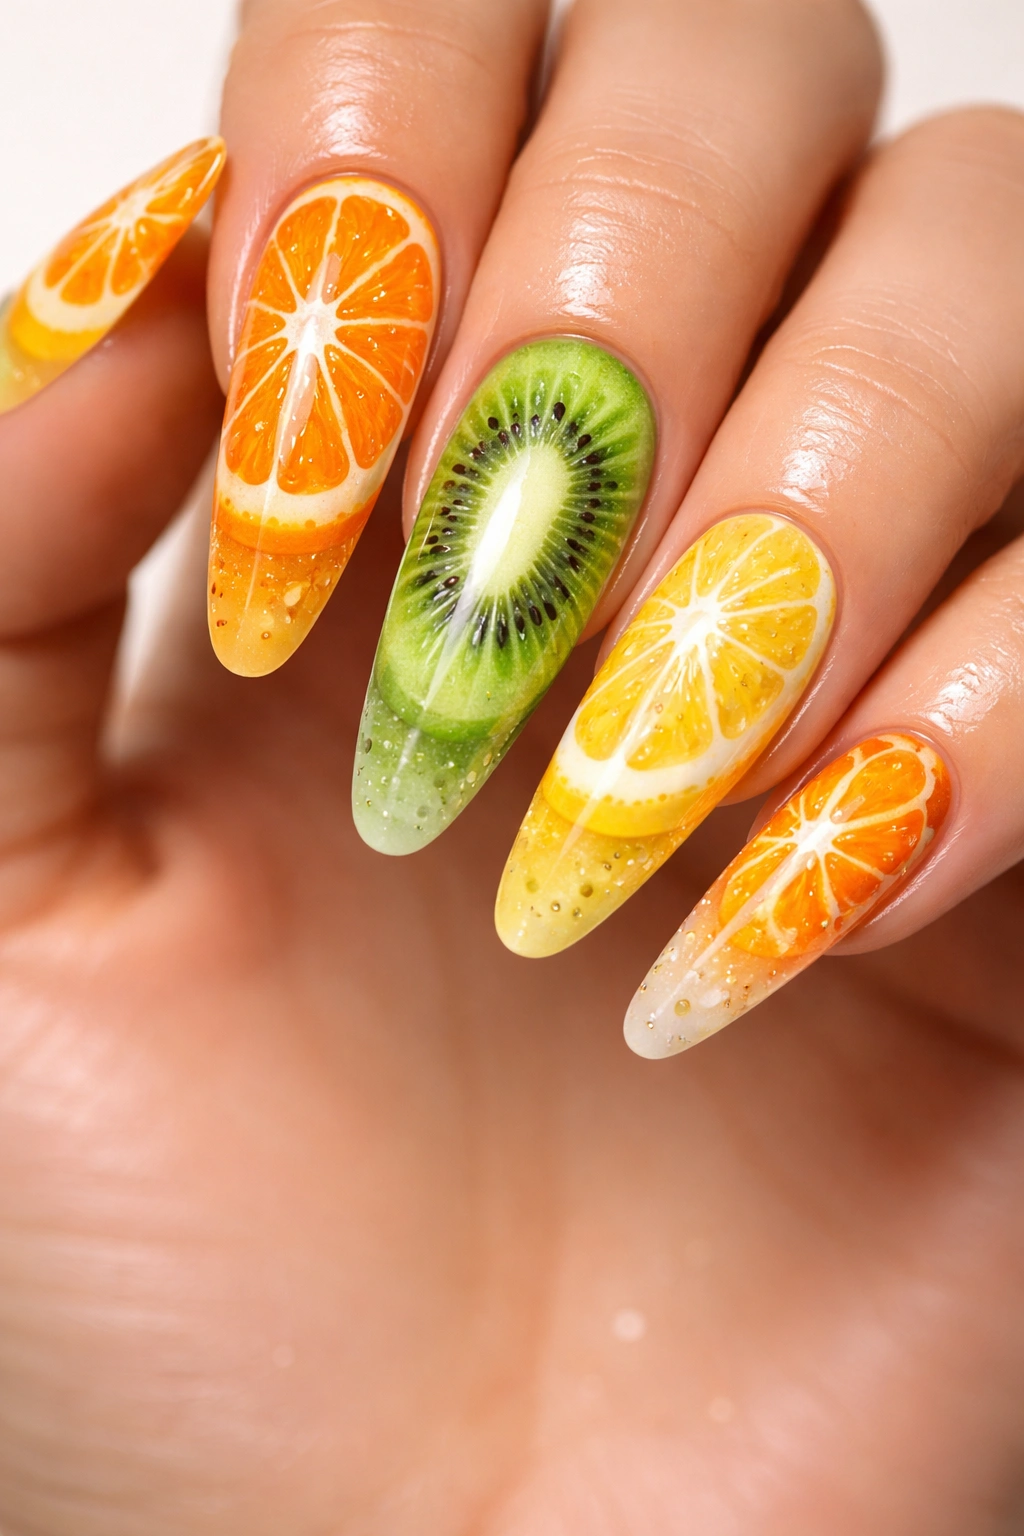
Summer vibes live year-round on Megan Thee Stallion’s citrus-inspired nails. Her extra-long tips featured hand-painted oranges, kiwis, and lemon slices that turned nails into wearable art. While you might not go quite as long with your length, the fruit design translates beautifully to more moderate nails.
Start with a white or cream base—this makes your fruit colors pop. Once dry, use thin liner brushes and gel paints to create your fruit. For orange slices, paint a semi-circle in bright orange, then add white segments radiating from the center. A thin outline in darker orange or brown adds definition.
Kiwi slices feature a green center with tiny black seeds (just dots with a fine brush), surrounded by a lighter green ring and a brown outer edge. Lemon follows the same pattern as orange but in sunny yellow. The key is working in thin layers and letting each element dry before adding the next.
You don’t need to be a master artist to pull this off. The small scale means even wobbly lines read as charming and hand-crafted rather than sloppy. Place one fruit on each accent nail, or create a fruit salad on every finger. Add tiny white highlights to each fruit for that cartoon-like shine that makes them feel dimensional.
Seal everything with thick builder gel or multiple coats of regular top coat. The protection matters here since you’ve invested time in detailed art. These nails bring instant happiness and work surprisingly well with neutral outfits that let them be the star.
13. Hailey Bieber’s Buttercup Yellow
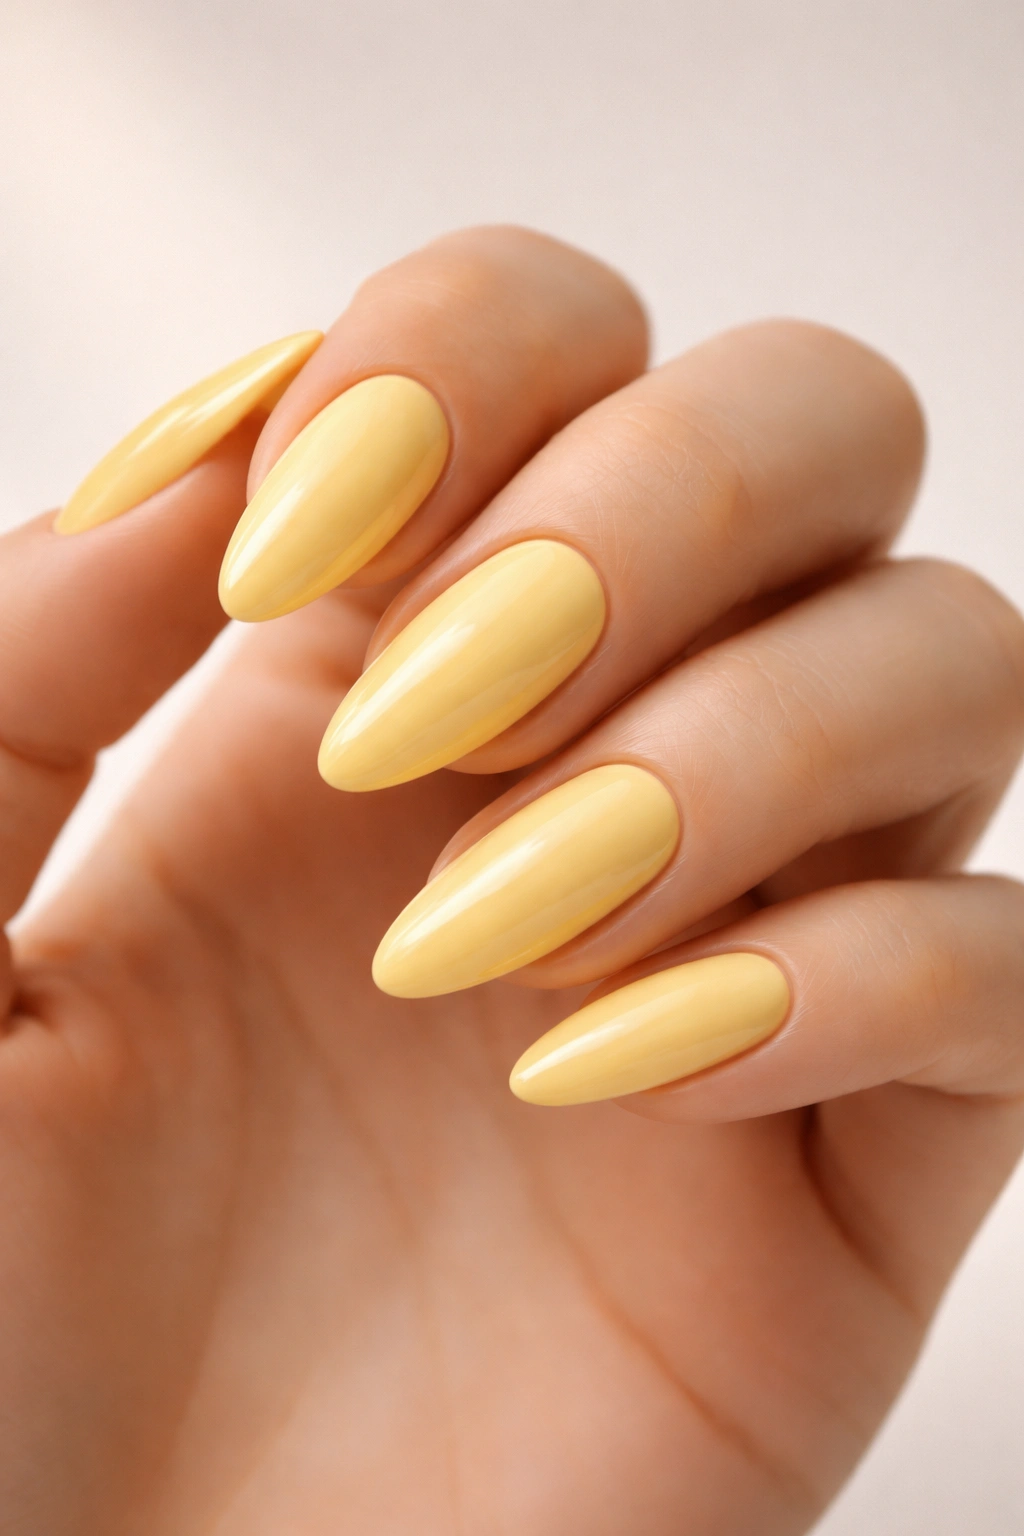
Hailey struck again with her buttercup yellow manicure that had everyone running to their colorists and nail techs. This soft, warm yellow feels like sunshine in nail form—cheerful without being aggressive, bold without being loud.
The shade is crucial here. You’re looking for yellow with warmth and slight creaminess, not neon or primary crayon yellow. Think buttercup flowers, lemon cream pie, or morning sunlight. Most polish brands released their version after this look went viral, so finding the right shade is easier now than ever.
Application requires attention since light colors can look streaky. Use a white base coat first—this creates an opaque foundation that helps your yellow polish appear even and true to bottle. Without this step, you might need four or five coats to reach opacity.
Apply your yellow polish in thin, even coats. Two to three layers over your white base should give you perfect coverage. Let each coat dry thoroughly before adding the next. Light colors show every application flaw, so take your time.
The shape Hailey chose matters too—long almond tips give the look editorial appeal. But this shade works on shorter, natural nails too, where it feels fresh and approachable. Finish with a top coat to prevent yellowing (ironic, but lighter shades can discolor over time) and add shine.
14. Cynthia Erivo’s Bejeweled Masterpiece
Cynthia Erivo treats her nails like tiny canvases, often wearing sculptural designs that defy gravity and expectation. Her jewel-encrusted sets feature such intricate work that they’re best left to professionals, but you can capture the spirit with a simplified version.
Choose one or two accent nails to bedazzle rather than attempting all ten. Apply your base color—Cynthia often works with nudes or bold jewel tones that let the stones shine. Once completely dry, plan your design. You might create a line of stones down the center, frame the nail with gems, or cluster stones at the base near your cuticle.
Use nail glue or thick builder gel as adhesive. Place stones one at a time, using varied sizes to create visual interest. Larger stones make great focal points, while tiny stones fill gaps and add texture. Mixing stone colors within the same family (all purples or all pinks) creates cohesion without being matchy-matchy.
The professional secret is encapsulation. Once all stones are placed, apply builder gel carefully around and over them. This locks everything in place far better than top coat alone. You might need to use a tiny brush to work gel around stone edges. Cure under LED lamp if using gel, or let dry thoroughly if using traditional glue.
These statement nails photograph beautifully and feel special for events. Fair warning—they require extra care. You’ll need to baby these nails and avoid tasks that might knock stones loose.
15. Blake Lively’s Butterfly Garden
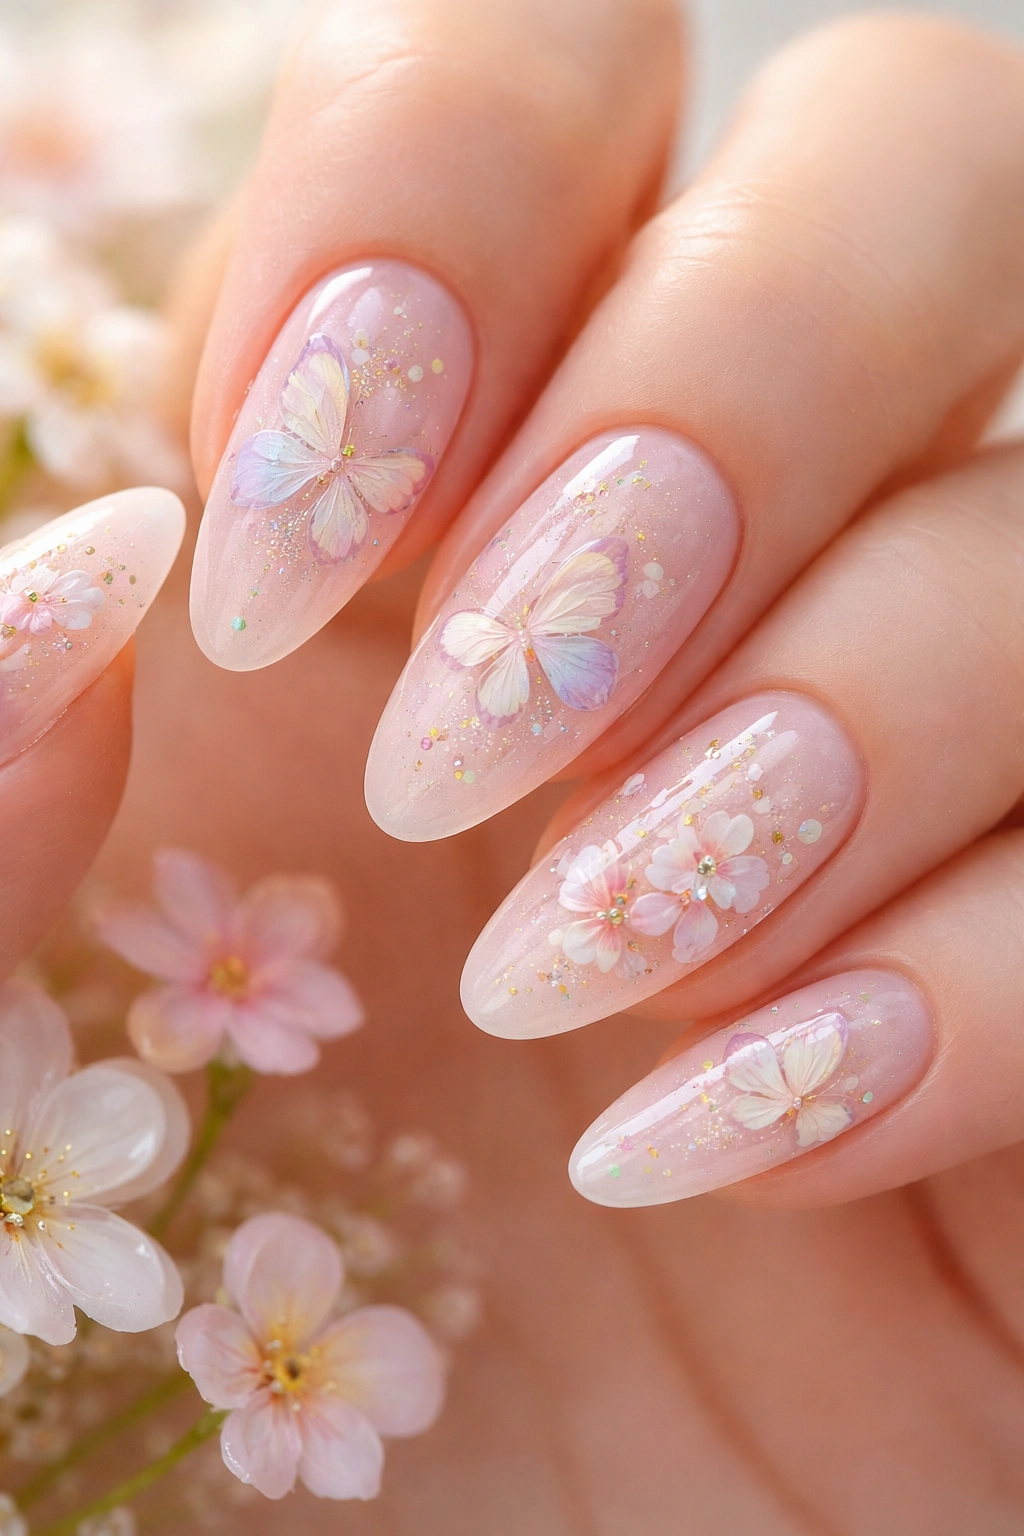
Blake Lively hand-painted her own butterfly and bloom nail art for a premiere, proving that DIY nail art can absolutely hang with professional work. Her pastel creation featured delicate flowers and butterflies that felt whimsical without being childish.
Start with a sheer shimmer base in soft pink or nude. This gives your art a dreamy foundation. Once dry, use a very fine nail art brush to paint tiny flowers. You don’t need to be a skilled artist—simple five-petal flowers work beautifully. Use white or pastel polish for the petals, adding tiny yellow or pink centers.
For butterflies, paint a small body (just a thin vertical line), then add two wings on each side. The wings can be simple triangular shapes. Use a dotting tool to add tiny spots or designs on the wings. Keep everything small and delicate—scale matters when you’re working on such a tiny canvas.
The magic is in restraint and color choice. Blake stuck with soft pastels and whites against her shimmery base, which created cohesion. Scattering a few flowers and butterflies across select nails feels intentional, while covering every surface would feel busy.
If hand-painting feels intimidating, butterfly and flower nail stickers exist in every style imaginable. Apply them over your base coat, seal with top coat, and nobody will know you took the easier route. The final effect—delicate, romantic, and surprisingly versatile—is what matters.
16. Kerry Washington’s Camo Chic
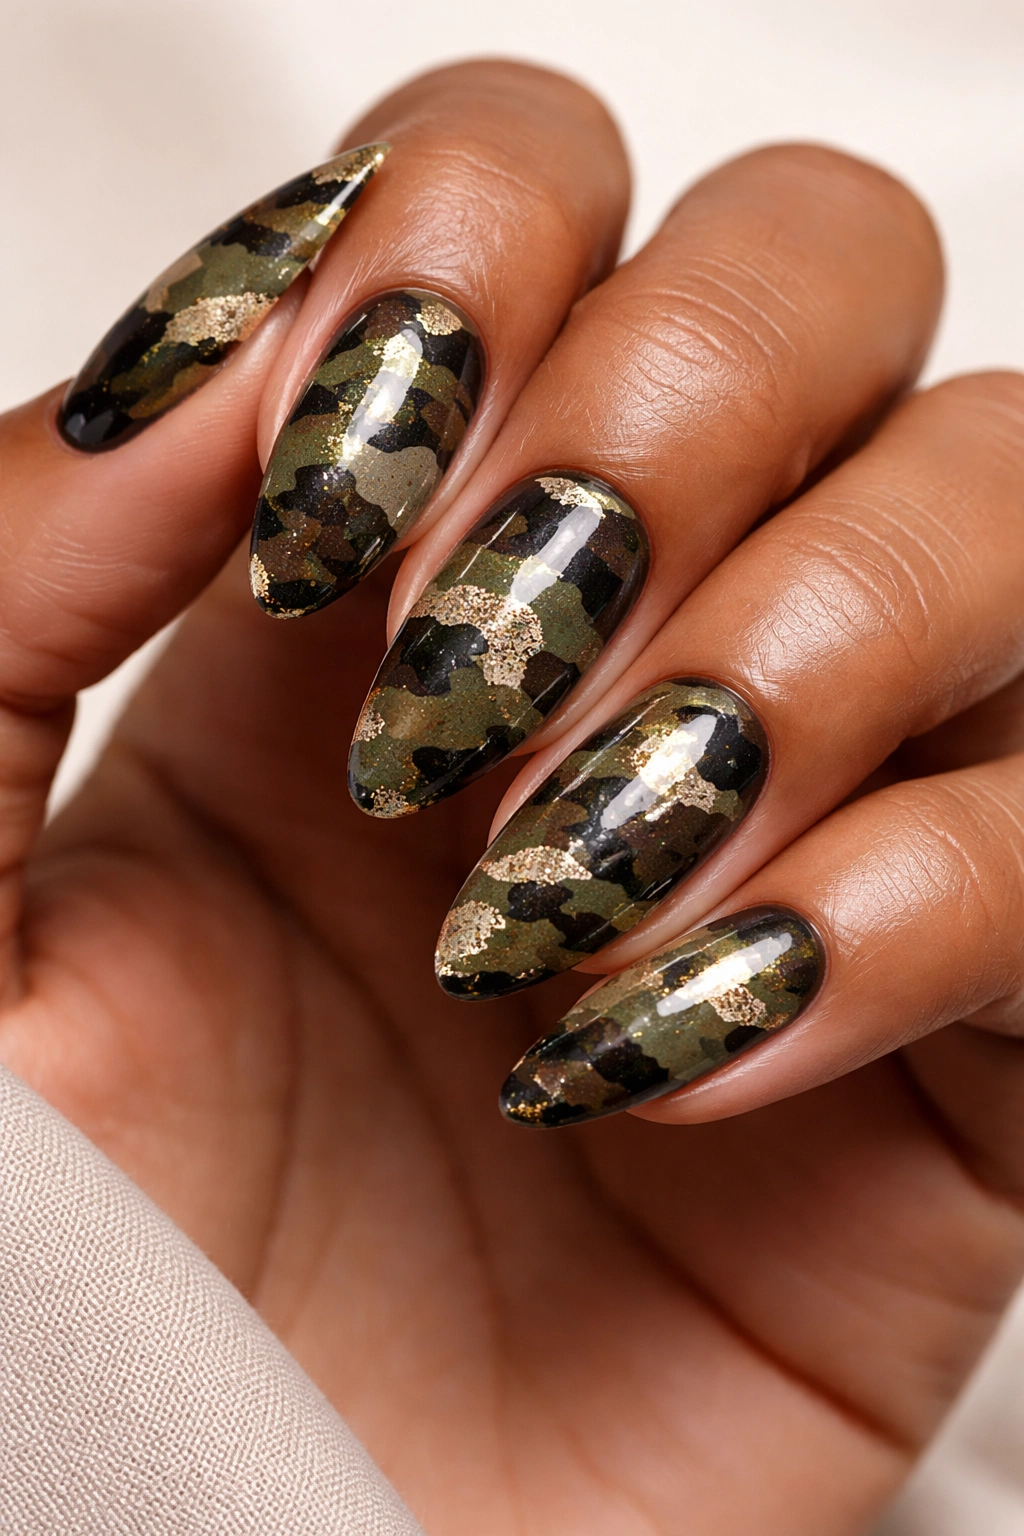
Kerry Washington took typically masculine camo print and made it completely elegant. Her custom camo press-ons mixed dark green, black, gold glitter, brown, and white in an organic pattern that felt fashion-forward rather than militaristic.
Creating camo is more forgiving than you’d think since there’s no right or wrong pattern. Start with your darkest color (usually dark green or brown) as the base. Apply two coats for solid coverage. Once dry, use a makeup sponge to dab on your second color in irregular patches.
Don’t cover the entire nail—leave plenty of your base color showing through. Add your third color (maybe black or a lighter green) the same way, dabbing randomly with a fresh section of sponge. The sponge creates that slightly blurred edge that makes camo recognizable.
For added interest like Kerry’s gold glitter, apply it sparingly in just a few sections. Too much sparkle disrupts the camo effect, but strategic placement elevates it from costume-y to couture. Finish with top coat to blend all the colors slightly and add shine.
The color story you choose changes the entire vibe. Traditional green/brown/black feels outdoorsy. Black/white/gray reads urban and modern. Pink/purple/white becomes unexpectedly feminine. The technique stays the same regardless of your palette.
17. Olivia Rodrigo’s Grunge French
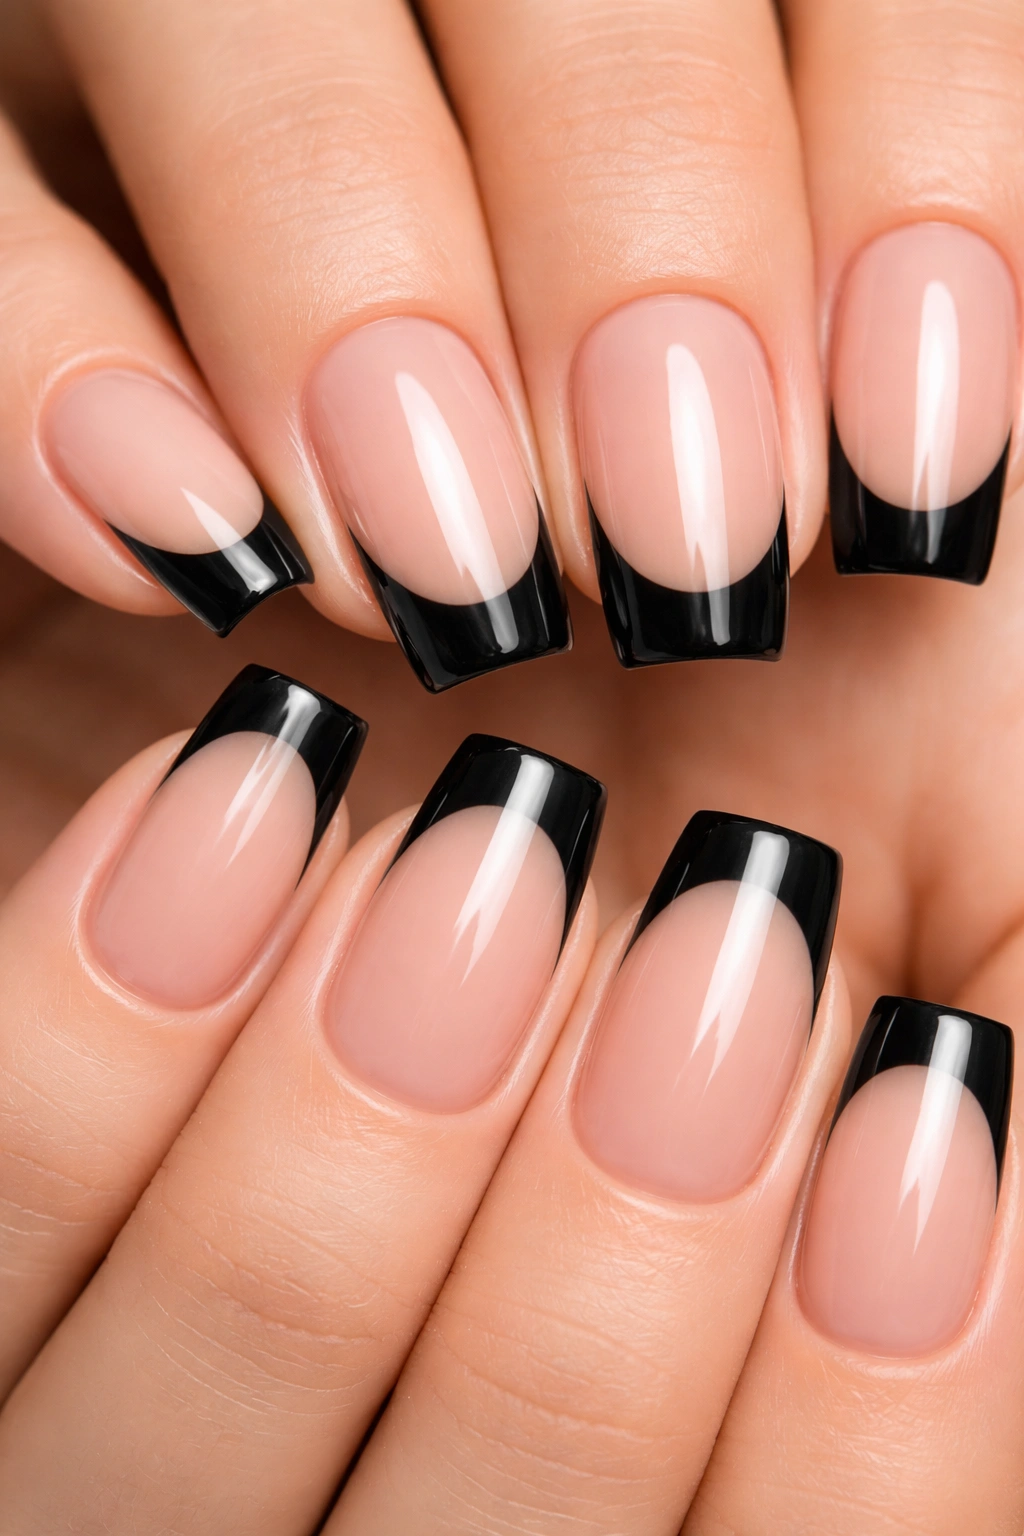
Olivia Rodrigo brought 90s grunge aesthetics to French manicures with black tips instead of white. This simple color swap completely transforms the vibe from classic to edgy, from corporate to cool.
The technique mirrors traditional French manicures exactly—you’re just swapping colors. Apply a nude or pale pink base across the entire nail. Once dry, carefully paint black polish on just the tips. You can use guides, tape, or freehand depending on your comfort level.
The thickness of your black tip changes the intensity. Thinner tips feel more subtle and sophisticated, while thicker tips make a bolder statement. Olivia’s version featured medium-width tips that struck a balance between the two extremes.
Shape amplifies the edge factor here. Square or coffin shapes feel more grunge than rounded ovals. Keep length moderate—too long starts feeling more goth than grunge. The look works best when it’s slightly undone rather than absolutely perfect anyway.
This design pairs beautifully with everything from vintage band tees to business casual to evening wear. It’s that rare combination of distinctive and versatile. Plus, if you mess up the black tip on one nail, simply repaint it. You’re working with two of the most forgiving polish colors.
Final Thoughts
Your nails don’t need a celebrity budget to channel celebrity style. These looks prove that with the right techniques, a bit of patience, and quality products, you can recreate red-carpet-worthy manicures at home or work with your nail tech to bring these visions to life.
The beauty of celebrity nail trends is their range. Feeling minimalist? Zendaya’s classic red or J.Lo’s milky ombré have you covered. Want to make a statement? Cardi’s rhinestones or Megan’s fruit art bring the drama. There’s no single “right” way to do nails—only what makes you feel confident and expresses your current mood.
Don’t be afraid to modify these looks to suit your lifestyle. Shorten the length, simplify the design, or adjust the colors to match your wardrobe. The techniques remain valuable even when you make them your own.
Screenshot these looks, bookmark this guide, and head to your next nail appointment armed with inspiration. Your fingertips are about to become your new favorite accessory.
