

Grunge isn’t just a fashion statement—it’s an attitude. When you want your nails to scream rebellion without saying a word, grunge designs deliver that perfect mix of chaos and intention. These aren’t your polished, pristine manicures. They’re raw, they’re moody, and they don’t apologize for taking up space.
Born from the underground music scene and flannel-soaked aesthetics, grunge nails have evolved into something that’s both nostalgic and refreshingly modern. You’ll find distressed textures, dark palettes, and elements that look like they belong on a leather jacket or concert venue wall. The beauty lies in the imperfection—smudged lines, rough edges, and deliberately chaotic patterns all work together to create something unexpectedly stunning.
Whether you’re channeling your inner ’90s rebel or just want to add some edge to your everyday look, grunge nail designs let you express that darker, more daring side. They pair just as well with ripped jeans and band tees as they do with sleek black dresses. The versatility makes them perfect for anyone who’s tired of playing it safe with their manicure.
What makes grunge nails so appealing is their refusal to conform. There’s no single “right way” to do them. Some designs lean heavily into gothic elements with crosses and chains, while others embrace industrial vibes with metallic finishes and distressed effects. The thread connecting them all? An unapologetic edge that makes people look twice.
Ready to transform your fingertips into tiny rebellious canvases? These ten grunge nail designs will help you nail that edgy look you’ve been craving.
1. Matte Black with Silver Studs
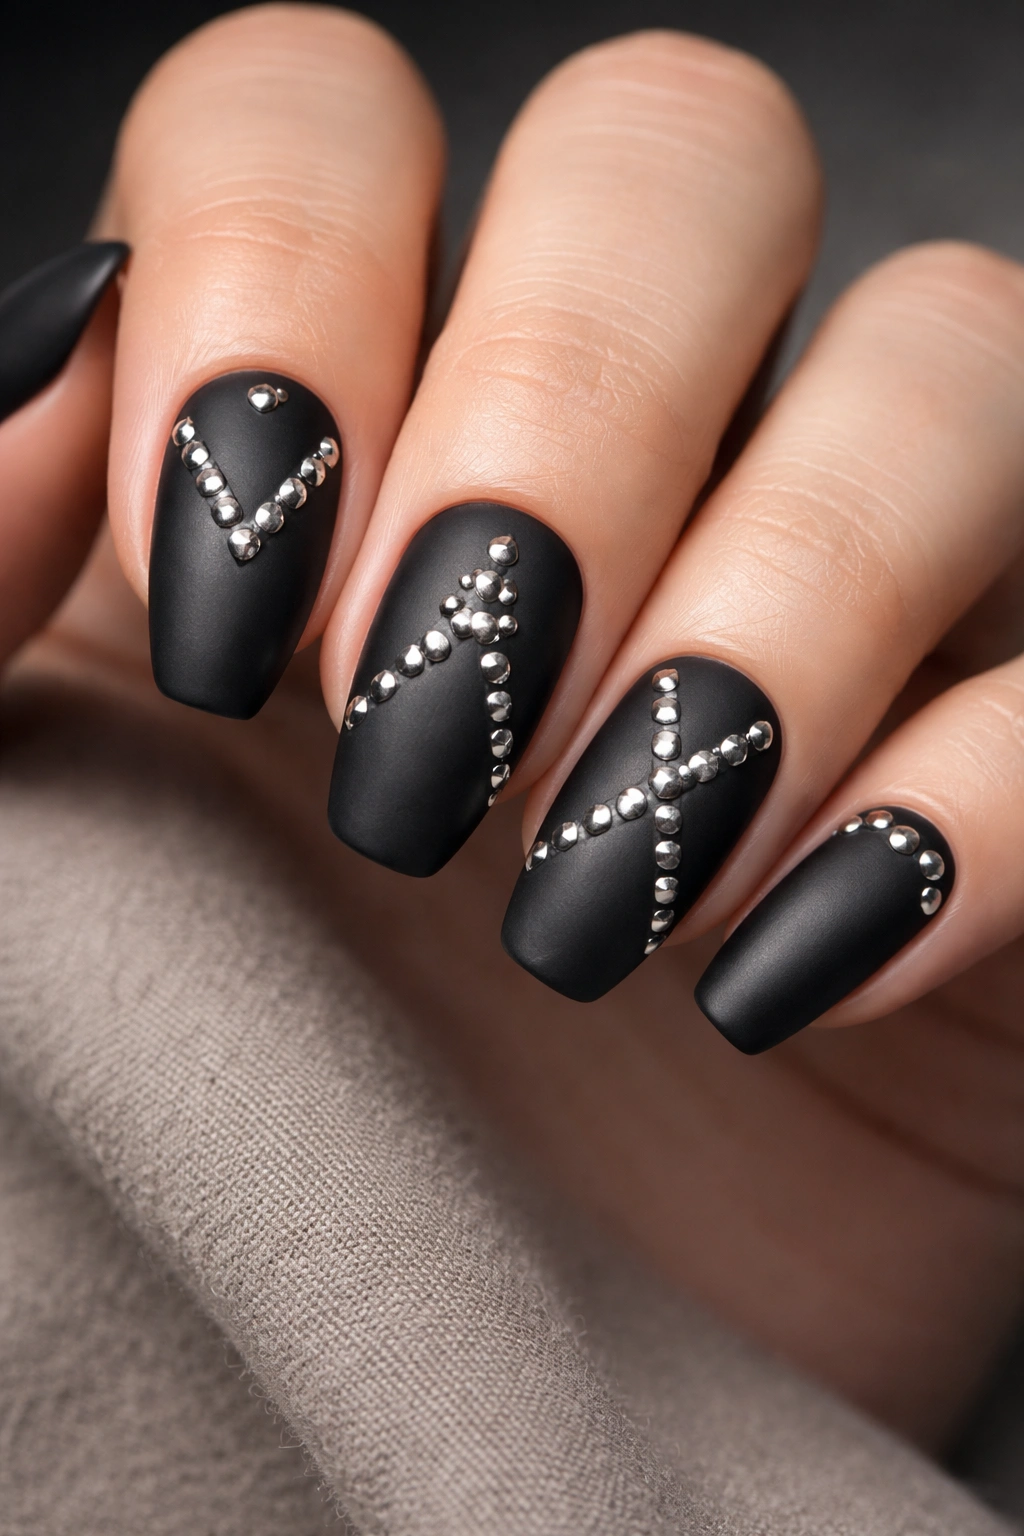
Nothing captures the essence of grunge quite like a matte black base adorned with strategically placed silver studs. This design is the little black dress of alternative nail art—timeless, versatile, and effortlessly cool. The flat, light-absorbing finish of matte polish creates that moody, mysterious vibe that’s become synonymous with grunge culture.
Why This Design Works
The contrast between the soft matte texture and sharp metallic studs creates visual interest without overwhelming the eye. You can arrange studs in geometric patterns, cluster them near the cuticle, or scatter them randomly across each nail for an organic feel. The beauty here is in the simplicity—you don’t need advanced artistic skills to pull this off, yet the result looks intentionally edgy and put-together.
Styling Tips
- Apply two coats of matte black polish and let it dry completely before adding studs
- Use nail glue or a thick clear topcoat to secure each stud firmly
- Try mixing stud sizes for added dimension and texture
- Skip the topcoat to maintain that flat, velvety finish
Pro tip: This design transitions seamlessly from day to night, working with office attire or your favorite concert outfit. The studs catch light without being too flashy, giving you just enough sparkle to stand out.
2. Smoky Ombre Shadow Fade

Imagine capturing the essence of cigarette smoke drifting through a dimly lit venue and translating that onto your nails. Smoky ombre designs blend charcoal black, ashy gray, and sometimes deep burgundy or navy to create a diffused, faded effect. The gradient mimics that hazy, atmospheric quality you’d find on vintage grunge band posters.
Creating the Perfect Fade
This technique requires patience and a makeup sponge for seamless blending. Start with your darkest shade at the tips and gradually work toward a lighter gray or even nude at the base. The key is building layers slowly, letting each one dry slightly before adding more color. The imperfect blending actually enhances the grunge aesthetic—you’re not aiming for perfection here.
What Makes It Special
The soft, blurred edges give these nails an almost ethereal quality while staying firmly rooted in darker territory. You can add tiny star accents, metallic flecks, or leave them bare for a minimalist approach. The smoky effect works beautifully on any nail length and shape.
- Use a dampened makeup sponge for the smoothest gradients
- Build color gradually with multiple thin layers
- Seal with a matte topcoat for extra moodiness
- Add a single glossy accent nail for contrast
Fun fact: The imperfections in your gradient make each nail unique, which perfectly captures grunge’s anti-perfectionist philosophy.
3. Industrial Chrome and Metallic Madness
Chrome nails with a grunge twist take the mirror-like finish you’ve seen everywhere and roughen it up. Think blackened chrome, distressed metallic effects, and that oil-slick sheen that shifts between dark blues, purples, and greens. This design channels industrial aesthetics—machinery, aged metal, and futuristic dystopian vibes all rolled into one.
The Metallic Edge
Unlike traditional chrome that’s polished and pristine, grunge chrome embraces imperfection. You’ll see scratched effects, tarnished finishes, and intentionally uneven application. Some designs layer chrome powder irregularly over a dark base, creating gaps that mimic weathered metal or corroded surfaces. The reflective quality adds dimension while maintaining that essential grunge darkness.
Application Techniques
Start with a deep charcoal or black base, then apply chrome powder in sections rather than covering the entire nail. Use your finger or a silicone tool to buff the powder into the polish, leaving some areas untouched. Layer different metallic shades—gunmetal, copper, and silver—for that rusted, aged appearance.
- Mix matte and chrome finishes across different nails
- Try blackened silver for a less intense metallic look
- Add scratches with a thin brush for realistic distressing
- Seal chrome areas carefully to maintain their shine
The industrial quality makes these nails conversation starters, reflecting light in unexpected ways while keeping that rebellious edge intact.
4. Gothic Spider Web Corner Details
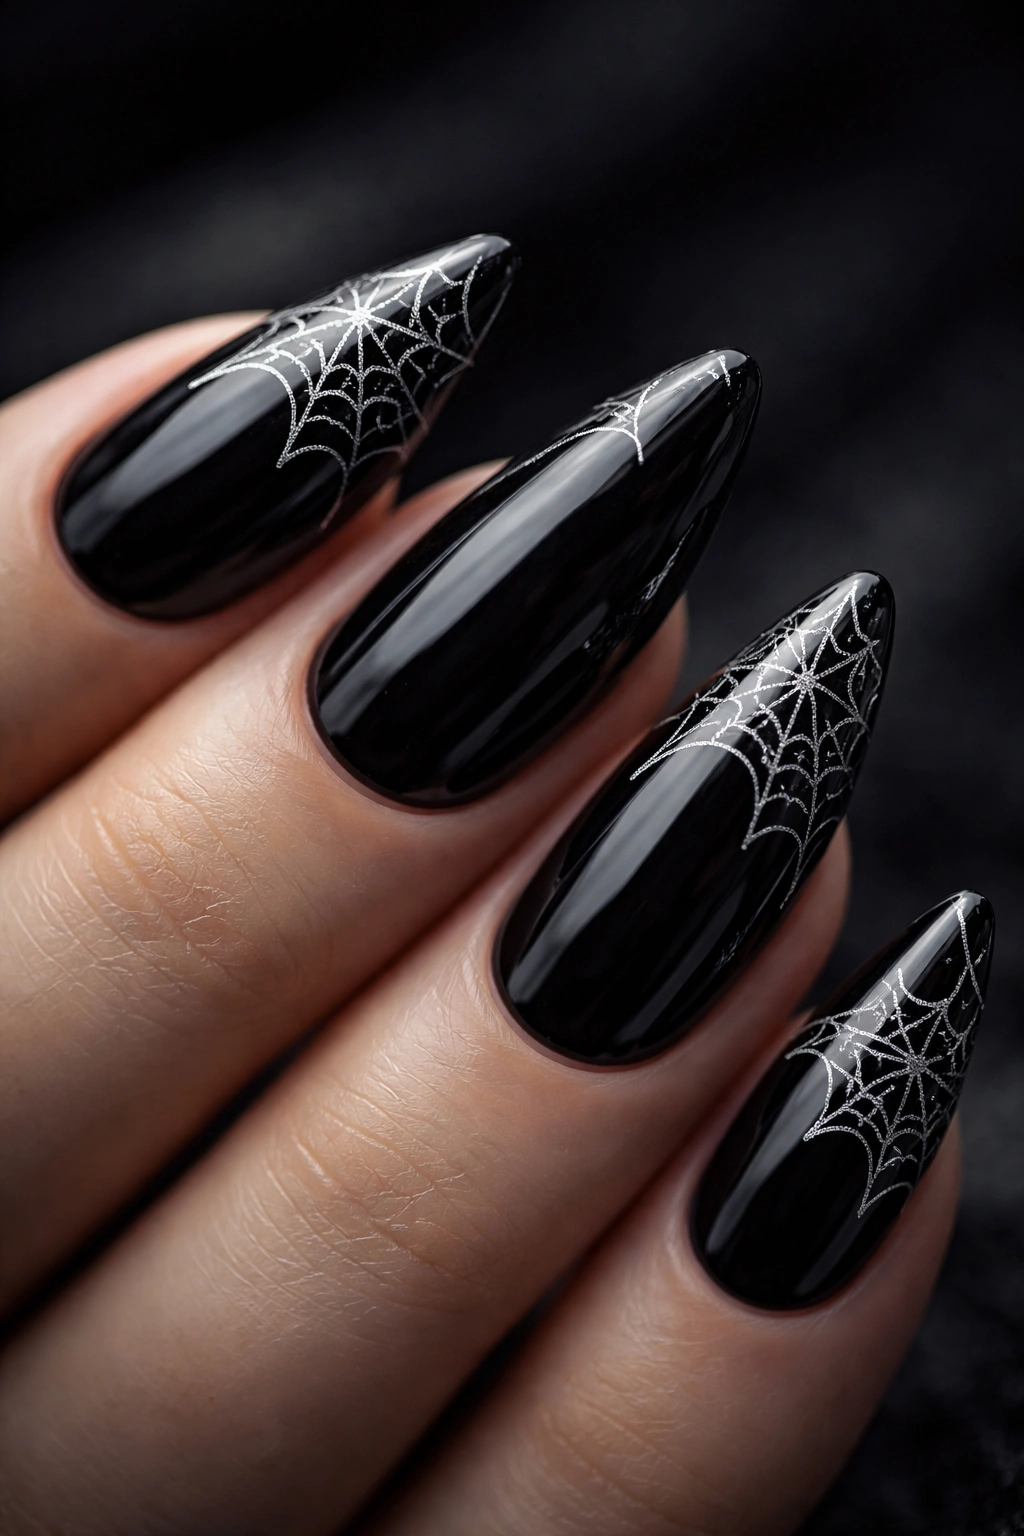
Spider webs have long been associated with gothic and alternative aesthetics, making them perfect for grunge nail designs. These intricate patterns typically sit in the corners of your nails, creating the illusion of abandoned spaces and haunted beauty. The delicate lines contrast beautifully with dark, moody base colors.
Mastering the Web
Creating realistic spider webs requires a steady hand and a thin nail art brush. Start from a corner point and draw increasingly larger connected arcs, linking them with straight lines radiating from the center. White or silver polish shows up best against black, deep burgundy, or forest green bases. Some folks add tiny spider details for extra creep factor.
Why Webs Work
There’s something simultaneously delicate and eerie about spider webs that captures grunge’s complex relationship with beauty. They represent both creation and decay, abandonment and artistry. The pattern works on accent nails or can cover your entire hand for maximum impact.
Design Variations
- Keep webs minimal in one corner for subtle edge
- Cover entire nails with interconnected web patterns
- Add tiny rhinestones as “dew drops” for dimension
- Pair with matte topcoat for a softer, more gothic feel
Pro tip: If you’re nervous about freehand designs, vinyl stencils and stamping plates with web patterns can help you achieve clean lines. The slightly imperfect hand-painted version often looks more authentic and grunge-appropriate, though.
5. Blood Drip Horror Effect

For those who embrace the darker side of grunge with gothic and horror influences, blood drip nails make an unapologetically dramatic statement. Deep crimson polish appears to drip from your tips or cuticles, creating effects that blur the line between vampire chic and alternative glamour. This design isn’t subtle—it’s meant to catch eyes and maybe raise a few eyebrows.
Creating Realistic Drips
The secret to convincing blood drips lies in using multiple shades of red. Mix burgundy, bright crimson, and touches of black to create depth and dimension. Apply the drips with a dotting tool or fine brush, letting gravity guide the shape naturally. Start with a small dot at the top and carefully drag the polish downward, allowing it to pool slightly at the bottom.
Finishing Touches
Some nail artists apply glossy topcoat only to the drip areas while keeping the base matte, creating striking contrast. Others add darker shading around the drips to enhance the three-dimensional illusion. The base color matters too—drips over nude, pale gray, or even white create more dramatic visual impact than over black.
- Layer different red tones for realistic depth
- Apply drips while polish is still slightly wet for organic flow
- Use a toothpick to create thin trailing lines
- Consider placing drips asymmetrically for natural randomness
This design pairs beautifully with all-black outfits or provides shocking contrast against pastels, challenging traditional ideas about what makes a manicure “pretty.”
6. Barbed Wire Attitude
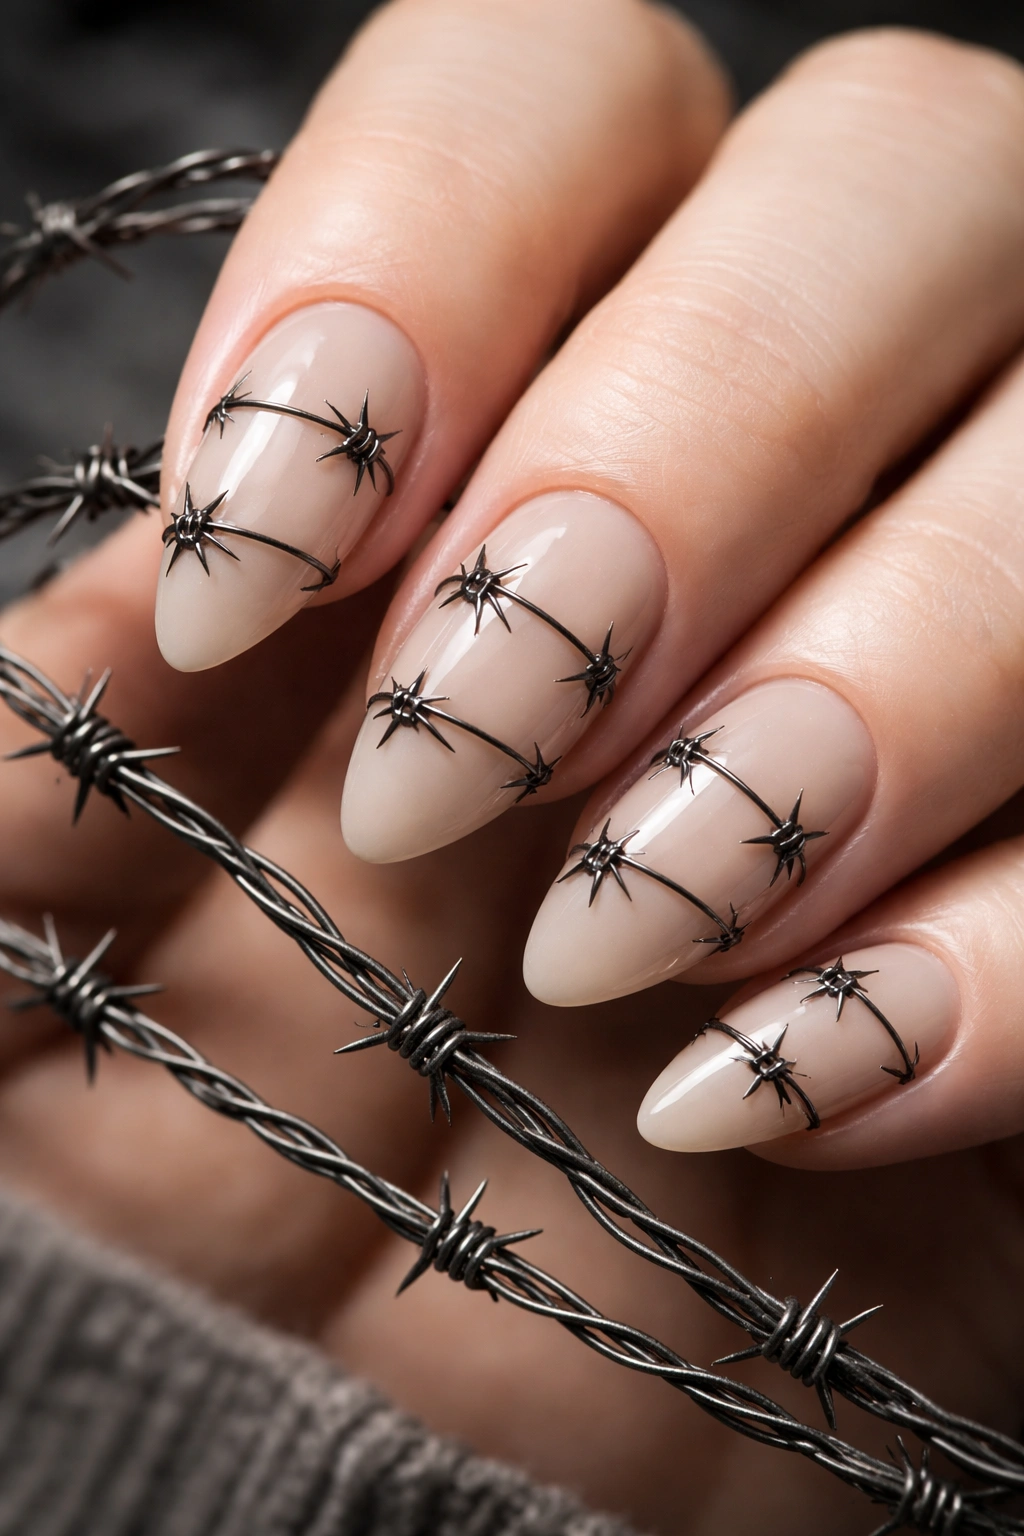
Barbed wire nail art transforms your fingertips into tiny warning signs, perfectly capturing grunge’s defensive and rebellious spirit. The twisted wire patterns wrapped around each nail create a “keep out” vibe that’s both protective and provocative. This intricate design requires precision but delivers maximum edge.
Technical Execution
Use a thin nail art brush with black or gunmetal polish to paint the wire effect. Create pairs of parallel twisted lines that wrap around the nail, adding small triangular barbs at regular intervals along the wire. Maintaining consistent spacing and angles helps achieve that authentic barbed wire appearance. The pattern can sit over various base colors—concrete gray for industrial vibes, deep purple for mystery, or even nude for contrast.
3D Enhancement Options
Some nail technicians incorporate actual thin wire pieces or 3D gel to add texture you can feel. While striking, painted versions offer more comfort and durability for everyday wear. The design works on any nail length but shows up particularly well on longer nails where there’s more space to develop the pattern.
Styling Considerations
- Practice the twist pattern on paper before committing to nails
- Keep barbs uniform in size and spacing
- Try multiple wire strands wrapping in different directions
- Layer over ombre bases for added complexity
The protective barrier symbolism resonates with grunge’s anti-establishment stance while remaining surprisingly wearable and conversation-starting.
7. Distressed Plaid Flannel
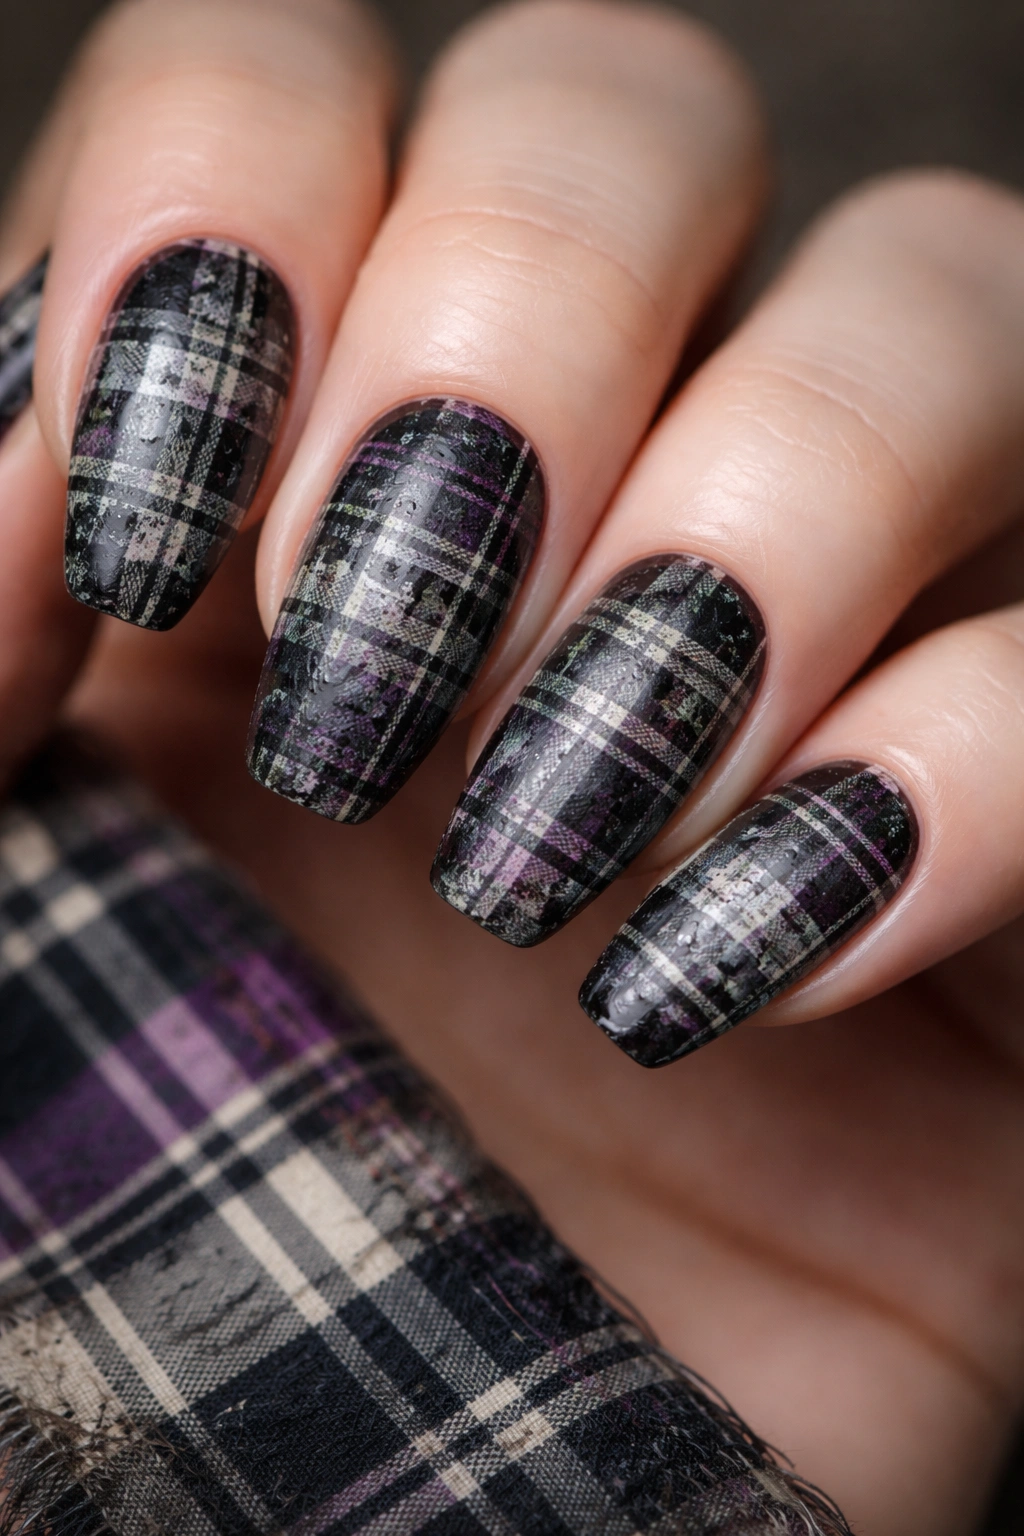
Paying direct homage to grunge’s most iconic fabric, plaid nail designs bring flannel shirt energy to your fingertips. This pattern requires precision but delivers authentic ’90s nostalgia mixed with alternative edge. Forget traditional red and green tartan—grunge plaid embraces unconventional color combinations and intentionally rough execution.
Color Palette Choices
Think black and gray, purple and green, burgundy and navy, or even monochromatic variations. The intersecting lines create classic tartan patterns, but the color choices keep things firmly in alternative territory. Some designs incorporate cracked or worn-out textures, mimicking distressed fabric edges and giving the illusion that your nails are covered in ripped flannel fragments.
Pattern Construction
Use striping tape to ensure clean lines when building your plaid pattern. Start with your base color, add vertical stripes, then horizontal ones, finishing with thinner accent lines for depth. The layering creates that woven fabric appearance. You can keep it neat or intentionally rough up the edges for a more distressed, authentic grunge feel.
- Plan your color scheme before starting
- Use striping tape as guides for straight lines
- Layer colors from lightest to darkest
- Add intentional “fraying” with a thin brush
Pro tip: This design particularly shines during fall months when flannel naturally appears in wardrobes, but the edgy color combinations keep it wearable throughout the year. It’s preppy meets punk in the best possible way.
8. Chain Link and Wire Details
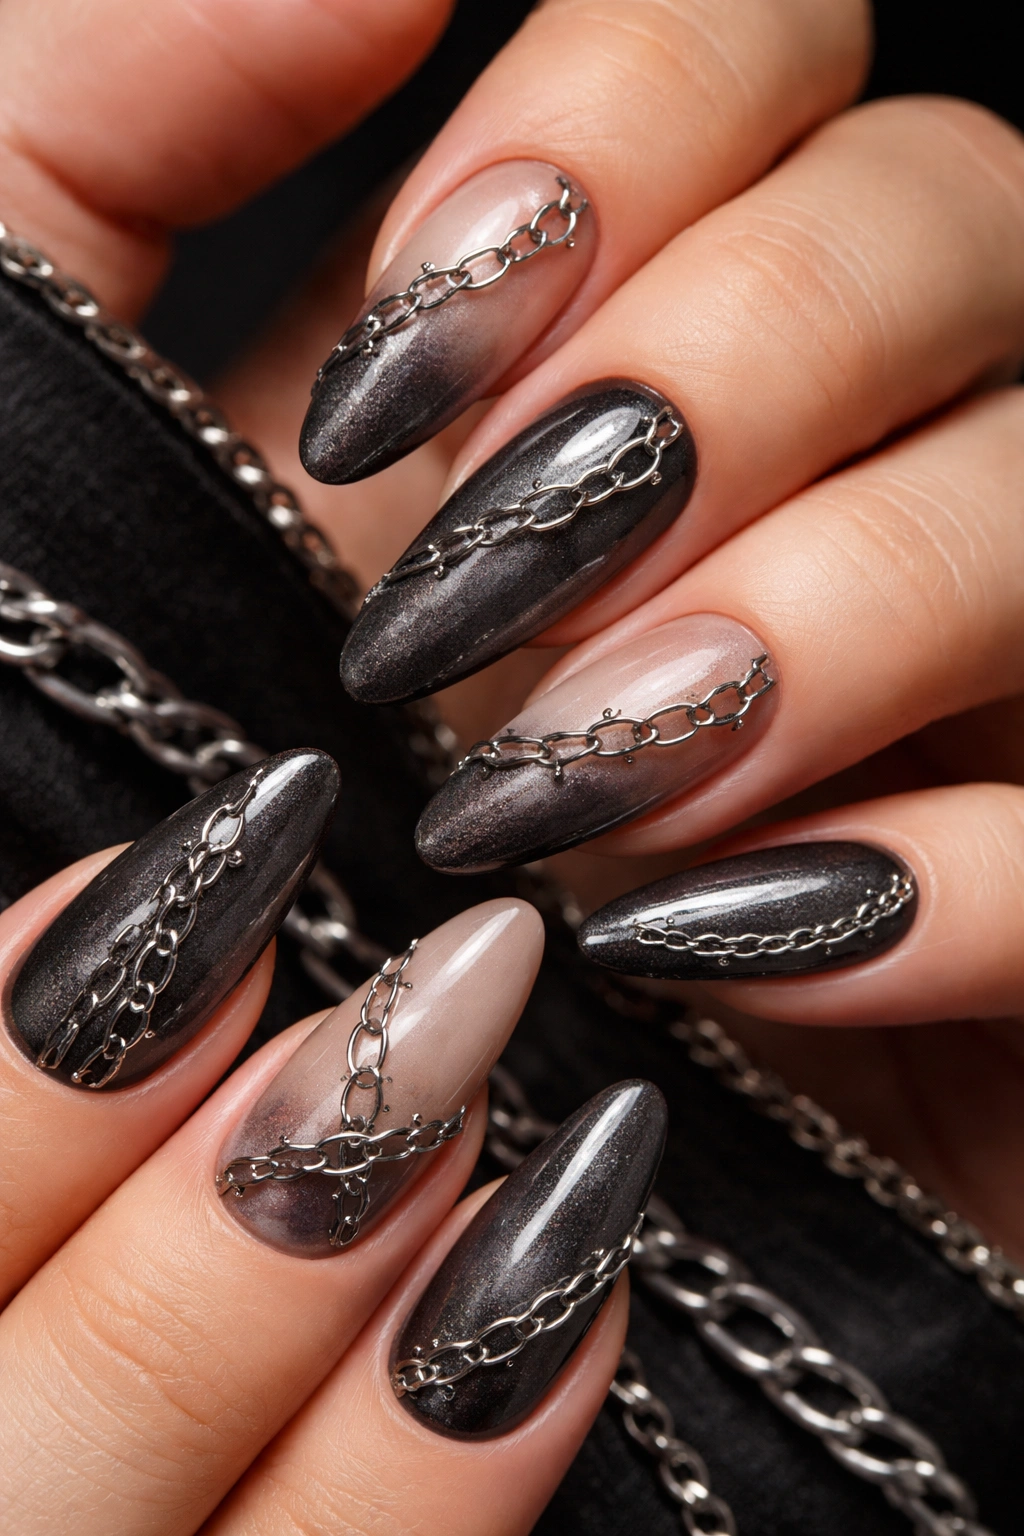
Incorporating chain patterns into your nail design adds industrial edge while nodding to punk and alternative jewelry aesthetics. These designs feature thin silver or gold chains draped across nails, sometimes as painted details, other times as actual 3D elements secured to the nail surface. The contrast between delicate chain patterns and the rebellious grunge context creates compelling visual tension.
Painted vs. 3D Chains
Painted chain details require careful shading and highlighting to create realistic dimension. Use a thin brush with metallic polish to outline each chain link, then add shadows with darker polish and highlights with white or lighter metallic shades. Actual chain pieces attached to nails provide genuine texture but can catch on clothing and hair, so consider your lifestyle before committing.
Base Color Selection
Chains show up beautifully against nude bases for subtle subversion or over deep colors like black, midnight blue, or forest green for bolder statements. The nude base approach keeps things wearable for professional environments while still expressing your edgier side. Darker bases make the design more overtly alternative.
Design Applications
- Drape chains diagonally across accent nails
- Create interconnected chain patterns spanning multiple nails
- Mix chain sizes for visual interest
- Combine with other grunge elements like studs or crosses
The design whispers rebellion rather than shouting it, perfect for those who want sophistication with an undercurrent of attitude. It proves grunge can be refined without losing its essential edge.
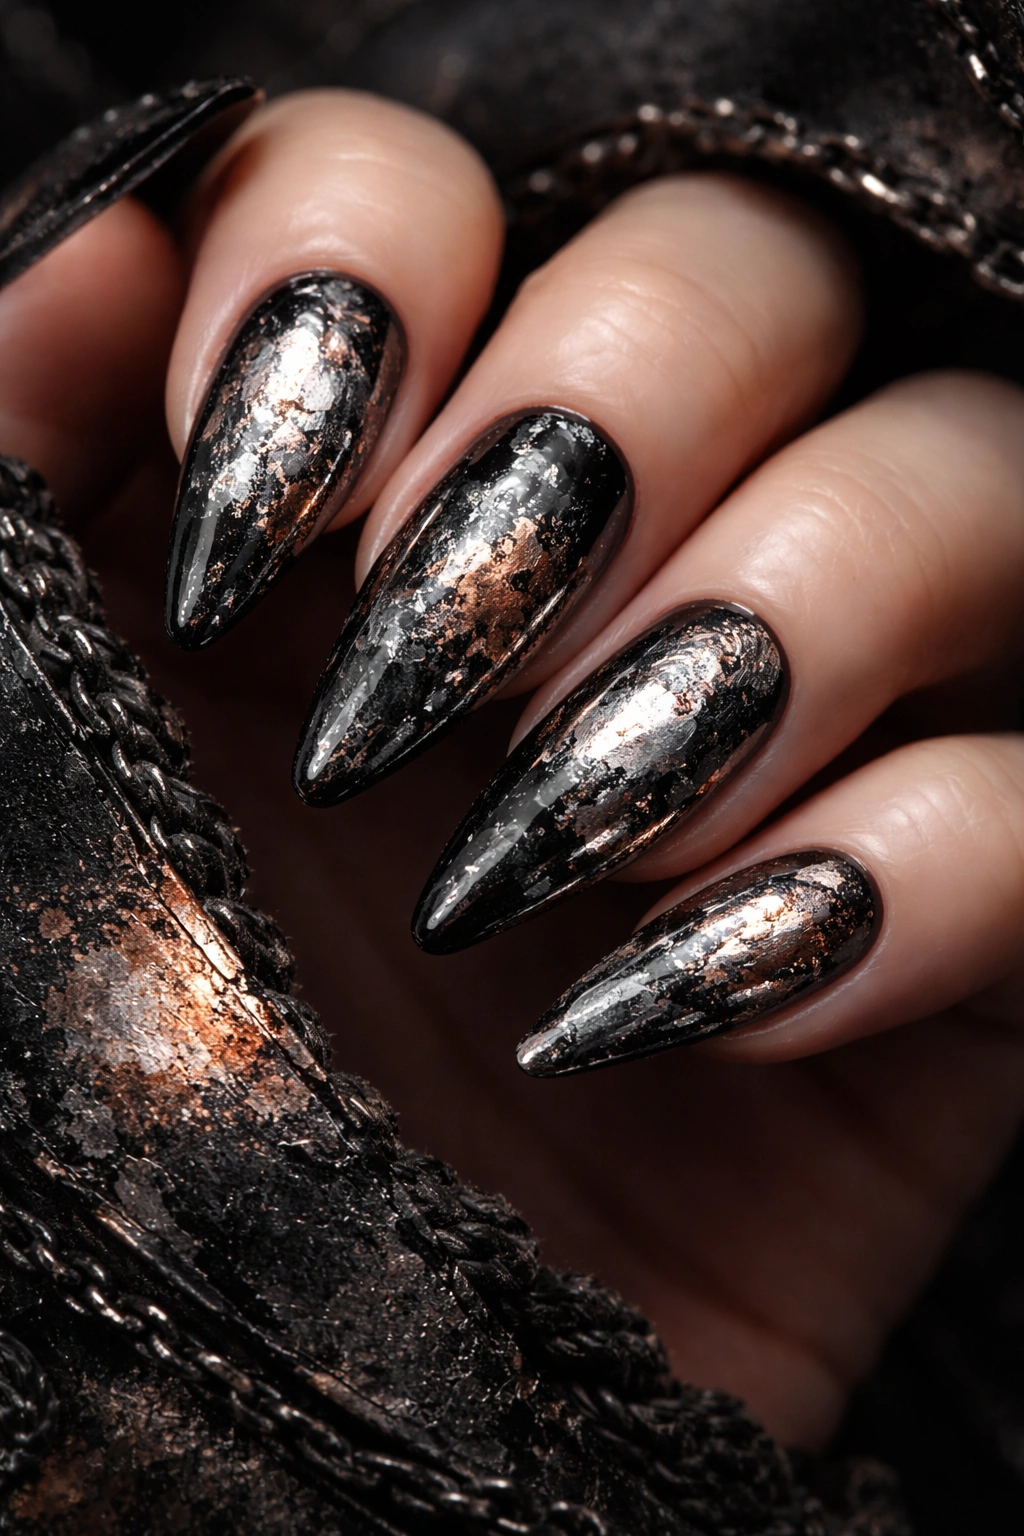
9. Shattered Mirror Mixed Metals
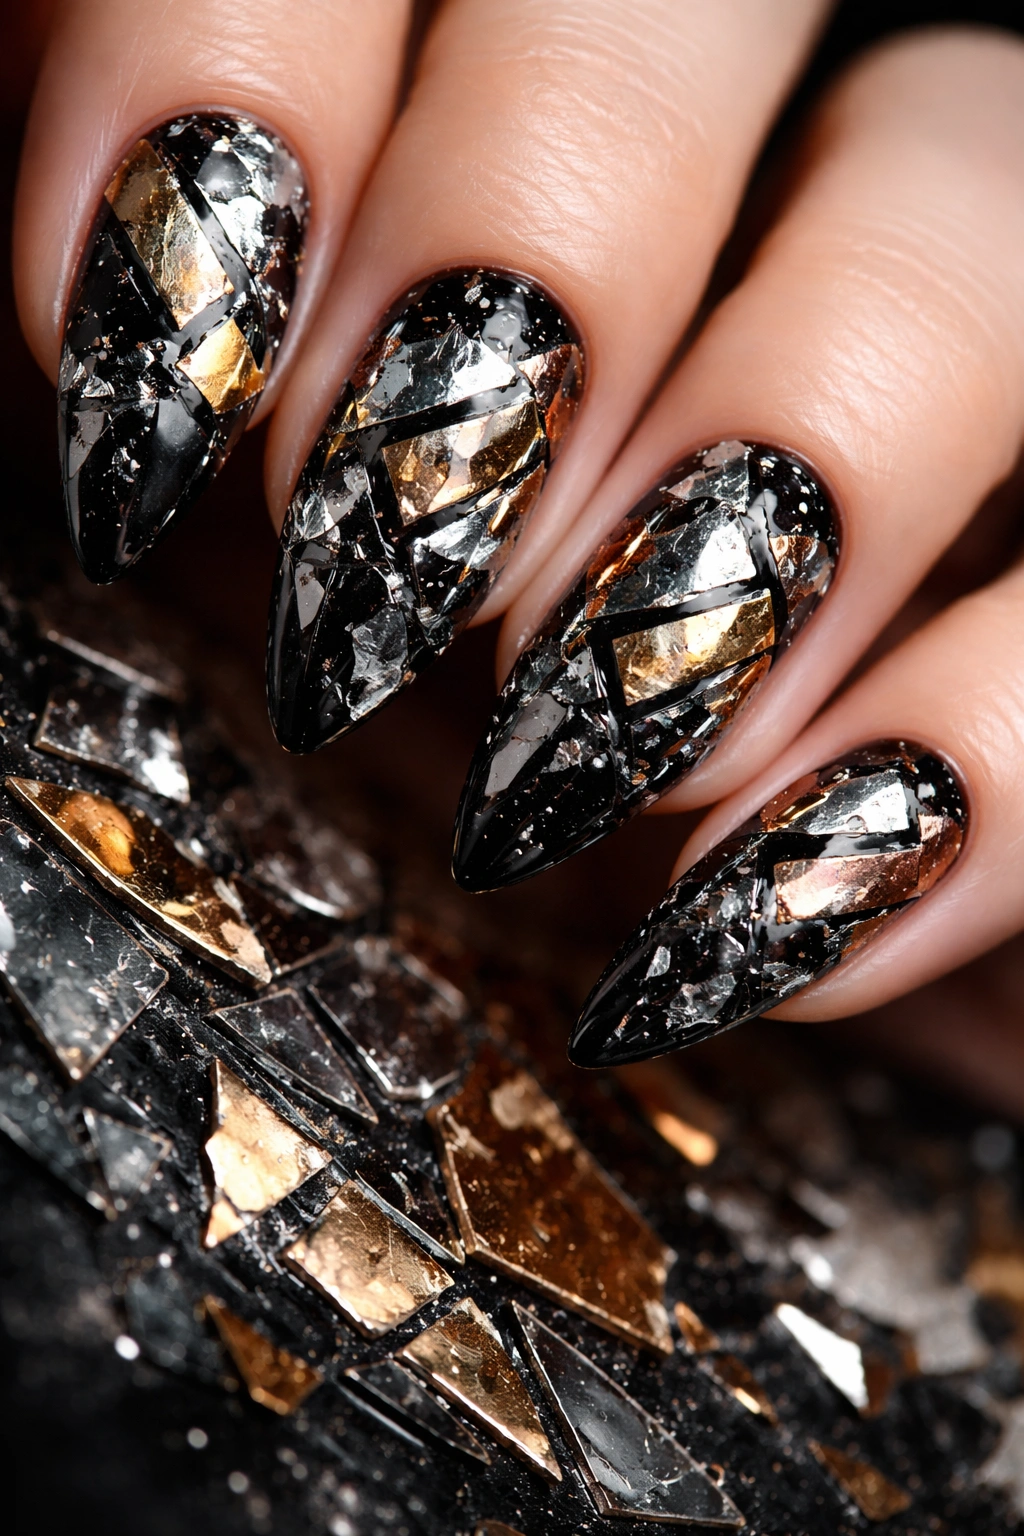
Jagged pieces of metallic foil layered over dark bases create the illusion of broken glass or shattered mirrors. This design captures the fragmented, chaotic beauty that grunge celebrates—finding artistry in destruction. The sharp, irregular shapes and reflective surfaces make for nail art that’s both visually complex and deeply symbolic.
Foil Application Technique
Apply foil in random, irregular pieces rather than smooth, even layers. Use transfer foil or cut regular foil into jagged fragments, then press them onto tacky polish or nail glue. Mix gold, silver, copper, and gunmetal tones for a scrapyard aesthetic. The key is restraint—leave plenty of negative space where the dark base color shows through.
Creating Depth
Layer different metallic tones on top of each other, allowing lower layers to peek through. This creates visual complexity that mimics actual shattered surfaces where you can see multiple reflective planes. The fragmented application provides glamour while the chaotic arrangement maintains grunge’s essential roughness.
- Apply foils in overlapping, irregular patterns
- Seal edges well to prevent lifting
- Mix matte and metallic finishes across nails
- Consider color-shifting foils for extra dimension
Fun fact: This design looks dramatically different depending on lighting and angle, creating ever-changing reflections that ensure your nails never look boring.
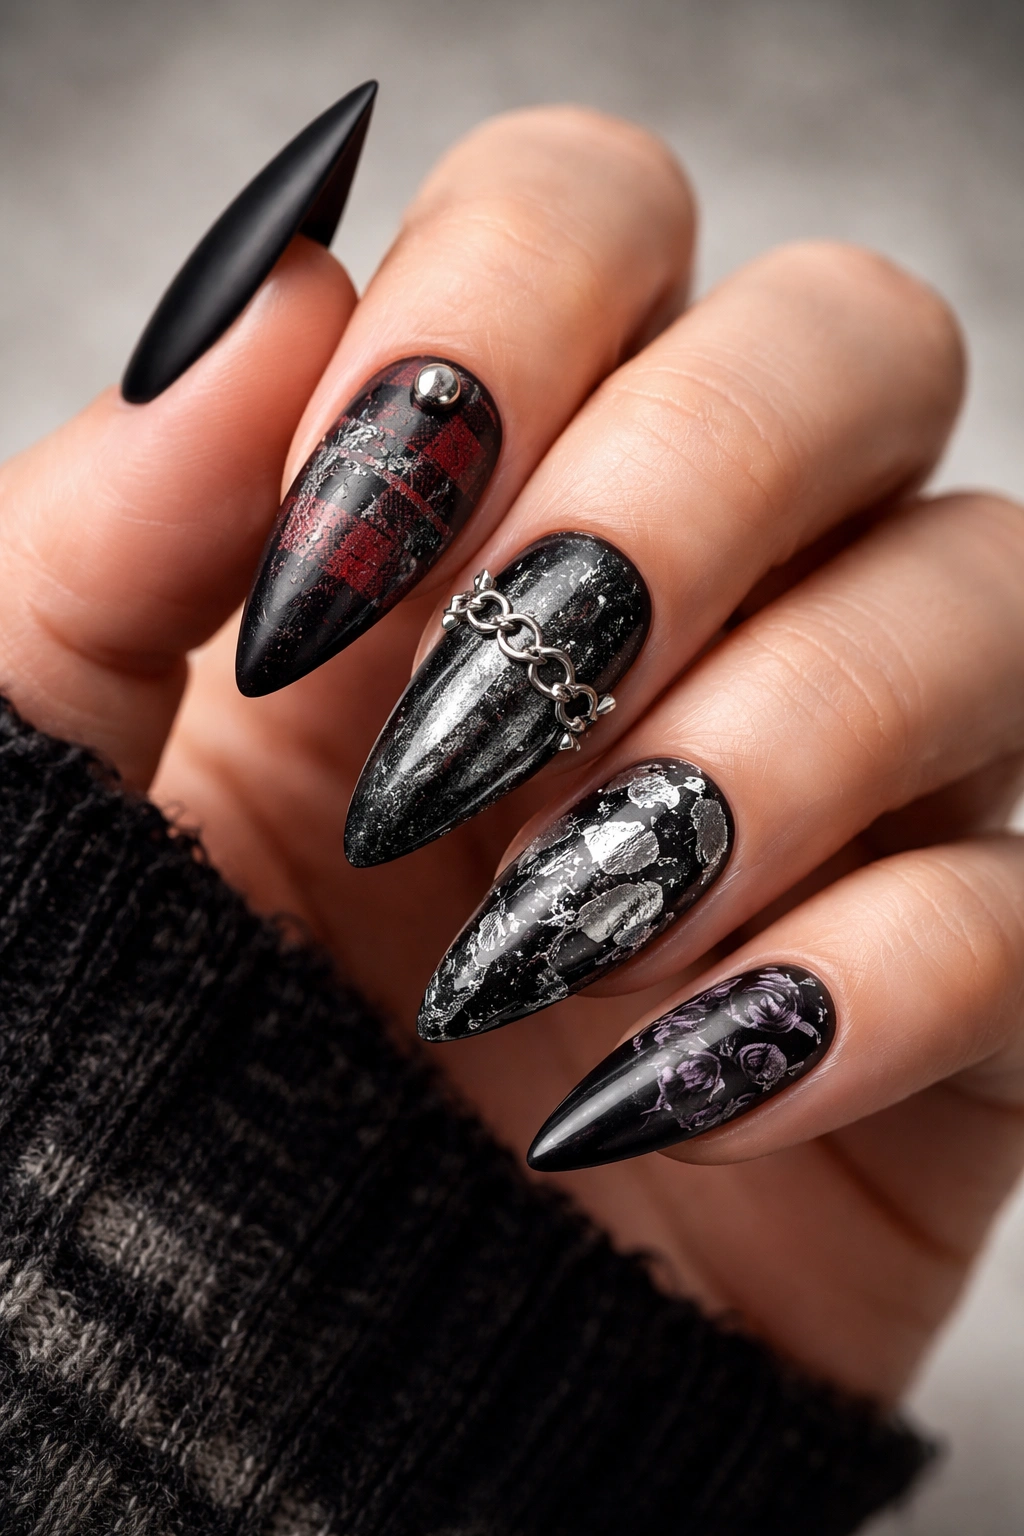
10. Dark Floral with Thorns

Subverting traditional feminine nail art, dark floral designs wrapped in thorny vines create beauty that bites back. These aren’t your typical spring garden blooms—they’re roses and peonies in burgundy, black, and deep purple, surrounded by sharp thorns that warn against getting too close. The juxtaposition perfectly encapsulates grunge’s beauty-in-darkness philosophy.
Painting Technique
Create flowers with intentional imperfection—wilted edges, bleeding colors, and slightly distorted petals enhance the dying garden aesthetic. Use a detail brush to add thorny stems in black or dark green, wrapping them protectively around each bloom. The thorns should look sharp and numerous, creating defensive barriers around the delicate petals.
Symbolic Resonance
This design appeals to those who appreciate romance filtered through cynicism, beauty tinged with danger. It’s simultaneously inviting and intimidating, pretty and punk. The thorns represent boundaries and self-protection while the flowers acknowledge vulnerability and beauty—a complex emotional landscape captured in nail art.
Enhancement Ideas
- Add glossy “dew drops” with clear topcoat for dimension
- Incorporate metallic gold or silver centers for unexpected glamour
- Try different flower types for variety across nails
- Layer thorns heavily on some nails, sparingly on others
Pro tip: This design works beautifully for those transitioning from more traditional nail art into grunge territory. It maintains recognizable elements while adding that essential edge that makes it unmistakably alternative.
Wrapping Up Your Grunge Nail Journey
Grunge nails offer endless possibilities for self-expression without requiring you to follow rigid rules. That’s kind of the whole point—rebellion against perfection, embracing the raw and real. Each design we’ve covered brings its own flavor of edge, from industrial metallics to gothic horror elements, distressed patterns to protective symbols.
The beauty of these designs lies in their adaptability. You can go full-throttle with blood drips and barbed wire, or ease in with subtle studs and chain details. Mix elements from different designs to create something uniquely yours. Add your own twists, experiment with color variations, and don’t stress about making everything perfect. Grunge actively celebrates those “imperfections.”
Your nails become tiny billboards for your personality, telling people something about who you are before you even speak. Whether you’re wearing these to concerts, coffee shops, or corporate offices, they add that unmistakable attitude to everything you do. They’re conversation starters, confidence boosters, and creative outlets all rolled into one.
So which design speaks to your inner rebel? Maybe it’s the classic matte black simplicity, or perhaps the dramatic blood drips call your name. Whatever you choose, wear it with that essential grunge ingredient—unapologetic confidence. Your nails, your rules.
