

Your nails aren’t just an accessory. They’re a statement, a mood, a declaration of who you are before you even say a word. Baddie nails take this concept and amplify it, transforming your fingertips into unapologetic works of art that demand attention.
The baddie nail aesthetic isn’t about following rules or playing it safe. It’s about bold colors, daring shapes, and designs that make people do a double-take. Whether you’re scrolling through social media or walking into a room, baddie nails announce your presence with confidence and flair.
What makes a nail design truly “baddie”? It’s that perfect blend of fierce and fashionable, edgy and elegant. Think elongated shapes like coffin or stiletto nails, dramatic color choices, and embellishments that catch the light from across the room. These aren’t nails that whisper—they shout.
The beauty of baddie nails lies in their versatility. You can go full glam with rhinestone-encrusted tips or keep it sleek with a glossy black finish. The common thread? An attitude that refuses to apologize for taking up space and looking good while doing it.
Ready to transform your fingertips into the ultimate power accessory? These 12 baddie nail ideas will give you the inspiration you need to create a look that’s as bold as you are.
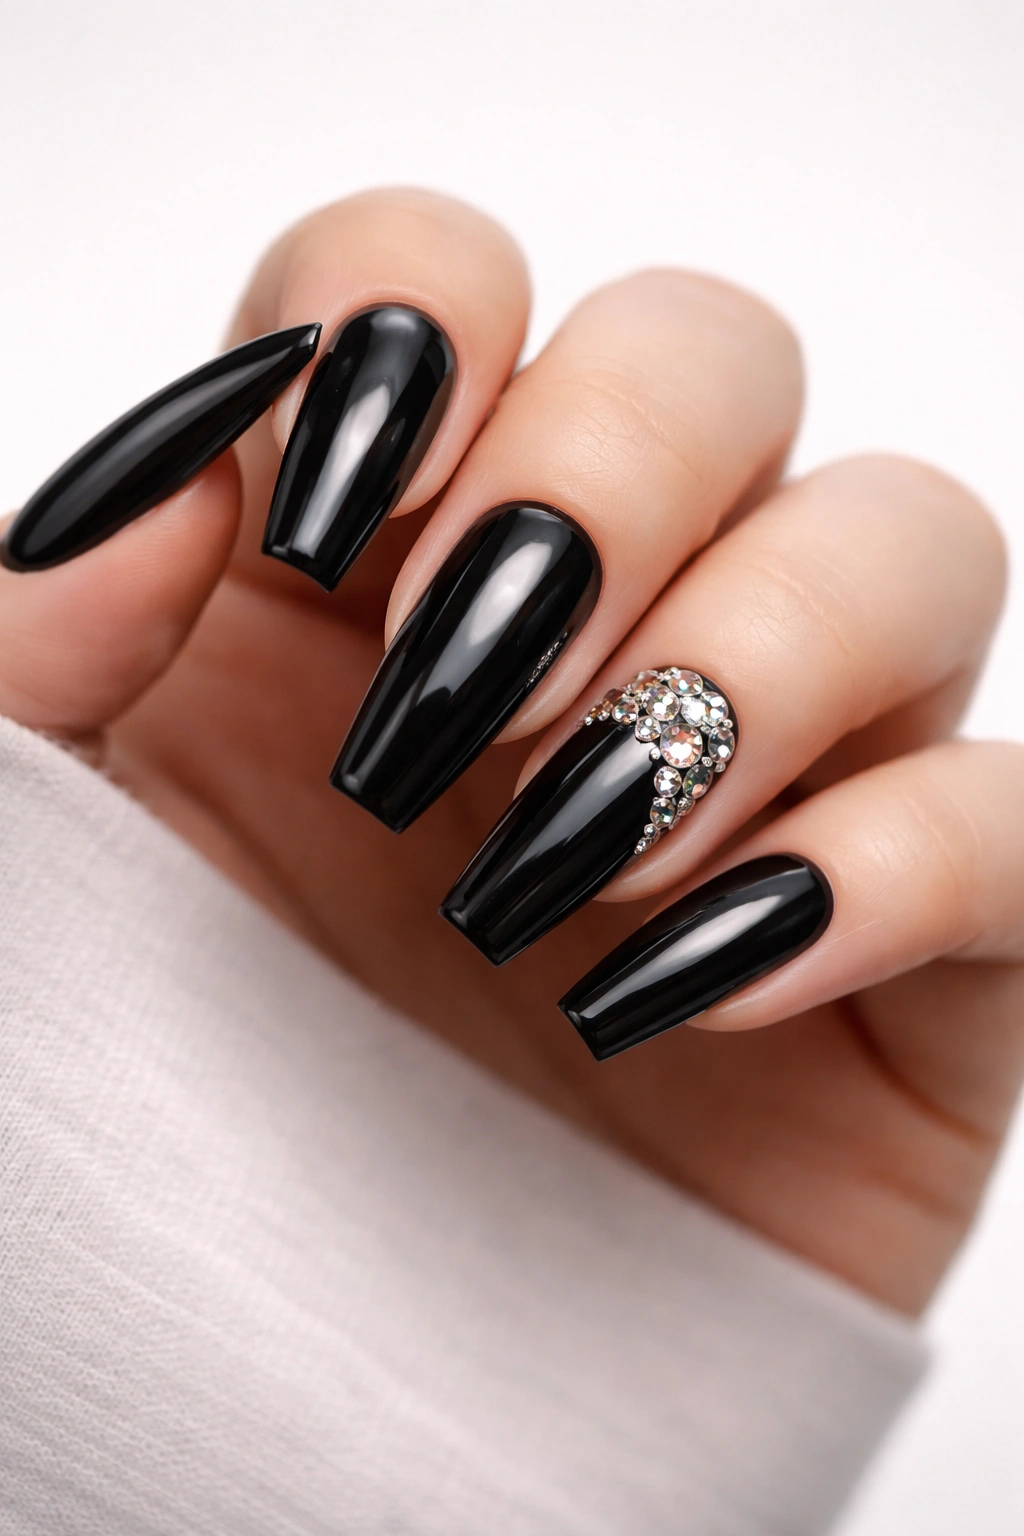
1. Glossy Black Coffin Nails
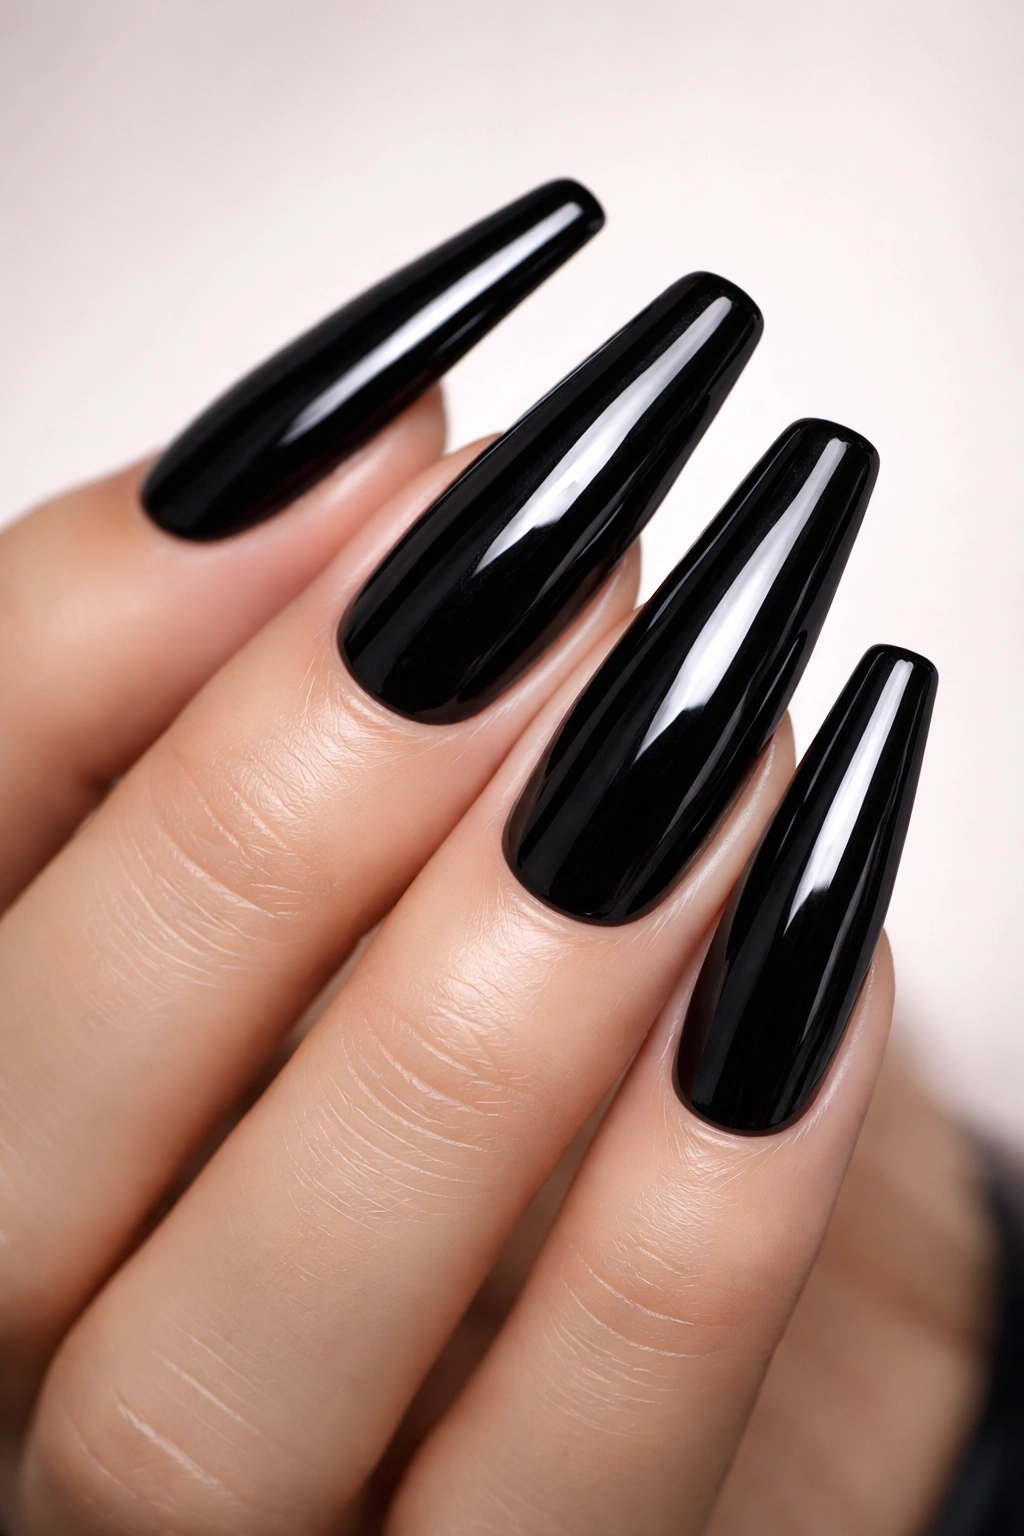
There’s something undeniably powerful about a set of jet-black coffin nails. The elongated shape combined with that mirror-like finish creates an instant aura of sophistication mixed with an edgy bite. These aren’t your average neutral nails—they’re a whole vibe.
The coffin shape (also called ballerina nails) features tapered sides that meet at a flat, squared-off tip. This silhouette naturally elongates your fingers while providing the perfect canvas for that dramatic black polish. The glossy finish amplifies the intensity, reflecting light and drawing eyes straight to your hands.
Why Black Never Goes Out of Style
Black nails have been a staple in the baddie aesthetic since the beginning. They pair effortlessly with any outfit, from your favorite leather jacket to a sleek little black dress. The beauty of this look is its simplicity—you don’t need elaborate designs when the color itself makes such a bold statement.
The high-shine finish is key here. It transforms what could be a basic manicure into something that screams confidence and polish. When light hits those glossy surfaces, it creates depth and dimension that matte finishes can’t achieve.
Keeping Them Perfect
To maintain that showstopping shine, apply a quality top coat every few days. This keeps your nails looking freshly done while preventing chips. The coffin shape requires regular maintenance to preserve those sharp lines, so keep a nail file handy for quick touch-ups.
2. Rhinestone-Encrusted Glam
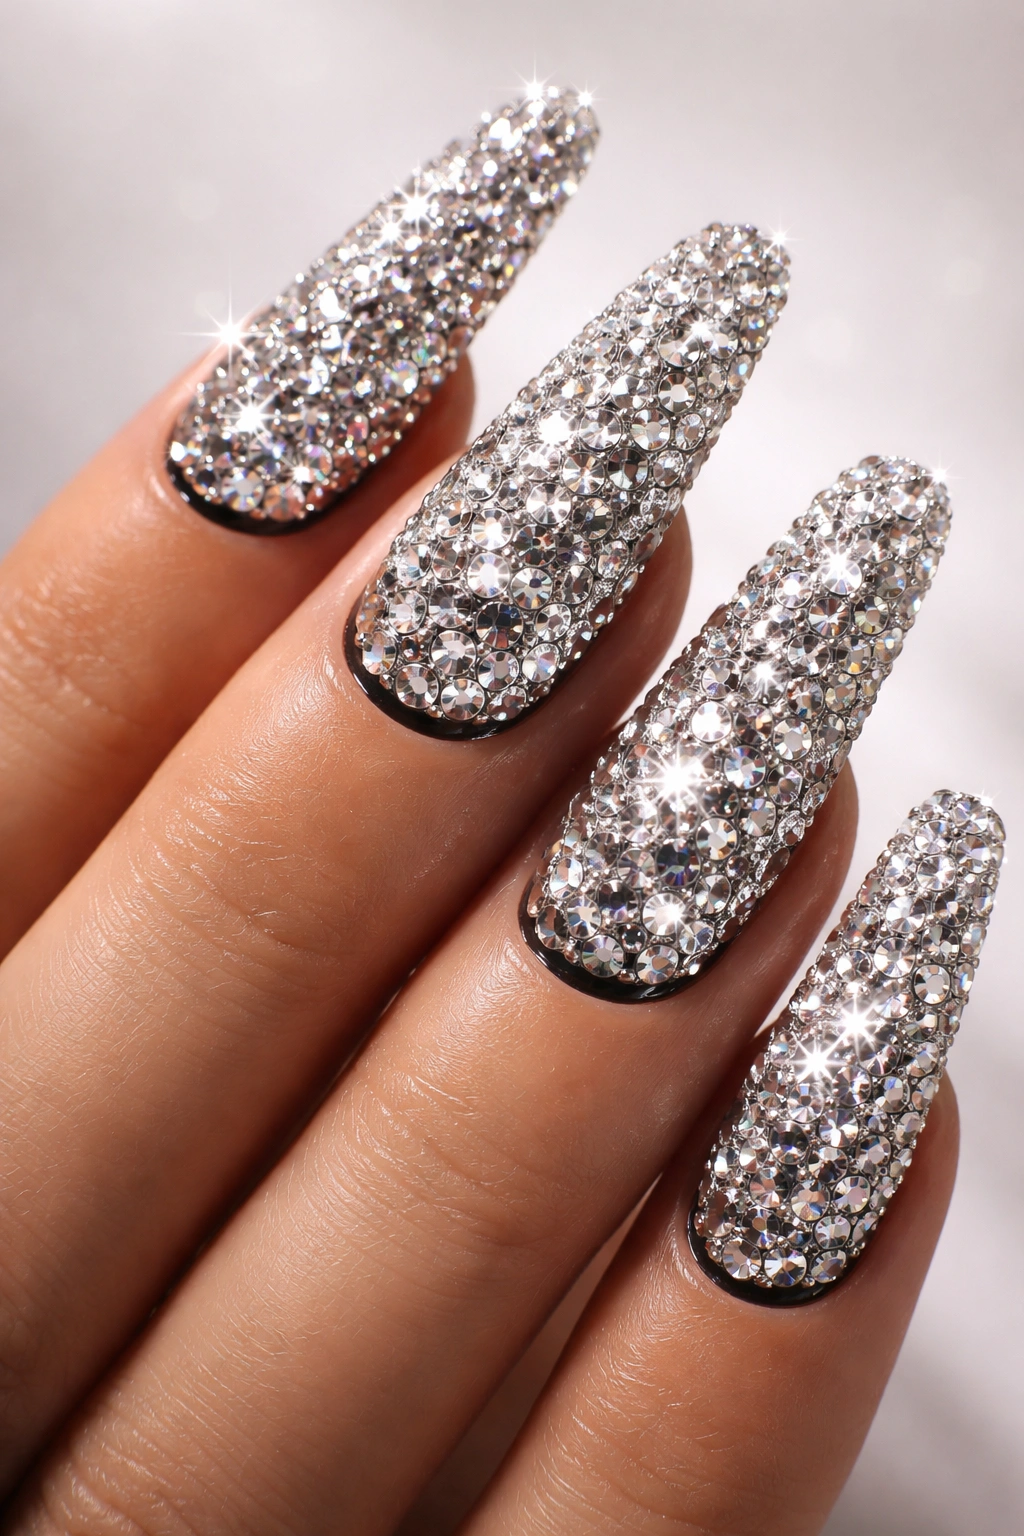
When subtle isn’t in your vocabulary, rhinestone-covered nails deliver maximum impact. These sparkly masterpieces catch light from every angle, turning your hands into dazzling focal points that refuse to be ignored. This is baddie glamour at its most unapologetic.
You can customize the rhinestone placement to match your personality. Some prefer full coverage, where every millimeter sparkles with intentional glamour. Others opt for strategic placement—lining the cuticle area, creating patterns, or focusing the bling on accent nails.
Creating Your Crystal Vision
The magic of rhinestone nails lies in the variety of approaches you can take. Clear crystals over dark base colors like burgundy or black create stunning contrast. Colored rhinestones can match or complement your polish, adding layers of visual interest.
Application requires patience since each stone needs individual placement using nail glue or gel. Start from the cuticle and work toward the tip in organized rows. Premium crystals offer superior brilliance, though they come with a higher price tag.
Mix different stone sizes for dimensional effects—use larger gems as focal points with smaller ones filling the spaces around them. This technique creates depth and prevents the design from looking flat or one-dimensional.
What You Need to Know
Rhinestone nails aren’t exactly low-maintenance. You’ll need to be mindful during daily activities since crystals can snag on clothing or lift off with rough contact. Apply a thin top coat around (not over) the stones to secure edges without dulling their sparkle.
These nails photograph beautifully, making them perfect for special occasions or anytime you want your hands to look absolutely stunning. With proper care, your rhinestone design can last two to three weeks.
3. Matte Nude with Gold Accents

Not every baddie nail has to scream—sometimes they can speak with quiet confidence. Matte nude nails with gold details strike that perfect balance between understated elegance and bold attitude. This look whispers luxury rather than shouting it.
The matte finish gives nude polish a modern, sophisticated edge that glossy versions can’t achieve. That velvety texture feels expensive and looks intentional. When you add strategic gold accents—whether foil, striping tape, or delicate chains—the design transforms into something truly special.
The Power of Subtle Glam
Gold accents work beautifully against nude bases because they create contrast without being overwhelming. Try thin gold lines near the cuticle, geometric patterns across the nail, or gold foil scattered like precious flakes. Each approach offers a different vibe while maintaining that refined baddie aesthetic.
This design works across all nail lengths and shapes. Shorter square nails look chic and professional, while longer almond or coffin shapes amplify the elegant factor. The nude base keeps things grounded, allowing the gold to become the star without stealing the whole show.
Making It Your Own
Choose nude shades that complement your skin tone—warm undertones pair beautifully with peachy or caramel nudes, while cool undertones shine with pink or taupe-based shades. The right nude acts like a second skin, creating a seamless, elongating effect.
Matte finishes require specific top coats to maintain that flat, non-shiny texture. Regular glossy top coats will ruin the effect, so invest in a quality matte sealer. These nails are surprisingly forgiving with minor imperfections since the matte texture hides small flaws better than glossy finishes.
4. Flame Nail Art
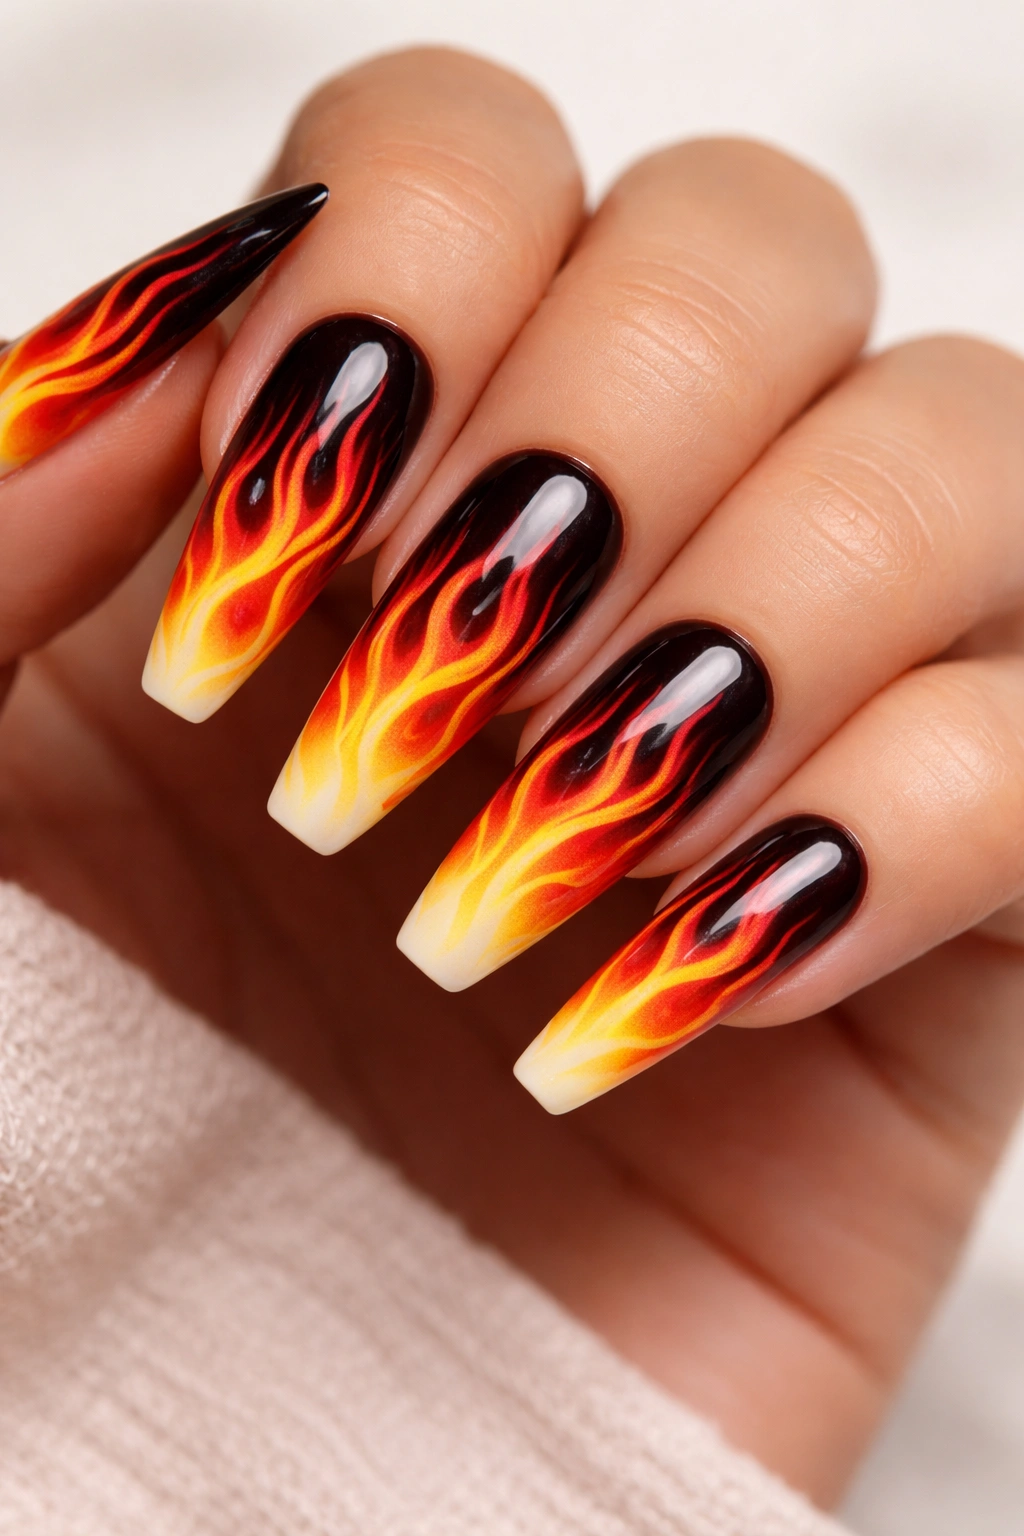
Nothing channels fierce energy quite like flames dancing across your fingertips. This bold design literally puts fire at your command, creating movement and intensity that embodies the baddie spirit. Flames suggest you’re hot, untouchable, and absolutely on fire.
Traditional flame designs feature gradient color transitions from deep reds to bright oranges and yellows, mimicking real fire. The upward-reaching shapes create visual elongation, making your fingers appear longer and more elegant. Each nail becomes a miniature inferno.
Getting Creative with Fire
Don’t feel limited to realistic fire colors. Baddie flame nails can feature unexpected palettes like icy blue and purple (think supernatural flames) or neon greens and pinks for a more playful, rebellious vibe. The flame shape itself is what matters—those organic, flickering lines that suggest movement and heat.
Flames work exceptionally well on longer nail shapes where patterns have room to develop and breathe. Stiletto and coffin nails provide the perfect canvas. However, you can adapt the design for shorter nails by keeping the flames smaller and more concentrated near the tips.
Application Tips
Creating flames requires a steady hand and the right tools. Use a thin nail art brush or striping brush to paint the characteristic curved lines. Start with your base color, then layer the flame colors on top, working from dark to light for the most realistic effect.
The beauty of flame designs is their intentionally imperfect nature. Unlike geometric patterns that demand precision, flames are organic and flowing. Slight variations in your lines actually enhance the design, making it look more natural and dynamic.
5. Chrome and Mirror Finishes
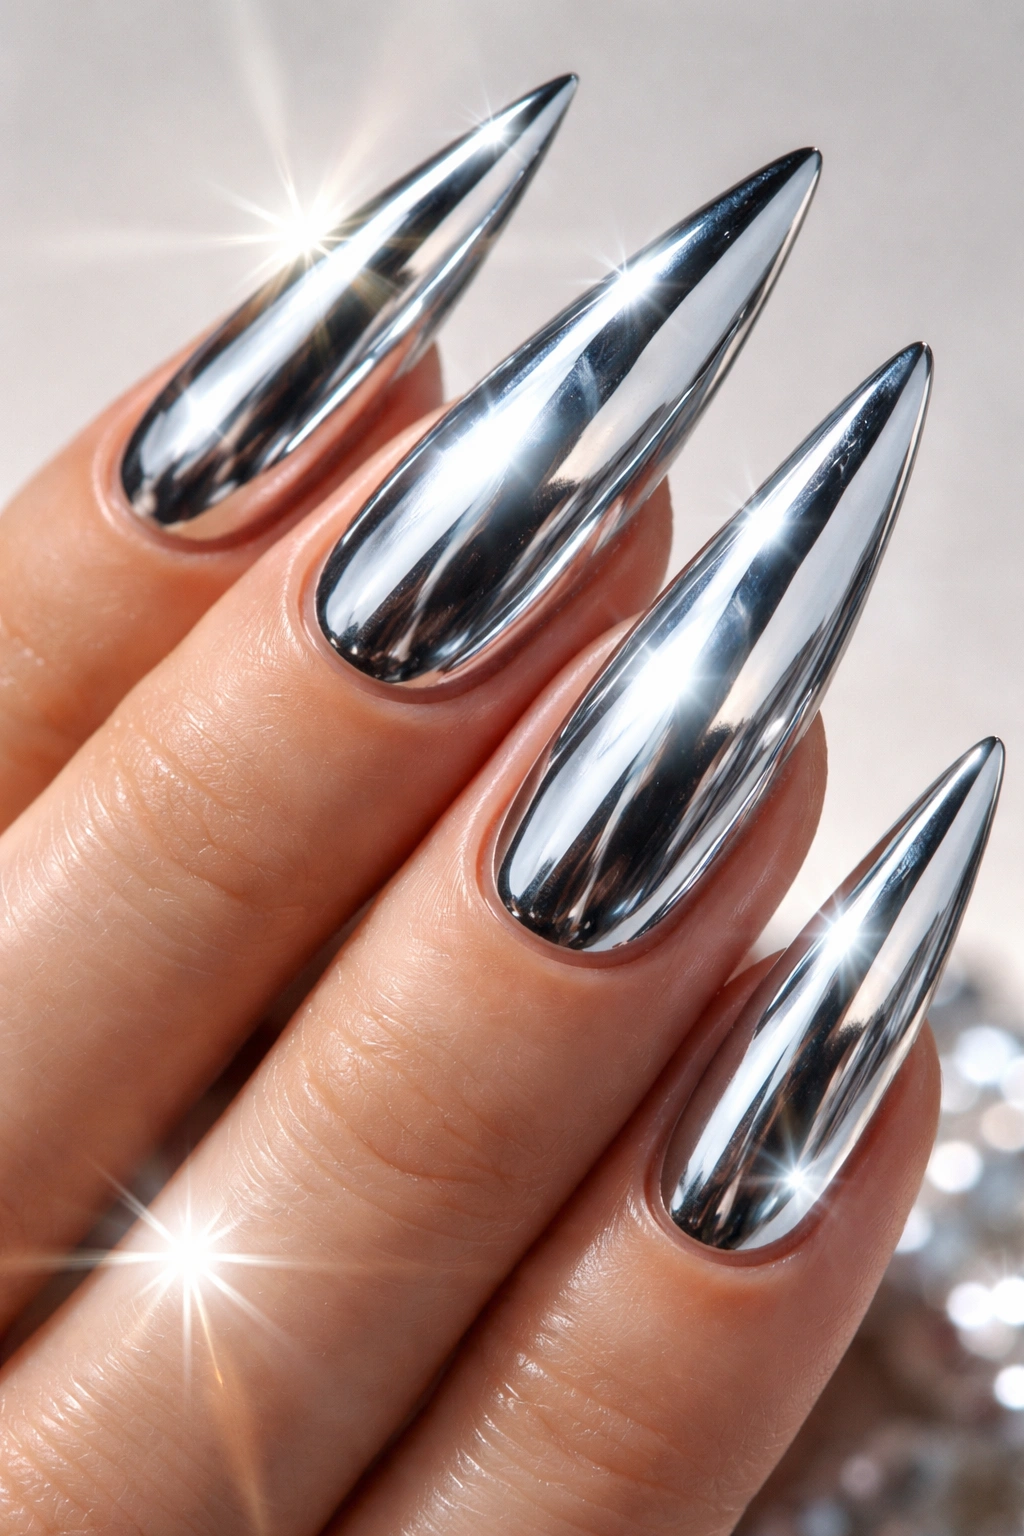
Chrome nails deliver that futuristic baddie aesthetic with their reflective, almost liquid-metal appearance. These nails don’t just catch light—they transform it, creating a mirror-like surface that shifts and shimmers with every hand movement. It’s like wearing liquid mercury on your fingertips.
The chrome effect is achieved by applying special powder over a tacky gel base. The powder bonds with the surface, creating that incredibly smooth, reflective finish. Silver chrome is the most dramatic, but rose gold, holographic, and colored chrome options offer equally stunning results.
Why Chrome Commands Attention
The reflective quality of chrome nails makes them impossible to ignore. They create an almost otherworldly effect that feels both high-fashion and edgy. The finish photographs beautifully, making it perfect for social media content or anytime you want your nails to steal the spotlight.
Chrome works across various nail shapes, though it particularly enhances the sleek lines of coffin and stiletto nails. The smooth finish amplifies their architectural quality, creating a cohesive, polished look that screams modern sophistication.
Chrome Application Secrets
Getting that perfect chrome finish requires proper base preparation. The gel must be completely smooth and the tacky layer intact for the powder to adhere correctly. Use steady, firm pressure when buffing the powder onto the nail—multiple thin layers create better adhesion than single thick applications.
Seal your chrome design with a specialized top coat designed for chrome finishes. Regular top coats can dull the reflective intensity, so don’t skip this step. With proper application and care, your chrome nails will maintain their mirror-like quality for weeks.
6. Animal Print Fierce
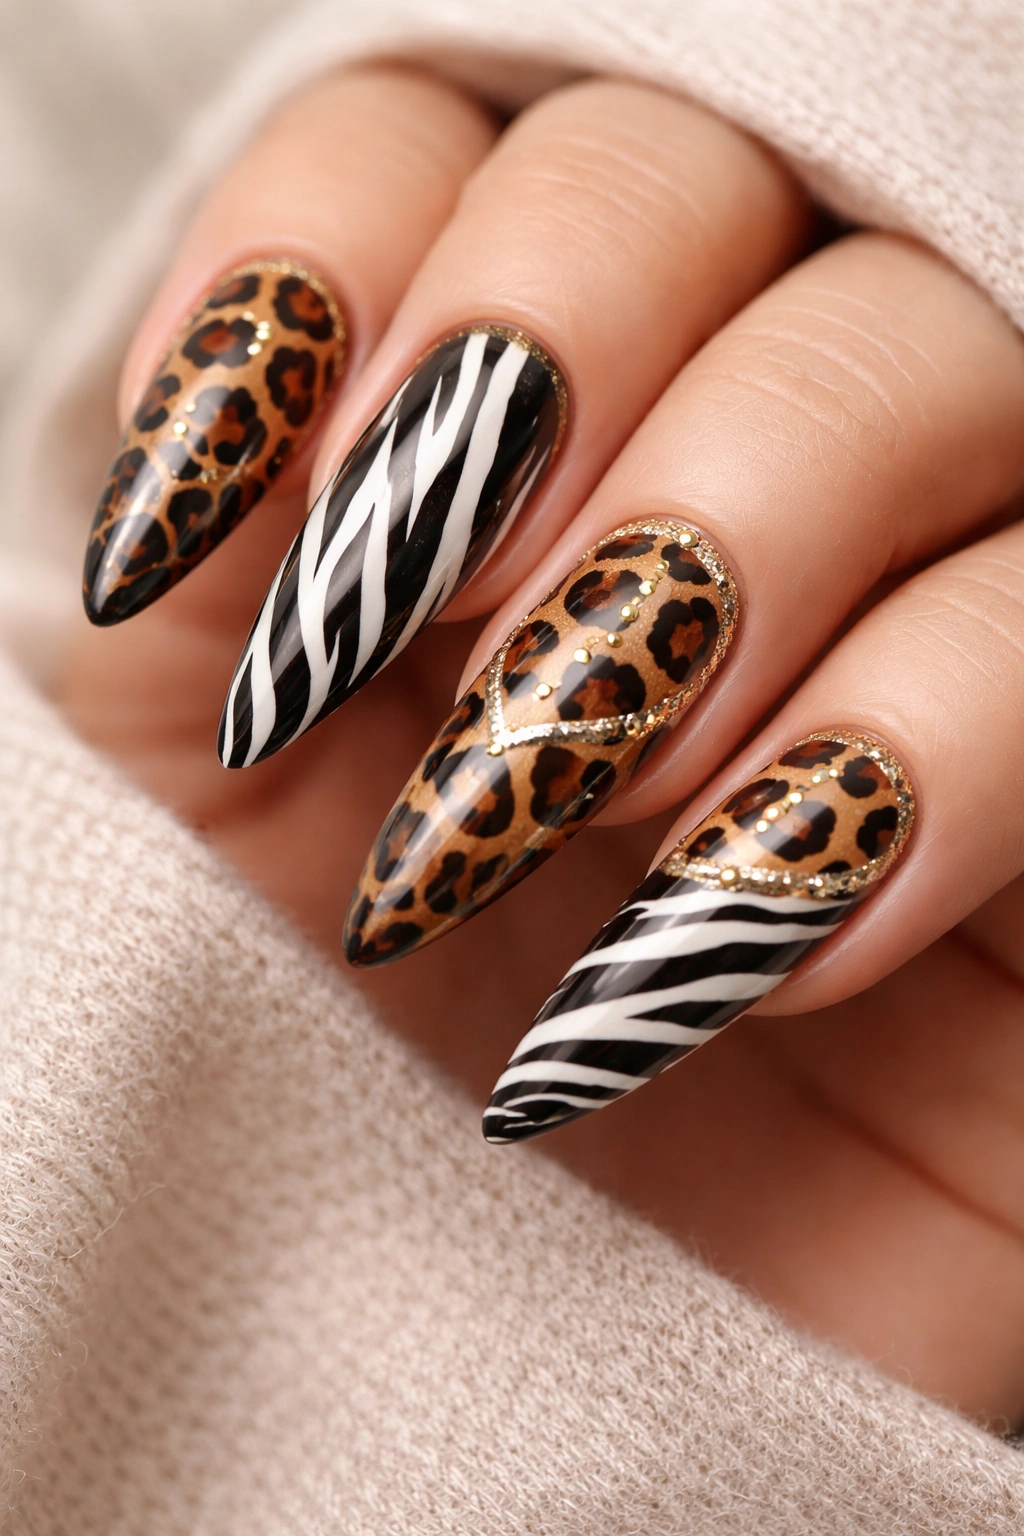
Leopard spots, zebra stripes, snake skin—animal prints tap into primal, predatory energy that defines baddie confidence. These patterns announce you’re wild, untamed, and not afraid to show it. Animal print nails have an inherent fierceness that perfectly embodies the baddie aesthetic.
The beauty of animal prints lies in their versatility. Classic colorways like traditional leopard (browns and blacks) or zebra (black and white) offer timeless appeal. But you can also experiment with unexpected color combinations—think pink leopard spots or neon green zebra stripes for a more playful twist.
Making It Wearable
Animal prints don’t have to cover every nail. Try them as accent designs paired with solid colors for a more balanced approach. For example, leopard print on your ring fingers with glossy black on the rest creates striking contrast without overwhelming your look.
These patterns work beautifully across all nail shapes and lengths. Shorter nails benefit from smaller, more delicate print patterns, while longer nails can handle bolder, larger-scale designs. The organic, asymmetrical nature of animal prints means slight imperfections actually enhance authenticity.
DIY or Professional
Animal prints are surprisingly achievable at home with the right tools. Nail stamping plates offer the easiest route to perfect patterns. Simply load the plate with polish, stamp the design, and transfer it to your nail. This method delivers professional-looking results without requiring artistic talent.
Hand-painting animal prints gives you more creative freedom. Use a thin brush or dotting tool to create the characteristic spots or stripes. The irregular, hand-drawn quality adds to the wild, untamed vibe that makes these designs so appealing.
7. Red Acrylic Drama
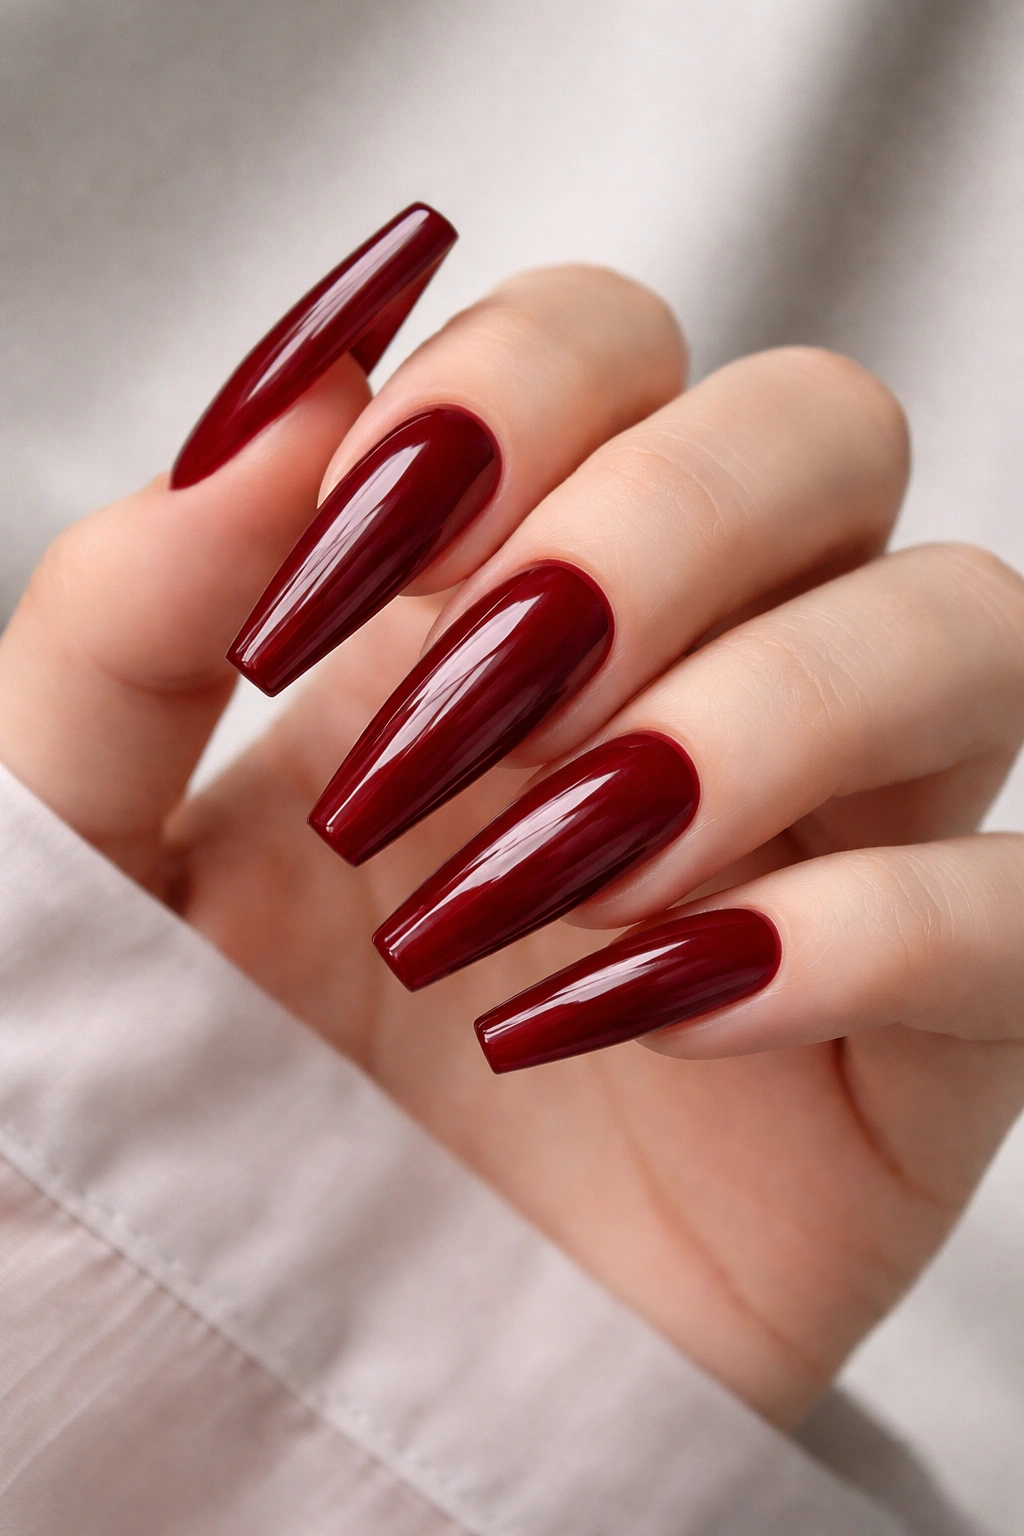
Bold red nails aren’t just a color choice—they’re a declaration. Deep, sultry red acrylics command attention and exude confidence, sensuality, and power all at once. This is the nail equivalent of red lipstick: classic, timeless, and undeniably baddie.
The key to killer red nails lies in choosing the right shade. Deep cherry reds offer dramatic intensity, while brighter fire engine reds bring energetic vibrancy. Darker wine or burgundy tones add sophistication and mystery. Each shade creates a different vibe while maintaining that signature bold impact.
Finish Makes the Difference
Red nails can go glossy for classic glamour or matte for modern edge. High-shine red creates a candy-apple effect that looks polished and luxurious. Matte red, on the other hand, delivers a more contemporary, fashion-forward feel that’s equally striking.
Length amplifies the drama with red nails. Extra-long coffin or stiletto shapes in bold red create maximum visual impact—these are nails that announce your presence before you enter the room. Shorter lengths work beautifully too, offering a more practical yet still fierce option.
Keeping Red Perfect
Red polish shows chips and wear more obviously than darker colors, so maintenance is crucial. Apply a quality base coat to prevent staining (red pigments can tint natural nails). Seal with a durable top coat and refresh it every few days to maintain that pristine finish.
Red nails pair effortlessly with virtually any outfit. They work with casual jeans and tees, elevate professional attire, and complete evening looks with equal ease. This versatility makes red acrylics a staple in the baddie nail repertoire.
8. Nude Nails with Baddie Details
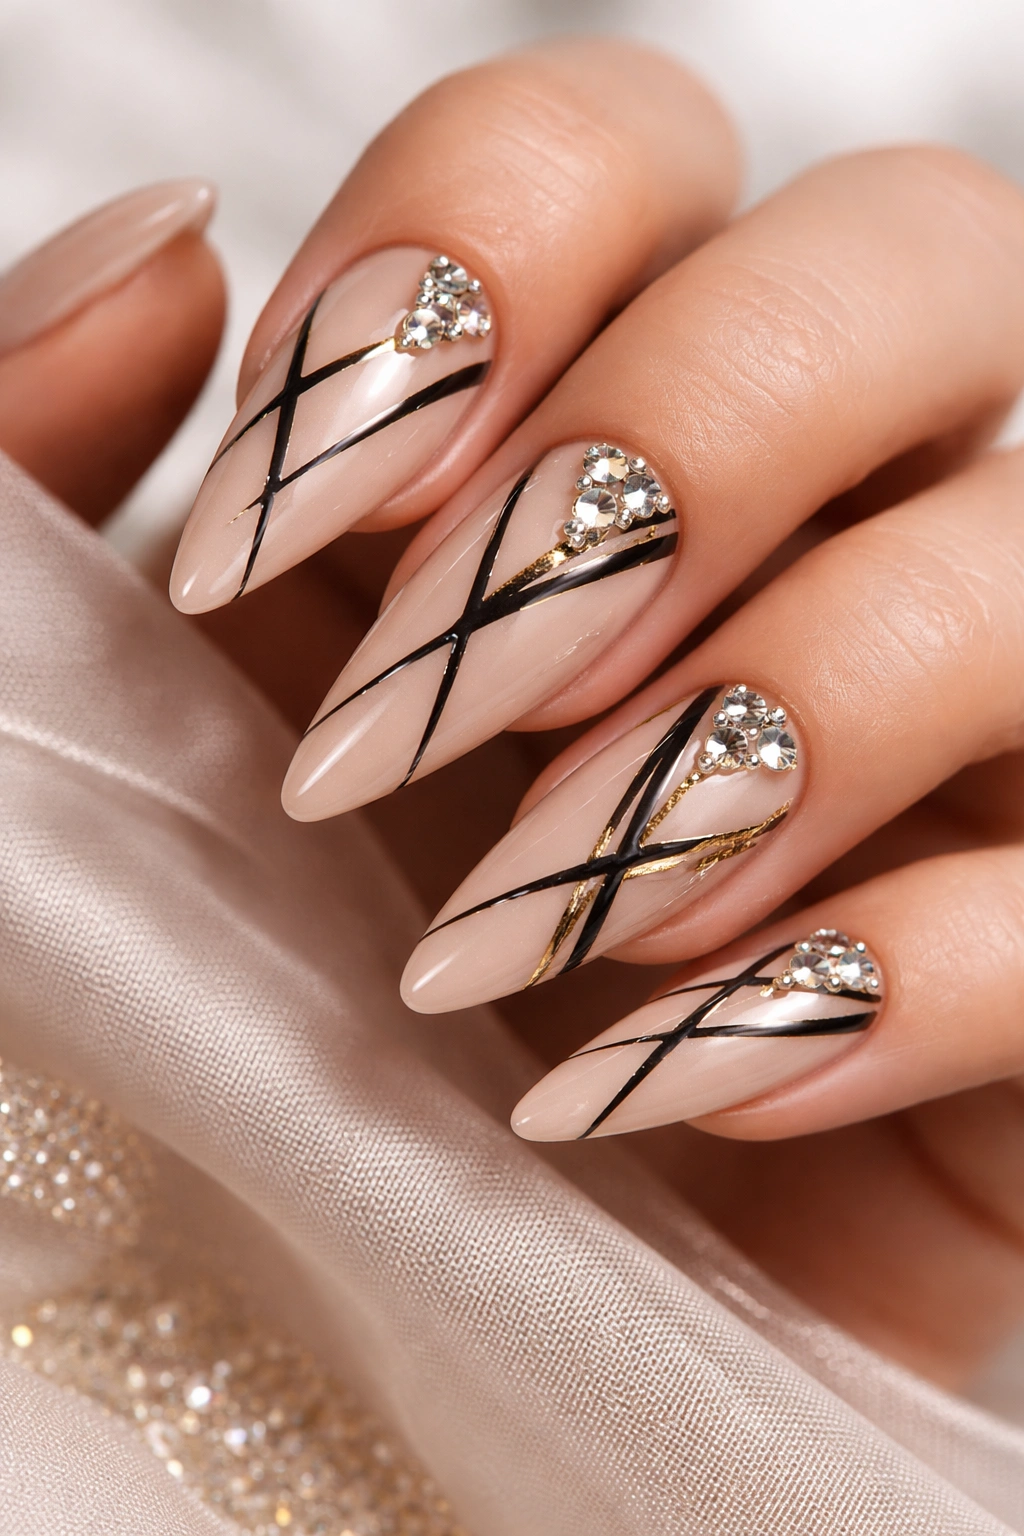
Nude nails might seem too subtle for the baddie aesthetic, but when executed with the right details, they deliver understated confidence. These designs prove you don’t need bold colors to make a bold statement—sometimes, it’s all about the execution.
The nude base provides a neutral canvas that lets details shine. Add rhinestones for sparkle, create geometric patterns with thin black lines, or incorporate gold foil for subtle luxury. The restraint of the nude backdrop makes these embellishments feel intentional and sophisticated rather than overwhelming.
Why Nude Works
Nude nails offer incredible versatility. They complement every outfit and occasion while still allowing you to express your baddie side through thoughtful details. This makes them perfect for professional settings or anytime you want fierce nails that won’t clash with your wardrobe.
Choosing the right nude is crucial—it should complement your skin tone rather than washing you out. Test shades against your hand in natural light. The perfect nude should look like your skin, only better—creating a seamless, elongating effect.
Detail Ideas That Pop
French tips with a twist work beautifully on nude bases. Skip the traditional white and try black, metallic, or even neon tips for modern edge. V-shaped tips or curved variations add contemporary flair while maintaining that classic refined feel.
Minimalist line work creates striking contrast against nude. Use a thin brush to paint abstract lines, geometric shapes, or delicate patterns. The simplicity keeps things chic while the details prove you put thought into your look—a very baddie move.
9. Pink Baddie Perfection
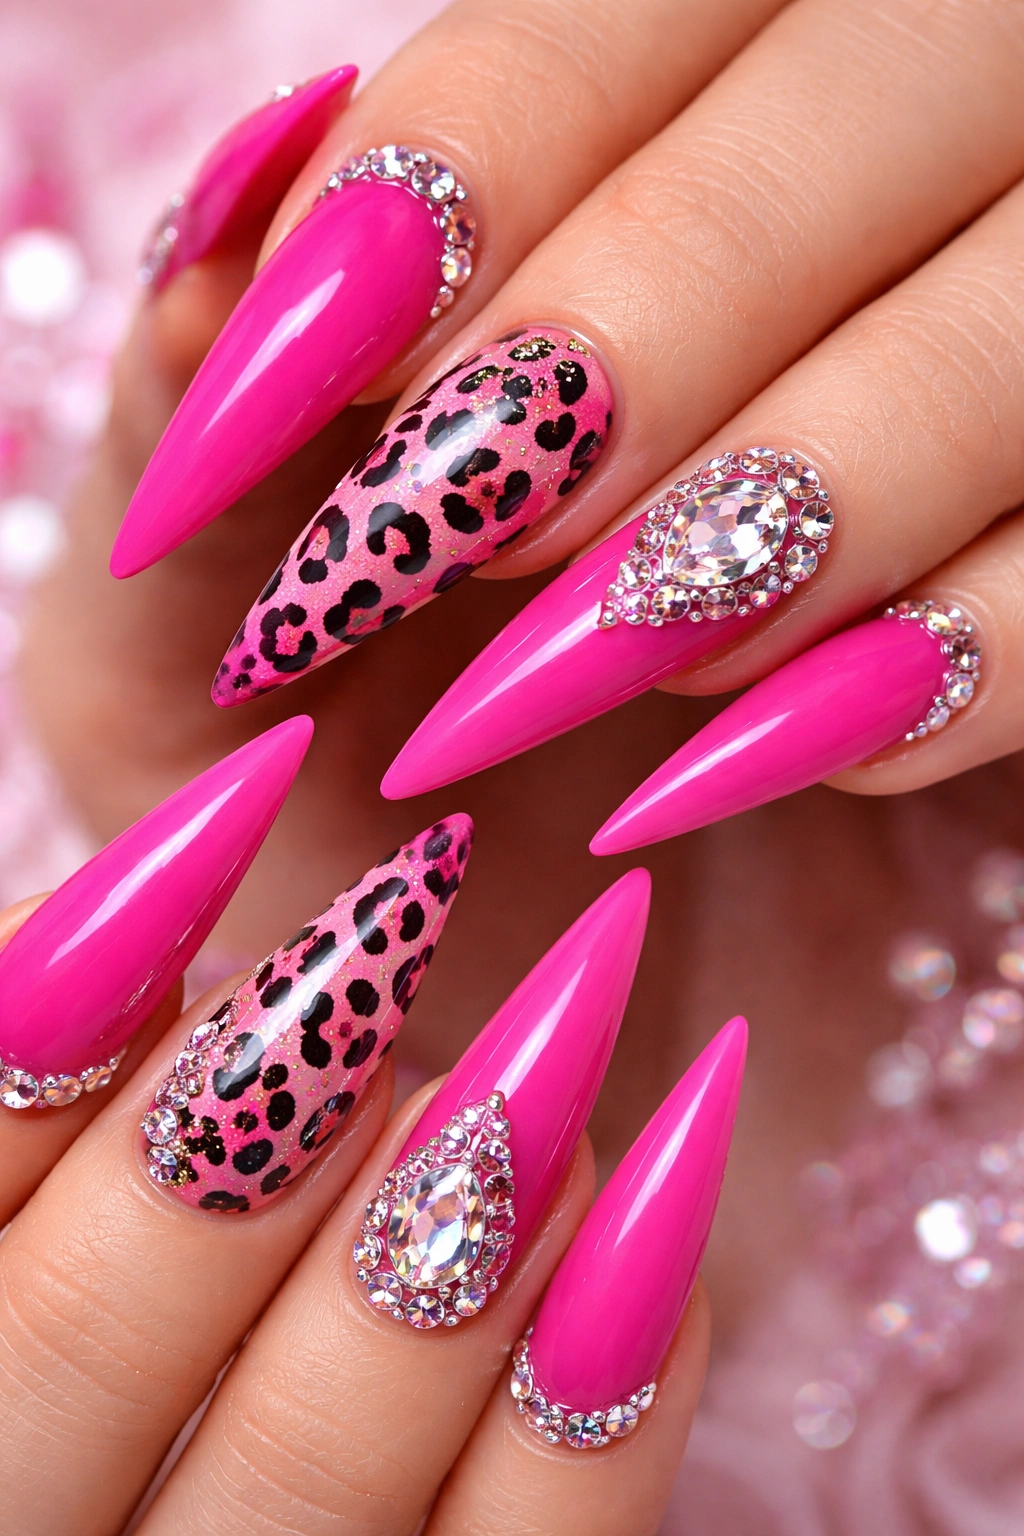
Pink nails bring feminine energy to the baddie aesthetic without sacrificing boldness. From soft baby pinks to vibrant hot pinks, this color range offers endless possibilities. The key is executing pink in ways that feel fierce rather than precious.
Hot pink nails scream confidence and playful energy. This shade is unapologetically bright and impossible to ignore. Pair it with stiletto or coffin shapes for maximum impact. The combination of bold color and dramatic shape creates that perfect baddie balance.
Mixing Pink with Edge
Elevate pink nails with edgy details. Try black leopard print over hot pink, add silver or black rhinestones, or create geometric patterns that give the sweet color an unexpected twist. These combinations prove pink can be soft and fierce simultaneously.
Ombre effects using multiple pink shades create gorgeous gradient transitions. Start with deep magenta at the cuticle and fade to pale pink or white at the tips. This technique adds depth and visual interest while keeping the overall vibe feminine and fun.
Pink for Every Vibe
Bubblegum pink brings playful, girly energy with a baddie attitude. This shade works beautifully with bows, hearts, or other cute embellishments that embrace femininity without apology. It’s sweet with a side of sass.
Dusty or mauve pinks offer sophistication and maturity while maintaining the pink family’s inherent charm. These shades work particularly well in matte finishes, creating a modern, fashion-forward look that feels both elegant and edgy.
10. Black and Gold Royalty

The combination of matte black and gold creates instant luxury. This pairing channels opulence and sophistication while maintaining that essential baddie edge. Black provides the dark, mysterious foundation while gold adds just enough sparkle to say you’re not messing around.
Matte black amplifies the edgy factor, creating a velvety texture that feels expensive. The flat finish provides the perfect backdrop for gold details to shine. Whether you choose gold foil, striping tape, or hand-painted accents, the contrast creates maximum visual impact.
Design Approaches That Work
Geometric gold patterns over matte black deliver structured sophistication. Use striping tape to create triangles, diamonds, or chevron patterns. These clean lines feel modern and intentional, proving you appreciate both form and function.
Gold leaf or foil scattered across black bases creates an organic, luxe effect. The irregular shapes of foil pieces add texture and dimension while maintaining an upscale vibe. This technique looks complex but is surprisingly simple to execute at home.
Making the Look Last
Matte finishes show oils and fingerprints more easily than glossy ones, so keep them clean with alcohol wipes. Apply matte top coat every few days to refresh the texture. Gold details typically last as long as your base polish when properly sealed.
This color combination works year-round and complements virtually any outfit or occasion. It’s equally appropriate for casual outings and formal events—the ultimate versatile baddie look.
11. White with 3D Details
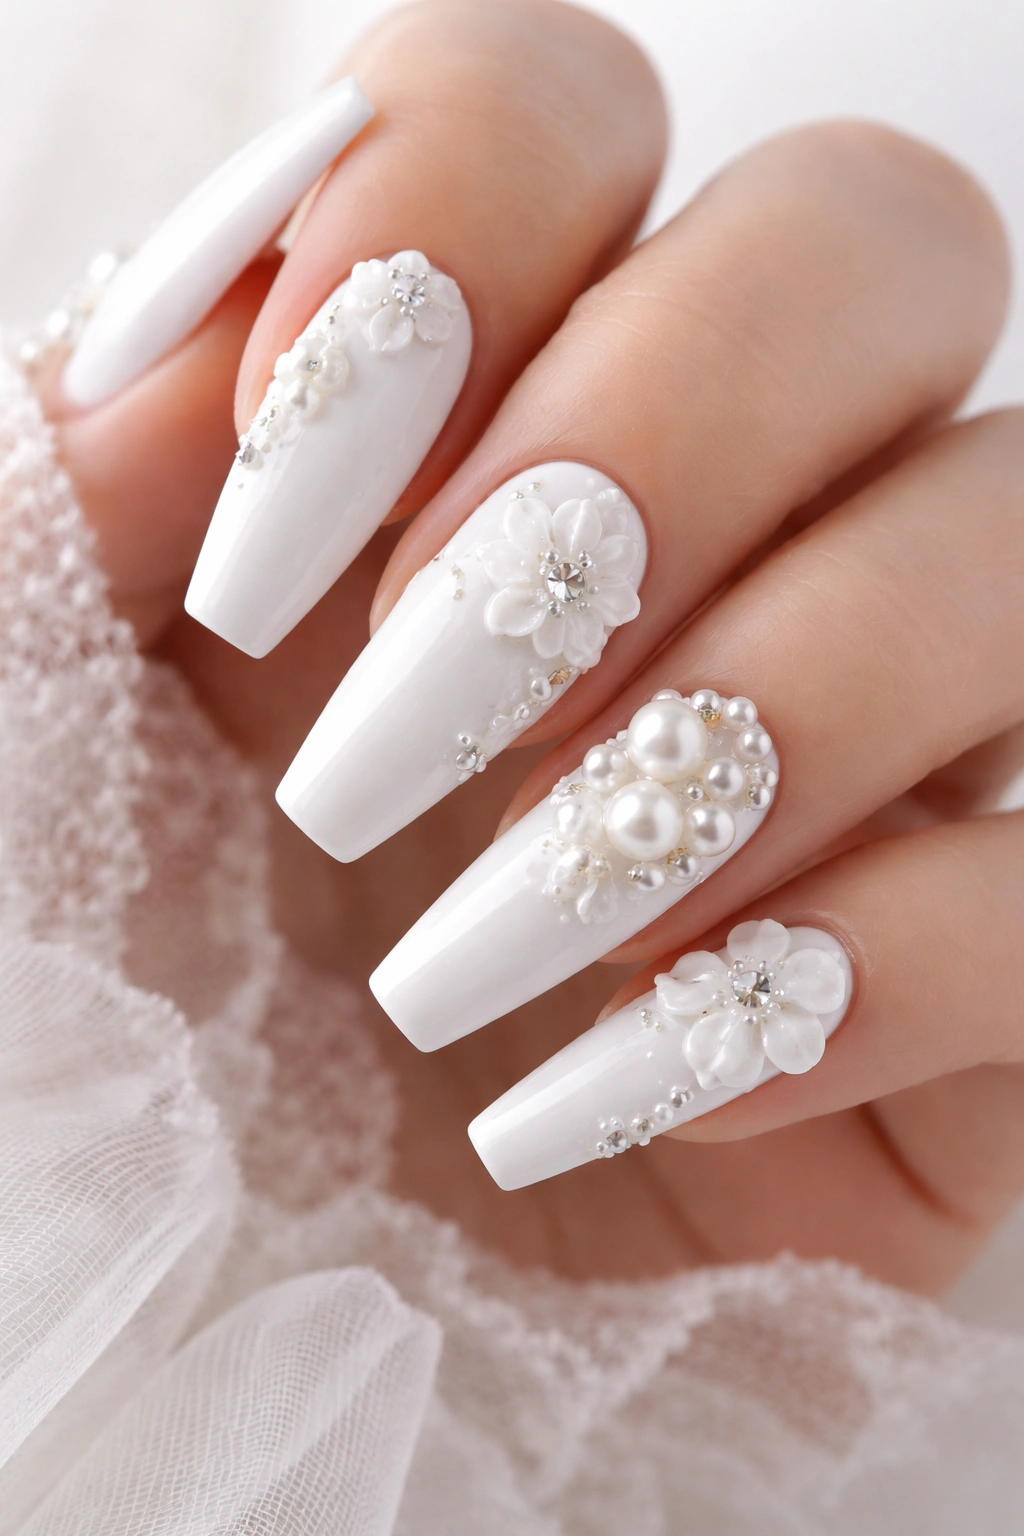
White nails offer a fresh, clean canvas that’s anything but boring when you add dimensional elements. Think pearls, rhinestones, 3D flowers, or sculptural accents that literally elevate your manicure into wearable art. This is where creativity meets baddie confidence.
The brightness of white makes embellishments stand out beautifully. Clear crystals sparkle more intensely against the white backdrop, while colored gems create striking contrast. The neutral base ensures your 3D details become the undeniable focal point.
3D Design Options
Pearl accents bring elegant luxury to white nails. Place them along cuticle lines, create patterns, or scatter them randomly for organic appeal. Pearls evoke sophistication while the white base keeps things modern and fresh rather than overly traditional.
Molded acrylic details like bows, flowers, or geometric shapes create actual texture you can feel. These sculptural elements transform nails into miniature art installations. While they require professional application for best results, the stunning effect is worth it.
Practical Considerations
Three-dimensional nails demand extra care during daily activities. The raised elements can catch on clothing, hair, or objects, potentially causing damage. Be mindful when typing, opening containers, or doing tasks that involve your hands.
These nails shine for special occasions, photoshoots, or anytime you want to create an unforgettable impression. The dimensional quality photographs beautifully, creating depth and interest that flat designs can’t achieve. Your social media feed will thank you.
12. Ombre Elegance
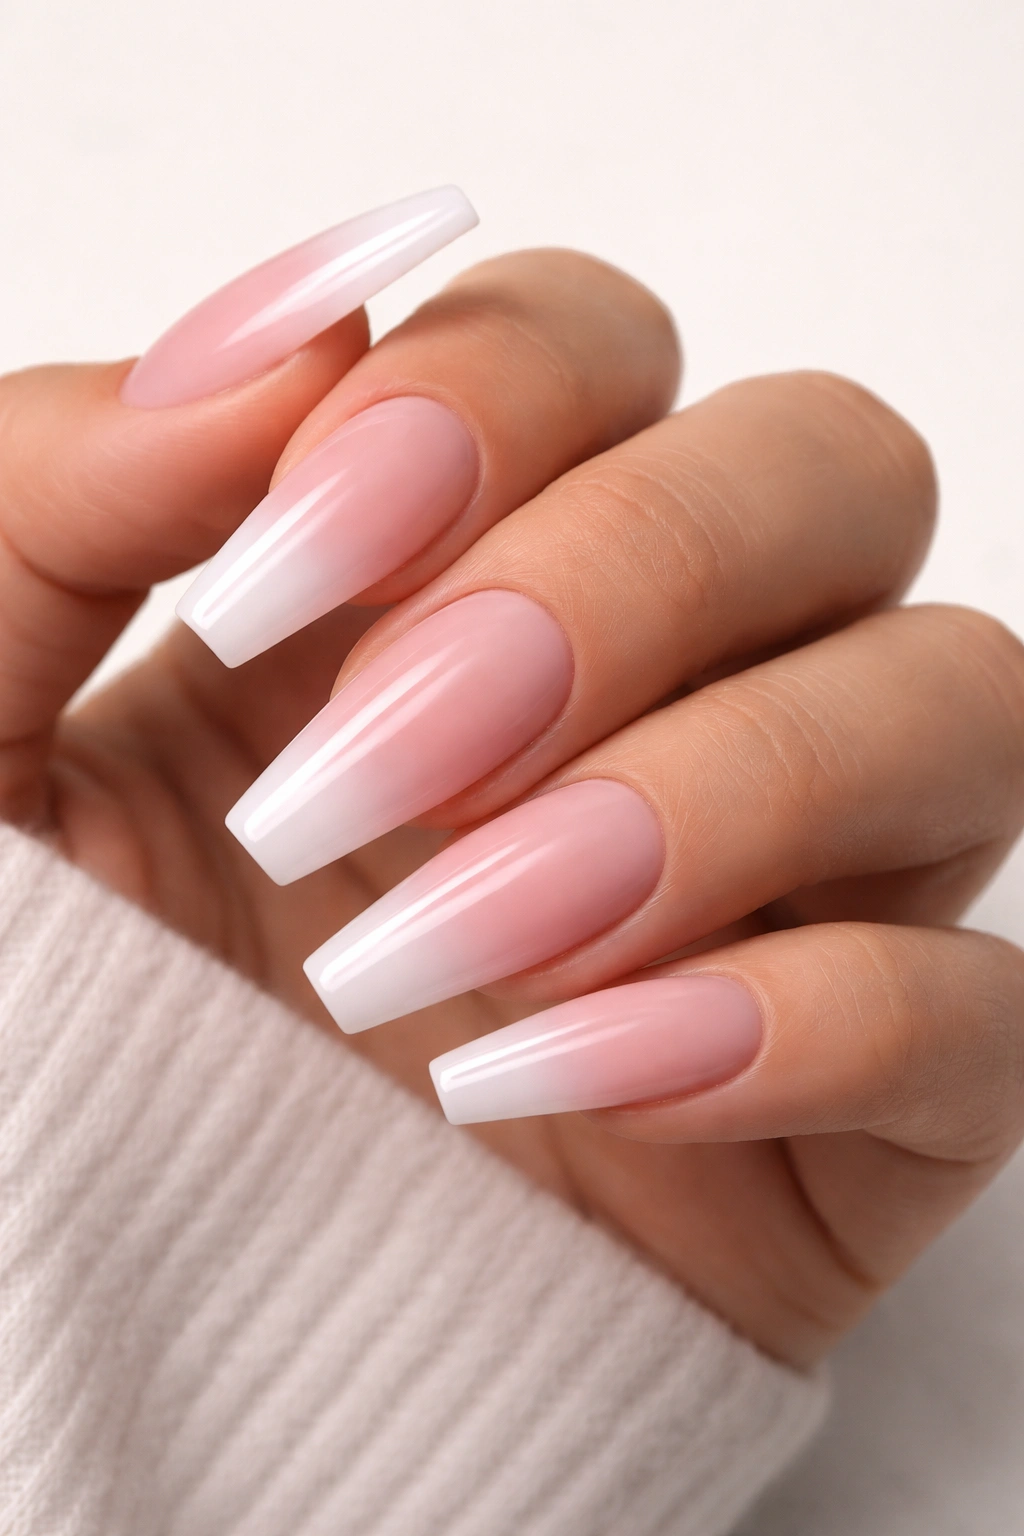
Ombre nails feature seamless color transitions that create sophisticated gradient effects. This technique works with any color palette—from nude to black, pink to purple, or bold neons. The gradual shift adds depth and dimension that makes nails look longer and more elegant.
The beauty of ombre lies in its versatility. Subtle transitions using similar tones create understated elegance, while dramatic shifts between contrasting colors deliver bold impact. Either approach embodies baddie energy through thoughtful execution and artistic flair.
Creating the Gradient
Achieving smooth ombre transitions requires blending colors while they’re still wet. Use a makeup sponge to dab and blend where colors meet, creating that signature seamless fade. This technique takes practice, but the results are worth the effort.
Glitter ombre adds sparkle to the gradient effect. Start with heavy glitter concentration at the tips and fade toward the cuticle for a glamorous twist on the classic technique. This approach combines two trends—ombre and glitter—into one stunning design.
Color Combinations to Try
Pink to white ombre creates soft, feminine gradients perfect for everyday wear. This classic combination works across all seasons and pairs beautifully with any outfit. Add rhinestones near the cuticle for extra baddie points.
Black to red ombre delivers drama and intensity. The dark-to-bold transition embodies fierce energy and works particularly well on longer nail shapes. This combination screams confidence and makes an undeniable statement wherever you go.
Wrapping Up
Baddie nails aren’t just about following trends—they’re about expressing your boldest, most confident self through intentional nail art. Each design we’ve explored offers a different way to channel that fierce energy, from the classic elegance of glossy black coffin nails to the dimensional drama of rhinestone-covered tips.
The beauty of the baddie aesthetic is its flexibility. You can adapt these ideas to match your personal style, comfort level, and lifestyle needs. Go full glamour with 3D embellishments for special occasions, or keep it sleek with chrome finishes for everyday wear. The common thread is that unapologetic confidence that makes baddie nails so compelling.
Your hands are canvases waiting for transformation. Whether you opt for professional application or tackle these designs at home, remember that the attitude you bring matters just as much as the execution. Wear your nails with pride, own your space, and let your fingertips announce your presence with bold, beautiful style.
Which design speaks to your inner baddie? The only wrong choice is playing it too safe.
