

Having short or small nail beds doesn’t mean you’re stuck with boring manicures or awkward-looking nails. Actually, there’s a whole world of flattering options designed specifically for petite nails that can make your fingers look longer, more elegant, and totally Instagram-worthy.
The thing is, not all nail shapes and styles work the same way on smaller nail beds. What looks amazing on someone with long, narrow nails might overwhelm or just plain not fit right on yours. But here’s the good news: once you know which shapes, lengths, and techniques work best for your nail type, you’ll never feel limited again.
Whether you’re dealing with naturally short nail beds, wide nails, or just prefer keeping things practical, this guide breaks down everything you need to create beautiful manicures that actually complement your hands.
Understanding Your Nail Bed Type
Before diving into specific shapes and styles, you’ll want to understand what you’re actually working with. Your nail bed is the skin beneath your nail plate—the visible part we shape and polish. Some people naturally have larger nail beds, while others have smaller, wider, or narrower ones.
Small nail beds typically mean there’s less surface area between your cuticle and the tip of your finger. This can make certain nail shapes look disproportionate or unnatural. Wide nail beds, on the other hand, might make your nails appear shorter than they actually are, even if you’ve got decent length.
The good news? Both scenarios have specific solutions. Knowing your nail bed type helps you choose shapes that create balance and visual length. When you work with your natural nail structure instead of against it, everything from polish application to nail art becomes easier.
Pay attention to the ratio between your nail width and length. If your nails are wider than they are long, you’ll benefit from shapes that create the illusion of length. If they’re just naturally small all around, you’ll want shapes that maximize the visible nail area without looking fake or overwhelming your fingers.
The Most Flattering Nail Shapes for Small Nail Beds

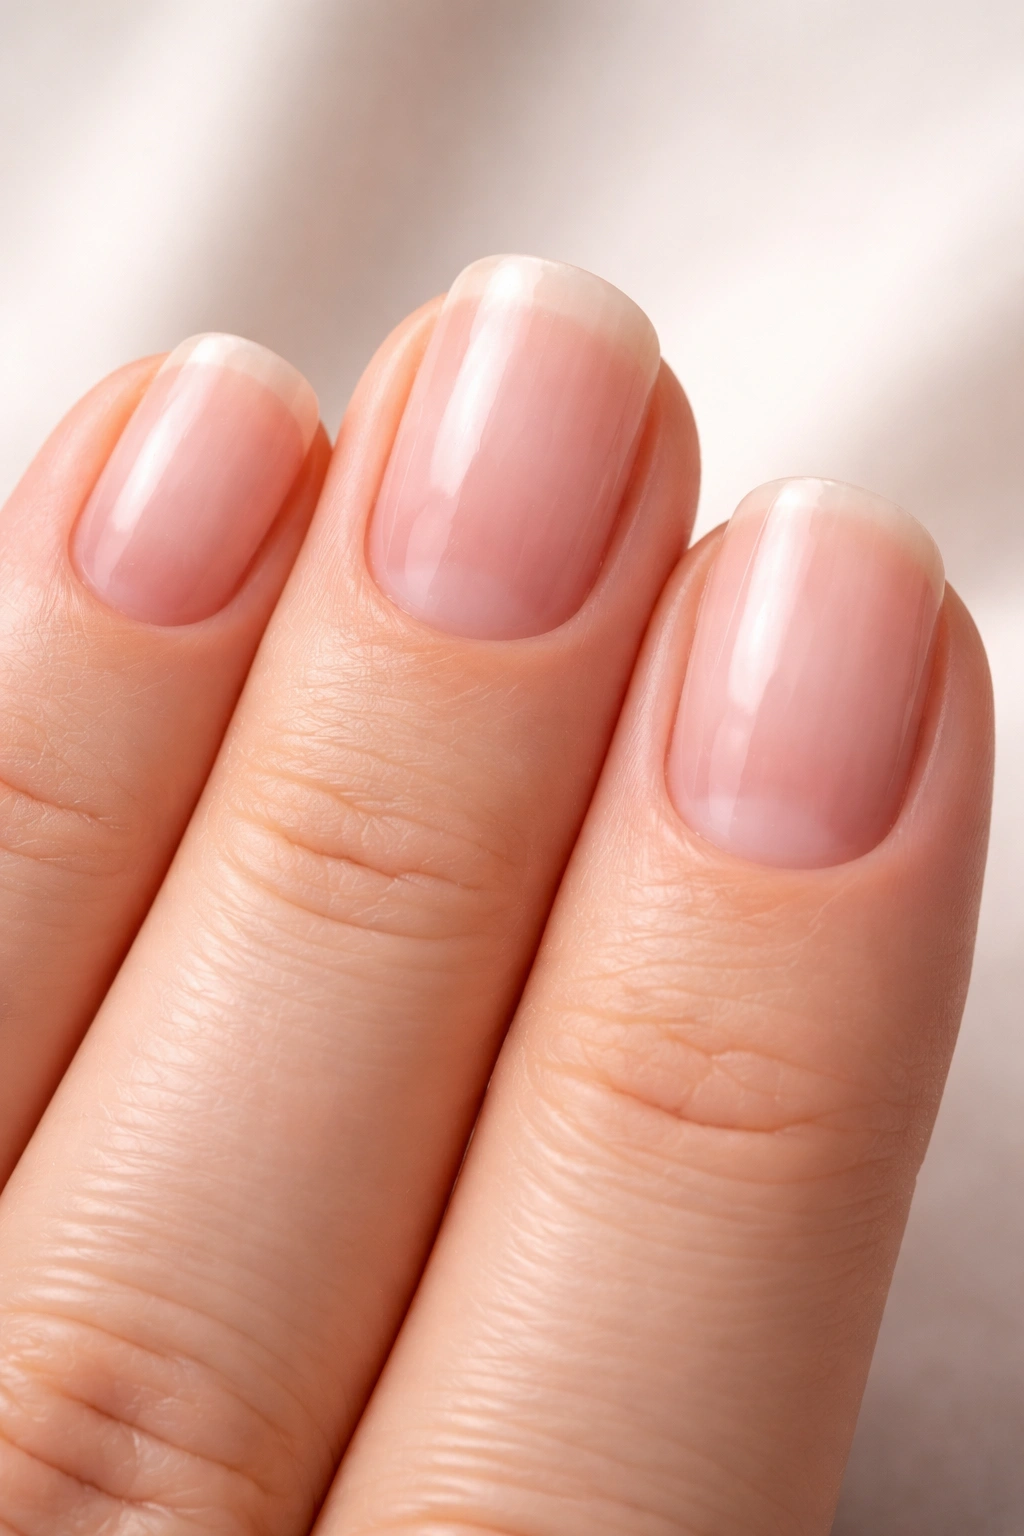
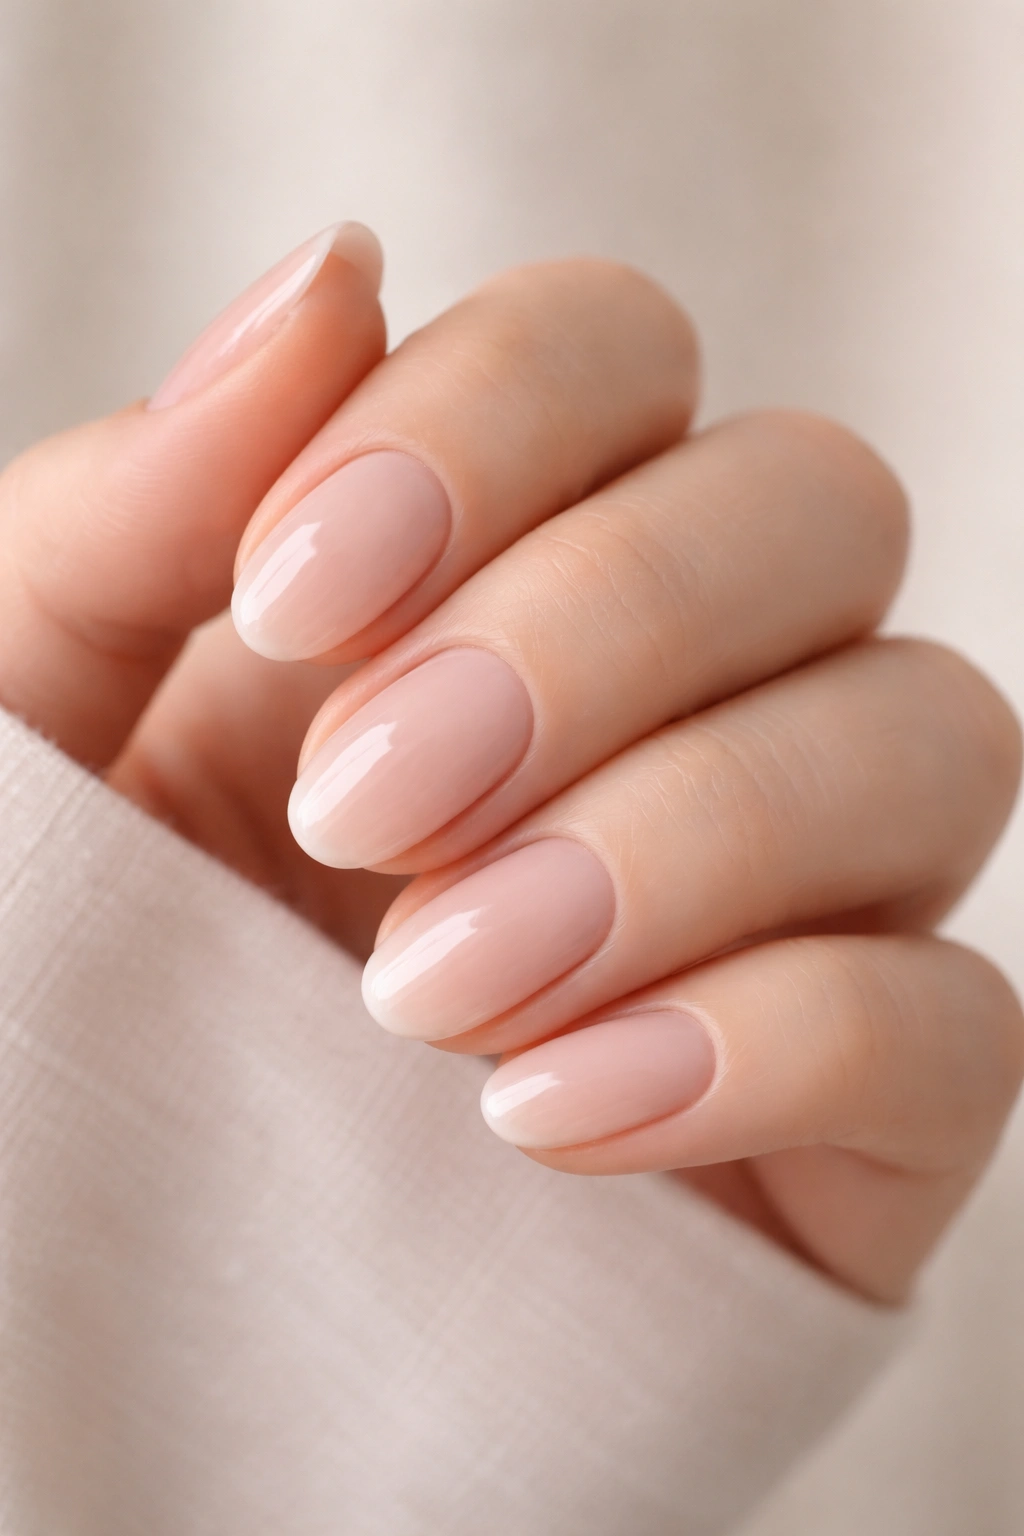
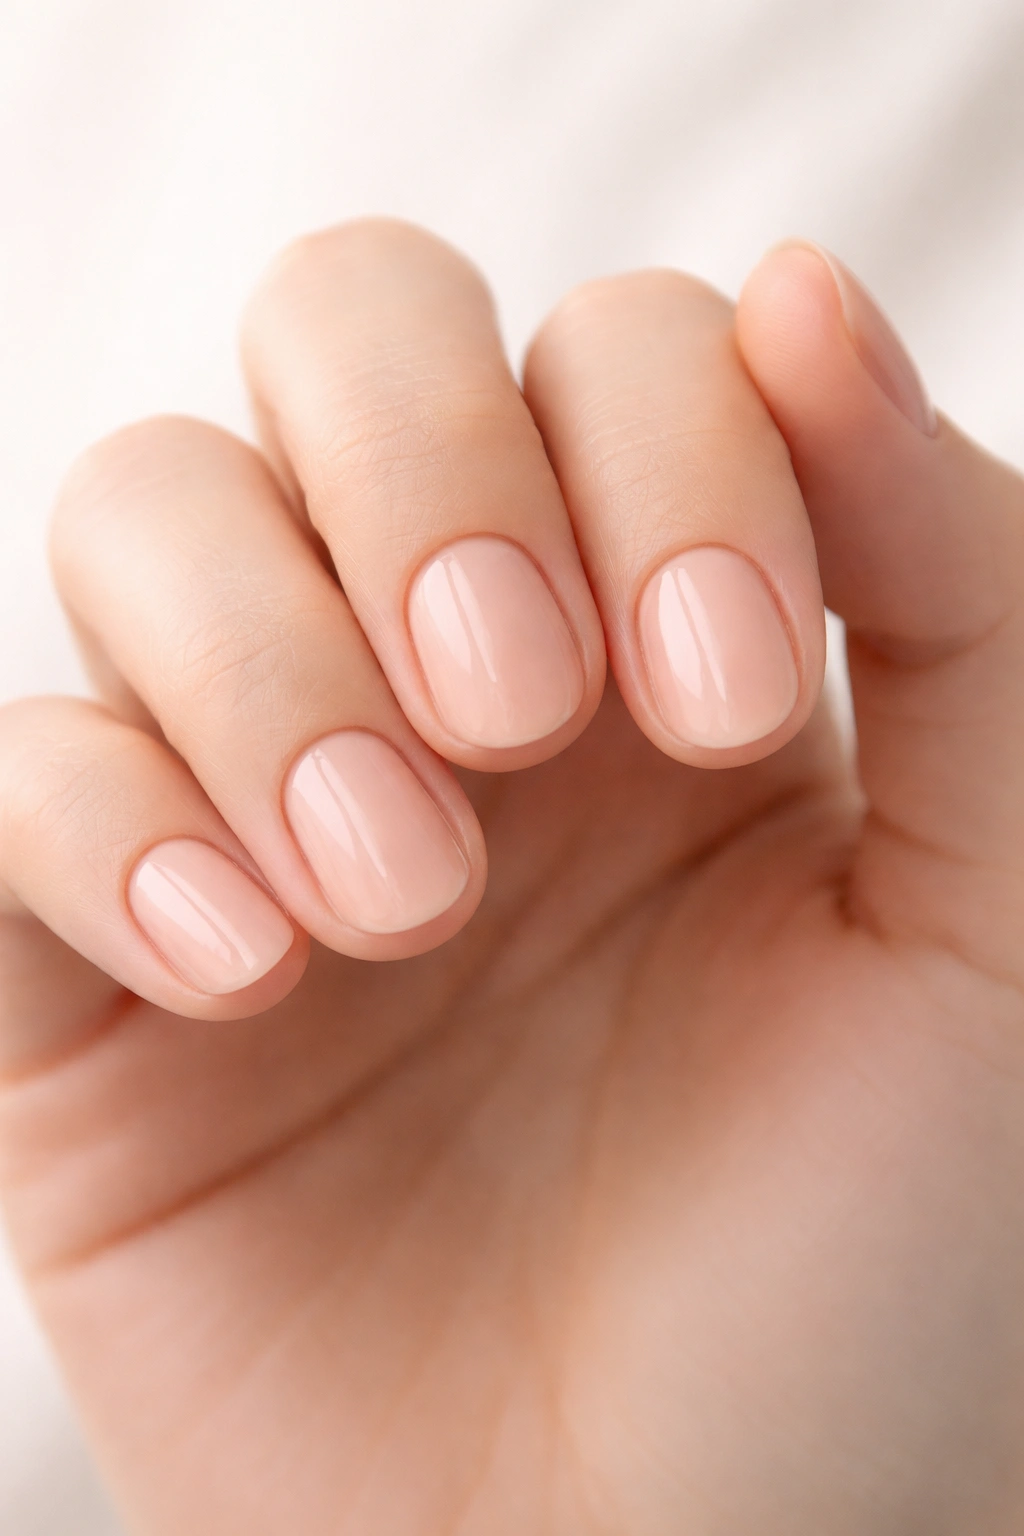
Round Nails
Round nails follow the natural curve of your fingertip, creating a soft, feminine look that’s incredibly low-maintenance. This shape works beautifully on short nail beds because it doesn’t require much length to look intentional and polished.
The rounded edge eliminates sharp corners that can catch on things and break. For busy lifestyles or anyone who types frequently, this makes round nails one of the most practical choices. They’re also less prone to chipping because there aren’t any vulnerable points.
Round nails help elongate shorter fingers by creating a smooth, continuous line from your cuticle to the tip. The shape naturally draws the eye upward rather than emphasizing width. This makes them particularly flattering if you have wide nail beds or stubby fingers.
To achieve this shape at home, file straight across the tip, then gently round the corners in smooth, one-directional strokes. The key is maintaining symmetry—compare your nails side by side as you work. Round nails also blend seamlessly with your natural nail bed, making growth less obvious between manicures.
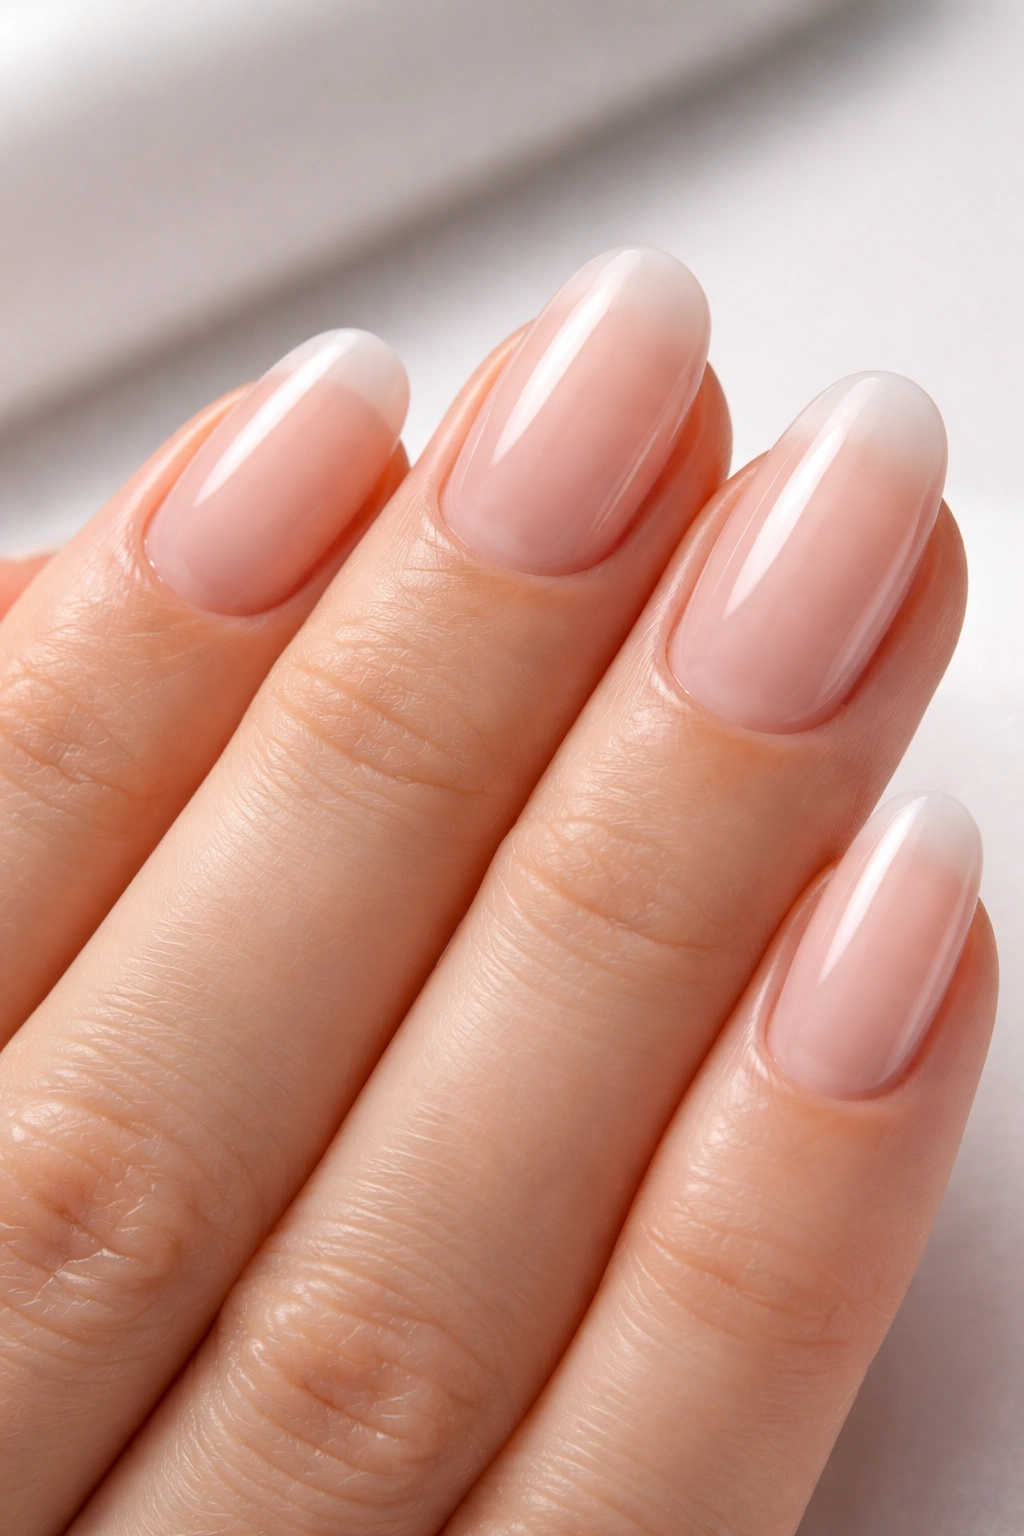
Oval Nails
Oval nails take the round shape one step further by creating a slightly more elongated, egg-like appearance. They’re often considered the most universally flattering nail shape because they work on nearly every hand type, finger length, and nail bed size.
For small nail beds specifically, oval shapes create the illusion of length without requiring dramatic length. The gentle taper from base to tip makes fingers appear longer and more slender. This shape also softens the overall look of your hands, giving them an elegant, refined appearance.
Oval nails need just a bit more length than round nails—even an extra millimeter or two past your fingertip works. If you’re growing out bitten nails or have naturally short nail beds, this shape becomes achievable faster than you might think. The tapered sides visually narrow wide nail beds too.
File the sides at a slight angle toward the center, then round the tip into a gentle curve. The oval should be widest at your cuticle area and gradually narrow. This shape holds polish beautifully and provides enough surface area for subtle nail art without overwhelming small nails.
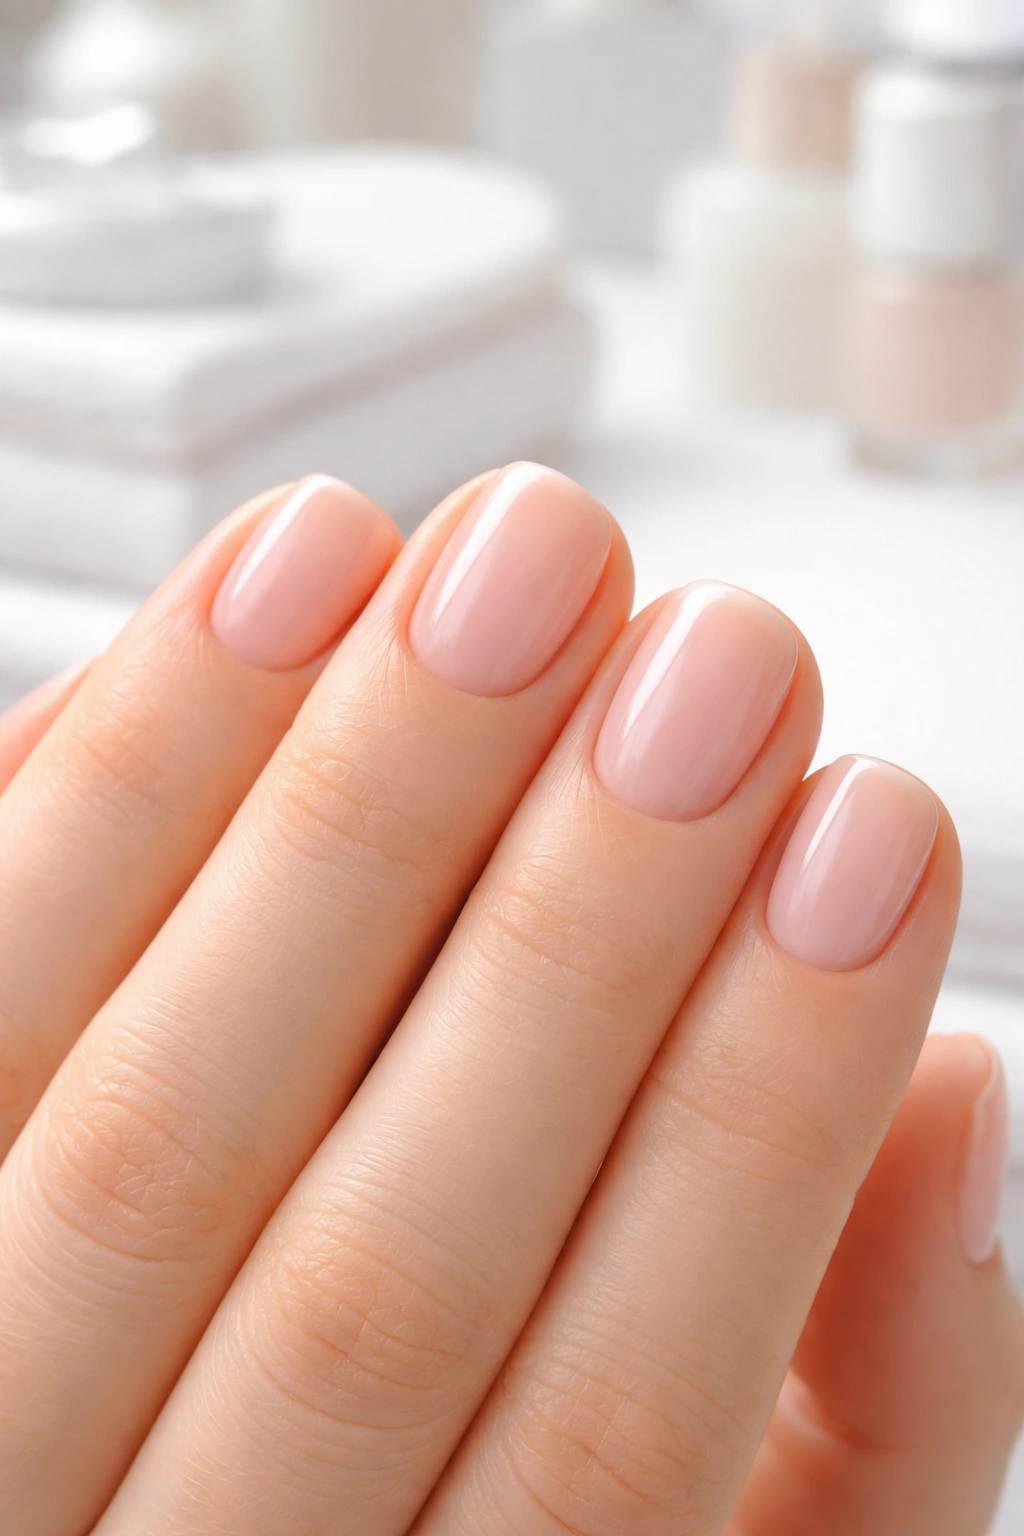
Squoval Nails
Squoval combines the durability of square nails with the softness of oval—it’s basically the best of both worlds. The straight free edge provides strength and structure, while the rounded corners prevent snagging and breaking.
This hybrid shape works wonderfully on small nail beds because it maximizes surface area without looking bulky. The squared-off tip makes nails appear wider and more substantial, while the rounded corners keep things looking natural and proportionate. Squoval nails strike that perfect balance between edgy and elegant.
If you have wider nail beds, squoval helps add visual length through the straight free edge. The slight curve at the corners softens the overall look, preventing that blocky appearance square nails can sometimes create on shorter nails. It’s also one of the easiest shapes to maintain at home.
To create squoval nails, file straight across the tip first, creating your square base. Then take your file at a 45-degree angle and gently round just the corners—not too much, just enough to remove the sharp edges. The result should look like a square that’s been slightly softened.
Almond Nails (for Slightly Longer Short Nails)
Almond nails taper to a rounded point, resembling the shape of an actual almond. While they typically require more length than other shapes, a modified short almond can work beautifully on small nail beds that have grown out even just a bit.
This shape is incredibly slimming for the fingers and creates maximum visual length. The tapered sides draw the eye inward and upward, making both your nails and fingers appear longer and more delicate. Even on shorter lengths, almond nails maintain an elegant, sophisticated vibe.
The key to pulling off almond nails on small nail beds is keeping them shorter than traditional almond shapes. Think of it as “baby almond”—enough taper to create the effect without requiring dramatic length. This works especially well with gel or acrylic extensions that add just a bit of length.
File from the sides toward the center at a steeper angle than you would for oval nails. The sides should be more dramatically tapered, and the tip should come to a softer point. On shorter nails, you’ll want to be conservative with how pointed you go—aim for a gentle taper rather than a sharp stiletto-like point.
Nail Lengths That Work Best
Extra Short (XXS) Lengths
Extra short nail tips—often labeled XXS or extra extra short—are specifically designed for people with tiny nail beds or those who prefer ultra-practical lengths. These tips barely extend past your fingertip, giving you a polished, finished look without any of the maintenance headaches longer nails bring.
The beauty of XXS lengths is that they look intentional rather than like you just couldn’t grow your nails out. They’re perfect for active lifestyles, playing musical instruments, typing all day, or working in professions where long nails aren’t practical. You get the benefits of a manicure without sacrificing functionality.
Many nail tip brands now offer XXS options in various shapes—round, square, coffin, and almond. The SINOKAME brand, for instance, created their XXS square tips specifically after customer feedback that other “extra short” options were still too long. These truly short pre-etched nail tips fit small nail beds like those of children or petite adults.
When choosing XXS tips, look for sets with 12-15 different sizes. This range ensures you’ll find proper fits for all your fingers, including those weird thumbs that never quite match the rest. Having extra pieces in the most commonly used sizes (usually 4-6) means you won’t run out of your most-needed sizes halfway through a manicure.
Natural Nail Length
Sometimes the best length is your own natural nail growth—especially if you’ve got healthy nails that grow evenly. For small nail beds, keeping nails just at or slightly past your fingertip creates a clean, polished look without overwhelming your hands.
Natural length nails are the easiest to maintain and the most versatile for everyday life. You can type comfortably, button clothes without struggling, and handle small objects without that awkward adjustment period longer nails require. Plus, they’re less likely to break or chip since there’s less nail extending beyond the protective fingertip.
The key to making natural length look intentional is maintaining consistent shape and keeping them well-groomed. Regular filing keeps edges smooth and prevents snags. A good cuticle routine makes your nail beds appear larger by revealing more of the nail plate. Even without polish, well-maintained natural short nails look put-together.
If you’re growing out damaged or bitten nails, natural length is your best friend. It allows your nails to strengthen without the added stress of extensions or length. Apply strengthening treatments and keep them filed to your preferred shape. As they grow, you’ll have a healthy foundation for whatever length you eventually want.
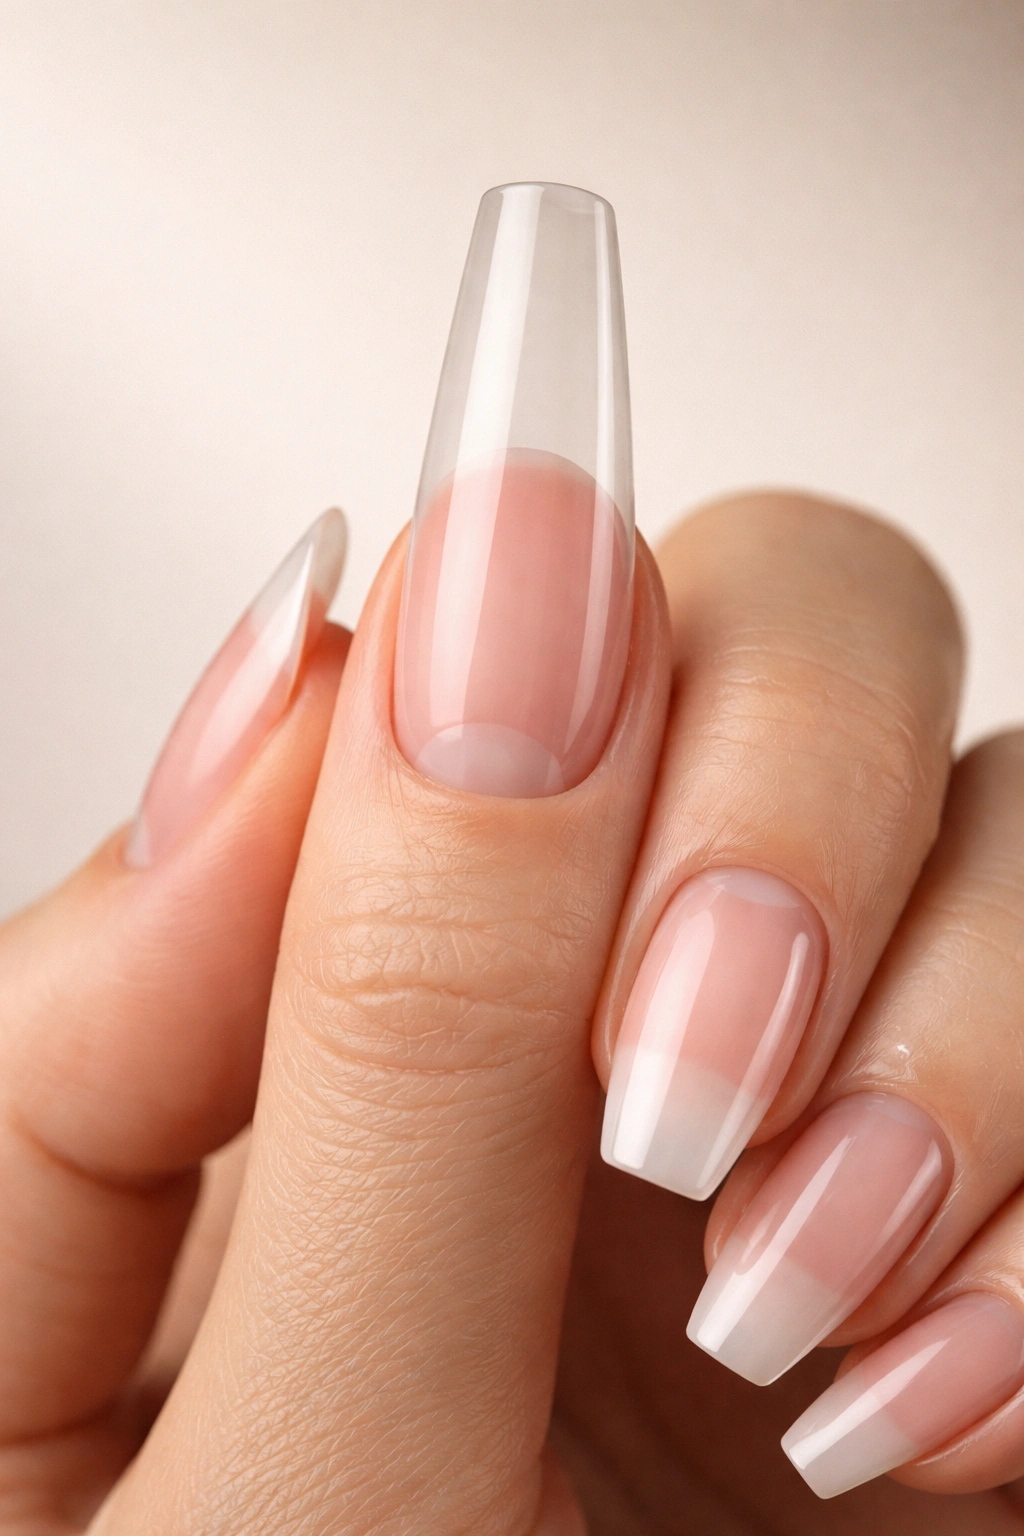
Best Nail Tip Materials for Small Nail Beds
Soft Gel Tips
Soft gel nail tips have become incredibly popular because they’re flexible, lightweight, and more comfortable than traditional plastic tips. Made from a soft gel formula, these tips bend slightly with your natural nail rather than feeling rigid and artificial.
For small nail beds, soft gel tips offer several advantages. They’re typically thinner than acrylic or hard plastic tips, creating a more natural appearance. The flexibility means they’re less likely to crack or break when you accidentally bump them. They also bond well with gel polish and nail glue, creating a seamless finish.
These tips come pre-etched on the underside, which means the surface is already roughed up for better adhesion. You won’t need to file the inside before application, saving time and reducing the risk of making them too thin. The pre-etched texture helps gel or glue grab onto the tip, creating a stronger, longer-lasting bond.
Soft gel tips can last up to four weeks without lifting or chipping when applied correctly. To remove them, you’ll soak them in acetone just like regular gel polish. This makes them less damaging than filing off hard acrylic, which can weaken your natural nails. They’re available in various shapes and lengths, including those XXS sizes perfect for tiny nail beds.
Acrylic Tips vs. Gel Tips
Traditional acrylic tips are harder and more rigid than gel alternatives. They’re made from durable plastic and have been the nail industry standard for decades. While they’re certainly sturdy, they can feel heavy and unnatural on very small nail beds.
Acrylic tips work well if you need serious length or want nail art that requires a completely solid base. They’re less expensive than gel tips and come in a wider variety of shapes and sizes. However, they require more filing and shaping to blend with your natural nail, which can be tricky on smaller nail beds where there’s less room for error.
Gel tips, on the other hand, feel closer to your natural nails. They’re more flexible and lightweight, making them comfortable for everyday wear. The clear gel material looks more natural than plastic, especially on shorter lengths where you want a barely-there appearance. Gel tips are generally easier for beginners to work with too.
For small nail beds specifically, gel tips tend to be the better choice. They create a more natural look at shorter lengths, they’re easier to apply without bulk, and they’re more comfortable for daily activities. Unless you’re specifically going for dramatic length or intricate 3D nail art, gel tips will give you better results.
Application Techniques for Small Nail Beds
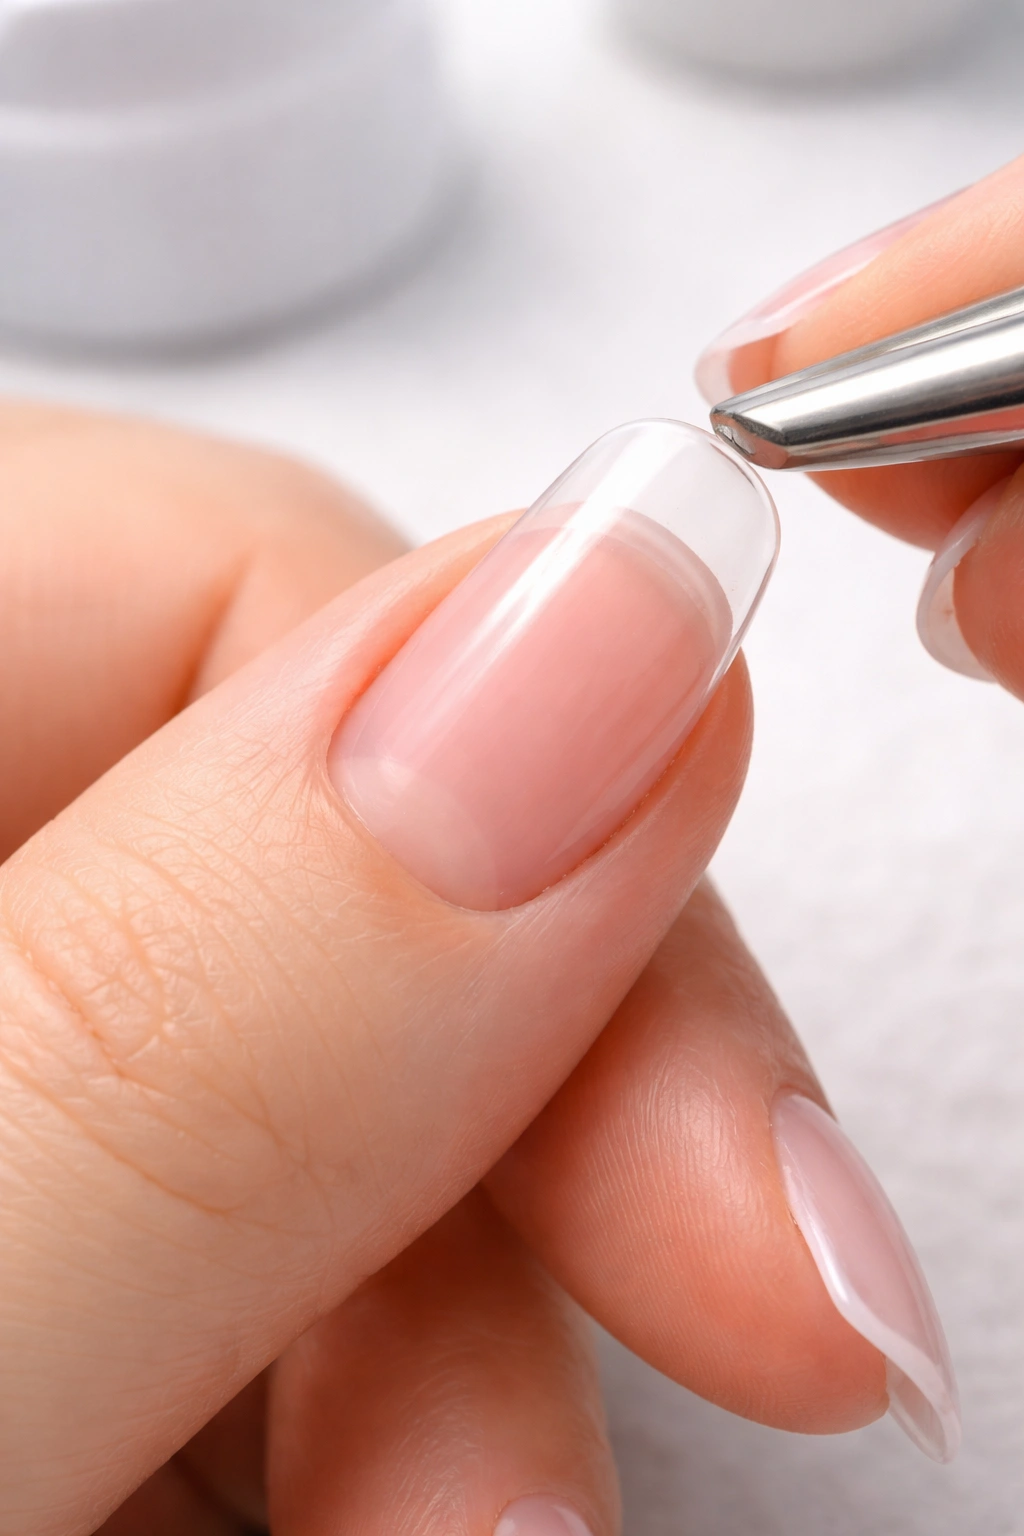
Proper Sizing and Fit
Getting the right size tip is everything when you’re working with small nail beds. A tip that’s too wide will hang over your sidewalls, looking bulky and lifting prematurely. One that’s too narrow won’t provide adequate coverage and will pop off quickly.
When sizing tips, hold them up to your natural nail without glue first. The tip should cover your entire nail from sidewall to sidewall without extending past either edge. It should fit snugly against your cuticle area without gaps. If you’re between sizes, go slightly smaller—you can always file the sides to widen them a bit.
Many nail tip sets now come with 12-15 different sizes specifically to accommodate various nail bed shapes and sizes. Take your time matching each finger. Your thumbs will likely need different sizes than your other fingers, and your pinky will probably need the smallest size. Don’t assume all your fingers are the same.
Check the contact point—where the tip will attach to your natural nail. On small nail beds, you want maximum contact for the strongest bond. If the tip’s curve doesn’t match your natural nail curve, it won’t adhere properly. Some brands offer tips with different C-curves (the arch from sidewall to sidewall) to match various nail shapes.
Application Methods
There are three main ways to apply nail tips to small nail beds: traditional nail glue, builder gel, and press-on adhesive tabs. Each method has pros and cons depending on how long you want your manicure to last.
Traditional nail glue creates the strongest, longest-lasting bond. Apply a thin layer to both your natural nail and the tip’s underside, press firmly for 10-15 seconds, and hold steady until it sets. This method can last 2-4 weeks but requires acetone for removal. It’s your best bet if you’re adding gel polish on top.
Builder gel is perfect for gel nail tips. Apply a small bead of builder gel to the inside of the tip, press it onto your natural nail at a 45-degree angle, then slowly lower it into place. Flash cure for 10 seconds under your LED lamp to set it, then cure fully for 60 seconds. This method integrates beautifully with gel manicures.
Adhesive tabs are the quickest, least committal option. They’re basically double-sided sticky tabs that go between your nail and the tip. They last anywhere from a few days to a week, making them perfect for special events or testing out shapes before committing. They’re also the easiest to remove—just gently lift the edge and peel off.
Creating a Seamless Look
The goal with any nail tip application is making it look like your natural nails, not obviously fake additions. On small nail beds, this requires extra attention to blending and finishing.
After your tips are applied and set, use a fine-grit buffer (180-240 grit) to smooth the seam where the tip meets your natural nail. File in one direction rather than sawing back and forth—this prevents weakening your natural nail. The transition should be completely smooth when you run your finger across it.
Buff the entire surface of the tip lightly to remove any shine and create a slightly rough texture. This helps your base coat, polish, or gel adhere better. Don’t over-buff though—you don’t want to make the tips too thin or create weak spots that might crack.
Apply a good base coat that fills minor imperfections and creates a smooth canvas. On small nail beds, even tiny ridges or gaps show through polish, so taking time with your base coat makes a huge difference. Let it dry completely before moving on to color.
Nail Designs That Flatter Small Nail Beds
Colors That Create Length
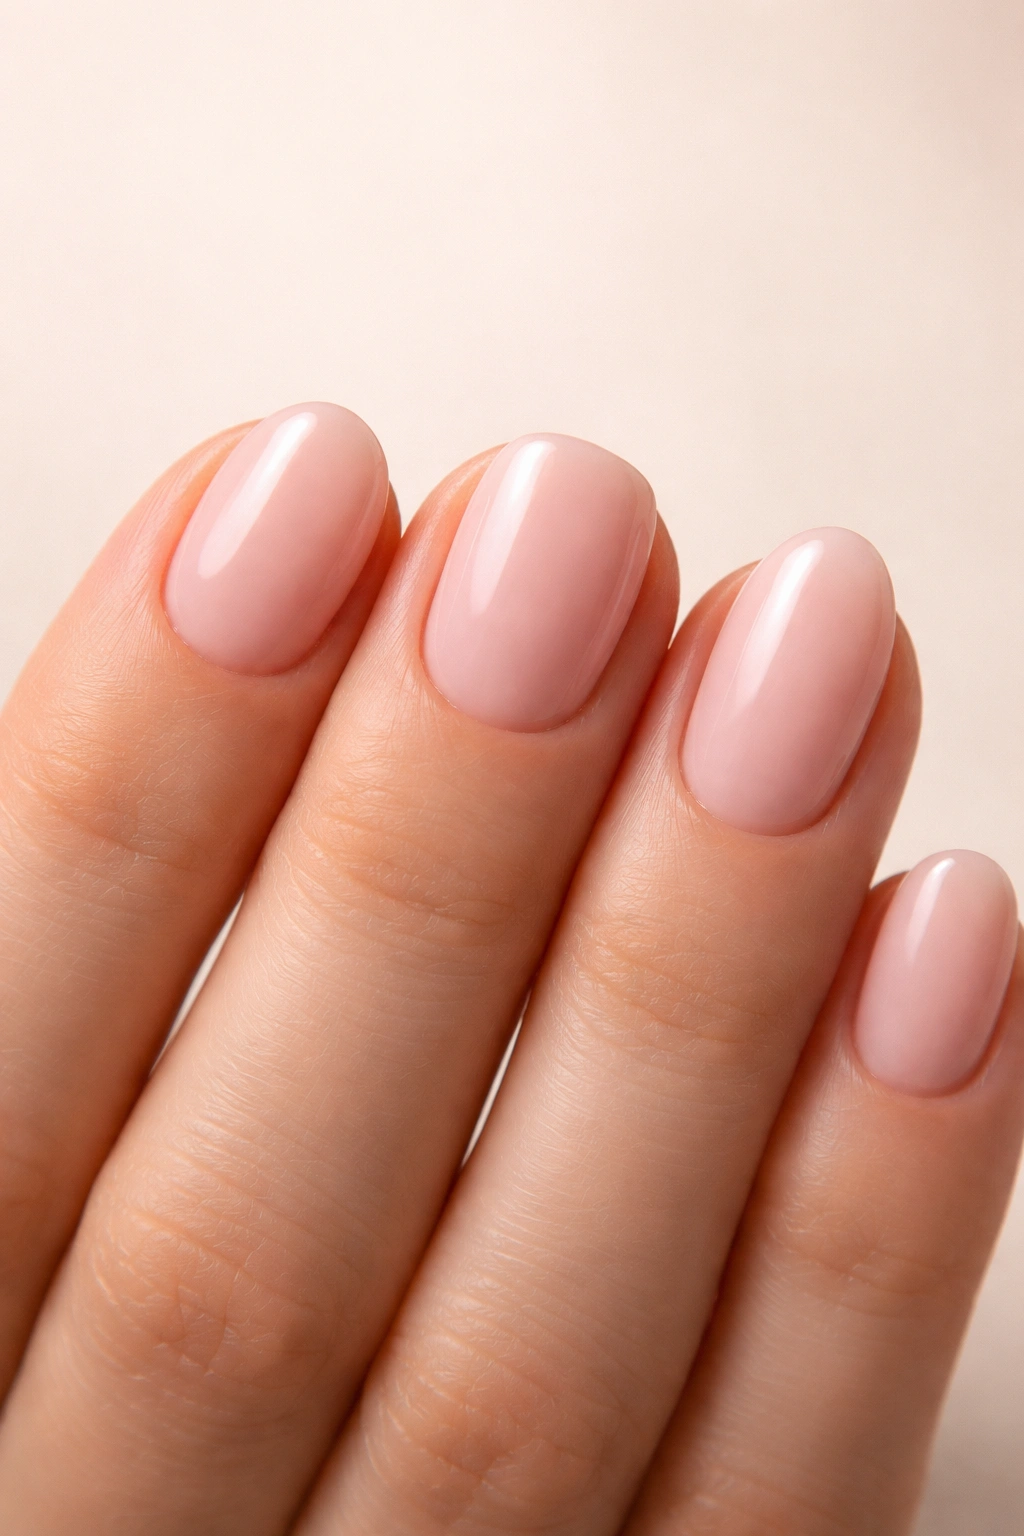
Certain polish colors can make your nails appear longer and more slender. Nude shades that closely match your skin tone create a continuous line from finger to nail, visually extending your nail bed. This makes them look larger and longer than they actually are.
Light, neutral colors like soft pinks, peachy nudes, and pale beiges work beautifully on small nail beds. They’re versatile enough for any occasion and don’t overwhelm petite nails the way super bold or dark colors sometimes can. These shades also make any imperfections less noticeable.
That said, don’t feel like you can’t wear bold colors. Deep reds, rich burgundies, and even dark browns can look stunning on short nails. The key is application—make sure your color goes all the way to the sidewalls and cuticle area to maximize visible nail space. Clean, precise application makes any color look intentional.
Sheer, milky colors—sometimes called “soap nails” or “milk bath nails”—are having a moment and they’re perfect for small nail beds. These semi-translucent whites and pinks create that expensive, minimalist look. They elongate without being too bold, and they hide minor imperfections in your natural nail color.
Nail Art for Small Surfaces
When you’re working with limited nail real estate, you’ll want to choose nail art carefully. Overly complex designs can look cluttered and make your nails appear even smaller. Simple, strategic art creates impact without overwhelming your nails.
Vertical elements are your best friend. Thin vertical stripes, elongated French tips, or vertical ombré effects all draw the eye upward, creating the illusion of length. Even a simple vertical line accent on one or two nails can make all your nails look longer.
Minimalist designs work beautifully on small nail beds. Think tiny dots, delicate gold foil accents, a single rhinestone, or subtle geometric shapes. These add interest without competing for space. Negative space designs—where part of your natural nail shows through—also work well by not covering every inch of available space.
French manicure variations are classic for a reason. The contrast between the nail bed and tip creates visual length. Try different approaches: a thin white tip for maximum elongation, colored tips in soft pink or nude, or even reverse French where the color is at the cuticle. Keeping the tip lighter than the base naturally draws the eye forward.
Avoid chunky 3D nail art, large rhinestone clusters, or busy patterns that cover the entire nail. These compete with your actual nail shape and can make small nails look cluttered. When in doubt, less is more. A single focal point—like an accent nail with a small design—lets you enjoy nail art without overwhelming small nail beds.
Finish Options
The finish you choose affects how your nails photograph and how large they appear in person. Glossy finishes reflect light, making nails look plumper and more three-dimensional. They’re perfect for simple designs or solid colors where you want maximum impact.
Matte finishes create a sophisticated, modern look and can actually make nails appear slightly longer by eliminating reflective surfaces that emphasize nail size. A matte nude or soft pink creates that expensive, understated vibe. Matte topcoats are also more forgiving of minor application imperfections.
Sheer or jelly finishes work wonderfully on short nails because they let your natural nail show through slightly. This creates depth and makes artificial tips blend seamlessly with your natural nails. Sheer pinks, peaches, and nudes are especially flattering.
Chrome, shimmer, and metallic finishes can work but require careful application. On very small nail beds, super reflective finishes can sometimes emphasize how small your nails are. If you love these looks, try them as accent nails or in softer, more subtle metallics rather than full-on mirror chrome.
Common Mistakes to Avoid
Choosing Tips That Are Too Long
One of the biggest mistakes people make with small nail beds is thinking they need dramatic length to compensate. Actually, the opposite is true. Tips that are too long look disproportionate to your nail bed size and are uncomfortable for daily activities.
When your tips are much longer than your nail bed is wide, they look obviously fake rather than like a natural extension of your nails. The ratio feels off, drawing attention to the artificial nature of the nails rather than creating a seamless, enhanced version of your natural nails.
Overly long tips on small nail beds are also more prone to breaking. There’s less surface area for the tip to bond to, so the longer the extension, the more leverage exists to pop it off or crack it. Keeping tips shorter creates a stronger, more durable manicure.
Start with XXS or XS lengths and see how they feel and look. You can always go slightly longer next time if you want, but you can’t make tips shorter once they’re applied (well, you can file them down, but that defeats the purpose). For daily wear, tips that extend just 2-3mm past your fingertip create the most natural, comfortable result.
Improper Nail Prep
Rushing through nail prep is a recipe for tips that lift, chip, or pop off prematurely. Proper prep is especially important on small nail beds where there’s less surface area for adhesion—every millimeter of contact counts.
Always start by gently pushing back your cuticles. This reveals more of your nail bed and creates a larger bonding surface. Don’t cut your cuticles aggressively; just push them back with a cuticle pusher and trim any dead skin or hangnails.
Buff the surface of your natural nail lightly with a fine buffer. This removes the natural oils and shine that prevent good adhesion. You’re not trying to thin your nails, just create a slightly textured surface for better grip. Wipe away all dust with a lint-free wipe.
Cleanse your nails with rubbing alcohol or a nail dehydrator to remove any remaining oils, lotions, or moisture. Let them dry completely—even dampness can prevent proper bonding. This step takes 30 seconds but makes the difference between tips that last one day versus three weeks.
Ignoring Your Lifestyle
Your nails need to work with your life, not against it. If you type all day, play sports, work with your hands, or have young kids, you’ll want shapes and lengths that accommodate those activities.
Super pointy shapes like stiletto or long coffin nails might look amazing on Instagram, but they’re impractical if you need functioning hands. You’ll constantly be adjusting how you do basic tasks, and the tips will be more prone to breaking when you inevitably forget and use your hands normally.
Similarly, if you’re hard on your nails, skip the trendy but fragile options. Square nails with sharp corners catch on things. Long almond nails break when you’re active. Choose durable shapes like round or squoval that can handle your lifestyle without constant repairs.
Be honest about your maintenance commitment too. Some nail styles require weekly fills, careful attention, and frequent touch-ups. Others can go 3-4 weeks with minimal maintenance. If you’re not going to baby your nails or schedule regular appointments, choose low-maintenance options that still look good when they’re not perfect.
Maintaining Nails with Small Nail Beds
Daily Care Routines
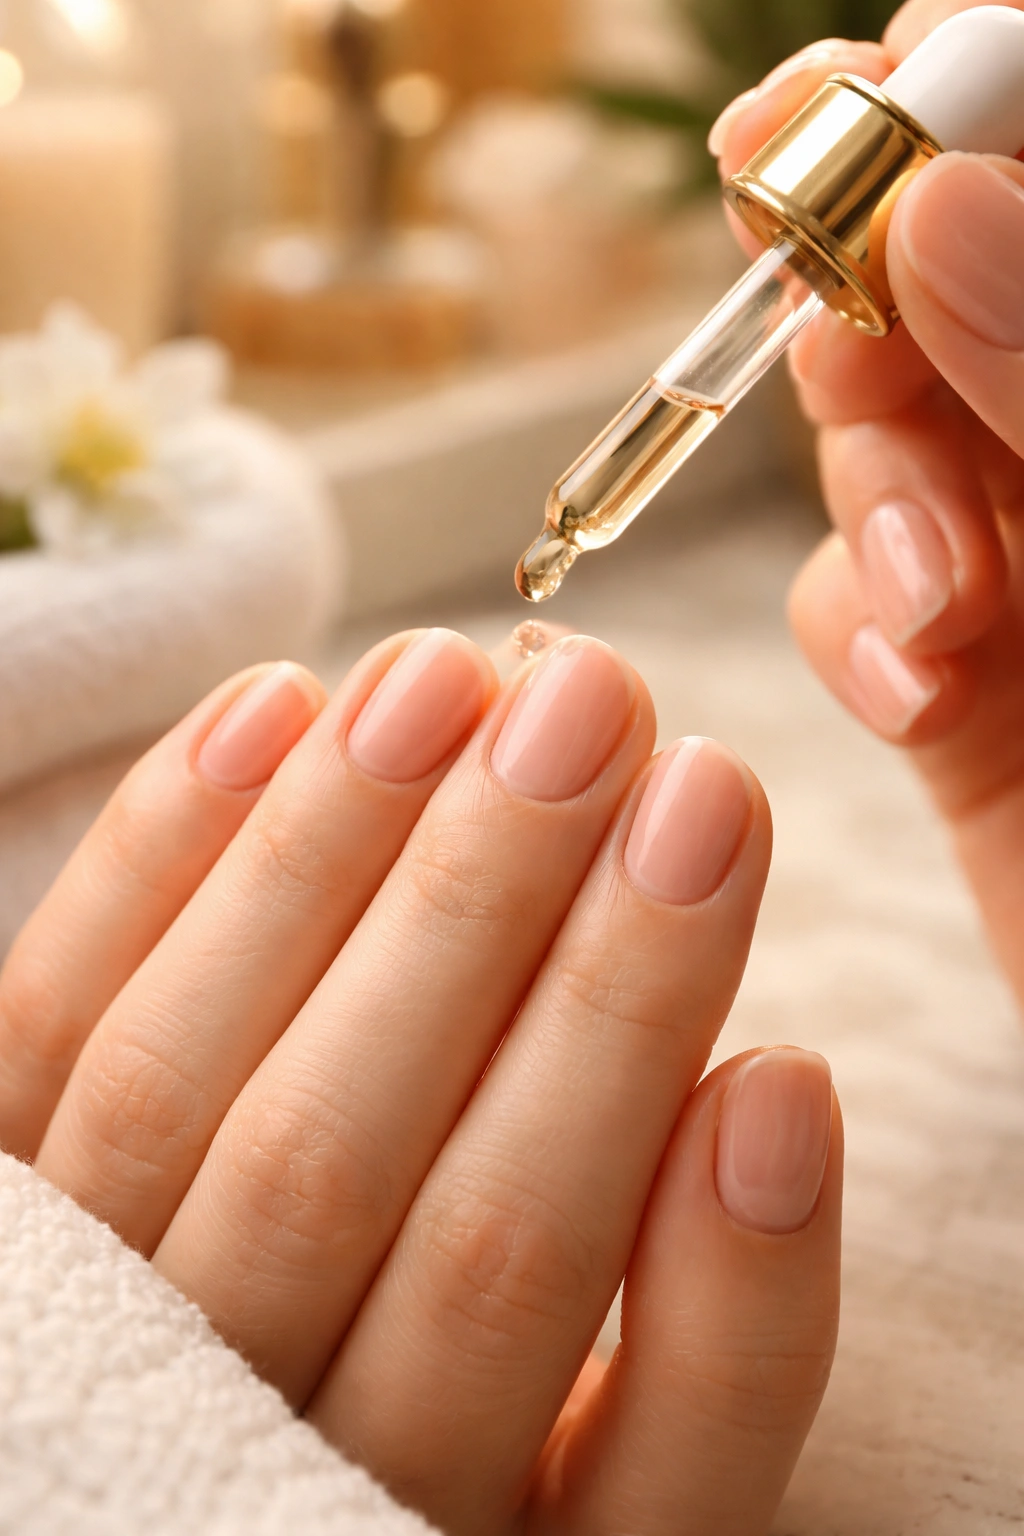
Keep your cuticles moisturized with cuticle oil at least once daily. This prevents hangnails, keeps the nail area looking groomed, and actually promotes healthier nail growth. Well-maintained cuticles make your nail beds appear larger by creating a clean, defined starting point for your nails.
Wear gloves when doing dishes, cleaning, or working with water frequently. Constant water exposure weakens both natural nails and the adhesive holding tips in place. Even if your tips are sealed with gel, prolonged water exposure can cause lifting at the edges.
Be mindful of how you use your hands. Use the pads of your fingers rather than your nails to open cans, press buttons, or pick things up. This simple habit prevents chips, breaks, and early lifting. It takes a few days to adjust but becomes second nature quickly.
Apply hand lotion regularly, but avoid getting heavy creams directly on your nail tips, especially around the edges. Oil-based products can break down nail glue and cause lifting. If you do get lotion on your nails, wipe them clean and apply a quick-dry topcoat to reseal everything.
When to Seek Professional Help
If you’re struggling to get tips to stay on, it’s worth visiting a professional nail technician. They can assess your specific nail bed shape, recommend the best tip styles, and show you proper application techniques. Sometimes you just need hands-on guidance to understand what works for your nails.
Persistent lifting, peeling, or breakage might indicate an underlying nail health issue. Conditions like nail fungus, thyroid problems, or vitamin deficiencies can affect nail structure and make it hard for tips to adhere properly. A nail tech can often spot these issues and recommend you see a doctor if needed.
Professional application is worth it for special occasions when you absolutely need your nails to look perfect and last. Weddings, photo shoots, important presentations—these are times when investing in professional application pays off. You’ll have peace of mind knowing they’re done right.
If you have naturally very small, very wide, or unusually shaped nail beds, a professional can customize tip application in ways that are difficult to do at home. They might blend multiple tip sizes, sculpt custom fits, or use professional-grade products that create better results than DIY kits.
Finding Your Perfect Nail Style
The best nails for short and small nail beds are ultimately the ones that make you feel confident and work with your lifestyle. There’s no single “right” answer—just what’s right for you.
Start by experimenting with different shapes on shorter lengths. Try round nails for a week, then squoval the next time, then oval. See which feels most comfortable and which you think looks best. Take photos from different angles to see how each shape photographs—sometimes what looks good in person translates differently in pictures.
Pay attention to which colors and finishes you gravitate toward. If you constantly find yourself reaching for neutrals, lean into that. If you love bold colors, don’t feel limited by having small nail beds. The “rules” are guidelines, not restrictions.
Consider keeping a nail journal or Pinterest board with styles you love. When you get a manicure you absolutely adore, take notes: what shape, what length, what colors, which tips you used. Building this reference library helps you replicate successful looks and avoid repeating things that didn’t work.
Key Takeaways
Small and short nail beds offer unique opportunities for creating beautiful, practical manicures that complement your hands. Round, oval, and squoval shapes consistently work best because they create visual length without requiring dramatic extension.
XXS and extra short nail tips have revolutionized options for people with petite nail beds. These pre-sized tips fit properly without requiring extensive filing and reshaping. Brands like SINOKAME now offer truly short options with 12-15 sizes to ensure proper fit.
Soft gel tips typically work better than traditional acrylic for small nail beds. They’re lighter, more flexible, more natural-looking, and easier to apply without creating bulk. The pre-etched backs ensure better adhesion even on smaller bonding surfaces.
Proper application technique matters more on small nail beds because there’s less margin for error. Take time with sizing, nail prep, and blending. A well-applied shorter nail always looks better than a poorly applied longer one.
Vertical design elements and nude or neutral colors create the illusion of length, making nails and fingers appear longer and more slender. Simple, minimalist nail art works better than busy patterns that overwhelm limited space.
Your lifestyle should guide your choices as much as aesthetics. Practical lengths and durable shapes mean you’ll actually enjoy your manicure rather than fighting with it. Beautiful nails that work with your life beat Instagram-worthy nails that constantly break.
Small nail beds aren’t a limitation—they’re just a starting point for finding what works uniquely well for you. With the right shapes, lengths, and techniques, your nails can look just as polished and put-together as anyone else’s.
