

Long oval nails have become the go-to shape for anyone seeking a balance between elegance and practicality, and when you pair that shape with minimalist design, you get something truly special — nails that whisper rather than shout. The appeal is straightforward: oval nails elongate the finger, feel comfortable in everyday life, and provide just enough surface area to express your style without overwhelming your hands. But here’s what makes minimalist oval designs stand out from the endless scroll of maximalist nail art — they prove that a clean, intentional aesthetic is infinitely more sophisticated than filling every inch of space with color and embellishment.
Minimalism in nail design isn’t about being boring or plain. It’s about strategic choices, intentional negative space, and letting the beauty of the oval shape itself become part of the design rather than just a canvas. A single line, a subtle gradient, a perfectly placed accent nail, or simply a pristine nude with a glossy finish — these understated approaches often feel more elevated and timeless than ornate designs. Whether you’re drawn to minimalism because you have a professional environment, because you prefer a clean aesthetic, or because you want nails that won’t distract from your everyday life, the oval shape is the perfect vehicle for that vision.
What follows are fifteen distinct approaches to minimalist long oval nails, each one offering a different interpretation of what “clean” and “minimal” can mean. Some rely on color and finish alone, others introduce subtle geometric elements or thin line work, and a few play with the interplay between matte and glossy to create depth without visual clutter. Each design is achievable at home or in a salon, and each one proves that restraint and precision can be just as impactful as complexity.
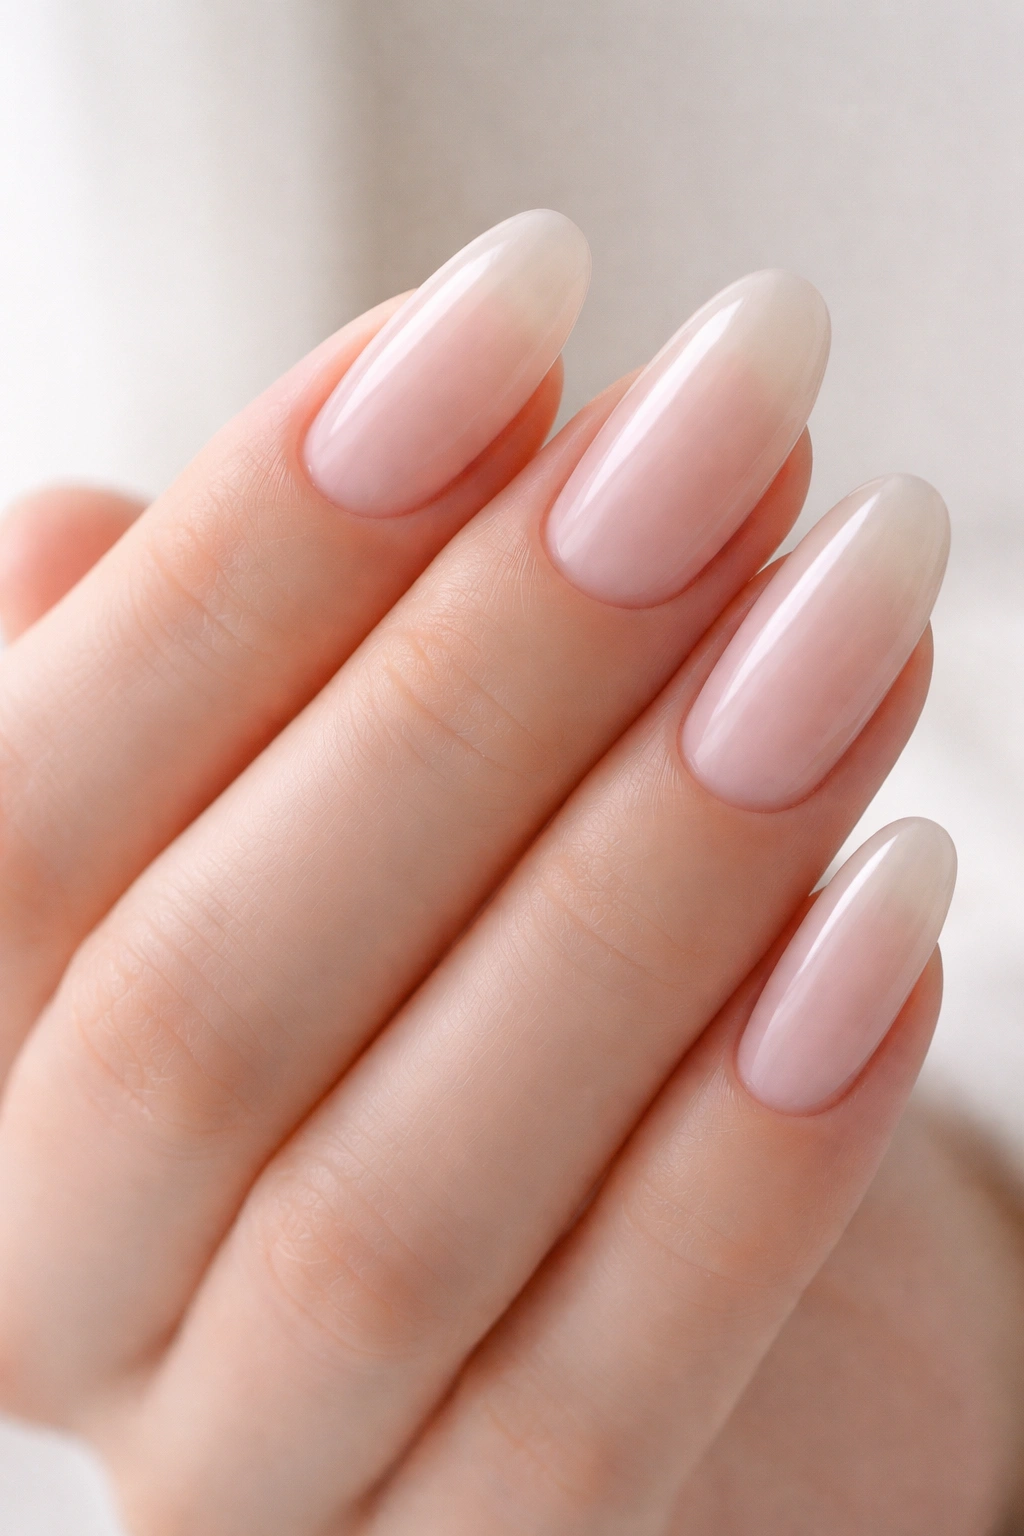
1. Creamy Nude with a High-Shine Finish
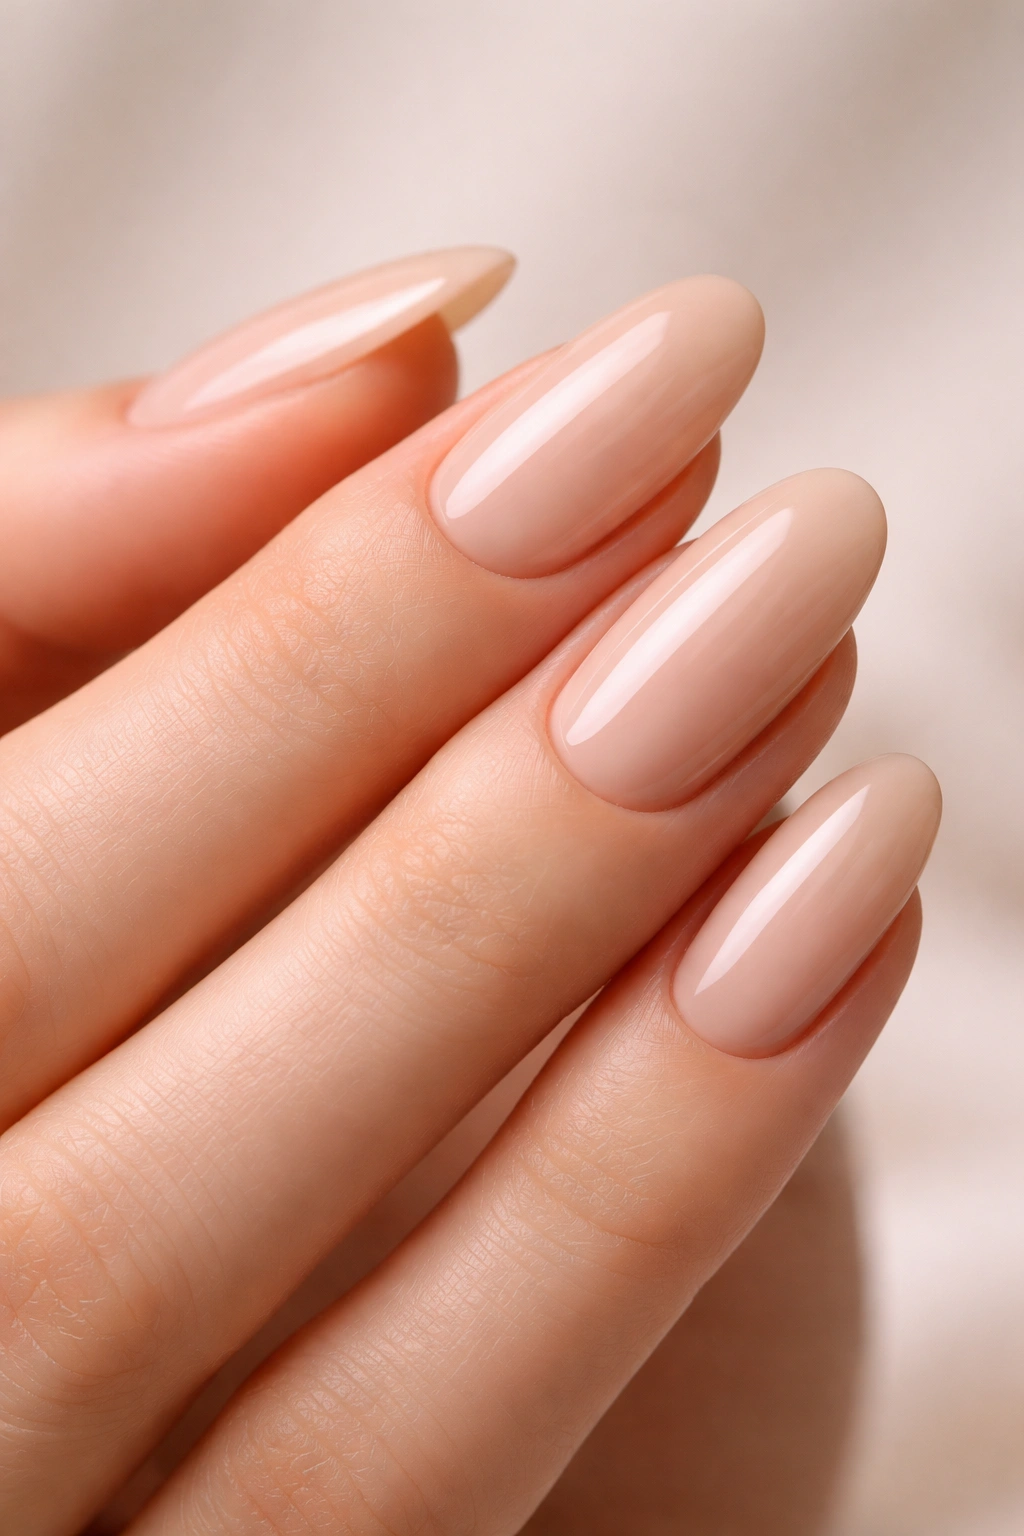
There’s a reason creamy nude has remained a staple for decades — it works with every skin tone, pairs with any outfit, and feels effortlessly put-together. A high-shine finish elevates this simple approach by catching light and giving your nails a multidimensional quality that reads as polished and intentional. The key to making this design feel premium rather than plain is choosing the right shade of nude for your specific undertone and applying the glossy topcoat with precision so that the finish is glass-smooth and reflective.
Finding Your Perfect Nude Shade
The most common mistake when selecting nude polish is assuming that one shade works for everyone. Warm undertones benefit from nudes with peachy or golden warmth, cool undertones look best in nudes with pink or rosy undertones, and neutral undertones can typically pull off either direction. Look for a shade that disappears into your skin rather than creating a stark contrast — that seamless blend is what makes the design feel like an extension of your hand rather than a coating on top of it.
Application for a Flawless Finish
- Use a base coat to create a smooth foundation and protect your nail beds
- Apply thin, even layers of nude polish rather than one thick coat — two coats typically provides better coverage and durability
- Invest in a high-quality glossy topcoat that doesn’t yellow over time
- Seal the edges of each nail by painting the underside of the tip to prevent chipping
- Buff out any minor imperfections in the polish before applying topcoat for a truly smooth surface
2. Soft White with Bare Nail Bed Showing
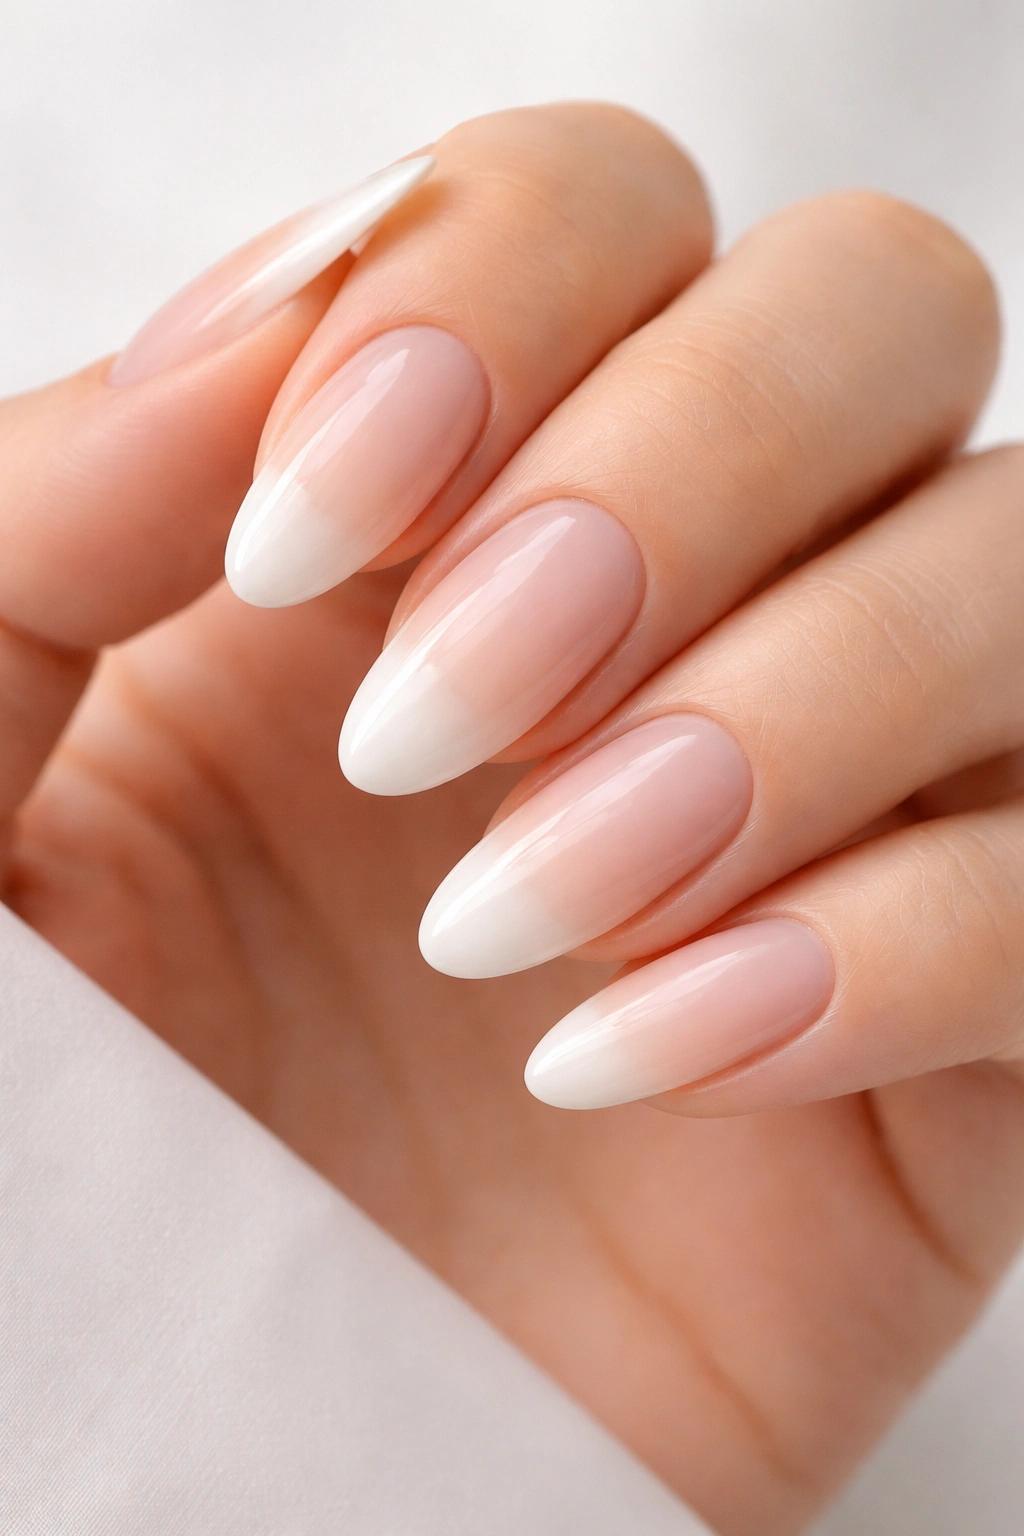
This design walks a fine line between minimalism and almost not being a design at all, and that’s precisely what makes it so effective. A soft, slightly off-white shade applied only to the tips creates the illusion of a French manicure while maintaining the clean, barely-there aesthetic that defines minimalism. The contrast between the white tips and your natural nail bed creates just enough visual interest to feel intentional, but the overall effect remains calm and understated.
Why Soft White Reads Better Than Bright White
Bright white can feel harsh and clinical, especially against the natural nail bed. A softer white with subtle warmth or a creamy undertone feels more sophisticated and contemporary. This shade sits between pure white and off-white, creating what’s sometimes called “soft white,” “cloud white,” or “ivory” depending on the brand. The slight warmth prevents the design from feeling sterile while still maintaining that clean aesthetic you’re seeking.
How to Perfect the Tip Application
- Use a nail guide or tape to establish a clean line where white begins
- Apply the white to the tips in thin layers, building opacity gradually
- Keep the line between white and natural nail straight and precise — any wobble will disrupt the minimalist effect
- Finish with a matte or satin topcoat to enhance the soft, non-reflective quality
- Consider a very thin glossy topcoat for durability if you prefer shine
3. Monochromatic Nude Ombre from Base to Tip
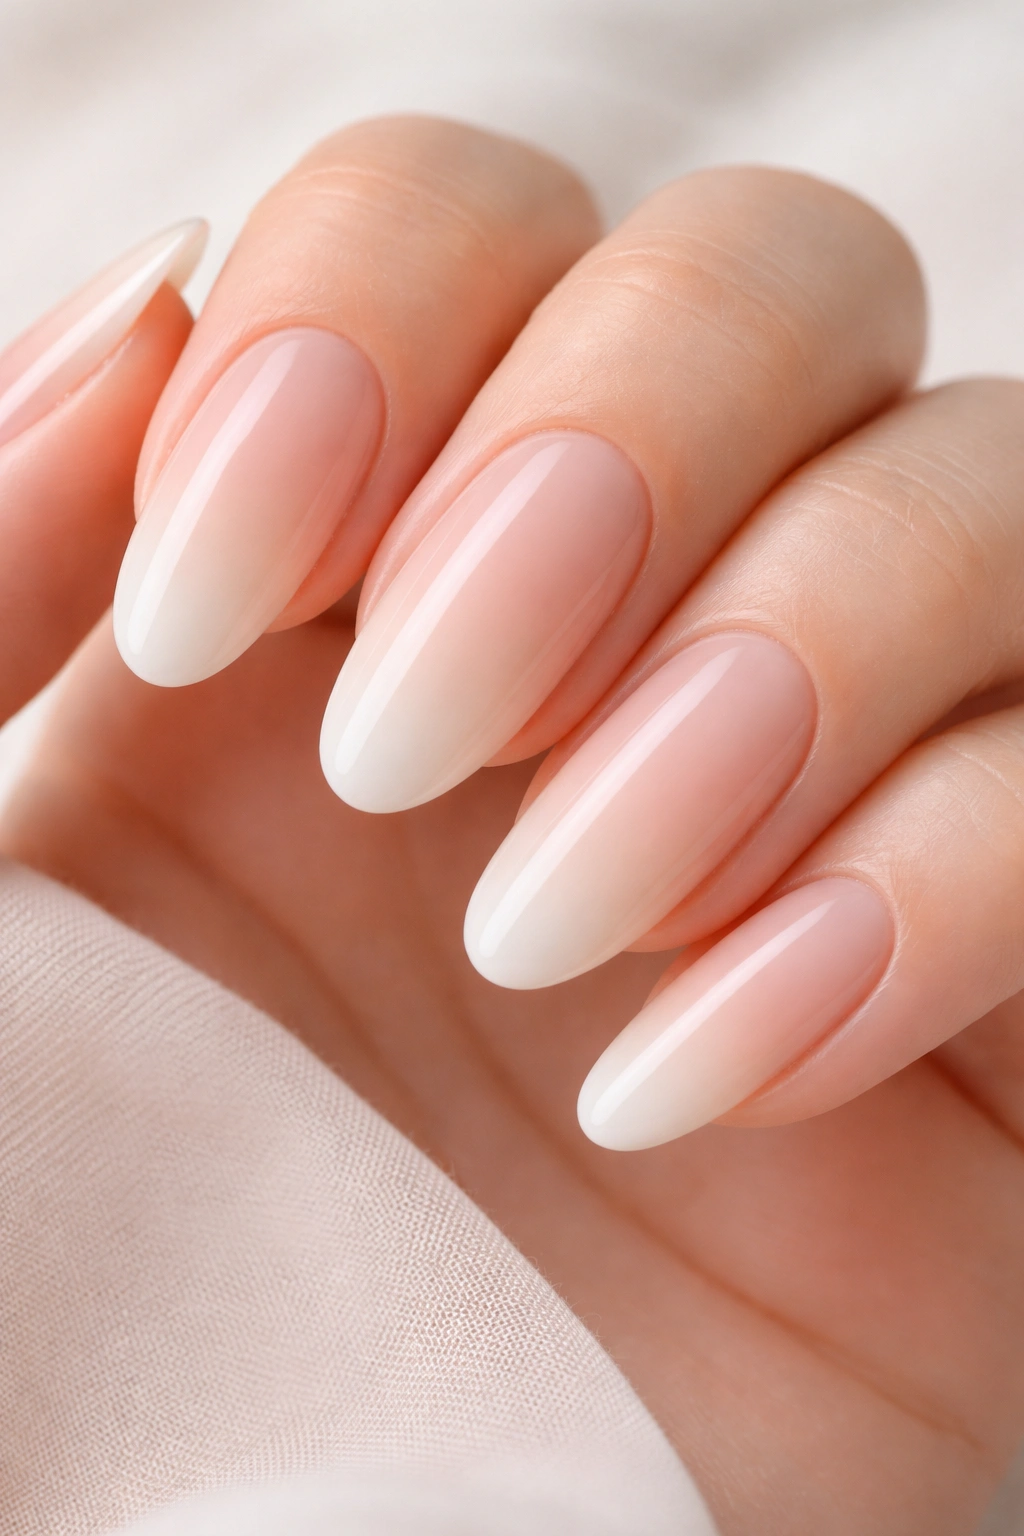
Rather than a stark transition between two colors, a monochromatic ombre keeps you within the same color family while gradually shifting from a slightly deeper shade at the base to a lighter version at the tips. This creates movement and depth while maintaining the cohesive, minimal aesthetic. The oval shape works beautifully with ombre because the elongated form naturally guides the eye along the gradient.
Creating a Seamless Gradient
The secret to a professional-looking ombre is blending the shades while the polish is still slightly wet. You’ll need two shades in the same color family — usually a shade that’s two to three levels darker than your base nude. Apply the darker shade to the base, the lighter shade to the tips, and blend them in the middle using a sponge or blending brush with dabbing motions while the polish is still wet and workable.
Tools and Technique for Best Results
- Choose a makeup sponge or specialized blending sponge — the texture helps distribute color evenly
- Keep both polish shades nearby and damp by lightly misting the sponge with a setting spray or polish thinner
- Dab rather than swipe to avoid streaking and to encourage seamless color blending
- Apply a generous topcoat to seal and smooth any texture created by the sponge blending
- Seal the underside of the tips to prevent the ombre from chipping quickly
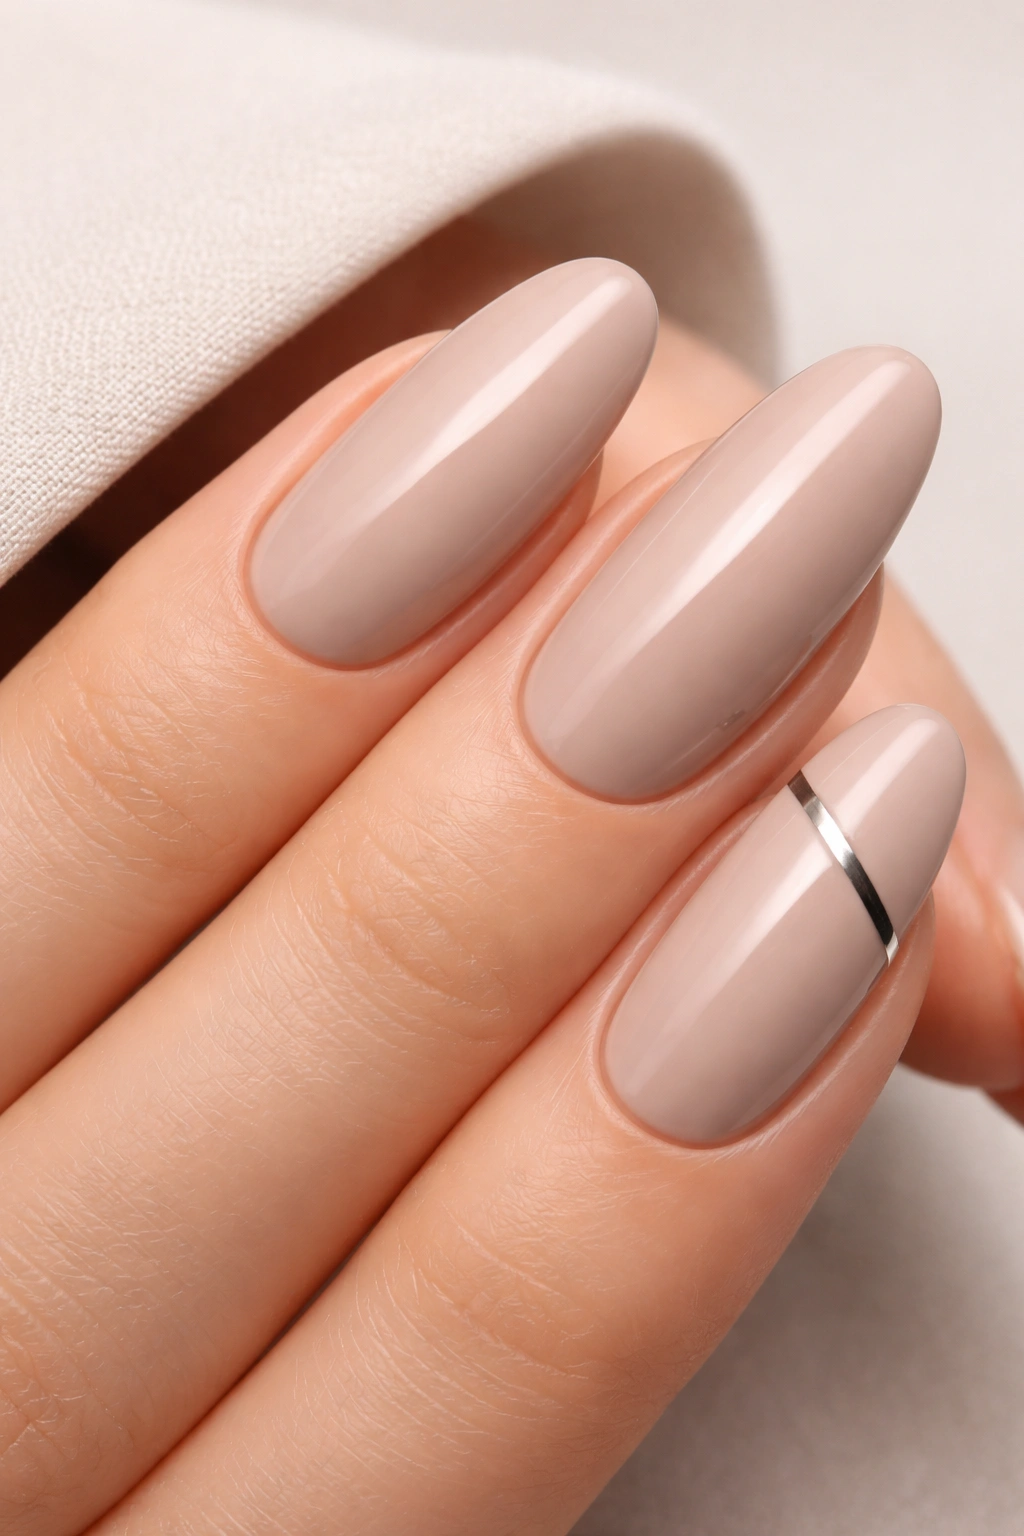
4. Pale Grey with Minimalist Line Detail
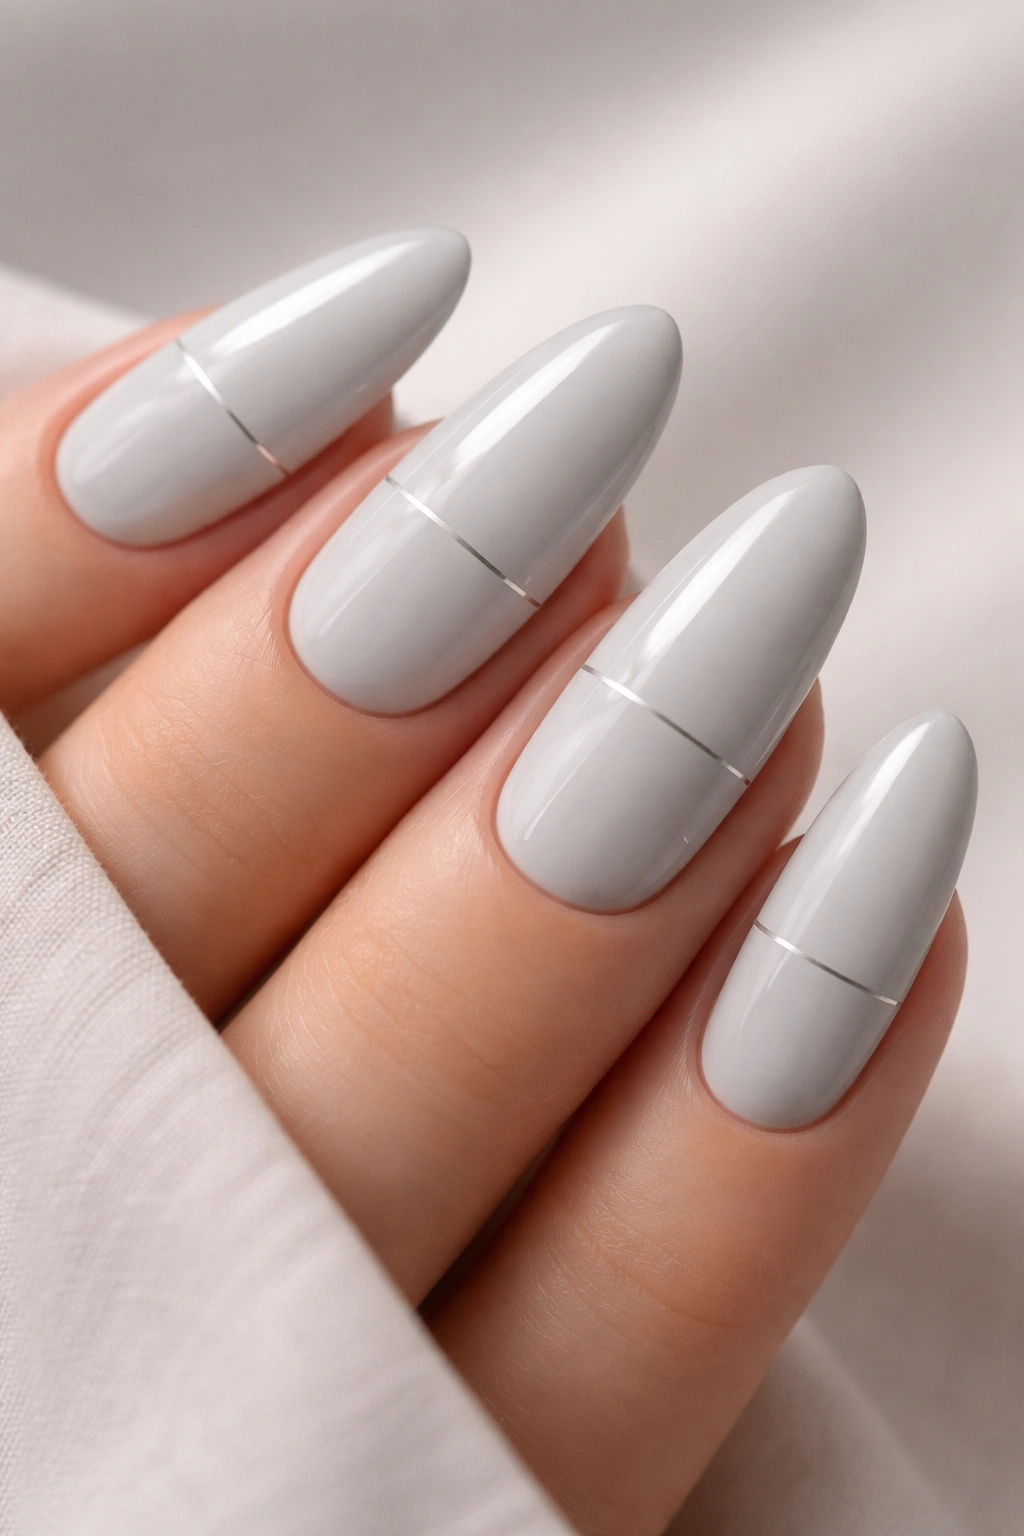
Introducing a single thin line — whether it’s a horizontal stripe across the middle, a vertical line down the center, or a subtle half-moon accent at the base — breaks up the solid color in the most minimal way possible. A pale grey base is calm and sophisticated, and a contrasting thin line (either in black, charcoal, or even a lighter metallic) adds just enough architectural interest to elevate the design without compromising the minimalist vibe.
Choosing the Right Contrasting Color
Black provides the most dramatic contrast and reads cleanest, but charcoal offers a softer alternative that still has impact. Some people prefer a metallic gold or silver line, which adds a touch of understated luxury. The pale grey base should be light enough that any line you choose creates clear visual separation — if the base is too dark, a thin line becomes hard to see and loses its impact.
Techniques for Precise Line Work
- Use a thin striping brush or nail art liner to paint the line freehand if you have a steady hand
- Alternatively, use nail tape to create straight, clean lines by placing the tape where you want the line to be, painting the contrasting color, and removing the tape while the polish is slightly wet
- Seal the underside of the tip to protect the line work from wear
- Multiple thin coats of the contrasting color look better than one thick coat
- A glossy topcoat will make the line appear sharper and more defined
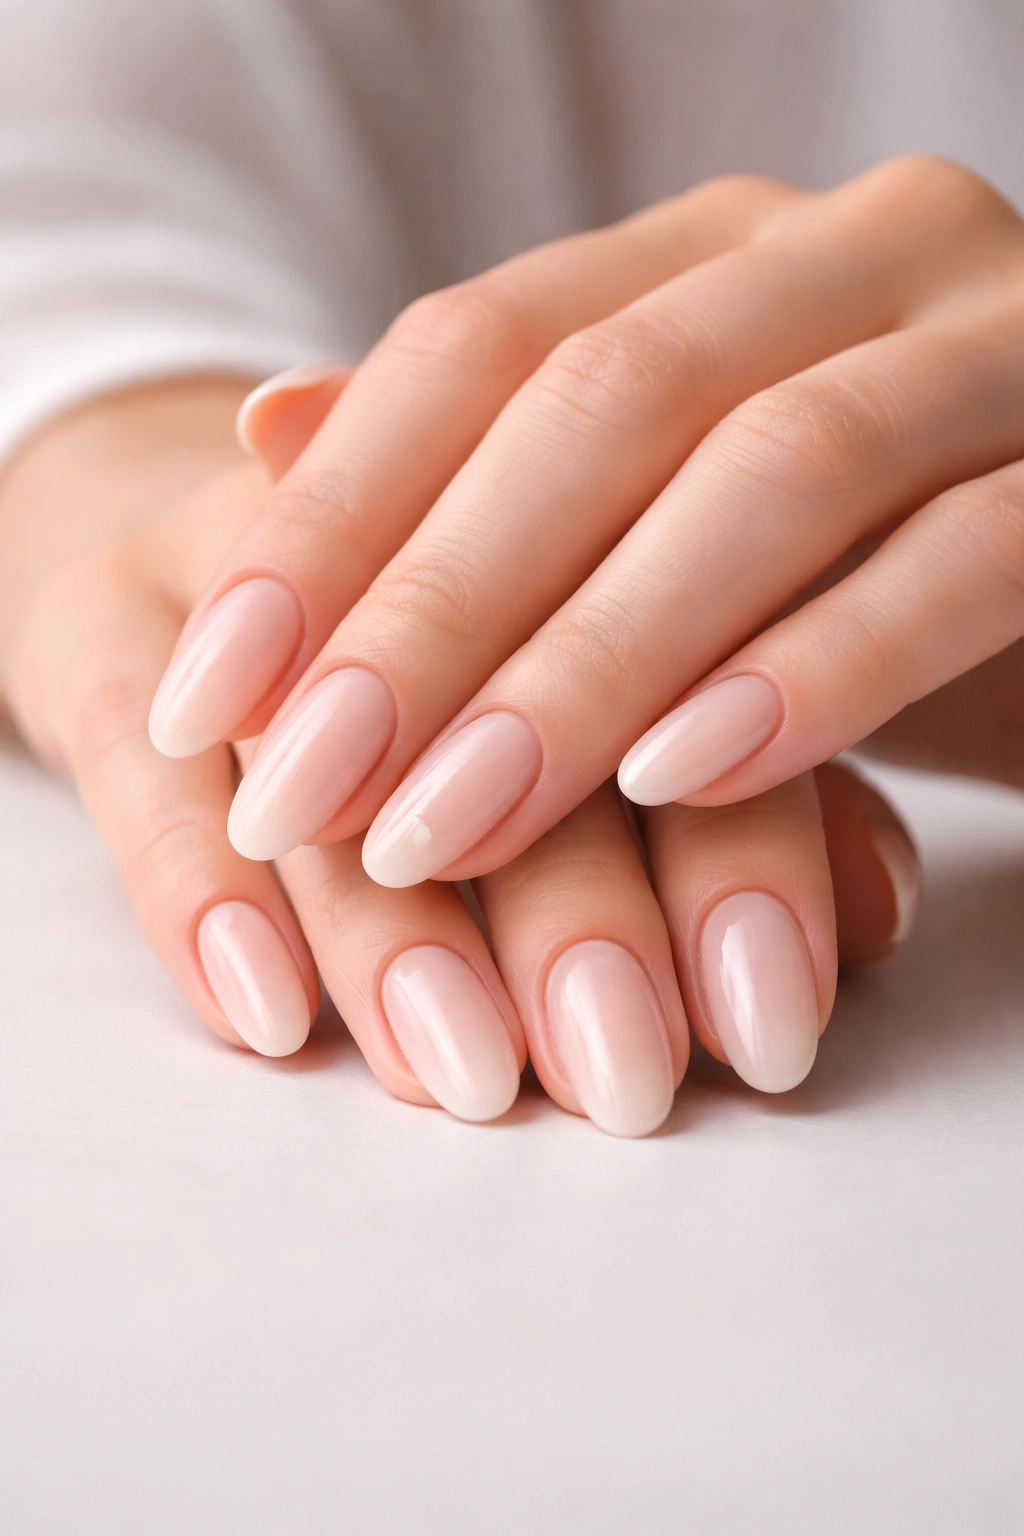
5. Milky Translucent Base with Subtle Blush Undertone
This design uses a milky, almost see-through polish that hints at a blush or peachy pink undertone without being overtly colored. The effect is incredibly subtle — your nails look mostly like themselves, just slightly enhanced and refined. This approach appeals to people who love the minimalist aesthetic but want something slightly more intentional than bare nails.
Why Translucent Polish Feels Minimalist
Translucent and semi-sheer polishes sit in a unique category — they’re not bare nails, but they don’t read as a full color either. They create what’s called a “jelly” or “milky” effect depending on how opaque they are. This in-between quality feels inherently minimal because it doesn’t make a bold statement; instead, it whispers. The blush undertone adds warmth without introducing an actual distinct color, creating a natural-looking enhancement.
Application to Achieve the Perfect Translucent Effect
- Apply a base coat to prevent staining, especially important with lighter shades
- Two thin coats of translucent polish typically provide better color payoff than one thick coat
- Build opacity gradually by layering rather than applying heavily in one coat
- Skip a topcoat or use a matte topcoat to maintain the soft, skin-like quality
- If you do use a glossy topcoat, keep it very thin so it doesn’t obscure the translucent effect
6. Soft Taupe with Geometric Edge Accent
Taupe is the ultimate minimalist neutral — it’s warm enough to feel friendly but cool enough to feel sophisticated. A geometric accent on just one or two nails (perhaps a thin triangle or trapezoid shape along the edge) adds a subtle architectural element without overwhelming the design. This approach gives you the satisfaction of a “designed” nail while maintaining the restraint that defines minimalism.
Why Geometric Shapes Work for Minimalism
Geometry is inherently clean and intentional. A simple shape — a triangle, a thin rectangle, or a half-circle along the edge — reads as a deliberate design choice rather than decoration. The key is scale: keep the geometric element small and confined to one nail or a subtle accent on each nail. The overall effect should still feel calm and organized.
Creating Clean Geometric Shapes
- Use nail tape or thin stencils to establish clean lines for your geometric shape
- Paint the contrasting color (often black, charcoal, or a deeper shade of the base taupe) inside the taped area
- Remove the tape while the polish is slightly tacky for the cleanest edge
- A single accent nail with the geometric element creates asymmetry in a controlled, minimalist way
- Seal with a glossy topcoat to define the shape and add polish
7. Cool-Toned Beige with Vertical Brushstroke
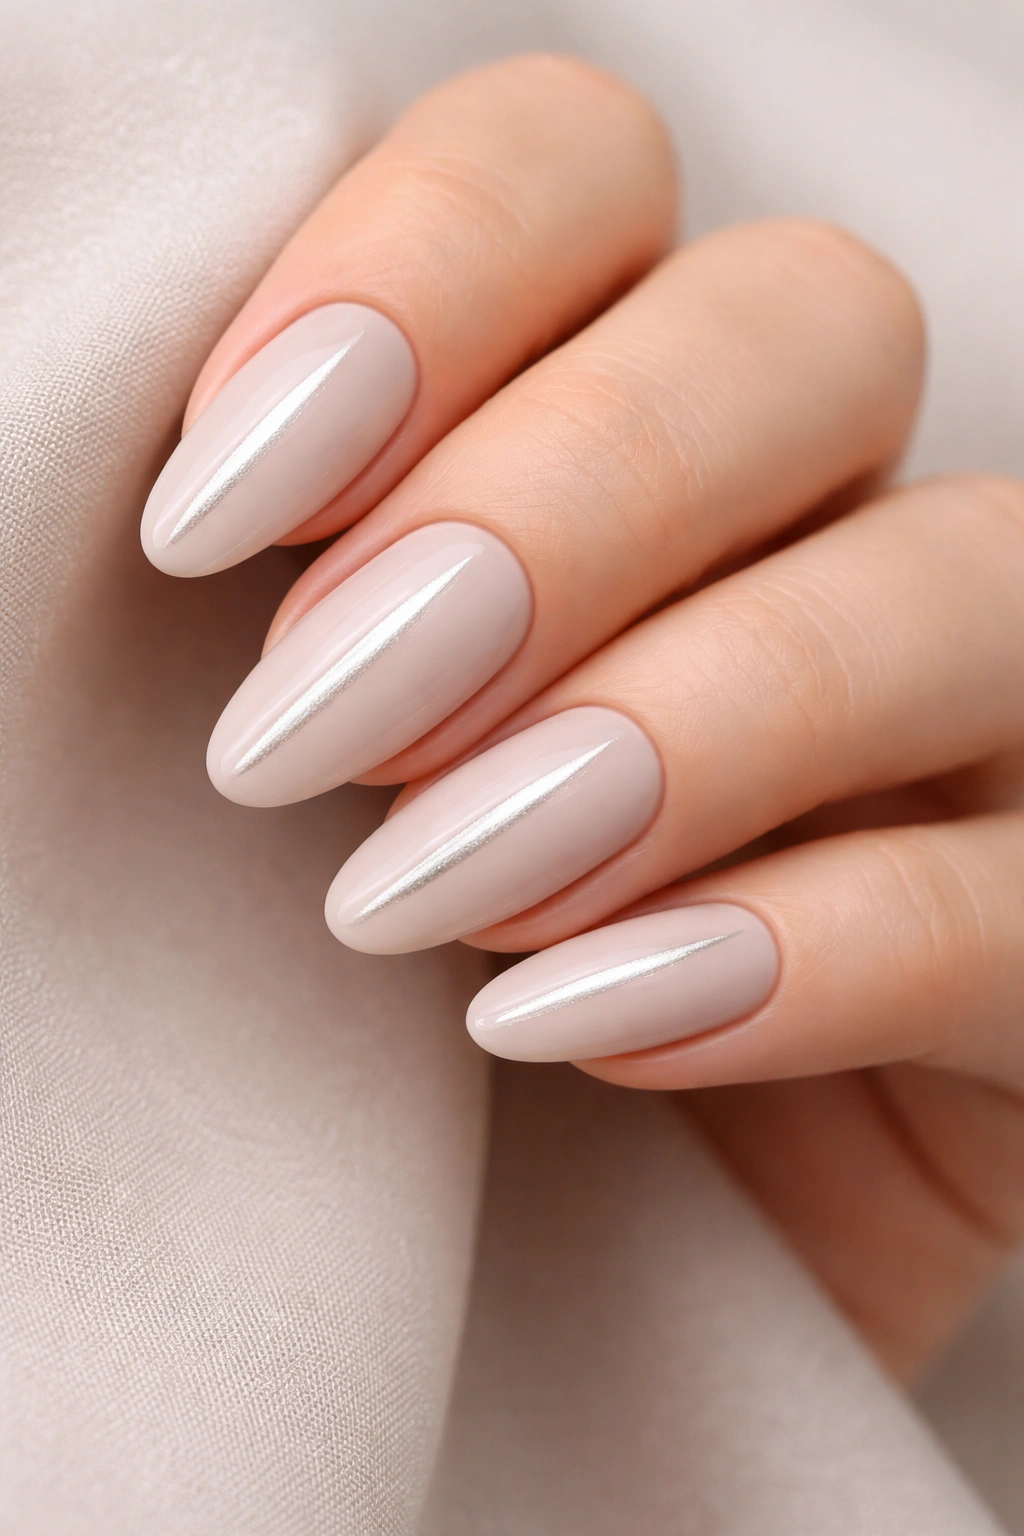
A cool-toned beige — sometimes called greige — is a sophisticated neutral that feels current without chasing trends. A single vertical brushstroke in a contrasting shade (white, black, or a metallic) runs from the base to the tip, creating a sense of movement and intention. The minimalist approach means this brushstroke is the only design element, making its placement and execution crucial.
Finding the Balance with One Brushstroke
One brushstroke is an interesting design choice because it has to earn its place. It should feel organic and intentional rather than accidental. Some prefer a perfectly straight, thin vertical line, while others like a slightly imperfect, hand-painted quality that feels more human. The width of the brushstroke matters — too thin and it disappears, too thick and it overwhelms the design.
Painting a Single Minimalist Brushstroke
- Sketch the approximate line placement with a very light pencil mark on the nail if you need guidance
- Use a thin art brush or liner brush dipped in your contrasting polish color
- Paint in one or two smooth motions from base to tip rather than multiple passes, which can create a ragged line
- The brushstroke can be perfectly straight or have a gentle, organic curve — both read as intentional
- Allow it to dry completely before applying topcoat, which will seal and smooth any brush texture
- Matte topcoat emphasizes the hand-painted quality, glossy topcoat makes it appear more polished
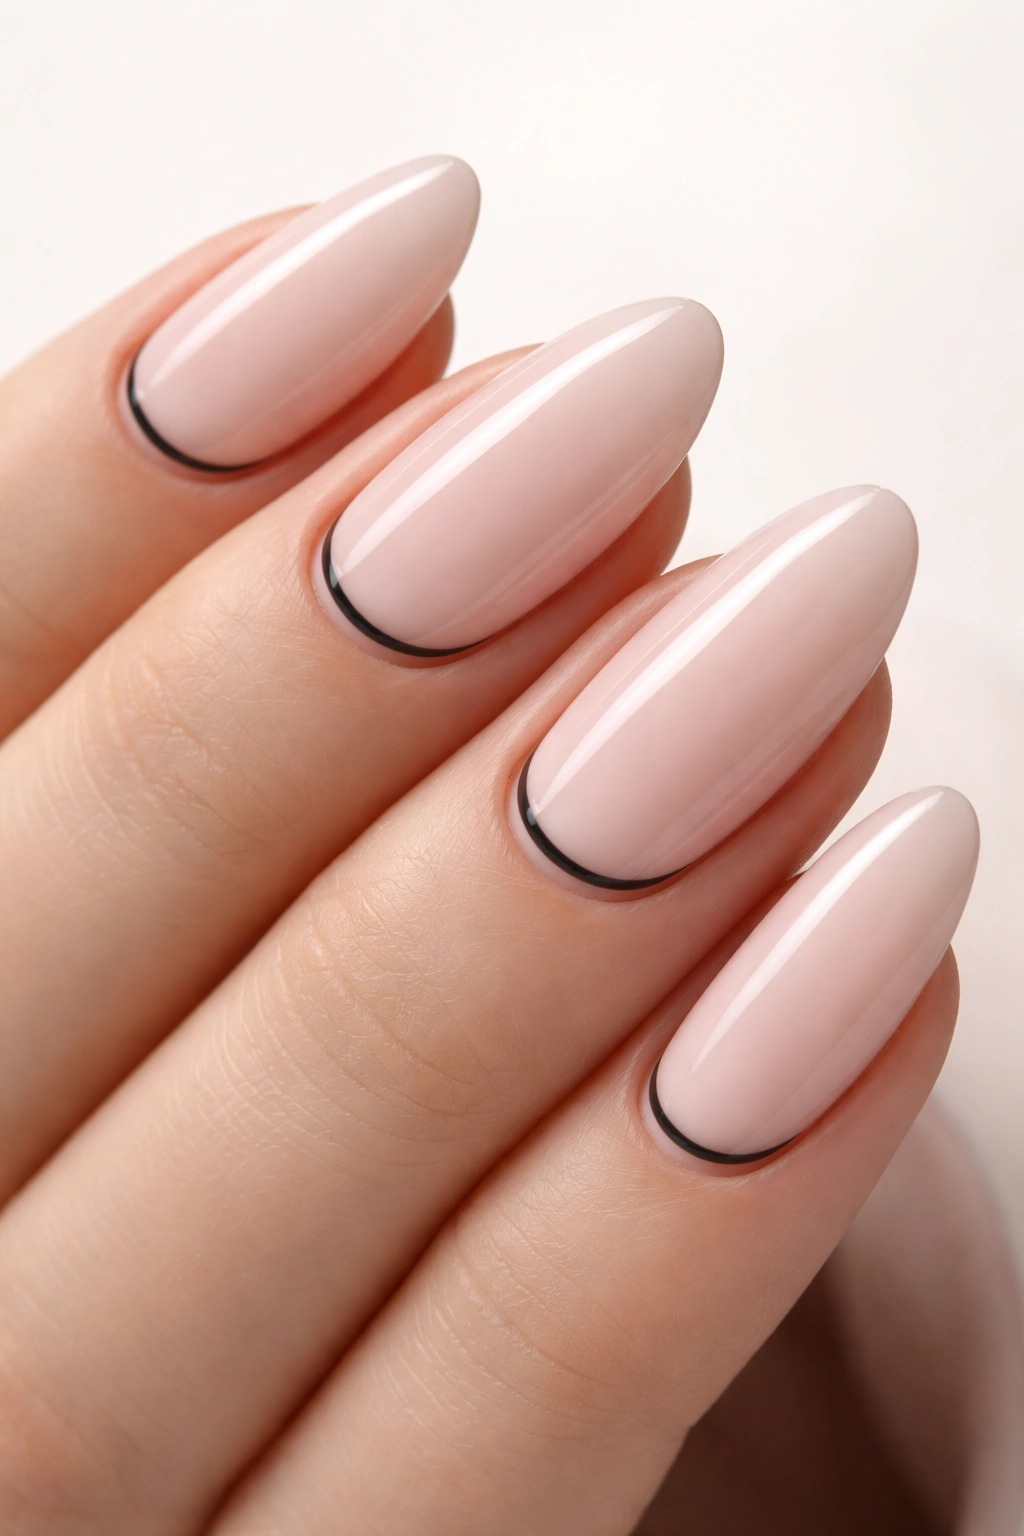
8. Warm Vanilla with Thin Black Underlining
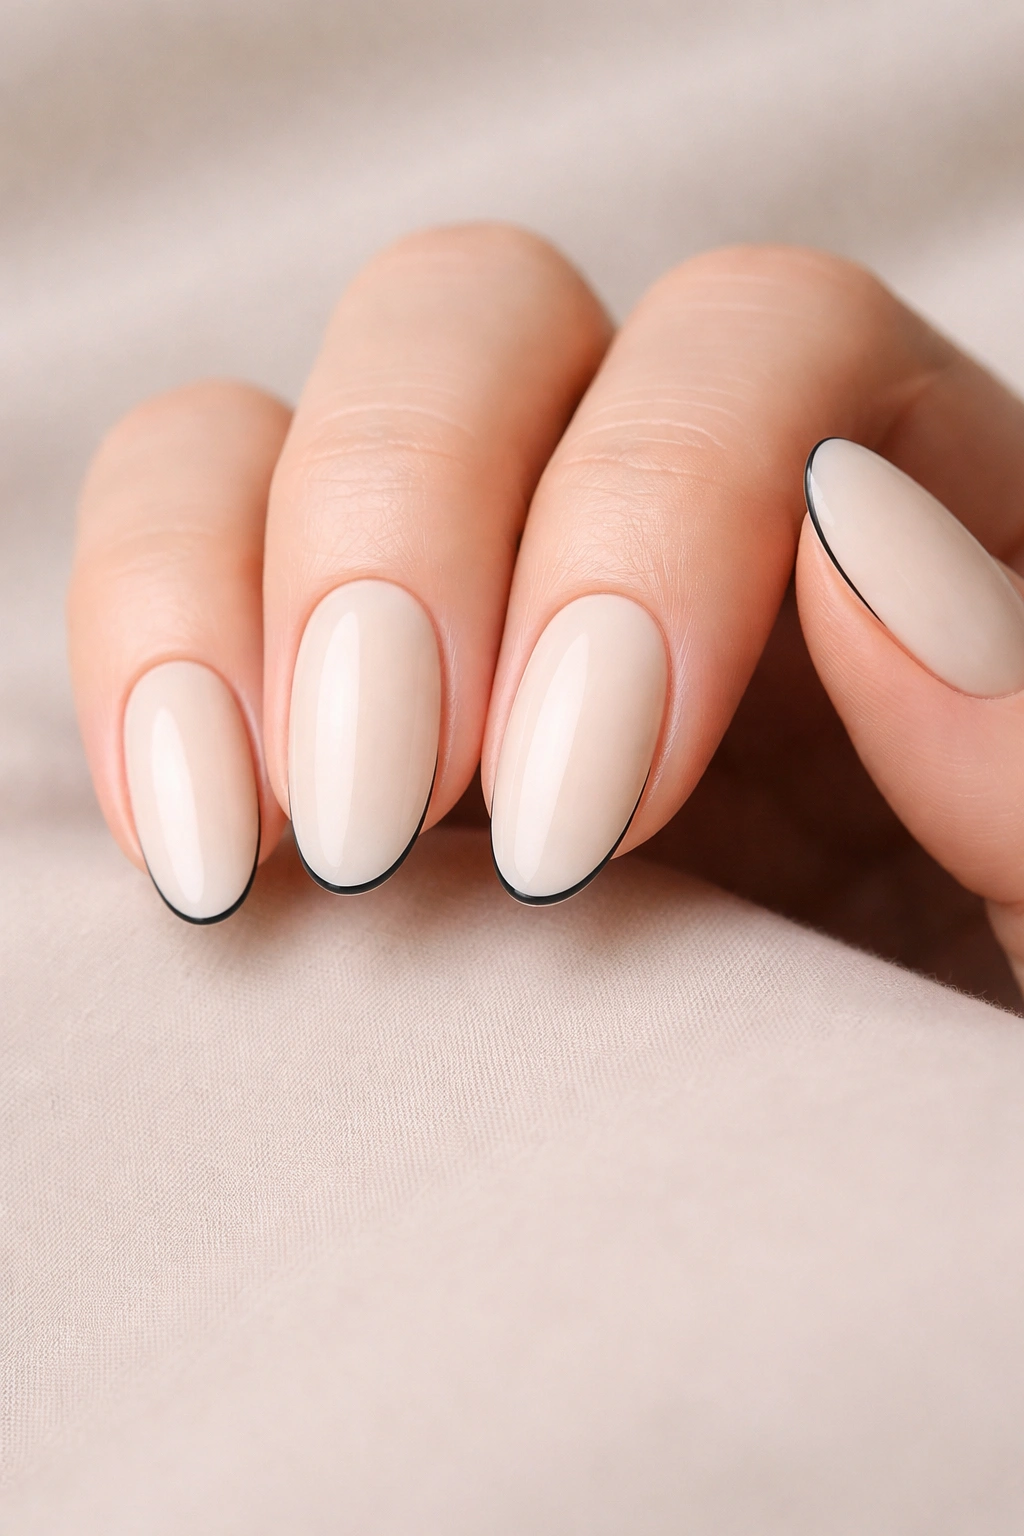
Warm vanilla — a soft, creamy off-white with subtle yellow undertones — feels inviting and warm in a way that cool whites don’t. A thin black line running along the very edge of the nail (either along the cuticle area or along the free edge) creates a subtle frame or definition without being visually heavy. This design is sophisticated in its restraint.
The Psychology of Underlining in Nail Design
A line that runs along the free edge of the nail (where the white shows naturally) is sometimes called an “underline” or “framing” element. This placement emphasizes the oval shape of the nail and creates a subtle horizon line. It’s a design choice seen in high-end minimalist nail art because it’s so intentional — there’s no practical reason for the line to be there, so it’s clearly aesthetic.
Executing a Perfect Underlining
- Measure the placement carefully so the black line aligns with the edge of the white (if using a white base) or sits slightly below the cuticle area
- Use a very thin striping brush or nail liner for precision
- Keep the line as thin as possible while still being visible — this is where minimalism truly lives
- Allow each nail’s line to be exactly the same thickness and position for a controlled, polished look
- The underline works especially well on oval nails because the shape naturally guides the eye along the line
9. Soft Pink with Gold Dot Accent
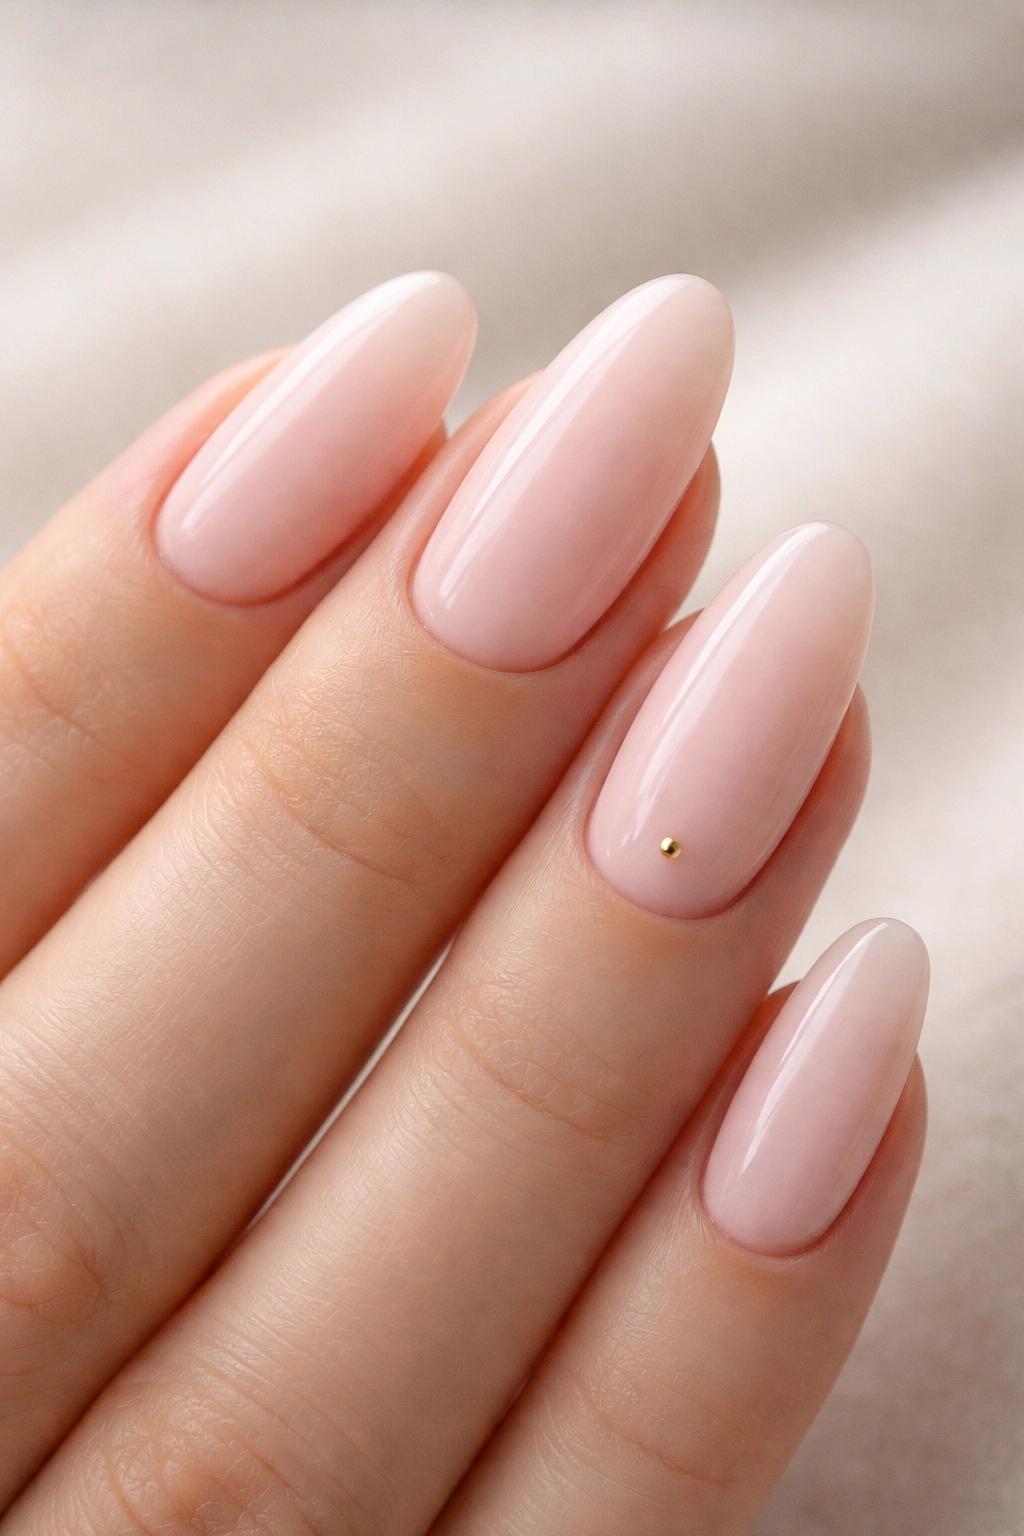
A soft, muted pink feels fresh and minimal when paired with just a single accent — a tiny gold dot placed strategically on one nail, perhaps at the base or off-center. This adds a jewelry-like touch without introducing complex patterns or covering large areas. The gold catches light and adds luxury while the overall design remains spacious and calm.
Choosing Between Various Accent Placements
The power of a single dot is that its placement becomes the design. A dot at the base (cuticle area) reads as intentional and controlled, a dot off-center creates an asymmetrical balance, and a dot at the tip feels more playful. Some prefer the dot on the ring finger nail only, creating an asymmetrical accent across the hand. Others place a matching dot on each nail for symmetry.
Creating Precise Metallic Dot Accents
- Use a dotting tool — either a specialized nail art tool or even a bobby pin — dipped in metallic polish or metallic gel
- Create the dot in a single, quick motion to avoid smudging or creating an irregular shape
- Let it dry completely before applying topcoat
- If using a polish dot, consider a matte topcoat that won’t make the dot look shiny and obvious in a way that disrupts the minimal aesthetic
- Gold tends to feel warmer and more luxe than silver; silver reads more modern and cool
10. Nude with Bare Cuticle Area and Painted Tips
This variation on the French manicure concept maintains the minimalist aesthetic by leaving the cuticle area completely bare (showing the natural nail bed with no polish) and painting just the tips in a soft nude or white shade. The key difference from traditional French manicure is how minimal the painted area is — instead of a thick white tip, keep the painted area very narrow, almost just grazing the edge.
Why Negative Space Equals Sophistication
Negative space — the unpainted areas — is the unsung hero of minimalist design. The more negative space in your nail design, the more intentional and restrained the overall look. By leaving the cuticle area bare, you’re creating a design where almost half of each nail is untouched, which emphasizes the shape and natural beauty of your nail beds while still having a design element.
Precision Application for Minimal Coverage
- Use a nail guide or tape to establish where the painted color begins
- Keep the painted area to the very tip of the nail, perhaps just ¼ to ⅜ inch
- The line between bare nail and color should be absolutely clean and straight
- Matte topcoat on the bare areas helps them blend seamlessly with the natural nail bed
- This design requires excellent nail health to be truly striking — brittle or damaged nails will diminish the effect
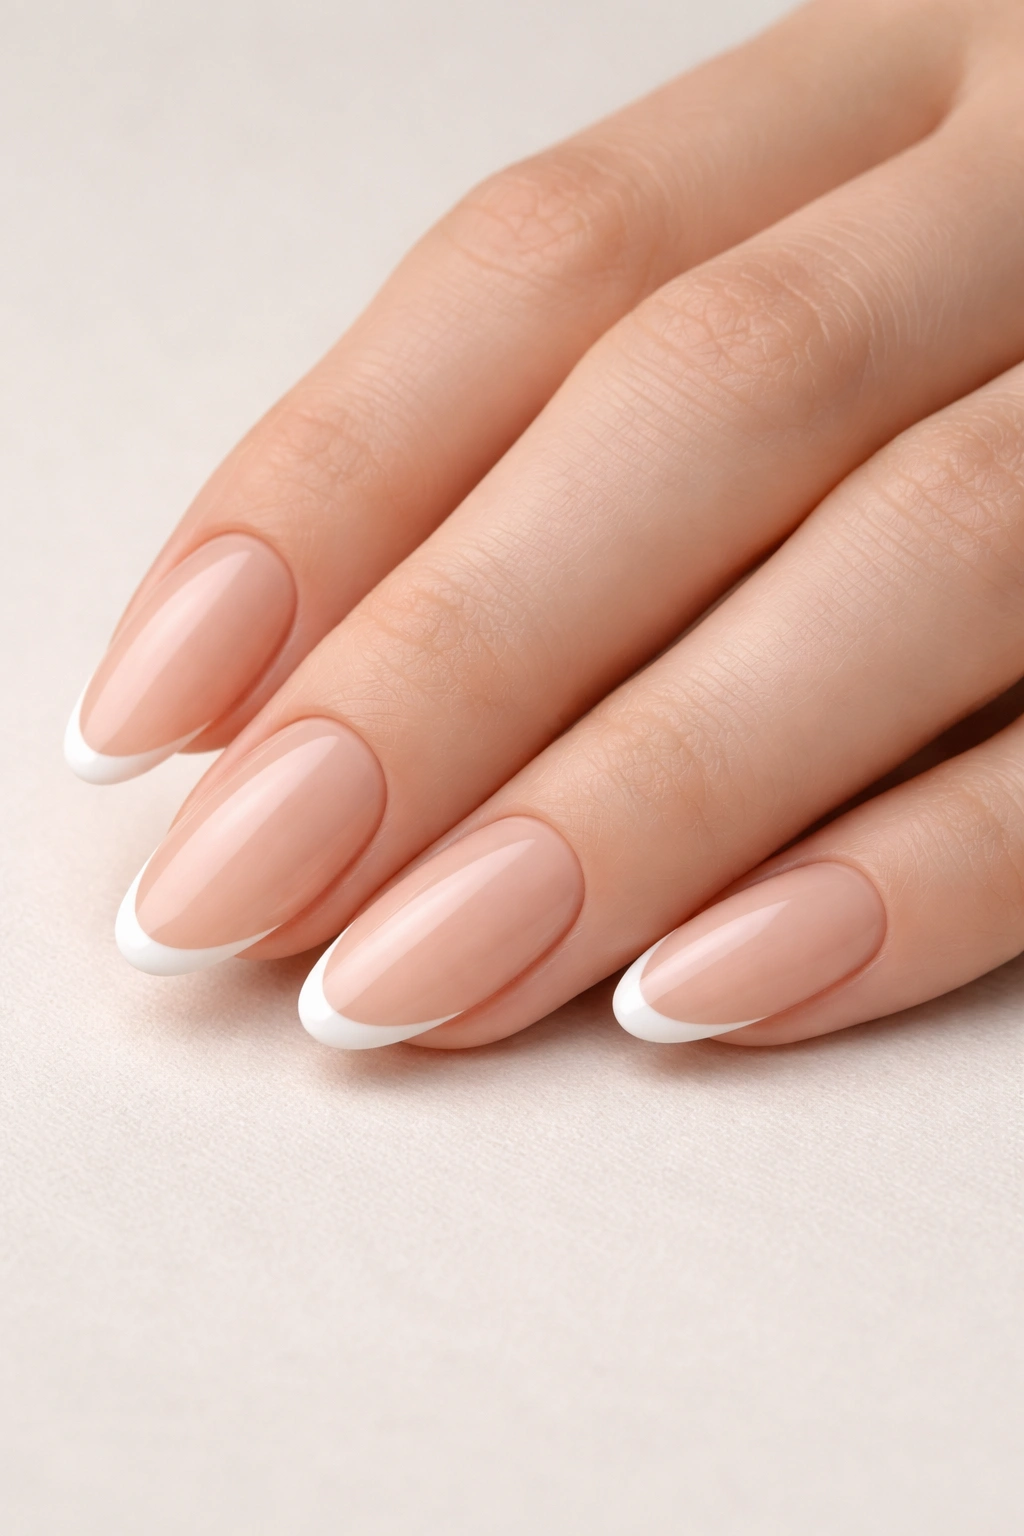
11. Warm Beige with Thin White Smile Line
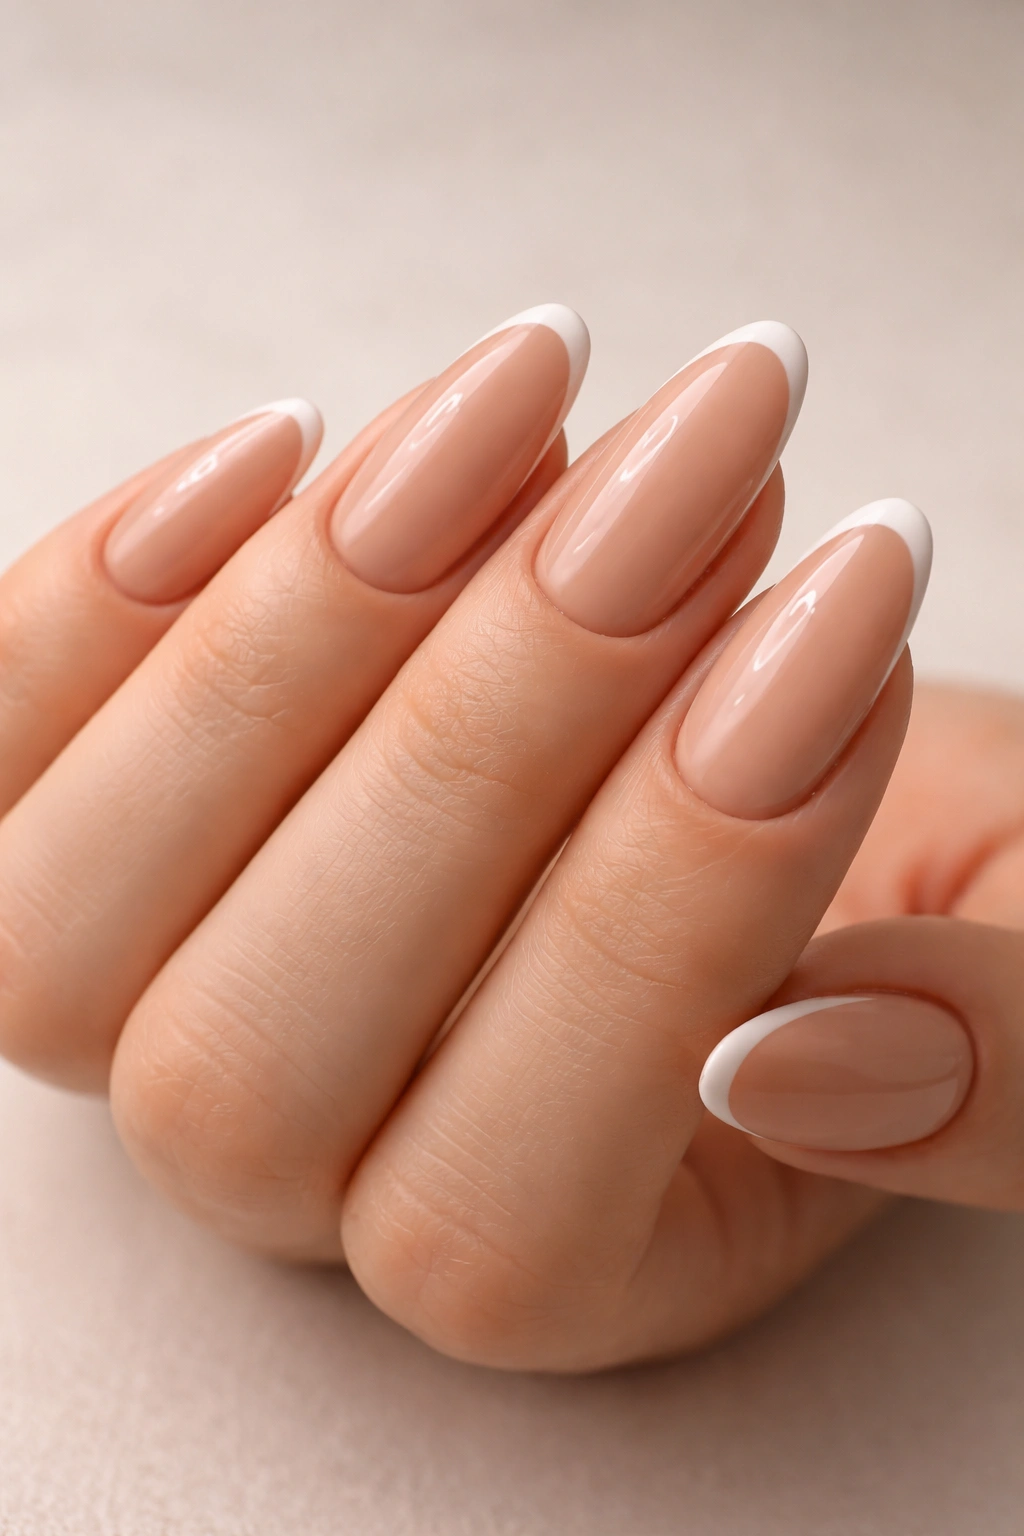
This design is like a minimalist version of a classic French manicure, but refined. A warm beige serves as the base color across the entire nail, and then a thin white line is painted along the tip edge to create a subtle “smile line” — the curved edge where the white naturally shows. The white line should be extremely thin and follow the natural contour of the nail tip, creating an understated frame.
The Art of the Perfect Smile Line
The smile line is one of the most elegant design elements in minimalist nails because it works with the natural nail shape rather than against it. An oval nail naturally has a curved smile line, and emphasizing it with a thin white stripe is minimalist because you’re essentially highlighting what’s already there. The white should be warm-toned (not bright, clinical white) to maintain cohesion with the warm beige base.
Creating a Curved Smile Line by Hand
- Practice the curvature on paper first if you’re nervous about free-handing
- Use a thin striping brush or bent liner to follow the natural curve of your nail tip
- Apply thin coats of white polish, building opacity gradually for better control
- The smile line should be approximately 1-2mm thick at most
- A very thin glossy topcoat will seal the line and make it appear crisp and defined
- Seal the underside of the tips to prevent the white line from chipping
12. Stone Grey with Matte and Glossy Contrast
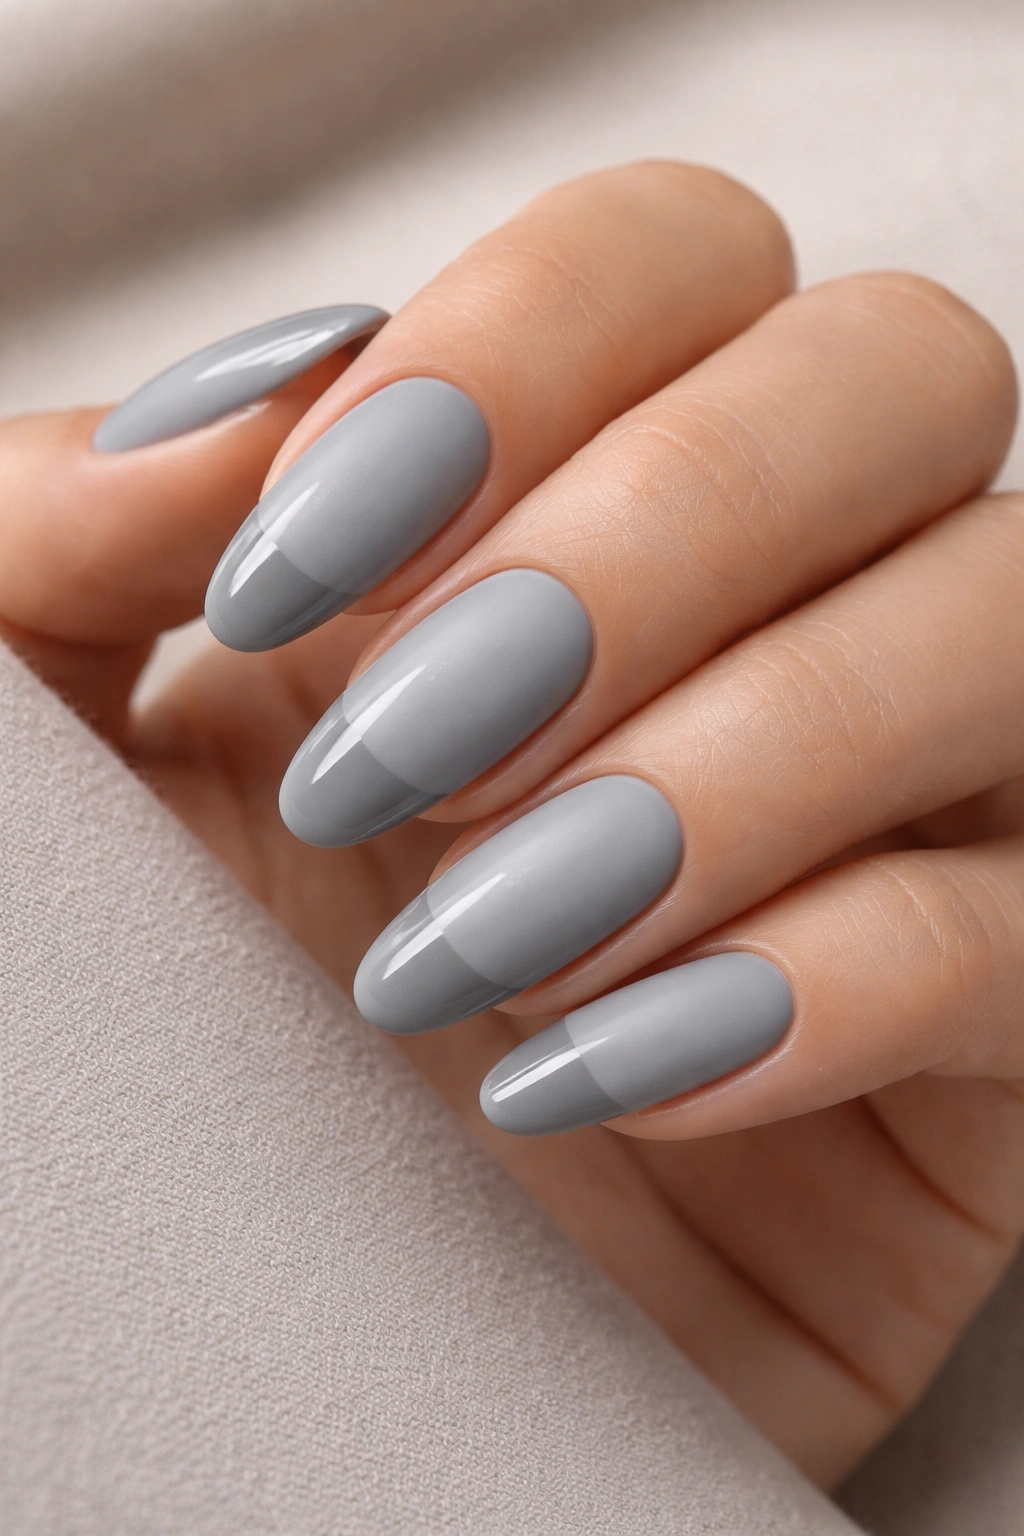
This design plays with finish rather than color or pattern — the entire nail is painted in a sophisticated stone grey, but the tips are sealed with a glossy topcoat while the base remains matte. This creates subtle dimension and visual interest based purely on the interplay between matte and shiny surfaces. The effect is abstract and architectural, yet completely minimal in terms of actual design elements.
Why Finish Contrast Works as Design
Matte and glossy are often seen as choices you make throughout a design, but they can be the design itself. By changing the finish halfway through, you’re creating a division of the nail that guides the eye without introducing additional colors or patterns. This approach appeals to people who want to push minimalism into more interesting territory without abandoning the philosophy.
Achieving Clean Matte and Glossy Separation
- Paint the entire nail in stone grey polish with a glossy topcoat first and allow it to dry completely
- Apply a liquid matte topcoat to just the base portion of the nail, creating a clear line where matte becomes glossy
- Use tape to establish a clean division line between matte and glossy areas
- Alternatively, paint the entire nail matte first, then apply glossy topcoat to the tips only
- The line of demarcation should be distinct enough to be visible but subtle enough to feel intentional rather than accidental
13. Pale Blush with Thin Charcoal Base Line
A pale blush is understated and flattering on most skin tones, and when paired with a thin charcoal line that runs along the very base of the nail (near the cuticle area), it creates a subtle frame. The line grounds the design and prevents the pale blush from feeling like bare nails, while remaining minimal enough that it doesn’t introduce visual clutter.
Why a Base Line Changes Everything
A line at the base of the nail is a sophisticated design choice because it breaks visual expectations — most nail art sits at the tips, so a base line feels modern and intentional. It also creates a visual anchor that defines the space in a controlled way. The thin charcoal line should align with your natural cuticle line or sit just slightly below it.
Painting a Base Line with Precision
- Establish your placement by lightly marking with a pencil if needed
- Use a thin liner brush or striping brush dipped in charcoal polish
- Paint the line in one smooth motion across the nail, staying parallel to the cuticle line
- Keep the line extremely thin — no thicker than a few millimeters
- The line should be the same thickness and darkness across all ten nails for a cohesive look
- Seal with glossy topcoat to emphasize the line and add durability
14. Creamy Ivory with Asymmetrical Accent Nail
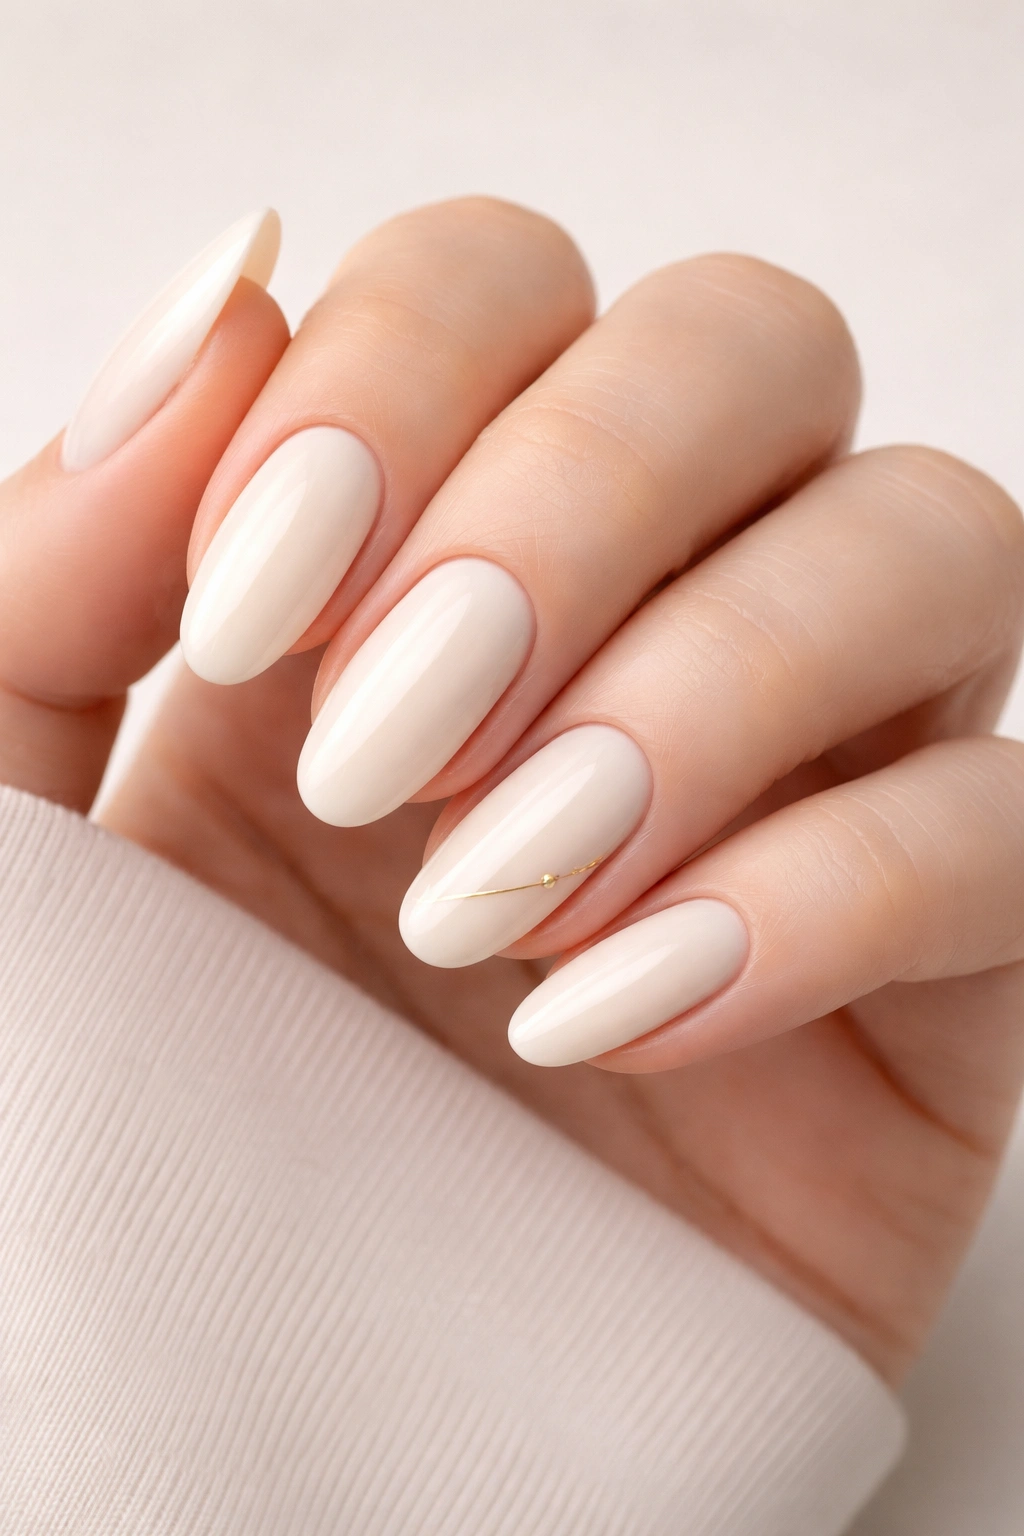
Most of this design is simplicity itself: creamy ivory polish across all ten nails with a glossy finish. The minimalist twist comes in the form of one accent nail (typically the ring finger) that features a subtle design — perhaps a single thin line, a tiny geometric shape, or a minimal pattern. The asymmetry of having nine identical nails and one that’s different creates visual interest while maintaining the overall minimal aesthetic.
The Power of Asymmetry in Minimalist Design
Asymmetry is a design principle that can feel modern and intentional when executed with restraint. By keeping nine nails identical and introducing design only on one nail, you’re telling your viewer that this design choice is deliberate and controlled. This approach works because the eye is drawn to the different nail, making even a subtle design element feel like the focal point.
Design Ideas for Your Single Accent Nail
- A thin vertical or horizontal line in black, charcoal, or metallic
- A minimalist geometric shape (triangle, rectangle, or half-circle) in a contrasting color
- A tiny symbol or icon (such as a minimal line drawing of a leaf, moon, or curve)
- A subtle gradient or ombre effect on just that one nail
- A different finish — perhaps matte while the others are glossy — that creates visual distinction
- The accent nail should feel like a natural extension of your personal style, not an afterthought
15. Cool White with Paper-Thin Negative Space Stripe
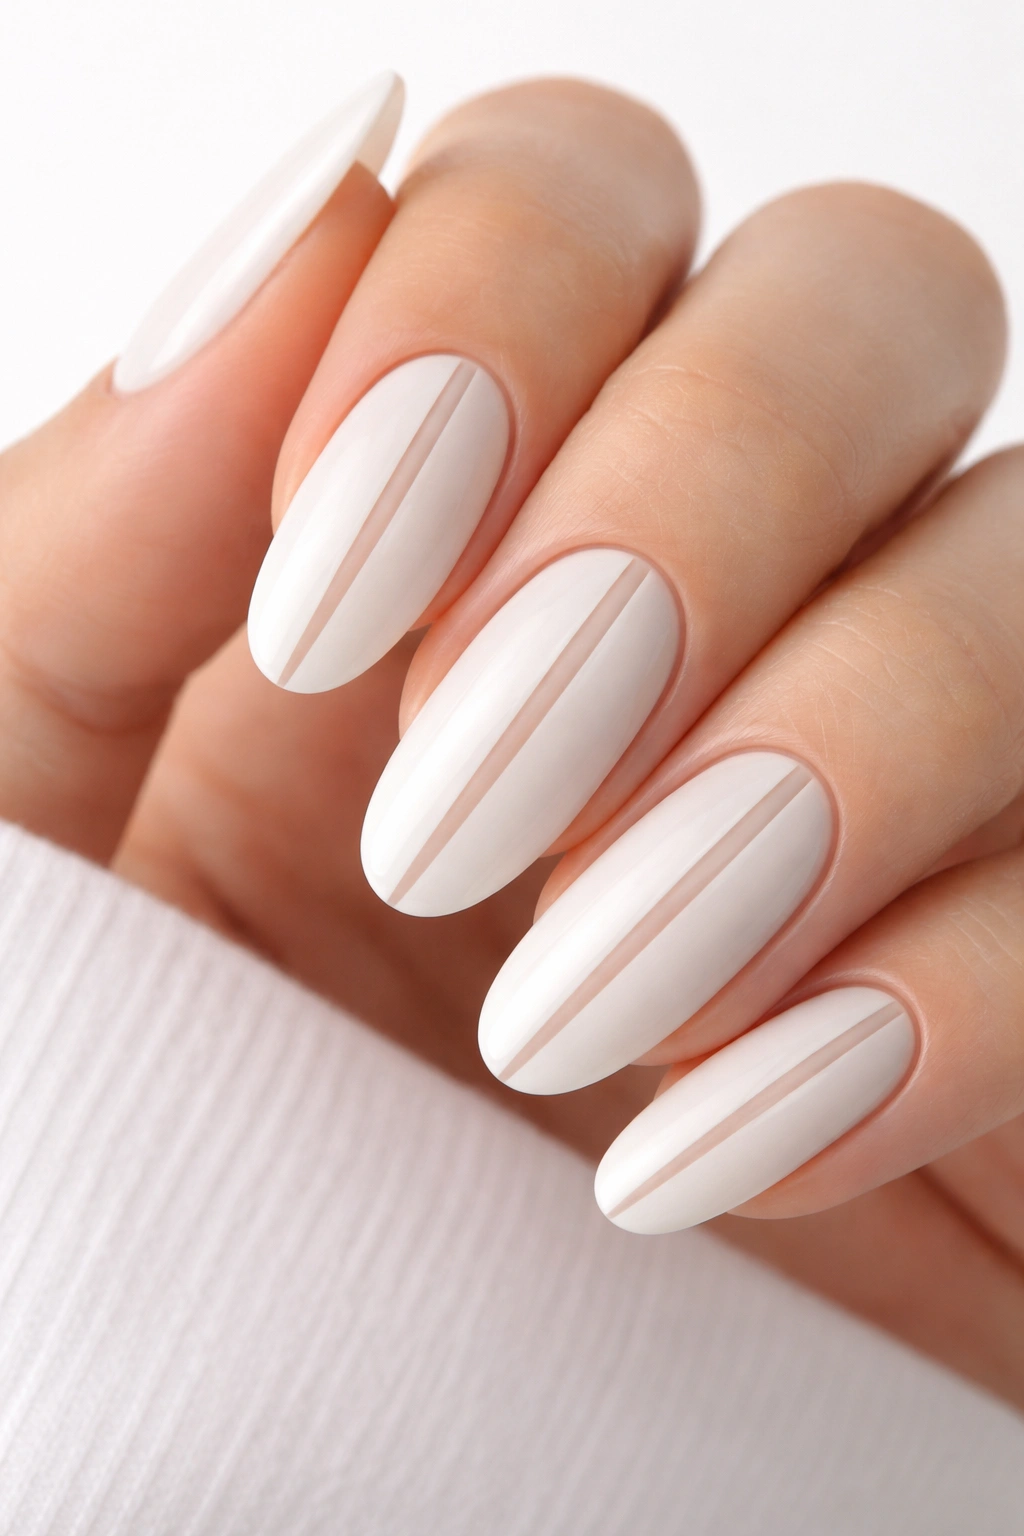
This final design is perhaps the most refined of all — a cool, crisp white covers the entire nail, but a very thin stripe of negative space (bare nail bed showing through) runs vertically down the center of each nail. The contrast between the white polish and the natural nail color showing through creates a clean, almost architectural effect. This is minimalism taken to its logical extreme: your design is literally just the space you’re not painting.
The Challenge and Beauty of Negative Space as Design
Negative space design requires excellent precision because you’re literally leaving gaps in your polish, and those gaps have to be perfectly straight and even. The reward is a design that feels incredibly sophisticated and modern — you’re essentially creating lines through subtraction rather than addition. This works best on healthy nails with good color and no blemishes, since the natural nail bed becomes part of the visual composition.
Creating Perfect Negative Space Lines
- Use painter’s tape or nail tape to mask off the stripe area where you want the nail to show through
- Paint the white polish around the tape, being careful not to paint over the edges of the tape
- Remove the tape while the polish is still slightly tacky for the cleanest edge
- Make sure the negative space stripe is perfectly straight and centered — any wobble will disrupt the minimalist effect
- The width of the negative space stripe should be thin enough to feel intentional, typically just 1-2mm
- Seal the edge of the polish that borders the negative space to prevent chipping
- A glossy topcoat will emphasize the architectural quality of the lines
Final Thoughts
The beauty of minimalist long oval nails lies in the confidence required to embrace restraint. In a world of maximalist nail art with layered designs, glitter, gems, and elaborate patterns, choosing to paint your nails in soft neutrals or near-bare finishes is actually a bold statement. It says you understand that elegance lives in the details, that the oval shape itself is design enough, and that sometimes what you don’t do is more powerful than what you do.
Long oval nails are inherently graceful, and when you pair that shape with minimalist aesthetics, you’re amplifying their best qualities. The elongated silhouette becomes the star of the show rather than competing with complicated nail art. This shape works with your hands rather than against them, making even simple tasks feel refined.
What resonates from these fifteen approaches is that minimalism isn’t a limitation — it’s a philosophy that opens up entirely different creative possibilities. Whether you gravitate toward the simplicity of a single nude shade, the sophistication of a thin line accent, the architectural intrigue of matte and glossy contrast, or the refinement of negative space design, there’s a minimalist long oval nail approach that matches your aesthetic. The key is choosing one that feels authentic to you and committing to it with precision and care. That’s what transforms a simple nail into an elegant statement.
