

Squoval nails have quietly become the shape that bridges the gap between the effortless grace of ovals and the sharp, architectural statement of squares. When you keep them short, something magical happens — they stop feeling formal or dramatic and instead become this perfectly practical, endlessly wearable foundation for color, texture, and design. The warm months are exactly when short squovals shine because they’re short enough to withstand beach trips, pool days, and the general friction of active season, yet their hybrid geometry gives you that nail-shape sophistication that makes even the simplest designs look intentional.
What makes squovals so perfect for summer specifically isn’t just practicality. The shape catches light differently than traditional ovals, giving dimension even to sheer finishes. Short squovals also offer a visible nail bed, which means lighter, more luminous colors and pastels that might look washed out on longer nails actually pop with life and movement. You get the benefit of showing off your hands without the maintenance burden, which is exactly the vibe when you’re dealing with sand, chlorine, and the reality that longer nails chip faster in warm months when you’re moving around more.
I’ve tested this shape through countless summer seasons and nail appointments, and the designs that work best are the ones that feel fresh without trying too hard. The best short squoval designs for warm weather respect the season’s energy — light, airy, natural but still elevated. Think creams that glow in sunlight, pastels that feel like sherbet, graphic designs that channel vacation vibes, and textures that add interest without adding length. Whether you’re drawn to minimalist elegance, full-color impact, or intricate nail art, there’s a short squoval design waiting for you.
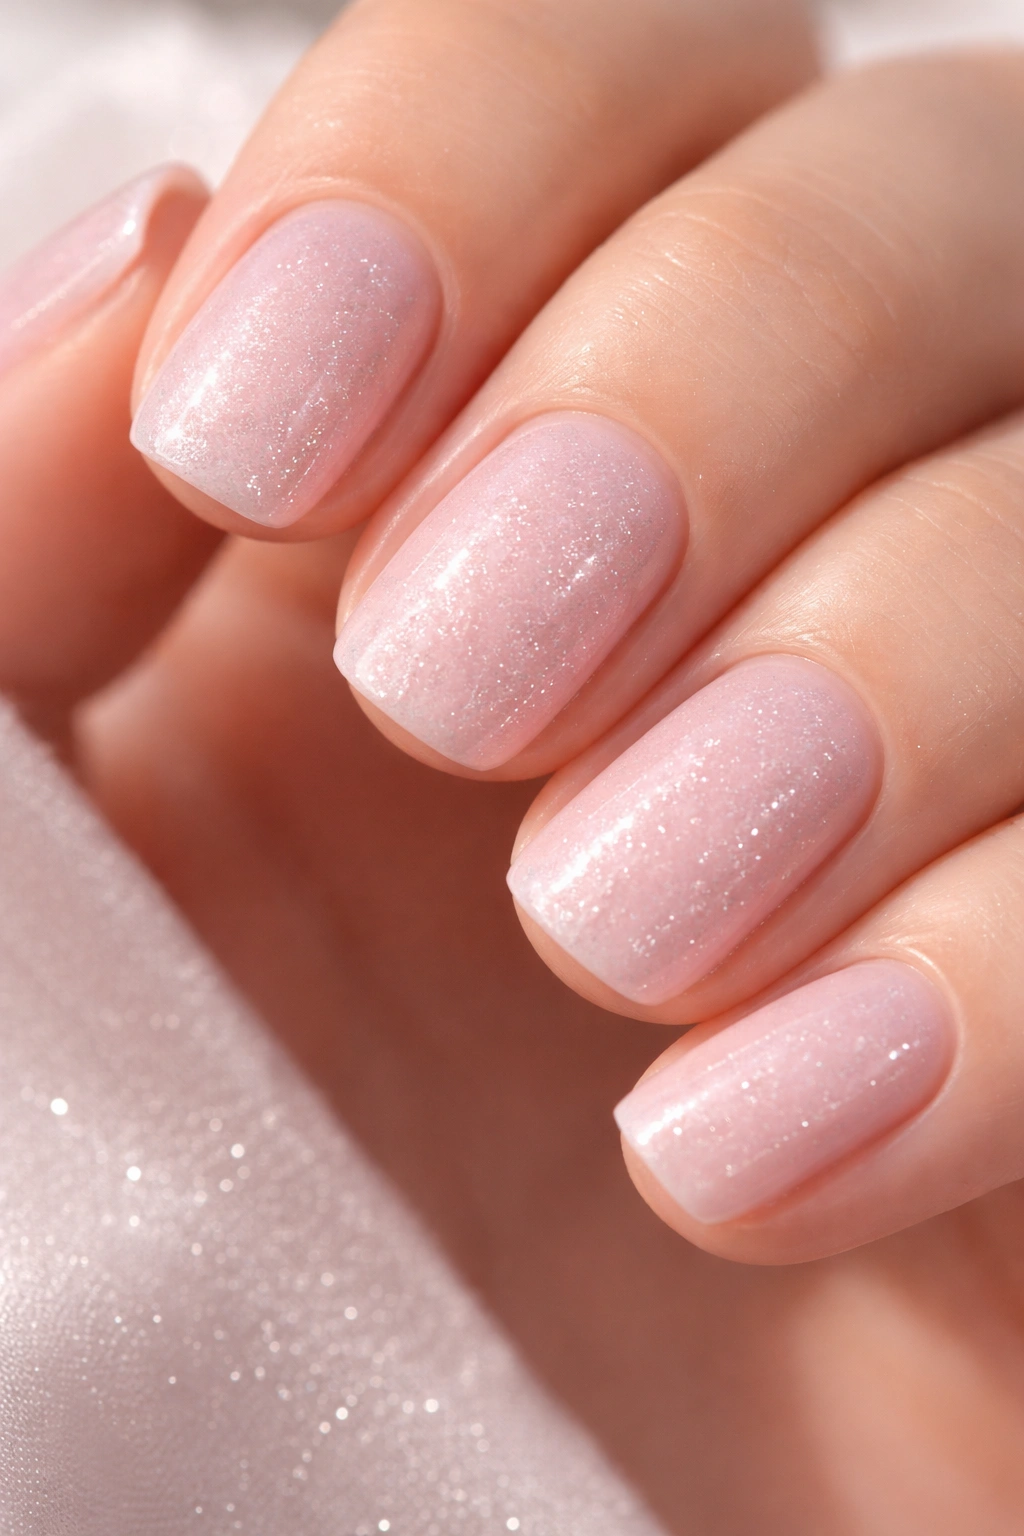
1. Soft Cream with Pearl Shimmer
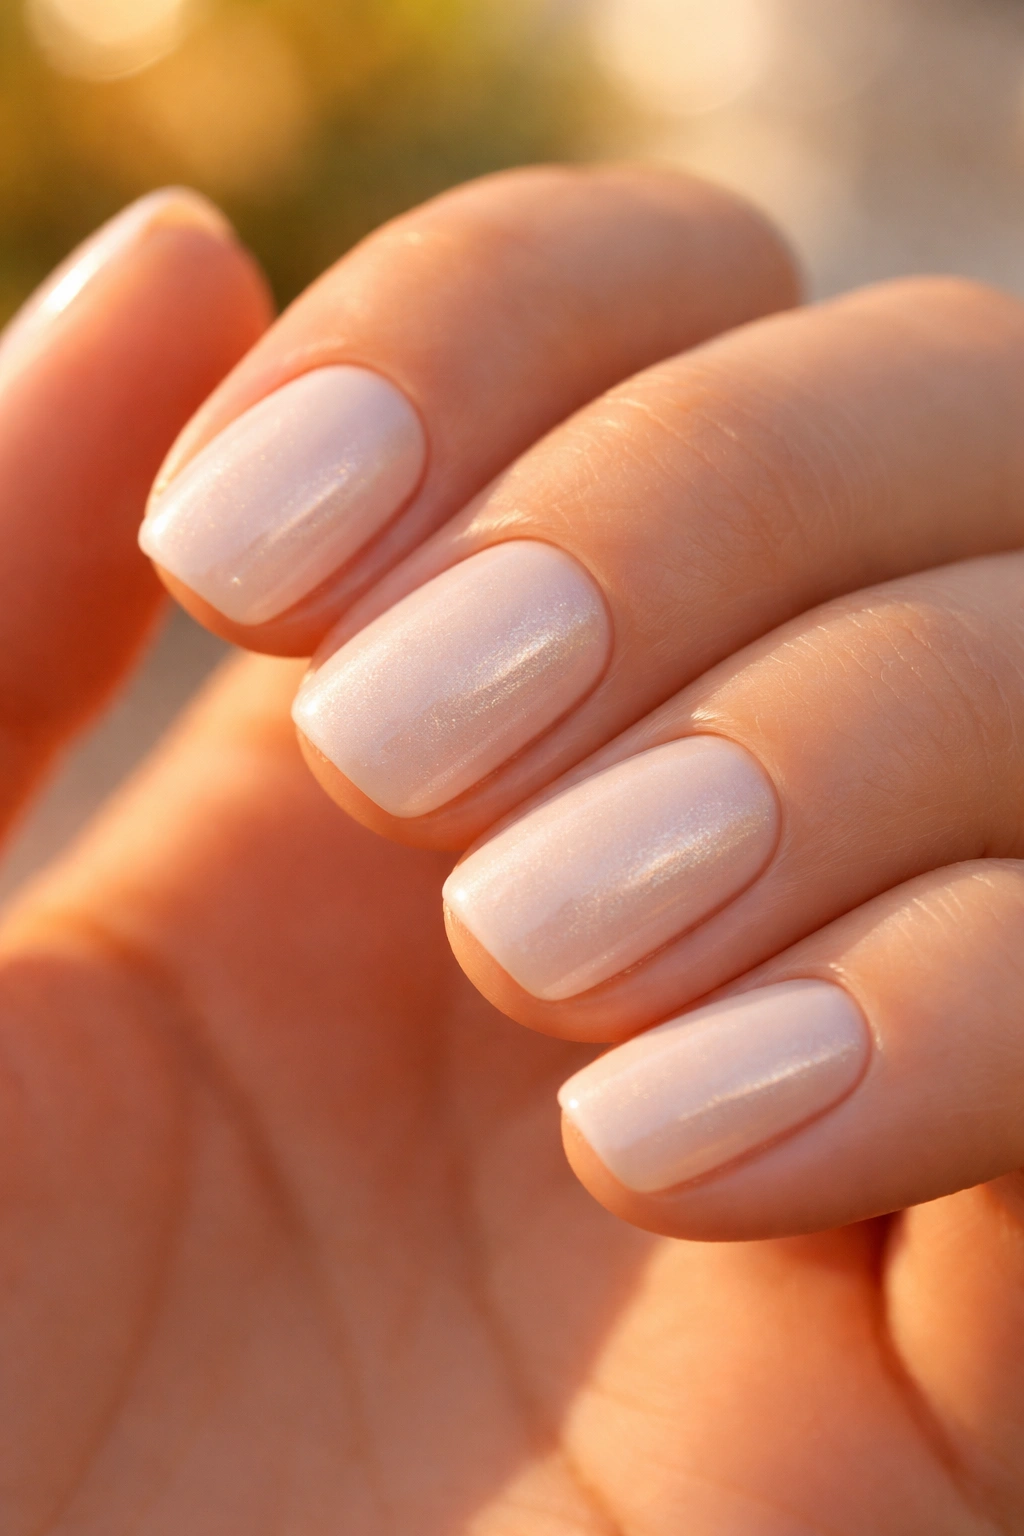
A creamy ivory or soft beige base with a subtle pearl shimmer creates a nail design that feels impossibly luminous in natural sunlight. This shade works because it catches light beautifully and reflects the sun in a way that makes your hands look refined without screaming for attention. The pearl shimmer adds just enough dimension to prevent the design from feeling flat or boring, creating movement across the nail bed that changes as you move your hands.
Why This Design Works for Summer
This combination is unbeatable for any warm-month occasion — from casual beach days to dinner reservations. The pearl shimmer amplifies in bright light, which means it looks especially stunning during golden hour when you’re outside. The cream base feels fresh and modern, not dated or overly feminine, which gives it serious staying power across seasons and styles.
Application and Care Tips
- Apply thin, even base coats to prevent streaking; cream shades show imperfections more than darker colors
- The shimmer layer should be applied in 2-3 coats for full intensity; resist over-saturating in a single coat
- A high-shine topcoat amplifies the pearl effect even further
- This design lasts 3-4 weeks without chipping if you prep your nails properly and avoid excessive water exposure during the first 24 hours
Pro tip: This shade is incredibly flattering on all skin tones because it reflects rather than contrasts, making it the ultimate chameleon nail color.
2. Coral Blush Ombré Fade

An ombré that transitions from warm coral at the tips to soft blush pink toward the cuticle creates a gradient that feels like a sunset captured on your nails. This design works with short squovals because the shape gives you just enough surface area to show the gradient transition without it feeling cramped or muddy. The squoval’s slightly squared edges actually help the ombré colors blend more dramatically than they would on a pure oval.
The Science of This Gradient
The color transition works because coral and blush sit close enough on the color wheel that they blend seamlessly, but they’re distinct enough that you can see clear dimension. The warmth of coral combined with the softness of blush creates a color pairing that feels modern and beach-ready without being trendy or dated.
How to Achieve It
- Use a makeup sponge to dab and blend the two colors directly on the nail
- Apply coral to the tip area in light stippling motions, then blend blush from the cuticle toward the middle
- A topcoat smooths out the stippled texture and creates an almost airbrushed finish
- Three layers of topcoat create depth and prevent the ombré from looking dull or dusty
3. Classic White Tips with Squoval Shape
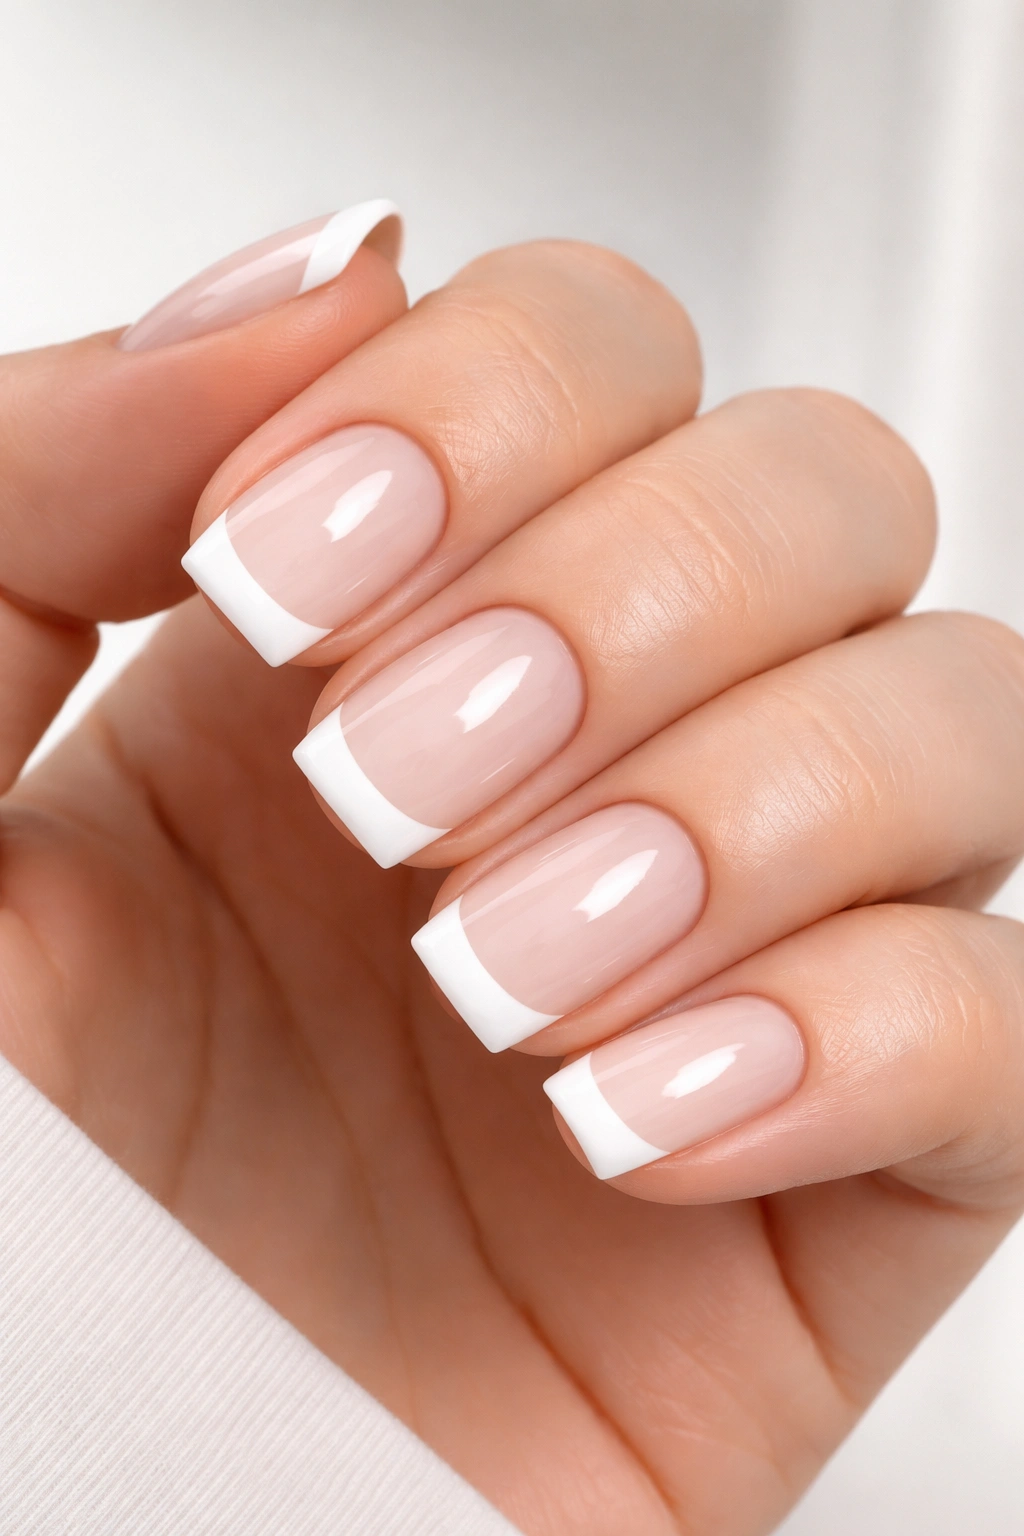
An updated French manicure where the white tips follow the natural squoval curve of your nail shape — crisp at the slightly squared corners, subtle at the rounded sides. This isn’t your grandmother’s French tips; short squovals give you more white at the tips than traditional ovals, which makes the design feel bolder and more intentional. The shape itself becomes part of the visual impact.
Why Squovals Reinvent the French Manicure
The hybrid shape creates asymmetry that reads as modern and deliberate rather than geometric. The squared edges of the squoval frame the white in a way that makes the design feel sharp and fresh, not safe or predictable. It’s familiar enough to feel effortless but distinctive enough that it reads as intentional.
Perfect Application for This Design
- Use a thin, fine-tipped brush for the white line; the thinner your line, the more elegant it reads
- The white should be applied in one clean stroke at a slight angle to follow your nail’s natural curve
- A matte white creates a more modern, architectural look than glossy
- The cream base color should be neutral enough that it doesn’t compete with the white tips
4. Peach With Delicate Sunflower Details
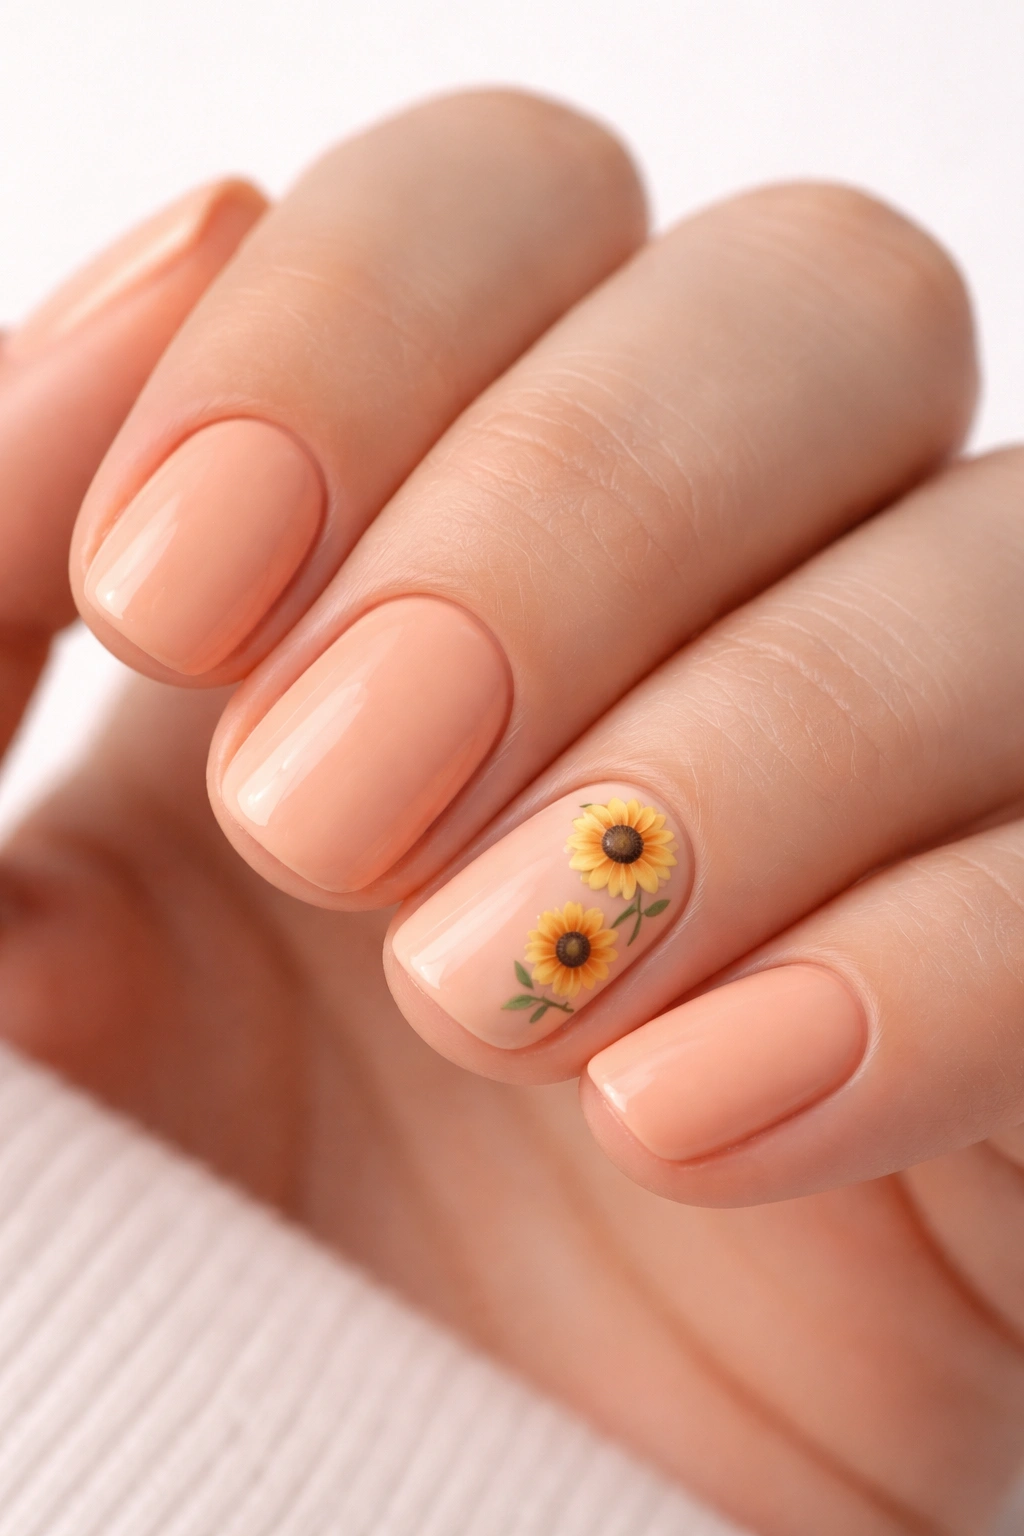
A warm peach base adorned with tiny sunflowers on one accent nail creates a design that feels playful without being childish. The peach color is ideal for warm months because it’s flattering against sun-kissed skin and feels summery without being stereotypically beach-y. Sunflowers are bold enough to be interesting but small enough that they don’t overwhelm a short nail.
The Art of Nail Art at Small Scales
Tiny details work best on short nails when they’re simplified rather than photorealistic. A stylized sunflower with bold petals and a darker center reads immediately and doesn’t require perfect precision. The peach base actually helps the sunflower stand out because of the color contrast between warm peachy-orange and the golden-yellow of the flower.
Technique and Placement
- Use a 0 or 00 brush for fine detail work; thinner brushes give you more control
- Apply the sunflowers on your ring finger or index finger for maximum visibility
- A matte finish on the peach and glossy topcoat on the sunflowers creates subtle dimension
- Keep sunflowers centered on the nail rather than trying to cover the entire surface; negative space actually makes details more impactful
5. Pastel Lavender With Geometric Line Design
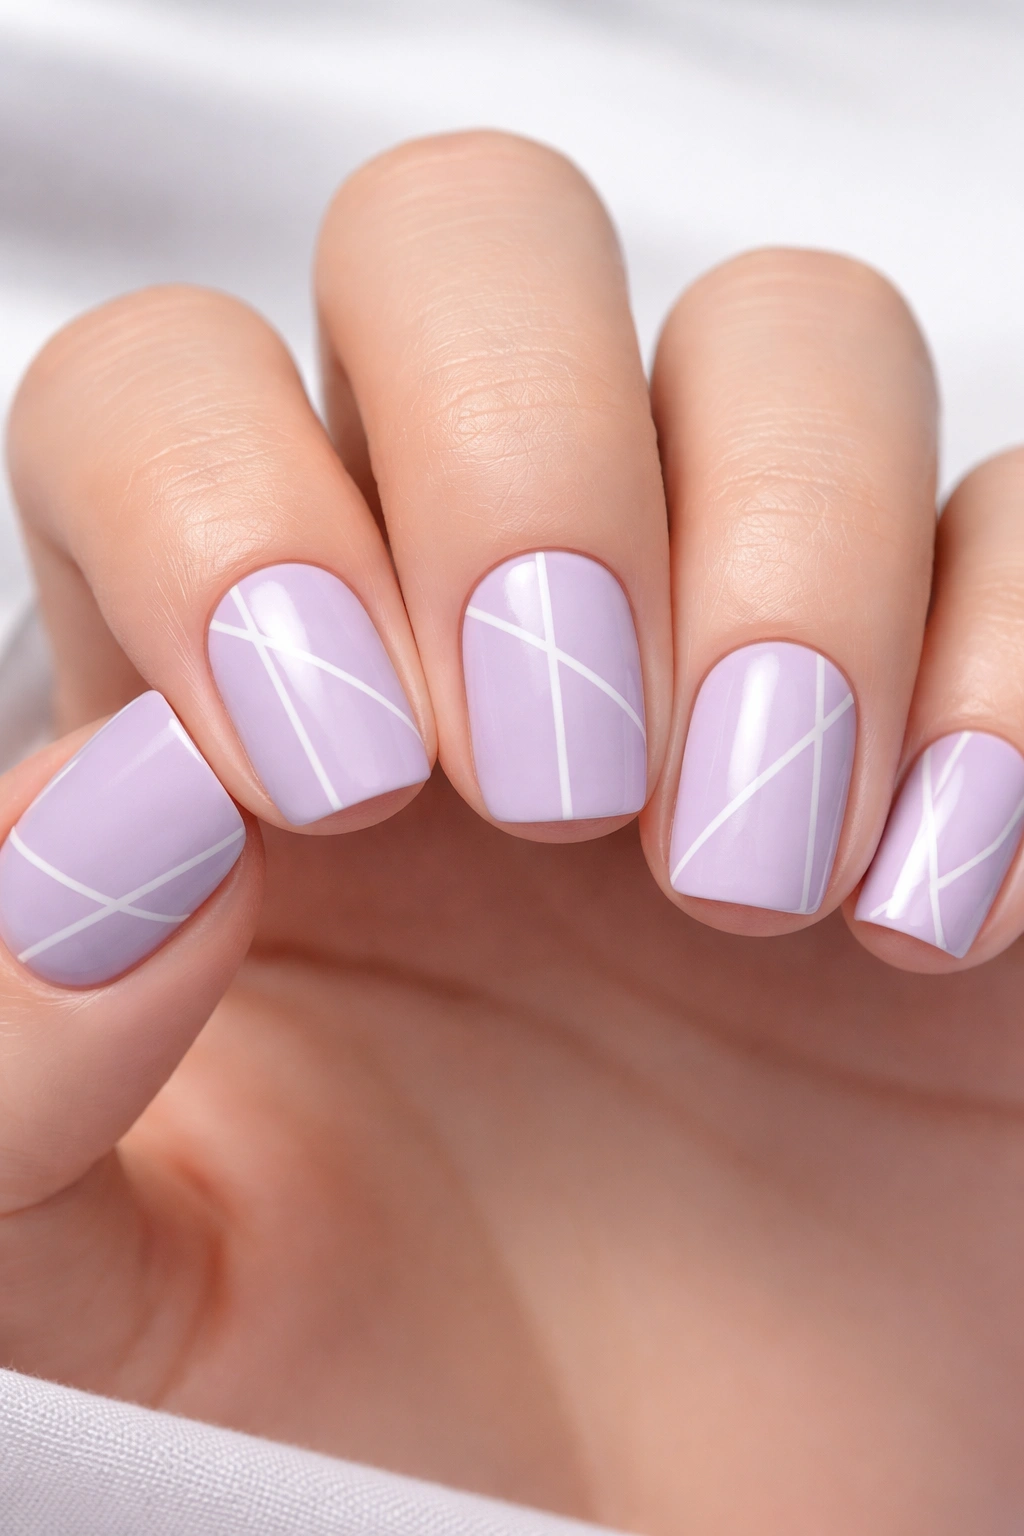
Soft, barely-there lavender with clean geometric lines creating a modern design that feels both calm and intentional. This shade works because it’s light enough to feel airy and summery while still being substantial enough to be visible. The geometric lines add architectural interest without the design feeling busy or overly trendy.
Why Lavender Owns Warm Months
Lavender is the color that bridges the gap between spring pastels and summer heat. It’s cool enough to feel fresh against the warmth of the season, yet warm-toned enough to not feel out of place during summer. The color pairs beautifully with sun-kissed skin because it creates contrast without clashing.
Creating Clean Geometric Lines
- Use painter’s tape to mask off areas and create perfectly straight lines
- Thinner lines (1-2mm) feel more modern and sophisticated than thick stripes
- Negative space — leaving portions of the base color visible — prevents the design from feeling heavy
- A gel topcoat creates a smooth, seamless finish that makes geometric designs feel polished rather than hand-drawn
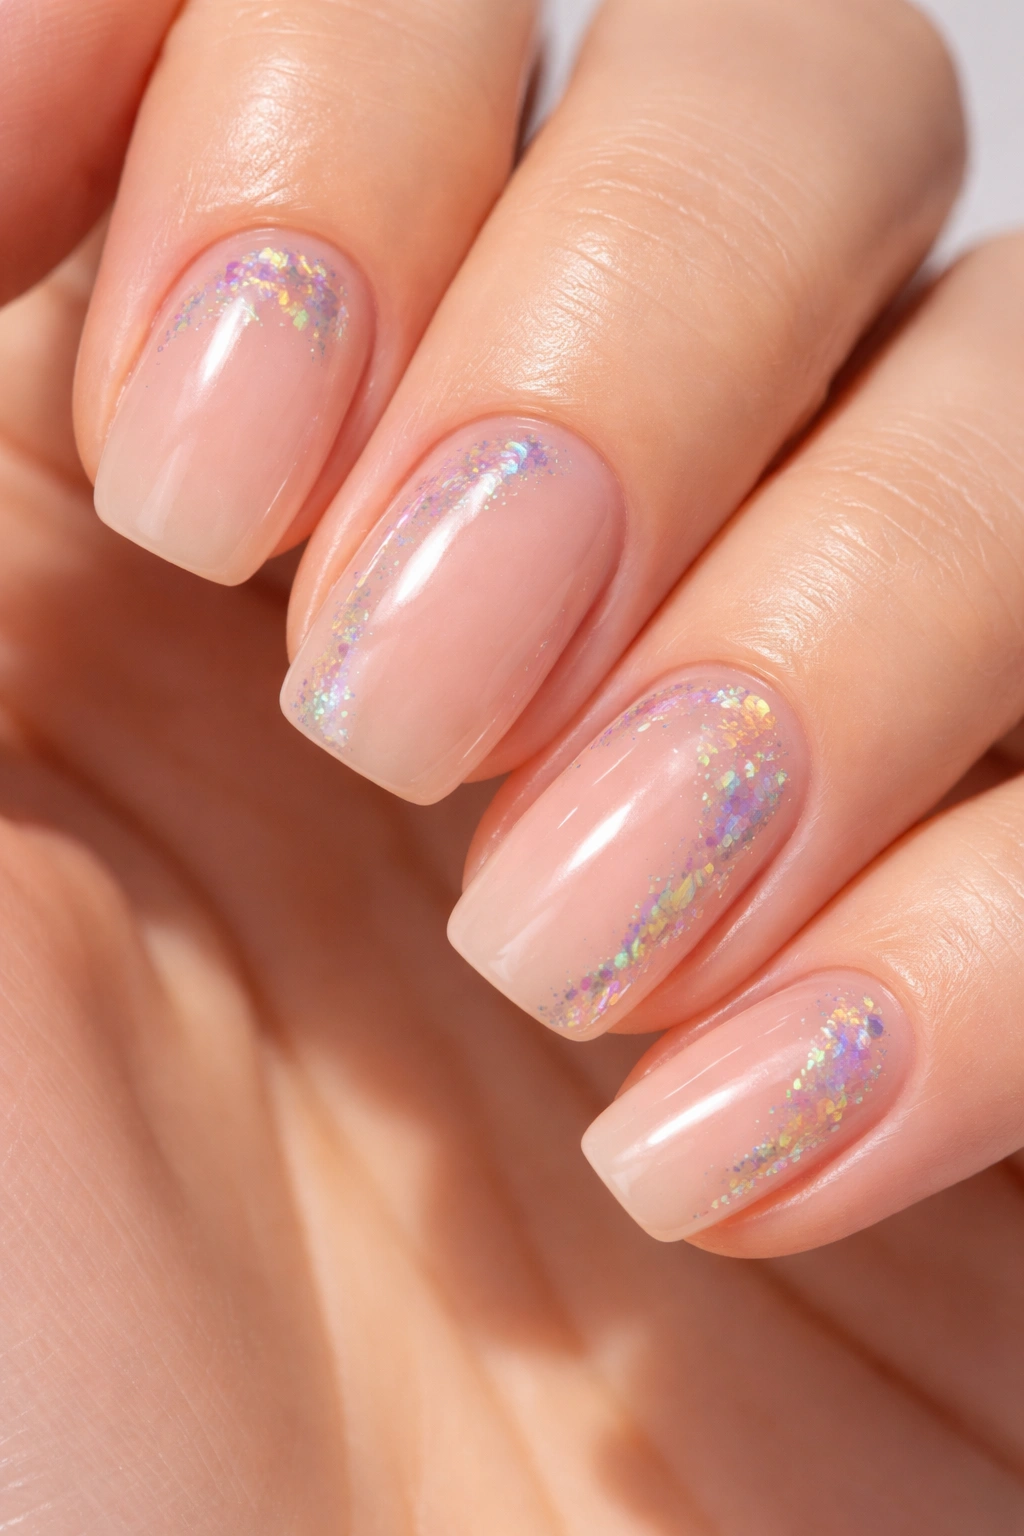
6. Sheer Nude With Iridescent Glitter Tips
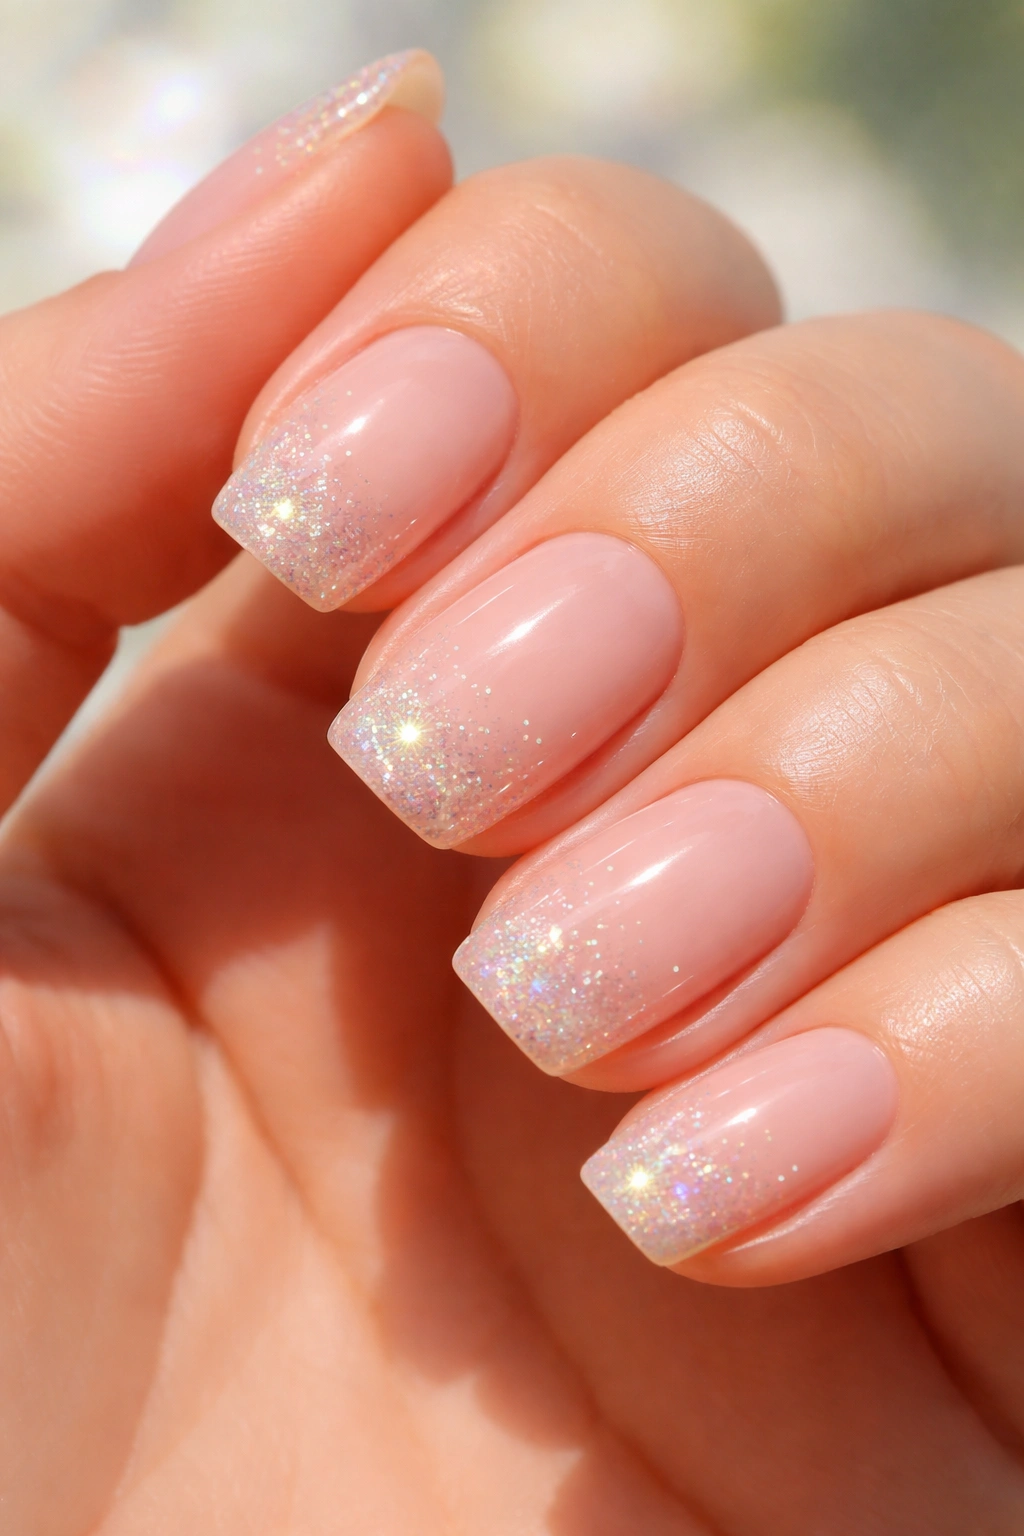
A barely-there nude base that reveals the natural nail, with iridescent glitter concentrated at the tips that shifts color in different light. This design is all about subtlety and movement — from some angles it reads as pure cream, from others you catch flashes of rainbow. The short squoval shape gives you just enough space for the glitter to make an impact without overwhelming the nail.
The Magic of Strategic Glitter Placement
Glitter at the tips creates a gradient effect where the base nail is visible and clean, then glitter intensifies toward the edges. This creates visual dimension and prevents the nail from feeling flat. Iridescent glitter works better than single-color glitter for warm months because it catches sunlight and creates micro-sparkles rather than solid shimmer.
Application Strategy
- Apply the nude base in two coats for full opacity and to cover any yellowing on the nail bed
- Use a glitter topcoat or loose glitter suspended in clear gel for the tip application
- Concentrate glitter density at the very tip, then feather it backward to create fade
- A glossy topcoat seals everything and makes glitter embedded in gel last longer without chipping
7. Soft Pink With Ombré Gold Leaf Accents
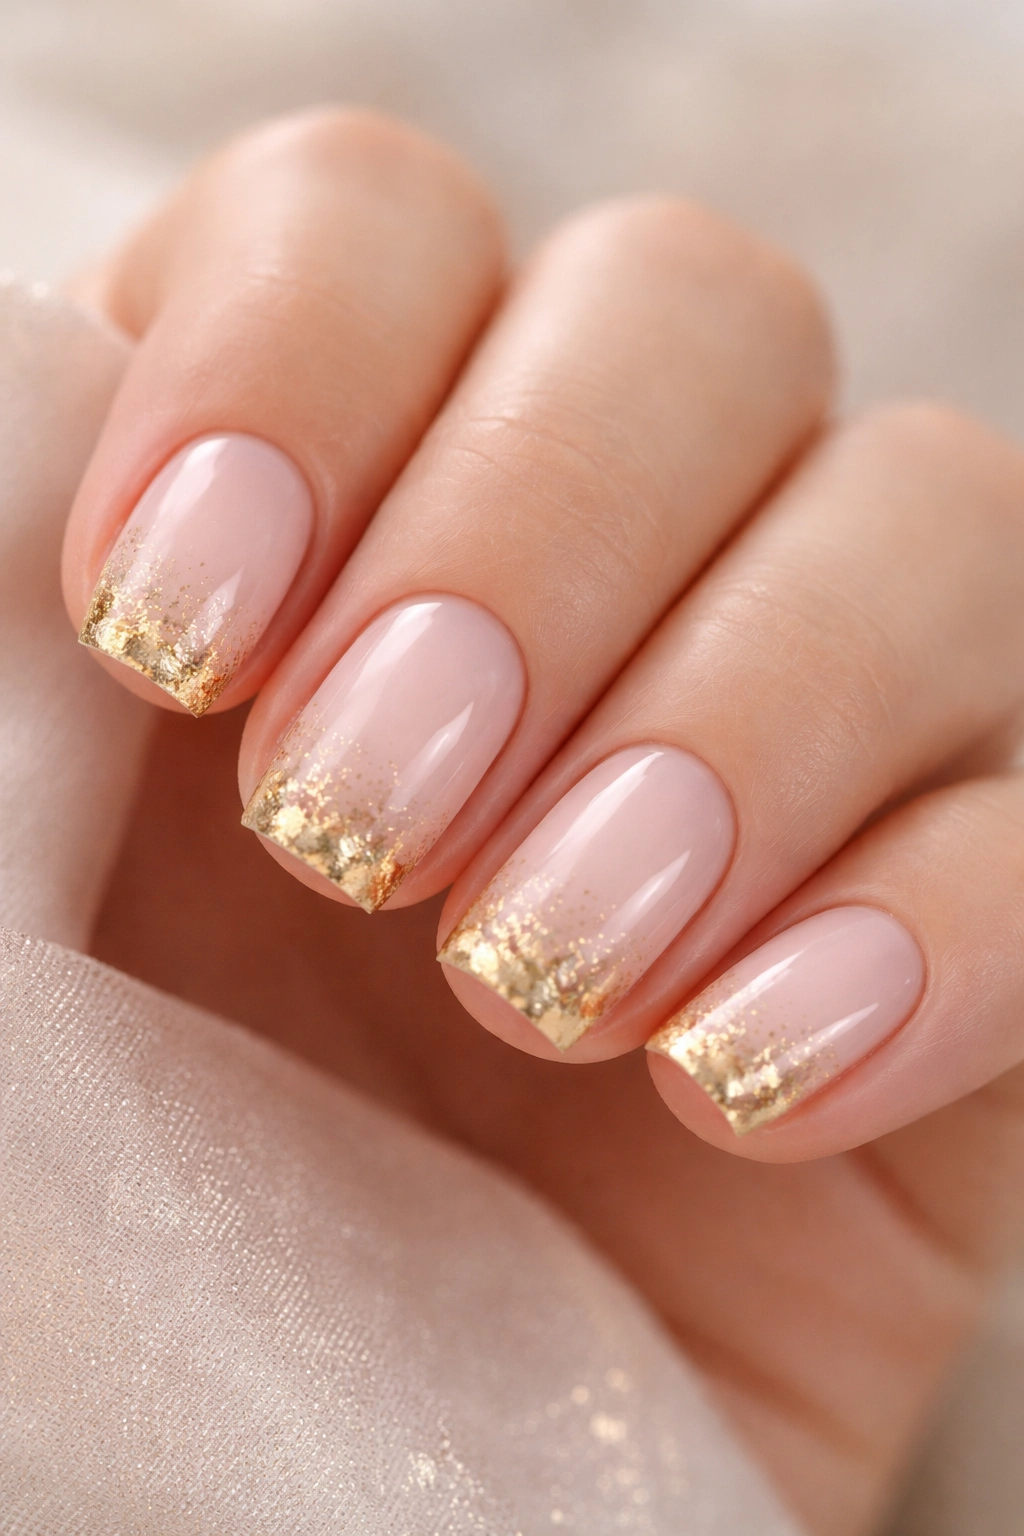
A delicate pale pink base with gold leaf carefully applied to the tips and side edges, creating an ethereal gilded effect. This design feels luxurious without being loud, which makes it perfect for warm months when you want to look elevated without looking dressed up. Gold leaf has a sophisticated quality that simple glitter can’t quite replicate.
Why Gold Leaf Elevates Short Nails
Gold leaf creates an illusion of dimension because the metal actually sits on top of the nail rather than being flat. Even on short nails, this creates depth and catches light in ways that painted gold simply cannot. The organic, slightly irregular placement of gold leaf reads as intentional and artistic rather than uniform.
Applying Gold Leaf Without Frustration
- Apply a sticky topcoat or special leaf adhesive to the area where you want gold placement
- Carefully transfer small pieces of gold leaf using a dry brush; gold leaf sticks to anything damp
- Don’t worry about perfect coverage; imperfections actually look more beautiful and organic
- Seal everything with a clear topcoat to protect the leaf and prevent it from lifting or peeling
8. Mint Green With White Scallop Shell Design
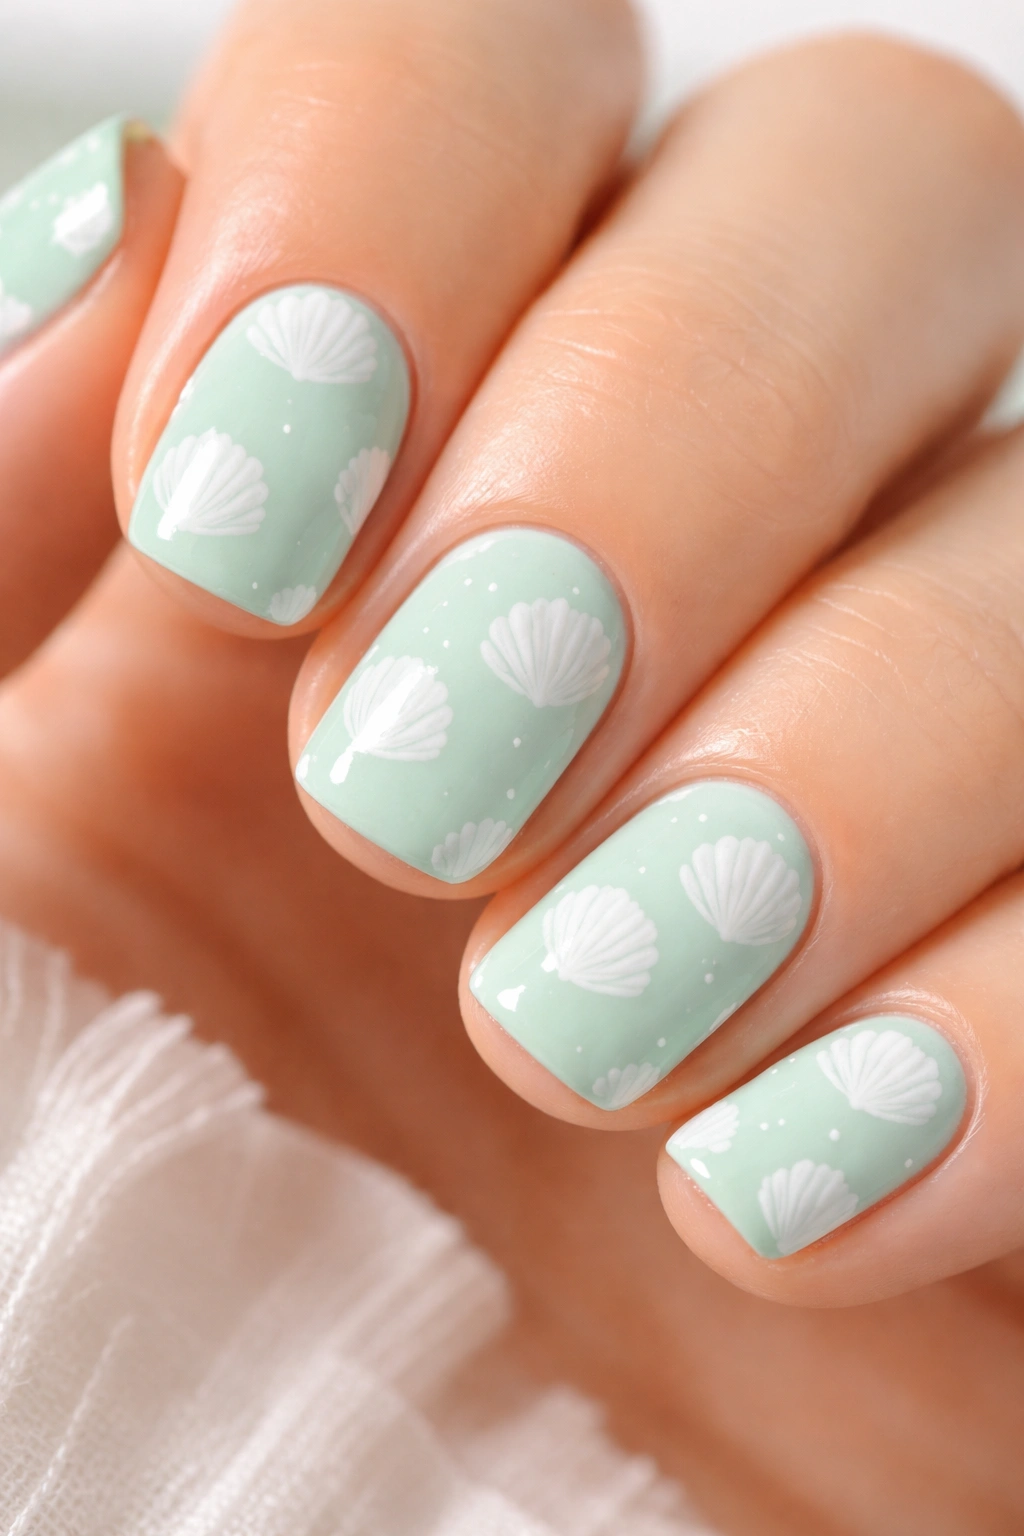
A cool, refreshing mint green base with delicate white scallop shell shapes creating a whimsical beach vibe. Mint is the perfect warm-weather color because it feels both fresh and sophisticated, cooling to the eye in hot months. The scallop shell design is instantly recognizable and feels summery without being cartoonish.
The Psychology of Mint in Warm Months
Mint connects psychologically to cooling, freshness, and beach environments, which makes it an ideal choice for warmer seasons. The color reads as clean and modern rather than nostalgic or precious. Against sun-kissed skin, mint creates a beautiful contrast that makes hands look more dimensional.
Creating Shell Designs
- Use a thin detail brush to paint shells; shells are essentially curved v-shapes with a central line
- Start with a white outline, then fill in with white if you want solid shells, or leave them open for a more delicate look
- Space shells in a scattered pattern across the nail rather than in perfect rows; randomness feels more organic and summery
- Matt finish on the base with glossy on the shells creates subtle visual separation between elements
9. Coral Peach Jelly With Dimensional Bubbles
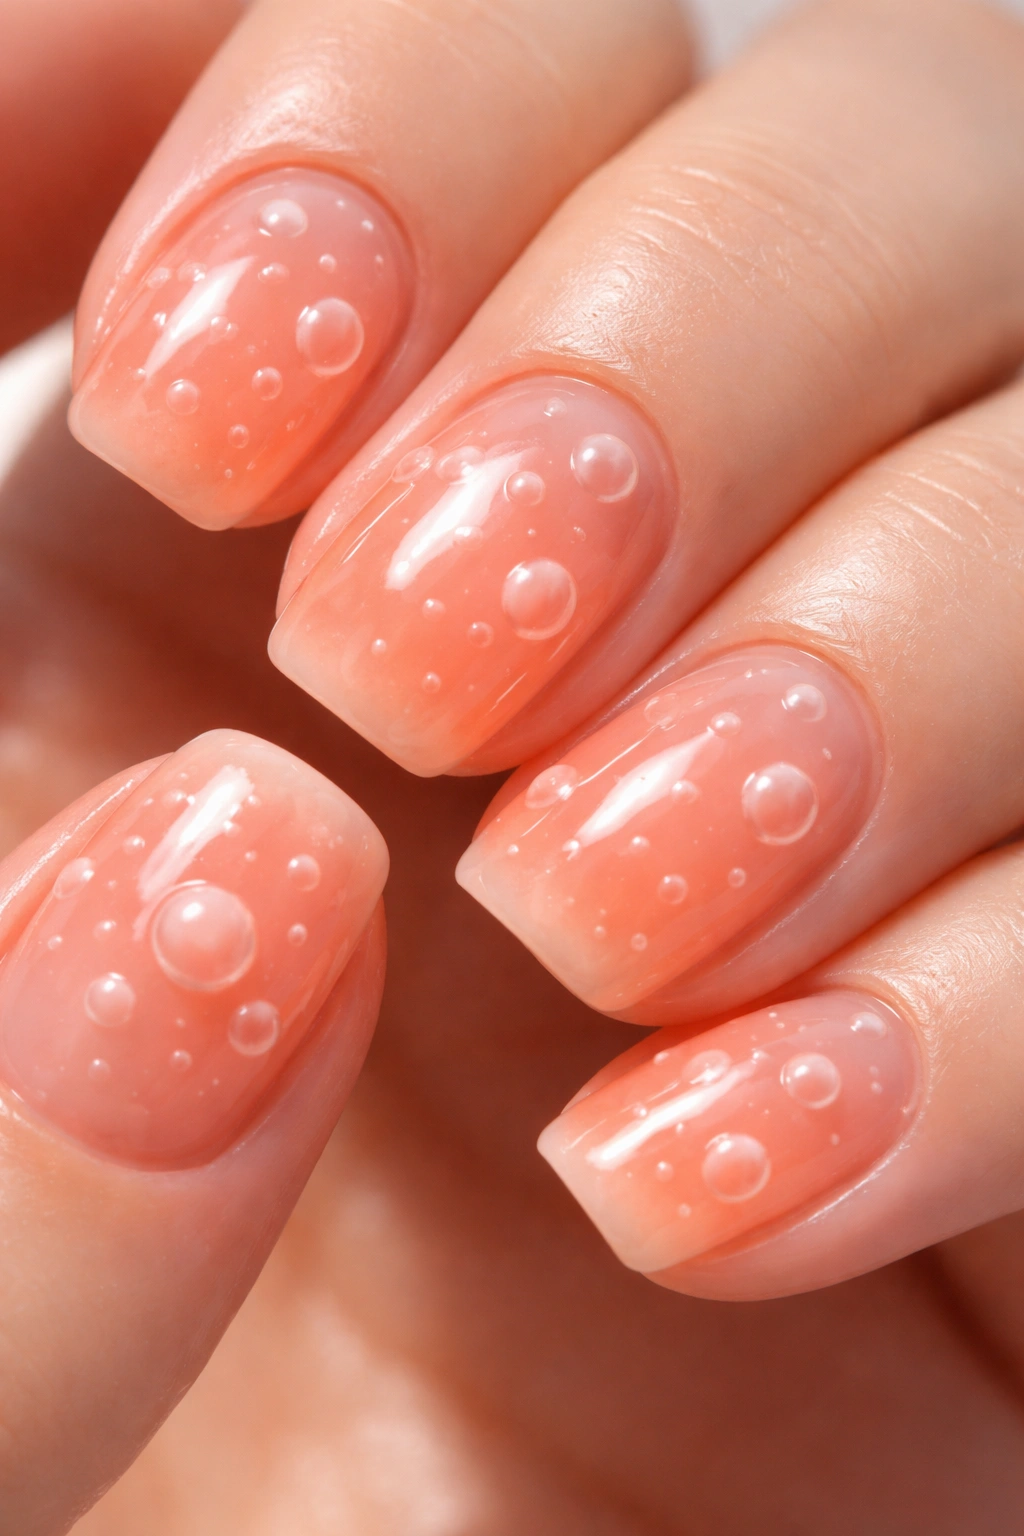
A translucent coral-peach jelly base where white dimensional bubbles appear to float just under the surface, created through a special gel technique. This design combines the trendy jelly finish with three-dimensional art elements that catch light and create movement. The bubble design is simple but visually interesting, perfect for short nails where you want impact without complexity.
The Jelly Finish Advantage
Jelly nails are perfect for summer because they have a luminous quality that mimics light shining through colored glass. The translucency makes them feel fresher and less heavy than opaque colors, even in warm tones. Against warm, sun-kissed skin, jelly nails create a gorgeous glow effect.
Building Dimensional Bubbles
- Layer thin coats of jelly base — 3-4 very thin coats create better translucency than 1-2 thick coats
- White dimensional elements are created using special builder gel or thick topcoat applied in dome shapes
- Cure between each layer to prevent the bubbles from sinking into the base
- The final bubble layer should sit noticeably on top, creating visible dimension when you look at the nail from the side
10. Cream With Sage Green Geometric Accent
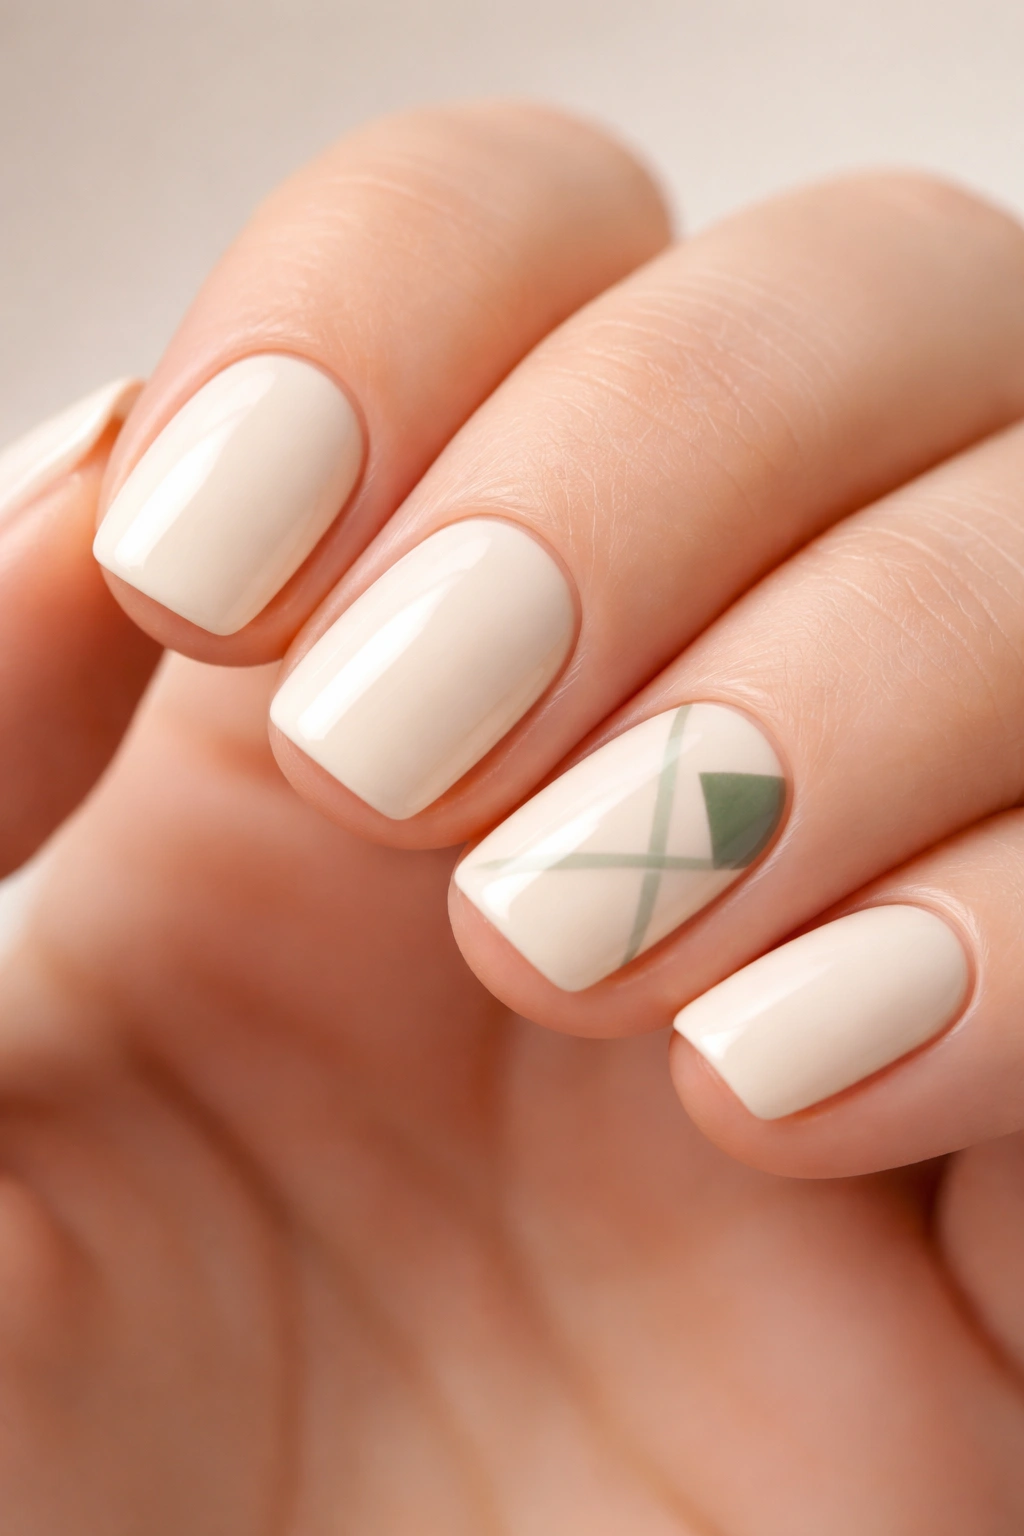
A warm cream base with geometric shapes (triangles, squares, or thin lines) in muted sage green creating an understated but intentional design. This color combination feels fresh and modern while remaining subtle enough for professional environments. The geometric shapes on short squovals read as deliberate design rather than pattern.
Why Sage Green Is the Hero of Summer Nails
Sage green is becoming the warm-month alternative to neutral because it adds interest without the visual weight of darker shades. It’s earthy enough to feel natural, muted enough to be wearable, and sophisticated enough to elevate a simple cream base. This combination works across all skin tones because cream is universally flattering and sage green is cool enough to coordinate with everything.
Geometric Design Strategy
- Use thin, straight lines rather than thick strokes; thinner lines read as more intentional and modern
- Apply geometry to just one accent nail or distribute small geometric shapes across all nails in a scattered pattern
- Negative space (leaving portions of the cream visible) prevents the design from feeling busy
- A matte finish on the sage green against glossy cream creates subtle textural contrast
11. Nude With Holographic Foil Accents
A neutral nude base with holographic foil carefully applied in strategic areas, creating a design that shifts and changes in different lighting. Holographic foil is more modern and less heavy-handed than traditional metallic finishes, and it’s perfect for short nails where subtle movement is more impactful than bold coverage. The nude base ensures the holographic elements stand out rather than competing with color.
The Holographic Effect in Daylight
Holographic foil creates rainbow shifts that are barely visible indoors but absolutely stunning in natural sunlight. This makes it perfect for warm months when you’re spending more time outside. The effect is modern, not glittery, which keeps the design sophisticated and wearable.
Applying Holographic Foil
- Create a slightly tacky base layer using a sticky topcoat or special foil adhesive
- Carefully press small pieces of holographic foil onto the tacky surface using a small applicator tool
- Placement matters — concentrate foil at the cuticle area, tips, or along one side edge rather than scattered haphazardly
- Seal with a glossy topcoat to protect the foil from peeling while enhancing the reflective effect
12. Peachy Pink With Tiny Heart Accent
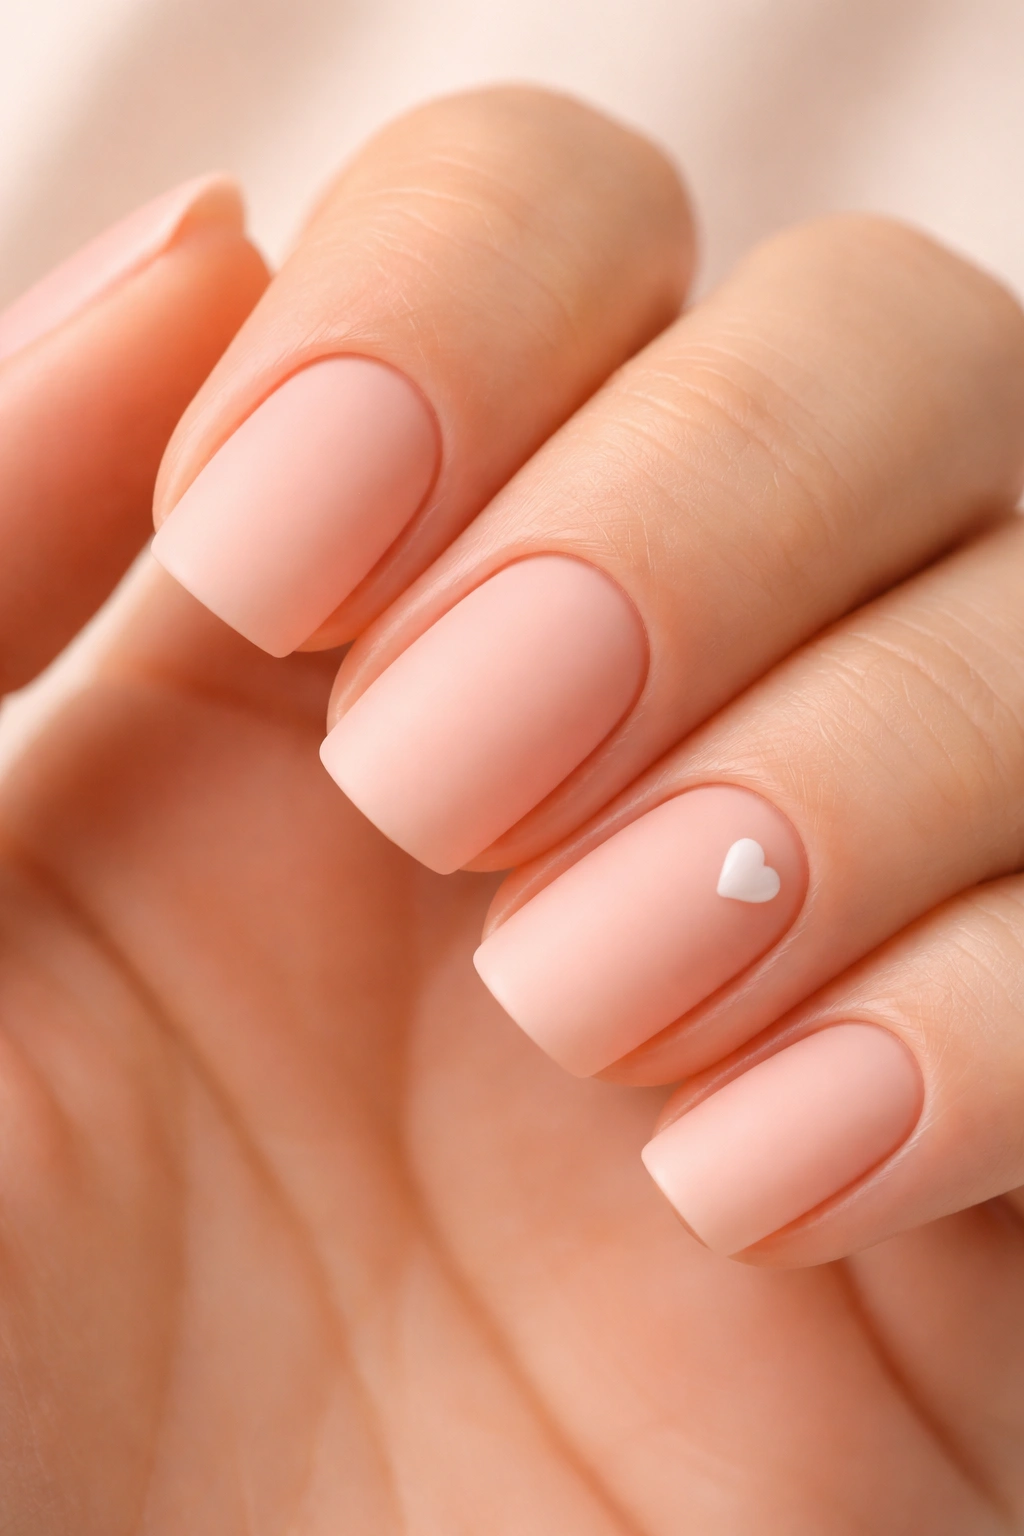
A soft peachy-pink base with one small heart on the accent nail creates a design that’s sweet without being overdone. Short nails make the small heart feel intentional and modern rather than cutesy. Peachy-pink is perfect for warm months because it’s flattering against sun-kissed skin and feels both summery and sophisticated.
The Power of Single-Accent Design
One small design element on a short nail is more impactful than scattered pattern because it creates focus. The heart shape is recognizable but not juvenile when rendered small and placed strategically. This design works because it’s simple enough to stay professional but personal enough to show personality.
Placing the Perfect Accent
- Center the heart on your ring finger or index finger for maximum visibility
- Size it to be roughly 1/4 to 1/3 the width of your nail; too large and it overwhelms, too small and it disappears
- The heart outline should be clean and defined rather than rough or shaky
- A matte finish on the base with glossy topcoat on the heart creates subtle dimension without being obvious
13. Warm Beige With Thin Gold Striping
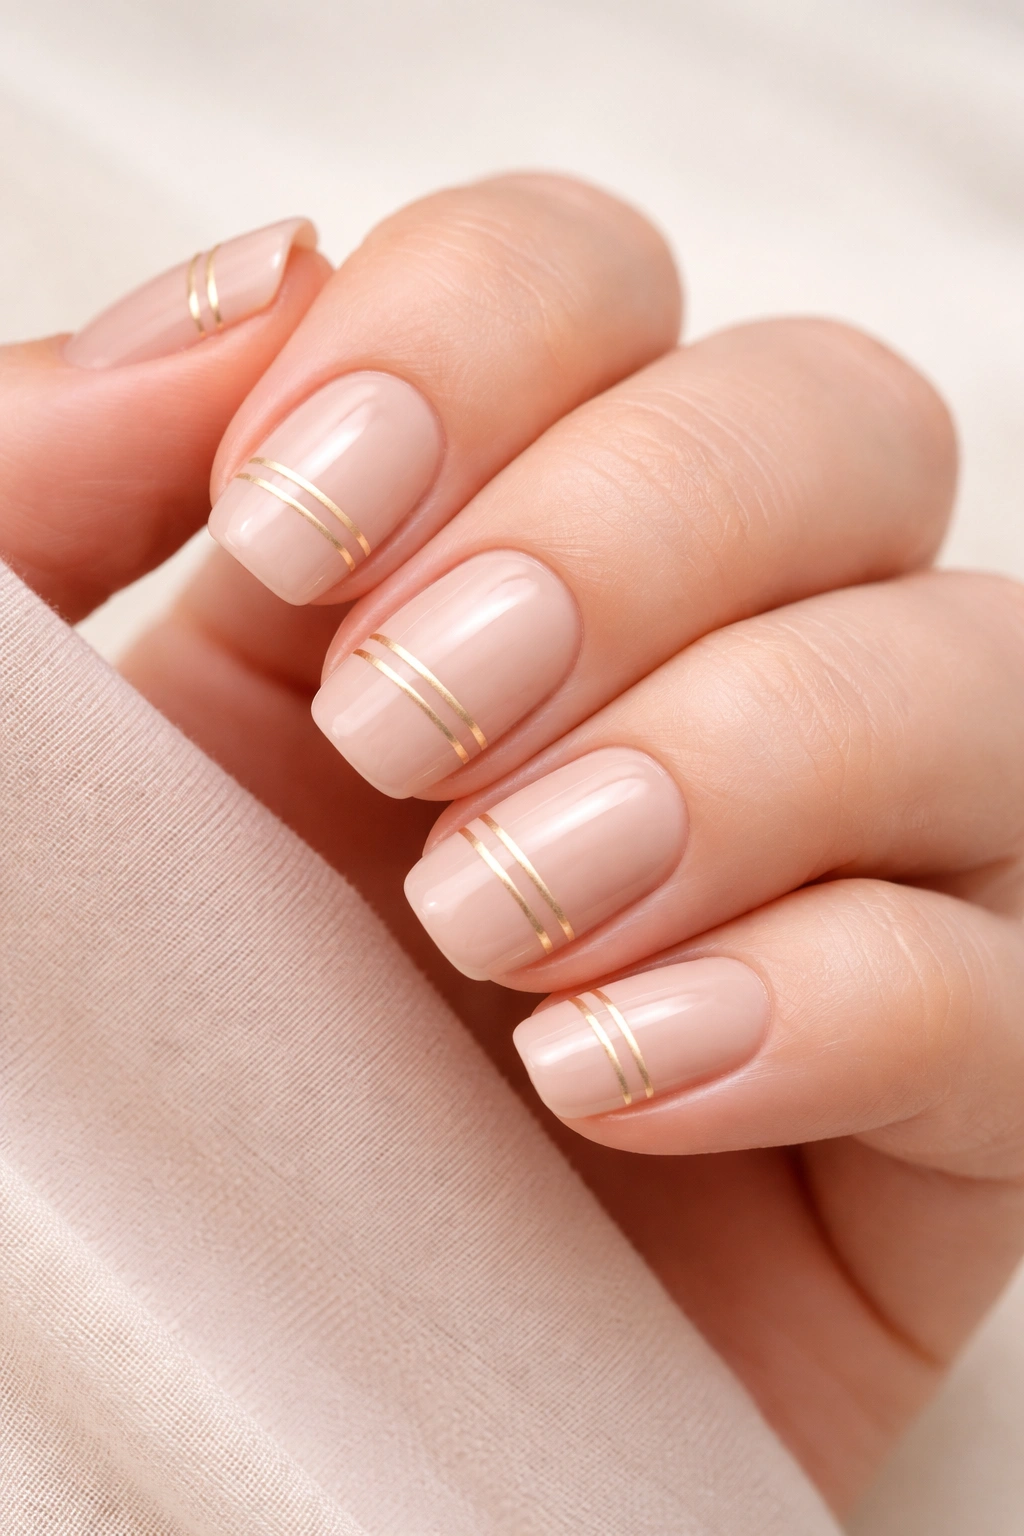
A warm neutral beige with delicate gold striping creating clean horizontal or angled lines across the nail. This design is endlessly versatile and works for any occasion because beige is the ultimate neutral and gold striping adds just enough visual interest to prevent the design from feeling boring. The thin lines read as sophisticated rather than decorative.
Why Thin Lines Over Thick Stripes
Thin striping (1-2mm) creates a modern, architectural look while thick stripes read as dated or busy. Short nails benefit especially from thin lines because they create dimension without overwhelming the limited surface area. The spacing between lines matters — evenly spaced lines feel intentional and designed.
Executing Perfect Stripes
- Use painter’s tape to mask off stripe areas if you want perfectly even spacing and crisp edges
- A gold gel pen or thin brush works better than traditional nail polish for ultra-thin lines
- Keep spacing consistent — either 2mm apart or 5mm apart, not random; consistency reads as design
- Stripe direction matters; horizontal lines feel calming, angled lines feel more dynamic
14. Blush With Rose Quartz Texture
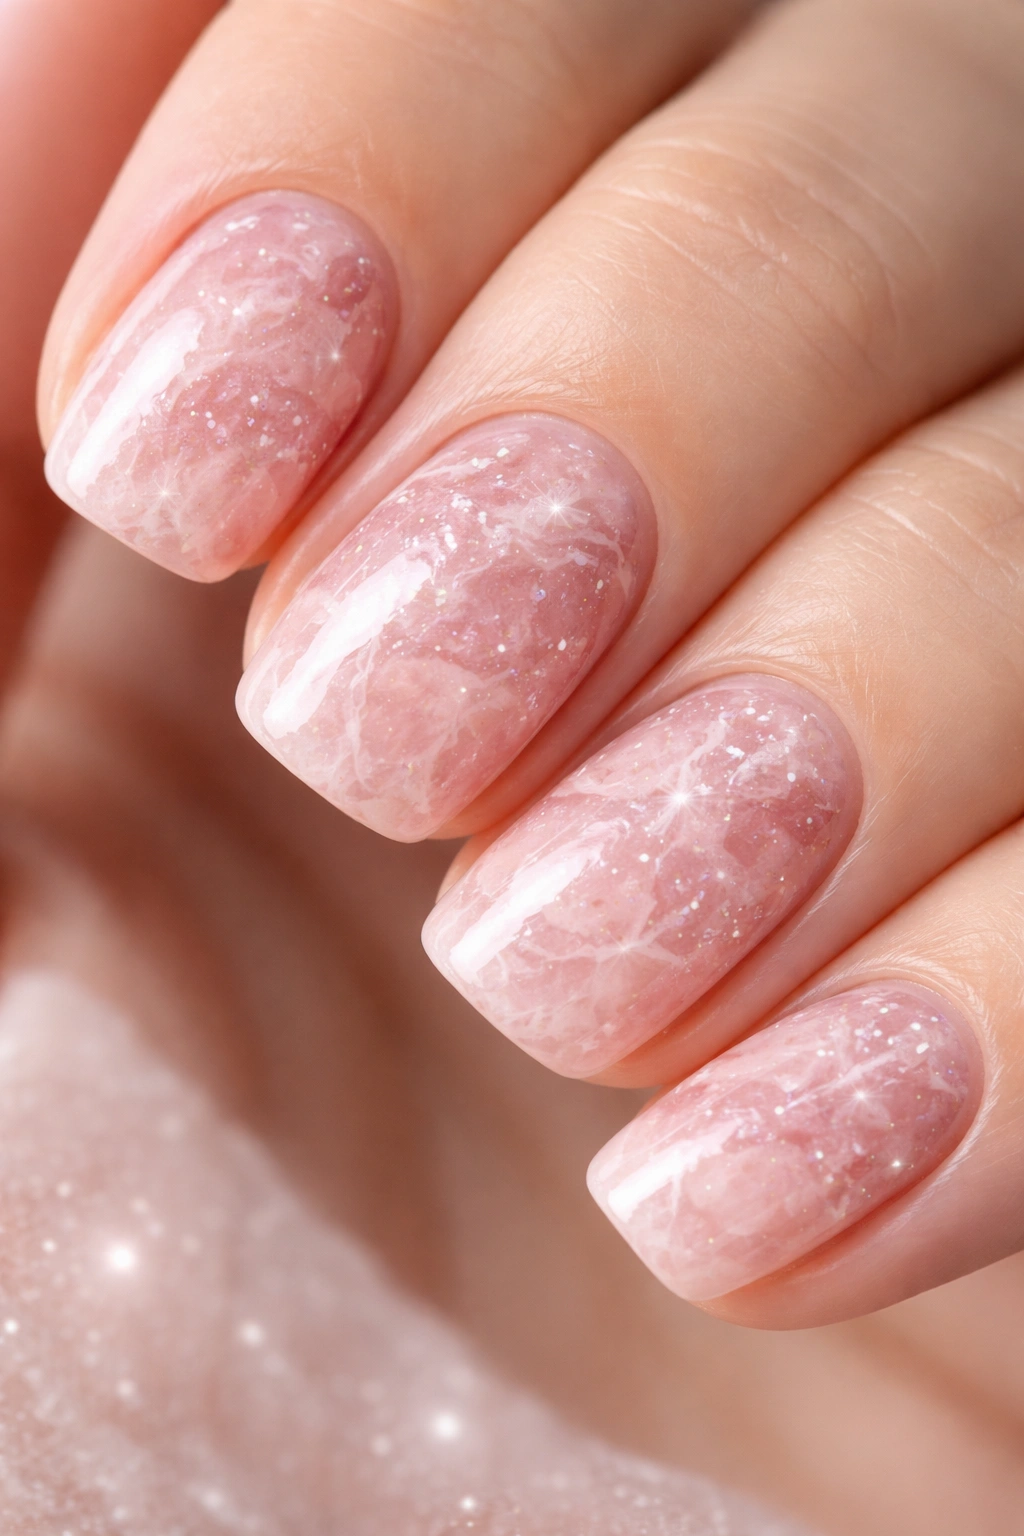
A soft blush pink base with a rose quartz-inspired speckled texture that mimics the natural variation in the stone. This design feels luxe and intentional without being high-maintenance. The texture is subtle enough that it doesn’t catch on anything or feel rough, but it adds enough visual interest that the nail doesn’t look flat.
Creating Texture Without Bulk
Rose quartz texture is achieved through careful speckle application rather than adding actual texture medium to your polish. This means the nail stays smooth and wearable while still reading as textured to the eye. The speckling should look random and organic, not patterned or uniform.
The Speckle Technique
- Use a thin brush loaded with white and touches of mauve to create tiny specks across the blush base
- The specks should be small dots, not lines or shapes — randomness is key to the natural stone appearance
- Vary density across the nail; some areas slightly denser, some sparser, mimics how stone actually looks
- A topcoat smooths the speckling and creates a finished, polished look rather than textured
15. Bright Tangerine With Matte Finish
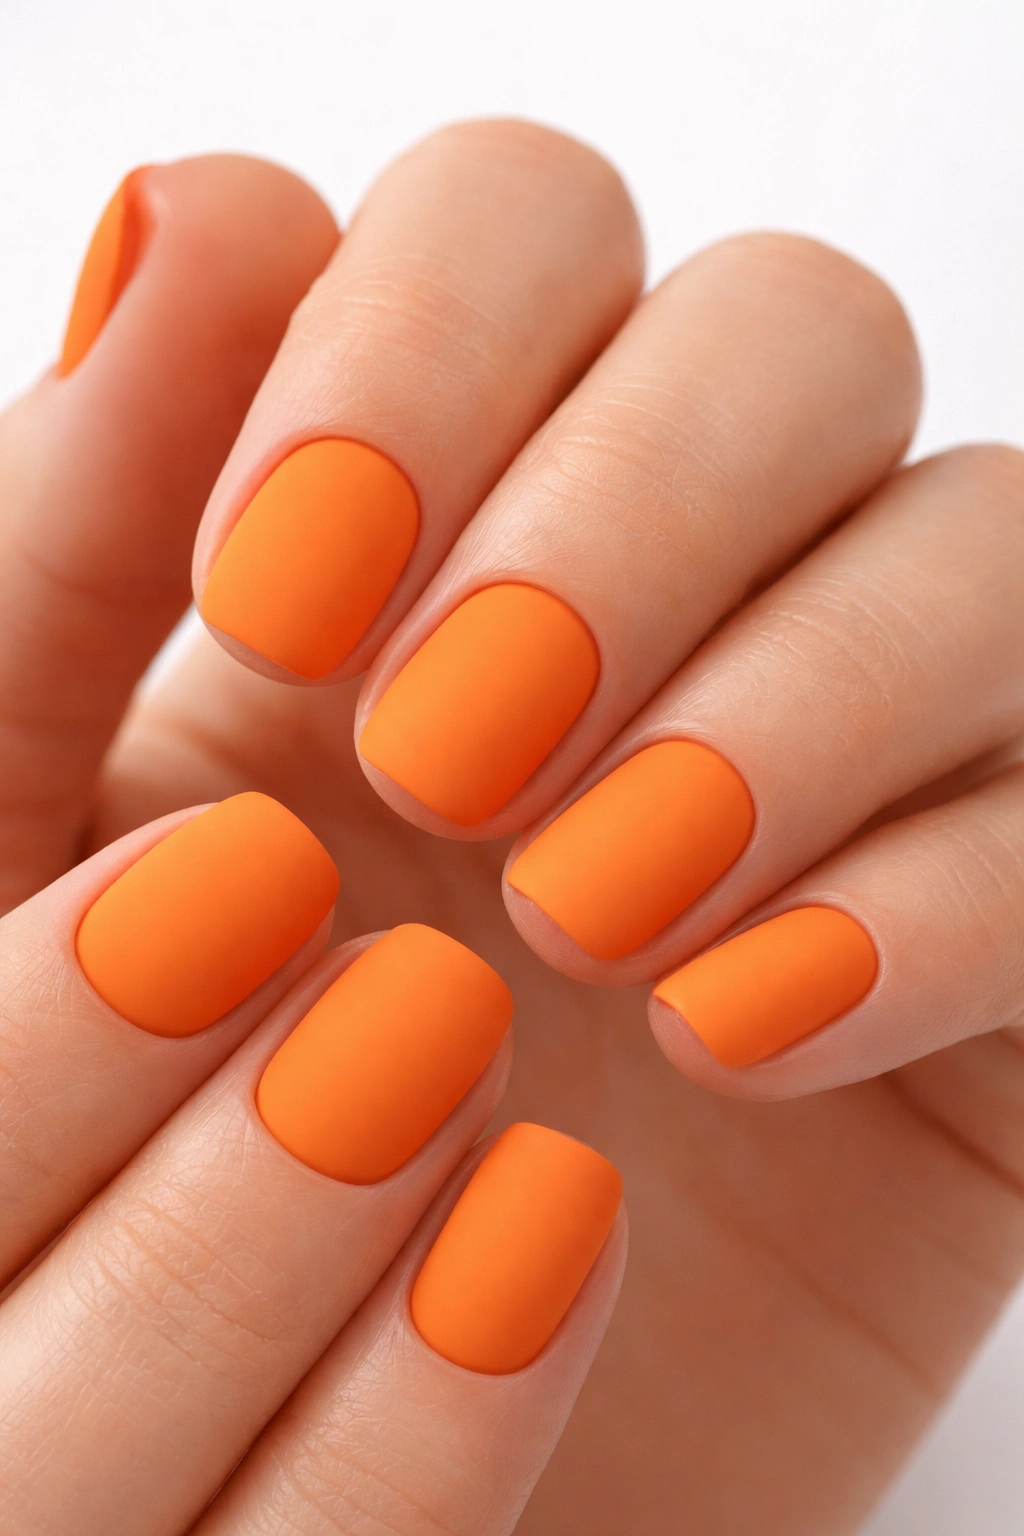
A bold, warm tangerine that reads as confident and summery, finished in matte rather than glossy for a modern, unexpected vibe. Tangerine is bold enough that it makes a statement but warm enough that it feels summery rather than neon. The matte finish elevates this warm tone from playful to sophisticated, making it wearable for more occasions than the glossy version.
Why Matte Changes Everything
Matte finishes transform bright colors into something more refined and intentional. A glossy tangerine can read as fun and casual, but matte tangerine feels deliberate and modern. The matte texture also makes the color appear slightly deeper and more saturated than it is in reality.
Maintaining Matte Nails
- Matte topcoat requires two thin coats rather than one thick coat to avoid a dusty, uneven appearance
- Matte nails show dust and fingerprints more readily than glossy, so regular cleaning keeps them looking fresh
- If you want longevity, a very thin layer of glossy topcoat over the matte prevents chipping without losing the matte appearance
- Matte designs last 2-3 weeks before the topcoat naturally wears slightly glossy at the edges
16. Soft Yellow With White Daisy Chain
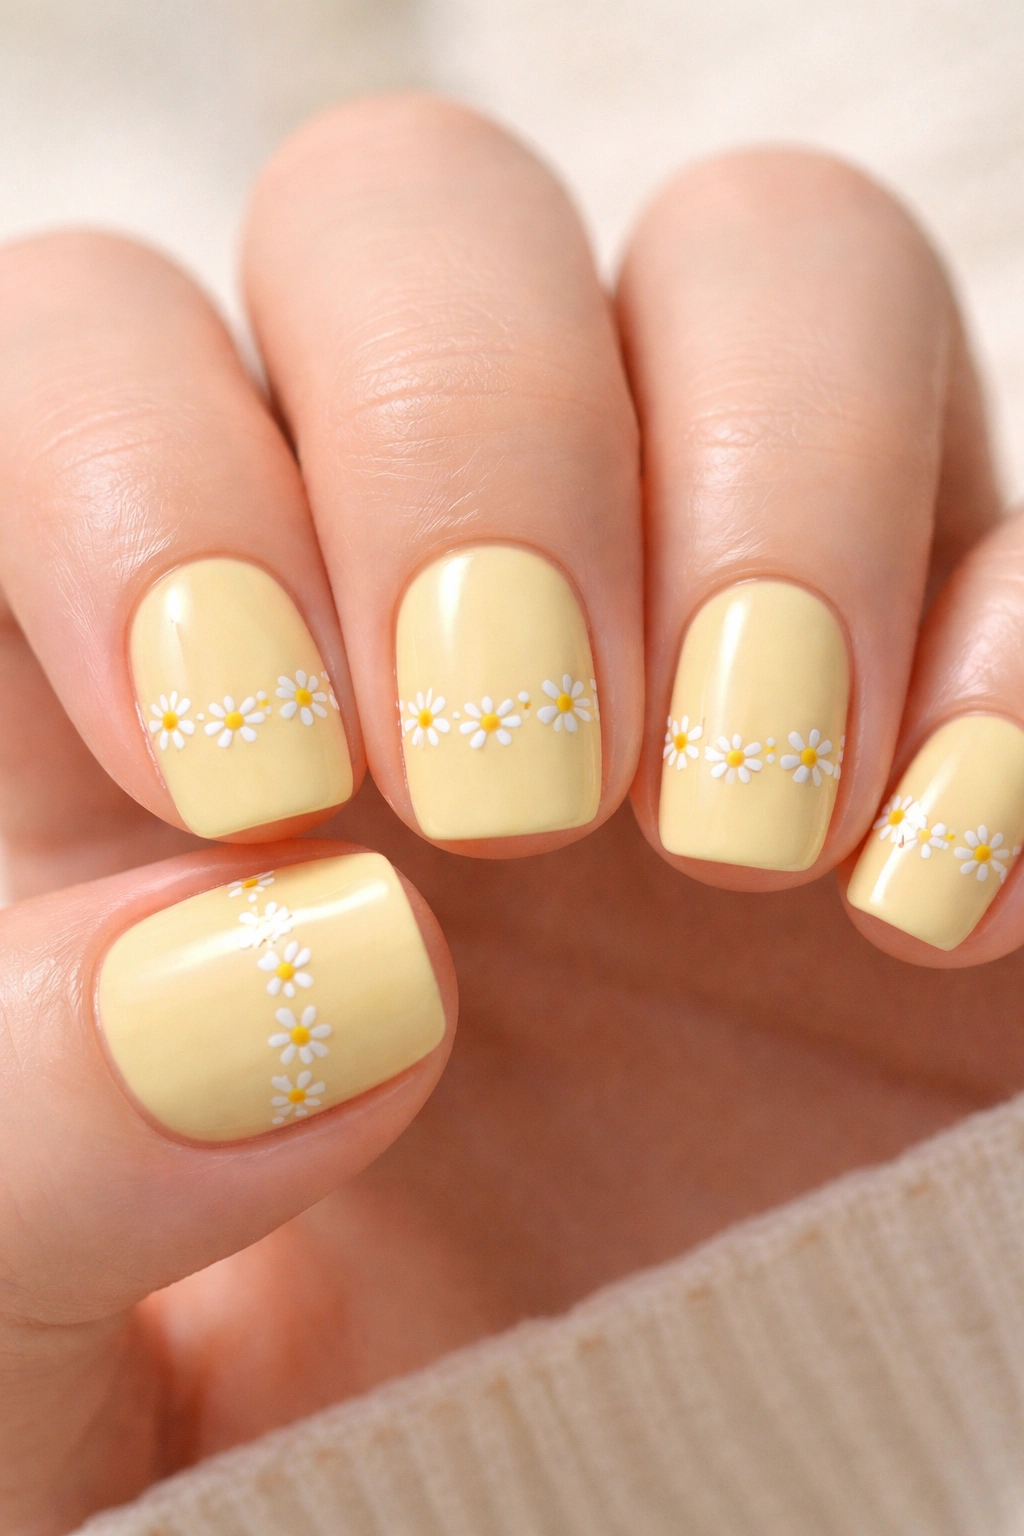
A pale, warm yellow base with delicate white daisies marching across the nail in a loose chain pattern. Yellow feels sunny and summery without being harsh when rendered in soft, pale tones. The daisy chain design is charmingly nostalgic but reads as modern and intentional on short squoval nails.
Yellow as a Summer Staple
Pale yellow connects to sunshine and warmth, making it perfect for warm months. It’s flattering on most skin tones because it reflects light rather than competing with skin tone. Against sun-kissed skin, pale yellow creates a luminous, glowing effect.
Creating a Daisy Chain
- Start with tiny white circles as the flower centers
- Add small white petals around each center in a petal-wheel pattern (5-6 petals per flower)
- Space flowers in a loose, organic pattern rather than perfectly spaced rows
- Connect flowers with a thin white line to create the “chain” effect; this line should feel casual rather than perfect
17. Translucent Nude With Embedded Tiny Shells
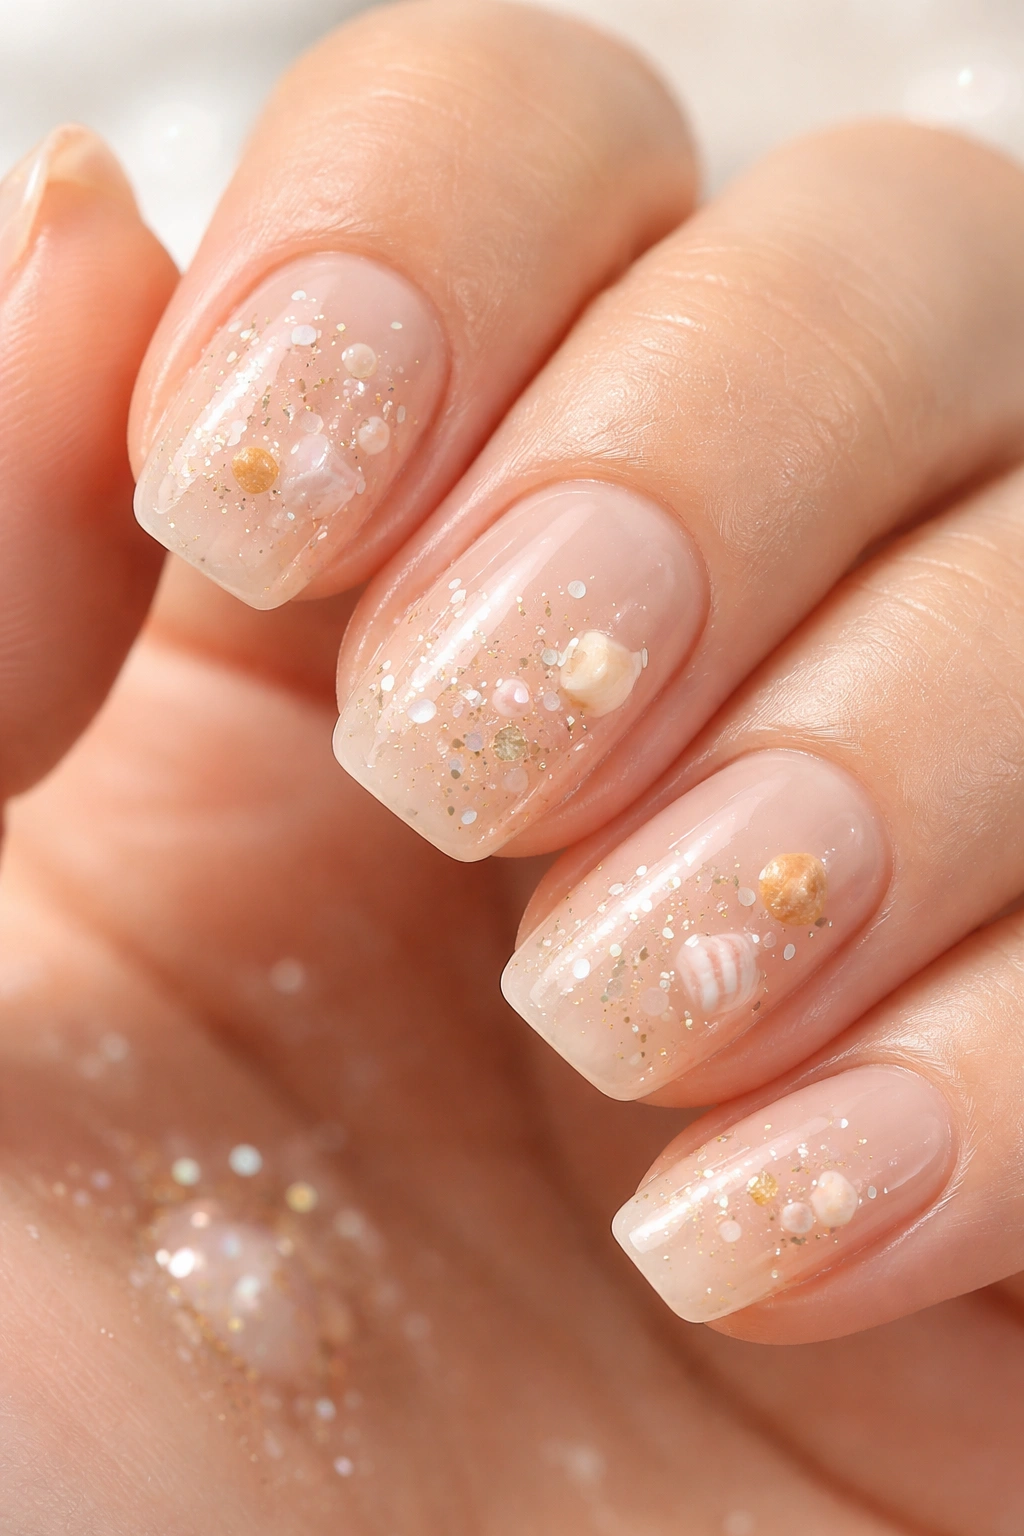
A barely-there nude that almost looks like natural nail, with real tiny shells embedded in the gel creating texture and a beach-forward design. This design is sophisticated and subtle while still being undeniably summery. The shells catch light and create dimension that painted designs simply cannot match.
The Luxury of Embedded Details
Embedding actual objects into gel creates a three-dimensional element that reads as thoughtfully crafted rather than simply painted. Tiny shells are perfect because they’re delicate enough for short nails and literally reference the beach environment. This design feels intentional and designed specifically for the warm months.
Applying Embedded Shells
- Use a thick builder gel as your base and let it partially cure so it’s tacky but not fully set
- Carefully place pre-soaked tiny shells into the tacky gel using a small applicator or tweezers
- Cure fully once shells are positioned; they’ll stay embedded permanently
- A final layer of clear gel over the shells protects them and creates a smooth surface
- This design lasts the full 3-4 week grow-out period without shells shifting or loosening
18. Powder Pink With Fine Silver Dust
A romantic powder pink base with barely-there silver dust creating a luminous, almost ethereal appearance. This design reads as delicate and sophisticated while still being modern. The silver dust catches light subtly without the sparkle reading as glitter, making it appropriate for any season while feeling fresh in warm months.
The Difference Between Dust and Glitter
Dust is much finer than glitter and creates shimmer rather than sparkle. A nail with dust reads as having a subtle sheen, while glitter reads as having obvious sparkle. For warm months when you want luminosity without drama, dust is perfect.
Applying Even Dust Coverage
- Mix fine silver dust into a clear gel topcoat and apply as your final layer
- Alternatively, brush dry dust onto a tacky topcoat, then seal with clear gel — this requires more precision but gives you better control over density
- The dust coverage should be subtle enough that the pink base color is still clearly visible, not opaque dust
- Cure fully to lock everything in place
19. Cream White With Scattered Wildflower Silhouettes

A cream white base with tiny wildflower silhouettes scattered across the nail in dark teal or sage green. This design feels botanical and summery while remaining understated enough for everyday wear. The silhouettes are simple enough that they read immediately without requiring detail-work precision.
Why Scattered Florals Work
Multiple small flowers scattered across the nail feel more modern and less cutesy than a single centered design. Wildflower silhouettes are simple shapes (just outlines) so they’re easy to execute but create visual interest. The color choices ensure the flowers read clearly against the light background without overwhelming it.
Creating Silhouette Flowers
- Use a thin brush with dark teal or sage green to paint flower shapes as simple outlines
- Keep shapes simple: small circles with lines extending upward for stems, or basic petal shapes around a small center
- Vary flower sizes slightly to create visual rhythm — not all the same size, but no one flower dramatically larger
- Scattered placement across all five nails (or an accent nail) creates cohesion and feels intentionally designed
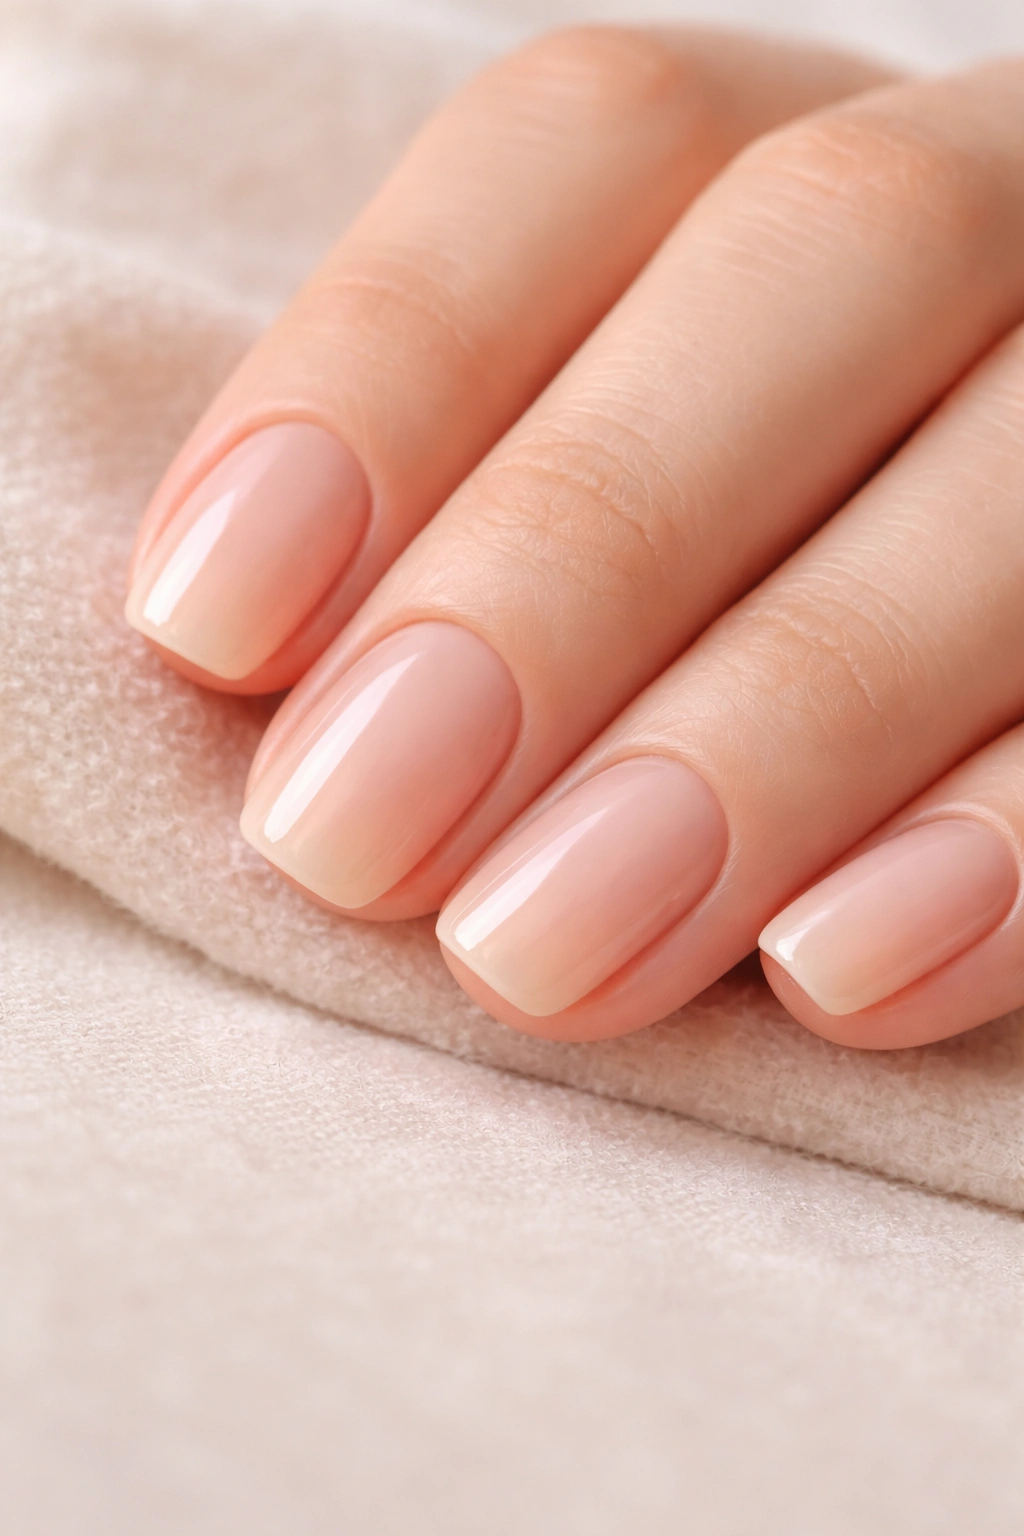
20. Warm Apricot With Clear Gradient
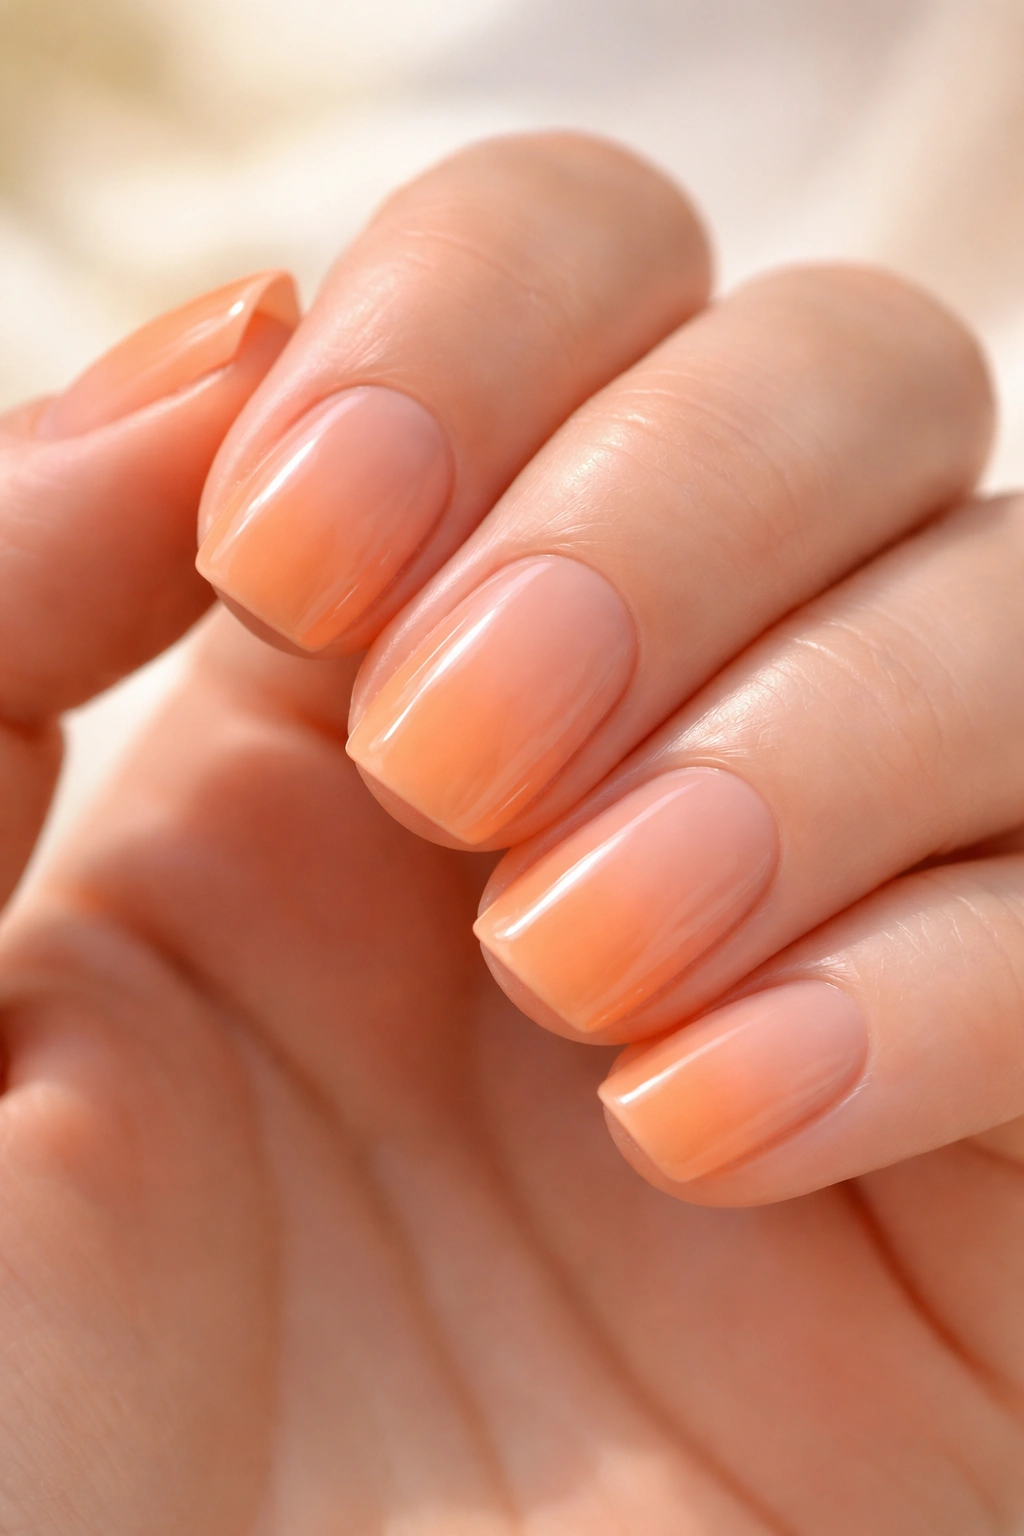
A warm apricot at the tips fading to clear/transparent at the cuticle area, creating a design that shows off the natural nail bed while maintaining color at the tips. This design works because it’s both practical and visually interesting — the natural nail remains visible (making it look healthier and longer) while the apricot tips add color and dimension.
The Benefits of Gradient Toward Clear
Showing the natural nail bed makes nails appear longer than they are, which is perfect when you’re working with short length. The gradient creates visual interest without actual design work. This approach is flattering because the natural nail becomes part of the design rather than something to hide.
Creating a Smooth Color-to-Clear Gradient
- Apply apricot color at the tips in full opacity
- Using a makeup sponge, blend apricot backward toward the cuticle in increasingly lighter applications
- Continue blending until the color fades to nearly transparent, then completely transparent at the cuticle
- The fade should be gradual enough that you can’t see distinct color banding, just a smooth transition
- A high-shine topcoat creates a seamless, airbrushed appearance
Final Thoughts
Short squoval nails in warm months are about embracing practicality without sacrificing elegance. These twenty designs prove that shorter nail length doesn’t limit your creativity — it actually forces it in better directions, pushing you toward intentional design choices rather than relying on nail length to create drama. The squoval shape itself is the perfect bridge between the structured and the soft, the modern and the accessible, which is why it works across every aesthetic and skill level.
The beauty of short nails during warm months is that they actually age better and chip less than longer alternatives, meaning your designs stay fresh and intentional-looking throughout their wear time. You’re not constantly fighting against breakage or managing length-related maintenance, which frees you up to actually enjoy your hands and show off your design choices rather than worrying about them.
Whether you gravitate toward the minimalist elegance of solids with subtle shimmer, the botanical warmth of tiny florals, the modern geometry of clean lines, or the beachy sophistication of embedded elements, there’s absolutely a direction that speaks to your style. The key is choosing designs that feel like genuine reflections of your aesthetic rather than chasing trends. That’s what makes these designs feel fresh and wearable even as seasons shift — they’re built on timeless principles of color theory, proportion, and intentional simplicity rather than trends that expire.
