

There’s something about the holiday season that makes us want to go all out with our beauty looks. While you’re planning your party outfits and perfecting your festive makeup, don’t forget about your nails. They’re basically tiny canvases waiting to showcase your holiday spirit.
Here’s the thing: holiday nails don’t have to be complicated or over-the-top. Sure, you can go full maximalist with 3D ornaments and enough glitter to blind Santa, but you can also keep things simple with a classic red or a subtle shimmer. Both are completely valid choices for the season.
The beauty of holiday manicures is that you’ve got endless options. Want to channel your inner Grinch with emerald green velvet? Go for it. Prefer something that screams “I just came from the North Pole”? Frosted tips have you covered. Can’t decide between Christmas vibes and New Year’s glam? Mix them both together.
We’ve rounded up more than 25 holiday nail designs that’ll work whether you’re hitting up office parties, hosting family dinners, or just want your hands to look cute while wrapping presents. From DIY-friendly looks to salon-worthy art, there’s something here for every skill level and style preference.
1. Classic Red Velvet Nails
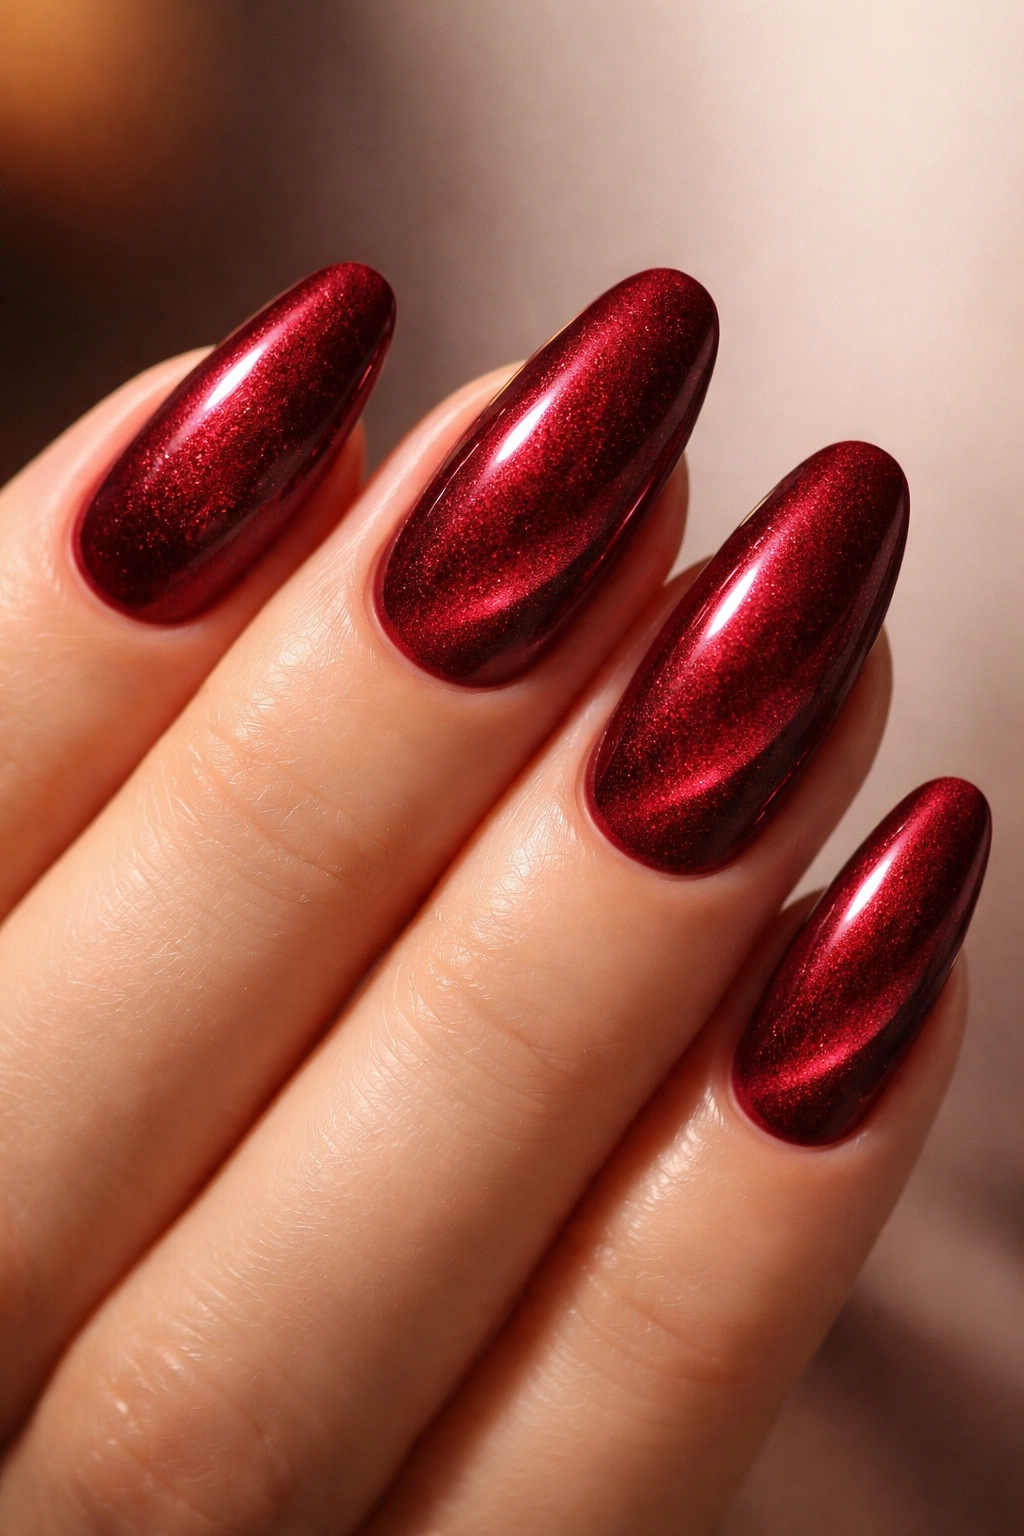
You really can’t go wrong with a rich, velvety red manicure during the holidays. It’s like the little black dress of festive nails—timeless, elegant, and works with absolutely everything in your winter wardrobe.
What makes velvet nails special is that magnetic shimmer effect. When you apply magnetic polish and hold a magnet over it while it’s still wet, the metallic particles shift to create that soft, textured look. It catches the light beautifully without being too sparkly or in-your-face.
The best part? This look is surprisingly achievable from home if you’ve got magnetic polish and the right magnet. Just apply your base coat, then your magnetic polish, hold the magnet over each nail for about 10-15 seconds, and watch the magic happen. Seal it with a good top coat and you’re set for weeks.
Deep cherry reds, burgundies, and wine tones all work beautifully for this technique. The darker the base color, the more dramatic that velvet effect becomes.
2. Candy Cane French Tips
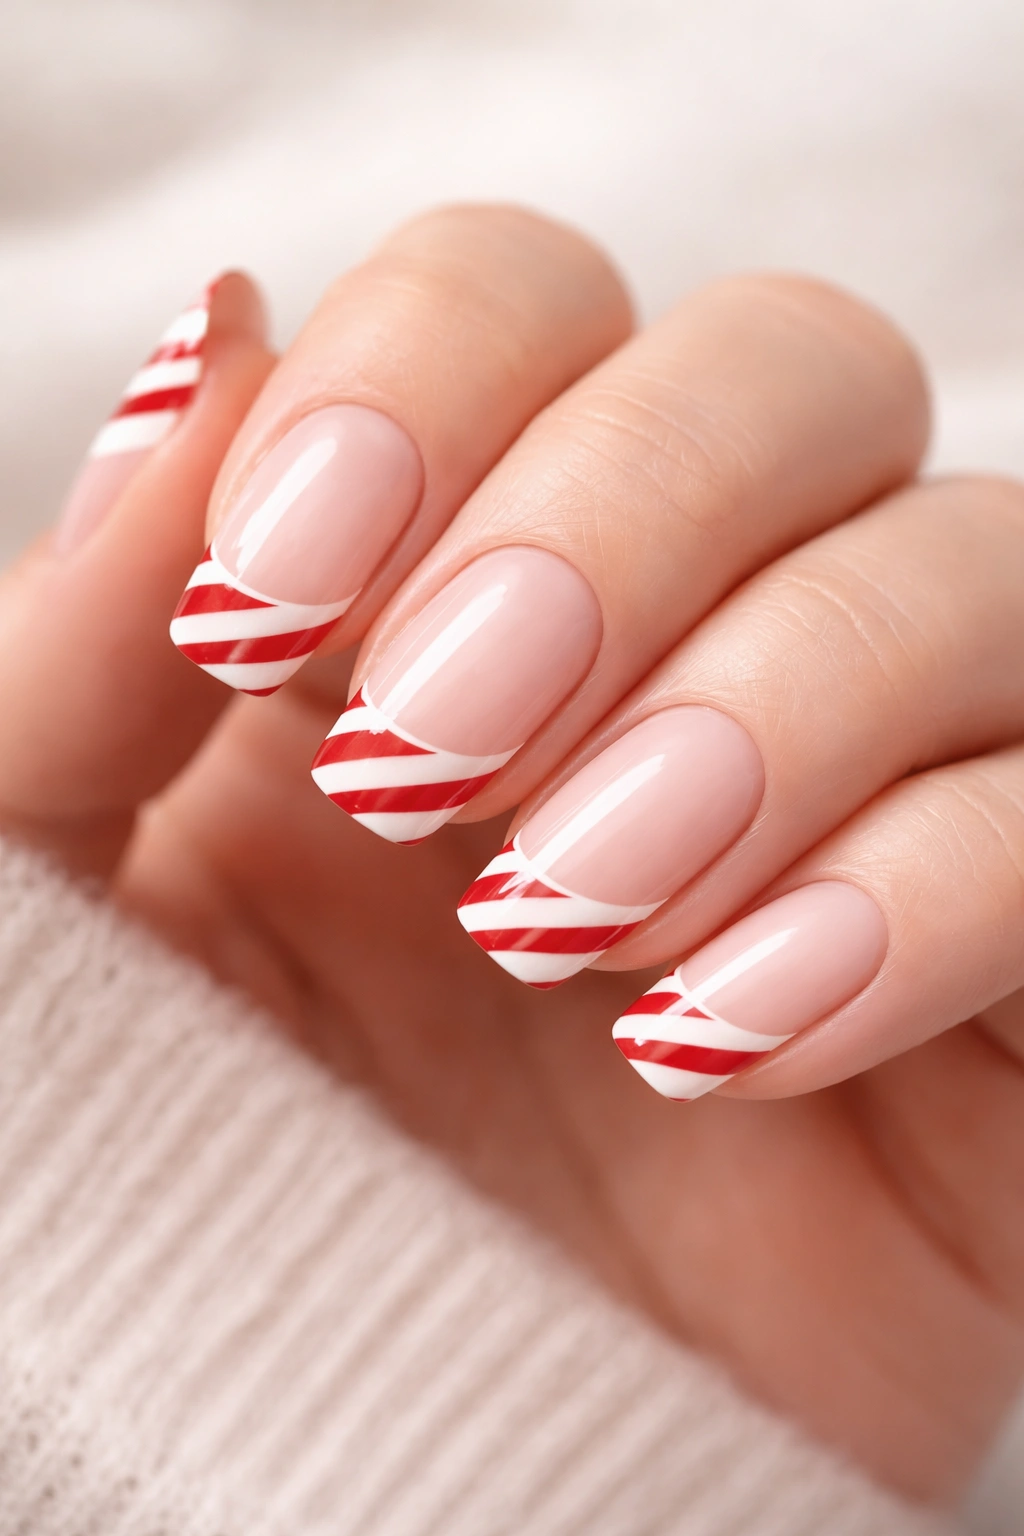
French manicures get a festive upgrade with diagonal red stripes that mimic everyone’s favorite holiday treat. This design is so much easier than it looks—seriously, if you can paint a line, you can nail this look.
Start with a white or pale pink base and let it dry completely. Then, apply white polish to your tips in the classic French style. Once that’s dry, use a thin nail art brush (or even a toothpick) to add thin red diagonal lines across the white tips. Space them evenly for that authentic candy cane vibe.
If freehand painting isn’t your thing, thin striping tape works wonders here. Apply it diagonally across your white tips, paint red polish in the gaps, then carefully peel the tape away. You’ll get crisp, clean lines every single time.
This look stays festive without being too themed, which means you can wear it throughout December without feeling like you’re trying too hard. Plus, it’s perfect for those who want to participate in holiday nail fun but prefer a more understated approach.
3. Emerald Green Chrome
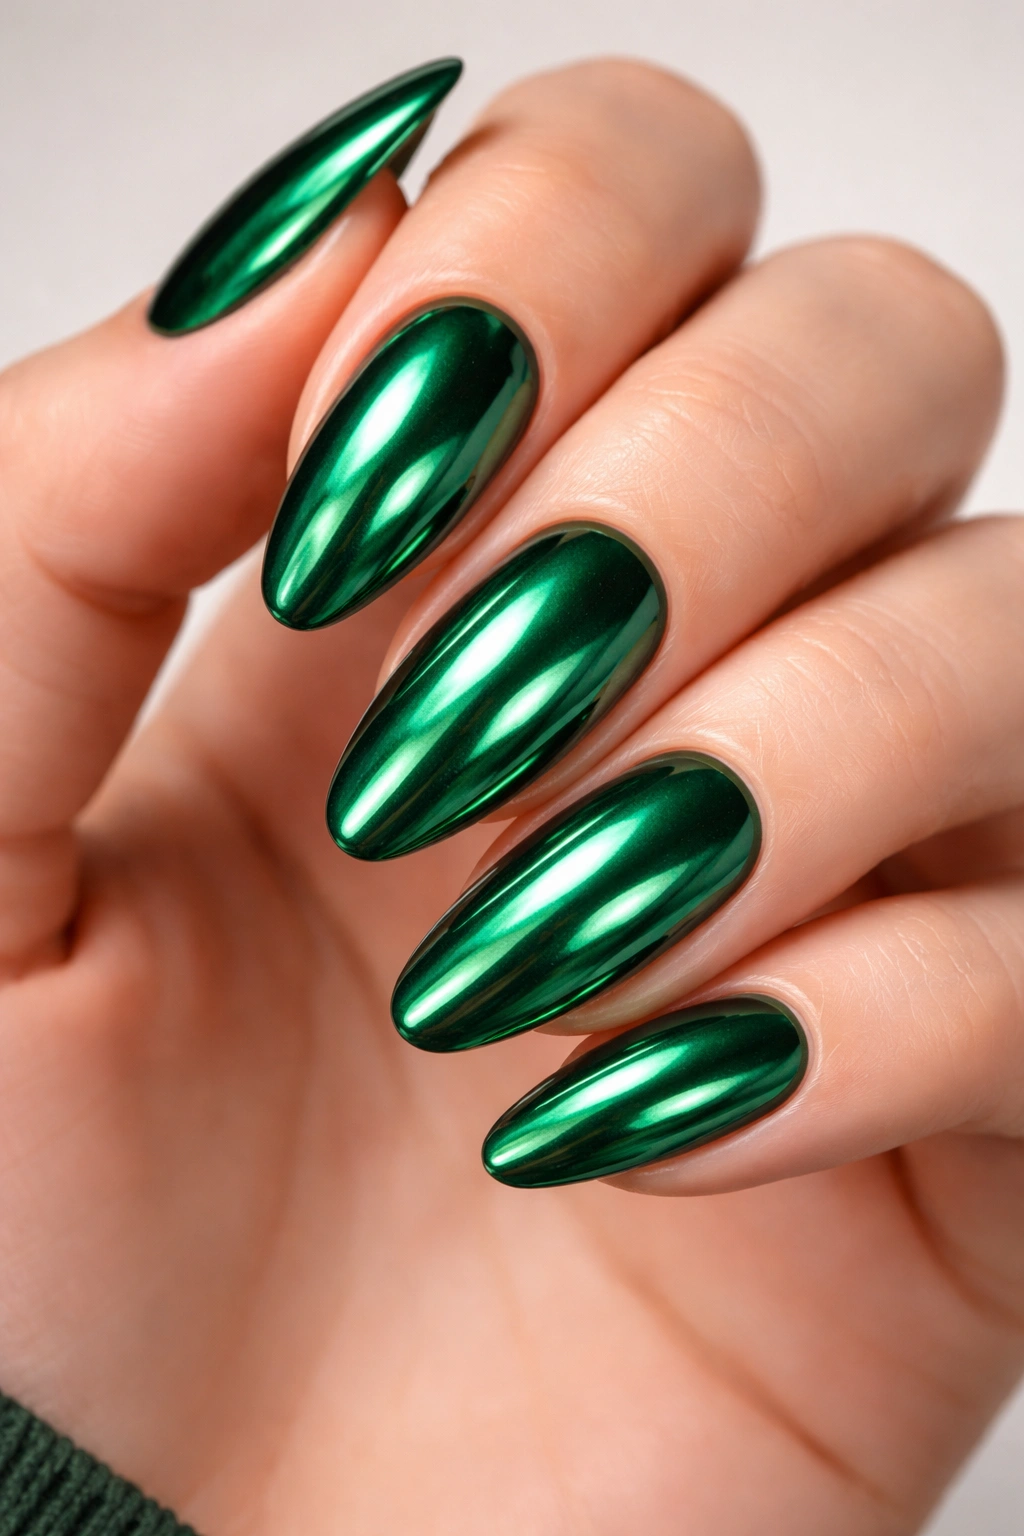
Green is having a major moment this holiday season, especially when you add a chrome finish. That mirror-like shine takes a classic Christmas color and makes it feel completely modern and fashion-forward.
Chrome nails require a bit of technique, but the payoff is worth it. You’ll need chrome powder and either a gel base or special base coat designed for chrome application. Apply your base color (a dark green works best), cure or dry it, then use a sponge applicator or your finger to rub the chrome powder onto the nail until you get that reflective finish.
The color can range from deep forest green to bright emerald, depending on your preference. Darker shades feel more sophisticated and evening-appropriate, while brighter greens channel that fun, Grinch-inspired energy that’s surprisingly chic.
What’s great about chrome is how it moves in the light. Your nails will shift and shimmer as you move your hands, creating this almost liquid metal effect that’s absolutely mesmerizing. It’s definitely a conversation starter at holiday parties.
4. Snowflake Accent Nails
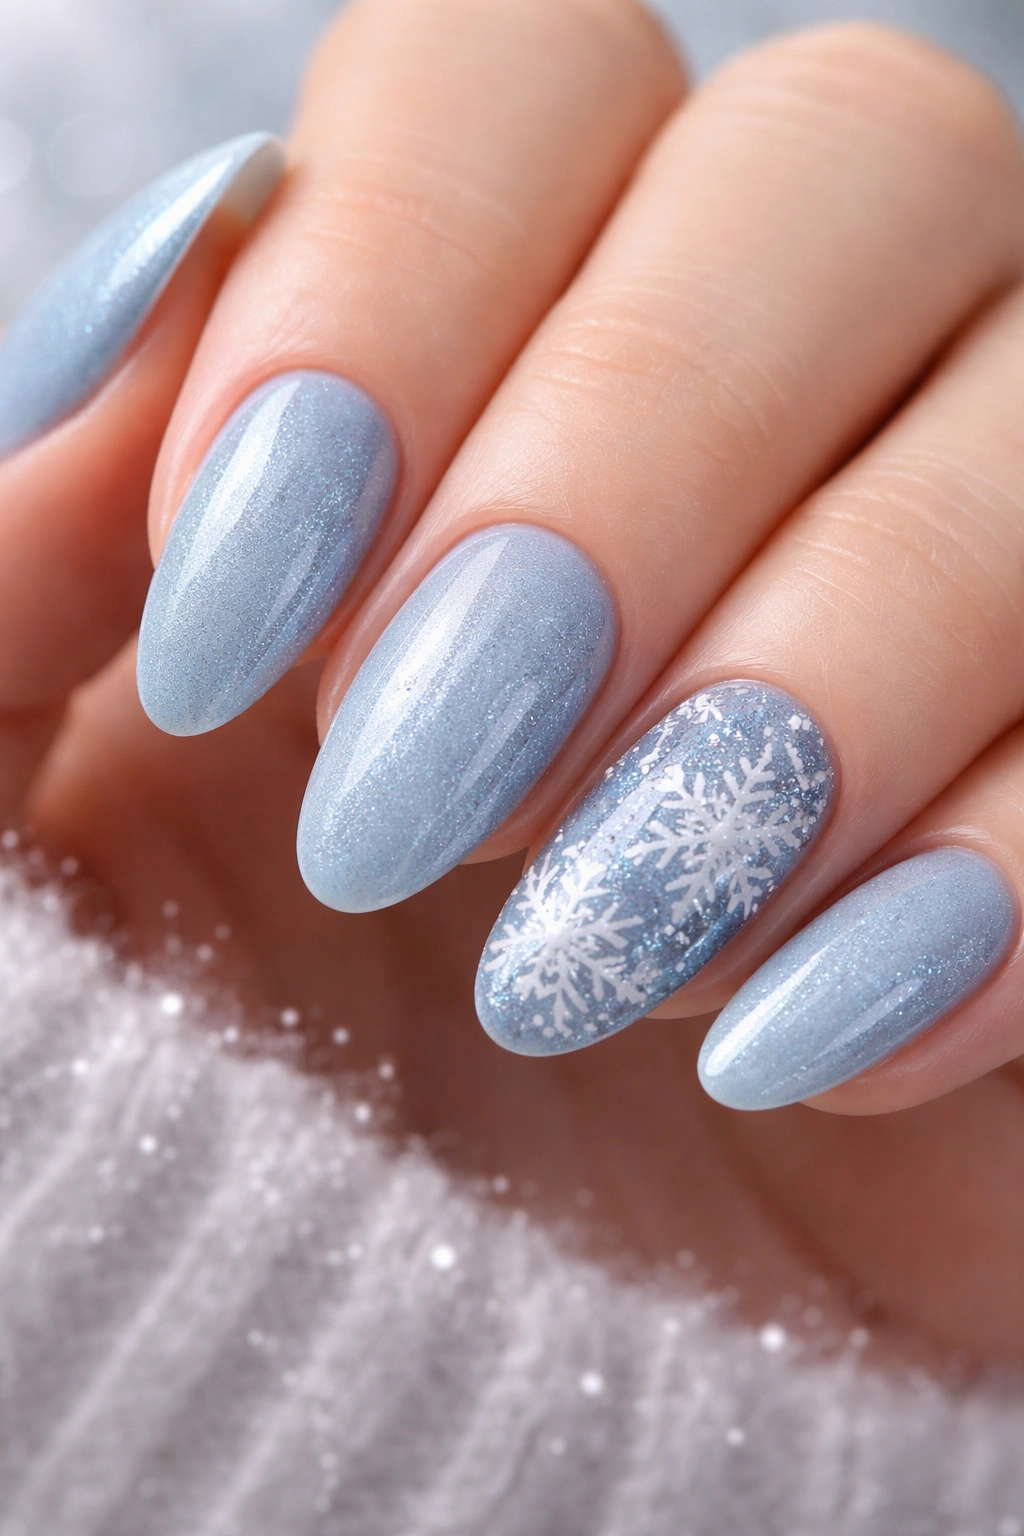
Not everyone wants a full set of intricate nail art, and that’s where accent nails save the day. Keep most of your nails a solid winter color—think icy blue, soft gray, or classic white—then add delicate snowflake designs to one or two nails per hand.
Creating snowflakes is easier than you’d think. Grab a dotting tool (or a bobby pin) and make a small dot. Then, use a thin brush to draw six lines radiating out from that center dot. Add small dots or lines to the ends of each spoke, and boom—you’ve got a snowflake.
If hand-painting feels too ambitious, snowflake nail stickers and decals are your best friend. They come in tons of styles, from minimalist line art to intricate, glittery designs. Just apply them to dry polish, press down firmly, and seal with top coat.
The beauty of this design is its versatility. Navy base with white snowflakes? Elegant. Nude base with silver snowflakes? Subtle and pretty. The combinations are endless, and you can adjust the vibe to match your personal style.
5. Frosted Berry Chrome
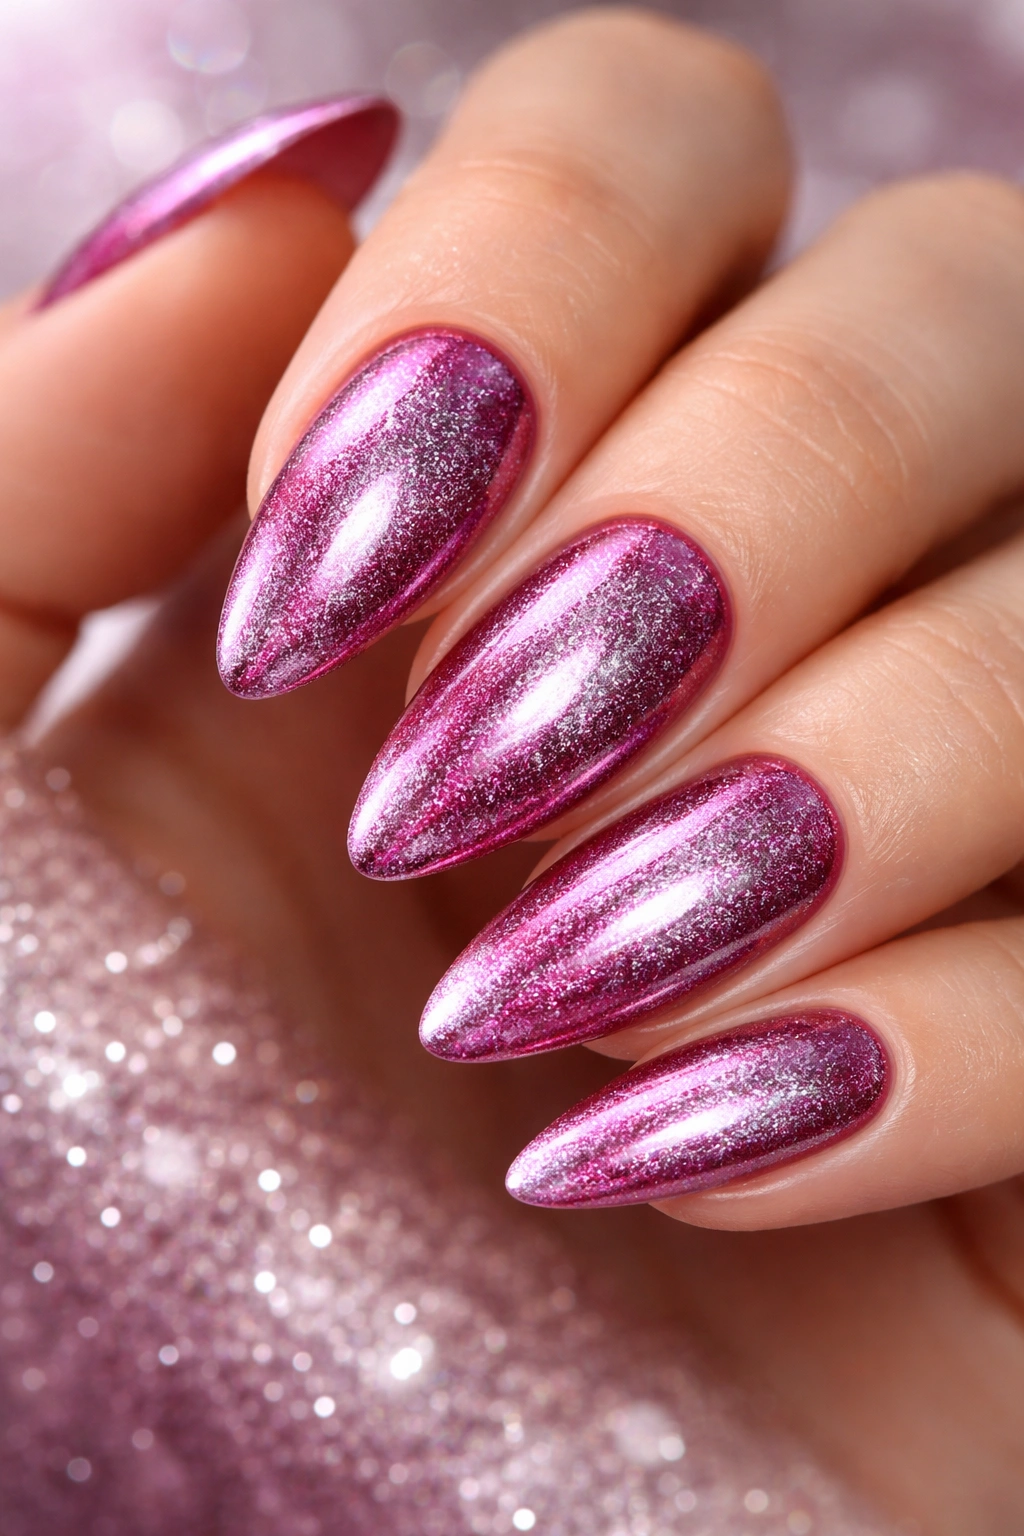
Frosted berry nails are one of the biggest trends this winter, combining rich red tones with chrome powder for a frosty, almost crystallized effect. It’s like your nails got dipped in crushed candy canes—in the best possible way.
The technique is similar to regular chrome application, but you’re layering the chrome over a berry-toned base instead of a solid color. This creates depth and dimension that straight chrome doesn’t give you. The red undertones peek through the metallic finish, creating this gorgeous, multidimensional look.
What makes this style so appealing is how it catches the light. As you move your hands, the nails shift between deep berry and bright, reflective silver. It’s festive without being too literal about the holidays, which means you can wear it well into January.
This look does best with almond or oval nail shapes because the chrome finish emphasizes the shape of your nails. Shorter nails can absolutely rock this too—just make sure your application is smooth and even for that flawless frozen effect.
6. Gold Glitter Gradient

Sometimes you just need glitter. Not a little shimmer—actual, visible, chunky glitter that announces your presence before you even enter the room. A gold glitter gradient gives you that sparkle while keeping things slightly more refined than a full glitter nail.
The gradient technique concentrates glitter at your tips and fades it toward your cuticles. Start with a nude or champagne base, then use a makeup sponge to dab glitter polish from the tip downward. Use a lighter hand as you move toward the base of the nail to create that seamless fade.
Multiple thin layers work better than one thick coat. Build up the glitter gradually, letting each layer dry slightly before adding more. This prevents that chunky, bumpy texture that can happen with glitter polish.
Gold is universally flattering and works for literally every holiday event on your calendar. Office party? Check. Fancy dinner? Absolutely. Casual family gathering? Still appropriate. It’s festive enough to feel special but not so themed that it only works for two weeks in December.
7. Plaid Pattern Nails

Plaid is everywhere during the holidays—on wrapping paper, pajamas, tablecloths—so why not on your nails too? This cozy pattern translates surprisingly well to nail art, and you can customize the colors to match your vibe.
Traditional red and green plaid is the obvious choice, but don’t sleep on other color combinations. Navy and white feels preppy and chic. Red and black gives off serious flannel shirt energy. Green and gold is unexpected but gorgeous.
Creating plaid requires patience but not necessarily artistic talent. Paint your base color, then use a thin brush or striping tape to add vertical and horizontal lines in your accent colors. The key is layering—lighter colors first, then darker ones on top to create that woven appearance.
You don’t have to do plaid on every nail, either. Try it on one or two accent nails with coordinating solid colors on the rest. This keeps the look interesting without overwhelming your hands with pattern.
8. White Christmas Nails with Gold Accents
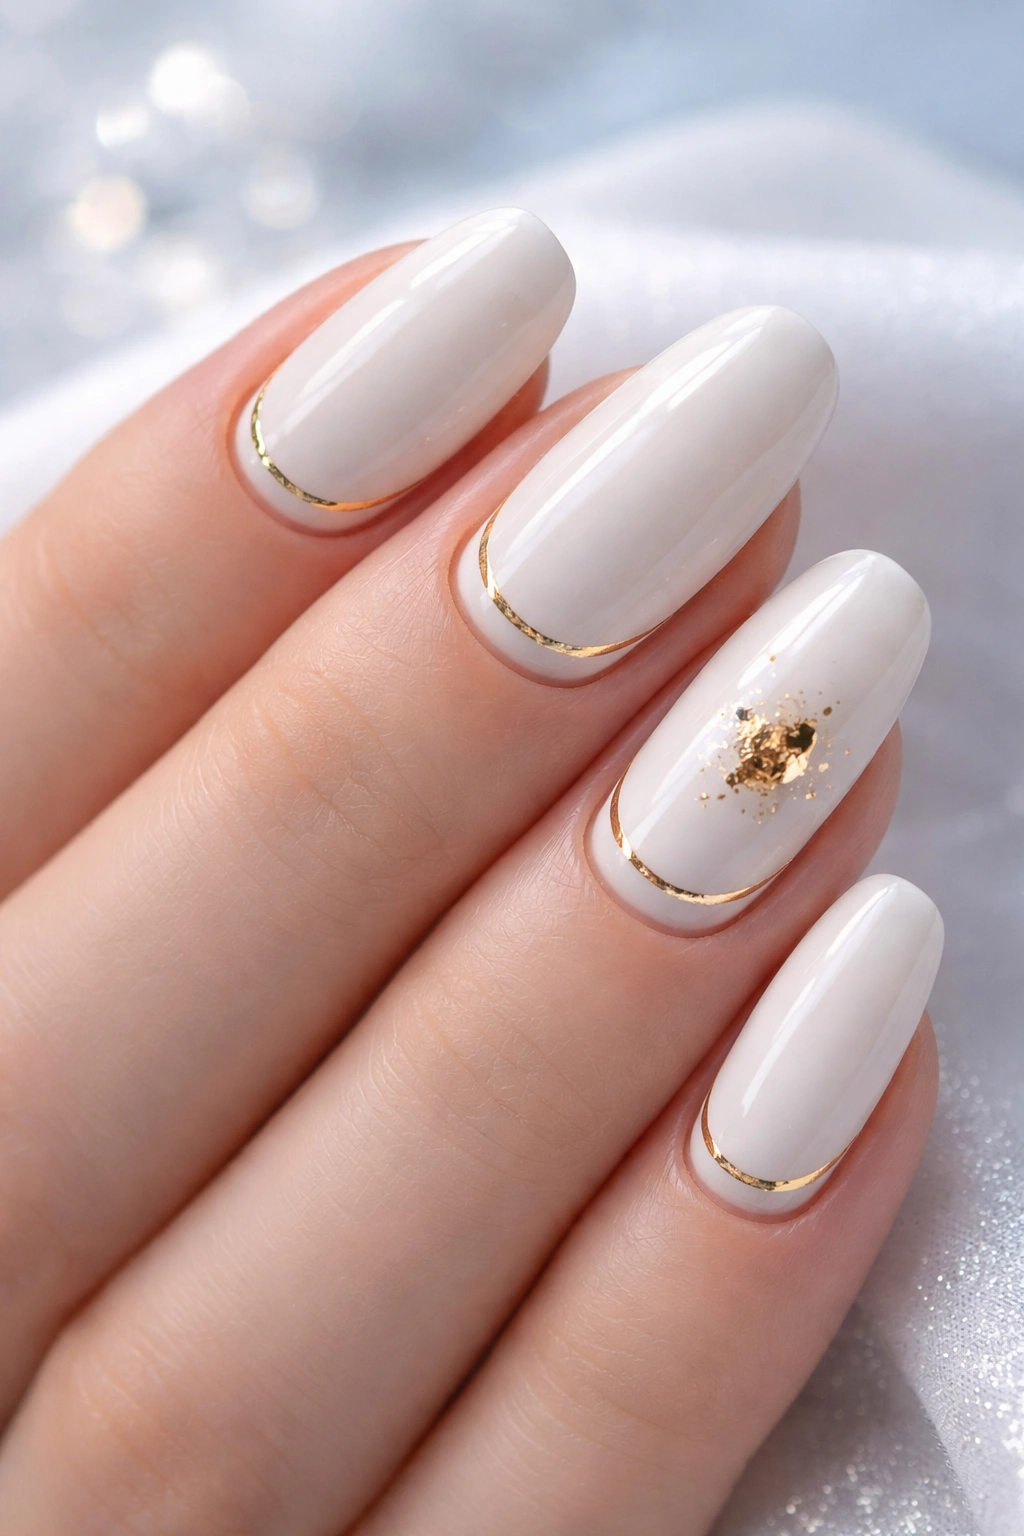
There’s something so elegant about a pristine white manicure, especially when you add just a touch of gold. It’s winter wonderland meets luxury, and the combination never fails to look expensive.
The gold accents can take many forms. Thin gold lines along the cuticle or tip create definition. Small gold foil pieces applied randomly give texture and interest. Even just a single gold chrome accent nail mixed in with the white creates a stunning contrast.
What makes this look so appealing is its versatility. It reads as festive during the holidays but doesn’t scream “CHRISTMAS” so loudly that you can’t wear it into the new year. It’s sophisticated enough for formal events but simple enough for everyday wear.
Application is straightforward—white polish tends to need two or three coats for full opacity, so be patient. Let each layer dry completely before adding the next. Then add your gold details last, sealing everything with a good top coat to prevent chipping.
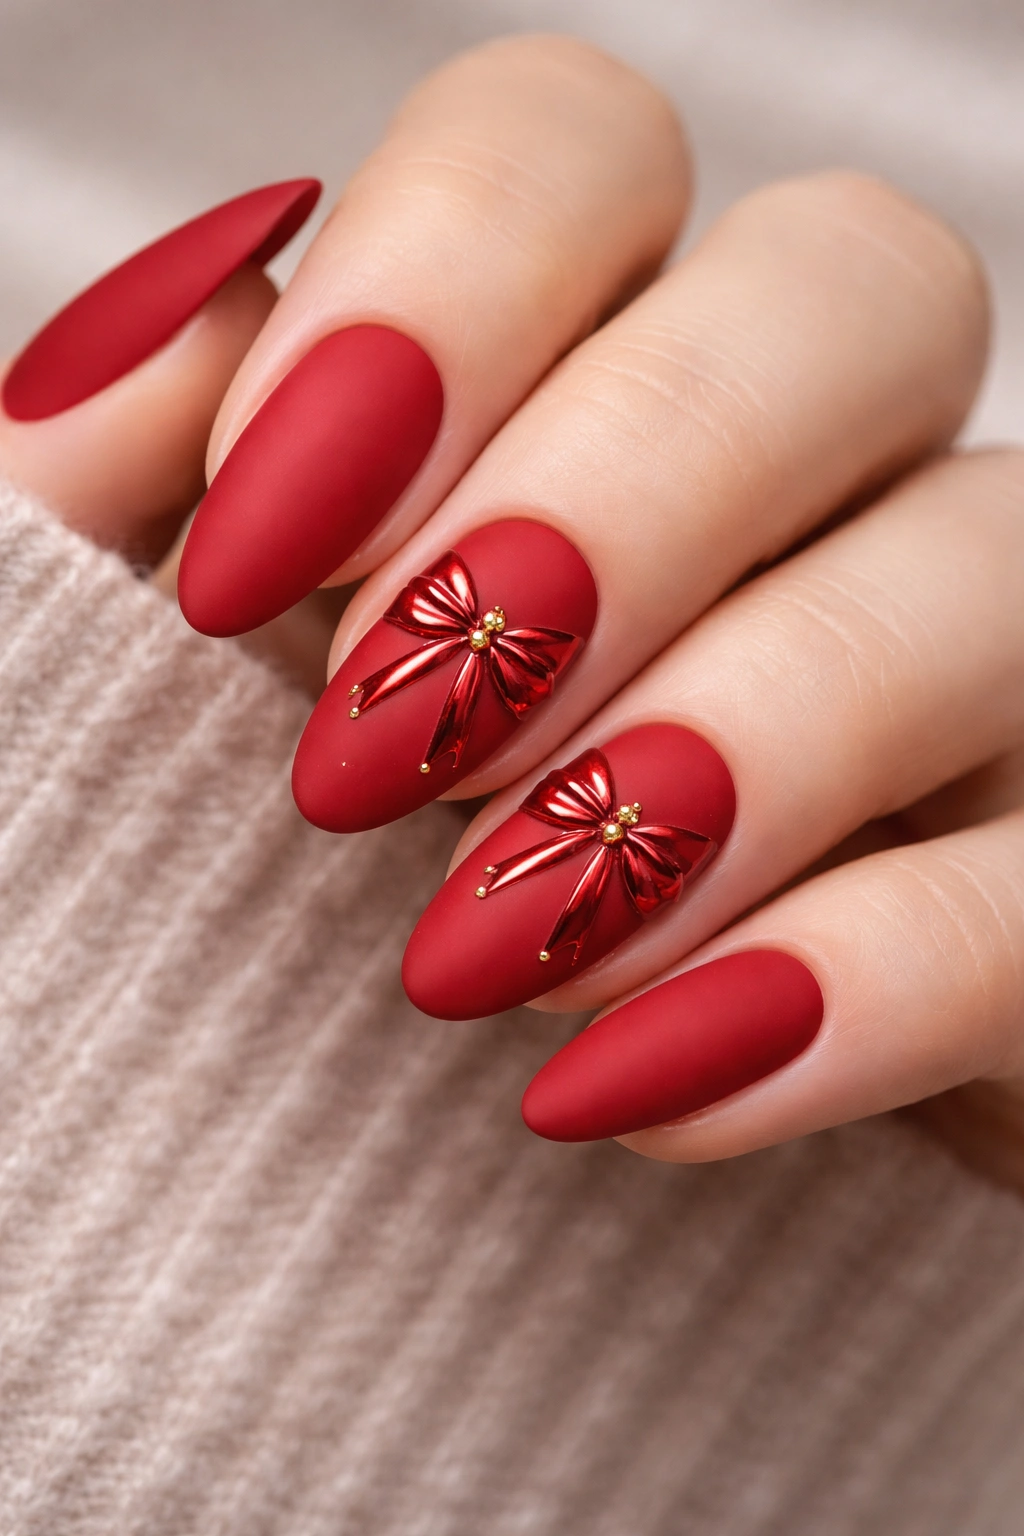
9. Ruby Red with Bow Accents
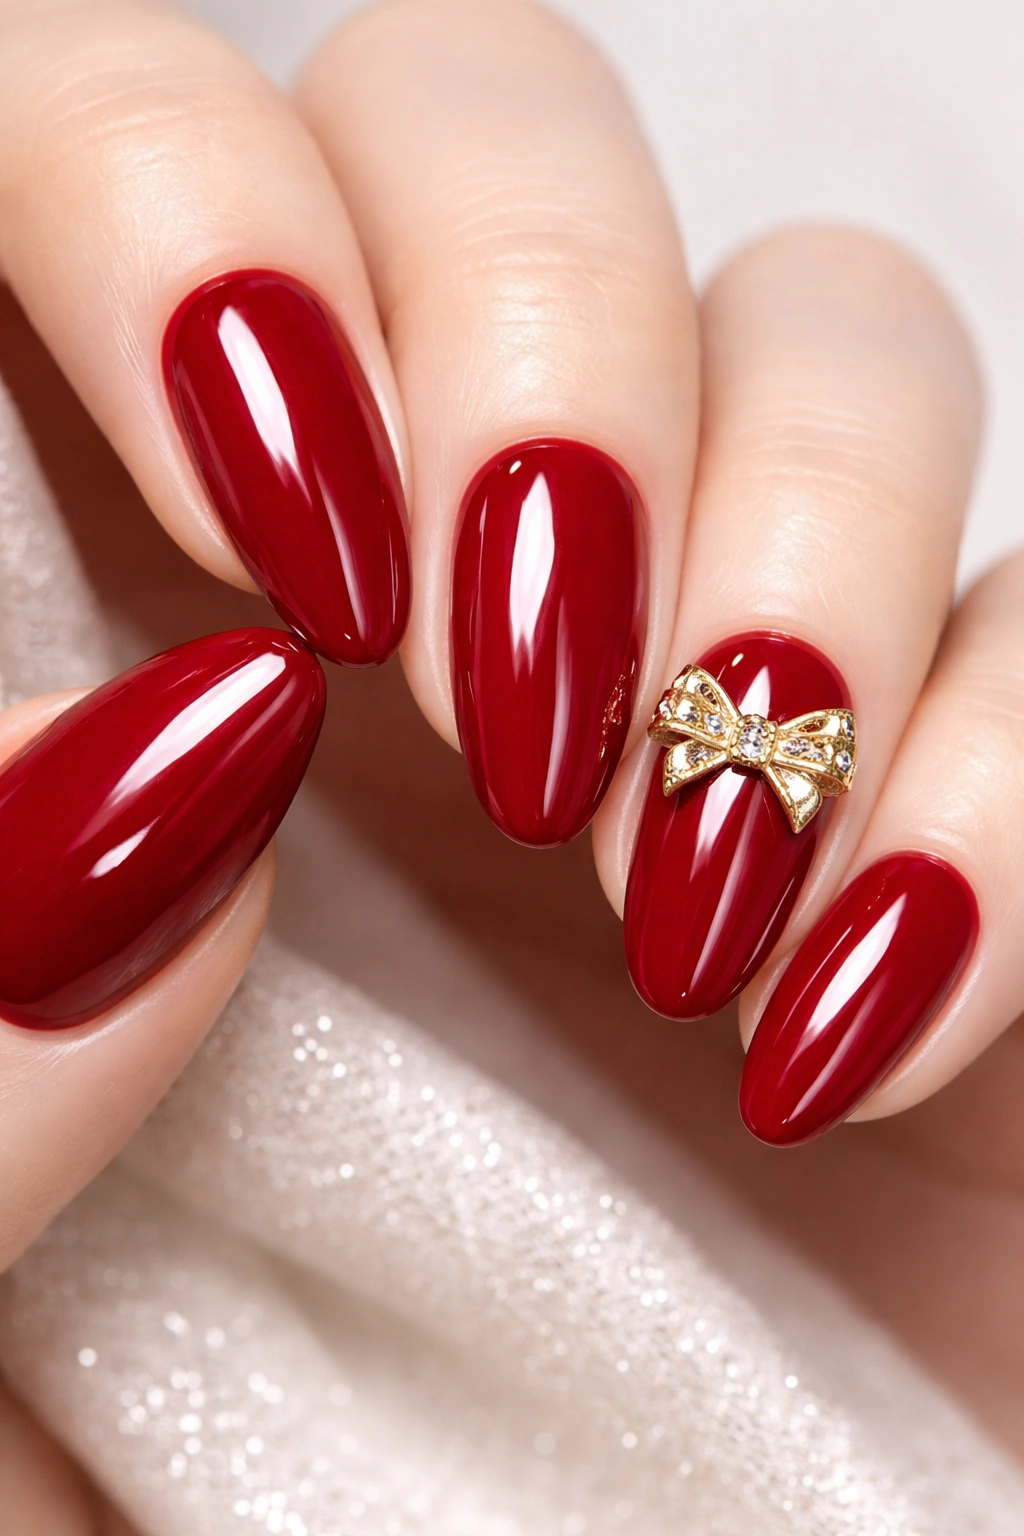
Bows are having a major moment in fashion and beauty, and adding them to a rich ruby red manicure is peak holiday elegance. Whether you go for hand-painted bows or 3D bow decals, this look is sophisticated with a playful twist.
For hand-painted bows, you’ll need a steady hand and a thin brush. Draw two loops side by side, then add streamers extending down from the center. Fill in with metallic polish—gold or silver both look gorgeous against red. Add a small dot in the center where the knot would be, and you’re done.
If painting isn’t your thing, bow stickers and charms are readily available. They come in various sizes and finishes, from flat decals to 3D embellishments with actual texture. Apply them to one or two accent nails for a balanced look.
The glossy red base is what makes this design pop. Choose a true red—not orange-red or pink-red—for that classic, timeless appearance. Add a high-shine top coat to make your nails look like patent leather.
10. Navy Blue with Silver Stars
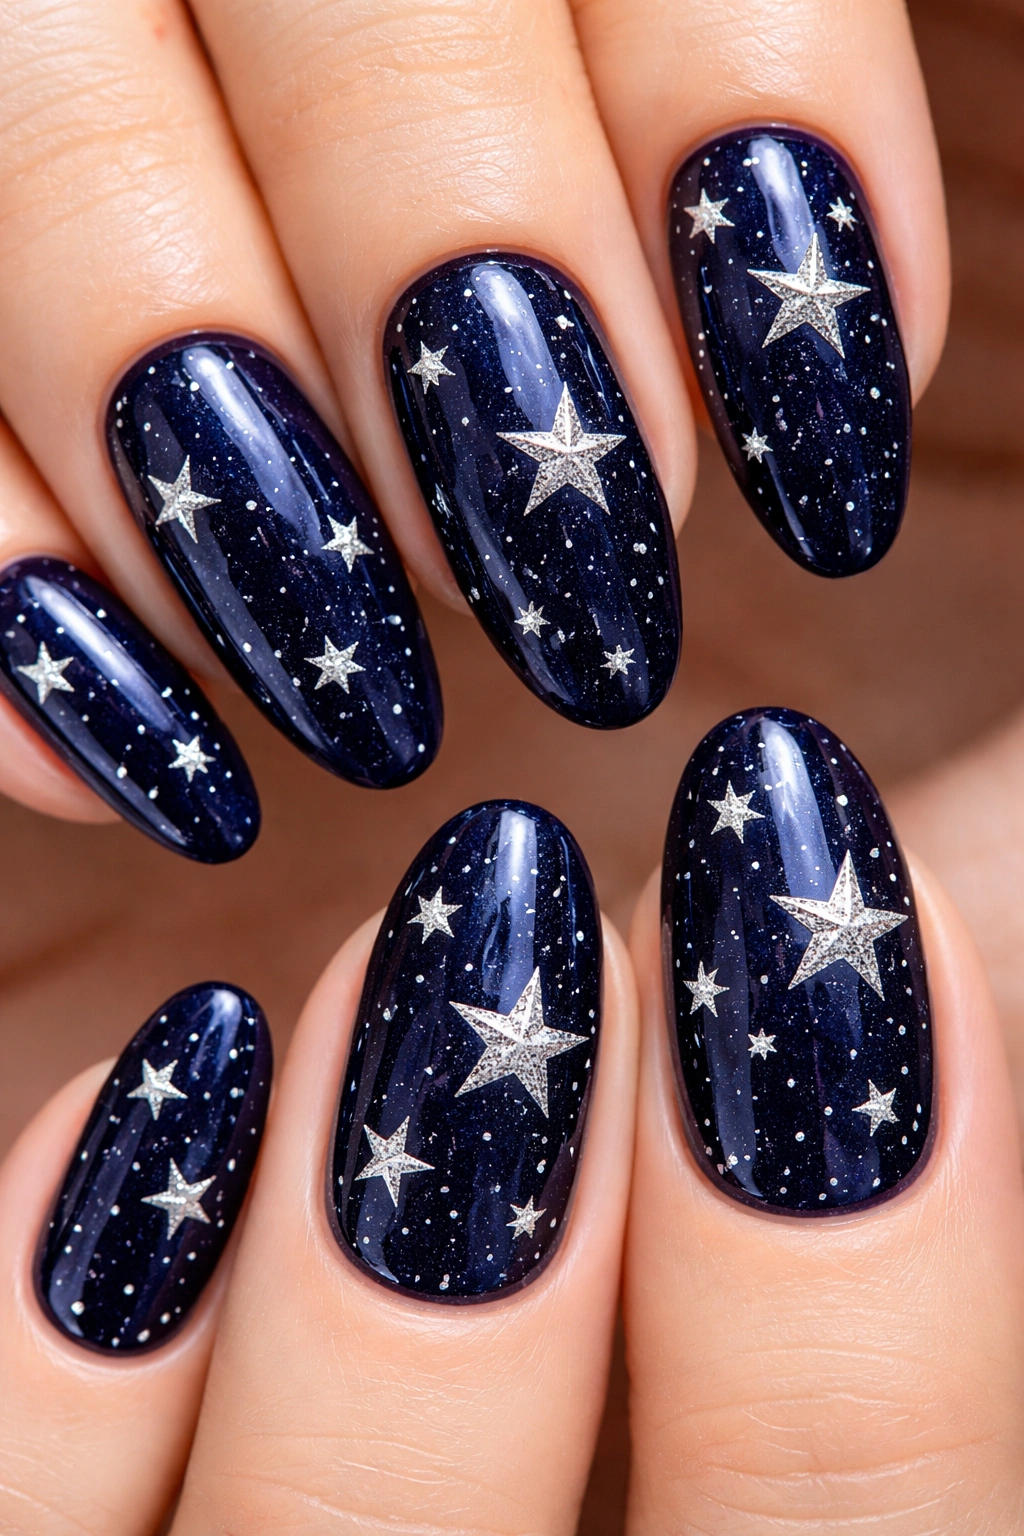
Navy blue is seriously underrated for the holidays. It’s festive without being obvious, elegant without trying too hard, and the perfect backdrop for metallic accents like silver stars.
The deep, moody blue feels like a clear December night sky, especially when you add scattered stars across the nails. You can go minimalist with just a few small stars, or create an entire constellation across your fingertips.
Creating stars is simple with the right tools. Use a dotting tool to place a small dot of silver polish, then drag tiny lines outward from the center to create star points. Or skip the technique entirely and grab star-shaped nail stickers for instant gratification.
This color combination works beautifully for Hanukkah celebrations specifically, but it’s festive enough to work for any December occasion. The navy blue base is understated enough for professional settings while still feeling special and intentional.
11. Gingerbread Nail Art
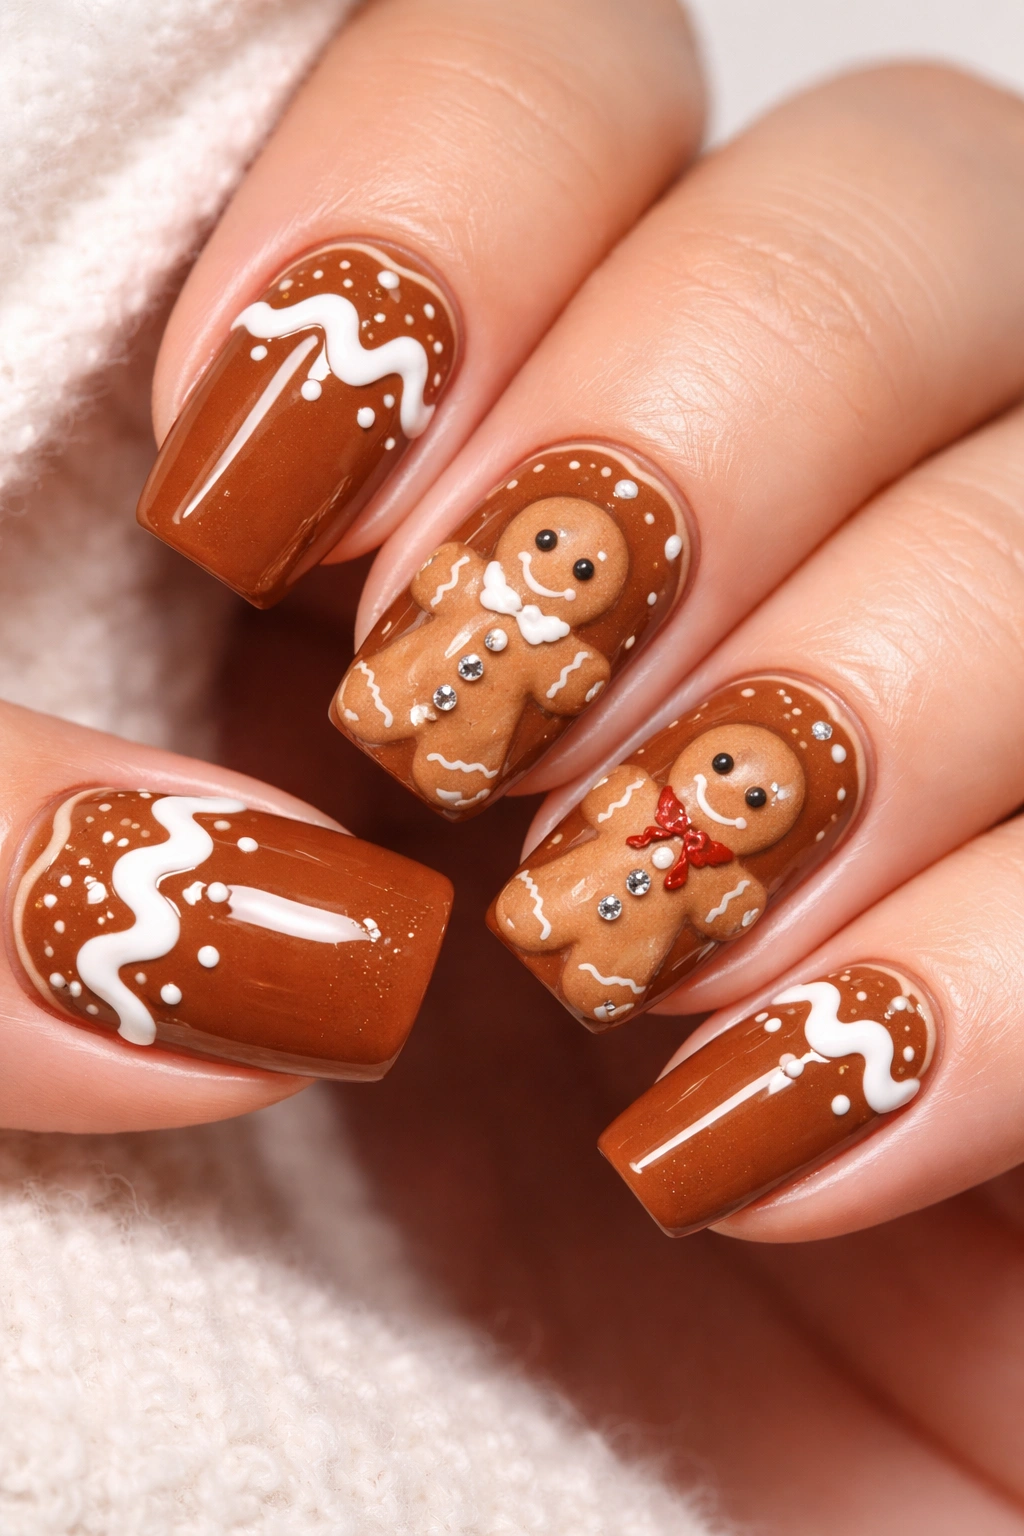
Nothing says holidays quite like gingerbread cookies, and translating that adorable aesthetic to your nails is easier than you’d think. Brown nails with white “icing” details are charming without being too cutesy.
Start with a warm brown base—think milk chocolate or caramel tones. Once dry, use white polish and a thin brush to draw simple gingerbread man outlines, or create that classic icing decoration look with dots and swirls. Small rhinestones can act as “buttons” for extra dimension.
If full gingerbread characters feel too involved, try gingerbread-inspired colors and patterns instead. Bronze base with white dots and swirls gives that cookie vibe without literal depictions. It’s festive but abstract enough to feel grown-up.
The beauty of this design is how it immediately brings up cozy holiday memories. Baking cookies, decorating with family, the smell of cinnamon and nutmeg—all captured in a manicure. Plus, brown is a surprisingly flattering nail color that works with every skin tone.
12. Icy French Tips
French manicures get a winter wonderland makeover with frosted, icy tips that look like they’ve been kissed by snow. This is achieved through strategic use of white, silver, and iridescent polishes layered together.
Start with your classic French base—either clear or a soft nude. For the tips, apply white polish first, then layer a sheer silver or iridescent topper over it. The layering creates depth and that frosty, crystalline effect that’s perfect for winter.
Some polishes are specifically designed to create this frosted look. They contain fine shimmer particles that catch the light without reading as traditional glitter. The effect is more subtle and sophisticated than straight sparkle.
This look works on any nail length or shape, but it’s particularly stunning on almond or oval nails where the tip has more surface area to showcase that icy effect. Short nails can rock it too—just keep the white tip thin and delicate.
13. Red and Green Color Block
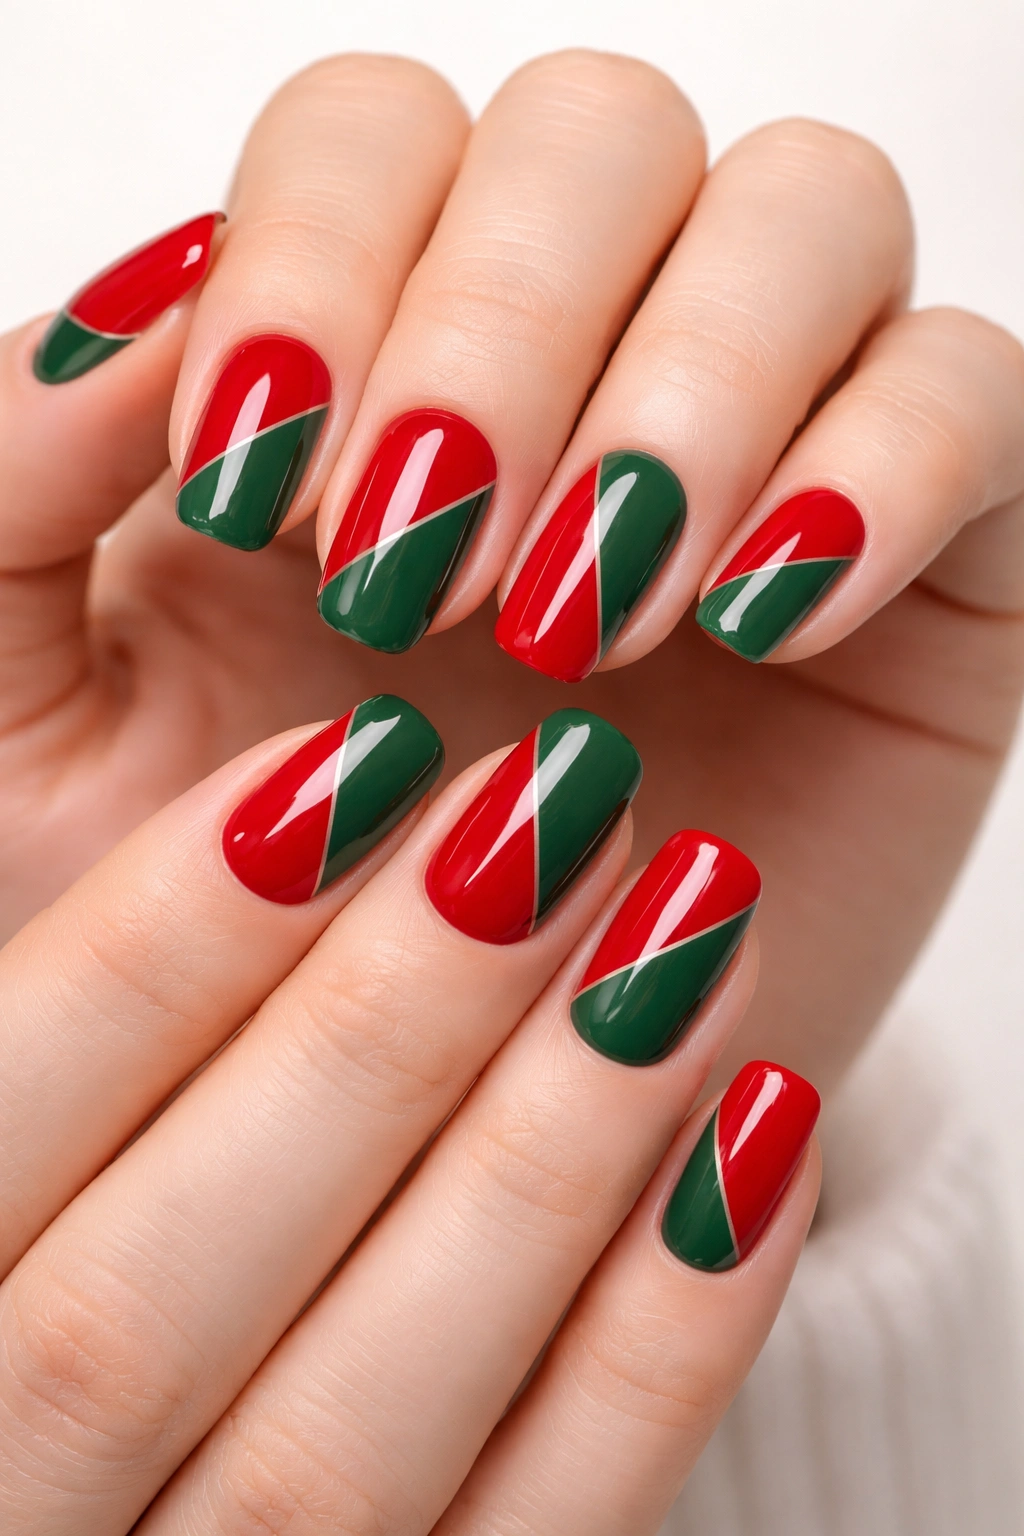
Can’t choose between red and green? Don’t. Color blocking lets you wear both iconic holiday colors in one manicure without it looking chaotic or overdone.
The key to successful color blocking is clean lines. Use striping tape or a steady hand to divide each nail into sections—half and half works, but so do diagonal splits or geometric shapes. Paint each section its own color, making sure to let the first color dry completely before adding the second.
What makes this modern instead of crafty is the execution. High-quality, saturated polishes with smooth finishes look intentional and chic. Add a glossy top coat to unify the look and make those colors really pop.
You can also alternate solid red and green nails instead of blocking on individual nails. This creates a skittle mani effect that’s festive but less involved. Add one or two accent nails with both colors for visual interest.
14. Burgundy Velvet with Gold Foil
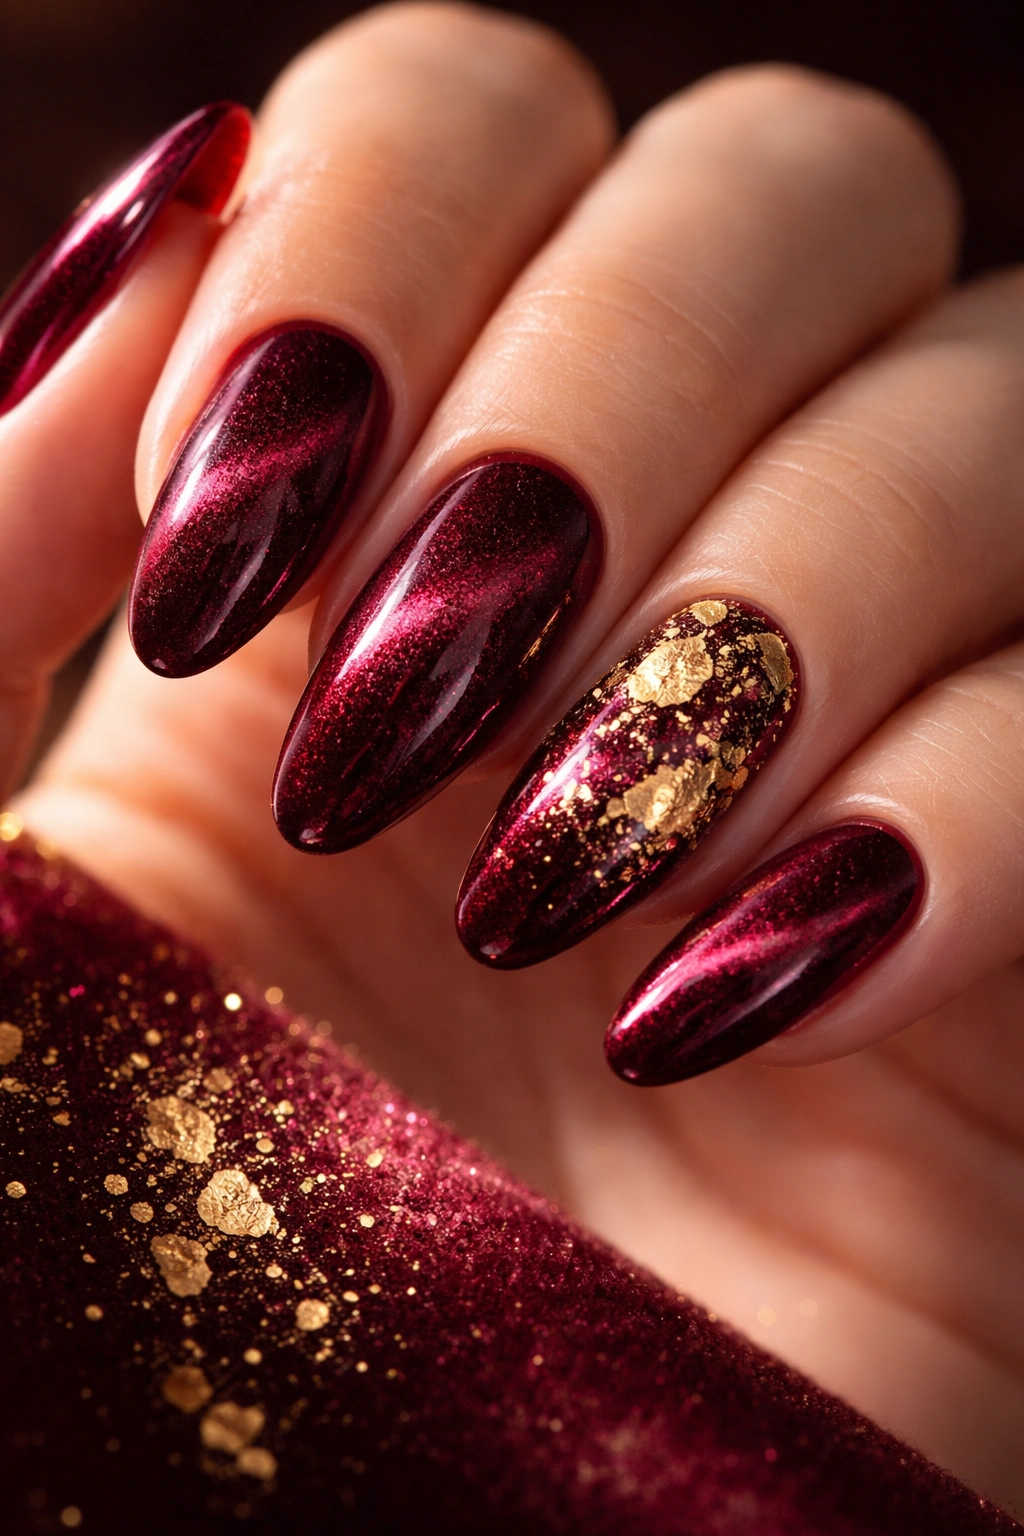
Burgundy is that perfect between color—dark enough to feel moody and winter-appropriate, but still reading as a red family color for the holidays. Add the velvet treatment and gold foil accents, and you’ve got a manicure that’s pure luxury.
The velvet (or cat-eye) effect in burgundy creates incredible depth. The magnetic particles catch the light and create this soft, dimensional shimmer that shifts as you move your hands. It’s mesmerizing to look at and photographs beautifully.
Gold foil adds just enough contrast without competing with the rich base color. Apply small pieces randomly across one or two nails, or create a more structured look by placing foil strategically at the tips or along the cuticle line.
This combination feels expensive and sophisticated—perfect for holiday parties where you want to look polished without trying too hard. The wine-toned base is universally flattering and works with both warm and cool skin tones.
15. Peppermint Swirl Nails
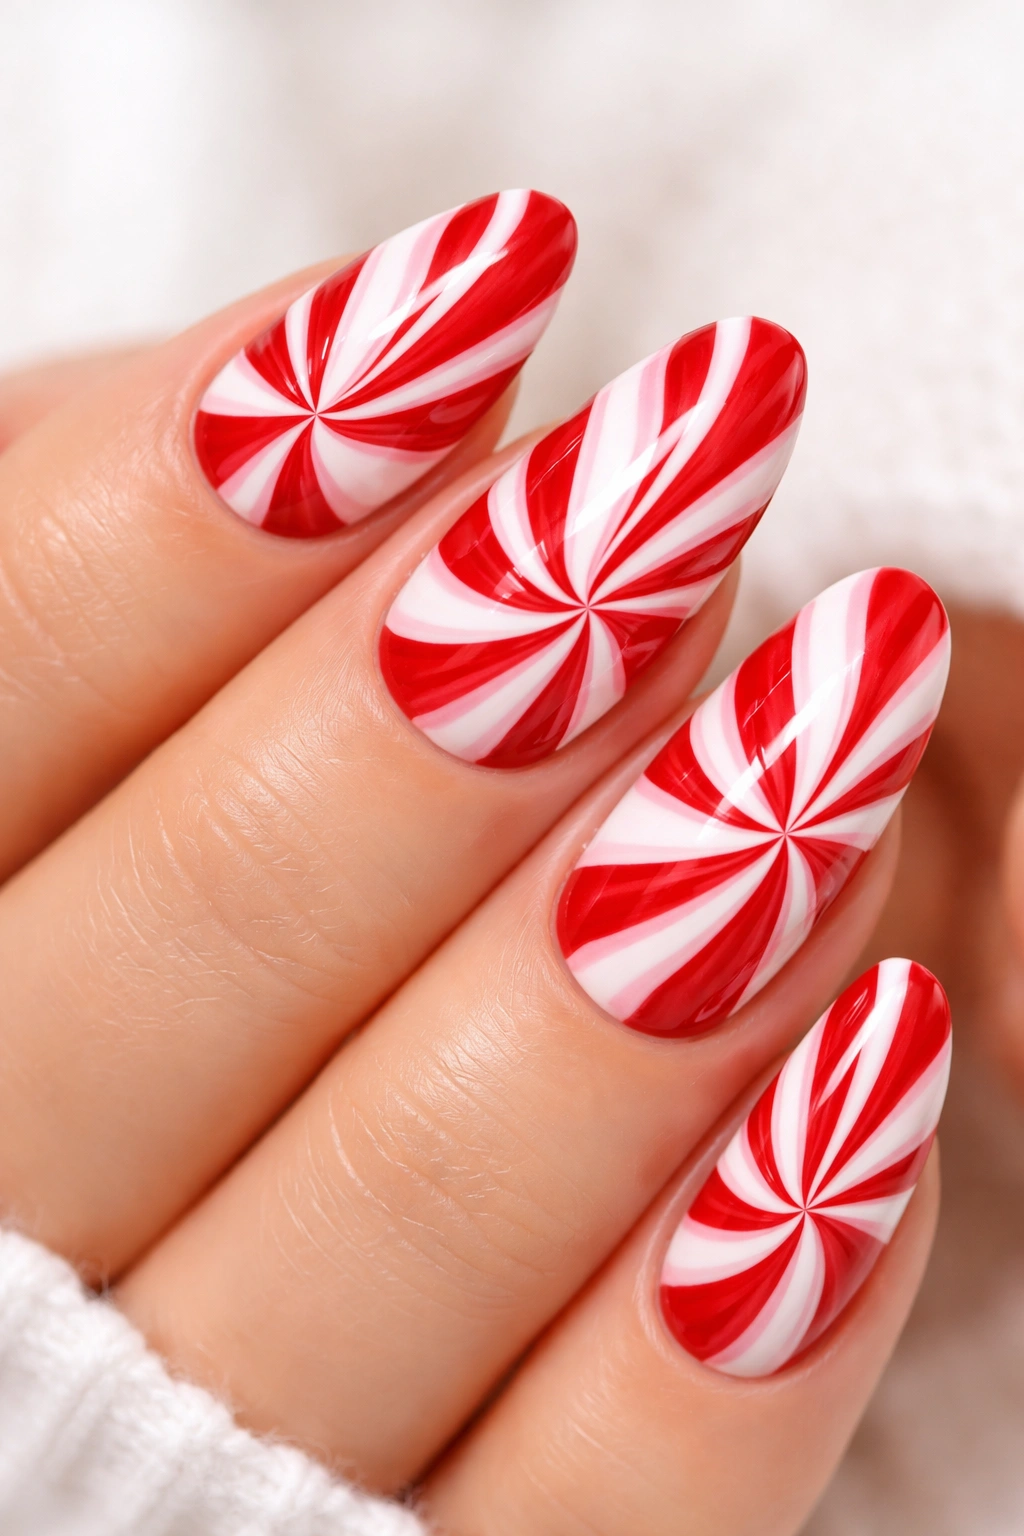
Peppermint swirls bring that candy shop energy to your fingertips. Red and white swirled together create a hypnotic pattern that’s festive, fun, and surprisingly easy to achieve with the right technique.
You’ll need both red and white polish, plus a toothpick or thin brush for swirling. Apply drops of both colors directly onto each nail while they’re still wet, then use your tool to swirl them together in circular motions. Work quickly before the polish dries.
The key is not over-mixing. You want distinct red and white swirls, not pink. A light touch creates better definition than aggressive stirring. Each nail will turn out slightly different, which is part of the charm—no two peppermints look exactly alike, right?
Seal with a good top coat to smooth out the surface and add shine. The swirls create natural texture from the layering, so top coat is essential for making everything look polished and professional.
16. Neutral Base with Holiday Charms
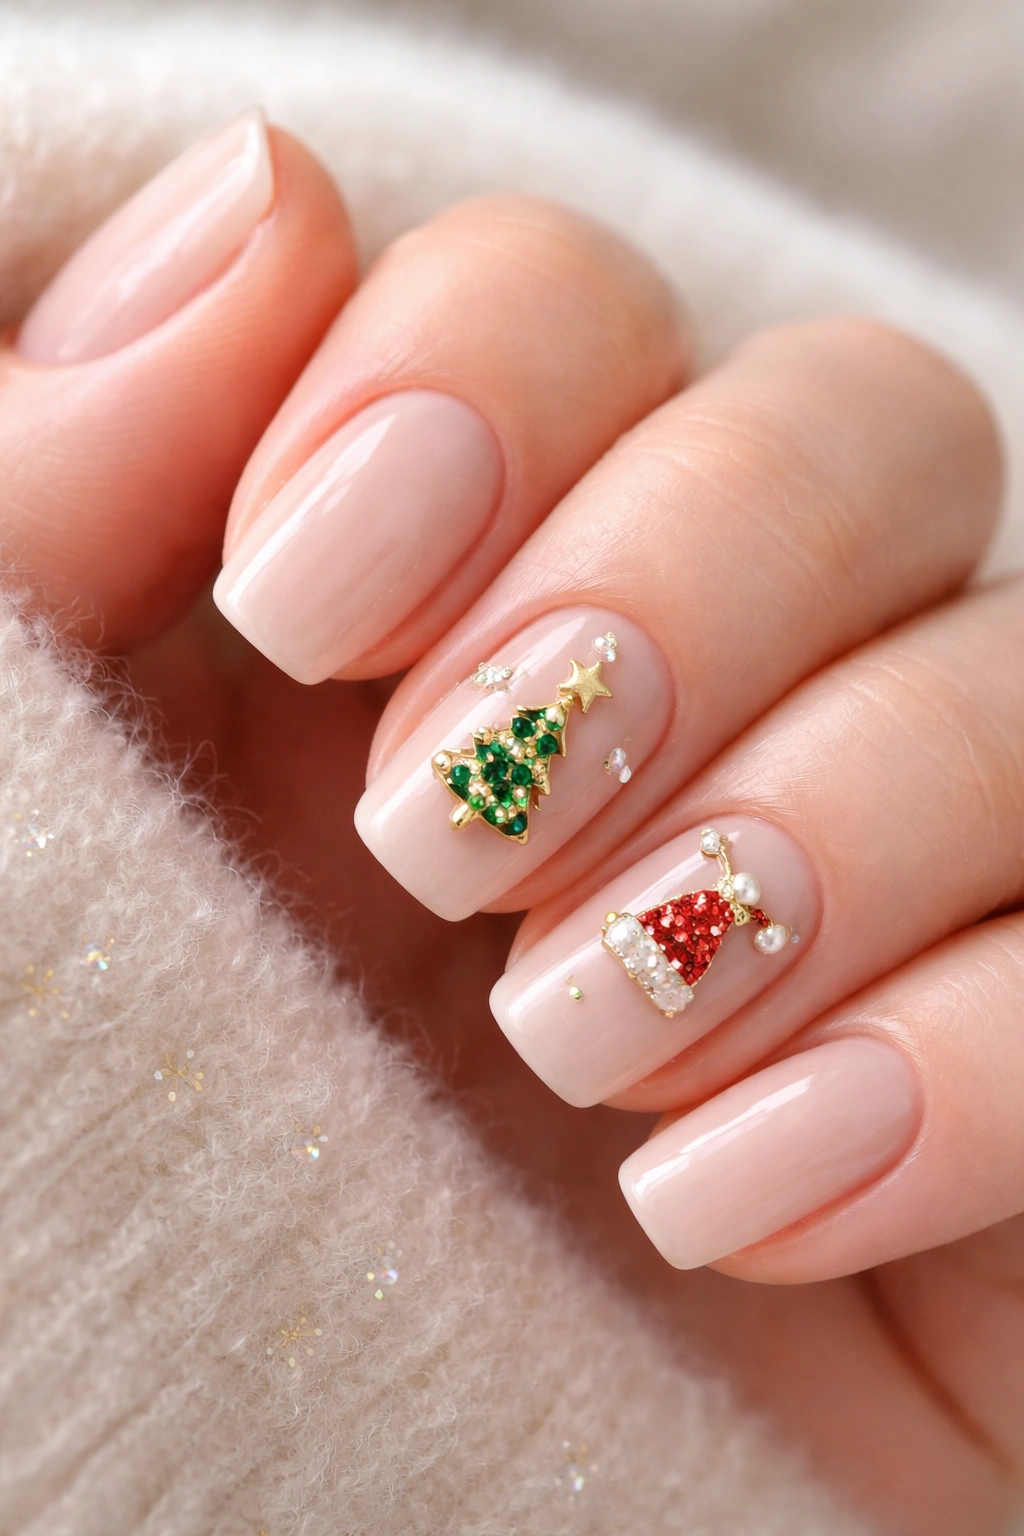
Not everyone wants colorful holiday nails, and that’s completely fine. A neutral base—beige, soft pink, or clear—provides the perfect backdrop for 3D holiday charms that add festivity without overwhelming your look.
Nail charms come in every holiday motif imaginable. Tiny Christmas trees, snowflakes, candy canes, gifts, ornaments—you name it, someone makes a charm for it. Apply them to one or two accent nails using nail glue, then seal everything with top coat to keep them secure.
The neutral base keeps things grounded and sophisticated. Your nails read as a regular, polished manicure from a distance, then surprise people with festive details up close. It’s perfect for professional environments where you want to participate in holiday fun without going too bold.
This approach also makes the charms last longer. Since they’re only on a couple nails instead of your entire set, you’re less likely to catch them on things or knock them loose during daily activities.
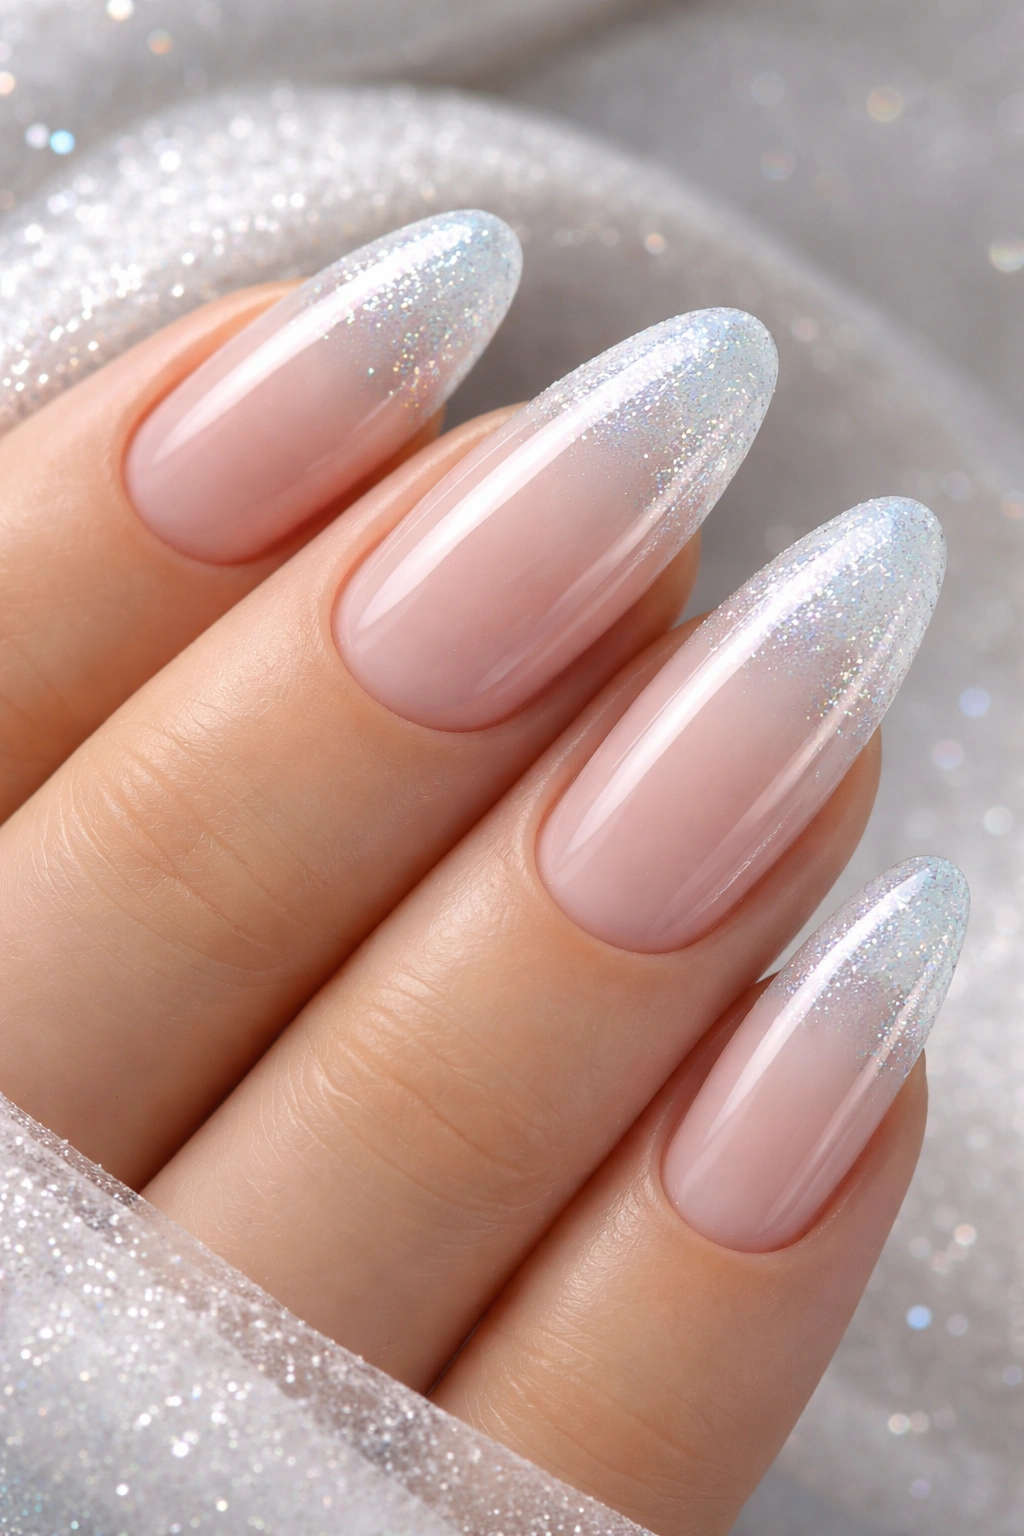
17. Silver Glitter Tips
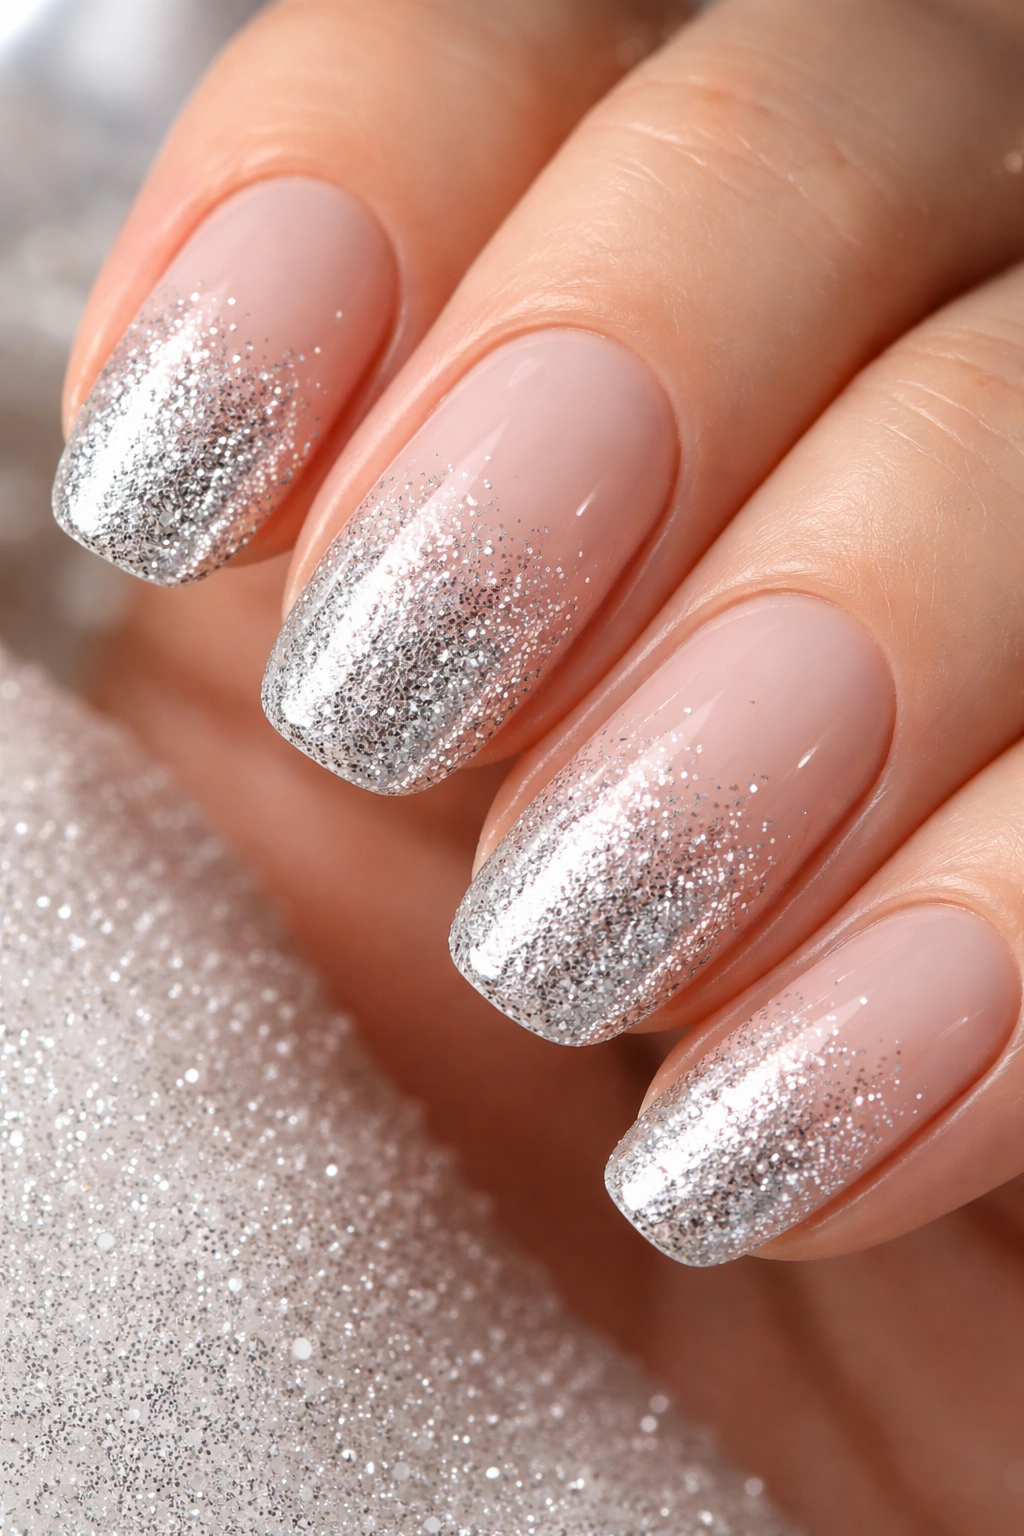
Silver glitter concentrated at the tips creates a gorgeous ombré effect that’s like fresh snow catching sunlight. It’s festive enough for the holidays but versatile enough to wear straight through to New Year’s Eve.
The gradient technique works best when you build up gradually. Start with a nude or sheer pink base, then apply silver glitter polish to the tips. Use less product on the first coat, focusing on the very tips. Then build up with additional coats, extending slightly further down the nail each time.
A makeup sponge is your secret weapon here. Dab silver glitter onto the sponge, then press it onto your nail tips. This creates a more diffused, natural-looking gradient than brushing it on directly.
Silver is incredibly versatile and matches every outfit in your closet. It catches light beautifully at holiday parties but doesn’t look out of place during daytime events. The glitter adds just enough interest to feel special without requiring any artistic skill.
18. Deep Green with Gold Accents
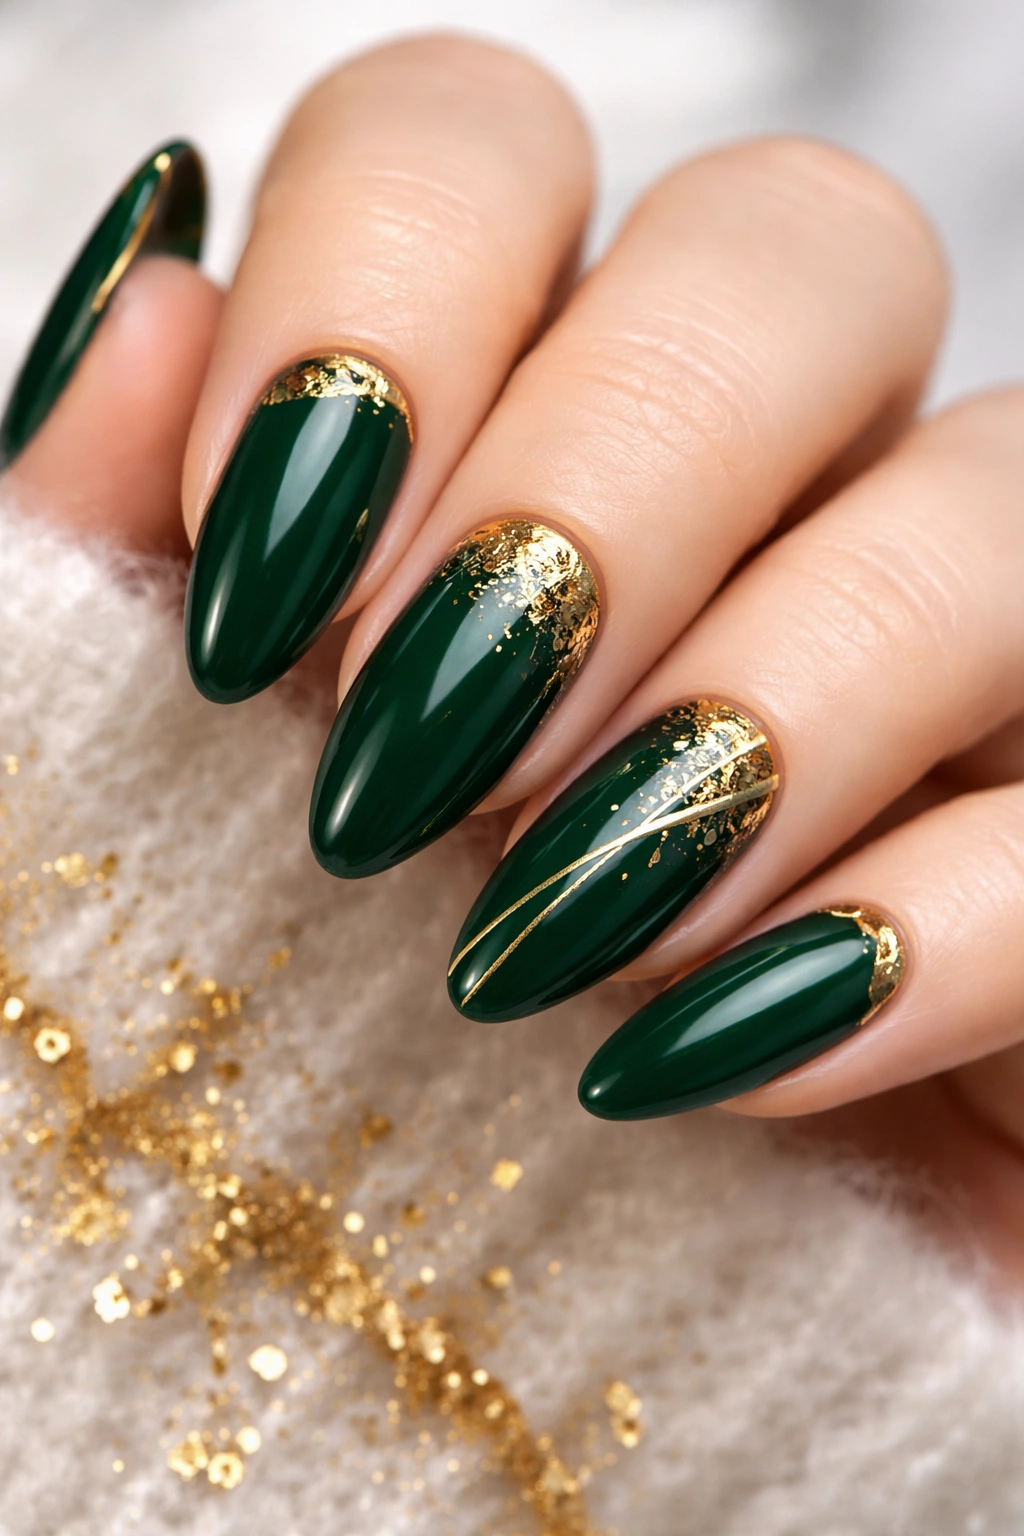
Forest green nails get an elevated treatment with strategic gold details. Whether you go for gold foil, thin gold lines, or metallic gold French tips, this combination is sophisticated holiday elegance.
The deep green base should be rich and fully saturated—think evergreen trees, not lime or sage. Apply two coats for full opacity, making sure your application is smooth and even. This creates the perfect canvas for gold accents to shine.
Gold details can be as simple or complex as you want. A thin gold line along the cuticle adds definition. Gold foil pieces pressed randomly onto one or two nails create texture. Even just painting one accent nail in solid metallic gold creates stunning contrast.
What makes this combination work so well is the richness of both colors. They’re both jewel tones that command attention, but they complement rather than compete with each other. The result feels luxurious and intentional.
19. Matte Red with Glossy Bows
Playing with different finishes on the same nail creates dimension and interest without requiring multiple colors. Matte red nails with glossy red bow accents hit that sweet spot of being festive but refined.
Start with your favorite red polish applied in two coats. Once completely dry, apply matte top coat to all nails. Then, using glossy red polish and a thin brush, paint small bow shapes on one or two accent nails. The glossy details will stand out beautifully against the matte base.
This technique works because of the contrast. The matte finish feels modern and sophisticated, while the glossy bows add a playful, feminine touch. Together, they create visual interest without relying on different colors or glitter.
The monochromatic approach makes this suitable for any setting. It’s subtle enough for conservative workplaces but special enough to feel festive and intentional. Plus, red nails are always appropriate for holiday season.
20. Chocolate Brown Shimmer
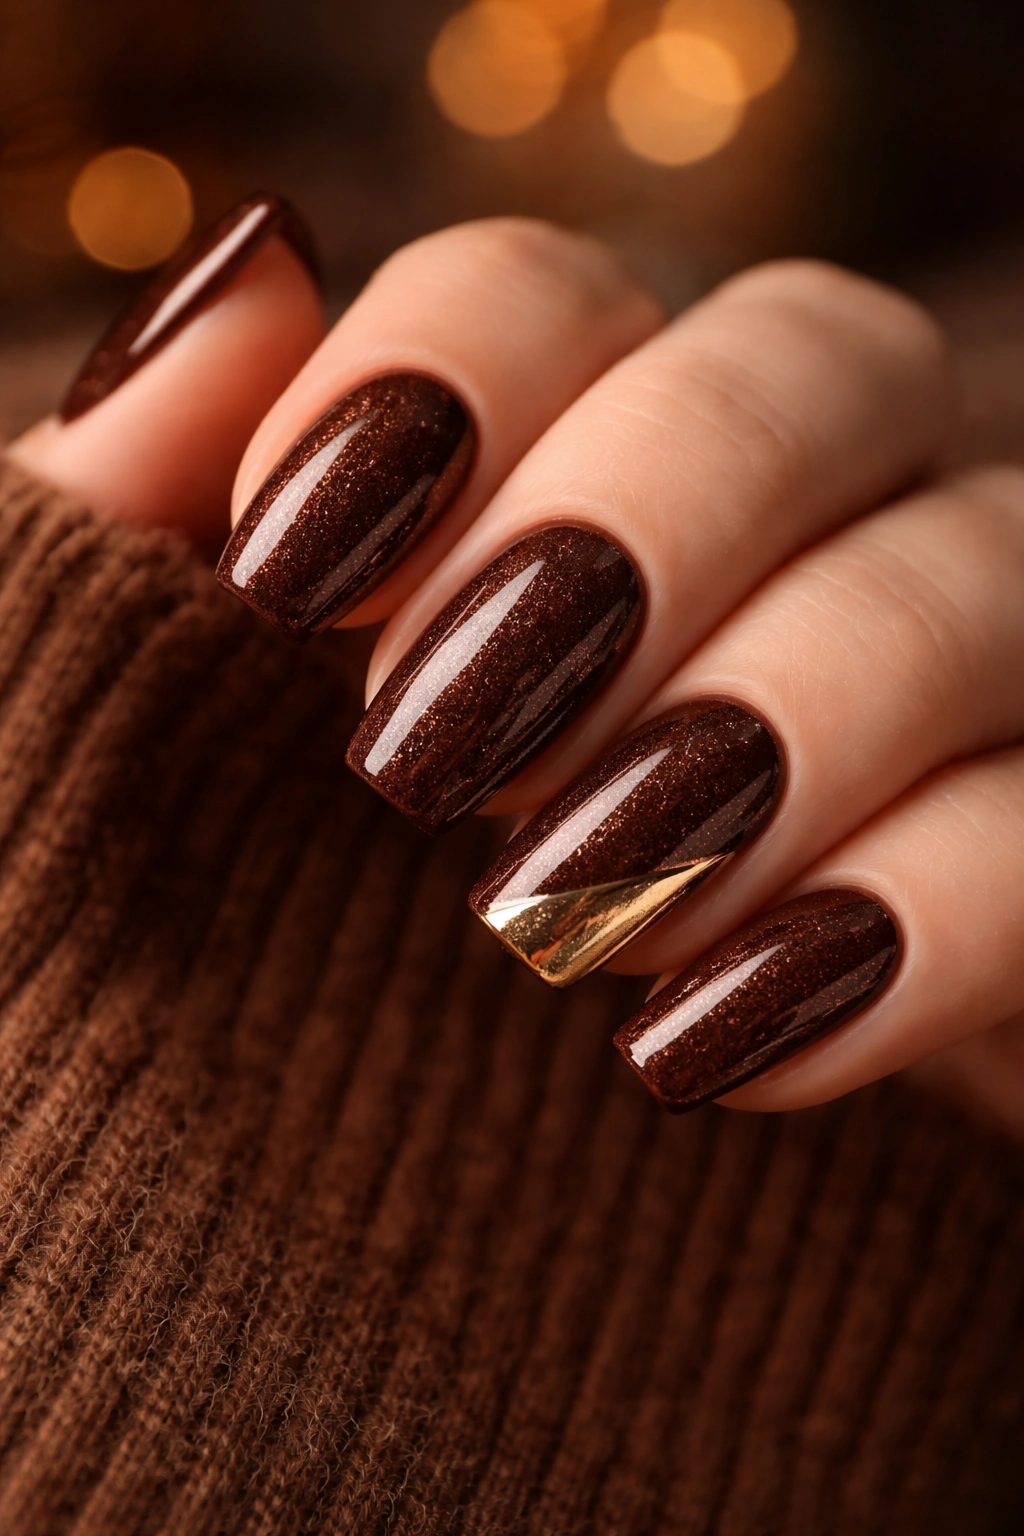
Brown nails had a major moment this year, and the chocolate brown shimmer trend is perfect for carrying that into holiday season. The warm, cozy color feels seasonal without being overtly Christmas-themed.
Look for brown polishes with fine shimmer or metallic particles already in the formula. These create that “glazed chocolate” effect that’s so popular right now. The shimmer catches light subtly, giving dimension without reading as glittery.
What makes brown so appealing is its neutrality. It works as a base for holiday nail art if you want to add details, but it’s equally gorgeous on its own. The color complements every skin tone and matches with absolutely everything.
For extra holiday flair, add gold chrome to one or two accent nails. The warm metallics pair beautifully with chocolate tones, creating a color story that feels rich and indulgent—perfect for the season of hot cocoa and desserts.
21. White Nails with Colorful Gems
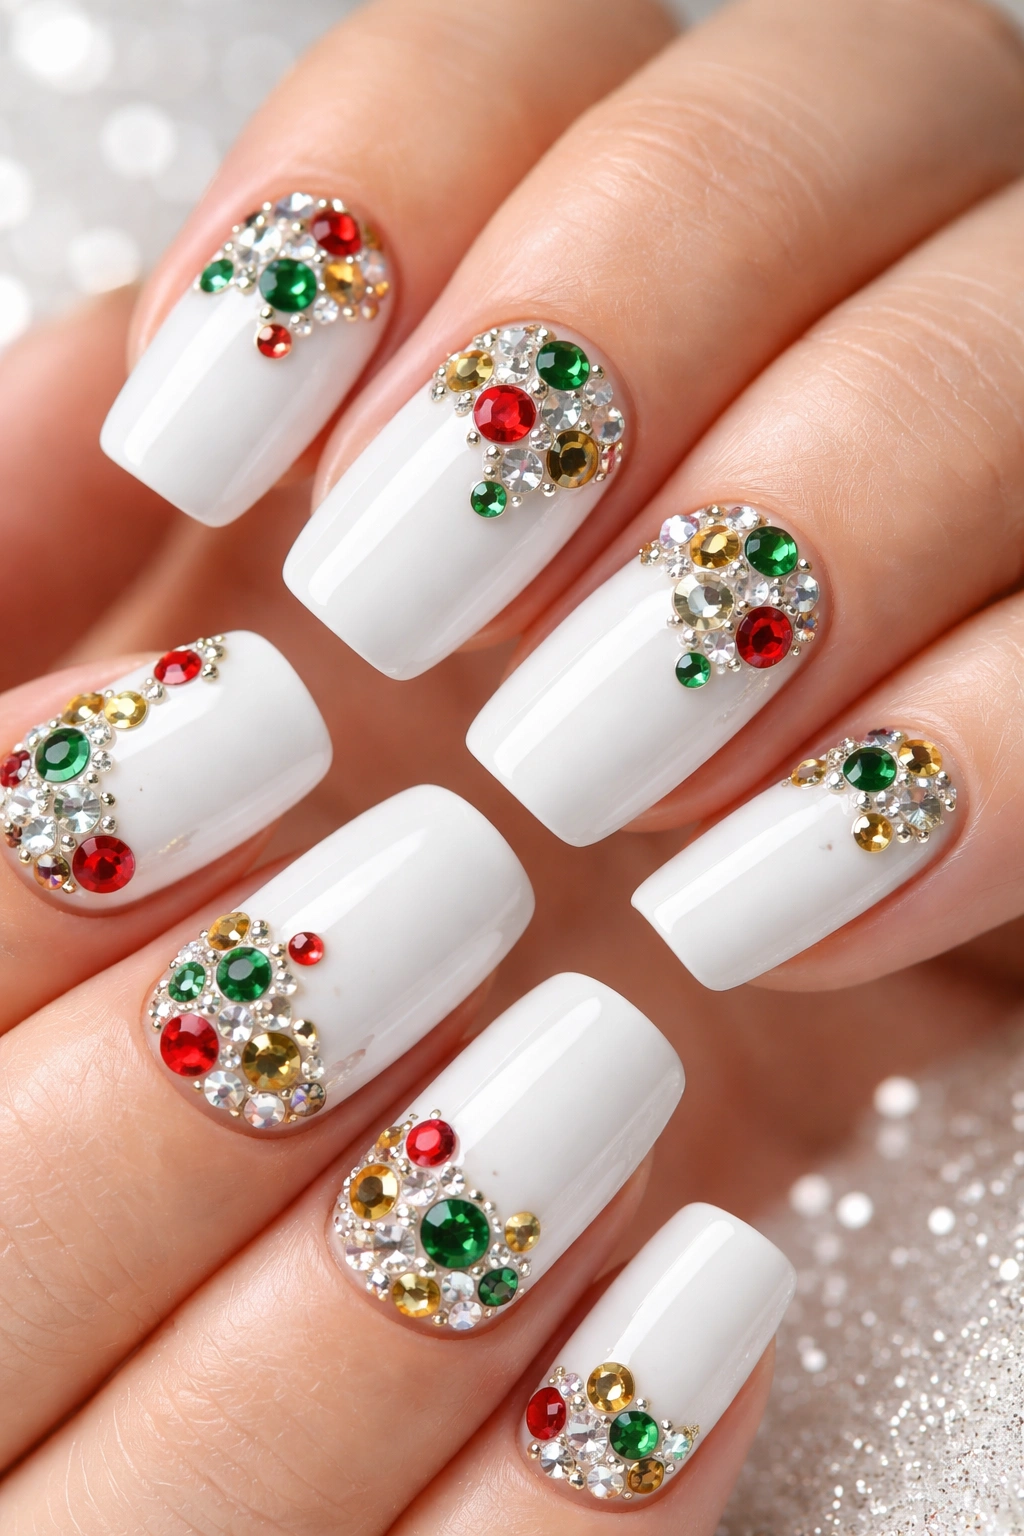
White nails provide a blank canvas for colorful gemstone accents that look like ornaments on a tree. This approach lets you incorporate every holiday color without committing to bold polish colors.
Apply two to three coats of opaque white polish as your base. Once completely dry, use nail glue to apply rhinestones in red, green, gold, and silver. Place them randomly or create patterns—both approaches work depending on your preference.
The variety of colors keeps things interesting while the white base prevents the look from feeling chaotic. Each nail can feature different color combinations, or you can keep the gems to just one or two accent nails for a more understated approach.
This design photographs beautifully and catches light in the most flattering way. Every time you move your hands, those gems sparkle and shine, creating this magical effect that’s perfect for holiday celebrations.
22. Dusty Pink with Silver Snowflakes
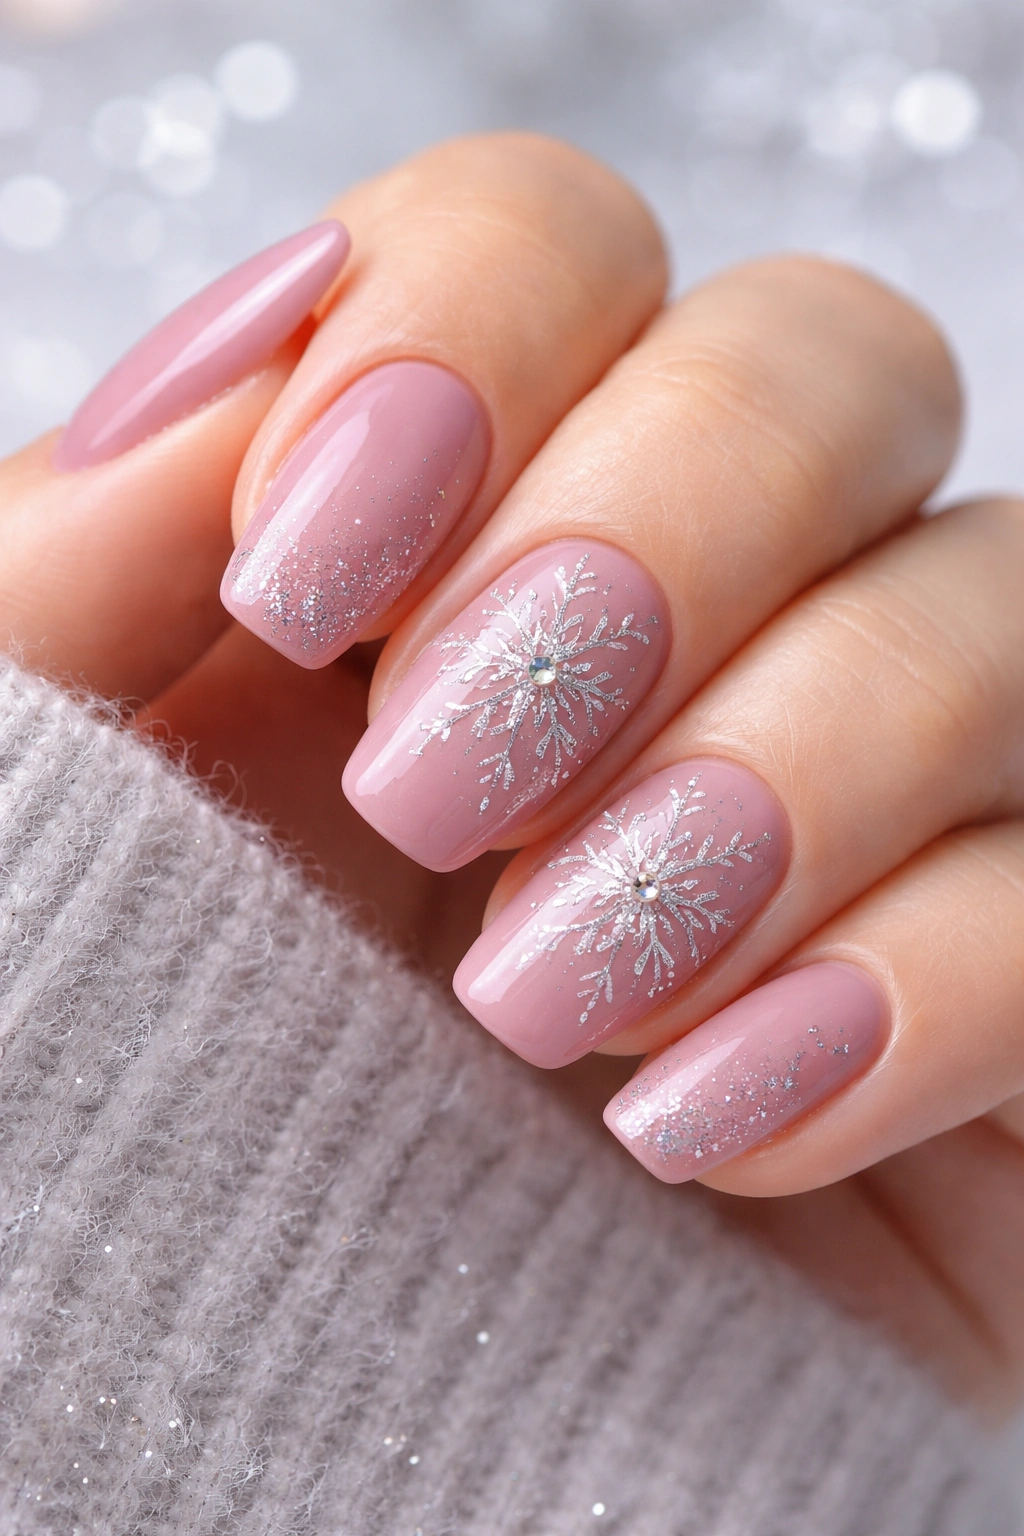
Not everything has to be bold red and green. Dusty pink with silver snowflake accents offers a softer, more romantic take on holiday nails that’s just as festive.
The muted pink base feels feminine and delicate without reading as too sweet or juvenile. It’s sophisticated enough for adults but still brings that festive energy when you add the snowflake details.
Silver snowflakes can be hand-painted, stamped, or applied as stickers depending on your skill level and patience. Placing them on just one or two nails per hand keeps the design from overwhelming the softer base color.
This color combination is perfect if you’re looking for something festive but not specifically Christmas-coded. It works for winter weddings, New Year’s celebrations, or any December event where you want your nails to look special.
23. Black Nails with Gold French Tips
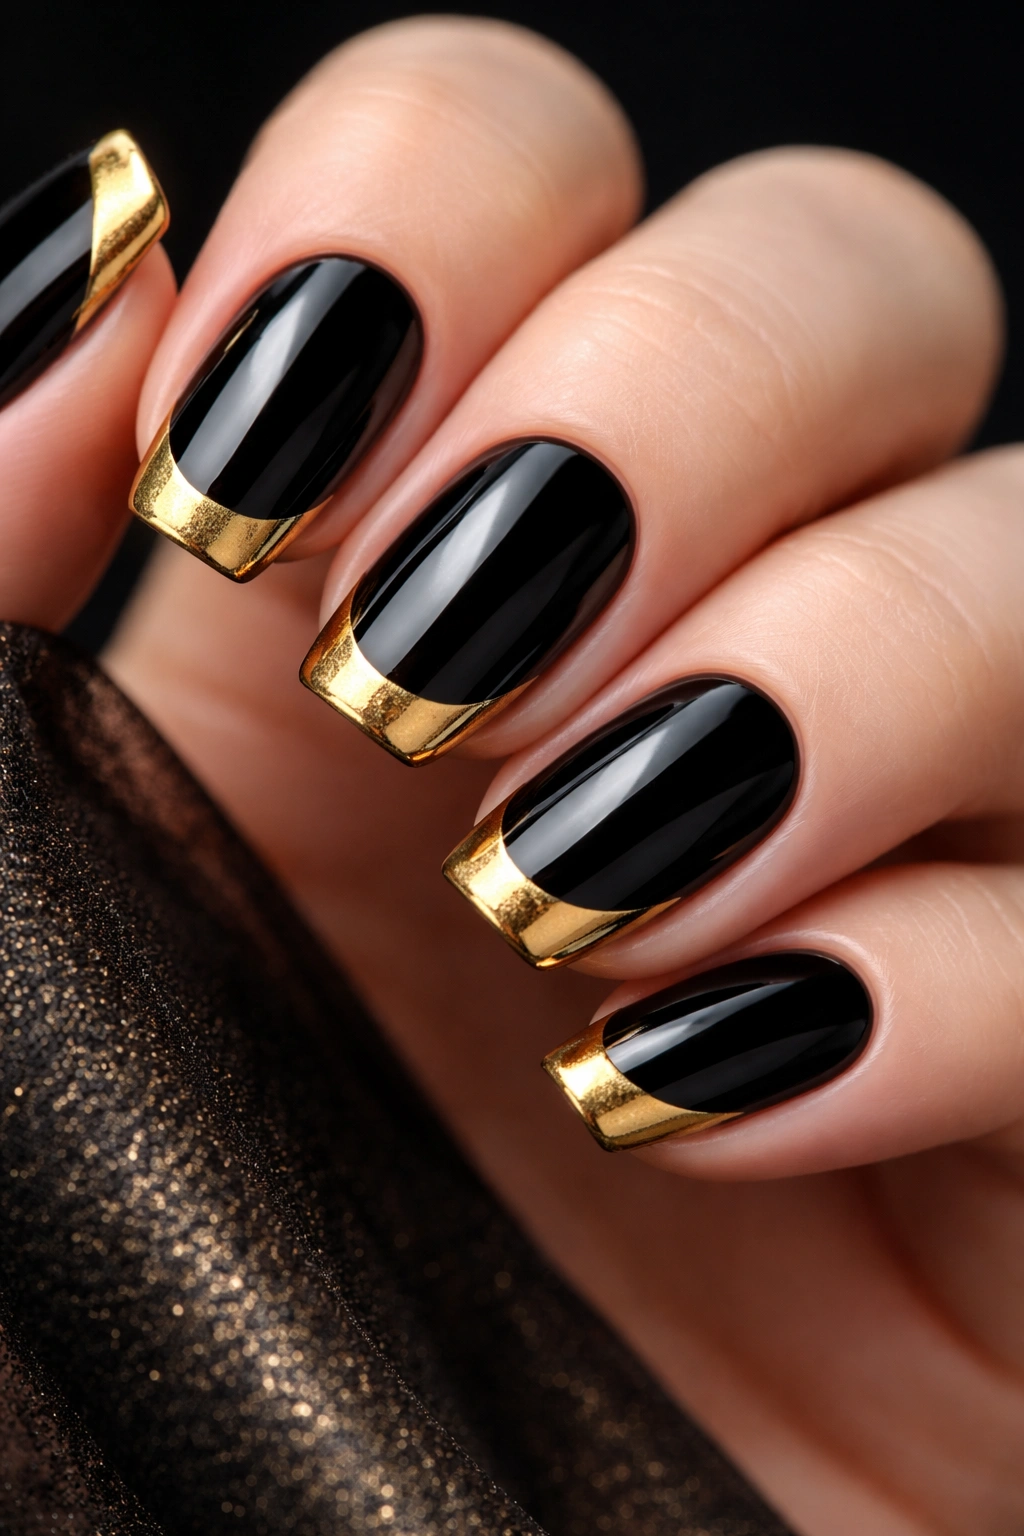
Black nails get a festive upgrade with metallic gold French tips. This combination is sophisticated, modern, and perfect for those who prefer a moodier aesthetic even during the holidays.
The contrast between the deep black and bright metallic gold is striking. It’s bold without being loud, festive without being traditional. The gold tips catch light beautifully against the dark base, creating visual interest through contrast rather than color.
This look transitions seamlessly from Christmas parties to New Year’s Eve celebrations. It’s versatile enough to work with any outfit and appropriate for literally any event on your holiday calendar.
Application is straightforward—two coats of black polish, let dry completely, then carefully paint gold metallic polish on your tips. Use striping tape if you want perfectly straight lines, or embrace a slightly irregular edge for a more artistic vibe.
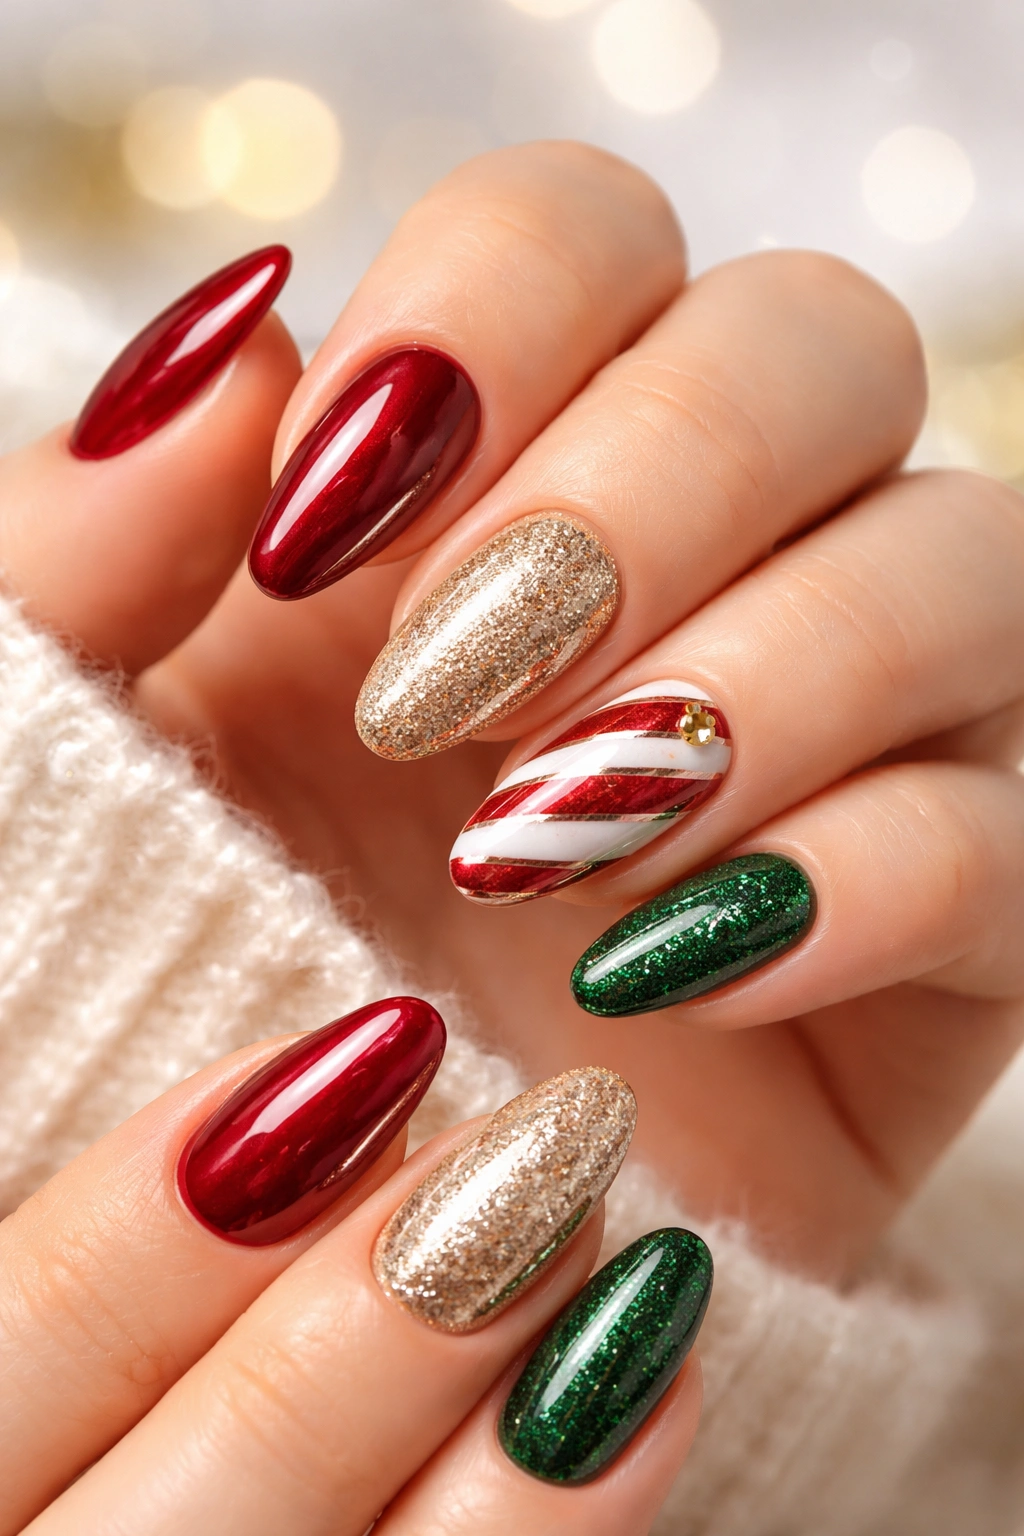
24. Mismatched Holiday Patterns
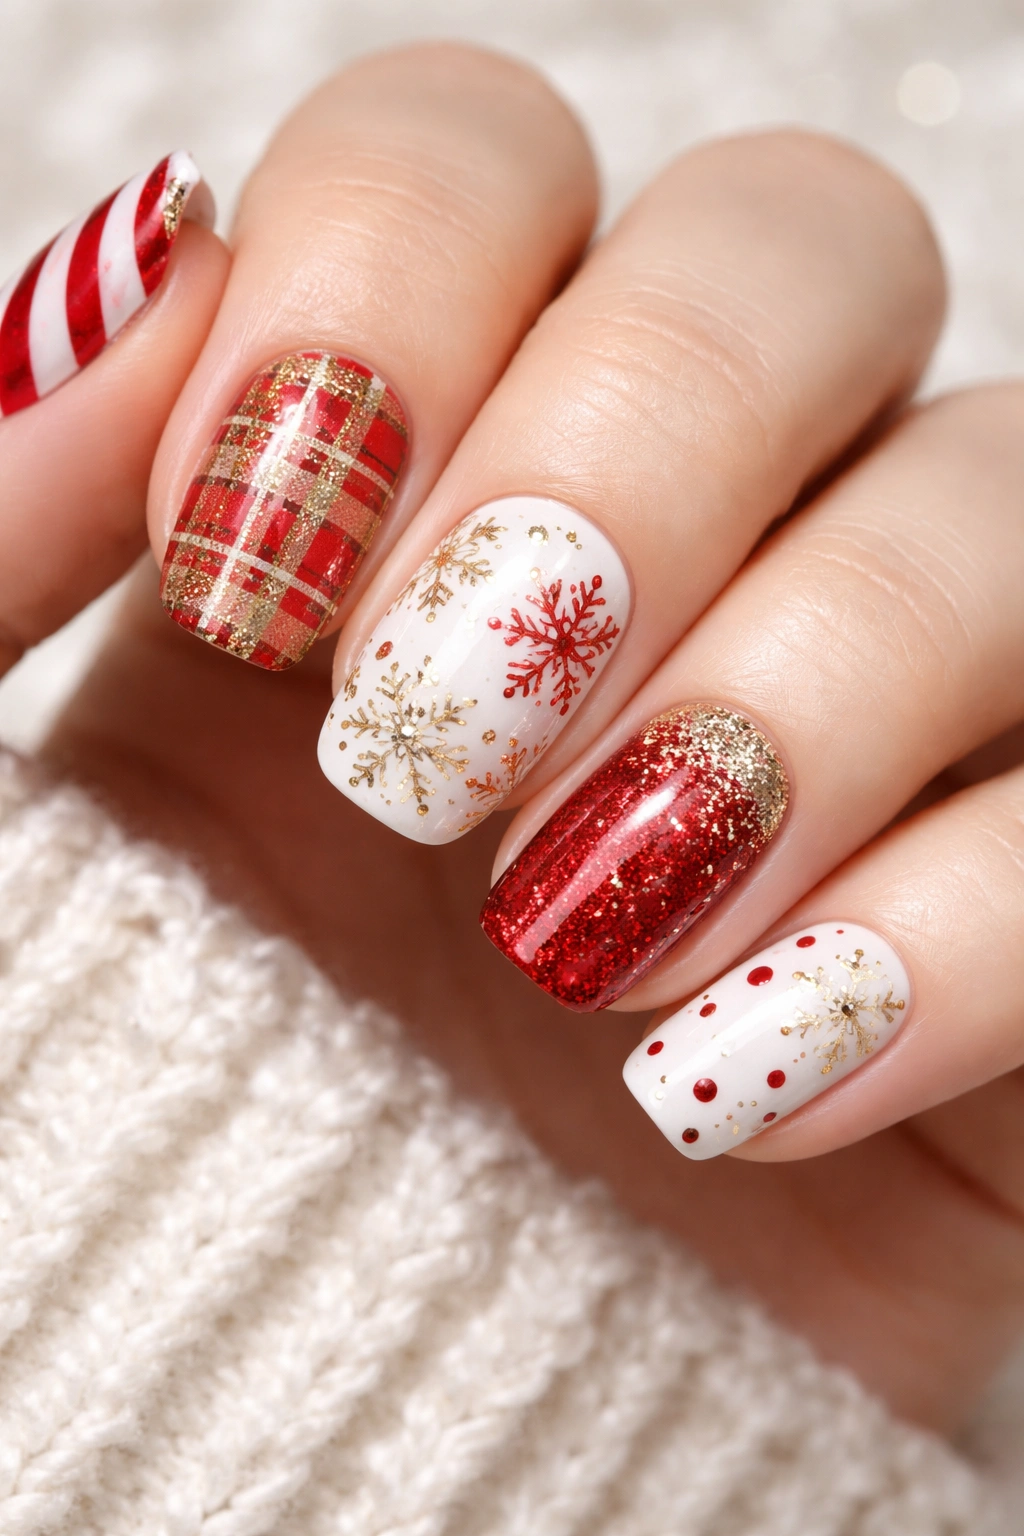
Who says your nails all have to match? A mismatched set incorporating different holiday patterns—candy canes, snowflakes, plaids, dots—creates visual interest while showcasing your personality.
The key to making mismatched work is sticking to a cohesive color palette. Red, white, and gold across various patterns looks intentional. Randomly mixing every possible color and pattern looks chaotic.
Each nail can feature a different design, or you can repeat patterns across both hands. Some people prefer symmetry with matching designs on each hand, while others like a completely unique set. There’s no wrong answer here.
This approach is perfect for indecisive people who want to try multiple trends without committing to just one. You get to experiment with different techniques and styles all in one manicure.
25. Pearl Accents on Red
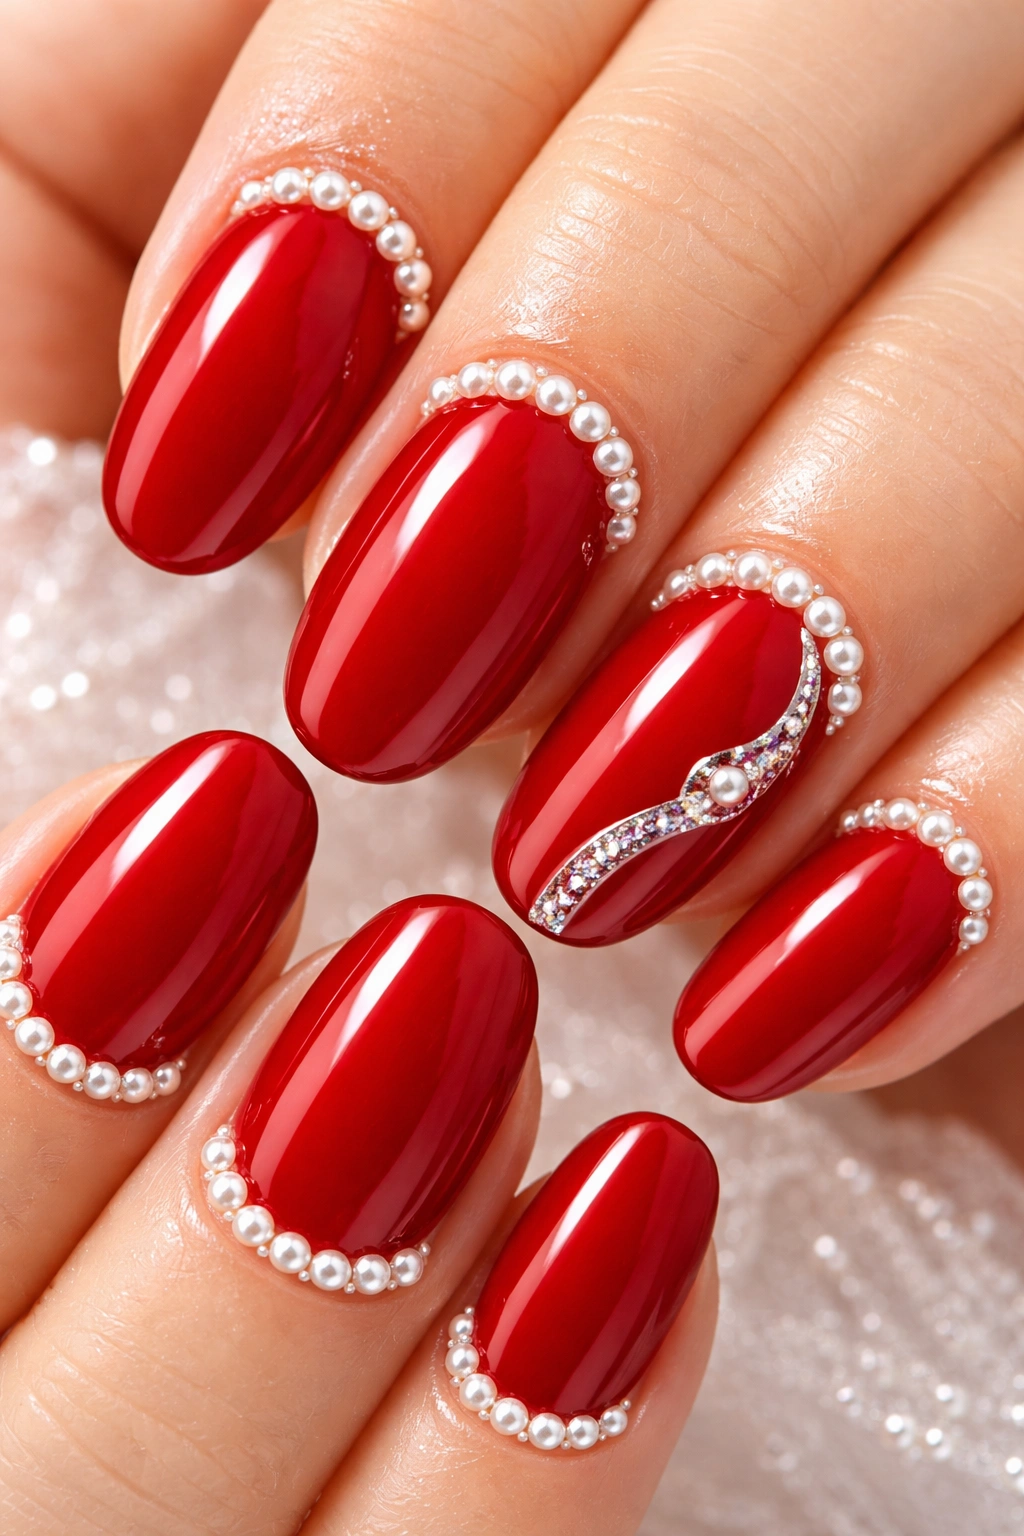
Classic red nails get a luxurious upgrade with strategically placed pearl embellishments. The combination of rich red polish and creamy pearls is timeless elegance with a festive twist.
Small pearl studs can line the cuticle area, create a curved line mimicking a French tip, or dot randomly across one or two accent nails. However you place them, pearls add sophistication and texture that plain polish alone can’t achieve.
Use nail glue to attach the pearls, then seal everything with a thick layer of top coat. This ensures they stay put through holiday activities and last as long as your polish does.
The beauty of this design is how it elevates a simple manicure without requiring artistic skills. If you can glue something and paint your nails red, you can create this look.
26. Ombré Shimmer in Holiday Colors
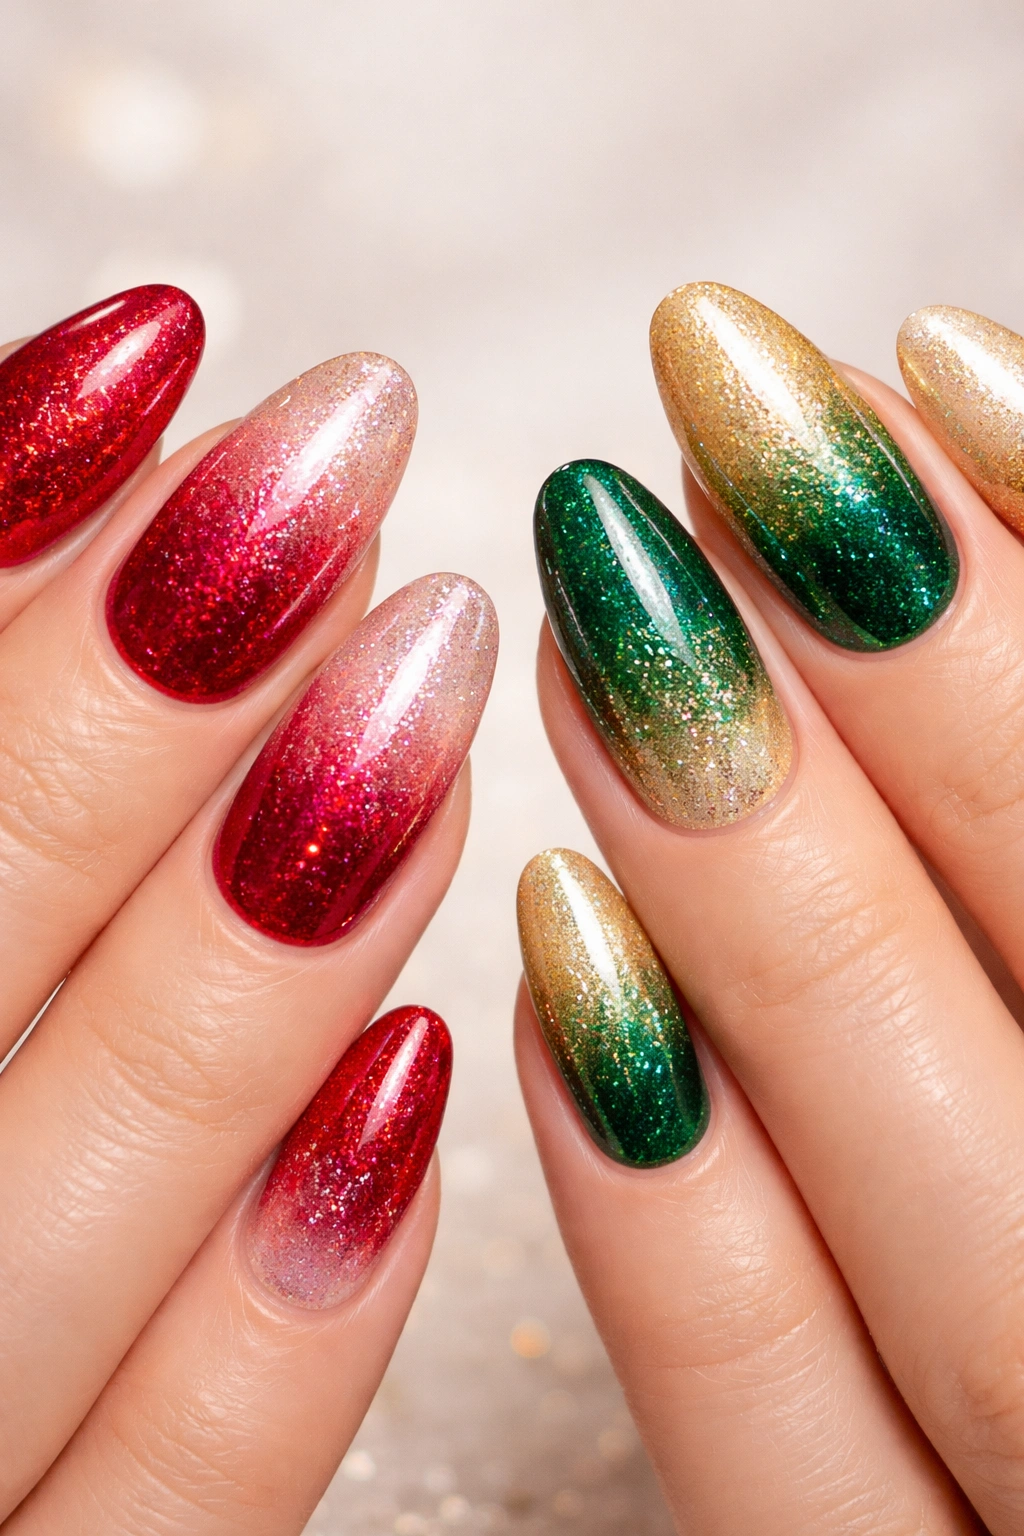
Gradient nails featuring festive colors create a soft, dreamy effect that’s perfect for the season. Red fading into white, green melting into gold, or silver transitioning to blue—the combinations are endless.
Creating a smooth ombré requires the right tools. A makeup sponge is essential for blending colors seamlessly. Apply your polishes in stripes on the sponge, then press onto the nail. Repeat until you get the color intensity and gradient you want.
The shimmer factor makes this technique even more forgiving. Shimmery or metallic polishes blend more easily than flat cremes, and any imperfections get hidden in the sparkle.
This look feels artistic and special without requiring steady hands or painting skills. The technique is accessible to beginners but looks professional when executed properly.
27. Green Velvet with Pearl Tips
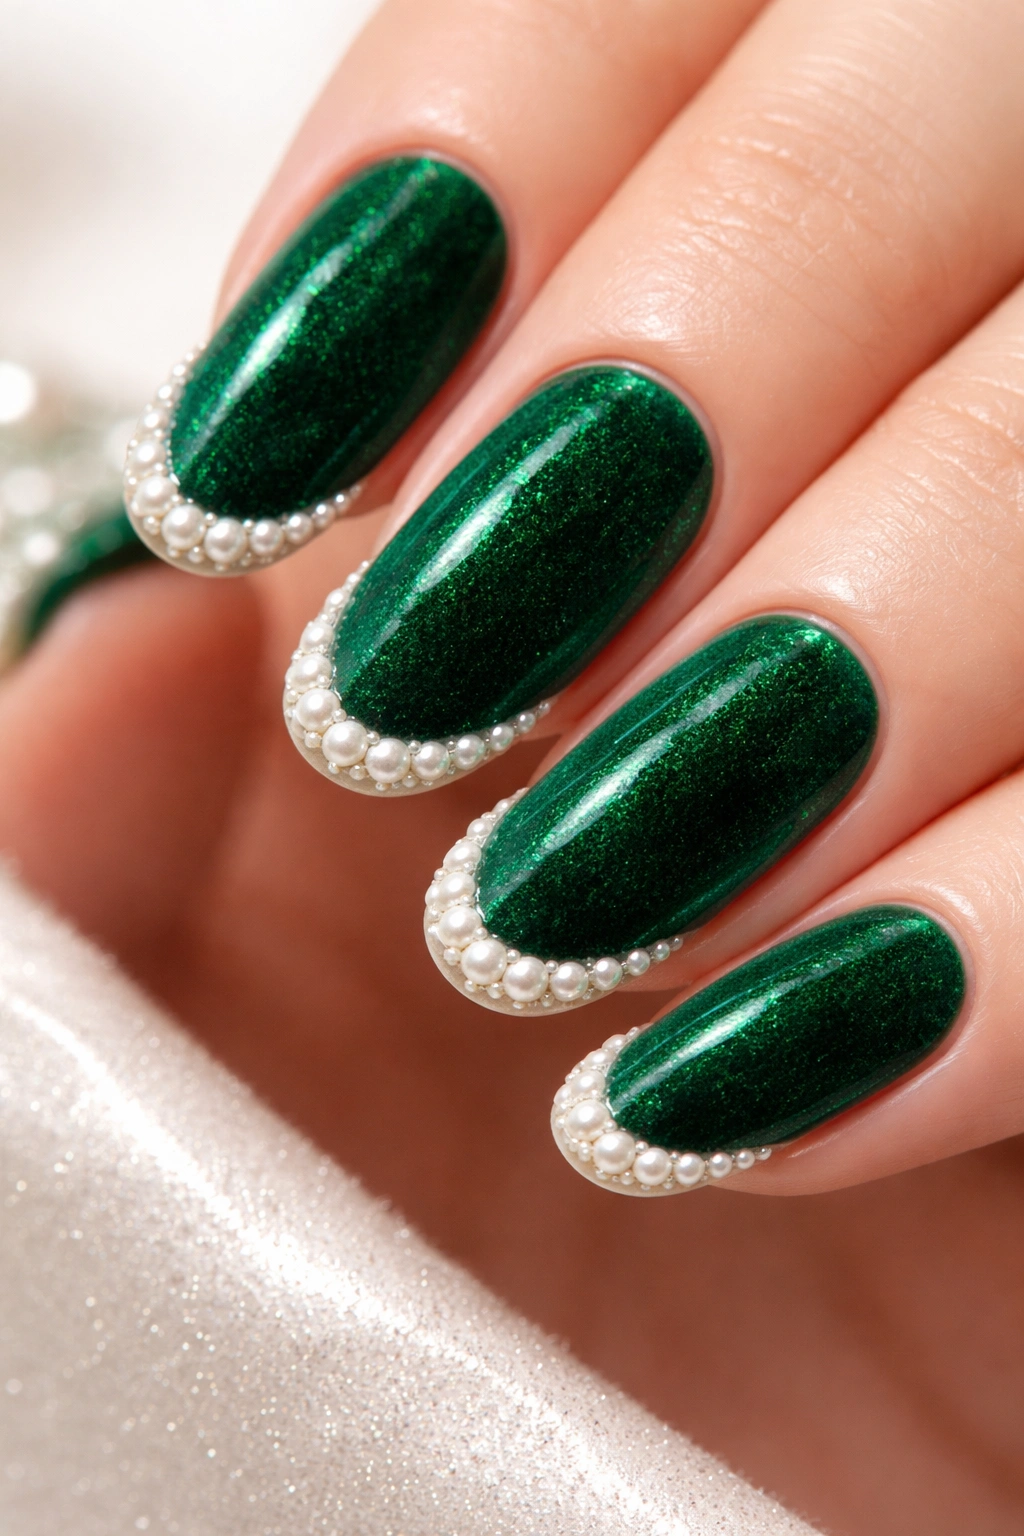
Combining trending techniques creates unique, editorial-worthy nails. Emerald green velvet with pearl-adorned tips brings together multiple nail trends in one cohesive, stunning design.
The velvet base provides that soft, dimensional shimmer that’s so popular right now. Apply magnetic polish and use the magnet to create that characteristic cat-eye effect. The green color keeps it festive and seasonal.
Pearl tips take the place of traditional French tips. Line small pearl studs along the edge of each nail, creating a curved border. The contrast between the rich green and creamy pearls is unexpectedly gorgeous.
This combination feels high-fashion and luxurious—perfect for holiday events where you want to make an impression. It’s definitely a statement manicure that won’t go unnoticed.
Wrapping Up
The holidays are the perfect time to have fun with your nails and try something you wouldn’t normally wear. Whether you go for classic reds and greens, experiment with chrome finishes, or load up on glitter and gemstones, there’s no wrong way to do festive nails.
Remember, the “best” holiday nail design is whatever makes you happy when you look down at your hands. Maybe that’s a simple red manicure, or maybe it’s a full-on 3D gingerbread scene. Both are completely valid choices.
Don’t stress about achieving perfection, especially if you’re doing your nails at home. Part of the fun is experimenting and trying new techniques. Some will work beautifully, others might need practice. That’s part of the process.
The most important thing is that your nails make you feel festive and special during this busy season. When you’re wrapped up in holiday chaos, a pretty manicure is a small reminder to take care of yourself and enjoy the moment.
