

Short squoval nails have quietly become the goldilocks of festive manicures — they’re long enough to show off intricate holiday designs, short enough to handle last-minute holiday cooking and gift-wrapping, and shaped perfectly to showcase seasonal colors without the drama of stilettos or acrylics. If you’re planning to do your nails for the holidays but haven’t committed to length, this shape delivers serious impact without the commitment.
The holidays are the perfect time to experiment with bold colors, sparkle, and festive nail art that you might hesitate to wear year-round. Squoval nails — that hybrid between square and oval that tapers slightly at the sides — have become the preferred choice among nail artists and enthusiasts alike because they’re flattering on every finger, durable enough to handle winter weather and frequent hand-washing, and infinitely versatile when it comes to design possibilities.
What makes the following designs work is that they balance holiday statement-making with the wearability that short nails naturally provide. Whether you’re drawn to rich jewel tones, classic reds, shimmery metallics, or intricate nail art, there’s a festive squoval design here that’ll fit your style, your schedule, and your skill level. The beauty of the squoval shape is that even simple two-color combinations look elevated and intentional.
Why Short Squoval Nails Are Perfect for Holiday Celebrations
Short squoval nails hit a sweet spot that longer shapes simply can’t match during the busy holiday season. You get enough surface area to display real nail art detail — snowflakes, geometric patterns, gradient effects, or intricate designs that require some real estate to shine. At the same time, short nails let you actually use your hands without constant worrying about breakage or maintenance.
The shape itself is inherently elegant because of its geometric precision. The slight taper from a broad nail bed to softly squared edges creates a polished, intentional look that photographs beautifully and reads as refined without being fussy. This makes squoval nails the perfect canvas for everything from minimalist holiday designs to full-coverage sparkle.
Durability matters during the holidays, and short squoval nails are genuinely hardy. You’re not fighting against length-related brittleness or the tendency of longer nails to crack under stress. You can wrap presents, wash dishes, type emails, and handle all the holiday tasks without babying your manicure.
Temperature fluctuations during winter can be harsh on longer nails, but squoval nails weather the season better. They’re also more practical if you’re doing your own nails — the squoval shape is forgiving to shape and file, and much easier to achieve a salon-quality result at home than longer, more elaborate shapes require.
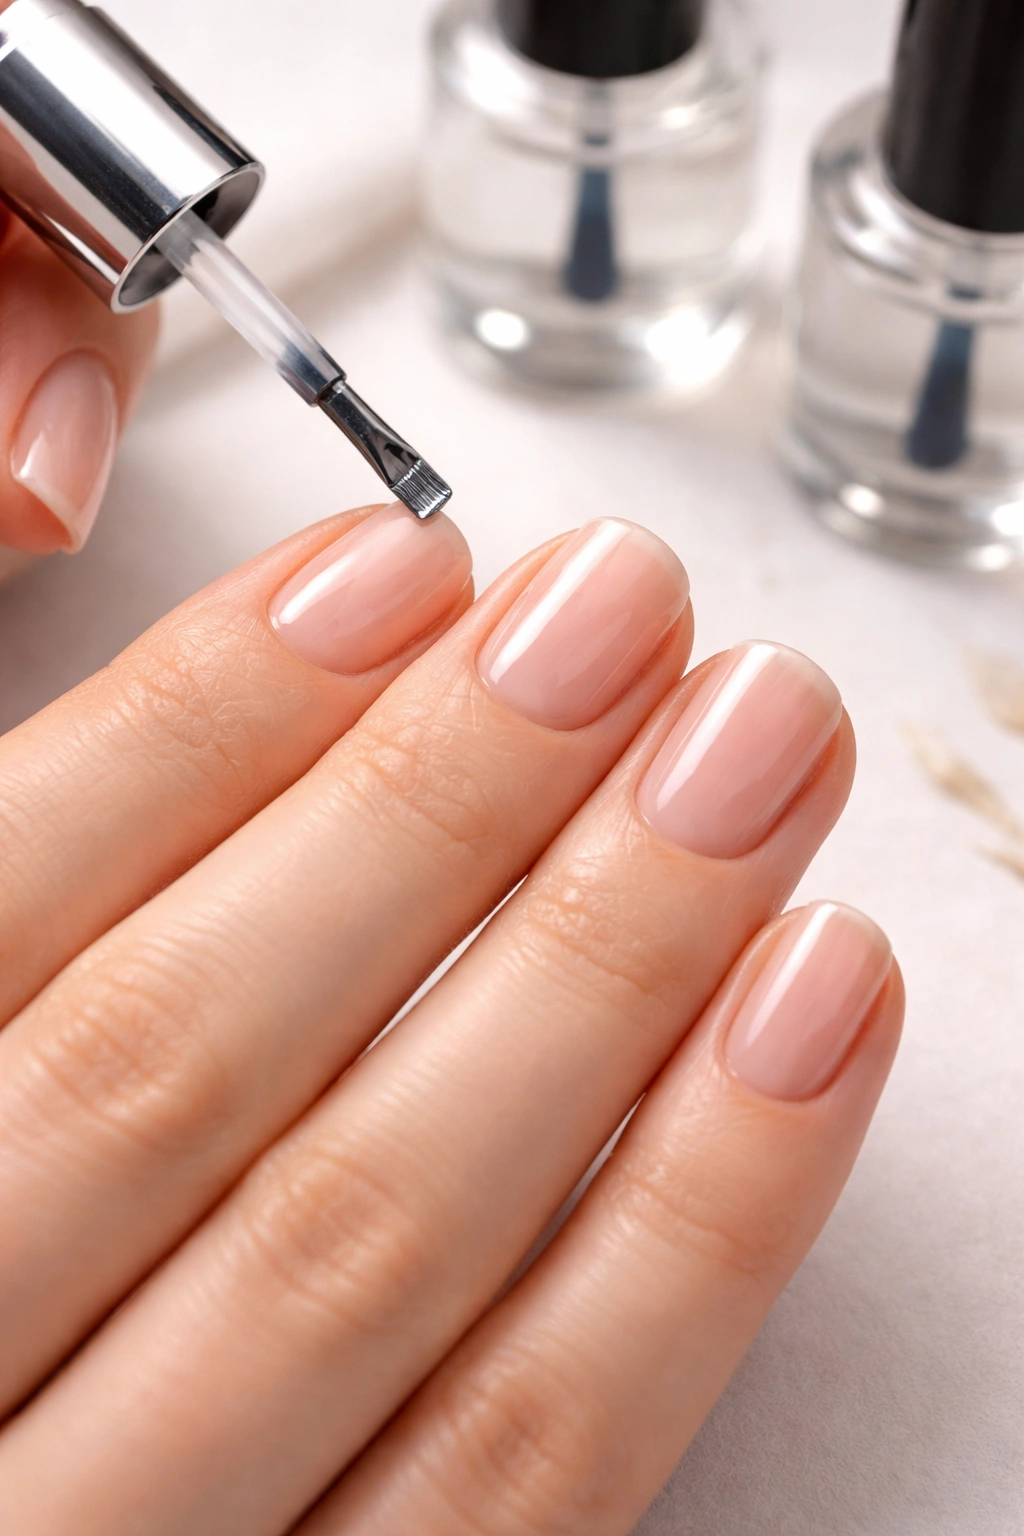
Getting Your Nails Ready for Holiday Designs
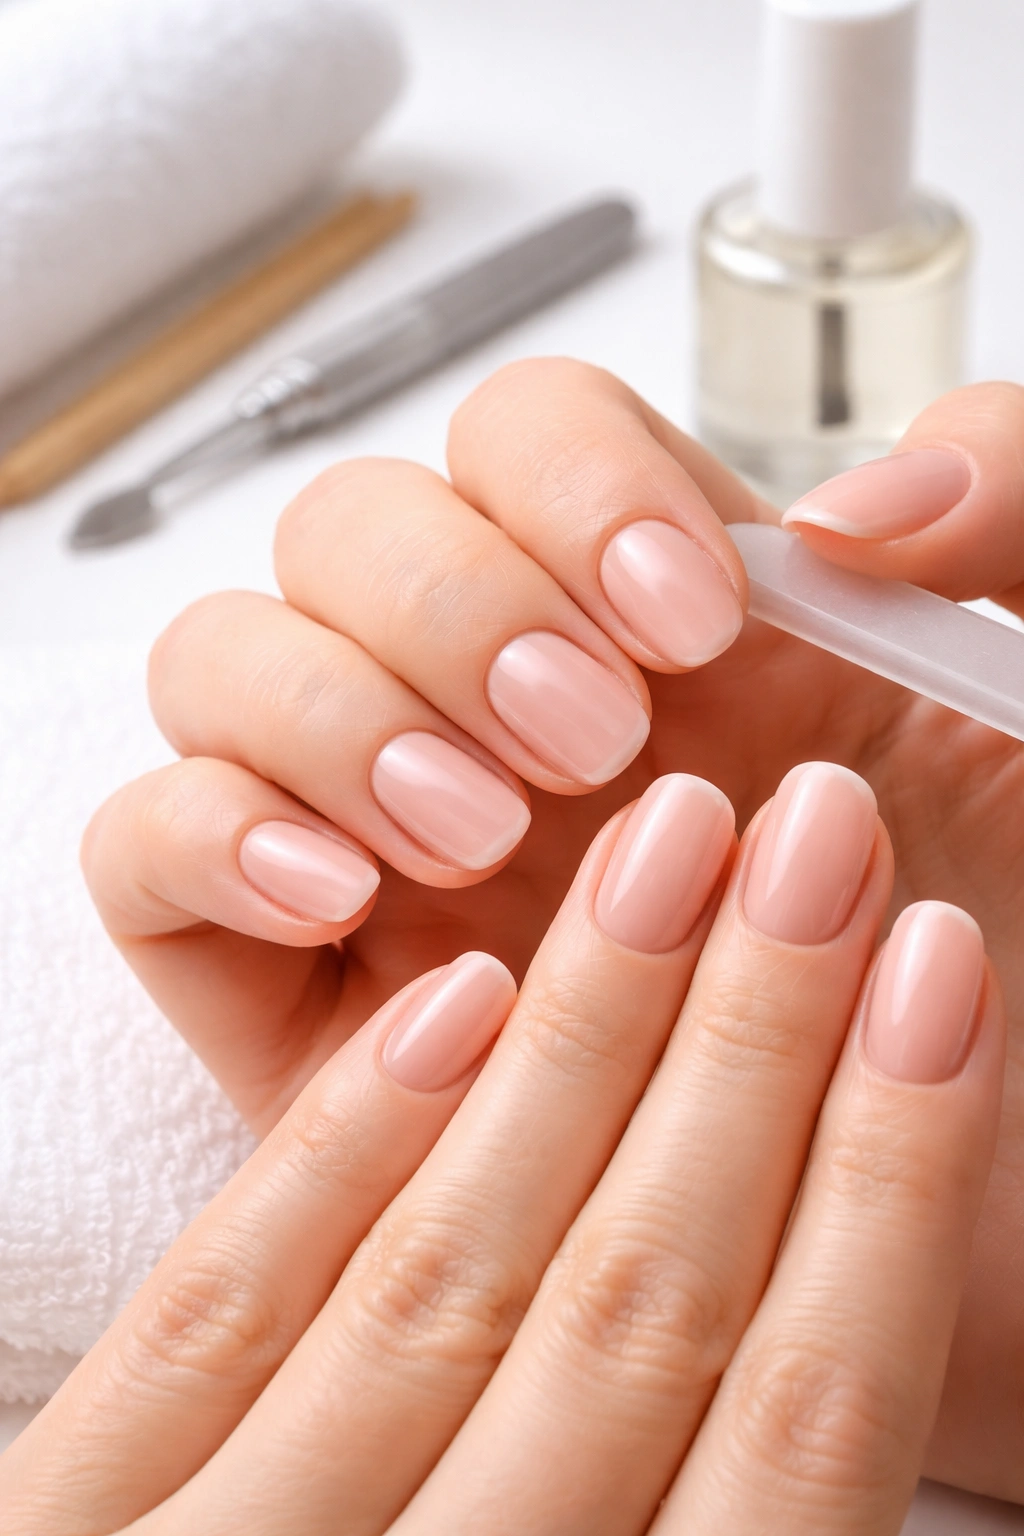
Before diving into festive designs, your nails need a proper foundation. Start with a nail file and gently shape each nail into a squoval by filing the sides at a slight angle inward, then rounding the edge just barely at the top. Aim for nails that are roughly the length of your fingertips or just past them — short enough to feel practical, long enough to showcase detail.
Push back your cuticles gently, don’t cut them. A cuticle pusher and some warm water soften the cuticle area and make this easier without causing damage. File any ridges smooth across the nail surface — a ridge-filling base coat helps, but starting with a smooth nail bed is even better.
Buffing the surface lightly removes shine and helps polish adhere better. You don’t need to be aggressive; just a light once-over to create a slightly matte surface is enough. Wipe away any nail dust with a damp cloth, then apply a base coat. This step matters more than people realize — it protects your nails from staining, improves color payoff, and gives polish something to grip so designs last longer.
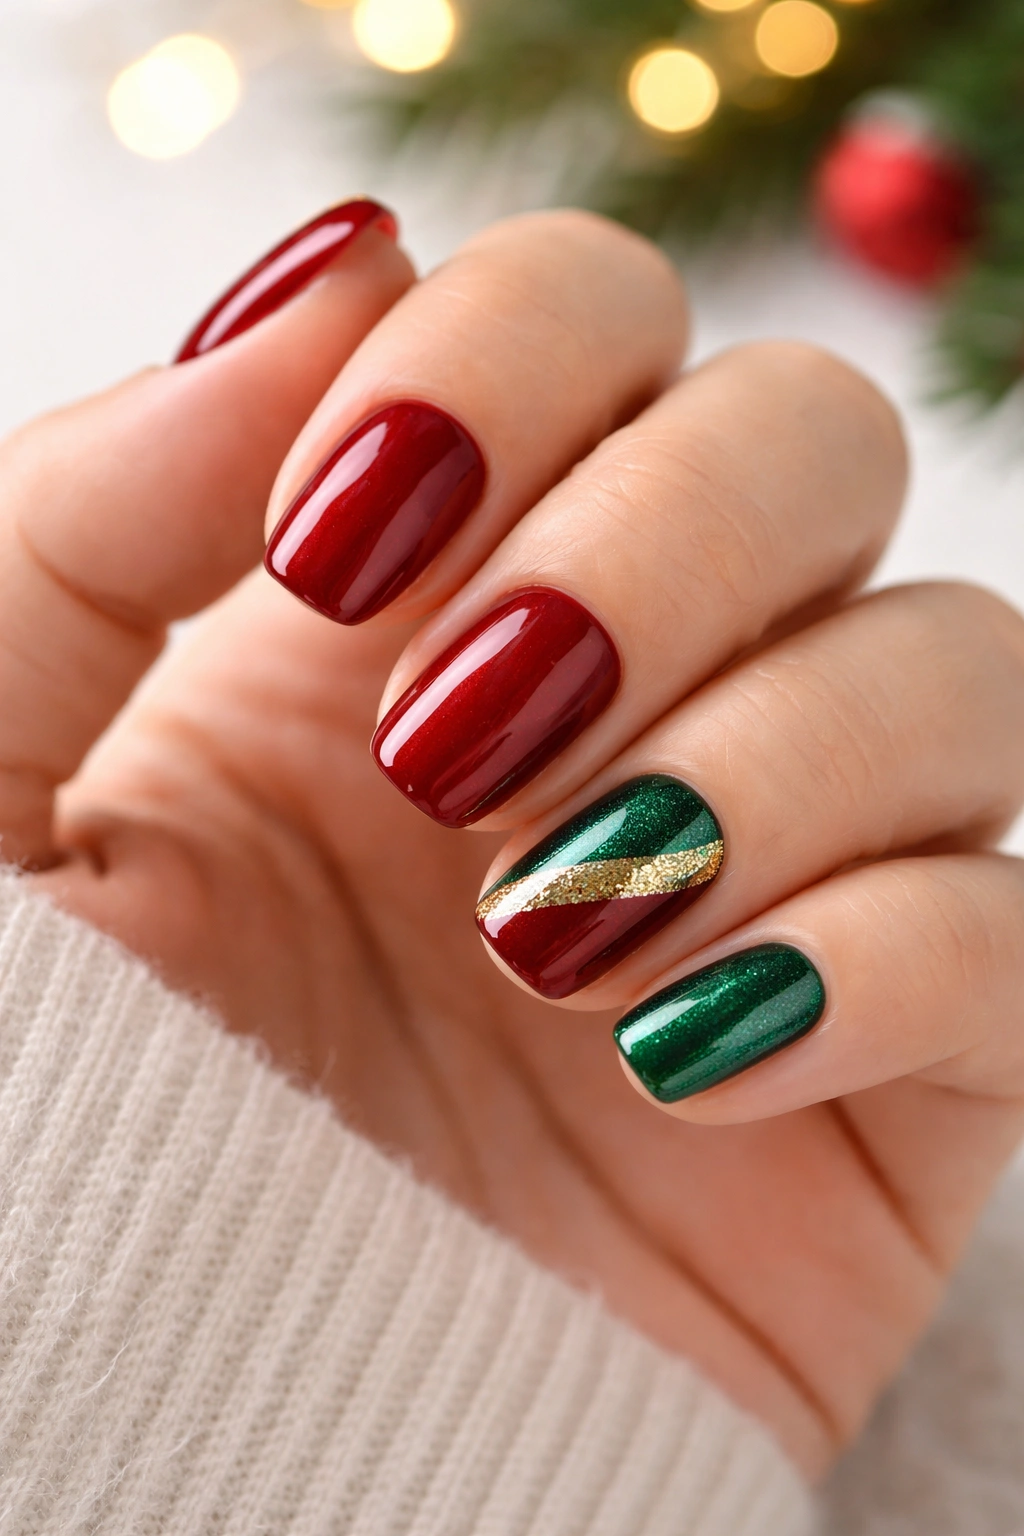
1. Classic Red with Gold Leaf Accents
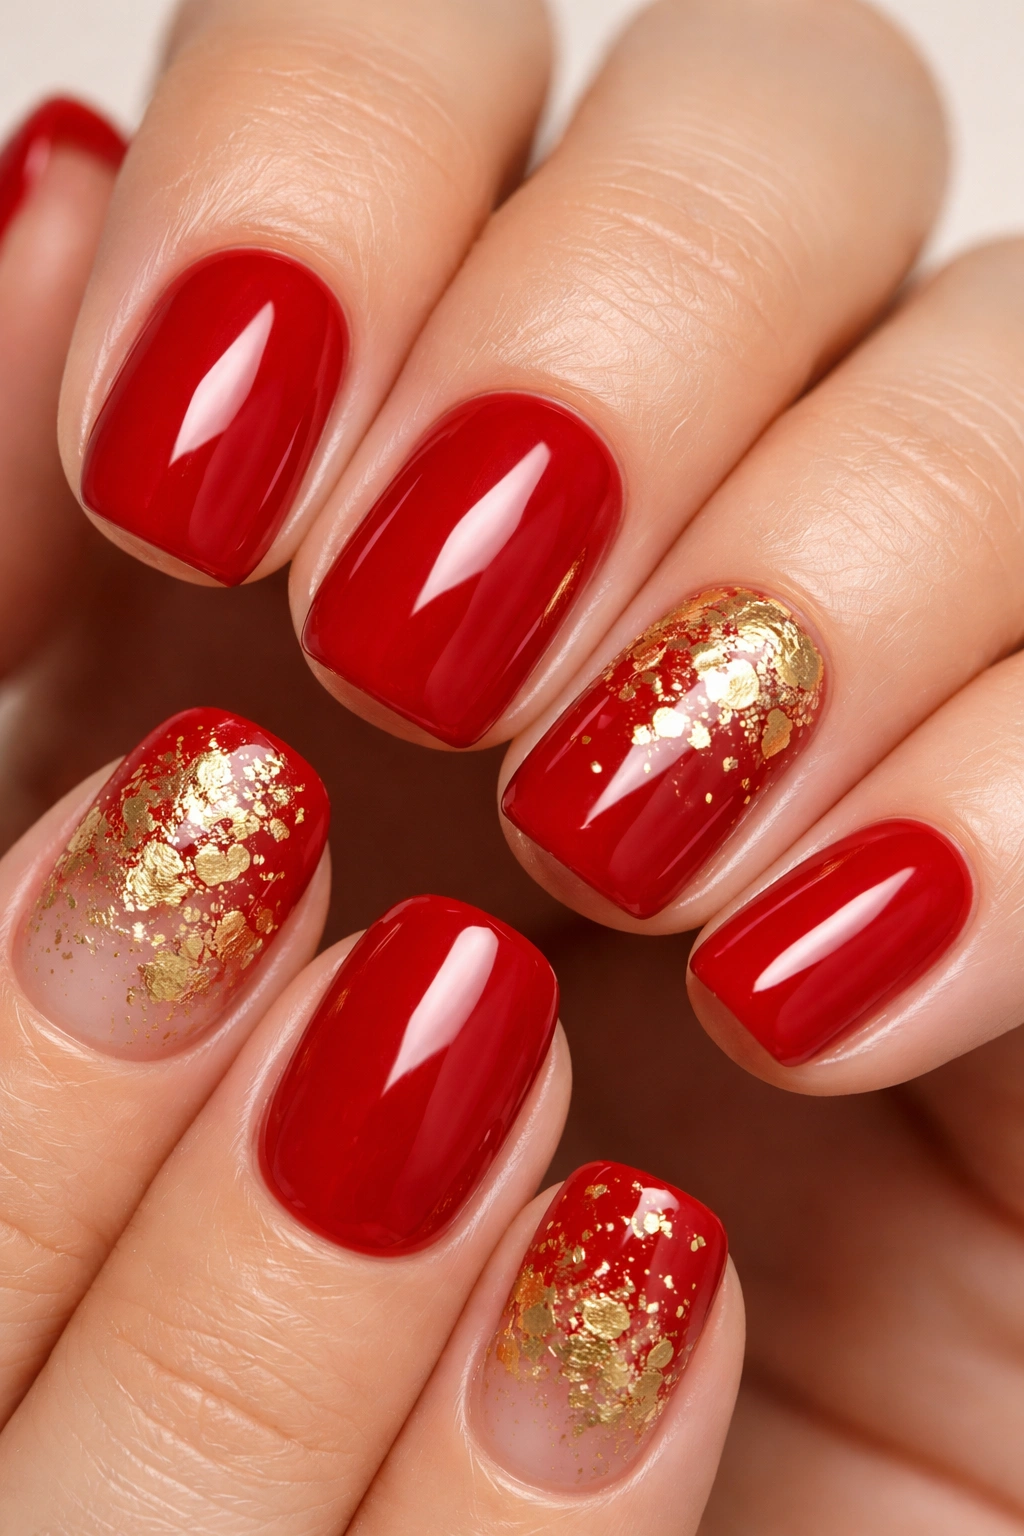
There’s a reason red nails feel synonymous with the holidays — it’s the color of excitement, celebration, and tradition, all wrapped up in one bold shade. A rich, cream red (not too blue-toned, not too orange) strikes the perfect balance between festive and wearable, and it’s flattering on virtually every skin tone when you find the right red.
Why This Design Works
Red is a statement color that needs no embellishment, but gold leaf elevates it from standard to special. A few strategic gold leaf pieces scattered across random nails — perhaps one accent nail, or scattered across two or three nails — catches light and adds dimension without overwhelming the design. The contrast between the deep, warm red and the cool metallic gold creates visual interest that reads immediately as intentional and seasonal.
How to Execute It
- Paint two coats of a true red (cream finish, not glossy) across all ten nails
- Apply a glossy top coat to one or two nails where you want to apply gold leaf
- Tear or cut small, organic shapes from gold leaf sheets
- Press the gold leaf gently onto the wet top coat, using a small brush or your fingers to position it
- Seal everything with a final glossy top coat
Pro tip: Use tweezers to handle gold leaf — your fingers transfer oils that can make it stick unpredictably. If you mess up placement, you can gently wipe it away with a slightly damp brush before it sets.
2. Emerald Green with Silver Snowflakes
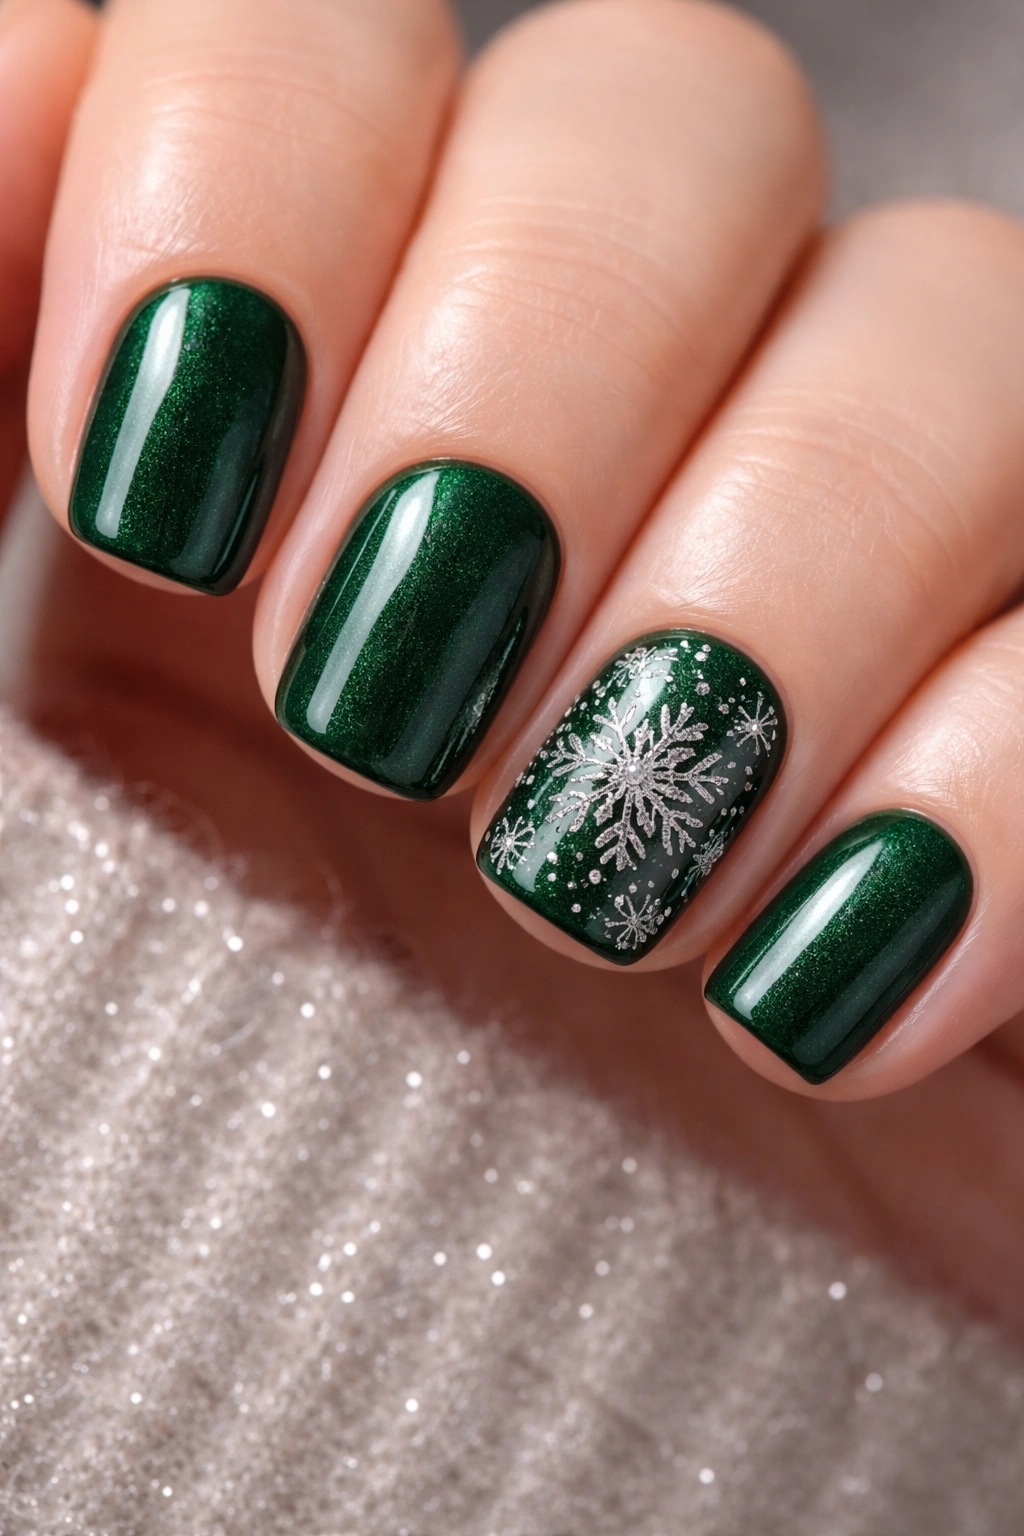
Emerald green is having a major moment in holiday nail design, and for good reason — it’s jewel-toned, sophisticated, and deeply festive without screaming “Christmas” to everyone in the room. Paired with delicate silver snowflakes, it becomes an elegant winter landscape right on your nails.
What Makes This Combination Shine
The depth of emerald green creates a luxurious backdrop that makes silver pop dramatically. Snowflakes are the ultimate winter motif, but when rendered in fine detail on a jewel-toned base, they read as sophisticated nail art rather than cutesy holiday imagery. This design walks the line between fun and elegant beautifully.
Building the Design
- Apply two coats of a true emerald green (rich but not so dark it becomes black in indoor lighting)
- Using a thin nail art brush and silver polish or a silver nail art pen, sketch fine snowflake patterns on a few nails
- Start with the center point and create six rays extending outward, then add smaller details like delicate branches off each ray
- Keep some nails solid green for balance — alternate between snowflake and solid nails
- Seal with a glossy or matte top coat depending on the mood you want
Worth knowing: If freehand snowflakes feel intimidating, nail stickers of metallic snowflakes exist in every color combination. They offer the same visual impact with zero skill required.
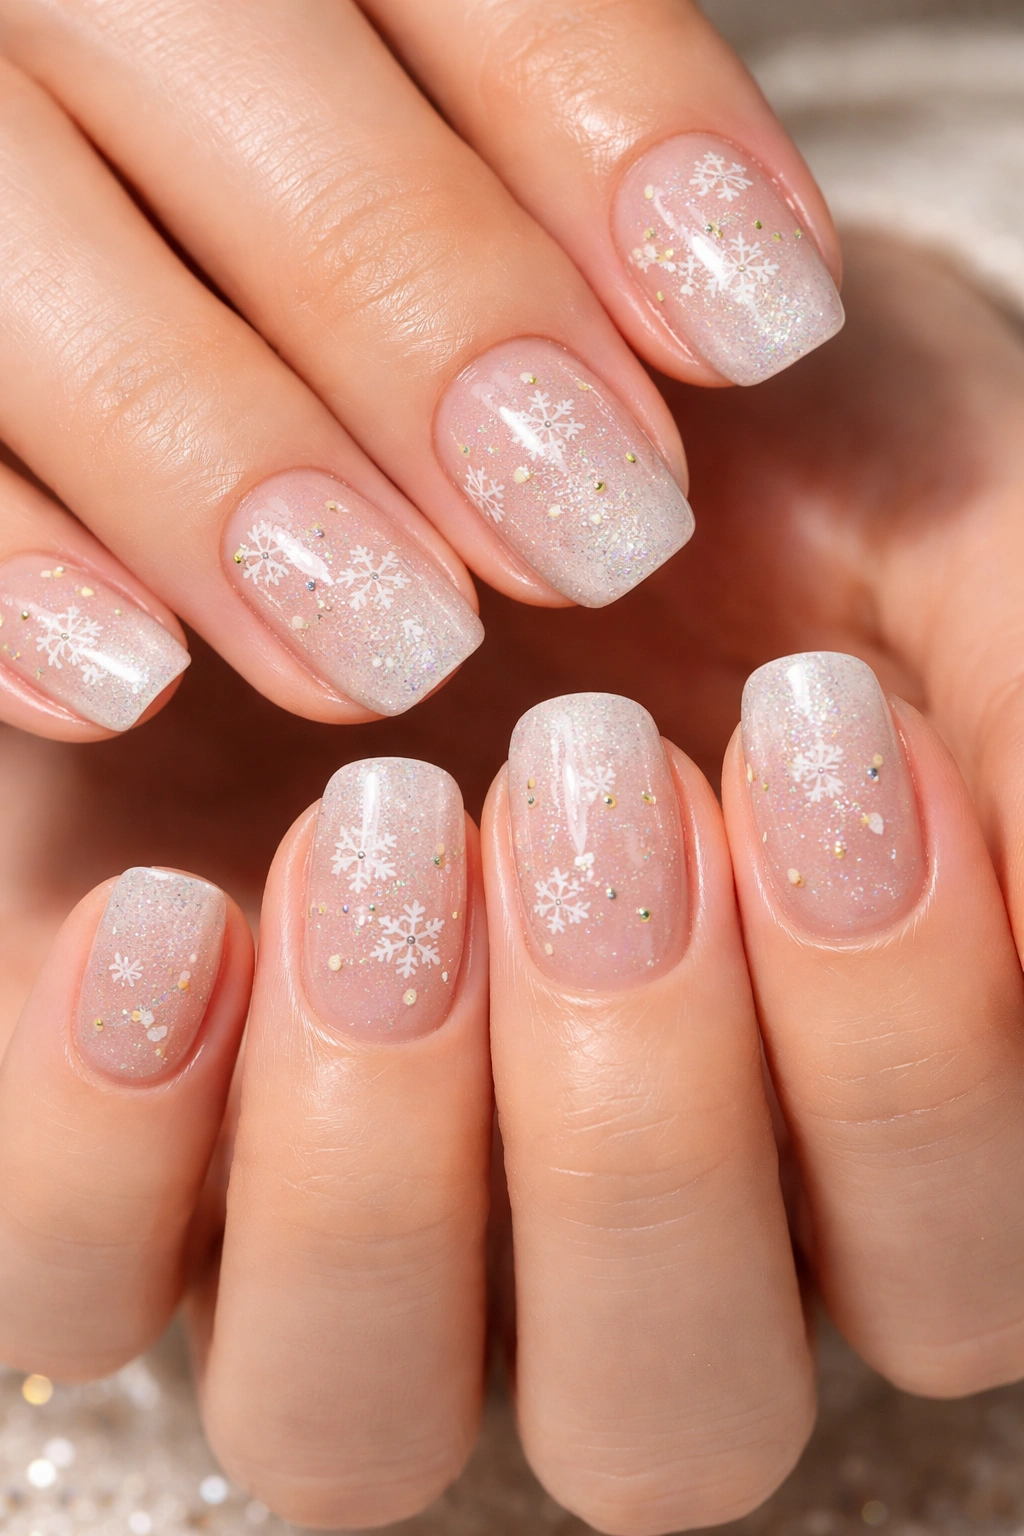
3. Winter White with Pearl Details
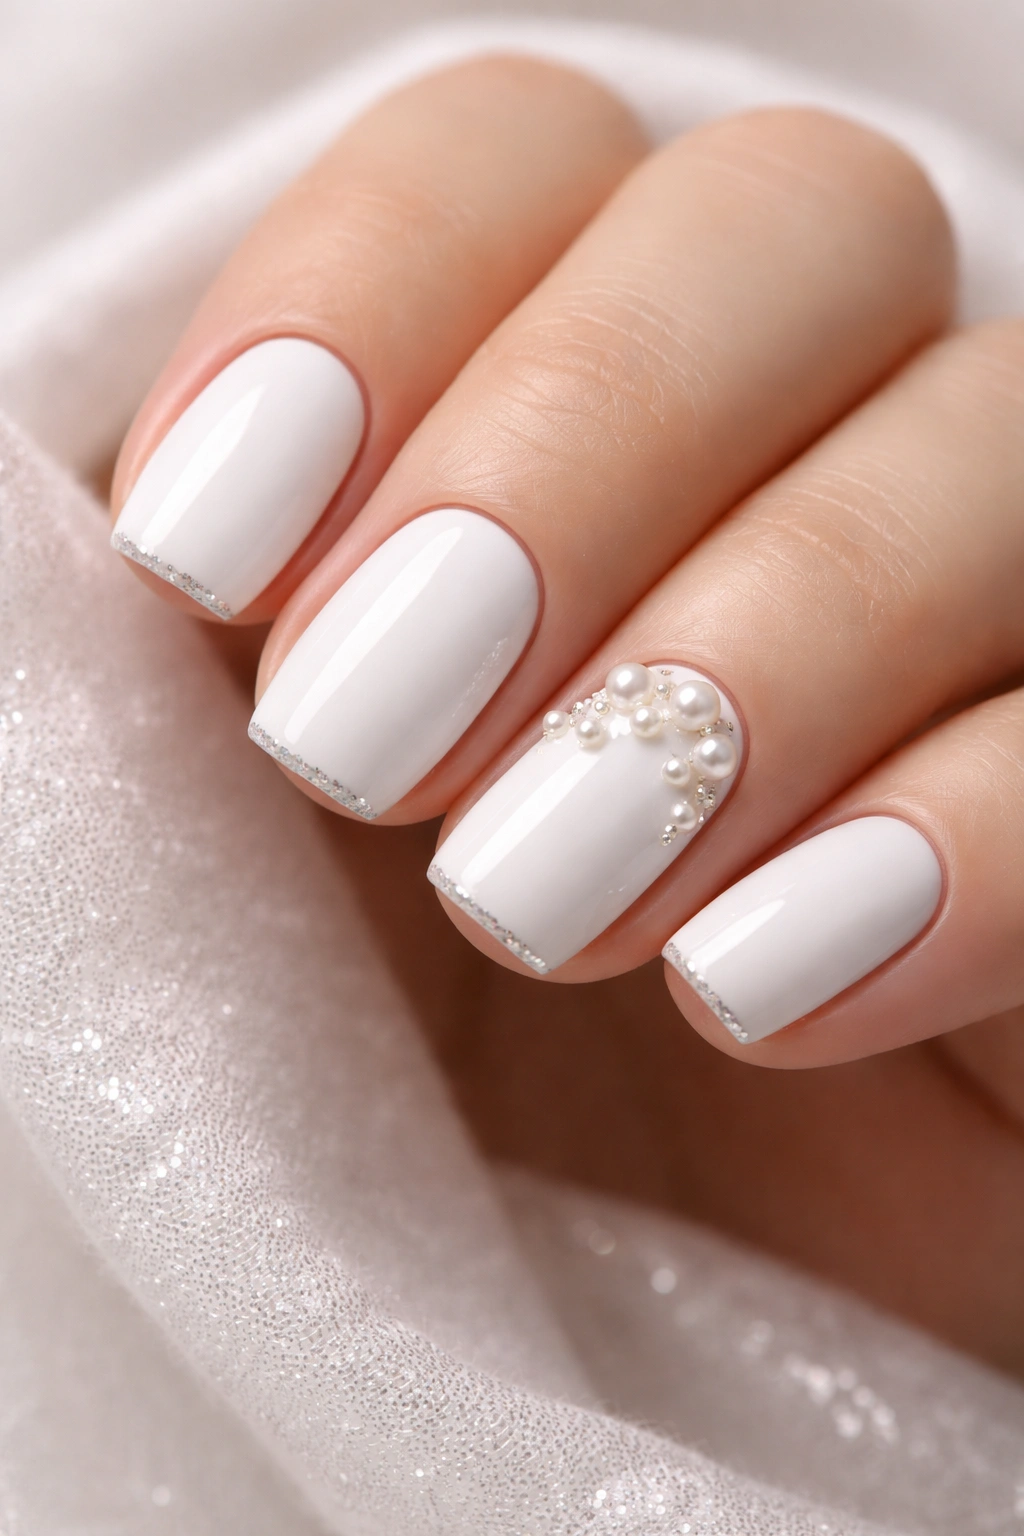
White nails feel fresh and clean, which is why so many people assume they can’t be festive. That’s the misconception this design dismantles — white is the ultimate backdrop for sparkle, shimmer, and subtle detail. Pearl accents turn white nails from simple into sophisticated winter elegance.
Why Pearl Transforms White Into Festive
Pearl has an understated luxury that suits the holidays perfectly. It’s not as in-your-face as glitter, but infinitely more interesting than a flat base. The iridescent quality of pearl polish shifts slightly with movement and light, creating a subtle animation that keeps the design interesting without being busy.
The Application Process
- Paint two coats of a crisp white polish (slightly warm white reads better than cool/blue white for most skin tones)
- Choose a pearl polish in a complementary tone — champagne pearl, rose pearl, or icy silver pearl all work beautifully
- Apply pearl polish to accent nails (typically your ring finger on each hand, or a full ring finger and thumb)
- For extra dimension, add a thin line of pearl along the tips of your white nails using a thin brush
- Top everything with a high-shine top coat to enhance the pearl’s luminosity
Quick fact: Pearl polish looks completely different depending on undertones. Test on one nail first to make sure the pearl tone reads as complementary against your base white.
4. Navy Blue with Iridescent Confetti
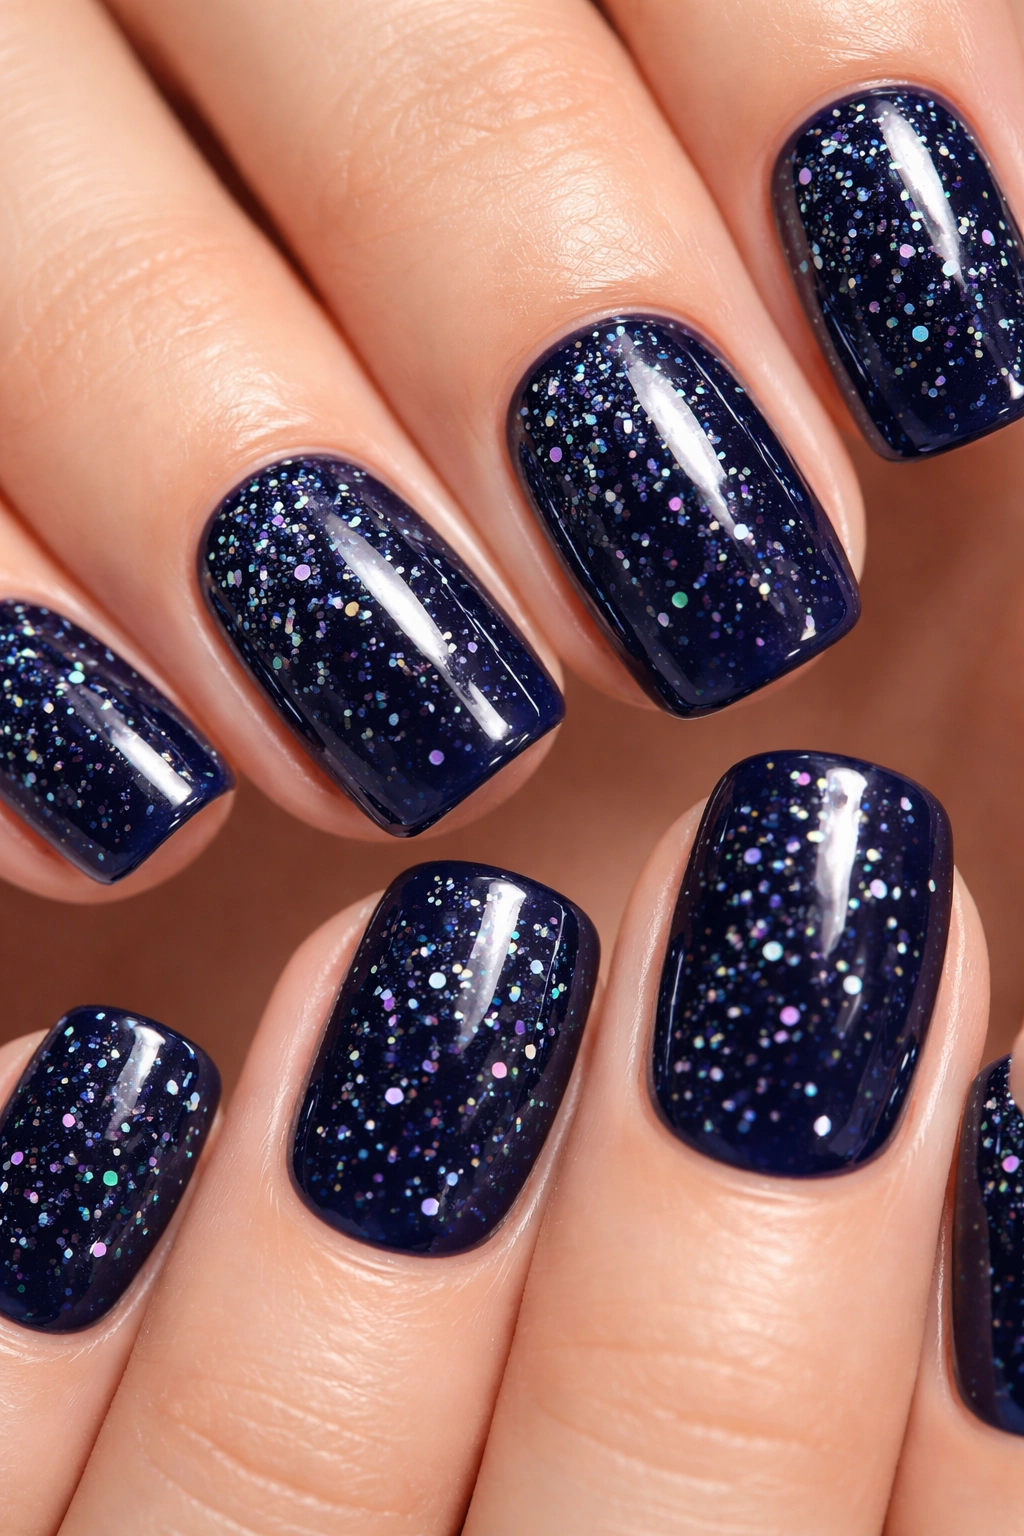
Navy blue is the sophisticated alternative to classic red or green — it’s festive without being overly obvious, and it coordinates beautifully with virtually every holiday outfit. Iridescent confetti adds movement, joy, and visual interest without requiring precise nail art skills.
The Appeal of This Pairing
Navy grounds the design and prevents the confetti from reading as chaotic. The dark, rich base creates contrast that makes every sparkly particle stand out. The combination reads as elegant and celebratory simultaneously, making it perfect for holiday parties, family gatherings, or everyday festive wear.
Creating the Confetti Effect
- Apply two coats of a deep, saturated navy blue
- While your second coat is still slightly tacky, sprinkle iridescent nail art confetti (the tiny glitter flecks, not chunky glitter) across all your nails
- Press gently with a damp finger to embed the confetti into the polish
- Once dry, seal everything with a thick, glossy top coat — this locks the confetti in place and prevents it from catching on everything
- You want the top coat to feel smooth, so make sure you apply it generously
Pro tip: Iridescent confetti is light-catching magic on navy, but if you want to keep it subtle, apply it only to accent nails rather than all ten. You still get the festive sparkle with a more minimalist aesthetic.
5. Burgundy with Geometric Gold Lines

Burgundy is the color of wine, velvet, and luxury — it says “special occasion” without screaming for attention. Paired with clean geometric gold lines, it becomes modern, intentional, and undeniably festive. This design works for anyone who wants holiday nails that feel sophisticated rather than whimsical.
Why Geometry Works Here
Geometric patterns add structure and visual interest without requiring any artistic skill beyond drawing straight lines. Gold lines against burgundy create high contrast that makes the pattern pop, and the geometric approach feels contemporary and fashion-forward rather than traditional and cutesy.
Executing Geometric Lines
- Paint two coats of a deep burgundy (wine-toned is more sophisticated than blue-toned)
- Using a thin gold nail art brush or gold polish pen, draw thin, straight lines across your nails
- Create a few different patterns — diagonal lines on some nails, vertical lines on others, maybe a simple frame around the edges on a few nails
- Keep the patterns sparse enough that you can still see plenty of burgundy base
- Finish with a matte or glossy top coat (matte will make the gold lines look more striking and modern)
What to watch for: Gold lines need a steady hand and patience. If freehand feels risky, use thin gold nail tape or striping tape to create perfectly straight lines, then apply polish over the tape and remove it once dry.
6. Deep Plum with Metallic Stars
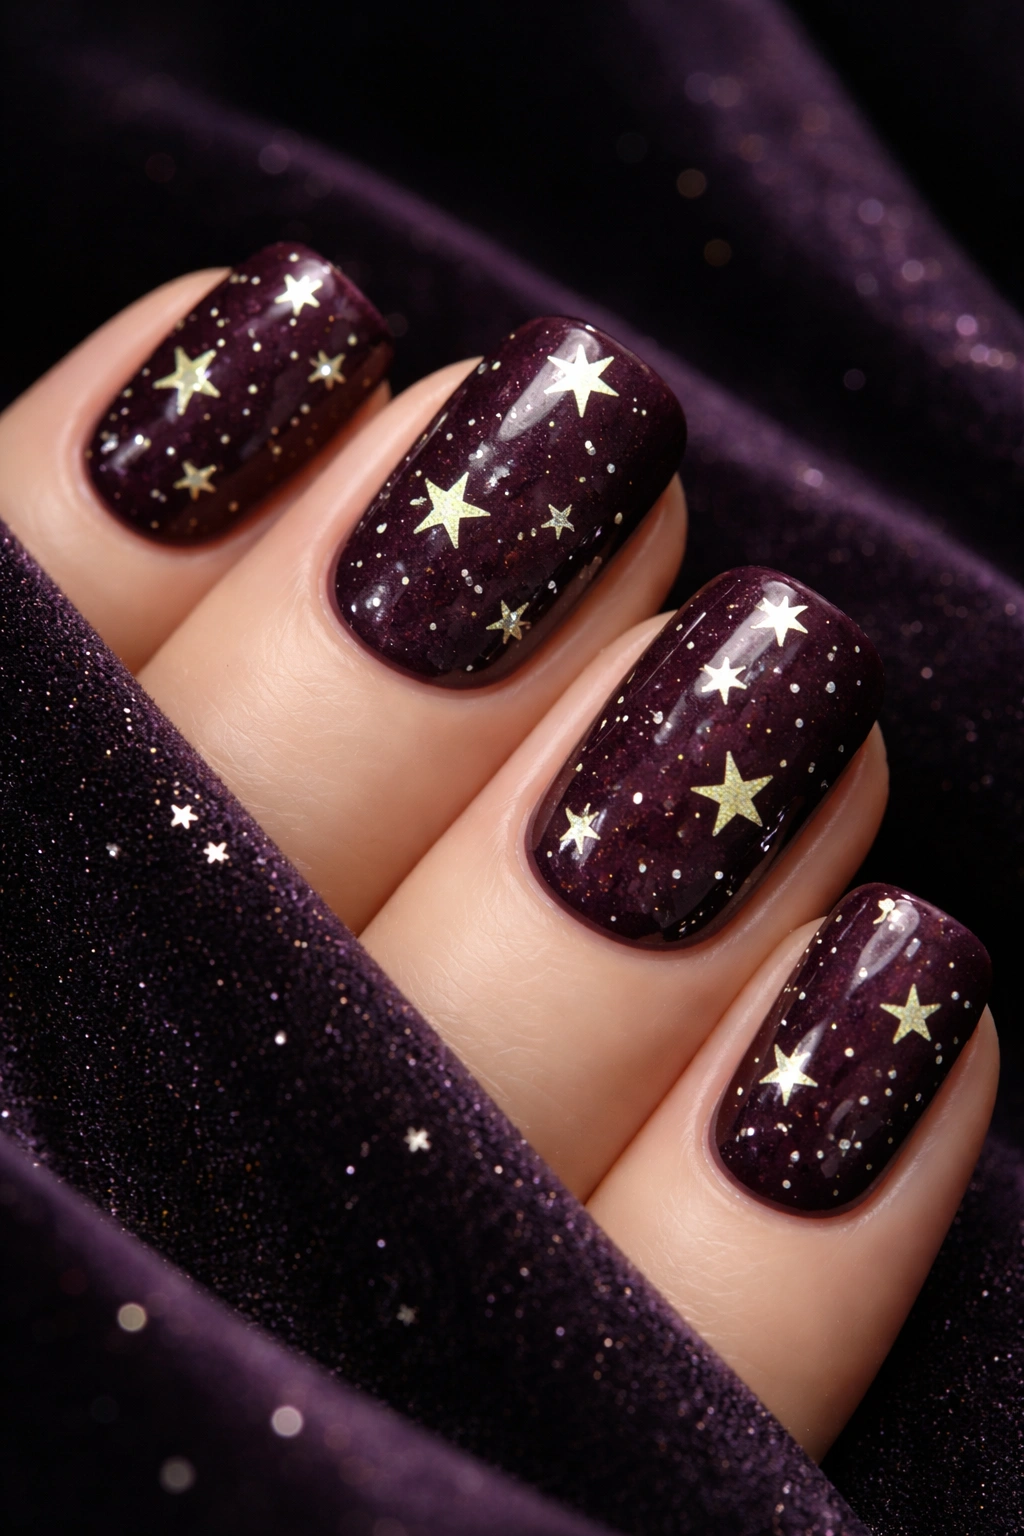
Plum sits in that gorgeous in-between space where it’s purple enough to feel luxurious but dark enough to read as a sophisticated neutral. Scattered metallic stars transform it into a night sky that happens to be deeply festive, making this one of the most elegant holiday designs possible.
The Magic of Plum and Stars
Plum is an underrated holiday color because most people default to red and green. Stars feel magical and celestial rather than strictly Christmas-themed, which gives this design year-round wearability without sacrificing holiday spirit. The metallic stars catch light and add dimension that elevates the entire look.
Building the Night Sky Effect
- Apply two coats of a deep, rich plum polish
- Using a thin brush or dotting tool dipped in silver or gold metallic polish, create small five-pointed stars scattered randomly across all your nails
- Vary the size slightly — some tiny stars, some slightly larger ones — for a more organic, natural-looking effect
- Don’t fill every inch of space; leave plenty of plum showing for visual breathing room
- Seal with a glossy top coat to make the metallic stars gleam
Quick fact: If you’re not confident drawing five-pointed stars freehand, use a star dotting tool (it’s a small tool with star-shaped indentations) or star nail art stickers for perfect stars every time.
7. Champagne Sparkle with Diamond Accents
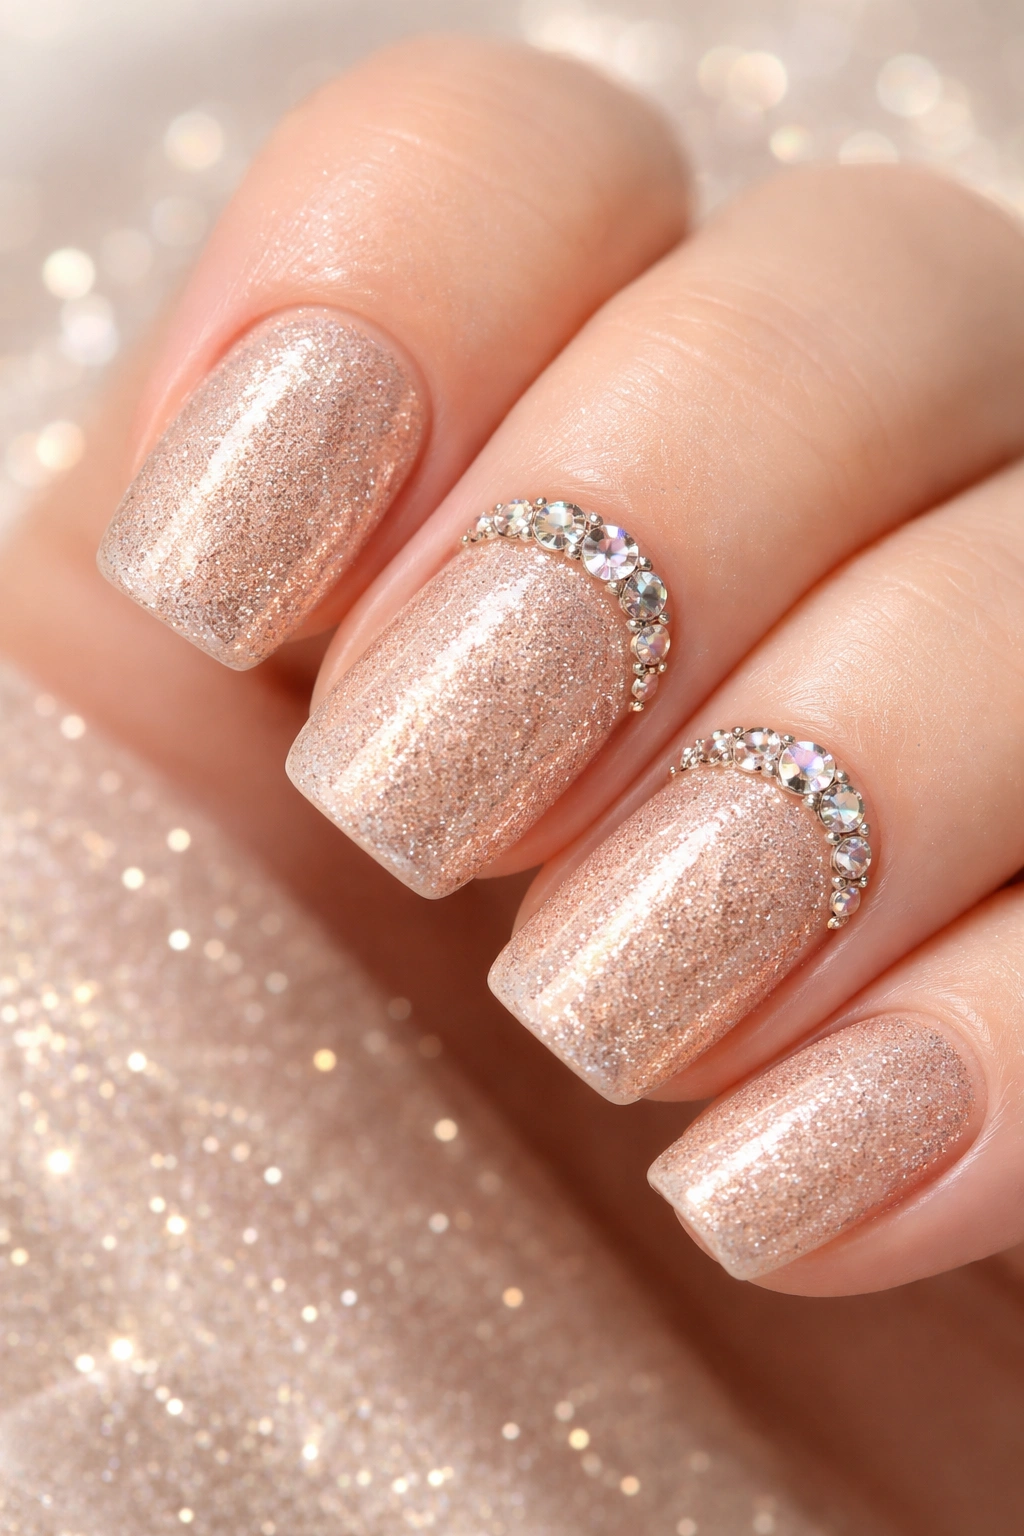
Champagne sparkle is the safe choice when you want drama without commitment. This soft, shimmery neutral works with every holiday outfit, complements every skin tone, and reads as celebratory without forcing a specific color statement. Diamond accents add tactile luxury and genuine sparkle.
Why Champagne Is the Perfect Holiday Neutral
Champagne sits between silver, gold, and nude, which is why it’s so universally flattering. A sparkly champagne polish gives you glitter and shine without the intensity of a true glitter mani — it’s sophisticated, wearable, and distinctly festive because of how it catches light.
Adding Diamond Details
- Apply two coats of a champagne sparkle polish (the polish itself contains fine shimmer throughout)
- Once fully dry, apply a thin layer of clear top coat to one or two accent nails
- While the top coat is still wet, press flat-back rhinestones or faux diamond nail gems around the cuticle area or creating a simple design
- You can arrange them in a curved line, scattered randomly, or create geometric patterns
- Seal everything with additional top coat, being careful around the gems
Worth knowing: Nail gems stay put best when applied to a fresh layer of top coat and sealed immediately. Give them at least 12 hours before doing dishes or getting them very wet.
8. Forest Green with Holly Leaf Nail Art
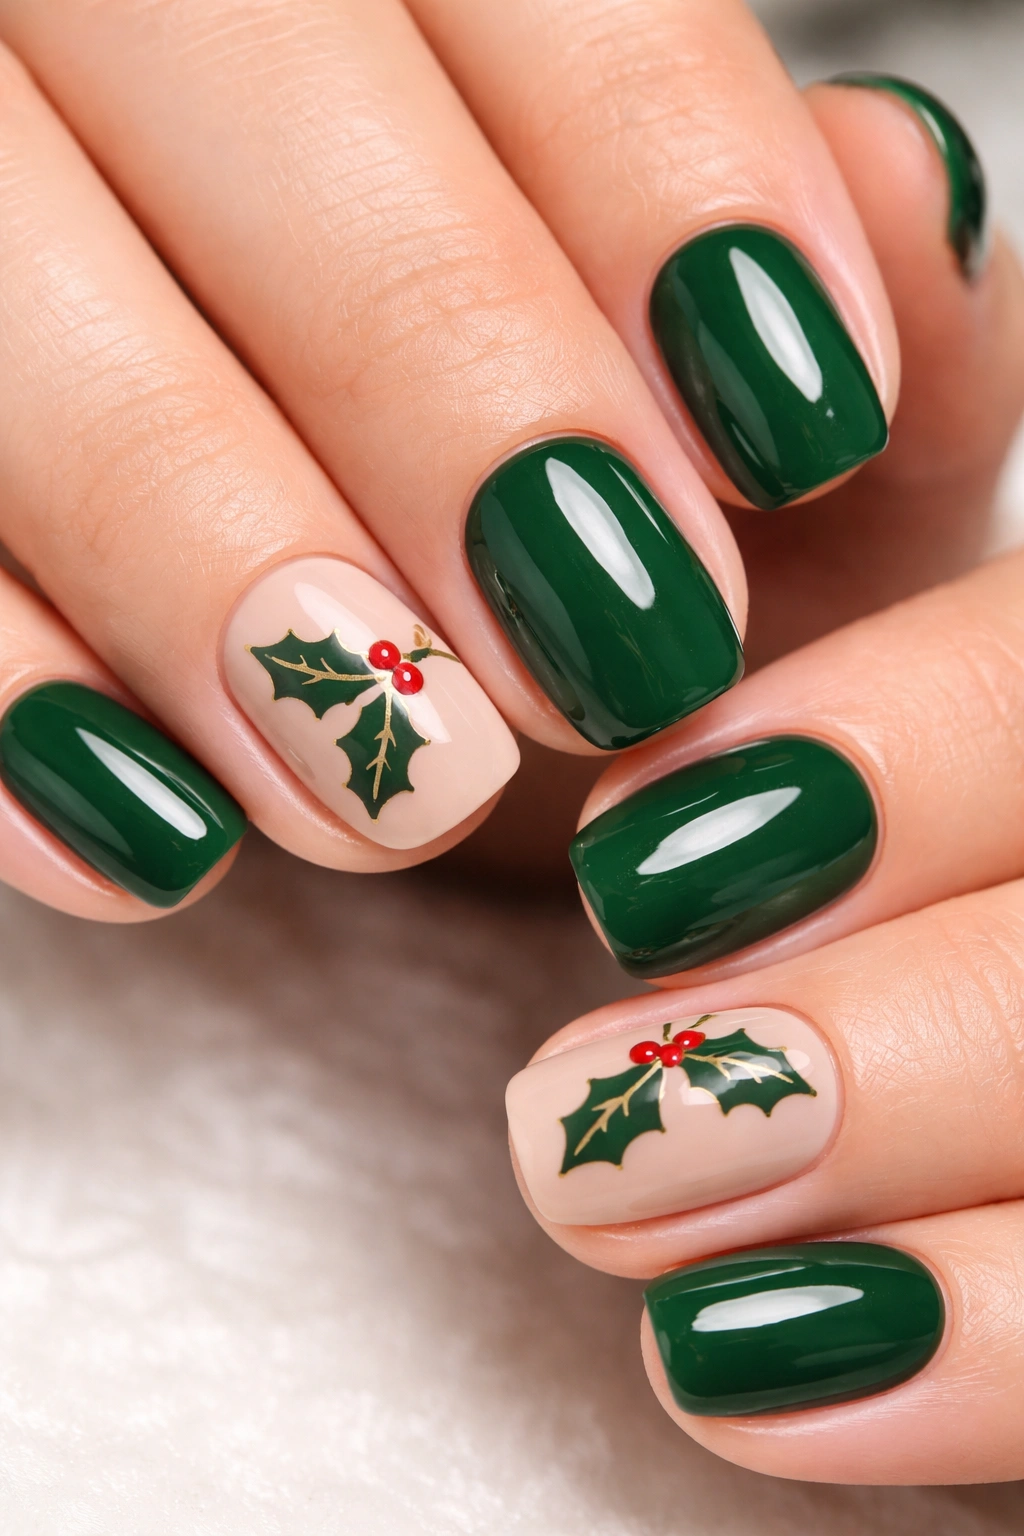
If you want unmistakably festive nails that still look polished and intentional, forest green with holly leaf details is your answer. Holly is a classic holiday symbol that’s immediately recognizable without being overdone, and it translates beautifully into nail art on a rich green base.
Making Holly Leaf Art Feel Modern
The key to keeping this design from feeling kitschy is precision and restraint. Rather than drawing detailed holly leaves on every nail, create subtle details on just one or two accent nails, keeping the others solid. Holly leaves have a distinctly pointed, jagged edge that’s actually easier to draw than you’d think — sharp angles read better than trying to create complex detail.
Rendering Holly Leaves
- Paint two coats of forest green as your base
- On one accent nail, use a thin brush and dark green or black polish to outline holly leaves
- Holly has pointed, spiky edges — draw the outline, then fill it in lightly
- Add tiny red dots nearby to represent holly berries (use red nail polish on the tip of a thin brush or dotting tool)
- Keep details minimal and concentrated on just one or two nails
- Top coat with glossy finish to enhance the depth
Pro tip: Holly leaf designs work beautifully as just outlines without fill-in — the negative space of your base color showing through the lines looks more sophisticated than completely filled leaves.
9. Black with Christmas Tree Outline
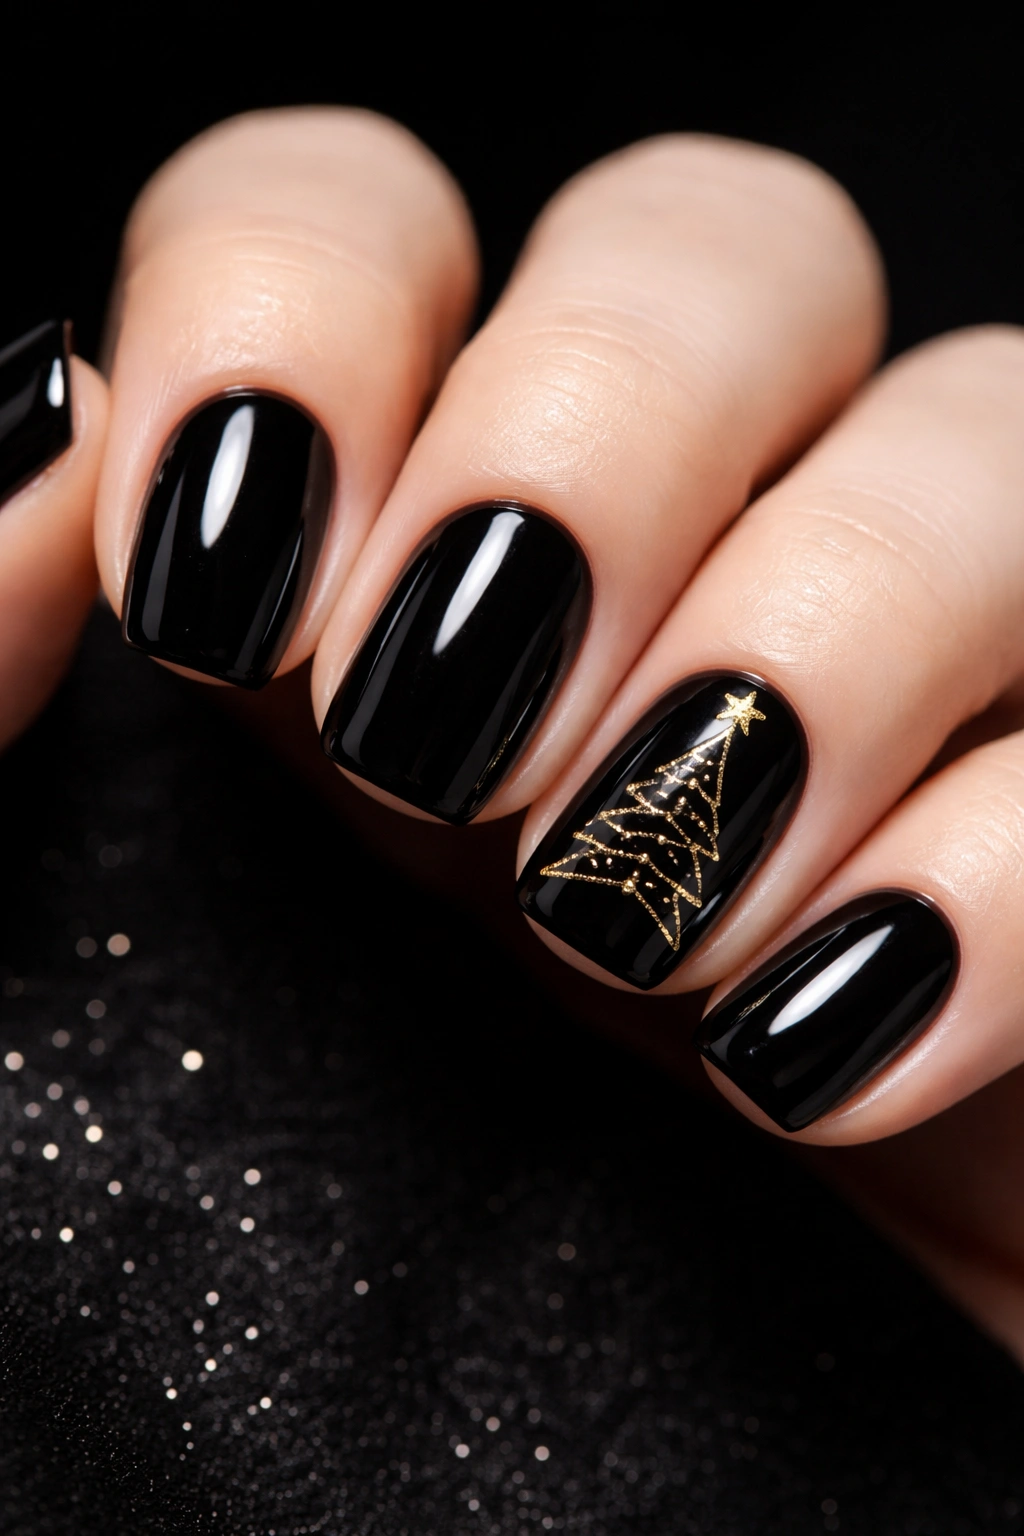
Black nails are the unexpected holiday choice that always turns heads. They read as edgy and modern rather than traditional, which is exactly what makes them feel fresh. A simple Christmas tree outline in gold or silver on a few black nails adds festive meaning without going overboard.
Why Black Works for Holidays
Black is elegant, slimming, and makes any accent color pop. It’s not a color people associate with holidays automatically, which is why it reads as intentional and stylish rather than generic. Black nails also show off accent colors and glitter more dramatically than light colors.
Drawing the Tree
- Paint two coats of a true, rich black (dark gray reads differently than black)
- Using a thin gold or silver nail art brush, draw a simple triangle tree outline on your accent nails
- Start at the top with a point and draw a line down one side and back up and over to create the opposite side
- Add a thin rectangle at the bottom for the trunk
- You can add small star or dot details inside the tree outline if desired
- Seal with a top coat
What to watch for: Black polish can be streaky, so apply thin coats rather than one thick coat. Three thin coats cover more evenly than two thick ones. Make sure the surface is fully dry before applying your next coat to avoid dragging polish around.
10. Rose Gold with Glitter Gradient
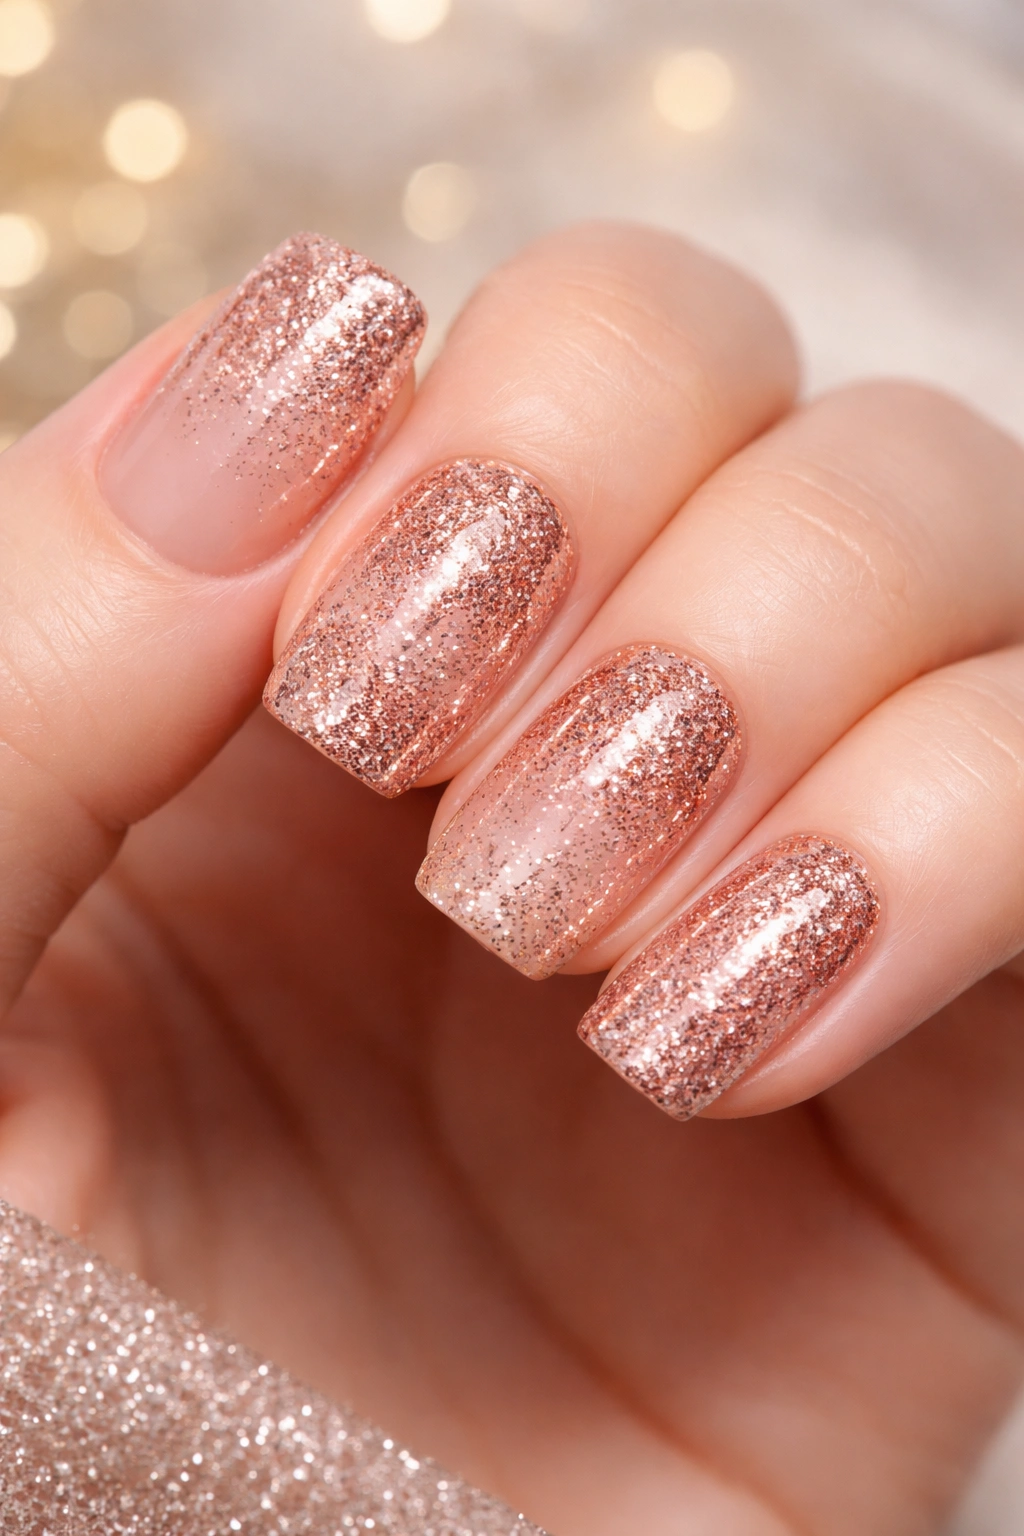
Rose gold is having an extended moment for good reason — it’s warm, luxurious, and flattering on nearly every skin tone. A glitter gradient that builds from subtle at the cuticle to dense at the tip creates dimension and visual interest while keeping the overall effect wearable and elegant.
The Appeal of the Gradient Effect
Gradients immediately read as intentional and professional, even when created at home. Glitter gradients specifically add sparkle that concentrates where you want maximum impact — at the tips, where your nails catch light. The transition from subtle to shimmery feels sophisticated rather than tacky.
Creating a Glitter Gradient
- Apply two coats of rose gold shimmer polish as your base
- Using a makeup sponge, apply a layer of rose gold glitter polish (the kind with actual glitter particles) to the tips only
- Dab it on rather than swipe it on to create a patchy, gradient effect
- Build more glitter density with a second or third dab, creating the transition from solid color to dense glitter at the tips
- Once you’re happy with the gradient, seal everything with a glossy top coat
Quick fact: Sponges work better than brushes for creating gradients because you can control exactly where the polish is applied. Let the sponge do the work — just dab it gently.
11. Silver with Snowflake Patterns
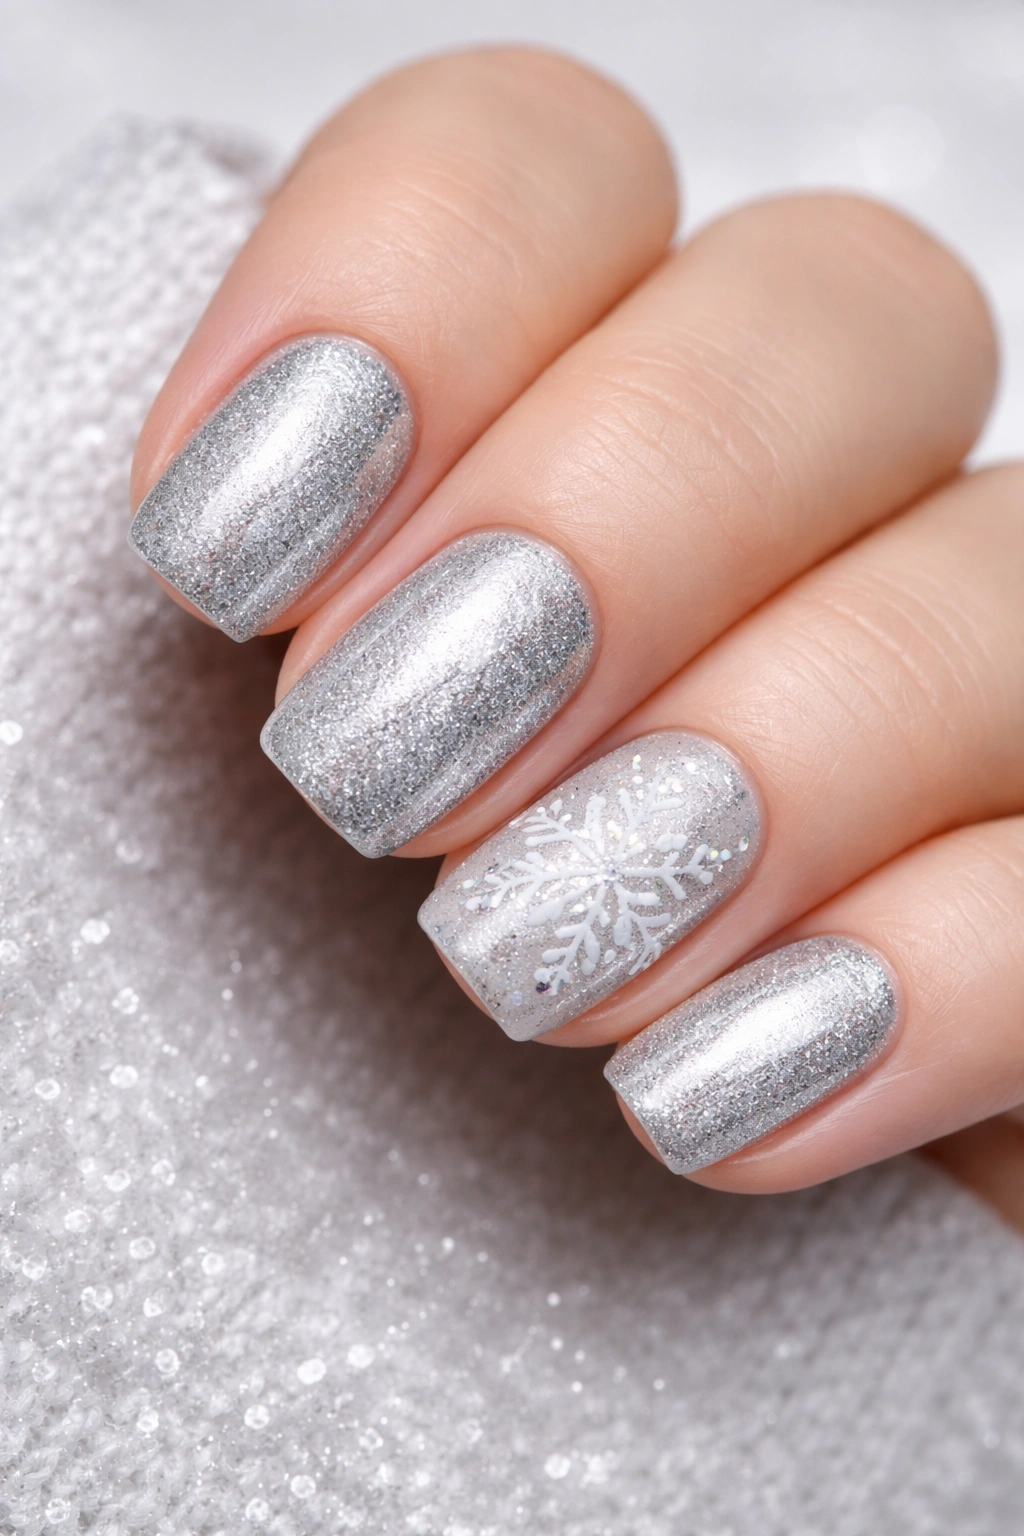
Silver is the pure essence of winter, and snowflake patterns are the obvious pairing that somehow never gets old. The key to keeping this design from feeling overdone is precision in the snowflakes — small, detailed, intentional rather than large and cartoony.
Making Snowflakes Feel Elevated
Snowflakes are a classic holiday motif, but when rendered with fine detail and careful spacing, they read as nail art rather than decoration. The difference is in the execution — tiny snowflakes with delicate detail on a clean silver base look sophisticated, while large, chunky snowflakes read as more playful and less refined.
Painting Fine Snowflakes
- Apply two coats of a bright, true silver polish
- Using a thin nail art brush and white or light blue polish, create small, intricate snowflakes on a few accent nails
- Start with a central point and create six rays extending outward (not four or eight — six is the authentic snowflake structure)
- Add tiny branches off each ray, creating a feathery, delicate effect
- Keep snowflakes small and spaced apart so they don’t overwhelm the nail
- Seal with a matte top coat for a more winter-like, frosty appearance
Pro tip: Reference actual snowflake photos before you start painting — there’s enough natural variety in snowflake structures that your designs will look more authentic if you base them on real patterns.
12. Crimson with White Polka Dots
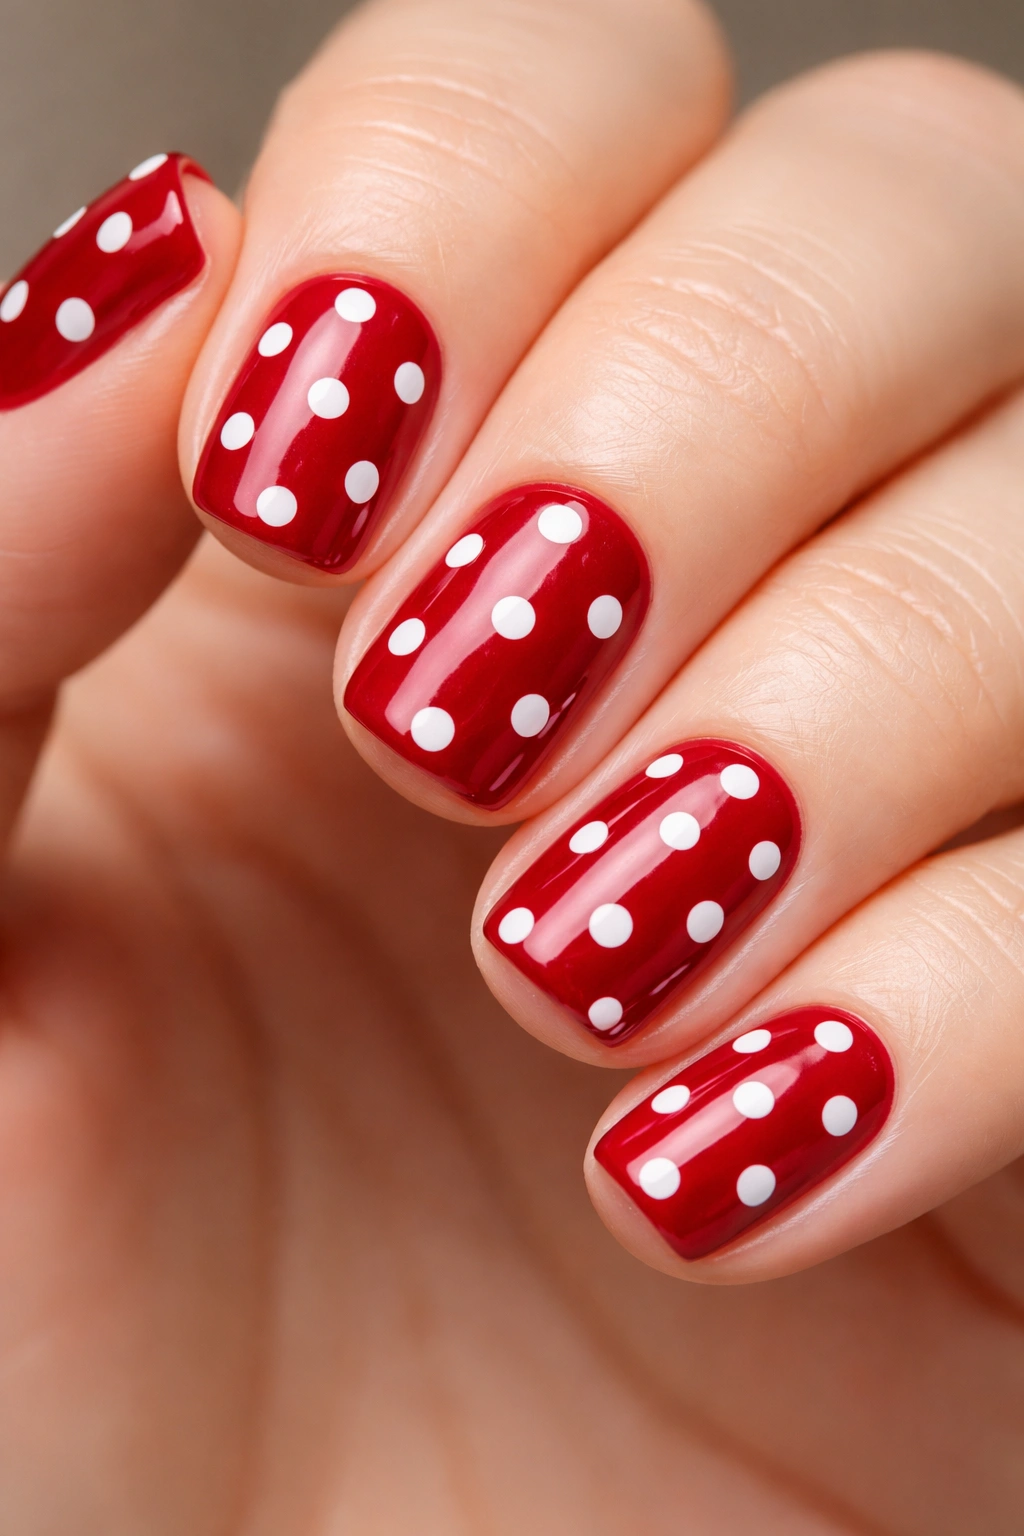
Crimson is deeper and richer than bright red, giving this design a more sophisticated, less generic red-nails feel. White polka dots add playfulness and visual interest without requiring advanced nail art skills — they’re just dots, but dots scattered across a rich base read as intentional design.
Why Polka Dots Work
Polka dots feel vintage, cheerful, and intentional. When scaled properly (not too large, not too tiny) on a rich base color like crimson, they feel modern and stylish rather than retro or kitschy. White on crimson creates crisp, clean contrast that reads polished.
Applying Polka Dots
- Paint two coats of a true crimson (deep red with slightly cool undertones, not orange-leaning red)
- Using a dotting tool or the end of a thin brush dipped in white polish, create dots scattered across all your nails
- Vary the spacing so the dots look organic rather than perfectly geometric
- Vary the size slightly — some larger, some smaller — for visual interest
- Don’t dot every possible space; leave plenty of crimson visible
- Seal with a glossy top coat
Worth knowing: Dotting tools come in multiple sizes. If you’re creating this design, have at least two sizes on hand so you can vary your dot sizes without hunting for a tool in between.
13. Teal with Gold Matte Accents
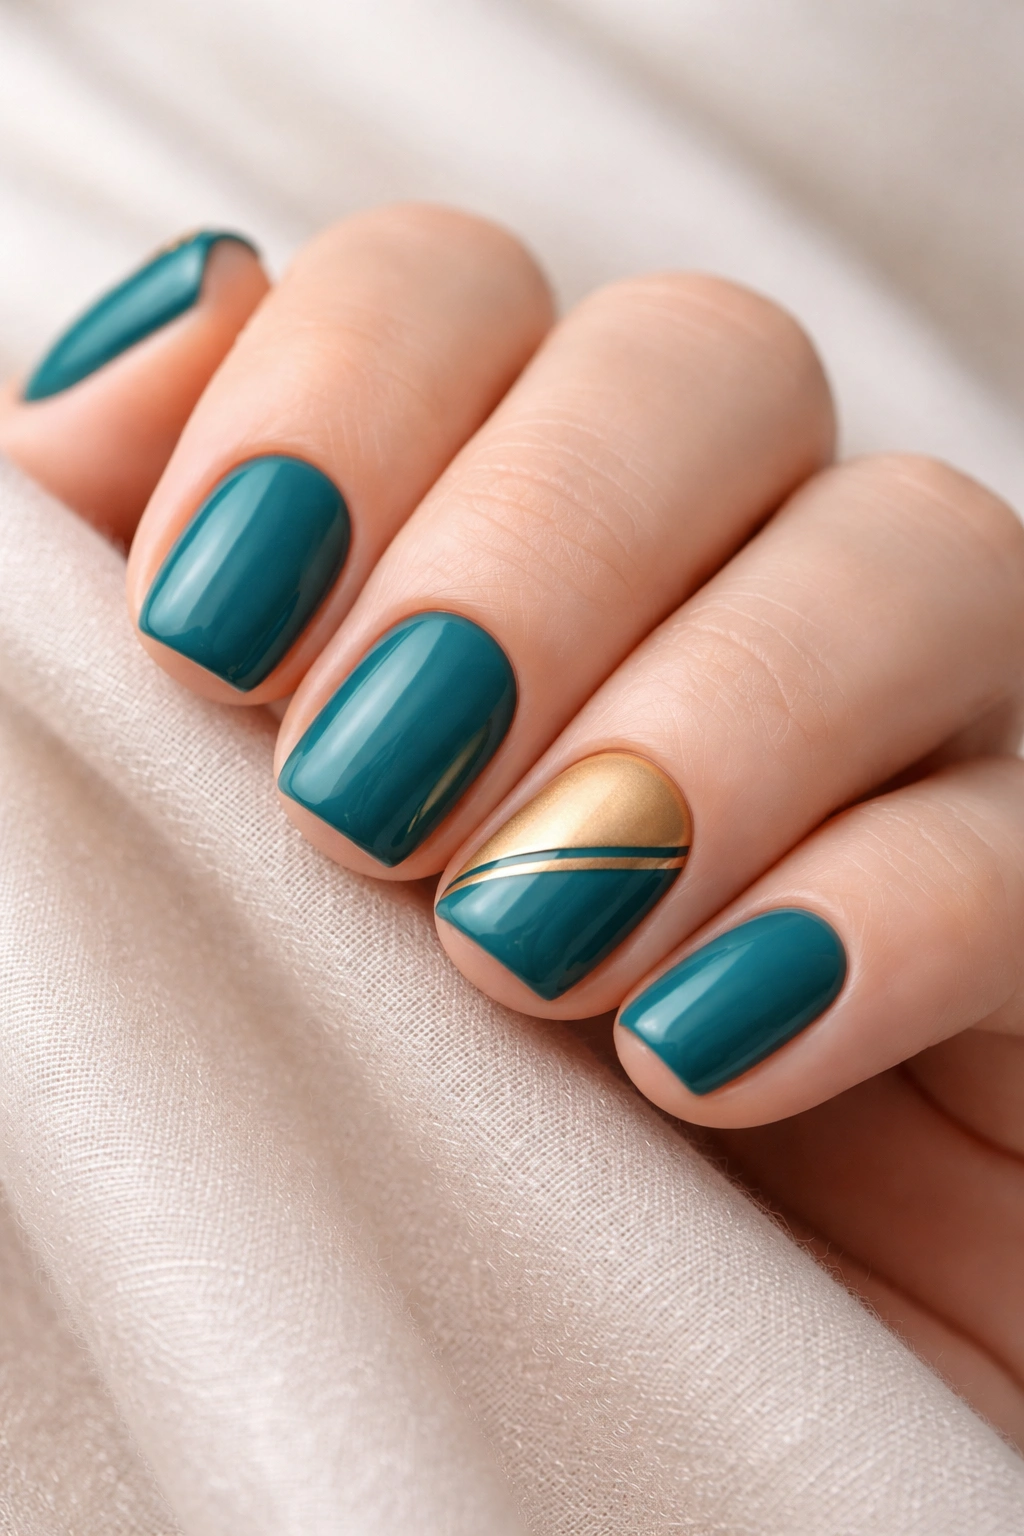
Teal is the perfect compromise between green and blue — it reads as festive without being obvious red-or-green, and it’s sophisticated enough to wear throughout the season. Matte gold accents add modern polish and prevent the design from feeling too precious or overly detailed.
The Modern Matte Approach
Matte finishes are having a moment, and for good reason — they read as intentional and fashion-forward. Matte against glossy creates textural interest and depth. Matte gold specifically has a sophisticated, almost metallic-without-shine quality that feels more elevated than glossy gold.
Incorporating Matte Gold Details
- Apply two coats of a bright, true teal polish in a glossy finish
- Using a matte gold polish or a gold polish sealed with matte top coat, create accent details on one or two nails
- Geometric lines, a simple border, or scattered rectangles all work beautifully
- Keep the design minimal — too much matte against the glossy teal becomes visually competing
- Apply matte top coat only to the gold areas you want to be matte; leave the rest glossy
- Or, apply matte top coat to your entire nail for a cohesive matte-glossy combination
Quick fact: You can create matte details without matte polish by using regular polish and applying matte top coat only over those areas. This gives you flexibility to adjust the look before committing.
14. Blush Pink with Mistletoe Design
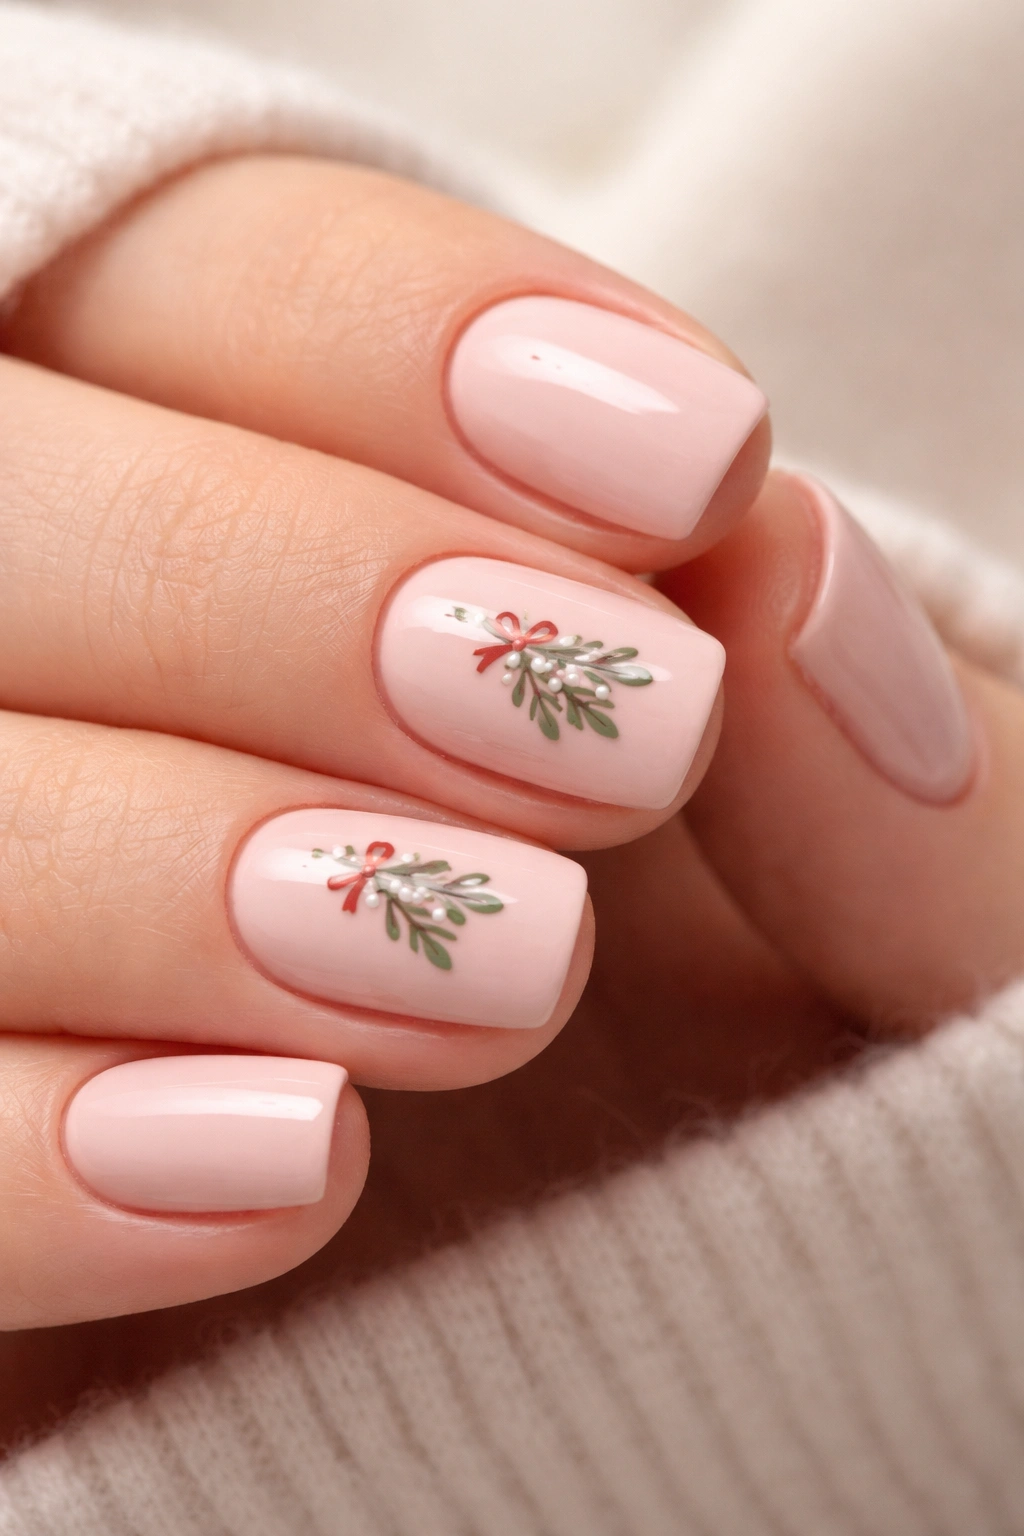
Blush pink is unexpected for holidays, which is exactly why it works so beautifully. It’s delicate and feminine without being saccharine, and it provides a soft backdrop for mistletoe design details. This approach is perfect for anyone who finds traditional holiday colors too bold or overdone.
Making Mistletoe Graphic
Mistletoe is visually distinct — small rounded leaves and delicate berries create a recognizable shape that reads instantly as festive without being heavy-handed. The botanical nature of mistletoe feels elegant and organic, especially against a soft blush base.
Rendering Mistletoe
- Paint two coats of a soft blush pink (warm, not too cool-toned)
- Using a thin green nail art brush, create tiny mistletoe branch details on one or two accent nails
- Mistletoe has small, rounded leaves — simple curved shapes work perfectly
- Add tiny red or pearl dots near the leaves to represent berries
- Keep the design small and concentrated on just one or two nails
- Seal with a glossy top coat to enhance the delicate effect
Pro tip: If freehand mistletoe feels too detailed, nail stickers of mistletoe designs exist and work beautifully on this base color.
15. Metallic Mix with Ombre Effect
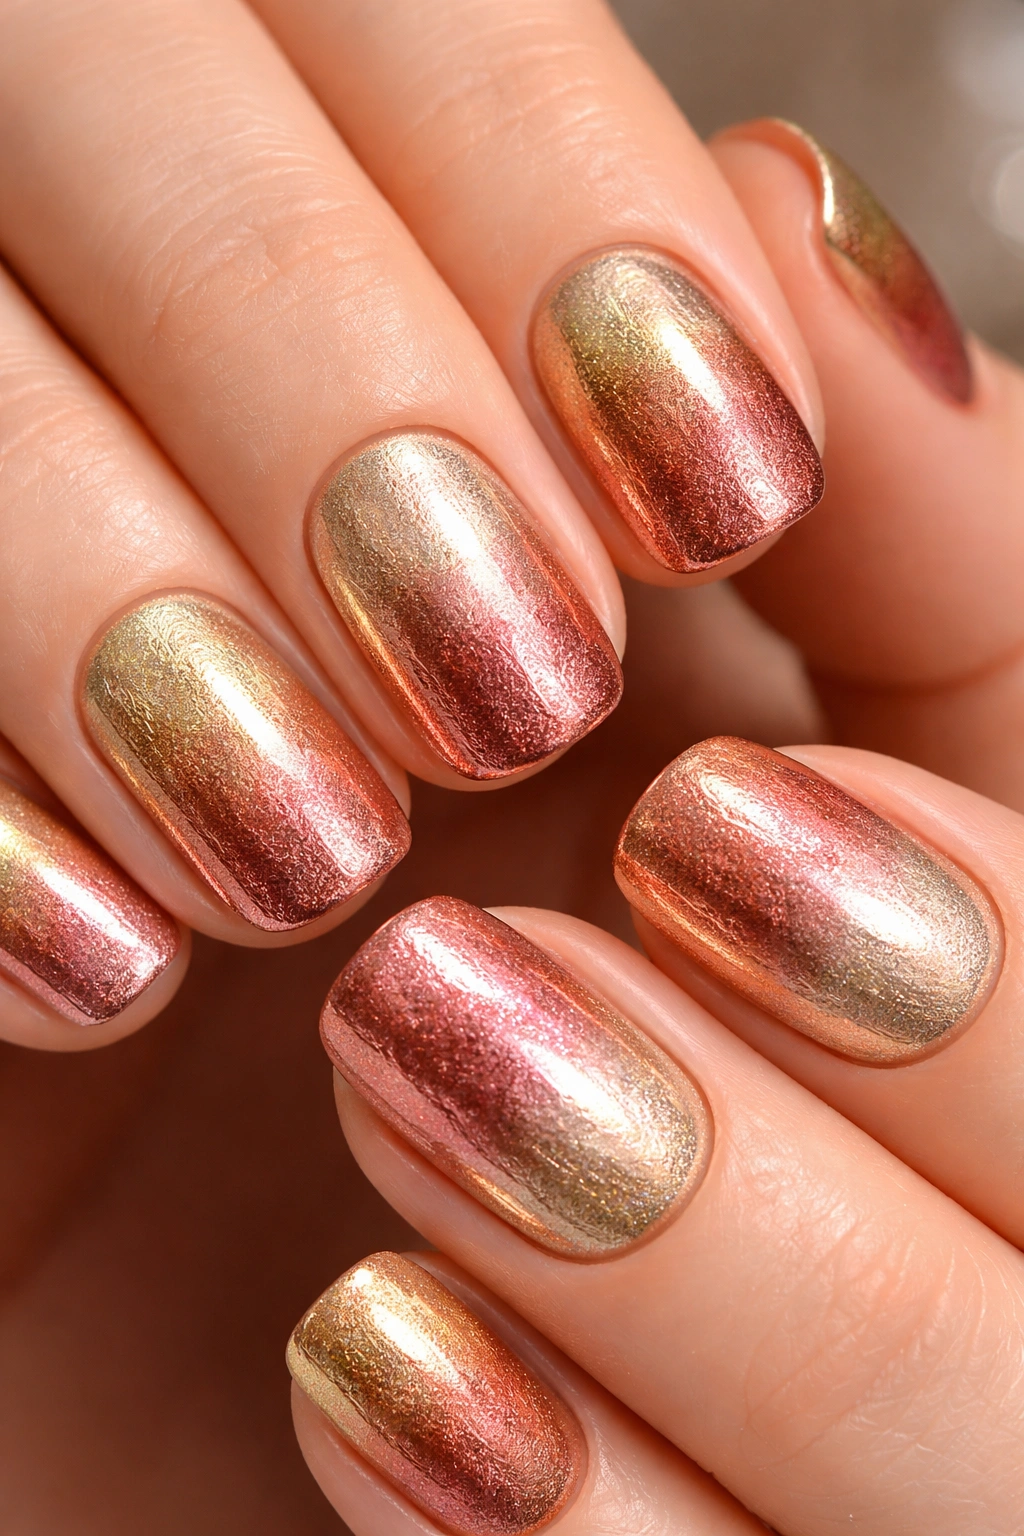
For anyone who wants maximum impact and sparkle without overthinking the design, metallic ombre is the answer. This design uses multiple metallic tones that transition and blend, creating depth and luxe factor that reads immediately as special occasion appropriate.
Why Metallics Together Work
You might think mixing metallics would look chaotic, but when they’re in the same family — gold to rose gold to copper, or silver to champagne to pearl — they create visual harmony. The ombre transition makes the effect feel intentional and sophisticated rather than random.
Building Your Metallic Ombre
- Choose three metallics in a complementary family (gold, rose gold, and copper OR silver, champagne, and pearl)
- Paint your entire nail in the lightest metallic as a base coat
- Using a makeup sponge, apply the medium metallic to the upper half of your nail and dab gently to blend
- Apply the darkest metallic to just the tips, dabbing to create a gradual transition
- The sponge creates soft blending; the more you dab, the more the colors blend together
- Build opacity with multiple layers if needed
- Seal with a glossy top coat to enhance the metallic shine
Quick fact: The order matters — always go from light to dark when applying ombre, building darkness as you move toward the tips.
Tips for Making Holiday Nails Last Longer
Once you’ve created your festive manicure, you want it to last through the season. Holiday schedules are hectic, and you don’t want to be redoing nails mid-season. A few strategic habits make a real difference in manicure longevity.
Always apply a base coat before polish — this is non-negotiable. It protects your nails from staining and gives polish something to grip. Even if you’re in a rush, don’t skip it. Your manicure will last visibly longer, and your nails will thank you by not turning an unfortunate color after the polish comes off.
Wear gloves when doing dishes, cleaning, or handling anything wet for extended periods. Repeated water exposure is the primary culprit behind chipping polish. Wet nails swell slightly, and as they dry, they shrink, creating stress on the polish edges. Gloves are genuinely the easiest prevention method available.
Apply a fresh layer of glossy top coat every two or three days to protect your design and refresh shine. Top coat seals everything and prevents chipping at the edges. It only takes 60 seconds and dramatically extends mani lifespan.
Be intentional about how you use your hands — nail polish is more durable than people realize, but it’s still not indestructible. Open cans with a can opener instead of your nails. Use a tool to pry things open rather than your nail tips. Small shifts in how you interact with the world make a measurable difference in how long your manicure survives.
Keep your nails moisturized with cuticle oil or hand cream throughout the season. Dry nails are brittle nails, and brittle nails break and crack more easily. Holiday weather is dry, so consistent hydration is genuinely important for maintaining both your manicure and your nail health.
Final Thoughts
Short squoval nails give you the best of both worlds — enough length and surface area to showcase genuinely beautiful holiday designs, with the practicality of keeping your nails short enough to handle a busy season without stress or constant maintenance. Whether you gravitate toward classic red with gold leaf, sophisticated emerald green with snowflakes, or unexpected options like black with Christmas trees, the designs above offer something for every style and skill level.
The holidays are the perfect time to experiment with colors and designs you might hesitate to wear year-round. This is your permission to go bold with that deep plum, try out rose gold if you usually wear neutrals, or lean into pure silver sparkle without apology. Your manicure should match your mood and your celebration, and there’s no time of year when that matters more than the holidays.
The most important part isn’t the specific design you choose — it’s picking something that genuinely makes you happy every time you look at your hands. Whether that’s a statement red, a jewel-toned green, a sophisticated neutral with sparkle, or something unexpected, commit to it fully. Confidence is the best accessory, and it shows in how you wear your nails.
