

A celestial manicure can look expensive or cheap in about two seconds, and the difference usually has less to do with the stars than with the shape underneath them. Star coffin nails work because the tapered sidewalls and squared-off tip give the artwork a long, clean frame. You get room for detail without the design turning crowded, and the shape already has that slightly dramatic edge a night-sky theme needs.
Most people know when they want a star manicure. They do not always know why some versions look polished while others feel like sticker overload. Tiny things change the whole mood: whether the stars sit near the tip or the cuticle, whether the base is jelly or opaque, whether the shine comes from chrome powder, magnetic gel, or plain top coat.
Placement matters more than people think. On a coffin nail, a star dead center can flatten the look, while a star nudged toward one side makes the nail feel longer — and, honestly, more intentional. The same goes for scale. A 1 mm silver star can look crisp and sharp. A bulky sequin on a short coffin set can start lifting at the edges by day three.
That’s where the fun starts, because once the shape, finish, and spacing make sense, you can take the celestial theme in fifteen completely different directions.
Why Star Coffin Nails Work So Well on a Tapered Shape
The coffin silhouette does half the styling for you. That narrowing from the cuticle toward the tip creates a built-in sense of movement, which is why star coffin nails tend to look more refined than the same art on a blunt square or a short round nail. The shape gives stars somewhere to “travel,” whether you want a scattered constellation, a tip-heavy design, or a single bright accent.
Length changes the effect. A medium coffin shape — roughly 10 to 14 mm past the fingertip — gives enough space for two visual zones, which is useful if you want a base color plus starbursts, foil, or a shooting-star trail. Extra-long coffin nails create even more room, though they can tip into costume if every nail has the same busy pattern.
A few design rules keep the look sharp:
- Micro stars read cleaner than oversized ones on most sets, especially if you want all ten nails done.
- One focal nail per hand often looks better than five matching statement nails.
- Tapered tips favor diagonal placement, not centered placement, because diagonals echo the shape.
- Flat decals or painted stars last longer than chunky sequins unless the set is encapsulated in acrylic or hard gel.
And one opinion, because I do have one: if the stars are large enough to cover half the nail, the coffin shape stops doing its job. You lose the elegant line and end up with a themed press-on look.
Base Colors That Make Star Coffin Nails Stand Out
Color is where celestial nails either get moody and chic or drift into craft-project territory. Star coffin nails need contrast, but not always the loud kind. The base has to hold its own before the first star goes down.
Dark shades that make metallic stars pop
Navy, black, charcoal, deep plum, and burgundy are the easiest way in. Metallic silver and gold sit on top of those shades with crisp edges, and magnetic or shimmer formulas add movement without extra line work. Black is the hardest hitter. Navy is softer. Plum has more depth than people expect.
Sheer neutrals that keep the look light
Milky nude, pink-beige, soft gray, and translucent rose builder gel make stars feel airy instead of heavy. These bases are useful if you want your manicure to work with office clothes, formalwear, or a lot of jewelry. White stars, thin silver constellations, and negative-space details look strong here.
Reflective finishes that do the heavy lifting
Chrome, pearl powder, cat-eye gel, and fine holographic dust can replace half the art. That matters. If the base already shifts when you move your hand, you need fewer stars to sell the idea. A magnetic black with one gold star often looks more polished than a plain black base covered with ten decals.
The nicest sets usually balance one bold element with one restrained one. Shiny base, spare art. Matte base, glossy star outlines. Sheer base, one metallic accent. That tension is where the manicure starts to feel edited instead of piled on.
How to Ask for Star Coffin Nails at the Salon
Walk in saying “I want celestial nails” and you might leave with moons, clouds, rhinestones, glitter, and three things you never asked for. Bring a tighter description.
Use this checklist when you talk to your nail tech:
- Shape: medium coffin, long coffin, or extra-long coffin.
- Base finish: opaque cream, jelly, chrome, magnetic, matte, or pearl.
- Star type: hand-painted starbursts, decals, sequins, foil stars, or crystals.
- Density: one accent nail, scattered stars on every nail, or heavy art on two fingers only.
- Metal tone: silver, gold, bronze, iridescent, or mixed metals.
- Structure: natural nails with gel polish, builder gel overlay, hard gel extensions, or acrylic.
Bring two or three reference photos, not ten. One photo for shape, one for color, one for art placement works better than a giant camera roll dump. Nail techs can combine references fast when the brief is clean.
A small warning here. If you want encapsulated stars, charms, or chunky glitter, say that before the service starts. Those details change the build of the nail, the thickness of the product, and how long the appointment takes. Regular gel polish on a thin natural nail is not the place for a raised 3D star.
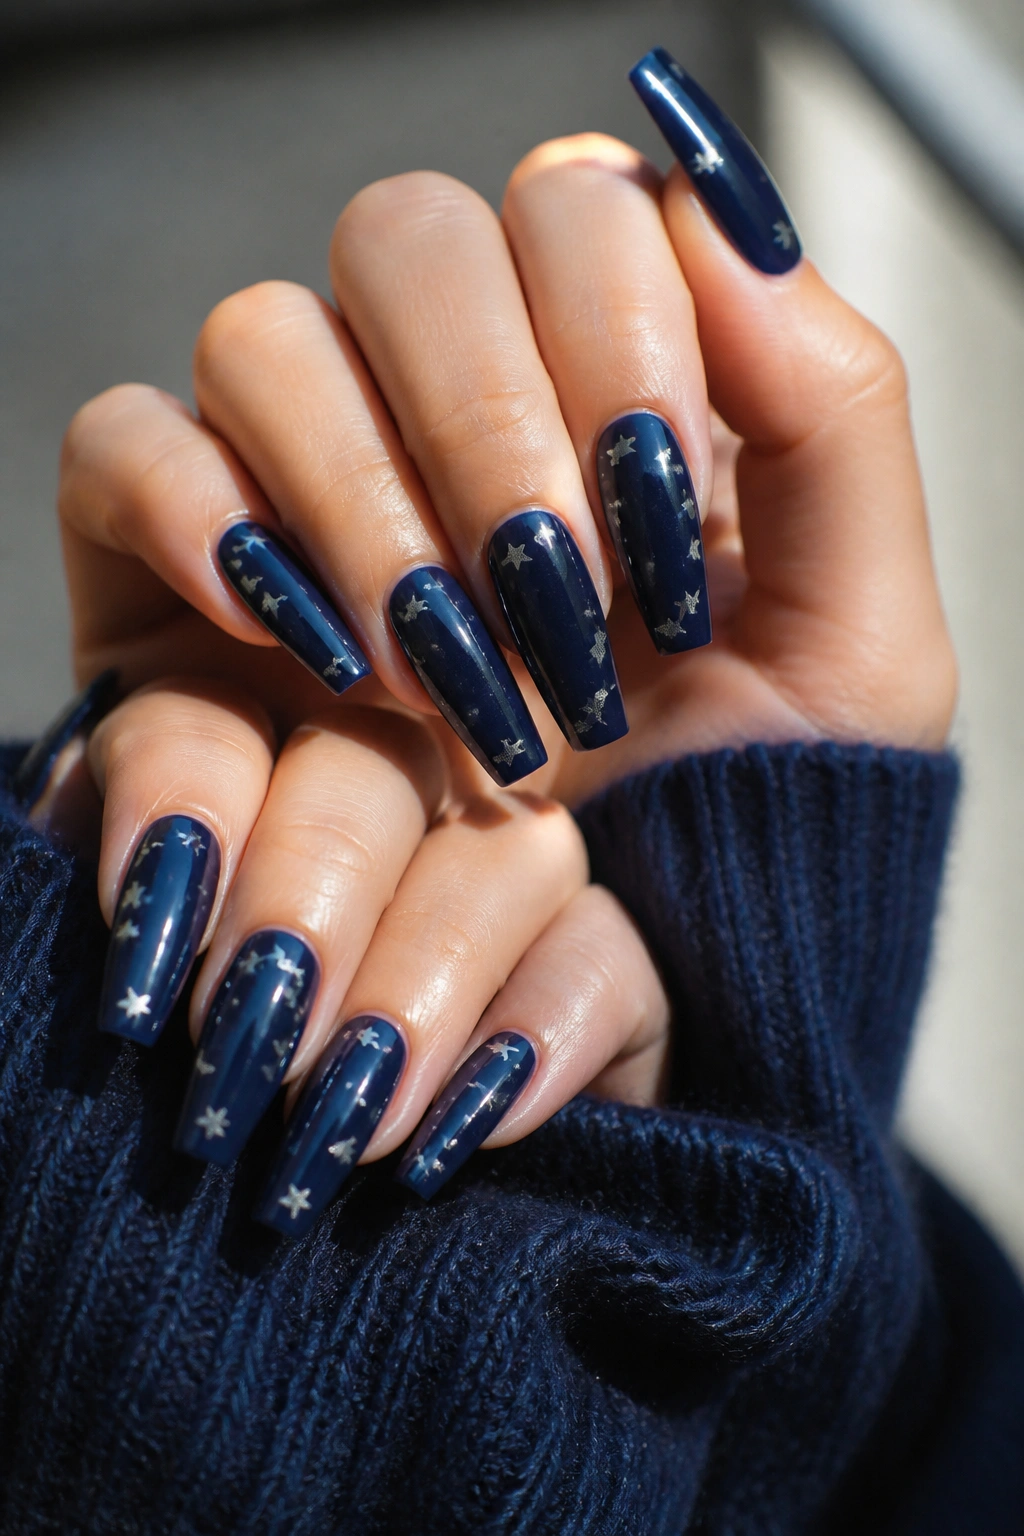
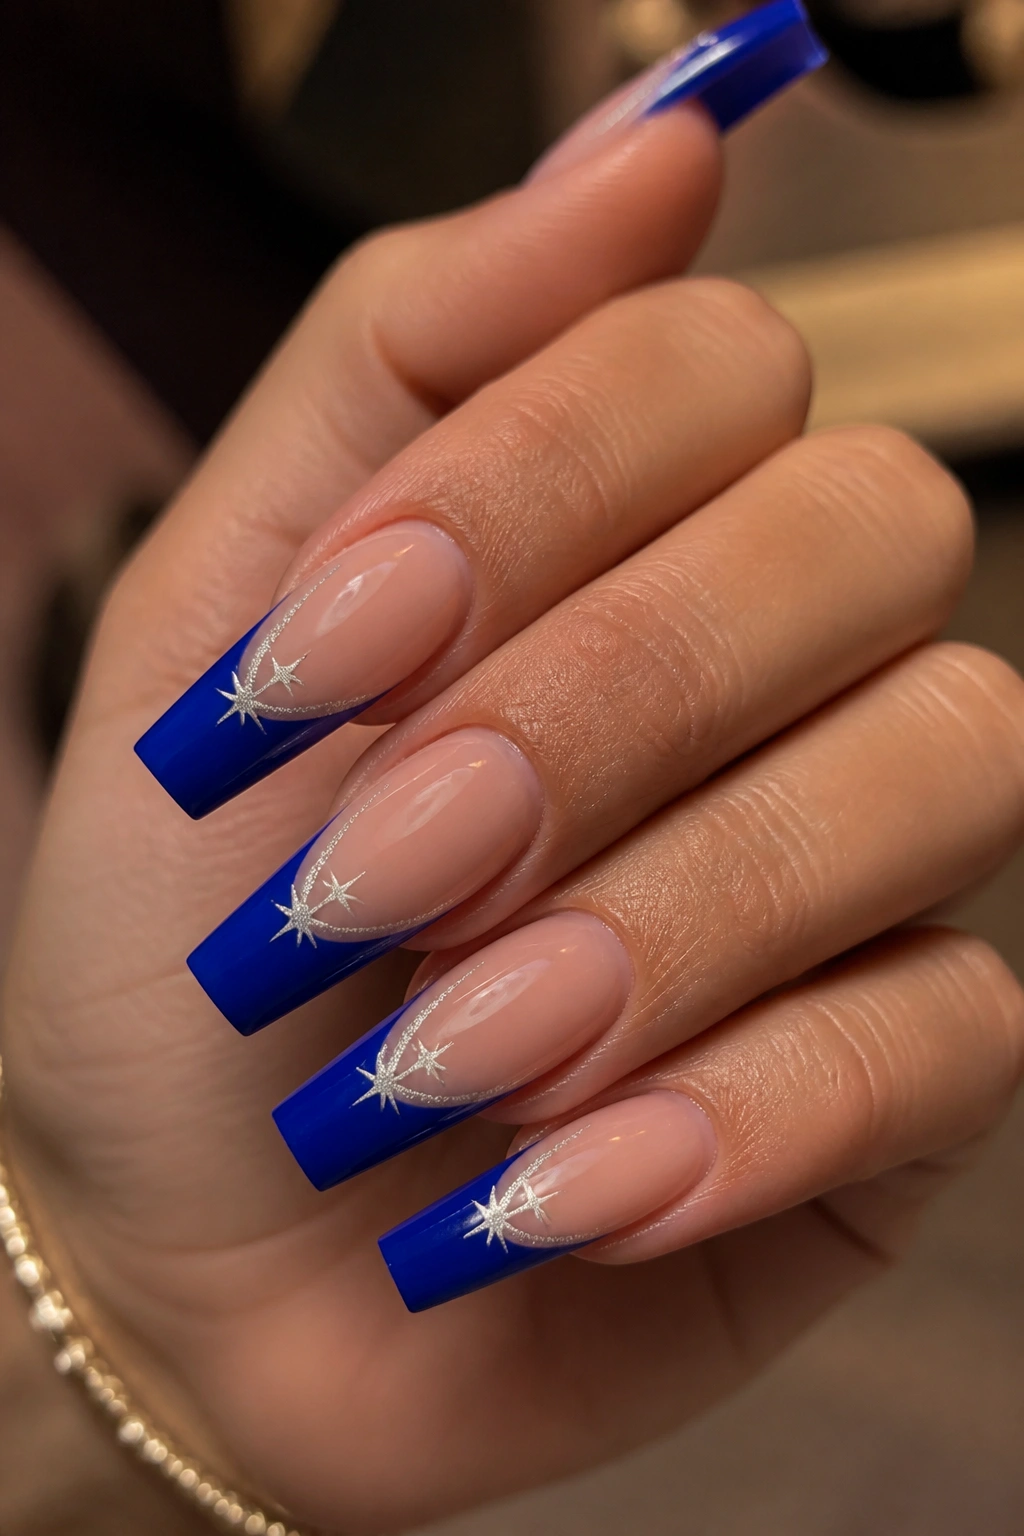
1. Midnight Navy with Pinpoint Silver Stars
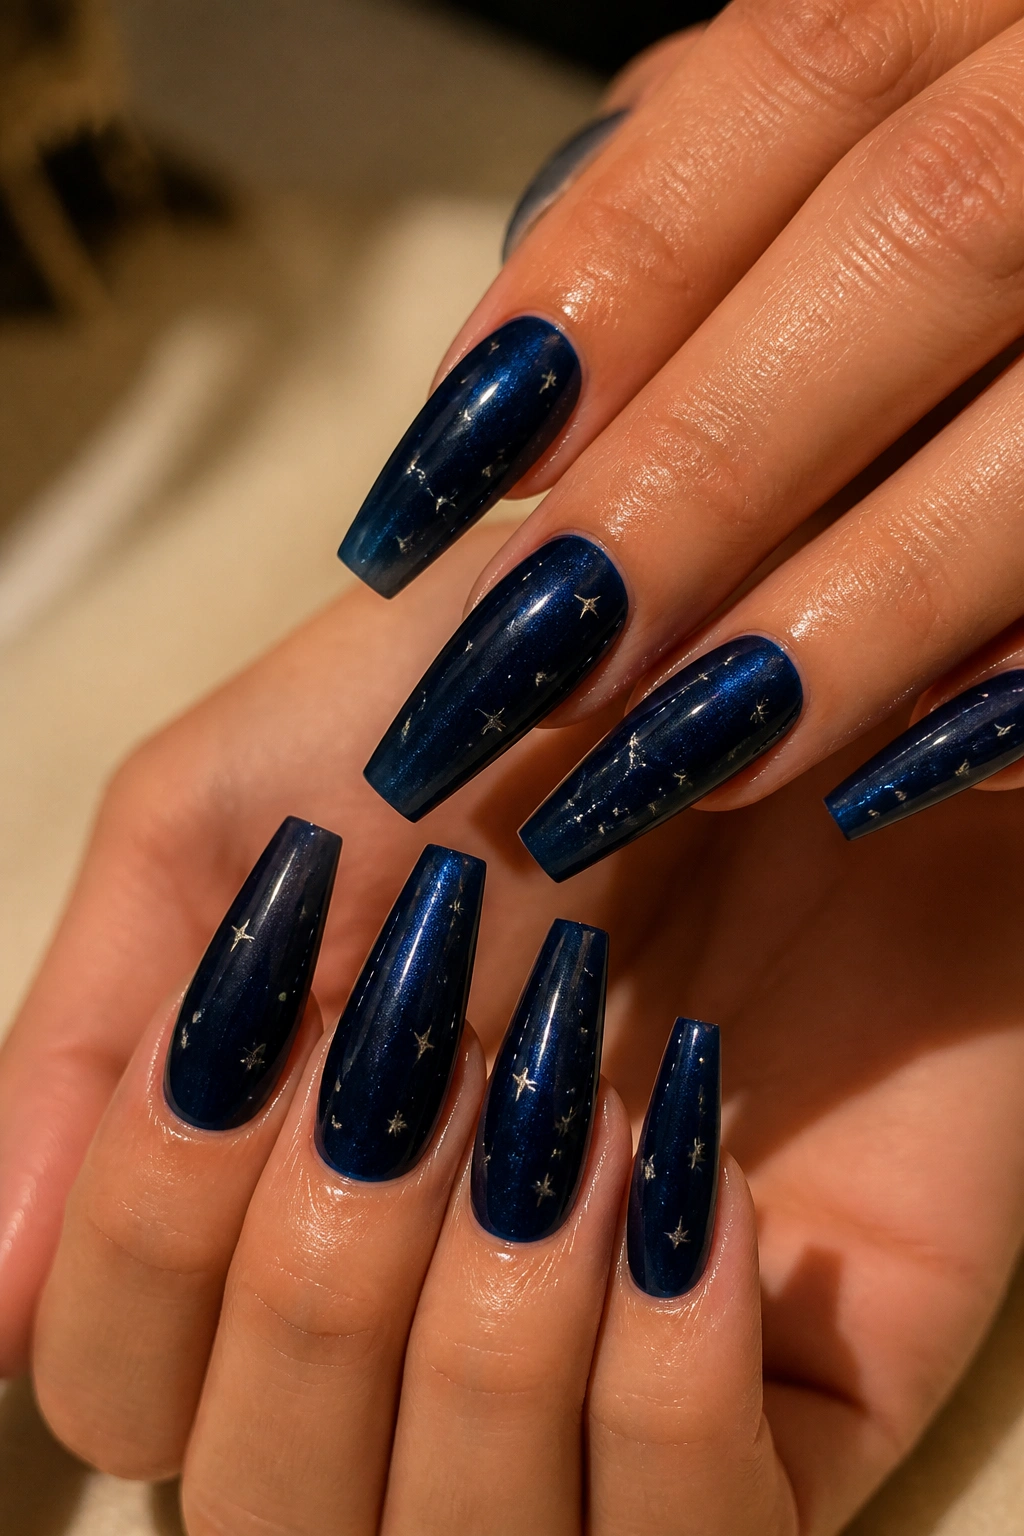
Navy is the smartest starting point if black feels a little too blunt for you. It still gives that night-sky depth, but the blue undertone softens the mood and makes silver stars look sharper, not harsh. On a coffin shape, that contrast feels sleek without pushing into gothic territory.
Where this design gets its edge
The trick is scale. Ask for a deep navy gel base — not royal blue, not shimmer-heavy sapphire — then add tiny silver stars no larger than 1 to 2 mm. A few dots of silver glitter or chrome pigment near the sidewalls can mimic distant light without turning the whole set sparkly.
This one looks best when the stars are unevenly placed. One near a cuticle, two near a tip, one floating off to the side. Symmetry can make celestial art feel stiff.
- Best length: medium to long coffin.
- Best finish: glossy top coat with a glassy surface.
- Best accent detail: one nail with a mini constellation line in silver.
- Watch for: glitter overload, which can muddy the navy.
If you want a celestial manicure that still works with dark knitwear, tailoring, or a black coat, start here.
2. Milky Nude Ombre with Tiny White Constellations
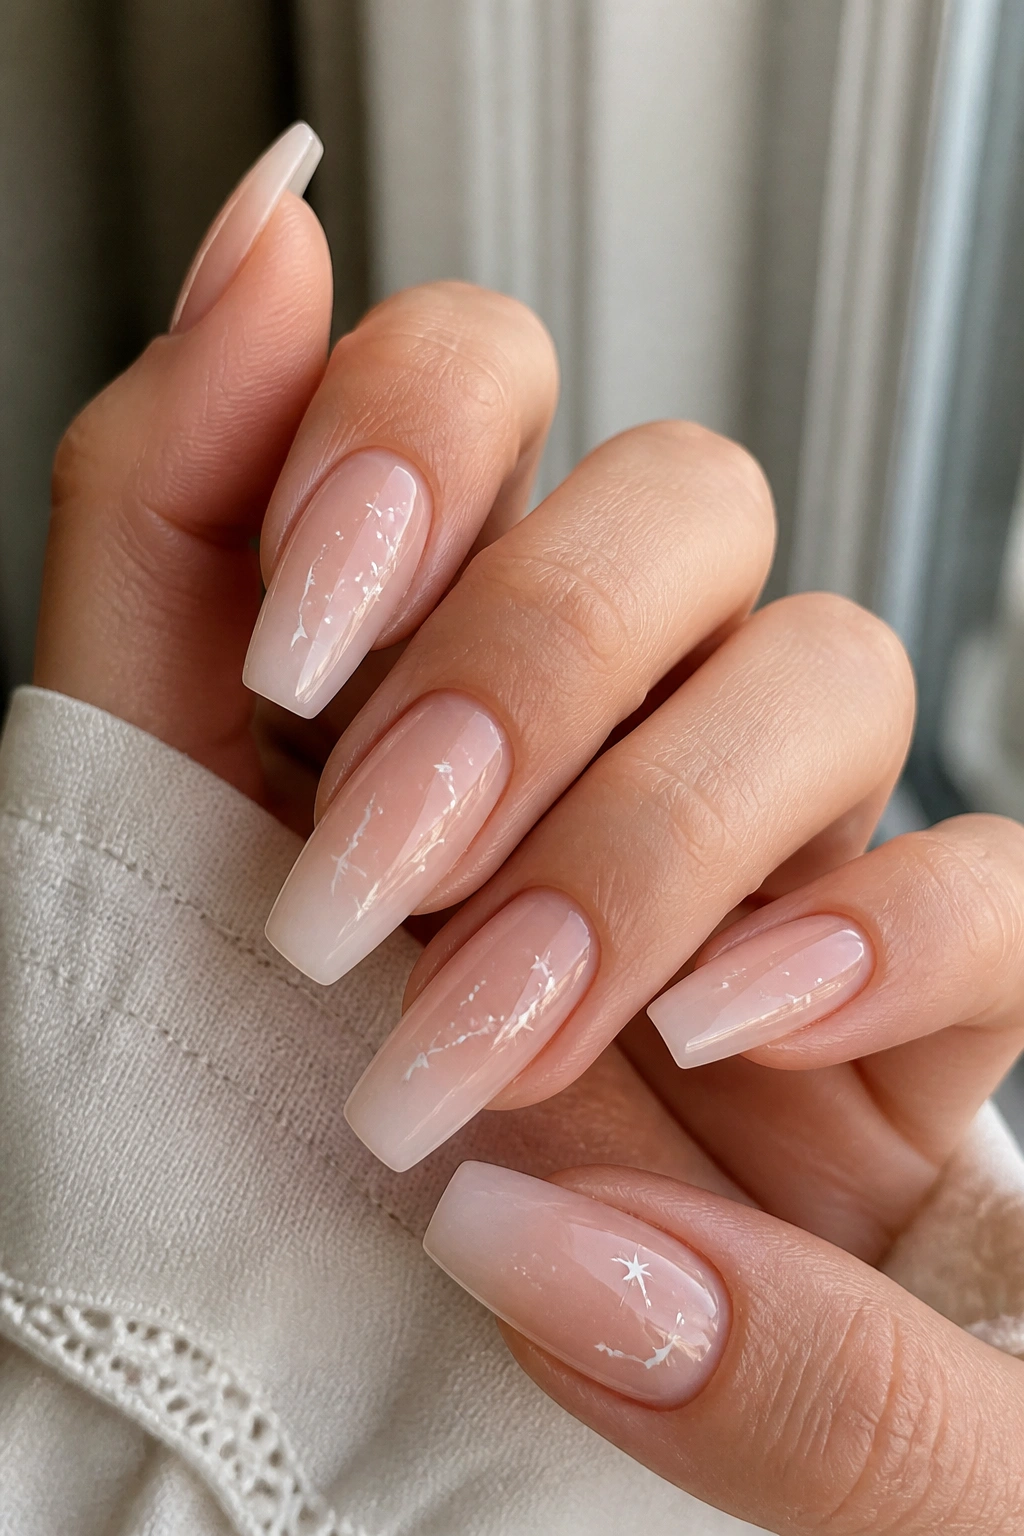
This is the low-drama version of star nails, and I mean that as praise. A milky nude ombre fades the color from soft pink-beige near the cuticle into a slightly whiter tip, which gives the nail a cloudy, almost backlit look. White stars on top feel clean and airy instead of flashy.
The art should stay fine. Think thin liner-brush constellations, miniature four-point stars, and a dot or two placed like distant lights. Heavy silver glitter ruins the point. The beauty of this set is that it whispers a little.
It also grows out well. Because the base stays close to your natural nail tone, the gap near the cuticle is less obvious after a week or two. That matters if you love nail art but do not love salon maintenance every ten days.
I like this look most on medium coffin nails with a soft apex, especially when the stars appear on six or seven nails rather than all ten. It suits someone who wants the celestial theme without feeling dressed for a costume party. White gel paint, a sheer milky base, and a crisp glossy top coat are enough. No charms. No chunky glitter. Let the restraint do the work.
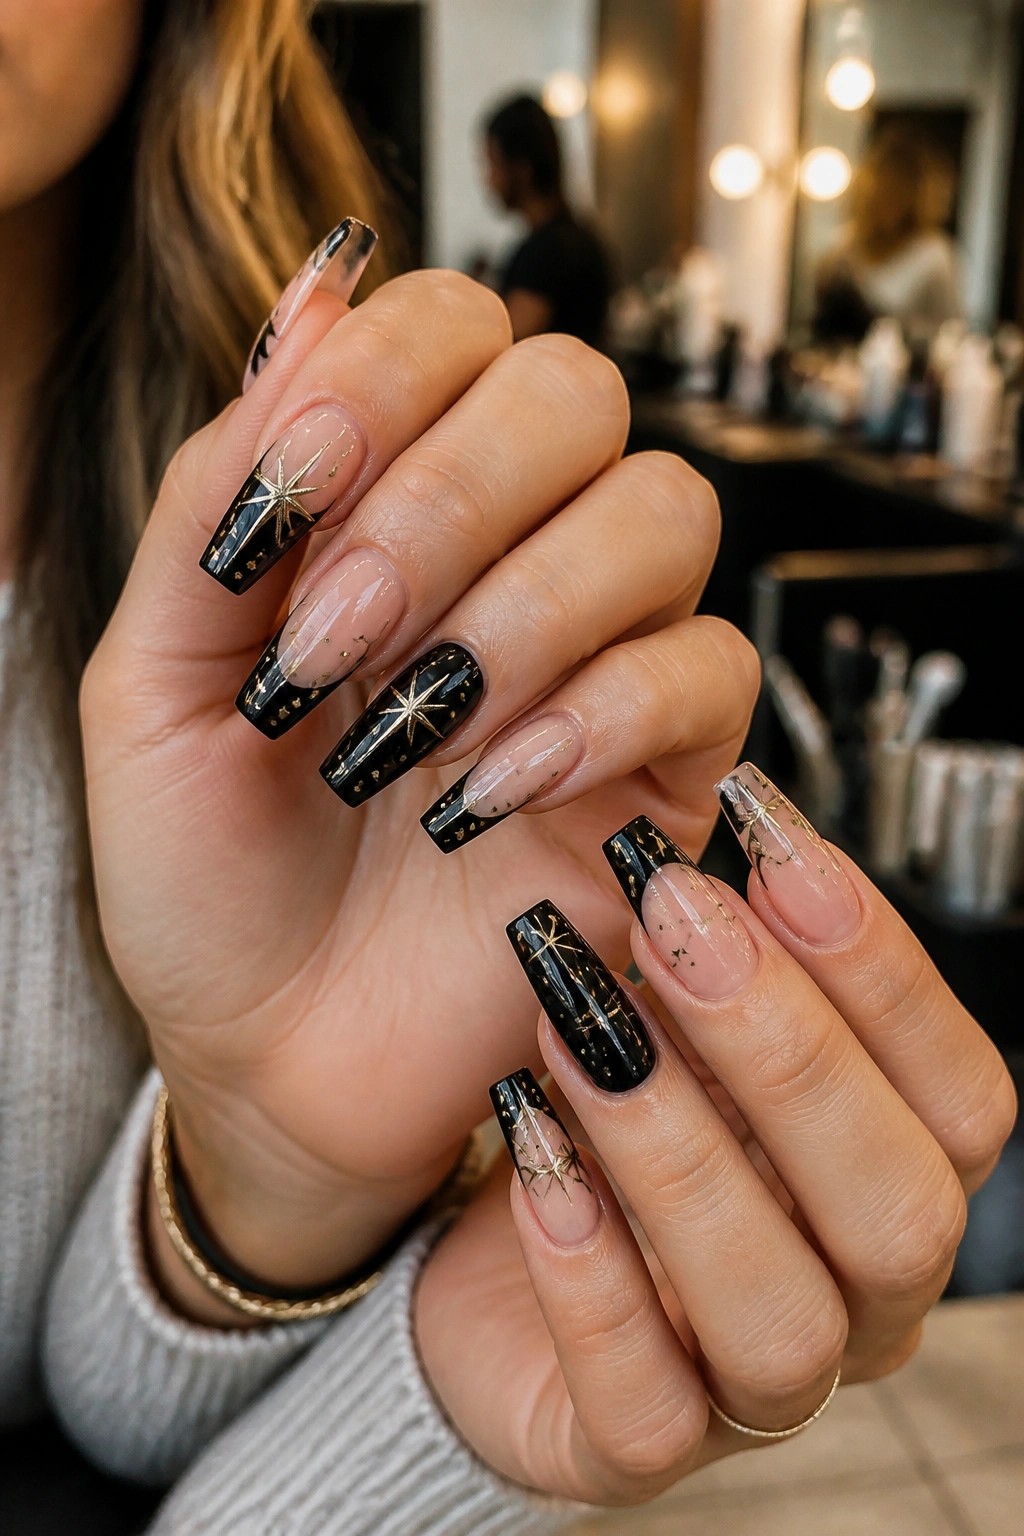
3. Black Velvet Magnetic Nails with Single Gold Star Accents
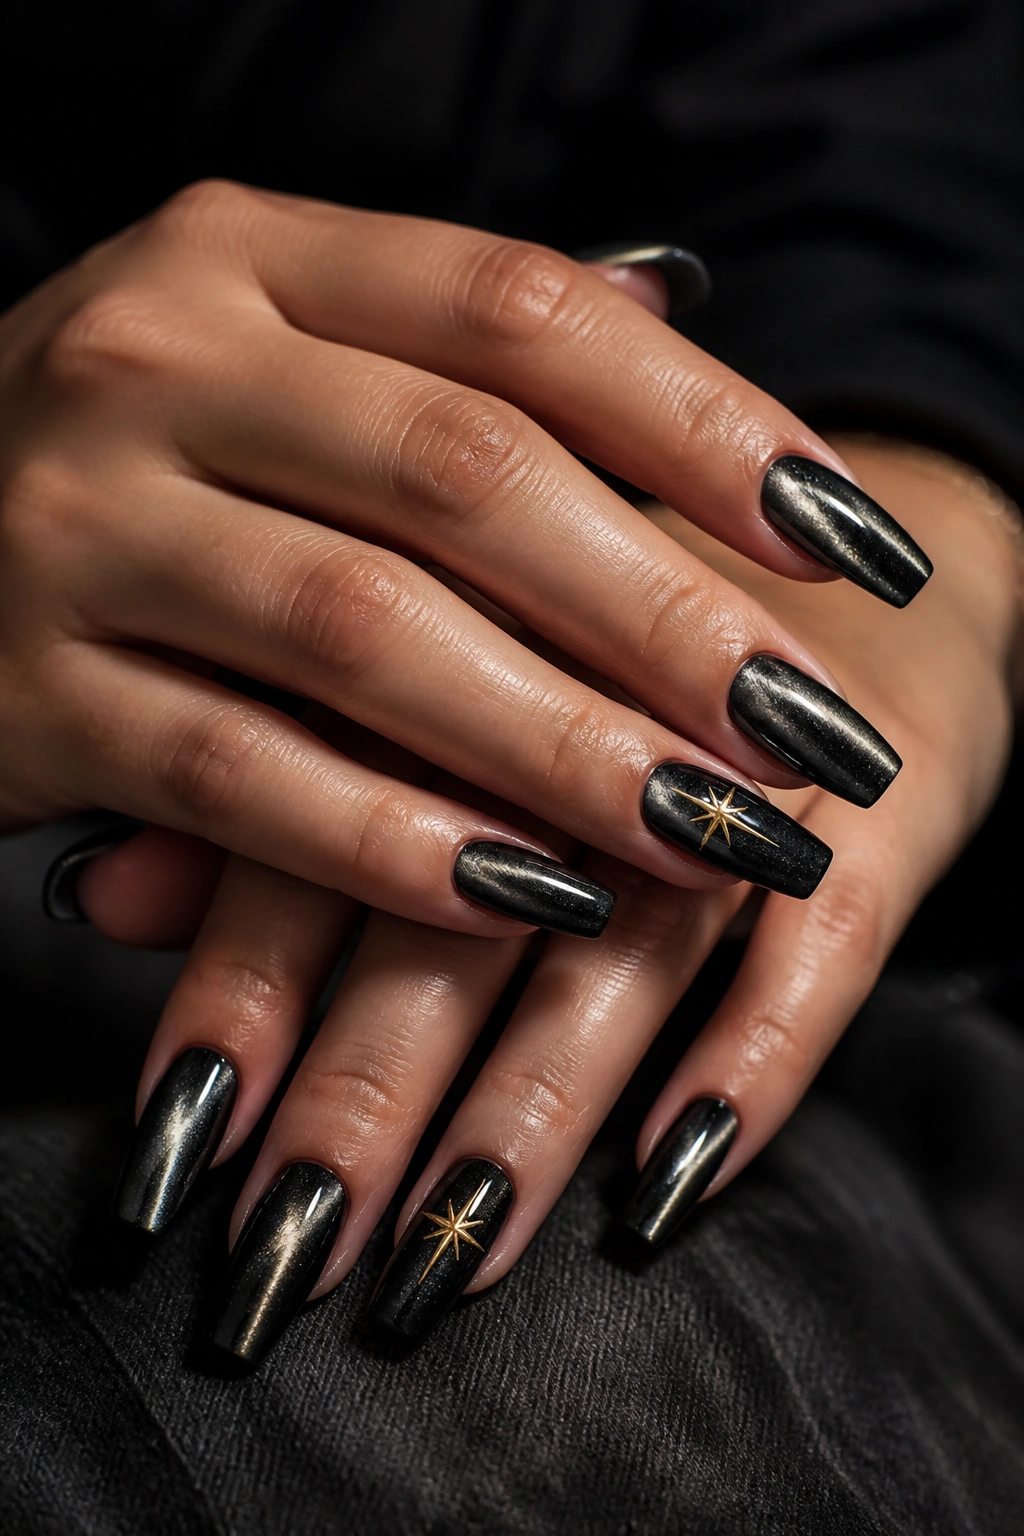
Want your manicure to shift every time you turn your hand? Go magnetic.
Cat-eye gel over a black base creates that brushed, velvety beam that moves with the light, and on coffin nails it looks expensive in a way plain glitter often does not. Add one or two small gold stars per hand, not per nail, and the result lands somewhere between celestial and tailored.
Why the magnetic finish does most of the work
The magnetic line acts like a streak of light across the nail. That means the design already has movement before any art goes on. If you pile on moons, stars, crystals, and foil, you lose the tension that made it good.
A tighter formula works better:
- Black gel base.
- Dark silver or graphite cat-eye pulled diagonally.
- One flat gold star decal on the ring finger.
- One tiny gold dot cluster on the thumb or middle finger.
Gold matters here because silver can disappear into the magnetic sheen. Warm metal sits on top of black velvet in a cleaner way.
Long coffin nails show this design off best, though a medium set can still carry it if the magnet effect is strong. Ask your tech to keep the star accents flat and sealed well at the edges. Raised edges on dark nails show up fast.
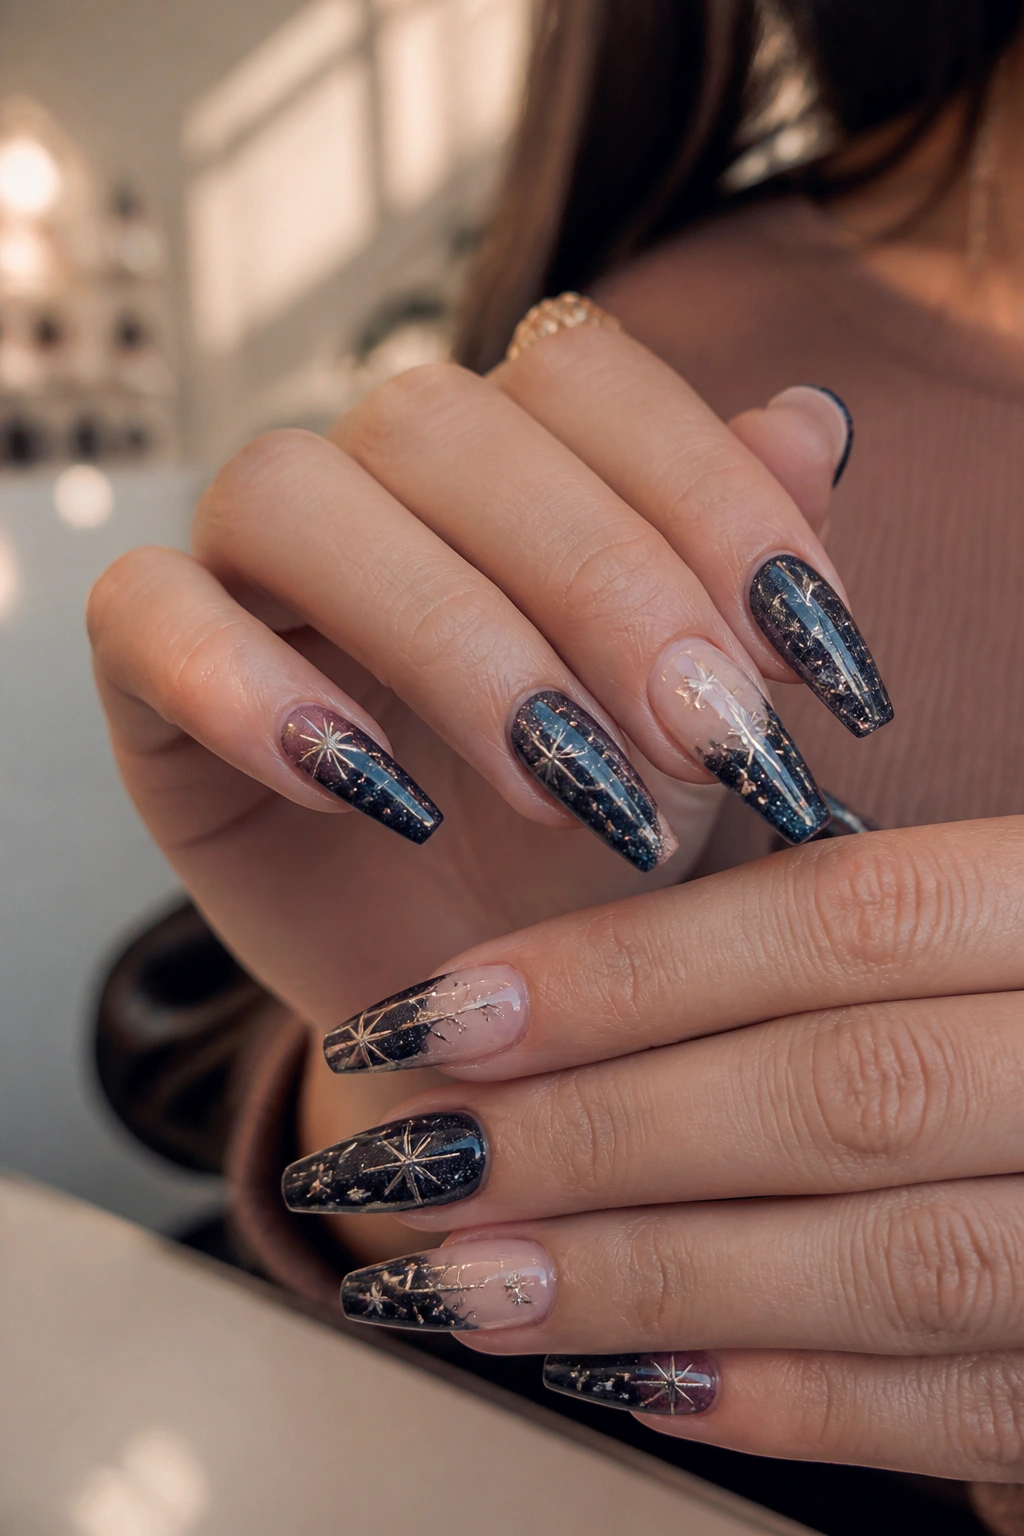
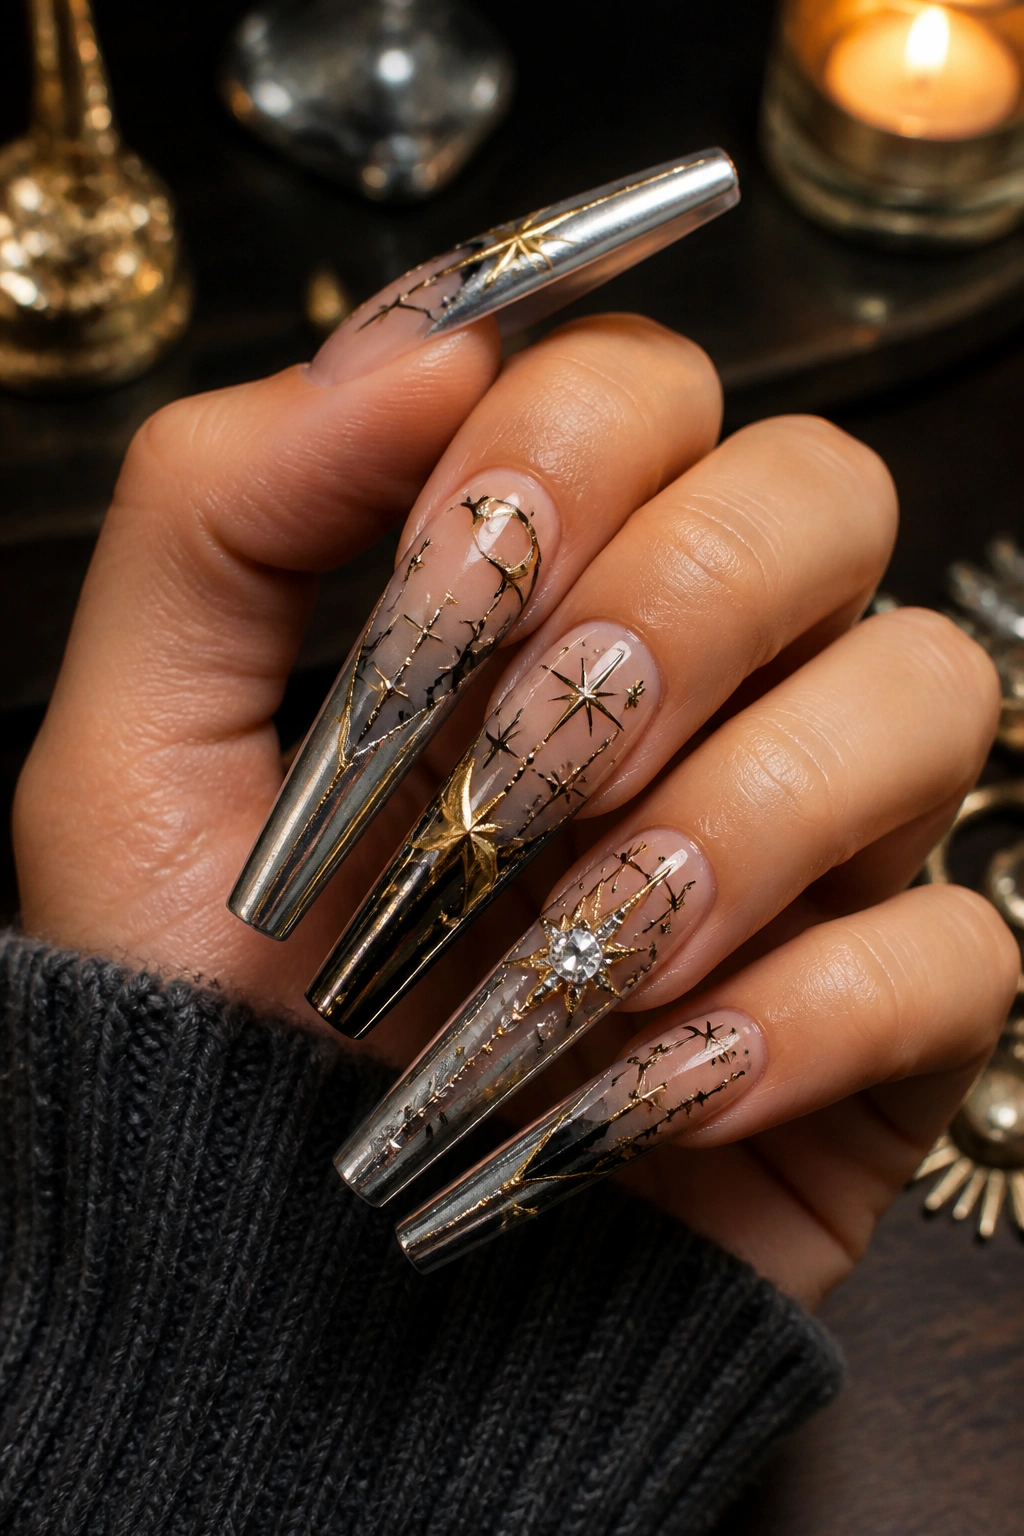
4. Clear Acrylic Tips with Encapsulated Gold Stars
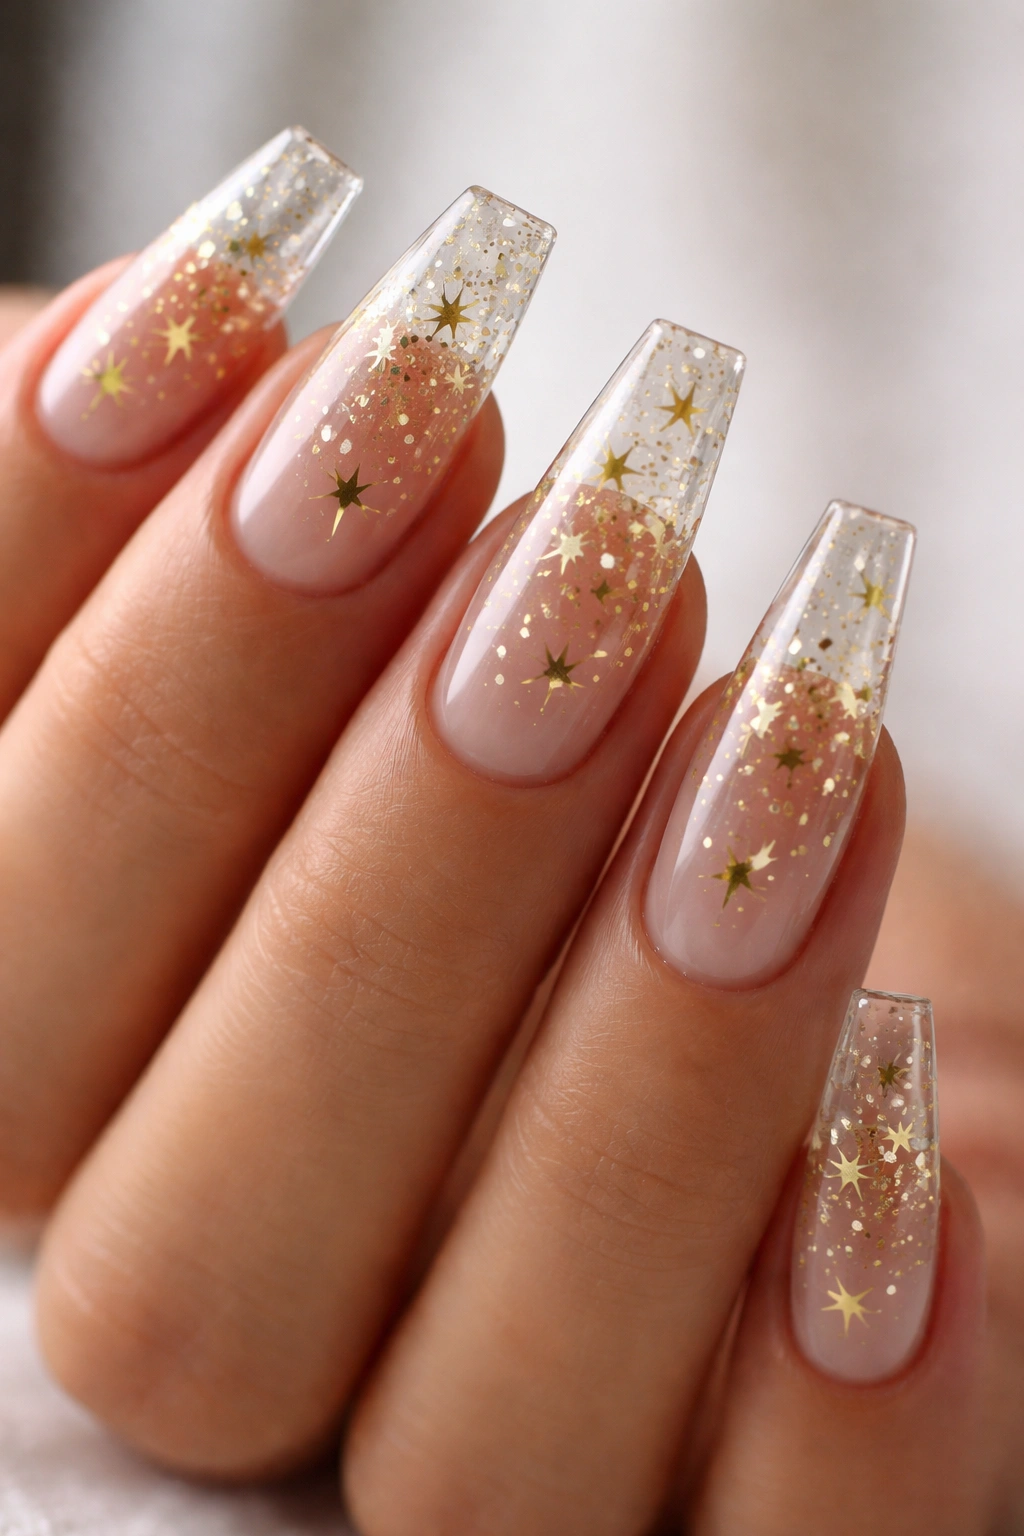
Under indoor light, these nails can look almost bare. Then your hand moves, and the gold flashes from inside the nail. That hidden depth is the whole appeal.
This style works because the stars are encapsulated, not stuck on top. The nail tech places ultra-thin gold stars or foil pieces between layers of clear acrylic or hard gel, then files and seals the surface smooth. You get sparkle with no snagging, no rough texture, and less risk of sequins catching on hair.
The build matters more than the art here. If the structure is too thick, clear nails can look bulky. If it is too thin, the stars can sit awkwardly and flatten the nail visually. A clean apex and crisp sidewalls are non-negotiable.
Key details worth asking for:
- Extra-thin gold stars, not chunky craft sequins.
- A crystal-clear extension, not one clouded with excess glitter.
- More stars near the tip than the cuticle, which keeps the grow-out neater.
- A short to medium-long coffin length if you want the set to stay wearable.
I’d skip this on natural nails. Encapsulation needs room, and extensions carry it better. When it’s done well, this one has that floating-in-glass look people keep chasing with jelly polish and never quite get.
5. Baby Blue Chrome with White Starbursts
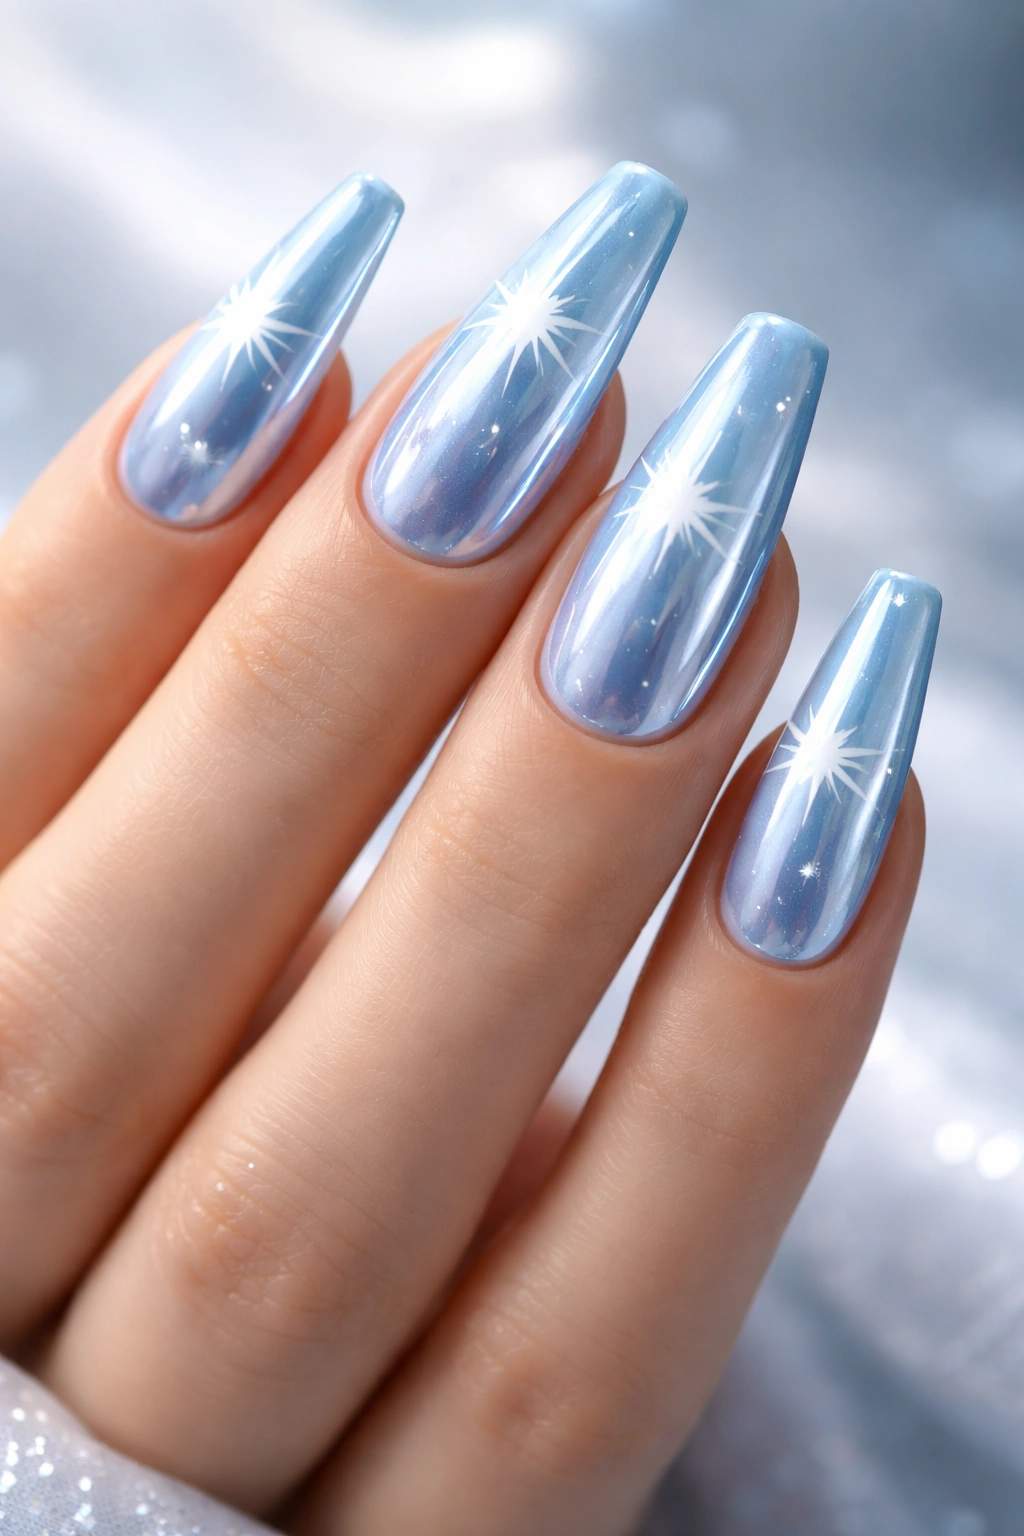
Unlike dark galaxy nails, this set feels cold, bright, and almost frosted. The base starts with a pale blue gel — think sky with a silver undertone — then gets finished with chrome or pearl powder until the surface has that icy sheen. White starbursts on top keep it crisp.
The difference between a polished version and a messy one sits in the line work. Starbursts need thin arms with one longer vertical stroke and shorter cross-lines, not fat little asterisks. A liner brush and a steady hand matter more than extra embellishment.
This is also one of the better ways to wear a celestial manicure on a medium coffin length. You do not need extra room because the base already creates visual interest. A single small crystal in the center of one star can work, though I would stop there.
If your skin leans warm, ask for a baby blue with a gray cast rather than a sugary pastel. It reads cleaner. If your skin leans cool, a brighter icy blue can look striking — and yes, that’s one of the few times a chrome finish can feel sharp instead of overdone.
6. Plum Jelly Galaxy with Fine Holographic Dust
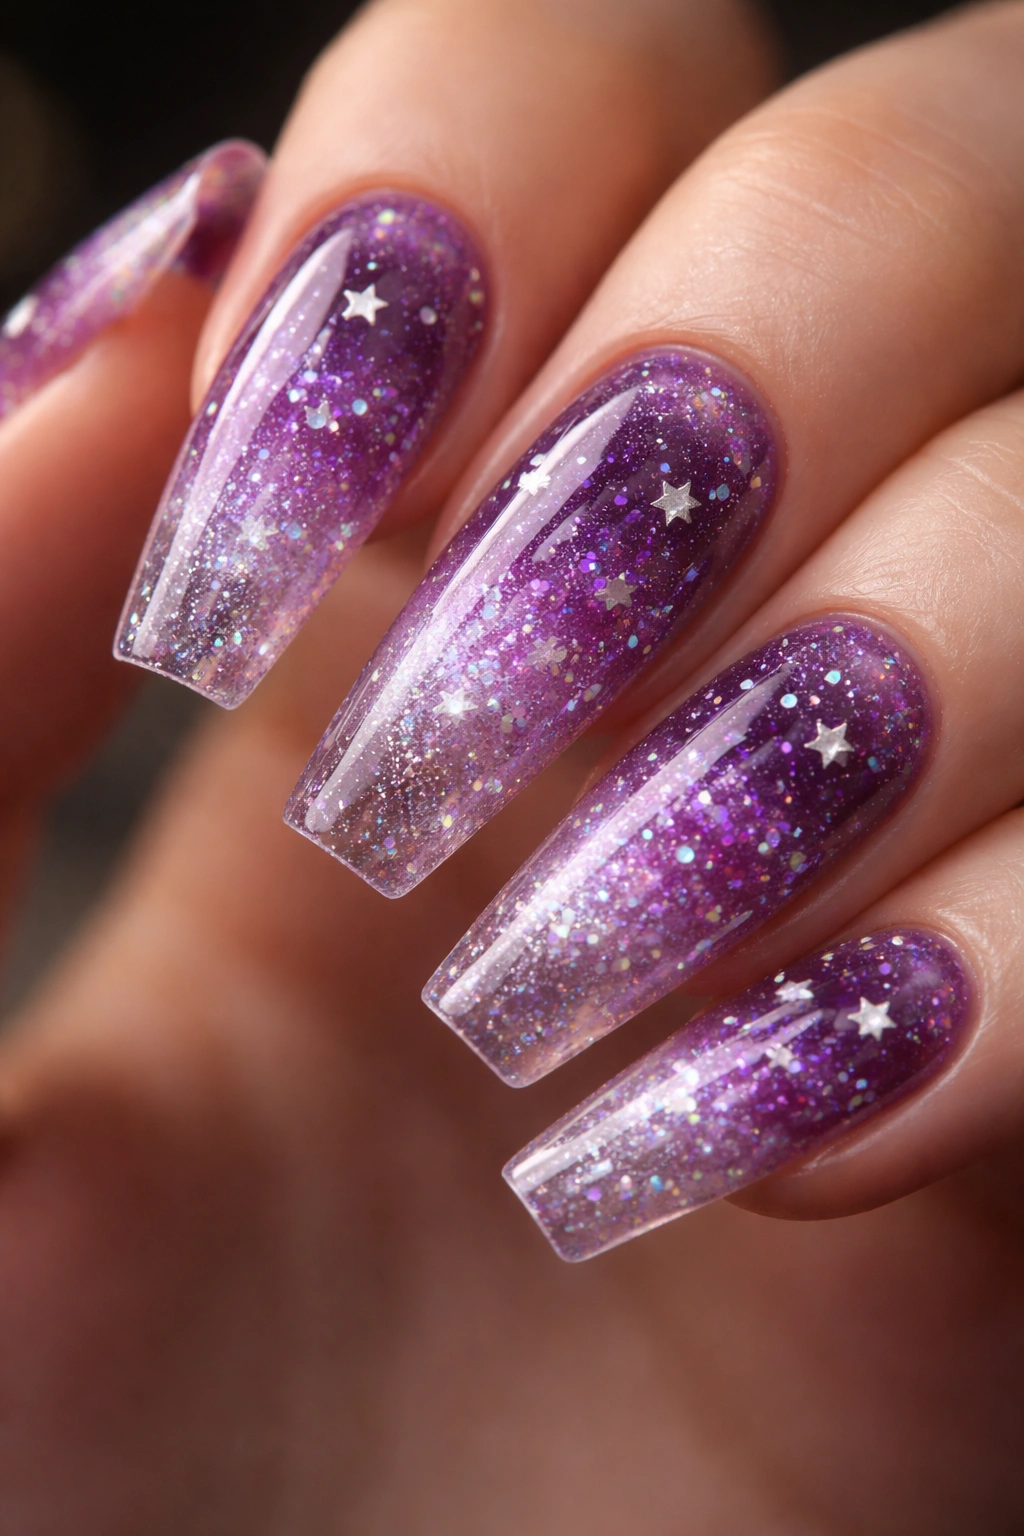
Deep plum does something black cannot. It gives you darkness, but it also gives you color underneath the darkness, which makes the whole manicure feel richer when light hits it from the side.
A jelly plum base is the move here, not an opaque cream. You want that translucent depth, the kind where the free edge seems to disappear a little under the color. Over that, a whisper of fine holographic dust can create a scattered-sky effect without chunky sparkle. Then come the stars — silver, lavender-chrome, or even a cool rose-gold if you want warmth.
This design loves layering. One thin coat of plum, another coat focused more toward the center, then dust, then art. Done right, the nail looks like it has distance inside it. Done badly, it looks muddy.
I’m especially fond of this set for longer coffin nails because the side taper makes the plum shade look darker at the edges. That little shift adds shape. A few pinpoint stars near the tip, one tiny constellation on an accent nail, and you’re done. Resist the urge to add moons, flames, gems, and foil all at once. Plum already carries more visual weight than pale blue or nude. It does not need help.
7. French Coffin Tips with Floating Silver Stars
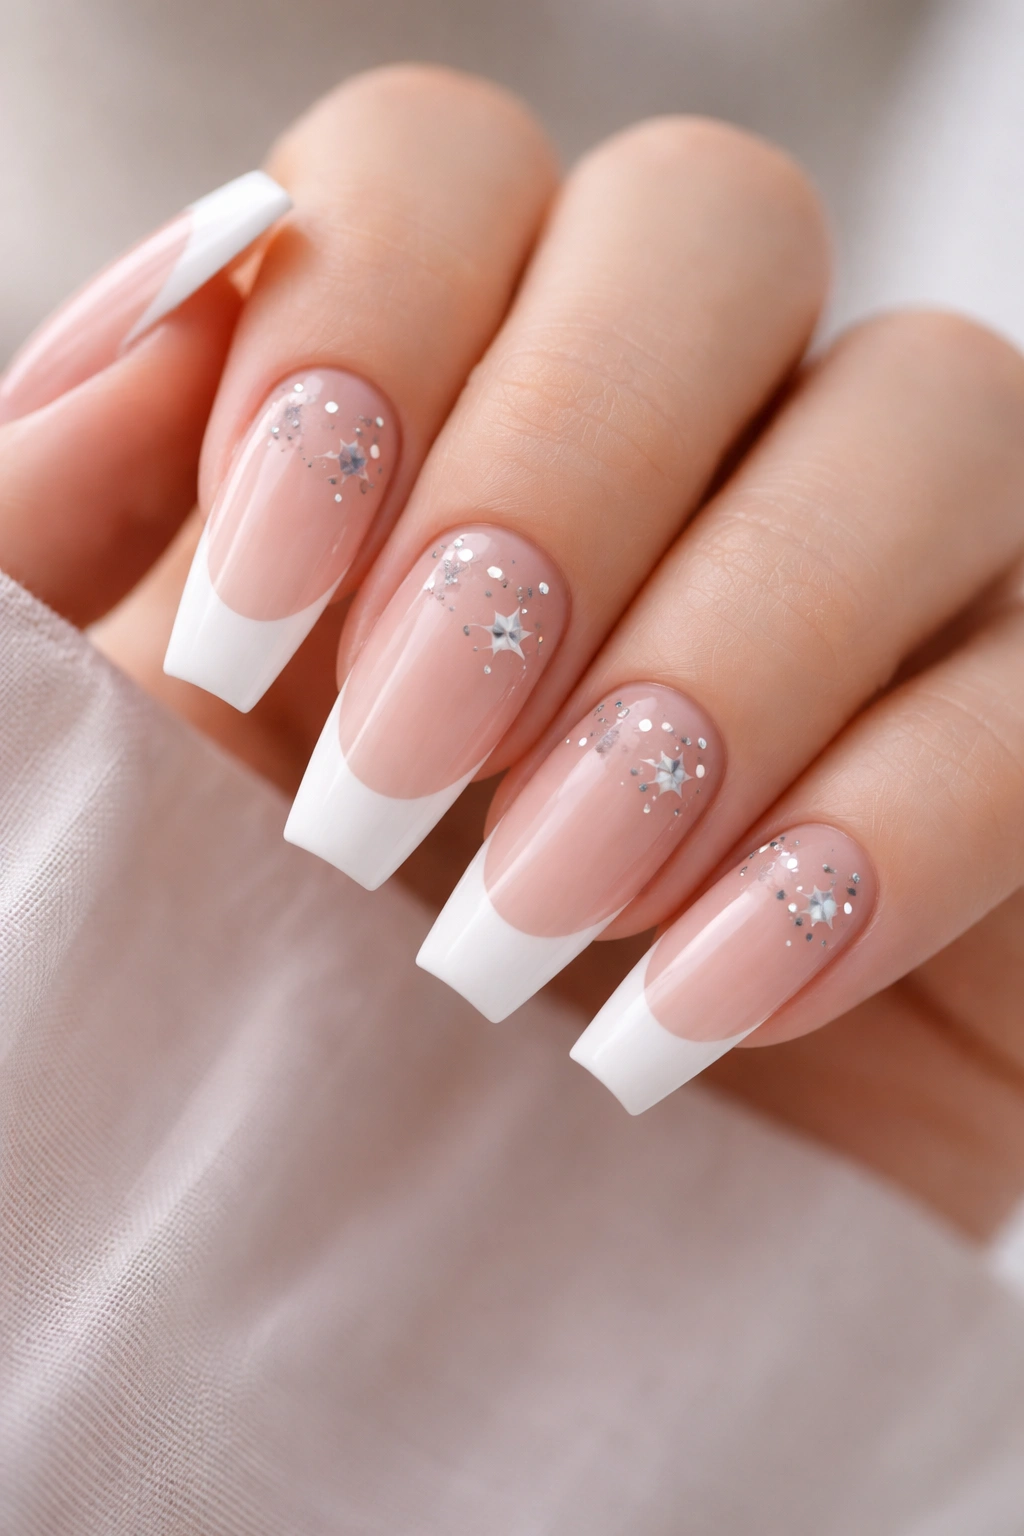
French tips get a little stiff when they’re too proper. Add floating stars, and the whole design loosens up.
The structure is familiar: nude or milky pink base, crisp white or silver French tip, coffin shape with a clean squared end. Then, instead of packing the nail with art, you place a few tiny silver stars just above the smile line or drifting into the center of the nail. That bit of distance is what makes it feel fresh.
Placement that keeps the design clean
If the stars touch the French tip edge, the eye reads them as part of the tip. If they float 2 to 4 mm above it, the nail gets a sense of space. That space matters more than people expect.
Who this one suits best
This is a good choice if you wear a lot of rings, especially silver ones, because the nail art does not compete with the jewelry. It also works well on medium coffin nails where you want shape but do not want the set to look heavy.
A silver micro-line at the smile line can tie it all together. I would keep the stars on four to six nails, not ten. You want the French structure to stay visible.
8. Matte Charcoal with Glossy Black Star Outlines

Matte nails can flatten fast, which is why I like them paired with gloss in the same color family. A matte charcoal base gives you that soft, smoked look, while glossy black star outlines catch the light only when your hand moves. The effect is subtle from a distance and much more interesting up close.
This set does not need glitter at all. In fact, glitter would break the whole mood.
Here’s what makes it work:
- The charcoal should lean cool, not warm brown-gray.
- The matte top coat needs to be smooth, not chalky.
- The stars should be outlined in glossy black gel, not filled in.
- A few tiny glossy dots around one star can add depth without adding color.
Medium-length coffin nails carry this design best. On extra-long nails, the matte field can start looking empty unless you add more art, and more art is not the point.
There’s also something practical about it. Because the palette stays dark and tonal, tiny chips or scratches read less loudly than they do on a white chrome set. If you like nail art but hate obvious wear, this one earns a look.
9. Pearl White Coffin Nails with Iridescent Star Sequins
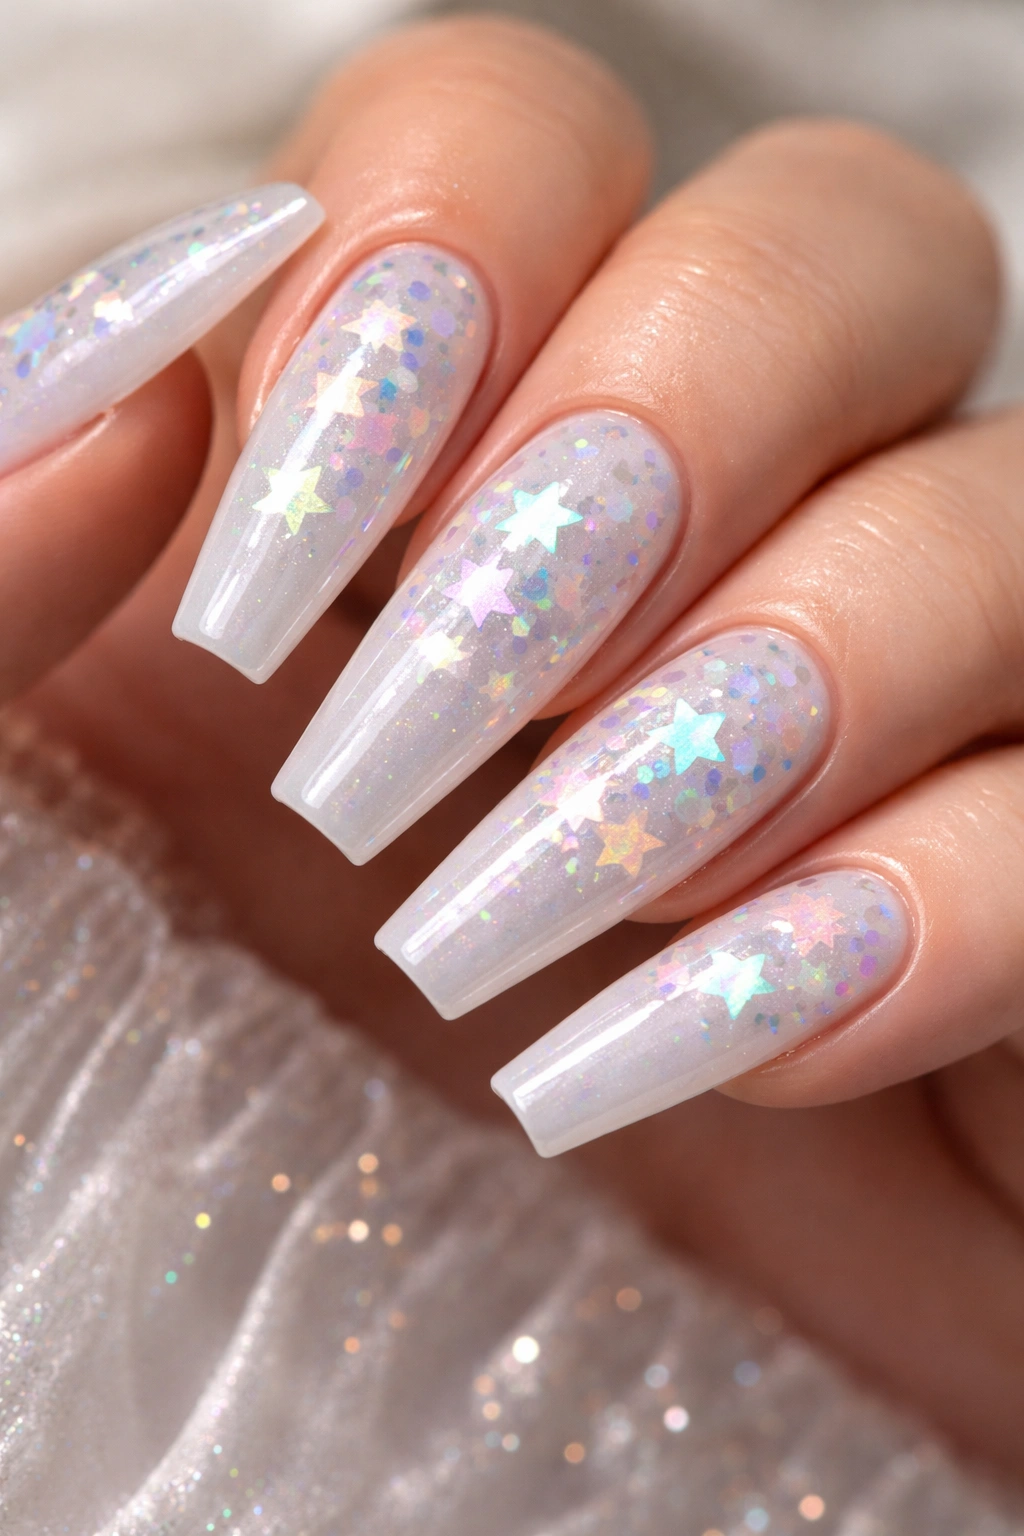
Pearl white can go bridal, frosty, or almost futuristic depending on what you put on top of it. Add iridescent star sequins, and the look shifts every time the angle changes — pink at one turn, green-blue at another, with flashes that feel soft rather than loud.
The base should not be flat white. Ask for a milky white with pearl powder or a pearl gel polish so the nail has a satin-like glow underneath the stars. Flat white plus iridescent sequins can look stuck-on. Pearl white gives them a surface that makes sense.
Use restraint with the sequins. Two on one nail, one on another, maybe a hand-painted white starburst on the ring finger to echo the shape. Large iridescent stars can lift if they are not sealed under builder gel, and once an edge lifts, hair will find it. Hair always finds it.
I’d place this design on a medium or long coffin set with a glossy top coat rather than matte. Matte kills the color shift. The whole reason to choose iridescent stars is that they throw off different tones under daylight, indoor light, and flash. Let them do that.
10. Rose Pink Builder Gel with Gold Foil Constellations
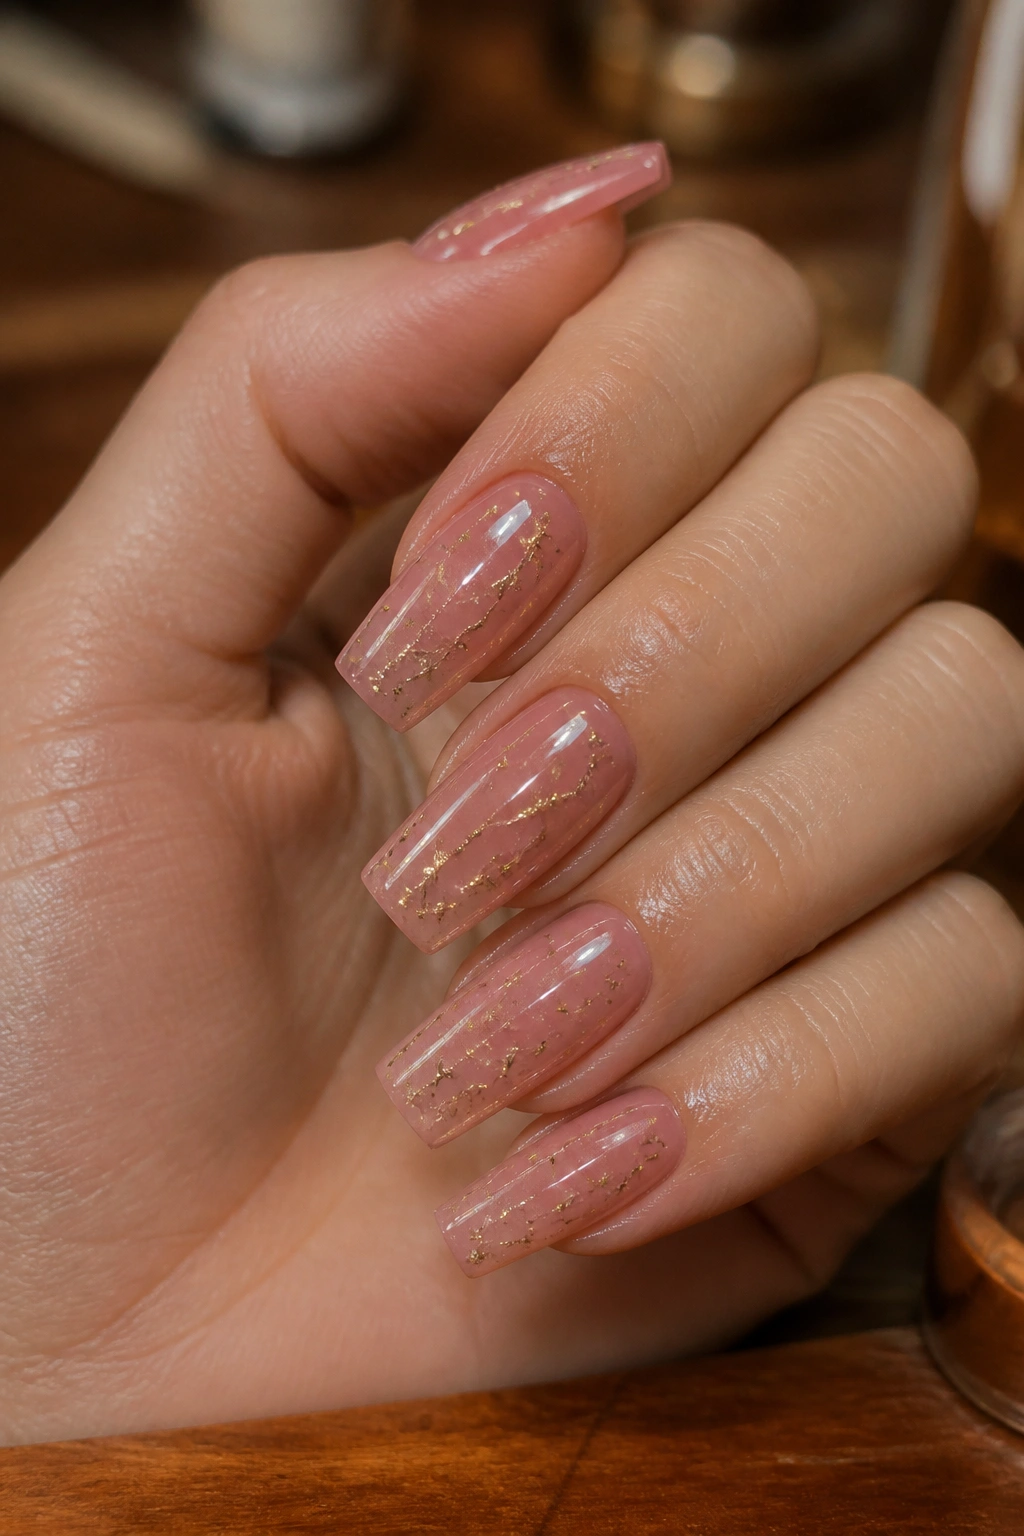
Need something warm, polished, and a little romantic without drifting into sugary pink territory? A rose-toned builder gel base with gold foil constellations does the job.
Builder gel helps because it has that translucent, lit-from-within look that plain polish cannot fake. You can keep the nail close to natural, then float tiny foil fragments and fine gold liner work over the top. The foil should suggest stars and small clusters, not random metallic confetti.
How to keep the foil from turning messy
Foil needs boundaries. Place the larger pieces where a star would naturally sit, then connect only a few points with thin gold lines. If the foil is scattered everywhere, the manicure starts looking accidental.
A clean version often uses:
- Rose or dusty pink builder gel.
- Gold foil pieces smaller than a grain of rice.
- Two or three thin constellation lines across the whole set.
- One accent nail with a centered starburst near the tip.
This one flatters short-to-medium coffin nails better than you might think, because the warm sheer base keeps the set from feeling dense. If you wear gold jewelry daily, this manicure slots right in without trying too hard.
11. Cobalt Blue Tips with Shooting Star Trails
Not every celestial manicure needs to cover the full nail. This design puts the drama at the tip, which keeps the nail bed cleaner and makes the grow-out easier to live with.
Picture a sheer nude or pink-beige base with cobalt blue French tips, then a silver or white shooting-star trail arcing from one side of the tip toward the center of the nail. A tiny star lands at the end of the trail. It’s graphic. Sharp. A little sporty, even.
The color choice matters. Cobalt has enough intensity to stand apart from silver line work, while navy can blur into it. If the blue is too pastel, the whole thing loses its punch.
I like this design on medium coffin nails where the tip still has some width. That width gives the shooting-star arc room to curve. On a narrow almond nail, the same design can feel cramped.
You can also vary the set without losing cohesion: one full cobalt accent nail, two French tips with trails, the rest mostly nude with one small silver star. That bit of unevenness gives the manicure life. Matching every nail too closely can make a design this graphic feel stiff.
12. Smoky Gray Negative Space with Tiny Black Stars
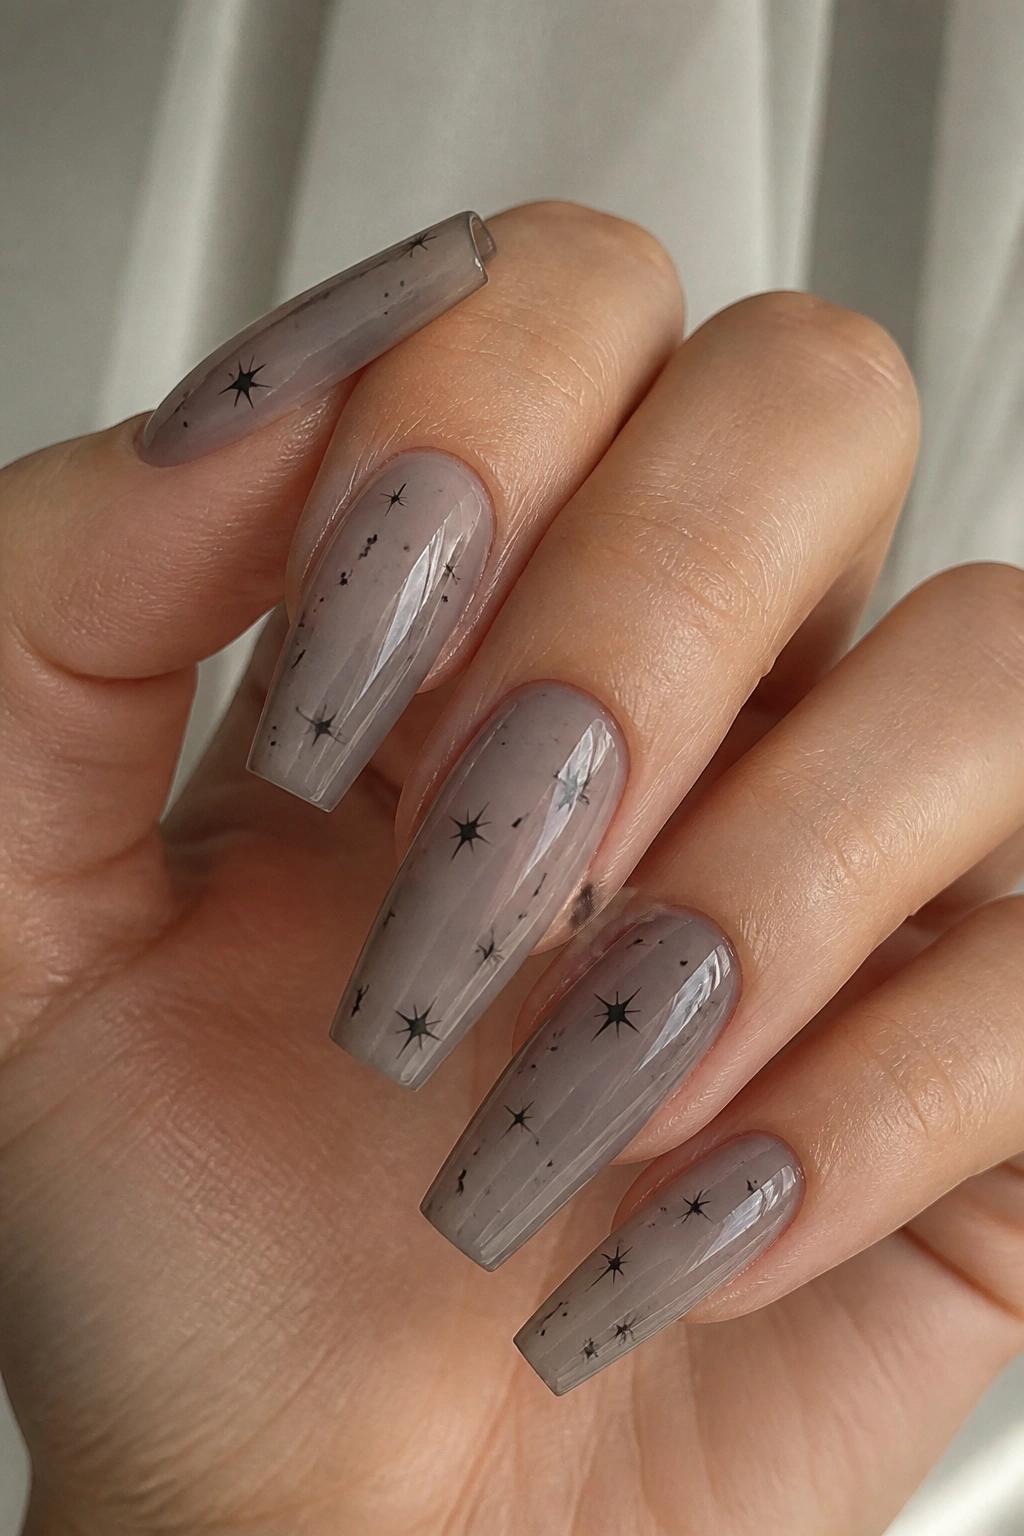
Not every celestial set needs sparkle. Sometimes the strongest move is to take light away.
A smoky gray negative-space design uses a sheer gray wash over part of the nail, leaving sections of the natural or nude base exposed. Then come tiny black stars, maybe a few fine black dots, maybe one thin crescent if you want a little extra line work. The result feels more editorial than dreamy.
This is one of those designs that looks easy and isn’t. The gray has to be sheer enough to keep the negative space visible, but not so watery that it streaks. The black stars have to be clean, too. A wobbly black star on a pale base stands out in the worst way.
The good news is that this style handles grow-out well because there is already negative space built into the design. That makes it useful if you want art with a little more time between fills. I also like it for people who wear mostly black, gray, white, or denim and want their nails to feel connected to the rest of their clothes rather than acting like a separate event.
13. Lilac Cat-Eye Coffin Nails with Crystal Star Centers
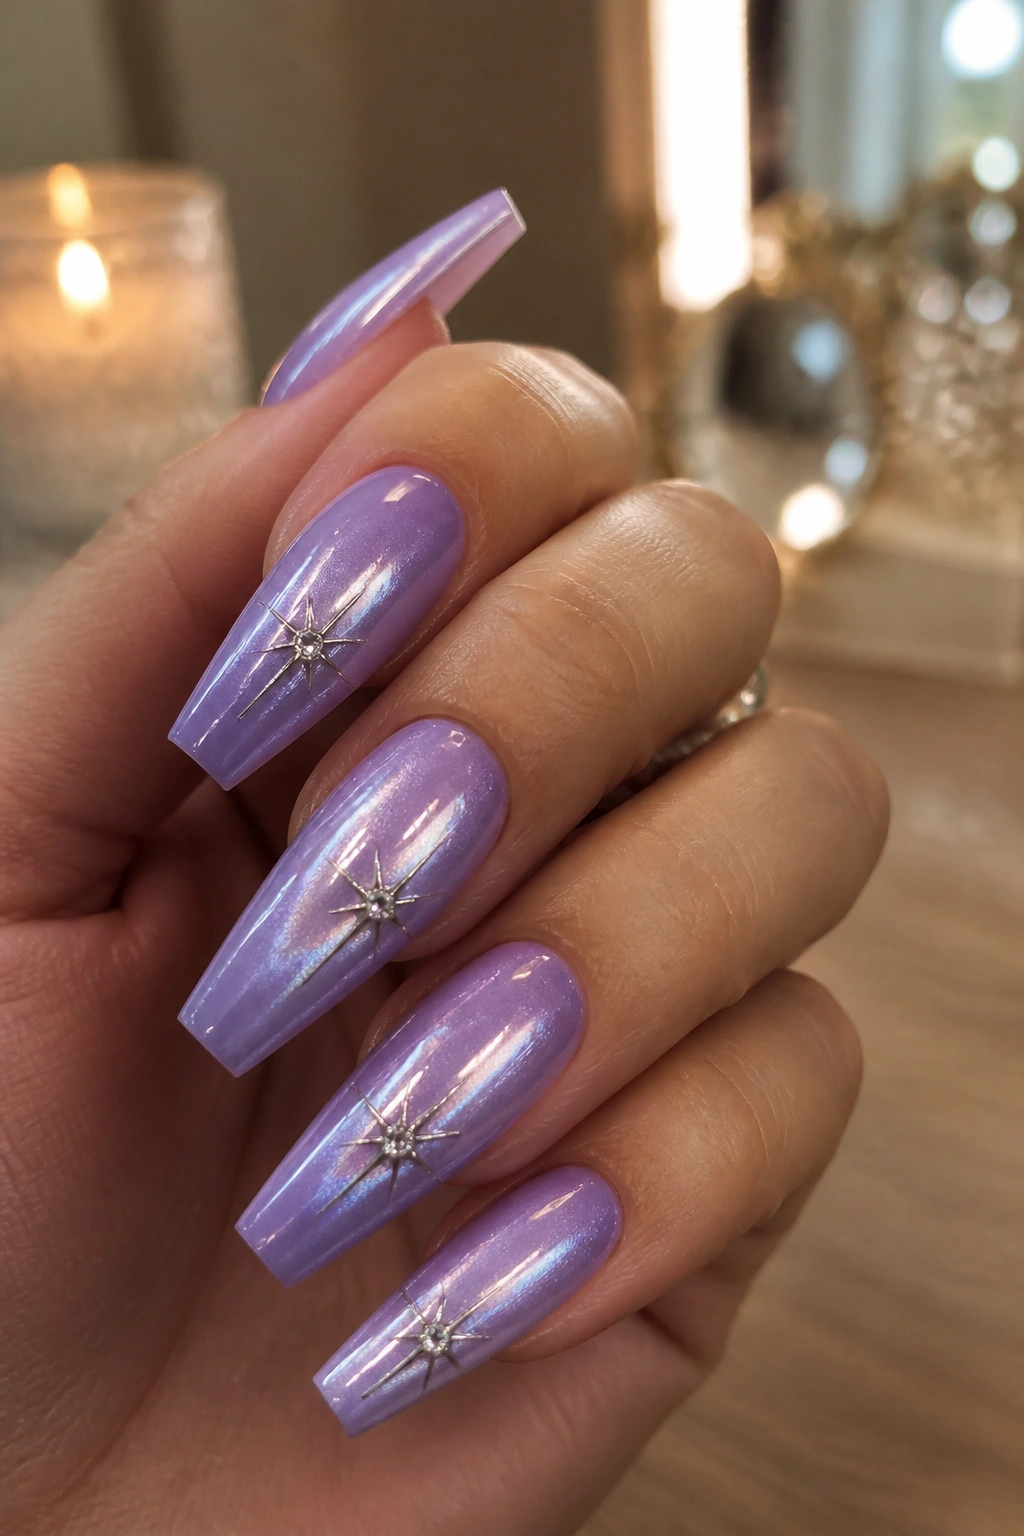
Lilac can go sweet fast. Pair it with a magnetic cat-eye effect and tiny crystal centers, though, and it gets sharper.
The base should be a cool lilac with a gray or silver undertone, then pulled with a magnet so the light stripe cuts diagonally or sits off-center. Over that, your tech can paint a few fine white or silver starbursts, placing a micro crystal — one small stone, not a cluster — in the center of one or two stars per hand.
Why the crystal count has to stay low
Crystals already reflect more light than chrome powder or glitter. Add too many, and the cat-eye beam disappears behind them. Two or three stones per hand is usually enough.
A balanced version looks like this:
- Long or medium-long coffin shape.
- Lilac magnetic base with a narrow beam.
- White starbursts on three or four nails.
- Micro crystals only on the focal stars.
- High-shine top coat around the painted art, sealed carefully.
This one leans dressier than the smoky gray or the matte charcoal set, and that is fine. Some manicures are built for denim. Some are built for rings, satin, and low light.
14. Burgundy Night-Sky Nails with Bronze Celestial Details
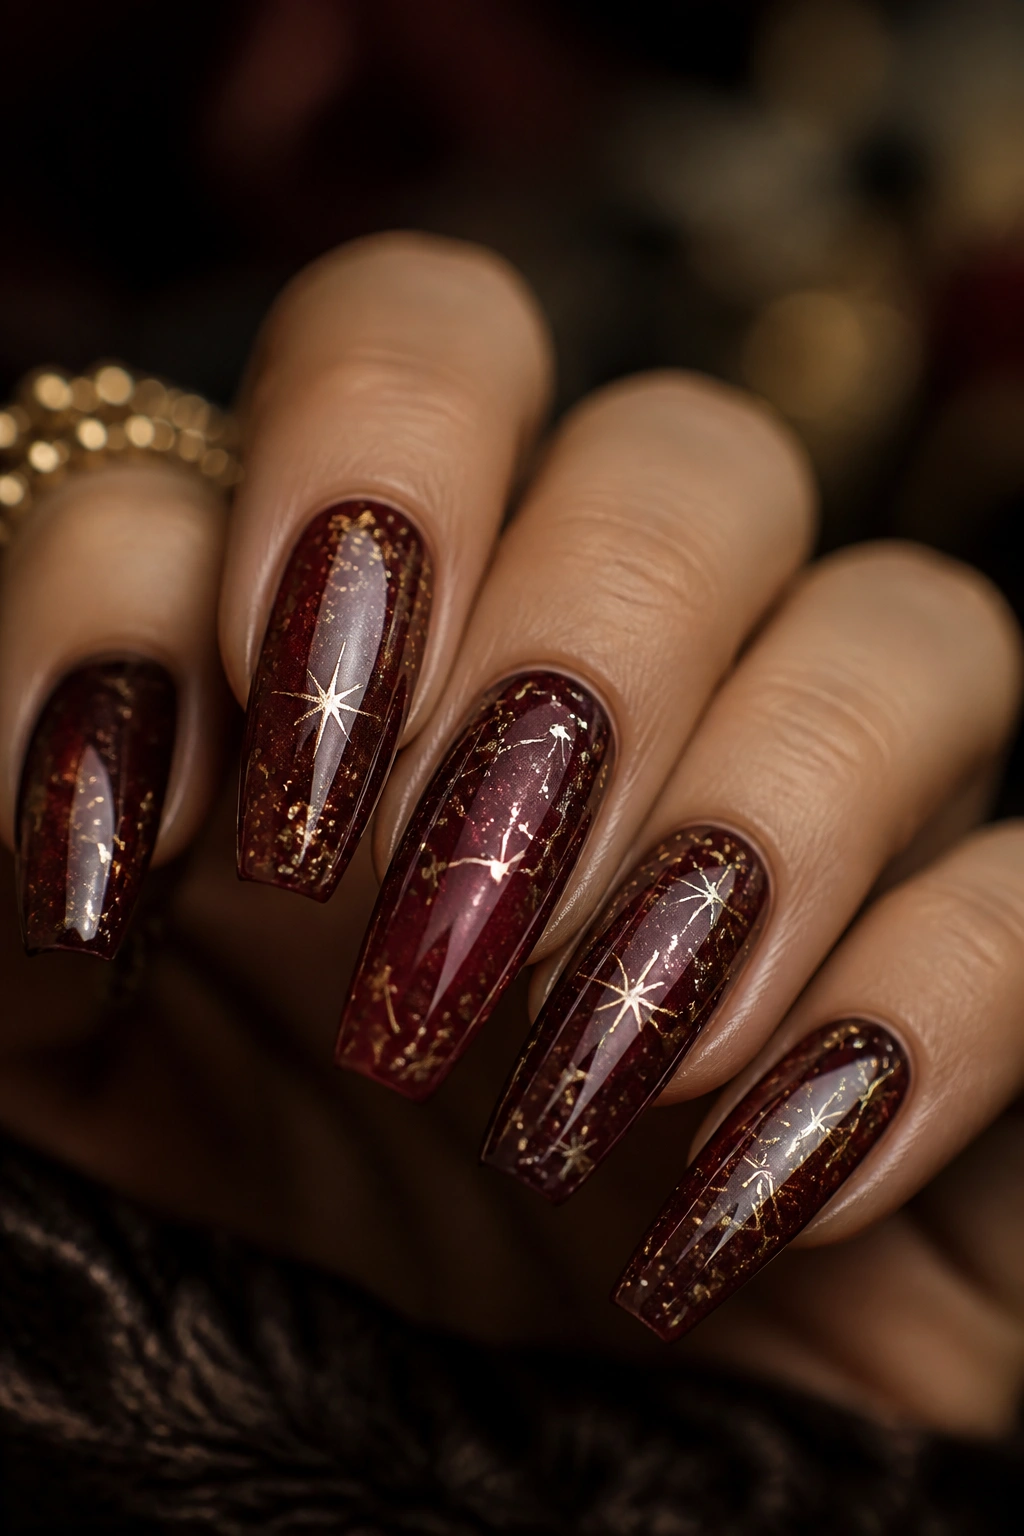
Burgundy and bronze together can look almost antique, like an old star map printed on dark paper. That’s why this set feels different from the usual black-and-silver formula. It’s warmer, richer, and a little moodier in a grown-up way.
Start with a wine-red or oxblood base, preferably one with depth rather than a flat candy-red finish. Bronze foil stars, tiny bronze dots, and thin celestial line work sit on top without the sharp contrast you get from silver. That softer contrast is the charm.
I would not overload every nail here. Burgundy already carries weight. Two focal nails with bronze starbursts, one with a faint constellation, the rest with a single bronze dot or one small star is plenty.
This color pairing also works nicely on medium coffin nails if you want something darker but do not want the manicure to read black. It pairs well with gold jewelry, bronze-toned makeup, camel coats, dark denim, and all those rich neutrals people wear when they want color without brightness. If black celestial nails feel too stark on you, burgundy is worth a look.
15. Mixed-Metal Celestial Collage on Extra-Long Coffin Nails
This is the maximalist option, and it only works when the editing is smart. Mixed-metal star coffin nails can look wild in the best way — silver chrome details, gold stars, a few black line accents, maybe one crystal — but extra-long coffin nails need a plan or the whole set turns noisy.
Think of each nail as having one job. One nail gets a silver chrome French edge and a gold star. Another gets a negative-space constellation in black and gold. Another carries a single crystal-centered starburst. One or two nails stay calmer so the busy ones have breathing room.
A set map helps:
- Thumb: metallic tip plus one star.
- Index: negative-space constellation line work.
- Middle: single focal starburst with crystal center.
- Ring: mixed silver and gold micro stars.
- Pinky: quieter nail with only one accent near the tip.
I would keep the palette to three finishes at most: metallic silver, metallic gold, and glossy black line work. Add chrome, holographic glitter, pearl powder, aurora flakes, and rhinestones all together, and the coffin shape gets lost.
This design is not subtle, and it should not pretend to be. If you love long nails and want your manicure to start conversations before you do, this is the one with the strongest payoff.
Final Thoughts
The best celestial manicure is rarely the busiest one. Shape, spacing, and finish matter more than the number of stars you put on the nail. Coffin tips already bring drama, so the art can relax a little and still land hard.
If you want my blunt take, start narrower than your first instinct. Pick one metal tone, one base effect, and one style of star. Nail art tends to look more expensive when there’s a clear point of view.
And if you’re torn between two designs, choose the one your daily life can actually support. A glossy navy set with micro stars will age better than bulky raised charms if you type all day, wear gloves, or wash your hands often. The prettiest idea on paper is not always the manicure you’ll still love a week later.
That balance — a little fantasy, a little discipline — is where star coffin nails stop being themed and start looking like part of your style.
