

Black and white is one of those color combinations that never feels outdated. It’s chic, it’s versatile, and it works with practically every wardrobe, season, and occasion. When you add the elongated elegance of coffin-shaped nails to the mix, you’ve got something genuinely striking—a look that reads sophisticated and a little bit edgy at the same time.
The beauty of coffin nails lies in their dramatic silhouette. That wider base tapering to a blunt, squared-off tip creates a naturally glamorous canvas, and medium-length coffins hit a sweet spot: long enough to make a real statement, but short enough to actually be practical for daily life. You’re not struggling to type or do basic tasks, yet you still get that unmistakable nail shape that catches the light and draws eyes.
Black and white designs on coffin nails offer incredible range. You can go minimalist and let the geometric shape do most of the talking, or you can layer pattern, texture, and detail into something showstopping. Medium length is particularly forgiving—it’s substantial enough to display intricate designs without feeling overwhelming, and it’s a length most people can actually maintain without constant breaks. Whether you’re heading to the office, out for the evening, or just want a polish refresh that makes you feel confident, there’s a black and white coffin nail design in this collection that’ll fit exactly what you’re after.
Let’s dive into fifteen of the most striking options.
1. Classic Tuxedo Split
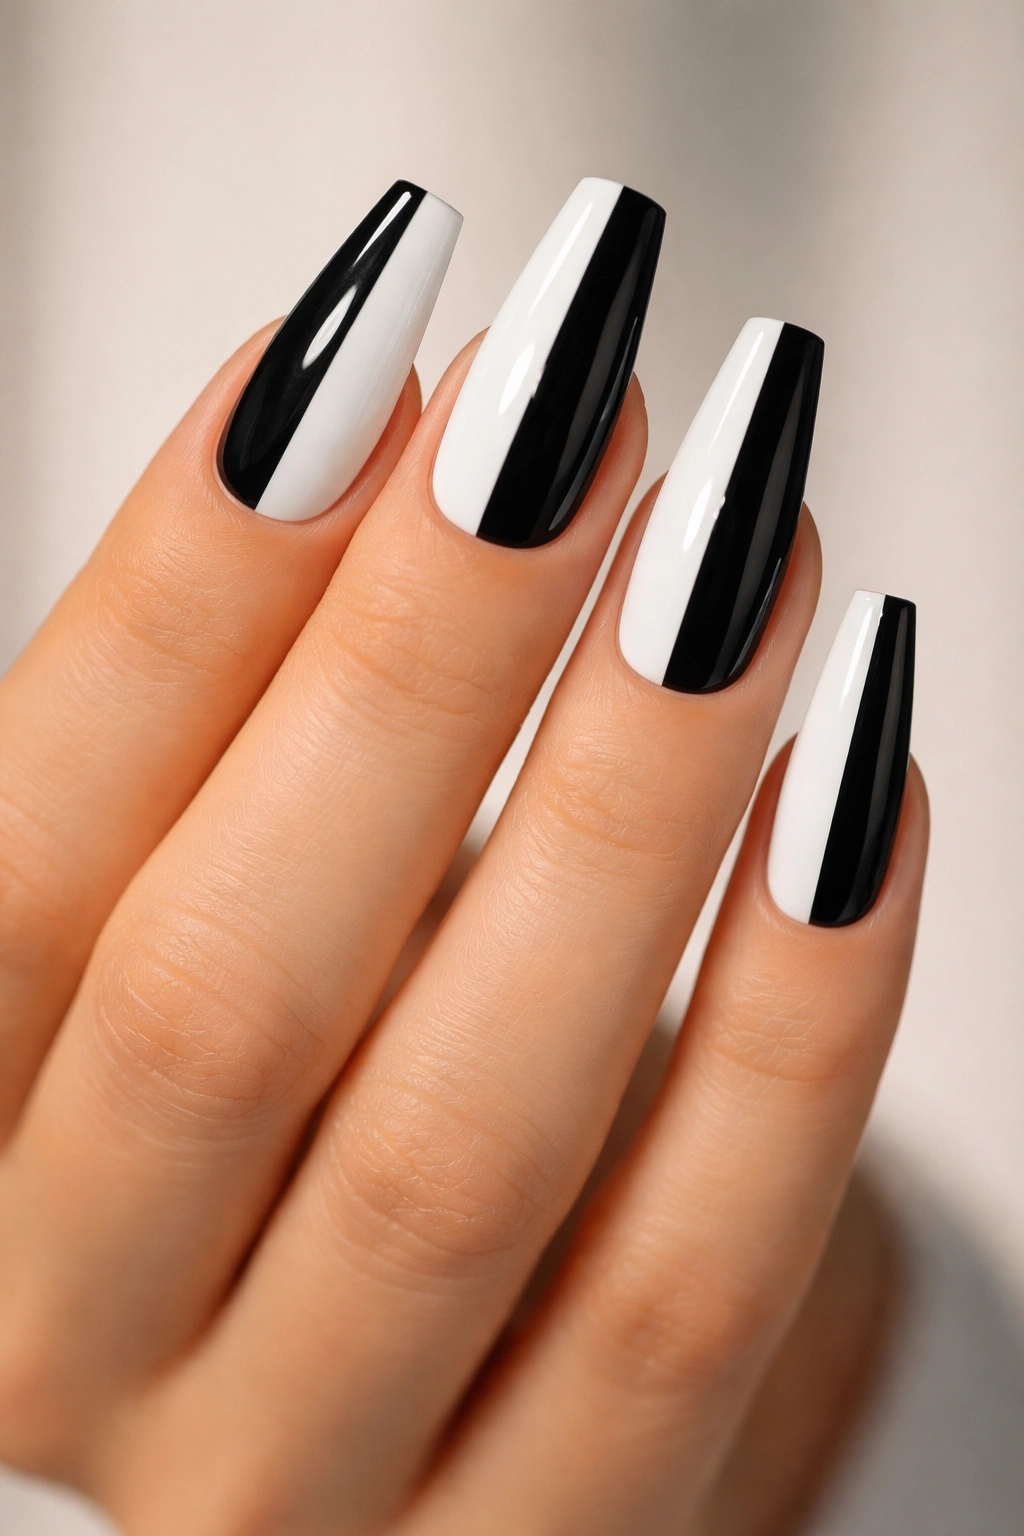
This is the black and white design that started everything—and it’s still stunning because of its simplicity. Picture your coffin nail split directly down the middle: one half glossy jet black, the other crisp white, meeting in a perfectly clean vertical line at the center of the nail. The elongated coffin shape actually enhances this design by emphasizing the vertical split, making your nails look longer and more sophisticated.
Why This Design Works So Well
The tuxedo split mirrors formal wear, which is why it feels instantly elegant. There’s zero fussiness here—just bold, clean color blocking that works with literally any outfit. The high contrast makes each nail pop individually, so even on medium-length coffins, the design reads clearly and confidently from a distance. You’re not relying on tiny details; you’re using negative space and crisp color division to create visual impact.
How to Execute It Perfectly
- Use painter’s tape down the exact center of each nail to create your dividing line
- Apply your base coat, then carefully paint one half black and the other white
- After the first coat dries, apply a second coat to each side for full opacity
- Seal everything with a quality top coat to keep that line sharp
Pro tip: The secret to a truly clean split is removing your painter’s tape while the polish is still slightly tacky—not completely dry, not wet—otherwise you risk dragging dried edges or lifting polish.
2. Geometric Marble Fusion
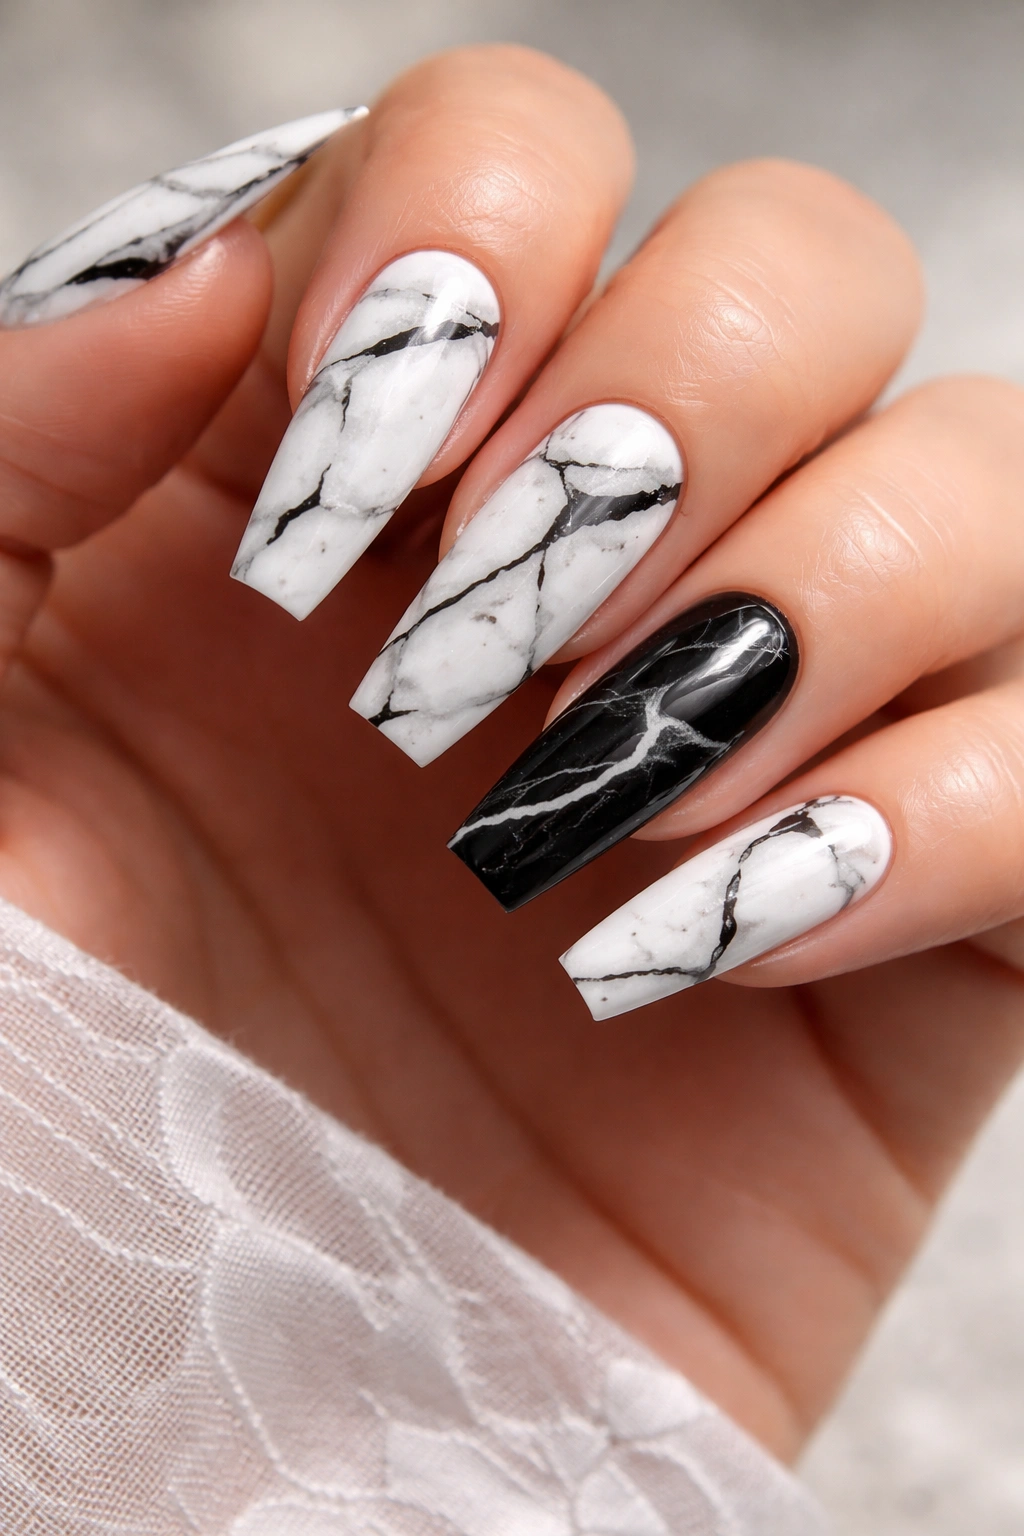
Combine black and white marble patterning across your coffin nails for a texture-rich design that feels modern and organic at the same time. Use a base of white with irregular veining in black that mimics natural marble, then add accent nails with the reverse—black base with white veining. The flowing, unpredictable nature of marble patterns suits the coffin shape beautifully because the longer nail gives plenty of room for the veining to create movement and depth.
The Technique Behind It
Marble nail art isn’t as complicated as it looks. You’ll need a thin nail art brush or even a detail brush from a craft store. After applying your base coat and letting it fully dry, use the brush to create irregular lines that vein across the nail in one direction. Vary the line thickness and spacing—make some lines thick and bold, others thin and delicate. This variation is what makes it look authentically marbled rather than drawn-on.
Design Variations to Try
- Make the veining patterns more concentrated on the coffin tip and gradually faded on the base
- Mix glossy and matte finishes within the same design for added sophistication
- Add thin gold or silver lines alternating with the black veining for luxury appeal
- Create the marble effect on just two accent nails and keep the others solid
Worth knowing: Let your marble base coat fully cure (at least 10 minutes) before adding veining—any stickiness from the base coat will cause your brush strokes to drag and blur instead of gliding cleanly.
3. Minimalist Geometry
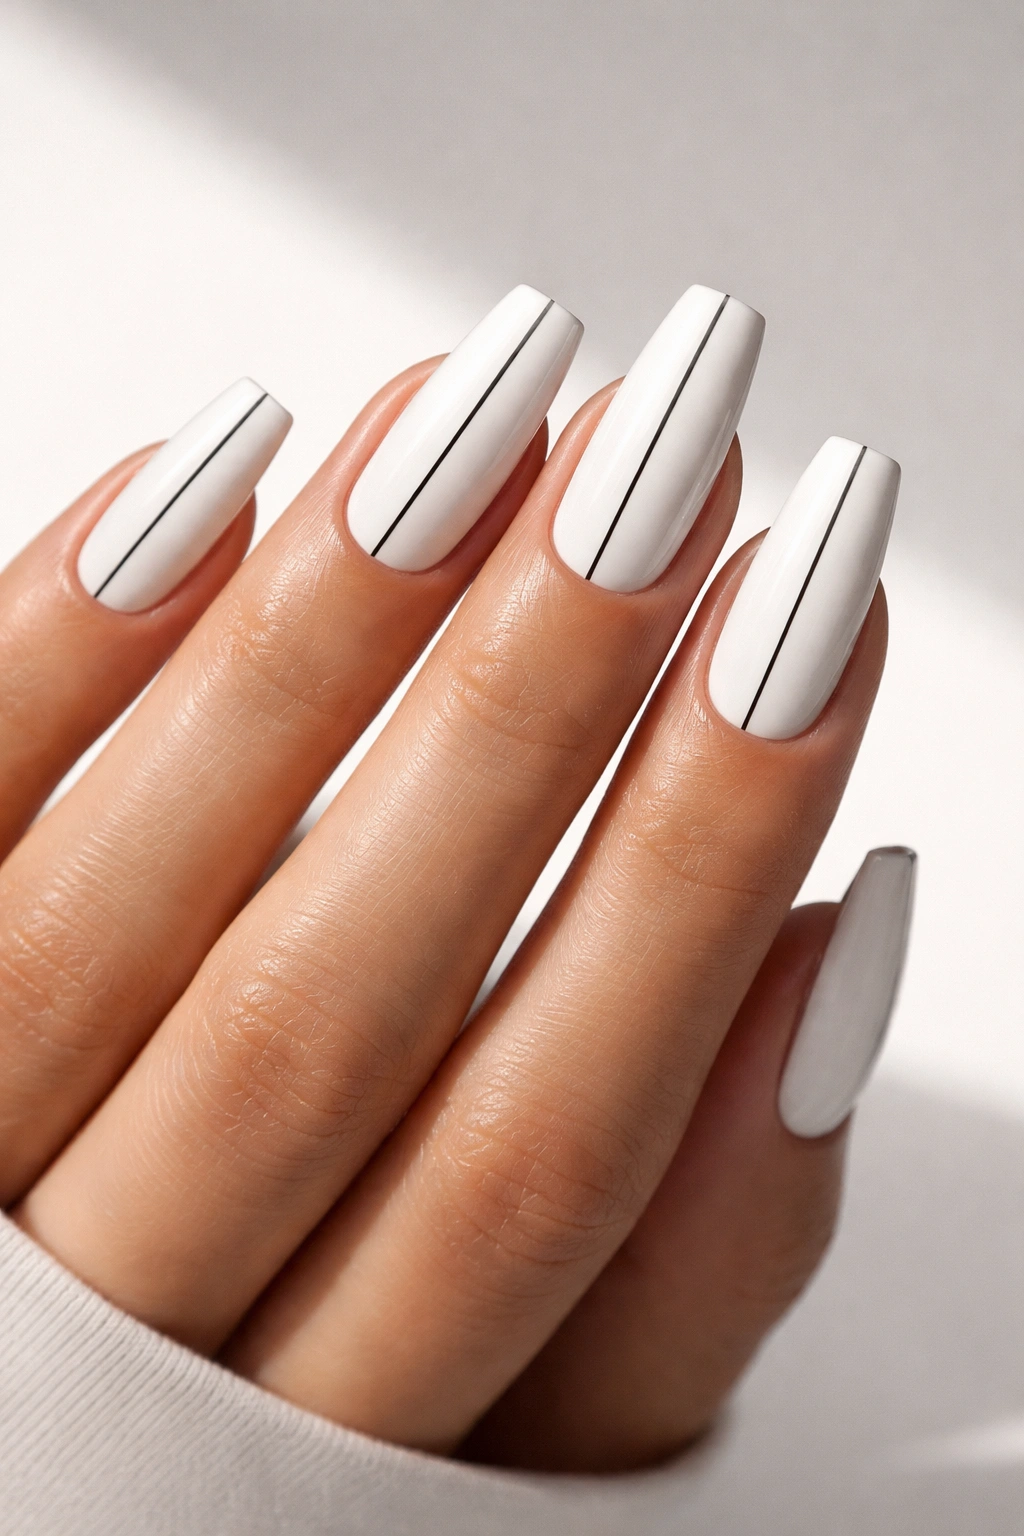
Sometimes less truly is more. On medium coffin nails, a single thin black line running vertically down the center of a white nail—or vice versa—creates a look that’s modern, gallery-like, and completely effortless in appearance (even if the precision takes a bit of patience). You could add a second horizontal line near the tip to create a subtle cross, or keep it to the single line for maximum zen minimalism.
Why Minimalism Matters on This Shape
Coffin nails are already a statement shape, so minimalist design lets the shape itself be the focus. A single perfect line draws attention to the nail’s dimension and proportion rather than competing for attention with busy detail. On medium length, you have enough real estate for the line to register clearly without being overwhelming.
Specific Design Ideas
- A vertical line on just one accent nail, with solid white or black on the others
- A thin vertical line on the entire coffin nail hand, creating a cohesive, monochromatic look
- A small geometric shape (triangle, square, or circle) in the center or corner of each nail
- A single line that connects across multiple nails when your hand is relaxed at rest
Pro tip: Use a ultra-fine nail art brush (0 or 00 size) or even a toothpick dipped in polish for absolute control over line placement and width. Thinner lines require a lighter hand and a brush with good bristle snap.
4. Bold Striped Pattern
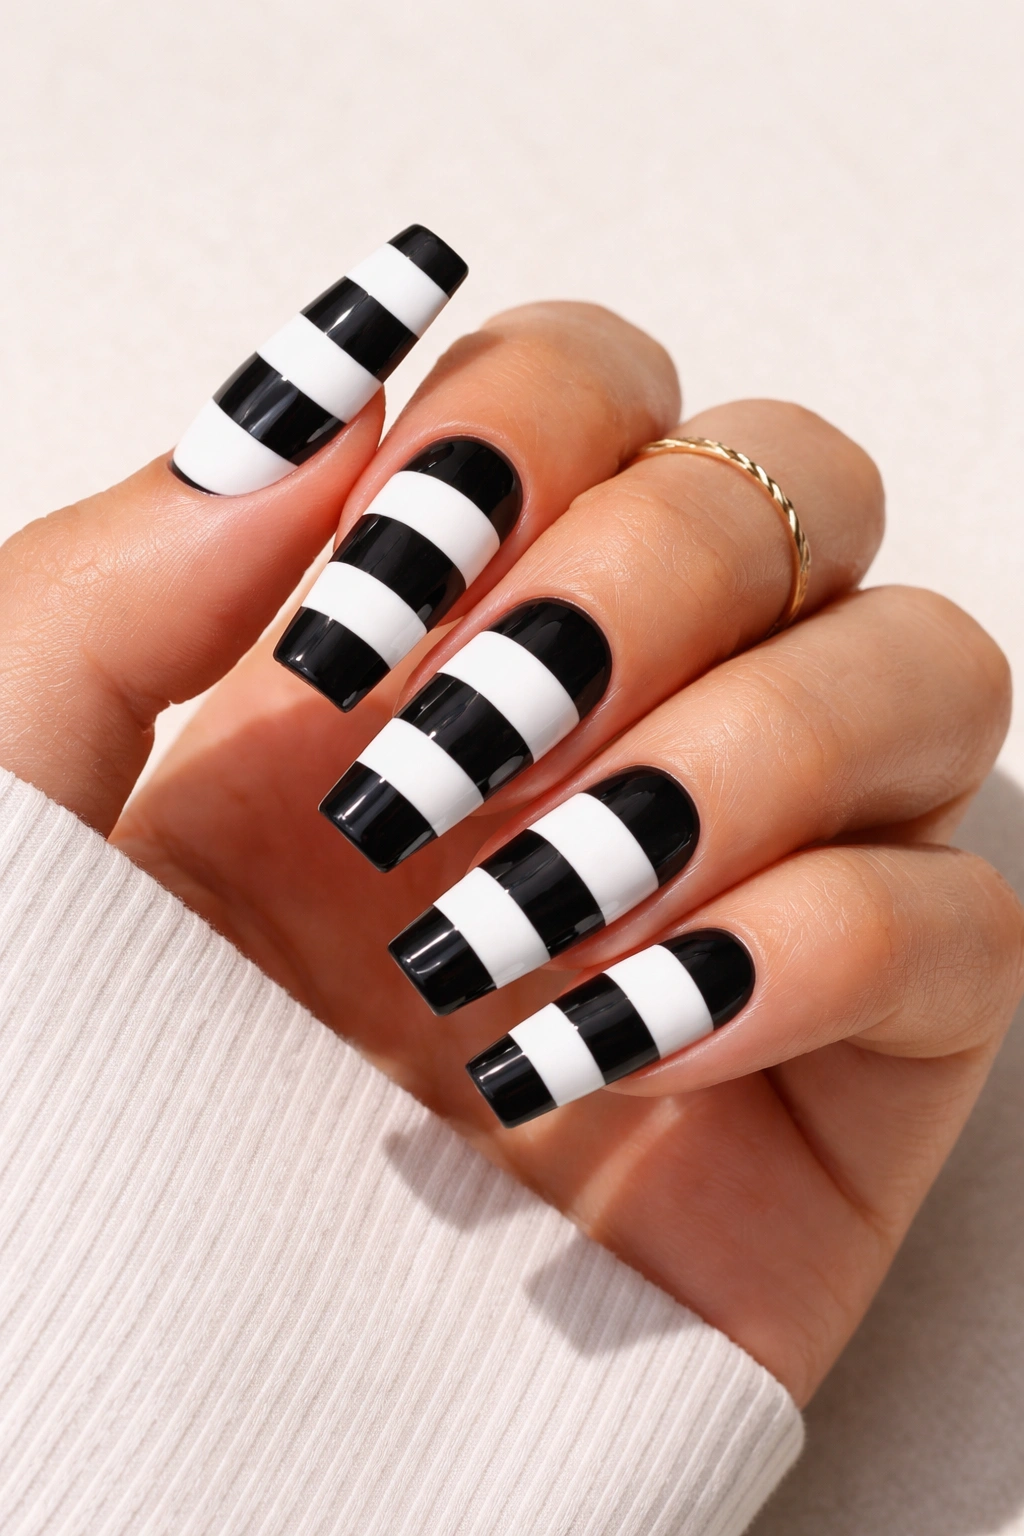
Horizontal stripes in alternating black and white bands create a classic, almost hypnotic effect on coffin nails. Depending on stripe width and spacing, this design can feel anything from sporty to sophisticated. Medium-length coffins accommodate wider stripes beautifully—you can do three or four thick stripes across each nail and the design remains clean and legible without looking cramped.
Creating Clean Stripe Lines
Painter’s tape is your best friend for stripe work. Apply horizontal strips of tape across the nail, leaving gaps where you want white to show, and paint the entire nail black first. Once dry, remove the tape to reveal crisp white stripes underneath. Then flip the direction of your tape and paint again if you want additional complexity, or leave it at that clean black-and-white stripe state.
Variations on the Theme
- Diagonal stripes instead of horizontal for a more dynamic feel
- Thick and thin stripes alternating to add visual interest
- Stripes on just the tip of the coffin nail with a solid base
- Rainbow stripes but in black and white only—various shades of gray creating a gradient stripe effect
Quick fact: Thick stripes (3-4mm wide) look more modern and easier to execute, while thin stripes (1-2mm) feel more delicate and detailed. Choose based on your comfort level with painter’s tape and your desired aesthetic.
5. Negative Space Modern Art
Negative space design leverages the coffin nail’s longer, wider platform to create visual interest by leaving portions of the nail bare (showing the nail bed or base coat) while painting other sections black or white in geometric or organic patterns. Picture a coffin nail where the base is white, the tip edges frame a negative space shape in the center, and thin black lines define the boundary—it’s high-fashion minimalism.
Making Negative Space Work
This requires planning ahead. Sketch your design on paper first, then transfer it to the nail using a light pencil mark or by using guides like painter’s tape. The key is that the empty space is as intentional and striking as the painted areas. It’s not accidental—it’s a design choice.
Design Approaches
- A black frame around the outer edge of the coffin with white center and negative space tip
- A geometric shape (hexagon, diamond, or trapezoid) left unpainted in the center
- Organic flowing shapes that echo the coffin’s silhouette but leave gaps
- A combination of black and white painted sections with strategic gaps between them for rhythm
Insider note: Negative space designs photograph beautifully because the contrast between the painted areas and the bare nail bed creates real visual depth—perfect if you like sharing your nails on social media.
6. Checkerboard Pattern
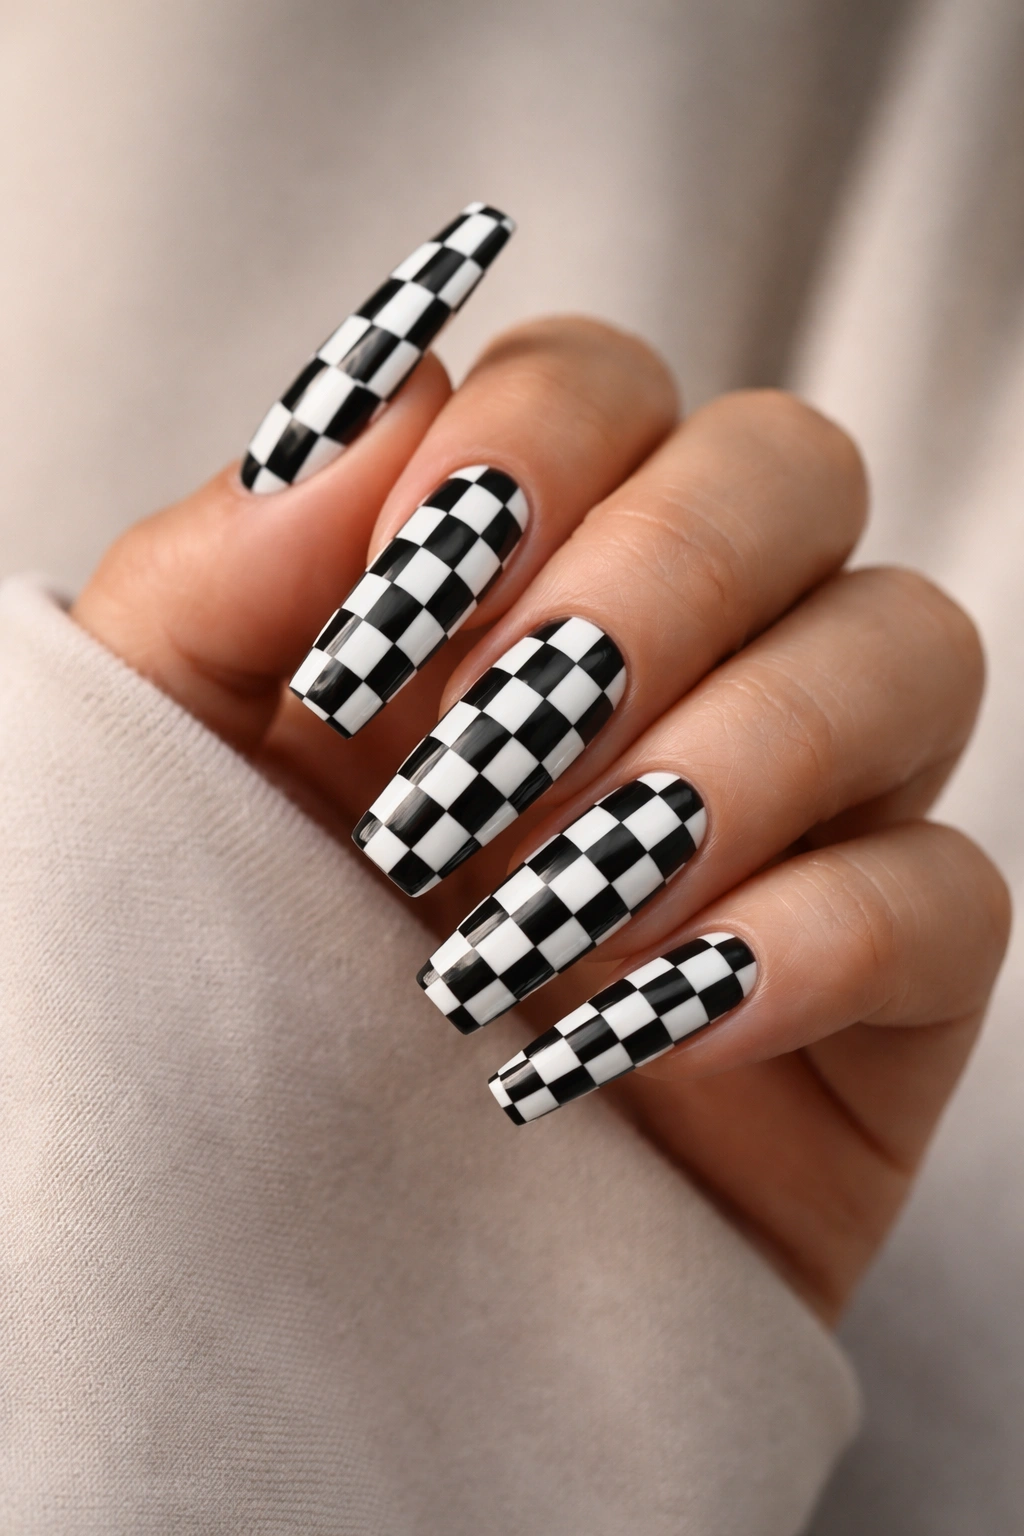
A black and white checkerboard covering the coffin nail is a design that reads bold and graphic from any distance. On medium-length nails, you can fit a genuine checkerboard pattern (even if the squares are small) that actually looks intentional rather than accidental. This design works especially well if you’re confident with a thin brush or if you’re willing to spend time with painter’s tape creating tiny squares.
The Patient Approach vs. The Efficient Approach
Patient approach: Use painter’s tape to create a grid, paint one color in alternating squares, let dry, remove tape, apply the other color. This takes longer but produces perfectly clean edges. Efficient approach: Use a small nail art dotting tool or the end of a thin brush to freehand paint tiny squares in a checkerboard pattern. It’s faster, and the slight imperfections actually add charm.
Checkerboard Variations
- Gradient checkerboard where the white fades to gray on one side
- Checkerboard pattern on just the tip with solid white base
- Mixed-size checkerboard (some large squares, some small) for visual complexity
- Metallic checkerboard using black polish with white and a touch of silver or gold
What to know: Plan your square size before you start. For medium coffin nails, squares around 3-4mm work well—visible enough to read as intentional, small enough that you fit several across the width of the nail.
7. Ombre Gradient Black to White

An ombre or gradient effect that transitions smoothly from solid black at the base to pure white at the tip (or vice versa) creates a sophisticated, almost three-dimensional effect on coffin nails. The elongated shape of the coffin nail gives plenty of room for the color transition to feel gradual and polished rather than abrupt or choppy.
How to Create a Seamless Gradient
The sponge method is your friend. Use a makeup sponge, eyeshadow sponge, or even a wedge-shaped cosmetic sponge. Dab black polish on one end and white on the other, then press the sponge onto your nail and lift carefully. The color transitions where the polishes meet on the sponge. Repeat this 2-3 times if your first gradient isn’t smooth enough. The beauty of this method is that subtle imperfections create organic texture.
Gradient Direction Ideas
- Base to tip (most common and flattering on coffin shape)
- Inner nail to outer edge, creating a halo effect
- Diagonal gradient running from upper left to lower right
- Multiple gradient segments across the nail for striped ombre
Pro tip: Clean your sponge between applications if you want cleaner color transition, or leave old polish bits on the sponge if you want the gradient to be more blended and diffused. Different outcomes, both beautiful.
8. Splatter and Abstract Art
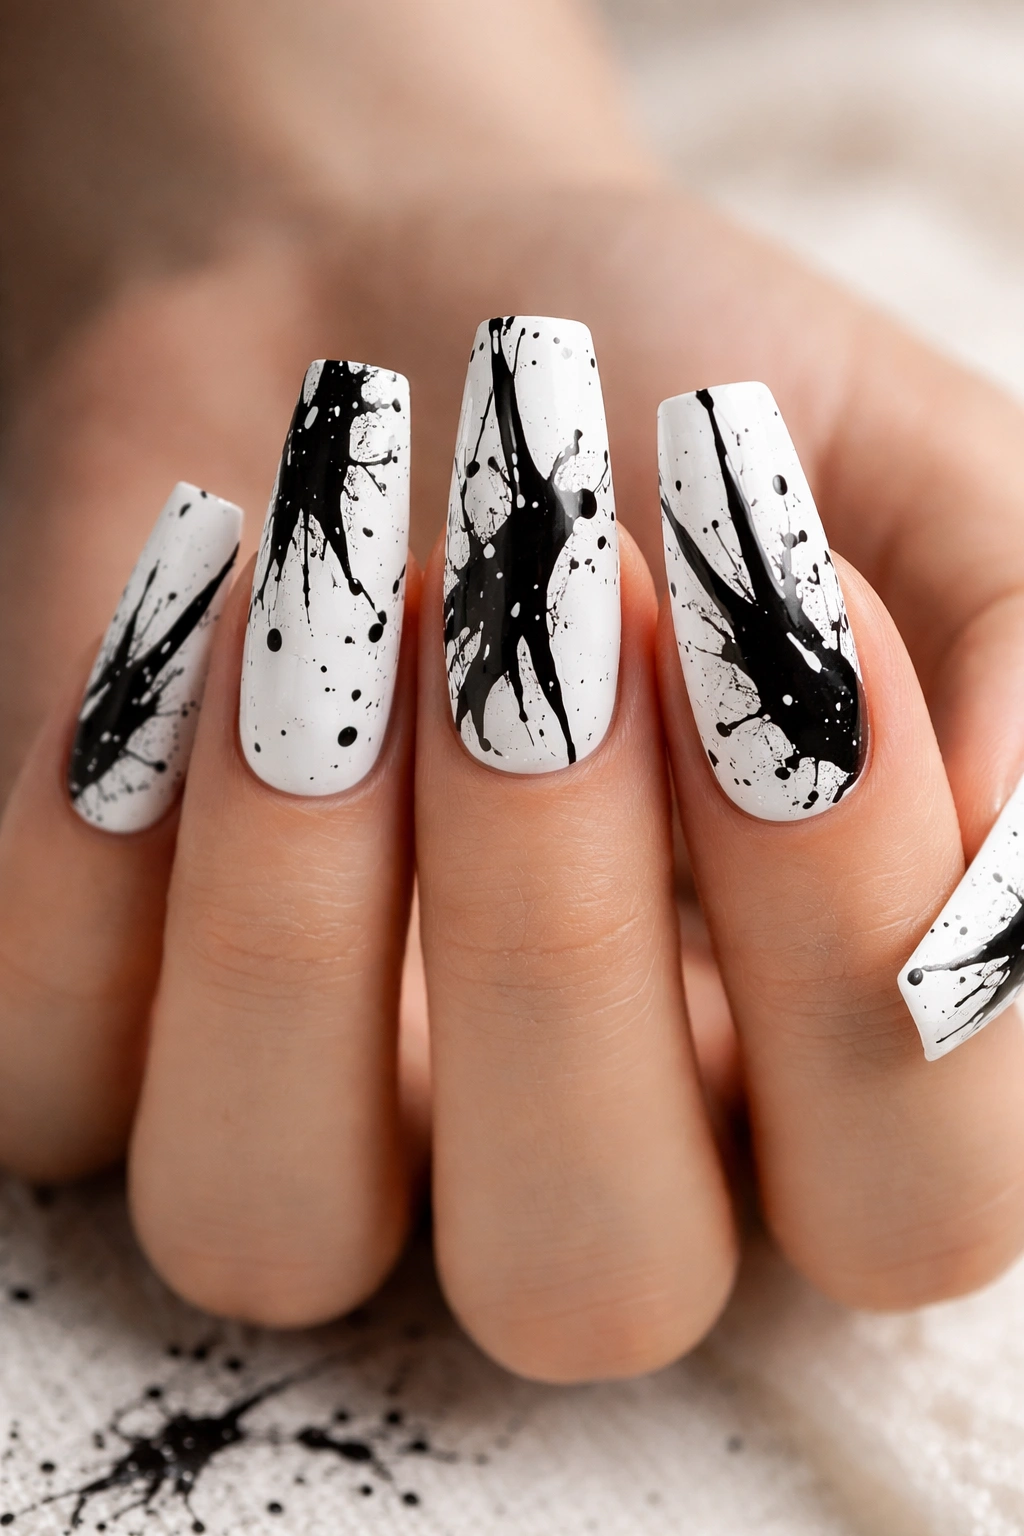
Flick black polish onto a white base, or white polish onto a black base, creating a splatter pattern that looks intentional, edgy, and modern. This is one of the most forgiving designs because perfection isn’t the goal—the more organic and unpredictable the splatter, the better it looks. It works beautifully on medium coffin nails because the surface area accommodates various splatter sizes.
Technique for Controlled Splatters
Use a toothpick dipped in polish, then flick it with your finger toward the nail. Or use a thin brush loaded with polish and tap it against another brush to create tiny splatters. You want some splatters to be large and prominent, others tiny and delicate, creating visual rhythm. Concentrate heavier splatter on one area (like the tip) and lighter splatter on another (the base) for intentional composition.
Splatter Design Variations
- All black splatter on a white base for maximum contrast
- Mixed black and white splatters on a nude or gray base for subtlety
- Concentrated splatter creating a gradient effect from sparse to dense
- Adding a single clean stripe or geometric shape alongside the splatter for structure
Worth knowing: Your base coat absolutely must be completely dry before splattering, otherwise the polish will drag across the surface instead of sticking cleanly. Wait at least 15 minutes.
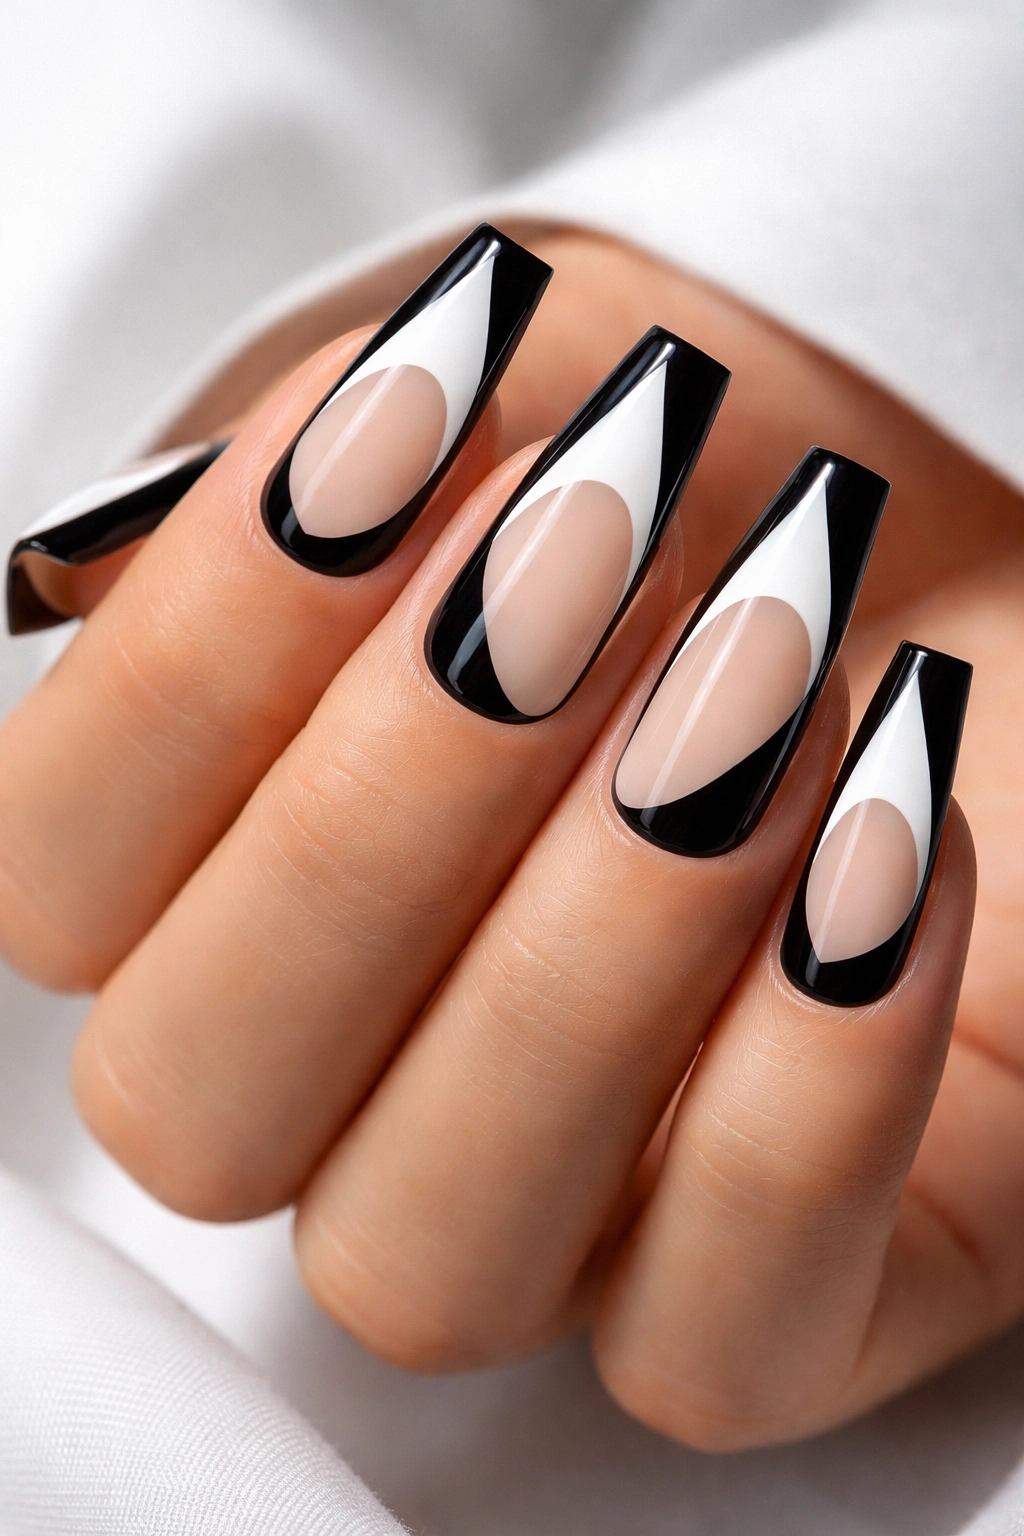
9. French Tip with a Modern Twist
The classic French tip gets a coffin makeover. Instead of a thin white line at the tip, create a thicker white or black band across the coffin nail’s tip (about ¼ of the nail length), and add details within that band—thin lines, geometric shapes, or a subtle pattern. This design combines the elegance of French tips with the visual interest of detail work.
Modern French Tip Variations
- A thick white tip with thin black veining lines creating a marble effect
- A wide black tip with white geometric shapes (triangles, circles) scattered within
- A white tip with a thin black stripe running horizontally through the center
- A color-blocked French tip where the tip is split into black and white halves
Why This Works on Coffin Nails
The elongated coffin shape makes a French tip look incredibly elegant because the tip’s proportions feel balanced rather than stubby. A medium-length coffin is long enough that a thick French tip (¼ of the nail) doesn’t overwhelm the design—it feels intentional and statement-making without looking ridiculous.
Insider note: The French tip remains one of the most universally flattering nail designs because it subtly elongates your fingers while looking refined in any setting—professional or casual.
10. Half-Moon Design with Coffin Shape

A half-moon design where a curved black or white band wraps around the base of your coffin nail (at the cuticle area) creates an Art Deco feel that’s both vintage and contemporary. The coffin shape actually enhances this design because the wider base of the coffin provides a larger canvas for the moon shape.
Executing the Half-Moon
Use a curved piece of painter’s tape shaped like a half-moon, or freehand the curve with a thin brush. Apply your base coat (white if you want a black half-moon, black if you want white). Let dry, then carefully paint your half-moon color in the curved band at the base. The coffin’s wider base gives you plenty of room to make this curve graceful and visible without it feeling cramped.
Half-Moon Variations
- A thin black half-moon at the base with a white nail and white tip for maximum contrast
- Two half-moons (one at the base in black, one at the tip in white) creating visual bookends
- A half-moon filled with geometric pattern (tiny stripes or dots) instead of solid color
- Mixed finishes where the half-moon is matte and the rest is glossy
Quick fact: The half-moon design was popularized in nail art during the Art Deco period of the 1920s. It’s making a major comeback because it’s instantly recognizable and undeniably elegant.
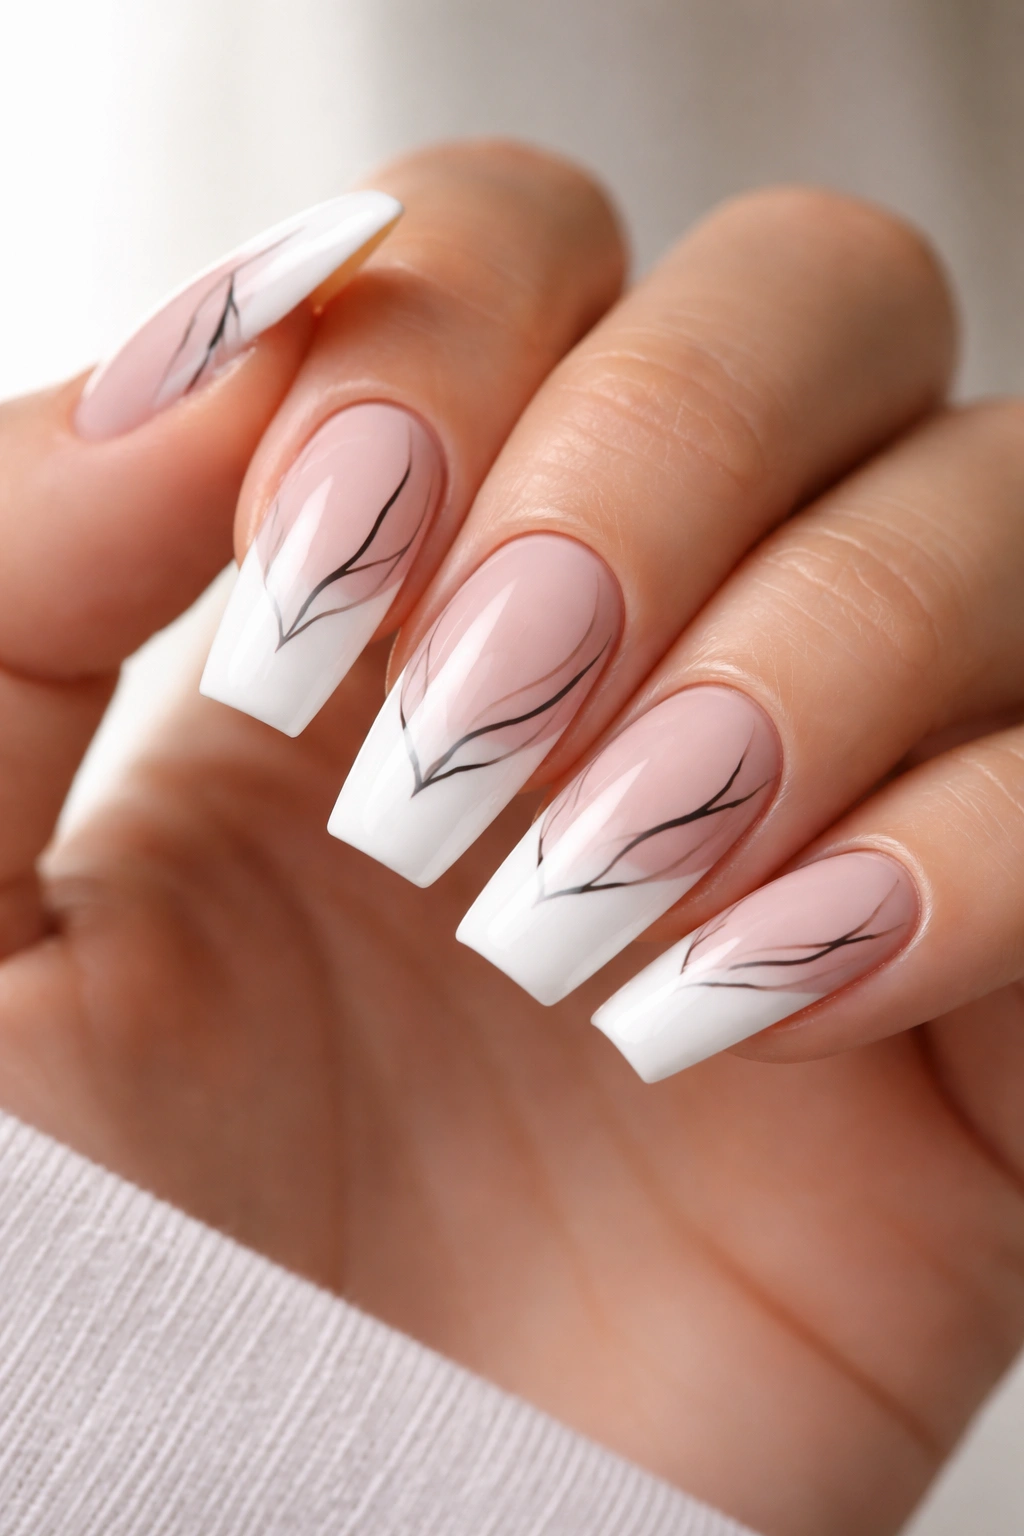
11. Floral Line Art
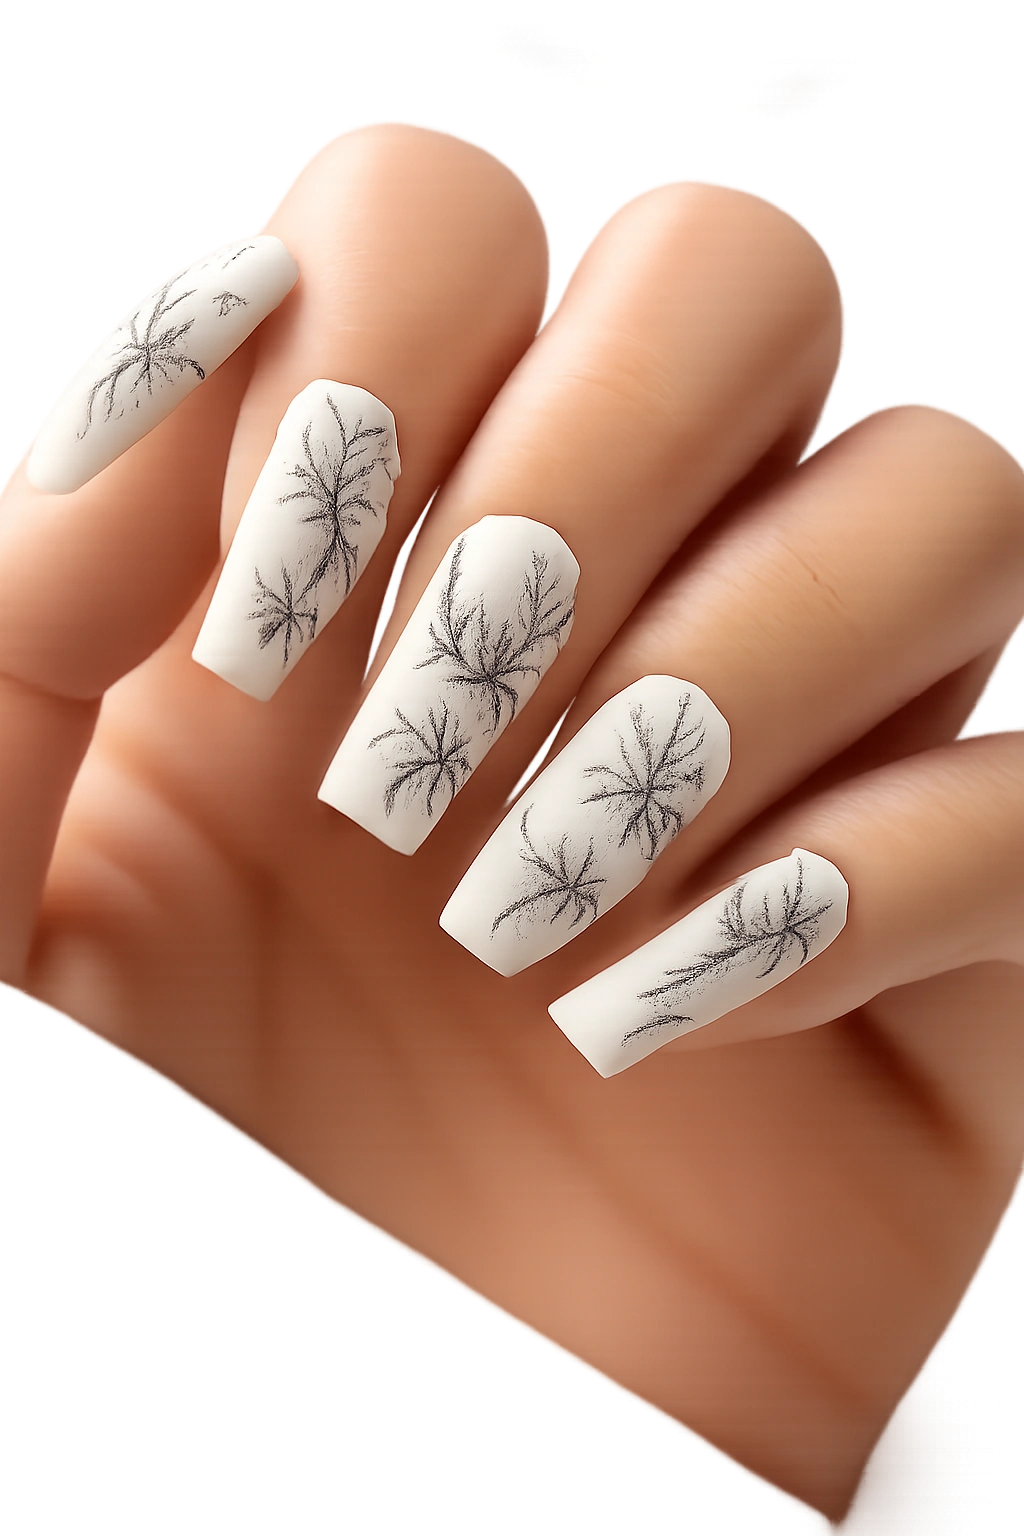
Delicate black line drawings of flowers, vines, or botanical elements on a white base create an intricate, detailed look that still feels modern and wearable. A medium coffin nail accommodates small floral designs beautifully—you have enough space for detail without needing the design to be so tiny that it becomes a squinting game.
Creating Floral Designs
A thin nail art brush (size 0 or even smaller) is essential. Sketch your design lightly in pencil first, then paint over it with black polish. Simple flowers (a circle with petal lines, or a minimalist bud shape) work better than overly realistic botanical detail. The key is that the design reads clearly from arm’s length away, not just under magnification.
Floral Design Ideas
- A single delicate flower on the accent nail, solid white or black on others
- A vine with small flowers running vertically along one side of each nail
- Scattered small flowers across all nails creating a cohesive garden feel
- Detailed flowers concentrated on the coffin tip with clean white base below
Pro tip: Practice your floral design on paper or a practice nail wheel before committing to your actual nails. Small line work requires confidence, and practicing builds that muscle memory so your hand is steady when it counts.
12. Geometric Colorblock
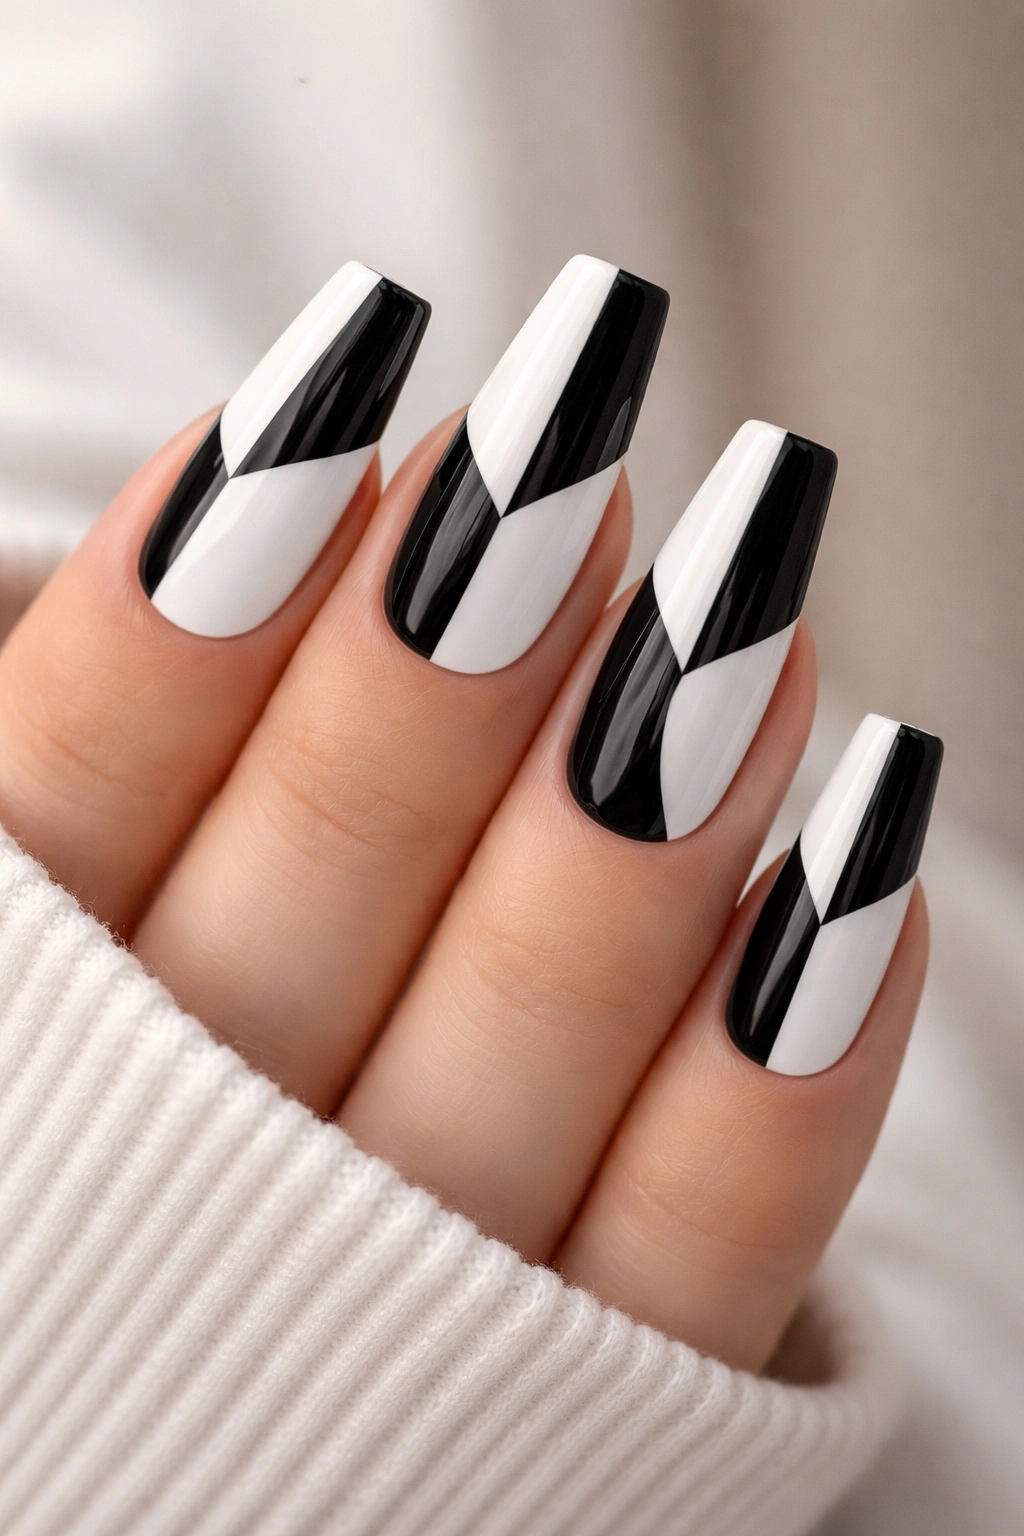
Break the coffin nail into distinct geometric sections—triangles, rectangles, trapezoids—and fill each section with alternating black and white. This is bolder and more architectural than simple color blocking, and it suits the coffin shape’s naturally angular silhouette. Medium coffin nails have enough width that geometric sections feel substantial rather than fussy.
Planning Geometric Sections
Sketch your geometric layout before you paint. You might do three large triangles across the width of the nail, or a central rectangle surrounded by smaller shapes. Painter’s tape is invaluable here—tape off each geometric section, paint it, and remove the tape for clean lines. Even if your tape work isn’t perfectly precise, the geometry still reads clearly because of the strong black-and-white contrast.
Geometric Arrangements
- A single large triangle in the tip, white or black, with the opposite color in the base
- Vertical geometric sections creating a modern stained-glass effect
- Nested geometric shapes (a triangle within a rectangle within the nail outline) for depth
- Asymmetrical geometric sections that look intentionally off-balance
Worth knowing: Asymmetrical geometric designs feel more contemporary and artistic than perfectly symmetrical ones. Don’t stress about making every section identical or perfectly measured.
13. Reverse French with Accent Details
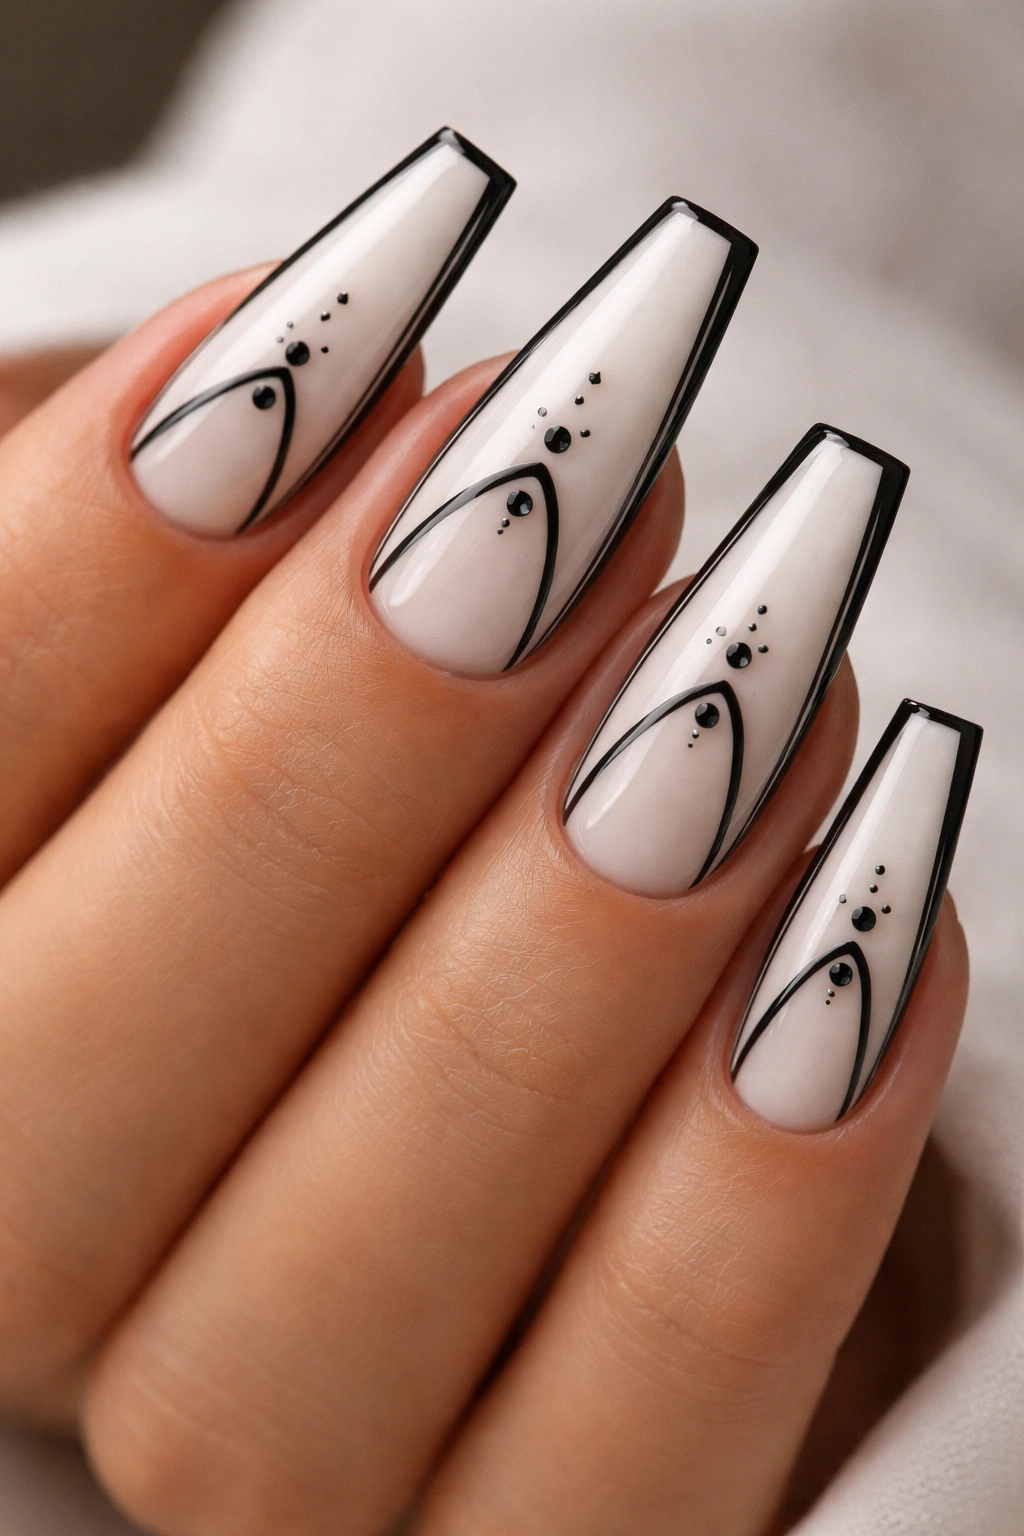
Instead of a colored tip, color the base and sides of the coffin nail in white (or black), leaving a negative space frame at the very tip that you fill with detailed pattern—small dots, tiny lines, or a delicate design. This inverts the traditional French tip concept and creates a layered, sophisticated look that reads as high-effort (even though it’s actually straightforward).
Reverse French Design Execution
Paint your base coat (white or black). Once dry, use painter’s tape to mask off an area at the tip (about ¼ inch from the edge), leaving a frame and a center tip space. Paint the exposed center tip with the opposite color, then remove the tape. Add your details to that center tip area—a tiny pattern, a stroke of color, or geometric shapes.
Detail Options for the Tip Frame
- Tiny black dots on a white background (or vice versa)
- Delicate line work creating a linear pattern
- A small geometric shape repeated across the tip
- A subtle gradient filling the tip area
Insider note: This design works brilliantly because it creates visual framing—your eye is drawn to the contrast and detail at the nail tip, making the entire hand look intentional and curated.
14. Matte and Glossy Contrast
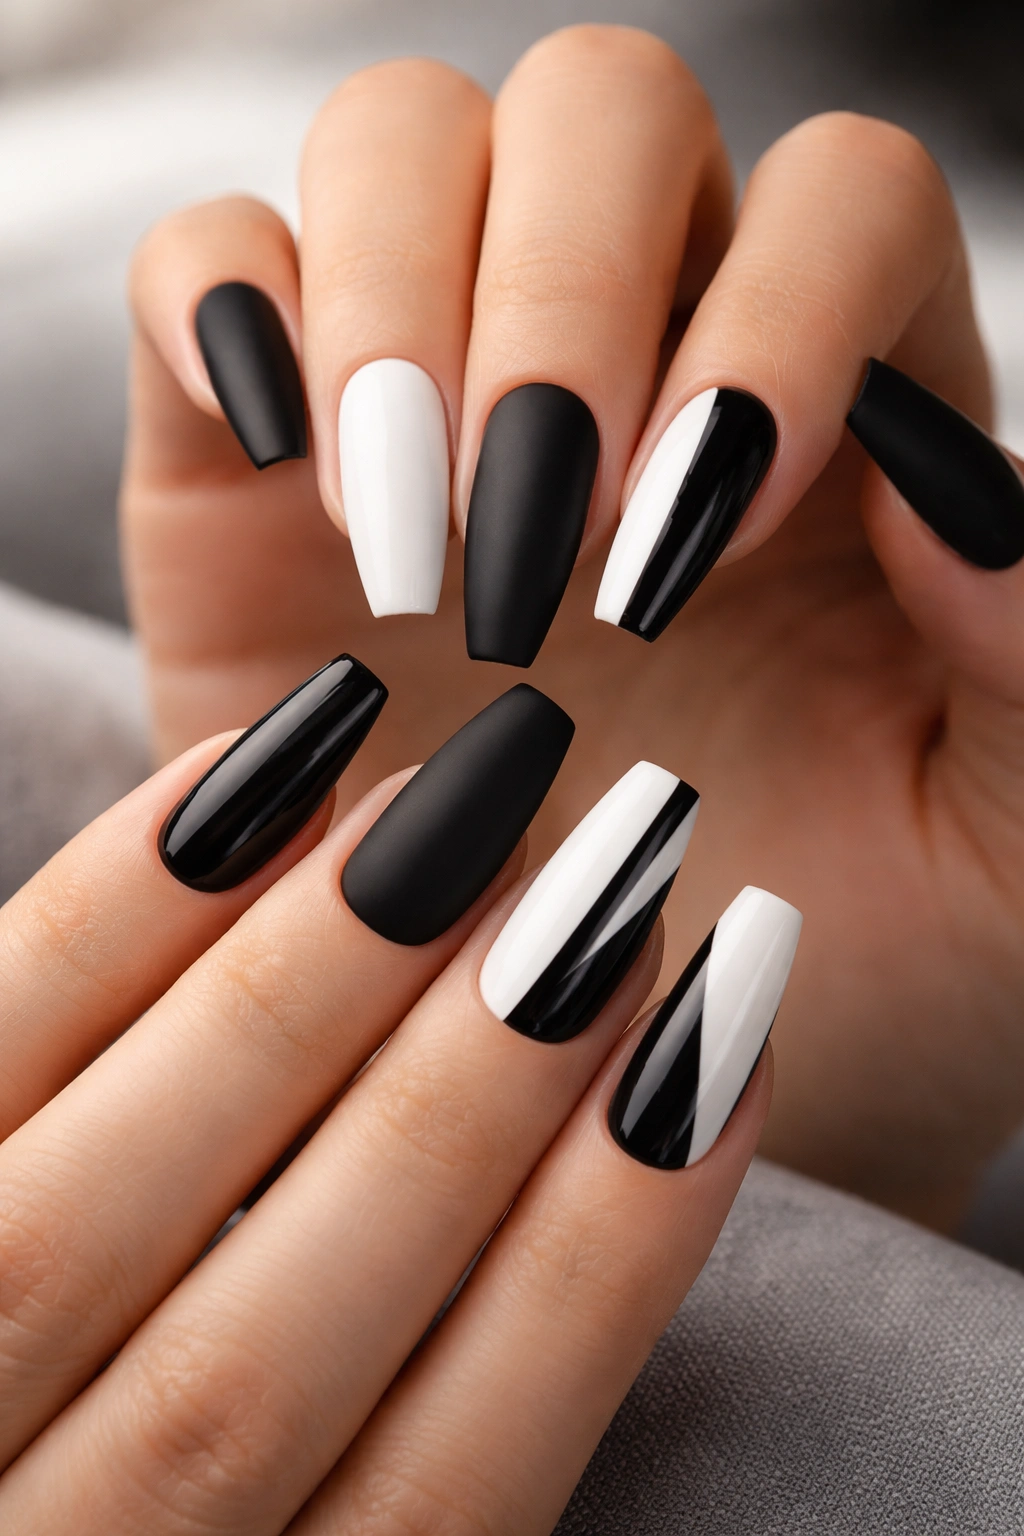
Use the same black and white color scheme, but play with finishes: a matte black section alongside a glossy white section, or matte stripes alternating with glossy stripes. The textural difference adds dimension that photographs beautifully and feels sophisticated in person. On a coffin nail, this contrast feels especially luxe because the shape already commands attention.
Achieving Matte vs. Glossy
Paint your design first with regular glossy polish. Once completely dry, apply a matte top coat only to the sections you want matte, or use painter’s tape to mask off areas before applying matte top coat. Some brands also offer matte polishes in true black and white, which simplifies the process—just paint one color glossy and the other matte, no top coats needed.
Matte and Glossy Ideas
- Black stripes matte, white stripes glossy, running horizontally
- Matte base with glossy geometric shapes on top
- Matte coffin tip with glossy white base creating contrast
- A checkerboard pattern where every other square is matte and the rest glossy
Pro tip: Matte finishes show fingerprints and dust more readily than glossy, so expect to touch up or wipe down your nails more frequently. The trade-off is worth it for the visual impact.
15. Rhinestone and Glitter Accents
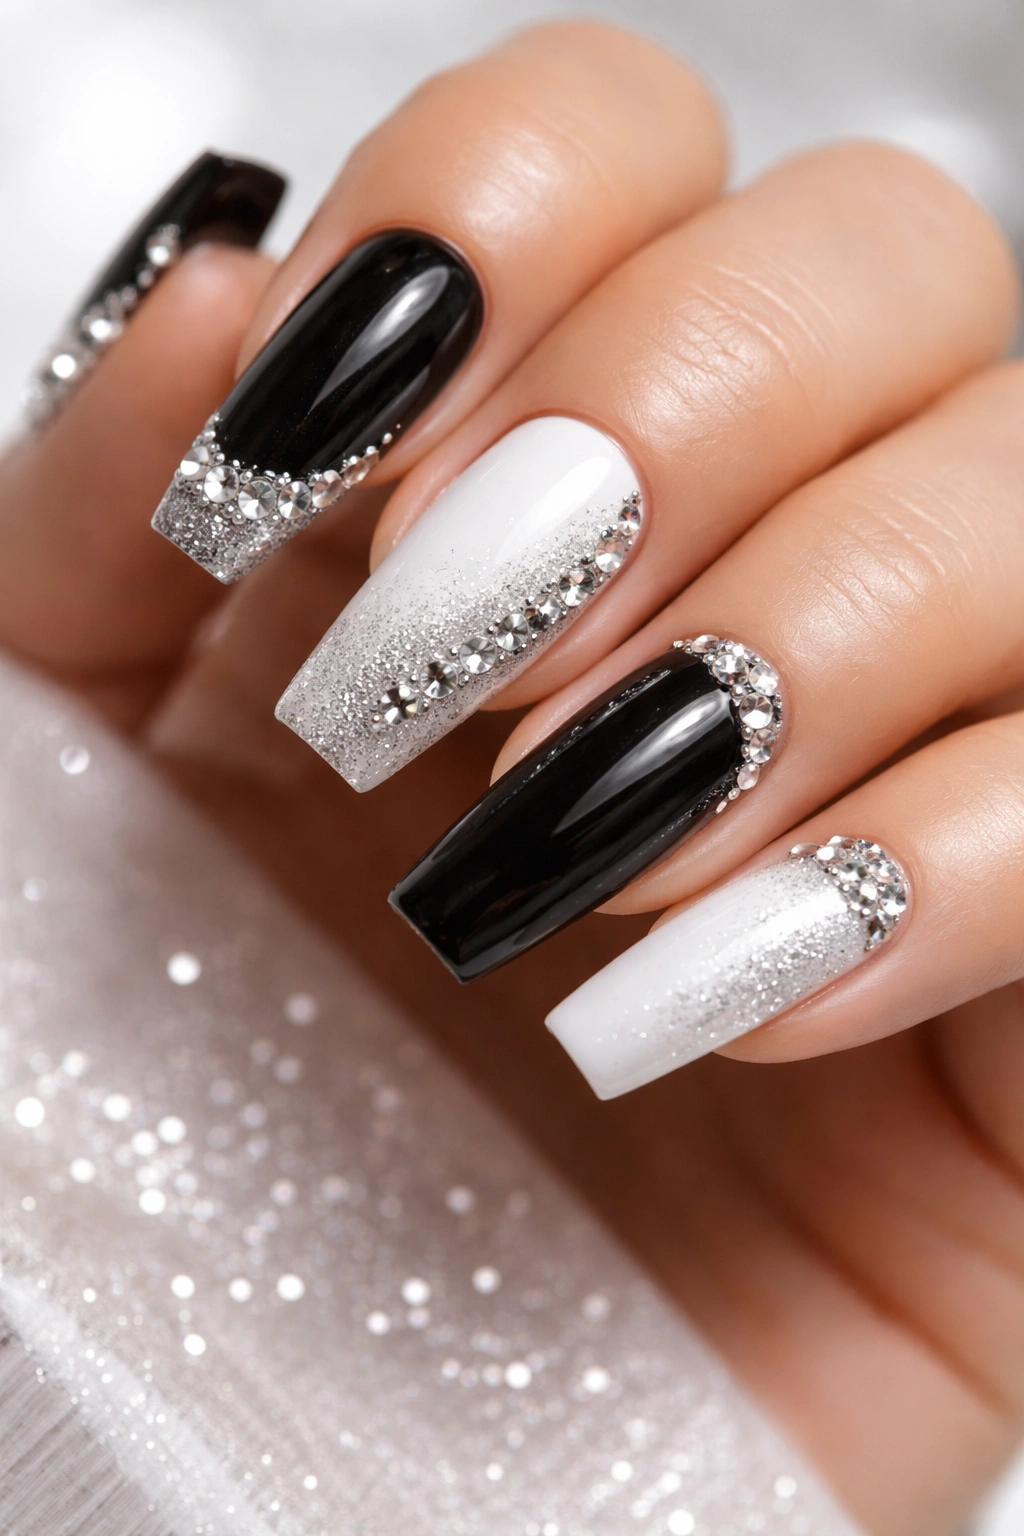
Combine clean black and white design with strategic rhinestone or glitter placement for a design that captures light and adds sparkle without feeling over-the-top. A coffin nail’s shape actually works beautifully with scattered rhinestones—they follow the nail’s lines rather than fighting against them. Medium length gives you enough room to add accent stones without making the design feel cramped.
Placing Rhinestones Strategically
Use nail glue or a thick gel top coat to anchor rhinestones. Create a line of tiny rhinestones along the French tip area, or scatter them in a gradient (more concentrated near the tip, sparse near the base). You could also outline a geometric design with rhinestones for maximum drama. The key is restraint—three to five well-placed stones per nail looks elegant; covering the entire nail reads as costume rather than sophisticated.
Glitter and Rhinestone Ideas
- A line of small rhinestones following the coffin tip’s curve
- Scattered rhinestones creating an ombre effect from tip to base
- A halo of tiny glitter around accent nails only
- Clear glitter in black sections, black glitter in white sections for subtle shimmer
Worth knowing: Use quality nail glue specifically made for rhinestones, not regular glue or topcoat adhesive. Quality stones catch light crisply and stay secure much longer than cheap alternatives.
Final Thoughts
Black and white nail designs on medium coffin nails strike that perfect balance between making a statement and remaining genuinely wearable. You’re not limited to one approach—these designs mix and match beautifully. A tuxedo split on one hand, geometric colorblock on another. A minimal line design on Tuesday that evolves into splatter art by Friday.
The medium coffin length specifically is forgiving because you get the dramatic elongation and elegant shape without the breakage issues that plague super-long nails. You can actually live in these designs, wear them to work, type on a keyboard, open doors—and they still read as intentional and fashionable.
The real key is choosing a design that actually resonates with how you like to present yourself. The most stunning nail art in the world falls flat if it doesn’t feel authentically you. Whether you’re minimalist (that single perfect line) or maximalist (rhinestones plus geometric pattern plus texture contrast), there’s a black and white coffin nail design waiting for you.
