

Curved coffin nails have become a cornerstone of modern nail design, offering the perfect canvas for creativity while maintaining an air of sophistication and edge. The distinctive tapered silhouette with softly rounded edges creates depth and dimension that straight styles simply can’t match, and when you combine that shape with long lengths, you’ve got a nail structure that commands attention. Whether you’re after bold statement looks or subtle elegant designs, curved coffin nails deliver versatility that works for virtually every aesthetic—from minimalist chic to full-on glamour.
The beauty of this nail shape lies in how it flatters the hand while providing real estate for intricate nail art. The curve creates natural shadows and highlights that make even simple designs look more sophisticated. Long nails amplify this effect, giving your artist more space to play with gradients, patterns, textures, and embellishments without feeling cramped. If you’ve been wearing the same nail design on repeat or struggling to find looks that actually suit this shape, you’re about to discover some seriously stunning options.
What makes curved coffin nails special compared to straight coffin or almond shapes is the way they catch light and movement. The subtle curve—not as dramatic as a full almond, but more defined than a square—creates a modern aesthetic that reads both current and timeless. Long curved coffin nails work across professional settings, casual everyday wear, and special occasions. They’re forgiving enough that slight imperfections in application actually add to the handmade charm, yet structured enough to showcase intricate designs beautifully.
Ready to transform your nail game? These 15 designs work beautifully on curved coffin nails and will give you the inspiration to try something new.
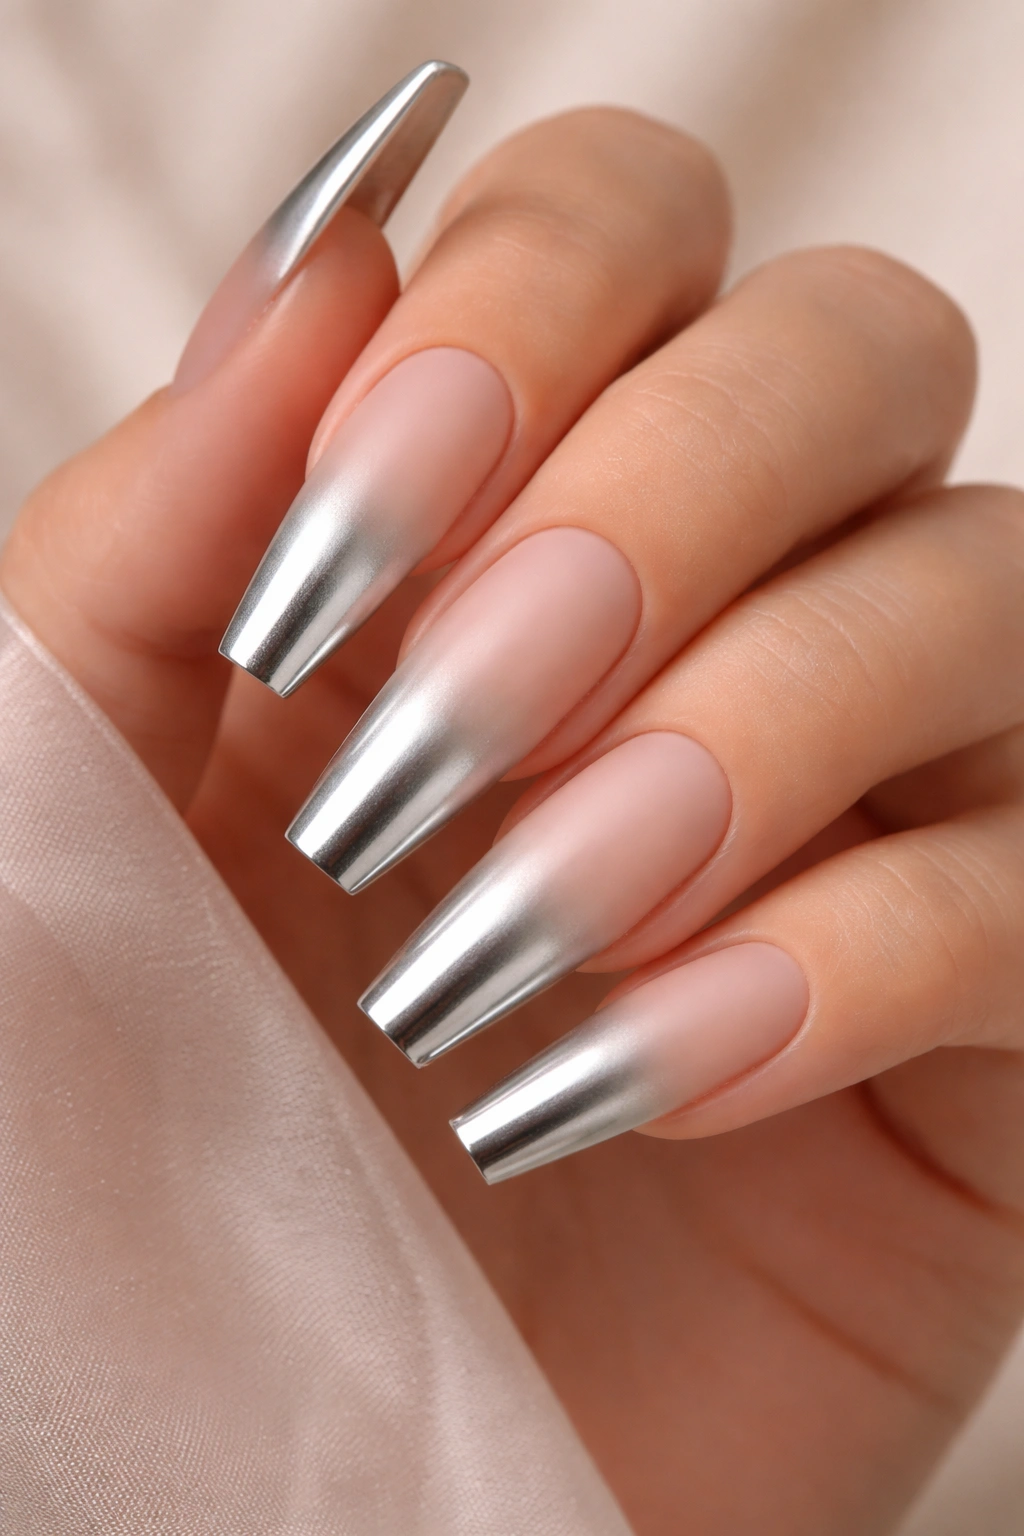
1. Soft Ombré Gradient with Chrome Accents
This design combines a smooth color gradient with reflective metallic details for an effect that’s both calming and eye-catching. Start with a nude or pale pink base that gradually transitions to a deeper rose or mauve shade toward the tips, creating depth that follows the natural curve of the nail. Add a thin chrome powder stripe down the center or along one edge to catch light with every movement—it transforms an otherwise understated design into something truly luxe.
Why This Works on Curved Coffins
The gradient follows the nail’s natural shape and makes the curve appear more pronounced and elegant. Chrome accents draw attention to the design’s structure without overwhelming it, and the soft color progression is flattering to any skin tone.
How to Achieve It
- Use a sponge to apply two or three complementary shades, overlapping them slightly for a seamless blend
- Seal with matte or glossy topcoat depending on your preference
- Apply chrome powder with a dry brush or applicator, working in light strokes to avoid overpowering the gradient
- Chrome powder pairs especially well with nude-to-pink or gray-to-blue transitions
Pro tip: Practice your gradient on a practice wheel or false tip first—the sponging motion takes a few tries to get smooth, but once you nail it, you’ll use this technique constantly.
2. Negative Space Geometric with Thin Gold Lines
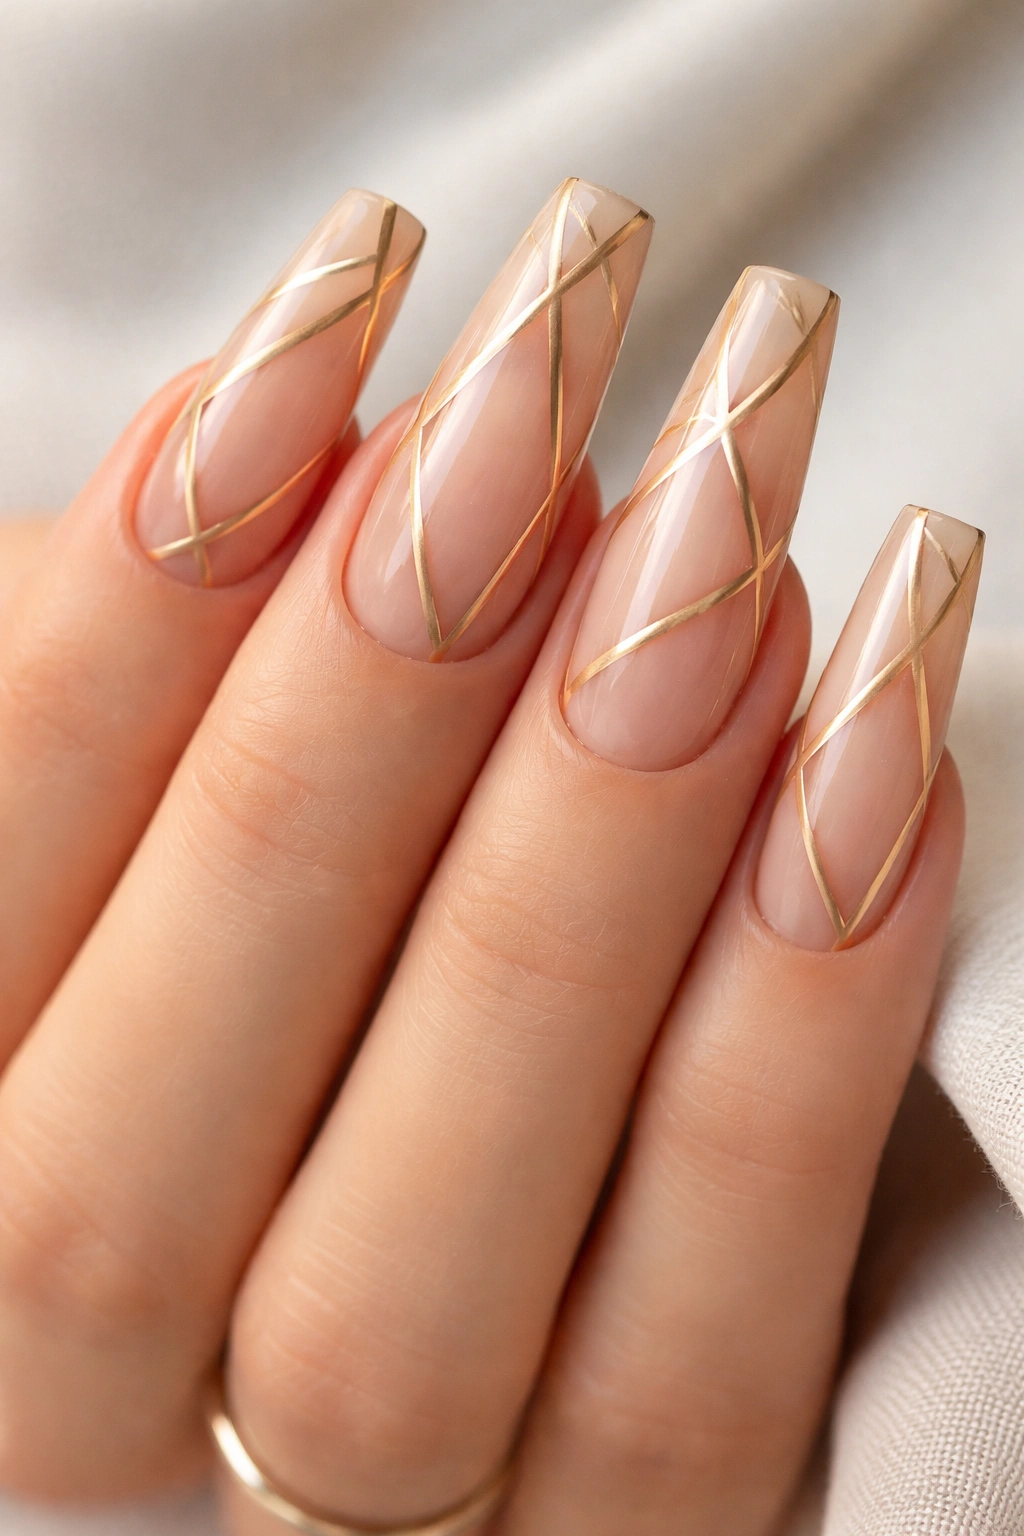
Negative space designs make curved coffin nails look even more sculpted because they emphasize the shape itself. Create geometric patterns—triangles, stripes, or angular shapes—by leaving the natural nail visible and using thin gold or copper lines to define the boundaries. The negative space can cover 40-50% of the nail surface while the colored or decorated sections anchor the design.
The Power of Minimalism
Negative space designs feel modern, intentional, and way more sophisticated than they look to create. They also showcase nail length beautifully because the curves of the coffin shape become part of the design itself.
Execution Tips
- Use thin striping brushes or nail art liners to create perfectly straight lines
- Metallic accents in gold, rose gold, or copper work best for this style
- Keep background colors neutral: nude, white, soft gray, or pale blush
- Seal everything under a thick glossy topcoat to make the gold lines really pop
3. Marble Effect in Black and White
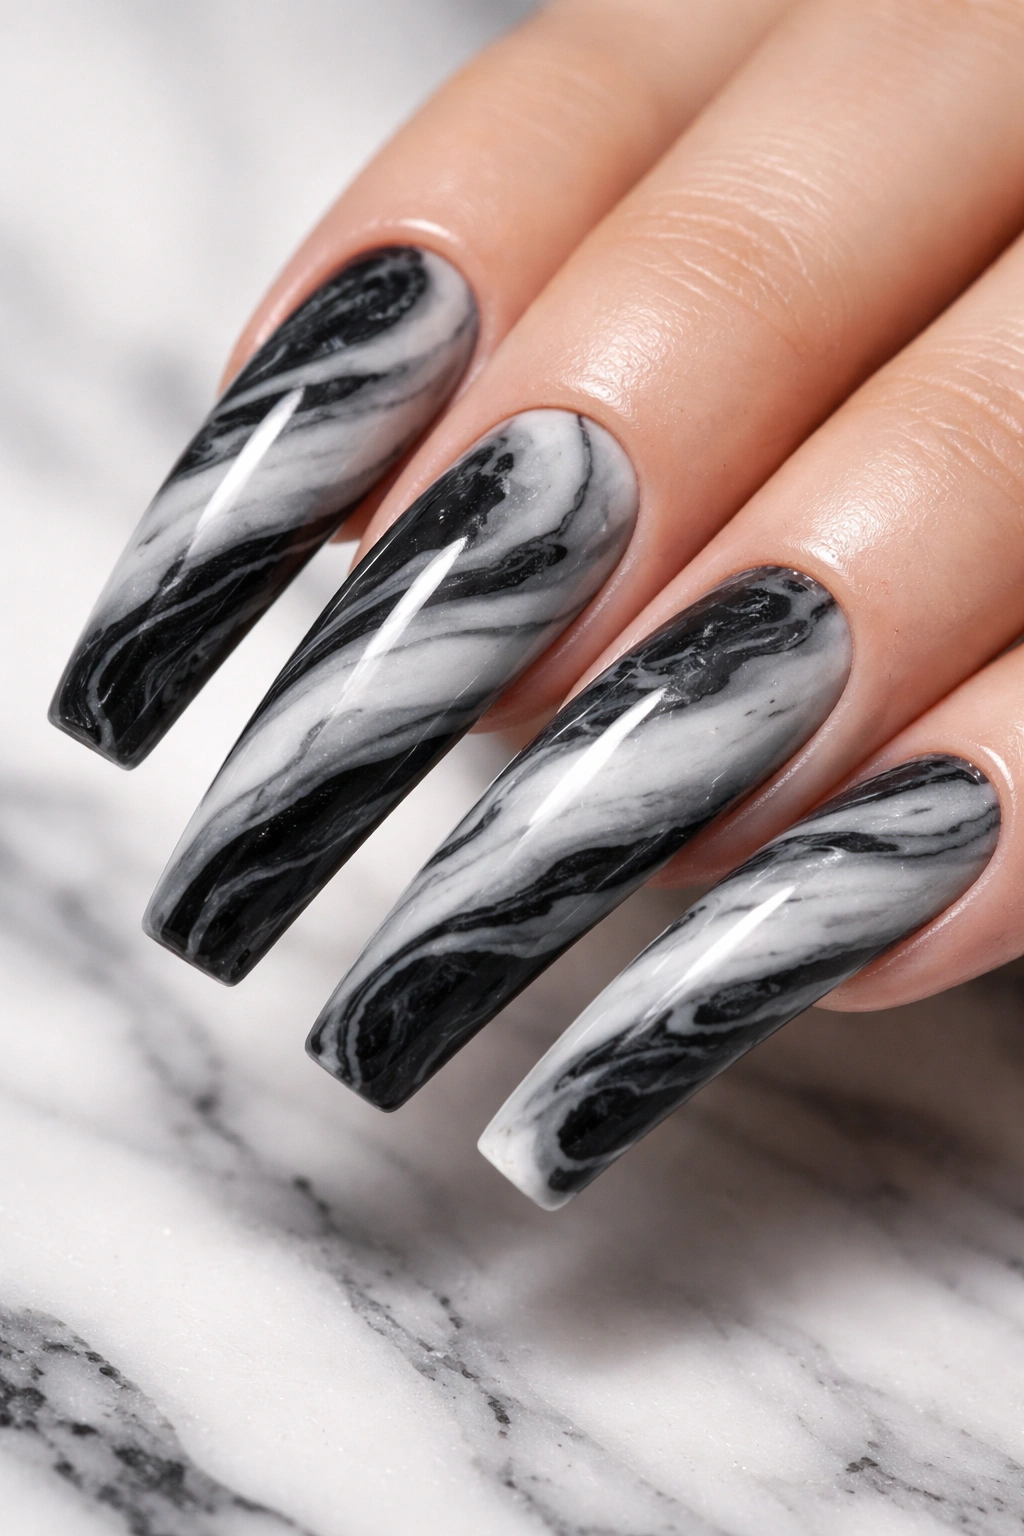
Marble nail art on curved coffin shapes creates a sophisticated, high-fashion look that works for virtually any occasion. Swirl black and white (or gray and white) together on a wet base using a thin brush or toothpick, letting the colors naturally blend and create organic veining patterns. The marble effect looks organic on curved nails because the curves enhance the natural flow of the design.
Why Marble Feels Elevated
Marble mimics luxurious stone and automatically signals elegance. On long curved coffin nails, it feels less trendy and more timeless—the kind of design people will admire for years rather than months.
Application Strategy
- Work on one or two nails at a time before the base dries
- Create veining by dragging a thin brush through wet color while it’s still workable
- Seal with a generous glossy topcoat—the shine amplifies the marble effect
- Keep the marble to the nail bed and let a clean white or nude tip frame the design
4. Encapsulated Glitter and Confetti Look
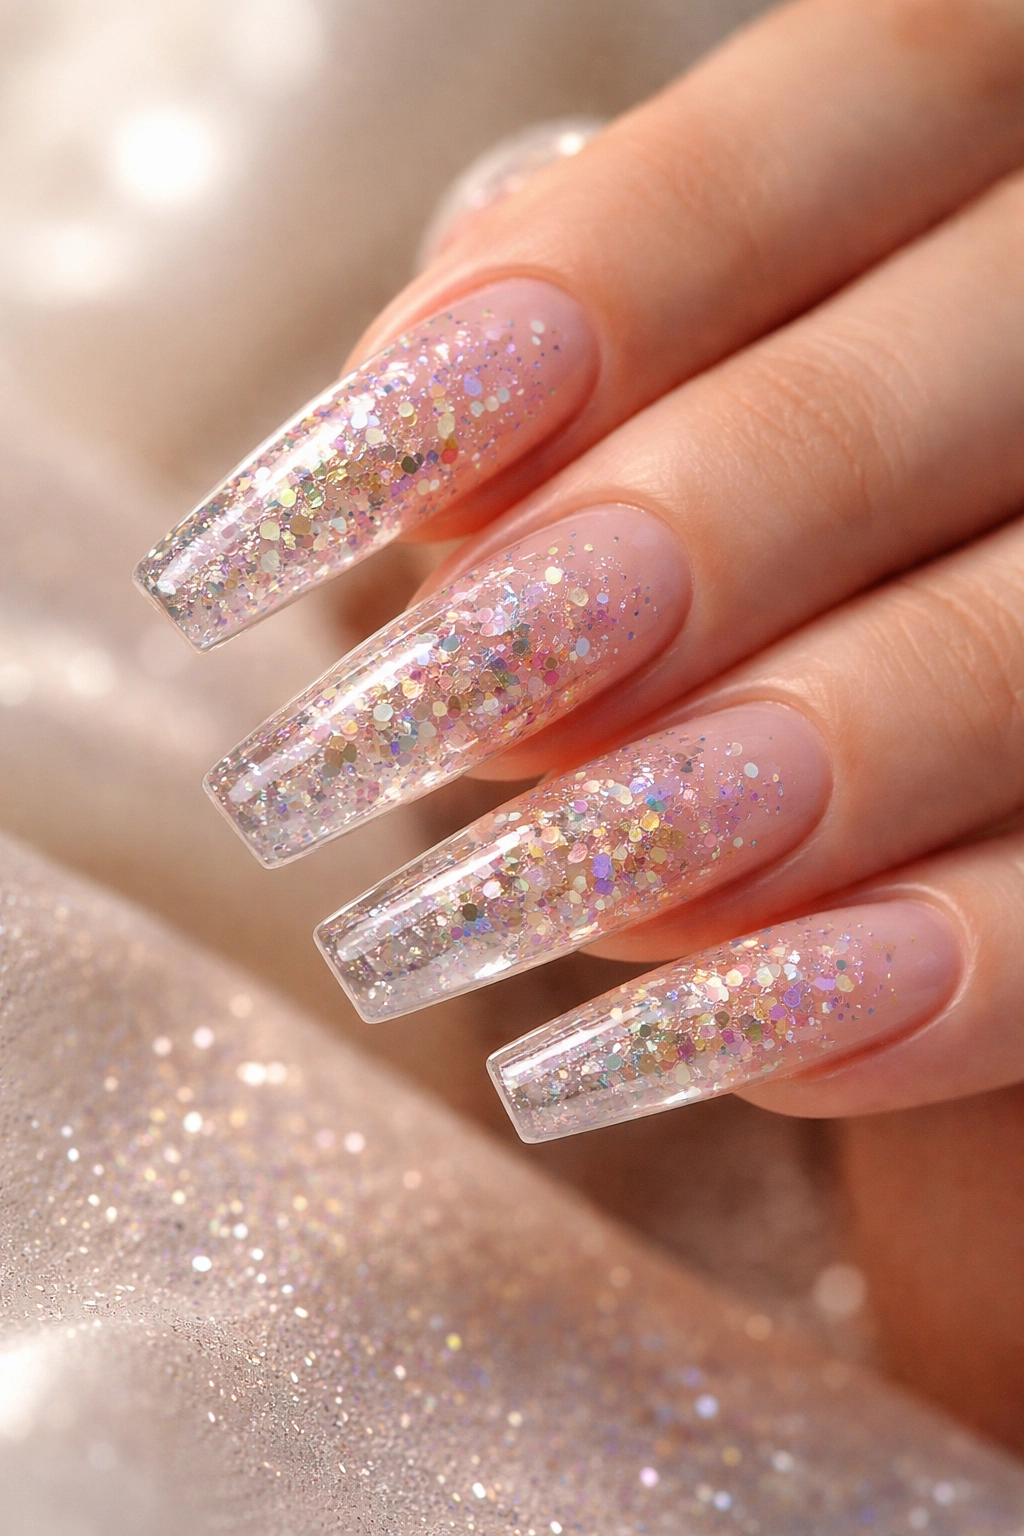
Encapsulation means trapping glitter, confetti, or foil pieces within layers of gel or polish, creating a dimensional, almost floating effect. Build a nude or soft pink base, add a thin layer of builder gel, sprinkle your glitter or confetti, seal with another layer of gel, then add a shiny topcoat. The encapsulation technique works beautifully on curved coffins because the layers add depth that enhances the nail’s natural shape.
The Luxury of Movement
Encapsulated designs catch light differently as your hands move. Glitter suspended within the layers creates subtle sparkle that’s less chaotic than surface glitter and infinitely more wearable for everyday.
Execution Steps
- Choose glitter in complementary sizes—mixing holographic micro-glitter with larger flakes creates more visual interest
- Encapsulation works best with gel systems that allow for layering and curing between stages
- Keep the encapsulated section toward the center of the nail for balance on longer lengths
- The curved shape creates natural shadows that make encapsulation look even more dimensional
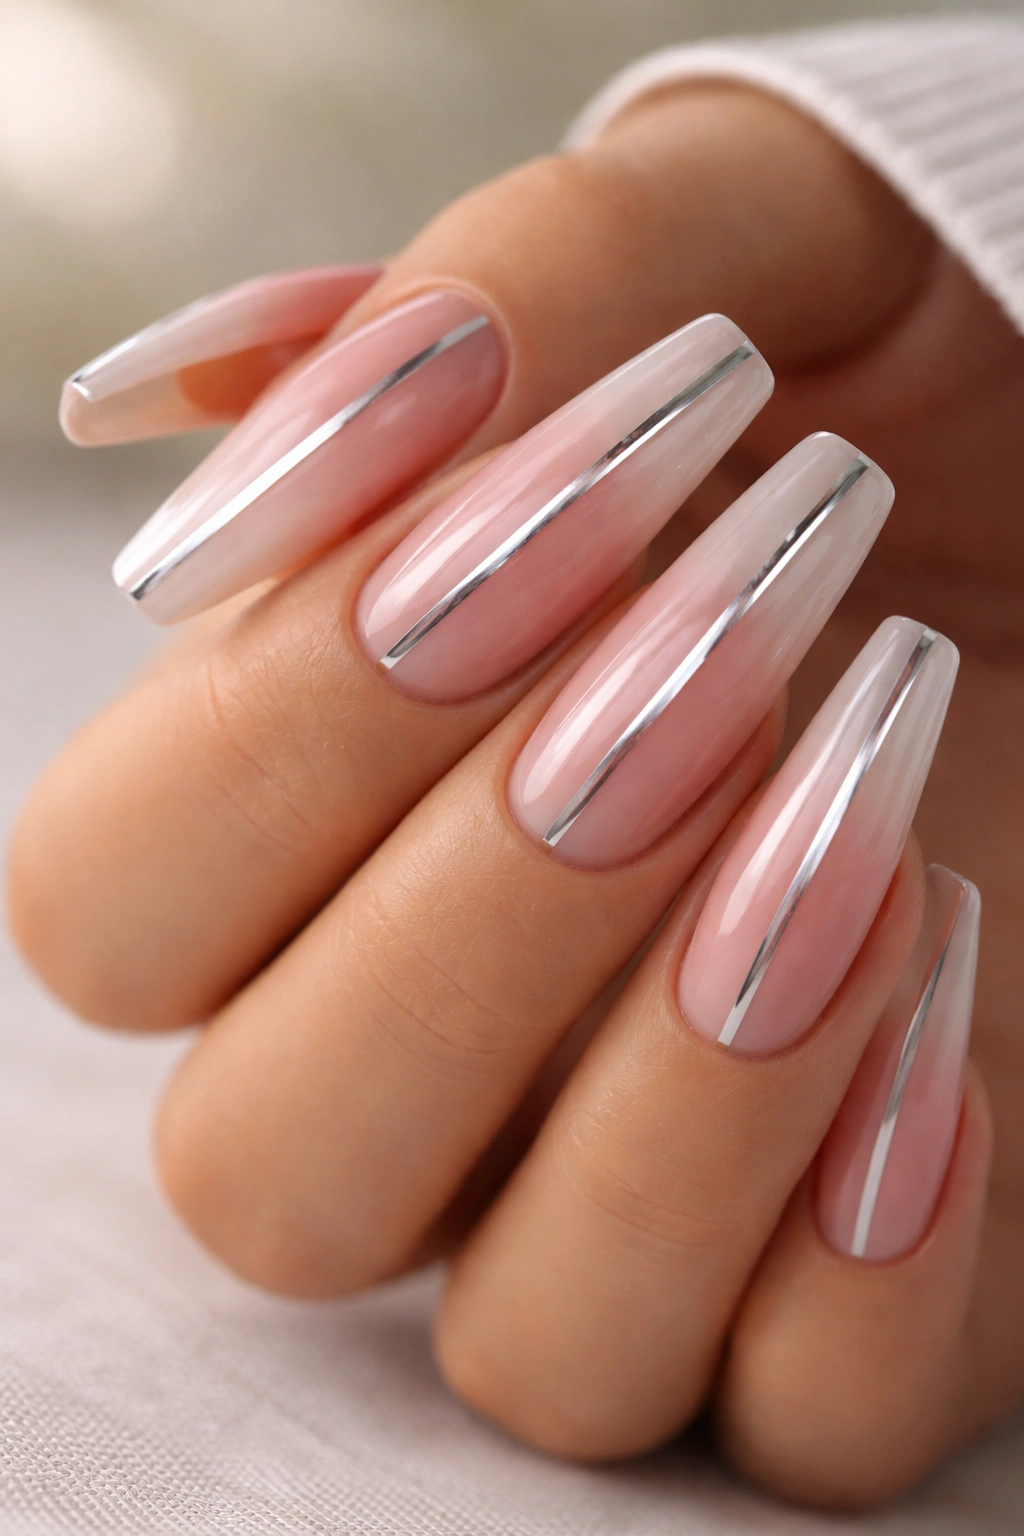
5. Reverse French Manicure with Gradient Tips
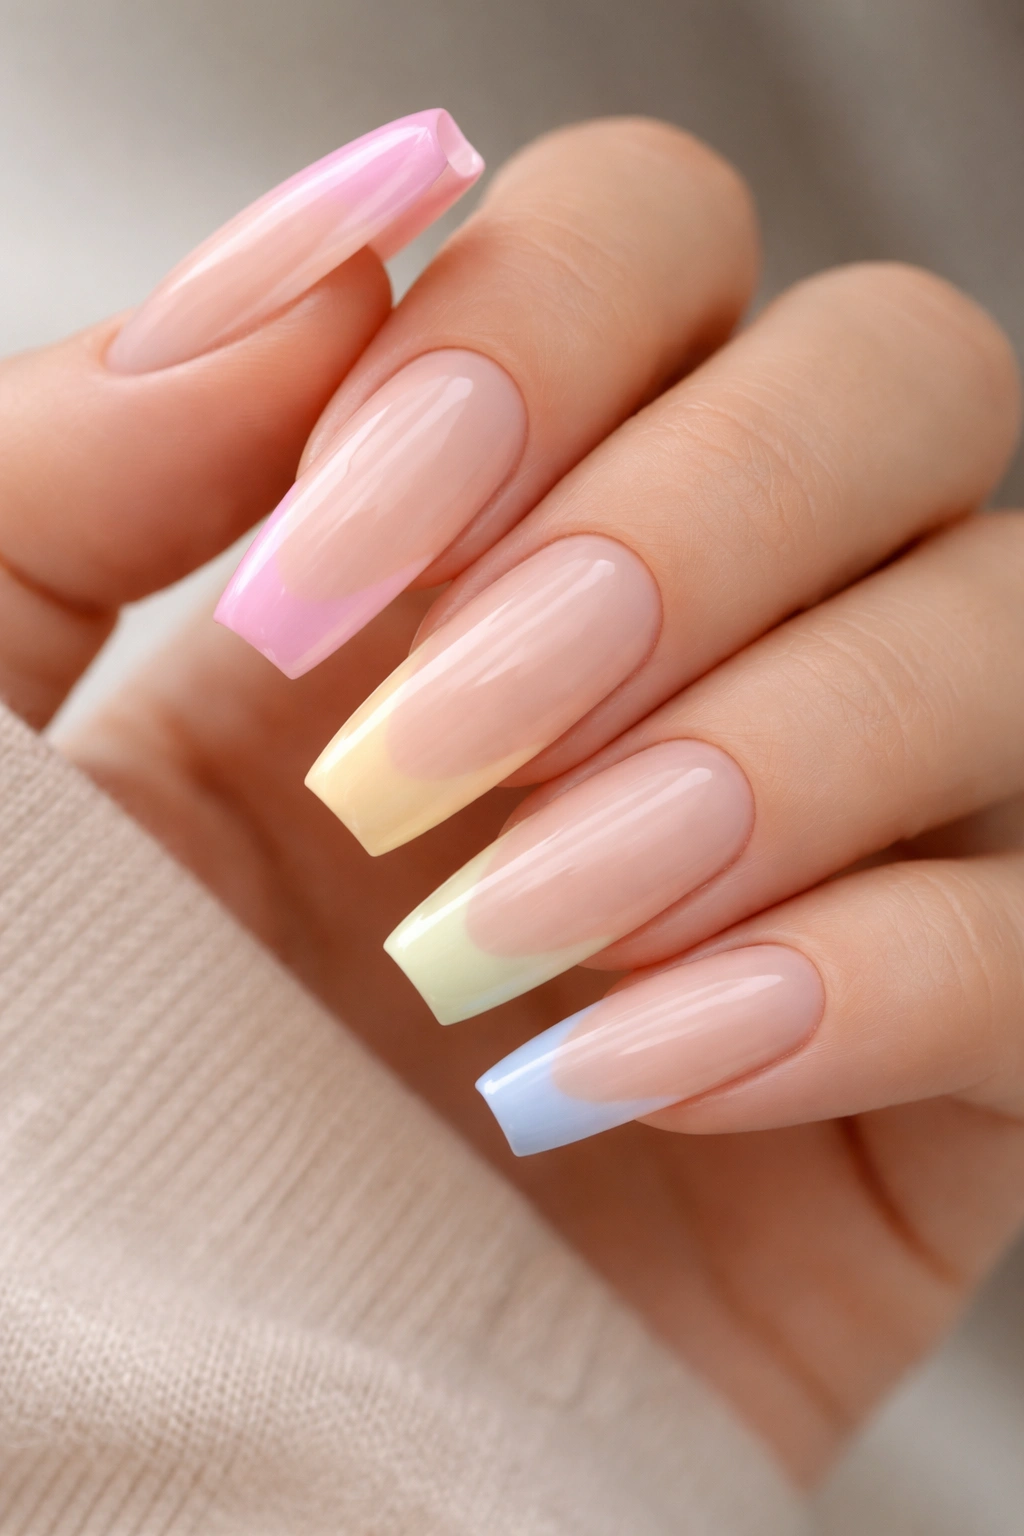
The reverse French—colored tips on a pale base rather than pale tips on a darker base—looks strikingly modern on curved coffin nails. Create a nude or pale pink base covering most of the nail, then add a colored tip (burgundy, deep teal, or rich plum work beautifully) that has a gradient fade into the base color. The curve of the coffin nail makes this transition look like it’s part of the nail’s natural architecture.
Modern Takes on Classic
Reverse French works because it’s familiar but unexpected. On curved coffins, it looks less like a basic manicure and more like a deliberate design choice.
Color Combinations That Shine
- Nude base with burgundy gradient tips
- Pale pink with forest green tips
- Off-white with deep plum fade
- Soft beige with charcoal gradient tips
Worth knowing: The gradient fade on the reverse French should start about one-third of the way down from the tip, giving you plenty of colored area to see while maintaining the elegant simplicity of the style.
6. 3D Nail Art with Sculpted Elements
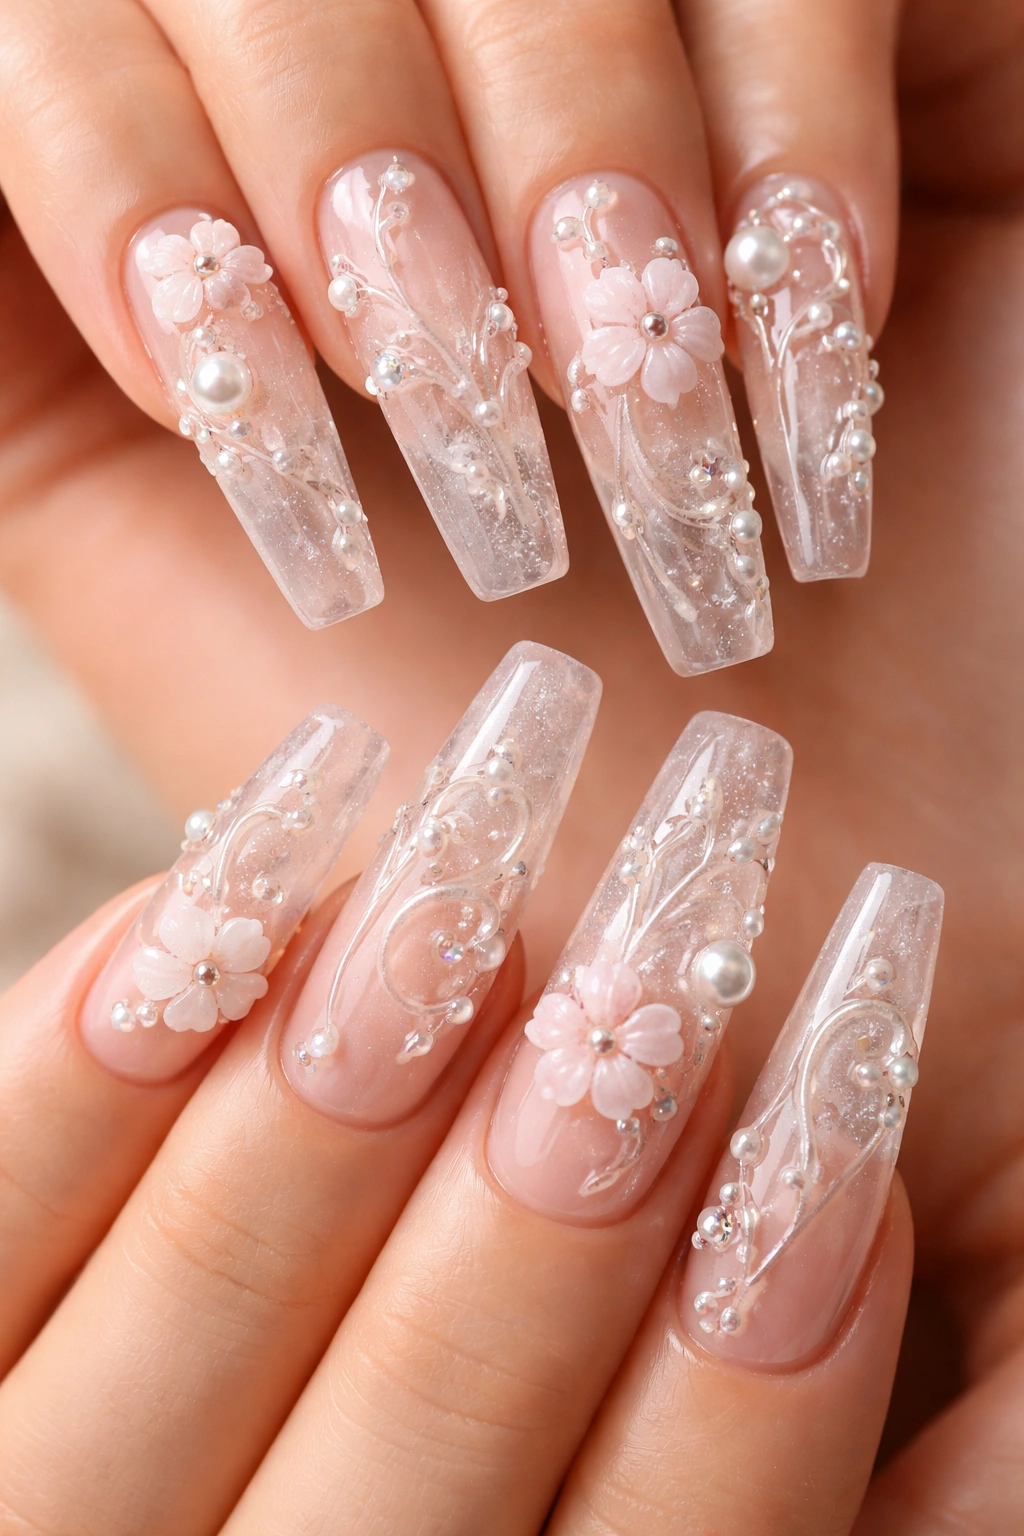
Three-dimensional nail art adds literal texture and dimension to curved coffin nails. Use builder gel or acrylic powder to sculpt tiny elements—flowers, rhinestones, studs, or abstract shapes—directly onto the nail surface. A clear or neutral base with 3D white or gold sculpting makes the dimensional elements pop without competing color distractions.
Why Long Curved Coffins Are Perfect for 3D
The length provides surface area for sculpted elements without making hands look clawed or impractical. The curve naturally displays 3D elements beautifully because of how light hits the angles.
Structural Considerations
- Keep 3D elements centered or toward the tips to avoid snagging on clothing or hair
- Seal everything under a thick, durable topcoat designed for textured nails
- 3D nail art requires more careful daily handling but creates unmistakably luxe results
- Gel systems handle 3D elements more durably than regular polish
7. Ombre Dust with Matte Finish
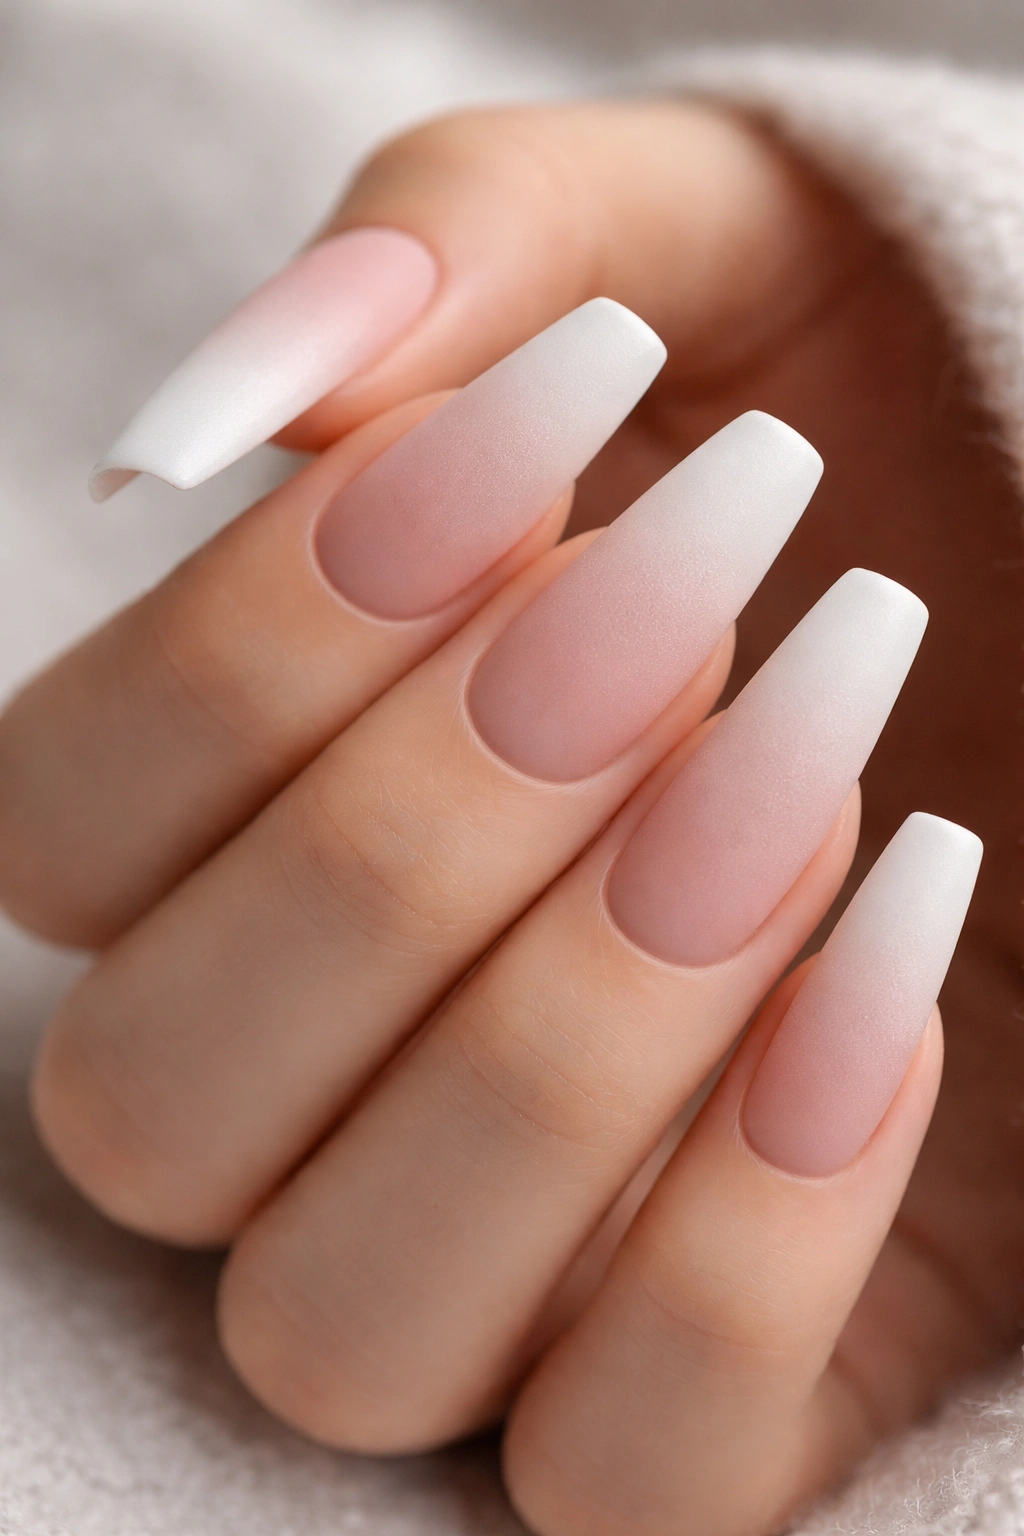
Ombre dust—also called chrome dust or pigment powder—creates a soft, powdery color gradient that feels completely different from glossy gradients. Apply colored gel or polish, sprinkle ombre dust (or chrome powder) over the wet surface, and seal with matte topcoat. The result is a soft, velvety finish that makes the gradient look airbrushed and professional.
The Appeal of Matte
Matte finishes on long nails feel sophisticated and less predictable than glossy alternatives. The ombre dust technique ensures color saturation without shine, creating a modern editorial aesthetic.
Technique Notes
- Work section by section so the surface stays wet enough for powder to adhere
- Matte topcoat creates slightly less dramatic light-catching than glossy, but the texture becomes the focal point
- Ombre dust blends more smoothly than traditional sponged gradients
- This technique works especially well on warm or cool-toned color transitions (warm peachy to coral, cool gray to blue)
8. Stiletto-Style Negative Space with Thin Lines
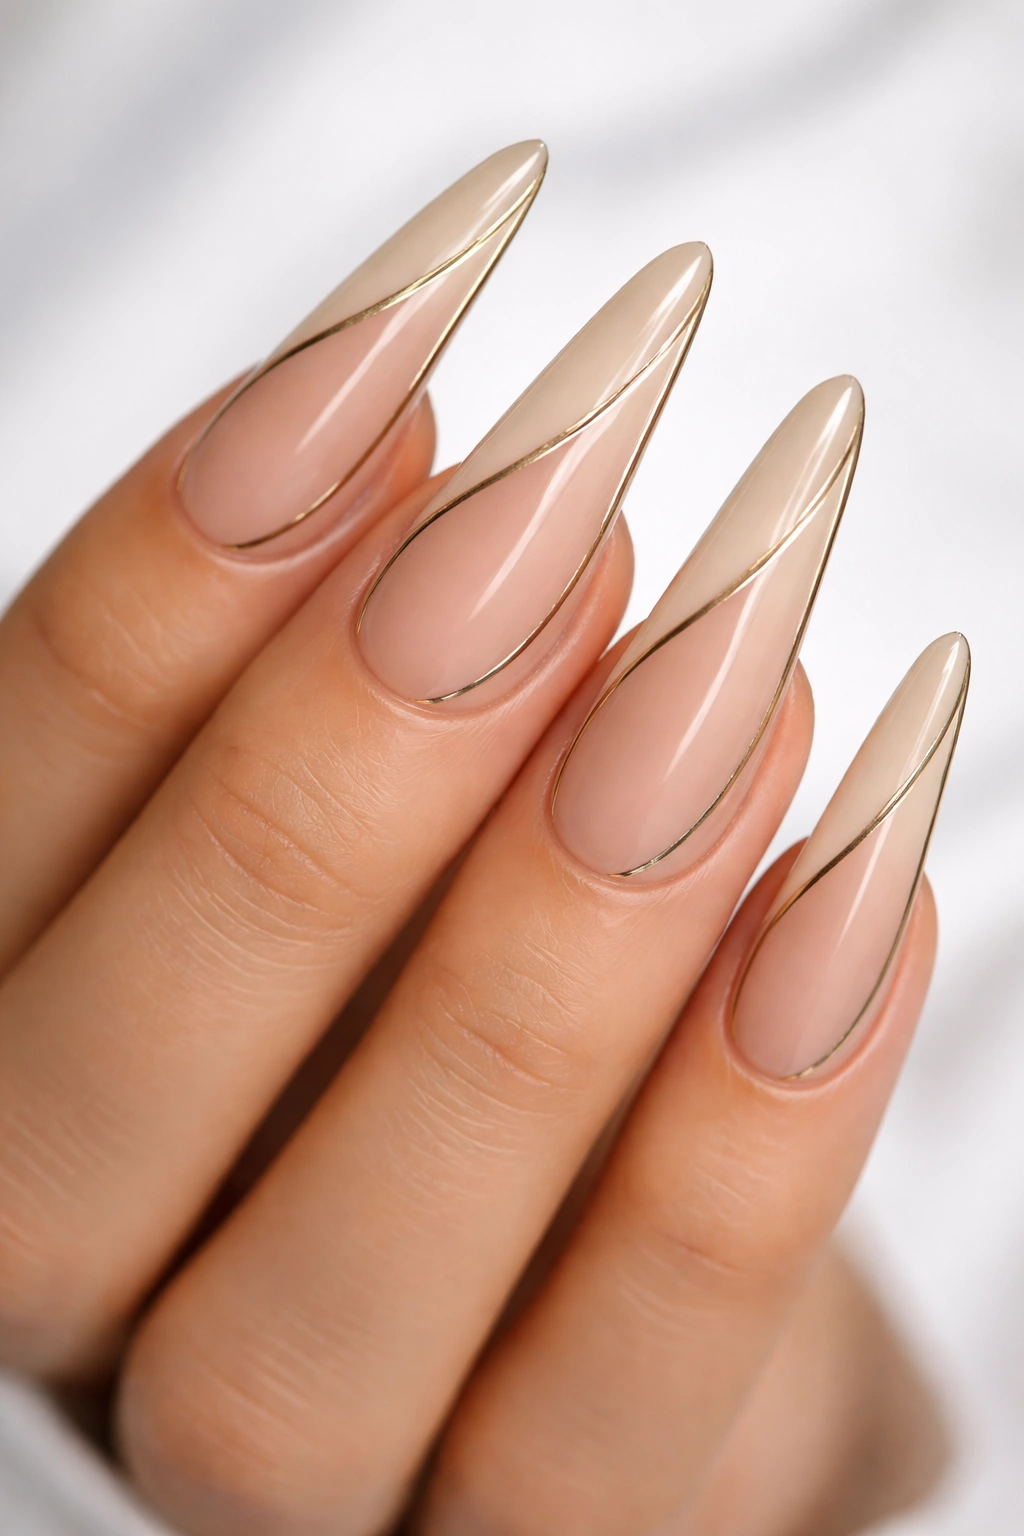
Create a visual illusion of even more length and sharpness by using negative space to draw thin lines along the sides of the nail, making the curved coffin appear more pointed. Leave a thin strip of natural nail visible on either side, connected with delicate lines in metallic gold or a complementary color. This design emphasizes the nail’s architecture while creating an almost architectural appearance.
Visual Elongation
Negative space on the sides makes even moderately long nails appear dramatically extended. On curved coffins, this technique plays with the shape to create a visual effect that defies the actual curve.
Application
- Map out your design lightly with a pencil or guide tape before committing
- Use a thin striping brush and steady hand to create perfectly even side lines
- Keep the metallic accent thin (one to two pixels wide) for an elegant effect
- Nude or white base colors show off this design best
9. Holographic Rainbow with Hologram Powder
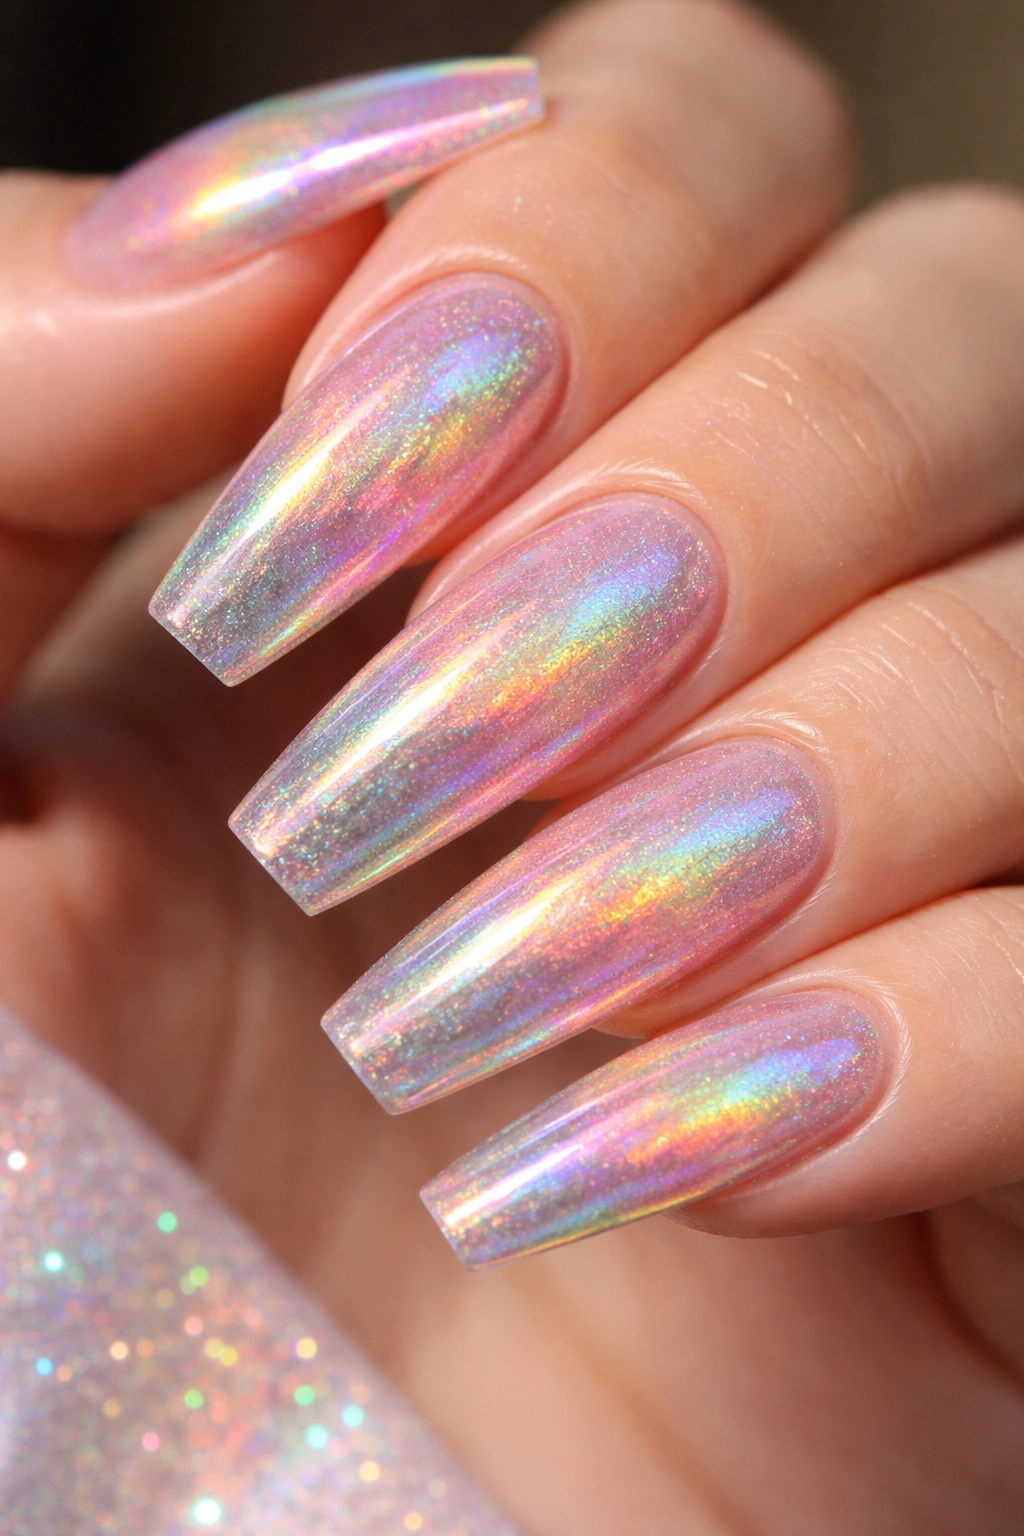
Holographic designs catch light across the entire spectrum, shifting colors as your hands move and catch different angles. Apply a clear or neutral base, seal it, then brush holographic powder across the surface. The powder adheres to the topcoat, creating an iridescent effect that ranges from subtle to full-on rainbow depending on powder density and light.
Why This Feels Modern
Holographic elements feel current without being trendy because the color-shifting effect is genuinely striking. On curved coffin nails, holographic powder makes the shape shimmer differently from multiple angles.
Execution
- Holographic powder works best over gel systems or very tacky gel topcoats
- Apply powder with a soft brush, using light strokes to build up color gradually
- Seal under glossy topcoat for maximum light reflection
- Holographic elements work alone or layered over other designs
Insider note: Holographic powder varies wildly in quality—invest in good brands because cheap versions look chalky and don’t shift colors properly.
10. Marble Base with Gold Foil Accents
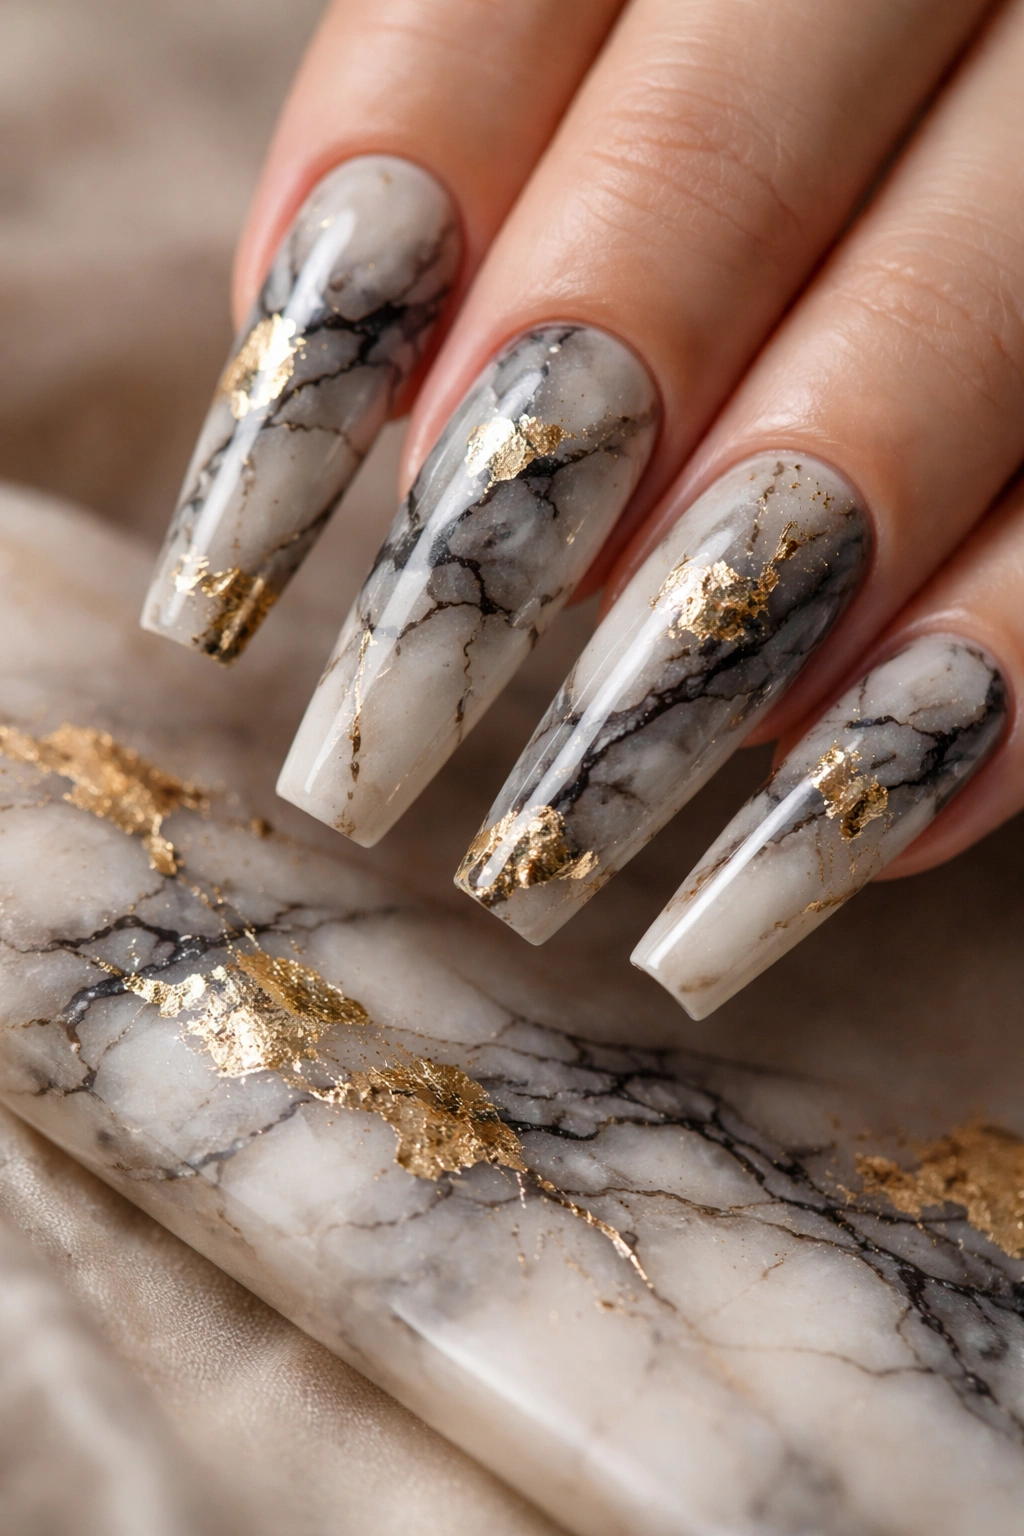
Combine two trending techniques for a design that feels high-end and editorial. Create marble veining across the entire nail in black or gray, then add strategic gold foil accents—small geometric shapes, lines, or scattered elements. The foil catches light dramatically, while the marble provides visual complexity and texture.
Layering for Luxury
Combining marble with metallic accents creates depth that single-technique designs sometimes lack. The two elements work together: marble adds sophistication, while foil adds glamour.
Application Order
- Create your marble base first and let it fully cure
- Apply clear topcoat or gel over the marble
- Press gold foil into the wet topcoat, positioning it strategically
- Seal everything with a final glossy topcoat to protect the foil and create shine
11. Soft Pink Ombre with Rhinestone Accent Line
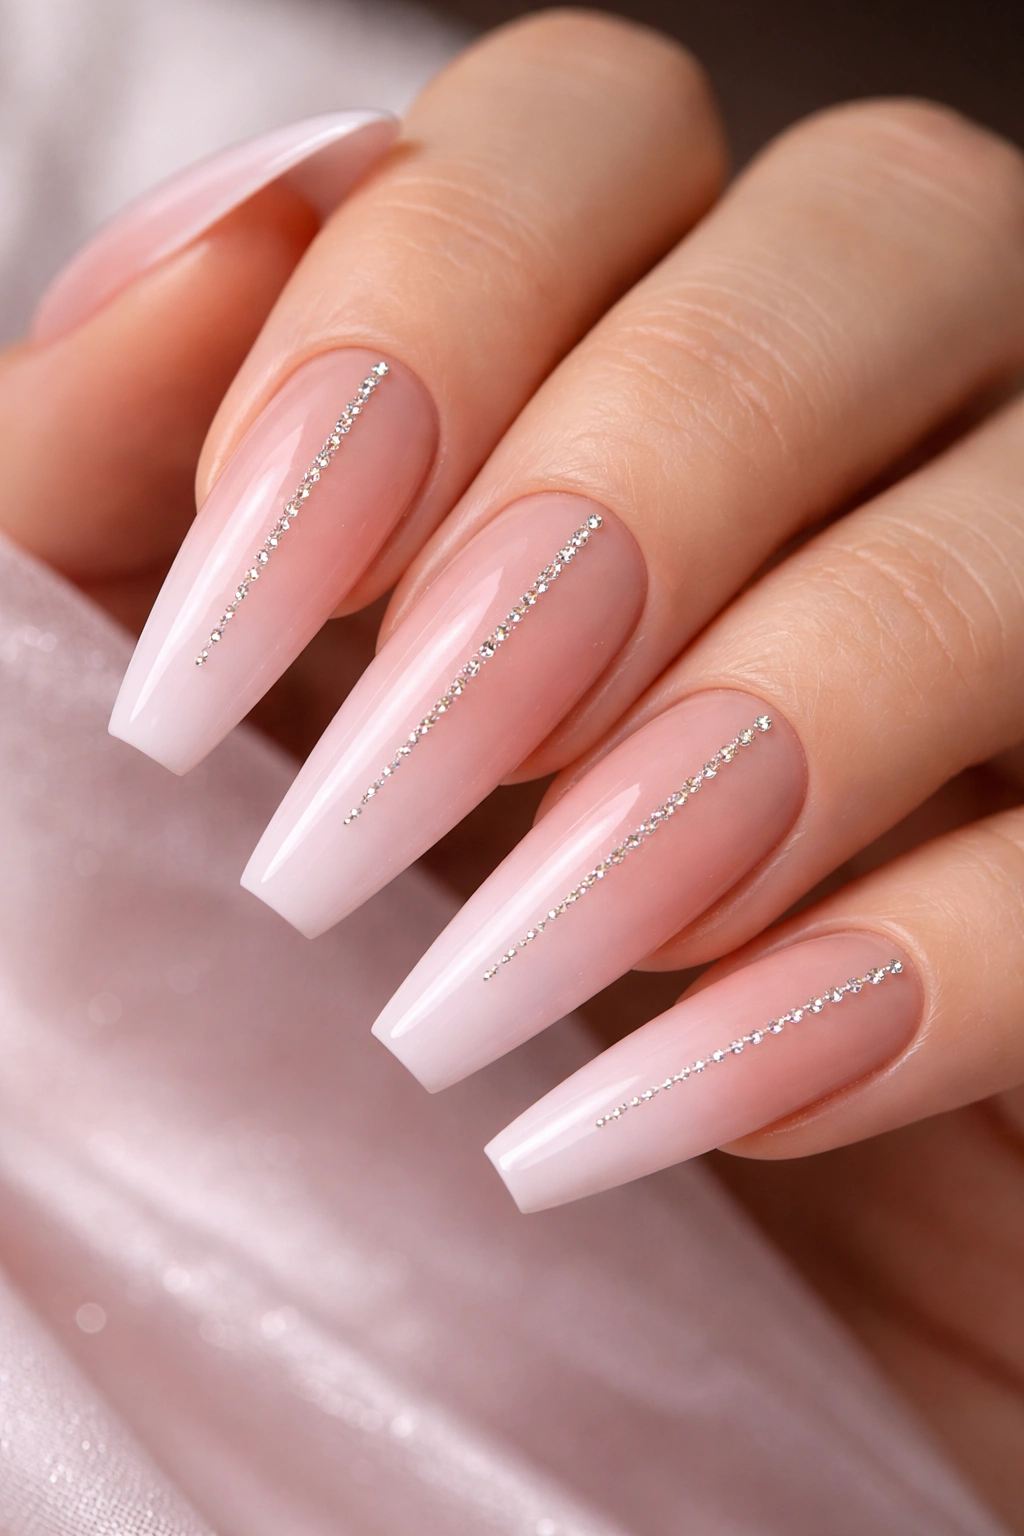
This design is elegant, wearable, and works for both casual and formal settings. Create a gradient from pale pink at the base to a slightly deeper rose or mauve toward the tips using the sponge method. Once cured, apply a thin line of small rhinestones down the center or along the cuticle area, creating a linear accent that draws the eye vertically (which further emphasizes nail length).
Elegance Through Simplicity
The best designs aren’t always the most complicated. This combination of gradient and scattered rhinestones feels refined because of the restraint and color cohesion.
Rhinestone Application
- Use nail glue specifically formulated for rhinestones, not regular adhesive
- Place stones while the glue is still slightly wet so you can adjust position
- Line stones with tweezers for precision placement
- Seal under topcoat to keep stones secure, but they’ll need reapplication eventually as they can shift
12. Color-Blocking with Geometric Shapes
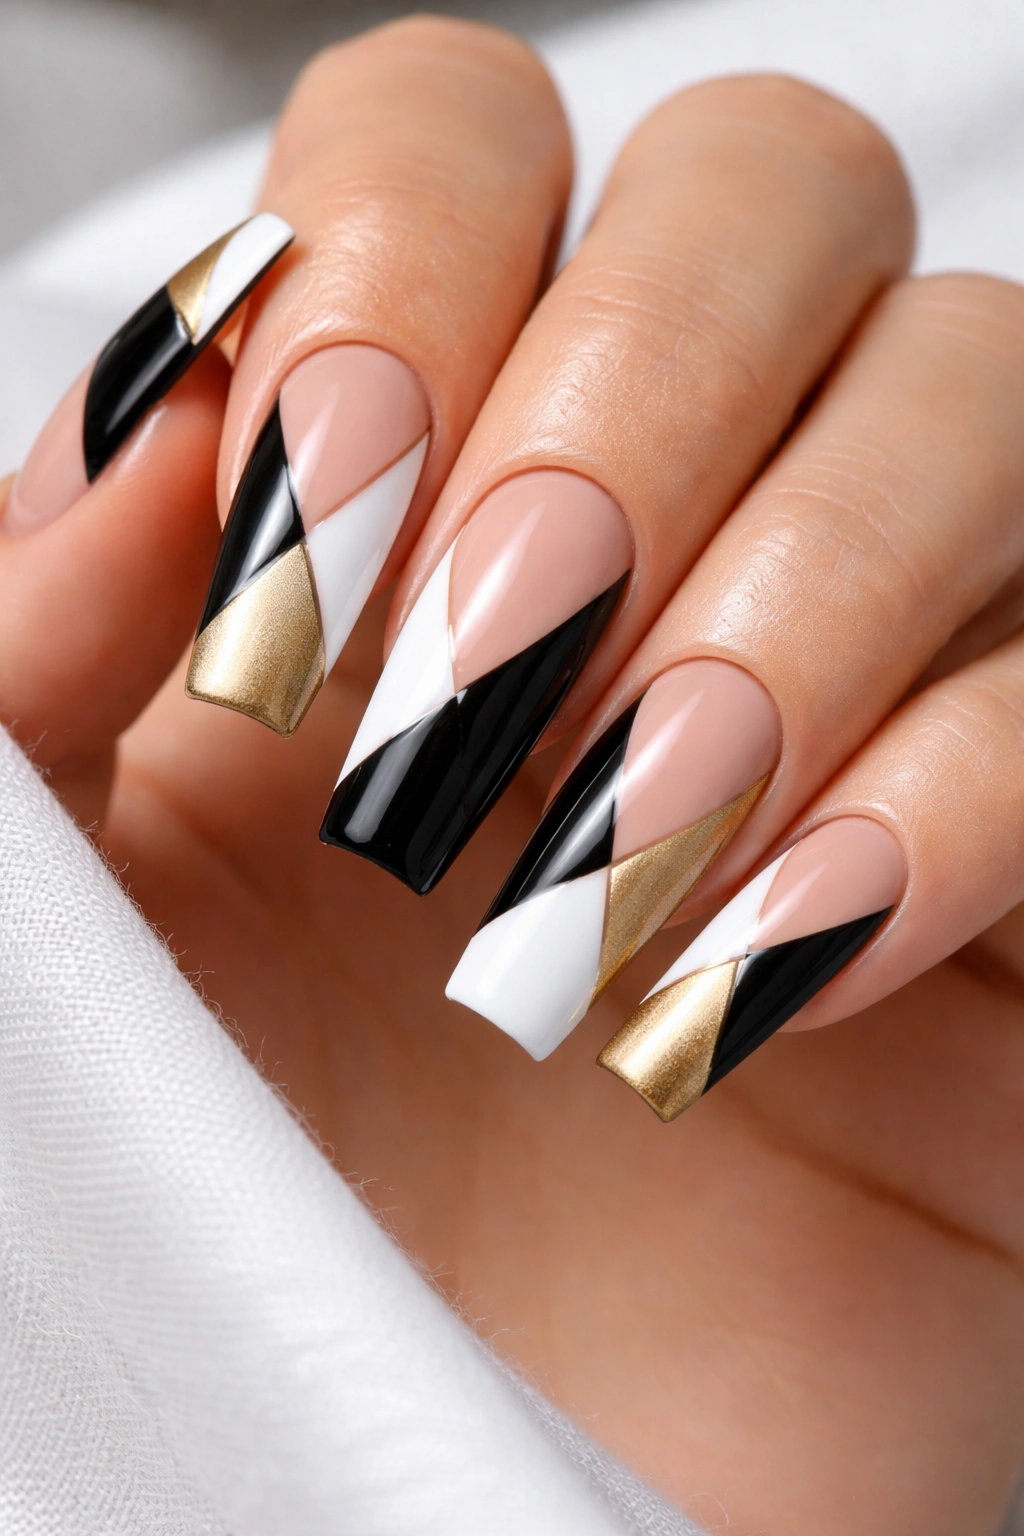
Color-blocking uses distinct blocks of solid color to create a boldly graphic design. Divide the nail surface into geometric sections—diagonal halves, triangular areas, or striped zones—and fill each section with a different color. On curved coffin nails, use colors that complement but contrast sharply: black and white, navy and gold, burgundy and blush.
Bold Without Chaotic
Color-blocking feels intentional and fashion-forward. The geometric structure prevents the design from feeling chaotic even when using bold color combinations.
Design Execution
- Use tape or guides to keep edges clean and sharp
- Allow each color to cure fully before removing tape to prevent smudging
- 3-4 colors maximum prevents the design from becoming visually overwhelming
- Metallic or chrome accents between color blocks add dimension
13. Glitter Placement with Clean Lines
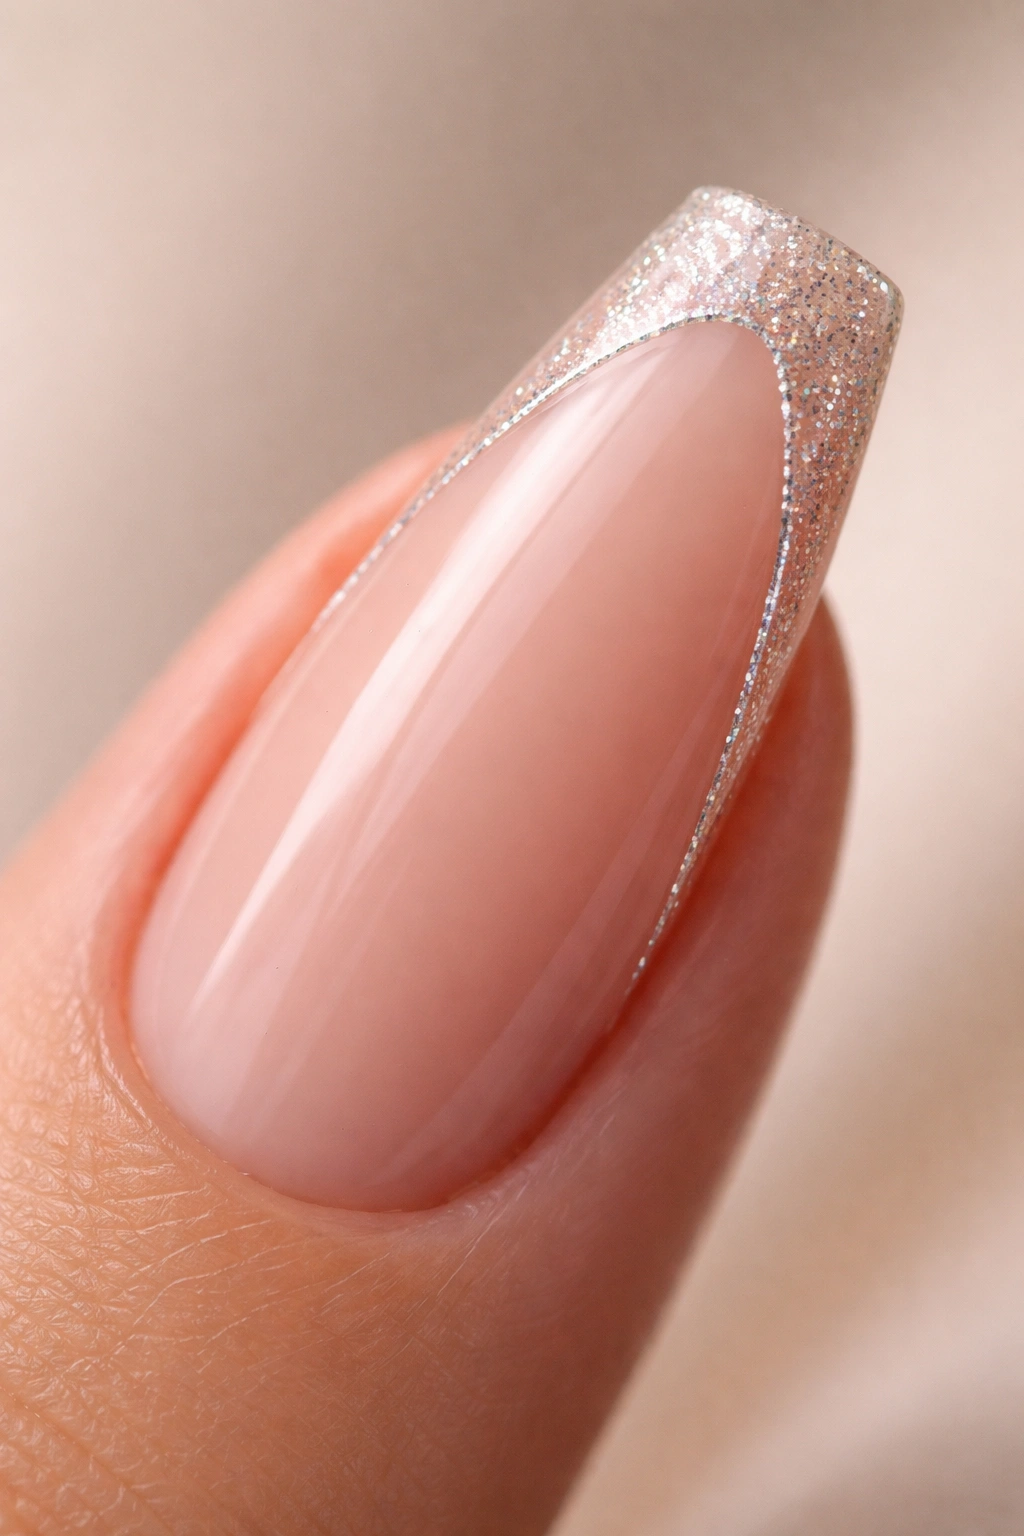
Rather than covering the entire nail with glitter, strategically place it—along tips, in geometric sections, or as an accent line. This approach lets you use sparkle without the glitter-covered-everything aesthetic. A nude or soft color base with glitter carefully placed in one area looks more curated and fashion-forward.
Intentional Sparkle
Strategic glitter placement feels editorial. It works beautifully on curved coffins because you can place glitter to follow or emphasize the nail’s natural curve.
Placement Ideas
- Glitter gradient along just the tip area
- Glitter confined to a triangular or geometric section
- A thin glitter line down one side
- Glitter concentrated at the cuticle area with a clean tip
14. Chrome Powder Ombre with Matte Base
Combine two different finishes for a design that transitions from matte sophistication to shiny metallics. Create a matte ombre gradient using powder or pigment, then add chrome powder to the tip area for a glossy-to-matte contrast. The two finishes create visual separation and make the design feel more dimensional.
Texture and Finish Contrast
Mixing matte and glossy finishes creates sophisticated visual interest. The transition between finishes naturally emphasizes the nail’s curve.
Technique
- Apply matte base and ombre dust first, seal with matte topcoat
- Over that, add a thin layer of glossy topcoat or gel to just the tip area
- Apply chrome powder to the wet gloss section
- Seal everything under glossy topcoat—the final finish will be slightly shiny overall, but the matte base still shows through underneath
15. Abstract Watercolor Design with Metallic Details
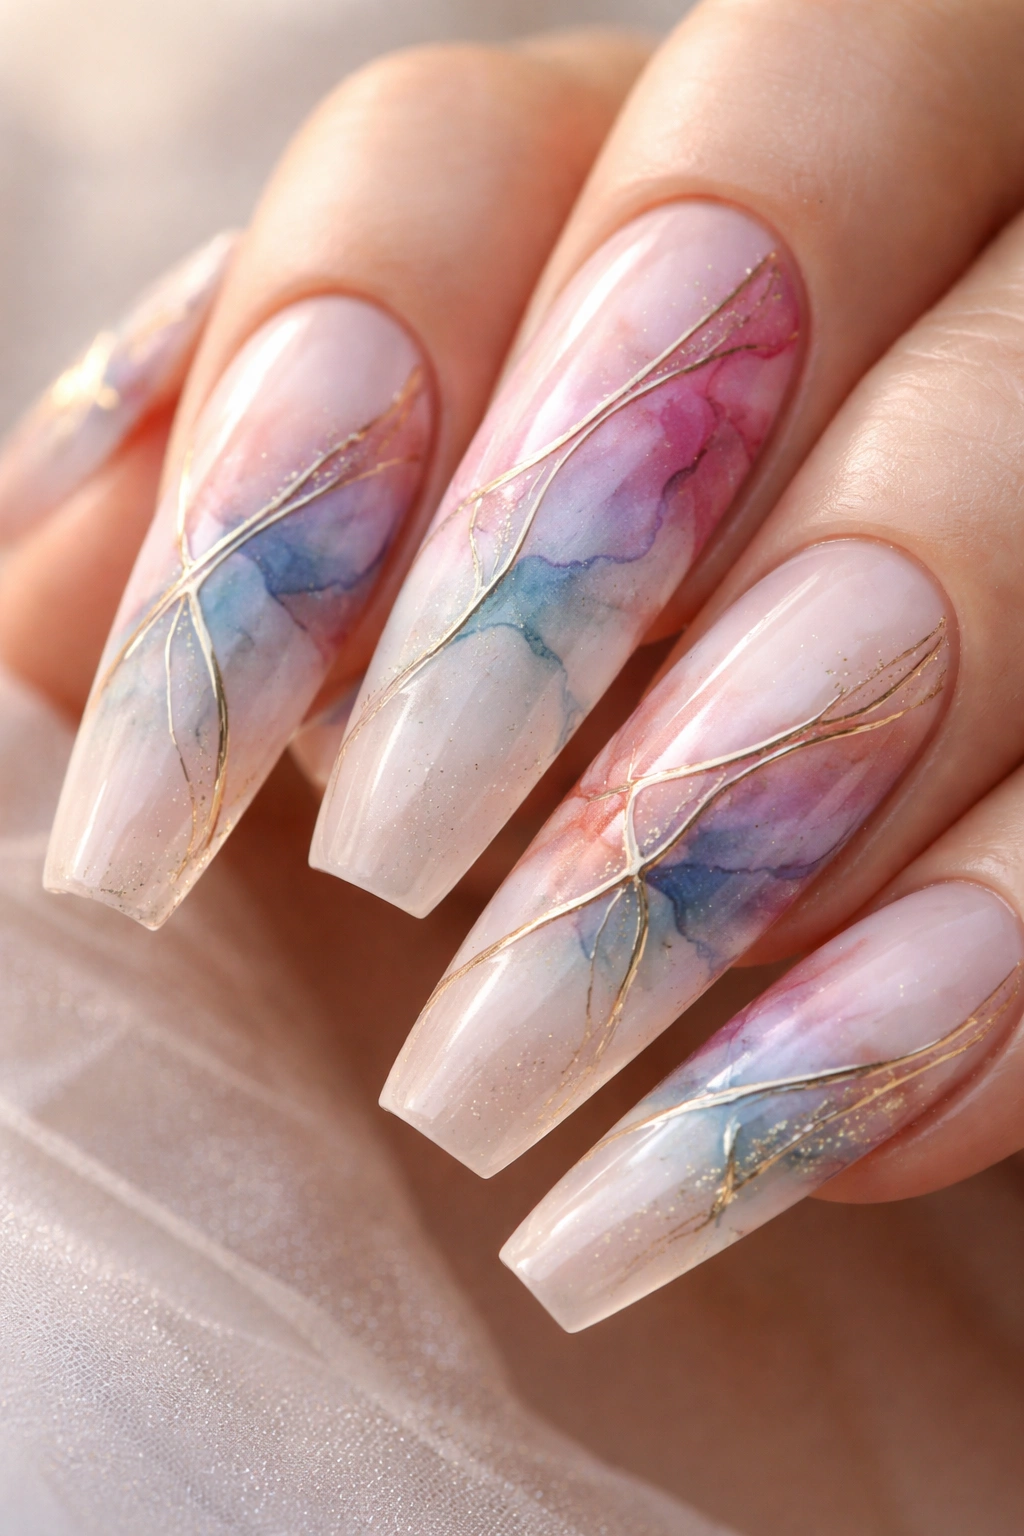
Watercolor nail art uses brush and pigment techniques that mimic actual watercolor painting—loose, flowing, with intentional color blending rather than defined lines. Create abstract watercolor art across the nail using water-based dyes or thinned gel, letting colors blend and flow naturally. Add metallic accents (gold or silver lines) once the watercolor is sealed, creating contrast between organic and structured elements.
Artistry Meets Wearability
Watercolor designs feel genuinely artistic without being difficult to pull off. Imperfections actually enhance the aesthetic because watercolor is meant to look organic and loose.
Creating Watercolor Nails
- Watercolor effects work best on a white or very pale base
- Use a thin brush and diluted gel or pigment for proper flow and blending
- Allow colors to mix slightly where they overlap naturally
- Seal before adding metallic accents to protect the watercolor underneath
- Add metallic lines once sealed to create structure within the organic design
Pro tip: Watercolor designs are forgiving—slight mistakes look intentional because the whole aesthetic is about organic flow. This makes them great for someone trying nail art for the first time.
Final Thoughts
Curved coffin nails give you the framework for genuinely stunning nail designs. The shape itself becomes part of the art when you choose designs that work with rather than against its natural architecture. Whether you gravitate toward minimalist elegance, bold color-blocking, or intricate mixed-technique designs, your curved coffins provide the perfect canvas.
The designs here range from beginner-friendly (soft ombré, simple color-blocking) to more advanced (3D elements, marble with foil accents), so you can choose based on your current skill level and comfort with nail art tools. Start with whichever design speaks to you most—don’t feel obligated to master them in order. Each style teaches you different techniques that eventually become part of your everyday nail design arsenal.
Long curved coffin nails work because they’re both striking and practical. They catch attention in genuine nail artistry without requiring impractical length, and they flatter most hand shapes and sizes. Whatever design you choose, commit to it fully—nail art deserves that confidence. Your hands will become a walking portfolio of your personal style, creativity, and attention to detail.
