

There’s something undeniably elegant about nails that don’t try too hard. You know the ones—clean, refined, effortlessly put-together. While bold nail art has its moment, minimalist designs have staying power that transcends trends and seasons.
The beauty of minimalist nails lies in their versatility. They complement everything in your closet, transition seamlessly from work meetings to weekend brunches, and never feel like they’re competing with your overall look. Instead of screaming for attention, these designs whisper sophistication.
What makes minimalist nail art so appealing right now? It’s the perfect antidote to overstimulation. In a world where everything feels loud and demanding, there’s real luxury in simplicity. These designs prove you don’t need intricate patterns or neon colors to make your nails look expensive and intentional.
Whether you’re someone who prefers a natural aesthetic or you’re just tired of high-maintenance manicures that chip within days, minimalist nails offer the perfect middle ground. They’re polished without being precious, interesting without being complicated. Ready to discover designs that’ll become your new go-to? Let’s explore the most chic minimalist nail looks worth bookmarking right now.
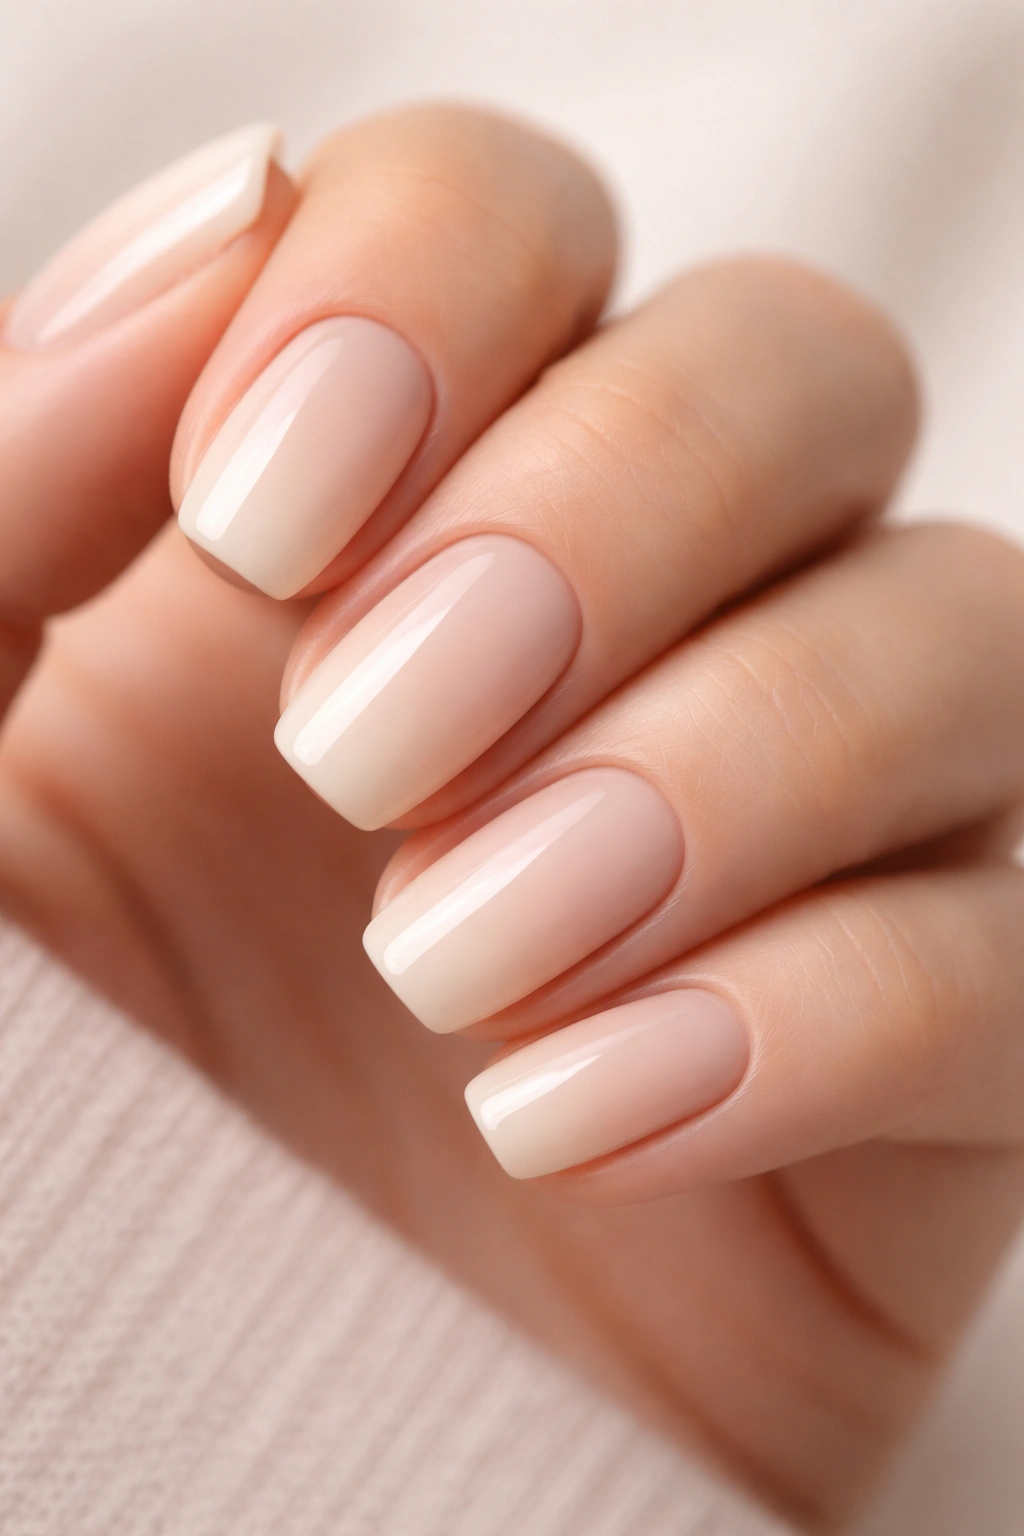
1. The Milky Manicure
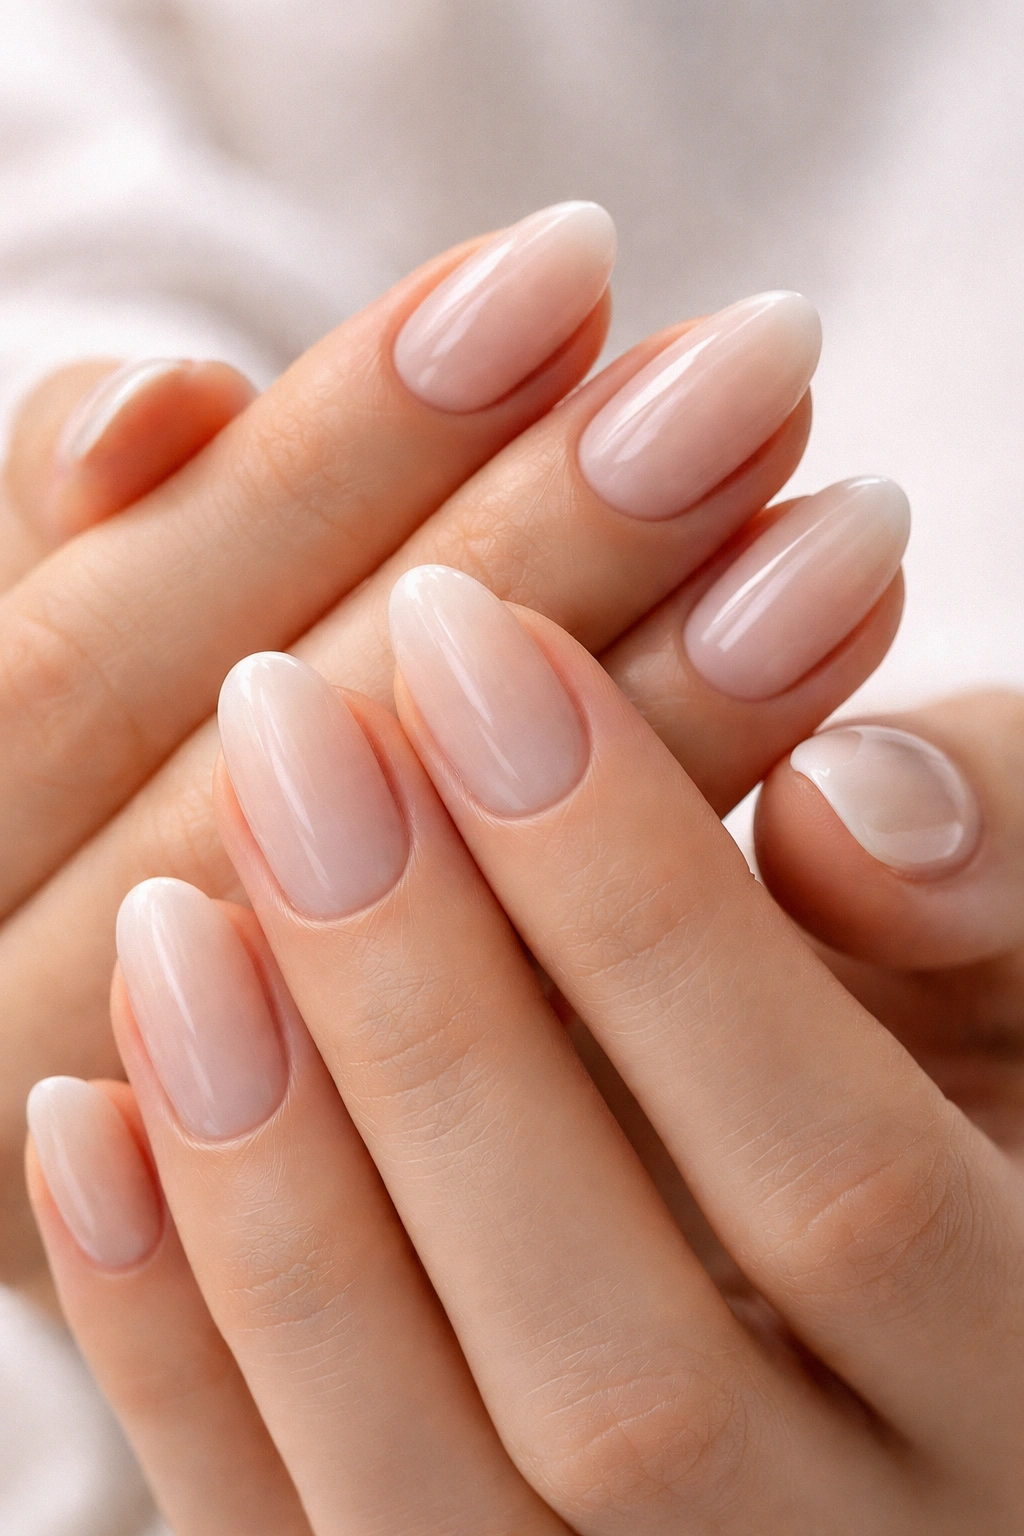
The milky manicure has become the unofficial uniform of the minimalist nail movement. This look features a soft, translucent white or pale pink that creates that “your nails but better” effect. It’s the kind of manicure that makes your hands look instantly polished and put-together.
What sets this design apart is its sheer quality. Unlike opaque polishes, milky nails have a subtle transparency that enhances your natural nail color rather than covering it completely. The result feels fresh and modern, like you’ve just stepped out of an expensive spa.
The technique is surprisingly forgiving. Because the polish is sheer, slight imperfections in application become virtually invisible. Two to three thin coats typically deliver that perfect cloudy effect. Finish with a glossy top coat to amplify the luminous quality.
This design works beautifully on any nail length or shape. Short, natural nails look healthy and well-groomed. Longer nails gain an ethereal quality that’s sophisticated without trying too hard. The milky manicure pairs effortlessly with everything—jeans and a t-shirt or your most formal outfit.
Shades like OPI’s Bubble Bath or any polish labeled “sheer nude” or “milky white” will get you this look. The key is choosing something with just enough pigment to create that dreamy, diffused appearance.
2. Barely-There French Tips
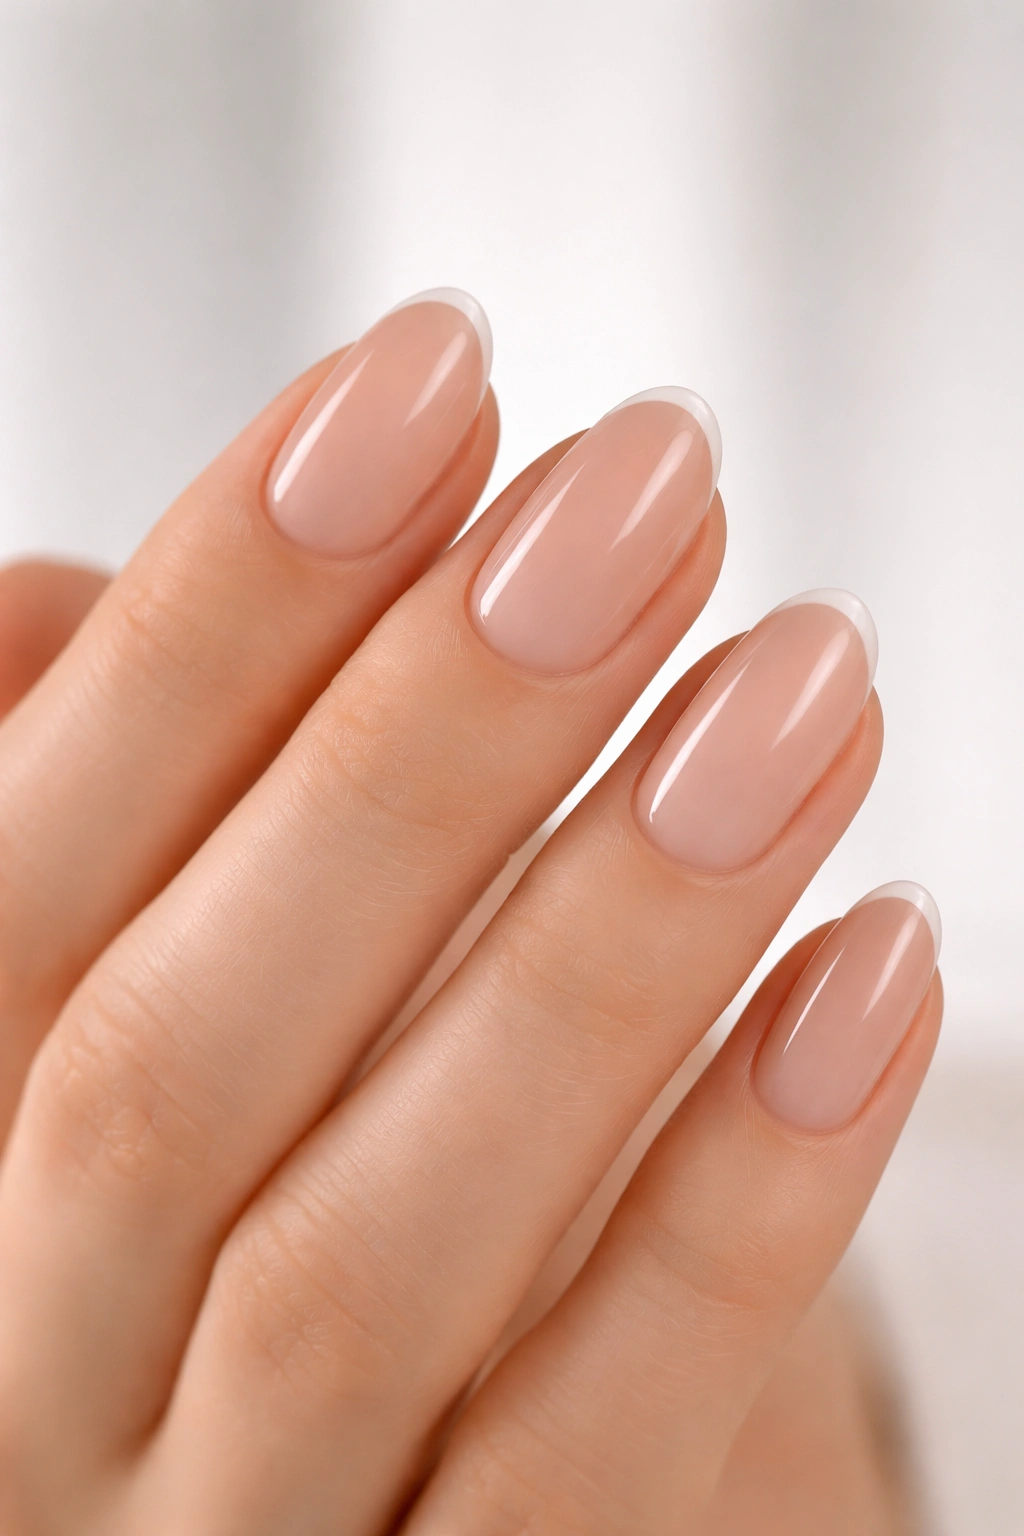
The French manicure has evolved. Gone are the stark white tips and obvious smile lines of the early 2000s. Today’s version is whisper-thin and barely noticeable—which is exactly what makes it so chic.
These micro French tips feature an ultra-fine white line at just the very edge of the nail. We’re talking paper-thin here. The effect is subtle enough to pass as natural but polished enough to show you put thought into your appearance.
Creating this look requires a steady hand or quality striping tape. Start with a sheer pink or nude base that closely matches your natural nail. Once dry, use a thin nail art brush to paint the thinnest possible white line along the tip. The thinner the line, the more modern and expensive the look.
This design elongates shorter nails beautifully. The delicate tip draws the eye forward, creating the illusion of length without actual extensions. It’s also incredibly practical—when growth happens, the regrowth is far less obvious than with traditional French tips.
For a contemporary twist, try using different colors for your tips. Soft butter yellow, muted sage green, or even a sheer gray can give this classic design fresh energy while maintaining that minimalist vibe.
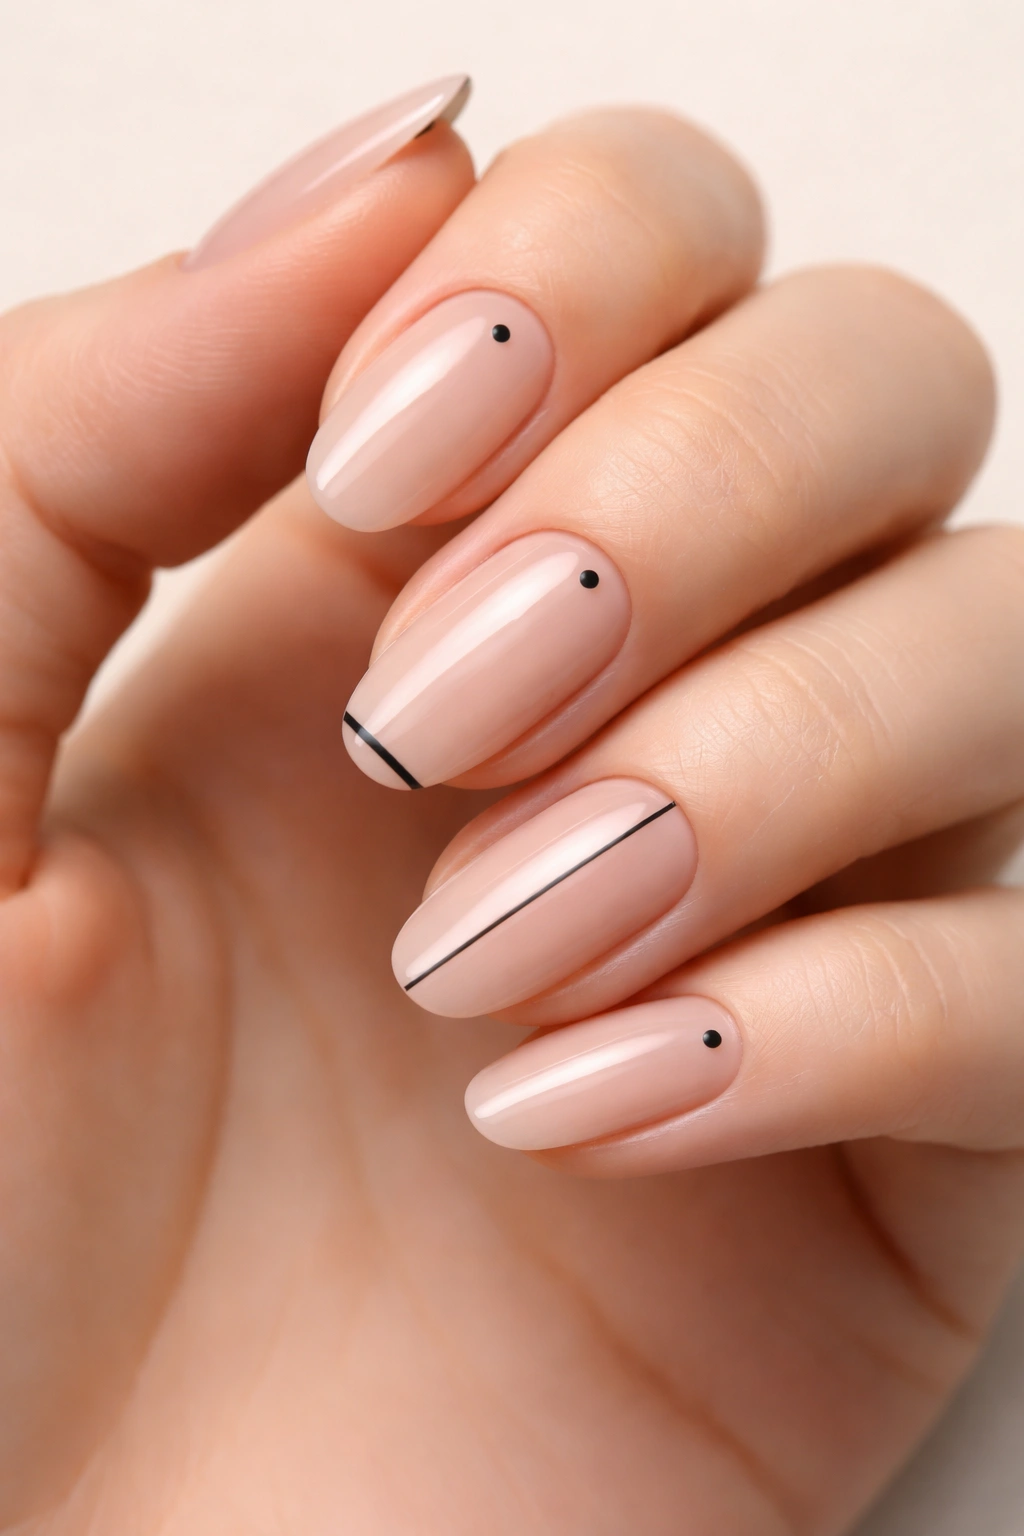
3. Single Accent Dot
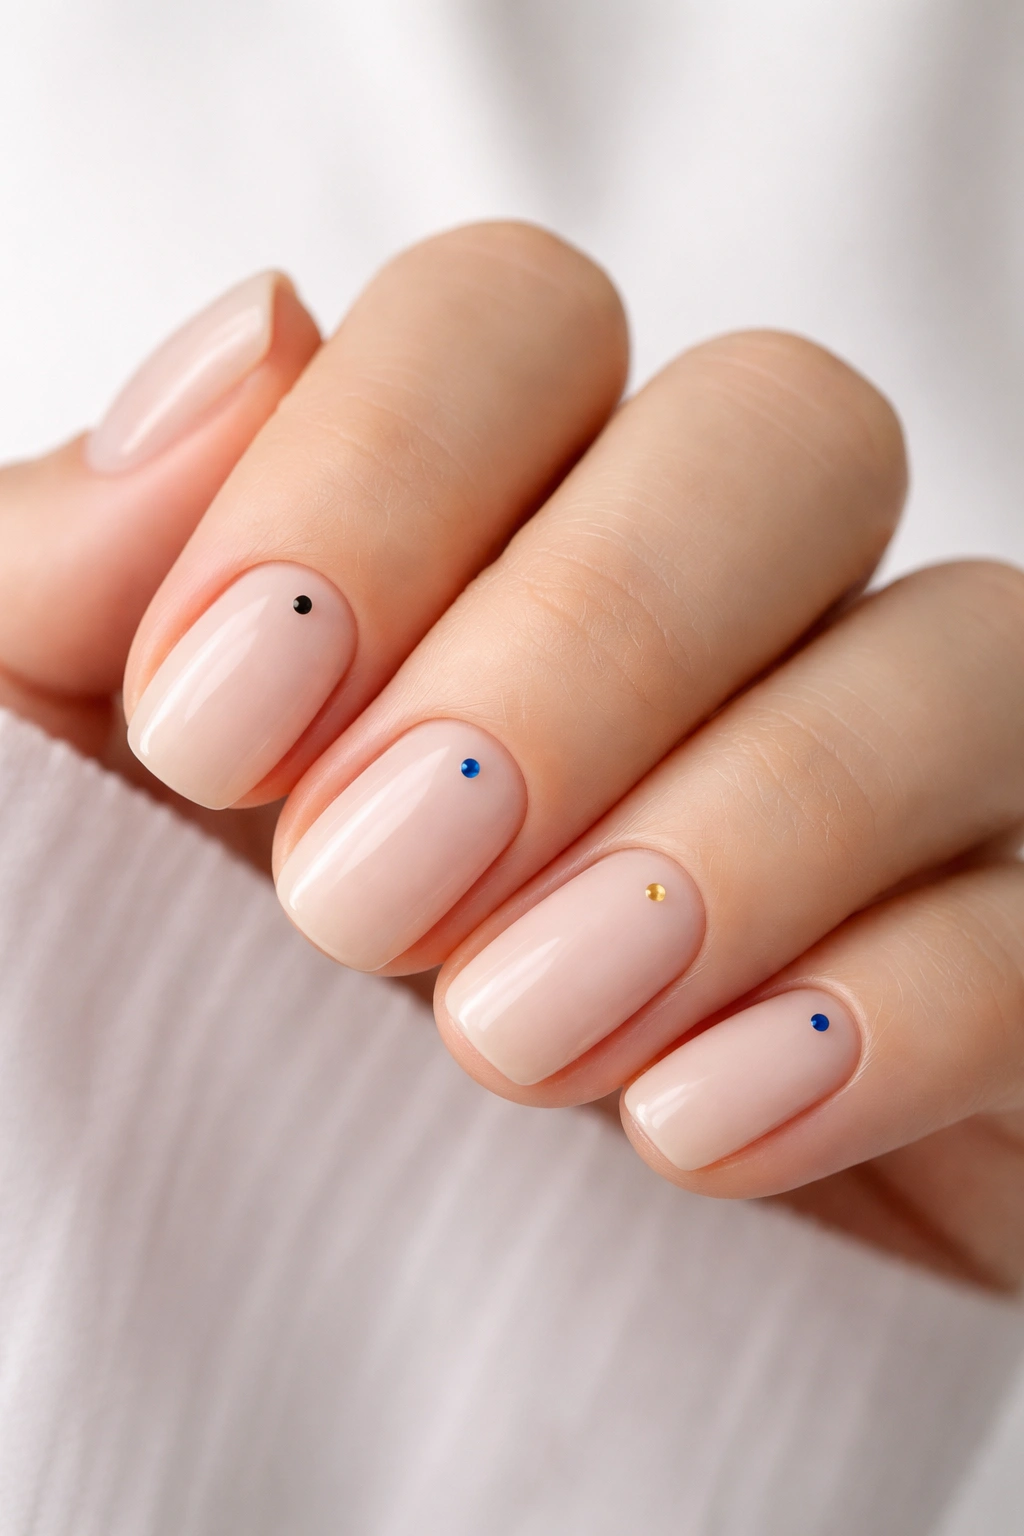
Sometimes all you need is one tiny detail to make a manicure feel intentional. The single accent dot proves that minimalism doesn’t mean boring—it means strategic.
This design involves painting your nails in a neutral shade, then adding one small dot in a contrasting color. Placement matters here. A dot near the cuticle creates a different effect than one at the tip. Near the base feels modern and unexpected. At the tip? More playful and sweet.
The contrast color should still fit within a muted palette. Think a tiny black dot on beige nails, a gold dot on soft pink, or a white dot on gray. The goal is subtle intrigue, not bold statement.
Application is straightforward. Use a dotting tool (or the end of a bobby pin in a pinch) to create perfectly round dots. Consistency in size across all nails creates a cohesive, intentional look. Too much variation can read as accidental rather than artistic.
This design offers maximum impact with minimal effort. It’s the nail art equivalent of wearing a simple outfit with one perfect piece of jewelry. Understated, but unmistakably stylish.
4. Negative Space Nails
Negative space designs have taken the minimalist nail world by storm. This technique involves leaving portions of your natural nail exposed, integrating the bare nail into the overall design. The result feels contemporary and artistic.
The beauty of negative space is its endless versatility. You can create geometric shapes, curved lines, or abstract patterns—all while keeping the overall look clean and uncluttered. The natural nail becomes part of the art rather than just a canvas.
One popular approach involves painting thin vertical or horizontal lines across the nail while leaving sections bare. Another option is creating half-moon shapes at the base or abstract cutouts. The key is maintaining balance between painted and unpainted areas.
This design works particularly well for those who want interesting nail art without committing to full coverage. It’s also more forgiving as nails grow out. The natural nail remains visible throughout, making regrowth less obvious than traditional manicures.
To nail this look, use striping tape to create clean, sharp lines. Apply your base color where desired, carefully remove the tape, and seal everything with a clear top coat. The tape ensures professional-looking edges without requiring expert-level skills.
5. Thin Vertical Lines
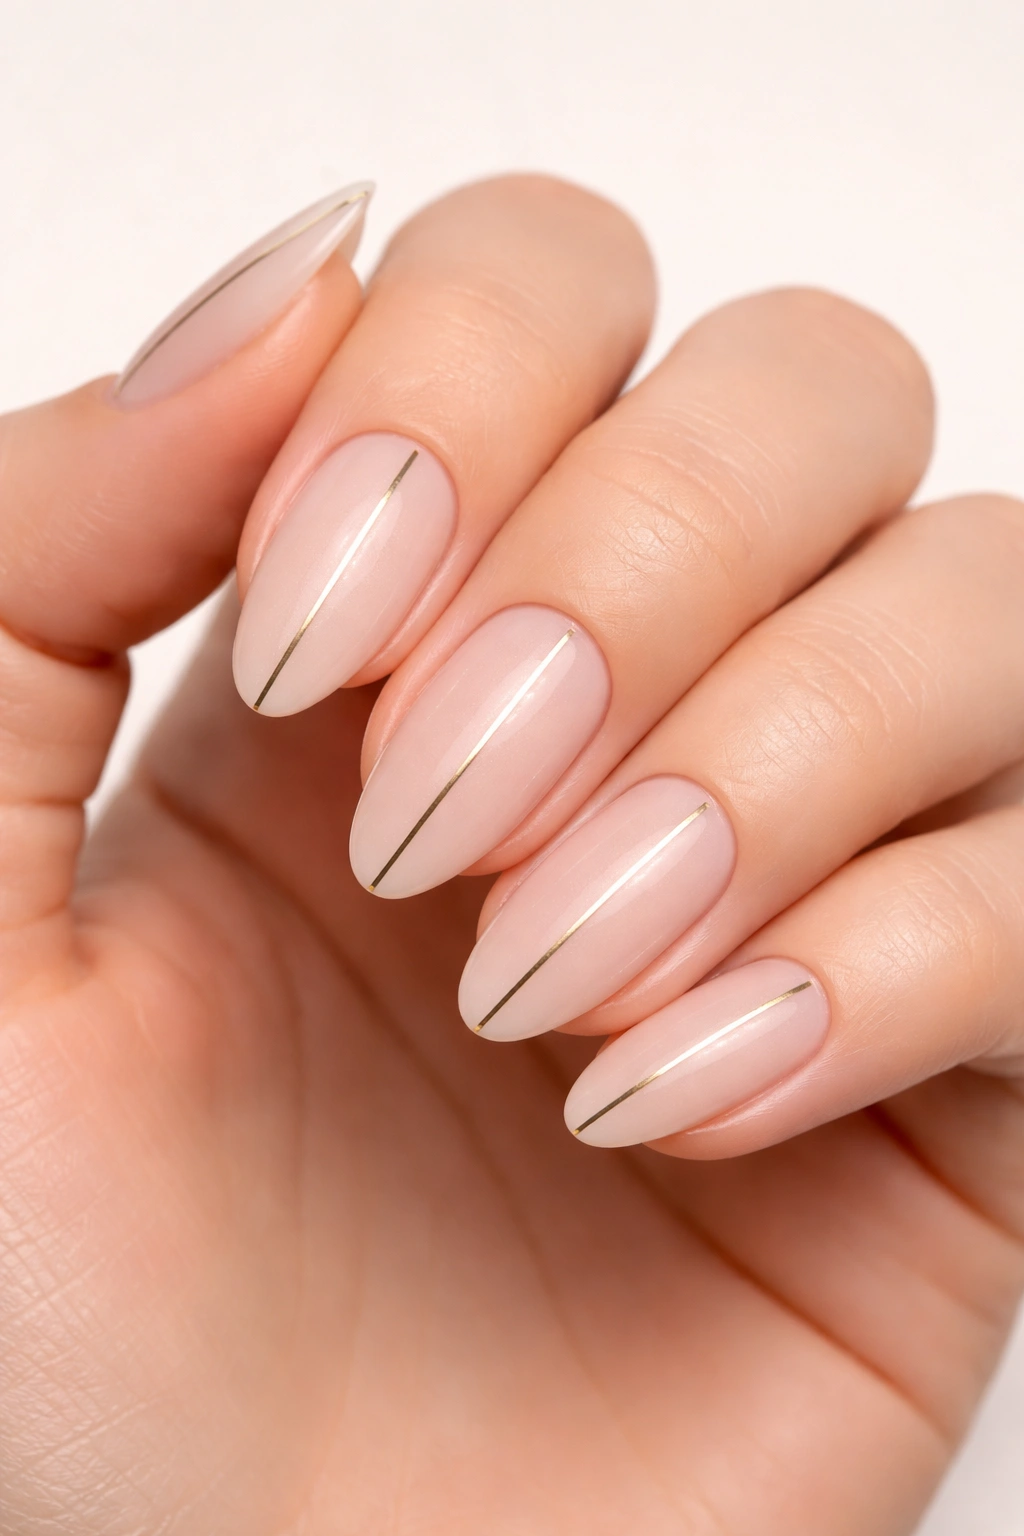
There’s something sophisticated about vertical lines running down the nail. This design adds dimension and visual interest while maintaining that coveted minimalist aesthetic. It’s architectural without being complicated.
The lines can be placed anywhere on the nail. A single line down the center creates symmetry. Multiple thin lines offer texture. Offset placement feels more contemporary and unexpected. All variations work beautifully within the minimalist framework.
Color choice matters here. Gold or silver lines on a nude base read as expensive and refined. Black lines on white or beige feel modern and graphic. Staying within neutral territory keeps the design grounded in minimalism.
Application requires either a very thin brush or nail striping tape. For freehand lines, use a nail art brush with long, fine bristles. Load it with polish and draw in one smooth motion from base to tip. Striping tape offers an easier alternative—just apply the tape, paint over it, and peel away.
This design elongates the nail visually, making it perfect for shorter nails. The vertical orientation draws the eye upward, creating the illusion of added length. It’s a clever optical trick that works every time.
6. Glazed Donut Nails
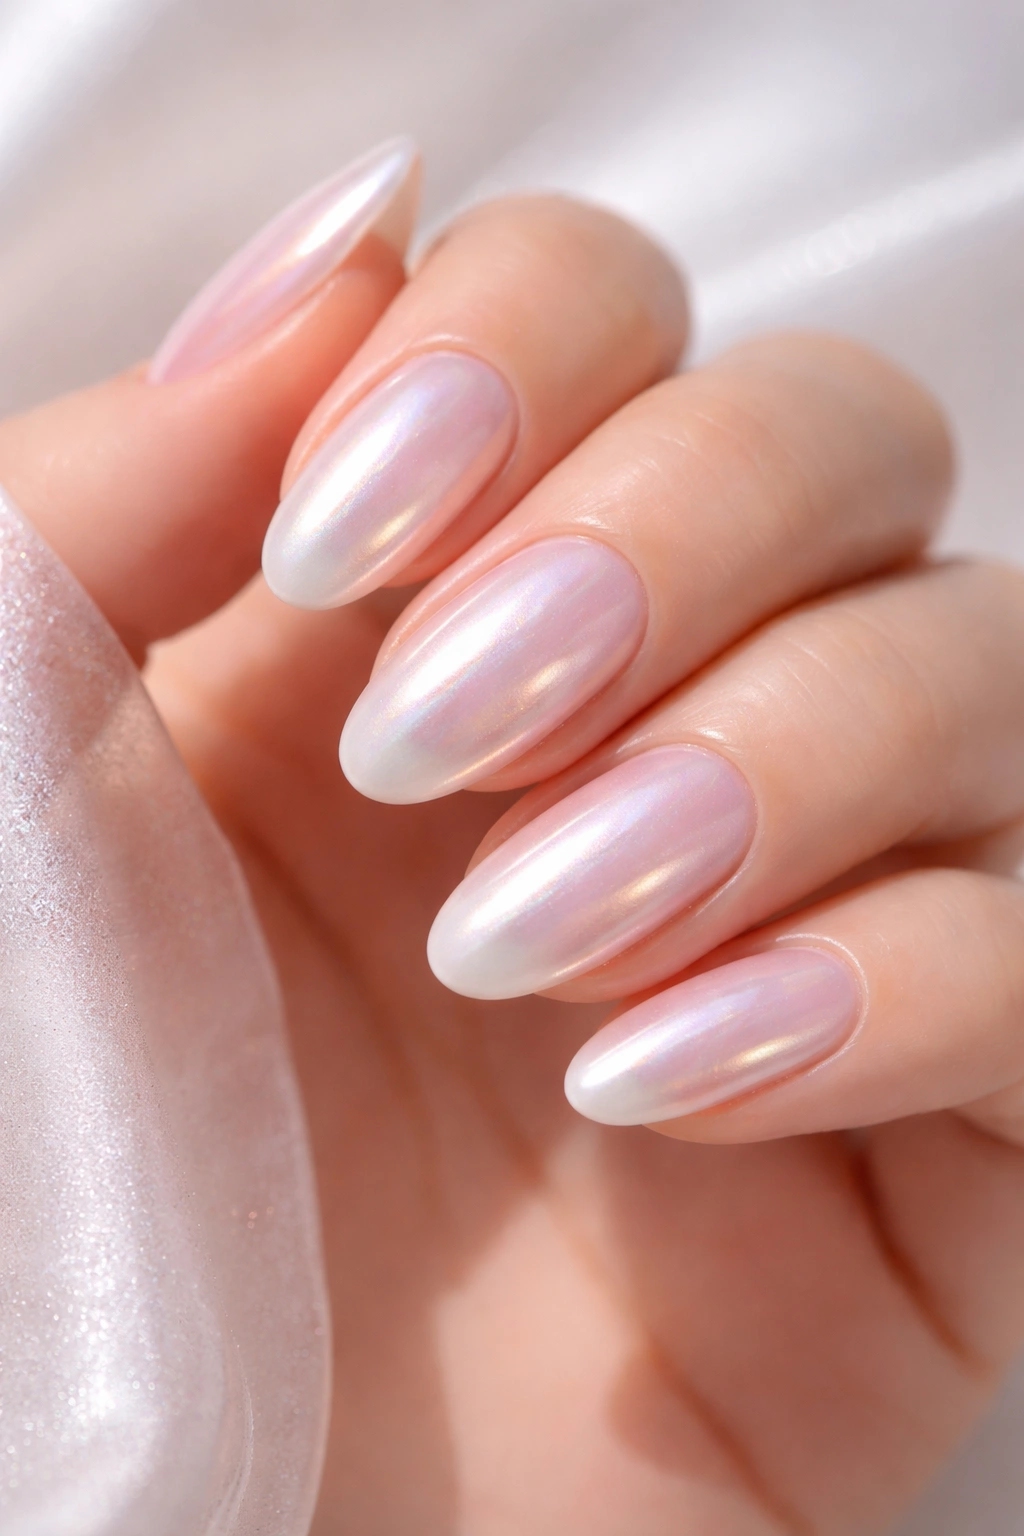
Hailey Bieber made this look famous, and it’s easy to see why. Glazed donut nails feature a pearlescent, iridescent sheen that catches light like morning dew. They’re luminous without being glittery, sophisticated without being stuffy.
The magic happens with chrome powder or pearl topcoats applied over a sheer base. The result is that glazed effect—shimmery, reflective, and utterly mesmerizing. It’s like your nails have been dipped in liquid pearl.
Creating this look at home is more accessible than you’d think. Start with a sheer pink or nude base coat. Apply chrome powder using a sponge applicator, rubbing it into the nail until you achieve that mirror-like finish. Seal with a no-wipe top coat to lock in the shine.
The beauty of this design is its subtlety. From a distance, nails look naturally healthy and glossy. Up close, that iridescent quality reveals itself. It’s understated luxury at its finest.
This manicure photographs beautifully. The reflective quality catches light in photos, creating that covetable “expensive manicure” look. It works equally well for everyday wear and special occasions, which is the hallmark of truly great minimalist design.
7. Monochrome Ombré
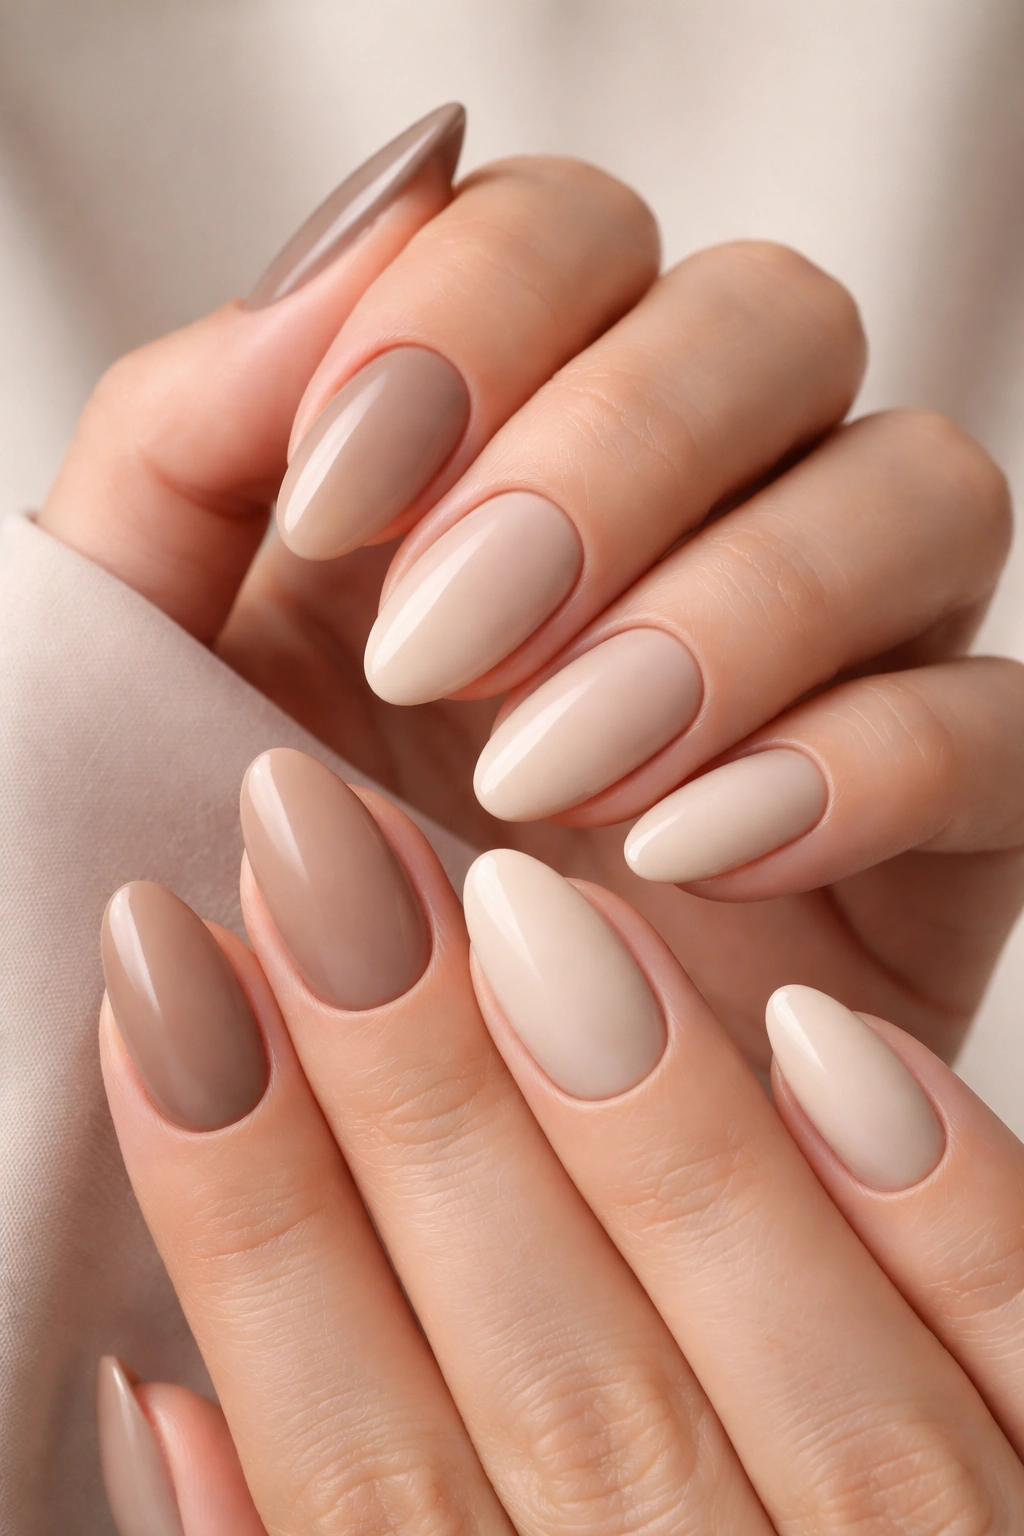
Ombré might sound complicated, but a monochrome version stays firmly in minimalist territory. This design uses varying shades of one color family, creating a subtle gradient that adds depth without chaos.
The technique involves painting each nail a slightly different shade of the same color. Start with the darkest shade on your thumb, gradually moving to the lightest on your pinky. The progression creates visual interest while maintaining cohesion.
This works beautifully with neutral palettes. Shades of beige, from tan to cream. Variations of gray, from charcoal to silver. Even different tones of pink or mauve. The monochrome restriction keeps things minimalist while allowing for creativity.
Application is straightforward since you’re working with solid colors. No blending or special techniques required. Just paint each nail cleanly with its designated shade. The magic happens in how the shades relate to each other across your hand.
This design offers personality without loudness. It’s perfect for those who find single-color manicures boring but don’t want busy nail art. The subtle variation across nails creates movement and interest while remaining sophisticated.
8. Micro Dot Pattern
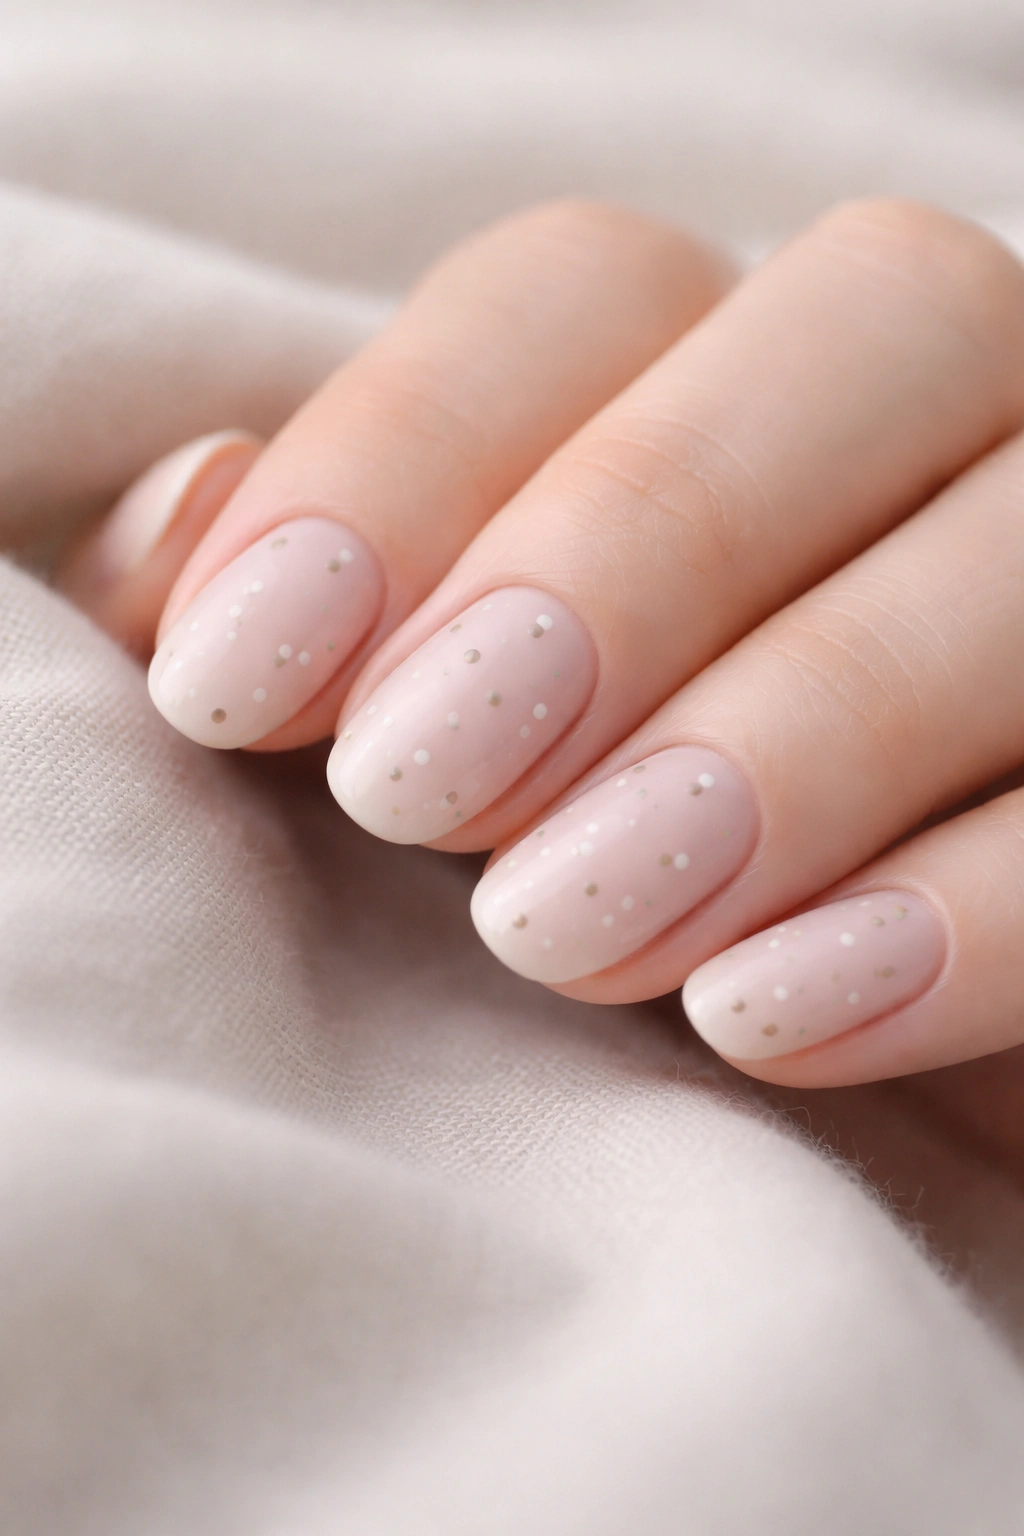
Dots are having a minimalist moment. Not large, bold polka dots—we’re talking tiny, delicate dots that add texture without overwhelming. Think refined confetti rather than bold circles.
These micro dots can be applied randomly for an organic look or in precise patterns for something more structured. Clustered near the cuticle, they create a subtle accent. Scattered across the entire nail, they add dimension. A single line of dots down the center? Modern and chic.
The key is keeping dots small and colors muted. White dots on beige. Taupe dots on cream. Soft gray dots on pale pink. The contrast should be noticeable but gentle, creating texture rather than boldness.
Application requires a dotting tool with a very fine tip. Dip the tool in polish and gently touch it to the nail. Consistent pressure creates uniform dot sizes. Too much polish creates larger blobs, so reload your tool frequently with just a tiny amount.
This design adds visual interest without commitment. The dots are small enough to feel subtle and refined. They create a sense of detail and care without reading as “decorated” nails. It’s that perfect balance minimalist lovers crave.
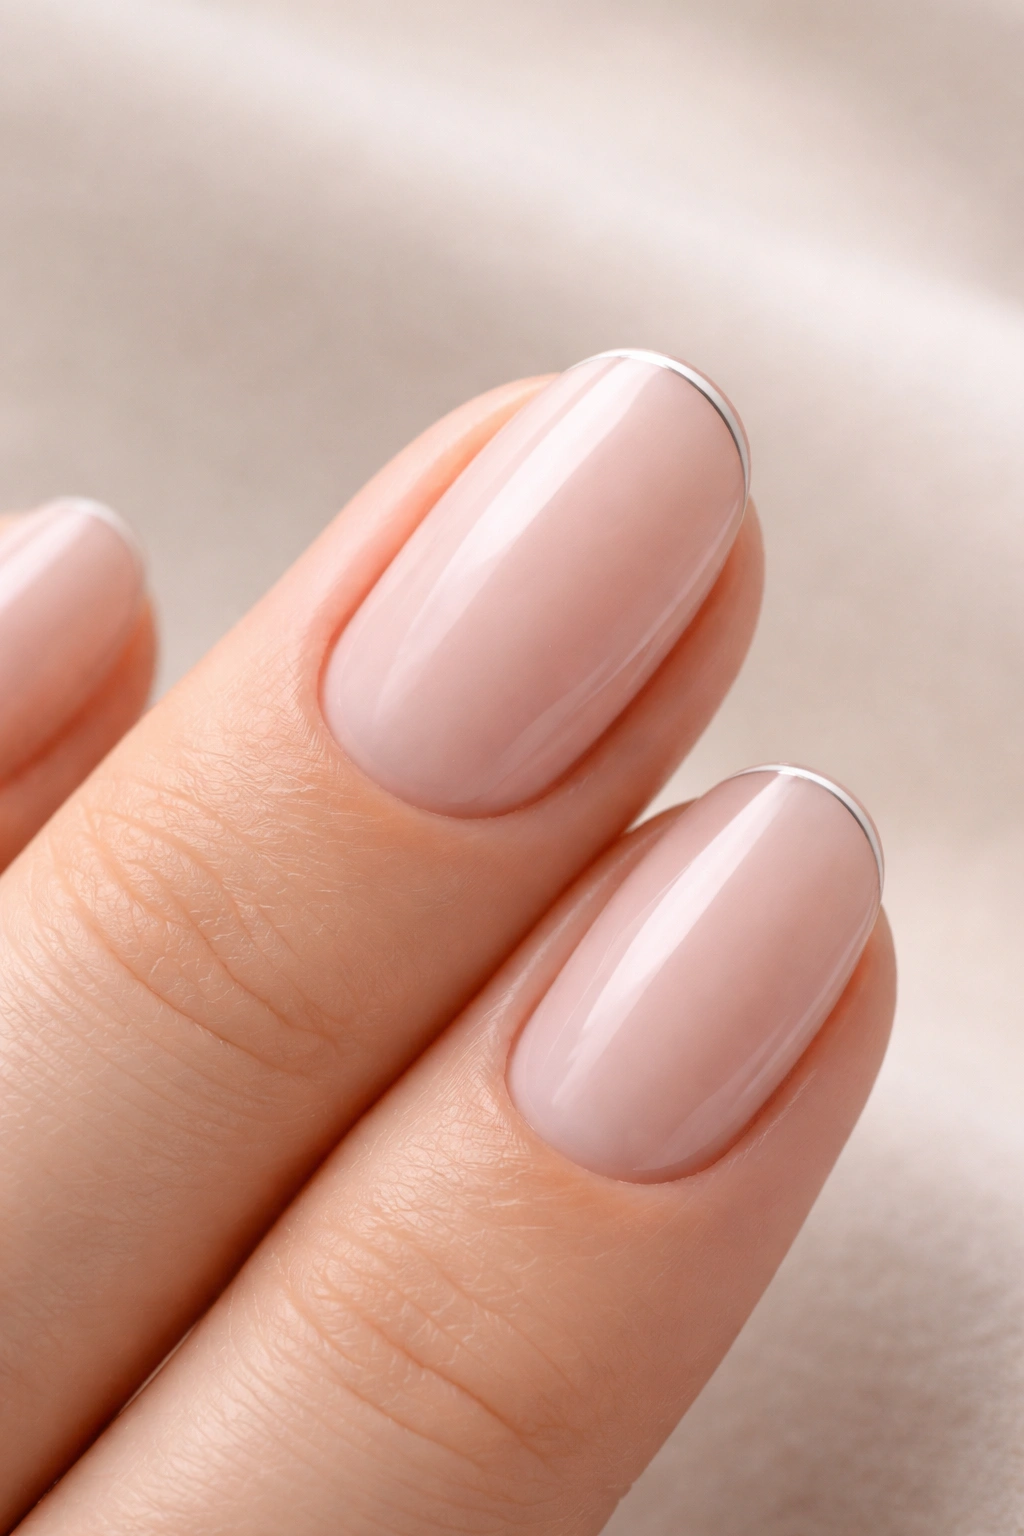
9. Soft French with Gold Edge
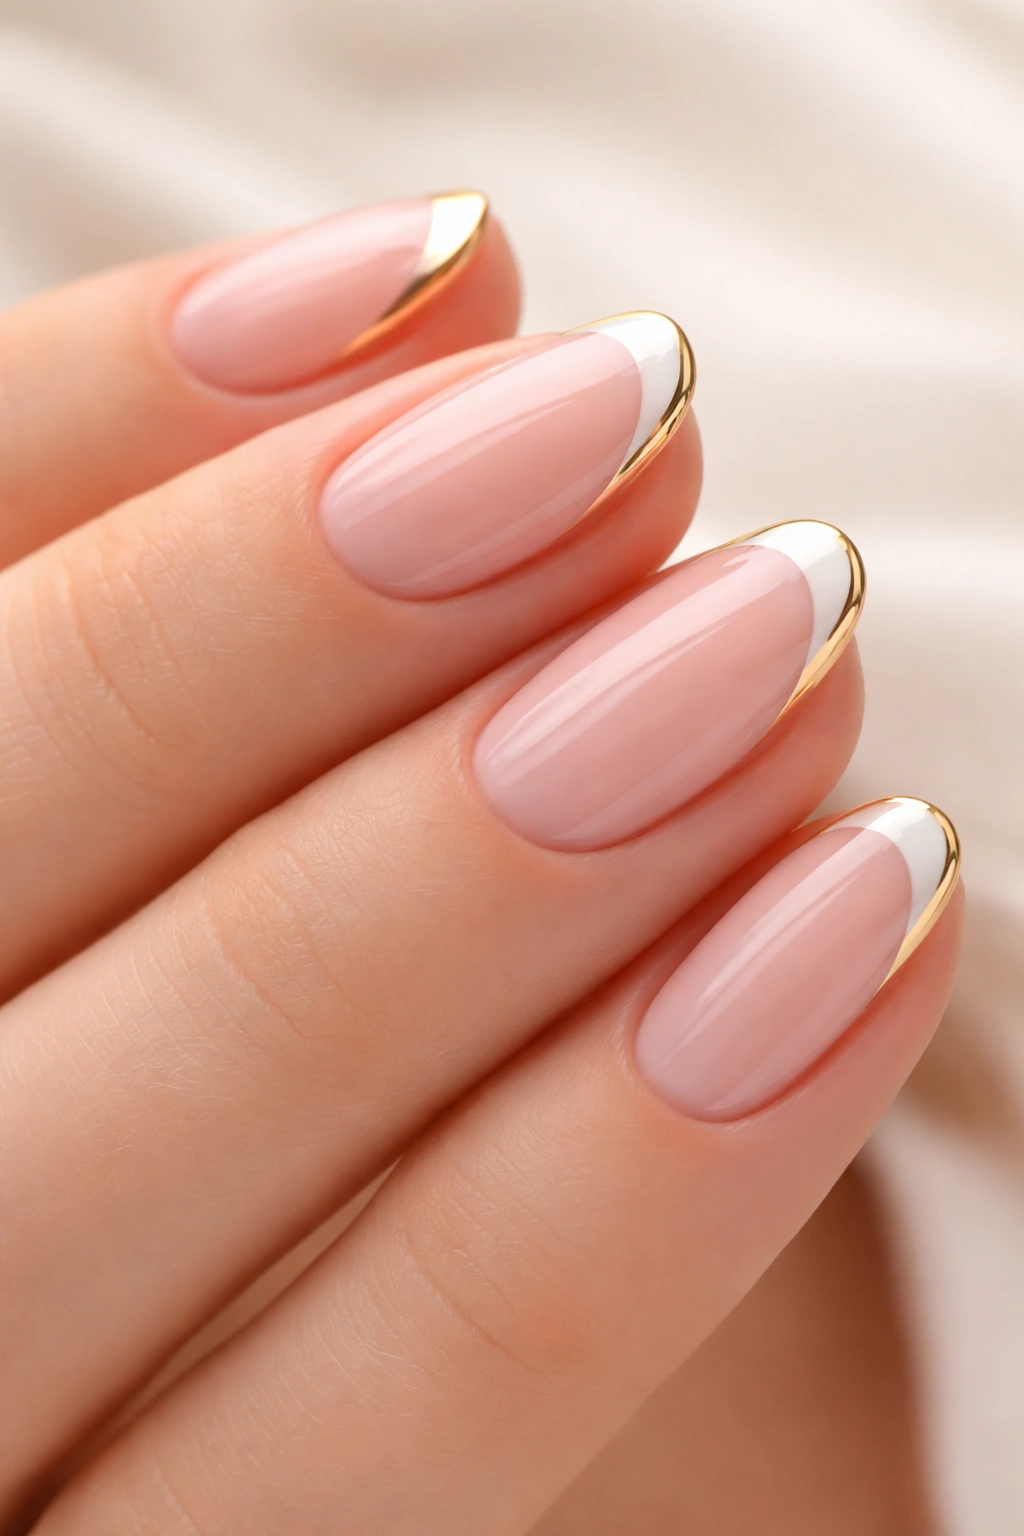
The traditional French manicure gets an elevated update with a whisper-thin gold line separating the tip from the base. This tiny metallic detail transforms a classic into something special.
Start with a sheer pink or nude base. Add white tips—either traditional or micro-thin. Then comes the magic: use a thin striping brush to paint a delicate gold line right where the white tip meets the base color. That’s it. Simple addition, major impact.
The gold accent adds warmth and luxury without feeling flashy. It catches light beautifully, creating subtle sparkle as your hands move. The effect is expensive-looking and thoughtfully designed.
This design works particularly well for events when you want your nails to feel special but not costume-y. Weddings, dinner dates, professional events where you want polish—this manicure fits all those scenarios perfectly.
The gold line can be replaced with silver for a cooler tone or rose gold for something softer. Each metal creates a slightly different mood while maintaining that minimalist elegance. Choose based on your jewelry metals or personal preference.
10. Nude with Metallic Accent Nail
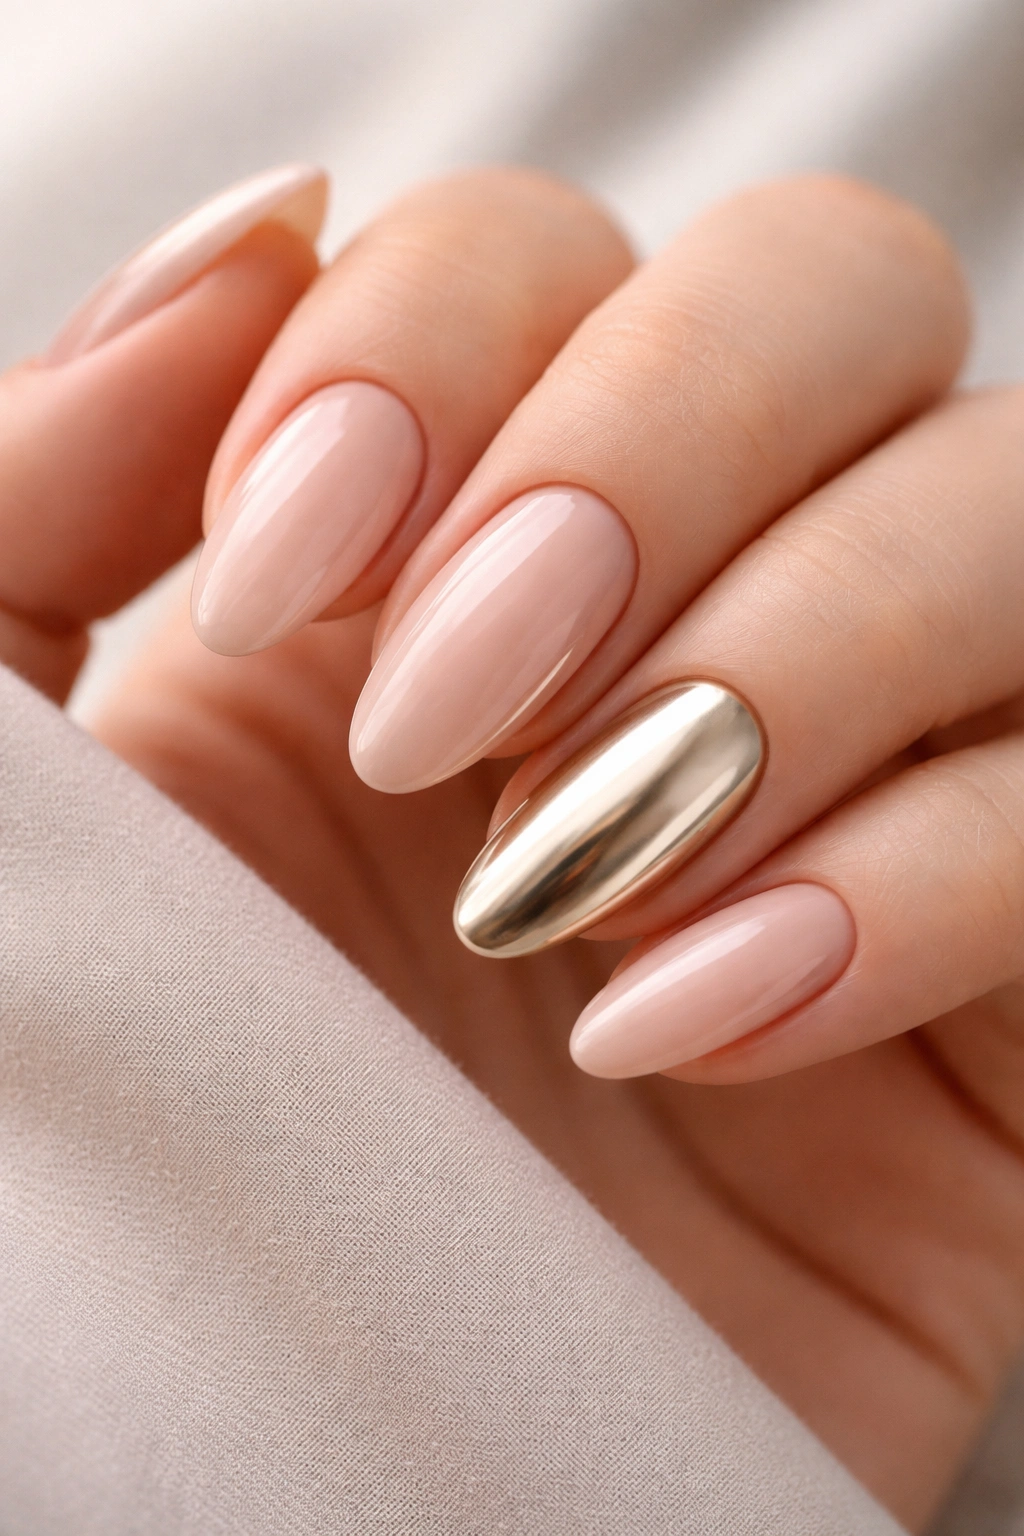
Sometimes one nail is all you need. This design keeps most nails in a classic nude shade while painting one or two accent nails in a complementary metallic. The result is balanced and interesting without crossing into busy territory.
The accent nail technique works best when you choose metallics that harmonize with your nude base. Gold pairs beautifully with warm beiges and taupes. Silver complements cool-toned nudes and pinks. Rose gold works with almost everything, offering a softer metallic option.
Placement matters. The ring finger is traditional and elegant. The middle finger feels more unexpected and modern. Doing both ring fingers (one per hand) creates symmetry. Some prefer alternating—ring finger on one hand, index on the other—for asymmetrical interest.
This design offers versatility. Feeling more minimal? Keep the accent subtle. Want a bit more presence? Make the metallic more eye-catching. You control the balance based on your mood and occasion.
The beauty of this approach is its simplicity. No complicated patterns to execute. Just clean, solid color application. Yet the thoughtful use of contrast creates a manicure that looks intentional and polished.
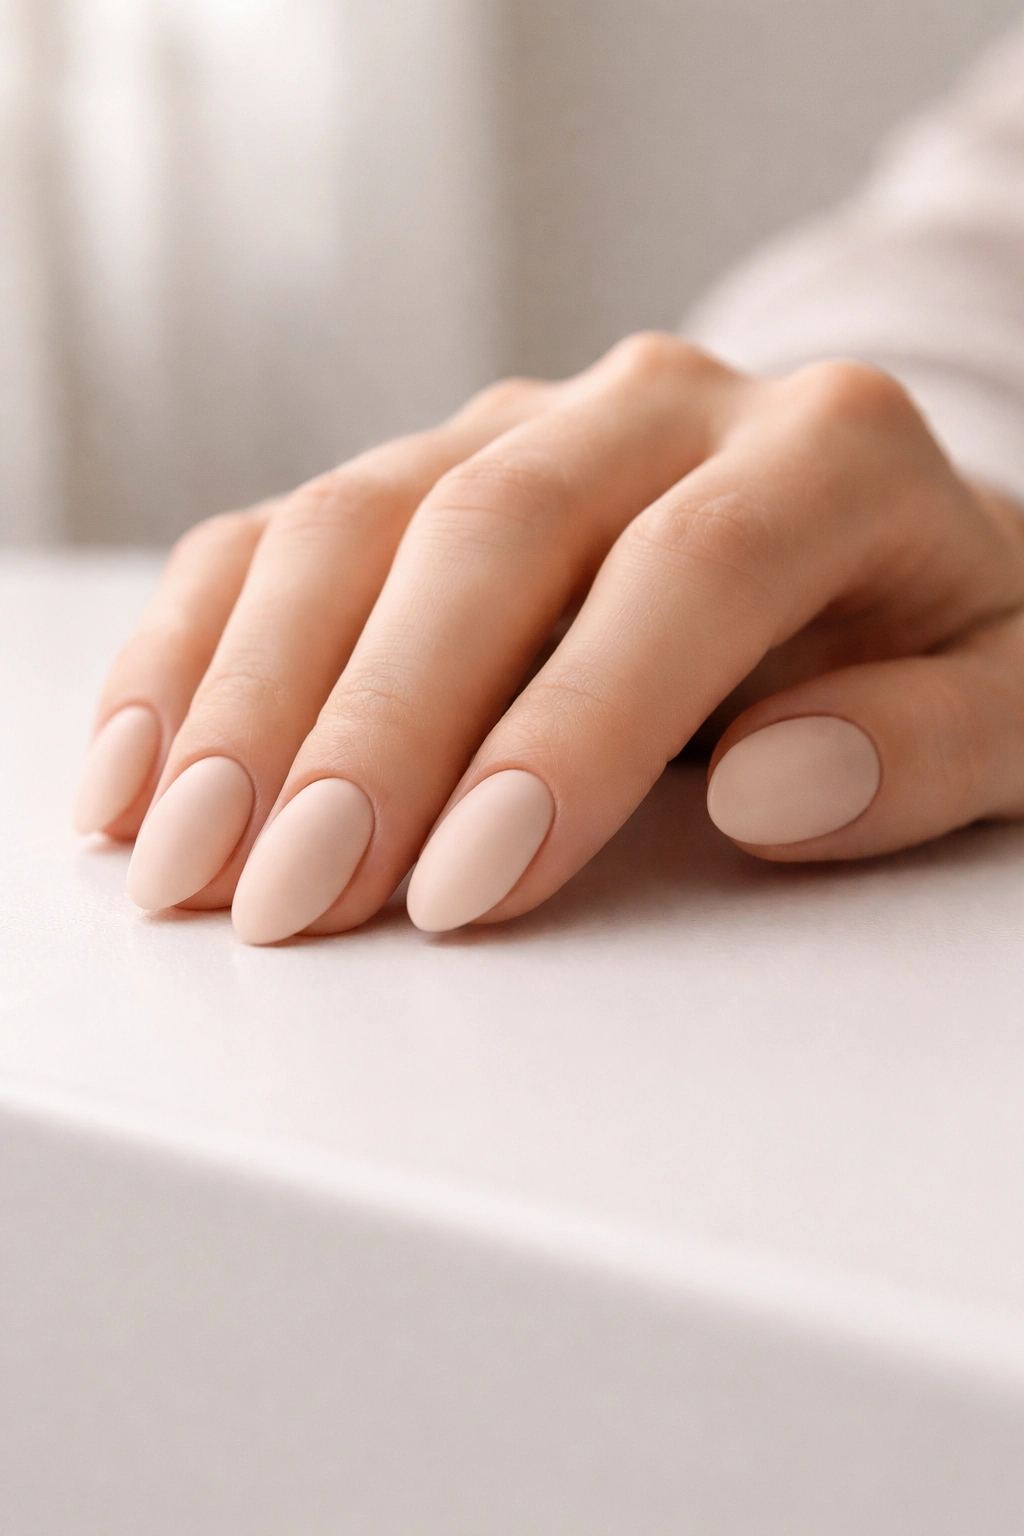
11. Matte Neutral Finish
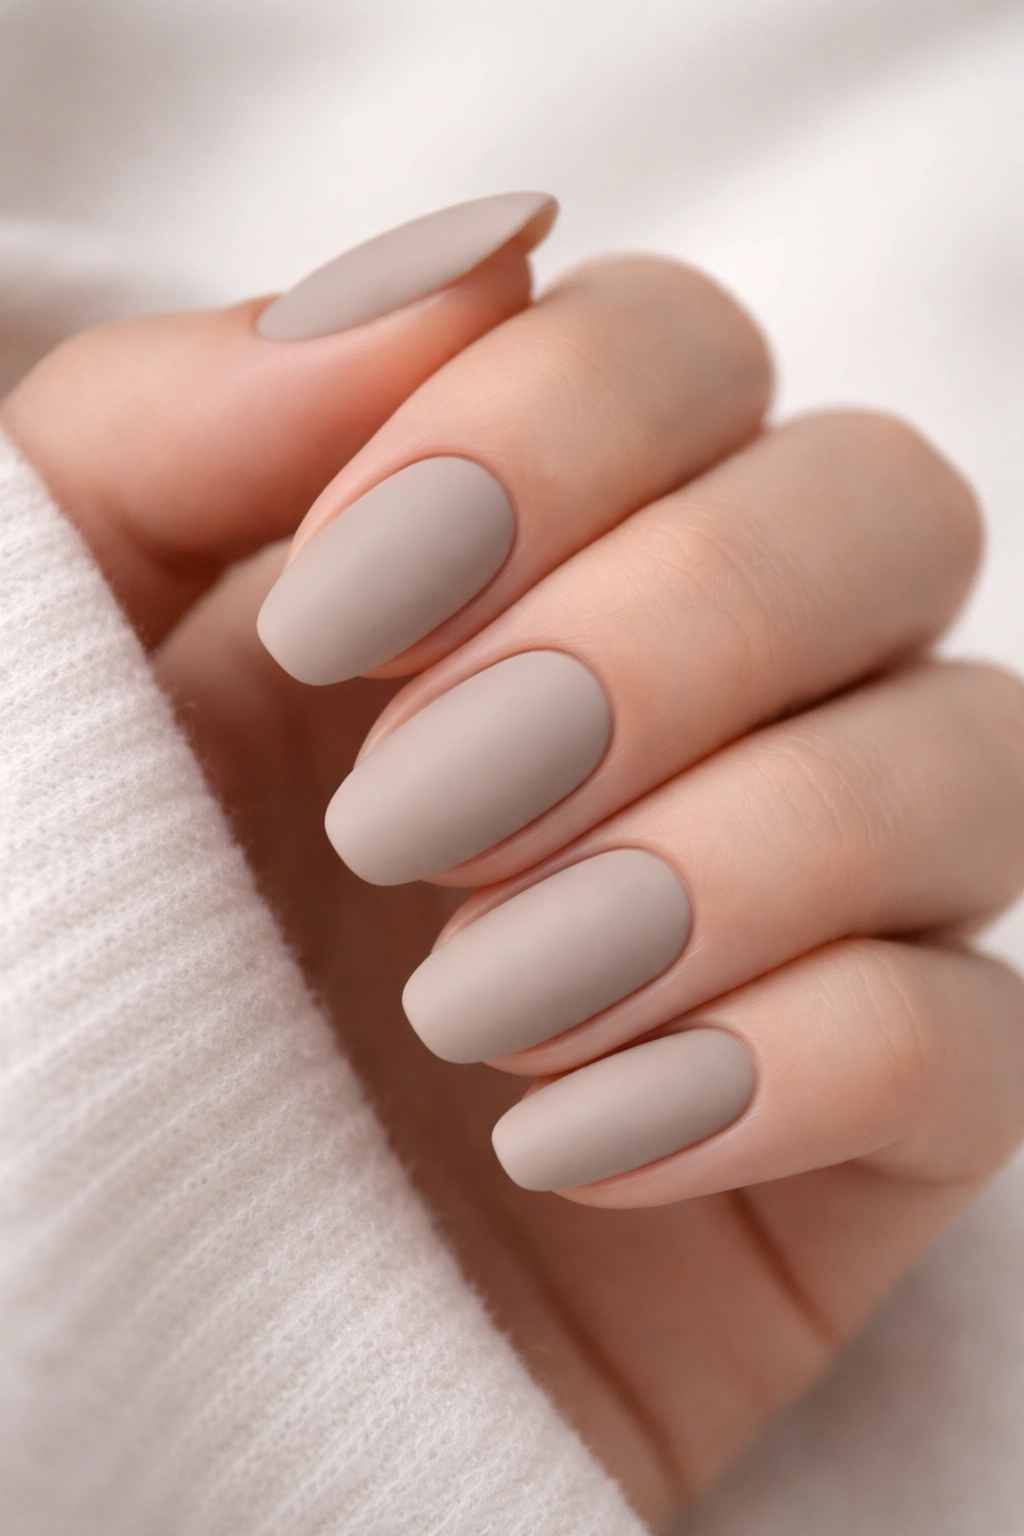
Gloss gets most of the attention, but matte finishes deserve equal love. A matte top coat over neutral shades creates a modern, velvety appearance that’s quietly stunning.
Matte nails photograph beautifully. Without reflective shine, they have a more uniform, sophisticated look in photos. They also show fewer fingerprints and smudges than glossy finishes, keeping nails looking fresher longer.
The key to this look is choosing the right base colors. Soft beiges, warm taupes, muted mauves, and dusty roses all shine (or rather, don’t shine) in matte. Avoid colors that might look chalky or washed out without gloss—test first on one nail.
Application couldn’t be simpler. Paint your nails with your chosen color, allow to dry completely, then apply a matte top coat. The transformation is immediate and dramatic. That velvet texture feels expensive and intentional.
Matte finishes do require slightly more maintenance. They can show oils from skin contact more readily than gloss. A quick wipe with rubbing alcohol restores that perfect matte finish. Small trade-off for such a chic aesthetic.
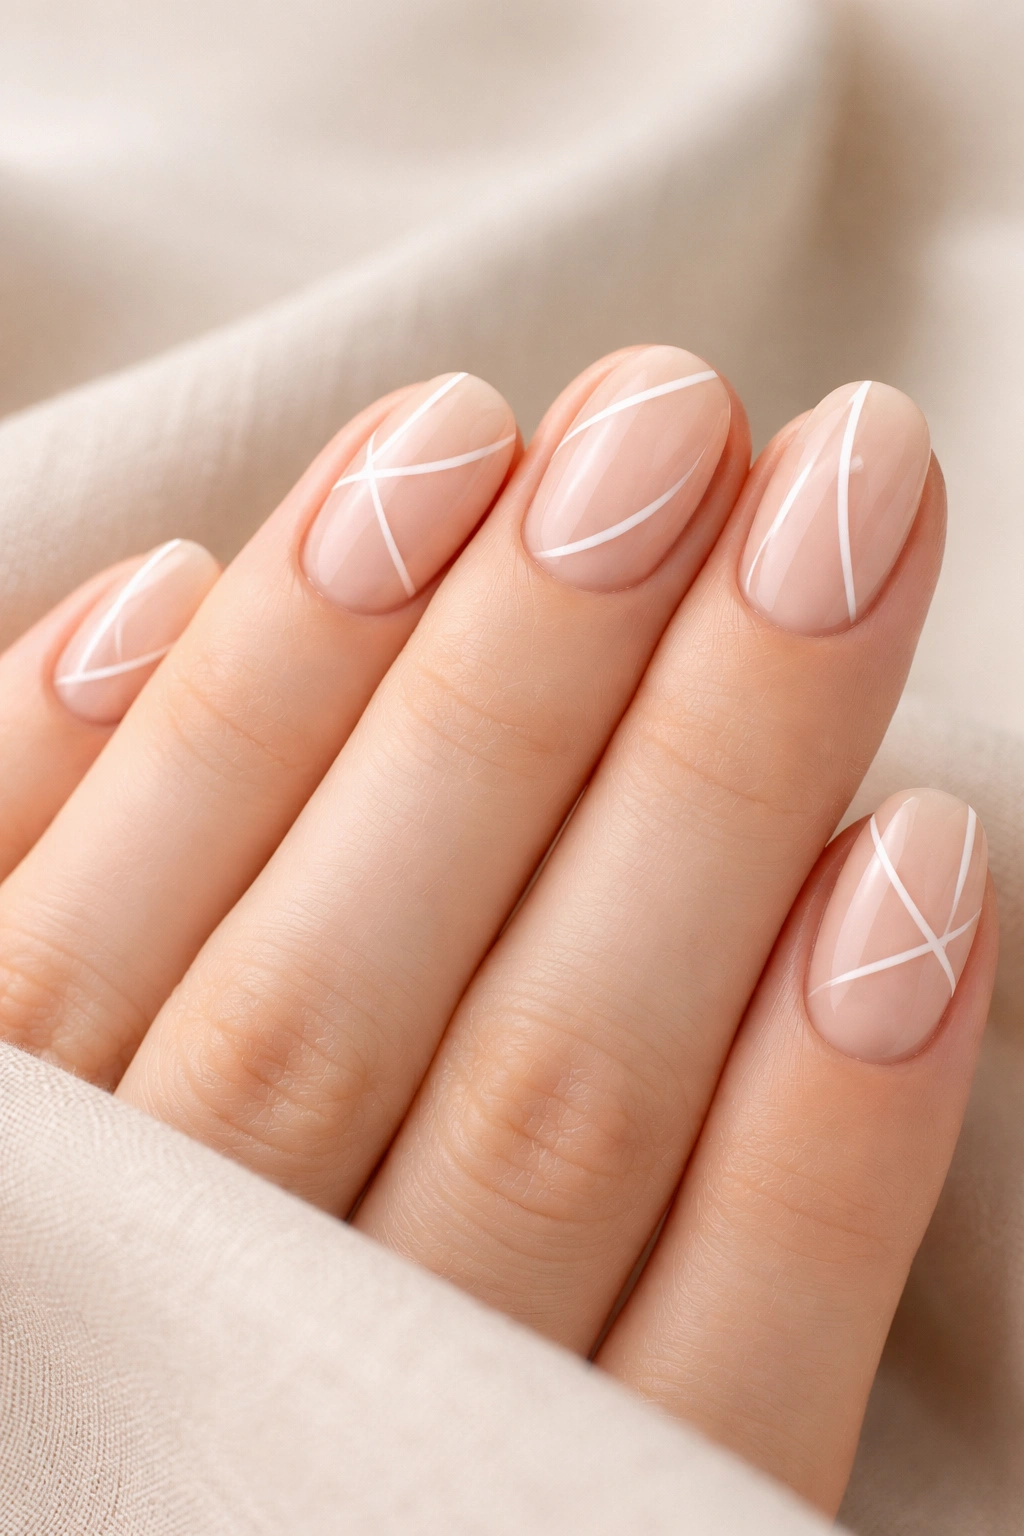
12. Thin Abstract Lines
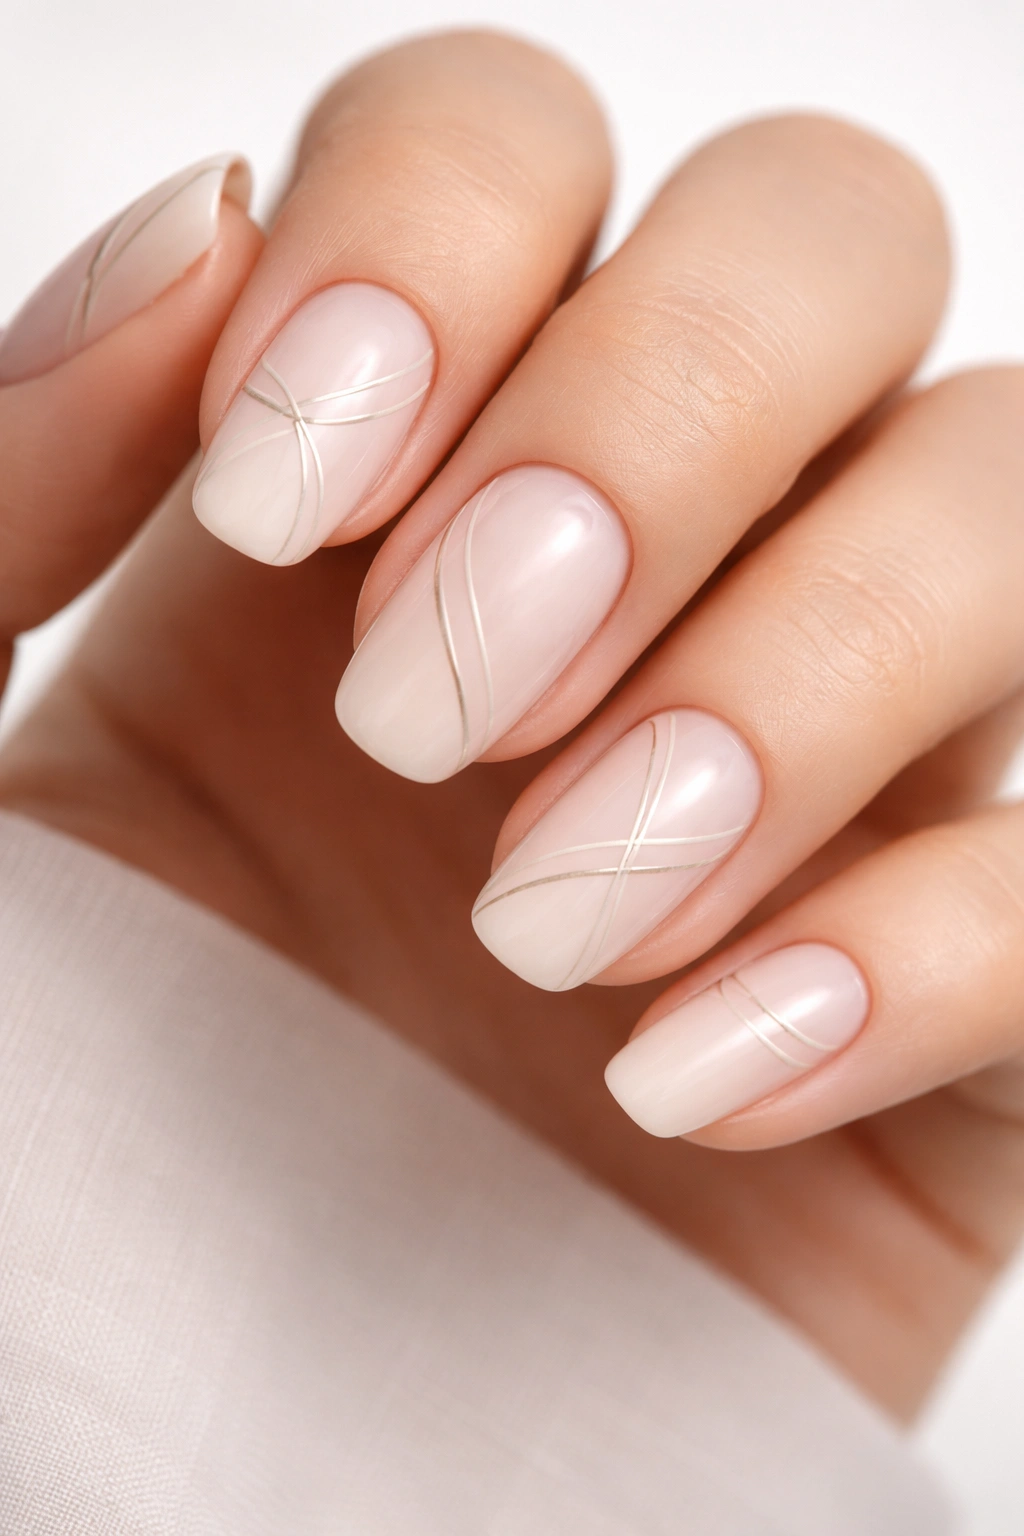
Abstract nail art doesn’t have to be chaotic or colorful. Thin, delicate lines drawn in understated colors create artistic interest while staying firmly minimalist. Think modern art museum, not kindergarten craft project.
These lines can be straight, curved, intersecting, or free-flowing. The organic, imperfect quality actually enhances the design. Overly perfect lines can look stiff; slight variations feel hand-drawn and authentic.
Color choice keeps this minimalist. Black lines on nude or white create graphic contrast. Gold or silver lines add subtle luxury. Even using a slightly darker shade of your base color can create dimension through line work alone.
Application embraces imperfection. Use a thin nail art brush and don’t stress about perfectly straight lines. The beauty is in the hand-drawn quality. Draw lines at various angles, let some intersect, leave others floating. The abstract nature means there’s no “wrong” way.
This design appeals to creative types who want their personality reflected in their manicure. It’s artistic without being loud, interesting without being overwhelming. Each nail becomes a tiny canvas for minimalist expression.
13. Soft Color Block
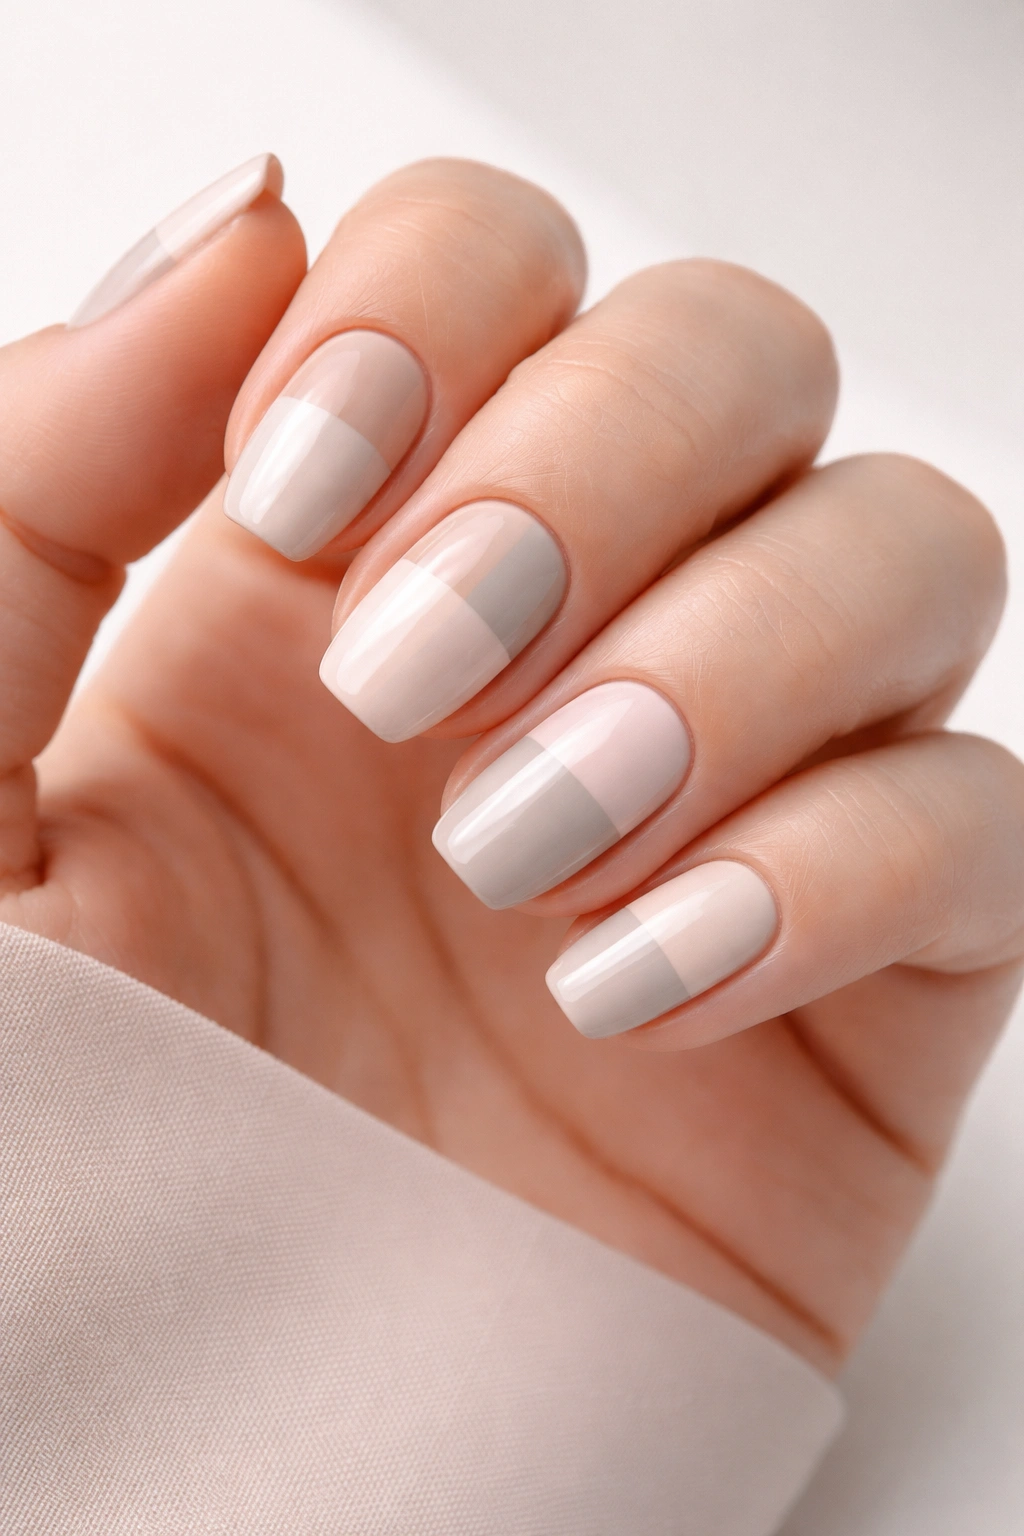
Color blocking sounds bold, but executed in muted tones with clean lines, it’s surprisingly minimalist. This design divides the nail into geometric sections, each painted a different neutral or pastel shade.
The most common approach is a half-and-half split—vertical, horizontal, or diagonal. One side gets one color, the other side another. The contrast creates interest, but keeping both colors soft maintains the minimalist aesthetic.
Other options include thirds, where the nail is divided into three sections. Or offset blocks, where a small rectangle of color sits in one corner. The geometric precision keeps things looking intentional and modern rather than random.
Color combinations matter. Beige and white offer subtle contrast. Soft pink and pale gray create gentle interest. Muted green and cream feel contemporary. The key is choosing colors with similar saturation levels so neither overwhelms the other.
Striping tape makes this design achievable at home. Apply your first color, let it dry completely, place tape where you want the division, paint the second color, and remove tape while still wet. Clean, sharp lines without needing a steady hand.
14. Pearl or Rhinestone Accents
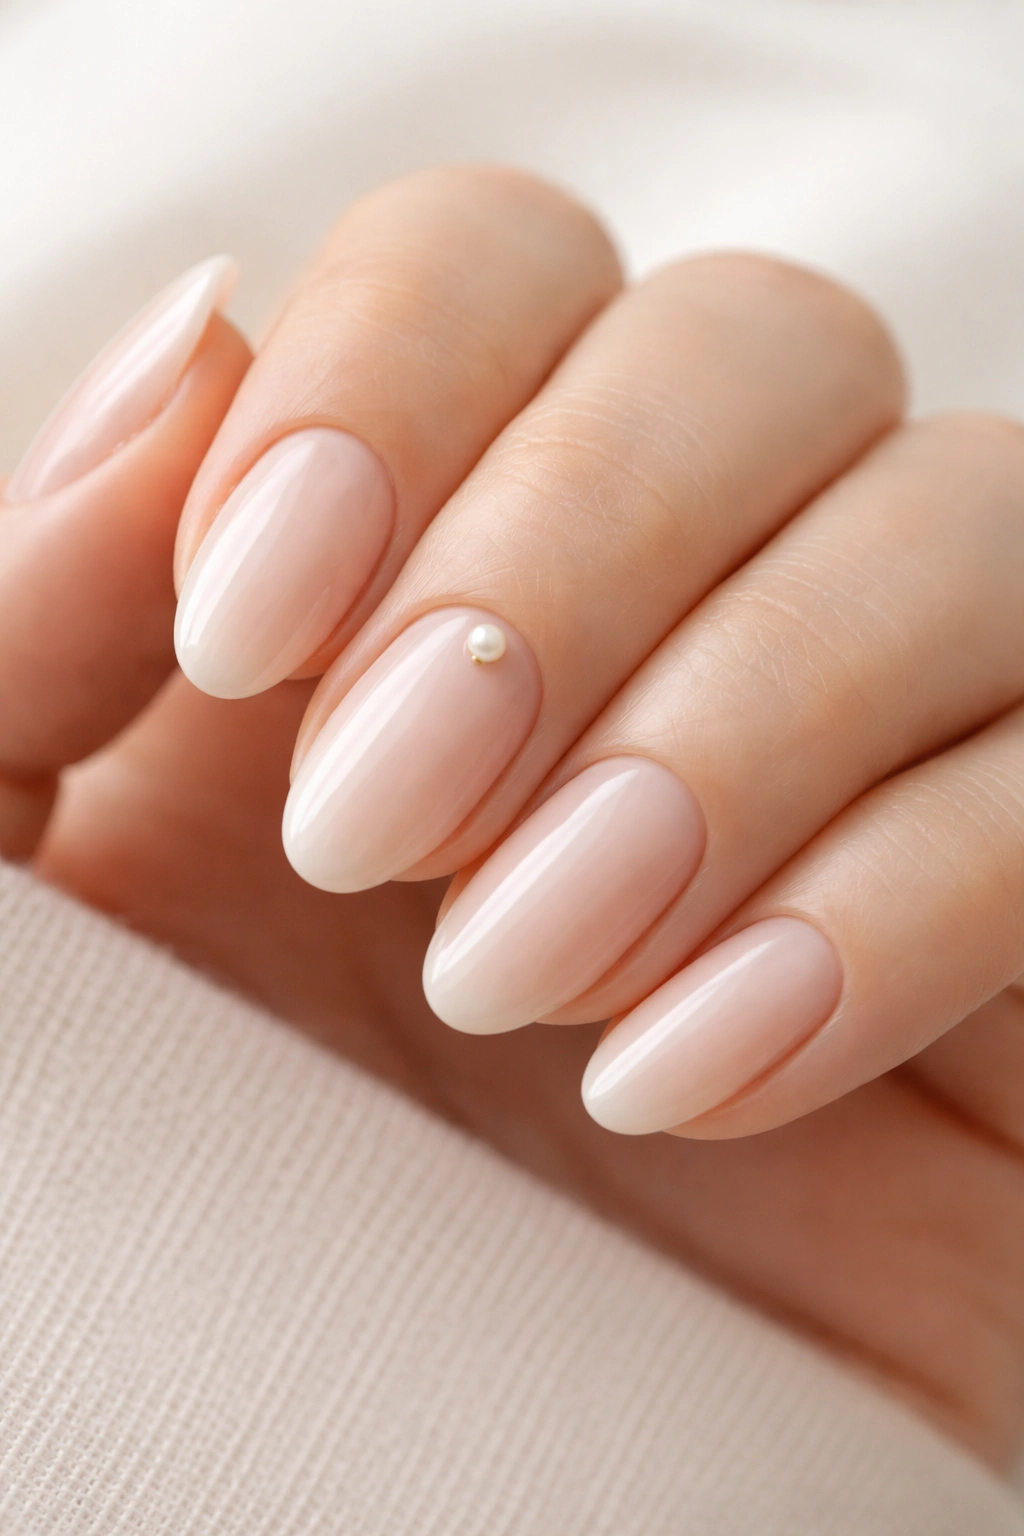
Sometimes minimalism needs just a touch of sparkle. A single pearl or tiny rhinestone placed strategically can elevate a simple manicure without abandoning minimalist principles. Less really is more here.
Placement options include near the cuticle for a delicate accent, at the tip for subtle glamour, or off-center for modern asymmetry. One embellishment per nail is plenty. Two nails per hand keeps things balanced. Going beyond that risks crossing into maximalist territory.
Pearl embellishments offer soft, classic elegance. They catch light gently without aggressive sparkle. Tiny rhinestones provide more shimmer for those who want a bit more presence. Choose based on your personal style and the occasion.
Application requires nail glue or a thick layer of top coat. Place the embellishment carefully with tweezers or a dotting tool. Press gently to secure. Once positioned, apply another layer of top coat around (not over) the embellishment to seal everything in place.
This design bridges the gap between simple and special. Your manicure looks thoughtfully designed without appearing high-maintenance. It’s perfect for events where you want elevated nails that still feel like “you.”
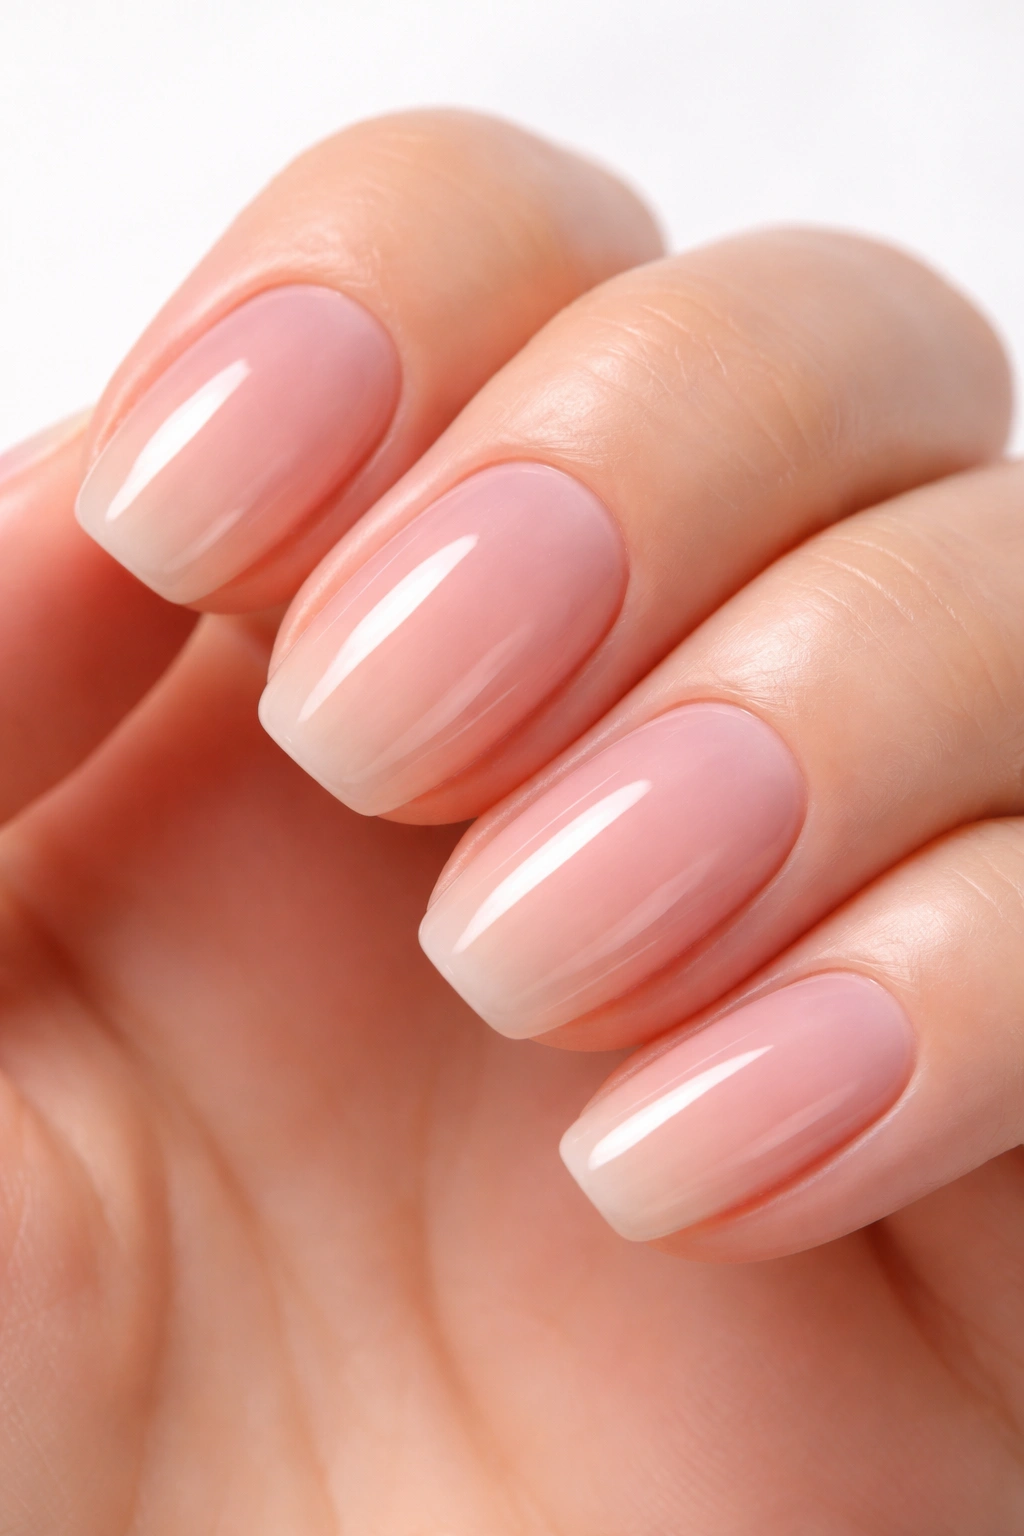
15. Neutral Gradient
A soft gradient using two neutral shades creates dimension and interest through subtle color transition. This isn’t your bold pink-to-purple gradient. We’re talking cream fading into beige, or soft pink transitioning into peachy nude.
The ombré effect in neutral tones reads as sophisticated rather than playful. The gentle color shift adds depth without drawing too much attention. It’s interesting enough to be intentional but subtle enough for any setting.
Creating this look involves a makeup sponge. Paint both colors onto the sponge in a line where they meet. Dab the sponge onto the nail, creating the gradient. Repeat until you achieve the desired intensity. Clean up edges with a brush dipped in remover.
The transition should be soft and diffused, not stark. The goal is barely noticeable color shift that adds dimension. From a distance, the nail looks like one sophisticated neutral shade. Up close, the gradient reveals itself.
This design works beautifully for shorter nails where bold patterns might feel overwhelming. The vertical color transition creates the illusion of length while maintaining that minimalist sensibility. It’s flattering and subtle.
16. Sheer Tinted Base
Sometimes the most minimalist choice is barely-there color. A sheer tinted polish in soft pink, peach, or even lavender adds just a whisper of color while showcasing healthy natural nails underneath.
These sheer washes enhance rather than cover. They’re perfect for those who find nude too neutral but don’t want opaque color. The translucent quality feels fresh and modern, like a filter for your nails.
Sheer polishes are incredibly forgiving. Application imperfections vanish because of the transparency. Brush strokes blend together. The coverage is so light that perfection isn’t required. This makes them ideal for at-home manicures.
Layer two to three coats to build your desired intensity. More coats create slightly deeper color while maintaining that sheer quality. Finish with glossy top coat for a healthy, natural shine.
This design exemplifies “your nails but better.” They look well-groomed and cared-for without appearing “done.” It’s the kind of manicure that complements rather than competes, which is minimalism at its finest.
17. Black Micro Details
A touch of black can be minimalist when used sparingly. Think tiny black dots near the cuticle, a thin black stripe down one side, or delicate black abstract marks on one accent nail.
The key is keeping the black delicate and sparse. Too much becomes dramatic rather than minimal. A few tiny black details on an otherwise neutral manicure, however, add modern edge without overwhelming.
Black provides maximum contrast with minimal effort. Even the tiniest black dot shows up clearly against beige or white. This makes it perfect for adding interest without needing large or complicated designs.
Application requires a precise hand. Use a thin brush or dotting tool for accuracy. The beauty is in the refinement—clean edges and intentional placement. Messy black marks read as mistakes rather than design choices.
This approach appeals to those with slightly edgier style who still want to keep things understated. It’s minimalism with a hint of attitude, proving that simplicity doesn’t have to mean soft or sweet.
How to Make Your Minimalist Manicure Last

Even the most beautiful design loses impact when it starts chipping. Extending the life of your minimalist manicure isn’t complicated—it just requires a few smart habits and the right products.
Start with proper prep. Clean nails are essential for polish adhesion. Remove all oils with rubbing alcohol or nail dehydrator before applying polish. Push back cuticles and gently buff the nail surface to create texture for the polish to grip.
Apply thin layers rather than thick ones. Multiple thin coats dry more thoroughly and chip less than one thick coat. This is especially important with sheer polishes where you might need two or three layers. Patience here pays off in longevity.
Wrap the tips. When applying each coat—base, color, and top—brush across the free edge of your nail. This “seals” the tip and prevents peeling from that vulnerable spot. Many people skip this step, but it makes a noticeable difference.
Reapply top coat every two to three days. This refreshes the protective layer and maintains shine. It takes two minutes and can extend your manicure by several days. Keep a good top coat handy for these quick refresh moments.
Wear gloves for wet work. Water is polish’s enemy. Washing dishes, cleaning, even showering can weaken polish adhesion. Protect your manicure during these activities to prevent premature chipping and peeling.
Choosing Colors That Feel Minimalist
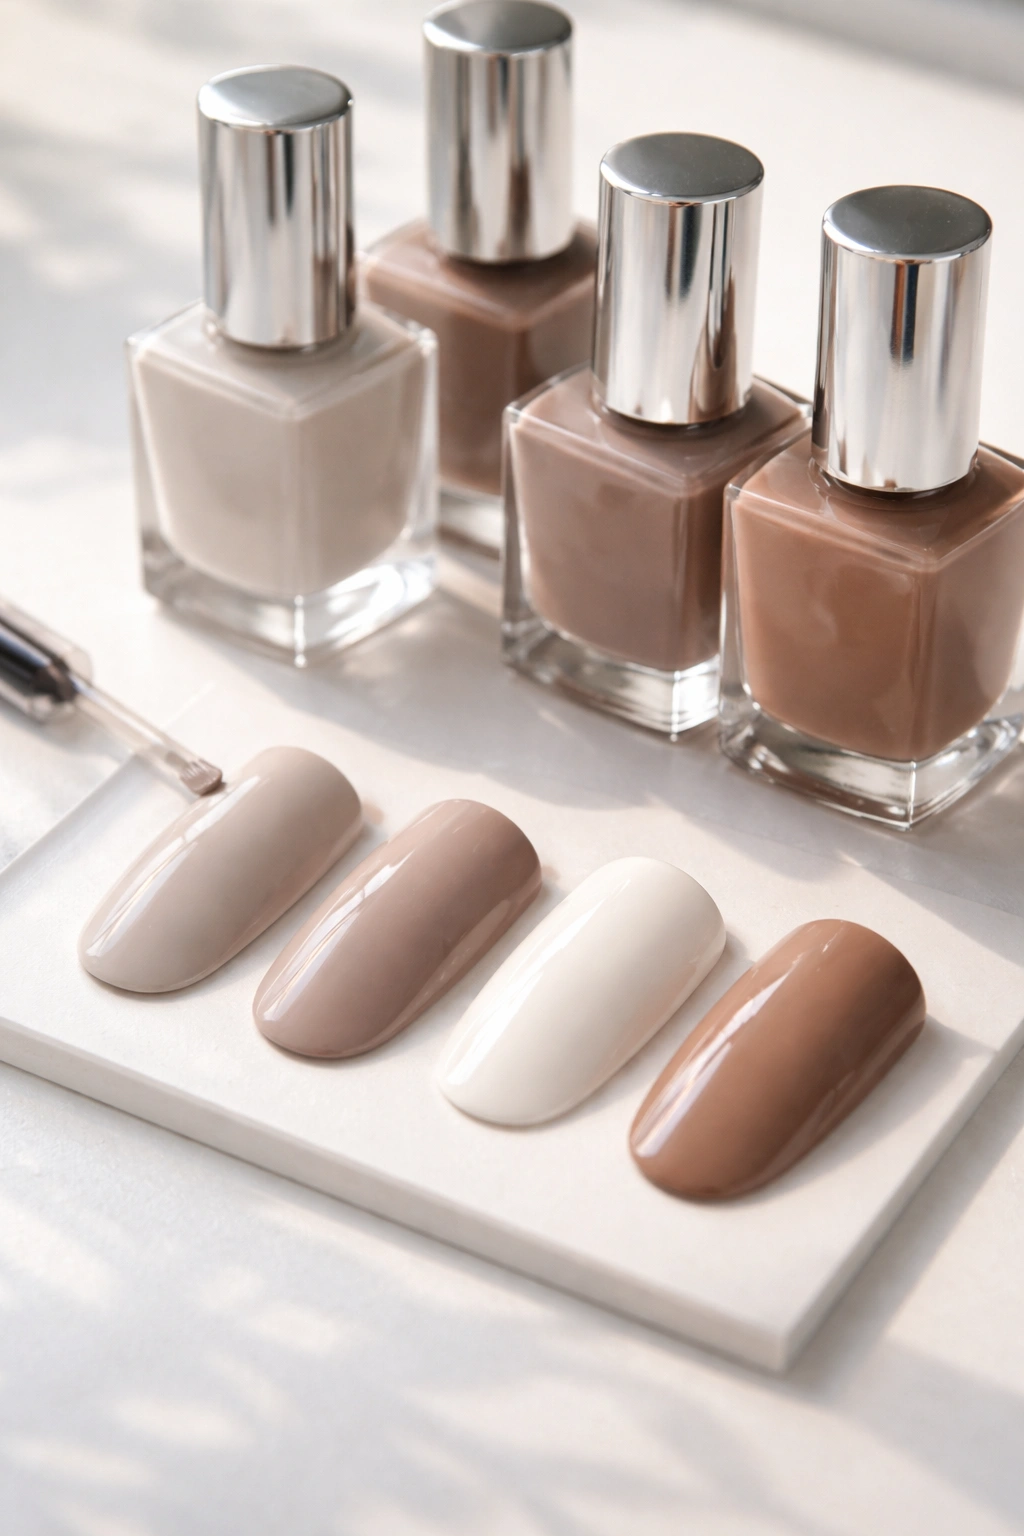
Not all neutral shades read as minimalist. Some colors, despite being beige or pink, still feel busy or too warm or too cool. Finding the right minimalist palette for your skin tone makes a huge difference.
True neutrals work universally. These are colors without strong warm or cool undertones. Soft greige (gray-beige), true taupe, milky white, and soft brown with balanced undertones tend to complement everyone. They’re the safest starting point.
Consider your skin’s undertone. Cool undertones pair beautifully with soft grays, cool-toned pinks, and whites with blue bases. Warm undertones glow with beiges, warm taupes, and creamy nudes. Neutral undertones can wear either family comfortably.
Muted colors feel more minimalist than saturated ones. A dusty rose reads as more minimal than a bright pink. Soft sage feels more understated than kelly green. When choosing color, opt for versions that look slightly faded or mixed with gray.
Test before committing. Paint one nail and live with it for a day. See it in different lighting. Notice how it makes your hand look. Some shades that seem perfect in the bottle look off on your actual nails.
The best minimalist colors are ones you forget you’re wearing. They enhance your hand without announcing themselves. When people compliment your “well-groomed nails” rather than your “nail color,” you’ve found the right shade.
Tools That Make Minimalist Nail Art Easier
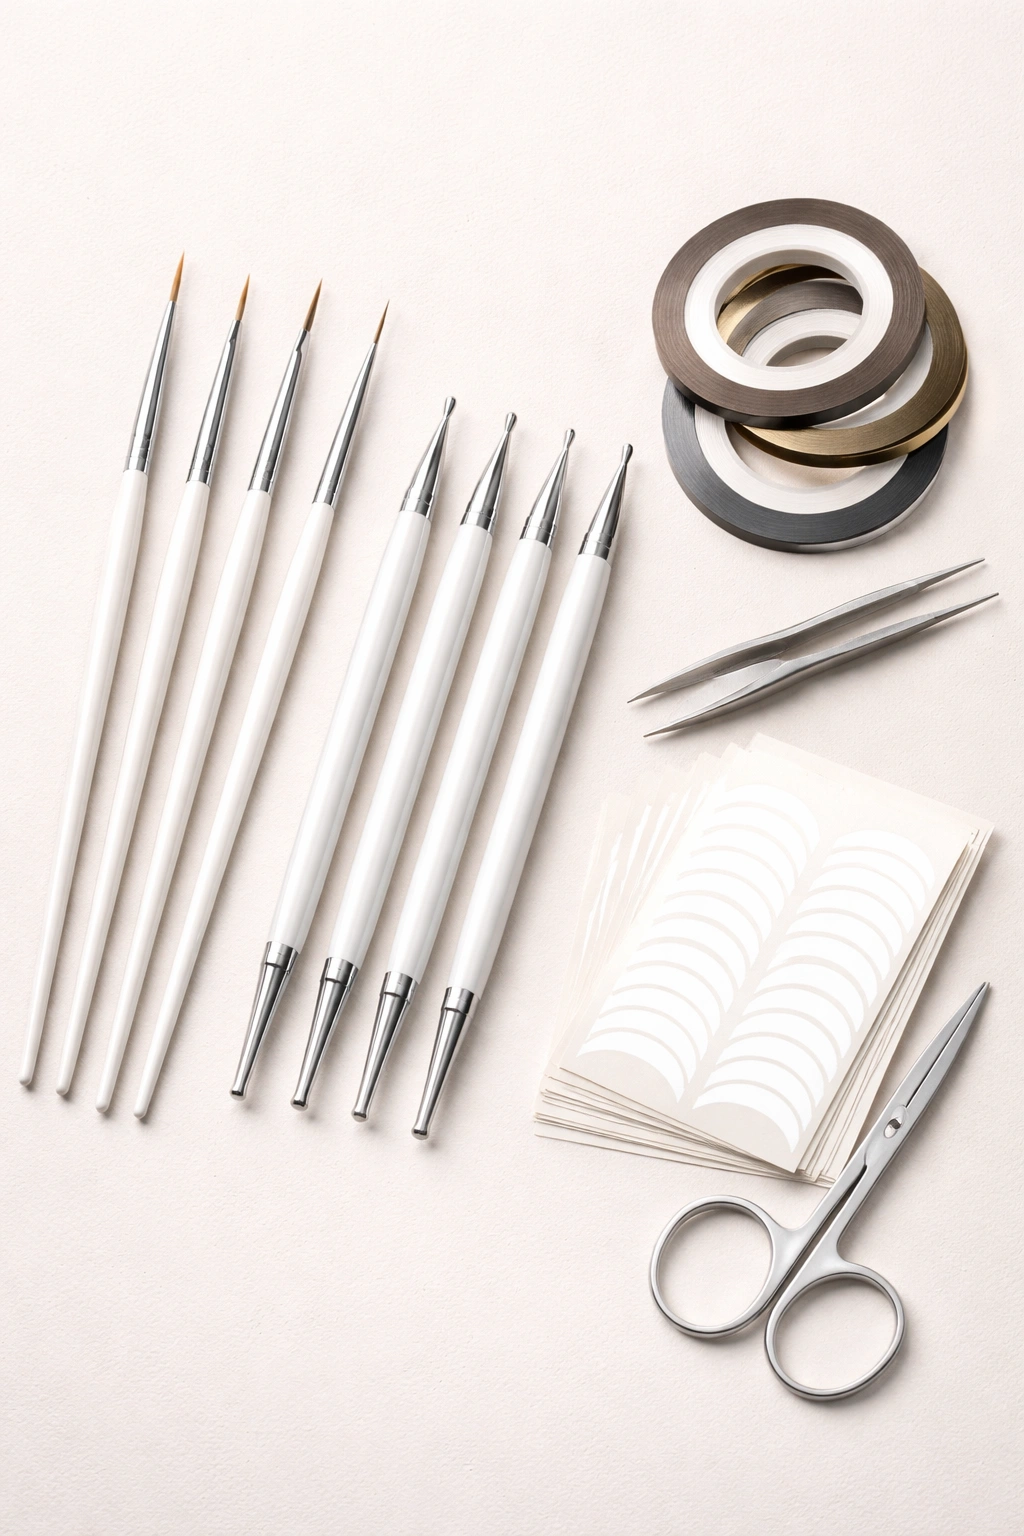
Creating clean, precise minimalist designs doesn’t require expensive equipment. A few key tools, however, make the process significantly easier and results more professional-looking.
Thin nail art brushes are non-negotiable for line work. Look for brushes specifically designed for nail art with long, fine bristles. A good striper brush creates thin, consistent lines that regular polish brushes can’t achieve. The investment pays off immediately in cleaner designs.
Dotting tools come in various sizes. A set with different tip diameters offers versatility for creating perfectly round dots in different scales. These are inexpensive and make dot designs accessible to anyone, regardless of artistic skill.
Striping tape creates sharp, clean lines without requiring a steady hand. Apply it where you want your line or border, paint over it, and remove while polish is still wet. The result is professionally crisp edges. It’s basically cheating in the best way.
Nail tape or guides for French manicures ensure consistent tip shapes across all nails. Even professional manicurists use these to maintain uniformity. They’re especially helpful for achieving those barely-there micro French tips.
A cleanup brush dipped in acetone fixes mistakes. Look for a thin, flat brush specifically for this purpose. It erases wayward polish around cuticles and cleans up edges for that polished finish. This tool is the difference between DIY-looking and salon-quality results.
When to Choose Minimalist Over Bold Nails
Minimalist nails aren’t just a style preference—they’re often the smarter choice depending on your lifestyle, profession, and personal circumstances. Knowing when to embrace simplicity helps you make intentional decisions.
Professional environments typically call for minimalist designs. Conservative workplaces, client-facing roles, and interviews are situations where understated nails work in your favor. They convey polish and attention to detail without distraction.
Busy lifestyles benefit from minimalist manicures. These designs typically require less maintenance and show wear less obviously than bold, opaque colors. When you don’t have time for frequent touch-ups, minimalist nails are practical luxury.
Transitional seasons make minimalist nails smart. Between summer and fall, or winter and spring, neutral designs bridge the gap without feeling seasonally misplaced. They offer year-round appropriateness that trend-driven colors can’t match.
Special events where you’re not the focus benefit from minimalist nails. Weddings (especially as a guest), formal dinners, or professional conferences are times when your nails should enhance rather than distract from your overall appearance.
Sometimes you simply need versatility. When one manicure needs to work with multiple outfits or settings, minimalist designs deliver. They’re the equivalent of a classic white shirt—appropriate everywhere, always polished, never wrong.
Final Thoughts
Minimalist nail designs prove that restraint can be just as impactful as abundance. These looks don’t shout for attention, yet they command it anyway through their polish, precision, and thoughtful simplicity.
The real beauty here is versatility. A milky manicure or barely-there French tips works with everything—your favorite jeans, your power suit, your date night dress. You’re not constantly wondering if your nails “go” with your outfit because understated always works.
These designs also offer sustainability in a different sense. They age gracefully as nails grow, require less frequent salon visits, and work across seasons and years without feeling dated. That’s true value in a manicure.
Whether you’re drawn to the sheer elegance of glazed nails, the modern edge of negative space, or the quiet luxury of matte neutrals, there’s a minimalist design that speaks to your personal style. The options are more varied than you might expect.
Start with one design that resonates. Try it. Live with it. Notice how it makes you feel. Chances are, you’ll discover that simplicity on your nails creates space for everything else to shine a little brighter.
